Cultures - Northland

Cultures - Northland

Not enough ratings
Cultures - Tips and Tricks, and useful information for both Northland and 8th Wonder
By Skrymaster
A guide I put together from personal extensive play-testing to get new or returning enjoyers of this rough gem of a game a better playing experience. I'm still actively adding new screenshots and expanding sections in the guide, so expect certain areas to either be splintered into more dedicated sections, or have new and updated information listed later after more testing.

Most of my experience is from Northland and Cultures 2, but information should be valid for 8th Wonder as well. I played that less because I couldn't get the alt-tab fix to work there until recently. I've freshly added a new section detailing the fix for that into the guide.

I wrote this guide because one can't really find much detailed/advanced information on this game.

All information in this guide was gathered and strategies were crafted by yours truly, and if someone else claims otherwise, I'm sorry, but I separately came up with what I got here through more than 300+ hours of play-testing and experimentation across the different Cultures titles. I've also found quite a few "unintended behaviors", and included detailed information on them for fairness sake. They might just blow your mind if you read about them... (see school or cake section for example)

Especially useful for those who are curious about how certain mechanics work more in-depth, or want to optimize and improve their play-style. If I get questions in comments about certain interactions, I'll update it to cover them as well after some testing, if it's not something I don't know already or thought too trivial to include.

Some of the strategies listed in my guide are only really feasible when playing on x1 / x2 speed, some are simply my own preferences and don't really improve "speed-play", and quite a few lean more towards a "colony-building" side of things, where you take it slow and plan things out VS an RTS approach where speed is king, hence the whole "logistics" section might not even interest some people, depending on how long you intend to keep playing a map. I did include several sections that are vital to know for speed-play however.

One can oftentimes just mass 30+ archers and win most maps reliably that way (unless they involve enemy catapults...), but I personally don't find that aspect of this game the most enjoyable. What I like to do instead is win the levels and then keep playing, all whilst playing in Anno or Factorio - style. It's both relaxing and engaging, especially after a long day at work.

The Logistics strategy is not necessary to win most maps, but it makes resource gathering and settling objectives a breeze to achieve, and should help massively with completing missions like "have 800x of certain goods in your warehouses", which basically force you to expand beyond your initial location and have multiple settlements to complete.
2
2
3
2
   
Award
Favorite
Favorited
Unfavorite
BASIC INFO FOR BEGINNERS I - ACTIONS
Difficulty settings when starting the game not only impact combat & enemy AI, but also can potentially disable your villagers' needs bars. If you're having a very rough time and can't figure out how to keep your guys alive, I highly recommend playing a map or two on "Easiest", where all your villagers don't need to eat/sleep and talk to get work done.

By pressing "Spacebar" or right-clicking on a villager's portrait after selecting it, you will open the "Actions" menu for that villager. The tutorial teaches you this, but to recap, the most important actions here are "change job", "equip", "marry", "eat" and "sleep" buttons.

>>With only married, housed women who don't have children already selected, you can also ask them to have "male" or "female" offspring.

>>The eat and sleep buttons are not necessary for most regular villagers, as they automatically attempt to re-fill any need they fall below 20 in. These are mostly for your builders and soldiers, or early game micro-ing, to get your people to eat more than once in a row so they "bank" more energy for longer working / long distance trips.

>>>>Make a habit to do this with soldiers when you encounter large berry bush areas in the forest while on the march. You should also tell them to sleep before moving on and potentially encountering battles too.

>>You're able to equip or affect multiple units at once by selecting them and then hitting spacebar too, so you don't have to individually, 1 by 1, order things.

>>All the things you're actually able to do with your units are directly tied to the commands/buttons listed in their character panel AND this "Actions" menu. Certain actions can be "multi-threaded" or rather they'll try to do both actions at once or in sequence (even if issued during paused state), while others will override one another and only the most recent will take precedence.

>>>>Example: Right clicking on a resource with an extractor for instance is the same as "assigning outdoors work area" command + possibly "changing resource type" toggles available the character panel.

>>>>>>What this command doesn't do, however, is actually tell him to go there immediately, as that is a "move" command and needs to be issued separately. In order to change his extraction location AND get him to go there asap instead of where he was previously moving to, you will need to right click again, this time on the terrain there, AFTER having asked him to go extract that resource.

>>>> Conversely: If you tell a unit to do literally anything, but then change his job to something else while he's on his way, he'll forget everything about previous commands, and will remain stationary after changing his job.

>>>>Aditionally, in order to switch unit configurations, or issue most commands, they must not currently be in an animation. For example: you can't immediately force your carpenter to switch to furniture while he's busy currently making a wooden tool he started the animation for. What you can do instead is issue a "move" command out of the building, as he'll respect that first and foremost after he finishes his crafting animation, and after he goes outside, you can then more easily tell him what and how much of something you want him to craft.

>>>>Learning which actions can be "multi-threaded" is vital, and it comes with experience. Another example would be group-equip commands: You want to give your builders 4 meads each, so you select them all, press "Spacebar", click on the equip option and click mead.

>>>>>>IF you do this 3-4 times in a row before they get their first mead equipped, you'll notice that they're still equipped with only 1 each and they didn't get another.

>>>>>>IF however you try to equip them individually by clicking each and every button corresponding to an equipment slot and selecting everything at once, they can and WILL actually grab all 4 meads, shoes and tools, as instructed.

>>>>>>You can also ensure they equip their items from a certain place (like mead from the brewery so it can keep producing more) by also issuing them a move order to the building entrance alongside the "equip" order (either before or after). This way, they'll for the most part leave the warehouse stocks alone (unless warehouse is too close or workshop goes empty...).

A neat trick can be done with the sleep command. Normally when non-soldier villagers are ordered to sleep, they'll first scan up to ~20 tiles away from them to find a tree, then head there and sleep... You can circumvent this mechanic by simply ordering them to sleep before/after you've previously issued them a move command (that they haven't completed yet). As soon as they arrive at destination, they'll drop on the spot and sleep there instead.

>>If this is done with babies (before they grow up into boys/girls), they don't have a sleeping animation, so what'll happen is they'll appear to be "walking on the spot" instead and this will persist potentially forever until they die or you issue them a new command, allowing you to ensure they stick conveniently in 1 spot (possibly near the barracks or school).

When you assign a craftsman to a workplace, and also whenever you change their required production (so you switch potter to make tiles instead of bricks, for example), they'll forget previously issued "equip" commands.

>>In order to ensure they begin their work with tools, either equip them with tools before assigning them to the workshop, or make sure to issue them to get their tools + a move command to the tool warehouse AFTER you've already configured where to work/what they have to craft.

When you task a married woman to have kids, you can force her to get in the house sooner by issuing a move command to interrupt her previously *get food/supplies* sequence. If there's enough (2+) foodstuff in the house, she'll then immediately head inside.

>>You can do the same with the husband to ensure he gets home earlier, however do note he will only "understand" that he's meant to have kids if the wife is already waiting for him inside, otherwise he'll do a round trip back to his workplace and THEN head back home...
>>"MOVE/GO TO" COMMAND
In the previous section, I haven't mentioned this command almost at all. It's the standard movement command usually issued by selecting a unit and right clicking somewhere.

You might ask, why on earth would anyone go out of their way to open action menu and click the "go to" button first before right-clicking where to go? Well, the answer is simple. It's simply superior to right-clicking units somewhere, in certain scenarios:

Scenario 1: Your scout is derping hard instead of exploring. You will notice that for scouts in particular, when you hover over unexplored dark areas, instead of "go to" they try to use the "explore command" unique to them, which not only doesn't override existing "go-to" commands, it oftentimes misbehaves and doesn't allow them to properly explore. Using "go-to" will enable them to scout further without manual intervention.

Scenario 2: You're trying to "scan" the shoreline of your particular unexplored location. The "go-to" command has a hex-tile marker that is visible even if the area is unrevealed, and the marker will not show ONLY if the tile there is un-walkable. Using this to your advantage, you can select it and move it around to see to about where the land extends, or if there's any rivers on the way.

Scenario 3: If using it with a manned ship, you will be able to scan for any potential islands or the lay of the body of water before actually exploring it. You will also be able to move the ship more reliably, as otherwise the ship would not like to move too far into unexplored terrain and would require constant babysitting.

Scenario 4: Trying to check if your catapult is able to get from point A to B. Catapults occupy a whole hex grid of 7 tiles, but translating this in simpler terms, they'll need about 3 tiles of unoccupied space to be able to pass through gaps. The "go-to" command will display areas where the catapult can be positioned, and if there isn't a visible "illuminated" path from A to B, catapult will refuse to move. This way you can more easily see where the choke/blockages are.

Scenario 5: There's stuff on the ground and simply right-clicking your unit there would have an undesired effect, EX: there's tools on the ground and right clicking your villager there would issue him with a "equip" command instead of the desired go-to, or you're trying to move an extractor through a wooded area but you don't want him to swap to "wood" extraction and move his work area there.
>>"EXPLORE" COMMAND
The explore function is only available when you have a single scout as the sole unit in your selection box. The way this command works, you're not supposed to use it by clicking its' button in the action wheel. Instead, when you hover over unexplored areas, this command will be the default, instead of the more common "go-to" command.

The best way I found to use this command is to increase the length of distance my scout explores, or to give the scout slightly more complex pathing during exploration;

First, you issue the scout a "go-to" command somewhere into the darkness via action menu, and then you follow it up with an "explore" right click somewhere nearby on the map, and what'll happen is the scout will first go to the location you tasked him to "go-to", and then will try to head towards the point where you right clicked for the "explore".
>>Using this method, one can more easily scout in irregular shapes around the map, or issue scout to explore strips of land and then right-click a dark spot that initially got missed to make sure the scout gets that too instead of simply idling away before you get back to him from whatever else you were preoccupied with.

Caveats of "explore" functionality:
1. Limited range: Unlike the go-to command, which has virtually unlimited range as long as there's no obstructions in the way or at the destination, the "explore" command very often fails if issued to a location that's too far from the position from which the scout starts doing it.

2. Scout decision-making: During "explore", unlike with "go-to", the scout is able to do other things, like eat, sleep, talk, on his way to the destination. This can be possibly dangerous if you suspect there's enemies/wolves about.

3. Unexplored areas of the map you hover onto and the text "explore" doesn't come up are most likely impassable terrain like water or buildings.

Scouts & wolves:
When exploring, be very vigilant, make sure you quick save (ctrl+S) right before issuing a new explore command OR keep constant watch over your scout.

THE MOMENT wolves enter your vision range, they'll often be already aggro-ed onto your scout.
>>At that point, make your scout run away immediately, possibly right-click spamming if the wolves get in melee range to get away. If you do this, most of the time you'll be able to rescue your scout as wolves have a limited range they chase in.

If your scout has shoes (or wind amulet, or both), they'll be at far less risk of being caught and killed, even though wolves still move slightly faster than villagers with shoes.

Bad terrain (non-grassy/road) of any kind will reduce your odds of rescuing your scout, as the movement penalty from the terrain will cause it to take longer for your scout to leave the wolves' chase radius.

If scouting with melee heroes, they can easily dispatch a single wolf pack (5-6 wolves) on their own without issues. More wolves than that, and you're best off retreating, possibly luring them a pack at a time.

Lions are a joke, as even though they're ~4 times tankier than wolves, they're too slow to pose much of a threat, one can easily run away.
>>If fighting lions with a solo hero, make sure to right-click each lion individually, otherwise the hero will alternate taking swings between all lions present, taking needless damage and possibly failing to kill any before having to retreat.

>>Wild animals, like all living units in this game, regenerate, so if you don't kill them off, they'll be at full hp when your hero re-engages after a while.
>>"ATTACK ANIMAL" COMMAND
It is possible to utilize this command to manually attack livestock(sheep + cows), even if said livestock has already been captured by your scout.

It is very important to keep this in mind if playing on island-maps, as the game sadly lacks automated ship trade-routes.

If you by chance capture sheep/cattle on an island while already having them present at your cattle farm back home, what might happen is your cattle farmer would cull all the animals on your main island, leaving only the animals on the remote island you've visited recently, which would mean you'd have to move your entire leather production chain...

Since there's also no way of transporting livestock over water, at least that I know of, it is imperative you avoid capturing livestock on other islands, or make sure you kill them immediately like this otherwise.
BASIC INFO FOR BEGINNERS II - FOOD
Sourcing food for your people should be your highest priority when starting out (provided you don't start with "nourishing potions"/"mead"/"cake" or lots of food already in your Headquarters' stockpile, or find some in chests.

>>This being said, you don't HAVE to get tangible food items and can survive on nearby berry bushes earlier on if your population is small enough. You can't "harvest" the berries for later storage (and in my mind it kinda makes sense, since most berries IRL spoil very quickly) however, and to expand and have offspring, you will need tangible foodstuffs at your disposal.

>>The SINGLE best food source in the early game is fish. Assign a fisherman for each ~15 population you have to the shore ASAP, if you're near one. (AND even if the shoreline is a bit further away, build signposts towards that area and assign them). After a bit of mucking about (they're quite slow for catching the first few fish) they'll start pumping out food and easily keep your small-medium settlement supplied for keeping your settement fed and birthing new people.
>>>>With fishermen, you gotta be mindful, the water needs to have "visual representations" of fish swimming in it. You might want to use a scout/hero, get them closer to the shoreline and see if you can spot the fish. If you don't, the fisherman won't be able to produce anything. Fish is also a limited resource in this game, so eventually you'll have to relocate him and/or setup something else;

>>Steer clear of hunting with your starting people. You might assume it brings in food, but the hunter barely breaks even on energy with the stuff he brings in, and it's mostly meant as a source of leather and a pathway to tailoring/cattle farming, which you'll tackle later on.

>>Try to avoid assigning people to work too early in professions that don't help you progress towards food self-sufficiency/ getting building materials unlocked early on. A notable example of this is creating mushroom pickers early. Mushrooms will be useless for a good part of the game, but harvesting one drains 5 hunger (so a 1/8th of a food item).

>>>>Stick to the basics, have at least 1 clay + 1 wood extractor combo at a clay deposit near a wood-line, 1 stone extractor, and 1 farmer (+~2 fishermen if coast available). The rest you will want to use as builders/carriers/farmers/scouts (and then turn some of them into other things once you unlock school), or worst case scenario if you really don't have anything to do with them, make up to 2 hunters and send the rest to sleep by some berry bushes a bit further away from your worker's areas/HQ, so they don't hog the berries conveniently close to your workers or munch on the food for newborns in the storehouse.

>>>>>> You don't need to pay attention to carpentry too early on, as this would require you to have a dedicated wood extractor in a separate forested region to supply a carpenter, and the carpenter mostly produces "bonus" things that you could easily do without at the start (so only go for this if you have too many people you don't know what to do with and you don't have iron immediately available nearby)

>>Try to place your farm somewhere WITH grasslands below it (preferably within range of naturally occurring wheat). Wheat can only grow on grassy terrain. You will eventually want to be able to place your early cattle farm nearby, maybe to the left of it(due to how the cattle farm's structure is shaped). This means you could place the mill + bakery to the right, or directly above it, for maximum adjacency.

>>>>Their relative positions in your settlement will matter less and less the moment you start using merchants to have them interact with your primary warehouse though.

>>The basic food cycle is farmer > miller > bakery, and for this you'll at most need 1 cut stone by a mason, however past re-tasking experienced farmers to become millers (farmer experience doesn't do anything past ~3xp), for the baker you should strive to have a school ready (so you might need a pottery workshop for bricks), to directly instruct one of your builders for it.

>>>>This is because it's better to keep experienced workers in the same working field. Your miller that's reached level 10 experience is already producing ~2 sacks of flour per wheat, so turning a new guy to be a miller they'll have to start over from 1 sack per.

>>>>>>This is the case for all craftsmen and extractors (they extract faster and more energy-efficiently at higher experience). You should still re-assign your starting clay and stone extractors into potters/masons and then back into extractors when they fill their workshop's stores, since you're probably short on hands at the start, and you don't need them to keep constant production anyway.

>>>>When setting up the bakery, try to make sure you can place the well somewhere convenient first, as wells can ONLY be built on grassland tiles (so not snow, rocky, arid etc.). For future-proofing, you might want to check if you can fit 2 wells, as the beehive needed later has the same building footprint.

>> After setting up your farmer > miller > baker combo, you can FURTHER improve their production speed by:
>>>>1. Assigning a carrier to the well. This carrier should be treated as an "extractor" and preferably housed nearby, as every water extraction costs him 5 energy.
>>>>>>If he's not close enough to the bakery, you might also assign his "work area" to near the bakery's entrance, so he hauls water primarily there. Don't mind if water goes into the HQ though, you'll eventually get merchants to redistribute excess water later anyway.

>>>>2. Assigning a carrier to the bakery. This carrier should be assigned his "work area" to be onto the mill. This will force him to prioritize hauling flour instead of doubling down on water, giving your baker more baking "uptime" and streamlining efficiency.

>>>>3. Optionally assigning a carrier to the mill. This carrier can have his "work area" left unassigned, as it'll personally judge whether to get wheat or deliver flour, but if you notice he prioritizes shipping flour to HQ, assign his work area towards the bakery instead. Again, don't mind flour piling into your HQ, it'll be useful later on, with merchants.

>>>>Having done all these steps, your bread production rate will ramp up and skyrocket, allowing you to easily and quickly feed more than 50+ people in your settlement/baker. It becomes even MORE ridiculous if you give the baker wooden or preferably iron tools.

>>>>With this, you should have plenty of food to not be stressed about keeping your guys alive and working for the duration of the game, if you choose to stick to 1 main settlement location.

>>>>>>IF this wasn't enough already, you can get 2 bakers working at the same time once you upgrade the bakery to tier 2, and all the carriers should keep things smooth. (baker animation is quite slow, so 2 bakers improves that bottleneck)
Here is an example of how your food production chain should more or less look like. There are still things that could be improved upon, like road placement to make things go faster, or not-so ideal placement of bakery well(could've been crammed in closer), or the cattle farm possibly needing its' own well, but this should serve as decent enough reference to keep your settlement vibrant and thriving.
BASIC INFO FOR BEGINNERS III - HOUSING
Next we cover housing. Why should you invest in houses, how many to build, where to build them. What they do for your villagers.

>>Houses are primarily needed to allow you to grow your population. This is their key most important role. At the start of the game, select your clay/stone extractors and order them to marry, and then marry the future miller/baker/fishermen, maybe the farmer too if you still have women available (generally you start with only 2-3 women on most maps though)

>>Houses ALSO allow residents to sleep and eat inside, usually at double efficiency than doing it outside (eating food gives them 80 energy vs 40 if they ate from bushes or storehouse)

>>>>For this reason, you generally want to marry and give houses to all your heavy energy consuming villagers first, which are the extractors, and then focus on giving workshop craftsmen houses too.

>>>>Even though they consume lots of energy when building (fully erecting a structure might cumulatively cost your builders 2-3 units of food to break even) you will want to AVOID giving them houses/wives later on. This is because builders best "double down" as scouts, or as soldiers/defensive garrison, and are thus highly expendable, and this group of people you DON'T want to marry until you know for sure they won't be in those roles.

>>>>>>After finishing a building, manually select your early game builders, send them into some more remote bushes, and force them to eat 1-2 extra times and sleep. This'll mean they're in top condition for your next 1-2 building projects, and since they picked all berries clean there, the berries will start re-spawning earlier, and all at once for future use.

>>>>>>In scout, soldier or merchant jobs, they'd also refuse to go home and have kids if they were previously married. This is by game design, and isn't a bug. Their soldier/scout/merchant roles "force" them to stick to their orders, thus preventing them from acting willy-nilly and potentially trekking back home when they feel like it, deserting their posts/cart.

>>You generally might think you want to, but SHOULDN'T assign just 1 married couple per larger houses. Women act as food & supplies carriers as their primary "job", so they'd strive to keep the house stocked to as close as possible to the maximum.

>>>>The reason you might not want this however, is that houses can have (house tier)x5 total stored foodstuff in them. Women however don't take into consideration if their other women colleagues are also bringing food at once, so quite often, when the food in the house drops by 1 unit, all of them go get food, but when they realize no room is available for the rest, they drop it off in any other nearby houses, thus supplying sufficient food to their new unmarried neighbors living next door.

>>>>>>When just starting out food production and things are rough for your villagers, having all say, 3 women living in the same tier 3 house will mean they'll only "lock-down" 15 food units for them and their families, and they'll "deliver" the excess ~2 food periodically to their neighbor's house. The remaining food remains available to the general populace to access.

>>>>>>IF you had them distributed so each lived in a tier 3 house separately, they'd, albeit slowly, end up "locking down" 45 total units of food in all 3 houses, potentially causing some of your other un-housed workers to go hungry, waiting for the fisherman to catch something or sitting wistfully by the now-barren berry bushes someone else already ate at....

>>>>>>Having all 3 in one house also means the required food for the new births will be more quickly brought in and available, so say 1 food delivery wave and woman 1 can give birth, and with the 2nd delivery both woman 2 and 3 can birth as well. They'd all have to deliver food each at least 2 times otherwise, unless someone else in that house decides to go eat first, further delaying new villager production.

>>>>>>If you've got a surplus of food production, and un-assigned extra houses nearby, you can shift the families with existing babies into a different house once their primary is fully stocked, so the others get stocked too and prepared for the future families to live there.

>>At the start of some games (when you don't start with build anything papers or pre-existing houses), dwellings I cost 4 total resources, so only a maximum of 4 builders can work on building them at once (this also applies to upgrading them to dwelling 2). Thus, you want to have ideally either 2 or 4 builders available. With 3, they'll each bring their respective materials, but then for the last material, 2 of the builders will remain idle by the build-site and waste time while the 3rd goes to fetch it. This would be strictly worse than if you only had only 2 builders and the 3rd person was tasked on something else.

>>You want to upgrade a house just after all women in the house gave birth to babies, and the banner symbol with the 2 wedding rings is "THICC"-er than usual. This way, upgrading the house doesn't get in the way or slow down your new villager production. Make sure not to do this too many times in a row as the women will need some time to bring in enough food for the next "batch" and they can't do it while building is being upgraded...

>>You will also want to first try upgrading your houses over creating new ones, as past the first upgrade, all subsequent upgrades only require 2 builders per house to upgrade, thus allowing multiple simultaneous upgrades with your limited pool of builders.

>>>>Houses also have a "medium" footprint, so you'd prefer fewer high tier ones vs many low tier if limited on building space, and when houses go above tier 2 they take more and more visual space "above" them, so they'll prevent you from seeing there or possibly moving catapults through their small gaps.

>>Always order new women to be born only when you know where to send them, and you'll send them to places where houses are being built and/or have unmarried workers already housed in the area.

>>You want to build new houses pretty much all the time you set up a new workshop/working area somewhere. In the early game, you'll probably like to build your first 2 houses somewhere near the fisherman or the place where you'll build your bakery + mill.

>>>>You'll have a house by the tailor + cattle farm + farm area. A house near the potter for the extractors + potter(s). A house near the carpenter(s) too. When you expand for iron (possibly away from base) you'll want a house there too. Always strive to get the workshops up and running first when they become available though!
Here's a small smithy setup in a very remote area, they receive shipments of food and export iron tools.

Try to make a habit to marry off only the workers that'll stick around for long in an area. Avoid marrying scouts/soldiers/merchants as they don't go back home when "called upon" until you change their profession to something else.

>>Later on, builders might not be a good idea to have married either, since they'll usually be all the civilians you haven't yet decided what to do with, they will travel across the map to build, and they would serve as scouts or military garrison when needed... If you've had any of 'em married (possibly in the early game) make sure you find them "local jobs" afterwards.

>>On extractors, it's entirely up to you. I tend to marry them off along with well/beehive carriers simply to have more married couples in the earlier stages of the game, and because they use up more energy and housing doubles food values when eaten inside. It can however get fiddly to then re-assign and relocate them later on, so you could opt to leave them as unmarried mead-fueled alcoholics instead.
BASIC INFO FOR BEGINNERS IV - RESOURCES
Mushrooms and trees regrow (very slowly) in tiles they were originally growing in, but only if up to ~3 tiles away from other uncut/unpicked specimens. IMPORTANT: They also have a random upper limit to how many times they can regrow in the same spot.
In the image above, I've had a mushroom extractor assigned to an area and let the game run for a while. His gather point is on the road, which was quite a ways from where the mushrooms were in the forest, and there were several specimens outside the radius. He managed to harvest (due to his displayed experience), and I kid you not, a total of 940 mushrooms, several of which were carted by couriers or used up for crafting. No way in hell would I have gathered that much if I had several extractors assigned in the middle of the mushroom clusters instead. (also note how roads extend "sight/work" radius). Further mushrooms stopped regrowing since I reached their tile regrowth limit.

>>For this reason, make sure your extractors have their resource drop-off points a ways OFF the actual resource growing area and to deliberately "miss" specimens in an "outer crescent/ring" shape if you want regrowth.

>>I like to sometimes measure the extractor's work radius, and then pave a "hex pad" of road right on the spot I'll want to remember to assign extractors to in the future as well, before they start dropping off resources >>>more in roads section.
For wood, just let an iron tooled extractor rip through the forest as quickly as possible for your initial supply, up to about 2-3 rows of tree stumps in, and then assign un-tooled novice there to allow regrowth. The tree line will start regrowing, it might thin and recede slowly over time, but this ensures ~600+ logs per dense treeline without being slow as all sh*ts to harvest and ensuring ample wood for kick-starting a new production line.


Fish is a limited "extractible" resource, albeit every school of fish has about ~25 food in it (you can see them in the water). You can use this to ensure food supplies in new settlements early on, and after bakery is unlocked, you'll still want to send your fishermen to extract in other locations you predict you'll want to expand into, instead of just letting their accumulated skills go to waste.

Hunters and their wild bunch: You shouldn't consider hunting as a food source, but rather as an optional source of leather: Whenever they shoot their bows, they spend 1 extra energy per shot, and afterwards when they harvest the carcass they also spend total of 10 more energy, 5 for every "gather" action. If we include the time they spend chasing prey and delivering the goods, they barely break even on food.

>>Since leather for shoes and armor is better off sourced from cattle farms, they should only be used early game if at all, with their gather points assigned somewhere where you'll expect to have the tailor's workshop/cattle farm nearby.

>>One could also assign a hunter to work near carpenter's workshop 4, to more easily supply it with the little leather it needs for ships.

>>Great care should be taken as they love wandering off and potentially running into wolves. If they encounter wolves that attack them from outside the explored terrain, there's 0% chance you're getting them out alive. This is another reason why hunting is not a good idea, losing villagers can set you back quite a bit, so if you have to hunt, make sure to thoroughly scout the surroundings with your hero and put down any wolf pack in the vicinity.

>>You can assign hunters to "attack animals" manually if you feel like micromanaging them, and they'll keep shooting 'till there's at least 1 carcass nearby, at which point you'll need to order them to attack the other animals after every shot fired. You don't want more than 1-2 hunters in an area at one time, as they can end up wiping out the entire animal "groups". Most huntable animals like rabbits stick around in groups and they periodically respawn if not fully killed off.
>>>>Hunters get 1 experience every time they harvest from a carcass for the first time. This means that if you have 1 hunter kill a rabbit and bring back both leather and meat, he gets 1xp total, whereas if you had 2 hunters, the first would skin the rabbit, and the 2nd would bring back the meat, and both would get 1xp. (only useful if you don't use school to unlock tailoring/cattle farming)

Berry bushes are a naturally occurring static source of food, most areas have 'em in spades, but they might not all be ripe initially. That said, you don't usually want to rely on them for food for long, but when you have small groups of people near them, you should manually order them to eat, up to 2-3 times depending on their energy bar to "bank energy".

>>All "need" bars can go up to 150% maximum, and berries, like most foods, restore 40 per eat. Forcing people(especially early builders or groups of soldiers) to eat from the bushes will reduce their food trip frequency for a while.

>>>>This also allows you to ensure workers eat berries and not the food items in the storehouse/on the ground, which early on will be needed to create new villagers.

Quarrystone is everywhere. That being said, you should place your early stone mason workshop near more reliable sources of it, like near an ore mountain, or near quarries (rocky terrain with lots of rocks spawning on top)

>>On the flip side, your early stone extractor(s) should be tasked to clear out the more annoying in-your-face stone deposits around your intended build areas first, so you can utilize space more efficiently when planning your settlement, instead of sending them straight to the stone pits and having to cram buildings around due to the odd rock.

>>>>Do this for trees too if the starting area has lots of stragglers. Don't mind non-fully grown trees though (2/1) as those can simply be built on top of, destroying them.

Ore(iron/gold) is usually found bountifully on mountains, but can be particularly tricky to extract because it can be clogged up/surrounded by regular rocks, AND the rocky mountain terrain type greatly reduces the extractors' work radius & line of sight >>>see roads section for more details

>>For this reason, I highly recommend always partnering your ore extractor with a nearby stone extractor guy.

>>>>You might want to keep different extraction jobs on separate people, as this allows them to do their jobs efficiently. If you set an extractor to alternately dig stone along with ore as well, and then later get another extractor in there, they'll often get in each other's way.

Livestock is found and "captured" by asking a scout to get uncomfortably close to them... They're for an advanced leather/wool producing building which also happens to provide lots of (by then probably useless) food, called the "Cattle farm", operated by "stock farmers". You can also capture already-captured livestock belonging to another faction/player too.

Large wild animals in the forest like bears will generally not be touched by hunters who are hunting automatically, so their only purpose is to serve as archery practice for your archers. Killing all wild animals on your way to the enemy camps will drastically increase their accuracy and thus your overall pushing power. It also frees up the unit cap (yes, it exists, and it's shared, so be fast and prolific in long MP's!

>>Chickens are near immortal, and can be stockaded and used as archery target practice.
ABOUT EXTRACTORS
Most extractor types start to one-tap resources(clay, stone, iron, gold, herbs) at 18 experience in the field with iron tools. Wood extractors take 8 experience, but are generally slower to get there, due to crappy "double tap" animation per "unsuccessful" hit + moving around the tree.

>> At these thresholds, iron tools = 1 strike, wood = 4 and barehanded = 6 to chip resources/ down trees/ scythe herbs. Iron tools should thus always be given to expert extractors. 1 tapping also means they extract 4x the resources than a wood tool before breaking, while doing it much more quickly too.

Extractors gain experience every time they successfully chip a node. After they fully chip a node (or if they're interrupted) they will then try to "harvest/extract" the resources that the node yielded.

>>This action doesn't grant them experience, and is likely to take them the longest bit of time, having to walk with the resource in their arms to their designated drop-off point.

>>>>Depending on the terrain type, they'll also incur movement penalties(and those apply to their overall "work radius" where they can actually see resources.

>>>>>>Clay pits and quarries(the grey terrain on top which limestone-like rocks spawn) debuff by about 20% but mountainous terrain hits them harder, by about 50% or so. Hence it's difficult to extract mountains without employing road strategies >>> roads section will have more info.

>>trees are an exception, where after their x swings they don't "chip", but all 3 units inside become "harvestable", granting only 1 xp.

The first few levels of an extractor skill are always the slowest and least efficient, even with iron tools;

>>Example: Iron tooled woodcutter takes 5 swings to bring down his first tree, 4 swings for his 2nd, 3 on his 3rd, 2 on his 4th to 8th and eventually one-shots trees at 8xp and stops excessively wasting tool durability and "energy"(food) and time.

>>Wood tools shave off ~1.5 minutes of work time (on x1 speed) before extractors reach their proficiency threshold, whereas iron tools shave about ~3 minutes or more. Of course, this also means they get you their goods available sooner...

>>>>For woodcutters, leave the ones near workshop tree-lines tool-less to allow the treeline to regrow somewhat, due to their slow harvesting. Equip only a few woodcutters (maybe just 1) with iron tools for carving an inital supply of logs in each area, then move them off and replace them with a tool-less novice afterwards.

Try not to overlap multiple same-resource extractors' work areas and especially experienced extractors with inexperienced ones. You can click the "eye"/"question" button to check their registered work area to double-check.

>>The experienced ones will one-tap chip resources(provided they use iron tools), hoarding the experience, while the inexperienced ones will waste energy (extraction progress is "tracked" per extractor, and not per resource vein) and stop whatever they were doing, having wasted tool durability and not finishing their extraction, and then go "extract" the readily felled tree/dug clay/smashed rock/mined ore from the ground, reporting "cannot find their way" if they don't make it there in time, and not getting xp.

>>>>The exception to this is if you intentionally mix a 8/18xp+ extractor with iron tools, with ~2 "lackeys" with no tools, probably fresh civilians you didn't decide what to do with yet.

>>>>>>Essentially the new guys will act as "outdoors carriers" and keep the master at higher working speed/efficiency. EX: When he cuts 1 tree, and then picks up 1 out of the 3 logs, the other 2 guys will do the rest, and the main guy can cut another tree instead.

>>>>>>Piggybacking off of his experience you can more than double the rate resources are collected in the area this way, with minimal investment(only one guy uses tools)

>>>>>>You will have to consider that the 2 aides will realistically never gain much extraction experience themselves, and you should think what to do with them shortly after (worst case scenario maybe turn into actual carriers at a nearby warehouse to haul all the cut wood off the ground?)

Try NOT to fiddle too much with extractors who are in the midst of their work animations, even something as "seemingly harmless" as re-assigning them their drop-off point WILL reset the number of strikes they require to chip their resource.

Extractors assigned to buildings (yes, you can press A and then right click building) will need to have their desired resource re-selected, especially if building gets upgraded later on.

>>These extractors act like carriers, where they act to replenish the resource(s) they're tasked, prioritizing picking readily-available resources off the ground before ever actively extracting, and they can be potentially better than carriers as they do not haul finished goods out of the workplace (you might want 2-4 merchants with handcart for this eventually, as they'll ensure much greater workflow in the workshop, so internal extractors are more for the early game local supplying needs)

>>>>Example: assuming a smithy I churning out iron tools, carrier will haul wood/wood+iron until workshop's stock is full, after which he'll waste time hauling finished goods to the warehouse, no longer supplying the workshop, and you only get 1 and he usually heavily focuses on either of the two resources. What you can do is task carrier's "work area" near where iron's dropped off (since that's likely to be getting further away with time), and have the wood "extractor" tasked towards where the real woodcutter's drop-off point is, essentially getting carriers for both resources.

>>These can also be tasked on warehouses, up to 3 per, (and preferably each for different resources if you're expecting them to actually do the harvesting without getting in eachother's way), preferably assigned to actual warehouses with decent capacity (50/100) to ensure they keep working 'till the merchants arrive to load up the raw goods and ship them where needed.

>>Clay and Stone extractors should usually be kept working outdoors (unassigned to building) and have their drop-off point regularly moved to ensure efficiency, perhaps even going as far as to pave roads into the clay pit/rocky area/mountain as they extract, so they do their job even faster.

>>You will always want at least SOME outdoors/warehouse extractors because otherwise your builders might not be able to find the wood/clay/stone they need.

You can quickly assign outdoor extractors' exact drop-off locations by pressing Shift+A then right clicking. This is usually better than right clicking the raw resource, particularly with trees, as this will allow the treeline to regenerate better.
>>Mushrooms are affected too. Also on mushrooms, they don't use up tools and are very fast to gather (the experience level does nothing in their case), but every mushroom costs 5 energy to "harvest" and you should only realistically start to set out gathering them only AFTER you unlock iron and setup a smithy.
>>>>This is because they unlock herb gatherer, which needs iron tools to function at a sane/reasonable rate and get the xp needed to then unlock druid.

>>>>Druid needs mushrooms for both oil and potions, but potions will also require gold coins, and to unlock that, you need a 10 xp blacksmith, hence you want to start gathering them after you set up your smithy at the earliest.

>>With metal ore, it makes it available potentially closer to the smithy, and you'll want to pave mountain roads to facilitate easier, faster and deeper/further extraction.
CHESTS EVERYWHERE!
Note: In Cultures 2, ONLY druids could open "magic chests", heroes were unable to.

Chests can oftentimes be found strewn everywhere in most missions. There are regular(anyone can open them) and "magic chests" (requiring druids or heroes to open), and they can contain many useful things, like:

>>3 armed viking soldiers ready to join your cause (in more peaceful missions you should immediately send these guys to HQ, disarm them and turn them into workers/builders.

>>large bundles of up to 30 food. These are generally found not anywhere near close to your base, so the way to use them is either to later create a resource outpost nearby to utilize them, or to force-feed them to your troops

>>large potion caches of 5-10 of all varieties, the most useful of these are healing potions on adventure maps and nourishing potions on all maps( if not playing on easiest difficulty).
>>>>Stamina potions are mediocre, on soldiers they're not really necessary(and in fact will generally end up gimping you more, since that equipment slot could've been better taken up by an amulet or extra healing potion instead).

>>Amulets. These oftentimes confuse most players and could make you spend lots of time trying to manage them and figure out who gets to use them. You should give strength, defense and wind amulets to your melee warriors, precision to archers.

>>>>Strength amulets increase melee-only damage by about 50% and their effects don't stack, and I presume it's similar with precision amulets for ranged troops. Strength has no effect on archers, and precision has no effect on melee troops.

>>>>Wind amulet is also good on scouts with shoes and some healing potions to scout enemy fortifications when you don't want to risk your hero or don't have one. Nothing will catch up with them, and they should be fast enough to reliably avoid catapult and most tower fire and spot them for you to then assault. Note: In Cultures 2 they don't increase movement speed (either a bug or they do something else?)

>>>>Stamina and nourishment amulets are generally not ideal on troops since you'll usually already have equipped ample potions and it could end up wasting slots for extra healing. (maybe send a scout later to pick 'em up? if you end up remembering about them). Best use case is to equip them on iron/gold extractors.

>>>>>>Similarly to how stamina/nourishing potions are only used when equipped units are garrisoned, inside a vehicle or stationary, they also don't prevent their respective status while unit is ordered to move to faraway positions, only applying after movement is complete, and when they do, they restore very little.

>>>>>>They can and should be given to your builders as this will at least remove 1 of the potential reasons some builder dropped the last building material somewhere and went to take a nap, while the others are just waiting at the construction site idly (not daring to sleep so they can be tired and be the ones to forget materials the next time too). The worst thing is, after that initial guy wakes up, he forgets about the material, and someone else from the build-site will head out for it instead...

>>Caches of 5 chainmail or 5 plate armor, these often trivialize adventure missions, as coupled with healing potions they usually enable you to finish the mission with the guys you start and maybe a few others from chests without actually building your settlement.

>>>>Winning a map this way first will still allow you to keep playing afterwards, and might be preferable to some as it reveals the entire map without further need of scouting, so you can city-build peacefully, if you wish.

>>"Papers", which are found in your "extras" tab and will oftentimes allow you to place fully readily built: specific buildings, or "any building" that you actually have unlocked, OR they might "place a certain building " like a mint and fill its' stores -raw input materials start at max(10), coupled usually with a villager ready to operate the building.

>>>>The "school" and "place any building" papers are the most valuable you can find, followed closely by "place dwelling 5", "place temple" and "place building x and fill its' stores", and for this reason you might consider starting the map, turning everyone into scouts, quickly finding all nearby chests and seeing if you can identify one that might contain them. Then you restart and start playing for reals with this knowledge...

>>>>>>The "place temple" blueprint should be reserved for offensive use, to be placed near/inside enemy encampments for the regenerative buff it provides (read more on temples in the dedicated section)

>>Hostile mobs like wolves can oftentimes be found when opening chests, they'll initially be derpy and not attack, but could act as enough deterrent to repel your cheeky scout from opening the rest. Hero should be able to handle them, provided he wasn't aready attacked by wolves and tried to push their luck.

>>Catapults. They can be incredibly useful if you're used to using them and know what they're useful for, or feel outright unnecessary and clunky to most players so they go unused/ get left behind. >>> More info on them in the weapons section of the article

You can quick-save before opening chests, and if they contain undesirables, simply reload afterwards...

You can easily locate hidden chests under foliage if you activate your minimap in the corner bottom left and then clicking on the large map button. This should open a screen where you can selectively filter displaying things, including resources, so in highly vegetated areas make sure you do so as it might just reveal that 1 extra chest containing something vital (like extra soldiers on battle maps, which might end up shifting the tides of battle in your favor

>>Like the first duel arena against the "Keepers of Knowledge" on the "Fog of Horrors" map for example if, like me, your quest glitched out after playing off their tribute, then got pissed off and razed their base but found out afterwards that moving to the obelisk didn't progress the map quest, and had to fight their rigged large scale tactical battles... )

>>>>Actually managing to spot and click on them through the dense vegetation afterwards might be a different problem altogether...
PRODUCTION I
Most craftsmen produce 2 or more goods per craft at 9+xp in a category of goods (with no tools). Tools add +0.2 items for wood and +0.7 items for iron as FLAT bonus output. This means that every tool on a craftsman will directly output 20 or 70 "extra" goods at 100 crafts.

>>This also means that on craftsmen, the earlier you get the tool, the more impactful it will be for goods production. Eventually at level 150+, a craftsman will end up producing 2.5/2.7/3.2 goods depending on tool equipped. At that point, tools only add about 8%/28% "productivity" bonus.

>>>> Perhaps a notable threshold is 28xp for exactly 3 items crafted with iron tools(2.5 if wood). Iron tools reach 2.5 items/craft at just 6xp (and wood tools 2 items). Untooled, 10xp is the threshold for 2 goods per craft.

>>For ALL craftsmen who consume non-renewables like druids, potters, masons, mintworkers, smiths (maybe <item carpenters> too if you have those) you will always want to strive for iron tools.

>>For "high-consumption goods" craftsmen earlier on (baked goods, shoes, mead) you might also want iron tools if available, to get an "initial boost" stock of goods, but it's usually not necessary.

>>>>Most workshops starting from 10 input goods will usually produce enough to fully fill the stores with either iron or wood tools, so the bottleneck becomes purely logistical at that point.Tools help less in that regard.

This all said and done, for fast play this means it's considerably more important to prioritize getting your smithy I up and running ASAP early, so your workers are more productive.

>>This would also potentially allow you to get shortsword units trained very early to rush objectives much sooner than you'd be able to upgrade and use mass longswords, or god knows, ~5-10 minutes later bows and spearmen at the earliest.

>>You can win most maps just fine with death-ball goon squads of ~35+ leather armor/tunic archers, with no metal consumption involved, so never hesitate to use iron for tool making, unless you start with no / very little available on the map. If you just hoard it, you're not putting it to use when/where it should be.

>>>>I'd still make tools out of it even if it's highly limited, and have my important craftsmen compensate by crafting more of their stuff with them, along with bakers producing more food faster for more rampant population growth, and brewer to get my homeless people meaded up more quickly.

>>>> I guess if there's ever a map objective that specifically requires hoarding iron, maybe then I'd consider... though I'd still craft at least 10 for non-renewables craftsmen.

>>>>>>Sure enough though, you might not want the iron tools delivered by merchants into the big warehouses, as that'd mean you'd produce them more quickly than your people will get to need them, chewing through your iron reserves. Use supply depots to store them instead >>> more in logistics sections.

>>DO make sure to have your smith craft only 1 iron tool and have him equip it immediately first, so as to maximize output for the rest of his crafting.

Cattle farmers for some reason don't use up their tools, however they benefit doubly from them(+0.4/+1.4 instead of +0.2/+0.7), so it's a good idea to give them iron tools for maximum culling output.

>>Cattle farming might be weird for new players. Basically the way it works, your scout needs to get very close to cows or sheep. Once your scout manages to secure 2 of these animals, they head back near your headquarters.

>>>>Usually, you will be able to get multiple cows and sheep, but they're functionally an infinite renewable resource, so there is no real need to go out of your way to claim more, if only to give yourself more of a boost and possibly prevent enemies from getting them.

>>Your cattle farmer, after assignment to building, checks his initial herd of desired animals. If it starts large enough, he immediately culls some. Then he attempts to "create" multiple new animals by expending wheat and water in storage, 1 new animal per 1 wheat and 1 water. Once he manages to multiply them to a number greater than ~4-6? I think, and he runs out of stored fodder in the building, he waits for a bit and then begins the culling process, where he brings in each animal one by one and produces large quantities of meat and leather/wool(starts at 2 of each per animal but ramps up rapidly to 4-5 per). During culling, animals outside have their hp drop, probably because the noises from inside are scaring them sh*tless(don't mind this too much). After the herd is reduced back to 2 specimens, the breeding process begins anew, but only IF the meat and leather stores are cleared properly.

>>>>The cattle farm production speed relies HEAVILY on your logistics, and a good supply chain can lead your farmer to have herds as big as ~15 animals before culling. If you manage to resupply water (have carrier assigned to permanently work at nearby well) and wheat fast enough during the breeding phase, you will have an insane number of cows in your herd.

>>"Un-oxed" Oxcarts freshly built by the carpenter will lure an ox to turn into a functional vehicle, but will never screw you over if your herd is currently at 2 or lower. It'll just sit there 'till the cattle farm or scout gets more. Don't worry about this when building them(except if you're at 2 and your scout captures cattle on a DIFFERENT island)

>>You will either want a separate well with assigned carrier to constantly bring water to the cattle farm, or if using the same well for other workshops, you'll want dedicated "merchants" supplying each workshop from the well.

>>If you don't have already, assign an extra farmer to your wheat farm so it can keep up production smoothly(so have at least 2 by now)... or build another separate farm for the cattle farm closer by (I don't do this as I hate having wheat growing all over my sh*t, potentially forcing me to use a scout with signposts to destroy unwanted growths)

>>later on when getting large numbers of civilians isn't an issue anymore, you'll want 2-3 merchants assigned to the building to bring in wheat and take out the leather. Meat should be a non-issue as your married women will clean that stock out better than any merchant ever could, provided you halt bread and fish production.
In the image above, the farm placement was a mistake... I tried to be cheeky and set his "work area" to the right but he still planted wheat in undesired places. The brewery has no carriers, there are however carriers for both imput resources assigned on the well + beehive, and they've not been assigned a house yet(just rocking full mead) but I'd set them to live in the new dwelling 5 next door...
PRODUCTION II
Carpenters(carts or ships), armourers(catapult) and builders shred though tools insanely quickly if building anything, so they should be using only wooden tools if at all. They seem to reduce building times by about 20%, thus being ~25% faster at hammering, but if you factor in their walking times, it drops to about 10-15% realistically, even worse for builders who don't have supply depots and gotta walk half across the map for some random tile or brick, all the while the other builders congregate and idle away collectively

>>For carpenters, you will want separate carpenters to work all day making handcarts and oxcarts on loop (ships too if needed). You will need LOTS of carts for strategies discussed in the logistics section. Suffice to say, you'll want at least 2 handcarts for most buildings that consume and produce goods(oftentimes 3 or 4).

>>>>Seriously, they're amazing, but you need to know how/where to use them and in sufficient numbers, otherwise you might feel underwhelmed at first, think they're mediocre, and miss out on establishing sprawling economies of scale.

>>>>You'll primarily only want to use the oxcart variants for long distance trade routes between your settlements, trading with external nations, or assigning multiple carriers with these and either dropping building supplies for remote regions or picking up large quantities of ore mined on the mountains (hold CTRL when pressing the + or - keys to unload 10 at once) and then unloading it all at your warehouse / workshops.

>>>>>>You should preemptively craft and have ready at least 2-3 for every time you want to expand and settle a new outpost/colony somewhere else on the map.

>>>>>>You might be tempted to think that the doubled capacity of these, coupled with the relatively proportional wood cost directly obsoletes handcarts, but you'd be wrong in that assumption.(again, more talk about this in logistics section)

>>Same carpenters who build carts can also be building ships. Ships offer great, yet limited utility.

>>>>A ship can hold up to 11 people (can ferry sets of 10 across water as 1 needs to remain inside to move it). It can ALSO hold up to 50 goods directly + 1 vehicle( together with its' own separate inventory) of your choosing, if you send your manned vehicle to board the ship. Militarily, this also means you have a new and actually usable method of quickly deploying catapults with a host of ~9-10 archers(10th man will need to man the catapult again, and you might want to keep 11th inside/near the ship), This is per ship too, and nobody's saying you can't land with 3 of 'em.

>>>> Since the internal capacity of 50 (+20 extra with oxcart) is nothing to scoff at, you can send crews of 3-4 (hopefully experienced, iron tooled) extractors and 6-7 carriers, all equipped with 4 meads, to load up on rare resources if you previously found them present on some island elsewhere.

>>>> Don't sleep on scouting the waters, especially if your town is close to shore. On many maps, enemies will have their own ships and land armies in your base, and you REALLY don't want to be caught unawares. As long as you don't get too close to hostile shore defences, ships are virtually un-attackable in open waters.
In the image above, this is how a lategame carpenter's workshop should look like. There's 3 carpenters, 1 for items (equipped with iron tools), he makes primarily wooden tools but also wooden spears or furniture if I need 'em, and 2 for buildables (equipped with wooden tools). Wood is brought in by 3 merchants with handcarts from other places while the local forest is regenerating. They're all set to load up on either tools, furniture or spears (never more than one type at once) and they ship them back to warehouse.

>>To the untrained eye, it might look like the carts outside are many/excessive but they're all that's left after I previously assigned ~20+ merchants to places all over.

There are certain buildings which have "useless" input materials assigned to them. The 2 most notable are barracks and armourer's II. The barracks can take 100 coins (no usage) while the armoury can hold 10 iron (also isn't used for anything).

>> I believe these might be "legacy" materials previously required for something in different versions/ports of the game (since most cultures series games are very similar, near identical sometimes), but while their use case was removed, the code that allows them in there wasn't... so avoid placing barracks near Mint, and assigned couriers operating near the armourer's workshop with iron nearby.
ADDITIONAL INFO ON CONSUMABLES
Tools improve the workspeed of harvesters and builders. For craftsmen, wood tools add an extra 0.2 output and iron 0.7. You ideally use iron for most experienced, "real" extractors and all regular goods producers. Wood tools can serve as a stepping stone if there's no iron near your starting area, otherwise can be avoided, carpenter's workshop is mostly just for making carts...

>>In the situation where you start the game with tools, always give the best tool to your clay extractor, as him reaching level 10 asap unlocks pottery, and thus the school. Later on, this very same extractor will use his remaining iron tool durability for brick/tile crafting. >>>see school section for vital information!

>>If you start with wooden tools in storage, they're not really worth pondering much on, just give 'em to anyone you feel like, be it craftsman, extractor or builder. On extractors and builders, these tools will essentially translate to ~1 unit of food saved in the long run (and ~20% faster extracting/building). On craftsmen the slight bonus won't really be noticeable and you'll replace with iron tools as soon as available anyway...

Mead is a 2-dose 50 energy 50 stamina potion. A full inventory of meads on a unit ensures 400 units of energy and stamina and they're automatically used when units become stationary and low on energy/stamina. Really important to set up the brewery in the same areas where you train your civilians into either troops or advanced workers, close to shoes and other equipment workshops. Meads are essentially the only way to keep workers productive when they don't have a house. It's also useful for your troops before you can source or produce potions, but even then, home-defense troops and garrisoned archers, along with your builders group and your merchants will need to stock up on meads to keep productivity at max.

>>Earlier on when playing I was wondering why there wasn't a feature in the game to turn some dwellings into "taverns", essentially allow them to house and feed up to x2-x4 the people but not allow families/kids. Later on after figuring out how mead works, I understood that mead already fills that role much better, as 1 mead equipped is essentially superior to a worker trekking to his house to rest and eat. Only drawback is they don't get their social needs fulfilled this way... With 1 brewery, you can essentially keep an almost limitless number of workers productive without the need of houses, albeit it's a bit finicky as you gotta remember to issue them to get mead from time to time...

>>>>Because of this, it's actually always worth occasionally pressing the "Everyone Equip Mead" button in the extras menu, as even for married, housed people, if they had inventory slots available, it'll be similar in "downtime" as if they went inside their house instead to eat/sleep, even if their house was closer to them than the brewery/warehouse where the mead can be picked up...

Cake is broken. More info on cake in the next section...

Shoes: Considerable speed buff for your villagers. You eventually want this on every villager. Not sure how much speed, might be 20% or so but it's very worth it, and it scales impressively with roads.

>>It's best assigned en-masse via the extras menu.

>>Leather should become a non-issue for 'em once you build the cattle-farm and grow cows.

>>In missions where you start out with a small initial stock, you should assign this to your clay gatherer and the other people you want to have marry and settle, so they get home faster.

>>Alternatively you want them on your military units if it's a map where you don't turn all your starting troops into workers(possibly builders to replace the starting builders into other jobs) for that extra economic power.

>>>>Troops with shoes might just be able to keep up/catch enemies or retreat in hairy situations where otherwise they'd be boned. If you're able and willing to micro your troops (and pull out soldiers getting focus-fired), shoes + tunic armor might be able to save you more soldiers' lives than heavier armors will (especially since heavy armor without shoes will almost completely prevent your troops from running away, effectively locking them in do-or-die fights).

>>Since most of your extractors' tasks involve not only harvesting the resource but also dropping it at their designated drop point and your carriers job essentially mostly involves walking around, and your workshops rely on the previously mentioned 2 groups for supply, shoes are part of the "holy trinity" of production speed, the other 2 being tools and mead (maybe roads as a 4th contender).

Potions: I bundle them all here because they're functionally similar; all come in 2 varieties, Small (2 dose) and Large (5). Doses restore 100 energy/stamina or 2000 health, depending on potion type.

>>The large ones cost double the materials to make = 2x(shroom,water,herb,coin) However both small and large potions of a variety share the druid's experience pool

>>>>For example: in order to get the druid to produce a decent quantity of Large healing potions more material-efficiently, you probably want to set the druid to make 20 units of the small variety first, for training (which should bring them to 9xp if done with iron tools)

>>The small potions are very good too, and can be assigned to archers, as they tend to take less chip damage because they run away in melee

>>Healing potions - the most important potion if you value your soldiers' lives, as the other 2 have similar(more potent) effects as mead. Give every archer 1 small/large, and every melee soldier 1-3 large ones.

>>Stamina potions: restore 100 stamina per dose. The worst of the bunch, they just prevent the soldiers from getting sleepy... but even without them, before taking a long fight or a siege, you can select your army and force them to sleep, maxing their stamina at 150, which should last for the entire razing of an enemy city.

>>>>Don't produce these, but if you find or get them early, have your homeless workers, especially the builders and extractors get them, they're only good on workers.

>>Nourishing potions: The superior "mead" for the warrior on the go, restores 100 energy per dose. This is your go-to ration pack for military troops, provided you decide to not cheap out and just give them full inventory of mead instead.

>>>>Warriors consume lots of energy, especially when playing out their respective fighting animations. Archers burn more energy on average during combat than melee units, and melee units should mostly use healing potions or certain amulets if available (and force-eat from bushes).

>>>>If you produce enough of these (or to dispose of the remaining small ones), you can give one to each builder too, so they use their meads only to restore sleep instead.

Will do some more testing on crockery and furniture later, although they seem to have ~20 uses and increase food/sleep efficacy. Of those 20, since men expend more energy by working, I'm guessing they'll end up grabbing 12-15 of the "effect doses" on average.

>>Without having concrete numbers, I still don't produce these unless the mission has good trade deals for them. For crockery, you need to waste time upgrading your potter's workshop, for furniture you'd want a separate, iron-tooled carpenter, to be more efficient with wood, but the other crafted goods from the carpenter's aren't exactly necessary either.

>>>>You should be swimming in food/cakes, so crockery is a question of enabling your workers/craftsmen on going for marginally longer work streaks. Highly dependent on the abundance and availability of clay and wood.

Oil is not really worth producing for consumption purposes. See the dedicated "temple" section for more information.

>>Inside dwellings, 1 oil lasts for about 5 minutes at x1 speed, and is consumed regardless of if anyone in that household uses prayer.
CAKE - THE FORLORN SUPERFOOD
Cake WAS essentially intended to be superior food and could potentially fully obsolete regular food. Food normally restores 40, cake does 60 hunger/energy. This is still doubled in households...

Why did I previously say cake is broken? well... After doing very thorough research and testing I concluded the following facts:

Cake is probably coded to be sharing the same "foodgroup" class with the regular "food" item. At a glance, the devs thought that since it's in the same class, it'll behave ok, as it'll be "available as food" if villagers go hungry.

>>Assumption is correct so far, except the game doesn't actually have a random / round robin decision-making process to pick either one. IF both are available in a building (dwelling/ bakery/ warehouse), villagers will ALWAYS prioritize food, similar to how IF there's 2 warehouses, one filled with 2 types of goods and you assign 1 single merchant to ferry both resources to the other warehouse, only 1 of them is first prioritized.

>>>>What this means is cake will only ever get eaten when the houses run completely dry on regular food and the baker's stops producing bread. So for the most majority players out there, cake acts only as a burden on your economy and doesn't do anything, it just sits in your stores and dwellings, unused.(perhaps traded away or tributed if mission asks for it)

>>>>>>Feeling cheated? Don't. You can cheat the system right back...Since cake obsoletes regular food, you can just cease bread production entirely(you might still want to keep producing bread only in cases where mission requires food for trade/tribute though).
Don't believe me?Here is an example of a baker's shop that ceased bread operations, houses are still fine, even without food, though I did leave the game running for quite a while to see if demand for bread will ever overflow or something... It didn't. Nobody died of hunger, everyone's just peachy. The villagers with ! marks are "freshly born" and matured civilians.

>>Not supplying/stocking bread will enable your housewives to assist with clearing out your cattle farm's stock of excess meat (but it might also enable them to go looking for meat pieces in the wilds if you previously killed creatures there and had signposts erected, so beware)

>>No longer baking bread will also mean that every time villagers go hungry, instead of getting only 40 (or 80 if in house without crockery) energy from eating, they'd get 60/120.

So far, we've only made cake no longer hinder us and work in our favor. How is this "cheating the system"? You may ask... well...

>>See, the way making kids works in the game, the woman "checks" if the house contains at least 2 items part of the "foodgroup" category we spoke about earlier. If they are present, she heads back in and awaits the husband, and "after a while", 2 food items are subtracted from internal storage and a kid is born...

>>>>That all seems fine on paper, and most people would never find out about this because turning bread production off is HIGHLY un-intuitive, but CAKE counts as a "foodgroup" item and allows initiating kid-making too, HOWEVER IT ISN'T SUBTRACTED when the kid is born. AS LONG as the house has no food, and the internal cake stores aren't eaten by its' inhabitants, it allows/unlocks "free" villager production (the only cost being time, or maybe your own willingness to manually evict couples with kids so others can have kids in that same house too...)

>>>>Do with this knowledge as you will, since by the point you get cakes unlocked food shouldn't really be an issue to you anyway, either for sustenance or villager production. It can be somewhat abused however on maps where you start with a couple pieces of cake in your starting warehouse.
>>>>And remember, if you're a veteran player, you've already been tricked and cheated by the system for hours upon hours of playtime, without having a clue. I would personally see it "only fair" to start rigging it in your favor instead.
TEMPLES - A BLESSING FOR THE ARMY
What most people assume when they read the description of the temple is that they act sort-of similar to your regular Headquarters, as it'd have blue braziers and weapon & armor crafters would pray here to restore faith instead of trekking all the way to HQ or to their house if it has oil stocked.

Temples don't use oil as a consumable, you only need 1 oil to build them, and that's all you'll ever need, and most of the time you might even start the game with 1 unit of oil in your starting storage.

Temples have a large "building footprint", so you will most likely need to clear some space to place them properly. They do not have/need any "workers" or any other operation costs associated with them.

Temples have 2 very strong effects tied to them:

>>The first is that they have an aura that extends to units up to about ~40 tiles away (that'd be 2-3 signposts away in scout terms). ALL units in this area regenerate their prayer by a steady rate, completely circumventing their need to pray at either their houses or Headquarters. This allows craftsmen to keep pumping out weapons and armor uninterrupted.

>>>>This renders oil completely useless as a house consumable, as not only does it get used up in dwellings even if nobody's praying, but even if someone goes to pray at their home, it'd still require the same "prayer" animation and thus waste time. Not to mention those mushrooms could be going into healing and nourishing potions instead.

>>The second advantage is a hidden one, the game doesn't mention this anywhere, however you might or might have not noticed that once the temple is built, units within the same 40 tile radius start having their HP regenerate faster, and eventually goes above their max HP threshold by up to 50%.

>>>>This effect essentially allows your troops to begin combat with 7500 hp instead of 5000, however it won't regenerate back to 7500 until they return within the area of influence of a temple.

>>>>>>It provides a considerable bonus advantage that is renewable and "free", if you know about it and decide to get it, that is. It's equivalent to them starting battles with 1.25 free "doses" of healing potion pre-applied, and would allow any units to reliably survive 1 hit from a catapult, even if they had no armor or healing potion equipped.

>>>>>>This makes "Build anything" and "Build Temple" papers very useful for rapid temple deployment in the field to get that extra hp regen/buff edge in rough battle zones, so make sure to save some in combat missions...

Tested the regeneration rate of the temple's aura, and can confirm that it is more than sufficient to keep your villagers from dying of hunger damage while within its' radius.

>>This radius also works on garrisoned archers in towers within temple range, but you should just give them mead from time to time instead of trying to cheese the system here...
WEAPONS
Before covering anything else, a word of caution: Almost all weapons apply varying levels of movement speed penalties to the troops equipping them. Note: These speed penalties are not applied in Cultures 2.

>>I don't know the exact numbers yet, but Iron spears, Longbows and Longswords are tied as the most movement-impairing, (~10-15% reduction);

>>Then there's shortswords which are not as affecting (~5-7.5%);

>>Finally, wooden spear and shortbow which don't affect movespeed at all.

Mercenary units, like Frank, Byzantine or Arab troops, might not be able to equip some of the weapon types, whereas vikings are able to equip and use everything. Franks can't use any spears, Byzantines can't equip wooden spears, shortbows & longswords, etc.

Weapons also break down in 2 types of separate damage types (at least according to my experience and tests), for armor resistance purposes:

>>Spears and bows deal primarily "pierce", which is usually better against units but worse off against buildings, and highly resisted by tunics.

>>Shortswords, Longswords and Catapults deal primarily "melee", which can be highly resisted by plate armor but demolishes buildings quickly.

Iron Spears are useful for your melee troops to counter heavily armored enemy soldiers, as they fare better versus chainmail and plate compared to swords.

>>They're a bit tricky/fiddly to craft, since they require a carpenter to ship wooden spears to the blacksmith, but have comparable dps to shortswords in general-purpose combat.

>>Versus unarmored soldiers, they require 2 stabs to kill. This is directly comparable in time/speed to shortswords' 4 hits, however shortsword troops can more easily give chase to fleeing targets like enemy civilians (still not ideal to use melee troops for this though)

>>Versus a building(defense tower), it takes ~20 "stab" hits, the slowest of all melee weapons.

Wooden spears should not be underestimated. Units using them aren't movement impaired at all, so they can give decent chase. A good option for your frontline if you've got absolutely no iron available, before you mass enough archers.

>>They also deal pierce, so they take down buildings considerably slower if compared to any other weapons, but they aren't half-bad when used in groups.

>>With decent micro and ~15 of these guys wearing shoes and leather/tunic armor, you can win "Enchanted Forest" with almost no losses, for example.

Longswords hit like trucks, but have a very unwieldy/clunky attack animation, which makes moving targets a lot more difficult to hit. Skilled longswordsmen can even oneshot unarmored units.

>>I personally often use 5-10 of 'em as dedicated "suicide chargers"/siege units, I give them lots of healing potions(3-4 large, depending if they have wind/defense amulet equipped too or a single L. nourishing - optional), boots and tunics (for insane arrow resistance) and send them to rush down AI catapult positions(f*ck those, seriously), and afterwards either retreat them to my archers to deal with the inbound enemy troops, or start cracking their towers and other buildings.

>>>>First you try to thin out their garrison by whittling them outside with archers, and then you send in these boys. They should be too fast for the catapults or their own melee troops to hit 'em while on the run, that is until they stop to perform attacks.

>>>>Because campaign maps love to have enemy catapult positions chained, simply rush past them towards the others, and they'll usually kill each other + potentially other units with the in-suing friendly-fire.

>>>>>> They should resist well enough to ~1 accidental catapult hit per every healing potion L they have, and due to their tunics, arrow-fire will very slowly chip them down but nothing can be done about that, you're essentially storming a fortress, expect some losses...

>> Alternatively in regular battles, you let your other soldiers draw aggro, and while you slightly retreat those, you then bring these guys forward from the flanks/behind so they can hit hard on the (hopefully) mostly stationary enemy units busy attacking your armored dudes.

>> In smaller-scale skirmishes of about ~15 people per side, they will pull quite a lot of weight, because archers are less impactful when not massed properly and the other melee variants simply can't out-DPS the longsword when stationary and trading blows.

>>They melt buildings, at about 10 hits required to take down a defense tower.

>>It's the only weapon that 2-shots catapults, all others take MUCH longer (disproportionately more hits).

>> With larger armies, they don't perform nearly as well as longbows when massed as a general purpose weapon, and tend to be worse off than shortswords in that regard (since shortswords have faster attack animation, so they're more responsive and easier to micro out of danger, while also being more capable of chasing and hitting archers)

>>When inside the enemy base and there's no soldiers threatening them nearby, like with most melee units, only focus on having them smash buildings, let your archers pick off the fleeing enemy villagers instead.

Shortswords - cheap, FAST and versatile. I, like most other plebs, used to choose the more expensive/fancy options, or only massed archers. I've started using and appreciating shortswords more in recent times.

>>Their melee attack is both faster and weaker than longswords, but they're the ONLY weapon you can mass the earliest in the game, and they also allow you to very quickly destroy the enemy's buildings.

>>They take about 32 fast-swings to down a defense tower, that'd take about the same time as 16 longsword/spear swings, so they're quite decent.

>>They take ~4 swings to kill unarmored units, however since they attack quicker than other melee options, they're more suitable for catching and killing enemy archers, while being comparable in dps to iron spears / longswords if enemy doesn't use armor.

>>>>Their faster animation allows them to respond to movement orders sooner, so they can be micro-ed out of danger much faster & easier than any other melee unit.

>>>>Shortsword units will also be slightly faster-moving than most other equivalently armored troops, so they're able to more easily give chase and kill fleeing targets.

>>Because of faster, weaker attacks, this is the perfect weapon to train future longswordsmen with, as they'll get more experience quicker, and eventually when they do the switch to longswords, they'll be absolute beasts (since both sword types share the same experience pool)

>>Unlike how the game sprite looks as if it has a shield, the unit doesn't actually receive any additional damage resistance bonus from them.

Longbows - my default ranged weapon. Rarely hits with untrained units, but when it hits, it's a delivery truck (~2k dmg). A group of 5 archers might seem insufficient, 10 can usually volley-kill something if focus-firing, but a group of 25-40+ archers can act as a massive ball of death that skewers anything trying to get remotely close to them, and can even take down buildings and fortified positions, provided there are no catapults(seriously, fk AI using those).

Shortbows - A good training weapon to equip on archers if trying to train them for longbows later (since both bow types share the same experience pool).

>>Good for extra defense tower garrisons, as you can have 3/4 garrisoned in tandem with the longbows. (note, inside towers they'll still have their short attack range, so they might not be able to hit enemy attacking longbowmen for example)

>>Since they have no movement speed penalties and much faster attack animations, they're easier to micro, and you could in theory kite(hit and run) most melee-only armies to death with a small group of these with minimal losses, given enough time and open space (and I just ain't patient enough for that, so I just mass longbows)
CATAPULTS
Catapults - these are vehicles, not items, and in my use experience, seldom a weapon, more often they're a woodcutting/area clearing tool first and foremost, as it's easier/faster to just send in 5-10 tunic swordsmen with healing potions to smash enemy structures.

>>They can be built at an armourer's II using 10 pieces of wood per, by an armourer with at least 20 experience (or schooled). The building animation might be a bit... lacking...

>>In case you didn't know already, they usually deal more than enough damage (~6k) to oneshot most unarmored units. The damage is dealt equally-high in a 7-tile hex, so it could even oneshot 7 units at once if they're very clumped together.

>>They're an insane threat/time-waster in the hands of the AI, for defensive positions, but for the player, they're an absolute b*tch to get them from point A to point B, slow as all sh*ts, get stuck in all sorts of terrain, highly inaccurate and can friendly fire - hence many people simply chose to never touch 'em after trying them once or twice.

>>>>You can at least use the friendly fire part to destroy "allied" structures and units... save the game first in case it breaks something and you can't progress afterwards... Destroyed allied warehouses might get rebuilt but their previously listed trade deals will forever be lost! (they also won't contain any of the items you traded to them, or those you traded for)

>>Best use for them is to create a rock waterfall by setting 2-3 to sequentially attack-ground (hold CTRL and right click) a choke-point (like the enemy's base entrance) and watch the enemy eat sh*t, or to land them from ships if possible to avoid ~80% of their pathfinding nonsense and make them really good. They 2/3-shot most buildings too...

>>Even better however, since in single player maps you get handed catapults from chests on a daily occurrence, is to use these to try to snipe enemy catapults from range using attack ground, attack enemy fortifications earlier on before you can fully outfit a good army, OR chop trees and clear space for your base building needs in too-densely forested areas.

>>>>NEVER just right click enemy catapults/towers with yours and expect them to fire from max range... that'll just get it too close & get 1 rock-shot sniped before it gets to fire or slowly whittled down by arrow-fire. You specifically want to repeatedly CTRL+right-click the game tile close or underneath the closest part of the enemy position. This will ensure that your catapult actually stops and fires from max range.

>>>>Unless the enemy fortress was revealed by some mission trigger or something, you will always want to take a scout with some healing potions, maybe a wind amulet and boots and run him along enemy wall-line, to reveal any towers and catapults.

>>Catapults can be manned by military units, but also heroes, so you can have Bjarni "cut trees" for you if you get it from a chest early. Afterwards, you send your wood extractors to harvest the fallen trees into a huge pile of logs quickly, and then build whatever you needed(because putting the building on top of "un-extracted" logs deletes them, which might be a waste...).

>>>>Don't send your guys to do this while the catapult's still firing though, as it's highly inaccurate and can randomly one-shot your unsuspecting worker.

>>Another strategy, you can have the catapult quickly cut down trees with attack ground, then turn some soldiers into extractors to get the wood "extracted", then to builders to get stockades with said wood, and then change them back to soliders and re-equip them. This way you can quickly deploy stockade funnels - chokepoint/fortified positions so the catapults themselves become more efficient, if you ever need to (unlikely, but hey, who knows).

>>Also on catapults, they use regular "unit pathfinding logic" for some reason, so they'll often get confused and say they can't reach somewhere even though theoretically they could've.

>>>>For example, there was a shorter path to their destination that only regular 1-tile units could've fit through, like a small bridge, but they couldn't fit, so they ignore the shallows just a bit away from the bridge through where they could've crossed.

>>As previously mentioned in the commands section, a catapult's "go-to" command can be used to check and see if catapult has a viable pathway to reach its' intended destination. If not, albeit tedious, it can cut through trees at least.

Catapults are the only vehicle you can shift+click on to have multiple in a selection. This also shows a "debug:remove" command which, when pressed, instantly destroys the catapults (and sometimes it even deletes the soldiers inside, leaving their weapon, but no bones, on the ground)

>>This makes me believe that the developers initially intended to have vehicles more easily maneuverable and selectable along with regular units(as most of us would probably like), but they most likely ran into several issues, and ultimately scrapped the idea, just making vehicles not selectable by dagging a selection box ontop of them and leaving this bit into the game...

>>>>My guess is that this is related to how when you have 2 different unit types selected, you can only order them to do actions that both unit types have available in common, so for example, if you select your soldiers along with your hero, and press spacebar, your selection can no longer "eat/sleep" because heroes can't.

>>>>>>Taking a step further, trying to select regular units AND catapults together most likely invalidated most, if not all actions the group could perform together, especially if the catapults used differently-programmed "move-to" and "attack" commands, hence they probably gave up on the idea... since a bit of well-thought conditional logic could've made it work, yet they haven't done this, it leaves me hoping that it was a game engine limitation instead of sheer incompetence.
ARMORS
Note 1: Non-soldier villagers benefit from equipped armor 'till they put 'em away. (tested with catapult shots onto chainmail/plate equipped scout...). This can be useful by having a tunic-equipped soldier with a couple healing potions (shoes + amulet of wind are great to have) switch job to scout and immediately send him to scout enemy fortified positions (towers & catapults), making sure to right-click-spam (if under tower/archer fire) to not let him stop so he doesn't drop his armor.

>>In Cultures 2, this is even easier as you can swap an equipped soldier's job to civilian and then immediately something else, like scout, and AS LONG as you don't task them to equip anything else, they will keep the armor+weapon on them, readily equipped.

Note 2: Armor types don't impede movement speed in Cultures 2

Tunics: good on quick moving soldiers. Archers should rarely get hit, and when they do, it's either melee chip damage, enemy catapults or archer fire.

>>If threatened by melee, the aggressors are about to be put down with great prejudice in the next volley, while the attacked archer will back away due to his minimum range (only if he isn't in ignorant stance, otherwise he'll stand his ground and shoot at something else).

>>In catapults' case, without potions or temple blessing you'll still get one-shot anyway, and this holds for any non-metal armor, however you're way faster and thus harder to hit.

>>The game description states that "tunics" are better for arrow-fire resistance. In reality, against longbows this translates to roughly 75% reduction, which is the highest in the game. Instead of taking ~2k damage per shot, they only end up taking ~0.5k.

>>Tunics don't have any of the movement penalties of other armors, so troops can march quickly while still having good defense.

>>They only offer about ~7% damage resistance to catapults, which is insignificant. Their sword resistance is relatively weak as well.

>>They perform pretty well, oftentimes trumping leather when it comes to werewolves and serpents, at about 49% protection. Further values to be determined after more testing.

>>The tailor also has no issues creating them in large quantities quickly, and although they drain his religion bar, he isn't "compelled" to go pray like the smith/carpenter/armourer, so it's very fast to produce (and you should have a tailor for shoes if nothing else anyway).

>>>>In the case of tunics, consider using a separate cattle farmer to grow sheep, as you'll constantly need the ox leather for shoes. Alternatively, you could just temporarily flick your cattle farmer to sheep when you notice your leather is getting clogged.

Leather Armor: the cheapest and quickest renewable option. This is a general purpose armor that you can equip on virtually all your troops if nothing else is available.

>>It offers ok protection for both melee and ranged attacks (about 37% vs serpents & werewolves, 20% damage resistance vs catapults - still not enough on its' own to avoid one-shots, the rest I need to research more).

>>It however applies a light debuff to unit movespeed(about -15%). The movement speed hit isn't very pronounced, but noticeable if comparing to unarmored troops.

>>This is probably the fastest armor to mass-produce and, for most speed-oriented situations, it's good enough.

Chainmail is the more expensive option to Leather. It costs 2 iron and 1 wood per craft.

>>It has the exact same movespeed penalty as leather armor, however the defense values are superior across the board:

>>>>Catapult resistance is 50%. This allows your units to consistently survive 1 catapult shot, even without potions. (Given regeneration is quite fast, they might just barely survive a second one if a few seconds pass after getting hit the first time). Resistance vs serpents/werewolves at about ~57%.

>>>>Pierce resistance seems to be about 25% (tested against longbows), so although it protects somewhat, it's not great when storming fortresses. Roughly the same protection as leather...

>>Always equip chainmail on your troops when you come across it in chests, and maybe leave the plate armor for your melee soldiers only.

Plate armor is for the ultimate melee damage sponge. It is costly at 3 iron and 2 wood per craft.

>>It has a much greater movement penalty than all other armors (about -30% according to my tests), to the point it prevents your troops from catching any fleeing enemy units. Thankfully, AI doesn't usually flee from battle...

>>Catapult resistance ~85%. This means with this armor equipped and nothing else, they can even survive 4 catapult hits in a row. Serpent/werewolf damage resistance 71%. The rest to be determined...

>>The "pierce" resistance is severely limited, at about 15% vs longbows, so be wary of archers and defense towers, they'll skewer your heavily armored dudes, especially since they're slower moving thus easier to hit, and will be hit more often 'till they finally engage.

>>>>Since archers tend to step back due to minimum range, it makes dealing with them that much harder.

>>The melee resistance is far greater than other armor types, so healing potions (which restore 2k hp per dose) have much greater mileage on these soldiers in melee frays. Just don't try to use them for assaulting enemy fortifications, even with potions, it won't end well...

>>Due to the high cost and high speed debuff, I only tend to have 5-10 units equipped with this, if any at all. The movement speed penalty practically forces you to keep them at the forefront before starting any engagement, and they can't reliably retreat if anything goes wrong. At least give them shortswords so they're slowed down just a bit less by their weapon...

>>>>It makes 'em look like wearing "bling drip", so at least there's that.
PLATE ARMOR + SHORTBOWS?
Due to to how the AI's target acquisition works, enemy units will initially lock onto the first unit they "see", and swap to a different unit mid-combat if their initial target is no longer "available". They can also shift focus if they get hit enough by a different unit whilst chasing their initial target.

Shortbows have weak damage, but fast attack speed and much better hit rate than longbows at low skill levels. This constant barrage of arrows means they're very likely to draw melee aggro onto themselves, and their reduced attack range does them no favors in keeping them safe either.

Shortbows also give no weapon-based movement speed penalties to the unit...

Plate armor, as discussed, inflicts 2 times the speed debuff compared to what regular chainmail or leather armor would inflict, but is very protective against melee hits.

Equipping your shortbow archers with plate armors allows them to draw aggro & soak melee hits, while still being relatively mobile and capable of re-positioning, all the while your melee units who would initially be positioned a bit behind your archers can have a much easier time hitting the enemies with little to no retaliation.

Archer units automatically try to move away when being hit in melee (as long as they're not on ignorant mode). With little to no micro on the player's part they'll be able to distract enemy units for much longer than equivalent melee plate-armored units just trading blows.

Melee units NEED the opponents to be stationary for them to land their hits, and that is only possible when trading blows OR hitting a unit that's already trying to attack another unit.

All things considered, this strategy is mostly useful in adventure maps where you find a random cache of 5 plate armors + some healing potions, have a few poorly equipped troops and can't afford/don't want to wait to go for more conventional strategies like massing longbows.
EXPERIENCE AND COMBAT STANCES
Damage numbers from the same unit/creature will constantly get bigger, as all non-hero units "accumulate experience" and that leads to them hitting harder in combat. Usually the ramp-up is almost negligible, however, by about 2-5 extra damage per hit when armored.

>>I can only assume that units end up dealing ~double their initial damage at 100 exp, when their "star" is max sized.

>>For archers, their damage per second scales much better with xp than melee types, as their accuracy improves considerably as well, so while a starting archer may only hit 1 out of 4 arrows fired, a higher xp archer might hit 3 out of 4 instead. Even 100xp archers are prone to miss occasionally, however, and sideways-moving targets tend to be harder for them to hit compared to units charging directly towards them or stationary ones.

>>Heroes don't accumulate experience, however you seldom want to engage them directly into frays, and when you do, they usually hit ~2-3 times faster than normal units could with that particular weapon, and inflict great damage anyway. The only issue with this is if they're manning catapults.

>>>>Soldiers manning catapults get experience when dealing damage to units/buildings (even your own), and their accuracy slowly improves with xp. Heroes don't, thus will always be highly unpredictable, potentially shooting up to ~5 tiles off-target, so you shouldn't really have them man catapults in combat scenarios unless you have no other option...

Most enemies have the same 3 stances your soldiers have, but predominantly use the "defensive" stance. This means they'll only give chase in a certain radius, and then head back. You can use this to your advantage in adventure maps where you only got very limited troops, to bait/whittle down the enemies.

>>Very rarely however, you might encounter enemies on "aggressive", which will chase you all across the map 'till they're killed or the unit they were chasing dies or becomes un-targetable(ex:boards a ship).

Ignorant stance doesn't mean the unit will never attack, it only means they'll try to hold their position when trying to acquire targets (stand/hold ground in other games). This stance is superior for large groups of archers (instead of ordering them to attack something specifically, you just move them closer or further), and for your heroes if mixed within said archer groups. For smaller archer squads, defensive stance is better as it allows them to reposition if hit in melee range, but you can cycle their stances according to your needs.

>>It can also be useful when you're trying to strategically position your few melee troops on x1/2 speed and order them to attack once enemy is within acceptable range, instead of them diving enemy lines from the start and dying recklessly. Just make sure to switch them to defensive/aggressive right before they finally clash in melee, to be able to reposition & chase afterwards.

Prevent regeneration can be used to temporarily stop your soldiers from spreading out and trying to eat/sleep on their own, so they sit in a more cohesive unit, are easier to equip & order around etc. (they'll still drink their meads/nourishing potions if they have them, however).

>>While hunger will start inflicting constant damage to your units at 0 energy, sleep deprivation will only slow their movement speed when stamina is lower than 20. Unsure what 0 social motivation would do, since they usually keep that high by talking to themselves anyway. They can still be manually ordered to eat/sleep in this state, however.

>>>>NOTE: Soldiers sleep much more soundly than regular villagers, and are able to quickly reach 150 stamina in only 1 sleeping session on the ground.
WEAPONS & ARMORS DATA
Combat stats with 0 experience fresh troops vs various threats:
VS Bear (neutral animals in the forest that fight back and aggro in groups):
Defensively:
No armor = 536 hp taken per hit
Leather = 352 hp taken - 35% reduction
tunic = 352 hp taken - 35% reduction
chainmail = 174 hp taken... 68% damage reduction
plate = 174 hp taken - 68% dmg reduction

Offensively:
Wood spear - 4 hits to kill
Iron spear - 3 hits to kill
Shortsword - 6 hits, albeit fast
Longsword - 1 hit

Kill time: First is longsword, as it oneshots, then Iron spears and shortswords tie, then wooden spears being the slowest, but not by much.

Versus Serpent/Werewolf (with leather armor as drop) - NOTE: they double-slap in quick succession followed by a "bash", dealing whopping ~4.5k+ dmg really quickly to unarmored targets, with a bit of a pause in between. Their 3 hit combo takes about as long as a single longsword slash, and they deal slightly higher damage (but armors reduce it considerably more)
Defensively:
No armor -1479 hp taken per hit
leather - 933 ~37% damage reduction
tunic - 763 ~49% damage reduction - Really good
chain mail -638 ~57% damage reduction
plate armor - 424 ~71% damage reduction

Offensively:
Longsword - 2 hits - unable to hit non-stationary targets. Good when tackling serpents with very few troops available, provided they also have armor.
Shortsword - 6 hits - suffers from the same issue as longsword, enemies will reliably walk past them in a fray and will only start taking damage when stationary.
Iron spear - 3 hits - they have a slight range advantage and thus perform better in numbers than swords.
wood spear - 4 hits - same as for Iron spear, decent in numbers.
shortbow - ~32 registered "xp hits" cumulatively on 10 archers. They shoot quickly at least.
longbow - ~13 registered "xp hits" cumulatively on 10 archers. Albeit they fire slower, they've got longer range and pack almost x3 the punch when they hit compared to Shortbows.

Again, spears perform slightly better than shortswords simply because they have a slight range advantage and can attack the serpent first + can snag & aggro serpents that try to move past them (possibly to get to the archers in the rear) more reliably, unlike with swords. Longswords kill them in the least amount of time once stationary, however.

Archers perform a decent "support role", unless massed in numbers of 30+, when they begin to decimate them quickly, possibly without melee assistance, especially after they get some experience and get more accurate.

We can conclude that when up against these monster types, tunic is the best armor as it doesn't give ANY movement penalties while giving sufficient protection and being cheap & renewable to craft.

>>Plate armor is not needed, as even though it's very tanky, the massive speed penalty doesn't really justify the extra protection gained. Sure, your melee tanks will survive about twice as long and use fewer doses of healing potion, but they'll slow down the mission progress considerably. Not worth the cost, unless you've got a very limited army size and can't grow it larger.

Speed buff and penalty tiers from equipment seem to be first substracted from eachother, and then multiplied. What I mean by this is: having a unit equip shoes increases their speed by 20% compared to base movement speed. If they then equip a longsword, their speed "modifier" goes back down to 0%(-20%), and afterwards if they equip plate armor(2 tiers of 20% reduction), they'll move about 36% (1 - 0.8 * 0.8) slower than base instead of 40% slower. Without shoes, they'd move ~49% (1 - 0.8^3) slower than base instead of 60%.

>>This essentially means that, for example, chainmail longbowmen with shoes will move at the same speed as unarmored/tunic longswordsmen without shoes.

Roads and rugged non-grasslands terrain apply a different type of "terrain-based" speed modifier to units, which behaves differently compared to equipment speed modifiers and is calculated separately. Melee units are disproportionately affected by this and thus perform slightly worse in claypit/quarry/mountain/sandy(beach) areas, simply because they can't reposition as quickly.
SCHOOLS - HOW THEY WORK, HOW THEY CAN BE ABUSED
Schools allow your villagers to get experience insanely fast in any profession, by sending them inside and selecting their training regimen. The training can last anywhere from 10 to 30 training "ticks", depending on complexity of selected job. This is info most people know and assume this is all to it...

VERY IMPORTANT: The training is counted as "temporary experience" for the current villager's selected job field when sent inside. What this means:

>>IF you send in a fresh Civilian to become a merchant(which might usually be the case), he will train to 10 units(that's how long Merchant takes) and then... well... become a merchant, unlocking only that, because the "Civilian" Job doesn't have follow-up professions. This is intended behavior.

>>IF you select the same Civilian, turn him into an "Extractor" first, send him in to become a "Merchant", he will train the same 10 units, but then something AMAZING happens: Because he's technically an extractor in the school and gained 10 units of experience in the extracting field(even though temporary), he suddenly unlocks Pottery(Brick), Masonry(Stone), Smithing(Iron Tools), Carpenter(Wooden Tools) Extractor(Iron), Extractor(Gold), Herb Gatherer, AND THEN he turns into a merchant...

>>>>Because of unlocking all of these new professions, all the related buildings and structures dependent on the materials from them become available too.

>>>>Selecting this new "Merchant" and turning him into a potter(brick), and then sending him to learn Pottery(Brick) will have him train to 10 units, and then he'll come out a potter who's unlocked TILES and CROCKERY! without having to wait for him to craft the initial 10 brick crafts. This also unlocks buildings that require Tiles to be built.

>>>>Selecting this villager again and changing him to Mason(stone) and training him to be a "Mason-stone" will unlock marble, and buildings that require marble. Suddenly, you're now able to use your "Build anything" papers to plonk down dwelling 5's and focus your builders on actually setting up workshops instead of wasting time building low-tier houses so you can start creating more villagers.

>>>>Select and change him to herb gatherer, make him train in herb gathering and he unlocks Druid, but not just Druid(oil), he actually somehow unlocks all druid stuff except L Healing potions (and you don't want to begin with crafting those until your druid crafts ~15 sets of both s.Healing and s.Nourishing potions anyway, to not waste double the gold on lower initial yields. By making some oil for temples too, it'll naturally unlock L.Healing easily enough).

>>>>Select and change to Smith and train him as a Smith, and he'll unlock everything, including plate armor, BUT ALSO he will now unlock Coin Minting.

>>>>Select and change to Hunter and train... something else, it doesn't matter, just remember you trained him for 10 units from hunter, and he'll unlock tailor and cattle/stock farmer.

>>>>THE ONLY caveat I found is with the carpenter, or at least in order to get carpentry unlocked fast, you turn him into a carpenter, and then you gotta train him in something that takes 20 training xp ticks, like training him to be a Mason(Marble). After this he'll unlock carts and carpenter's 3 (and also Armourer II's-Catapult), then if you order him to build 1-2 handcarts, he'll rapidly accumulate the carpentry experience to build ox carts and ships too.

>>>>>>Alternatively, if you're really hellbent on unlocking carpenter's workshop 4 before building the carpenter's workshop 3: after you unlock handcarts, set your carpenter to "learn carpentry(handcart)" in the school, this will take 30 xp ticks and he should eventually unlock ox carts and ships too from this.

Do with this information as you will. If it appeals to you to spend more time every game slowly tech-ing up and eventually being able to find out whether can fit that Cattle farm where you wanted, near the farm and the tailor's, go ahead (you might also not like this for immersion reasons). If, on the other hand you're like me and start a new map, and are fed up with not knowing what you can build where and being able to properly plan your base, or want a leg up setting up production chains from the get-go, go ahead, you now know how. You'll still need to get the building materials required though somehow, knowing how to build the cattle farm won't help if you don't have tiles available.

>>With this in mind, it might be important to you to start a "test run" on any map and do some reckless scouting around, see if you find some school papers in a chest near your starting area, as quite a lot of maps generally have those either provided outright or in a chest somewhere nearby, then restart mission (during this preliminary scouting session, you could also make everyone a scout and look for nearby resources/livestock/ore too).

>>>Sometimes chests are concealed by trees, so you should always click on the full map icon next to your minimap and check the "chests" checkbox. All unopened chests will display as squares on the large map then.

>>>If none found, your next best bet is to expend one of your "build anything" papers (sometimes you start with some available) as soon as your clay dude gets 10 experience (give him tools if available in HQ at start to facilitate this), as manually building the school would have you build a pottery workshop first to get some bricks and then building the school itself is slow as well, not to mention at this stage of the game you're probably not floating around too many civilians who can be builders, maybe 2-3, and you want those juicy unlocks as fast as possible to use your remaining "place anything" cards for max value.

>>On some maps, you start with advanced materials like tiles and marble but they're useless 'till you unlock their crafting, and by then it would've been better if you just started with more raw wood/stone/clay in your storage instead.

>>This makes the "build anything" papers a heck of a lot more useful, since you can only place buildings you know of, and once you know of them, usually you got ample materials stocked already and it only ends up saving you the building time. You can place dwelling 5s or an early cattle farm, or maybe even an armourer's II to make longbows asap to speedrun certain adventure map objectives.

NOTE: Depending on the map being played, certain professions/buildings can be permanently or temporarily "locked out" and thus inaccessible to the player, even though all prerequisite conditions were fulfilled for them. This is usually only the case in campaigns or certain tutorial levels(think tutorial 3 or 4 had this in place temporarily at the start for certain extractor resources), but also on some custom player-made maps.

>>You can check and see what's locked by opening your "tech tree menu" and clicking on the thing you're hoping to unlock. If it just says "locked" instead of "something required"... you're out of luck.
PERSONAL BUILD ORDER
When you start, make sure you have at least 3 extractors: 2 on wood and clay near each other, and a quarrystone dude assigned to clear buildspace-obstructing rocks in your general vicinity. If manpower affords it, have a 2nd wood and stone extractor assigned too.

>>You'll want to get 1 farm + farmer early (to harvest any readily-grown wheat) so you can "unlock" dwelling 1, you will want to build 1-2 of 'em after the farm's built, to have at least half as many as your starting women.

If you start with troops, it's often best to turn some of them into builders, scouts or fishermen (add to ctrl group 3), and re-assign the initial scout/builders into other roles, as needed. (just keep in mind, avoid marrying them)

For food: Many maps provide you with miller & baker + their "free buildings" in chests near the start.

>>IF you start the map with plenty of coastal fish available, it is actually better to have 2-3 fishermen catching fish instead, as they get to produce adequate food supply much more quickly, and don't require carriers to assist them.

>>>>EVEN if you get the free bakery, mill, farm and well buildings, only place the farm and have 1 guy on wheat 'till you have ~10 units(for buildings), then you can re-purpose him (if your builders are idle, make them temporary farmers too...)

>>>>The bakery setup, in order to produce decent food output, requires 1 farmer, 1 miller, 1 baker, and 2 carriers to provide enough for ~ 10 constantly child-producing families with a bit leftover from time to time. That's 5 people you essentially "lock down" early on. 2-3 fishermen produce similar food output with only 2-3 individuals and not requiring buildings placed, so you can better plan your settlement later after clearing out starting rocks/trees.

Alternatively, if you don't have either baker/miller OR coastal fish, you'll want to take into account how many berry bushes you got around your starting area, and according to that, go wild with increasing your population using your starting food in your stockpile, but try to spread them and their working areas out more so there's fewer people per berry bush cluster, while trying to prioritize getting a cattle farm/mill+baker, whichever you feel is easiest...

AS SOON as your clay extractor reaches 10 experience, you will be able to build pottery workshop + school. If lacking starting bricks or you don't have a "build anything/build school" paper found yet, start working on the potter's workshop first, then build the school.

>>School is your most important objective, and takes precedence before anything else. After your school is built, make sure to build the mason's shop too.

>>Your starting clay and stone extractor will be switched to potter/mason, and left to craft bricks/stones 'till they're able to have their workshops upgraded (at which point temporarily switch them back to extractors 'till you upgrade their workshops later on).

>>Using the school, start rapidly unlocking the other professions (using the mechanics explained in further detail in the school section).
>>>>Your potter & mason can be sent in to unlock tier 2 of their crafted goods immediately (and all respective buildings locked behind them, only really useful for pre-planning your base or if you start with advanced materials in warehouse...)

>>>>You will want to turn your experienced farmer into miller and unlock baking, then turn him baker and send him in again to unlock brewing.

>>>>Apart from him, you'll want an extractor unlocking his stuff,
>>>>>>then switch him to herb gatherer to unlock druid;

>>>>>>then switch him to carpenter and train him on something long like plate armor to unlock handcarts(carpenter's 3) & armourer's II;

>>>>a hunter to unlock cattle farming & tailoring.

At this point, have your builders begin building the necessary structures for your food setup if your start didn't have fish, otherwise a brewery setup (building itself + well + beehive). If you had your unplaced well from earlier on, you're in luck...

After builders are done, immediately begin mead production with 3 carriers, one on each structure, and the brewer. Brewer will be that initial farmer with whom you've unlocked brewing already, and the carriers can be created from whatever builders you have available (but try to avoid the ones with military training).

>>After you get your first batches of mead, have your carriers + brewer get themselves 1 mead each so they work with fewer interruptions.

After you've equipped all your men with meads (prioritizing builders and extractors), food consumption (for hunger) and over-reliance on berry bushes should be a thing of the past. Your builders will be especially affected and become much more efficient. All your food will be going to new villager production.

At this point, it's ideal to ensure you have at least ~3 dwellings built and to start upgrading them so as to have at least 10, but ideally 15 families to greatly expand your population. If you had 2 fishermen assigned since early-game, they'll be producing enough to keep up with demand 'till they run out of fish to catch.

Focus on upgrading your houses every time they're with newborns.

Your next priorities are setting up a smithy, a cattle farm & tailor workshop.

>>The smithy is required to get some iron tools for your extractors & craftsmen, and start pumping out weapons if the mission requires it. (If no iron available, build an armourer's II workshop for longbows production here instead)

>>>>For this, remember to school a villager to extract iron, and have another extract wood nearby. You'll probably have a guy you schooled capable of smithing already (the one you unlocked stuff with)

>>Cattle farm will allow you to get more food and replace your starting fishermen who may or may have not run out of fish to catch by now (it should be placed near starting farm) and will provide leather and wool for tailor's.

>>Tailor near cattle farm to make use of leather to get shoes and armor. On difficult maps I recommend crafting at least a few leather armors to equip your starting melee units, even if you plan on going for tunics later on.

At this point (if you had fish or decent stockpiles of food earlier on), after all this was done, it's fine to build the mill + bakery, you will want bakery II and only use it to produce cakes with the necessary carriers assigned.
>>>>Note how it's entirely feasible to skip the bakery chain by going from fishing or relying on starting food/cake stockpile directly to cattle farming for your food supply needs(for villager production) on most maps, so baking cakes can be seen as more of a luxury than anything, but it ensures guaranteed food supplies in case your cattle farm ever clogs up on leather & wool.

By this point, try to make sure you have at least 20 families capable of having offspring, build a barracks (if you weren't forced to build it earlier), an armoury 2 and upgrade the smithy and tailor's workshop as needed. Build a temple too for the weapon craftsmen and hp buffs.
>>If you had no oil for temple in starting warehouse, make an alchemist's hut 1 and get it, so your craftsmen don't need to constantly pray to make weapons.

After all this is set up, or if you didn't need troops, build/upgrade carpenter's workshop 3, start pumping carts, and have fun with setting up merchants. Upgrade to 4 only if you need ships...

You can probably fit a mint + herb hut + alchemist's hut II in the build order, probably right after the smithy's complete, if you have/see gold available and want healing potions for your troops. (In Cultures 2: Gates of Asgard, alchemist's hut uses gold instead of coins, so a mint isn't required there...)
USING CONTROL GROUPS I
The game gives you 10 control groups at your disposal, of which most people end up using only 1, if at all, and that one ends up being a military group or possibly JUST the hero. In order to have a smoother experience when playing, I highly encourage to form your own preferred control group "squads", to better keep track of your villagers. Your preferences might vary, but I'll be providing some info on the hotkeys for using the groups and then some decent examples;

First of all, you can select or cycle between your heroes by pressing the F key (unless you're playing Cultures 2). If only for sending Bjarni in the forest to look for chests and kill wolves, you don't need to waste a group on that. (also you can use observation windows)

Secondly, control groups place visible number markers in the corner of your subjects, enabling you to more easily identify certain individuals and what they are supposed to be. If nothing else, you should be at least using control groups as a form of labelling and not necessarily a way to issue orders to large groups of people.

Use SHIFT+number to add new people to groups. ALWAYS. EVEN when creating new groups, you select the new joiners, and do shift+number, and then press the number key if you want to select the group, you need to learn this habit for this game.

CTRL+number should be used ONLY to exclude people from groups, when you previously selected a group, and then did CTRL+click on the people on the right side of the screen to exclude them from selection. Doing CTRL+number on the new selection would kick the previous members of the group out(since it "re-creates"/overrides the group), and is mostly used to keep heavily wounded/depleted soldiers behind and out of your fights 'till they regenerate, otherwise they'd end up dying needlessly.

>>Pressing CTRL+number with no units selected will completely "disband" that number's group, so units previously in the group get unassigned.

From my own personal usage/experience/habits I can recommend the following:

>>Control group 1 for builders & base scouts. New mature villagers usually enter this group, or go directly into the school/barracks.

>>>>I like to keep some of my builders in "scout" form near the outer edges of my village so I can more quickly expand and place buildings I need units nearby for.

>>>>They're also useful when considering to re-position earlier signposts.

>>>>Keeping your builders in scout form also prevents them from loitering around their previous build-site, or spamming you with "lost, need signpost" notifications when some faraway building is damaged and they can't reach it.

>>>>Having all your builders in this group also allows you to instantly assign them to a building project if you do it fast enough right after placement, instead of relying on them to auto-assign themselves slowly.

>>Control group 2 for tracking: schooling soon-to-be-craftsmen/merchants, unassigned merchants or craftsmen I've had their workplace unassigned, or even skilled craftsmen I temporarily turned into builders/carriers due to manpower shortage. After re-assigning them their workplace, I simply remove them from the group as I no longer need to keep track of 'em here.

>>>>When I'm upgrading workshops, I often like to un-assign the craftsmen working there(or turn them into carriers if no carrier was assigned already) so that after upgrade is complete and I'm not paying attention at the time, they don't immediately waste resources on stuff I don't want. As they're not assigned to building but still in this group, I'll be more easily able to find and re-assign them later.

>>>>When I want to train new merchants/craftsmen, I select guys from group 1, and do Shift+2 on them, then send them to school. After a while later, I can select group 2 and check if they're done training so I can assign them (and most importantly, this way I don't lose track of them afterwards)

>>>>Any merchant that I don't need working somewhere anymore, I disable his trade route and put him into group 2, and when I need new merchants, I first check in group 2, if none are available here, I then train new merchants...

>>Control group 3-6 for military units. 3 is usually militarily trained villagers that I keep back at home as builders/home defense, or just another military group, depending on situation; 4,5,6 is offensive troops. I usually keep the hero in an archer group and set them to ignorant with large armies, so he contributes his line of sight to the battle but doesn't risk engaging enemies headfirst and dying.

>>>>His movement speed also matches archers with shoes and leather/chain/tunics, but is too fast for plate armored melee units, thus would move ahead too much, draw aggro, get attacked and die like a moron if I'm not careful to micro him out.

>>>>Regular units can have healing potions to keep them alive reliably, heroes can't carry healing potions (best they can get is temple buff). Press F key and right-click him away whenever you notice him getting focus-fired.

>>>>With small troop counts (up to 18-24ish), it's best to keep them evenly distributed at about 6 units per group max, this allows you to very quickly check their needs bars and spread them out to forage in various berry bush clusters. At larger army sizes, I try not to go beyond 20 troops per control group, and I don't use more than ~5-10 melee units, mostly archer armies.
USING CONTROL GROUPS II (+ TALK ON POPULATION GROWTH)
>>Control group 7 is for my "real" extractors. After playing some more, I've concluded that it's best(and least fiddly) to not marry most of these guys (apart from your initial clay & stone extractor which tend to turn into potter/mason as you're usually low on manpower early)

>>>>Hovering over them in selection box will display their set resource. They're arranged/ordered by the order in which they were selected and/or added to the group, so it usually gets a bit chaotic...You COULD order them by excluding all extractors but those of a particular type and pressing Shift+7 again, and they'll all be placed last in the control group selection.

>>>>Its too big a waste to leave these guys in one place for too long, especially after you've spent the initial time (& iron tool) investment to get them to 18+ extracting and beyond in a category. For woodcutters, un-tooled new guys can replace them in their old spots, or you could just leave them there(if un-tooled) and omit from adding them in this group altogether.

>>>>After any forest area is felled ~4 tiles deep (up to 3-4 rows of stumps), you should let it regenerate. Similarly, clay, stone and ore deplete quite fast, so you'll always have to move these extractors every 20 or so minutes, to help set up a new settlements or harvest resources where they're more bountiful.

>>>>When relocating them, as with any other homeless worker, make sure to give them plenty of mead to keep them working before having to relocate them again.

>>Control group 8 for "traders", merchants who are fulfilling trade deals with foreign warehouses. You'd be surprised how many merchants can get to operate in the same warehouse area, you'll have 10+ merchants but usually more parked at once outside sometimes, with a lot more listed in the warehouse interface as "working there".

>>>>This group allows you to more easily control your trade deals with external factions and stop them when no longer beneficial, rather than trying to "fish" for the exact guy(s).

>>>>Similar to other merchants, make sure to rename them according to the trade good they're importing, as it gets hectic sometimes (say you got 10+ traders, 3 of which selling goods for coins, and 4 other traders trading coins for something else, knowing which one's which at a glance can be very helpful)

>>Control group 9 for unmarried women in the early game. Before getting merchant infrastructure, while your settlement is still in the initial growth phase, you'll probably want to keep track of unmarried women to more easily know how many more you'll need, where they are, etc. So just add them to this group.

>>Same control group 9 for "internal"(between 2 warehouses in same settlement) and "inter-settlement"(links between settlements) merchants, in the lategame >>>See logistics section for more details. Their names should also be changed to act as a telling label of where they're assigned at a glance, because hovering them in the selection pane doesn't give much info, just "merchant". Jeez, thanks for the info, game...

>>0(10) for married, housed women for new villager production. Not only will this allow you to tell if a female villager is married or not at a glance (or if unmarked, you will see that and can then select the female villagers and do RIGHT-SHIFT+9/0 to get it into the right group), but will also more easily allow you to order controlled "spurts" of population growth.

>>>>I generally have 20-25 women here but could easily do more. Barracks can max train batches of 20 (*provided it doesn't have carriers assigned), and schools can only train 5 people at once.

>>>>If messages are left on red+orange(I prefer it this way): For all matured male villager messages, hold "." key pressed, and it'll quickly cycle through civilians and remove the messages. This will only leave the matured female villager messages at the top, among potential other unrelated but important ones. You then click on each individually and press RIGHT-SHIFT+9 while clicking on them to select them, and eventually you'll have all of them in group 9, at which point, you can send them to walk to destination, potentially across the map (if you have waypoints between settlements) from the more remote regions to areas where new houses are built or being built, to then find them local spouses (there's usually nothing else to have them do in the meantime anyway).

Always assign male villagers who are least likely to be relocated into houses first (craftsmen, carriers of wells/beehives), along with any builders/extractors you intend to turn into craftsmen later. When women become available in the area for them to date, click on their house markers and order them to marry. You might have to do this a couple times (because if woman is eating/sleeping, male villager will lose interest/be heartbroken and go on his merry way. Also if the male villager is ordered to marry while carrying an item, order will 100% fail, make/wait for him to drop the item first).

>>Afterwards, you can click the house and add all women inside into the desired group.

>>Alternatively you can permanently remove women from groups if you want, by selecting their group, de-selecting the women you want excluded and then re-creating the group with Ctrl+number.

When relocating a family, you can select the person to relocate, and then click on the "married to" symbol to select his wife. With the wife selected, you can then have her "move house", and if done like this, the house banner will display the husband and his job, so you can more easily tell who's meant to be in which house to be closer to their workplaces.

>>If done the other way around (like you probably might want in the early game or have it at game start), the banner will display the wife, which gives little information about the occupation of the male inhabitant, but allows easier selection of wife when not with child for birthing children as fast as possible. (this is less useful with 8th Wonder, because of the new features added in the "Extras" menu)

IMPORTANT: Try to avoid assigning women to a house first and then asking men who have "job site" markers to "find marriage candidates" and marry them. You'll want to marry off the women even before the house is built, let alone assigned, or at the very least un-assign them from the house first before marrying, or best of all, assign the men to the house first (possibly before it's even fully built) and ask them to marry afterwards. (this also allows you to count how many women you need, and where).

>>It's safe to do it with most workshop workers(like bakers, millers, masons, potters etc.), but doing this with other jobs will glitch their "job sites" onto the house, so farmers(and herb gatherers) will bug out and start growing sh*t in front of their doorstep and then trek miles back to their huts, extractors/ hunters/ fishermen will have to be re-assigned their work area, carpenters and armorers will try to build carts, ships and catapults by their house's doorstep, carriers get similarly messed up, etc. and it's tedious to fix.

>>>>The carpenter's ship-building area "shift" is a useful "strat" if your carpenter's workshop 4 isn't close enough to a body of water, and that carpenter isn't married yet. You can place a dwelling foundation anywhere near water, assign an unmarried woman to it, then have carpenter marry her. Done. You don't even need to build/finish the building afterwards, you'll just need the materials for the ship available there, and that can be easily arranged. Same thing can be done with armourers for catapults.
USING HOTKEYS
Similar to Control groups, certain hotkeys make playing the game a more smooth/enjoyable experience. Very useful ones I use a lot include:

".", which allows you to cycle through all your civilians. You generally hold this pressed from time to time. This is important because normally people probably get sick of the insane number of messages of new civilians maturing at the top of the screen, especially when you order them in batches of 20-25, so most people turn them to only red messages, but this means you will no longer see when certain craftsmen/extractors cease production due to invalid conditions, or other potentially vital stuff (imagine finding out that you don't have weapons produced because your smithy stopped working, because your iron extractor stopped working, because he can't see/reach ore in the mountains, and you needed to slowly stock up those weapons and armor over time to fend off an attacking army. yikes)

",", which cycles scouts. I'm going to have 1 scout(rarely 2) that is not part of my builder group, this scout is only for exploring the map, taming cattle and sheep, setting up long distance signposts for new settlements etc. Apart from him, I have a habit of temporarily turning my builder group or groups of newly trained and outfitted batches of workers to scouts, so they don't mingle so much, don't move willy-nilly and can be more easily identified if left in large cities (because of the hat, really easy to spot 'em, and also double-click selection, etc.)

"F" ('s in chat) for the heroes, in maps where you get them. lets you avoid wasting a control group on the hero alone, and allows you to quickly press the key and right click the hero out of hot waters if he's focused in fight.
You can press the key and right click the map without looking at him to gradually explore(but quick-save beforehand in case he lands in sh*t and you don't react in time)

>>But seriously, my attempted pun aside, it's quite impressive how vulnerable and weak heroes are in this game. They have the same HP as regular troops and since they can't use healing potions, I end up having them on ignorant mode along with my archers to just contribute line of sight and MAYBE get a swing or two on enemies when I have my archers focus fire (I just move my archers closer or farther in fights, don't order them directly to attack, they just automatically start to hail arrows after they finish moving, even on ignorant...).

>>In Cultures 2, this hotkey sadly doesn't exist...

"CTRL+S" or "F9", creates a quick-save. Enough said. You probably don't want auto-save on, or might forget to turn it on because it's map-specific setting from what I noticed, but always hit this before a fight, or doing something potentially stupid like scouting with your hero in a new area without looking (or maybe something as simple as before opening a chest, if you don't know or might not be able to grab its' contents before the AI's carriers will potentially swoop in like vultures)

F3 opens the "loading menu", in case you previously messed up and have a save/quicksave available.

F7 opens the "subject management" menu, where you can find and filter your subjects, find and select all civilians for equipping and training, etc.

"A", allows you to assign a unit to a building. This allows you to assign extractors to workshops or warehouses, so they act more like carriers(you need to also set their production). This also allows you to assign carriers to a workshop provided that they'd be able to job change on right click instead, and you don't want that. Basically when you notice that hovering on a building with a unit doesn't produce the desired effect, try this hotkey.

"SHIFT+A", probably much more useful than the "A" key, this allows you to set the outdoors extraction point of fishermen/hunters/extractors, but only for those not also assigned to a building (for some inconvenient reason).

>>For some resources like fish you can't right click it, and for others you don't want to extract it right on-top of the resource node(trees and shrooms don't regrow if you clutter gathered goods on-top of the cut forest).

Holding CTRL while having a manned catapult selected and then right-clicking anywhere will allow you to unlock 80% of its' "hidden potential". Feel free to have fun with it, but make sure to save before you inevitably demolish some of your buildings and kill your own people with it.

>>In order to stop it, it's easiest to issue a "go-to" command from the actions menu, otherwise catapult might keep firing at previously targeted spot. Spamming right-click is unreliable.

"Spacebar" you probably know this already, but if you're new to the game, this opens the unit menu and allows you to actually play the game.

"C" - Avoid using this one. It allows you to skip pressing spacebar and clicking on the "change job" button. It also enables you to sometimes press "V" accidentally and temporarily FK up your economy by ringing "town bell" - lots of personal experience. Also, it doesn't work with many villagers selected at once.

"S" - Vital for road building. Just make sure you keep some of your builders in scout form beforehand or you might get overwhelmed by the number of flags you gotta re-assign to the right segment before they start building them slow/wrong/wastefully. >>>check road section for more info there.

>>Just know that you can use road markers (placed or otherwise) to measure distance in the game, as a line of markers will stretch for 20 tiles, in all hexagonal directions (diagonals and left-right). You can also measure & space building footprints with game paused if you really REALLY want to get that perfect alignment. Placed road markers, if removed, also remove all road markers up to 4 tiles away in a hexagon, so they're quick to clean up if unwanted.

"D" - stockade hotkey... for if you have a choke-point to hold, or if you got an exposed shoreline from where enemies can land( but seriously, prioritize scouting the water if you get a ship instead, uses less wood and gives you more of a heads-up/warning on surprise landings on certain maps). Can be used to further protect defensive towers and defensive catapults since they'd melt like hot cheese to melee damage.

>>Also useful if map spawns with chickens. You can build a large enclosure for them and try to chase them into it. Afterwards, you can use them for archery target practice (they're really tanky for some reason, near immortal...)

>>Again, you can also create your own choke-points quickly at places in levels where you get catapults from chests, by flattening some nearby trees, putting some soldiers to extract the wood and set up the stockades to funnel enemies for catapults to stone them to death more easily.

>>Just make sure that when building roads, you don't accidentally press this key instead. It'll look different, and will have less eligible areas to buit it in too, so be careful...

"B" Build menu key... also take care when pressing this as it's too close to "V" for comfort...

Holding CTRL when editing a craftsman's production queue or increasing/decreasing minimum good stocks for merchants to leave in warehouse/workshop is also a thing.

>>By setting "minimum" goods, what you're doing is basically telling your merchant he's not supposed to touch certain goods up to that point in the warehouse/workshop. For most workshops, it's good to set at least 5-10 goods of a type to always remain inside for use locally (except high output buildings like brewery/bakery)

>>Workers will still be able to access and take out resources below the minimum, but holding CTRL and clicking on most advanced building materials in follow-up settlements, you ensure there's always going to be at least 10 of those in there eventually, ready for building stuff.>>>see logistics section for more info.
USING OBSERVATION WINDOWS
Since most of us nowadays use monitors of at least Full-HD or higher resolution, screen space is not really an issue. This is why I highly recommend opening and keeping open several "observation" windows during game play to keep track of several groups at once.

>>They get closed if pressing the "ESC" key, so try to avoid spam-pressing ESC.

>>They also get closed when you restart the game or switch maps in-level (say you send Bjarni in some cave), so you'll have to re-open them then.

You can open a new window by having a unit selected and pressing the "O" key. This will have the window constantly follow the initial selected unit. By clicking on the window, your screen will automatically center on the unit, without selecting it (so if you had units selected you can use this to quickly pan to the location you want them to go)

These observation windows I find are most comfortably kept at the bottom of my screen, between the mini-map and where the selected character information panel would go, precisely because mini-map is also there so I glance at it from time to time to see other faction's positions.

>>You could try to fit them in the upper sections of the screen or upper right corner, depending on what you're comfortable with, though.

It's a good idea to create temporary observation windows for units that are en-route to somewhere far away, so you can see when they arrive to avoid idling them, like for any carrier-manned cart you're employing.

I suggest you keep at least 3 open at all times:

One with Bjarni or your main soldier group, so you can always keep an eye and be able to quickly move your screen there if the need arises, and also to more easily find them (double tapping F for Bjarni or the control group key for the soldiers also works for this)

One (or more) for each scout you're using at once. When you see their observation screen not moving, it means they've reached destination/placed their signpost, so click it and assign them to keep scouting. This alone should be the most important reason to use observation windows.

One with your builder group, allowing you to see when they finished building something & are idle, so you can decide if they can upgrade houses or get reassigned.

Additionally, I like to keep one open on my Carpenter's workshop 3/4, to keep track of ship/cart building progress, and to quickly switch screens to assign carriers/merchants to carts and have carrier carts move where needed.

You could also select a dwelling or two and create windows on those, to keep visual track of when all the residents are with child (for upgrading purposes) or without (for new villager production)...
ADVANCED LOGISTICS AND MERCHANT INFRASTRUCTURE I
Designate 1 large warehouse(warehouse 2/3/HQ) for mass goods storage in constant production towns and 1 small warehouse right "next door"; This will now be also referred to as a "supply depot" (warehouse 1).
Supply depots are for stocking designated specialty goods (like iron tools, advanced building materials, crockery, furniture, oil? etc.), and will serve mostly for distributing goods of this variety produced in the area, while slowing down the production of less in-demand goods.

>>You might not want to fill HQ with 100 bricks, keeping up to ~25 locally is more reasonable, and they'll eventually move up or downstream to other depots, thus creating more demand locally(so their production speed picks up again) and supply globally for you to be ready and able to build anywhere quickly.

>>Have supply depots impose "minimums" of 5-10 on all building materials + don't forget wheat under the "foodstuffs" tab, and minimum ~10-15 for consumables like furniture, crockery, shoes, tools. This way, merchants connecting to this warehouse WON'T touch the stores if there aren't excess goods past these minimums.

>>>>You don't necessarily need to retain locally produced goods in the depot at all, since they'll most likely be ever-present in the workshops/large warehouse themselves, but it keeps things simpler and easier to understand when you build larger-scale.

>>>>In the long run, this will make depots retrain sufficient inventory on hand for quick building deployment and consumable renewal while continuously pushing the excess upstream or downstream to facilitate faster expansion in new areas and eventually slowly trickling up and saturating goods in all warehouses, depending on what goods the external merchants are set to trade(obviously you want them to push goods into areas said goods are not produced and pull goods that aren't produced locally, but in demand for local workshops)

>>>>A caveat, if you decide to increase the number of external merchants between towns to upscale trade and make things run smoother, make sure that you have the merchants import/export separate sets of goods, to avoid situations where they unwittingly try to oversupply and end up with "dead stock" in their inventory. Have one merchant only supply processed building materials & wheat(because the other 3 can be sourced locally basically everywhere) and another move only consumables.
>>Goods that are consumed quickly and in large quantities (like food, cake, mead, potions) should be kept out of the supply depot chain and traded separately. The whole setup is just meant for near global building material availability and tool/shoe renewal when they inevitably expire.

The supply depot strategy is, in my experience, the only reasonable way to actually make use of "unset" merchants, as when they trade between depots, they'll actually supply newly created remote depots with a very diverse assortment of goods, all of which are bound to be of use at the location (so they won't also bring random crap like flour, water, honey, leather, herbs, shrooms, and other high-supply goods from your main warehouse)

You'll have 1(up to 3 sometimes) Internal merchant(s) to be assigned per every 2 local warehouses, set to act as Input/Output control for the supply depot. This achieves 2 things:

>>1. They ensure that the goods meant to be kept at lower stocks, like bricks for example, don't end up building up needlessly in the large warehouse, and counteracts the production workers' attempts to haul their oversupplied goods, so they don't craft them needlessly.This is helpful because every few hours or so, if you notice your large warehouse build up say 25% of its internal capacity with these extra goods, you can disable that craftsman's loop 'till the stocks disappear completely both from the large warehouse AND from the supply depot reaches only minimum stock or less.

>>2. They assist with loading the high-supply consumables into the depot (the workshop-to-warehouse local merchants shouldn't fill the depot with those directly)

>>3. They keep unwanted goods out and stock raw material(wood, clay, quarrystone) from the large warehouse, for local craftsmen of low-demand goods to use.

>>Internal merchant(s) can start doing their job just fine without handcart earlier on, but make sure to pave some road between the 2 warehouses.

>>>>Important: Also make sure to rename them something easily identifiable to you, like "Intern HQ-1" or "Intern Town1-1" or something, as eventually you'll have too many merchants to keep track of, and this will allow you to easily identify and select them for further configuring later on.

If one of the craftsmen of a workshop stops crafting and starts shipping to warehouses, he's slow enough at doing it that in the long term scheme of things, it's fine: he'll craft once, and then he'll have to ship 1-4 excess goods all the way to a warehouse before being able to craft again, during which time his workshop buddies will craft more of their more "in-demand" specialty goods instead

>>The merchant(s) assigned to the workshop would have loaded whatever goods are REALLY needed into cart and offloaded some extra raw materials to assist the extractor(s) present in keeping the other craftsmen churning, and then he's off again to either to the large or small warehouse.

>>>>This way you can keep all craftsmen on "produce x infinitely" on 1 specific good without much worries.

>>You'll eventually want to "phase out" workshop carriers with (~2-4) handcart merchants, as they offer you more control over their activities and a whole lot more efficiency. Carriers are still good for wells/beehives, and also assigned on warehouses so they clean the streets and get raw extracted goods into the system (you'll assign their work areas onto where extractors are operating).

When setting up a small resource gathering outpost or a new village, just start setting up the warehouse 1/ supply depot there and send the extractors/carriers fully loaded with mead and think about the necessity of growing the settlement and adding a food production chain later.

>>You can temporarily add a merchant connecting this warehouse to the trade depot of your previous settlement, and have him operate "unset".

>>>>This will cause him to transfer all goods that are over the set minimum of previous warehouse in balanced quantities(aka he will try to get a little bit of everything there per trip (and won't just deliver bricks 'till the capacity there is full, then switch to the next thing on his checklist).

>>>>You don't want him to be set up like this forever however, since you can't upscale/add multiple unset merchants per route, as they'd be bound to get loaded with "dead stock" and stop working eventually.

>>>>The merchant will sadly begin transferring potentially unwanted high-in-supply goods over time once the previous settlement's large warehouse fills and the trade depot starts getting potentially unneeded items, like water, honey, flour etc., slowing it down even further, so you will want to add more configured merchants eventually. For just preparing a new area's warehouse with goods however, an unset merchant between depots is ideal, and better than a configured one.

When setting out to trade goods with other "nations", setting up a small "production settlement" close to their warehouse for the needed trade goods might be a good idea, rather than hauling goods from all the way from HQ.
Image above, small trading outpost with our merchant friend Miguel. Cakes baked locally for both food and trade with him. Notice the 2 warehouses set up, one is the "supply depot" and contains stocks of all building materials and consumables for the inhabitants of the outpost to use.
ADVANCED LOGISTICS AND MERCHANT INFRASTRUCTURE II
Designate at least 3 raw resource extractors in vicinity of warehouses. Warehouses to be set up with carriers/extractors to carry goods, from resource spots where the real extractors exploit resources, into whichever warehouse needs for workshop merchant to use them to supply his workshop on return trips.
>>Each warehouse can only have 3 carriers... but you can "cheat the system" a bit by assigning 3 additional "extractors" here as well and task their working areas and preferred resource near a real extractor's drop-off point, this will have them behave as carriers specifically for that raw resource.

>>Warehouse and workplace carriers/"extractors" can be essentially un-housed, untrained fresh civilians that are meant to keep things smooth either temporarily or permanently, clean the roads, get raw goods in, etc. and don't need houses.

>>Carriers assigned to wells or beehives however need to be seen as "employed extractors", and are better off married and housed, as they need to eat a lot - extracting water and honey costs them lots of energy.

Always designate an "extractor" to production workshops that allow it, like carpenter, smithy, mint etc. who have the role of acting as carriers, except they only supply their selected resources, they don't send goods to warehouse-that shouldn't be their job anyway.

Designate different craftsmen per production workshop where multiple goods are needed once possible, each with their own separate crafting queue (for example: all 3 potters working at a pottery 3, each specializing in different goods, 2 masons at a Mason's workshop, 2 smiths at a smithy - 1 for tools the other for other military gear) etc.
>>To deal with the increased consumption, Simply have more than 1 merchant pull goods out and push raw materials in, and they'll ensure decently supplying the workshop, but again, make sure the merchants pull out different sets of goods(one pulls bricks, the other tiles + crockery, lets them avoid accumulating dead inventory). Have said merchants use regular carts where possible(ox carts take way longer to build and you need them for long distance routes already anyway).
>>>> 2 handcart merchants will always be better at their job than 1 oxcart merchant, especially for short same-town supplying: They take half the time packing/unpacking at the warehouse/destination since they only load up to 10 goods. By their nature, if workshop is lacking say...5 wood at the time of their warehouse stocking, they'd only each load up to 5 more wood in the cart even if workshop is constantly consuming it and would reach 0 when they arrived, so by having more merchants they'll be able to oversupply and saturate, AND probably most important of all, they can each bring their designated specialty good. For this reason, try to only use oxcarts for foreign and long-distance trading.

Disable bread production once cake becomes available, and only produce bread as a band-aid if you actually need food for trading or as diplomacy tribute in mission, otherwise not producing bread allows cattle farm to passively and rapidly dump its' stock of meat.
>>> More info on cake can be found in its' own dedicated section of this guide, as previously discussed.

Try to avoid supply depots if you have materials that aren't needed all throughout the depot chain. If you extract gold/iron somewhere, just ship it directly to the supply depot/big warehouse where it's needed for processing.
ADVANCED LOGISTICS AND MERCHANT INFRASTRUCTURE III
Alternatively, if you don't feel it worth the cost & effort to stock building materials across the map, but would still like to expand into new areas, you could simply have a single supply depot kept fully stocked "at home" with all building materials and supplies, and then simply have some of your many builders turn into carriers, grab handcarts/oxcarts and load up on at least 10 of each building material you'll need (don't forget wheat in the foods section). You then send them across the map where you will want more buildings, unload there (and setup a warehouse first if it's a new area, to make unloading the rest more organized...) and build whatever you intended.

>>This should allow you to effortlessly build extensions or new outposts and you can afterwards focus your "external"(between settlements) merchants to only supply cakes(for food) and consumables (shoes/tools) while retrieving whatever is produced there.

>>Doing this, however, requires you to have a decent fleet of carts readily-built (thus it's never a bad idea to have your carpenter build them in batches of 10 at once and have ~20 ready at one time). After the materials are delivered, the carts can then be used locally, between settlements, or be brought back to the original supply depot to reload with more supplies for other places.

>>In order to more easily move the screen back and forth between the 2 locations (ie: for issuing each and every carrier cart to move to destination), it's probably easiest to have 2 observation windows open (I keep mine at the bottom of my screen), one open on a scout or random object present at desired location, and another close to where I keep my carts parked.

>>>>You can then more easily navigate between the 2 screen locations by clicking on the observation windows. Selecting the carts one by one, moving screens and right clicking them to move there this way in bulk goes considerably faster (but still a bit tedious).

Keep in mind: The reason you generally want merchants to haul goods across the map versus opening new workshops locally is because it can be more space, population and resource efficient, while potentially being less tedious in the long term, if done right. Simply put, it scales better.

To elaborate, here's an example:

>>You can have potter's workshops at home and in 3+ or however many settlements you got... Each workshop would require at least a potter and 2 extractors, so 3 people minimum. The potter is easily able to over-saturate local demands for bricks and tiles very quickly, since you don't really consume that many at once. Afterwards, the potter remains idle, the workers no longer really need to keep extracting, and it's tedious to re-purpose them to do something else more useful.

>>On the other hand, you can decide to only have 1 potter's workshop at home, employ 1-2 potter(s; if 2 you want each to do their own separate thing), the 2 extractors can initially be local but later positioned anywhere on the map as their materials would then be shipped via 1-2 oxcart merchants (preferably to a warehouse first, not directly into the potter's workshop). Then you'd have 2-3 handcart merchants locally to supply wood & clay, and to pick up bricks and tiles between pottery and warehouse. Said tiles and bricks would then be shipped off where needed without having to set up redundant workshops everywhere.

>>>>This is perhaps not as important with 2-3 settlements, but it definitely makes things easier at larger scales. It's more resource efficient too, because you need to assign fewer tools to potential would-be potters and extractors, and since you only have 1-2 specialized potters doing their thing back home, they'll very quickly reach higher efficiency (up to 3.2 goods produced/craft) so less raw material is "wasted".

>>>>I prefer having 2 dedicated potters (at least eventually, as in the early game it's totally fine to have the initial clay extractor dub as potter simply because manpower is tight...) because this allows me to keep both on infinite craft loop and they'll not spam me with "potter can't produce brick/tile" whenever they decide to craft one but workshop & nearby warehouse's are full so they swap to the other.

The only things you might want to establish in multiple locations are bakeries (and/or breweries) as foodstuff and mead can be very quickly consumed with very high populations, and it might not be efficient to have merchants slowly supply those instead. You can then simply ship flour (or wheat if you set up their local miller too, or the whole chain if you really want) and it'll keep them fed.

Merchants who trade with other factions should always be assigned to begin trading with an empty cart. If the cart was previously filled with some goods, even if they're the goods that would eventually need trading anyway, the merchant will derp big time and potentially lose you items and waste trips.

>>To re-purpose a filled cart/merchant combo, simply select the merchant and turn him into a carrier. If you didn't issue a move command to get him out of the cart first(as merchant was outside at the time, maybe), this will have him remain assigned to cart. Then just empty the cart and turn them back into merchant...

>>>>try to avoid doing this with switching into other professions though, as it can get a bit glitchy textures-wise if you turn merchant with cart assigned into..say... solider. It's funny though, as the soldier can then equip weapons and armor, and when sitting inside cart, it looks empty. Nobody expects armed soldier to burst out of apparently unmanned handcart (perhaps can be used to spook someone in MP, dunno)

>>They can be assigned to trade directly from a workshop to warehouse, even if the received goods can't fit/exist inside the workshop. For example, having a trader sell bricks for some other desired good, the trader will load up with bricks, trade them, and then when he gets back he simply dumps his cargo on the floor in front of the potter's workshop, before repeating his schedule. The cargo can simply just be swept up into warehouse by carriers later on, if needed. (or it could just be potions/equipment and you just equip it straight from the ground...)

WARNING: Make sure to build some guard towers I, even if left empty, throughout your cities or at least on routes where merchants operate. IF combat occurs nearby and the merchants get spooked, and have no suitable building to garrison in (perhaps HQ is full already or you don't even begin with one), they'll permanently "forget" about their assigned carts, massively disrupting your trade routes. This is a colossal pain to fix manually afterwards, and some carts can be left parked "inaccessibly" behind buildings too.

>>This is especially important to heed on missions where you can be attacked by surprise-landings from the coast (also, explore the waters asap to prevent getting caught with your pants down, in general), but valid for any of the more "violent" mission types.
ROADS, PAVING THE WAY TO A MORE EFFICIENT SETTLEMENT
Road paving works like this: A builder assigned to a road marker goes and grabs 1 quarrystone, and then goes to the marker and hammers the road in place. If the marker he hammered happened to be adjacent to any other marker, those markers are also built along with it, meaning 1 single quarrystone can "road" at most 7 markers in a hexagon shape.

>>This means that if you want greater road coverage(most useful inside settlements where building placements or upgrades could increase the buildings' footprint and overlap onto smaller, thinner roads) you will want to try to pave hexagons' worth of roads at once, however you'll need to employ some micro-management to prevent your builders from auto-assigning themselves poorly...

Don't be afraid to spend quarrystone on paving. Sure, it's a "limited resource" as it doesn't regrow, but there's usually metric fktons of it available, especially near mountains. The only uses of quarrystone is to serve as material for buildings, and for stone and marble, of which you need limited amounts. Very rarely do you encounter maps where stone is scarce.

>>There's bound to be spells of downtime for your builders, during which you could assign them to build roads. Even if you end up building on top of them later on, they'll still provide a permanent advantage: Carriers&workers will be able to see&reach further, as their work radius is boosted.

Assigning road markers behind tall structures is nigh-impossible. Some larger buildings cover 150% or more of their foundation with the structure sprite (i'm looking at you, dwelling 3+, school, brewery etc.), so you want to plan ahead and place these in such a way you'd not have to pave behind them afterwards.
>>You can quicksave, place footprint, see about where you'd need to build the road behind it(can measure location with the road placement tool too...) then load before footprint was placed and build the road first, or at least pre-assign the builders to segments of it.

>>Buildings will always, without fail, have at least exactly 1 tile "space" surrounding their footprint on all sides, so it's impossible to create "building walls", obstacles that would greatly impede navigation.
>>>>This can be used to our advantage when designing tightly packed cities by making sure we build from top to bottom, prioritizing paving the bottom side of the buildings' footprints with (thick) roads, and then connecting them to each other, ensuring most routes between 2 buildings have 100% paved area.

The strategy I've found to work best for preventing workers from auto-assigning themselves onto random road segments is the following:

>>First, before planning any road, find a convenient and very remote location on the map, either near your exploring scout or hero, and place building foundations, tower ones work best in my experience, as many as needed to get all your builders "assigned".

>>>>It is important that your builders aren't actually able to navigate there and build the structures. Make sure to place them in areas that aren't close to any of your signpost networks.

>>Then, identify where you need your roads to be placed. Your headquarters/warehouse is probably going to be the highest foot-traffic area in your town, along with your food production buildings and lastly your other workshops. Prioritize and build your roads accordingly.

>>Afterwards, drag single-line strips of road connecting your building entrances, and just make sure to manually re-assign your builders so they skip every 2 "dots" so as to pave the "critical path" roads as efficiently as possible. If you want thicker roads, before assigning the builders, expand the thin road markers into hexagons and assign builders to their center tiles.

>>>>Because all the builders were pre-assigned to those remote building foundations, simply select them (preferably from a control group) and task them with road segments 1 by 1. After they finish their segment, they'll most likely re-assign themselves onto the remote structure, and you can keep assigning them new road segments. When done roading, just delete the remote building foundations...

VERY IMPORTANT: Road markers can't be placed on tiles where there are existing signposts, stuff on the ground, or natural resources like berry bushes, shrooms, trees, clay, wheat. Road markers can however be placed and then covered by the above, and still be built afterwards without any repercussion.

Before assigning extractors in crappy terrains like mountains, always have a signpost right where you intend the extractors to begin working from, and then from time to time snake roads (even lines of 1-thick is fine) leading deeper into the mountain, and always re-assign your extractor to drop-off onto these roads.

>>This would make extracting mountain resources at least ~33% faster, and will greatly assist with getting to particularly difficult-to-reach veins. Carriers working in warehouses/workshops at the base of the mountain will have an easier time "seeing" and reaching the resources if the're dropped on or near the mountain roads too, so it also boosts productivity.

Merchants in carts benefit from road speed-buffs as well, but unlike regular workers who try to follow the roads on short distances, or follow the signposts on long distances (hence try to put signposts on top of roads), merchants' paths need to be "observed" and paved accordingly, as it's sometimes difficult to predict (I've had occasions when they'd decide to ride their oxcarts right BESIDE paved road)
MORE ON SCOUTS AND SIGNPOSTS
The only units in this game who don't need signposts to get from place A to B are scouts and soldiers... except that's fake news.

>>Heroes have improved scouting mechanics built in...

>>Then there's druids, who have a sh*t line of sight but CAN walk very far and in un-signposted territory, and open magic chests.

>>Additionally, carriers, merchants and other units assigned to vehicles, like carts, ships and catapults don't care about signposts at all(catapults and ships have difficulty path-finding as is though).

>>>>You could still want your settlements to be loosely connected by a string of signposts though, so you can more conveniently move your people about (I say loosely so that in case you want to stop it, you just have to remove 1 signpost and it's disconnected).

Signposts "cover" a radius of 15 tiles in all hexagonal directions (measured with roads since they can be built in strips of 20 tiles long). The max range at which they still connect is for some reason 38 tiles (I guess it's a total length of 40 tiles if we include the base of the signposts...), which is more than double their radius and means they can reliably be placed without having to connect dark areas, but also that if you place them this loosely, you'll be later able to place a signpost in between them to cover more, or remove only one of them to guarantee breaking the connection off.

>>You might willingly want to remove signposts in areas where your settlements connect to prevent locals from going to the town over to source materials or even dropoff their low-demand goods if their local warehouses filled. I won't even mention how housed women like to walk forward 50% of the map to get some meat from the dead wolves in the forest, creating a greater time-lag between offspring generations if you already had enough required food/cake stored anyway... oh wait, oops, too late.

>>>>Once you no longer have issues with manpower shortages(when you get to the point you can start rapidly ordering batches of 20-25+ men every new generation), you can keep a scout stationed at junctions where 2 settlements connect and have the signpost re-erected only if needed.

It can be a good idea to flick newly acquired civilians/non-military units to scouts in order to get them across the map over long distances, and to avoid having to babysit them. Like for civilians, there's a dedicated hotkey to cycle through them, potentially allowing you to quickly find where they are and if they'd arrived at your base yet.

VERY IMPORTANT: You might be tempted, or even used to, like I was, to use your scout to put signposts in your starting area, all over the place, trying to put them around nooks, corners, existing impassable objects like rocks, trees and generally try to achieve 100% "dark" coverage everywhere from the start while trying to maximize available place for building later down the line, possibly placing some of them as tightly as possible... DON'T. Try as hard as possible to BREAK these habits. It took me way too long to break mine, and after I stopped, my cities were flowing much more smoothly, I was actually impressed how quickly stuff was getting done.

>>For starters, having signposts packed too tightly will make it awkward or outright impossible to relocate them later on when you intend to build something. This will also force you to build in the remaining space after their placement(sometimes invalidating entire areas from building specific things), when you could've just had a builder swap to scout quickly and place the signpost right in front of the building entrance(ideally).

>>After you build that kind of 100% coverage signposts network, you'll also have difficulties with your workers walking in very awkward spots through crappy terrain and taking highly inefficient routes to get things on the other side of your city, and it will make building & built roads less effective as well.

>>What you want to do instead is make sure your scout erects signposts near where your extractors will drop off their goods, near any berry bush clusters and near where you place workshops, and then just make sure they're connected(they point towards, or there's a line on the map/minimap) with your main warehouse area. You don't have to, but you can just place the remaining signposts to achieve 100% coverage AFTER you build lots of buildings/houses in the area and used the space efficiently, in the remaining space available.

>>>>To reiterate, you don't need near 100% coverage of areas, you only need the signposts to cover your workers' resource drop-off points, potential resource harvesting spots, any nearby berry bush clusters, your workshops, and then to connect to other signposts in the network. Builders will still be able to navigate to and find buildings outside of covered areas as long as they're not 1 extra signposts' worth away.

>>>>Turn your builders group into scouts and send them on the outskirts of your base, or where you expect you'll expand into, since you NEED UNITS IN THE AREA to be able to place buildings there in the first place. AFTER THAT, turn all but a few scouts back to builders, and with the remaining scouts place loosely-connecting signposts that you gotta make sure point from one to another(so people can path), and perhaps another signpost in the area you expect your new building will need resources extracted from.

>>Not marking berry bush clusters near work areas can lead to people wandering off hungrily into an un-signposted forest nearby and then "getting lost", unable to return by themselves, or outright not being aware of them and not going to eat them when hungry...

>>Extra care should be taken with mountain/ore extractors, as those are very prone to targeting rocks further up the mountain, and in the process, getting outside the signpost radius , thus not being able to return and starving to death. Always have their dropoff position behind/ontop an existing signpost, and put signposts RIGHT AGAINST the start of the mountainous area, as this will mitigate the issue considerably.

>>>>This issue happens mostly because mountain terrain severely limits the detection radius of both units and signposts in the game. The opposite is true with paved/road terrain.

>>You can use a scout to place and delete signpost to destroy berry bushes, mushrooms or other crap that'd get in the way of building roads, like especially wheat.

>>In maps with limited building space, hopefully you'll have already sent some experienced stone/wood extractor over to make short work of all the stone debris and straggler trees in the area too. Your starting extractors should be tasked with continuing to develop and expanding new buildable areas as soon as they're proficient enough to do it(8/18 experience), as workshops will be able to make do with new novice extractors just fine, since they'll have a buffer of the already-collected materials. (or you could temporarily re-assign the mason/potter to go extract materials themselves if you're short on hands)

You will most likely want to remove and re-place signposts at some point. Signposts are not solid so villagers can walk though them just fine, so their best placement would be right on-top of the road "hex-pad" that you'd build at the entrance of buildings, along with any potential area you expect to send extractors to in the near future.

>>Example: Scouting around your settlement and found iron/gold vein? Signpost there. Clay deposit? Yep, signpost there too, why not. Oh a few large forests with mushrooms in them? Signpost me in! By doing this, It's a high likelihood that the signposts will connect between themselves loosely, and all you'd have to do is eventually finish the connection with someone back home and you can now send people over there to get resources you'd otherwise need to deliberately snake signposts toward instead.
MORE INFO ON BUILDERS AND SOLDIERS
Apart from using control groups, you'll probably want to avoid marrying builders at all costs, same as most carriers & merchants and any permanent scouts and troops. That's because you'll likely end up having the same squad of ~15 dudes building stuff all over the map, hopping from town to town.

>>It's good to marry your builders early game, when you have few of them, but you will definitely want to "phase them out" of the building job and turn them all into craftsmen or extractors who have a more "stable" working area.

>>>>It helps a great deal that builders don't really have issues pertaining to "work experience", they get about 85% efficient at their job after hammering 15 times, so you should NOT care about having "expert builders" and always be willing to re-purpose them as needed, and create brand new ones on the fly. Whenever you notice that your builder pool is starting to grow "too big", turn the extras into new extractors, carriers for workshops, or school them into craftsmen or merchants.

You'll want your permanent builders militarily trained in "danger maps" where you can be attacked, to be used as "emergency base defense forces", possibly manning defense towers when you expect them to be idle for a longer time.

>>This is also a good way to get the towers supplied with just enough bows, you equip soldiers at the armourer's, and then you assign them to towers, and then you turn them back into builders once garrisoned and you need them to build, this will ensure you will always have 3-4 bows left behind at the tower ready to be used.(also note that in particularly violent choke-points/spots, you can have 6/8 bowmen per tower1/tower2 by having half of them equipped with shortbows.)

>>side note, builders don't "lose" or discard their tools when turned to soldiers, they're temporarily hidden from the interface, and will re-appear when switched back to builders. Due to the rate they chew through tools however, I could only recommend them being equipped with wood at best, if not outright tool-less, as the majority of building time isn't caused by them hammering too slowly, it's having to wait for/ retrieve the materials.

Have their inventories CRAMMED with meads. (After you get a new batch of civilians, you'll always want to give them at least shoes - using the extras menu and 1 mead - by selecting them and "change equipment") I can't stress enough however how important having meads equipped are for builders, as they completely SHRED through their energy stores, every time they hammer something they lose 1 energy per strike and it takes a lot of hammering to build, and yet you don't want to marry and house them because most are migrant workers whose fate is undecided.. It's so important that on certain maps where I start with nourishing/stamina potions, I assign them to my initial builders and extractors instead of starting troops.

>>If you keep your builders hot-keyed, and you're at the point you have brewery running, try to make it a habit to select them all when there are no buildings to be built and issue them an "equip mead" order, possibly also issuing a move order to the brewery too, so they don't take from the warehouse stocks.

Builders have a tendency to always return and frequent the last spot they've had a job at, I suspect the game still sees them as "assigned" a "work" location there, works similarly to outdoors markers/blue flags. To prevent this, flick their profession from builder to scout (and builder again). This should "wipe their memories" and allow you to keep them where you expect you'll need new buildings set up soon, in a forward base or new settlement.

All buildings can have only as many builders assigned to it as max number of resources required, and since the most expensive building is the dwelling 5 at 14 resources, you'll need to eventually reach at least this amount of builders to build things very quickly.

>>Alternatively, you will want to get as close as possible to divisors of the number, so for dwelling 5's earlier on you'd want 7 builders(2 building supply runs), but if not, at least 5 (3 "building supply runs") as this directly impacts the time before building completion. Just assign new civilians you haven't found a job for yet as builders, so they aren't just dead-weights, and can contribute something to your colony.

>>>>You can always turn permanently stationed archers from nearby towers into temporary localized builders if you really need them to, they'll leave their bow at the tower, and you can re-equip them once they're done (and they don't really need to be wearing armor because that's the whole point of the tower, really, so archers can shoot without direct retaliation).
>>>>>>You should do this especially after the tower receives damage and the threat subsides, to avoid having your main builder group go there and waste time.

>>Because more builders get to be able to work at once with more resources required, it's also faster to build structures like dwelling 5's fully upgraded (once possible), instead of building them lower-tier and then slowly upgrading them.

On most maps, even some where you do end up getting attacked, you will probably start with a small number of ill-equipped troops, these are oftentimes useless unless immediately under threat, and better off repurposed into other roles, to give you a better start.

>>The main advantage repurposed soldier villagers have is fast sleeping when turned back into soldiers (also combat abilities if you scout enough to see the enemy coming to have enough time to react)

>>Turn these soldiers into builders, fishermen, farmers, carriers, scouts, and try not to marry them (have them in a separate control group to remember they're military).

>>>>Needless to say, if you started the map with builders, fishermen, farmers, carriers, scouts, you could turn those into other needed roles as you replace them.

>>>>Fishing skills are worthless on regular villagers after cattle farm/bakery, but soldiers with fishing are always a great boon, can sustain remote garrisons near water.

>>You could also assign a few as wood(if no catapult was found in chests) and stone extractors, to assist with initial clearing out of starting (building) area.
GAME FREEZES AND OTHER BUGS
It would be best to take into account the following while playing, to avoid the unpleasant scenario where your save game "becomes unplayable" because you saved just before an event that causes the game to freeze, or you just lose progress by being forced to load from a previous save.

Primary sources of game freezes and how to avoid them:

>>Villagers trying to drop off more than 5 resources in a single tile freezes the game...

>>>>Can easily be reproduced by having game paused, asking ~3 people to "put away" some equipped items like potions/mead on the same ground tile...

>>>>because of this, DO NOT assign multiple gatherers' gather points onto the same exact tile, no matter how tempting it may be. It's unlikely but, over the course of a long game, 2 overlapping fishermen or extractors can sync up and freeze your game by piling 4 into 6 resources in the same tile at the same time.

>>AVOID assigning 2 or more carpenters/armourers from the same or close-by workshops to build the same type of vehicle.
>>>>During the building process, there are no issues, they act like builders would, bring the materials, then whack the vehicle footprint 'till it's built.

>>>>THE MOMENT it completes however, you'll hear the "structure completed" noise (same one as when finishing a building, but there are no "building complete" notifications), and the game freezes.

>>>>This one was a very nasty and hard to find bug, forced me to "roll-back" to earlier saves on a few maps 'till I had a save game 2-3 seconds away from freeze, which helped me figure out what was causing it, especially since I like building and using carts...

>>>>It is still possible to have 3 carpenters helping out with bigger projects like shipbuilding, as long as only one of them delivers the "finishing touch".

More bugs will be listed here if/once I identify and find a way to reproduce (so I can be certain of the cause) and a workaround for them.

It's a good idea to quick-save the game often with ctrl+S.

Every half an hour to an hour of playing, make sure to save your progress in a game save slot to avoid issues.
8TH WONDER ALT-TAB FIX
I've done some digging on this topic, checked existing information in other guides online and finally found the following solution that worked for me (The missing link was step 4, which I found on a small polish "cultures" discord channel, after rummaging and google-translating all their FAQ section articles).

1. Run game a bit, tweak the resolution & sound settings in-game and create a save-game so the game generates the settings files (files might not be there initially if game hasn't been launched at least once and if the default settings weren't changed at all)

2. Navigate to the game's saves folder that should've generated if you did step 1, should be found in YourGame'sSteamLibraryLocation\steamapps\common\Cultures 8th Wonder\Saves

3. Add or modify these lines accordingly to the "opt_glob.ini" file (these .ini files can be opened with any text editor):
gfx_screen_width X
gfx_screen_height Y
gfx_screen_depth 32

4. VERY IMPORTANT: Add these lines to "opt_game.ini" file (without these lines it would just throw error no matter what):
gfx_fullscreen 1
cda_off
game_pre_stuff_skip
gfx_screen_width X
gfx_screen_height Y

(Of course, for both files mentioned above, replace X and Y with your screen resolution parameters, for me they were gfx_screen_width 2560 and gfx_screen_height 1440)

Extra Note: You will need to re-apply step 4 if you change your settings in-game later, otherwise it'll throw error on next launch, since the game would overwrite the opt_game.ini file and remove the lines added at step 4.
10 Comments
BROtato Apr 28 @ 1:20am 
You can fix after alt+tab issue by changing screen resolution in game.
beeejahaa Apr 15 @ 7:29am 
Splendid guide! Interesting captions on stuff like temples and cake, and I found your analysis on how energy activities cost very useful. I never would have guessed that getting water or honey takes so much energy O_O
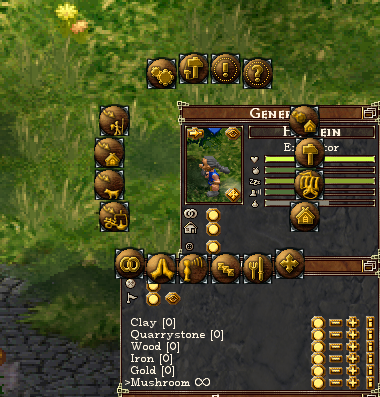
I'm certainly gonna try things like using several obsevation windows, didn't know that's possible.
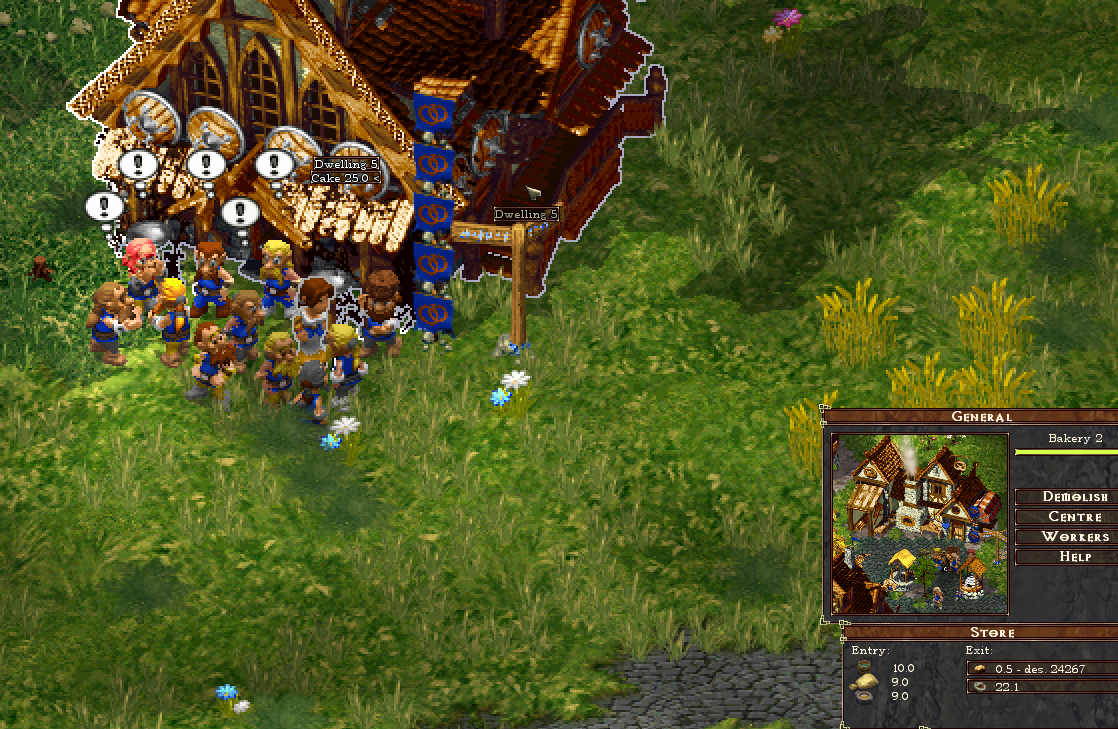
But coins in the barracks are far fro useless. Each coin buys 5 xp per soldier (make sure to give them a weapon before sending them back in for training), so I always assign several merchants to haul coins in as fast as they can. Attacking innocent chickens and bears is cheaper of course, but when a map provides plenty gold I'll gladly spent time for producing lots of coins.
Raito Mar 24 @ 4:21pm 
Great guide, especially the analysis of cake, potions, weapons and armor! Writing all of this must've been a lot of work but it resulted in a great guide.
Basssiiie Mar 24 @ 1:56pm 
Great guide! I learned a lot reading this :) One thing you may have missed is that in 8th Wonder you can auto-distribute shoes, mead, and wooden/iron tools. Especially the first two are very useful if you have a lot of them. It's just an on/off switch and after that all males will make sure to always carry 1 mead and 1 shoes, if any are in range.
imanhuwel Jan 29 @ 8:43am 
also, coins in the barracks allow soldiers to be trained for 1xp per coin used - max of 20 soldiers except when you have carriers in the barracks.
Skrymaster  [author] Jan 27 @ 3:26am 
@LKTH_Studio Interesting, I've not noticed it, but the fish regrowth rate must be so slow it's not worth leaving a fisherman semi-idle for them.
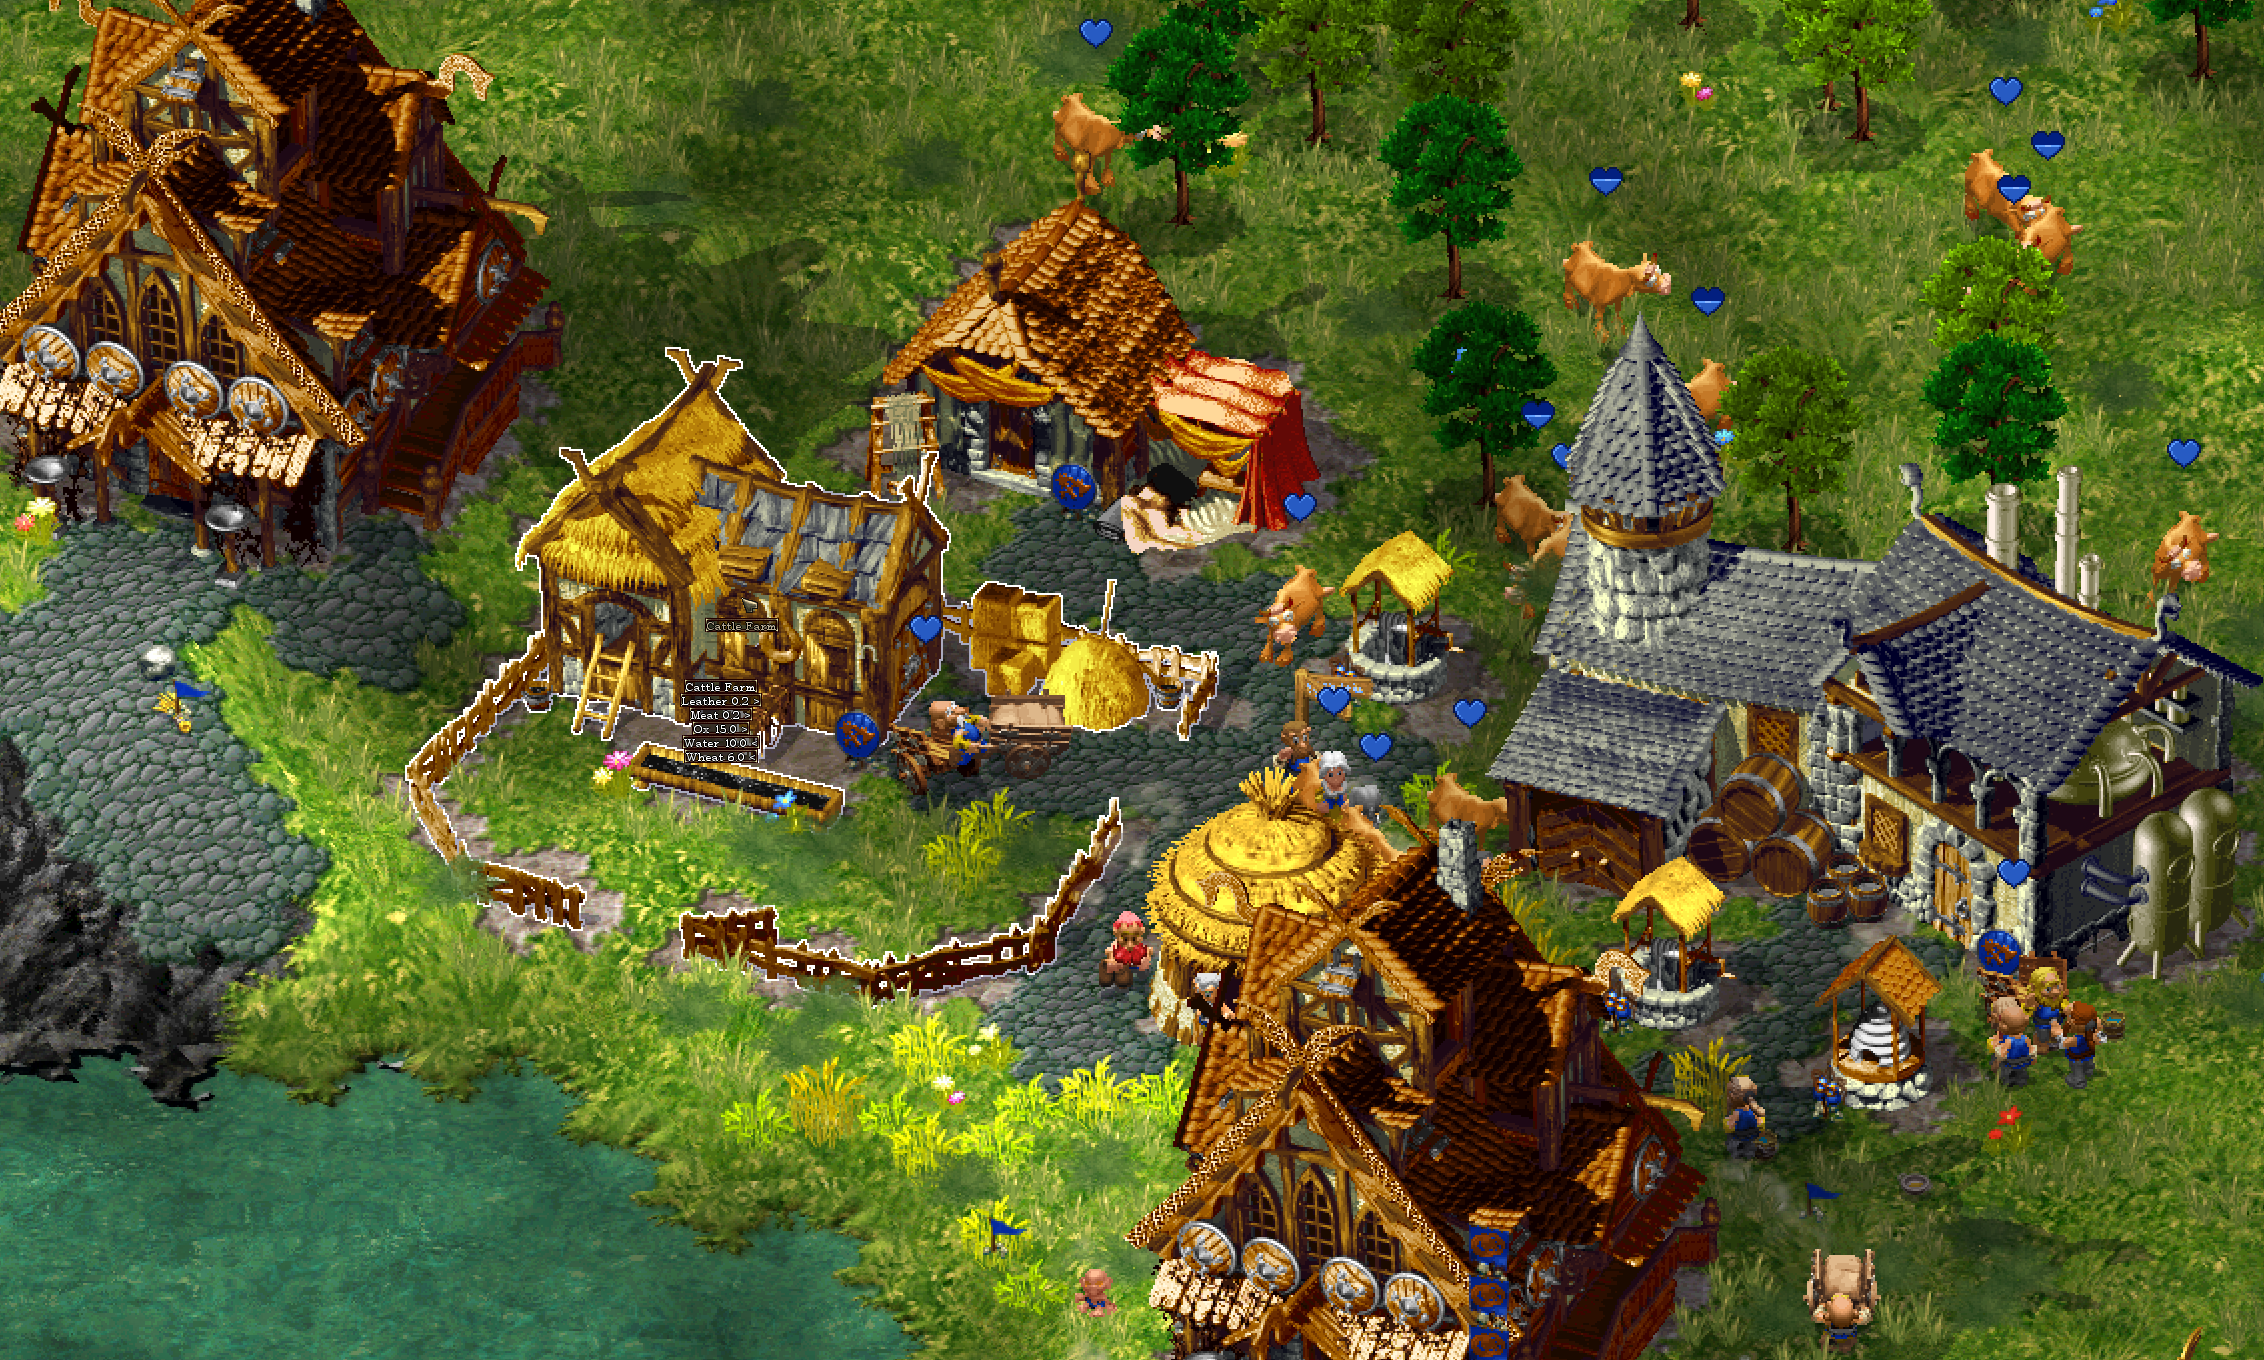
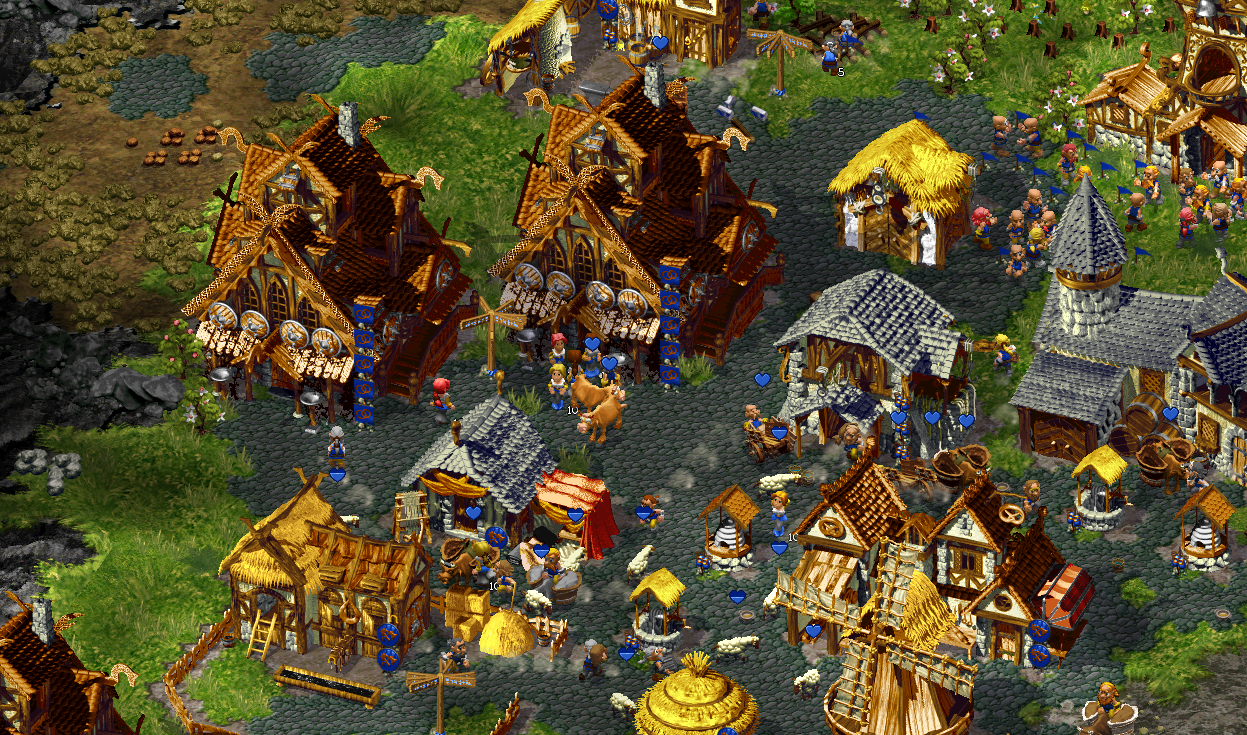
For the primary settlement, getting cattle farms usually makes fishing redundant, and it doesn't take long to get them either.
LKTH_Studio Jan 26 @ 1:29pm 
If you don't relocate your fisherman - fish do regrow or return - 219 fishing points while the guy occasionally complains about not being able to find fish. Then furthest fishes respawn and he goes on fishing.
Lil Beetle Jan 1 @ 6:15am 
Good shit my man!
imanhuwel Sep 27, 2024 @ 5:53am 
Oh what could be added here is either how or just the information on the phenomena that in a large enough selected group of maybe 50 to 100, they often freeze during actions to move and when they get attacked, many dying in the process without being able to retreat. The guide is right in keeping the squad numbers in low 30 - 4x's.
imanhuwel Sep 27, 2024 @ 5:49am 
Amazing, in-depth, phenomenal, and truly necessary for the improvement of Culture life. There are bits of goldchunk wisdom here too. God bless you my man.