

Install Steam
login
|
language
简体中文 (Simplified Chinese)
繁體中文 (Traditional Chinese)
日本語 (Japanese)
한국어 (Korean)
ไทย (Thai)
Български (Bulgarian)
Čeština (Czech)
Dansk (Danish)
Deutsch (German)
Español - España (Spanish - Spain)
Español - Latinoamérica (Spanish - Latin America)
Ελληνικά (Greek)
Français (French)
Italiano (Italian)
Bahasa Indonesia (Indonesian)
Magyar (Hungarian)
Nederlands (Dutch)
Norsk (Norwegian)
Polski (Polish)
Português (Portuguese - Portugal)
Português - Brasil (Portuguese - Brazil)
Română (Romanian)
Русский (Russian)
Suomi (Finnish)
Svenska (Swedish)
Türkçe (Turkish)
Tiếng Việt (Vietnamese)
Українська (Ukrainian)
Report a translation problem


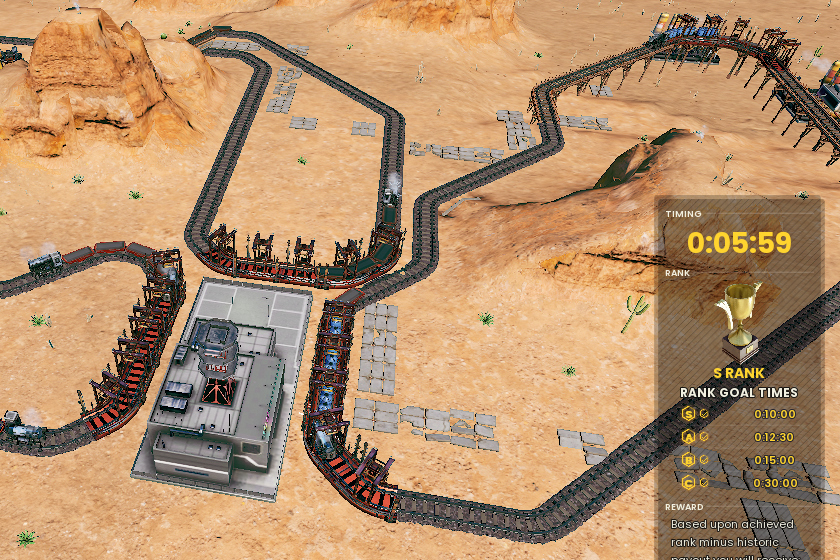
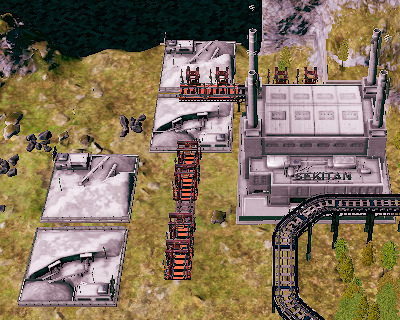
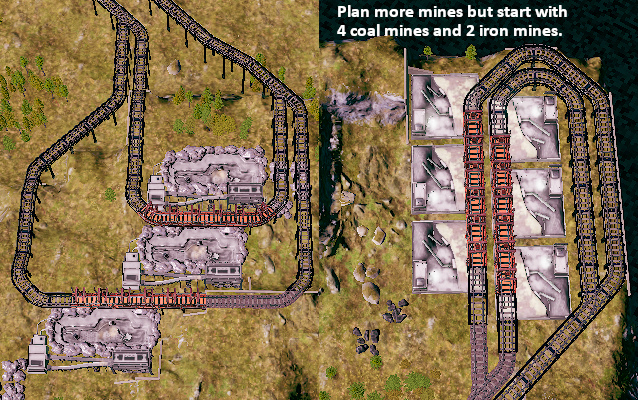


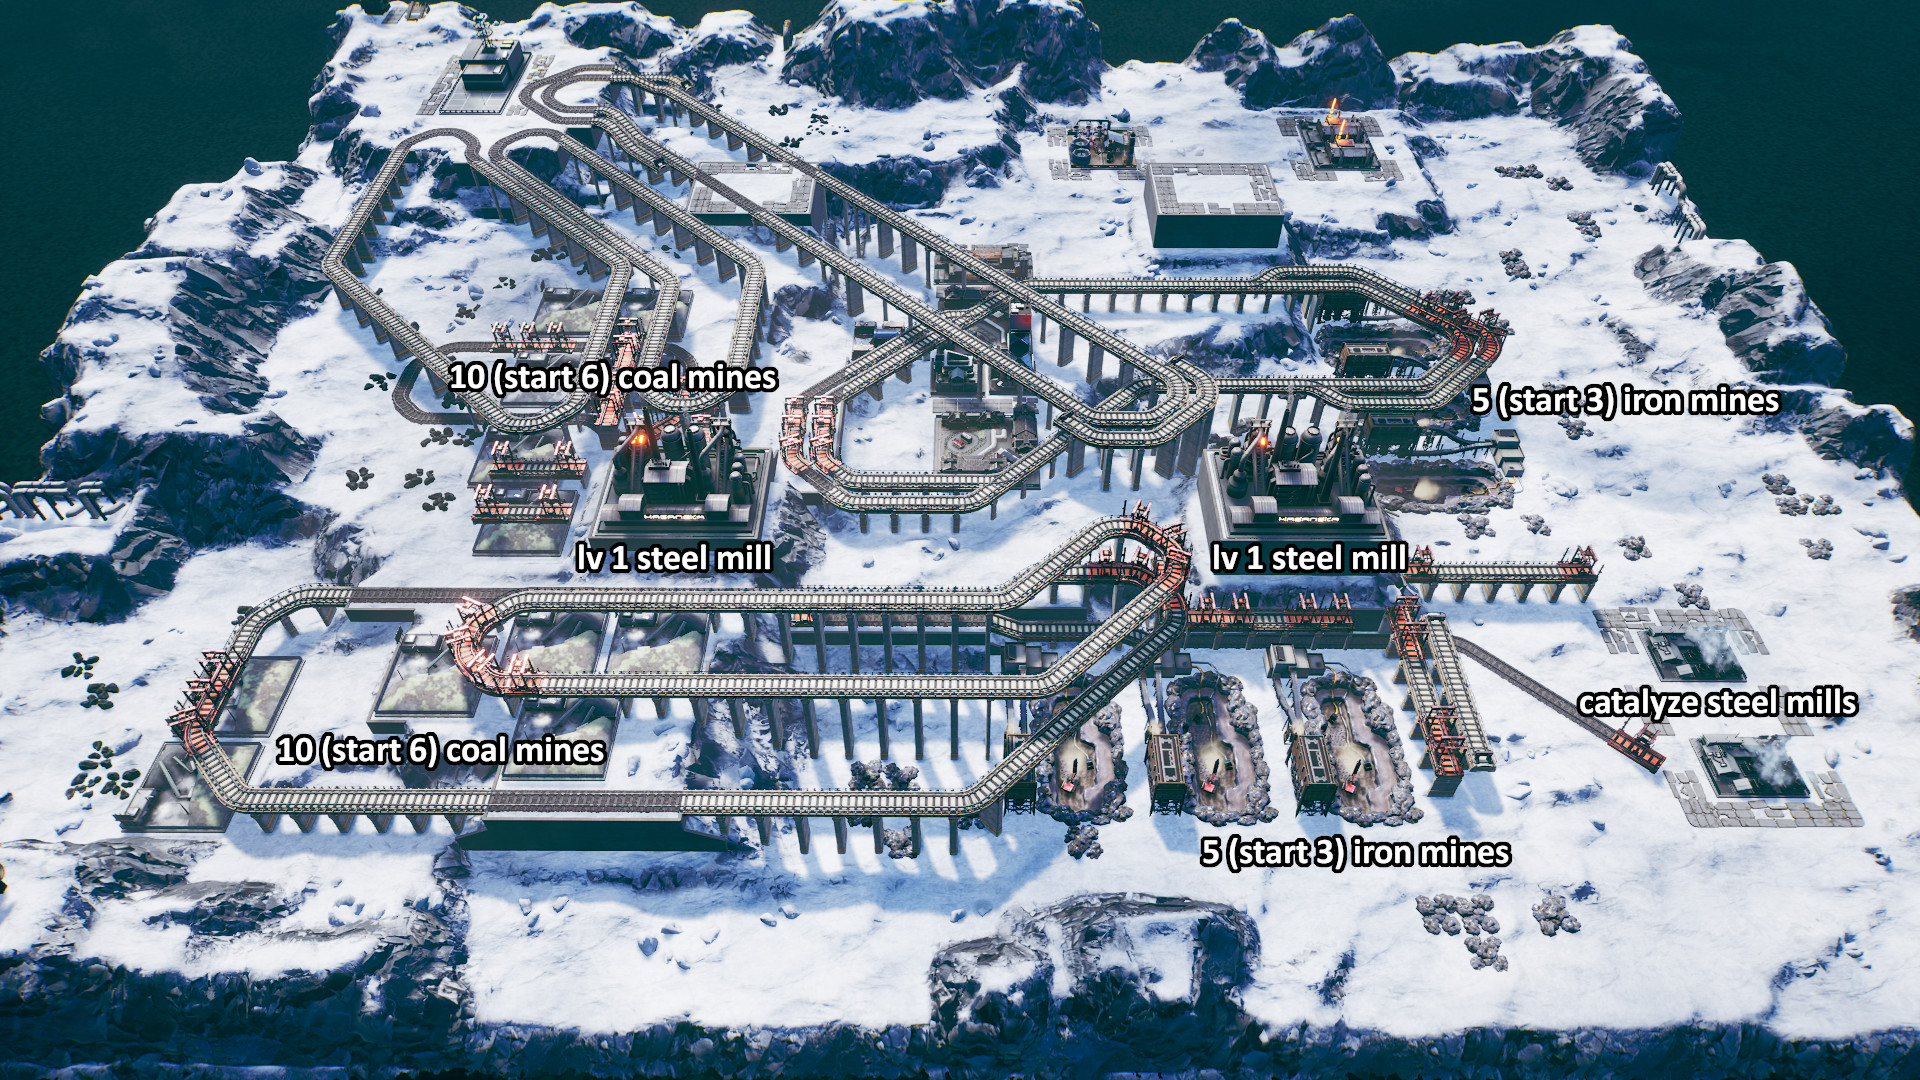


Easy way to get S Rank.
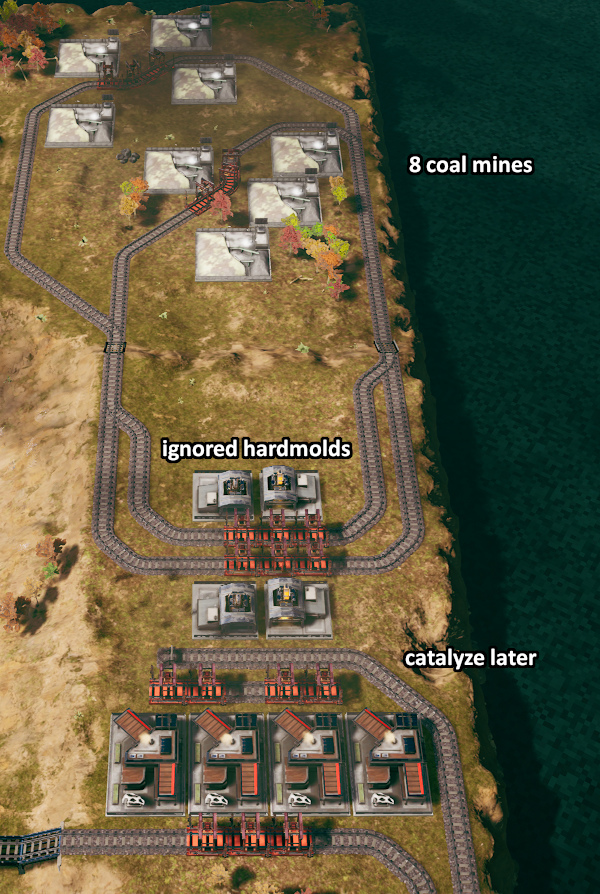
Just output Coal with (Custom Engine - Boiler Engine - 6 cars Coal) per Lv 0 Coal Mine and set Full Load.
And then, build more Coal Mine and upgrade your train to (Spark Engine - Spark Engine - 16 cars Coal) per 2 or 3 Lv 0 Coal Mines.
(Dock maybe need three platform.)
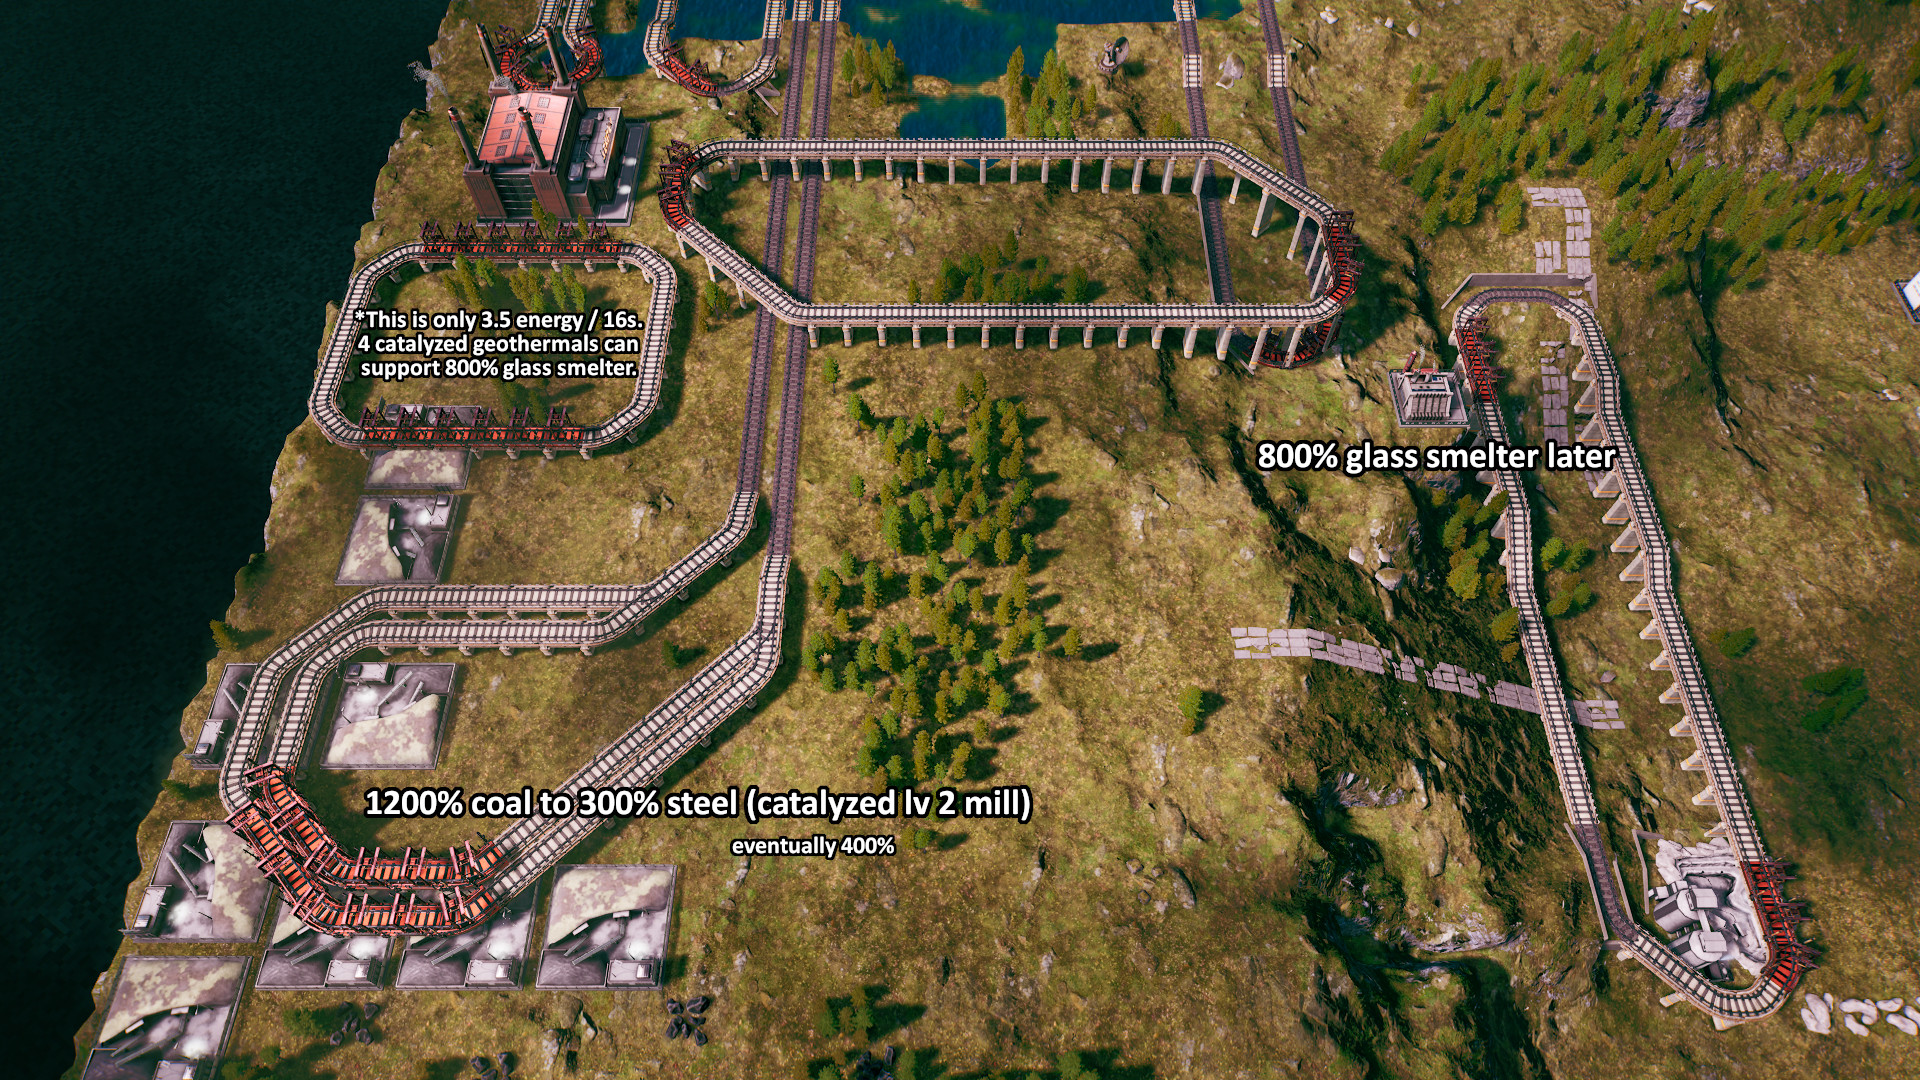
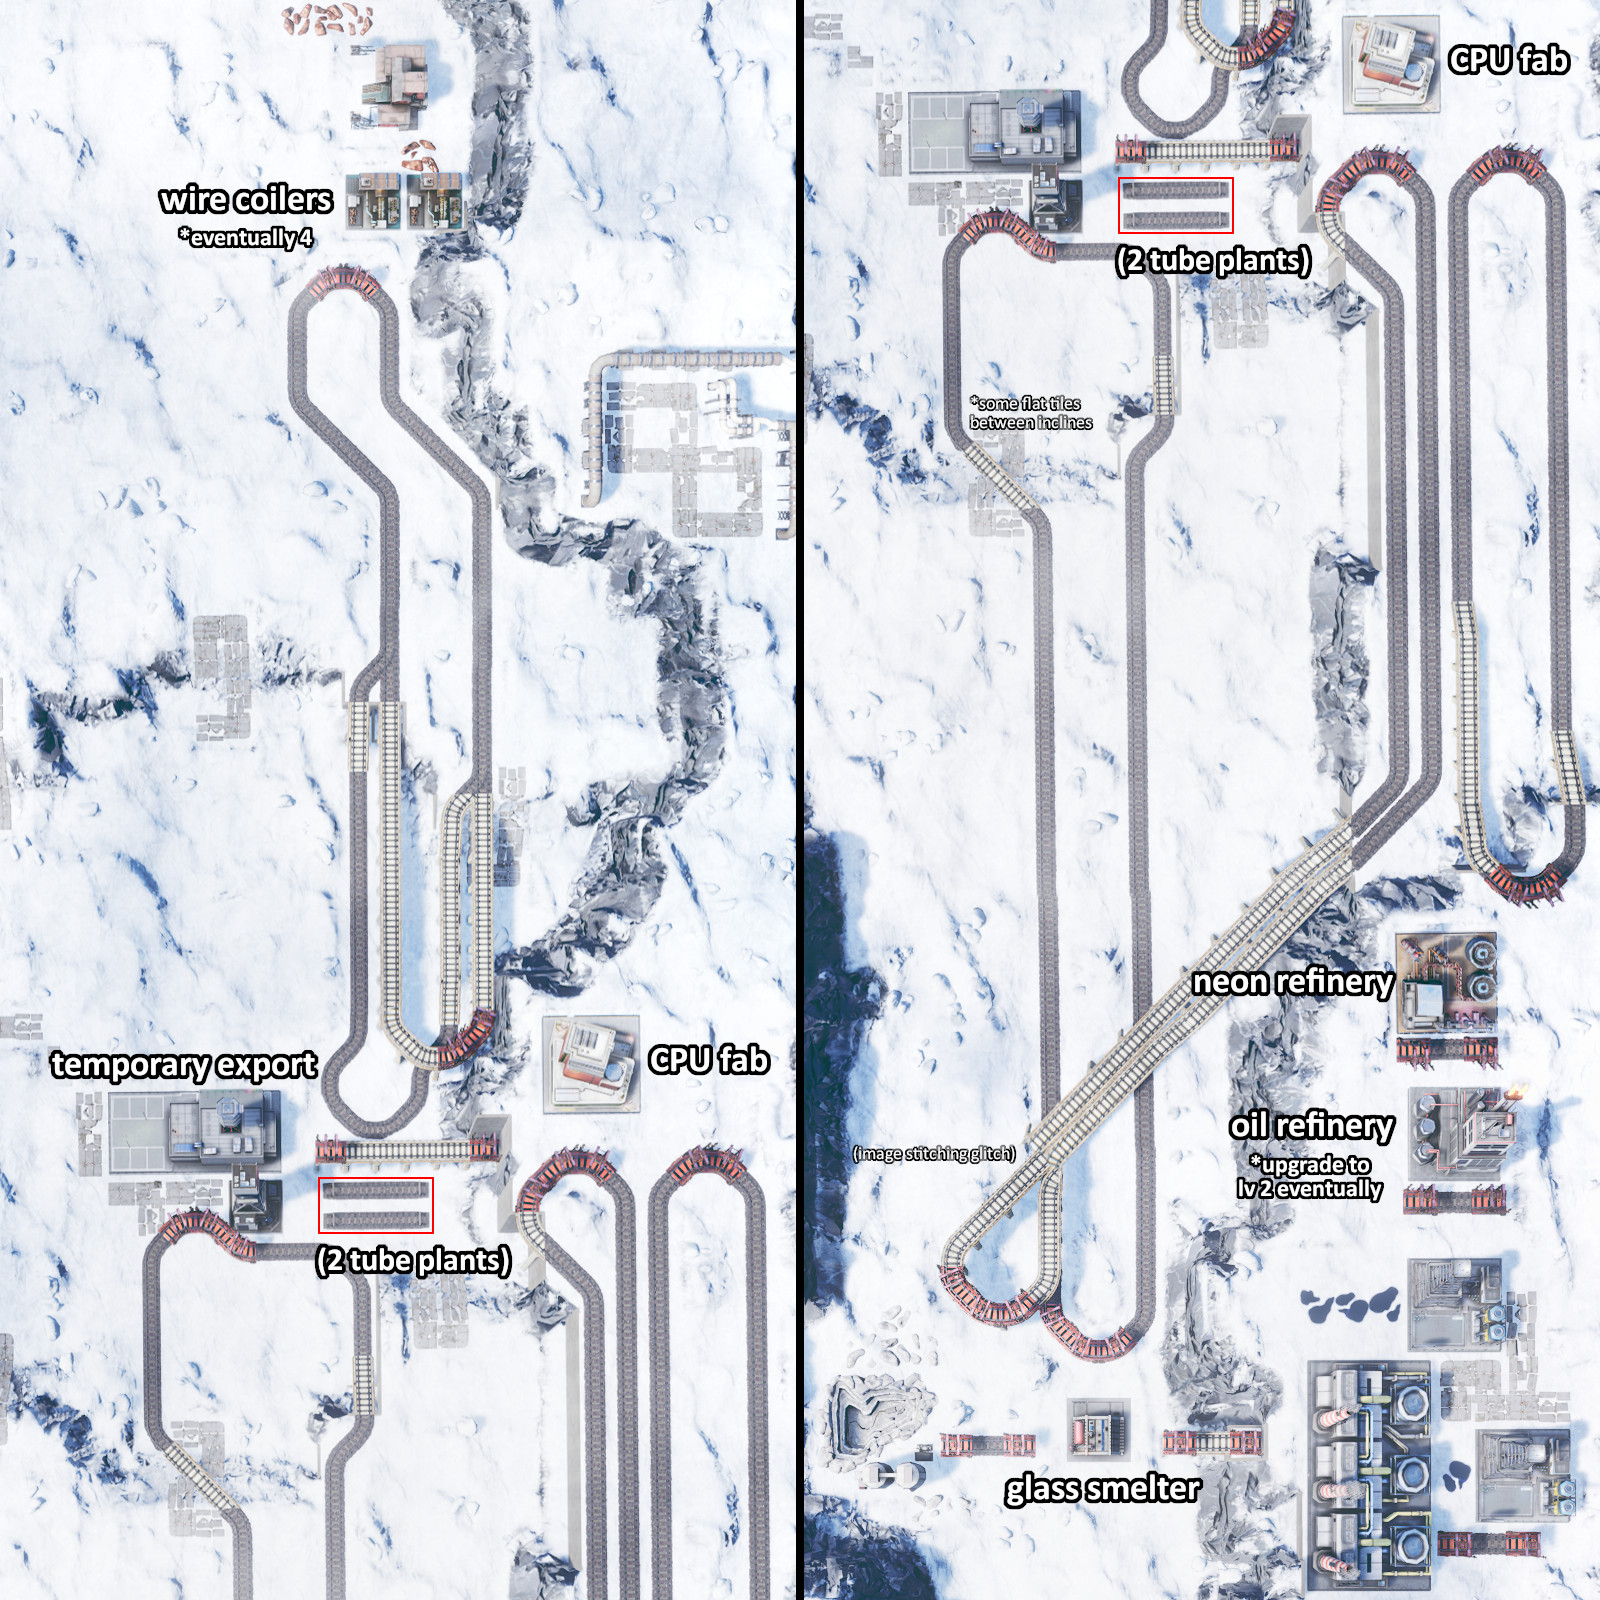
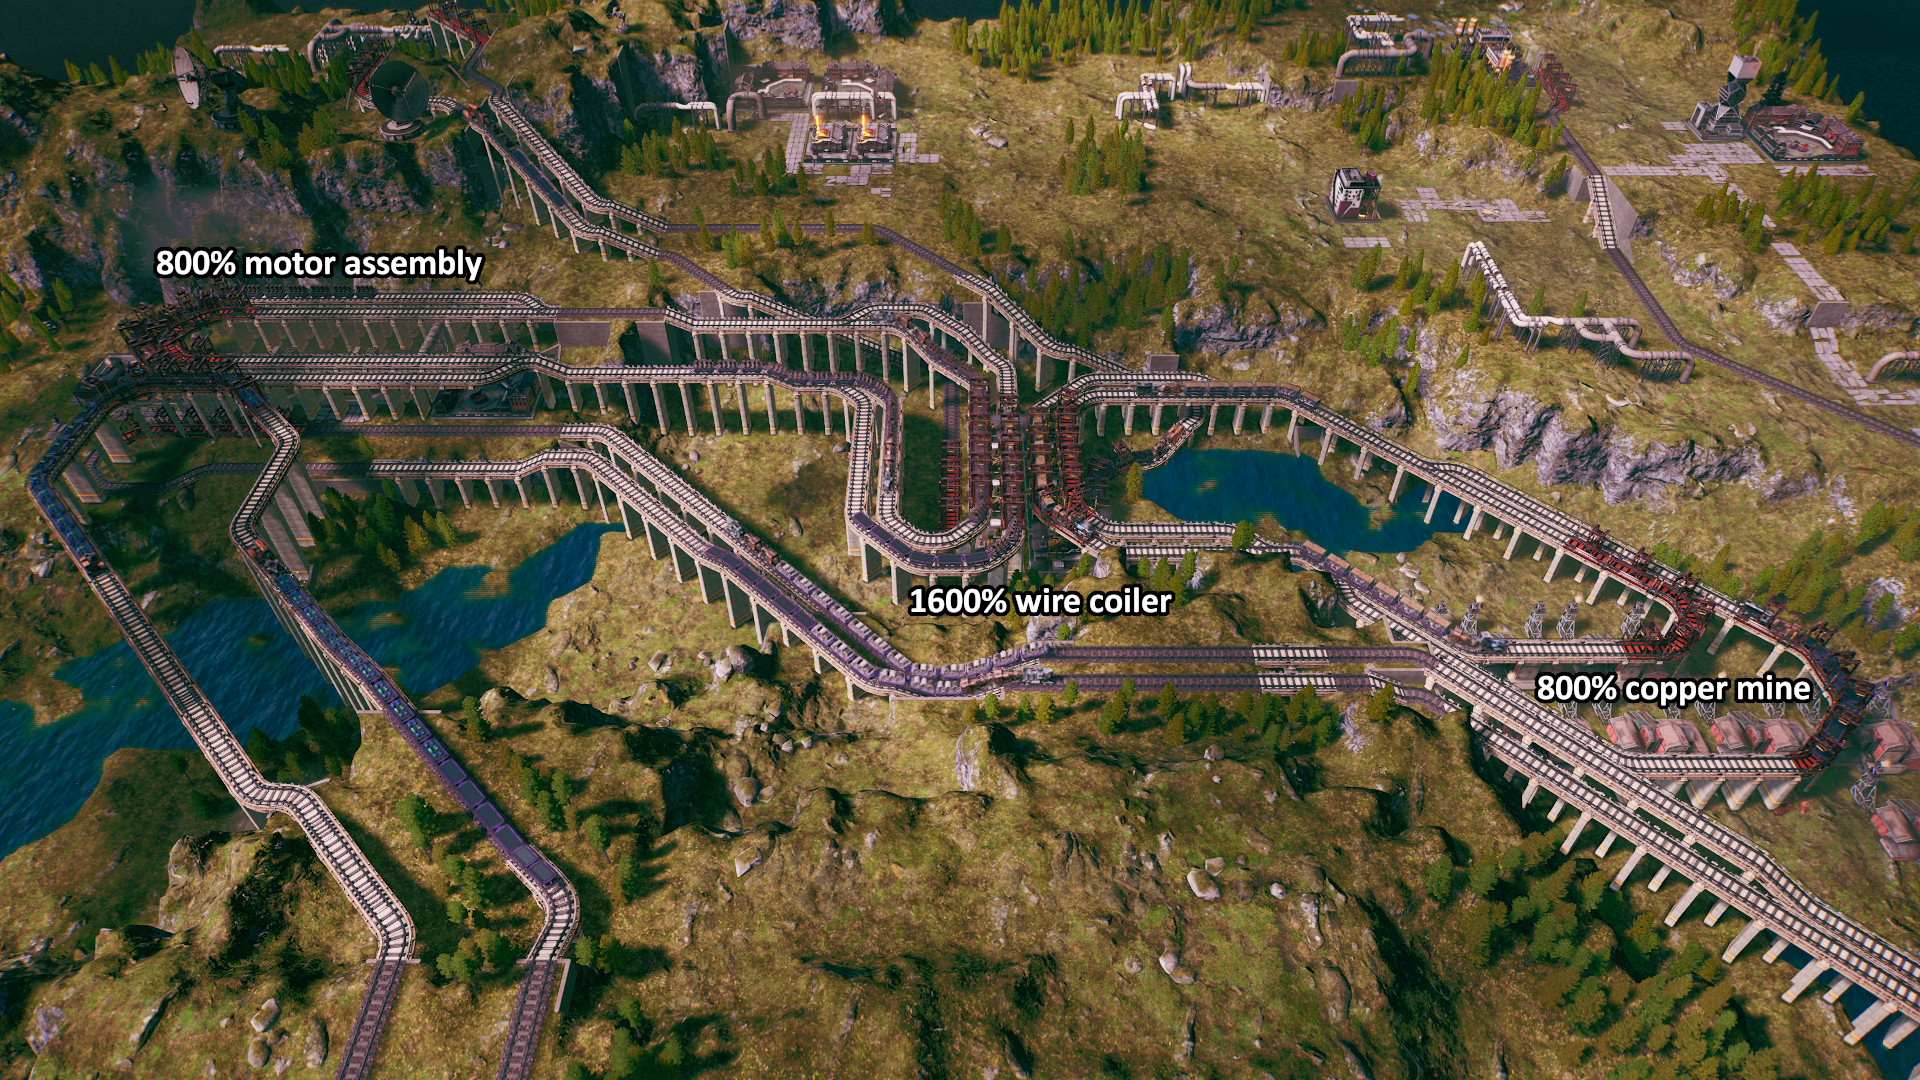
I have a question regarding Region #23 Branch B: Out of Rocket Expenses.
In the write up you show 1200% wire coiler and 600% motor assembly. How do you set these up? Is it one building leveled up or multiple building totaling that much?
Thanks.
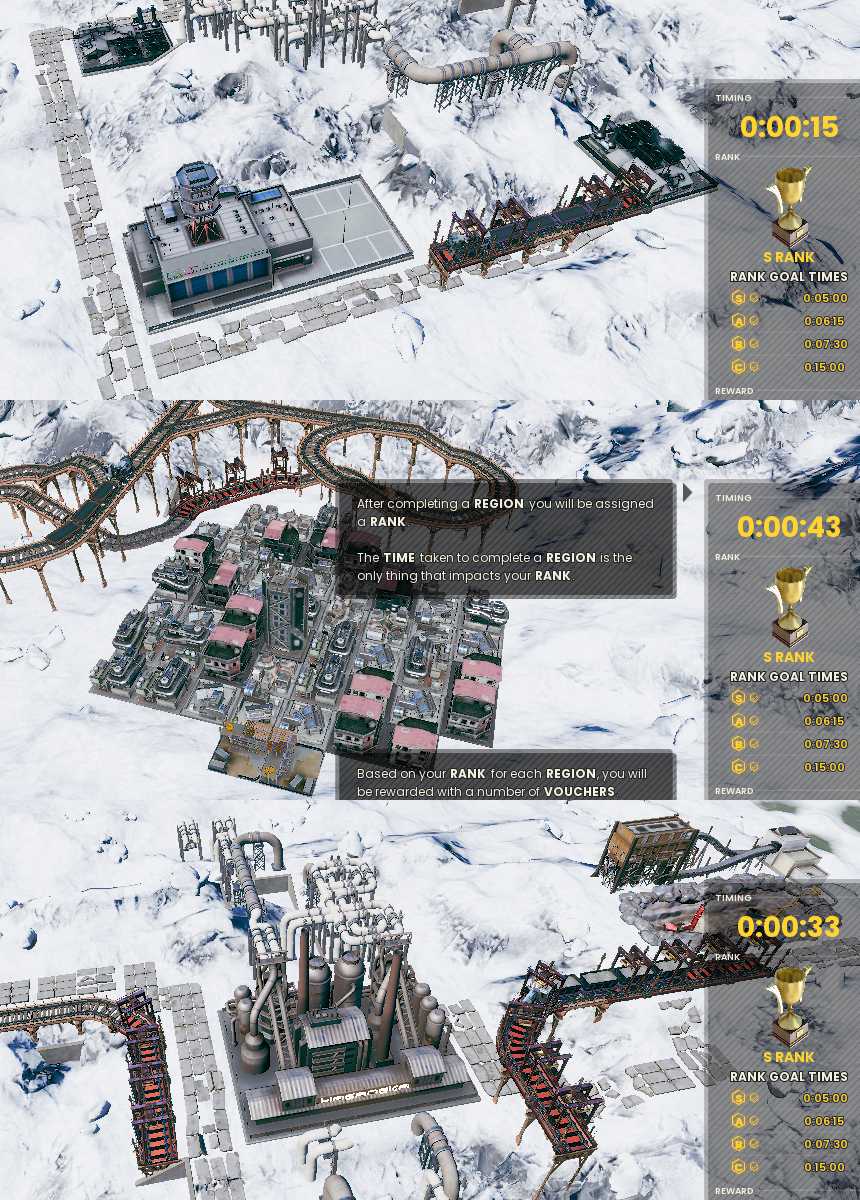
Sit back and relax
You'll win before running out of money.
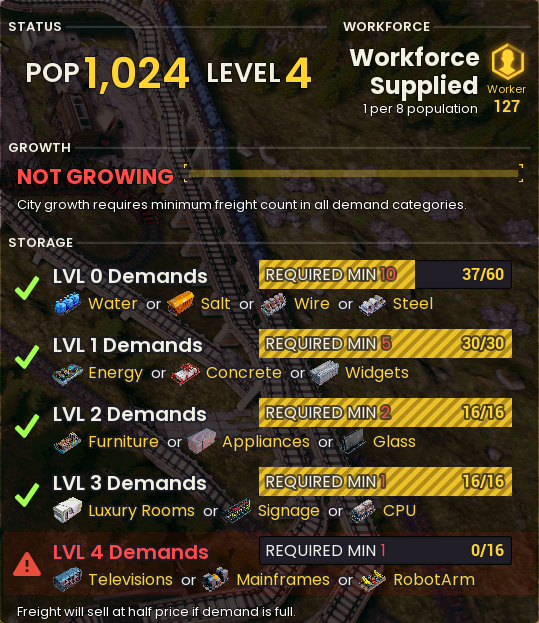
I feel like I am stuck without a good strategy.
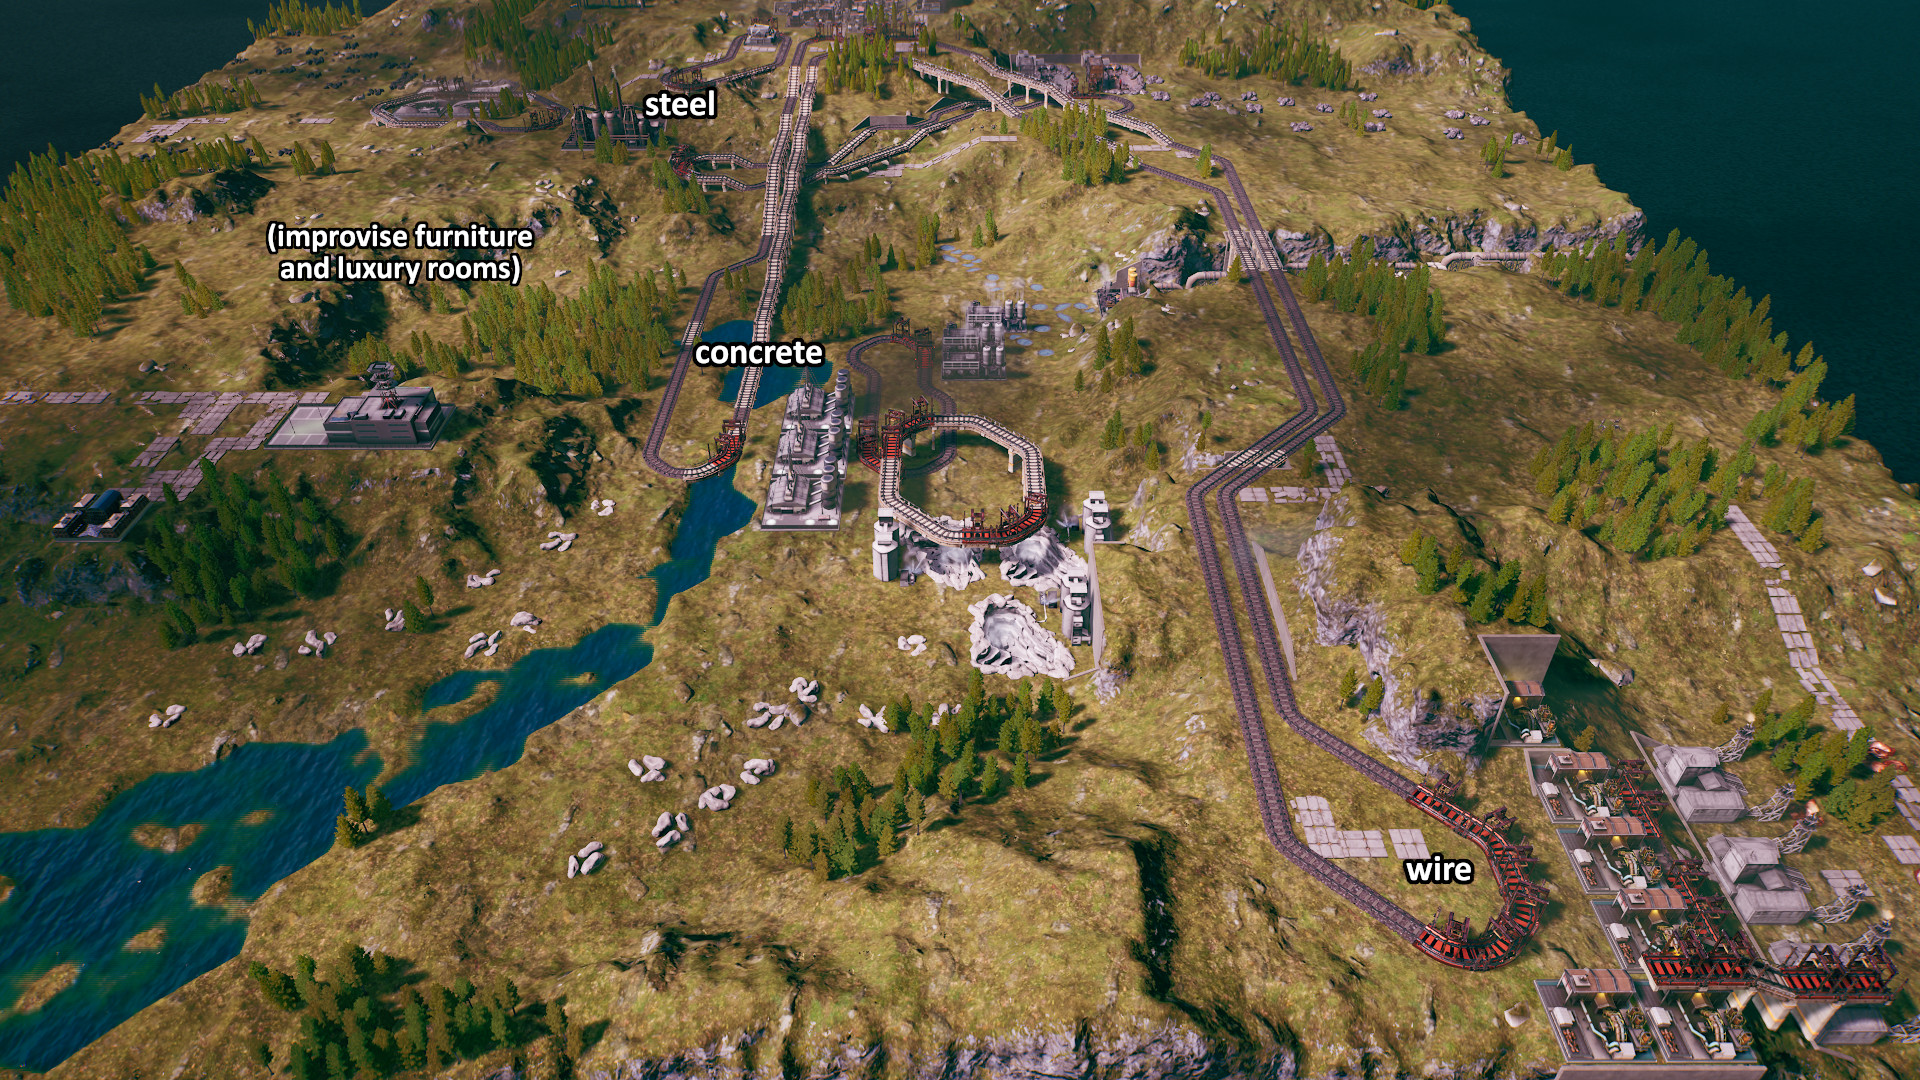
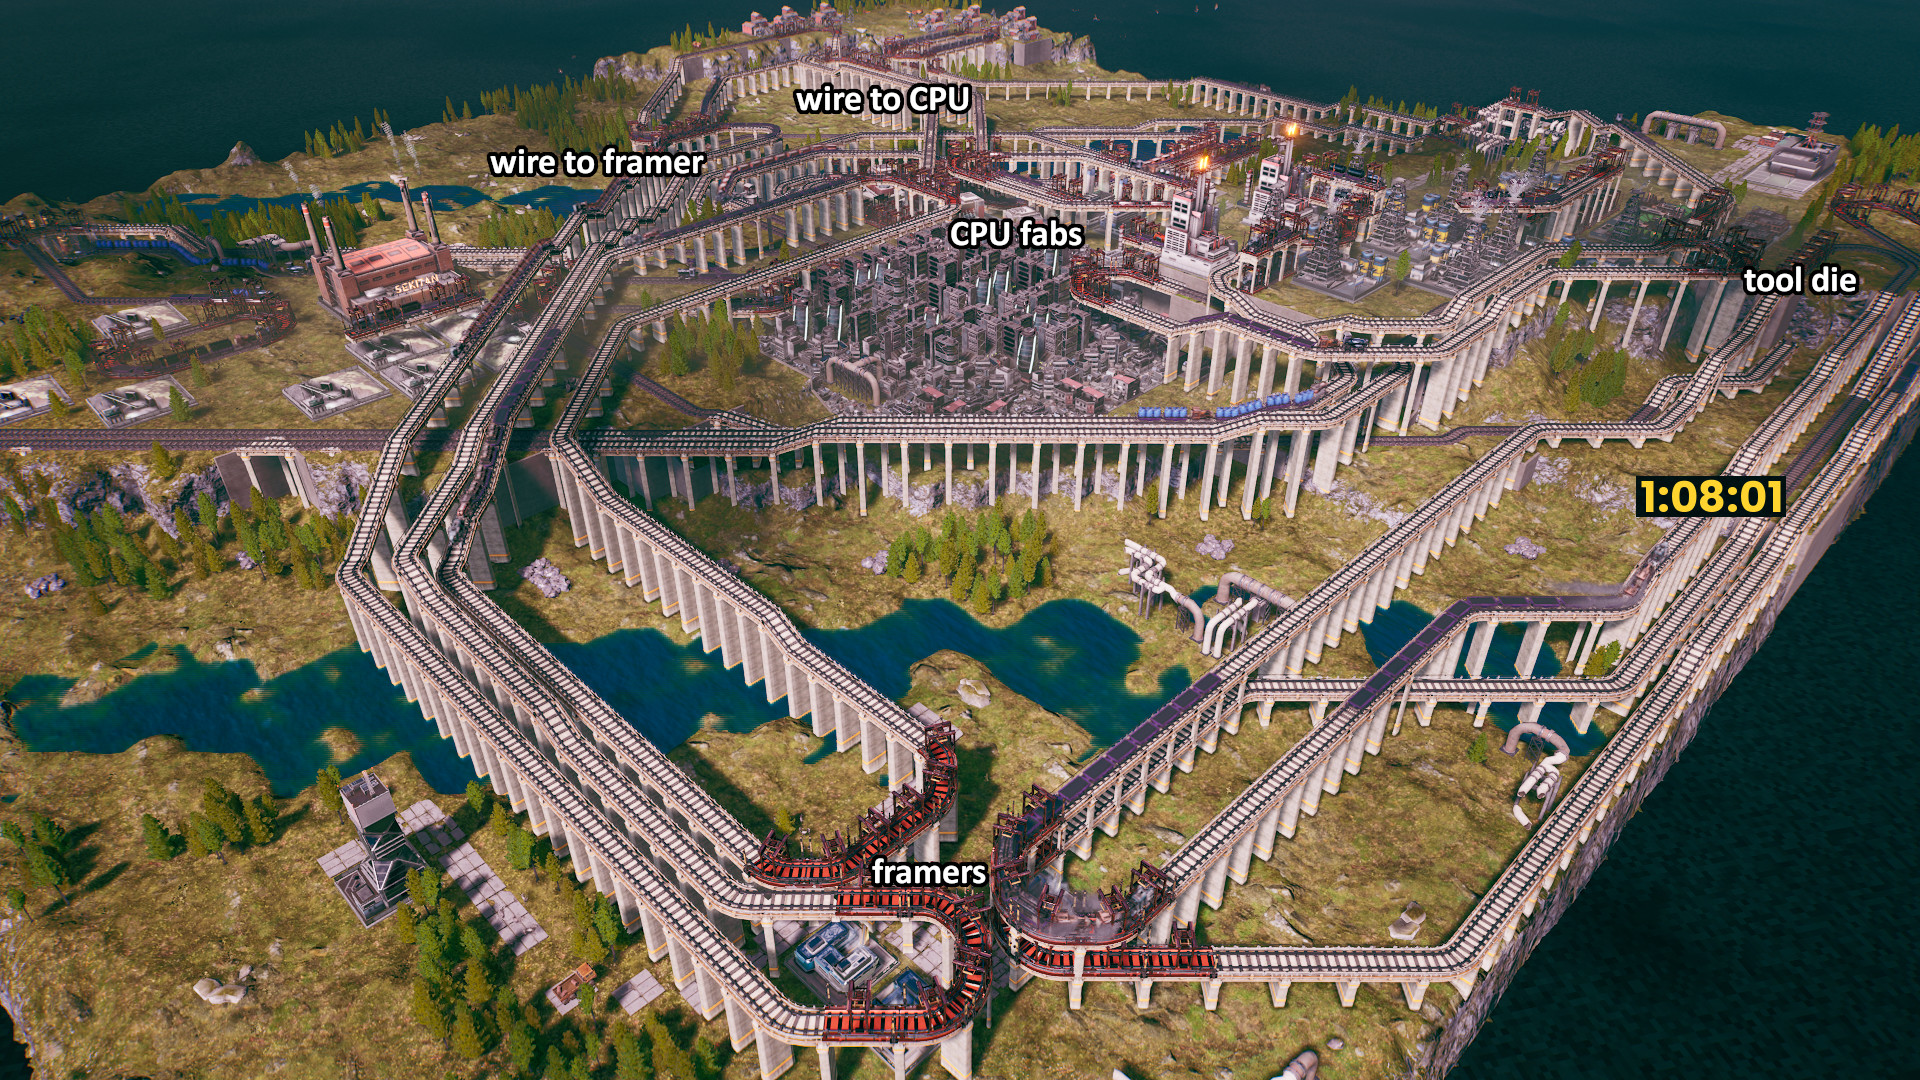
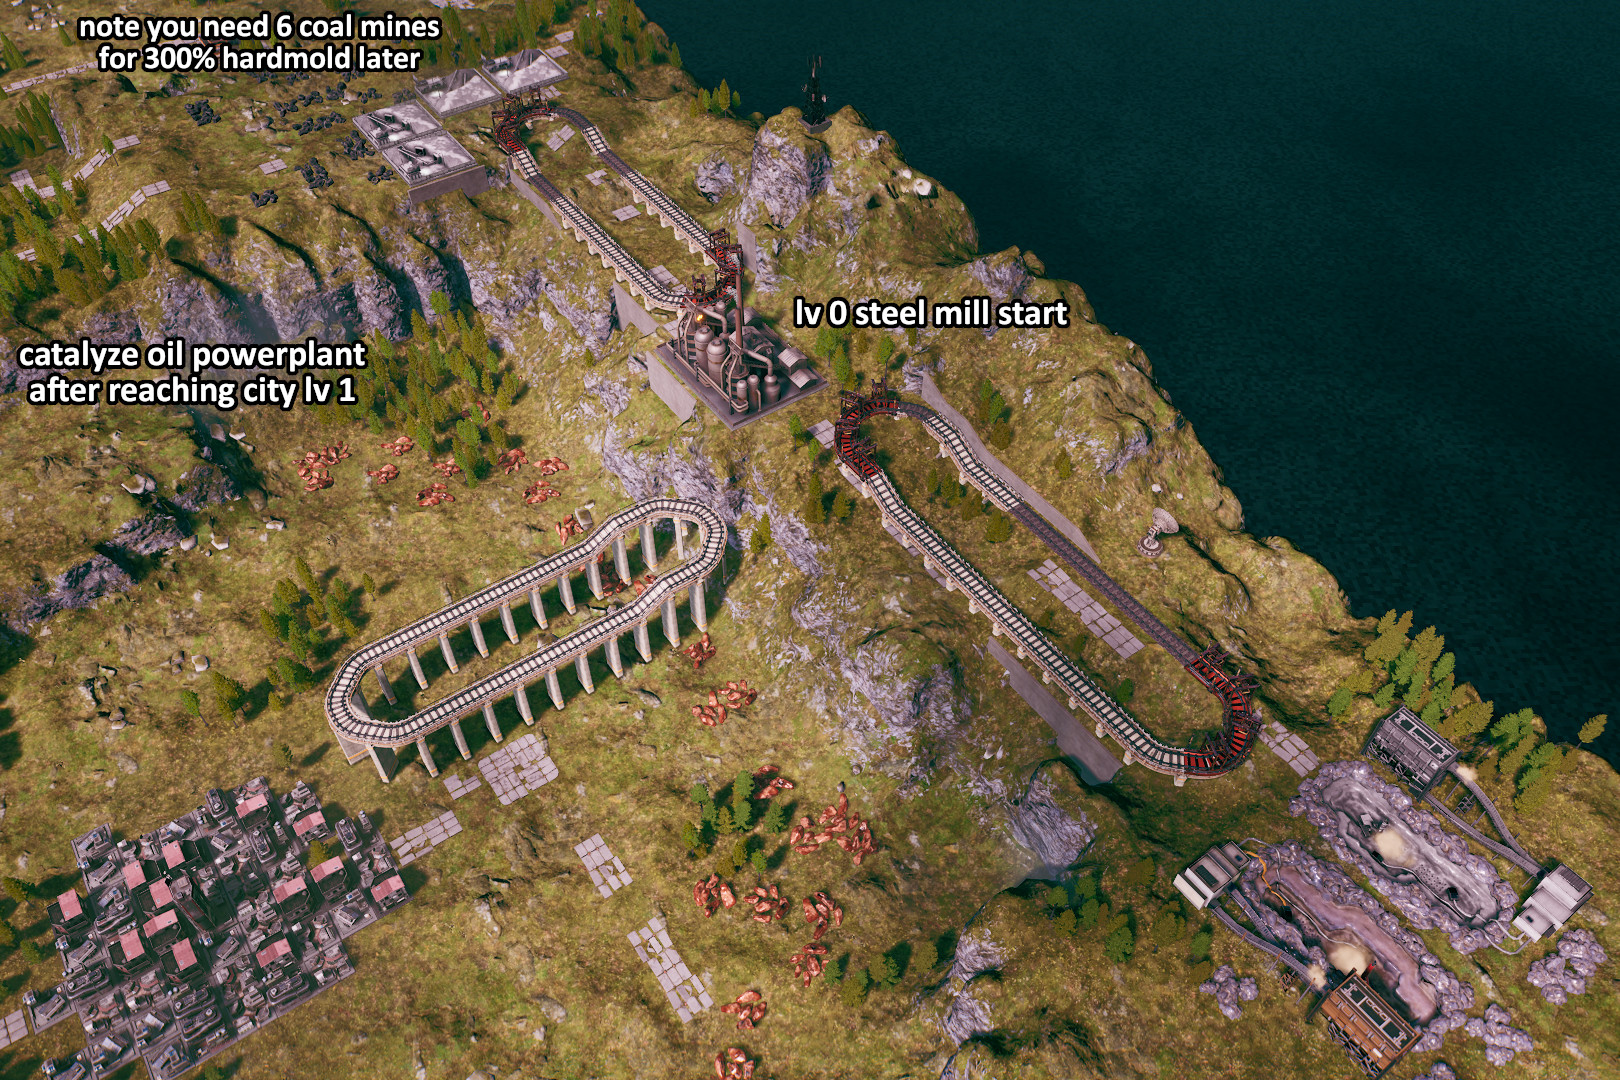
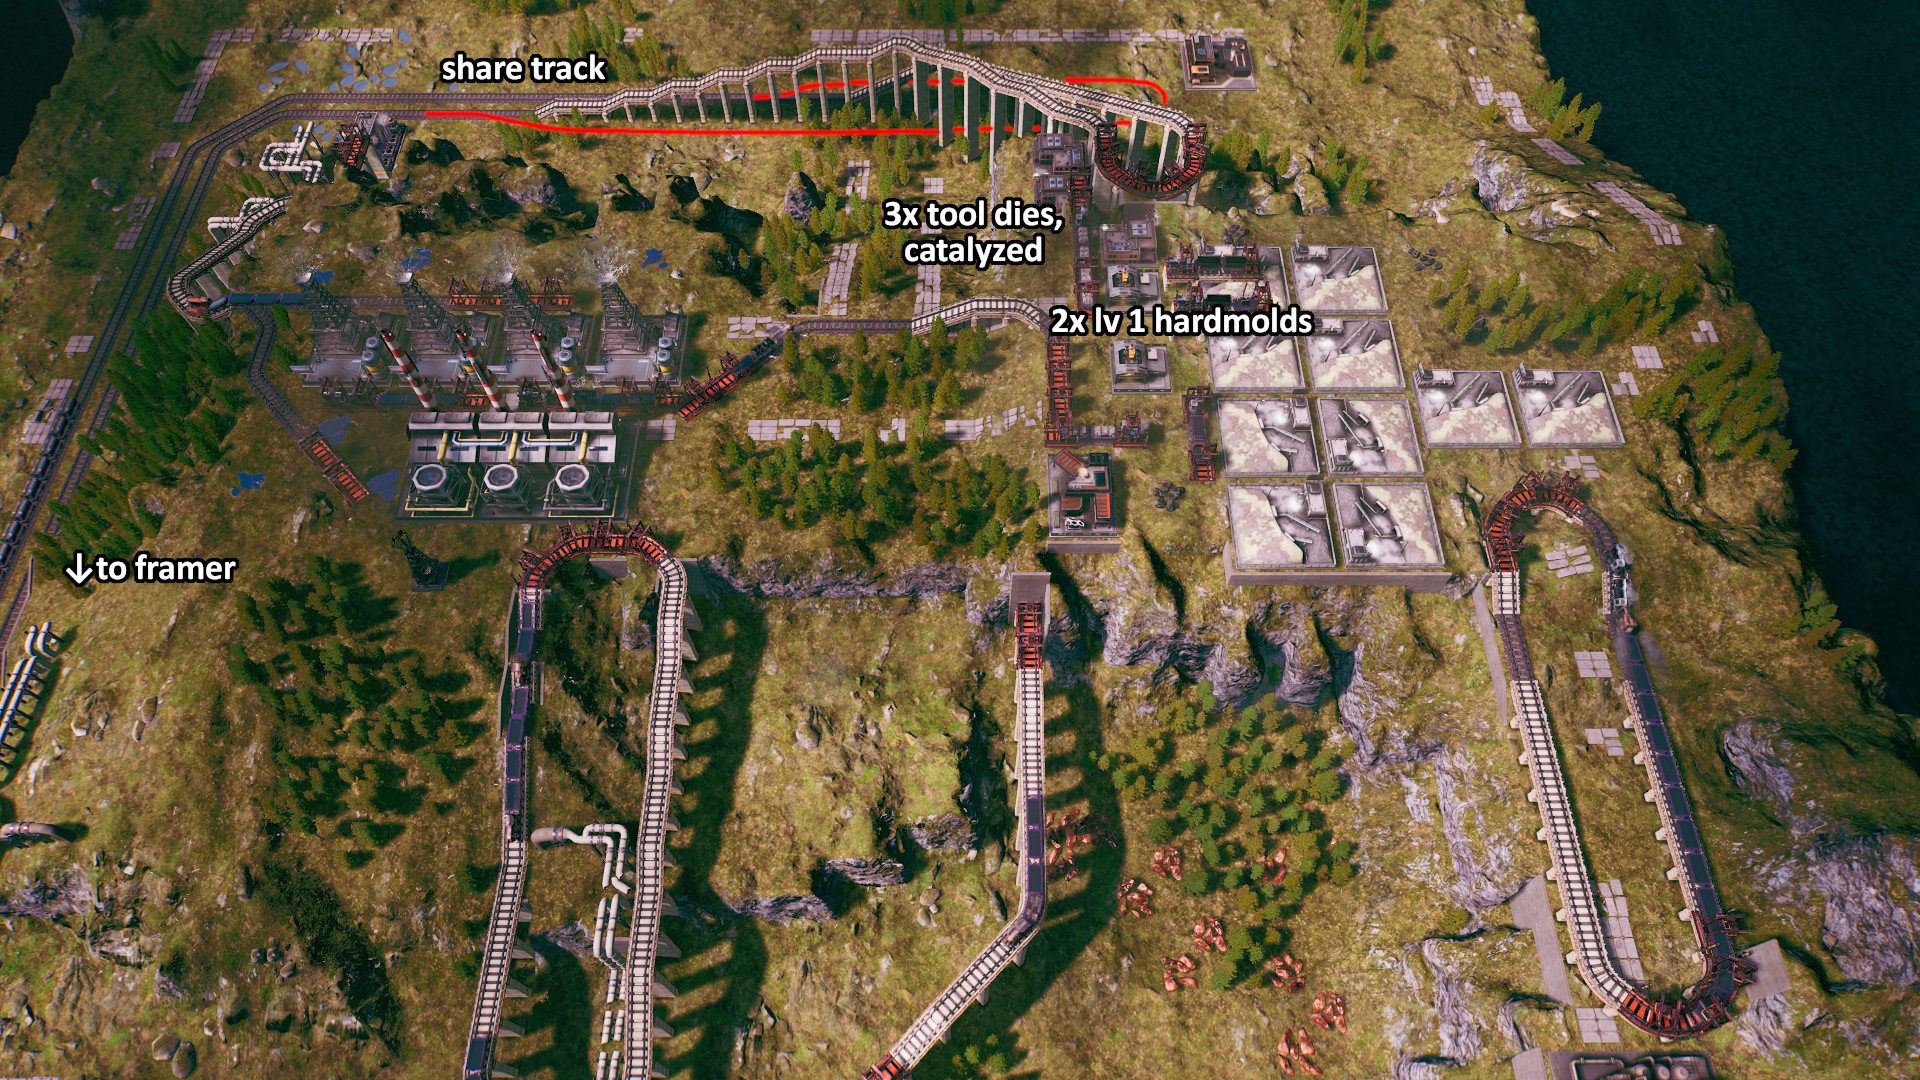
Needs mainframes, heavy tools, motors, steel and concrete.
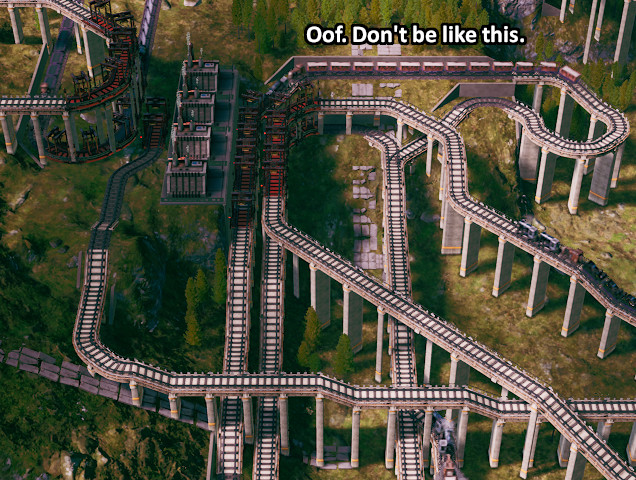
The strategy of providing the high volume materials doesn't seem to pay fast enough for the complicated things, Concrete basically needs to be started immediately for an entire hour, there is not enough workers to work all the stuff I want to place, and I am constantly out of wires and widgets. The high hills between everything make trains expensive too...
Thanks!
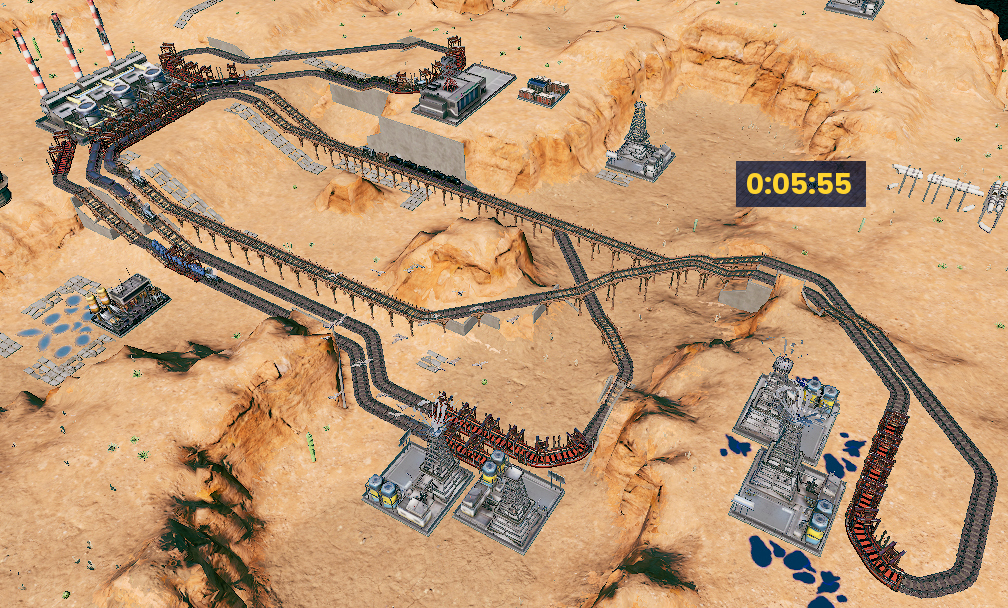
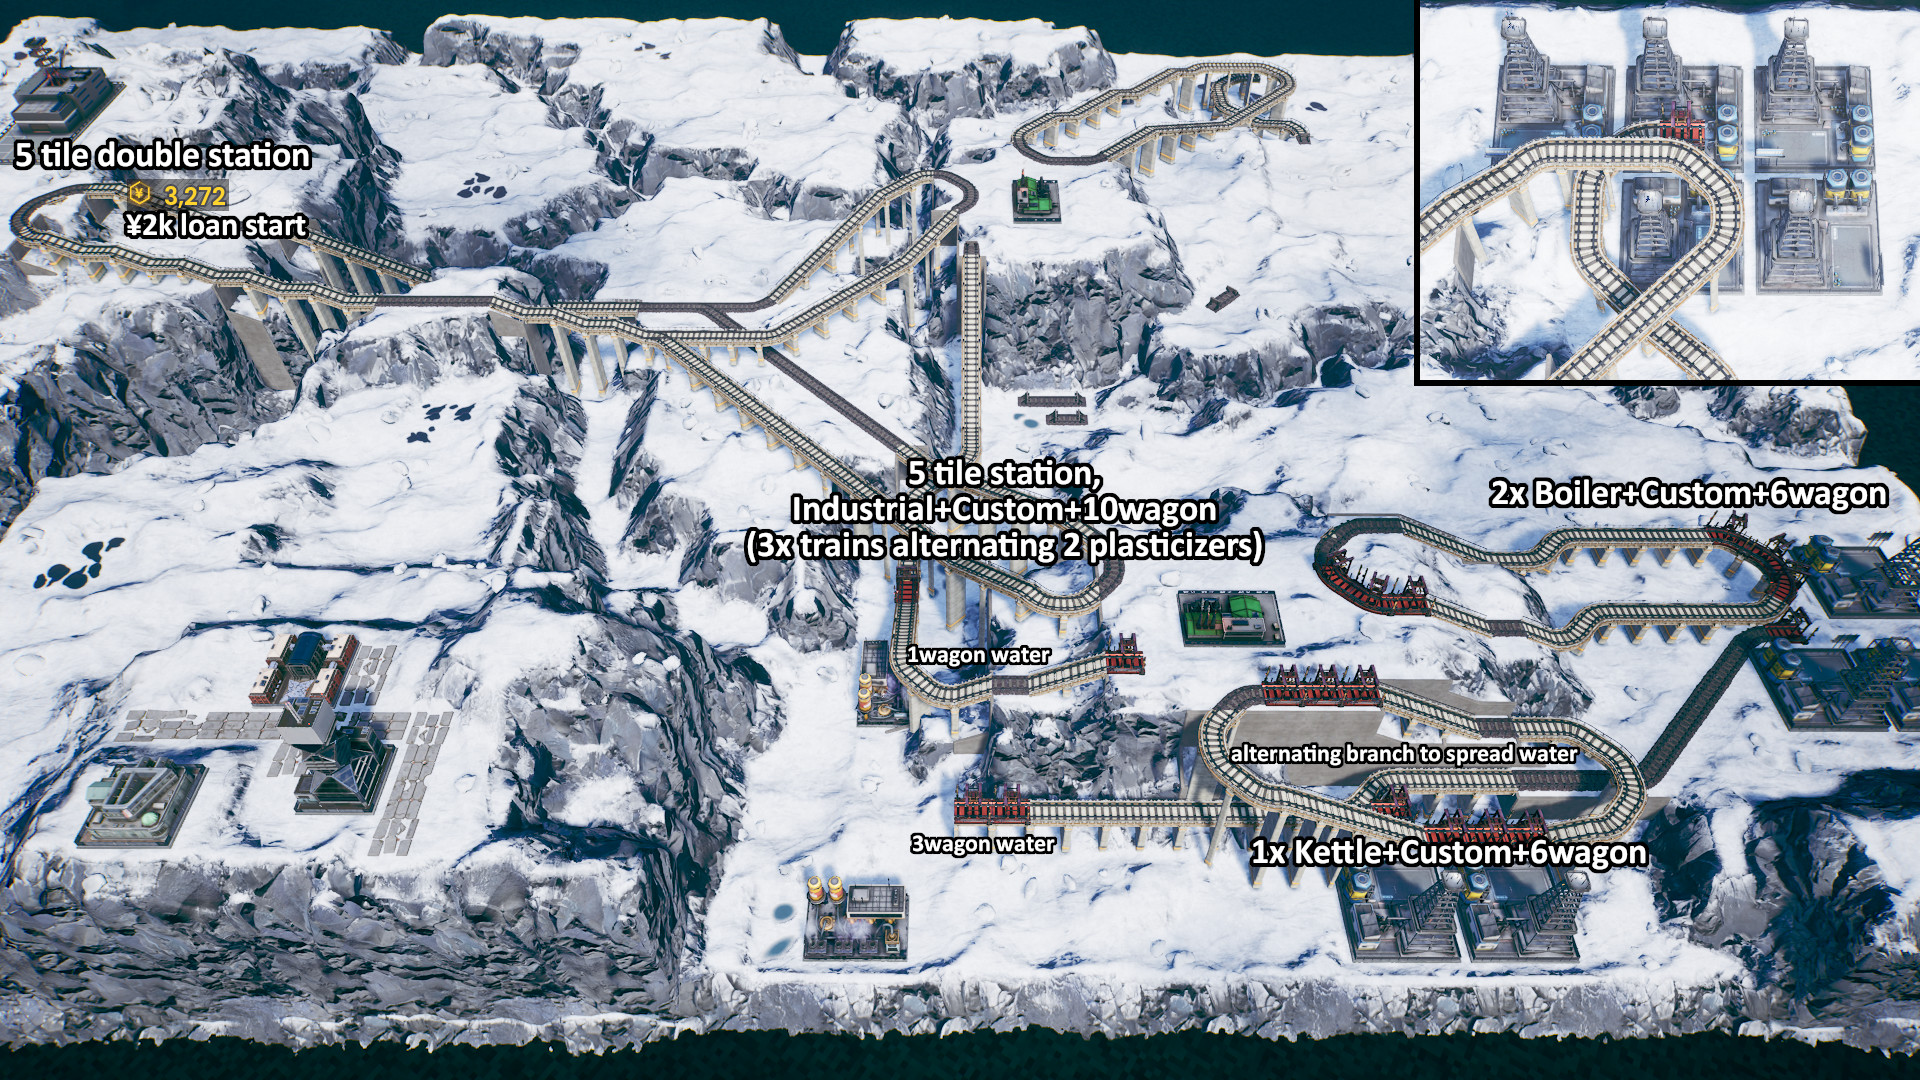
Longer trains are more efficient than short trains. Learned this the hard way trying to S-Rank Oil Overflow Omega. Had trouble trying to move trains in and out fast enough to keep the power plants fed at 100% with trains that have 6 cargo wagons. After trying fewer longer trains, it was a breeze. I usually run 6, 12, or 18 cargo wagons in a train depending on what sort of volume I expect to move on a rail.
Upkeep - Besides being more expensive to buy, the nicer engines also have a higher upkeep cost. For instance, a custom is twice as expensive as a boiler to both purchase *and maintain*.
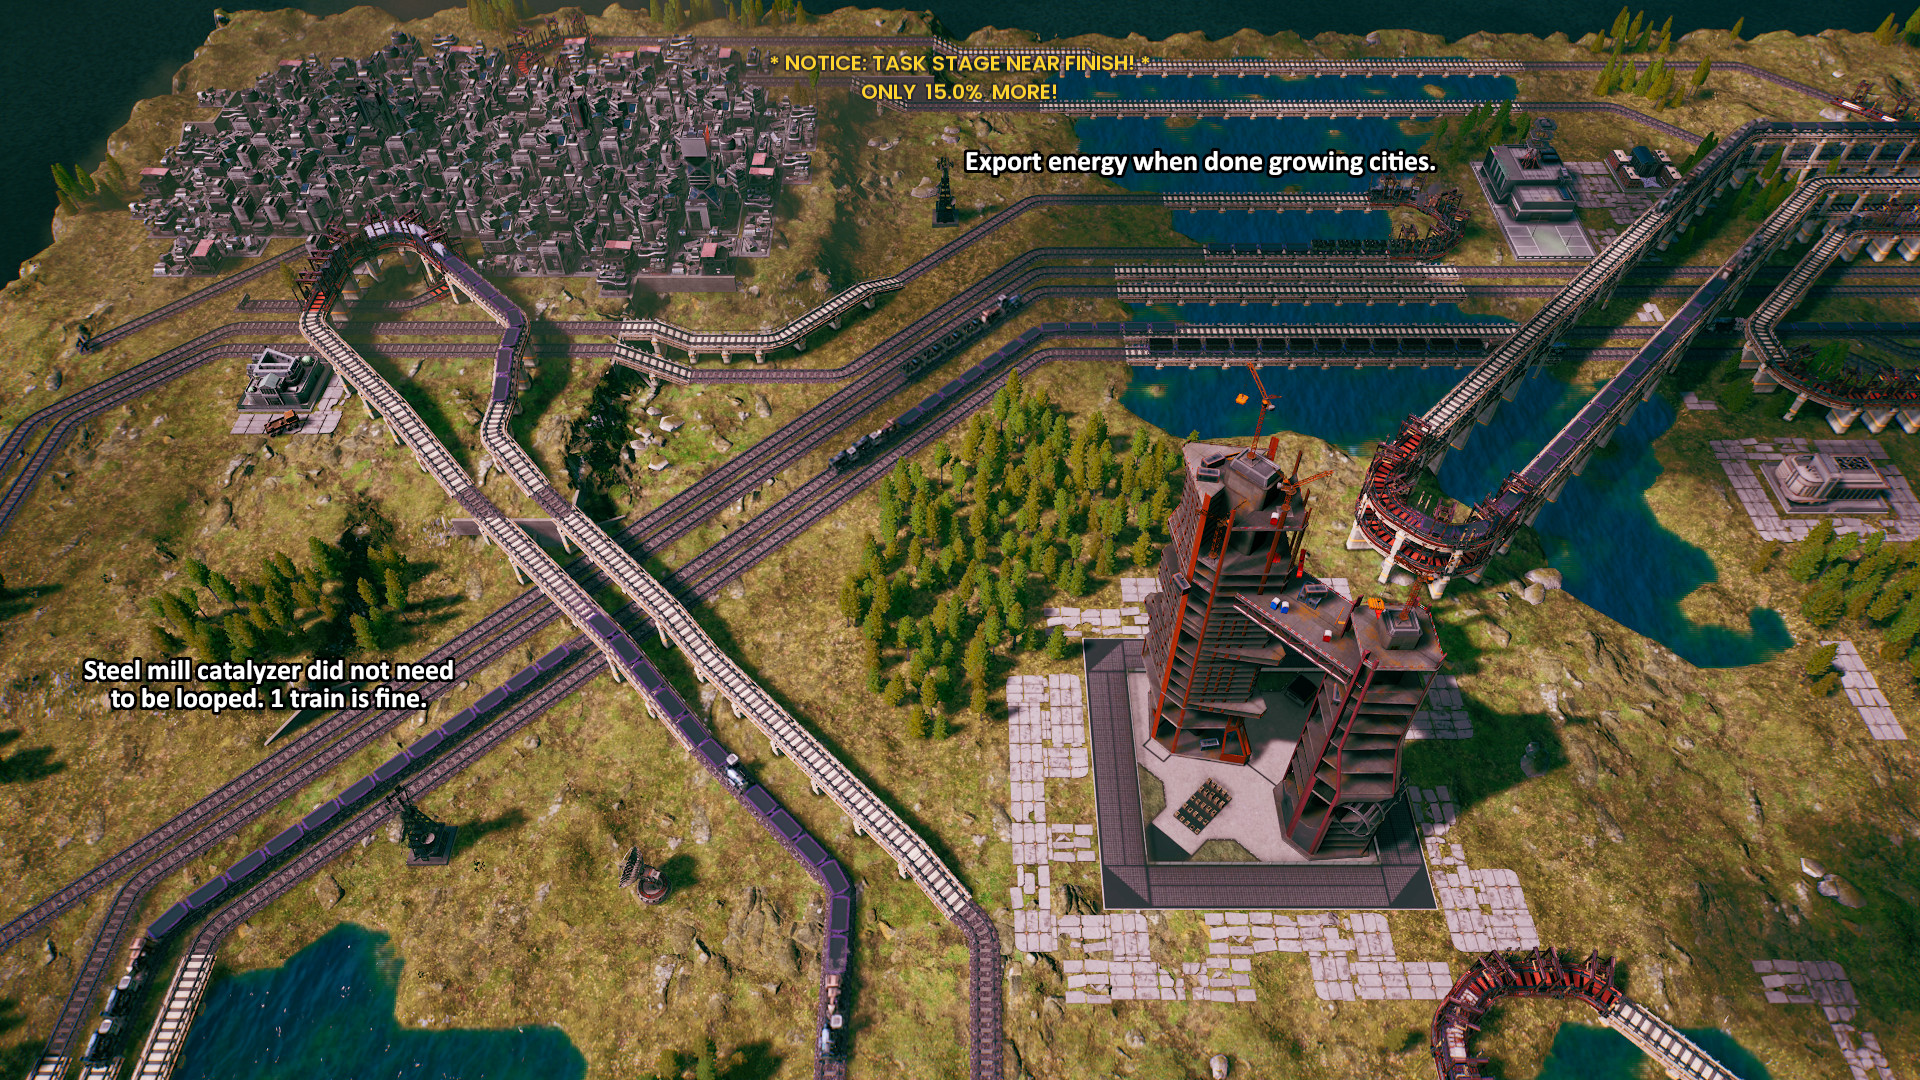
Wide vs Tall - As a generality, it's far better to build more factories than it is to upgrade factories. Where it's possible and/or practical anyways. Upgrading a factory from level 0 to level 1 costs as much as building a second factory but is only half as good. Upgrade costs double every time too.
Station Length - In the critical parts of a level, think carefully about how long you make your stations. More stations = faster loading/unloading (usually). Good on paper. In practice, it often doesn't actually help. Any time your train has to wait for goods anyways, the extra instantaneous capacity is doing nothing but costing you more upkeep.