vivid/stasis

vivid/stasis

156 avaliações
Tips and Solutions for Puzzles
Por AqueousNico e 1 colaborador(es)
Are you stuck in one of the puzzles with locks and don't know how to deal with them?
And you don't want to just straight up give the solution to you?
This guide is for you!
This guide will guide you across the puzzle elements with hints so you can still figure out a part of the solution yourself!
8
22
2
3
2
   
Premiar
Adic. a Favoritos
Nos Favoritos
Desfavoritar
Introduction on how this is going to work
you can go to the v/s discord if you want people to directly guide you

Thanks to PH-10 for helping me write half of the Ch4 puzzles and the FNCh part 1.1+ puzzles!

(Chapter 3 spoilers) for the people who don't know how to navagate betweenspace for now, go to the vivid/stasis discord https://discord.gg/eqSbztGPHh and ask there (i don't think this is a puzzle since it's mainly exploration) (might do another guide for it though)


This guide will be segmented into puzzles
There will be the location of each puzzle so that you don't spoil yourself
For each section i will show the unlock conditions, then the hints, then the solution for each of the puzzles like this
Hover over each of the black boxes to reveal the answer or just click on each boxes idk what your settings are
Also there are going to be some hints that are basically useless, it's just me trying to cover some edge cases
Chapter 1
Puzzle Location: after episode 6

At first, the unlock conditions seems pretty cryptic, so i'll add hints for you to figure out what the conditions are
Unlock Conditions Hints:
Hint 1: You can press up and down to scroll through the difficulties and see what's changed
Hint 2: The center one seems to not lead to anywhere, let's try looking else where first
Hint 3: All of the other show C1 as the beginning, seems like only some songs count towards the unlocks | It means all your clears must be in the Ch1 Folder
Hint 4: O,M,and F seems like the start of a word, maybe look at the top of the screen to see if anything matches? | It's the difficulty you need to play at
Hint 5: The x seem to be the times symbol | It's the number of songs you need to beat
Hint 6: The left side seems to cycle between A,AA,S and SS, Is there something in the song wheel that can represent these symbols? | It's the grade you need to get
Hint 7: The right side is just some numbers, What metric other than score/accuracy is used for performance in rhythm games? | It's the combo you need to get

Unlock Conditions Solutions:
Opening: Clear 3 songs in the Ch1 Folder on Opening with A or higher grade
and clear 3 songs in the Ch1 Folder on Opening with 200 or more max combo

Middle: Clear 4 songs in the Ch1 Folder on Middle with AA or higher grade
and clear 4 songs in the Ch1 Folder on Middle with 350 or more max combo

Finale: Clear 5 songs in the Ch1 Folder on Finale with S or higher grade
and clear 5 songs in the Ch1 Folder on Finale with 500 or more max combo

Encore: Clear 5 songs in the Ch1 Folder on Finale with SS or higher grade
and clear 5 songs in the Ch1 Folder on Finale with 750 or more max combo


After the conditions are met, the locks should open and you can see what's inside each of them
Center Hint: It probably means the answer for the 2 arrows are combined into the password
Hint 2: If you try to spam on it, you can see it only accepts 10 charaters

Left Side:
Hint 1: The shapes aren't pointing anywhere
Hint 2: each letter has a shape and sign, maybe it's trying to add/subtract the letter
Hint 3: How do you add or subtract a letter? You could go from the order of the alphabet
Hint 4: it needs an number to do that though, how does a shape correspond to a number? | it's the number of sides/corners
Solution:
Take each letter and add/subtract the number of the sides of the shape according to alphabetical order (so for the first one is X going back 3 alphabets and becoming U)
After that you will get "UNIFORM"

Right Side:
Hint 1: the fraction on the top part forms 11 1 7 6... all of them are <= 12...
Hint 2: The # symbol at the bottom means that you need to covert it into to a number, it is not a fraction again
Hint 3: The letters at the bottom are really early in the alphabet order... all of them are before M, the 12th letter of the alphabet
Hint 4: How many numbers does an analog clock have
Hint 5: The left clock is to be a cipher of sorts
Hint 6: Recall Center hint 2 | Since the other clue takes up 7 characters, this one probably takes up 3 characters
Solution:
for the top, do the fractions and take the numbers as hours and match it to the clock on the left. | you will get ZERO
for the bottom, translate the letter into numbers by their position in the alphabet A=1,B=2 and so on and match those with the clock as well. | you will get ELEVEN
Combine those two and get ZERO + ELEVEN which is either 011 or 11, you can test both of the cases and you'll find out it's 011

Therefore, the answer to this puzzle is UNIFORM011


Then you'll encounter a new screen with a new puzzle
This is the point where you'll need both locks to be open to be able to enter the password
Hint 1: Look at the text of the center lock, it's important now
Hint 2: shrinereport.xyz is a valid website address, have you tried going to it in your real web browser?
Hint 3: you now know what [RESULT] is now, let's just replace that
Hint 4: HTML is a file format, so it has to be lowercase (remember to be case sensitive)
Hint 5: after going to shrinereport.xyz/ULTIMATION.html, You'll see nothing maybe it's time for an inspect element (right click, then press inspect element) view source also works for this one

Solution:
using [RESULT] and the bottom text, go to shrinereport.xyz/ULTIMATION.html
Inspect Element shows that KEYCODE = TITLE
the title of the web page is RECRUDESCENT

Therefore, the answer to this puzzle is RECRUDESCENT
Prepare for what's coming next!
Chapter 2 Part 1
Puzzle Location: after episode 13

The Chapter 2's unlock conditions is pretty similar to the Ch1's unlock condition
in fact it's the same except for clearing it in the Chapter 2 folder instead
So let's just jump right into solving
A point of note: i'll be referring to converting letter to number using their alphabetical position as A1Z26 cipher since that's shorter

Center Hint: I mean it's pretty obvious what to do right
It's just left + right
Hint 2: 11 characters this time by spam checking

Left Side:
Hint 1: Huh, these shapes and colors are really familiar, aren't they?
Hint 2: It's almost as if it's like it's the exact same as Ch1's left side
Hint 3: Remember: blue is minus, red is plus, and the number of sides is the number
Hint 4: Adding all of them up for each square gives you all number that are ≤ 26
Hint 5: It's A1Z26 cipher, just use it when you see numbers that are ≤ 26

Solution:
Using knowledge from Ch1,
Add up the number of sides in each red shape, then subtract that of the blue shapes
doing it for each area gives 19 20 1 18
using A1Z26, the answer is STAR

Right Side
Hint 1: That clock do be looking familiar
Hint 2: It's from Ch1
Hint 3: Those are human and cars
Hint 4: the !@#$ correspond to 2 points, forming a line
that line has a distance
Hint 5: Cars are probably faster than humans
Hint 6: It's one of those questions about speed you get in middle school
Hint 7: The question is how long does it take from point to point
Hint 8: What does a analog clock show when it's 13:00?

Solution:
for each box is a question about how much time does a human/car need to go from one symbol to another
cars are 5x faster tan humans to cars travel at 2-3-2 unit times
Solving for every question, you get 25 7 4 10 8 2 30
Putting the numbers into the clock cipher (with numbers above 12 looping back), we get CROSSER

Therefore, the solution is STARCROSSER


New screen and new puzzle again
Remember both lock need to be open to be able to input the code
Hint 1: welp, the thing is same as last time
Hint 2: Wow, that is a load of text, but it seems to be on a loop, an iteration perhaps
Hint 3: just continue to scroll down until you hit something different

Solution:
replacing [PATH], you get shrinereport.xyz/valor/return.txt
scroll to the bottom and you'll find what you'll need to enter

Therefore, the solution is TOTHESTART
Be prepare for this as well as it's also pretty hard!
Chapter 2 Part 2
Puzzle location: after episode 14

This time there are more locks so we need to think about them again
Hint 1: the center left and right are similar to the previous ones, so i probably don't need to tell you how to do them
Hint 2: If you still haven't realized, PM refers to a song
Hint 3: the leftmost one references Ch1 again, is there some special song in Ch1 that is worth mentioning? (don't tell me it's grode)
Hint 4: the rightmost one refers to a similar thing to the one on the leftmost
Encore hint: Both boss songs's requirements has 2 conditions, but you only need to clear one of them for it to unlock
Since there's 4 unlock conditions, Remember that the multiple song clears must all be in the Chapter 2 folder for it to count
Opening:
Clear 4 songs on Opening with A or higher and 2 songs with 300 or higher max combo
Clear Pyromania and valor/starcrosser Opening with A or higher
Middle:
Clear 5 songs on Middle with AA or higher and 3 songs with 500 or higher max combo
Clear Pyromania and valor/starcrosser Middle with AA or higher
Finale:
Clear 6 songs on Finale with S or higher and 4 songs with 750 or higher max combo
Clear Pyromania and valor/starcrosser Finale with S or higher
Encore:
Clear 7 songs on Finale with S or higher and 4 songs with 900 or higher max combo
Clear Pyromania and valor/starcrosser Finale with SS or higher OR Encore with S or higher

On to the puzzles:
Center hint: oh god there's 4 symbols this time

Green Diamond:
Hint 1: Man, those dots feel familar don't they
When did it appear? in the story perhaps?
If you just skipped the story, see hint 2 and 3
If you didn't you already know what to do

Hint 2: All the lines have ≤ 9 dots perhaps each line represent a number
(you should totally read the story though it's pretty cool)

Hint 3: Notice what's the only red things here
Hint 4: Looks like a lot of math, but you can just give those to wolframalpha or any other calculator to do the work for you
Hint 5: There's still one more with scattered dots, maybe the naive solution could work
Hint 6: all results are ≤ 26, you know what this means

Solution:
Each group of dots represent a number, get the number by counting the number of dots in each line to form a number
The scattered dots can be done by just counting them
we get 5 18 18 15 18
Using A1Z26 we get ERROR

Pink Square:
Hint 1: You'll probably need the internet on this one
Hint 2: The long ones are 3 pixels long, and the short ones are only 1 pixel long
Hint 3: If you haven't notice by now, it's morse code

Solution:
The line are morse code with 3 pixels being long,and one pixel being short
Translating _.. . - . -.-. - .. --- -. we get DETECTION

Raspberry Circle:
Note: the puzzle has been changed to an easier one
So it might be different from when you first saw this section
Hint 1: You should know what red and blue means by now | red is addition, blue is subtraction
Hint 2: Adding 535 and subtracting 15555 makes way too large of a number to handle, maybe there's another way get a number from the dots?
Hint 3: You just need to count them
Hint 4: it's another A1Z26 thing again
Hint 5: Subtracting 26 will give a negative number, which looks wrong, maybe just put loop back to Z(26) when it goes below 1?

Solution:
The first number represents 5 (Which represents E in A1Z26)
For each arrow, add/subtact the dots at the top according to the arrow's color (red = +, blue = -) so 5+13 = 18 (represents R in A1Z26)
If it goes under 1, just loop back up to 26 so 18-26 = 18 (since it just loops once)
you get 5 18 18 15 18
using a1z26, we get ERROR (again)

Blue Triangle
Hint 1: The colors at the top and bottom seems to be the same
Hint 2: The squares doesn't seem to have any clear formation order, perhaps you need to do something else?
Hint 3: You are looking for numbers again
Hint 4: All the numbers are ≤ 26 you know what to do (A1Z26)

Solution:
Match each number at the bottom with the number of squares of that color
You get 16 18 15 20 5 3 20 9 15 14
Using A1Z26, you get PROTECTION

Therefore the solutions are ERRORDETECTION and ERRORPROTECTION

New screen again
Remeber you need to have all four locks unlocked to proceed
Hint 1: There is no place to input text into
Hint 2: This isn't a puzzle, just make sure to prepare for what next
Hint 3: Really prepare for this one, it's the hardest chart so far

Solution:
Just press enter
That's it, prepare for a extreme battle

After you've done that Prepare for one furious fight, you need it!
Chapter 3 Part 1
Puzzle location: after episode 22

So there are no more episodes after episode 22, so you're kind of stuck now
(also this is changed in an update so it might have different stuff from what you have seen)
Here's some hints to lead you to progress
Hint 1: look beyond the node flowchart, there are probably something you haven't done yet
Hint 2: You know the Betweenspace that you unlocked in episode 19? it might be a good time to go explore there
Hint 3: Hm... the TVO icon has 2 parts to it, maybe you can find both of them here?
Hint 4: The first half you need to progress to the 110 door, the 2nd half needs you to get to the 150 door
Hint 5: There seems to be a couple blue paths on the ground, maybe try following them?
Hint 6: There is a key in each special area, find them
Hint 7: The porta futra portal seems like it needs the 4 songs in the area to access the portal| feels like it might be linked to how you get gems from the songs
Hint 8: Enter the TVO again after you got the 2 halves of the important object


Solution:
Step 1: Go to Betweenspace (unlocked on episode 19)
Step 2: Collect gems and explore in Betweenspace until you obtain a half of an Important Object (it's behind the 110 gem door)
Step 3: Find all keys in the bonus areas that are directed by footprints
Step 4: Play the 4 songs in the 200 door to get enough gems for each song inside that room
Step 5: Clear Astellion (any difficulty) to obtain another half of an important object
Step 6: Go to TVO and press enter after you've obtained the two halfs of the object
Chapter 3 Part 2
Puzzle Location: Reach the 4th Story Lock | View episode 23 (the one you'll put into after solving part 1)

Here's a really important tip that the game doesn't tell you: Press shift to drop the item you're holding

well this time it's different, you are sill in Betweenspace but in a puzzle room, welp time to solve it!

Hint 1: You can pick up the orbs using enter
Hint 2: you can put the orbs on the pedestals
Hint 3: maybe just match the colors for now
Solution:
Step 1: put the orbs onto the pedestals by color
Steo 2: complete each of the notes by remember previous puzzles

After you've done that, you will see notes that you will need to solve
Here's a general hint for that: the puzzles in the notes are the ones you've already seen in previous chapters.

Orange:
Hint 1: it's similar to the one you have done in ch1 right side
Hint 2: fractions are all below 26 again...

Solution:
Step 1: calculate each fraction gives 5 7 15 5 18 9 19
Step 2: using A1Z26 gives EGOERIS
therefore,
Orange is EGOERIS

Pink:
Hint 1: it might remind you of the puzzles you have done in ch1
Hint 2: red is plus, blue is minus, the side is the number you need
Hint 3: the clock can be use as a cipher (and it loops around)

Solution:
Step 1: in each box, add up all the red shape's side and subtract the blue shape side. It will give 11 5 3 11 8 2 8 11 8
Step 2: turn each number into a letter using the clock, gives WHOWEREWE
therefore,
Pink is WHOWEREWE

Green:
Hint 1: you may recognize these symbols in ch2 pt1 right side and the colors on ch 1 left side
Hint 2: there's only 1 distance this time, maybe every symbol will only consider this distance
Hint 3: remember that it's a speed problem
Hint 4: car is 2, train is 5
Hint 5: red is plus, blue is minus, so maybe it's only considering the value this time?
Hint 6: for half a car, maybe you just need to half the value
Hint 7: the last one it's just an equation, you should be able to just divide the numbers
Hint 8: the numbers can be converted into letters using a method you've used before | it's A1Z26

Solution:
Step 1: according to the box at the top and considering their speeds, man is 10, car is 2, train is 5
Step 2: in each box after that, add the value of the symbol if it's red and subtract if it's blue, half means the value is halved and the last one is just a division, you'll get 2 5 6 15 18 5 9 20 1 12 12
Step 3: using A1Z26 gives BEFOREITALL

Blue:
Hint 1: you might wanna review ch 2 pt 2 and ch 1 left side
Hint 2: you might also need to solve the green note first since the symbols on the first arrow is unknown
Hint 3: since it is probably asking for numbers for letters again, it should be a 2 digit number| therefore you should probably just count them
Hint 4: if you've seen the green note, you should probably know what these mean| train is 5, car is 2
Hint 5: the shape is similar to ch 1 left side (but notice the blue arrow)
Hint 6: look at the blue triangle in ch 2 pt 2 for the third arrow]
Hint 7: look at the green diamond in ch 2 pt 2 for the last arrow
Hint 8: if it goes over 26, just loop it back

Solution:
Step 1: counting the squares gives you 20 (T)
Step 2: using the values gotten in green note gives 20+(5-2-2) = 21 (U)
Step 3: counting the sides and noticing the blue arrow gives 21-(4+4+4+3) = 6 (F)
Step 4: counting the squares gives 6+15 = 21 (U)
Step 5: translating the squares like in episode 4 gives 21+14 = 35 (loop around)-> 9(I)
Step 6: Combining all steps gives TUFUI
Therefore, Blue is TUFUI

Part 2 of the puzzle (after you finish the passwords on the 4 notes )
Hint 1: the octagons on the unlocked notes are circles (idk why they look like octagons)
Hint 2: you can pick the orbs up by using enter
Hint 3: remember you can drop items using shift
Hint 4: aren't the pedestals square-like and the orbs circle-like?
Hint 5: match each color pedestals with the colored orbs for each note

Solution:
step 1: match each pedestal with the color as stated on each note
put the pink orb in the green pedestal,
put the green orb in the blue pedestal,
put the blue orb in the orange pedestal,
put the orange orb in the pink pedestal

step 2: a new pedestal should appear in the middle

Part 3 of the puzzle (after the middle pedestal appear )
Hint 1: try putting different orbs in it
Hint 2: you don't have to guess which way the maze need to be oriented, there's another way to tell that
Hint 3: the layout of the room matters
Hint 4: the triangle at the top left is a pointer
Hint 5: point the pointer to the pedestals
Hint 6: you can use a drawing program (like krita) to combine the maze together
Hint 7: start the maze at the middle and notice what phrase you drew

Solution:
step 1: By putting different orbs into the pedestals, you can see different parts of the maze
step 2: Align the pointer on the top-left to point to the pedestals to get the correct orientation
step 3: by combining the 4 parts of a maze, trace the path that you took from the center to the outer exit to find a phrase
Therefore, the puzzle answer is THEBOUNDSHAVEGONE
Chapter 4 Part 1
Story Location: Right after Final Episode

Lock Requirements
First, Story locks are back!
You should know what do the conditions mean by now (look at ch1 locks again)
Here are the conditions if you forgot
Opening:
Clear 3 Ch3 songs on Opening or higher with B Rank or higher
Clear 1 Ch4 song on Opening or higher with B Rank or higher

Middle:
Clear 4 Ch3 songs on Middle or higher with A Rank or higher
Clear 2 Ch4 song on Middle or higher with A Rank or higher

Finale:
Clear 5 Ch3 songs on Finale or higher with AA Rank or higher
Clear 3 Ch4 song on Finale or higher with AA Rank or higher

Encore:
Clear 5 Ch3 songs on Finale or higher with S Rank or higher
Clear 3 Ch4 song on Finale or higher with S Rank or higher

On to the puzzles!

Puzzles
Left side
Hints:
Hint 1: Hmm,,, Don't all the dots color represent something...|or even someone?
Hint 2: Don't the colors feel like they are a part of saturday?
Hint 3: These parts are split apart aren't they?
Hint 4: Why don't you try putting all of them together?

Solution:
Step 1: put all 4 sections of the image together
Step 2: put all 4 images together and you the word "FATE" will show up
Therefore, The solution is FATE
Right side
Hints:
Hint 1: The thing on the right is something you've probably seen in school|It's the periodic table
Hint 2: Every element has a atomic symbol
Hint 3: the numbers are in a pair
Hint 4: The numbers in column 2 is suspiciously small
Hint 5: Columns 1 and 2 represent different things
Hint 6: Column 1 represents the Atomic number, Column 2 represents the order

Solution:
Step 1: Turn Column 1 into Atomic Symbols
Step 2: Use the numbers in Column 2 to order the rows
Step 3: Combining them together you get INVErSiON

Therefore, The solution is INVERSION
Middle
Combining Left and Right you get FATEINVERSION
Good Luck on the Song!
Chapter 4 Part 2
Puzzle Location: Layer 2 Betweenspace
if you haven't found it yet, go down from the main room in betweenspace after you've finished the boss song
General Info: this area is seperated into 3 parts, the goal of each part is to|push all 4 buttons in each area and find the activate the gate control
Left area
Area info: 2 Buttons are out in the open (will skip over these), 2 buttons are lock behind a note
1st Note
Puzzle location: the first room (the room before another save point)
this one is a bit hard (and also to explain) (it still kinda confused me at this point) but i'll try my best!
Hints:
Hint 1:The top one translates to reflect
Hint 2:you will need to reflect the image a lot, grab your favorite image editor!
Hint 3:look at how many symbols are there in each row
Hint 4:the first reflect text (translated from a1z26 span across all the sections|maybe do that big one first (also do it horizontally)
Hint 5:the symbols have 2 different directions|maybe one means to flip horizontally, the other is vertically
Hint 6:the number of symbols in the second row is the same as the third|maybe do that one by one?
Hint 7:just purely flipping it doesn't do anything|maybe leave the original copy behind put the new one with the original one side by side?
Hint 8:if you don't know the word yet, just guess it by using the letters you already know

Solution:
Step 1:Flip the entire bottom image horizontally
Step 2:For each symbol, Duplicate and Mirror each image by the symbol and put the original and copy side by side
Step 3:Reading the output gives AMBIDEX
Therefore, the solution is AMBIDEX

2nd Note
Puzzle location: the second room (the room with the save point)
Hints:
Hint 1:remember red is plus, blue is minus
Hint 2:don't use a1z26 to translate the letter for now, it doesn't really work
Hint 3:the letter are fairly low valued, is there a numbering system that handles letters to numbers in a different way?|how about base 16?
Hint 4:some numbers can't be directly translated back to letters using base 16, maybe we use a1z26 this time
Hint 5:reading from left to right doesn't work|how about up to down?

Solution:
Step 1:translate all letter to numbers using base 16
Step 2:For each pair, add/subtract according to the color
Step 3:translate all resulting number to letters using a1z26
Step 4:Read from up to down, then left to right
Therefore, the solution is NOCTURNE

Down area
Area info: 2 Buttons are out in the open (will skip over these), 2 buttons are lock behind a note
1st Note
Puzzle location: probably the first note you see in this area (the one with dice)
Hints:
Hint 1:the vertical lines are seperators
Hint 2:remember from previous puzzles|red is plus, blue is minus
Hint 3:if red is plus, blue is minus then what is yellow?
Hint 4:yellow means multiply
Hint 4:also white means initial number if you haven't figure it out yet
Hint 5:just convert it to letters again, they are all below 26

Solution:
Step 1:For each column, do operation on the first number to the second and third one by their colors (red is plus, blue is minus, yellow is multiply), you will get 19 8 9 11 9 20 1 19 15
Step 2:Using a1z26 you get shikitaso

2nd Note
Puzzle location: Backtrack a bit and go left when you see a crossroad
Hints:
Hint 1:That's a lot of characters, can you see some familiar patterns?
Hint 2:Does the 110 remind you of anything?
Hint 3:A past puzzle had the solution "uniform011", it seems like the "011" part is "110" backwards. Maybe you can find uniform but flipped?
Hint 4:You might also see some words that look familiar but backwards, such as "crosser" and "egoeris"
Hint 5:There are also some letters which doesn't correspond to anything. Maybe you can spell something with it?

Solution:
Step 1:Play word search lol
Step 2:You can find "crosser", "egoeris", "beforeitall", "011", "protection", "star", "whowewere", "error", "eleven", "uniform", "detection" and "tufui".
Step 3:Crossing the answers out, while reading from right to left and top to bottom. You get "hypermania"


Chapter 4 Part 2.2
(exceeded the character limit so here we are)
Right area
Area info: 1 Button are out in the open (will also skip over these), 2 buttons are lock behind a note and there is 1 environmental puzzle
1st Note
Puzzle location: Go down after entering the right area
Hints:
Hint 1:If you're a computer nerd, you definitely know what this means
Hint 2:If you're not a computer nerd, you should google it up
Hint 3:Quoting from Wikipedia (https://en.wikipedia.org/wiki/Exclusive_or), "Exclusive or (XOR) ,..., is a logical operator whose negation is the logical biconditional. With two inputs, XOR is true if and only if the inputs differ (one is true, one is false)."
Hint 4:You don't have to know what those magical words mean, you just have to know XOR is function that takes two inputs ({true} and {false}), and outputs {true} only if the input consists of exactly one {true} and one {false}
Hint 5:The green lights in the puzzle probably means {true}, and red lights mean {false}.
Hint 6:Now that you know what Exclusive or means, it's weird that it's only showing one set of data, but you need two inputs to XOR with.
Hint 7:Try exploring the area (Is there something representing a list of true and false?)
Hint 8:There are also multiple ways of writing {true}s and {false}s, computers use 1s for {true}s and 0s for {false}s

Solution:
Step 1:Going right and going down, you will see some red and green switches on the wall, which corresponds to {true} and {false}
Step 2:Now using the Exclusive Or operation on the first bit on the top, and the first bit on the bottom. You will get: XOR({false},{false}) = {false}
Step 3:The second and third bit (digit) goes like this: XOR({false},{true}) = {true}), XOR({true},{true}) = {false}
Step 4:Do this with the rest of the bits, and you will get {F}{T}{F}{F}{T}{F}{F}{T}
Step 5:Lastly, (a bit of computer knowledge for you), these operations used by computers are called logic gates, and they use 1s and 0s instead of {true} and {false}, but they basically mean the same.
Step 6:Switching the {true}s and {false}s with 1s and 0s respectively, you will get "01001001".

2nd Note
Puzzle location: In the red area, just follow the path given.
Hints:
Hint 1:You might have seen lock P somewhere before
Hint 2:It's mentioned in the story once, but if you forgot,|what important lock has the starting letter of P
Hint 3:It's the first story lock (PYROMANIA)
Hint 4:You might wanna go back to that lock to remember the unlocking process
Hint 5:Where do you remember seeing ".html" in the that lock?
Hint 6:Maybe you've entered a website with ".html" before?

Solution:
Step 1:As mentioned in the story, Lock P refers to the first story lock
Step 2:During the first story lock unlock process, you had to access this website link: "https://shrinereport.xyz/ULTIMATION.html"
Step 3:The puzzle asks for the string before ".html", so it must be "ULTIMATION"

Environmental Puzzle
Puzzle location: Go down from the {true}s and {false}s
Hint 1:There are a string of arrows on the wall. Is there anything resembling a grid?
Hint 2:The imaginary grid you walk on in between space.
Hint 3:The arrows probably resembles how you walk on the imaginary grid.
Hint 4:The white tile on the left definitely sticks out. Try exploring to see something similar to that tile. That's also probably where you'll have to start to execute the movement.

Solution:
Step 1:Go upwards a bit and you'll see the white tile on the front desk.
Step 2:Execute the movement where the starting position is the white tile (you can't actually walk onto the white tile, but you can imagine you start on it).
Step 3:You'll walk into the wall, press [enter] when you reached the end. It activates an invisible button.


Last Part

Solution:
Step 1:Activate each button that was locked behind a "lock gate" with the text "GATE CONTROL".
Step 2:Get ready for the most cinematic chart in the whole game!
Final Chapter Part 1
Puzzle Location: Episode X6 (Story Lock 1)
Hints:
Given Hint: Listen to the burdened girl.
Hint 1: Read the dialogue on Episode X6 carefully
Hint 2: The line you need to take notice is "OKAY! PLEASE, RESTART THE TVO CLIENT NOW!!!"
Hint 3: The TVO Client means the vivid/stasis program (like the game your running right now)
Hint 4: You need to do something to the game

Solution:
Step 1: Press Alt+F4 (or just close the window) when the textbox says "OKAY! PLEASE, RESTART THE TVO CLIENT NOW!!!" in Episode X6 and reopen vivid/stasis

General Notes:
You get a new power at this point, here's some basic notes:
Note 1: Sometimes there are inconsistencies where you think the solution will work but doesn't (e.g. you can't do the save or after the story lock screen for the next puzzle but you can on any other puzzles), these inconsistencies will be in each puzzle's notes section
Note 2: The solution steps will be split into 2 parts, one gives the episode number, the other the exact textbox

Puzzle Location: Episode X7 (Story Lock 2)
Note:You can't do the save on or after the Story Lock screen
Given Hint: After seeing the fate of her true love, would she still allow Chiyo to take the safer route
Hint 1: Allison died on Episode X7 right, can you make her see the future at a previous point by save/loading?
Hint 2: Maybe You should save when Saturday see that Allison died
Hint 3: You should probably load the save when Chiyo and the others start getting in the car when the apocalypse come on Episode X6

Solution:
Step 1: Save on Episode X7 | Storing Saturday Right after Saturday see Allison's Dead body, up until right before the "STORY LOCK 2" Message appears
Step 2: Load on Episode X6 | Right after The Screen turns Red and the meteor falls near the end of the episode, up until the end of the episode


Puzzle Location: Episode X7'
Given Hint: Try Saving the data here.
Hint 1: After you saved, you should probably load it back up so that she knows right?

Solution:
Step 1: Save on Episode X7' | Storing Saturday When Saturday asks you to save her data
Step 2: Load on Episode X7' | Right after you saved her data

Puzzle Location: Episode X8 (Story Lock 3)
Given Hint: The elevator isn't viable to use. Warn them before wasting their time going up
Hint 1: You should probably save right when they die to the elevator so they remember it
Hint 2: Saturday is the one who has the most knowledge about this whole saving/loading thing, you should probably give the remember job to her
Hint 3: The party went through 2 elevators in episode X8
Hint 4: One is when they went up to Setuki's office, the other is down to the duskbreaker's core
Hint 5: Read the given hint again: "The elevator isn't viable to use. Warn them before wasting their time going up"

Solution:
Step 1: Save on Episode X8 | Storing Saturday Anytime after Saturday's party went into the elevator going down the duskbreaker
Step 2: Load on Episode X8 | After the party entered the building, but before they entered the first elevator going up to Setsuki's Office

Puzzle Location: Episode X8 (Story Lock 4)
Given Hint: She just told you what to do.
Hint 1: Saturday ask you to reload her back before they entered the building
Hint 2: Probably shouldn't do it too early like going back to epX7 to remind her

Solution:
Step 1: Save on Episode X8' | Storing Saturday Anytime after tsuki responds to Saturday ask about what tsuki thinks about the plan right before the earthquake happens
Step 2: Load on Episode X8 | Before the party went into the building

Puzzle Location: Episode X9 (Story Lock 5)
Given Hint: Revisit memory lane. You may have to go further back than you expect.
Hint 1: Save Saturday at the end of Episode X9 if you're worried about if you saved correctly
Hint 2: At the last line before the lock, Saturday said "Was there ever a point in the Schrodinger Cycle after the museum burned that i wasn't in the hospital?"
Hint 3: The Schrodinger Cycle means Chapter 1-3
Hint 4: Saturday was only in Tanegashima in Episode 1-8
Hint 5: The museum burned down in Episode 6.1, she was in the hospital in episode 6.2 and 7
Hint 6: It's Episode 8
Solution:
Step 1: Save on Episode X9 | Storing Saturday anytime after Saturday mentions that they could load her data back into Tanegashima
Step 2: Load on Episode 8 | Anytime during Chapter 8

Puzzle Location: Episode X9' (Story Lock 6)
Given Hint: You should know what to do by now
Hint 1: The timeline you just loaded into is really early, you should probably go back to the timeline where they are at the end so that Saturday can tell their friends there
Solution:
Step 1: Save on Episode X9' | Storing Saturday Anytime after Saturday said "You know what to do, right? I'll leave it to you then."
Step 2: Load on Episode X9 | Anytime after Saturday mentions that they could load her data back into Tanegashima
Final Chapter Part 1.1
I've put some images with the colors marked in case you can't see colors.

Image:here
Hint 1: Looking at the bottom of the puzzle, it seems like you need the line segments to decode the message.
Hint 2: The line segments perform an operation indicated by the numbers to get the bottom letter.
Hint 3: Compass directions (NESW).

Solution 1: Translate the line segments into compass directions in the form of letters.
E, S, W, N, E, E, S, W, S

Solution 2: Using a1z26, translate the letters into numbers and perform the numbers' operations.
5 19 23 14 5 5 19 23 19
5 + 10 = 15
19 + 1 = 20
23 - 15 = 8
14 - 9 = 5
5 + 13 = 18
5 + 14 = 19
19 - 10 = 9
23 + 7 = 30, 30 - 26 = 4
19 + 12 = 31, 31 - 26 = 5


Solution 3: Using a1z26, we translate the numbers back into letters, and we get [OTHERSIDE].

Another tab will open.

General Hint (If you think you have the solution but it's not working):
Hint 1: Look at the puzzle borders and the answer borders
Hint 2: The puzzle borders and the answer borders don't match
Hint 3: It's Purple Puzzle Box and Green Input on the original program, Green Puzzle Box and Purple input in the program it just created
Solution: Go to the other window and input the answer there

LOCK P (bottom left)

Image :the degree is hue value
If you are colorblind, the order goes like this: B, M, K, P, H, D, N, W

Hint 1: Does the colored lines in the middle remind you of something? An order perhaps?
Hint 2: The numbers' colors doesn't mean anything.
Hint 3: The first letter is "C".
Hint 4: The forth letter is "T".

Solution 1: The colors can be arranged into the following order.
Red (B)
ORANGE (M)
YELLOW (K)
GREEN (P)
INDIGO (D)
BLUE (H)
VIOLET (N)
MAGENTA (W)


Solution 2: Then, we simply add the letters' a1z26 value to their ordering index, starting from 1.
2 + 1 = 3
13 + 2 = 15
11 + 3 = 14
16 + 4 = 20
4 + 5 = 9
8 + 6 = 14
14 + 7 = 21
23 + 8 = 31, 31 - 26 = 5


Solution 3: Using a1z26 to convert it back, we get [CONTINUE].


LOCK V (Bottom Right)
Image:
Hint 1: Yellow means multiplication.
Hint 2: Green means division.
Hint 3: The order of operations doesn't apply.

Solution 1: We use the number of sides of the shapes, and perform the operation of the next shape moving to the right.
Solution 2: We get:
6 * 2 = 12, 12 + 5 = 17
5 * 6 = 30, 30 - 4 = 26, 26 - 5 = 21
5 + 6 = 11, 11 - 2 = 9, 9 - 4 = 5, 5 - 4 = 1
4 + 3 = 7, 7 * 2 = 14
5 * 2 = 10, 10 * 2 = 20
6 * 6 = 36, 36 / 2 = 18, 18 + 3 = 21
6 + 4 = 10, 10 + 3 = 13


Solution 3: Using a1z26 to convert it to letters, we get [QUANTUM].


LOCK U (Top Left)
Image:
Hint 1: You start from 26 (or 0).
Hint 2: Yellow means multiplication.
Hint 3: Green means division.
Hint 4: White means the number given.

Solution 1: Starting from 26, we perform the operation of the color and by the number of dots. Then, we feed the output into the next input.
26 - 10 = 16
16 - 15 = 1
1 + 18 = 19
19 + 1 = 20
20 + 26 = 46, 46 - 26 = 20
20 / 4 = 5
5 + (3*3) = 14
14 + 5 = 19
5


Solution 2: Using a1z26 to convert it to letters, we get [PASTTENSE].
LOCK S (top right)
No image included because it is irrelevant to the puzzle

Hint 1: One number over another with a line seperating them. I wonder what that could mean.

Solution 1: It's just a fraction. Dividing the top number by the bottom gives you the result.
Solution 2: Not much more to say here. Using a1z26 to convert it to letters, we get [REALITY]

LOCK C (top middle)
Image:
Hint 1: The first letter is not "A".
Hint 2: The number at the bottom relates to the top phrase. (It's not binary)
Hint 3: The first letter is "V".

Solution 1: The number at the bottom refers to the index.
Solution 2: "10" points to the tenth letter, so the first letter is V.
Solution 3: Then, we perform the operation of the color and by the number of dots. We get:
10 + 1 = 11, and 11 gives us E.

Solution 4: Repeat this process, and we get [VENGEANCE].


Final Chapter Part 1.2
LOCK P (bottom left)
Image:
The bottom letter is a "Q"
Hint 1: Google "four color theorem" (Yes I know there are only three colors in the puzzle)
Hint 2: The letters move from left to right, and performs the corresponding actions according to the key at the bottom right.
Hint 3: Have fun coloring!

Solution 1: The completed picture is below:
put picture here :)

Solution 2: Translating the letters using a1z26, then applying the actions based on the key, and then translating it back, we get [ASHBLOOM]

LOCK V (Bottom Right)
Image:
Hint 1: You start at the dot, following the path.
Hint 2: If the path is above the squares, it refrences the left. If the path is below the squares, it refrences the right.
Hint 3: Look at the colors of the sides.

Solution 1: You first flip the right table across the y-axis, and then using the line, you spell [EARTHFALL].


LOCK U (top left)
No Image Included bacause it is irrelevant to the puzzle
Hint 1: This is similar to a board game, where you start at [GO], and work your way around the board.
Hint 2: The numbers in the middle are how far you move each turn.
Hint 3: You will also need to use a1z26.

Solution 1: Place your imaginary counter at "GO" and move how far the number says so.
Solution 2: The tiles you land on will say ARBNLUKZLS.
Solution 3: Using a1z26 to convert it to numbers, then adding them using the numbers in the middle, and converting them back, you get [ETERNALBOW].

LOCK S (top right)
Image:
Hint 1: =White means all the colors. But normal white means the number given.

Solution 1: Nico has organized the cards:
put that picture here *smile*

Solution 2: The number at the bottom refrences how many sides the shapes have. If the number is not white, then we only count the shape with the number's color and the number's side.
Solution 3: We get:
3 * 7 = 21
14
9
11 * 2 = 22
5
2 * 9 = 18
6 + 13 = 19
2 + 3 = 5
2
7 * 3 = 21
2 * 9 = 18
13 + 6 = 19
36 - 16 = 20


Solution 3: Using a1z26 to translate it to letters, we get [UNIVERSEBURST].

LOCK C (top middle)
No Image Included because the colors are already represented by the symbols
Hint 1: This might look a bit messy, but there are letters, so you should probably convert them to numbers first.
Hint 2: There are colorful symbols, which we will simplify to their colors. w(hite) [c(at)], r(ed) [f(ire)], b(lue) [d(ragon)] and g(reen) [k(nife)]. The symbols that are the same means the same as well.
Hint 3: The bottom part looks like it's made out of equations, with [1 w[c] = 26], [21 w[c] r[f] = 1], [4 b[d] r[f] = 3] and [5 g[k] g[k] b[d] = 14]
Hint 4: The symbols perform an action to the left number to make it into the right number of the equation.
Hint 5: The actions are not just algebraic. Think about the a1z26 cipher. How other ways can you make 1 (A) into 26 (Z)?
Hint 6: The white symbol [cat] uses atbash cipher.
Hint 7: The red symbol [fire] subtracts the number by 5.
Hint 8: The blue symbol [dragon] multiplies the number by 2.
Hint 9: The green symbol [knife] adds 1 to the number.
Hint 10: Each letter (or number) is solved from left to right. Starting from the letter, then applying the symbols moving to the right regardless of order of operations.

Solution 1: Using the equations, we get:
White [cat] - Appling the atbash cipher (it can be represented by 27-x)
Red [fire] - Subtracting by 5
Blue [dragon] - Multiplying by 2
Green [knife] - Adding 1


Solution 2: Then, we apply the operations to the numbers, and we get:
3 22 25 10 15 2 26 12 24
C: 3 * 2 = 6, 6 + 1 = 7.
V: 22 + 1 = 23, 23 - 5 = 18.
Y: 25 + 1 = 26, (27) - 26 = 1.
J: 10 + 1 = 11, 11 * 2 = 22.
O: 15 - 5 = 10, 10 - 5 = 5.
B: (27) - 2 = 25, 25 - 5 = 20.
Z: 26 - 5 = 21, 21 + 1 = 22, (27) - 22 = 5.
L: 12 + 1 = 13, 13 * 2 = 26, (27) - 26 = 1.
X: 24 - 5 = 19, (27) - 19 = 8, 8 + 1 = 9, 9 * 2 = 18.


Solution 3: We get 7, 18, 1, 22, 5, 20, 5, 1, 18, and using a1z26 to translate it back, it reads [GRAVETEAR].

FINAL PUZZLE:

Hint 1: Go to the door.
Hint 2: Those letters look like the locks. Maybe you have to combine them into a string.
Hint 3: I wonder what B64 means. Maybe you should google that.

Solution 1: After combining the codes you get from the locks in that order, put them into a B64 converter and you will get [INFERNALSTRIKE].
Solution 2: (remember to put it in caps) and good luck!
Final Chapter Part 2
Uh... there is literally no puzzles here
Although there is something else you could do
see the next section
??? ( Hidden Landing )
To begin (no hints leading to this so only solution is provided)(requires all of final chapter part 1 to be completed): Replay Memory Sacrafice from boundary shatter after playing CONVERGENCE in story

Next Step is a puzzle:

Hints:
Hint 1: The name of the charater during the dialogue part is not random anymore
Hint 2: "VEhFIFRJVExFIEJFVFJBWVMgWU9V"... there's a cipher you've used before that can decode this | It's Base64
Hint 3: Decoding gives "THE TITLE BETRAYS YOU". What can "TITLE" be refered to? | It's the profile title
Hint 4: Check your titles, there is something new, there's something you can do with it?

Solution:
Step 1: Equip the "Sacaficial" Title obtained after playing the modified Memory Sacrafice
Step 2: Replay Memory Sacrafice with the "Sacaficial" title

Next Step is another puzzle:

Hints:
Hint 1: The charater name changed again
Hint 2: "RklORCBNRSBJTiBUSEUgVk9JRA==" the string looks similar to the first one | maybe you can do the same thing again?
Hint 3: Decoding gives "FIND ME IN THE VOID". What can "VOID" be refered to? | It's the betweenspace
Hint 4: Just find her in the betweenspace, if you want a more percise location, | It's in layer 2, the solution will give the exact location

Solution:
Step 1: Find the girl in layer 2 of the betweenspace (it's in the 1st left room)

Next Step:
Note: The next part is just exploration so hints might not be as useful
Hints:
Hint 1: That was a lot of dialogue, but what's most important there is the "void lens"
Hint 2: You just need to find it somewhere in betweenspace again, the location is random so i can't really tell you where it is, but it seems to usually appear in the bonus areas/layer 2

Solution: Find the void lens in betweenspace (any layer)

Next Step:
Note: The next part is just exploration so hints might not be as useful
Hints:
Hint 1: 5 new portals in betweenspace has appeared, find all of them for the hidden landing content, these ones can appear in the normal areas as well so just check everywhere (although these ones have a set location so you might be able to look at another guide for this)

Solution: Find all 5 portals to discover 5 more songs
50 comentários
PH-10  [autor] 28 de abr. às 16:15 
Glad it works now :D
Aromia 28 de abr. às 8:45 
it turns out the bug was due to enabling hints in the settings. after disabling "puzzle hints" under accessibility, the input box is able to pop up
Aromia 28 de abr. às 7:10 
well for me the input box for the door in the final chapter part 1.2 does not show up... I dunno if I messed something up or it's a bug, so I wanna check if anyone have the same problem here...
Aromia 25 de abr. às 5:09 
A tip for the final chapter:
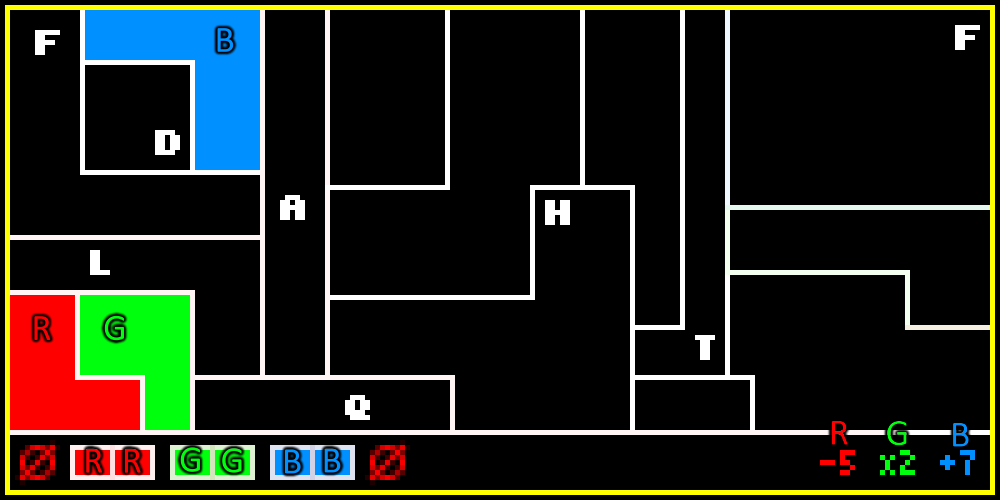
in the memory bank, you can use arrow keys to choose which character's memory to save
AqueousNico  [autor] 10 de abr. às 7:41 
probably the developer ig
Sizemore System 10 de abr. às 7:39 
if theyre unobtainable whats the 0.1%?
AqueousNico  [autor] 10 de abr. às 7:39 
uh the 3 achievements that has 0.1% completion rate is unobtainable, the rest should all be unlocked by doing the entire story or is pretty straight forward by just looking at the achievement description
so idk what i can help with there
soundtoxin 6 de abr. às 23:12 
Will you be adding any info on how to get the new achievements?
Sizemore System 31 de mar. às 13:38 
haooy transgender day of incineration
Rogikel 27 de mar. às 13:07 
im only at ch1 and its already painful figuring this out 🔥🔥🔥(get it)