Yet Another Zombie Survivors

Yet Another Zombie Survivors

446 ratings
100% achievements guide | Yet Another Zombie Survivors [UPDATED]
By JHG
A straightforward guide going through all of the achievements in Yet Another Zombie Survivors.
15
12
37
2
3
3
3
3
2
   
Award
Favorite
Favorited
Unfavorite
Introduction
The guide is updated to include all of the achievements and changes of the 0.8 update.

If you want to find a specific achievement, use CTRL + F and search directly.

If anything is incorrect or out of date please let me know, and if you have a problem with any of the achievements comment below and I'll see if I can assist.
Me And The Boys
Every few minutes you can recruit a survivor from an S.O.S indicated by a green Arrow, follow it and simply stand in the green zone and then select a survivor, do this 2 times and you will have a full squad.
A Horrible Night to Have a Curse
Get killed.
Eye Candy
Every survivor you recruit has different abilities they can unlock, as you level up in a run select 5 different abilities and you will get the achievement.
A Killer Feature
I'm pretty sure levelling up has some sort of damaging effect so that you don't return from a level up with enemies on top of you, you should get this achievement naturally.
Free Items!
Item Chests appear every few minutes indicated by a yellow Arrow, follow it and simply stand in the yellow zone to open the chest and then select an item.
Gear of War
Open 6 chests, selecting 6 items in a single run.
Pro Gamer Move


When offered upgrades or items: lockdown 1, banish 1 and then reroll.
L-l-l-l-legendary!
After collecting 4 military training points or after you have exhausted the regular upgrade pool you will be offered passive upgrades, when you see one of legendary rarity, take it.

The "Bells & Whistles" item will help you get higher quality military training upgrades.
Power Overwhelming
Collect 15 training points from gathering cash during runs, invest these points into a single 5/5 node on the "general" skill tree.
Forget It
Go to the Upgrades page on the main menu, and go to the bottom right of the screen and click "Reset Points".
Semper Fi
Survive for 20 minutes with the SWAT survivor as the Team Leader.
Steel Dawn
Survive for 20 minutes with the Tank survivor as the Team Leader.
Told You, You Can Trust Me
Survive for 20 minutes with the Engineer survivor as the Team Leader.
Bow Before Me
Survive for 20 minutes with the Huntress survivor as the Team Leader.
Way Past The Witching Hour
Survive for 20 minutes with the Ghost survivor as the Team Leader.
Impeccable Immunity
Survive for 20 minutes with the Medic survivor as the Team Leader.
Phoenix Rises
Survive for 20 minutes with the Pyro survivor as the Team Leader.
Armed Through The Night
Survive for 20 minutes with the Mechanic survivor as the Team Leader.
Call of Duty
Reach level 20 with the SWAT survivor by using him in your runs.
The longer you survive with him, the more levels you will get.
For Great Justice!
Reach level 40 with the SWAT survivor by using him in your runs.
The longer you survive with him, the more levels you will get.
Come Get Some
Reach level 60 with the SWAT survivor by using him in your runs.
The longer you survive with him, the more levels you will get.
Iron Will
Reach level 20 with the Tank survivor by using him in your runs.
The longer you survive with him, the more levels you will get.
The Juggernaut
Reach level 40 with the Tank survivor by using him in your runs.
The longer you survive with him, the more levels you will get.
The Immovable
Reach level 60 with the Tank survivor by using him in your runs.
The longer you survive with him, the more levels you will get.
Trust Me, I'm An Engineer
Reach level 20 with the Engineer survivor by using him in your runs.
The longer you survive with him, the more levels you will get.
Fullmetal Engineer
Reach level 40 with the Engineer survivor by using him in your runs.
The longer you survive with him, the more levels you will get.
The King Engine
Reach level 60 with the Engineer survivor by using him in your runs.
The longer you survive with him, the more levels you will get.
The Hunt Is On!
Survive 15 minutes in Isolated City.
An Arrow To The Knee
Reach level 20 with the Huntress survivor by using her in your runs.
The longer you survive with her, the more levels you will get.
Bullseye!
Reach level 40 with the Huntress survivor by using her in your runs.
The longer you survive with her, the more levels you will get.
Won't See Me Coming
Reach level 60 with the Huntress survivor by using her in your runs.
The longer you survive with her, the more levels you will get.
Ghost In The Hell
Defeat 100 boss enemies.

Bosses spawn after a few minutes and spawn increasingly more frequently as the run goes on.
Bravo Six, Going Dark
Reach level 20 with the Ghost survivor by using him in your runs.
The longer you survive with him, the more levels you will get.
Haunting Presence
Reach level 40 with the Ghost survivor by using him in your runs.
The longer you survive with him, the more levels you will get.
Banshee Scream
Reach level 60 with the Ghost survivor by using him in your runs.
The longer you survive with him, the more levels you will get.
Medic!
Collect 100 healthpacks.

healthpacks drop randomly from enemies.
An Apple Won't Keep Me Away
Reach level 20 with the Medic survivor by using her in your runs.
The longer you survive with her, the more levels you will get.
A Vaccine Against Death
Reach level 40 with the Medic survivor by using her in your runs.
The longer you survive with her, the more levels you will get.
Medical Marvel
Reach level 60 with the Medic survivor by using her in your runs.
The longer you survive with her, the more levels you will get.
Fired up! Ready to go!
Deal 2,000,000 elemental damage.

This can be done easily within 1 run with the Engineer solo,

For badges I recommend taking Power badge, Thunder badge, Reload badge and Chance badge, these should be best for the most extra damage output.

Take all of the engineers weapons and abilities and any passive stats or items that give you electric damage tags, weapon/ability damage and weapon/ability crit damage/chance.
Burning Desire
Reach level 20 with the Pyro survivor by using him in your runs.
The longer you survive with him, the more levels you will get.
Through The Fire and Flames
Reach level 40 with the Pyro survivor by using him in your runs.
The longer you survive with him, the more levels you will get.
It Burns!
Reach level 60 with the Pyro survivor by using him in your runs.
The longer you survive with him, the more levels you will get.
Need A Hand?
Activating 5000 abilities can take quite a while, around 3-4 runs naturally.


To get this done faster I recommend using the survivors with the lowest cooldowns on their abilities, Ghost > Engineer > Huntress (In order of lowest cooldowns) seem to be the best.

Play endless mode on the Isolated City map and prioritise taking new abilities and ability upgrades that reduce cooldowns.

For Items, military training and infinite upgrades aim for Ability cooldown.
Equipment Inspection
Reach level 20 with the Mechanic survivor by using her in your runs.
The longer you survive with her, the more levels you will get.
Serious Tinkering
Reach level 40 with the Mechanic survivor by using her in your runs.
The longer you survive with her, the more levels you will get.
Hardcore Underclocking
Reach level 60 with the Mechanic survivor by using her in your runs.
The longer you survive with her, the more levels you will get.
Yet Another Zombie Survivors
Survive for 20 minutes on the default game mode.
50000 People
Survive 10 minutes on Endless Mode on The Isolated City map.
Used to Live Here
Survive 20 minutes on Endless Mode on The Isolated City map.


Keep in mind Endless Mode difficulty scales more than the default mode, making it harder leading up to the 20 minute mark.
Now It's a Ghost Town
Surviving for 30 minutes in endless is pretty easy, I will go through what I believe is the easiest way to get this achievement.

It goes without saying that the more upgrades you have in the general and character-specific upgrade trees, the easier time you will have surviving in endless mode.

In the 0.7 update weapons are a very solid dps option, for this reason I recommend using SWAT's Assault Rifle and Tank's Minigun, Medic is a good 3rd survivor as she has a revive ability.

For badges I recommend taking Gunner badge, Tough badge, Reload badge and Growth badge, these provide a good mix of utility and damage.

For military training and infinite upgrades I recommend anything that gives hp regen, max hp, dodge chance, movement speed and Armour, I found these give me the best chance of avoiding enemies and giving myself a chance to heal. it's up to you what items you use but any that help with damage and cooldowns are very useful. It is important to note that there are item unlocks tied to most achievements, so it may be beneficial to unlock some before doing endless mode.
I'm Pro Gamer!
Hardcore mode is very similar in difficulty to Endless mode, except you have to survive for 10 minutes to reach dawn, with only 10 minutes the difficulty scales much faster.

I followed the same strategy mentioned prior for Endless mode focusing hp regen, max hp, dodge chance, movement speed and Armour for military training, and damage and cooldowns for items.
Hasta La Vista, Baby


To beat Extermination mode you must defeat 20 waves of enemies that gradually get harder as you go, Isolated City is the easiest map in the game so just constantly be on the move and it should be easy.
Arrived at Your Desert Nation
Survive for 20 minutes on the Vile Wasteland map.
The Desert of The Dead
Survive 10 minutes on Endless Mode on the Vile Wasteland map.
Dead Rude Sandstorm
Survive 20 minutes on Endless Mode on the Vile Wasteland map.


Keep in mind Endless Mode difficulty scales more than the default mode, making it harder leading up to the 20 minute mark.
Wild Wild West
Surviving for 30 minutes in endless on the Vile Wasteland map is harder than Isolated City, but still pretty easy.

The strategy for Endless mode on the Vile Wasteland map is very similar to the Isolated City map, except there are couple additions that make it more difficult

It goes without saying that the more upgrades you have in the general and character-specific upgrade trees, the easier time you will have surviving in endless mode.

In the 0.7 update weapons are a very solid dps option, for this reason I recommend using SWAT's Assault Rifle and Tank's Minigun, Medic is a good 3rd survivor as she has a revive ability.

For badges I recommend taking Gunner badge, Tough badge, Reload badge and Growth badge, these provide a good mix of utility and damage.

For military training and infinite upgrades I recommend anything that gives hp regen, max hp, dodge chance, movement speed and Armour, I found these give me the best chance of avoiding enemies and giving myself a chance to heal. it's up to you what items you use but any that help with damage and cooldowns are very useful. It is important to note that there are item unlocks tied to most achievements, so it may be beneficial to unlock some before doing endless mode.

There are a few extra things to be aware of in Vile Wasteland, There is a spider enemy that when it dies drops a web that slows you down, avoid these webs. There is a scarab enemy that explodes dealing high damage, this can be run ending. Obviously the Worm Environmental Hazard you have to avoid, and the circle of mummies can trap you into taking a lot of damage if you are not careful, try and create a gap in the circle to escape if you do.

Un-Dead Redemption
The strategy for Hardcore mode on the Vile Wasteland map is very similar to the Isolated City map, except there are couple additions that make it more difficult.

I followed the same strategy mentioned prior for Endless mode focusing hp regen, max hp, dodge chance, movement speed and Armour for military training, and damage and cooldowns for items.

But there are a few extra things to be aware of in Vile Wasteland, There is a spider enemy that when it dies drops a web that slows you down, avoid these webs. There is a scarab enemy that explodes dealing high damage, this can be run ending. Obviously the Worm Environmental Hazard you have to avoid, and the circle of mummies can trap you into taking a lot of damage if you are not careful, try and create a gap in the circle to escape if you do.
Waves In The Sand


To beat Extermination mode you must defeat 20 waves of enemies that gradually get harder as you go, Vile Wasteland isn't much different to Isolated City so Just constantly be on the move and it should be easy.
Cruel, Cruel Moon
Survive for 20 minutes on the Green Hell map.
The Trees That Whisper
Survive 10 minutes on Endless Mode on the Green Hell map.
Song Of Sorrow And Grieving
Survive 20 minutes on Endless Mode on the Green Hell map.


Keep in mind Endless Mode difficulty scales more than the default mode, making it harder leading up to the 20 minute mark.
The Moonlight Shadow
Surviving for 30 minutes in endless on the Green Hell map is similar in difficulty to the Vile Wastelands, but still easy. Just constantly move to avoid Werewolves.

It goes without saying that the more upgrades you have in the general and character-specific upgrade trees, the easier time you will have surviving in endless mode.

In the 0.7 update weapons are a very solid dps option, for this reason I recommend using SWAT's Assault Rifle and Tank's Minigun, Medic is a good 3rd survivor as she has a revive ability.

For badges I recommend taking Gunner badge, Tough badge, Reload badge and Growth badge, these provide a good mix of utility and damage.

For military training and infinite upgrades I recommend anything that gives hp regen, max hp, dodge chance, movement speed and Armour, I found these give me the best chance of avoiding enemies and giving myself a chance to heal. it's up to you what items you use but any that help with damage and cooldowns are very useful. It is important to note that there are item unlocks tied to most achievements, so it may be beneficial to unlock some before doing endless mode.

There are a few extra things to be aware of in Green Hell, there are corrosive puddles around the map which make it slightly harder to traverse, Vendigos which can shoot tracking projectiles and a Werewolf Mini-boss which can jump to your position fairly quickly, make sure to always be moving to avoid these attacks.
I Graduated Green Berets
The strategy for Hardcore mode on the Green Hell map is very similar to the other maps, except there are couple different threats to look out for.

I followed the same strategy mentioned prior for both Hardcore on Isolated City and Vile Wastelands focusing hp regen, max hp, dodge chance, movement speed and Armour for military training, and damage and cooldowns for items.

There are a few extra things to be aware of in Green Hell, there are corrosive puddles around the map which make it slightly harder to traverse, Vendigos which can shoot tracking projectiles and a Werewolf Mini-boss which can jump to your position fairly quickly, make sure to always be moving to avoid these attacks.
Blood Makes The Grass Grow


To beat Extermination mode you must defeat 20 waves of enemies that gradually get harder as you go, The only difference with Green Hell is the corrosive puddles and Werewolf jump attack so Just constantly be on the move and it should be easy.
Don't Hurt Me
You can play higher difficulties on any map or mode, the easiest way to beat difficulty II is to play on default mode on the Isolated City map.


It goes without saying that the more upgrades you have in the general and character-specific upgrade trees, the easier time you will have beating difficulty II.

In the 0.7 update weapons are a very solid dps option, for this reason I recommend using SWAT's Assault Rifle and Tank's Minigun, Medic is a good 3rd survivor as she has a revive ability.

For badges I recommend taking Gunner badge, Tough badge, Reload badge and Growth badge, these provide a good mix of utility and damage.

I followed the same strategy mentioned prior for other modes focusing hp regen, max hp, dodge chance, movement speed and Armour for military training, and damage and cooldowns for items.
Always take the highest quality upgrade when given military training choices.
Bring 'Em On!
You can play higher difficulties on any map or mode, the easiest way to beat difficulty III is to play on default mode on the Isolated City map.


It goes without saying that the more upgrades you have in the general and character-specific upgrade trees, the easier time you will have beating difficulty III.

In the 0.7 update weapons are a very solid dps option, for this reason I recommend using SWAT's Assault Rifle and Tank's Minigun, Medic is a good 3rd survivor as she has a revive ability.

For badges I recommend taking Gunner badge, Tough badge, Reload badge and Growth badge, these provide a good mix of utility and damage.

I followed the same strategy mentioned prior for other modes focusing hp regen, max hp, dodge chance, movement speed and Armour for military training, and damage and cooldowns for items.
Always take the highest quality upgrade when given military training choices.
The Lone Wolf
Being limited to only 1 survivor, I would suggest Engineer for his Energy shield and high elemental damage

As usual this will be easier with more upgrades in the general and character-specific upgrade tree, useful badges and with more items unlocked through achievements.

Being limited to only 1 survivor means you will easily be able to max the survivors weapon and all his abillities, so doing well is dependent more so on the items you take from chests, military training and infinite upgrades, as i have mentioned previously focusing hp regen, max hp, dodge chance, movement speed and Armour helped me the most when going for this.
It Takes Two
Engineer and Medic are probably the easiest choice of survivors, once you have taken your second survivor from the S.O.S signal, only choose the liberate option for future S.O.S', this will give you a level up each time instead. This is obviously more difficult than having 3 survivors, but as you unlock more upgrades in the general and character-specific upgrade trees, unlock new items and upgrades, this achievement becomes easy.
Third Time's a Charm
For this achievement, I believe the easiest way to get hit 3 times without taking damage is by getting a large amount of dodge chance, and getting lucky.

Before a run equip the "ninja badge" for 10% dodge chance, when taking military training upgrades and items, take ones that also grant you dodge chance, with enough dodge chance you should be able to avoid 3 hits in a row and get the achievement.
Draw 25
Level up 25 times during a single run.
Golden Years
Level up 50 times during a single run.
Diamond Jubilee
Your best chance to get this is to survive as long as you can in endless.
Ding! Ding! Ding!
Your best chance to get this is to survive as long as you can in endless.


Equip the growth badge before your run for bonus exp. If you are able to get the "Wooden Stick" item and military training stats that improve your exp early in the run, this achievement should take around 30 minutes.

Customise your Item pool prior to starting the run to remove any items that do not complement your build, I recommend using Engineer, Medic and another survivor of your choice, engineers abilities are quite strong so getting them levelled up as well as your ability area, weapon/ability cooldowns along with the survivability stats I have mentioned for previous achievements should allow you to survive long enough to reach level 100.
Three Times Three


Self-explanitory, just focus weapon upgrades before anything else.
Come At Me Bro
First you need to unlock 4 ability evolutions in the character-specific skill trees.
Once you reach max level with 4 different abilities, select their evolutions and you will get this achievement.
True Otaku
Items are unlocked by completing achievements, go to the in-game achievement menu and complete the ones which reward new items.
It's Over 9000!
Getting over 90,000 damage in one second might sound difficult, but with lots of weapons and abilities at max level it should be quite easy and come naturally.
Tons of Damage
The easiest way to get this is by stacking everything into a build for SWAT's Sniper Rifle: damage, crit chance, crit damage and kinetic tags.

For badges I recommend taking max level Gunner badge, Critical badge, Boss badge and Chance badge, these should be best for the most extra damage output.

Max out all weapon damage related upgrades in the general upgrade tree, but especially "Weapon critical chance", "Weapon critical damage" and "Damage against bosses".

Take any items/upgrades that grant extra damage or kinetic tags, I used SWAT, Tank and Huntress as they have a lot of weapons/abilities with the kinetic tag, I recommend aiming for the "Glass cannon" item which doubles your damage output. It only took me around 15 minutes to start hitting bosses for over 9000 damage with the Sniper Rifle.
Death From Above
Select abilities as you level up in a run and you will get this naturally while playing.
Yet Another Zombie Defence
Start a run and choose SWAT, Engineer and Mechanic then pick the "Automatic Turret", "Electric Turret" and "Ice Turret" abilities.
Why'd You Pick That?
When selecting items from the chest, look out for the potato, pick it. It serves no other purpose than for a couple achievements.
Emotional Damage!
Just avoid survivors and upgrades that have an elemental tag.

I recommend using SWAT and Tank as they have no elemental weapons/skills by default, for your 3rd survivor you can use any of your choice as long as you avoid upgrades with Fire, Ice, Electric or Chemical tags.
The Power Is Yours!
Take as many upgrades with different damage tags as possible, the more evolutions you have unlocked, the easier this will be.

Play endless mode on the Isolated City map for the most time to gather your upgrades.

Tank, Engineer and Medic seem like a pretty solid option: Tank can apply Injure with his shotgun/minigun and his "Sawblade drone: enchantment" evolution can apply bleed, burn and freeze. Engineer can apply electrify with his weapon and all of his abilities. Medic's "Antidote flasks" weapon evolution and "Experiment 21: 13" evolution can apply toxify.

Once these are acquired, continue to evolve the other abilities to apply effects more consistently, and for military training and infinite upgrades aim for weapon/ability cooldown for the same affect.

What A Week, Huh?
Take as many upgrades with different damage tags as possible, the more evolutions you have unlocked, the easier this will be.

Play endless mode on the Isolated City map for the most time to gather your upgrades.

Tank, Engineer and Medic seem like a pretty solid option: Tank can apply Injure with his shotgun/minigun and his "Sawblade drone: enchantment" evolution can apply bleed, burn and freeze. Engineer can apply electrify with his weapon and all of his abilities. Medic's "Antidote flasks" weapon evolution and "Experiment 21: 13" evolution can apply toxify.

Once these are acquired, continue to evolve the other abilities to apply effects more consistently.

The easiest way to apply 5 effects to a single enemy is to aim for a boss, make sure to aim for ability cooldown passive upgrades and once you have everything listed above (or more) get close enough to a boss for sawblade drones and energy shield to hit at the same time.
My Savior!
When selecting a survivor from the S.O.S signals during a run, you also get the option to liberate the survivor and get a level up and Meta-upgrade currency instead. Do this for 6 S.O.S signals in a row.

Note: you do not get the option to liberate a survivor once you have 3 survivors in your squad, so I recommend doing this once you have 2 survivors.
Accidents Happen
The Mummy boss on the Vile Wasteland map is able to damage and kill their own allies with it's ability, having this happen to 150 zombies in one run should happen naturally.
It's Dangerous To Go Alone
This achievement is not too difficult, it's very similar to a regular run except you will obviously be lacking some of the bonuses of items.
How Are You Not Dead?
The first minute of a run is not difficult so it's best to do it then.


First return any training points invested into your hp regen in the general upgrade tree as you are unable to stay below 10% hp with health regenerating. Investing into max hp meta-upgrades will make this easier.

Start a run with SWAT as team leader, let zombies damage you until you are below 10% hp and then simply avoid getting close to enemies for 1 minute.
Too Much Water
Corrosive puddles are only found on the Green Hell map, if you have a good amount of the meta-upgrades purchased you should be able to do this at the start of a run with no issues.
Beelzeshmub
The Witch is a boss that appears on multiple maps, once in range she will stand still and send a small swarm of flies at you.

I recommend going for this on the Isolated City map as the map is easier.

There are probably a lot of ways to get this achievement as if you have high DPS weapons and abilities you can probably kill her before she is able to spawn her minions. But my strategy was to stay far away and kill her offscreen, that way you never get close enough to her for her to spawn her flies.

To do this I selected Engineer as my team leader (him being leader is important), when an S.O.S signal appears you want to take a good survivor for group damage, I recommend Ghost for his Thousand Cuts weapon upgrade. You want to focus upgrading the Engineers weapon first, after maxing the tier 2 version, you will have a choice between Blaster and Laser, Pick Laser. Laser is a constant beam of damage in a straight line. After this, continue to take any other survivor and upgrades to help you survive.

Once you have Engineers Laser weapon upgrade, go to the settings and enable Manual aim for only for team leader, this will allow you to aim down the witch offscreen while your other survivor/s kill the zombies. When a boss spawns it will be indicated by a red arrow on the side of your screen, if you aim the laser at the arrows you are able to kill the bosses without them being on screen, If one of these is the Witch, you will get the achievement.
No Skill
Instead of taking and upgrading abilities from the start of the game, only take new weapons and weapon upgrades for the first 10 minutes of a run.

This achievement is fairly easy, if you are going for this then you most likely want to go for the 20 minutes with no abilities in the same run so take weapon upgrades when they appear and banish any abilities and reroll when weapons don't appear, you can always skip if you run out of banishes and only have the choice of abilities.
Skill Issue
Instead of taking and upgrading abilities from the start of the game, only take new weapons and weapon upgrades for the entirety of a run.

If there is any confusion on what is a weapon and what is an ability, abilities are indicated by a cog icon at the top of the upgrade, weapons are indicated by a gun icon.

Since you have to survive 20 minutes, it's best to play on default mode on Isolated City because it is the easiest map.

Since you are playing the full 20 minutes until dawn, you want to banish abilities whenever you don't have a weapon choice in your level up upgrades, since there are much less weapon upgrades than abilities you will eventually run out of banishes and potential weapon upgrades, when this happens just skip the upgrade choice.
Hold My Beer
Instead of upgrading weapons from the start of the game, only take new abilities and abilty upgrades for the first 10 minutes of a run.

This achievement is really easy, if you are going for this then you most likely want to go for the 20 minutes with no weapons in the same run so take ability upgrades when they appear and banish the weapons of your 3 survivors when they appear, save your other banishes for better item choices.
Hold My Keg
Instead of upgrading weapons from the start of the game, only take new abilities and abilty upgrades for the entirety of a run.

If there is any confusion on what is a weapon and what is an ability, abilities are indicated by a cog icon at the bottom of the upgrade, weapons are indicated by a gun icon.

Since you have to survive 20 minutes, it's best to play on default mode on Isolated City because it is the easiest map.

Since you are playing the full 20 minutes until dawn, you want to banish the weapons of your 3 survivors when they appear, save your other banishes for better item choices. There are a lot more abilities than weapons so you won't be able to max all of them in a single run, this won't matter as you will have more than enough abilities to survive.
Death is Approaching


Surviving for 30 minutes in endless is pretty easy already, with 1 survivor it isn't too much harder.

For the easiest time with this achievement, it's best to play on Isolated City because it is the easiest map.

For badges I recommend taking Gunner badge, Tough badge, Reload badge and Growth badge, these provide a good mix of utility and damage.

I recommend using Tank as he has a great DPS output with his Minigun and his abilities. Focus hp regen, max hp, dodge chance, movement speed and Armour for military training/infinite upgrades, and damage and cooldowns for items. Always take the highest quality upgrade when given military training choices.
Zero Deaths!


While this sounds difficult due to the existence of healthpack pickups, this achievement was specifically designed with that in mind.

You don't have to worry about picking up healthpacks off of the floor as the developer designed this challenge so that you can't fail it by levelling up your meta-upgrades or accidentally picking up a healthpack that spawned below your feet, this also means you can keep your meta-upgrade tree maxed out for that hp regen.

This achievement only requires you to not pick up any healing/regenerating abilities, items or passive stats in the run, for this reason, you want to avoid the medic survivor.

Other than the above, just play out a default mode run and you should get the achievement.
You And What Army?
This achievement is fairly difficult as with 1 survivor you are left with quite low health and limited damage.

For the easiest time with this achievement, it's best to play on Isolated City because it is the easiest map.

For badges I recommend taking Gunner badge, Tough badge, Reload badge and Growth badge, these provide a good mix of utility and damage.


I recommend using Tank as he has a great DPS output with his Minigun and his abilities. If he doesn't work for you, feel free to try other survivors. Since you are limited to 1 survivor it is very easy to max out all of his upgrades in the run. After this you can select infinite upgrades.

When it comes to items and passive stats I focused the usual hp regen, max hp, dodge chance, movement speed and Armour for military training/infinite upgrades, and damage and cooldowns for items. Always take the highest quality upgrade when given military training choices. Since you have limited upgrades to pick from, you'll have a lot of banishes to spare, use these to banish items that will not help you as much.

Most of this run is fairly easy if you can run away and dodge all of the enemies, you'll have a slightly easier time given your smaller hitbox with a single survivor. It only really gets difficult in the last couple minutes when enemies are super fast and super strong.

The Terminator


For the easiest experience, it's best to go for this achievement on Isolated City because it is the easiest map.

For badges I recommend taking Gunner badge, Tough badge, Reload badge and Growth badge, these provide a good mix of utility and damage.

I recommend using Tank as he has a great DPS output with his Minigun and his abilities. Focus hp regen, max hp, dodge chance, movement speed and Armour for military training/infinite upgrades, and damage and cooldowns for items. Always take the highest quality upgrade when given military training choices.
Come With Me If You Want To Live


Very easy achievement, survive with just the team leader for 10 waves, after completing the 11th wave you will be offered an S.O.S, select a survivor and get the achievement.
Decide Their Fate


This achievement is a little RNG reliant but there are a few ways that you can do this, Start a run on Isolated City with Engineer as team leader, here you can either get it on wave 1 or 2. It may take a few attempts but this is how I personally got it.

For wave 1 as soon as the timer starts, move until you find an enemy and try to stay close enough to them to be constantly attacking until the wave ends, if you get lucky with spawns you may get it on wave 1.

For Wave 2, upgrade Energy Shield twice, wait for the timer to start again and do the same as you did on wave 2, again if you get lucky with enemies spawning close you may clear the wave in under 20 seconds.


Alternatively the Boomer enemies on Extermination Green Hell are able to kill other zombies, if you follow the exact path that ^DreeMax^ discovered, most enemies will spawn together and can be killed by the Boomers, after those are cleared, move towards any stragglers to clear the wave.
https://www.youtube.com/watch?v=JHSkzxx9-Uo&t=15s If you are still struggling, the video also shows alternate ways to get this achievement on the other maps.
I am Speed
While this may sound time consuming at first, abilities count towards your stats while they are active.


There are a few survivors with abilities that grant movement speed for a short time, namely Pyro's "No Pain No Gain" ability and Medic's "Stimpack" ability.

You then want to focus taking any other items, upgrades or military training/infinite upgrades that increase movement speed.

Specifically try to aim for the "Quick Buck" item which gives you a super speed powerup whenever you pick up cash.

It helps to also take ability duration/cooldown items and stats when not offered movement speed as it will make it easier for the abilities to line up with one another.
Fire Walk With Me
Take Pyro and select his Fire walk ability.

You can do this over multiple runs so it's not that difficult.

If you want to get it as fast as possible, take any abilities, passive stats or items that increase ability cooldown/duration and movement speed.

Unlocking the "Fire walk: Always active" evolution is also very useful.
One Million Bullets
Very easy achievement, just take weapons and abilities with the "Kinetic" damage tag.


Equip the Gunner badge for extra kinetic damage/tags and other damage badges in the remaining slots.

The easiest way to get this is to start a run with SWAT as the team leader, max out his main weapon to the "Assault Rifle" upgrade and take any abilities/items with the kinetic tag.
Ragdoll Physics
Very easy achievement, just take weapons and abilities with the "Explosive" damage tag.


Equip the Bomber badge for extra explosive damage/tags and other damage badges in the remaining slots.

The easiest way to get this is to start a run with Tank as the team leader, max out his main weapon to the "Rocket Launcher" upgrade and take any abilities/items with the explosive tag.
They Bleed Pixels
Very easy achievement, just take weapons and abilities with the "Slashing" damage tag.


Equip the Carver badge for extra slashing damage/tags and other damage badges in the remaining slots.

The easiest way to get this is to start a run with Ghost as the team leader, max out his main weapon to the "Thousand Cuts" upgrade and take any abilities/items with the slashing tag.
Just Want To Watch The World Burn
Very easy achievement, just take weapons and abilities with the "Fire" damage tag.


Equip the Heat badge for extra fire damage/tags and other damage badges in the remaining slots.

The easiest way to get this is to start a run with Pyro as the team leader, max out his main weapon to the "Infernax" upgrade and take any abilities/items with the fire tag.
Let It Snow, Let It Snow, Let It Snow
Quite an easy achievement, you just need to take specific upgrades since there are less with the "Ice" tag.


Equip the Glacier badge for extra ice damage/tags and other damage badges in the remaining slots.

Take Huntress to start and don't take any other survivors until you have her "Freezing arrows" weapon upgrade, then select Medic and focus getting her "Freezing flasks" upgrade. Take any abilities/items with the ice tag.

Most things with ice damage are locked behind evolutions, so it would be helpful to unlock these first, the only survivor with more than one ice type ability evolution is Engineer, so he is a good choice for your 3rd survivor.
1.21 Gigawatts Of Power
Very easy achievement, just take weapons and abilities with the "Electric" damage tag.


Equip the Thunder badge for extra electric damage/tags and other damage badges in the remaining slots.

The easiest way to get this is to start a run with Engineer as the team leader, max out his main weapon to either of it's upgrades and take any abilities/items with the electric tag.
My Chemical Bromance
Quite an easy achievement, you just need to take specific upgrades since there are less with the "Chemical" tag.

Equip the Soul badge for extra chemical damage/tags and other damage badges in the remaining slots.

Take Medic to start and don't take any other survivors until you have her "Antidote Flasks" weapon upgrade, then take any abilities/items with the chemical tag.

Most things with chemical damage are locked behind evolutions, so it would be very helpful to unlock these first: Pyro, Ghost, Huntress, Engineer, Tank and SWAT all have a chemical evolution, I recommend Engineer as he has two that can deal chemical damage.
Going All in
This isn't very difficult, the kinetic tag is probably the easiest, by simply upgrading SWAT, Tank and Huntress' weapons you will get this achievement.
Monkey Business
For this achievement you need to have unlocked the third rank for the Huntress survivor to unlock her Decoy ability, the Decoy ability drops every 25 seconds and zombies are attracted to it.

To get the achievement you have to be playing on the Vile Wasteland map as it has an environmental hazard in the form of a giant worm that pops out of the ground at your position every minute or so. Each time your Decoy is dropped on the ground you want to stay close to it in hopes that the worm jumps out while the Decoy is active, your goal being for a zombie to be attracted by the decoy but be killed by the worm.

It may be helpful to use manual aim, found in the controls settings, so that you don't kill the zombie you are trying to lure. Taking ability cooldown items and meta-upgrades will make the Decoy drop more frequently and make this easier.
Dog Eat Dog
The Mummy boss on the Vile Wasteland map is able to damage and kill other bosses with it's ability, you should get this naturally while playing.
Om Nom Nom
Depending on how well you have played while going for the rest of the achievements, this will probably be one of the last you go for. So I will specifically explain how I farmed the rest of the kills I needed.

You obviously need to be playing on the Vile Wasteland map for the Worm Environmental Hazard, the best way I found for the worm to kill a large number of zombies was to try to focus taking weapons over abilities, this allows you to use manual aim to avoid killing zombies and form hordes for the worm to kill. Sticking close by the horde will make the worm pop up there and then all you have to do is guide the horde over the Hazard indicator.

This should only take a few runs at the most if you have already completed the rest of the Vile Wasteland achievements.
Why Didnt You Dodge!?
This is fairly easy if you have most or all of the meta-upgrades unlocked.


This obviously has to be done on the Vile Wasteland map for the Worm Environmental Hazard, wait until you have 3 survivors in a run for maximum health and run into the Hazard indicator until you take damage, then run away.

Wait until your health is full before trying again and repeat 4 more times until you get the achievement.
Don't Hug Me, I'm Scared
You get this achievement by "hugging" a zombie, which just means being close to one for 7 seconds, you should get this naturally while playing.

If you don't happen to get this naturally you can do this fairly easily with a boss.
It's Raining Men
To get this achievement you need to send at least 6 zombies into the air simultaneously, the easiest way to do this is with explosives, specifically the Tank survivor's Rocket Launcher.

To start, you want to reset your General and Tank upgrade tree. Having too much damage, reload speed or attack speed will make this achievement next to impossible.
These are the upgrades that I believe will make this achievement the easiest to get, you will probably be able to do it with less, but the extra upgrades to armour and health regeneration will help with survivability, This will cost you 114 upgrade points.


The general strategy for this is simple, you want to walk in a circle around the centre of the map, this will allow the zombies to group up and form a horde, try to avoid shooting towards the horde. Playing In Hardcore mode will make it harder to kill the zombies and allow for a bigger horde to form.
As you walk around in a circle you want to be collecting exp to upgrade your shotgun as you want to get your shotgun to the Rocket Launcher upgrade, do not choose either of the skill upgrades as they will kill the hoard and you'll have to restart, you do not need to collect the item chest or the 2nd team member. It will only take a few minutes to get to here, so don't worry.


This next part is the most important as it will determine whether you get the achievement or not.

After taking the Rocket Launcher upgrade it will start shooting rockets, you want to avoid shooting towards the hoard with this first set of Rockets if possible, if you can fire away from the hoard it will help, Using Manual Aim in the Controls settings will help with this.

As soon as the fourth and final rocket is firing, you want to run directly into the centre of the horde like shown in the screenshot, You will have a few seconds while your rocket launcher reloads for them to surround you. I was able to get this to work on my 2nd attempt so this should be easy for most people.

Final note, there is a chance that you will get another upgrade after you acquire the Rocket Launcher, this is why I opt to have enough training points for a banish, you want to banish it after the first upgrade as you don't want to increase it's reload speed. For any further upgrades you can take passive stats for survivability or just skip.
Cause Baby You're a Firework
This achievement is really easy, you need 2 different explosives for this to work, we are going to use Rocket launcher and explosive arrows, as these are the easiest.

Select Tank as the team leader and upgrade his weapon, after you max the tier 2 shotgun, you will have a choice between Minigun and Rocket launcher, select Rocket launcher. When you find an S.O.S signal, select or reroll for Huntress. Upgrade her weapon until you max her tier 2 bow, you will have a choice between Freezing arrows and Explosive arrows, select Explosive arrows.

Once you have these, go to the settings and turn on manual aiming for the whole squad. You will then want to circle around the map aiming away from where the enemies are grouping up until they form a small horde, simply walk towards this and aim into the horde and you should get the achievement, if not just keep retrying.
EXPLOSION!
To get this achievement you have to cause an explosion of a certain size.


This is simply done by investing into the explosive tag and ability area.

Take survivors with explosive weapons and abilities and level them up to gain the tags.

"The Bomb" item is very useful as it gives both explosive tags and increases explosion size.
Circular Decomposition
Every few minutes on the Vile Wasteland map you are surrounded by a circle of mummies that have high health and slowly close in on you, to get this achievement you need to kill one very fast after they spawn, I was able to get this by using the Ghost survivor's Thousand Cut weapon upgrade, you can also get this with Engineer's Energy shield ability as that also has high DPS. The more upgrades you have when the mummies spawn, the better.
Curly Little Potato
This achievement is an easter egg that requires going to a certain area with a certain item.


This achievement can only be done on the Vile Wasteland map and only after you have completed the very easy "Power Overwhelming" achievement. The goal is to take the Potato item from an item chest, I recommend going for this on endless mode so that you have extra time to try and get the potato. Once you have the potato, you have to go and stand at the edge of the map on the East side and Sanji the Rabbit will appear in the window of a building outside the map.

For the easiest time with this achievement first ban as many items from the item pool as you can prior to the run. I recommend having your rerolls and banishes maxed out in your Meta-upgrade tree, and equipping a max level gamble badge.

1) Obviously always take the Potato item over any other choice in the item selection.
2) Banish any other item choice that is not Potato.

This shouldn't take long but there's obviously RNG of getting the potato. Once you are able to find the potato you need to rush to the east side of the map, and walk along it until you see this building.
Sanji will appear in the window and after a few seconds he will be surrounded by hearts and you'll get the achievement.
I hope this guide helped you
If this guide helped you with any achievement then I would appreciate a Like and/or Favourite.

131 Comments
Paulo André Apr 10 @ 12:22pm 
Thanks @Red Dox for Explosion achievment tips. I did like you said (quote: "Tank+Swat+Huntress, picking everything to push explosions for their explosion weapons.")
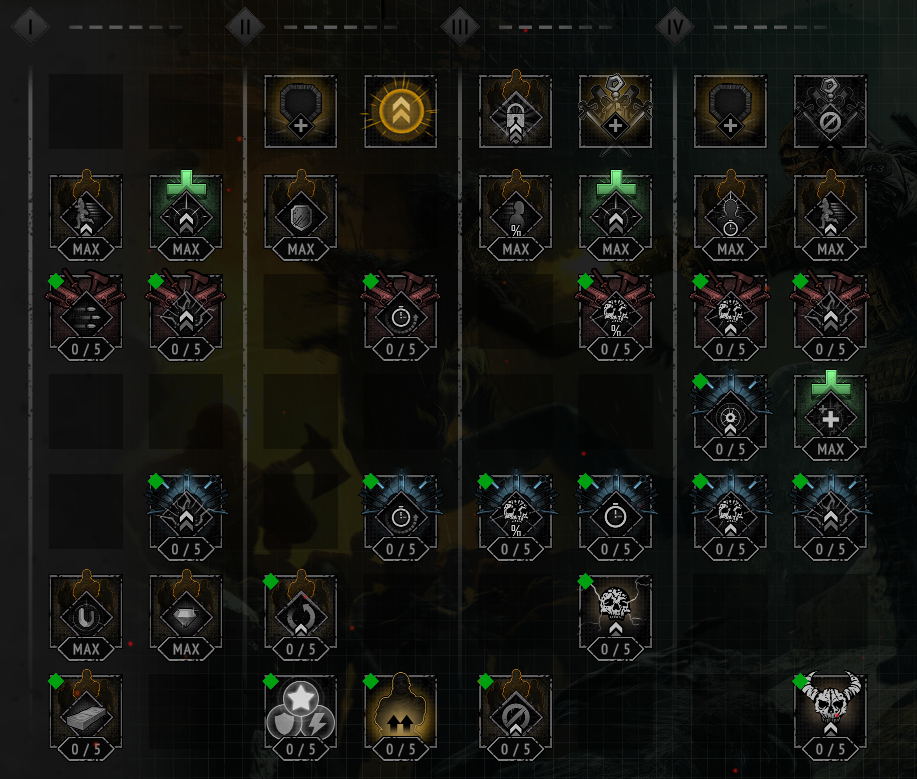
and as soon as i got "Ultra Instinct" the achievement popped it up. I checked tags i had 70 explosive tag by then.
Thanks again.
damn. Apr 9 @ 5:22am 
Yes, I play endless mode, difficulty level 1, reached 40 minutes. Collected explosive tags up to 40+, still can't do it. The only thing is, the item "Ultra Instinct" never dropped, as I understand it, the chance of its drop is very small, is it impossible without it?
JHG  [author] Apr 9 @ 4:54am 
Are you playing in endless? you want as long as possible to gather explosive tags
damn. Apr 9 @ 4:10am 
Hello everyone, please tell me about the achievement explosion!, I tried your advice, took swat + tank + huntress, knocked out the item "Bomb", nothing works, I've been suffering for 10 hours already, the last achievement remains. Maybe a certain location or difficulty level is needed? Maybe a certain tactic, according to my settings, I have auto fire enabled, maybe I need to gather zombies in a bunch and shoot at them so that there is a bigger explosion.
JHG  [author] Apr 5 @ 3:29pm 
its tags + "the bomb" item, not just having the item, you just reach big enough explosions after a certain point, but sure doubling your overall tags is a good call too, just more rng reliant
Red Dox Apr 5 @ 2:50pm 
For explosion achievement, "The Bomb" item did not really work. What did work, was using Tank+Swart+Huntress, picking everything to push explosions for their explosion weapons. That should bring you to 35+ explosion tag fast enough. Then, you have to pick "Ultra Instinct" out of the chest (if it comes too early, lock it down and pick it once your explosion tag is over 30 and highest) which probably push esexplosion tag over 70. Your survivors firing their explosion weapons should then unlock the achievement right away.
AzarinEvil Mar 18 @ 7:17pm 
The Circular Decomposition achievement appears to be bugged out in 0.8, I have one shot the entire circle as they spawn and it's not popping up. Also Chargers can damage zombies and other bosses for those related achievements. Explosion is tied to the size and damage of an explosion.. I got using items that boost explosion size and damage with Tank + Rocket Launcher
[murr] Mar 18 @ 2:21pm 
It's Raining Men
randomly did this ach with bomb arrow on huntress
Never Mar 18 @ 1:01pm 
any update for explosion! yet?
JHG  [author] Mar 16 @ 6:16pm 
The guide is now updated to include all of the achievements and changes of the 0.8 update.

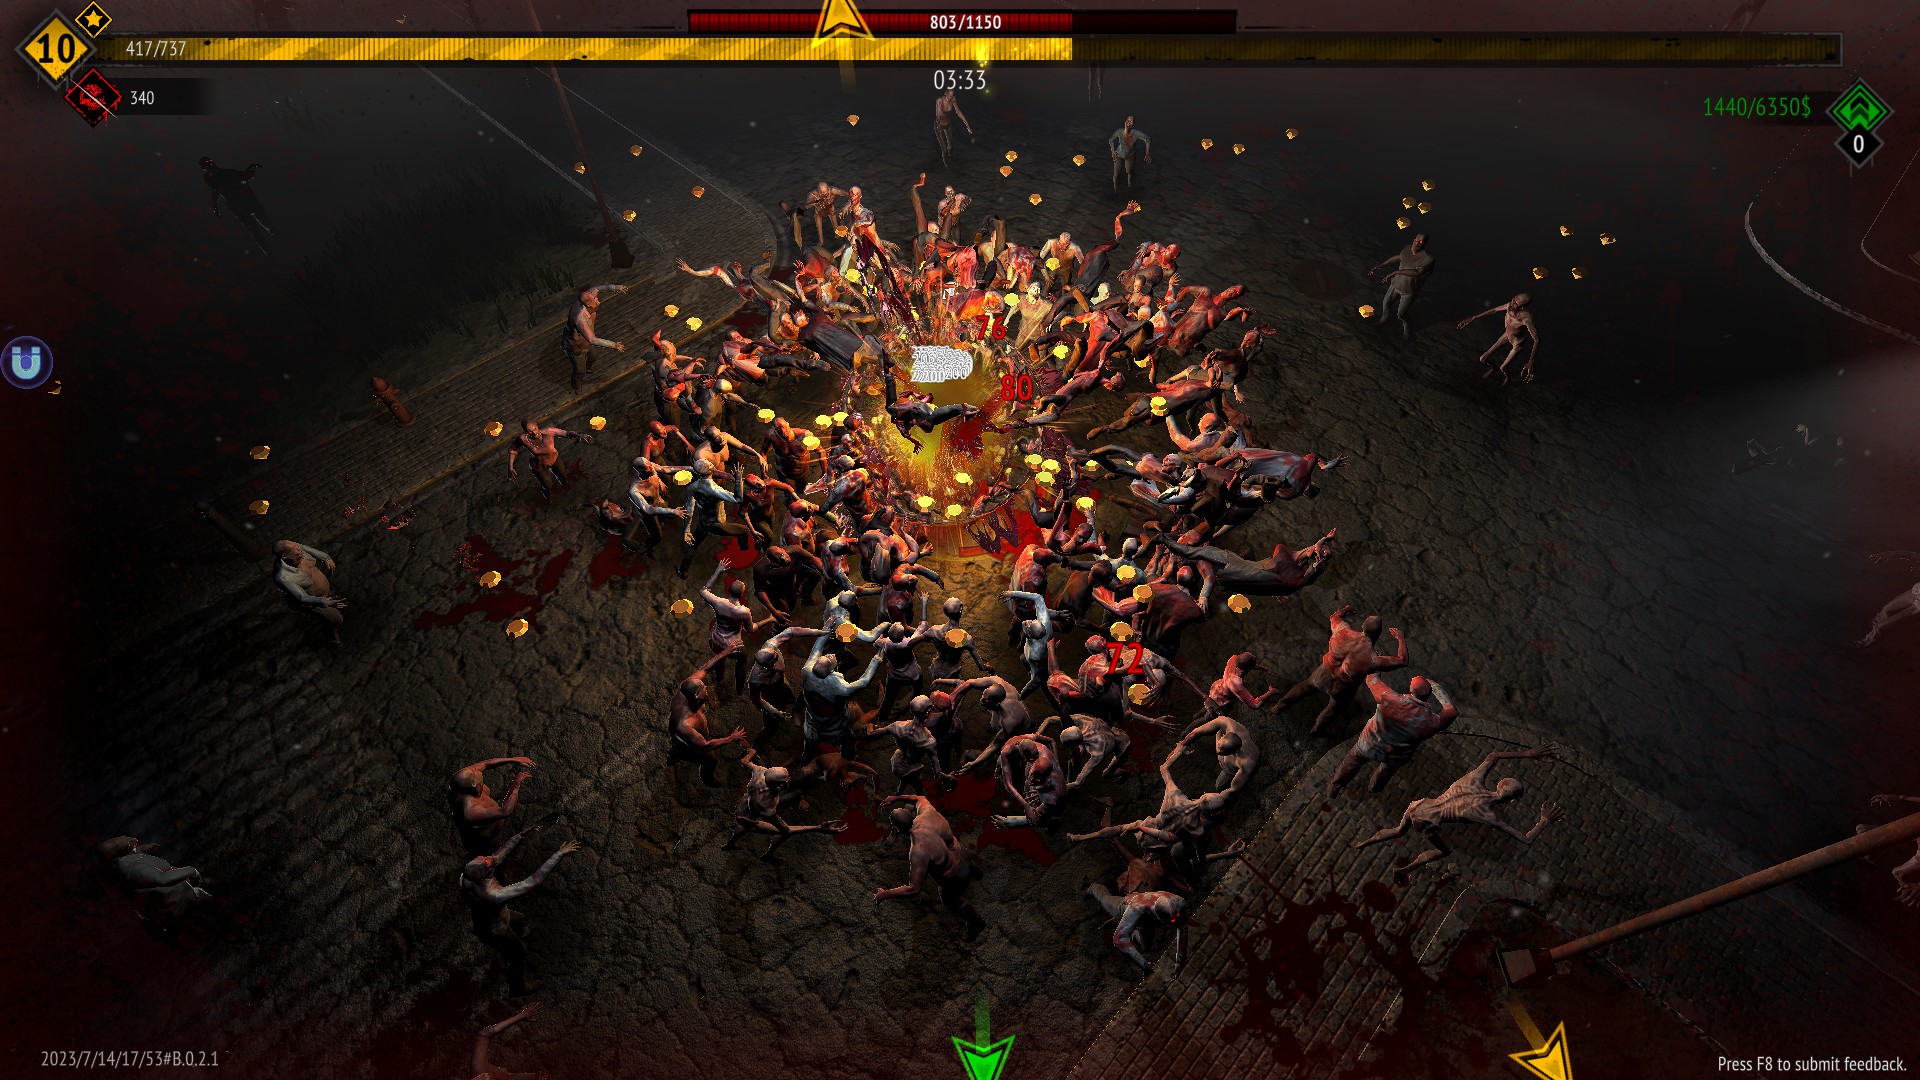
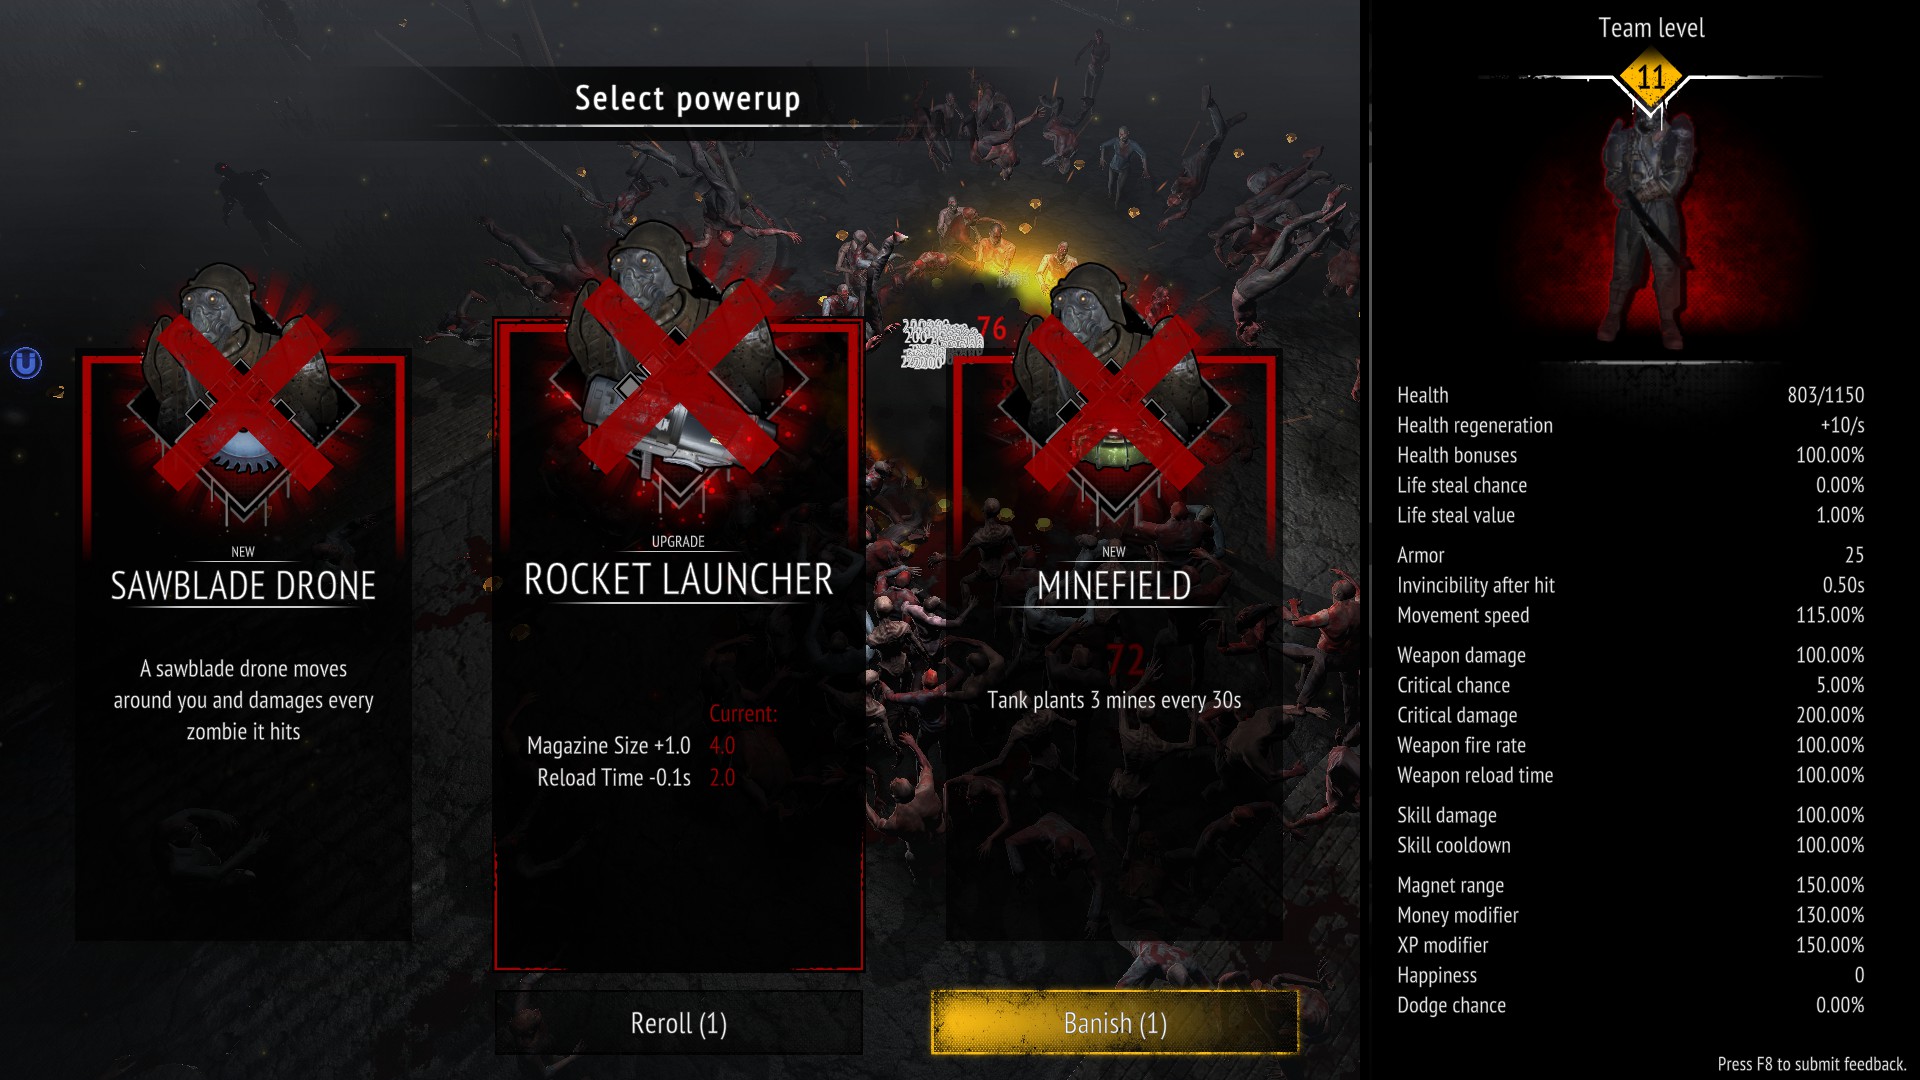
The "EXPLOSION!" achievement currently doesn't have a guide as it was unlocked automatically for a lot of people who previously played, I will update it when I know the requirements.

The three one-hit related achievements were removed with v0.8 and seem to be only returning as in-game challenges, as such they will not be part of this guide going forward.

Happy Hunting!