Derail Valley

Derail Valley

169 ratings
DV:Simulator Engineer's Comprehensive Manual [Deprecated]
By [Box] Silent Apollo
This Manual is now deprecated - the information contained was valid for the original Simulator release (1st July 2023 - Build ID 11604069) Though much of the information remains valid, some of the specifications and test results may be inaccurate.

The in-game manual is just reams of text, a picture paints a thousand words. This manual contains much the same information as the DV:Simulator in-game manual. The difference is, this one is designed to be easy to read and navigate, and is written in order of importance. I have also put in some advice for new players the official manual won't provide, these have been marked as spoilers.

DISCLAIMER:
If you want the challenge of overcoming the costs and other problems caused by your mistakes, don't read the spoilers.

I will say it again. Do not read the spoilers if you want to learn by failure. Read them if you never want to fail. Sometimes it's more fun to mess around and see what works. The spoilers will tell you everything you need to know to never incur a damage related fee. Damage related fees are a part of the game, so following the rules in spoilers of this guide will not always be the most fun option.

You have been warned.
14
4
3
10
3
3
2
   
Award
Favorite
Favorited
Unfavorite
Translations
Français: DV:Simulator - Manuel Complet du Mécanicien[www.dropbox.com]
Before You Drive
I recommend learning about the signage, the unmarked speed limits and the station schematic map before you even enter a locomotive. These are the first things I wish I knew about after the tutorial finished.

Apart from re-railing and remote switching, the comms radio has an LED light built in, as well as some other helpful functions depending on your game mode of choice, have a play around switching between the settings to see all the cool things it can do.

Generally, pushing the brake and throttle levers forwards slows you down, and pulling them backwards speeds you up. This is a safety feature, as, when trying to slow down, your weight is accelerated forwards relative to the train, so if you are pushed into the levers by momentum you will slow down harder instead of suddenly accelerating into a wall.

You don't need to use the switch remote to switch points, you can click on the lever near the ground. Or, use the mouse overlay mode and simply click the switch.

You can push a turntable by walking at the pole on either end.


Some Helpful Definitions:
Locomotive/Engine - A powered vehicle designed to pull cars
Car/Wagon - An unpowered vehicle designed to hold cargo and/or passengers
Consist/Train - Any collection of coupled cars and/or locomotives.
Job - I use the word job to mean delivery order, it's the same thing.


Train ID Codes:
DE - Diesel Electric
DH - Diesel Hydraulic
DM - Diesel Mechanical
S - Steam

For the diesel trains, the numbers correspond to the number of powered or drive axles.
For steam trains, from left to right, the numbers correspond as follows. First represents the number of leading (front) unpowered wheels. Second represents the number of powered drive wheels. Third represents the number of trailing (rear) unpowered wheels.


Job/Order Codes:
FH - Freight Haul - The first job type you are licensed for after the tutorial. Job to move cargo from an 'O' track in one station to an 'I' track in another. Will create an SH unloading job once completed.

SH - Shunting - Probably the second one you'll be unlocking. Job to load, unload and/or relocate parked cars within a station. Uses all track codes. May require multiple car drop-offs/pick-ups. You won't be travelling to another station for these. They unlock new LH, FH or SH jobs once completed.

LH - Logistical Haul - Job to move empty cars from one station to another. Similar to SH jobs, you may be asked to pickup cars from multiple tracks at the departure station, and may be asked to drop them off in multiple locations at the destination. Do not include loading/unloading of cargo. Create new SH loading jobs once completed.


ID Plates:
Every vehicle, powered or not, has an ID and a plate showing that ID.
The plate also displays vehicle type, empty weight, length, vehicle damage, cargo damage, Cargo type, cargo weight and current allocated job code. These are updated automatically as required.


It is possible to locate the cars before accepting the job by running around the yard looking at the ID plates. However, if you don't expect any delays, this is often just a waste of time as the time bonuses are generally very forgiving.
Signage
Station Track Identification Signage:


This has a number (1~15) and letter (I, L, O, S, P, PS) pair.
I - Inbound track
L - Loading/UnLoading track
O - Outbound track
S - Storage track
P - Passenger platform
PS - Passenger Storage track
It also has an arrow with a letter designating the track and yard (see station schematic map section for more info on yards).


Speed Limit Signage:
For VR distance visibility, speed limit signs have the trailing 0 omitted. So '6' means 60km/h and '12' means 120km/h.


Speed limits only apply to the block of track after the sign. When passing between speed limit blocks, the lower limit applies to your whole train. So you have to wait until the back of your train has passed a higher speed sign before the faster limit applies.

NOTE: For long trains you may be moving through multiple speed limit blocks, the slowest one always applies.


Other information found on speed limit signposts:
Mostly level gradient (between -0.5% and 0.5%):


Climbing gradient (%):


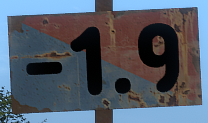
Descending gradient (%):


NOTE: If no gradient sign is present, the previously marked gradient continues.

Decreasing speed limit ahead (Expect at least 20km/h or greater reduction at next speed limit):


Increasing speed limit ahead (Expect at least 20km/h or greater increase at next speed limit):


NOTE: If neither the increasing or decreasing speed limit ahead sign are present, ONE of the following statements applies:
  • The next speed limit will only be 10km/h slower or faster than this one.
  • There is a junction ahead (see below)
  • There is no other speed limit before the end of the line.

Junction Ahead Warning (Expect severe speed limit changes), usually accompanied by a distance to the junction in km (i.e. 0.3 = 300m):


WARNING: This sign should never be accompanied by an 'increasing/decreasing speed limit ahead' sign even if one or more tracks would require it to normally - DO NOT LET THIS CATCH YOU OUT. You may see a 60km/h sign that's leading to a junction, until you know the junction and it's speed limits expect the junction to have a 30km/h limit. A number of them do. Real train drivers need to learn the route before they are allowed to go on their own. You are on your own in this game, without an instructor who knows the lines, be prepared for this and you will be fine.
Other Speed Limits
The default main line speed limit is 50km/h. So, when passing through a station using the main line, you are in a 50km/h speed limit block unless otherwise stated.

For all main line junctions the speed limit is 50km/h unless a slower one is defined. You can try a faster limit if you're feeling brave, but I've run into derailing related problems through junctions that are marked as 60km/h on approach and 60km/h or more on exit in the past. This also gives you a better chance of switching the junction with the remote if that option is available to you.

NOTE: I only recommend experimenting with this once you are familiar with the route. Always use the previously mentioned 30km/h rule on approach to an unfamiliar junction.


Yard speed limit is 30km/h. So, when manoeuvring on any track other than the main line you are in a 30km/h speed limit block.
This is especially true with lighter loads and empty cars as they are prone to getting lifted off the track on corners and junctions at higher speeds. A rubber banding effect can happen with empty cars where if you are accelerating sharply on a tight corner you can pull the car off the track. Imagine pulling a string from both ends, but the string is at the coupling height, so a foot or two above the track, and runs through the middle of the cars.

Coupling speed limit is 5km/h. Hitting cars at higher speeds will cause damage.
For hazmat cars I recommend imposing a speed limit of 3km/h. Sometimes the damage caused by collisions below 10km/h is negligible, or only applies to the cargo and not the cars. But all damage costs money, and that's what this guide is trying to mitigate. When you get to hazmat, all damage is extremely expensive, so getting into good habits early on will reduce your frustrations later.

Reminder for the overly cautious (myself included), explosions are fun, and thanks to the new auto-save and load capability, a mistake can be rolled back if it's impossible for you to financially recover. It is of course up to you whether you resort to something that drastic.


Acceleration and Deceleration:
Go easy on the throttle and the brakes, even more so when it's wet or raining. Wheel-slip and skidding damage is expensive.

Use sand to reduce wheel-slip when trying to accelerate rapidly, or during a climb. Sand costs money, but wheel-slip damage costs more than sand.

If you slam the brakes on full at high speeds, especially when the rails are wet, you will never stop, you will slide. When this happens, you need to release some brake pressure, which is counter-intuitive because you are trying to slow down, but you want wheel friction, and sliding along the rails only heats up and grinds the wheels and rails.

When braking, you can apply sand if you want, however it only affects the locomotive wheels, trailing cars will still slide, so it's better not to get into a situation where you need sand to slow down.

If it's sparking, flashing and/or buzzing at you, you're doing it wrong. Some trains don't have a wheel slip indicator, you'll have to keep an ear out and/or stare at the wheels when you're unsure.
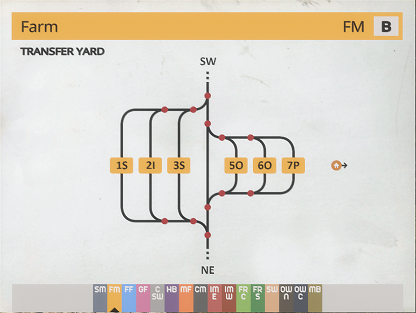
Station Schematic Map Book


Reading this one can be confusing. Start by memorising the first page, which explains what all the different symbols mean.


NOTE: The length and shape of the tracks in these schematics are not to scale, they only show the relative position of the tracks, so be sure to use the in-world signage to verify your position when you are unsure, which will happen occasionally because of this.

Each station may have one or more yards. Each yard is designated a letter, and consists of multiple tracks.
Yard A is the entire station, sub-yards are contained within yard A and are each designated a new letter starting at B.

In the station schematic map book, there is a section for each station. And one page for each yard in that station.

Tip: You can click on a station tab at the bottom to flip straight to that station's overview. This works in VR too.

Yard A (Overview) shows relative position for all points of interest at the station. It also shows where each sub yard is positioned and the points leading to them.


The remaining pages for a given station show the tracks and points within each sub yard.


The station pages are not always laid out North up, so be sure to check which direction you are coming in from first. This has, and continues to catch me out, I'm fairly certain this is done by design.

See above signage section to understand the format of the track number-letter pair.

If a keyboard warrior catches you saying track 10 instead of track 1O they will make your online life a living hell. Even though the in game signs show 10 and not 1O...
Locomotives Overview
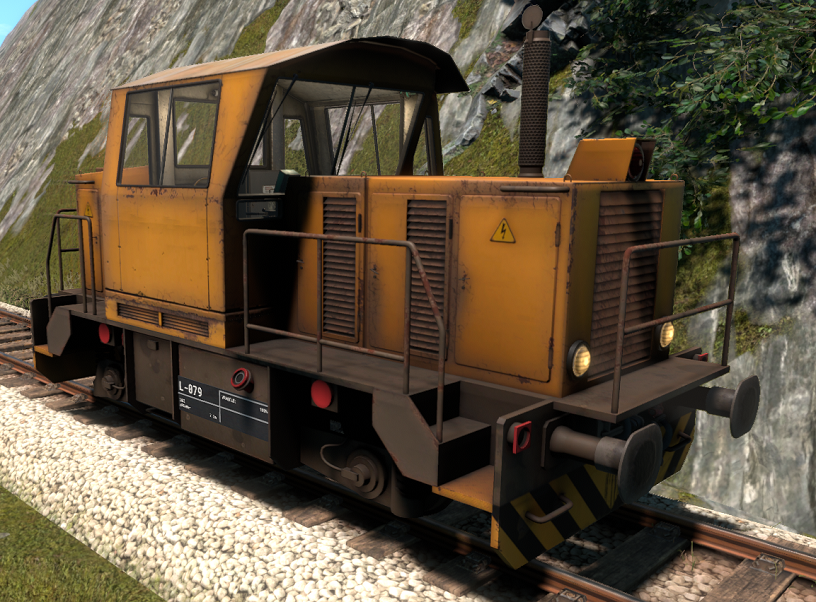
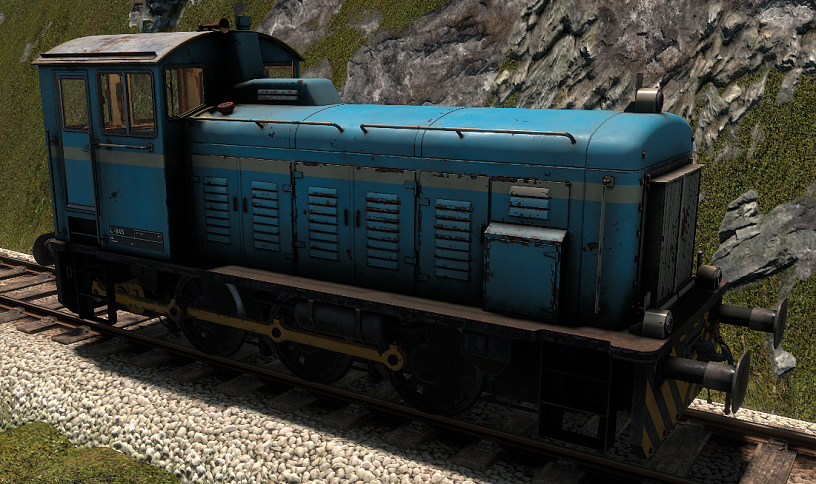
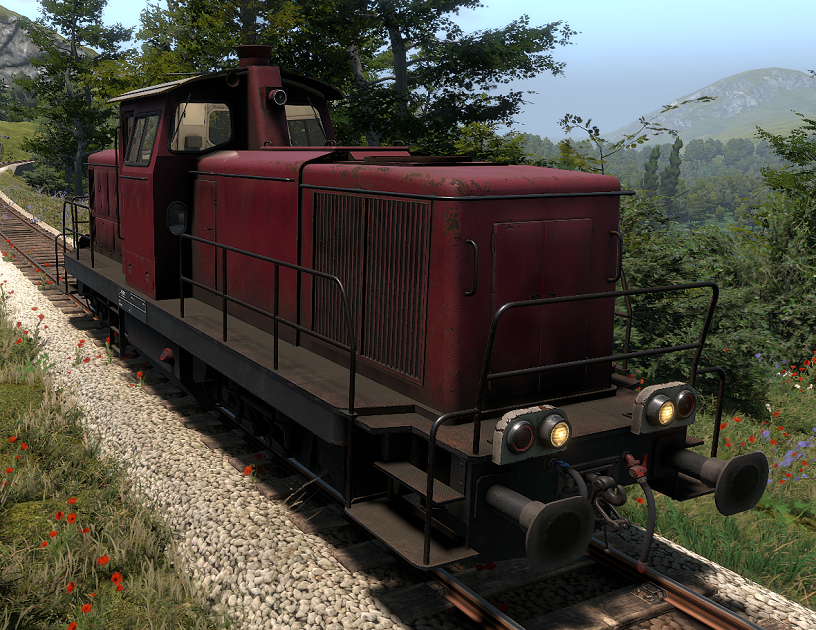
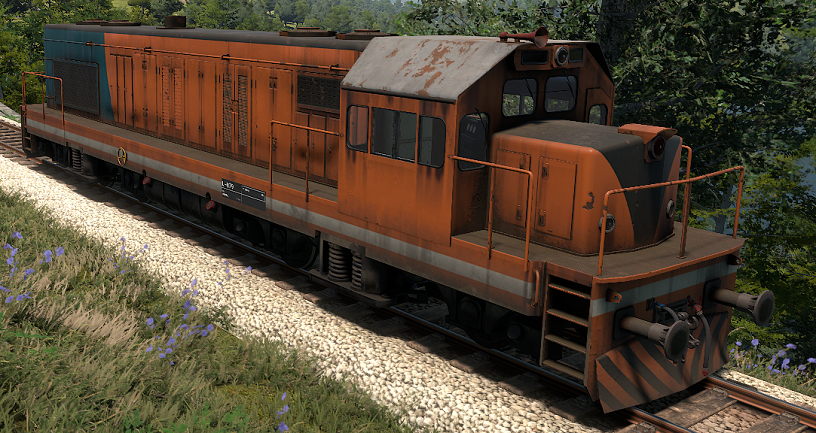
If you can drive the DE2, you can also drive the DH4 and DE6.
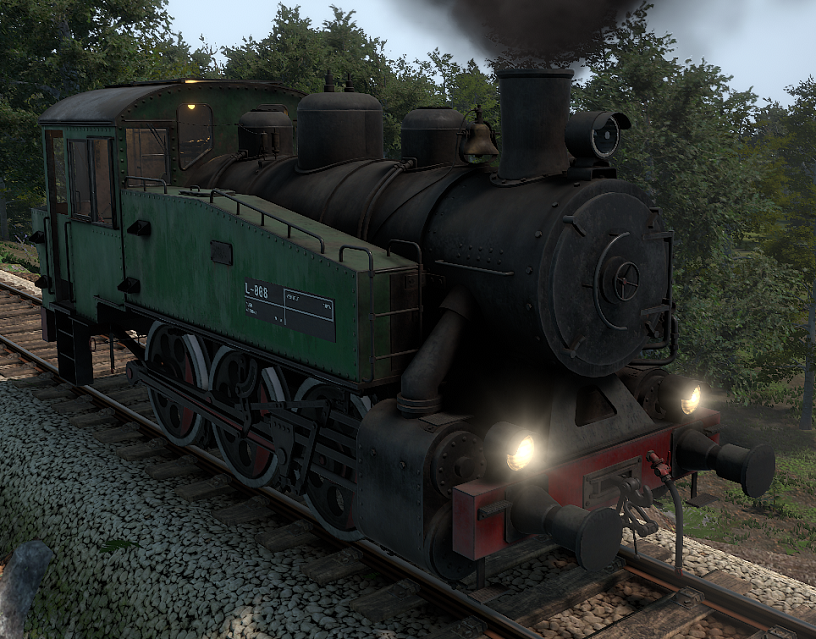
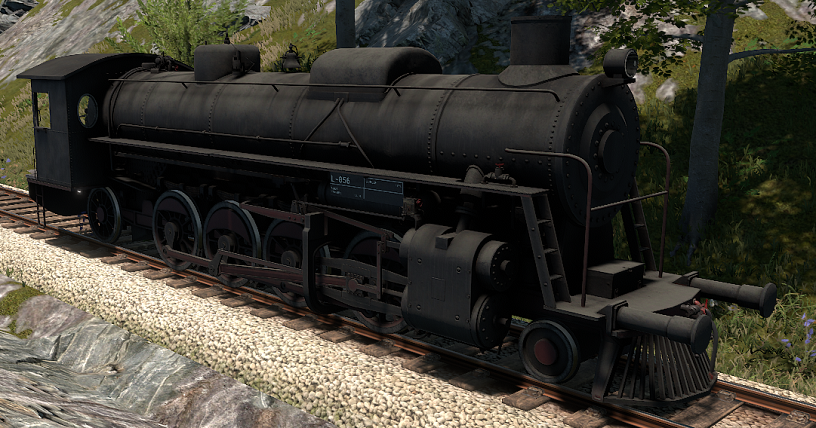
If you can drive the S060, you can also drive the S282.
If you can drive the DM3, you can drive anything.

Max speeds were determined by testing on straight-ish, horizontal track without other vehicles attached.


DE2
Type
Diesel Electric
Axle Count
2
Drive Axles
2
Max Load
400 Tonnes
Max Speed
~70km/h
Multi-Unit
Available

Braking Systems:
  • Pneumatic auto-lapping independent brake.
  • Pneumatic auto-lapping train brake.


S060
Type
Steam
Wheel Count
6
Drive Wheels
6
Max Load
~450 Tonnes
Max Speed
>60km/h
Multi-Unit
Incapable

Braking Systems:
  • Pneumatic auto-lapping independent brake.
  • Pneumatic manual-lapping train brake.


DM3
Type
Diesel Mechanical
Axle Count
3
Drive Axles
3
Max Load
500 Tonnes
Max Speed
~60km/h
Multi-Unit
Incapable
OK, so I may have managed to reach 68.5km/h, but that was really pushing the engine to the maximum, and as there is no coasting with this locomotive, the engine burnout would be significant if you red-line it for a whole trip.

Braking Systems:
  • Pneumatic auto-lapping independent brake.
  • Pneumatic manual-lapping train brake.
  • Dynamic engine compression brake.


DH4
Type
Diesel Hydraulic
Axle Count
4
Drive Axles
4
Max Load
800 Tonnes
Max Speed
>90km/h
Multi-Unit
Available
NOTE: Max speed read from display, however, the hydraulic traction motor RPM continued to rise after speedometer maxed out at 90km/h so I have no idea what the max speed of this loco actually is.

Braking Systems:
  • Pneumatic auto-lapping independent brake.
  • Pneumatic auto-lapping train brake.
  • Hydrodynamic brake.


S282
Type
Steam
Wheel Count
12
Drive Wheels
8
Max Load
1000 Tonnes
Max Speed
~120km/h
Multi-Unit
Incapable
NOTE: TBH I have no idea how fast this beast can go. I ran out of straight track before I could be certain it was going faster than 120km/h, but it definitely reached the max on the speedometer.

Braking Systems:
  • Pneumatic auto-lapping independent brake.
  • Pneumatic manual-lapping train brake.


DE6
Type
Diesel Electric
Axle Count
6
Drive Axles
6
Max Load
1400 Tonnes
Max Speed
~120km/h
Multi-Unit
Available

Braking Systems:
  • Pneumatic auto-lapping independent brake.
  • Pneumatic auto-lapping train brake.
  • Rheostatic dynamic brake.
Braking Overview
As you can imagine, decelerating hundreds to thousands of tons of momentum takes a massive amount of energy. To achieve this, Derail Valley Simulator uses three main types of brakes, the independent brake, the train brake and the dynamic brake. This overview should give you everything you need to know to operate these systems adequately. For those who want more information, there are more detailed descriptions below for each type of brake.

I'm not counting the hand brake as a braking type because it is not generally used to slow a train down, though you could if you really wanted to. The designed purpose of the hand brake is the same as a car's, to prevent the vehicle rolling around when no one wants it to.
You could probably do a handbrake turn in a train if you really want to try it. The challenge is set, take it or leave it.

Why three types?
Train Brake
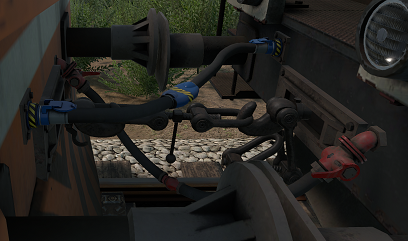
Every vehicle, powered or not has a set of brakes. The train brake system is used to apply the brakes on all vehicles in a train using a single lever. In Derail Valley, all vehicles use a pneumatic pipe based braking system, so when you couple the red hoses together, you are connecting the brakes, equalising the brake pressure throughout the train.

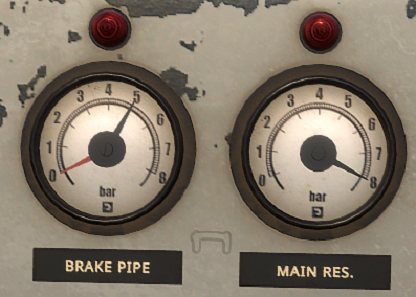
There are generally two gauges that indicate the state of the train brake. The main reservoir pressure gauge, and the brake pipe pressure gauge.


For now, all you need to know is that the red needle in the brake pipe gauge shows the amount of pressure being applied to the locomotive brake shoes. And, by extension, all other connected vehicle brakes too. If you try to pull away while there is still pressure on the brakes, be aware that you are likely wasting energy and as a result incurring unnecessary fuel costs.

This might sound obvious, but the best time to use a train brake is when you are pulling a train. If you want to stop a long train quickly use the train brake. Also very good for controlling speed on descents.

Independent Brake
Each locomotive has an independent brake. This system only applies the brakes independently on the locomotive. Confusingly, in most cases the physical brakes used are the same ones used by the train brake system. This means that fully applying both the train brake and independent brake doesn't apply more braking force, as the maximum pressure applied to the brake is the same through both systems. This also means the red needle on the brake pipe pressure gauge is affected by the independent brake too.

Independent brakes are primarily a safety feature, in the event that an operator forgets to hook up the brake pipe and the cars don't have functioning brakes the engine always will.

That said, independent brakes apply and release faster than the train brake, especially with longer trains. And if you want precise speed control, or are not connected to any cars, the independent brake is a good option.

When you are on a descent, use the train brake to control the worst of the runaway, and then use the independent brake to precisely hit that pesky speed limit. Or not, it's up to you.

Dynamic Brake
All braking methods have a fundamental physics problem they need to overcome. To slow down, friction is generated, and a side effect of friction is heat. Now, I'll leave it up to your imagination to decipher what can happen if the wheels and brake shoes start to melt from overheating.
Dynamic braking is a method of braking that does not use the brake shoes and is not applied to the wheels directly. For that reason, dynamic braking only applies on the locomotive. Each method of dynamic braking is different, they all have a different level of max effectiveness and different requirements to apply it.

Dynamic brakes should be the first brakes used in most scenarios, and if they prove not effective enough, then use the other methods. However, in an emergency, when pulling a train, the train brake should be prioritised.
Gradients and Loads
I'm not going to pretend I understand this topic fully, I do not. If you have a proper explanation and deeper understanding I would love to hear your thoughts.

The problem is knowing how much 'heavier' the train gets when going up a hill. Or, more accurately, how gravity affects the force required to climb a positive gradient.
In truth, there are a number of factors that affect the climb performance of a locomotive. These include gradient, climb distance, current haul load, weather, curvature, approach momentum, wheel friction and traction motor limits. The calculation to determine exactly how much mass a locomotive is capable of pulling up a gradient requires all these factors to be included, something far beyond the scope of this manual.

The best I can do is show you the results of some tests I performed.

The load limits for each train represent a weight that, if exceeded while on a flat gradient, would require acceleration in stages due to overheating effects on traction motors etc. Assuming the acceleration is controlled for maximum traction motor endurance.

So, given that on a flat gradient you don't need to worry about the acceleration force of gravity slowing you down. You can move cargo that exceeds your load limit, you'd just have to accelerate in stages to avoid burnout.

Friction plays into this, so to avoid an overdose of wheel-slip, I would not recommend moving loads greater than 1.5x the locomotive's rating.

Technically speaking, a downhill gradient doesn't require any force, as gravity will do the accelerating for you, so all you need on a downhill only journey is some way of applying brakes. However, most stations in DV are on a flat gradient. So, most jobs will need some effort to get moving.

Now for the reason you are reading this section, what about climbing gradients?
To satisfy the curious, I hooked a full 400T load to a DE2 and found some hills to stop on. Then proceeded to try hill starts, removing cars until I was able to get to the top without stopping.

Here's what I found.
On a 1% gradient, I could make it with 1/2 the cars (200T).
On a 2% gradient, I could make it with 1/4 of the cars (100T).

These tests were performed in dry weather and neither required any sand.
I would guess it's safe to do the same thing in wet weather, though you might need to use some sand.

I was able to pull the full load up these hills without losing more than 20km/h if I had some speed to start off with. Also, both of these hills occur on a route where I managed to pull up 630T with a DE2, after starting the climb at 70km/h and ending it at 35km/h.

To summarise, in dry weather, the maximum load you should take up a hill of infinite length is:
Max load for route (Lr) = Load limit (L) / (Gradient value (G) x 2).

Example:
L = 400T
Max gradient on route is 2% so G = 2

Lr = 400 / (2 x 2)
Lr = 400 / 4
Lr = 100T

Note: These tests were performed with the DE2, other locomotives might give different results.

A note on hill starts
A hill start is pulling away uphill after being stationary on said hill. These are tricky to pull off, and should be avoided if at all possible. However, the easiest way to get a train moving uphill, is to engage some throttle before your brakes are fully released to avoid rolling down.

If you start rolling backwards, simply apply some brake until you stop, then increase the throttle and try again. Sand can be used to increase friction and avoid wheel slip. Be careful, some locomotives can catastrophically fail when the engine is reversed, while others may stall, resulting in pressure loss in the braking system. Sometimes you'll have to give up the attempt, roll all the way back down and give yourself a faster run up. Alternatively you can grab another locomotive and give yourself that extra push.

Squirrel made a good video on the concepts talked about here, if you don't mind spoilers I recommend taking a look at his DE2 load testing video.
Friction and Sand
I've talked about sand in other parts of this manual, this section is mainly here to make the information more accessible and for better understanding of the mechanics of friction.

All wheels made with a hard material have a very small area of contact where the driving force can be applied. Metal wheels also have lower friction than other materials. This is great when hauling extremely heavy loads long distances, because it reduces the amount of energy required to keep everything moving. Not so great, however, when you want to get those extremely heavy loads moving.

Other than accelerating slowly, there are two main ways this problem is counteracted:

The locomotives are designed to be heavy. Try sliding an upside-down cup across the table, then pressing down on it while sliding it. Notice how pressing down increases the friction, which means you have to use more force to make it slide. Larger locomotives will require more force to induce wheel slip.

Every locomotive has sand, which can be applied to counteract the low friction of metal on metal. However, after the locomotive's wheels have had their way with it, it becomes mostly useless dust.

Because sand costs money, and is a limited resource, many people avoid using it. That said, wheel slip damage is far more expensive to repair than a sand refill. I would certainly recommend using it on a particularly hard to climb hill. Or during a hill-start to help get the train moving.

Remember when I said braking uses friction which generates heat? The heat generated by the extra friction from the sand is not directly applied on the wheels, but rather the traction motors driving those wheels. So, you won't be able to use the increased friction levels for too long before the motors need a reprieve.
Diesel Controls Summary
Circuit Breakers
Electrics: Connects the on board battery to the electrical system. Disable at end of trip to save battery power.

Starter: Connects the electrical system to the starter motor.
Traction Motors (DE only): Connects the traction motors to the electrical system. In the event of a traction motor fault, this breaker will trip and can be reset.


Controls
Starter: Not to be confused with the circuit breaker of the same name. Used to apply power to the starter motor which rotates the engine. Needs to be held for ~2 seconds. (except DM3 which shuts off automatically)

Fuel Cut-Off: Used to cut fuel flow to the engine, starving it and therefore stopping it.

Dash Light: Turns on lights that aid in readability of the controls and gauges.

Cab Light: Turns on the internal cab light.

Lights F/R: Controls the front/rear lights, switching between forward mode (clockwise) and reverse mode (counter-clockwise)

Wipers: Makes the rain go away (eventually). Has various speed settings.

Handbrake: Stops the train rolling away because the brake cylinder pressure drops over time when the compressor is not running.

Independent Brake: Controls the brake shoes on the current locomotive. Forward means slow down.

Train Brake: Controls the brake pipe pressure, and so, controls the brakes on all vehicles connected to the locomotive brake pipe. Forward means slow down.

Reverser: Has a neutral (middle), forward and reverse position.

Throttle: Governs engine and traction motor power. Do not change gears while engaged (DM3). Forward means slow down.

Dynamic Brake (DM3, DH4, DE6): Engages the dynamic brake. Only use when throttle is idle and reverser is set to current direction of travel. Do not change gears while engaged (DM3). Forward means slow down.

Sand: Toggle button or switch to enable/disable sand application to wheels. Used to reduce wheel slip.

Horn: Blows horn while held. Used to warn 'the others' about the kilo-tonne train you are unable to stop.

Bell: Enables the bell. Used to warn 'the others' about the kilo-tonne train you are shunting around.

Cabin Fan: Enables a clicking sound.


Gauges:
Oil Level: Read to determine how much oil you have to pay for at the end of the trip. If you are running low, fill it up.

Fuel Level: Read to determine how much diesel you have to pay for at the end of the trip. If you are running low, fill it up.

Sand Level: Read to determine how much sand you have to pay for at the end of the trip. If you are running low, fill it up.

Speedometer: Read to determine likelihood of derailment at sharp corners.

Brake Pipe: Red needle shows how much brake is applied on the locomotive. Black needle shows how much pressure is in the pipe. More pipe pressure means less braking force.

Main Reservoir: Shows how much pressure you have to re-fill the pipe and release the brakes with.

Tachometer: Shows how fast the engine is running.

All remaining gauges are specific to the traction motors of the locomotive. Please read the chapter on your locomotive's traction motors to understand what they show.
Light Switches
For rotary light switches, the general rule is that clockwise means white forward lights, and counter clockwise means red, rearward light. Generally, both types have three brightness levels that can be categorised as
  • Daytime running lights
  • Headlight (white) or fog light (red)
  • Full beam (white) or dense fog light (red)
Rotating further clockwise increases white light brightness and counter-clockwise will brighten the red.

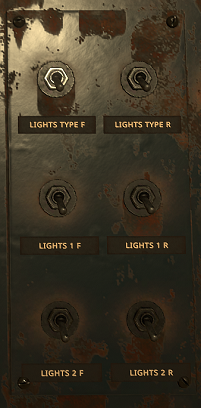
The DM3 is an exception. It uses a set of three switches for the front lights (labelled 'F') and a separate set of three switches for the rear lights (labelled 'R').


The 'Type' Switch controls whether the white light (down) or red light (up) is used.
The following table shows the varying brightness levels for each combination of the remaining two switches:

Lights 1 Position
Down
Up
Down
Up
Lights 2 Position
Down
Down
Up
Up
Result
Off
Daytime Running
Headlight or Fog Light
Full Beam or Dense Fog
Multi Unit Operations (DE2, DH4, DE6)
When you need a little more power you can use multiple locomotives on one train. The power of all locomotives in a train is added together, so the weight rating of a multi-unit train is the sum total of the weight rating of each locomotive combined.

Some locomotives are capable of directly interfacing with other locomotives. In Derail Valley this requires a Multi-Unit license and a link between MU capable locomotives which is established by connecting the blue MU cable when coupling.


This allows the engineer to control all connected locomotives from a single cab. Applying throttle, reverser and independent, dynamic and train brakes in one locomotive will replicate the input in the other connected locomotives.

Bells and wheel slip alarms are not linked with the MU cable.

Lights are linked through the MU cable, and only the leading lights of the front locomotive and the trailing lights of the rear locomotive are activated, so that when you put the lights on full you don't get blinded by the lights of a connected locomotive.

It is possible to link different types of locomotive with the MU cable and the input signals will be managed accordingly. But the temperature and other gauges are not linked, and the dynamic brakes do not adjust force according to their various capabilities so it's impossible to know from the cab of one locomotive how close you are to cooking the other locomotive's traction motors when dynamic braking or accelerating. It is safe to assume that identical locomotives performing the same operations will have similar temperatures.


Also, should you wish to apply the DE6 dynamic brake from the DE2 you will find no lever to do so. I would therefore recommend always driving a multi-unit train from the most capable locomotive.
Steam Overview
Steam powered locomotives use high pressure steam to push pistons, that push rods, that rotate the wheels.

First the steam pushes the piston in one direction. Then, a valve switches over and the steam is then routed to the other side of the piston to push it the other way.

In this gif, the exhaust steam flows out through the circle in the middle and pressurised steam flows in from the top:


Both the S060 and S282 have two sets of piston cylinders, one for each side. Each cylinder powers all the drive wheels on it's side through a set of rods. The drive rods are also connected to a control rod which is connected to the previously mentioned valve.


Here's a short video about steam engines that demonstrates the above.

Steam is generated by boiling water (sorry had to state the obvious here for the next bit to make sense). For steam locomotives, this happens in a boiler. The boiler is a sealed tank. So, the steam can't escape into the atmosphere which means as more water boils, more steam is added to the same volume, which causes the pressure in the boiler to increase.

Coal is the most common fuel used to heat the boiler.

So, the steps to get a steam locomotive moving are very simple.
  • Make fire to boil water.
  • Wait for boiler pressure to get high enough to push the pistons.
  • Let the steam push the pistons.

However, this doesn't help you stop, or chose which direction to go, or speed up. What if the parts that aren't the boiler have a bunch of cooled down steam (water) from yesterday blocking up the pistons? How can there be electrical lights and wipers on a steam powered train? And surely water is corrosive to metal, how do the moving parts not rust? The most important question you should be asking yourself is: What happens when there is no water to boil but the fire is as hot as a furnace, isn't coal used in forges that melt metal? And what if there's too much water, where does the steam go?

Once you know the answers to each of these questions, you will be ready to drive a steam locomotive. Oh, and don't forget all the other basics talked about in the above chapters from Before you Drive to Friction and Load.

And did you notice that the window you have to look out of is rather small, and makes it hard to see the track and signs ahead. The S282 doesn't even have window wipers, to see anything when it's raining you have to open the windows!

Ok, I've tried my hardest to dissuade you from running a steam locomotive. But you're still reading, so I can only imagine that the DE2 is getting a bit boring and you want to try a new type of shunting.
Steam Overview Continued
How a steam train produces pressurised air for braking:
Using a steam powered piston air compressor. This uses steam to pump a piston that pushes air through a one-way valve into a compressed air tank (the main reservoir).

How a steam train produces electricity for lights and wipers:
With a steam powered dynamo - uses pressurised steam to spin a (noisy) dynamo which generates electricity.

How to remove yesterday's water:
The only place this is of major concern is in the cylinders, all steam used to move the locomotive ends up here, the other water logged areas clear once everything warms up. This is what the cylinder coque (spelled like this for steam's profanity filter) is used for: To open a valve which lets excess fluid out of the cylinders. This is of course pointless when there is no excess fluid, as leaving them open will let out precious steam, but not letting the water out will destroy the cylinders because water cannot be compressed the way steam can.

Also, note that at start of play, or after standing for a while, the cylinders will have cooled to a temperature less than the steam coming in, which will also cause condensation, so whenever you start a trip, it's worth leaving the cylinder coques open until you are sure no water remains in the cylinders.

How the moving parts don't rust:
High pressure steam is actually quite dry. The parts you have to look out for are where the high pressure steam loses its pressure (the cylinders and rods). To prevent rust in these areas, a lubricator (contains oil or grease) is used.

How to reverse and go fast:
The cut-off. When fully forward, the cut-off ensures steam is pushing the piston throughout the full stroke in the correct direction to induce forward movement. When fully back, does the same, but for reverse. Whenever it's not at maximum forward or back, the cut-off cuts off the flow of steam to the piston earlier in the stroke. This allows the steam to maintain a higher boiler pressure as it's not wasted, and higher pressure means more speed. Also, once moving, the pistons don't need steam pressing on them for the full stroke, so, at faster speeds it's more efficient to apply steam to the piston only at the start of it's stroke when it's accelerating. This also prevents unwanted turbulence in the cylinder, which is not dangerous, but inefficient. So, for more torque use maximum cut-off and for more speed use closer to idle cut-off.

Note that idle is in the middle and anything beyond idle goes in the opposite direction.

It is possible to slow the train down by moving the cut-off to the opposite direction of travel which will apply steam to the cylinder in the 'wrong' direction. However, the valves and systems linking to the boiler are designed for one-way steam, so avoid doing this too much as it can cause serious damage. I would recommend opening the cylinder coques when attempting this manoeuvre to reduce these negative effects a little.

How to climb better and go faster:
A hotter fire means more boiling water, and consequently more steam pressure. It also burns through coal and uses up water faster. But it might just be what you need to climb out of that valley you are stuck in, or make up for lost time.

There are two common methods that increase the heat of a fire in steam locomotives, both involve drawing more air (increasing oxygen) through the firebox.

The first is the blower, which sends steam through the chimney to create a vacuum at the front end of the firebox which pulls air in from the fire door in the cab.

The second is the damper, which opens up a grate to let air into the firebox from below the coals. The amount of air that flows in increases with the speed of the locomotive. So, it becomes a self fulfilling prophecy where more speed creates more heat which creates more steam which creates more speed. This effect is of course reduced at slower speeds which is what the blower achieves.

Both methods can work together to really get the fire going. But it's important to monitor both water and coal more carefully when using them, otherwise the situation could become either catastrophic or disappointing very quickly.

How much water to have in the tank:
Note that water molecules expand as they heat up, so the same amount of warm water takes up more space than cold water. If the water is unheated, it's important not to fill the tank above 1/3 full as the water will grow significantly.

If there is a lot of water in the boiler there will not be much room for steam. And so the amount of steam you have available to push the train with will run out quite quickly. If the tank is completely full, you can dump excess water. Otherwise, you'll have to wait for the boiling water to push itself through all the pipes and cylinders before the train will run normally again.

Once there is heat, you don't want the water to be less than 1/4. Water boils at 100C which means, water cannot be hotter than 100C (at atmospheric pressure). So the boiler walls in contact with water are being cooled to 100C by that water. In the event water is no longer cooling the boiler it will quite rapidly start to melt because of the coal fire heat, so it's important to monitor the water level. However, be aware of the current angle of your locomotive, as on a slope the water level can show as higher or lower than what's actually in the tank, also, if you are accelerating and/or recently stopped suddenly, the water might be sloshing about.

Lastly, leaving a locomotive to burn through the rest of its coal at the end of a journey, might also boil through the rest of it's water, so make sure enough water is in the tank for the current amount of fuel before abandoning the locomotive.

To add water to the boiler use the injector valve.
To dump water from the boiler use the blowdown valve.
Steam Controls Summary
Inside the Cab
Regulator: Controls how much of the available steam pressure is sent from the boiler to the drive piston cylinders.

Cut-Off: Controls the timing and direction of the steam in the drive cylinders, providing the engineer with a means of adjusting for max torque or speed in both directions.

Cylinder Coques: Controls a ventilation valve to allow water or condensate to vent out of the drive cylinders. Preventing catastrophic damage, at the expense of steam pressure.

Injector: Controls the flow of water from the water tank into the boiler. Overfilling reduces the amount of boiler space for steam so the train won't run at max power for long. Under-filling will cause the boiler to overheat and melt causing explosive decompression.

Note: Adding cold water to the boiler will condense existing steam, reducing the boiler pressure.

Blowdown: Controls the flow of fluid from the boiler to the atmosphere. Used to dump excess water if too much is in the boiler.

Blower: Used to heat up the firebox by pulling air through it using steam to create a vacuum. More boiler pressure means more blower power.

Damper: Used to heat up the firebox by opening up a grate below it to allow outside air to flow through. More speed means more airflow. Down is fully open, up is fully closed.

Fire Door: Open to gain access to the firebox for coal lighting and shovelling.

Coal Dump: Open to dump unwanted coal from the firebox onto the ground. Note: it is not recommended to set fire to the sleepers by dumping hot coals on them.

The Rope: Pull it to find out (requires boiler pressure).

Chest: The chest pressure gauge shows how much steam pressure is currently being applied on the drive cylinders.

Fire Temperature: This gauge shows the temperature in the firebox.

Boiler Pressure: This gauge shows the pressure at the top of the boiler, i.e. the steam pressure.

It is perfectly viable to move a steam train without a fire while there is pressure in the boiler. Note, the boiler pressure also dictates the effectiveness of the brake air compressor.


External Valves
Compressor: Controls a valve allowing steam to power the brake air compressor. You won't be able to stop without this.

Dynamo: Controls a valve that allows steam to spin an electric dynamo for powering lights, wipers etc.

Lubricator: Controls a valve that allows lubricant to flow onto the external moving parts that would become damaged from corrosion and repetitive movement without it.
Steam Checklists
To help you get started with steam locomotives, I have put together a checklist for each phase of driving.


Startup
Hand brake
Applied
Tender Coal
Sufficient for Trip
Tender Water Tank
Sufficient for Trip
Boiler Water Level
~1/3
Firebox Coal
Shovel Until Full
Damper
Fully Open (Down)
Blower
On
Light Fire
Burning Coal
Boiler Pressure
Increasing
Air Compressor
On
Dynamo
On
Lubricant
On
Boiler water
~1/2
Firebox Coal
Full and Burning
Main Reservoir Pressure
Full
Independent brake
On
Handbrake
Off
Boiler Pressure
Normal Operating Pressure
Damper
Fully Closed (Up)
Blower
Off
Electrics
As Required
Cylinder Coques
Open
Cut-Off
Full Apply
Whistle
Operational
Brakes
Released and Lap Hold
Regulator
Open Gently
Speedometer
Increasing
Chest (Cylinder) Pressure
Correctly Fluctuating
Cylinder Coques
Once No Longer Wet, Close


Normal Operation
During normal operation I recommend the following steps are performed on a loop. Adjustments to timing may need to be made depending on the situation, but you should avoid missing an item off this list.

If you are moving, after completing each of these items, check the speedometer and look outside for changes in speed, switches, obstacles etc.
Boiler water
~1/2
Firebox Coal
As Required
Damper and Blower
As Required
Cut-Off
As Required

The short-hand version would be: Water, Fire, Air, Power.

If you are nearing the end of your journey, you can probably stop shovelling coal depending on how much boiler pressure you have available.


Shutdown
Handbrake
On
Firebox Coal
Check Level
Boiler Water
Check Level
Cut-Off
Idle (Centred)
Damper and Blower
Closed
Electrics
Off
Air Compressor
Off
Dynamo
Off
Lubricant
Off

In reality you would not want to dump red hot coals onto the wooden sleepers. But if you wish to avoid blowing up the locomotive because you forgot to check the remaining water level you can do so in Derail Valley without consequence, other than the expense of wasted coal.
Pneumatic Braking
A brake is applied by pumping high pressure air into the brake cylinder.

The air pumped in comes from an auxiliary reservoir found on all powered and unpowered vehicles.

The auxiliary reservoirs are pressurised by air from the brake pipe.

The brake pipe is connected through the engineer's train brake lever to a main reservoir on the locomotive. The main reservoir is pressurised by a compressor on that locomotive.

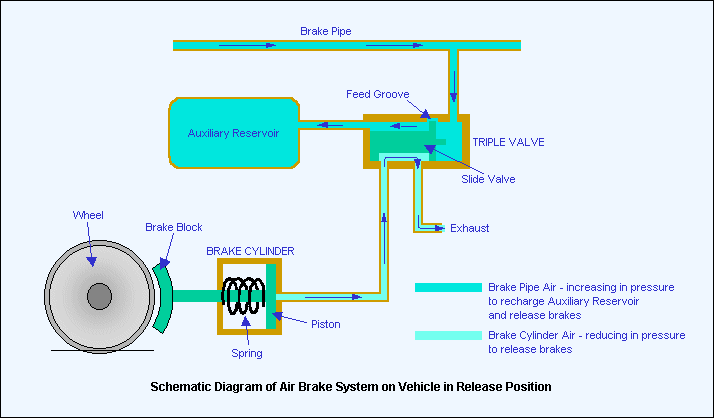
When the train brake is set to release, the main reservoir pressure is fed into the brake pipe and consequently the auxiliary reservoirs on each vehicle. Simultaneously, excess pressure in the brake cylinders is vented to the atmosphere, releasing the brakes.

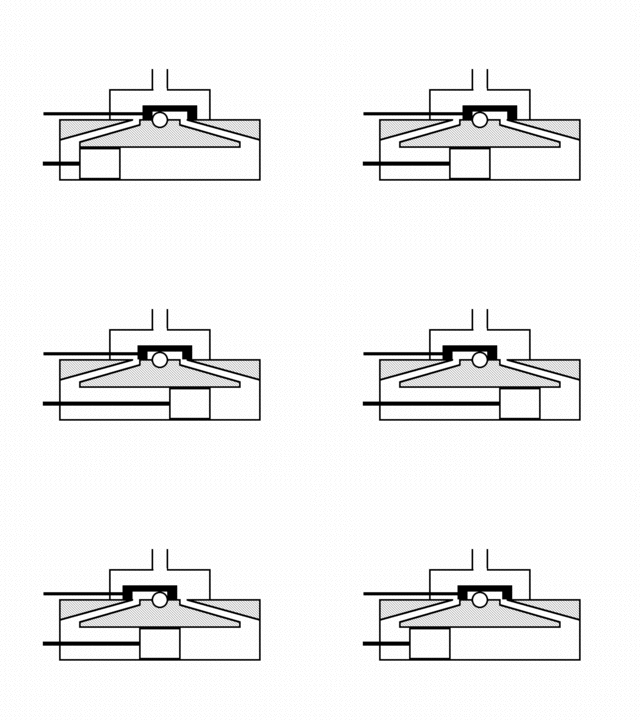
This process is controlled by a triple-valve mechanism.

When the train brake is applied, pressure is released from the brake pipe, and the triple-valve system equalises the auxiliary reservoir pressure with the lower brake pipe pressure by allowing auxiliary pressure into the brake cylinders.

Summary:
When the train brake is released, main reservoir pressure is used to fill the brake pipe and auxiliary reservoirs, and brake cylinder pressure is vented. When the train brake is applied, pressure is released out of the brake pipe, and auxiliary reservoir pressure is fed to the brake cylinders.

Here's a diagram of the triple-valve. This is not the full system used in reality today, but is principally accurate.


The independent brake applies regulated main reservoir pressure directly to the locomotive's brake cylinders without using a secondary reservoir, and is separate from the main brake pipe.


The Gauges


The red needle on the brake pipe gauge shows the pressure in the locomotive's brake cylinders.

The black needle on the brake pipe gauge shows the pressure in the main brake pipe.

The main reservoir gauge shows pressure in the main reservoir. (Not the auxiliary ones)

You might have noticed that maximum brake pipe pressure is lower than maximum main reservoir pressure, this is to ensure enough pressure is available to release the brakes. Releasing the brakes takes longer than applying because pressurising the pipes and reservoirs takes a lot more energy than releasing pressure into the atmosphere.


The Other Lever
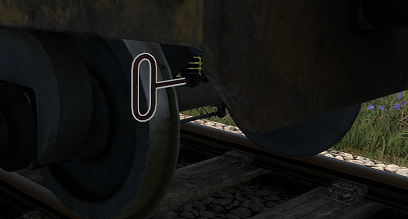
Some vehicles in Derail Valley have a brake cylinder release valve. By pulling the red lever you can release excess pressure out of the brake cylinders.


Here's another of Squirrel's videos which explains braking systems in Derail Valley.
Automatic and Manual Lapping Brakes
In reality there are many versions of both automatic and manual lapping brake types. In Derail Valley Simulator all locomotives that use manual lapping function the same, similarly for automatic lapping.


Manual Lapping
The manual lapping brake lever has four positions. From fully forward to fully backward these are:
  • Emergency Application - Used when you want to rapidly dump the air from the brake pipes and consequently apply the brakes to maximum application quickly.
  • Service Application - Used to slowly release brake pipe pressure to apply the brakes in a controlled manner.
  • Lap - Hold current brake pipe pressure.
  • Release - Increase brake pipe pressure to release brakes. Don't leave in release position for normal operation to avoid weakening release valve springs.


Automatic Lapping
Consists of multiple positions that represent how much pressure the engineer wishes to apply to the brake pipe. Ranging from full application (pushed all the way forward) to full release (pulled all the way back).

Instead of simply opening and closing various valves like the manual lapping system. Here the force required to open the inlet and exhaust valve of the brake pipe are set.
Hand Brake
None of the components in a pneumatic train brake are completely air tight, especially the valves that are designed to allow air through, even if it is one way. So, over time, (~20 minutes) reservoir and brake cylinder pressure will leak out and the pneumatic brakes will be released. The fully mechanical handbrakes don't rely on leaky air, so will remain applied when left alone.
Electric Traction Motors (Diesel Electric/Electric - DE2, DE6)
Traction is a measure of how much power is converted into movement through the wheels.
A traction motor is a motor that applies torque (rotational force) to the wheels.
An electric traction motor is a traction motor powered by electricity.

Both electric and diesel electric locomotives use electric traction motors. The difference is the source of the electricity.

Electric locomotives get their power from overhead power lines and the throttle dictates how much of that electricity goes to the traction motors.

Diesel electric locomotives generate their own power with an onboard generator. The throttle is used to tell the system how much power the engineer wants to apply to the traction motors. When the throttle is in idle position, the generator is disconnected from the engine. Increasing the throttle tells the system to generate more power by increasing the engine and generator speed.


The Gauges


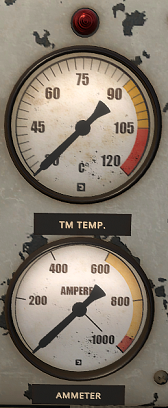
An ammeter measures the difference in current (power) between two points in a circuit. For electric traction motors, the ammeter measures the difference in current before and after the traction motor. A higher difference means more current is being used by the traction motor. This is due to the electrical resistance in the motor. Resistance works a bit like friction, more resistance means more heat generation. So the higher the difference in current across the traction motor, the faster the traction motor heats up. Too much difference in current can damage or discharge from the traction motors. And when the traction motor gets too hot it can melt.

Both the ammeter and traction motor temperature gauges have a red line that work as a visual aid for the engineer to see when too much power is applied to the traction motor. The yellow line is a warning marker alerting the engineer that a dangerous limit will soon be reached. No damage should occur while in the yellow bands, but the red bands must be avoided to prevent damage.

There is also a red TM Temp warning light and buzzer to alert the engineer when the traction motors are about to melt.

A TM circuit breaker activates when an electrical fault occurs with the electric traction motors. But sometimes even the circuit breaker fails to trigger and the traction motors burn out.

When you experience a traction motor fault, reduce the throttle, wait for the traction motors to cool down and try to re-engage the traction motor circuit breaker. If the traction motors continue to run you can continue, but the chances of traction motor failure will now be increased.

Traction motor faults incur electrical systems maintenance costs. Traction motor failure will render the locomotive useless and require replacement of the traction motors, which is expensive.
Rheostatic Brake (Diesel Electric - DE6)
Rheostatic braking is a form of dynamic braking that can be used by vehicles with electric traction motors.

When applying rheostatic brakes it is important to ensure the throttle is idle to disconnect and avoid damage to the generator. Also, the reverser must be applied in the direction of travel for the system to apply correct braking.

Rheostatic braking works by converting the traction motors into generators. Instead of the traction motors powering the wheels, the wheels now power the traction motors. The electricity generated by the traction motors is routed through a large variable resistor array in the locomotive which resists the force of the traction motors and consequently slows down the wheels. However, the resistors heat up due to the current running through them, so large cooling fans are powered by the engine to blow air through the resistor bank to cool them down.

Pushing the dynamic brake lever forward increases the resistance in this system. The traction motors are only converted into generators when the dynamic brake lever is engaged. This is why it's important not to have the throttle engaged when dynamic braking.
Hydraulic Traction Motors (Diesel Hydraulic - DH4)
Traction is a measure of how much power is converted into movement through the wheels.
A traction motor is a motor that applies torque (rotational force) to the wheels.
A hydraulic traction motor is a traction motor that uses the movement of a fluid (usually oil) to generate torque.

Within a hydraulic torque converter, engine rotation powers a fluid pump that spins hydraulic fluid within a cylinder. That spinning fluid applies it's rotation to a turbine which is connected to the wheels. This means that even with the wheels stopped, the engine will not stall as the fluid in the pump can still spin.

If the turbine and pump speeds are identical, the fluid in the cylinder spins at a constant rate and experiences very little friction (the fluid is slowed by the walls of the cylinder so some friction is still present - try stirring a cup of water very fast and watch how it slows down from the outside in when you remove the spoon, that is friction in a fluid).

Hydraulic oil is much thicker (more viscous) than water. So, if the turbine speed is different from the pump speed, by hundreds or thousands of RPM the fluid friction in the cylinder is significant. And as has previously been discussed, friction generates heat.

Diesel hydraulic locomotives such as the DH4, can have multiple torque converters that act much like gears, so that higher wheel speeds can be achieved from the same engine speed.

Some diesel hydraulic locomotives (Derail Valley's DH4 included) come with a powered fan that is used to cool the torque converter fluid.

The Gauges


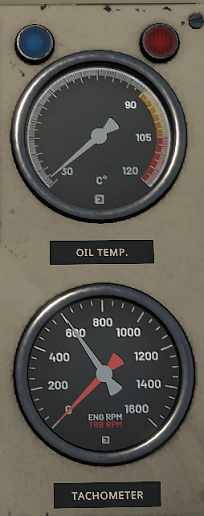
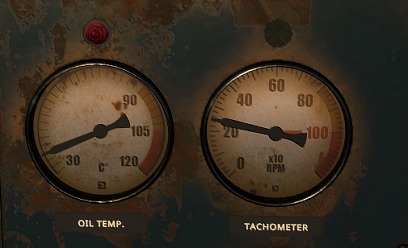
The oil temperature gauge displays the temperature of the oil in the hottest torque converter.
The ENG RPM needle on the tachometer displays the rotational speed of the engine.
The TRB RPM needle on the tachometer displays the rotational speed of the active torque converter's turbine.

A greater difference between the engine and turbine speeds (tachometer needles) means a greater rate of oil temperature increase. This is quite similar to the diesel electric ammeter, only instead of a red line showing when too much power is put through the torque converter, you have to use the gap between the needles.
Hydrodynamic Braking (Diesel Hydraulic - DH4)
Hydrodynamic braking is a form of dynamic braking used in locomotives that have hydraulic torque converters.

When applying hydrodynamic brakes, it is important to ensure the throttle is idle to disconnect and avoid damage to the torque converter pump. Also, the reverser must be applied in the direction of travel before the system can be engaged.

It works by reducing the size of the torque converter cylinder, which reduces the amount of available fluid and increases the friction. As usual, this increase in friction generates heat which must be monitored.

The slowing affect of the friction is greater at higher turbine speeds, and due to the nature of fluid, it's unlikely for this type of braking to stop a train in a practical amount of time, but it does save the brake shoes a little effort, thereby reducing the cost of brake wear and tear.

Pushing the dynamic brake lever forwards steps through decreasing cylinder sizes.
Mechanical Transmission (Diesel Mechanical - DM3)
With mechanical transmission, when the reverser is engaged, the locomotive is set in gear. Meaning that the wheels are mechanically linked to the engine. The reason the engine dose not stall when in gear, is due to the fluid coupling linking the engine to the transmission system. However, the fluid coupling is not the same as a hydraulic torque converter, so it is still possible to stall a DM locomotive by using too high a gear.

When either the throttle or dynamic brake are engaged, the fluid coupling is engaged and the engine becomes directly linked to the wheels through a gear train (yes another type of train - deal with it). To change the gear train to use a different set of gears, without damaging the gears, the coupling must be disengaged. So, to change gears, both the throttle and dynamic brake must be set to idle, which disengages the fluid coupling.

When accelerating, it's best to switch to a higher gear before reaching the red line on the tachometer. And when decelerating, it's best to switch to a lower gear before reaching the idle rpm.

Here's a nice short video that does a much better job at explaining mechanical transmission than I could provide in this manual. Though it shows a mechanical clutch-based transmission in a car with a single gearbox, the principles are much the same.


The Gauges


The oil temperature gauge shows the oil temperature in the fluid coupling.
The tachometer shows the rotational speed of the engine.

So, why do we need to worry about oil temperature on a diesel mechanical engine?
Well, unfortunately, the presence of a fluid coupling is the answer to that. Guess what happens when you put more force through the coupling. It's friction again, so, more heat etc. etc.


Engine Braking
Engine braking is a side effect of mechanical transmission systems. As the engine is directly linked to the wheels, when there is less fuel in the engine than it would normally use at the current speed, the pistons don't produce any force. The weight and friction of the engine and transmission cause the engine to decelerate, and the wheels end up pulling the engine along. This slows the train down.
DM3 Specific Transmission
When changing gears on the DM3 it's important to disengage any throttle and dynamic brake to allow the transmission to adjust it's speed accordingly.

Some would consider the following information to be a spoiler, if you wish to work out the gears for yourself (and I recommend doing so as you'll remember it better) do not read the rest of this chapter.

I ran some tests to determine what the best order for the gear changes should be, here's what I found.

The following table shows the minimum and maximum speed for each gear.

All 9 Gears:
Gbx A
Gbx B
Vehicle Speed at 300RPM
Vehicle Speed at 900RPM
3
3
20km/h
60km/h
2
3
14km/h
41km/h
3
2
11km/h
30km/h
1
3
9km/h
25km/h
3
1
8km/h
22km/h
2
2
7km/h
20km/h
2
1
5km/h
15km/h
1
2
5km/h
12km/h
1
1
0km/h
10km/h


Most of the time you'll find there is very little reason for changing to a gear that has a max speed difference of less than 10km/h from the current one. So, I prescribe the following 5 position progression for the majority of use cases:

5 to Remember:
Gbx A
Gbx B
Min Speed
Max Speed
3
3
20km/h
60km/h
2
3
14km/h
41km/h
3
2
11km/h
30km/h
2
2
7km/h
20km/h
1
1
0km/h
10km/h


That said, for heavy loads it may be prudent to follow this 7 position progression which adds in gears for 5km/h intervals where available:

7 When Things get Heavy:
Gbx A
Gbx B
Min Speed
Max Speed
3
3
20km/h
60km/h
2
3
14km/h
41km/h
3
2
11km/h
30km/h
3
1
8km/h
22km/h
2
2
7km/h
20km/h
2
1
5km/h
15km/h
1
1
0km/h
10km/h

You may need to push gear [3][1] to the red line.

Changing to a non-sequential gear:
Remember, do not change down to a gear if you are currently moving faster than the max speed as defined above. when both levers must be moved to reach the desired lower gear, you may need to switch through a higher gear first. It's far better to stall the engine than to blow it up or cause wheel slip from engine braking at a ridiculous RPM.

In the above 5 position progression. If the locomotive is travelling at 25km/h with gear [2][3] selected, and more torque is required, you'll want to switch to [3][2]. But gear [2][2] has a max speed of 20km/h. So, you'll have to switch from [2][3] to [3][3] and then to [3][2].

The same goes the other way. If gear [3][2] is selected at 30km/h and you want to change to [2][3] to continue accelerating, you must not switch to [2][2] because you are above 20km/h.
Compression Braking (Diesel Mechanical - DM3)
Surprisingly, driving the diesel engine trains in Derail Valley doesn't require knowledge about how a combustion engine works. But understanding the compression braking system does. So, finally, here's a video about diesel combustion engines.

Now that you understand that, in simplified terms, compression braking delays the opening of the exhaust valve. This means the exhaust gasses act as a brake against the piston which slows the engine down. And since the engine is mechanically linked to the wheels, this also slows down the wheels.

The braking force applied from compression braking also supplements engine braking (see above).

Pushing the dynamic brake lever forward increases the exhaust valve delay. It is important not to apply dynamic brake and throttle at the same time to avoid damage to the engine.
What's Missing From This Manual
  • Locomotive specific manuals - Semi-Complete
  • How to Sandbox Mode - Not Planned
  • Modding Guide - Not Planned
  • Settings, Key-binds, UI - Not Planned

At this point I have written everything I set out to, if you would like something else added to this manual please leave a comment detailing the specifics and I'll see what I can do.
23 Comments
ReverendTed Feb 16 @ 5:07pm 
I've found that it's marginally useful for when the temp is rising, but the light is off, which lets you know you've got a little bit of buffer coming once it kicks on. But yeah, it's not super useful.
[Box] Silent Apollo  [author] Feb 16 @ 4:46pm 
@ReverndTed I believe so, the blue light in the DH-4 can largely be ignored.
[Box] Silent Apollo  [author] Feb 16 @ 4:44pm 
@schutt I tend to agree with you now, and have modified the spoiler with your findings.
ReverendTed Feb 3 @ 5:10am 
Is the blue light on the DM-4's Oil Temp Gauge the torque converter fluid cooling fan indicator?
schutt Nov 1, 2024 @ 8:00am 
Still a great guide. I disagree on the most money by accepting the job when coupled though: if you do hand in one job, accept the new one, go on with the new one in one go you save a lot of time (running to the office and back) and normally the time bonus is easy to achieve with 1 or 2 jobs and impossible with 3 delivery locations anyways.
So for max money i let the locomotive running (stopping and starting cost some money) and just hand in the just deliverd 2 jobs, pick 2 new jobs, accept them, assemble the train and go. Servicing only if fuel is necessary, often i can do 3 tours before refueling.
A Succulent Chinese Meal Nov 8, 2023 @ 8:04am 
Hi, love the guide, it's really helped out on enjoying this game! One minor thing, I think you have the damper controls the wrong way around (at least for the S060, only steam loco I've driven) as both via in-game testing and the game manual mention that fully down = closed and fully up = open.
GAD Oct 16, 2023 @ 11:11am 
Many thanks for this incredibly helpful info. At this rate I'll be an expert, even before my monthly budget (which I blew on TSW4) allows me to buy it. Thanks again.
[Box] Silent Apollo  [author] Aug 27, 2023 @ 9:17am 
@RWag64 Thank you for sending a link, I have attached it in the 'Translations' chapter.
RWag64 Aug 16, 2023 @ 7:00am 
I've translated your good guide in French.

Can I upload it here as another guide, specifiyng you are the original writer ?
Larry Jul 31, 2023 @ 8:01pm 
Brilliant! Finally, a really comprehensive and truly useful guide. Well done, and very much appreciated!