Etrian Odyssey II HD

Etrian Odyssey II HD

Pas assez d'évaluations
100% Achievement Guide - Etrian Odyssey II HD
De Jedo
Welcome to my 100% Achievement Guide for Etrian Odyssey II HD. Happy hunting!!
3
2
   
Récompenser
Ajouter aux favoris
Favoris
Retirer des favoris
Achievement Breakdown
There are a total of 21 achievements in Etrian Odyssey II:
  • (6 total) for reaching each of the Strata divided across 30 floors.
  • (2 total) relating to guild functions.
    • 1 for letting 3 adventurers rest.
    • 1 for retiring 3 adventurers.
  • (2 total) relating to Combat
    • 1 for defeating a boss in a single turn.
    • 1 for dealing 1,000 damage in a single hit.
  • (6 total) for defeating various bosses
    • 1 requires beating the 6th Stratum boss on Expert difficulty
  • 1 for unlocking the Beast class.
  • 1 for earning 250,000 Ental.
  • 1 for finishing a specific quest.
  • 1 for triggering an encounter while gathering.
  • 1 for completing everything else (100%)
┌ Light Walkthrough
Light Walkthrough
The following Stratum maps are to be used as a light walkthrough. It's meant to give a broad picture of everything you need to swiftly pass through the floors. Everything in the game, save for the true final boss, can be completed outside of Expert for the 100%. For deeper strategies regarding preceding bosses, I suggest visiting the official EO discord and/or the wiki.

Unsorted Quests
I put this near the top of the guide so that you can plan ahead and reduce backtracking related to side quests. The following quests are not listed under a Stratum floor:
  • In the Duke's service I - Landsknecht (at least lv2) in the current party.
  • In the Duke's service II - Protector (at least lv2) in the current party.
  • In the Duke's service III - Survivalist (at least lv2) in the current party.
  • Volunteer service I - Medic (at least lv12) in the current party.
  • Man down - Alchemist (at least lv2) in the current party.
  • The naturalists - 50 Monstrous Codex entries
  • The company performer - Requires a Troubadour
    • Try Lv3 Songs, Lv5 Shelter, Lv5 Stamina for max reward.
  • Passing down the skills - Level 40+ Survivalist in current party = 1,600 Ental.
  • Forbidden foreign style - Ronin in your current party (optional: Lv50+ = 2,000 Ental).
  • The iron-walled Rook - Go to the shop. Pick "Beautiful" and buy the item for 2,000 En.
  • Ancient lore - War Magus in your current party (optional: Lv50+ = 3,000 Ental).
  • List mania - Talk to the Minister after completing the quest.
    • 350 entries in the Item Compendium and Gear Registry.
    • A girl's best friend - Beast in your current party (optional: Lv50+ = 4,000 Ental).
  • The best-laid plans - Level 50+ Survivalist in current party.
├ Ancient Forest (First Stratum)
Ancient Forest
Reached the First Stratum.


1-2F
  • Entrance examination (M) - Map 1F.
  • The leathersmith's request - Long Pin = Hedgehog (50% Conditional)
  • Pure mineral water - Draw (WATER) from 1F D3.
  • A cranky monster - (GASHTOR) starts moving once the quest has been accepted.
  • Paint the town blue - Amazonite = MINE points (2F/4F)
  • The class connectors (2-way connectors with abbreviations) require a specific class to enter
    • Dark Hunter (DH), Alchemist (AL), Survivalist (SU), and Gunner (GU) respectively
  • The perfect gift - Talk to the Innkeeper to start the quest. The gift(s) that you can find will depend on who you talk to in town. 4 townsfolk will give you suggestions. You only need 1 gift and it doesn't matter which one it is.
    • Potential gift (FLOWER) in 2F cell F3.
      • Other potential gifts - JAM (F7), TREASURE (F9), FEATHER (F10)
  • The waiting Wyvern - Head to D6, past the (TK LOCK), to reach (WYVERN).
3F
  • Find the Missing Guards (M) - Past a couple of Furylord FOEs in A4 (MG).
  • The item trade I - Bent Twig = CHOP points (3-5F)
  • Sounding the call - Red Shard = Red Horn
  • Dazed and disoriented - Talk to the Minister first to officially start the quest. Follow the yellow line to reach the soldiers (DD) at E4.
4F
  • Supply lines - Deliver supplies to D3 then make it back home safely.
  • Special projects team - Unlike in EO1, there's no safe zone available. Use this opportunity to grind and make sure you have an Ariadne Thread.
  • The dying forest (1/4) - Visit the hospital at night to start the quest. You can technically turn in the quest after visiting 3 locations, but the reward is quadrupled (500 → 2,000 Ental) if you visit all 4.
    • 1st location = Cell A5 (DF₁)
    • Other locations - 5F = A1 (DF₂), 6F = B7 (DF₃), 7F = D6 (DF₄)
  • Class connectors require: Protector, War Magus, Landsknecht, and Ronin
5F
  • Chimaera, king of beasts (M)
    • The 6 Slaveimps surrounding Chimaera will join as reinforcements.
  • The nameless flower - Head to D6 for the navy flower.
  • The item trade II - Metal Hull = Kingmai (4/5F); Bug Shell = Ladybug (3F)
  • Braggart Chap's tall tale - Visit B4 (BRAG) at night.
  • Beast class unlock - Visit D5 (BEAST) to trigger a scene. After defeating Chimaera in B4, head back to D5 to get the Trust Band. Take it to the Guild to unlock the Beast class.
├ Auburn Thicket (Second Stratum)
Auburn Thicket
Reached the Second Stratum.


6F
  • Connoisseur of leather - As you take a few steps into 6F, a (FLEEHOG) will spawn near you. Just follow it all the way to the TAKE point and kill it. a Trigourd will spawn behind you as you chase it. If you get into an encounter with one, use Volt/Ice to kill it or run away.
  • Medicinal research - Mint Leaf = TAKE point
  • Labyrinth stew - Talk to the Innkeeper to start the quest.
    • Mugwort = TAKE point; Moving Eye = Fangleaf (7F)
  • Volunteer service II - Beast Hide = Gigaboar (6-10F); Mint Leaf = TAKE point
  • Old scars, flaring anew - The quest goal is to inspect the Wyrm area in E7. To reach it, head to 9F past the (TK LOCK) and all the way to the linear Path to the Wyrm (PTW). Keep following this path from 9→6F.
  • Crimson vengeance - First, talk to the Minister and then head to the guild to chat with Abigail. Then head to 6F cell E7 to defeat the (WYRM). Hopefully, you unlocked the shortcut during your first visit here.
7F
  • The perfect gift - Potential gift (JAM) at A4.
  • Toward a cozier inn - Both Red Root and Hardwood = CHOP point
  • Uncharted territory - Talk to the Minister in the Duke's Palace before heading out. Your task is to map a good chunk of 7-8F. AUTOMAP works just fine and in my case, I mapped all the accessible areas prior to the 2nd Stratum Boss. It's ok if you forgot to talk to the Minister. Just do so and teleport back to both floors. It will retroactively tell you that you mapped a godly amount of the map which indicates you have satisfied the floor mapping requirements. Once both are done, you can turn in the quest.
  • Call of the gunner - Quest goal (ARTELIND) is at D2. This area can be accessed through the Tree Key locked area (TK LOCK) on 9F. Choose "worried about you" and accept her request.
8F
  • In pursuit of Salamox (M) - Salamox is too strong at this point of the game. Bait it out and check C5 for (FIRE PLUME). Teleport home or take the South connector to escape.
  • That ephemeral flavor - Talk to the Innkeeper to start the quest. PLACEHOLDER
  • Smithy Thompson's request - Fluorite = MINE point; Open Cap = Bigcap (6-9F)
  • A long way down - Despite the quest dialogue it's actually on F8.
    • Defeat the 3 Spectres that spawn as soon as you enter the floor.
9F
  • The perfect gift - Potential gift (TREASURE) at F4.
  • Specimen collection - Head to E5 and then walk to the nearest Geomagnetic Field (not Pole) available to you without anyone dying (6/11F). DO NOT use Ariadne's Thread to teleport home. You will fail the quest if you do. Cancel and retake the quest if you make this mistake.
10F
  • Extinguish the Hellion (M)
  • The perfect gift - Potential gift (FEATHER) at F4.
  • Many happy returns - There are 10 locations in total and they're all marked (STONE) on 1-10F. Giving all possible stones will only net you a small amount of extra Ental relative to the effort expended. Feel free to turn in the minimum amount of stones.

      Floor
      Cell
      Floor
      Cell
      1F
      A2
      6F
      C3
      2F
      C1
      7F
      C4
      3F
      C4
      8F
      E7
      4F
      A4
      9F
      A4
      5F
      B1
      10F
      D1

  • Class connectors - Dark Hunter (DH) and Troubadour (TR)
  • Quid pro quo
    • Tri-fruit = TAKE point
    • Blood Rock = MINE point
    • Red Pine = CHOP point
├ Frozen Grounds (Third Stratum)
Frozen Grounds
Reached the Third Stratum.


11F
  • Beast gone berserk - Talk to the Minister before heading out. Defeating the FOE will automatically fail the quest. Instead, you'll need to reach (NEST) in B1. 2 approaches:
    • Use a Sleep Bell/Slumber (Troubadour). -OR-
    • Bait Madsteps into following you then loop counterclockwise to reach B1.
  • Class connectors - War Magus (WM) and Solo Survivalist (1SU)
12F
  • Pluck the Snow Blooms (M) - There are 4 Snow Blooms. They can only be plucked at night.
  • To the bitter end - The (KILLFISH) can be found near one of the Snow Blooms (S2).
  • Class connectors - Ronin (RO) and Hexer (HE)
13F
  • Just out of reach - The hole is at D1.
  • The sun shines down - Between 12-1 PM, a FOE will spawn around cell F3.
  • A life in the balance - Talk to the Innkeeper before heading out. 2 steps:
    • Head to 14F to the same quest goal (OUT) as An outing in the forest to find the Innkeeper's daughter. Then, while still in 14F...
    • Go through the path unlocked (DUKE) in The sleeping Duke quest and make your way through 13FT to defeat Drake near where the (TOMB) originally was. Alternatively, you can take the Northern 2-way connector close to the goal if you've previously unlocked it.
14F
  • The sleeping Duke - Talk to the Minister to start the quest and allow passage across the bridge (DUKE) in E6. The end of this passage will lead to the (TOMB) in 13FT cell A7.
  • Under maintenance - You'll have to carry the (QUARRY) stones back one at a time. The stone on 14F is at C7. Talk to the Barkeep each time to turn the stones in.
    • Other locations: 5F = A3, 3F = D2
  • Yggdrasil cider
    • Blue Core = Blue Gel
    • White Chip = Darksoar
    • Death Stem = CHOP points
  • The enigmatic woodsman - You can end this quest immediately if you just sell the Wind Rock at the shop. The reward is inconsequential (Nectar vs. Amrita) but if you still want it:
    • Possible Locations: 14F = E7, 10F = A5, 6F = C1, 2F = D2
  • An outing in the forest - Quest goal is at A4 (OUT) near the CHOP point.
15F
  • Playing Cupid I - Ice Sheet (ICE) = MINE point
    • Also very rarely mined on 12F.
  • Playing Cupid II - Ice Branch (IB) = CHOP point
  • Rescue operation - Starts as soon as you enter the floor. I suggest bringing a Lure Bell for insurance. Head to the choke point marked X to cut off the 3 FOEs heading South.
  • Outpatient treatment - Talk to the Doctor first. I suggest going from 15F and working your way down. You can keep teleporting home until the last tree. After the final tree, you have to walk home. You will have to redo everything if you teleport home. That's why it's better to leave 2F for last. Tree to (SPRAY) at 15F cell D4.
    • Other locations: 9F = E5, 6F = B7 (also DF₃), 2F = A2
  • Art imitating life - Pale Arm = Nastue
├ Petal Bridge (Fourth Stratum)
Petal Bridge
Reached the Fourth Stratum.


16F
  • Missing pet - Visit the Duke's Palace at 11 PM to officially start the quest and then head to A6/7 on 16F while avoiding the Castwing FOEs. Pick "No".
17F
  • Playing Cupid III - The Wood Rose (ROSE) is at C5.
  • Law and order - Stay near the floor entrance and defeat all Banepion heading towards you. The quest will fail if any of them get past you and make it to the exit.
  • The volt king's rampage - Talk to the Minister before departing. Take the 2-way connector (VOLT) in the Northern part of 18F becomes available upon accepting the quest. This path connects to (DRAGON) in 17F. If Dragon isn't present, come back at night or something.
18F
The Tree Key can be reached by falling into the pits marked (TK) to fall into 17FK. There will be an NPC at C1 that sells it to you for 10,000 Ental so make sure you have enough to buy it. At this point, you can now backtrack to every (TK LOCK) door from 1-10F for the loot or for new quests. You'll revisit some of these later for post-game content.

To reach 19F, fall into the pit labelled 17FP and follow the linear path through 17FP → 18FP → 19F. Don't forget to unlock the 2-way connector from the South to have a shortcut close to the Geomagnetic Pole.
  • The forefront of research - Bring a Volt Gun to D4 (AE). To unlock:
    • 3x Malachite = MINE points (4th Stratum)
    • 2x Wind Blade = Windsnip (17F)
      • Condition: Kill with VOLT attack
  • The item trade III - Plum Quill = Big Moths (18-20F)
  • The golden shadow - Quest goal at F6. Defeat 3 Illgaze.
  • The value of knowledge - Bring a solo Beast to F7 (VOK). This passage (1BE) only becomes accessible after accepting the quest and talking to the Animal Expert (AE).
  • Yggdrasil's exterminators - Talk to the Doctor first then head to C3 (YE) for a few battles.
  • Beyond the depths - Bring a Tormentor to D4 (AE). To unlock:
    • 10x Pure Shell = Defender (25F)
    • 3x Gum String = CHOP points (5th Stratum)
19F
  • Pride of the gunner - Reach B3 with a Gunner in your party and defeat Edgewolf (EDGE).
  • An ethical dilemma -Talk to Abigal immediately to end the quest. Doing the quest properly won't affect your 100%. Otherwise, go to the quest goal at 19F A1 (AED).
  • The wise King - Talk to the Doctor first. Gold Quill = Glowbird
  • Leaves filtering the light - Chop some trees all marked (BRANCH) at the following locations:
    • F3 (19F)
    • D7 (13F)
    • B1 (10F)
    • A5 (5F)
20F
  • Dinner for one
    • Hazard Eye = Petaloid (20F)
    • Bee Nedle = Waspior (16-20F)
    • Heaven Pin = Killpion (16-20F)
  • A diviner's tools
    • Spinal Fin = Voltking (16/18/20F)
    • 100 Shell = Shelltor (16/20F)
    • Small Bone = Flygourd (17/18F)
  • Explorers! Heroes! Caterers! - Defeat the (AWEBULL) around B2 in less than 3 turns.
  • In the cold, white night - You can do this on other floors but 20F is great because both CHOP and TAKE points are close to the Geomagnetic Pole (see map). Not that Bloom Wood is uncommon and Arc Branch is rare.
    • Crabapple - TAKE point
    • Bloom Wood - CHOP point
    • Arc Branch - CHOP point
  • The courageous Knight - Head to C4 (CHIEF), just before the boss, and pick "Yes" twice. Requires a Level 20+ Landsknecht in your current party.
  • Imminent destruction - Talk to the (CHIEF) in C4 and then head to 21F point D1 to reach the (VAULT). Repeat this 2 more times selecting "Yes" during the 3rd loop.
  • The item trade IV - After finishing Imminent destruction, talk to the (CHIEF) again.
  • Ancient politics - Talk to the (CHIEF) in C4.
  • The beautiful Queen - Completing Ancient politics will let you complete this quest as well.
  • An ambassador's plea - Talk to the (CHIEF) in C4.
  • The ancient blade - Talk to the Minister first to receive some documents. Then, talk to the (CHIEF) in C4. Finally, without leaving the labyrinth:
    • Head to (DRAGON) in 17F and (DRAKE) in13F
├ Heavenly Keep (Fifth Stratum)
Heavenly Keep
Reached the Fifth Stratum.


21F
  • Settling a bet - Choose to leave the coin at B4 (COIN).
  • Nuptial preparatrions - Head to B3 (NP) and select "No".
  • Blood for the grail - First, talk to the Winged Elder (WE) at the floor entrance and select "No" then "Yes". Then, kill 6+ FOEs in the area to fill the grail with blood. You'll get a notification that the cup has been filled. Head back to the Winged Elder (1 cell above where you first talked to him). He'll ask you to meet him at 27F but turn in the quest first to activate that floor's event.
  • The white blade's gleam - Quest becomes available after you pick up the (SWORD) in 1F. The sword will appear after it falls from the event that unlocks the rest of the 6th Stratum following Blood for the grail.
    • Get 1 True Soul = Armorman conditional drop (kill with Bash/Protector's Smite)
    • With 1,000 Ental on hand, bring it to the Blacksmith (SMITH) in 21F and stay in the area for a full day before talking to him again. The quest fails if you leave the area prematurely.
  • Chasing the dream - Along with the Red Tablet you get from Old scars, flaring anew:
    • Get 6 Black Cores = King Gel (22F Side Rooms) and bring it to the 21F (SMITH).
22F
  • The opposing one - Coal Skull = Ebonwing conditional drop (do NOT kill with Cut/Bash/Stab)
  • Easing the pain - Talk to the Doctor to start the quest. Talk to him again once you've collected the ingredients below and then head to the Inn.
    • Life Honey = TAKE point (22F)
    • Black Core = King Gel (22F Side Rooms)
    • Shine Rock = MINE point (23F)
23F
FOEs on this floor are weak to Volt. I suggest using Volt-type weapons, bringing a Troubadour with Shock, and/or an Alchemist.
  • Strength of the traveler - Find the Mysterious Sapling (SAP) at E2.
  • Test of strength - Head to 23F before 5 AM. Stay until you get notified that the event is done. There are no random encounters on this floor so the pocket behind the boss is technically a safe zone.
24F
  • Task for the tracker - Requires a Beast in your current party. Defeat the Tortevil (TFT) marked on the map and then to the Guildmaster to officially finish the quest.
  • Rendering assistance - Talk to the Minister before departing. 3 steps:
    • Trigger one of the 2 teleports at B3/D5 (RT) in 24F.
    • Get teleported to C4 and talk to the guard (RENDER). Give him an Ariadne's Thread.
    • Fully map the side rooms of 22F. Automap should suffice (no drawing necessary).
  • Charity to monsters - Head to the 2-way connector in E5 (CTM) which becomes available upon accepting the quest. Defeat the Huelord.
25F
  • The Castle and the Grail (M) - Concludes after defeating the Overlord.
  • The Labyrinth's blessing - Head to E1 (LAB).
  • An inquisitive child - Head to D6 (INQ) or sell to the shop.
  • The second grail - The (FOUL) Grail is at D4.
  • Monarchy's restoration - Talk to Abigal at the shop first. Then, with a Dark Hunter (with Lv8 Whips) in your current party, head to E4 (OL) where you fought the Overlord.
  • Healing innovations
    • Life Honey = TAKE point
    • True Shard = Armorman
└ Forbidden Wood (Sixth Stratum)
Forbidden Wood
Reached the Sixth Stratum.


Unlocking the entire Stratum comes in 4 distinct parts:
  1. No teleports - Head straight for 27FG to find you're unable to proceed.
  2. Break the seal - After finishing the quest Blood for the grail, head back to 27FG to break the seal. This will cause the (SWORD) to drop all the way to 1F.
  3. Flip the switch - At 28F, you won't be able to open the door to the central stairs until you flip a switch. Make your way to 28F A7 via the 1-way connectors to reach 27FS and the (SWITCH) you need to flip. Flipping the switch lets you open the main door to 29F at C3.
  4. A few steps into 29F, you'll have to go back to 1F to defeat newly spawned FOEs that are outside of their respective Stratum. Upon defeating the 3 FOEs, you can now proceed through 29F all the way to the end of 30F. Around this time would also be a good time to pick up the (SWORD) in 1F and start the (WYRM) quest chain associated with it.
26F
  • You can take the teleporters after breaking the seal (see 27F below).
  • Take the (START) teleporter at night to stay on the path to the next floor. Taking it during the day warps you to the Western side of the floor.
27F
  • B4 is where (CANAAN) will meet you AFTER you turn in Blood for the grail. At this point, you can now break the seal and make your way to 28F up to a certain point. Breaking the seal will cause the (SWORD) to fall to 1F. This immediately leads to a battle with Golem.
  • When you first enter 27F, you only have 1 path forward. You won't be able to visit the 27FS or the thorn-tile area until you reach 28F. If you only want to progress forward, just beeline 27FS to flip the switch that opens the main door on 28F (C3).
  • Take the A→A & B→B teleports to quickly return to 28F after opening up the main door.
28F
  • Premonition of battle - 2 steps:
    • First, head to E4 (OL) on 25F where you fought the Overlord.
    • Then head to D7 (POB) in 28F.
  • Bonds of promotion
    • Cat's Eyes = MINE point (6th Stratum - easiest in 28F)
    • Star Rock = MINE point (6th Stratum - easiest in 28F)
    • Shine Rock = MINE point (5th Stratum - easiest in 25F)
  • Shadow of the castle - Take the teleporters starting from E7 near (POB) to reach (BRIAREUS). Answer questions correctly along the way. Savescum if needed.
29F
  • The 2-way connector with the 500,000 Ental can only be entered if you have a party of 3 or fewer units.
30F
  • Every door, except for the 1st and the one beside Ur-Child, will trigger an encounter. Unlock the 2-way connector immediately as soon as you reach that penultimate room.
  • Most blue tile teleporters that aren't marked will lead back to the Geomagnetic Pole.
Rest/Retire
Rest in Body and Mind
Let an adventurer rest.


A Valiant Effort
Retired an adventurer.


Self-explanatory for the most part. Retiring is a lot better in EO2 compared to EO1:
  • Retiring at 70 gives you +8(?) skill points and raises your cap by 1 level.
  • Retiring at your new level cap afterward will continue to raise your level cap by 1 (up to 99).
  • The skill points will remain at +8 up until level 98.
  • Personally, I would just Retire once just for the skill points. You can reach retirement/level 70 early by running a 5 Troubadour party with 5x Max Divinity (they stack).
Beast Class
Feral Might
Unlocked the Beast class.


The Beast class can be unlocked on 5F just before you meet the 1st Stratum Boss. You'll need to trigger an event and revisit the same place after defeating the boss. See the (BEAST) 5F map annotation above.
Surprise!
Surprise!
Encountered an enemy through mining ore, gathering plants, or chopping wood.


Gathering (MINE/TAKE/CHOP) points on later floors have a chance of triggering an ambush.
250k Ental
Filthy Rich
Obtained more than 250,000 Ental.
Not cumulative

Most conditional boss drops sell for 30k and are guaranteed to drop if the condition is met:
  • Chimaera - Kill while poisoned (Poison Gas from Shop)
  • Hellion - Kill with Instant Death (Dark Hunter's Climax)
  • Scylla - Kill within 3 turns.
  • Harpuia - Kill while poisoned (Poison Gas from Shop)
  • Colossus - Do not kill with Bash/Stab/Cut (Moves like Hexer's Revenge)
  • Golem - The Golem has 2 lives so you can nuke it with Revenge and it will respawn with half HP which is just right for the Dark Hunter's Climax
    • Condition: Kill with Instant Death
Quest
Welcome Back!
Completed the quest "The beautiful Queen".
Quest chain

Although you will see this quest early, you won't be able to finish it until completing the chain:
  • Quid pro quo → The iron-walled Rook → The wise King → The courageous Knight → The opposing one → Monarchy's restoration → Bonds of promotion → Ancient politics → The beautiful Queen
Combat
Cataclysmic Force
Defeated a boss in a single turn.


Crushing Blow
Dealt 1,000 damage with a single hit.


Both combat-related achievements will come naturally. Can be achieved earlier and easier by toggling down to Picnic difficulty. Hexer's Revenge can also reach high damage figures early on.
↪ Overlord
Hero of Lagaard
Defeated the Overlord.
Story-related
↪ Elemental Dragons
Each of these bosses has a relevant quest chain that unlocks/spawns them:

Drake Vanquisher
Defeated the Drake.
Post-game boss

The perfect gift → The sleeping Duke → An outing in the forest → Easing the pain → A life in the balance

Dragon Vanquisher
Defeated the Dragon.
Post-game boss

The golden shadow → Dazed and disoriented → An ethical dilemma → The item trade IV → Imminent destruction → The volt king's rampage

Wyrm Vanquisher
Defeated the Wyrm.
Post-game boss

The white blade's gleam → Old scars, flaring anew → Chasing the dream → An ambassador's plea → The ancient blade → Crimson vengeance
↪ True Boss
The End-Bringer
Defeated the Ur-Child.


Absolute Power
Defeated the boss of the Sixth Stratum on Expert difficulty.


Please keep in mind that the following is generic and there are lots of ways to beat Ur-Child that many other big-brain players have shown. I just chose this one since it was well-documented and seemed like the least time-consuming method from what I saw. I ran PDTHH:
  • Protector - Negate/mitigate most damage using Painless (FORCE)/Provoke/Parry/Manawall.
    • Gear: Dragonbane, best Armor available, best defensive Accessories available
  • Dark Hunter (swappable if you're not interested in binding Ur-Child)
    • Gear: Dominator, best Armor available, up to you
  • Troubadour - To compensate for the low level and maximize Hexer damage using Stamina.
    • Gear: Dragonbane, best Armor available, best defensive Accessories available
  • 2x Hexer - Spam Revenge from the start after entering the battle with 1HP.
    • Gear: Ebon Staff and 3x Vigor Belt
I used this simple comp with the goal of ending the battle early (as suggested on the wiki) using Hexers. In hindsight, I did not use my Dark Hunter to its full potential because Ecstasy didn't do much damage due to the low level and the buffs I used (Stamina and Shelter). I could have probably gotten away with 3x Hexers if I were willing to let my Troubadour possibly die. Alternatively, I could have slotted in another defensive character like a Beast.

To prepare for the battle:
  • I went to 6F with a Survivalist (max Stalker) to reduce my Hexers to 1HP using thorn tiles.
  • I stocked up on 4 (you can bring more if you want) Axcella II to keep my Protector topped up to use Painless at least 3 times.
  • Before entering the battle, I went to 29F for some random encounters to charge my Protector's (and whoever else's) Force Gauge to the max.

Demonstration:
Completion
Conqueror of Yggdrasil
Obtained all other achievements.
CONGRATULATIONS

Thanks for reading up to this point! If you'd like, check out my other guides: https://steamcommunity.com/sharedfiles/filedetails/?id=2987673258 https://steamcommunity.com/sharedfiles/filedetails/?id=2994339871
5 commentaires
brown malcolm x 4 janv. 2024 à 23h33 
First 6 for me
Silicis 7 nov. 2023 à 6h54 
might just be me but I haven't been able to get the first 5 maps to load.
Ragna 30 juin 2023 à 10h31 
No problems, stumbled upon this while I was farming the poppy leaves(?) for the axcelas, since your method was the one I used way back when I played it on the DS, and had yt in the background. Thought I'd share since more often then not the 6th Stratum bossed do require a pretty specific set-up to be consistent often involving leveling a specific party etc and this just let me skip it :P
Same btw, with his vids for manipulating the EO1 Dragons' rare drops. Probably the biggest thing I was dreading when playing these remasters.
Jedo  [créateur] 30 juin 2023 à 8h24 
Hi Ragna! Thanks a ton for sharing that. :D:

Will check it out over the weekend after I get some chores done.
Ragna 29 juin 2023 à 4h41 
Just wanted to add to the Ur-Child fight since you said you chose this method for it being the least time consuming.

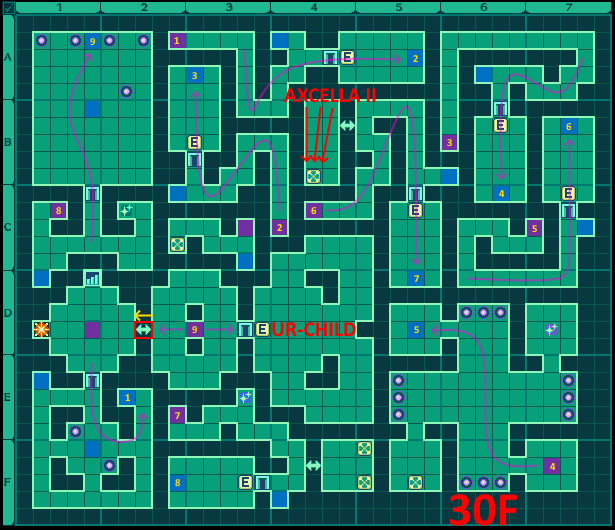
There's an RNG manip that Araxxor found that can beat him on the first turn with a lvl 8 Hexer and level 4 Survivalist:
https://www.youtube.com/watch?v=SohtMl3hfQ8 here is the vid.

It takes no time at all to set up, you don't need to farm for Axcelas etc, thus making this a great way for farming eden apples to buy the best gear for your toons so you can do the TRUE true final boss: Muckdile.