Wander Hero

Wander Hero

48 ratings
Wander Hero English Guide
By eharper256
A English guide to Wander-Hero, with tips and ratings of various cards, hero-girls, and starting abilities, as well as general hints and tips for getting ahead and navigating.
4
5
   
Award
Favorite
Favorited
Unfavorite
First of ALL!!
Has now been updated for 1.0 version.
All the core gameplay stuff is up to date and accurate. See the bottom of the guide for a video of gameplay, and more portraits for your MC.

BUT, FIRST OF ALL!!
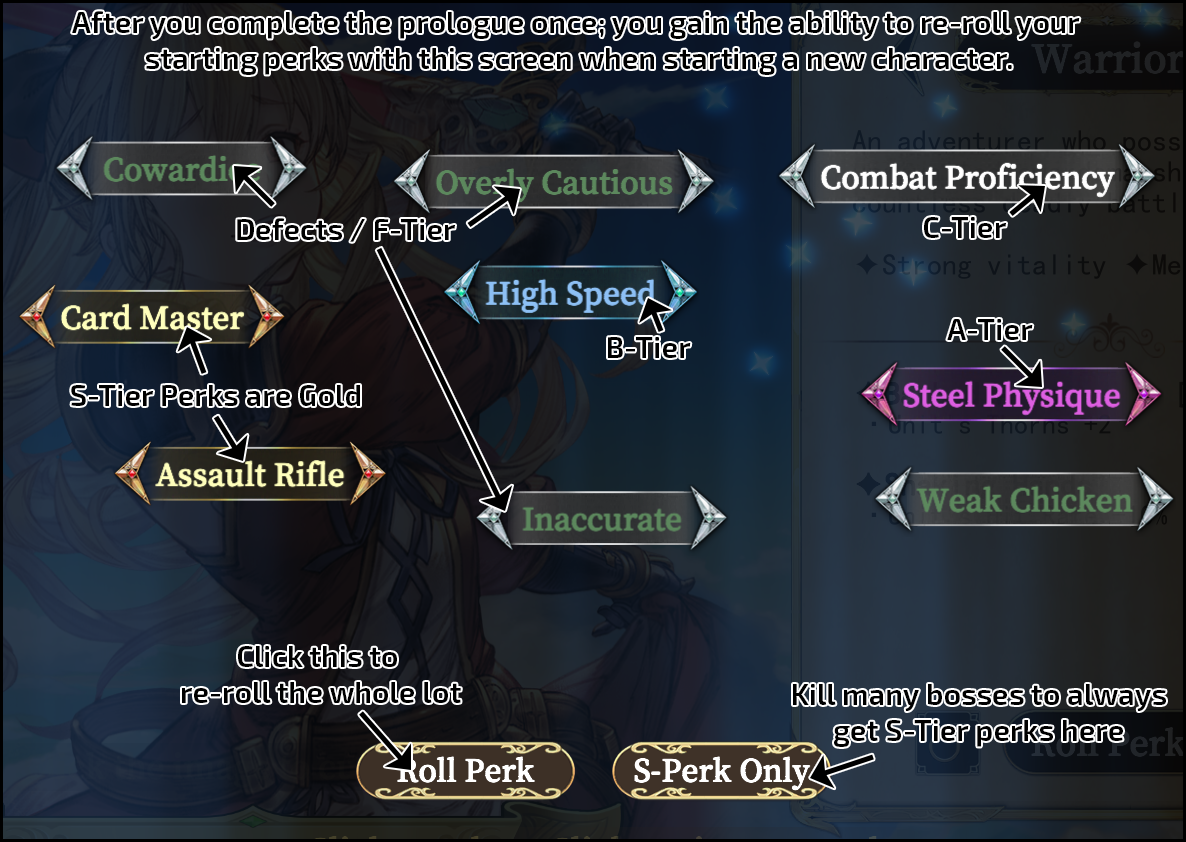
ALWAYS ALWAYS re-roll perks until you get an S-Tier that will be useful to your Main Character- Your MC - note I use this term for your player character from now onwards). This rather reminds me of rolling stats in a oldskool Wizardry game lol.

This can be a somewhat long process for your first character, as the rolls are entirely random. Look for perks that have [S] next to their name (they are ranked S, A, B, C, F). Don't make the mistake I did, which was thinking 1x A-Tier for +3 ATK was a good roll (lol).

You have a cloud of perks you pick three from here. Gold ones are S-Tier . YOU CAN get 2 or even 3 S-Tier in the same selection, as you can see above, if you're super dedicated to re-rolls, but having a good synergistic set of perks is worth more than mismatching S-Tiers, though. You can see some of my thoughts about S-Tier's and their relative ranking in this guide. It's below the class examination (3rd section).
Picking Your Class
NOTE: The MC always has a pinball melee attack (yes, even Ranger & Mage). Every time you use this as the MC, you get a 0 cost Slide Card to move a bit after. Keep in mind you moving with Slide can trigger some things like Apprentice attacking; but you should normally use your slide to get into cover or back away from a vulnerable spot.

Warrior MC
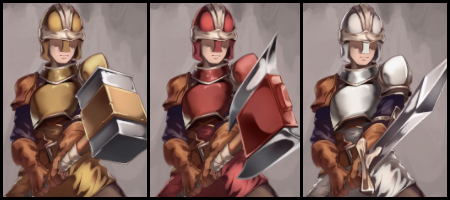
  • You have 100 HP base, 3 DEF, and high Speed. You use Heavy Weapons & Medium Armor.
  • [Jump Slash] is SUPERB; basically, if you have Line of Sight to an enemy when an ally hits it with ANY attack, in your MC's line of sight, you also jump at it and hit it for 1/2 ATK. Hence, as a Warrior you want to get as many mercenaries out as possible to make use of this, as it can trigger infinite times in a turn (and double-trigger from Swordsman Merc!). Jump Slash ignores Thorns. It can get you killed though; most notably with bosses that have constant damage auras and beams. These fights are horrible for the Warrior.
  • [Gale Sword] is decent, you fire off low-ish damage piercing whirlwinds after playing two skills. If used with melee cards, it will usually fire backwards from the target you hit.
  • Finally, [Whirling Blade] is quite bad. When you start your move, a variable number of blades will spawn around your start position, and then randomly shoot off some time during your movement. The hit-rate is very poor, so it isn't a priority to get.
  • In most cases, Warrior play order is Mercs => Cards => Your Melee. This is because you want smash as many enemies as you can with Jump Slash before actually attacking yourself. If you're in a bad position to jump slash or use your cards, of course, or want to focus on a specific enemy, then shuffle things around a bit.
  • Generally, Zweihander is your best weapon, for raw +ATK, but Katana is also a good pick for a mix of Min Dmg and ATK. Mercenary Armor is likely your best chest slot (free +Armor AND HP is a great combo). Shoes of Speed are also a good idea.
  • For Basic cards you get [Punch] which are garbage and should be removed at Libraries ASAP. You 1x [Slam] which is ok, but poor action economy, and a [Stored Power], which gives +3 ATK to other Attack Cards this turn, which is fine.
  • After the Prologue, you get a [Tornado Slash], which is AMAZING; as it does the stated attack (3x15!) continually on the route to the destination. Aim far, kills lots. It's usually worth the 3 AP cost. You also get a [Dash], which is meh, but okay as an opener.
  • Cards are a mixed bag. Some great, some awful.
  • Overall, the Warrior is tough, with decent abilities, and a good starter deck. But certain bosses will be very troublesome.
Ranger MC
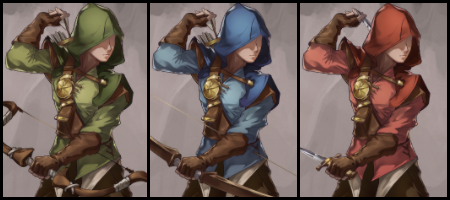
  • You have 60 HP base, 2 DEF, and about 80% the Speed of the Warrior. You use Light Armour and your pick of Bows, X-Bows, or an Arquebus.
  • [Sharpshooter] is a better version of the innate ability of Shortbowman mercenary: you shoot an arrow whenever an ally hits in LoS. +Spread or Shoot WILL add extra arrows.
  • Accuracy can be a problem for it; it has a 10 degree or so cone of error and arrows have a small hitbox. Keep in mind that +Hit Rate Does NOT affect this. You want +Accuracy, which is a different stat. +Hit Rate is for vs. Dodgy enemies.
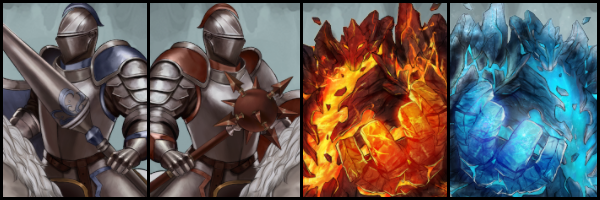
  • [Throw Shuriken], their second skill, gives free, zero-cost [Shuriken] cards when you play 3 attack cards in a row. Don't go out your way to get Shurikens, they're fairly mediocre cards.
  • Even so, try to get Temple upgrades ASAP on your Ranger MC because [Arrow Blitz] is AMAZING; you constantly fire shots when bouncing around for your melee. This is by far the best tier 3 ability of all the classes, especially since +Spread or Shoot WILL add extra arrows again.
  • Their Play order is typically Buffs => Your Melee => Mercs => Attack Cards, because you want to see how much you can get out Arrow Blitz before supporting your Mercs with shots, and then adding in supplementary fire from cards to polish off stragglers. Again, change this as needed for the situation.
  • You want to have a mixed crew with other ranged attackers and some melee. Weapon pick is up to you. Shortbow gives bonus arrows whenever you fire, which is great. Longbow gives a very good 30%+ Crit chance. Considering you fire dozens of arrows usually, the +crit is super nice to have. Crossbow means your arrows pierce 1 target, and Arquebus means ignoring some monster defence, so they are decent options as well.
  • For Basic Cards, you get [Bow Shoot], which is, you guessed it, garbage. You also get a [Bladestorm], which is a narrow cone with several daggers. It's decent, but really not worth the 3 cost, and should probably get removed as well. You also get a [Continuous], which gives you an extra pinball move for 2AP, which is a great card.
  • You get [Final Shot] after the prologue, which is for priority must die targets. It's 10% buff per card played on its high base damage is nice, and the great 1-shot damage makes it worth 3. You also get an [Insight], which is always a good card for deck cycling.
  • Archer has quite a few rather poor common and uncommon cards; but some amazing rares like [Split Arrow] and [Chakrams].
  • Overall, the Archer has the best abilities, moderate endurance, and a good starter deck, but has some pretty bleh common/uncommon cards.
Mage MC
  • You have 40 HP, 2 DEF, and about 65% the Speed of the Warrior. You use Robes and Staves. As you're squishy, a HP perk (or a +10/15 HP starting boon) is a good idea. Keep in mind that +ATK is useless for a Mage, all their damage keys off +MAG (including their Melee).
  • [Firebolt] is similar to Archer Sharpshooter, except it has has a small AoE but much worse accuracy (around a 25 degree cone, by estimation). Deals (MAG-3). +Shoot/+Spread on items does apply to fire multiple bolts!
  • [Power Surge] makes you gain +Min DMG for every two non-attack cards you play. This includes mercenary cards and defences, just not attacks. It's meh; since this is basically just affecting your bounce.
  • [Starfall] is mediocre to start. It drops a random micro-meteorite for (MAG-3) damage nearby you after you finish your move. The AoE is good, but the random targeting is not. However, +Shoot does apply, so when your MAG is high and you have +Shoot, it becomes pretty good. Even so, you're not in a rush for the 3rd Temple upgrade for your Mage MC (like Warrior). Give it your girls.
  • Mage Play Order is Cards => Mercs => Your Melee. Mage Cards are usually powerful attacks and nukes which you want to use to prune away choice targets. After that, send Mercs on remaining targets (which you support), then move yourself.
  • You want the most MAG you can get on a staff, and +Shoot/+Spread.
  • Basic Cards are the inevitably crap [Magic Arrow]. [Crack Armor], which isn't too useful overall. And finally, a [Throw Bomb] which, though cost 2, is pretty good if enemies are in a tight packed area and is easily your best starter.
  • After Prologue, you get [Shadow Ray]. It doesn't say so on the card, but this fires a Valefor laser, which is say, it sweeps a powerful beam in an Arc. It's stronger the later you pull it out in battle (+1 ATK per enemy killed) so it can be great; but if you draw it in your starter hand its not worth the 3 cost. You also get a Potential, which is always a good card.
  • Mage has some absolutely baller Uncommon cards (Acid Arrow, Fireball, and especially Drain Soul are of note). Their rares are typically high cost, high damage.
  • Overall, the Mage has a good ability set, has a meh starter deck, but is mega-squishy. But probably gets the best cards later.
[S-Class Perks] Tier-List and Analysis
Good lord there's alot, took me about several hours to test these. I may still be missing something, feel free to let me know if you spot something not here.

S-Tier+
  • Energy Restoration:After taking your MC's melee-pinball action, do it again. Basically, a free use of a [Continuous] (2 cost) card, every turn. Your MC can do alot of damage with their pinball, so this is absolutely baller for wiping out stages before they can do anything. Combo with a Speed boost for extra OP. SS-Tier.
  • Blessing of Eris: +300% Dodge for the whole Team on first round. The first round, when lots of enemies are active, is always the most dangerous round, so making the entire team immortal for it is amazing. Only issue is that you may not have many merc's out on round 1. Still SS-Tier, esp. for boss fights.
  • Fervant Collector: Disables discarding unused cards. SS-Tier for everyone; that's just more tactical options, permanently. Do keep in mind you will quickly reach your max hand size, though; so don't also get too many [Insight] or card draw relics. The 0-cost [Potential] card is your friend. S-Tier
  • Fast Growth: 300% XP gain and +1 option when levelling is bonkers. Not only do you level insanely fast, but you also have a bigger chance to pick one of the good stats to level (see levelling, below). S-Tier.
  • Favored Paladin: Two layers of Holy Shield each round. That's flat out just 'nope' to the first two hits against you, every round. Furthermore, whilst you have at least one layer of Holy Shield, you are totally immune to Thorns (ONLY: not counter-clouds, beams, blades etc.). Though it won't help you as much against big hordes, it allows playing much more recklessly, so it's a good S-Tier for all.
  • Master Leader: +1 ATK/MAG/MIN DMG on mercenary cards. That can be huge, since Mercs often provide alot of your firepower; and it scales as you level. S-Tier for all.
  • Execution Time: When card that costs 2 or less kills an enemy; copy it and it gets -2 cost, up to 3 times. This applies multiple times to AoE killing cards like Fireball! SS Tier for a Mage, but still A-Tier for others.
  • Ancient Shield: Floating Shield spins around you, TRON style, and projectiles that hit it are destroyed. Some bosses have this ability and its pretty annoying. Does nothing to melee hits, but permanent, makes it still a good S-Tier.
  • Distortion Field: Permanent 3 Armour. That's very good, as Armour doesn't reduce. Makes your MC give zero clucks about low damage attacks, forever. S-Tier.
  • Furious Charge: When MC is pinballing, they're invulnerable and immune to status. For a Warrior, definite S-Tier, as it means you give zero fracks about enemies with thorns, gas clouds and counters. Keep in mind it won't affect jump slash though. Less so for the others, probably A+ Tier, but they still get good use of it since they're squishier by default.
  • Mocking Face: Taunt Enemies on turn start, +1 Armour per 5 enemies. If you're a Warrior and want to go full tank spec, this is your talent, since you'll make enemies want to hit you much more than your squishy mercs, and even get free armour. SS-Tier for that. But B-Tier for Archer/Mage as they're a little squishy to be the centre of attention.
  • Assault Rifle: Fire at enemies that approach near you, somewhat like a Rogue Mercenary, but stronger. The shots are quite inaccurate, mostly missing enemies not directly coming at you, but are very rapid, doing A LOT of collateral damage if there's several moving targets, so it's pretty great. S-Tier, and SS for a Ranger MC (the shots ARE affected by +Spread/Shoot on Bows!).
  • Brainwash: A random Companion Hero Girl in hand each turn is -3 AP to play. Um... sounds dodgy... But undeniably this is really handy, because that means you can load your girls up with a powerful armour AND a powerful weapon and still get them completely free. Also great for a Harem build if you want that. Around a low S-Tier.
  • Card Shark: Up to 3 times a turn, playing a 0 cost card also draws a card. Talk about value!! This allows for free deck cycling which is always valuable. S-Tier.
  • Ancient Vampire: +2 Drain (Life Leech). Permanent leech 2 HP on EVERY hit is pretty amazing (you'll know that if you've used Gricoria at all). I'd say it's SS for Warrior, since they're guaranteed to hit with Jump Slash. The A-Tier version, Vampire is also an amazing secondary pick. S-Tier.
  • Survival Master: World Movement not affected by Terrain and can go 10 days without supplies. Not to underestimated, hills and forests and especially mountains REALLY slow your party down. Being able to go on 0 supplies means you get extra leeway for completing quests with complex dungeon layouts, and full clear more if your HP is up to spec, for more loot & XP. Makes Logistics Levelling useless though. Solid S-Tier.
  • One Punch: +150% Crit. Oh hai Saitama. You actually notice crit quite alot even with like 30% chance from equips, so basically guaranteed crits (with critting the crit chance too!) is pretty darn nice, basically a flat +50-100% damage. High S-Tier.
  • Flame Warrior: First three hits your MC makes in a turn also leave a big pool of napalm behind. Can be from any hit, but it support fire, jump slash, or cards. Enemies that move through the Napalm get 2 damage repeatedly, so they make excellent denial zones. Pretty fantastic for everyone. S-Tier.
  • Lord of the Dead: Free 0-Cost Skeleton Card every turn. Skeletons can't move or attack when summoned, and only have 5 HP, but they have a moderate size hit-box, count as a card played, are a defender, don't disappear at turn end, and have 3 Thorns. Free disposable walls that attract fire? That's great for survivability, and only gets better as battles drag out. S-Tier for sure.
  • Afraid of Pain: The Maple Perk. Converts your ATK/MAG stat into Block and Thorns. All of it! In my Warrior test, this gave 9 Block, 6 Thorns every turn in the prologue. Which is a lot, basically immortal at the start, so if you buff it with items, even better. Your normal pinball melee and support fire will proceed to be garbage with 0 ATK (lol). Cards with flat damage are still okay though. Very weird perk with a unique playstyle. If you want to go full defence build; I'd still argue Mocking Face is better with some supplementary perks, since with this, your Jump Slash won't do much, but its still unique and certainly an S-Tier. If you use this, consider getting lots of +Min DMG on items. Normally this isn't an important stat, but if all your attacks are 1, forcing it upwards is a huge multiplier. Alternatively, use on a Mage, and pretend you can only do damage with your spell cards.
  • Spirit of Heroes: Flat +35% ALL damage. Boring, but with some good supplement perks, I'd accept it as a moderate S-Tier, as it applies to cards, skills, and support fire.
[S-Class Perks] A-Tier
  • Combat God: +40% flat damage on skill cards is really good, especially for Mage. Combat King (the A-class version) also offers +30%, which is nearly as good. A-Tier.
  • Defence God: Adding +4 Block/+1 Armour to defence cards, as appropriate for the card- no card gives both. As this will even apply to 0 cost defences, it can get pretty ridiculous fast. 6 Block for 0 cost from an un-upgraded Quick Parry is pretty hilariously OP. Similar to Combat God, the A-Class version is nearly as good, though (+3/+1). Still A-Tier.
  • Battle Aura/Magic Crystal/Avatar of Demon God/Giant Blood: +35% Phys DMG/+35% Mag DMG/+5 MAG/+5 ATK as appropriate. Generally, the +flat is overall better (with ATK for Warrior/Archer, and MAG for Mage) as that's getting a strong, thrice-upgraded weapon for free, which is esp. good for support fire. The percentile is better for cards with high values though. A-Tier.
  • Arcane Swordsman: +3 MAG and ATK. Overall, this ends up being same as a +5 or maybe +4 since whilst the other stat is used in your total attack value for pinballs, its weighted less (and is normally 0). However, it gives you mildly more card versatility, in theory. A low A-Tier.
  • Path of the Brave: What this does is that, when smacking enemies in melee pinball, your ATK against them is boosted by whatever ATK is shown on the monster. Obviously no effect against enemies that are only defending this turn; but often causes an impressive damage boost vs. Elites and Bosses, possibly 20+. Naturally, an A+ tier, possibly low S, for the Warrior, but still a decent A tier for the others.
  • Meeting of Fate: Start game with an SSR girl already in your deck. Since you'll nearly always get one directly after the prologue as well, this means double powerful heroines, very early on; which is pretty good, though taxing on your wallet as you need to pay both (Hilariously, this used to be called Summon Waifu in early access, lol). A-Tier.
  • Magic Eye: +9 Accuracy. For Archer and Mage, this is A-Tier; gives pretty much perfect support fire accuracy. Obviously useless for Warrior as Jump Slash always hits.
  • Negotiation Expert: +50% Cash and Reputation from Task bounties (you normally get 10 rep). That's a pretty great amount. It's not helping you fight; but more cash is never bad. A-Tier.
  • Blessing of Water: You personally regenerate 20% HP a turn, which makes your hero pretty darn tanky. Sadly doesn't apply to your mercs, so it's not a top-tier godbless, but pretty good. Used to be 'Blessing of Goddess Aqua' in the early access, so I had a joke here about how you can throw Axis Cult recruitment forms for critical damage lol. Eris-pads-her-chest tier. I mean A-Tier. XD
  • Boss Killer: +100% (!) Damage from yourself vs. Bosses. Since the MC is usually the most damaging, and bosses are very threatening, this is never a bad pick. Also applies to cards. Very solid A-Tier for all. If you wanted to try some crazy lone-wolf build without girls or mercs, I would say this one becomes essential, since without support fire, bosses will be very hard.
  • Inhuman: Get 1 Life Leech, +2 STR, +1 MAG, +20 HP. All for one perk, there's ALOT of value here, and it will always serve you well alongside some other more interesting perks.
  • Automatic Reload: Fires +2 extra shots when you fire a shot (NOT on cards, only on support fire). Obviously an A+ Tier on the Archer or Mage, as it applies to your base abilities and makes their accuracy less important. Though will also bias you to wanting more mercenaries for more support fire opportunities. Useless on Warrior ofc.
  • Skeleton Knight: When you hit in melee, you also use a Spin attack. This is a lesser version of the Spin to Win effect, which is used by Ratna, and also very rarely spawns on a Katana as an enchant. As it adds AoE to every melee hit, it's great for everyone. A-tier for all.
  • All-Known Eye: You can see dungeon layouts in advance, and precise monster numbers for wandering groups, and also see upcoming draws. You can actually pay for part of this at Thieves Guilds if you find them, and it's worth every penny. So, permanently having it is pretty awesome; also getting a precise view of your deck is even better (though there isn't any Oracle draw-manipulation archetype in game, sadly, so it's just info). A-Tier.
  • Mobile Phone: Skill Card range +160. I want my phone to help me punch further and cast spells! Obviously really good if you're using cards at all. Best on the Warrior, oddly, since most Archer and Mage cards already have good range; but being able to skewer something from across the room is priceless (especially for Phantom Strike/Finisher builds). Though all can benefit. A-Tier.
  • Villager A: Creates three purple balls around you at turn start. They follow you around and do magic damage to anyone crossing them (even if you run into the enemy). Damage range seems like 2-10, and they can activate 3-5 times before disappearing. Probably low S-Tier for Warrior as they do follow along with Jump Slashes, but A-Tier for all.
  • Lightning Control: At turn start, you copy Anma's ability (see her section in Girls), but in reverse, with Lightning that connects you to the closest ally. Though a bit hard to guarantee a good target, and has no effect on turn 1, this is obviously a great ability. Both of you can move, expanding the lightning around (which pierces obstacles) to slice enemies apart. A-Tier.
  • Potion Master: Potions and Camping (in wild) has double effect. Direct massive savings if you buy or make potions. Potions are actually pretty rare to find to purchase; and this makes putting levels in Alchemy a better pick. A solid A-Tier. We ignore the camping part because you shouldn't do that, always find resorts and rest in towns.
  • Master Tactician: +320 Deploy Range/ZOC. Gives you A LOT of extra leeway with mercenary and girl deployment. Highly expands your tactical options, so a solid A-Tier.
  • Blessing of the Wind: +35% Speed. That's A LOT on the Warrior, so maybe an A+ for them. Pinball further and harder. A-Tier for Archer because longer Arrow Assault spam, C-Tier for Mage as their melee isn't too important (though if rolled with Avatar of Demon God, back to A-Tier as that's a perfect melee mage setup, lol).
  • Harem Wings: Has a hilarious name. +15% Speed per Companion Hero Girl in your deck (Slave girls don't count). If you fill your deck with companion girls, it could be ludicrous, but finding 3+ heroines to beat Blessing of the Wind's bonus might take a while. Still an A-Tier for Warrior/Archer. C-Tier for Mage.
  • Attract Girls: Vastly increases your ability to get better recruits. In testing I got absolutely excellent mercenary recruits constantly in Taverns (Knights, Foxgirls, Support Mages, etc.), and had 3 hero girls shortly after completing the three prologue quests! This is very good, but early on you also really can't keep loads of elites in your team at once (and it's pricey!). Still, a solid A-Tier.
  • Steel Savant: Allows you to equip weapons not normally for your class. Now, normally you'll want to use the weapon type of your class, as it will give you stats you want. However, it has some niches: Buckler access (Buckler is amazing for all, bonus Speed & Block ~ but normally limited to tank heroines), Crossbow access for Mage (free Pierce on your Firebolts is nice), and Broadsword access for Tank-Build Warriors (free Armour). Low A-Tier.
  • Otaku Reincarnation: At turn start, one card costs -3 AP. I mean, no-one dislikes a free card every turn, but I believe this can affect 0-cost cards, and it's random as heck. Ironically makes you want to avoid taking 0-costs, which is dubious since there's some good ones. Even so... the potential still makes it a low A-Tier.
[S-Class Perks] B-Tier
  • Loyal Companion: First Heroine you play stays 2 rounds. This resets every round, though of course you usually won't have Heroines available to play each round anyway. As they're strong, this is a good boon, but also means they're open to damage twice (some girls also have perks that activate on play or at start of turn, which is even better). I would say that if you're desperate to try the meme all-girls deck, this is one of the best options for that, albeit not as good as Brainwash. B-Tier.
  • Monster Purification: Apparently your princess is in every castle. Each Boss kill gives you a new Heroine (lol). Keep in mind that the new girls might well only have 0 or 1 perk (like Slave Market girls) and will still draw a salary from you. If you want to try for a meme build with only girls, go for it, but you'll soon be out of AP (and cash!). If you have infinite patience you can see if you can roll Harem Wings with it. But due to caveats, I can't rank it above B-Tier.
  • Astralization: +25% Dodge. No one is going to dislike a flat 25% Dodge chance, but it's still a chance thing, and so not worth your main S-Tier if you only get one. Used to be 15% in early access, so it's worth a B-Tier now. Possibly an A on a Ranger, since they can also wear a Gambeson & Agility Boots to triple-stack Dodge bonuses (for about 40-65% dodge, depending on your item upgrades). Fighters can also use it with [En-Guard!] but that requires lots of deck setup. Mage can also use Phantasmal Robes (which works like Gambeson), but they are rare drops.
  • Sniper Rifle: B-Tier. At the end of the enemy turn, you fire two shots at the 2 lowest HP enemies you can see in LoS. They do about 15 damage. This is super solid when first starting out, but it will lose effect over time (scaling is low). As a result, I consider it a B-Tier.
  • Medical Knowledge: 30% chance to avoid status effects for the whole team is good: no one like Paralysis on your Mercs, but it's overshadowed by other better stuff. Gets more value in the very late game (as [Danger]+ level quests often apply status effects). But still overall a B-Tier.
  • Half-Spider: At the end of melee move for MC, get a Jump card. Get a Slide card after playing it. Good for increasing your MC's mobility a bit. Jump is already a good card, after all. That said, only getting after your move is a bit less good. Still, there's literally no excuse to be out of cover with this perk; and Jumping Jack Starfall Mage build is a thing.
  • Steel is my Body/Magic Defence Barrier: 35% PR/MR- Physical/Magical Damage Reduction. Just less damage, forever. Decent, of course, if boring. Physical damage tends to be more common, so it's B+ Tier. But Magic Damage can be dangerous so MDB is still B-Tier.
  • Vicious Mockery: At start of round, each enemy has 5% chance of being stunned. Low chance means it can't be relied on, but still pretty good simply because it constantly happens forever. B-Tier.
  • Witches Pampering: I see you there, Re:Zero reference. Free Shadow Stab counter-strike when enemies hit you. Seems to deal somewhere between 3-6 damage on testing, which is better than most applications of Thorns your MC can have. Okay for a tank-MC concept, but there are better picks for that too. B-Tier.
  • Polymath: When you gain offered a new skill, pick from 5 options, rather than 3. Sure you'll get less chaff, but you actually want to pick Souls fairly often, rather than a new card. The rarity is also unaffected. Now, this ability is quite good when you kill a boss, since they have a high chance of dropping powerful rares, and cherry picking your favourite rare saves you some time with deckbuilding. Not sure it's worth taking over other perks though. B-Tier.
  • Business Acumen: Get gold from every town discovered so far. If you can somehow also roll GPS Satellite I expect that combo to be hilarious, and who doesn't like more cash? Even so, there are better picks overall. Solid B-Tier.
  • Card Master: Copy first skill card played in turn, with -2 Cost. A worse version of Execution Time, as its only one card a turn, though this doesn't require a kill and can apply to higher AP cost cards. If it applied to Merc's, copying them, it would be amazing. But it doesn't, so it's B-Tier.
  • Weakness Penetration: +2 Penetration. This means when your MC moves, their melee attack will pass through 2 enemies rather than bouncing off them. Its not bad by any means, but again, it's giving up better stuff, and your MC is not hyperfocused on penetrating attacks like Phalanx or Sorith is.
  • Black Swordsman: When you hit in melee, you also strike a small line zone through the enemy hit, in the direction of travel. It's decent against close packed enemies. Arguably B+ for a warrior, especially with buffed speed, though it doesn't apply to Jump Strike.
  • Orc Face: +2 AP permanently. A reference to Isekai Ojiisan (lol). Well +2 AP is a nice starting bonus; allowing you to hold off taking it for Levelups. But eventually you'll catch it up, so it's just a B-Tier for me.
  • Warding Gaze: 35% less damage taken during player turn. This means less mercenaries killing themselves by running into enemies with thorns and beams and stuff. Not bad as such, but not amazing. Furious Charge is better for the MC, though.
  • Life Harvester: +3 Minimum Damage. It's fine, it exists. Very boring, but fine. B-Tier.
  • Escape Mastery: Can use stage exits on first turn and can retreat without losses from world map fights. Can possibly get you out of some pickles if you need to get to a town, and/or have to escort a VIP through a very tough stage. More options is always nice, but a bit niche. Low B-Tier.
  • Final Blow: Removes damage decay from your pinball melee, but can't move or draw cards after. The penalty is absolutely awful, but damage decay can also be a pain if you've got a huge bounce set up or want to hit a boss with multiple uses of [Continuous]. It just about scrapes into a low B-Tier for me.
[S-Class Perks] C-Tier
  • Berserkers Soul: When you're hit, get +10% SPD, +1 Shot until end of next turn. I mean, you don't want to be hit. But you WILL be hit. The pure uncertain power level of this makes it C-Tier, but an okay pick for Archer. Mage SPD is too low, and they're too squishy to benefit, really. Possibly better if you get it with Taunting Face, though that would require obscene patience.
  • Personal GPS Link: See the entire World Map after the initial quests. When I isekai, I bring my GPS satellite. It's decent enough one-time info, though you'll learn it around 100 days of game time anyway, and you don't learn anything dead exciting from this. I guess if you're speedrunning the Paragon content, it's more useful, though. C-Tier.
  • Fist-Fighter: Get +50% damage if you have no weapon equipped. The Base Attack of the MC is 8, so you get +4, by default. So it's equivalent to a twice upgraded +ATK weapon. A weapon can have around 9x upgrades, varied bonus stats, and an enchant though (and 2 upgrades is just 4K gold, no upgrade mats needed). This ~does~ mean you can wear two accessories and an armour for some diverse bonuses; but especially considering there are +5 ATK/MAG perks that STACK with your weapon, I wouldn't rate it above C.
  • Shelter of Goddess: If MC loses 50% HP in one turn, get Life Protection for that turn (reduces all further damage that turn by 90% or so- bosses always have this) Honestly, if that happens, you should probably just quit and reload the battle. C-Tier. If you're doing an Ironman no-loading permadeath run, though, obviously alot better.
  • Monster Hunter: Boss and Elite kills give extra crafting materials. They're not usually all that expensive to buy and find anyway. Mainly, this is a convenience perk. Does save you money, but that's still only C-Tier.
  • Slime Devourer: Restore 15% of Max HP on killing enemy, once a turn. On a Warrior, you can consider this a C+, since restoring 15+ HP a turn is quite substantial. Obviously combo with +HP items or other perks. It's barely C-Tier on Archer, and worthless on Mage. But Ancient Vampire and Blessing of Water exist, and are just better for HP restoration.
  • Goddesses Fighter: +40 HP. "Only C-Tier to double Mage HP!?", I hear you scream. Well, yes, because there's just better things your rare perk could be doing. The +30 HP Miracle or +20 HP Rare are good secondary picks, but don't waste this slot, basically. C-Tier.
  • Slave Harem: Start with two slave girls. Slave girls are much worse than hero girls hired from taverns in nearly all cases. They'll have 0-2 abilities, and likely start with none. Hero Girls from regular recruitment have 2-3 abilities and much better stats. You might get a super-lucky Rance level Slave, since their perks are random, but since it's random, I'm inclined to put it at C-Tier. One special thing of note: the Slaves granted from this perk have a salary of only 90 gold, which is similar to a T2 Merc, rather than the usual 300+ that girls usually cost. That's fine I guess, but they're still not exactly great units.
  • Manaweave Sage: -50% cost of enchanting items. No flaws on them when you do. Enchanting is expensive by default, requiring 100 elite souls and 5K gold per attempt! (1-3 Elite Souls are dropped by an Elite monster, about 6-12 by a boss) You're likely looking at around day 100 before you can even do it once; and actually you've often already found good magic gear in drops or shops by then. So this perk does allow that to happen quicker, and does make re-rolling enchants less painful, but I wouldn't call it amazing. C-Tier.
  • Torch the Bodies: You get Mage's [Starfall], but it goes off when your MC kills with a melee attack (only). As that's already a kind of meh ability until you absolutely max out your mages' gear, this isn't great, though arguably the trigger condition is better here. Sadly, it cannot cause chain reactions- they must die specifically to your melee, not a explosion caused by another monster dying, so it gets a C-Tier.
  • Taxation Privilege: Get Tax when entering a town for the first time (only), as if you owned all the businesses there. Entertaining, since it's more money just for globetrotting, but it's a one off, so it's not an amazing use of your special perk.
  • God of Block: Appears to increase your innate DEF by +6. This means if you don't use all your AP, you'll get 8-9 Block at turn end. Makes that an almost viable choice if in a sticky situation, but 99% of the time you want to use all your MC's AP. C-Tier.
  • Braver Level Farming: Get free food items from merc's not currently in party. Food items mean party wide healing, albeit at really small quantities (2-5%). Not horrid, and it does make the Cooking stat more useful, but food isn't hugely expensive, so is it worth your S-perk? Probably not. C-Tier (possibly B-Tier if you get lucky and get Myra as one of your heroines, but no way to guarantee that).
  • Fire is My Blood / Revenge Link: You have 5 Phys/Mag Thorns permanently. If you can also pull King of Defence/Distortion Field, this combos for a tank build, raising this to a B. But alone, it's not worth it and is a C-Tier, or even D-Tier for a Mage.
  • Ancient Weapons: So this one took me ages to find out: there's a small hand icon next to your portrait; you can use this swap your pinball melee for a basic attack card (Punch/Bow Shot/Magic Arrow). There is NO reason to ever do that. This, however, changes that to give an 0 cost Arcane Beam instead. This is an okay trade for a Mage MC, but still poor for a Warrior or Archer. See [Generic Cards III] section for a review on this card specifically. C-Tier for Mage, D for Warrior or Archer.

[S-Class Perks] D-Tier and Worse
D-Tier
  • Pyromaniac: Fires 1 Fireball at the end of turn at closest enemy. Not actually the Fireball card, as it's pretty weak, only 3-5 damage or so. Inaccurate, and not very good honestly. D-Tier.
  • Unscrupulous Boss: Pay 50% less salary to mercs. It's really not that expensive~ if it is, you have too many mercs in your deck!! Has very mild value if you're insisting on hiring every heroine you find, as lots of girls become very expensive, very quickly, but not worth using your S-Tier perk on it. D-Tier.
  • Black Company: Mercs don't leave if you fail to pay them. See above: salaries aren't too hard to keep on top of. D-Tier.
  • Intuition of Battle: Hit Rate +35%. If this affected Angle it would be great, but that's Magic Eye. As it stands, its kind of bleh for a godbless pick. This perk just means you don't care about dodge-happy enemies (which are quite rare). D-Tier.
  • Treasure Map: Optionally open a Treasure Chest at Campsites. More loot, in theory, but Campsites already have many options you want to pick (heals and upgrades will always take priority over loot), so it may not even get used often. D-Tier.
  • Battlefield Medicine: Heal a small amount of HP up to 3 times a turn when you discard. I suppose this does promote a specific synergy of the cards that discard for a bonus, but there aren't many of them (like 4-5?). There are also several WAY better perks for HP recovery. D-Tier.
  • Magic Beings: Heal 3 HP when hit by Magic, up to 10 times a turn (the damage dealt is unaffected, so it's like -3 damage really). Pretty poor. It's quite uncommon to have magic attacks from monsters. Again, there are much MUCH better perks for HP recovery. D-Tier.
  • Gale Strike: Took ages to confirm this one: Whenever enemies are thrown into the air, you also do an additional jump slash at them (for around 5-9 damage). This is unlimited, but airtime is super rare: basically its just from Sorith, and from using [Dash], [Brutal Impact], [Quake Slam], [Flash Move], and [Meteor Strike] cards. Sort of a D-Tier for a Warrior, due to this, but basically useless for the others.
  • Game Legacy: Get 10K Gold and 3 Enchanted Items at start. Considering you can get 4-16K from the prologue quests alone depending on choices, and the items given are entirely random (and may not even be equippable!) this isn't very good at all. Low D-Tier.
  • Genius Accountant: Investment Industry Income +100%. After completing the 4th main quest (which may be awhile), you can invest in businesses for them to give you a constant monthly gold or material influx. However, it's 20-30K (!), per business, upfront, which isn't cheap. In my testing, a ++ Revenue place generated 1.2K/month for me, after costing 25K to buy. This would increase to 2.4K (so 10% / month, rather than 5%). Due to not being usable for 100+ days of game time, the heavy upfront cost, low returns, and zero combat use, I can't rank this above D, though eventually it might return dividends towards the late game.


    F-Tier
  • Refill Mana: Randomly increase a heroines level during a quest, but lose 20% of MC HP. Awful. It's not like Temples are super rare to level up your girls, and I don't know about you, but I sure as heck don't want to randomly lose HP out of nowhere. F-Tier.
  • Magic Phantom: For every AP left over at the end of turn, one of your units gets 1 free dodge of an attack. Wow, this is trash! You should never have AP left over at the end of turn where possible, so works only with a direct sacrifice of your offence, and not even with a good ratio of exchange. F-Tier.
  • Defensive Mastery: Gain 1/2 of your DEF as Block if you end your turn with AP remaining. If you have 0 AP, you get nothing. This means 1 block by default (lol). Not affected by your equipment either. Pretty much total deadweight. F-Tier.
  • Fetters of Resonance: For each Heroine in hand at turn start, hero has +1 ATK/MAG/Min DMG this turn. Considering we're talking 1-2 at best, even in heavy harem builds, and there are flat boosts that are better than this for your perk, this is honest trash. F-Tier.
  • Power of Sad: Mercs or girls dying gives you +1 ATK/MAG/Min DMG for the battle. Much sad, very death. Hilarious name, but awful perk- a low temporary effect, and only on allies dying!? No Thanks. F-Tier.
  • Peer Expectations: +6% DMG for each Heroine in deck. Honestly really bad, low bonus for a rare kind of card. Even in a full harem build there are better flat bonuses. F-Tier.

Super Basics Combat Tutorial
Since apparently the tutorial for this game baffles some people (notably @Callin in the comments) I decided to add this super basics section.
  • Combat in Wander Hero is a combination of Peggle/Pinball mechanics, and a deckbuilder game like Slay The Spire.
  • When a combat stage starts, the MC will always spawn in alongside lots of monsters. All units are represented by circular tokens.
  • The "pinball" element is the game's melee attack. All units get to use it every turn in addition to you playing your cards, so there's no reason to not do both. In fact, most strategies rely on both. To use it, click and drag on the unit, pulling in the opposite direction to the one you want to travel (like pulling back on a spring loaded launcher in pinball).
  • The game draws a preview line of where you're likely to go on the first bounce, so keep that in mind. When you let go of the mouse button, the unit will fly off in the indicated direction, bouncing on walls and enemies.
  • Bouncing off enemies is a melee attack, dealing damage. Generally, you should go for a max power bounce, and do not aim directly at an enemy (as you will bounce directly backwards away from it). Look for walls to exploit, and places you might be able to get in where you can multi-bounce in a confined space to cause maximum impact. I hope you're good at predicting angular geometry (lol).
  • As well as doing that, you will ALSO be able to play cards you draw into your hand, spending your Action Points (AP), which is 3 by default (based on your Action stat). A card's cost is indicated at the top left, its default ATK/DEF at the bottom.
  • To play a card, click and drag from the bottom of the screen to where you want it to target. Many cards have a range, area of effect, and require line of sight that will all be indicated by previews painted by the game.
  • Defence cards specifically have an unlimited range, and can target any unit on the field. They give Block or Armour, both of which reduce damage from incoming enemy attacks. For Block, some of it is always lost after it takes any hit it doesn't fully prevent, it may be lost on any random hit, and of course, it also disappears on a new round. Armour stays permanently and does not reduce regardless of what happens, but is rarely given in large values.
  • Mercenaries and Heroines that you hire are also cards in your deck, you don't want to fight alone. Drag them from your hand to select a point to play them, after which they are used like a normal unit (they can be used immediately, so do so!).
  • Where you can play them is limited by ZoC (Zone of Control). Your MC generates a large ZoC in a radius around them. Heroines and Mercenaries also project a smaller ZoC of their own once played. Some monsters react to being covered in ZoC or you playing an ally, so keep that in mind.
  • Merc's stay in play when placed, but if they die, they are gone forever, removed from your deck. Heroines go into your discard pile after the end of the enemy phase, only lasting the turn you play them, but they are usually very strong (especially SSR heroines).
  • Mercs and heroines that get damaged on fights keep that damage if replayed again in other battles (indicated by red filling up their portrait). So if your Spearman went down to 1 HP and hasn't yet been healed, you probably don't want to play him again and get him killed.
  • Playing Allies is VERY important in this game, as many of them provide support fire (or opportunities for your main character to add support fire) as well as defence and utility. The amount of allies you can include in your deck is limited by your (Leadership stat x 5), with T1/2/3 Mercs using that much of it (1/2/3), and heroines always using 5.
  • Your Command stat determines how many cards you draw each turn. All cards unused are discarded at turn end.
  • Monsters units will display if they are attacking or defending this turn, along with the values of each. They may do both (especially elites and bosses). If it's an attack, it doesn't show what kind of attack; though you will learn that as you play. Defending shows their Block for this turn, which applies during your moves.
  • Bosses usually have a countdown mechanic; where they'll react with a super strong attack if you play too many cards in a turn. Be careful of too much cycling!

Move on to Hints and Tips I, and the Main Quest Walkthrough, for more hints. There's also a video at the bottom of the guide if you're having troubles visualising what happens in turns.
Hints and Tips
Starting Out
  • You'll get a random starting benefit from Aqua (pick from 3 chosen from several) on a new character. +10 HP or +1000 Souls are probably the best. HP is especially good for a Mage MC, that's instantly a 25% HP boost. Artifact chest is ok (be sure to equip it after the first fight), but may not be useful for your build. Potions gives 10x HP Potion 2 (which is 20% heal, not bad). Don't take an enchanted item, its random and is often garbage. 3x Leaf of Life acts as an auto-resurrect item, which is a decent choice if you have permadeath on. 10K cash isn't much, but handy when poor initially.
  • Occasionally, you can get rarer options, like +15 HP, starting with experienced Mercs (which gives 2x fully upgraded random Tier 2 Mercs), starting with XP enough to instantly level to about 3, and once I've seen it give an extra random S-Tier perk replacing your worst perk, and once an extra Slave Girl. Most of these are good.
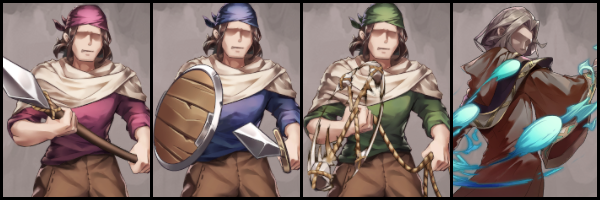
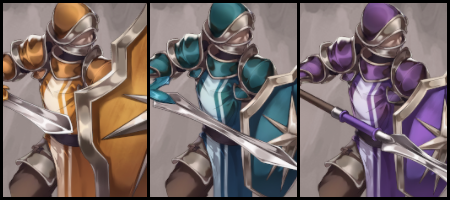
  • After the first battle, the answer you give to the scared spearman determines your starting Mercs. These mercs are experienced and start with both card abilities.
    Angry Choice (1) gives you 2 Spearmen, 2 Slingers.
    Cautious Choice (2) gives 2 Spearmen, 2 Slingers, and 2 Apprentices.
    Sneaky Choice (3) gives 2 Guards and 2 Apprentices.
  • You may think (2) is the obvious best pick since its more, but the 2 Apprentices aren't very good and bloat your deck (see Merc Codex). I'd usually go with (1) personally. (3) is ok if you're a Mage MC with no HP bonus for the two Guards to protect you (though it sacrifices power, this is the weakest set).
  • After the prologue, ~always immediately~ pay to reveal all of the 4 starting merc shadows in the Tavern. There's an almost guaranteed Heroine among them, with a very high chance to be a unique SSR one. Not 100% chance though. Regardless, you'll want the manpower as this is all you get for the subsequent 2 sheriff quests.
  • For more details of this part, see main quest walkthrough, below.

Levelling
  • Don't forget to Level Up your MC. You'll be able to level from 0 => 1 after the prologue, and very likely to be able to hit Level 2 after Hussar Knight's two starter Quests. L3 is slower. You need souls = (New Level x 100). After Level 10, you need Elite (blue) souls.
  • It should be obvious, but Leadership, Command, and Action are the best choices for levelling, for more Merc Capacity, Better card Draw, and more AP respectively. All of these flat out increase your combat potential. Aiming for at least 5 in each, adjusted as your build needs, is a good milestone.
  • If you're set for those (or the RNG hates you and doesn't give you one of them), I'd say Logistics > Collection > Medical > Charm > First Aid for support stats, in that order. Logistics: More time on quests and faster move. Collection: Flat more loot. Medical: Slow but constant free healing without wasting time. Charm: An easier time recruiting NPC's and getting rep. First Aid: A 75% chance to resurrect a merc once/stage, which is good when the RNG screws you over.
  • Then: Cooking > Alchemy > Trade > Forging. Cooking allows you to craft 10% Team HP restores like Wine and Fruitloaf for cheap, which is nice (and make Cookies at L2). Similarly, Alchemy 1 allows you to make basic potions. Trade is poor, only +5% profit is awful and extra things for sale is meh. Forging allows you to craft your own gear, but it requires AN INSANE number of points to be truly useful (at least 5, where points are super precious).
  • Notably, several support stats can be acquired by hiring NPC's via Social Mode (see that section) so that's generally the best way to get the crafting type stuff increased. Your MC should ideally focus on Combat stuff.
  • Temples in Dungeons are also needed to unlock/upgrade Card Abilities. They also require souls, and heroines also use this.

General Tips
  • On dungeon maps, it doesn't cost extra supplies to not choose an adjacent space, so feel free to bounce around the map.
  • Basic supplies are added whenever you arrive at a town or village (for apparently 0 cost?). After doing a quest, don't forget to click on the town you took the quest from after completing it to restore your supplies (why this is not automatic, I don't know).
  • Cities and Castles always charge you Gate Tax for entering. It's usually fairly cheap so you can just take it. Failing to Sneak in wastes a day but has no further repercussions; the chance to do so appears higher the smaller your group.
  • Food items can be used from inventory as a mass HP restore, though not much. Wine & Fruitloaf is the best with 10% all party restore.

  • A Slender deck being best is common sense in any game like this; but its REALLY important here, since your Mercenaries and Heroines ARE also in the deck.
  • Hence, you should only take a card as a battle reward if you are dead sure that will help you out. +25 Souls is often more valuable, as you use these to level and to pay costs in event spaces (temples, libraries etc).
  • Elite fights have a higher chance of Uncommon cards. Boss fights usually offer you at least a couple of Rare cards.

  • Difference between Block and Armour? Armour never goes away, so is inherently more valuable. Block reduces with each hit, but can reach much higher values.
  • What's DEF on the card? If you have AP remaining (as player) or choose to not use a pinball/action, a unit will gain the DEF value shown on their card at turn end. Usually, this isn't worth it for the player, as it's only 2-3 by default. It can help vs bosses sometimes, though.
  • Girls got injuries or getting diseased? Go to a cities Temple to fix it. Disease occurs randomly, but injury occurs usually if you're in a not-permadeath setting but that character is "killed" in a battle.

  • Critical is 0% by default. When you crit, it is indicated by a star next to damage numbers. It is always double damage, so it's not bad. If you have Critical over 100%, it gives a chance to crit the crit to further increase it (lol).

  • This isn't Slay the Spire. Don't feel like picking Card Upgrade at Campsites is mandatory. 20% all team healing is very valuable, as heals are rare, and upgrades can be found at libraries too (for a Soul Cost). Upgrading low-rarity cards is also usually not all that worthwhile. SSR Heroines also have Campsite ability (which isn't on their card, annoyingly- I cover them in the girls section).
  • At Libraries, you'll usually want to use them to remove cards that are poorly performing, or get upgrades. The random card pull isn't usually good, it nearly always pulls generic cards.
  • At Temples, you nearly always want to pick the 150 souls option. The other options are rather detrimental to your run; but if you want, you can sacrifice a Tier 1 Apprentice or something. Temples are very essential as the only way to improve the MC's or Girls cards, though.
  • At Mercenary Site, you should either hold a contest (2 random mercs get +1 card ability), or choose to hire the merc there. He'll always be Tier 2, and have all his abilities already unlocked, which is a decent deal for 800 gold.
  • Mercs can gain their card abilities via battle experience (generally kills, but they get 1 XP per battle for just being in the deck as well), as well as from the Merc event site. Most mercs have 2 abilities, one of which is unique, and one of which buffs their stats or other ability.

  • Retreat from battles and failing quests IS VERY HARSH. Literally 50% of your stuff and mercenaries will be stripped! So do be careful if you're not ready for a scrap when wandering the main world, and also be wary of stuff collection quests; you can easily fail these if you try to use Auto-collect. It's also this reason why healing at campsites is a good option.
Hints and Tips II
Minigames
  • Collect: Items phase in and out. Click on the items you want to get them. There is a bowling-like "Streak" bonus, so if you click the same item 5 times in a row, you'll actually get 7, for example. Usually the most profitable minigame, and you can cherry-pick items on it, but there are a limited amount of item phasings and clicks, so if you only go for the rarest item, you'll often not find it.
  • Mining: Look between the cracks for gems and minerals. Click stones to knock them out the way, and then click the gems to collect them. You have limited clicks, but you can click a gem even if just a couple of pixels are showing, if you're accurate. My personal favourite minigame.
  • Alchemy: Click the items rushing by to drop them into the cauldron. Collect all the parts shown on the recipe to get those items. The order seems to be irrelevant, but there is a time limit.
  • Craft: Click the items in the precise order shown on the recipe to get those items. There is a time limit. I'm not sure if there is any effect from crossing lightning streams.
  • Hunt: Click to fire (slow) shots at ultra-fast animal icons that leap out the bush. You'll need to lead your shots or just fire lots. Bear gives lots of points but requires 12 shots. By far the hardest minigame, as it requires insane reaction speed for high scores, so it's usually the only one I do on auto.
  • Lockpicking: Click and hold on a padlock icon. It will start rotating around it's wheel (sometimes fast!). Release the button when it lines up with the key icon. Over or undershooting is a fail. Wood chest has 1 wheel, Iron Chest has 2, Jade chest has 3. You're allowed three fails per chest, regardless of its type. Better loot tends to be higher tier chests, of course. Golden Keys (dropped by bosses) auto-succeed the game (even after failing a pick) so save them for Jade Chests. Smashing the chest has 50/50 chance to destroy each item in it, so it's the last resort.
Mercenary Management
  • You can temporarily withdraw mercenaries and girls from your deck ("Stay" button) when you're in a town. They will move to a seperate section, Camp. In Camp, they will still continue to draw a salary and follow you. However, they will heal to full the next time you complete a quest (though they will also NOT benefit from your Medical stat, if you have any).
  • Mercs and Girls that are in the 'Camp' section can also be fired. On the deck screen, simply click the X under their portrait.
  • Girls are expensive (lol). They typically cost 220+ gold a month, regardless of rarity, whereas a tier-3 merc is 180. As you might be aware, they're also 1-turn wonders, whereas a Merc, once played, stays out until the end of combat (or until they die, which removes them from your deck). Of course, SSR girls are very powerful, though (well mostly, see the Heroine Codex).
  • You can only give potions and items to yourself and girls (poor mercs). Food items heal the entire force, though, which is why carrying Wine is useful. To use them, drag the item in question from your inventory to main portrait of who you want to heal.
  • Because of this, most buff potions are fairly worthless. They last a single battle and affect a single character, and don't even have a very strong buff.
Equipment & Upgrading
  • Your MC and any and all girls can be equipped with up to 3 pieces of gear to boost their potency.
  • Weapons and Armour have +1 Cost, which means the users cost to play increases by 1. This mostly applies to the deploy cost of Heroines. Before you manage to raise your Action stat to 5+, have one or the other, not both, as with both, a heroine costs 3 AP. Accessories (shoes, helms, shields etc) do not have +Cost, though.
  • However, equipping +Cost items onto your MC DOES NOT actually raise any costs. Presumably since the MC is auto-deployed. The wording implies it might affect all the MC's skills but it does not (which is good; that would be awful for action economy and would make most items a penalty). So always give your MC a good weapon and armour.
  • Peridot Pendant reduces ES cost by 1, so can be a good idea if you really want to stack an amazing armour and weapon on a girl, even if you're wasting your third slot in the process. It's usually expensive to buy, though (10-15K from high end Accessory Shops) and rarely drops.
  • Gear can (and should) be upgraded if you intend to use it long term. You can do this in any village, town or city. Go into the Inventory Screen, click the item in question to get its details page, and press the upgrade button. The first upgrades cost 1.5K gold each. The third will start to require relevant T1 crafting materials, which you must obtain from drops, gathering points, or buy from specialists (see city section). After 2-3 more upgrades, ones after that will require Rare drops, which can generally only be found from Hard or Danger level quests. Rarely, they can show up at Markets, events, or high end specialists.
  • Gear can also be enchanted, which gives it another +random bonus (and sometimes, a penalty). To enchant yourself, a town needs a Rune Master (or you need 5+ Forge skill), and the cost is quite high (5K gold and 100 Elite Souls). So, unless you have an un-enchanted but heavily upgraded item you like, you should try to usually get enchanted gear from drops.
  • Artifacts are dropped from bosses, some elites, and some high-tier treasure chests (if you manage the unlock mini-game with all three rings). To equip them, go to the deck screen, click the treasure chest icon in the top-right. I think you can have 6 at once. You can upgrade them with relic shards in this screen as well. Some are very good passive bonuses, and some are kind of rubbish.
Paragon Tiers
  • After completing the main quest-line (normally you'll be level 5-7), the game goes into Endless mode.
  • Once you are both level 6 and Endless mode has started, [Hard] quests start to spawn. They tend to have more extreme and dangerous biomes, and new scenarios with tougher foes. Pay attention to enemy abilities. [Hard] Boss fights nearly always have multiple stage modifiers.
  • However, in [Hard] quests, all upgrades will allow cards to enter higher tiers than before, including the MC and Girls, your Mercs, and your normal deck stuff. Getting the 4th Temple upgrade for the MC or Girls will make them Paragon. A 'II' will appear on their card, multiplying all their stats by as much as double, and for the MC, buffing their starting perks. Adding in 5th-7th upgrades will then enhance your card abilities (i.e. Warrior Jump Slash becomes Jump Slash II, which adds extra damage).
  • Similarly, Mercenaries will be able become Paragon if they already have both card abilities. This takes longer than getting their usual upgrades, but mercenary site can force it quicker as usual.
  • After the second Demon King appears (and you kill it and it's armies) , and you are Level 11, [Danger] level quests start to appear as well. The name is no joke. Everything is amped up to 11 (appropriately), with big dangers, big rewards. In these quests, if you are already Paragon, you can upgrade everything further to Epic [III] in Danger quests.
  • Similarly, at level 16, at least 4 years in to the game, and three Demon Kings are down , there are [Deadly] quests, unlocking Demigod upgrades for Tier IV cards if you're already Epic.
  • The game does have an ending: Happens when six Demon Kings are killed, which means at 7-8 in-game years in total. Though you can choose to still continue this character if you like.
The Main Quest-line (Spoiler-Free)
Prologue Stage
Acts as Tutorial, simply move to the top most node. None of the battles should pose a serious problem as long as you have some decent perks, though at this early stage you're fairly likely to lose 1 or 2 merc's to the Boss level and lose some HP. That's ok!
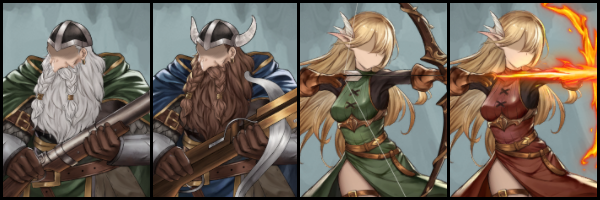
Hopefully you learn some important facts.
  • Most importantly is, if possible, try not to be out in the open in the range of melee attacks.
  • Try to envisage how enemies might bounce off walls if they aim for you, and if it's likely they can bounce constantly between you and a wall, try not to be there. Your Slide card is important for this early on.
  • Additionally, if ranged enemies can't see a target, they won't take a turn. But ranged attacks ignore some cover like boxes and gravestones that cause melee to bounce off.
  • Some terrain, like boxes and torches blocks melee but is also destroyed after the one bounce, often dropping loot in the process. Every little gold from these drops helps, so if you clear a stage but still have some melee to use, use it to smash boxes.
  • Support fire from both you and your mercs tends to do a lot of damage, so get used to its glory.
  • Be careful taking cards in the prologue if they have a bronze border (common). Potential and Insight (0 cost) are good picks, as are some others depending on your class, but it's normal to take the souls reward in about 80% of cases.

After reaching the village and getting your class rewards from Goddess Aqua, immediately go to the tavern and reveal all four mysterious strangers. There's about a 90% chance of getting a Hero Girl as the 4th one. Hire all of them anyways, this is all you're getting for two more quests. If there are HP potions in the Potion Shop, buy those. Click the quest, and a Hussar Knight working for the Sheriff will give you a job. Pick "There isn't anything more risky than goblins, right?" for a 3K reward on it.

Sheriff's Quest
Explore the Stage. This is the Scouting Mission type quest, you'll see it fairly often as an option later on. You just have to hit X nodes to clear it, but you should get into the habit of clearing more if you have the supplies and your team can hold out. As noted above, don't be afraid to use Campfires to heal. At this stage, you don't usually have much that warrants upgrades anyway except your free rare and maybe a couple of lucky finds.

Afterwards, the Hussar Knight gives you lots of basic potions. If you MC or Heroine got damaged past 50%, feel free to use them now. Hopefully not though. Go for the next quest straight away, as nothing in the village will have re-stocked. Say "Are these guys really goblins!?" for a 3K reward on it.

Breakthrough
This is a 'reach destination' type quest. Just move to the topmost node in a straight path again. These occur with delivery and escort NPC quests later. You may have to fight an Elite on the way.

These levels have the 'escape' mechanic on, where you can choose to end the stage early if the MC reaches the glowing white portal (or the NPC reaches it, on an escort quest), and you're at turn 2 or later. Sometimes all the enemies are sleeping at the start, implying some kind of stealth play... but it's hard to reach the exit without alerting enemies when you're using bouncy pinball movement mechanics (lol). So don't mind it too much, but if there's a real danger of losing due to damage, or you can't be bothered to clear the last enemy in a corner, you can use it. But, if you do, you don't get the reward from the stage.

Be careful of the Red Worms in this area. When hit once, they gain 5 Thorns! This can absolutely cut all your HP!

After reaching the top, you'll finally be at the World Map. Click the nearby City to walk there. It has a random (sometimes hilarious) name. Pay the toll, and use it's services; what's there is also random, but the first city has a high chance to have a good Tavern for more hires, and a good Magic Item shop (translated as "Grocery" for some reason).

When you leave the city, your bro the Hussar Knight is back. He gives you a choice of 10K cash, some magic items, or some materials. The Gold is always reliable. The items are totally random; they can be very good or very awful. Mats gives you 2 uses of all T1 weapon upgrade mats; which are useless right now, but helpful later if you hold them.

Hussar Knight will give you a final quest. Don't do it right now. Go off and explore the world, doing bounties that appear in cities along the way.

Free Roam
Personally, I like to get most of my deck setup done here. Go and find some good recruits, get cash, scout the world, build up and level. Come back at Level 4-5.

One thing to remember is that, due to random generation, some bosses can be absolutely insane. I've seen one boss that dealt 50 damage to enemies that attacked it in melee and also had 7 revolving immortal shields to block ranged attacks almost entirely. Absolute bull. The game only saves AFTER a battle, so feel free to ALT-F4 to abort if you see something stupid. I don't consider this cheating if the boss is absolutely stupid, personally.

The Source of the Menace
This quest is crazy if you do it straight from the previous one, so don't. It's a large area, and you need to find the Boss node, and terminate said boss. Large enough, in fact, that's it's possible to run out of supplies if you still have Logistics 0. That doesn't mean you should prioritise Logistics over other stats, though.

By now, you should have learnt to prioritise nodes that lead to other nodes, the more the better. Do this all the time, and you should be okay.

When you're done, enter a city and leave again to continue.

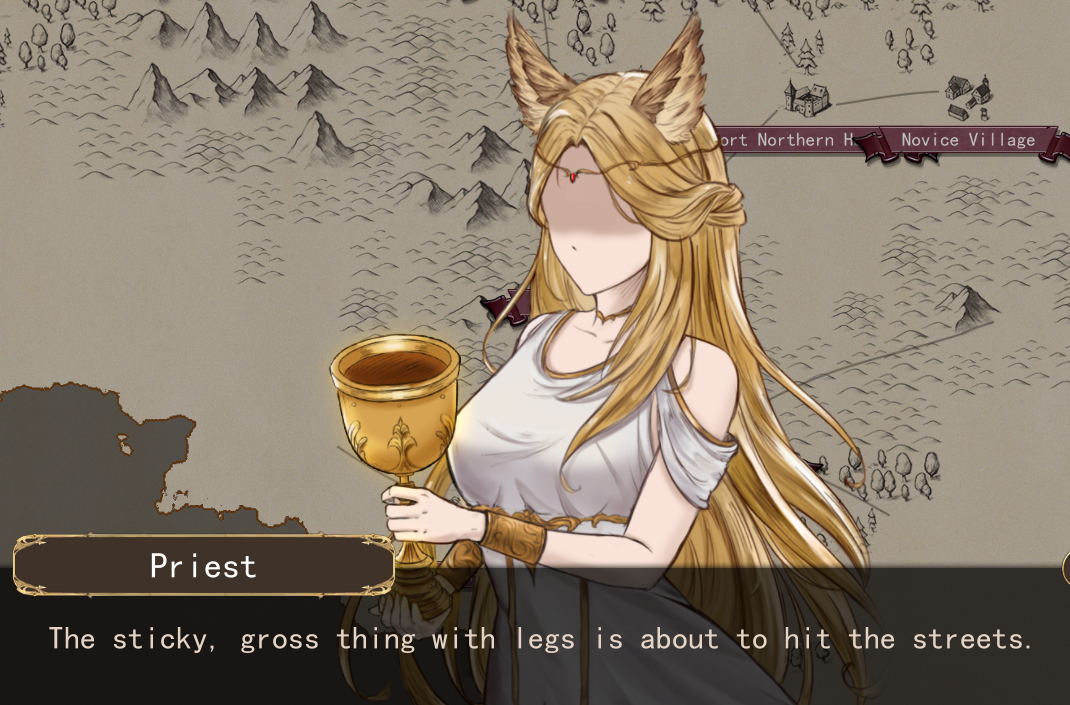
Gross Things With Legs
^ This was the old translation, and was amazing. :D

Anyways, this is an easy quest after the previous one. You can do it straight away. Just clear all the nodes. After returning to a city again, Foxgirl Cleric will ask you to get some shrooms for the priests. Gotta have their visions somehow.

Give me Mushrooms, or Give Me Death
This is a collect quest... so it's reasonably easy if you do collections manually, but if you use Auto-Mode you'll fail it. So don't use Auto-Mode. Prioritise grabbing the blue shrooms first, then gather any loot you actually want.

Afterwards, a panicked slinger will give you your next quest after leaving a city again.

Orcs Must Die!
COMPLETING THIS MISSION IS A POINT OF NO RETURN!!
This is a mission where you need to find 4 traders on the map, killing any Orcs in the way. Again, it's a big map if you still have Logistics 0, but I managed myself with 2 days to spare on Logi 0, so it's doable.

The Descent of Evil
Aqua's back! And she tells you something shocking. However, as a result, you can get a big triple upgrade.

First of all, you get the usual Gold, Items, or Craft Supplies. Gold is 20K. Items seem to be optimised for your MC (on Mage I got a Robe with Spread, and a ring with Shoot, pretty good). Mats are T2 for Weapon, so quite rare.
Then you'll be able to pick from +2 ATK, +2 MAG, +10 HP, or Cards.
Finally, you get to pick from +2K experience (around +2-3 levels), +50 to all city friendship (quite useful), or a "Partner of Justice". The partner option guarantees a new SSR Hero girl when you next reveal at a Tavern.

Spoiler on next: The demon descends. You're on the clock to kill it before it destroys everything. Find a town with a teleport gate! Clear the armies, then the middle. The quicker the better.

Afterwards, you can choose to rebuild destroyed things, and take Hard level quests, which can improve ALL cards more. Your rep preceeds you, so you can throw around your Hero title in some places too.

The game goes into endless cycles after this.
Heroine Codex I - Warrior Girls
All of the SSR girls in the game are now covered!!

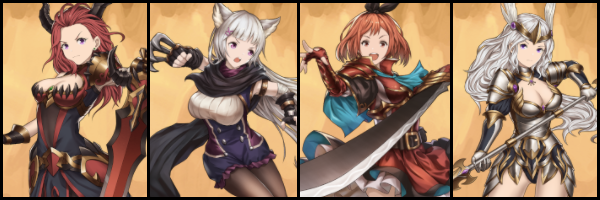
NOTE: Any Heroines with 1-2 abilities are randomly generated by the game and are not unique (and in fact, can use your portraits). Those hired from Slave Markets usually don't have more than 1 ability, and have low stats compared to the unique "SSR" girls, and we're only covering the SSR uniques here. But the abilities are randomised, so I don't doubt they can still make some silly combos. Top => bottom descriptions match left => right on portraits.

WARRIOR GIRLS

Defined as being fast, melee focused DPS, with damaging attacks. 100 HP, equipping Medium Armour and Two-Handers (like Warrior MC).
<<Sorith, Dragon Disciple>>
I can’t tell if she has yandere eyes or is just bashful, but she’ll probably gut you regardless. She fights like she just left a game of Medieval: Total War, blowing enemies away with Dragon Stronk, Dragon Smash!

Initially: Has 8 ATK. Always starts with Dragon Power, so she will always penetrate through enemies, and blow them into the air for ATK-3 extra damage. She’s moderately speedy. Free penetration is what makes the Lance Knight and Phalanx mercenaries really good, so having that, and making that even better, is really great against tightly packed enemies in strange places. A-
When Upgraded: With upgrades, she also deals a small AoE of chip damage and Armour Debuffs after finishing her move, and gets +2 ATK per Attack card your MC has used (which does include spells). A
Campfire: Force a single random Merc to level up and gain a Card ability. Not amazing, as merc’s usually do this quickly anyway, so meh. C+
Gear: A Zweihander, for sure. Go all out on her ATK.
Overall: A-Tier ~ Her main feature is the penetration; she will absolutely massacre a tight packed crowd of enemies due to not needing to bounce off them. She works best with a Mage MC, who often uses Cards before getting Mercs to do their actions. But still a strong and powerful warrior regardless.
<<Doreen, Dog-Girl Pugilist>>
She clearly didn’t do well at ninja-school, despite her outfit. She couldn’t be bothered with sneaking and prefers to cast fist whenever possible. Like any good dog, she gets excited chasing after cars. Uh… I mean cards.

Initially: Has 7 ATK. She moves fast, and has innate 50% critical, so initially, is like a worse Axe-Mercenary, and is fairly generic. C+
When Upgraded: BUT, her kit actually opens up with upgrades, so it’s important to give her priority in temples. Her main ability is to gain absurd bonuses to Speed and ATK each time you play a card. When Doreen is out, you should always play cards first (even if it means sub-optimal targets). Her final ability is to start a pinball when she sees another ally attacking in her sight. If she already has increased SPD at that point, can be very fast on it- and can still do her regular pinball as well. She synergises well with a Warrior MC; the two will follow each other like a good doggo and master. She is super vulnerable to Thorns on monsters, though, so keep that in mind; she can seriously wound herself from bouncing into too many. A+
Campfire: Recruit a 1-cost Spearman into your deck. Spearman is the best militia, of course, but this is still only okay. Note all the campfire recruit abilities like this say they can recruit a random one of their class (i.e. this says "Recruit a Warrior"), implying they can actually net you a higher tier merc, but I have never seen this, it's always a tier-1.C+
Gear: A Katana. She will crack the speed of light if used correctly, and bounce a lot. The minimum damage boost is incredible because of this (she's one of the few that actually might care about damage decay). Also Speed Boots because duh.
Overall: A-Tier ~ Might require turning your usual play order on your head whenever she’s out, but if you do, she’ll bounce round the entire stage like a maniac, slaughtering all that dare oppose her. Fairly meh initially, however.
<<Myra, She who Hungers>>
A chef with a buster sword; and she isn't afraid to use it. Her goal is chop everything up and eat it. She’s always hungry. Fortunately, we can point her stomach and sword in the direction of the enemy. Bon Appetit!

Initially:Has 9 ATK. Her card is upside down in the wiki reference, by the way. She starts with Rift Strike, not Fighting Spirit. That’s good, since that means she starts with some of the most terrifying support fire known to man, blasting powerful shockwaves at ANY enemy that gets hit by ANYTHING. The shockwaves pierce, though they do have a limited range. This makes her one of the best girls straight out of the box. A
When Upgraded: But there’s more with upgrades. She’s also boosts ATK cards (including Spells) in your hand by 50% when she comes into play, which is generally amazing, and even gives herself a small buff whenever she hits something. S++
Campfire: She’s a miracle chef. She can cook any single food ingredient into a 50% full party heal. That’s amazing. It’s better than Nirya’s camp heal (though Myra does cost a little cash, of course). A+
Gear: Again, a Zweihander is likely her optimal gear.
Overall: S-Tier ~ Support Fire is among the best thing any unit can do in the game, and is the source of most of your damage. What happens if a warrior girl specialises in it? Imagine that! Well, you don’t have to, because that’s Myra. As a bonus, she also makes your cards ridiculous and cooks you the best meals known to man. Stick a ring on it.
<<Ratna, Valkyrie>>
Zoom zoom she goes, on her white horse, sending things to Valhalla like she’s the heroine of a new non-hideous mobile port of Valkyrie Profile. Sadly, she doesn’t have a Nibalung Valesti, but alas, we can't have it all, Freya.

Initially: So you know that Knight Mercenary, who is already Spearman plus? Well, Ratna is Knight plus. She has a berserk fast speed (probably 30% higher than Warrior MC or so), always penetrates targets, and her Lunge is set off when ANY ally starts their main attack (be it melee, cone of bats, or laser), oh, and she can trigger it infinite times in a turn. A+
When Upgraded: Moreover, with upgrades, she gets permanent use of the ever great Spin to Win effect. She also gives a minor buff to consecutive attack cards played. The buff isn’t worth going out your way to trigger, but it’s fine. S
Campfire: She force adds a random Attack card to your deck, which you almost never want. Still, you can’t have everything. C-
Gear: Funnily enough, Ratna is already quite strong, but her lunge might get her into trouble, so you might want to get Mercenary Armor for her.
Overall: S-Tier ~ She works well with everyone, and brings all value, so that makes her top-tier. The fact she brings both crazy attack power and excellent support is great. Just pretend the campfire ability doesn’t exist.
Heroine Codex II - Defender Girls
DEFENCE GIRLS
Defined as being focused on protecting and buffing the team. 120 HP. They use Heavy Armour, Shields, and one-handed weapons. Oddly enough, no player class has this equip setup.

<<Valar, Dutiful Paladin>>
I’ll be honest here, Valar is actually my favourite SSR girl design. I love armoured girls and fishtail braids, and I usually play as Paladins in games, so she hits all my weak points, lol. You might say I have glowing praise, haha.

Initially: Valar is a hybrid Attacker/Defender girl, like Phalanx++. She has 12 ATK and surrounds herself AND all allies in a triple layered Holy Shield. Not noted on her card, but she also always pierces through enemies, like a Phalanx mercenary, and attracts fire. With triple shields, that means the first three hits to her or allies, no matter the strength, are flat out ignored, making her incredible for protecting your entire team instantly. A
When Upgraded: She has a curious first upgrade; buffing the MAG of a targeted ally by +3 for each Defence card played on them. Sadly, this is hugely nerfed from earlier versions; it used to raise the MAG of everyone in the team, but it's still sort of useful to buff the Mage MC or a Battlemage Girl. Her second upgrade was also completely changed for 1.0; now whatever she hits will also be skewered by flying holy swords with 1/2 her ATK. The swords appear quite a distance away and pierce everything in their way, so can deal huge damage sometimes.A+
Campfire: Her Campfire Ability gives everyone 10% Physical and Magical Damage Reduction for the next battle, which is pretty good. A-
Gear: Interestingly, she probably wants a higher offence and speed, since it’s optimal to play her in a place where she can pierce, attract aggro, and add damage~ as her protection already works globally and is strong already. A Chopper or Sabre is her ideal sword, with a Buckler, and Speed Boots.
Overall: S-Tier ~ Mostly immortal whilst on the field, and makes your whole team quite tough for a turn, whilst also providing by far the highest damage output of Defender girls. She's multi-faceted and very useful for all teams (though obviously not quite as great a Tank as Tiara).
<<Tiara, Dissector Knight>>
She wears dragon claws as a bra. Hardcore. Me ‘thinks that Tiara took the story of bathing in blood to increase her beauty a bit too literally, and she took that to the logical extreme. That in turn really pisses off all the monsters.

Initially: No doubts here: Tiara is THE greatest Tank girl of all; she always gains +1 Block for EACH enemy on the stage AND unerringly taunts them all towards her, making them target her without fail (a more absurd version of the already S-Tier "Taunting Face" MC perk). Slow, and not likely to kill anything, but that’s not why she’s here (unlike Valar). S
When Upgraded: With upgrades, she also gives Thorns to everyone for each Block card played, and also deals chip damage to enemies throwing themselves at her. Neither are amazing, but they support her astonishing core ability of taunting just fine. S+
Campfire: Campfire ability is creating a random basic melee weapon, meh. C+
Gear: Cover her in as much Armour, Block, and Plating as you can manage. May as well capitalise on her main strength. So Full Plate and a Spike Shield.
Overall: S-Tier ~ Slow, and will mostly only deal chip damage. But for being basically immortal AND giving you a breathing turn where hardly any damage will hit others, she's a fantastic find for any army with squishies in, allowing you to go full offence on the turn she’s out.
<<Licia, Lazy Knight>>
Prefers naps to fights, and has the enviable ability to sleep in full plate, even if a gang of goblins is trying to kick the crap out of her. I guess her “tenacity” is an inspiration to the rest of your troops?

Initially: Whilst she is out, gives all allies the Ice Golem perk: those hit will slow down their attacker, with a possibility of Stun. I mean, that’s not a very good perk on the golem, and it’s not here either, even giving it to your entire force, making Liss the worst Defender out the box. She does pierce foes (like Valar), but has a lower 10 ATK, and is also incredibly slow, like a Golem. D+
When Upgraded: Iron Wall is her keystone perk, though. This turns her into a Defence buffer- giving absolutely obscene value to your DEF cards, since each one played gives +2 block to ALL allies, regardless of target. Yes, even Quick Parry. That’s insane value. On top of that, giving all allies +2 Armour is super solid. B-
Campfire: At campfire, she can recruit a 1-cost Guard, which is fairly poor. C
Gear: Like Tiara, she’s not moving much or dealing much damage, so you should likely just stack her with defence and a powerful shield.
Overall: C-Tier ~ To hit her full potential, she is quite reliant on you having at least a couple of Defence cards in hand at the same time. The Armor buff helps, but Valar and Tiara just work when it comes to making your allies absolutely live longer. Of course, if you are specifically running a tank build that is flush with Defence cards and copies of Stand Fast, she is A-Tier, however.
<<Tyslyl, Wannabe Golem>>
Wears rocks, hates vowels. That sounds suspiciously Welsh to me. My headcanon is that Tyslyl saw golems during her childhood and rather than the sensible path of ‘I want to summon golems!’ she picked ‘I want to be a rock when I grow up!’.

Initially: Surprisingly for a tank, she has no innate way to gain any kind of protection. She gains block retroactively, whenever she is hit, so that does mean her defence doesn’t go down, but she does need card or item support to get started to begin with, which is a little poor. Has innate pierce but only 8 ATK. Of course, she’s slow, so doesn't really good much out of it. Quite poor initially. D+
When Upgraded: Her upgrades make it so Defensive cards also slow enemies down and reduce their shot-count. Sounds good on paper, but most DPS decks won't have many Def cards to hand, and Tank decks want to be hit to trigger thorns. Upgrade II counters with a boulder after being hit three times. Thorns is usually better, but this does work on ranged foes. Still meh. C-
Campfire: Campfire is getting some gold and an armour piece, which is okay. C+
Gear: Obviously, she requires a Shield or Armour that gives her innate Block, as much as possible.
Overall: D-Tier ~ Paradoxically, she’s a selfish tank. She needs defensive cards played on her to better protect you from incoming threats, but in so doing, she de-fangs said enemies, making them unlikely to hit her, whilst at the same time not really helping to protect the rest of the team. This kind of confused kit makes her among the worst of girls in the SSR selection.
Heroine Codex III - Sniper Girls
SNIPER GIRLS

Defined as being DPS and support fire focused. 60 HP. Equips ranged weapons and medium armour, like Ranger MC.
<<Virfy, Unlimited Blade Works>>
What happens if Archer from Fate/Stay Night had a daughter with Irelia from League of Legends. She has wings made of swords, which is pretty hardcore. She’ll introduce a high-iron diet to monsters everywhere.

Initially: Fires blades everywhere in support-fire when your melee guys are bouncing around, and also fires a massive burst of blades with her attack. Her accuracy is atrocious, but against clusters of foes she's obscene. It’s hilarious to cover the entire stage with flying bits of metal. B+
When Upgraded: Her upgrades just buff her obsession with heavy metal, but that’s a good thing. She gets more Min DMG and Pierce from you playing non-support cards, and then just flat out gets more blades with +3 Shoot. A+
Campfire: Campfire just gives random L1 equipment, which is meh. C+
Gear: Make sure to give her a Crossbow, or an Arquebus, as her Base ATK is 2 (lol) and she really needs the power. I’d say a Crossbow is likely the best, because it makes her not as reliant on Particle Slash for Pierce.
Overall: A-Tier ~ Very good synergy with the Warrior MC, but never bad as long as you have some melee on the team. With it, though, she's pretty fearsome.
<<Calarel, Elf Master Sniper>>
With a bottomless quiver and the ability to fire half a dozen arrows in a single pull of her longbow, she can and will black out the sky for you. Whilst twitching her ears in that rather adorable fashion.

Initially: By default, is basically a copy of the Archer MC, with the same sort of support fire, with slightly lower ATK but slightly better accuracy. This is still great, of course, since it’s free damage. B+
When Upgraded: The upgrades really make her kit, though. Every single Attack or Defence card plays adds +2 spread and +1 ATK. That is INSANE. Play one card, she now support-fires with 3x arrows. Play 4 cards? She fire 9 arrows in a 160 degree cone, repeatedly. Oh, and also now reacts to allies being hit as well as allies hitting. S++
Campfire: Also has an excellent Campfire ability; she can scout, revealing the entire area, like using a Thieves Guild, but only for current mission, which is great if you've not paid for that. A+
Gear: Get her a Longbow, for that Crit boost, as she has lots of shots to trigger it. An accessory with +Shoot is wise, of course, as well.
Overall: S-Tier ~ Eventually fires whenever allies hit, and whenever allies are hit. If you play her in a turn, always prioritise cards first, of course, to buff her, then let her support away your teams’ attacks. If you're running a deck with zero cost/copying atk/def cards, she quickly becomes ridiculous.
<<Raicys, Sniper Maid>>
As we know, it’s standard in all good anime settings for the maid training course to include either blademastery or sharpshooting. Raicys graduated from the latter, and will support you with her prototype rifle.

Initially: She’s fairly average out of the box. She does have a 19 ATK (!) sniper shot with a 50% crit, which is an instant kill for a most early minions, as it’s also nearly perfectly accurate. B
When Upgraded: However, her kit really comes online with her upgrades. First of all, she support fires the first target hit by attack cards. This is really useful against bosses. Secondly, she also gains the Slinger Militia ability to fire in volley when other ranged allies fire. A+
Campfire: Recruits a Slinger Militia for free. Slingers are decent, of course, but this is mostly only useful in an emergency. B-
Gear: Absolutely obvious candidate for a Magical Shortbow, as that doubles her already strong shots and makes her super strong. If you can get +Spread, even better.
Overall: A-Tier ~ With a small ACU buff (I had 3 degrees from a helm) she has basically perfect accuracy. Very strong S Tier if you're playing large amounts of attack cards. Still A- if you're not.
Heroine Codex IV - Battlemage Girls
BATTLEMAGE GIRLS

Defined as being able to do lots of AoE DPS and some debuffs. 40 HP. Like a Mage MC, they use staves and carry Robes with them. With their outfits, I don’t believe the Robes are being worn for a second (lol).
<<Gricoria, Elder Vampire>>
Take your standard vampire seductress, give her a cute bat pet, and amp her up to 11 to get yourself a Gricoria.

Initially: Fires a 90 degree Cone of Bats instead of pinballing. About 20 bats fired, each of which penetrates and hits based on her MAG! She also gains +1 MAG per close enemy when played. So, if placed right, she can do absurd damage. B+
When Upgraded: Upgrading makes ATK cards give her ATK, and gives your ENTIRE team +1 Life Leech/card played on their attacks. With the final upgrade, all allies apply 1 bleeding per hit as well. Has a low range, but whatever, just don't play her in a sub-optimal position. S+
Campfire: Campfire ability gives all allies +1 Life Leech in next battle which is incredible for your generic mercenaries survivability. S
Gear: I haven’t actually checked to see if +Spell aids her Leech, though I expect not. She doesn't actually need much, to be honest, as she is strongest when used with a 1AP cost. You might still consider upping her surviability and magic though, up to you.
Overall: S-Tier ~ Gives generally immense value, adding DoT's, sustaining your forces, and murdering everything that looks at her funny. No jokes, she's among one of the best girls you can get.
<<Anma, Laser Witch>>
Or rather “Anma the Deadlight”, since she is a massive Chuunibiyou. If there was once a witch obsessed with explosions, why can’t there also be one obsessed with lasers, eh? I'm pretty sure she hosts some mind-bending parties, at least.

Initially: She makes a constant laser between the closest character she spawns next to, and it stays connected and firing at that character for the entire turn. Place her next to a character who moves fast for melee (even better, a fast melee character that pierces), and then, when that character moves, the laser continues to always trace a straight path between Anma and her partner(s), which allows dicing enemies up, literally. ALSO then fires a laser as her "melee" which reflects off walls around 10 times, piercing through enemies for multiple hits. Has 11 MAG, rising to 13. Pretty great. A-
When Upgraded: Her extra abilities just boost her core, giving her extra MAG and laser penetration from cards played, and allow her to link to two allies simultaneously with her laser fence. A+
Campfire: Campfire is get 600 gold and an accessory, which is okay, but not why you're here. B-
Gear: A powerful staff to boost her MAG, and +Spread from an item, and she can run a Disco all by herself (lol) as all three lasers from +Spread bounce!
Overall: A-Tier ~ She only does one thing, and that’s to be an SDI satellite. But that’s a great thing indeed. With sufficient buffs, she can absolutely be a massive murder machine, though her support is limited.
<<Allosa, Fire Dancer>>
Despite the dancer part, it’s just a front for fire-bending, don’t be fooled! I think of her as the flaming version of Azura from Fire Emblem Fates. But I suppose her name should be Pyrra then, right?

Initially: Fires a Fireball that leaves napalm behind (like Lava Golem). Sadly, she's inaccurate and only fires a single ball with 8 MAG AoE. If it lands spot on, its decent, but out the box, she’s fairly mediocre. C+
When Upgraded: Second ability increases her MAG per attack or defence card played, and increases the AoE on her napalm slightly, which are fairly mild buffs usually not worth going out your way for. As the final upgrade, she gets the Apprentice ability, firing at where allies stop, though obviously she does it with her napalm ball. This ability alone makes her considerably better, as she can singlehandedly set half the stage on fire (lol). B+
Campfire: Campfire ability just gives you 1K cash (from dancing and getting tips from your men, presumably, lol). It’s fine, no one dislikes free cash if you’ve not got anything better to do. B+
Gear: Gear that adds +Spread is basically mandatory to get to her to the power level she deserves, as that triples her napalm shots. More AoE is also a good idea.
Overall: C-Tier ~ She’s pretty meh unless you really gear her up and upgrade her fully without reserve. With all that, she’s a solid support mage, but until you get there, she's weak. Her main feature, though, is completely locking down a stage with fire, and you should run with that. She’s extra great in dungeon stages with enclosing walls, but less good if there’s the possibility for fireballs to sail off into the distance and miss.

Heroine Codex V - Support Girls
SUPPORT GIRLS

Defined as being focused on debuffing enemies, and buffing the team.
60 HP. All have 5-8 Magic and are poor attackers. They wear clothing (not robes) and use Wands.

<<Haalyn, Melodic Bard>>
“In the midst a form divine! // Her eye proclaims her of the Briton-line; // Her lion-port, her awe-commanding face, // Attemper'd sweet to virgin-grace. // Haalyn doth sing, supporting so fine. // To reject her embrace is indeed such a crime.”

Initially: Fairly mediocre to start; she grants a global +2 ATK/+1 Min Dmg. Buff. This would be real good if she were permanent (like the Kitsune Bard mercenary), but since all girls are one turn wonders, she's staying in your hand until you have a few mercs out for her buff. Also only fires a 3 arrows, and isn't too accurate (but we expect that from Supports). C
When Upgraded: Upgrades mean Support cards (inc. Potential, Insight etc.) give bonus speed and shoot which is good. Song of Legends refunds 1 AP that Haalyn would have used; this is great as she wants both a wand and robe to maximise her potential. I could have sworn in early access (where it had no description) that it also had additional effects, but that may have been me being delusional. S+ ~ assuming with full Gear, see below.
Campfire: Campfire ability is a global +10% ATK buff for entire team, which is good, especially later on. B+
Gear: Gear with +SPELL is INCREDIBLY important for Haalyn. With an upgraded Cloth Robe and (Basic) Magic Wand, her song becomes an absolutely ridiculous +12 ATK, +11 Min Damage buff (WTF) to EVERYONE when out.
Overall: S-Tier ~ Fairly mediocre initially, but has a meteoric rise that is worthy of song (which is fitting, really) when she is fully upgraded and outfitted, assuming you have a decent selection of good mercs. How about a basic spearman doing 25 damage a poke followed by a 30-damage jump slash? Haalyn makes that happen! (Incidentally, if you care, her introduction poem is from The Bard, by Thomas Grey. I invented the last two lines, obviously.)
<<Nirya, Loli-Saint>>
The child of light, daughter of the pope. I believe she must be inspired by Carlie/Charlotte of Seiken Densetsu III / Trials of Mana, who is one of my favourite brats of classic RPGs, due to her sassiness. Nirya seems a little more timid, though.

Initially: She's a heal-bot. When she enters play, all allies present heal 6 HP. That's not much, but it is global, so it doesn't rely on allies staying close together like the Kitsune Healer merc. It's a shame she fires 3 light missiles as her attack rather than having a heal, though. The missiles are awful (5 DMG), but obviously, that’s not why she’s here. Even early, a decent bonus to your sustain. B-
When Upgraded: When upgraded, she gains her best ability, a global 2 HP heal every time a Support Card is played. That includes good 0-cost cards like Insight and Potential! So that's amazing! Her final ability is to auto-heal any ally that gets knocked below 35% by any enemy attacking them by 8 HP, once. Shame about the "once", but it's still a good insurance policy. A+ ~ assuming with full Gear, see below.
Campfire: She has one of the best Campfire abilities in the game: Heal everyone for 35%, flat, no strings attached. Obviously, that renders the usual campsite heal 20% obsolete. Amazing. S
Gear: Much like Haalyn, Nirya REALLY wants that upgraded Cloth Robe and Magic Wand. With it, she’s healing a more substantial 18-20 HP.
Overall: A-Tier ~ Nirya is obviously the best sustain in the game. In a game where there are basically hardly any heals; most of the time you will always be resting and using campsites and potions, with the occasional Kitsune Cleric or Wrap card being the only exceptions. Nirya makes Campsites even better, and gives you strong in-battle healing. She doesn’t help you kill much, but she does help keep you more aggressive.
<<Yoglyn, Succubus>>
Funnily enough, she’s a pacifist, which is an odd succubus trait, but is apparently also a newborn. Of what and whom is the real question? I could debate philosophy about Succubi all day.

Initially: On entry, sleeps everything in a small AoE around her. If you can find a good space for her to go, that's super good to just take some dangerous enemies out the fight for a short while. The AoE is quite tiny, though, and of course, you’ll need to avoid waking the targets. Fires black magic missiles which are terrible, though, so don't expect damage from her (as usual). B-
When Upgraded: With upgrades, she also debuffs enemies with every card you play, and also gives all allies the ability to act like a Blood Warlock on hits, reducing their attack. In effect, after your turn, enemies will be doing absolutely nothing this turn, which actually puts her almost as a pseudo tank. S
Campfire: Her campfire ability also completely restores her and the MC's HP to Max (via lewd handholding I'm sure, lol) which is amazing. A
Gear: Wants a Citrine Wand to guarantee everyone’s debuffs land ~ early on, it’s not important, but later enemies have some +Immune which you want to be able to pierce.
Overall: A-Tier ~ De-buff central. With a good turn from her, you can basically neutralise a good chunk of the enemy for a turn. Inevitably better the earlier you draw her, as a result. Free healing for your MC is also good for those trying risky plays.
Heroine Codex VI - Support Girls Cont.
<<Elanil, Ice Princess>>
Elanil’s design actually makes me think ‘water mage’ rather than ice, to be honest, since in my mind, anime girl ice mages need Bright White hair, like a snow-blinding blizzard. But your mileage may vary.
NOTE: Elanil is technically an Assault Mage, so has 40 HP/Robes/Staffs, but she acts like a Support, making me put her here.

Initially: This game really hates Ice related characters, and Elanil is no exception. She fires a phat ice blade that pierces, dealing 8 damage in a line. Every time it pierces, it fires off 2-4 small shards in random directions. If enemies are in a neat column for her, she can do some okay damage. The shards are 1/3 MAG (so 3 DMG by default) and rarely do much. D+
When Upgraded: Ice Coalescence is the reason I class her as Support. The first two attack cards you use in the round with Elanil out also Freeze enemies- which is helpful for Mage and Archer MC, as you can select some choice targets to shut down for a turn. Second upgrade has been improved for 1.0; in Early Access it was Wizard Apprentice ability; now, despite the wording, it goes off at the end of ANY movement~ This includes any rushing to a target that Warrior does to make their attacks (!!) with cards which massively improves it specifically for them. C+
Campfire: Campfire is to add a 1-cost Apprentice to your mercs (usually detrimental!). D-
Gear: To make her viable, she absolutely needs a Staff that boosts her MAG, upgraded as much as possible. If you’re commited, also get +Shoot; the shards are actually reasonably substantial at that point to make her effective (though all mages and archers get better with Spread and Shoot, of course).
Overall: D-Tier (B-Tier for Warrior) ~ Her disable doesn’t really match Yoglyn’s or Ulhen’s at all. Elanil requires you to be in card range and is always more subjective. So, it isn't going to affect many targets ~ and it's usually better to play cards with the intent to kill the target. I guess it could be a lifesaving boss disable in an emergency, but that’s all. Her attack is also not very spectacular (even verging on weak, without lots of item support). Fully upgraded, with a Warrior MC, however does allow her to get out her mediocrity (due to the improved reaction fire), so you can consider her a B+ in that specific case.
<<Ulhen, Snekemist>>
She's a snake, that's an alchemist, see, so Snekemist, lol. Now, personally, I'm not too fond of Naga girls myself, but if you're a monster girl enthusiast, go wild.

Initially: Sort of weak initially, she fires 3 black magic shots that each give -3 armour for the remainder of this turn, like x3 Curse Sorcerers hitting. Now, that's a good debuff to give a boss, but it means you'll need a setup ready to instantly take advantage of it. C+
When Upgraded: With upgrades, though, she gets vastly better. Her second ability applies the -3 armour debuff to ANY targets hit by ALL skill cards played, with increasing returns per card. Naturally, that's huge for AoE skills, so Mage MC will like her quite a bit. Her third ability is also great. Anything hit by your mercenaries, girls, or MC attacking is Paralysed for 1 round. Again, that has obvious synergy with AoE attacks (Wizard of Light comes to mind), as such a sweep will just shut the enemy side down for a round. A+
Campfire:Gives you a random potion (this may have changed ~ has not been tested recently). Potions aren’t usually great, but whatever. C+
Gear: Wants a Citrine Wand, like Yoglyn, to make sure those debuffs and paralysis actually does something.
Overall: B-Tier ~ Awful damage output with a mediocre start, but enables the team quite well. Of course, Haalyn is generally better at this job overall since buffs are not resisted, and not reliant on you hitting with cards or Ulhen’s missiles to activate in the first place, but the effect is still solid.
Mercenaries Codex I
Ratings & thoughts for ALL mercenaries in the game. Note that the descriptions are in order from left to right on the images, if you want to match names to faces.

1-Cost
    The game refers to these as Militia. They're cheap and easy to play, but will die to a handful of hits. You will start the game with a set depending on your answer to the scared spearman after the first fight in the game (see Hints).
  • Spearman: Generic, but useful. When the MC (or Hero Girl) starts their pinball move nearby, he'll also go bouncing off in a similar (but random) direction. He can still do a regular attack afterwards. Fast and can sometimes cause amazing damage. Easily the best 1-cost merc. B+
  • Guard: He's really slow; but if you get both of his abilities, he gets 2 free block and also gives the closest ally 2 block on play and at turn start. Guard is also a (lesser) defender type, so will also attract aggro around 66% of the time if there are two equally healthy (percentage-wise) targets for an enemy to pick to attack. Cards and perks (and higher tier Guardian Mercs) will always protect you better overall, though. C+
  • Slinger: Whenever a ranged ally fires nearby, he also fires in exactly the same direction, and can still fire himself afterwards. Fires 3 stones, average accuracy. Pretty good if you have many ranged allies on the field, and decent damage. Works especially well if set up together with several slingers and tier-2 archers in a line. B-
  • Apprentice: Starting Mage Merc. A bit crap. Fires 3 magic missiles at allies position when they stop after a melee pinball. Since you have little control over this, he rarely hits. [Jump] and [Slide] by the MC are still counted as a move for this, so having a few copies makes him mildly better. Can still fire normally as well. The worst Merc overall though. D-


2-Cost
Professional Mercenaries. They'll likely form the backbone of your team for quite a while, possibly forever, as many remain always solid.

Sniper-types often provide a bulk of support fire damage, but also pick off choice targets.
  • Shortbowman: Supports any ally melee hits with good accuracy. Fires 3-4 shots as well. Very good, honestly, if you have any amount of melee in the team. A-
  • Longbowman: He counter-shoots whenever enemies fire shots. Can be VERY useful if there's a lot of ranged enemies, but his normal attack is meh, and just 2 shots. C+ to B+
  • Rogue: In my opinion, one of the best mercs. Whenever enemies move, he throws
    daggers constantly at them (often hitting stuff nearby with collateral damage in the process). Also throws around 5-6 daggers with moderate accuracy as his main attack, typically triggering lots of support fire. A+

Warrior-types don't do much support fire, but obviously are great at triggering it from others and just flat out dealing damage with their fast melee bounce.
  • Hammer Warrior: Great damage on his melee, and will smash armoured enemies he hits. He's great at reducing enemy armour (-4 per hit!), so a solid pick. No support, of course. A-
  • Axe Warrior: Guaranteed criticals (possibly double-crits too!) mean he's the highest damaging Merc ~if~ you can get him to bounce a lot (20 DMG a hit!). No support, but he and Swordsman are best pals with Shortbowman. A-
  • Swordsman: Swings his sword (on the spot) in a whirlwind attack whenever an ally hits anything in his sight. Park him next to a tough enemy! Also fast, generally great. Note: Warrior MC will trigger the whirlwind with Jump Slashes, making them a great team! A- or A++ for Warrior MC

Guardian types have larger hit-boxes, more HP, and are slow. But, if an enemy could choose from two equal HP% targets, it will pick a Guardian unit 80% of the time. This doesn't apply if it can get a kill, though, it will go for the weaker ally (only full Taunts from Tiara or an MC with Taunting Face perk can prevent that).
  • Sentinel: Guard++. He's a wall. Very slow, low damage, but gives +4 free Block every turn to a close ally, and is self-sufficient without card support (always has 2 Block/1 Armour). Likely the best value for a pure defensive merc. B
  • Man-At-Arms: Has 2 thorns, and lunges in the way of enemies that get close to him on enemy turn, counter-hitting them (and being hit). I like that's he's proactive on defence, but he can be a bit suicidal at times, taking attacks that would have normally missed anyways. Still good. B-
  • Phalanx: Not noted on his card, but he always penetrates enemies, and has Base 9 ATK. If he's joining several other mercs, he gets a buff from that and can get exceptionally strong; and gets even stronger over time if he lives. Slightly slow, and no support, but generally a solid fighter. A-

Professional Mages do lower damage to single foes, but nearly always hit large areas.
  • Explosives Mage: A graduated Apprentice with same ability (fire at end of ally move), though he causes big AoE explosions (duh). The AoE means his low accuracy is less of a problem, but since damage drops off to the edges, he's still only ok. B-
  • Battlemage: He attacks in a spread shot of 5 shots, 3 times. Gets more MAG if he goes last in the round. Great damage against big hordes; but don't expect any kind of pinpoint focus. Not doing support fire is a shame, as that would make him amazing. B
  • Mortar Mage: Fires like a mortar in a vertical arc, ALWAYS passing over obstacles, with infinite distance, choosing an enemy closest to where your aim line was. The shot explodes in a medium AoE as well. At end of your turn, fires a second time, attacking a random enemy with his mortar blast. Also has +10 Accuracy. Will basically always do damage twice, so the best tier-2 mage by quite a margin. A+

Scourge Mages don't hit too many targets, but those that ~are~ hit are de-buffed. Each has wildly different roles.
  • Blood Warlock: Fires a few blood missiles straight ahead. Each applies a good debuff (-2 ATK and MAG, -1 Accuracy) and decent damage. Good, and helpful to shut down dangerous bosses and elites. B
  • Shadowcaster: Fire black missiles straight ahead, each reducing enemy armour (poss into negative). Decent, especially vs. high DEF foes and bosses, but I'd say Blood is better due to reducing potential incoming damage. B-
  • Illusionist: Fires a 45 degree Cone of Butterflies which have 50% chance to sleep enemy. Short range, low damage, but the chance to disable a pile of enemies makes him decent. Also gives a small dodge bonus to the entire army. B-

Mercenaries Codex II
3-Cost
Elite Mercenaries, with guests from non-human races who excel at what they do (usually... Elves are apparently not very useful at archery, lol). If you can afford the 3-cost to play, they can contribute a lot, but are also pricier, and often only appear in higher end taverns.

  • Lance Knight: aka. Spearman+, he charges in the direction of any ally making a pinball move. Fast, tough and powerful, so great. Not stated on his card, but he also ALWAYS pierces through enemies rather than bouncing off them, which further increases his effectiveness against big hordes, which are all smashed aside. A+
  • Mace Knight: He charges in the direction of enemies hit by ranged attacks. Also fast and strong, but does not have innate piercing like regular knight. Good support in a ranged-heavy team, but not quite as good as his regular counterpart. A-

  • Lava Golem: Golems have an extra large hit-box, but barely move (literally they shuffle a few steps). Lava version creates a pool of napalm around himself on play, and at the start of every turn, and also applies hard counterattacks. 9 Base Defence, 60 HP. Able to offer good area denial if placed in a big swarm. B-
  • Ice Golem: Has 11 DEF, the highest in the game, and with upgrades he gains 1 Block, 1 Armour, and 1 Thorns, and slows foes by 20% on impact. But whilst the immobility of the Lava Golem is less of a concern due to the Napalm pools, Ice Golem really feels it. Only useful on maps with a chokepoint (even as a Guardian type). D+

  • Dwarf Gunner: Shoots a single powerful gunshot (14-16 ATK) that has a small AoE. With upgrades, it also pierces the first target, ignores some Block, and sends out shrapnel to the sides. Accuracy low, treat as a shotgunner; but can deal a fair bit to big swarms or high armour foes. B+
  • Dwarf Arbalist: Crossbow Dwarf. Fires for 14-16 ATK. With upgrades, shoots at any enemy hit by another ranged hit. Fires twice with his normal attack as well. Can and will do lots of support damage in Ranged heavy parties. A, although C- if you're Melee Heavy (Shortbow is better then, of course).

  • Elf Ranger: Shoots in an allies movement direction whenever they start a melee attack nearby. Has high ATK (13) but a low shot count; and likely to miss, as you rarely angle directly at a foe for an optimal bounce (so, if you say, aim 30 degrees to the right of an enemy so you can bounce off the wall at them, she will fire at the wall). Not really worth the 3-cost, unless you can also afford lots of Lance Knight or Phalanx (or Sorith). C+
  • Elf Arcane Archer (Magicbow): When ally touches her when zooming past on a melee, fire an arrow in its movement direction. 15 ATK, but very niche and not likely to hit much as the condition to use her is hard to meet, and inaccurate. Basically, there's only one use case, that's playing her and a fast melee unit that bounces together in the middle of a horde. So really dubious for the 3 cost. D

  • Light Archmage: Fires a Laser that sweeps in a 90 degree arc. Everything unblocked in the Arc takes 8 DMG. After upgrades, rises to 10 DMG with a chance to blind. Can hit lots of targets, but not much concentrated damage. Still good, as this can trigger lots of support fire (though he doesn't do support himself). A-, or A+ for Mage MC.
  • Ice Archmage: Improved since Early access where he was awful, now fires 6 icicles, which shoot off forwards and pierce targets with decent accuracy. Each deals 7 damage when upgraded. He can inflict Freeze if three of the icicles hit, so he has semi-reliable disable if spawned next to something. Okay if enemies line up for him, but fairly average overall. B-

  • Kitsune Bard: Every turn, sustains a song that gives (+1 ATK, +10% SPD and +1 Accuracy) to all allies when on field, which is a terrific buff, and permanent whilst she's alive. What's more, she also fires a music note straight ahead that is mildly inaccurate, but has a big AoE explosion. Pretty amazing support kitsune! A+
  • Kitsune Cleric: When an ally touches her, up to once a turn, they heal 2 (or 4 if foxgirl is fully upgraded). Melee attackers get to (Touch Fluffy Tail) in passing (lol) which is fine. However, her main feature is actually that she heals allies in a medium sized circle for 6 HP (or 8 HP) as her 'attack' each round. Pretty good, but her positioning can be troublesome since you want to be in a place to heal as much as you can, but she's quite squishy. B+
Card Review - Generic Cards
Globally Available Cards
All these cards are available to all MC's as drops; though several are clearly more meant for certain classes. Of course, just because your Mage could potentially take a Cleave doesn't mean it's a good idea. Hence, some of them, I've put under sub-headers below.
Nothing making you listen to this though, and sometimes a few hybrid cards might work well.

GENERIC COMMONS
    Defence
  • Block: 1 cost. Target Ally gets +4 Block. All MC's start with 3x Blocks, and they're fine. No frills, but they can serve you to the end game, even without upgrades. Generally, you should consider switching gradually over to Quick Parry or Add Plating, though.B
  • Quick Parry: 0 cost. Target Ally gets +2 Block (Or +3 if target is a Defence Mercenary or Girl). Free defence! Great for everyone, and if I want a basic Block replacer, this (or Add Plating) is usually the one I want. S
  • Add Plating: 1 cost. Target Ally gets +2 Armour, or +3 if they're a Defensive merc or girl (not MC). As Armour is flat out better than Block, this is great for most decks as a Block replacer. Pick between this and Quick Parry. This has much longer staying power, but obviously has a cost. S
  • Unyielding: 1 cost. Target Ally gets 2 Block. If under 50% HP, get 6 instead. Generally, if you're under 50% HP, things are going wrong. You certainly shouldn't have a defence that relies on you nearly dying. Doesn't scale well either (6 Block at Level 6 lol). Ignore. F
  • Phalanx: 2 cost. Allies in small AoE get +4 Block. Generally, you should identify the allies most at risk, and target them for defences. You also can't guarantee them being in the AoE, so I don't personally see this as very good. D+
  • Multi-Block: 1 cost. Target Ally gets +2 Block. For each other defensive card played this round, additional +2 block. THE core Tank build card, to be used after Quick Parry for potentially lots of effect. Scales quite high. B- (A++ for Tank build).
  • Solo Hero: 2 cost. Get Block == Total enemies. Extremely good if played on the first round, and will usually make you immortal for that. But subjective as to whether you want this instead of cheaper, more reliable stuff. Scales very well, though (Enemies x3 at Level 6!). A-
  • Vigilance: 1 cost. Target Ally gets +2 Block, another defence in hand costs -2 AP. It's okay, but you usually don't have enough Defences in hand to make it do something, and Tank Builds get better value from Multi-Block. C-
  • Stoic Defence: 3 cost. Target Ally gets +4 Block. -1 AP cost per drawn Stoic Defence this combat. Uh... basic Block exists. Sure, if you fill your deck with them, eventually they're zero cost. But that's impractical for everyone and chance-based (even tank builds). F
  • Full Block: 2 cost. Target Ally gets +7 Block, and +1 Armour if they don't do their pinball action. Awful value initially; and generally not great due to the higher cost, though the scaling ramps up well at higher levels (21 Block at Level 6). D+
  • Defense Pose: 1 cost. Target Ally gets +2 Block. Subsequent defences this turn get +2 Block. Like Vigilance, you usually don't have enough Defences in hand to make it do something, but ok on tank builds. D (B+ for Tank build).
  • Punishment: 2 cost. Target Allies in small AoE get 3 thorns. Personally, I'd always rather do more direct damage. You need to be able to target at least 3 allies to make this worthwhile. Even then it's only okay. C-
  • Counterattack: 1 cost. Target Ally gets 3 thorns, or 4 if a defensive merc or girl (not MC). See above, but only 1 target. D

    Utility/Buff
  • Jump: 0 Cost, jump a medium distance, ignoring some terrain. Upgrades increase distance slightly. If used after your Melee, also gives an extra Slide. Good for mobility. Especially good for Mage as it triggers [Starfall] for free.B+, A for Mage.
  • Purify: 0 cost. Remove status effects, heal 1 HP. Status effects are annoying (Paralysis especially), and this is good value for the niche purpose of curing them, but it is clogging your deck and may not be available when you most need it. C+
  • Potential: 0 cost. Gain +2 AP, or +3 AP if you have 0 AP. Ungodly amazing. Because this exists, the other AP gain cards suck. I'd put 2 in every deck and upgrade them. SS
  • Insight: 0 cost. Draw 2, or 3 if you have 2 or less cards in hand. Also amazing. All decks should have 1-3 copies to help in cycling. Similarly to Potential, renders most other Draw cards useless. Do keep in mind that cycling excessively is dangerous in boss battles, though, due to their card counter that unleashes extra attacks. SS
  • Wrap: 1 cost. Heal 6 HP on target (extra +1 for each other Wrap played this round). As in combat heals are rare most of the time, this is valuable card, actually. I'd consider 1 in most decks. Scales decently, too (18 HP + 6 per Wrap at Level 6). A
  • Motivation: 1 cost. Target ally gets +3 ATK, +1 Minimum DMG (with extra +1 for each girl in hand). Adds 40-100% more damage to the target merc this turn. Keep in mind this won't affect their support fire so it's not as good as it sounds, but if your merc is in a good position, it's a decent buff. B
  • Hasten: 1 cost. +30% speed this round, Get +1 Shoot, multiple hasten uses have -50% less effect (stacking this round). Massively improved from it's early access iteration, with highly improved scaling and no penalty anymore. It's solid buff for everyone. A
  • Hasty Wisdom: 0 cost. Discard random card, get +1 AP. Considering [Potential] exists and is massively better, this is crap. F
  • Continuous: 2 cost. Target character gains a second melee attack this turn. Usually, should be used on your MC or a strong Warrior Hero Girl. Double the melee, double the fun. Can be very damaging. Generally great; Archer MC especially loves it, and handily gets a copy after the prologue. A+ (S on Archer).

    Other
  • Throw Bomb: 2 cost. Medium Sized AoE, dealing 5 ATK/5 MAG mixed damage. If you have multiple in hand, the others are immediately played for free (at same target) & discarded. Mage MC starts with 1x copy. Good in the early game, can cut through swathes of goblins, but the multi-play is usually a negative, and loses lustre as things go on (and Fireball exists for Mage). B-
  • Beartraps: 1 cost. Throw 3 bear-traps close to you. Melee enemies that go into them slow down, and take 3 DMG. This is a really annoying ability on monsters, but not so great for the player. It might save you if you would otherwise get several bounces, but can't be relied upon at all. Scales poorly as well. D+
  • Flash: 1 cost. Blinds 1 enemy. Blind was Improved a fair bit in 1.0, now actually reduces Hit-Rate rather than merely reducing Accuracy (firing cone). It's helpful for making a boss that's about to vomit a thousand arrows be reduced in effectiveness, though it's less useful for mob fights. A-
Card Review - Generic Cards II
GENERIC UNCOMMONS
  • Meditiation: 0 cost. Pull a card from Discard and it costs -1 AP. Solid enough, though personally I'd prefer to cycle more cards. B
  • Magic Shield: 1 cost. Target Ally gains +3 Block. Draw a Card. Decent because of card draw adding cycling power, can replace Block if you like. B+
  • Raise Shield: 1 cost. Target Ally gets (6- Cards played this turn) block. Restricts play order a bit, but a strong card for defence. B-
  • Guardian Field: 3 cost. All allies get +1 Armour. Subsequent uses in combat give an extra +1 Armour. Even with lots of merc's out, this is poor action economy. Not good. D
  • Brace: 1 cost. Discard all Defensive cards, get +2 block for each. Doesn't count itself, so it's fairly bad. Some niche use in a pure DEF Warrior, maybe, but otherwise dubious. D+
  • Last Stand: 1 cost. Target Ally gets 2 thorns, or 6 if under 50% HP. Personally, I only think it's worth paying AP for thorns if you can guarantee being hit; and that's only possible with Tiara, an SR rarity (2 skill) girl with the Taunt perk, or an MC with the Taunting Face perk. Okay in that circumstance (B-), but otherwise a D+, as using it with Guardian/Sentinel Mercs is less effective.
  • Contemplation: 0 cost. Discard 1 randomly, Draw 1. Costs +1 AP for subsequent Contemplation's played this round. Insight exists, and is a common, so this is garbage. F
  • Glue Potion: 0 cost. Make a zone that slows enemy by 50% and gives -1 Shoot in small AoE. It's fine, due to 0 cost, but rarely actually makes a huge difference. C
  • Vengeful Hex: 3 cost. Enemies that hit you this turn lose -3 HP (once). For that cost? Garbage. F
  • Hasten Area: 2 cost. In a medium AoE, allies affected get +30% speed this round, Get +1 Shoot, multiple hasten uses have -50% less effect (stacking this round). Massively improved from it's early access iteration, with highly improved scaling and no penalty anymore. If your mercs and girls are in a small area, it's great. Not quite as versatile as it's little brother but also considerably stronger in potential if you can line up.A-
  • Form Up: 3 cost. Small AoE, allies in it get +3 ATK this round. Not worth the cost; you need to hit 4 Mercs for it be even okay action economy at 3 cost. D-
  • Flame Shield: 1 cost. Get 1+X magic thorns, where X is 35% of DEF. Sort of okay on a golem or something, but still very mediocre. D+
  • Panic Block: 0 cost. Discard a card. Target Ally gains 3 Block. Uh... [Quick Parry] exists and is a common. Basically useless. D-
  • Flex: 1 cost. Next attack card played has +65% damage. If you can luck out and play with a powerful rare, it's good. But in testing, it rarely seemed to available when I wanted it. Hilariously, it's best on Mage MC. The image of the MC flexing before flinging a fireball is pretty funny. B-
  • Blazing Hearts: 3 cost. Entire team gets +1 ATK for battle. One of those that sounds great, but is kind of awful action economy in practice: you could add another mercenary worth more ATK overall, providing more support fire, for the same (or less) cost. F
  • Stand Fast: 2 cost. Target Ally gets +4 Armour, and if it's a Hero Girl, she won't discard herself, staying an extra turn. 4 Armour is A LOT, as that doesn't reduce like Block. The extra utility to keep a girl out for another turn is great (and play a squishy mage girl in a dangerous position to deal more damage). Great card. A
  • Stay Alert: 0 cost. Don't discard your hand this turn. It's fine if you're setting up a super attack turn, but personally I would rather play as much as possible and cycle more. Mildly higher value than in Early Access, due to the boss card limits now in place. B-
  • Fury Rune: 2 cost. Discard all defence cards. All attacks in hand then cost -1 AP this turn. Now personally, I feel that since [Potential] exists, I'd rather use that than reduce AP through something like this, but this is not awful. B-
  • Transform: 0 cost. Another random card costs -3 AP. Amazing; as it's always producing lots of value. Though you don't need more than 1-2 in deck. S
Generic WARRIOR Commons
  • Punch: 1 cost. 8 DMG. Garbage, you can't even kill a basic goblin with it. Sadly, Warrior starts with 3 of them. Get rid of them in Libraries ASAP. F
  • Slam: 2 cost. 12 DMG. -3 Armour. Warrior starts with 1x. It's kind of okay; but pretty awful action economy. Armor Split also exists for Warrior and is purely better. C-
  • Dash: 1 cost. Rush to target, knocks it into air, deals 6 damage. +2 DMG for each not used AP (doesn't consume them though). Though you can aim past targets, will always stop at the first enemy intersecting the line. Warrior gains 1x copy after the prologue. Meh. C-
  • First Strike: 1 cost. 5 DMG, another attack in hand costs -2 AP. Rubbish damage, doesn't scale much, but still decent for AP reduction on Warrior. B
  • Savage Rush: 1 cost. Rush to target, dealing 3+(35% of your DEF on your card). A better [Dash], as it also pierces through non-targeted enemies, damaging everything in the way. Allows you to relocate and deal damage in the process. Primary attack of a Tank build. B+
  • Execute: 2 cost. 10 DMG. 30 DMG if enemy on less than 50% HP. What it says on the tin. Usually not worth the cost, barely worth it vs. Injured enemies. C+
  • Hatchet: 1 cost. Throw hatchet for 20 DMG (guaranteed crit), with poor aim. Kind of okay if you're in something's face, but not likely to hit what you aim for. C
  • Pummel: 1 cost. 4 x 3 DMG punches. For each Pummel played this turn, punch +1 extra time. The super low damage self-sabotages any chance of an Oraoraoraora! deck, in my opinion. I wouldn't bother. C-
  • Stored Power: 1 cost. Attack cards played this round have +3 damage. Warrior MC starts with 1x. Can make mediocre cards (and Pummel) better, but personally I'd rather just get better cards (lol). Still okay at the start, but the Warrior also gets a strictly better Uncommon version, Power Burst. C+
Generic WARRIOR Uncommons
  • Full Attack: 1 cost. 12 DMG. Random defence card in hand costs +1 AP. Use it last in turn. Mediocre for an Uncommon card, but okay damage. C+
  • Quake Slam: 2 cost. Jump on the spot, doing 15 DMG AoE. Randomly discard a card. It's decent if you're right in the middle of a mob. This can actually happen semi-often with Warrior due to Jump Slash. The discard is annoying though, and there are better attacks with better economy overall. It also has a better big brother, Meteor Strike.C+
  • Cleave: 2 cost. Rush, ATK for 10 DMG in a small AoE. Subsequent Cleaves this round cost -1 less. Decent if you can get 2-3 in deck, but can be hard to do so, and requires good deck cycling. Overall low action economy otherwise. C+
  • Hidden Blade: 0 cost. 8 DMG with 50% chance of 12 DMG, costs more with each card played. Okay as a round opener to help trigger your Warriors [Gale Sword] card ability, but restrictive on play time (and annoying if you pull it with an Insight or other cycle card). Okay though. C
  • Shield Smite: 0 cost. 4 DMG, for each 1 Defence card played, +2 Damage. Free damage for the more defensive tank builds. Quick Parry is your friend in enabling it, of course. Not exactly going to do loads of damage, of course. C+
  • Juggernaut: 1 cost. Attack dealing 4 + (Your current Block + Armour Value). Loses range with each use. A primary attack of the Tank build, but poor for other Warriors. D (B+ for Tank build).
Card Review - Generic Cards III
Generic ARCHER Commons
  • Arrow Shoot: 1 cost. 2 shots for 4 DMG each. The Archer equivalent of Punch. I guess at least it has range... but it's also not accurate. Still F.
  • Blade Storm: 3 cost. Fires 15 daggers randomly in a 30 degree cone, each dealing 2 DMG. Archer MC starts with 1 copy. The 3 cost makes it awful action economy. Damage can be okay if you sit close and shotgun, but it's usually not worth keeping too long. D
  • Fire Support: 1 cost. You fire an extra projectile dealing 1 DMG when ally hits. Yes... 1 whole damage. It can trigger chains of support fire, so not pointless, but meh. C-
  • Fling Knife: 0 cost. 4 DMG knife. Stays in Hand if not played. Obviously, made to be used with Final Flings. Since all the cards are common, you can do a Throwing Knife build around this (with Shurikens from the Archer Ability too), but the game is very unfriendly to rapid fire multi-card damage decks. C
  • Final Flings: 3 cost. Throw a knife dealing 10 DMG. Costs -1 less AP and penetrates +1 target for each attack already played this turn. Can be good in a Throwing Knives build; but you will need to almost exclusively shift your deck to accomodate it. Awful for most. F (or B+ if you build around it)
  • Spread Strike: 1 cost. Changed in 1.0. Charge at a target, stabbing it in melee for 7 DMG. Then spit out 1+1 projectile per card in hand (not including itself) in random directions, each dealing 1-4 DMG. Can potentially be good, but extremely random. C+

    Generic ARCHER Uncommons
  • Headshot: 2 cost. 12 DMG, if it kills, get back 1 AP and draw a card. Okay early on, with decent utility, but it doesn't scale all that well later. C-

Generic MAGE Commons
  • Magic Arrow: 1 cost. 3 magic missiles for 3 DMG each. Inaccurate. The Mage equivalent of Arrow Shoot, except being Magic Damage, and +1 overall. Still F.
  • Prana Shot: 1 cost. Stronger Magic Missile for 8 DMG. +2 DMG for each not used AP (doesn't consume them though). Kind of inaccurate. Meh. D+
  • Bless: 1 cost. Target Ally gets (3 + 1 per Supporter Merc in Hand) Magic for this turn. If you think Mage MC or another Mage can get off lots of Support Fire this turn, decent. Note that this does not affect cards you play, though. C
  • Crack Armor: 1 cost. Target loses 3 Armour. If it has none, also deals 3 DMG (and gives negative armour). Mage MC starts with 1x Copy. Decent in theory vs. bosses, but Mage is usually just better off firing more at it for 1 AP. Good if you already have lots of support firing mercs in play, though. C
  • Enervation: 1 cost. Target loses -6 Attack and Magic. Or -8 if enemy on less than 50% HP. See above for Corruption, same applies, but nerfing attack stats is better for defence, and this has the potential to reduce the power of dangerous bosses for a turn, so it's fine. B

Generic MAGE Uncommons
  • Psychic Spear: 3 cost. Pierces all in a line for 15 DMG. Decent, but not usually worth the cost. A vastly better version exists as a Rare, too (Plasma Beam). C-
  • Raise Dead: 1 cost. Summon 5 HP skelly with good defence and 1 thorns. Can't attack on turn it's summoned, but has a high chance to be targeted by enemies. It's pretty good for taking boss fire. Decent card.A-
  • Shadow Bolt: 1 cost. 10 DMG, 20 if enemy has status effect. Pretty good for a generic uncommon, though Mage should highly consider Acid Arrow and Drain Soul. B-
  • Arcane Beam: 3 (0) cost. Pierces a line for 30 DMG. Basically a midpoint card between Psychic Spear and Plasma Beam, With 3 cost, it's still kind of poor action economy, since it's big brother Plasma Beam still exists. But it scales alright. It's okay. C+

    NOTE: Arcane Beam is also gained from the [Arcane Weapons] S-Tier perk. The perk that gives it also sets it to 0 cost... but in a fairly bad exchange, as you also lose your pinball melee action. This is NEVER worthwhile for Warrior or Archer, but Mage does have the weakest pinball. Even so, the pinball will usually be able to hit more targets, just for less damage. In this case: B- (for Mage with Arcane Weapons Perk), D (for others).
Card Review - Warrior Cards
Warrior's cards come on a huge sliding scale from awful to godlike. Many are short range, like extra copies of themselves, and have weird targeting restrictions, but the good is very good.

WARRIOR Uncommons
  • Brutal Strike: 1 cost. 10 DMG in a small AoE (15 DMG if you're on 50%+ HP). You lose 3 HP. Among the worst of the Warrior uncommons. Trading HP for a tiny AoE isn't worth it IMHO; but if you stick with it, it does get better with upgrades. D+
  • Fury: 0 cost. For each 20% HP you're down, gain +1 ATK/+1 Card Damage. Does get better with upgrades and does synergise slightly with Brutal Strike, but generally, I'd rather not try to get to lower HP if I could help it. Especially given Power Burst exists, this one seems unworthy. D
  • Power Burst: 0 cost. +2 ATK/+2 Card Damage. Is not discarded at turn end. If multiple Power Burst in hand, play them all at once, for +100% effect per card played. Speaking of which. This is just a great card, always useful, and if it's not right now, you can hold on to it. Makes Fury pointless. S
  • Flash-Move: 1 cost. Rush to target, dealing 7 DMG to all in the way. Gets a [Gale Wind Scroll] for each 2 played (which increases your SPD if played). Markets itself as Brutal Impact+ (though DEF not taken into account). It's not bad, but a bit gimmicky, requires multiple copies to use. B-
  • Armour Split: 1 cost. 12 DMG, 1 Armour Shred. Fairly meh initially, but gets okay with upgrades. The most generic card ever, though, lol. C+
  • Phantom Strike: 2 cost. Slashes rapidly, making 5 afterimages that pierce through the target, hitting stuff on the other side, for 4 DMG each (20 total). +1 Blade per attack card played before it this round. Due to the pierce, this is extremely good; attack a tight packed crowd and it will do lots of damage. Improves well from upgrades. The bonus blades on top are just gravy. A
  • Feint: 1 cost. 10 DMG. Draw 2 cards, or 3 if enemy is not attacking this turn. Insight attached to an attack; which is never bad. Never deals much damage, but decent utility. B+
  • Heavy Slash: 2 cost. 20 DMG (or 40 if enemy has no defence this turn). Shreds 2 Armour. A powerful card by default, and ramps up well with upgrades (up to 100 DMG at L5!). Worth the cost. A+
  • Rip and Tear: 0 cost. 7 DMG. Duplicates itself when discarded. Sort of like Melee Throwing Knives. Doesn't scale up very well, and kind of swamps your deck when you could have better stuff, but I'm sure you can run a meme biting deck for lolz if you want. C
  • Combo Strike: 0 cost. 4 DMG. Duplicates itself when any non-Combo Strike card is played. It gives supplementary damage from playing many attacks in a turn: sounds good on paper, but in practice, you'll have mercs, girls, defences and stuff in a given hand, so it won't duplicate all that much. It synergises with Rip & Tear, above, but lots of small attacks are pretty bad for fighting nearly everything, and especially bosses. Meme decks aside, just okay. D
  • Focus Strike: 1 cost. 15 DMG + (3 x Attacks in Hand) Damage. Scales well from upgrades: (20 + (5x Attacks)) at Level 3, and makes you slash through the target, similar to [Phantom Strike], but with a singular ghost blade. Harder to meet the condition, but still alright. B-
WARRIOR Rares
  • Tornado Slash: 3 cost. 3x15 DMG continuously in mid-size AoE on the route to the target location. Warrior gets 1x copy after the prologue. Just a plain excellent card; not many Warrior cards can target just a point rather than an enemy, and this can remain in your deck for the entire game and still perform well. A+
  • En Guarde!: 1 cost. 8 DMG, get +3 Block, or +5 if target not attacking this turn. Pithy chip damage for a Rare, but you get a free Parry use in the process for 1 AP. Not a horrid deal, but there are better rares. B
  • Hot Blooded: 0 cost. +1 ATK/+1 Card Damage for the rest of combat. Changed recently so it lasts all combat, so it's no longer absolute garbage. However, Power Burst still has better stats, is an Uncommon, and even has other benefits... and lasting longer is still pretty niche (since, if your build is working, most battles should be 1-3 turns, and bosses 3-6 turns). D
  • All-In: 3 cost. Discard Defence Cards, all Attack cards get +3 damage, and their AP cost is reduced by 3. Improved a fair bit since early access (used to be Predator+ and discard all but attacks). The AP reduction can be significant in a deck made of many attack cards, so it's pretty darn good. Just play your Quick Parry and Plating first ofc. S-
  • Untouchable: 2 cost. Target gets -4 ATK, +6 Thorns, +20% Dodge (or 30% if they choose not to melee this turn). The capstone Tank deck ability (Thorns still activates on Dodge). You can also technically play this on Defensive Mercs (or Tiara), but I wouldn't personally put it in my deck for that. C+ (S for Tank build).
  • Gale Sword: 1 cost. Lunge at a foe and fire 3x (4 ATK) Wind-Blades. For each other Gale Sword played in the whole battle, +1 Windblade is fired. Windblades pierce, have quite a big hit-box, and travel reasonably far, making them excellent at crowd control. Obviously, you need to dedicate your deck to Gale Sword (and have good cycling with 3+ copies of it) to make it worthwhile, but if you do, it's a great setup. A+
  • Earth-Rend: 2 cost. Fire a Quaking Shockwave (like Myra) in a long line, that pierces foes, dealing (18 + (Whatever ATK is shown on the monster)) to each thing hit. If enemies are in a neat column or tightly packed, this can cause extreme damage. Obviously less useful vs. monsters that are defending this turn, but still a very good card. A
  • Finisher: 2 cost. Slashes rapidly, making 5 afterimages that pierce through the target, hitting stuff on the other side, for 5 DMG each (25 total). Ignores ALL Defence and Block. Is not discarded at turn end, and in fact gets +1 DMG if unused. Phantom Strike's big brother; and that's already a good attack. Just ignoring armour on top of that is great. S-
  • Meteor Strike: 3 cost. Long range, pick an area. You leap at it and slam down, causing a large AoE explosion for 20 Damage. Guaranteed to Stun. Awesome strong; and well, just awesome in general. Seems to be rare among the rares, though, I've seen it only twice! S
  • Flash Kill: 3 cost. Charge at a target at immense speed, penetrating through it, anything between you and it, and basically anything behind it. All you pass takes 50-75 Damage (it has a +200% Crit Chance). If it kills anything, add Flash Kill back to your hand again, with a 0 AP cost. (Insert surprised Pikachu Face here). Yeah, this is flat out BROKEN. You will cross the entire stage and murder everything in the way. Oh, and then you can do it again! For free! Over and over, as long as you keep killing. The literal only weakness it has is that it MUST target an enemy within a medium range, so on stages with obstacles and kinks, you might not be able to get a targeting solution. One of the best cards in the game. S+
Card Review - Ranger Cards
If you read the class section, you'll know there are several utterly garbage Archer cards. Most the good cards here are buffs, there aren't many good attacks. Fortunately, that's fine, since Rangers's Arrow Blitz is great, so buffing it with your cards is a great idea.

ARCHER Uncommons
  • Rapidfire: 1 cost. Shoots 2x Arrows for 4 DMG each. +1 Arrow per attack card in hand, not counting self. Inaccurate. Uh... this is literally the basic Bow & Arrow attack. It has a tiny, minor synergy with Throwing Knives or if you stack it, but still not worth it. F
  • Chain Hook: 1 cost. 9 DMG, pull a random card from discard. Uh... Meditation exists, is a common, 0 AP, and also reduces the discarded cards AP cost by 1. Attaching it to a poor attack for a higher cost and reducing the utility is garbage. F
  • Poison Arrow: 1 cost. 10 DMG. Add 1 stack of Poison, dealing 1 damage at the start of the next two rounds. Absolutely awful. DoT's are not great in this game; they're okay as a supplementary thing (like Gricoria's Blood Curse). But normally you want to wipe out dangerous foes ASAP, not in four turns. F
  • Double Arrow: 1 cost. +1 Shoot, applying to both your melee/arrow blitz, your support fire, and the next card played. Subsequent uses this battle cost 2 AP, not 1. Oh thank god, finally a good card. This is making Arrow Blitz and your Support Fire much better; and is generally a great buff. Play it first in the round (with Split Arrow) and watch your Arrow Blitz completely annihilate stages. Then do it again with a Continue card. A+
  • Crossbow: 1 cost. Shoot a perfect accuracy shot dealing 20 Damage (it has 100% crit). Yeah, Crossbow's good. At Level 6, it's 60 Damage, so it also upgrades decently. If you want to make sure something low HP dies this turn, it's your card. A-
  • Drill Arrow: 1 cost. +1 target penetrated, applying to both your melee/arrow blitz, your support fire, and the next card played. Not quite as useful as Double Arrow, but still a solid buff. B+
  • Aim: 0 cost. Your Accuracy and Hit this turn are "greatly improved". Next card gets +3 ATK. The effect is hard to quantify, but it certainly makes your support fire more accurate. Zero cost makes it good to always have a copy. A
  • Eagle Eye: 0 cost. Draw 4, or 6 if you have 2 or less cards in hand. Insight: the berserk version. Fill up your entire hand, get more options, what's not to like? SS
  • Barrage: 2 cost. Shoots 6x Arrows in a narrow cone for 4 DMG each. +1 Arrow per attack played before this in a round. Basically, this is a more efficient version of the starting Archer card Bladestorm. The inaccuracy actually hurts it more than that card, since there are less shots and each is worth more, and you may not be in an optimal position to shotgun a crowd. Overall, not great on its own; but if you specifically build around an arrowstorm-type build, it's sort of alright. D+ for most. B+ for Arrowstorm build.
  • Opening Shot: 1 cost. 9 DMG, random attack in hand costs -2 AP. Ready Strike, the Ranger Version. Rubbish damage, doesn't scale much, but still okay for AP reduction. However, Ranger generally has less Attacks they want to reduce the cost of. Decent in a Barrage/Arrow Rain build though. B-
  • Dark Blades: 1 cost. Throw 5 Shuriken in a wide cone. Each deals 4 DMG. For each Dark Blades played, fires +2 Shuriken. The Accuracy is dreadful, and the damage is awful. In theory, you can make a meme deck with only these cards in, but I can't recommend it. D
ARCHER Rares
  • Final Shoot: 3 cost. 60 Damage. +10% Damage per other Attack card already played this turn before it. Ranger gets 1x copy after the prologue. Scales hugely from upgrades (is 120 ATK at Level 4). Expensive, but nearly any Elite or Minion you hit just dies. It is, shockingly, affected by Split Arrow, Drill Arrow and Double Arrow. Will usually be in your deck the entire game. A+
  • Predator: 0 cost. Discard all non-attack cards. Keep all attacks in hand this turn. Uh... Why?!? Just cycle faster dude, Ranger even has Eagle Eye to help!! Buffs are also Archer's best cards, and this gets rid of them. As it stands, garbage (even in a Throwing Knife build, it's super dubious). F
  • Powder Arrow: 1 cost. Attack Cards played this turn also explode in a small AoE for 6 Damage. Now, if you're running a Barrage build, this is an amazing buff that will literally double or triple your output. Good in that case; but usually, a Ranger won't have many attack cards (since they generally suck). A+ if built around. D otherwise.
  • Fatal Throw: 2 cost. Throw a knife that deals 16 damage. Discards ALL non-attack cards in hand, for +50% Crit for each. Despite being a Knife, doesn't synergise with Throwing Knives (lol). Frankly, discarding all the mercs, buffs and defences from hand is a horrible cost for a relatively average bonus overall. D+
  • Enchanted Bow: 2 cost. All Attack cards in hand have AP cost set to 0. You can't draw or otherwise obtain any cards this turn. Absolute hot, steaming garbage. Even if you're running Barrage. Killing your cycle and draw is like sticking a gun to your forehead for Ranger. Just don't. F
  • Toxic Blade: 3 cost. Skill card hits deal 1 extra layer of "poison". aka. Acid, as this is reducing enemy armour. Now, this does actually apply to your Arrow Blitz, so that's a thing to reduce high armour enemies, but generally your Arrow Blitz with a Split Arrow is better to just wipe out screens and doesn't need it much. It's still a decent enough buff, and @Ohko pointed out to me it's awesome effective with rapid hitting skill cards too (like Arrow Rain). B-
  • Chakrams: 2 cost. 18 Damage. If it kills anything, add it back to your hand again, with 1 cost (or 0 cost, if it's a third or later Shuriken throw). Pretty amazing. It's not a Flash Kill, but it's clearly meant to the Archer Version of that. At Level 6, it deals 54 damage. You'll need to keep it upgraded to keep it relevant in later dungeons, and it has some problem with [Hard] postgame dungeons, but it's still a great card limited only by the card limit per turn. What Throwing Knives wishes it was. S
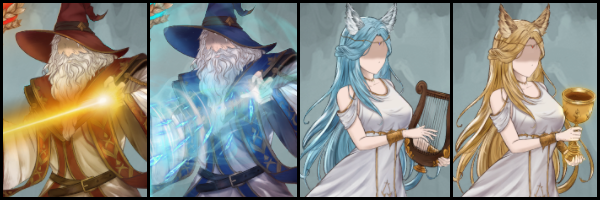
  • Arrow Hell: 3 cost. Summons 1+ (1 x attack cards played so far this combat) arrows behind you, which then fly off randomly. Each deals 4 DMG. Fairly mediocre, though THIS is actually the Throwing Knife capstone (not the actual knife card, go figure). C+
  • Split Arrow: 2 cost. Gives you +2 Spread, applying to both your melee/arrow assault, your support fire, and the next card played. Yeah, so Arrow Blitz with + 2 Spread is INSANE. It can be tough to find it on Equipments, but, even if you do, more is always better. Archer is all about filling the screen with hundreds of Arrows. SS
  • Arrow Rain: 3 cost. Fires 45 (!) arrows at random targets. Each is 1 damage, with +1 damage per level. The absurd version of Barrage. The randomness is a bit of a pain, but there's so many arrows and levelling it is so effective, that it can be a cornerstone for a build if you want to, rather than Arrow Blitz. Combo's nicely with Poison Blade and Powder Arrow to remove it's weakness vs. High DEF targets. S
Card Review - Mage Cards
The Mage has, as perhaps you might expect, some of the best cards overall, especially including some especially good Uncommons that synergise perfectly with the Execution Time S-Tier Perk.

MAGE Uncommons
  • Icy Comet: 2 cost. Fires a phat ice comet for 12 DMG, 35% chance to Freeze. Pierces. Expensive for what it does, and you don't even guarantee the disable. Hybrid damage is okay, but I wouldn't rush to get this. C+
  • Missile-Storm: 3 cost. Fires 10 Magic Missiles, each dealing 4 DMG. For every TOTAL AP you have, fires an +1 missile. Gets pretty silly if you're high level. Awful damage for each missile, of course, so if the target has any armour, the entire storm plinks off them, but the time spent firing can trigger support fire from everyone, so it's a comedy attack that sometimes works great. B
  • Ice Shield: 2 cost. Get 8 + (remaining AP after casting) Block. A mage specific block card. Played first in a round, it can give you a decent defence. I'm not sure it's really worth dropping Add Plating and Quick Parry for, though. C+
  • Soul Drain: 1 cost. 10 Damage, heal 4. If you kill with Drain Soul, also get 2 AP back. It ignores ALL cover, and may hit anything in a long range, even out of normal sight. Ungodly amazing; this card gives your MC Mage huge sustain, and good value. It will never do huge damage, but the free heal is incredible, and if you can use it to finish enemies off, it's massive action economy. All Mages should consider 2 copies. S
  • Acid Arrow: 2 cost. 20 Damage, shred 3 Armour. Very long ranged and accurate, this is a super great sniper spell that also reduces enemy defence for the rest of your mercs and support fire (as a Mage, you are playing cards first, right?). Scales well (50 Damage, Shred 7 at Level 5). A+
  • Fireball: 2 cost. 12 Damage in a moderate sized AoE. Every Merc, Defence, or Support card played before it gives it +2 Damage. Scales really well (triple damage at Level 6, with +5 per card played). Play your support fire girls and mercs, and then detonate. Everything tends to die. And what good is a mage without a fireball, anyways, lol. A+
  • Ready To Cast: 0 cost. The next attack spell played has +1 Magic, and 1 Attack Spell in hand has it's cost reduced by 1 AP. It's nothing to write home about, as buffs go, but its also 0 cost, so I don't mind carrying one copy around in most decks. B+
  • Mana Crystal: 0 cost. Restores 0 AP. Is not discarded at turn end. If not discarded or used in a turn, the AP restore grows by +1. One of the few AP boosting cards that can actually still somewhat compete with Potential, simply because you can hold it in your hand until you need it. Good to have 1 copy. B+
  • Transfer Mana: 0 cost. Discard a card, Draw a card, and get 1 AP. It's a thing. It's [Contemplation] but better. Can't compete with Insight and Potential, but it's all in one, and gets better in late levels, so its not bad. B+
  • Mana Sharing: 1 cost. Attack cards used this turn deal +1 Damage. Add an additional +1 for each Merc in hand. Probably the only bad Mage uncommon, you won't have attacks and mercs in hand at once, so it just ends up being a [Stored Power] in most cases, but more conditional. If you really want that effect, just take one of those (it's a generic Common). D-
  • Summon Shadow: 1 cost. Shadow acts like a worse version of the Shadowcaster Mercenary, firing 3x6 damage shots, but w/ no debuff. Doesn't attract fire like a Skeleton, so meh. C+
MAGE Rares
  • Shadow Ray: 3 cost. Valefor Laser (as in, fired in a 90 degree arc, left to right). Everything in the Arc takes 7 damage. For each enemy that has already died this battle, the ray has +1 damage. Mage gets 1x copy after the prologue. The Ray itself is unspectacular, and especially poor as a first turn play, but like Wizard of Light's attack, it should be viewed as an enabler. It is good for triggering support fire from Mercs and girls that react to hits (Swordmaster, Morningstar Knight, Dwarf Arbalester, Myra, Calarel, and Raicys, and it stacks Ulhen and Yoglyns debuffs). Obviously, in combo with these, the value soars. Overall, it's an A-
  • Electro-Chain: 3 cost. 16 damage, jumps to nearby targets, gaining +1 damage per bounce. The targeting is hard to figure out; but I think a bounce is limited to a cone about 50 degrees wide in front of the direction it first hits (so if you aim directly west, it can only go up or down 25 degrees from there). In other words, aim it at an enemy that has an enemy behind, if you were to keep the aim line going. Anyways, due to this, it could hit the entire map, or fizzle out after 1 bounce. The sheer variability makes it less good than some Mage Rares, but still decent. B+
  • Drain Mana: 2 cost. Choose a small AoE anywhere in the radius, not affected by walls or cover. Enemies in it lose 4 Magic. For each enemy hit, get 1 AP. No damage. If enemies are tightly packed, you can slightly debuff some of them and get AP for your trouble. Needs to hit 3+ to be worthwhile. I don't mind this, it's fine, but still, I'd usually rather be doing damage. It's rare it becomes so useful as to be a critical card in your deck. B+
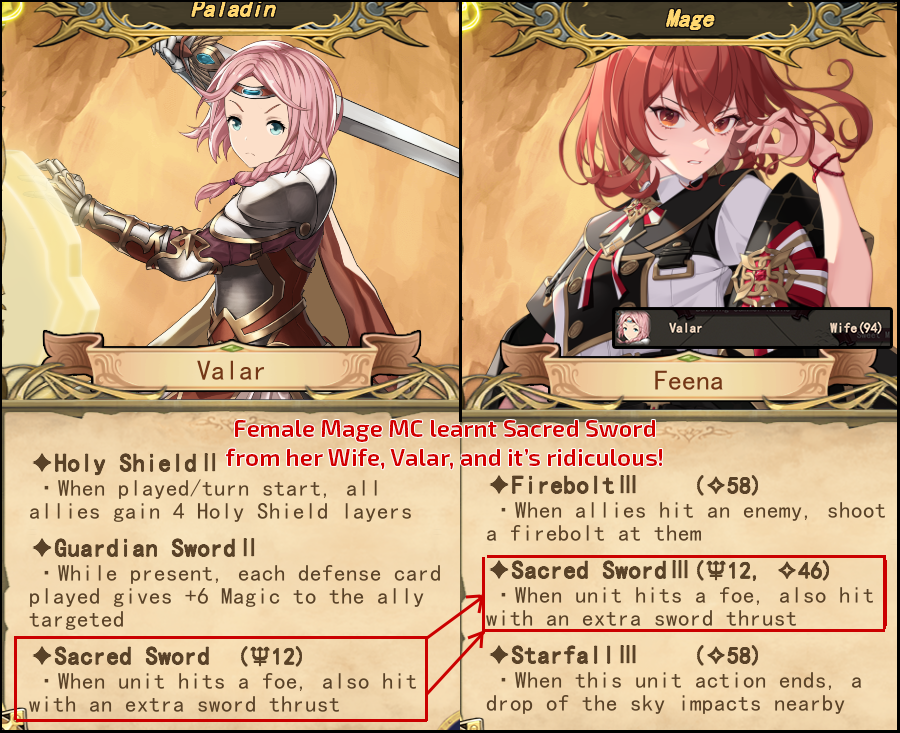
  • Magic Charge: 2 cost. Choose a character. This turn they get +6 Magic, and +6 Card Damage. Obviously, choose yourself, since it affects both cards and your support fire. It's a generic buff, for sure, but if you have the AP to spare, it's super solid. A+
  • Corpse Control: 3 cost. For each kill this turn, get a 0 cost Skeleton card. Skeletons aren't especially great, but knock yourself out if you want to go all Army of the Dead on us. There is the fact that it can up your survivability (esp. if, for some reason, you're not using Drain Soul cards). B
  • Star Energy: 2 cost. All damage enemies take this turn is x1.3. In a vast majority of cases, flat damage is better in this game than a multiplier, so I would always pick Magic Charge over this for the buff of choice. It's still fine, though. B+
  • Plasma Beam: 4 cost. A flaming lightning bolt deals 5x10 Damage to everything in a line, with extremely long range, piercing through everything. Ignores, and shreds enemy armour. The big bad version of Arcane Beam/Psi-Spear. If enemies are in a nice neat line for you, deals absurd damage, and due to its Defence ignoring, it's superb vs. bosses. Scales well, so by level 5 it deals 120 guaranteed damage. Obviously, don't pick if your AP is low, but otherwise great. S
  • Ice Age: 3 cost. A massive AoE around your MC is hit with a blizzard, dealing 15 damage with a 25% chance to Freeze. Deals +100% damage if the enemy already has a status effect. When I say massive, I mean massive. You cover a 1/3 to 1/2 of most maps (!), originating from yourself (you don't aim). Probably the only really good Ice spell in the game (lol). It seems to be super rare to find, though it's really good. S
  • Meteor Blast: 3 cost. Pick an area in a large AoE, doesn't have to be in sight. 3 Meteors with large AoE's will drop for 15 Damage each. +1 Meteor for each Meteor Blast played this round. The best part of this card is 'target anywhere', making it a good backup if you've ended up in a corner. It also bypasses orbital shields bosses might have. The damage scaling is decent. Obviously, if you have lots of AP, you can build a full meteor deck with dedication, though I personally like having more versatility in choices. A+
  • Dragon Breath: 4 cost. A long-ranged 60 degree cone area takes 30 damage. Deals +5 Damage for each time a Dragon Breath is drawn in this battle. The cone is actually really good, just big enough to catch lots of enemies in. Scales decently (+15 damage per level). A solid card. A+
City and Town Features I
Recruiting
  • Tavern: Offers Merc and Hero-Girl recruits. Pay to seek new employees from the mysterious strangers. The level determines the number of recruits, and acts as a multiplier for better mercs. [Tavern Revenue+] effects also give better recruit chances, I think. Heroines have about a 2% base chance to appear instead of a mercenary, but are always at least R tier (2 skills). This is the only place you can obtain SSR girls, as well. You can invest in taverns, but they give a very low return (like 300-700 gold a month for 7-12K upfront)
  • Slave Market: Offers Slave-Girl recruits. Most Slave girls are quite bad compared to heroines hired from Taverns, with low stats, and they're normally Common rarity (1 skill) with the occasional R (2 skill) at high-end slave markets. They're also quite expensive, but a market always has at least 1 guaranteed girl available, whereas tavern heroines share recruit chances with normal mercs. Personally, I don't usually bother, but if you're running a Harem Wings build, you might want some girls from here. However, there's also a chance of seeing non-combat slaves which can sometimes be useful. You can't invest here.
Shopping
Obviously, these sell gear and usable items. The higher the level, the more items they have, and the higher chance that they have Magic Equipment, if they can. I've yet to understand what causes buy and sell price fluctuation.
Investing in Marketplaces gives you cash returns of around 5% the purchase price, so it takes 20 months to get your money back (yikes).
Shops like Weaponsmiths are even more expensive (around 20-40K per level); but if you invest in them, you get a random selection of items they sell each month. (i.e. I bought out a level 1 Weaponsmith for 30K, upgraded it to level 2 (costing 8K), and next month it sent me a Scythe, a Greatsword, a Cleaver, and a Shield. None of them enchanted, but sold to a market giving a 65% return, that was around 2.5K). Generally quite hard to justify.
  • Grocery (Outfitter): Sells a random selection of gear. Level III+ Outfitters usually have Magic Items for sale. Outfitters will also buy ANY gear off you for 50-65% the base price.
  • Market: Sells a random selection of literally anything. Will also buy ANYTHING off you for around 40-65% the base price. What I tend to do is to keep an item with an exactly 1K value (an unenchanted weapon), then always see what happens if I were to sell it. If the market is offering me 550-650 for it, it's probably a decent place to dump my loot with the sell all goods button.
  • Weapon (Weaponsmith): Sells all types of weapons and Shields. Level III+ Weaponsmiths usually have Magic Weapons for sale.
  • Armor (Armourer): Sells Medium and Heavy Armour (for Warrior MC, Warrior & Defender-type girls). Level III+ Armourers usually have Magic Armour for sale.
  • Staff (Stave Crafter): Sells Staves and Wands (for Mage MC, Mage and Support-type girls).
  • Tailor: Sells Light Armour, Clothes & Robes. Level III+ Tailors usually have Magic Armour for sale.
  • Jewellry (Accessory Shop): Sells Helmets, Shoes, Rings, and Amulets.
  • Farm: Sells Food Items, which offer small global mass heals (or material for Myra to cook). Level 3+ farms might also have vinyards/bakeries attached and so sell Wine, Fruitloaf, Cookies, and stuff like that, which are pretty good for healing damaged mercs.
  • Item (Potion Shop): Sells a random selection of Potions. Generally, I kind of forget anything except health potions exist (lol), as most of the utility ones aren't really much good, except maybe Haste Potion. However, keeping a stock of X-class health potions can save your MC or Waifu's life in a bad situation, so you will use these on occasion.
  • Business Guild: Will ask for a specific item. If you bring it (in any bulk), they'll pay 150-300% (!) of the usual value for each one you hand in. Can be a good idea to keep an eye on these, if you have a city with one. The item demanded changes monthly.

Specialists
Specialists sell upgrade materials and specific trade items. The higher the level, the more variety they will have in stock. Usually, they sell upgrade mats at 80-85% of the actual value. This is cheaper than buying it from markets and more reliable. Selling your material or Trade goods back here gives you 40-50% the value, and isn't worth it.
For each tier, they usually gain both more goods, and more options available, with a Tier IV/V specialist often having 3-4 kinds in reasonable quantities. Tier V has a small chance to stock rare crafting mats, though they re-stock infrequently.
If you invest in a specialist, you don't get cash, but you'll get sent a couple of their materials every month. It's around 6K per level, making them one of the easier investments, and also probably one of the better ones, as you may want the craft or building materials.
Keep in mind, though, that upgrading specialists yourself often does not increase their selection of goods (which screwed me over, thought I could buy out a Level 1 Weaver and upgrade it to 5 for good materials, but it just sent me bandages. Lots of bandages...)
  • Cloth (Weavers): Sells Clothing Upgrade materials (Hemp), and Cloth trade items (Gloves, Bandages, Scarves)
  • Silk (Winder): Sells Robe Upgrade materials (Fine Silk), and Silk Cloth trade items (Blessed Cloth, Magic Bags, Carpets).
  • Leather (Tanners): Sells Light Armour Upgrade materials (Bear Skin) and Hide related trade items (Leather Rug, Backpacks, Belts).
  • Scales (Smithy): Sells Medium Metal Armour Upgrade materials (Scalemail), and Metal trade items (Horseshoes, Copper Pipes, Metal Sheets).
  • Alloy Smelter: Sells Heavy Metal Armour/Helm/Ring Upgrade materials (Alloys), and Bomb Trade Items (Alchemic Bomb, Bomb Bundle).
  • Library (Paper-Mill): Sells Shoe Upgrade Items (Scrolls- WTF) and Paper Trade Items (Paper, Ink, Candles).
  • Gem Mine: Sells Accessory Upgrade materials (Onyx), and Gem trade items (Sapphire, Emerald, Runestone).

  • Ironworks: Sells One-Handed Melee Weapon Upgrade materials (Iron Ingots), and Metal trade items (Sword Blades and Hilts, Cannonballs).
  • Mystical Spring: Sells Wand Upgrade materials (Silversand), and Enchanted Water trade items (Magic Fish, Glowing Pearls, Calming Tea).
  • Lumber Mill: Sells Bow/Gun Upgrade materials (Wood), and Wooden trade items (Tankards, Wooden Planks, Crates). Wood and Wooden Planks are also used for repairing and upgrading properties.
  • Crystal Mine: Sells Staff Upgrade materials (Glowing Quartz) and Magic Stones for Trading (Flame Stone, Magic Stone, Runic Fragments)
  • Hunters Lodge: Sells Two-Handed Weapon Upgrade materials (Shadow-Wolf Teeth) and Meat related Food Items (Thigh Meat, Good Meat, Pork).

  • Quarry: Sells (Rough Stones, Stone Bricks, Fine Bricks, Solid Slates). These are used for repairing broken buildings and upgrading properties you own.
City and Town Features II
Services
  • Rune Master: Whilst you're in this town, you can spend 100 Elite Souls and 5K gold on the equip screen to give an item a enchantment (or discard its current one for a new one). Its a gamble, and you can also get a defect. Generally, I find most magic gear from loot and drops, but if you've already got a good upgraded item you like that hasn't got an enchantment yet, its generally worth trying to add an enchant on it for extra value.

  • Soul Shaper: You can go here to spend souls for upgrades. You can get a couple of unique services here:
    >> 300 Regular (White) Soul => 150XP for MC. Alright deal early on; but a paltry amount as your level goes up. Not really worth it after Level 5 or so; and also pricey for an early character as you want to save to actually level with souls and use them in events. As a result, it tends to often remain unused in my playthroughs.
    >> Upgrade a Merc. Variable Cost. Not worth it, they grow quick anyway, and Mercenary Sites exist.
    >> 1 Boss Soul (Gold) => Give yourself or a Heroine +10% of their Base HP. Kind of poor on low base HP totals (i.e. Mages) but they also appreciate even a sliver HP boost. Especially decent growth on Defence girls.
    >> 100 Vigorous Soul (Red) => Give a Rare or Common Heroine or Slave a random extra perk. Make your own SSR's. Red Vigorous Soul is a Boss Drop option (for +5), or a drop from Super Elites in Danger+ missions, so you'll likely only be able to afford this once you hit Epic Level. Saving before getting your perk is a good plan. It is themed to the heroine's class. Has huge potential (like taking heroine skills for yourself with Social Mode).
    ^^ This girl was a Rare girl hired from a Tavern for being similar to Calarel, and has been made into a pseudo SSR girl with this effect!


  • Arena: You can go fight a (usually quite hard) battle here, for a reward. The rules will vary, but usually it stipulates that only the MC, or only the MC and girls can fight. You also get 5 Rep in the town for beating it. Dying in the Arena can still kill you if you have permadeath on in your difficulty setting. Make sure the reward is really worth it for you (i.e. a great item) before attempting it.
  • Resort: Spend a reasonable gold cost and use 3 days, for a complete team-wide full heal as you send everyone on vacation. Great if some horrible mission has minced you up, as its efficient for the money.
  • Thieves Guild: Sells Info for 500 gold. For the next month, all mission sites have their vague layouts revealed. This is extremely useful, and you should always buy it, unless you have All-Seeing Eye perk, or have Calarel (who can do this as a Campsite ability).
  • (Holy) Temple: Can resurrect dead hero girls. I've never managed to get one killed, so I can't comment on the costs. As of 1.0, also cures injury and disease; you need to use Elite Souls as the cost.
  • Skill Training: Offers you 5 uncommons that you can pay to add to your deck. Unlike usual, they can be from other classes (I've had an Archer offered Heavy Slash)
  • Portal: When you leave this city, the next destination you pick can be instantly teleported to by paying 50 souls. This is essential during certain events, and just generally helps. Try to remember which cities have portals.
Buff Places
These give a (usually crappy) buff if you're taking a quest on behalf of this city, or, if that city has 80+ Reputation for you, that bonus will apply globally.
Basically, locations will never have the 80+ rep bonus unless you've recently destroyed a demon army that had them in siege, since quests only give +10, and by the time a new job comes up in that city, it might be a while. I suppose if you're especially callous, you can let an army decimate places until there is a place that happens to have these bonuses in bulk, but it's not like the bonuses are so good to do that, and you end up with lots wrecked places that offer no services or jobs. Being a douche is generally a net negative.
  • Knight Order: +1 Thorns, +3 HP for Defender Mercs.
  • Warrior School: +1 ATK, +3 HP for Warrior Mercs.
  • Archer Range: +1 Shoot, +3 HP for Archer Mercs.
  • Arcane Guild: +1 MAG, +3 HP for Wizard Mercs.
  • Potion Workshop (Alchemist): +40 Range, +3 HP for Support Mercs. Will make your Curse and Blood Sorcerers do up to 20% more or less damage, arguably detrimental.
  • Barracks: -5% Merc Salary. Woo.
  • Herb Garden: 5% Resurrect chance. Yay...
  • Slave Trader (Monster Butcher): Each monster killed gives 10x Level extra gold. You can get more from smashing crates, lol. Yes, it has the same name (and icon) as the recruitment Slave Trader as well, which is confusing.
  • Stable: +40 Speed in combat, +10% Speed in overworld, for all. Probably the only actually great one here.
  • Battle Master: +1 Skill offered when you gain a skill. Decent enough, but hardly essential.
  • Brotherhood: -20% Tavern Recruiting cost. To completely clear out a large Level 4 tavern, it costs about 900, so this isn't terribly great.
  • Training Ground: Mercs that level via kills instantly go to level 2. It's not usually that slow anyways.
  • Depot: +2% Healing per day if you rest here. Generally, you shouldn't just rest in towns, it's a massive time-waste. Keep going on quests and using Campfires, find a Resort, or use Potions for emergency top-ups. The only exception is if you got wrecked by a quest and it's dangerous to travel due to being on 90% damage or something.
Foraging/Crafting Sites
You can spend 10 days (!) in a site to get 1 collection mini-game opportunity. This generally isn't worth it at all, as you can get these mini-games on quests, and they take 1 day. As of 1.0, however, they now give extra uses for each person in your reserve, so if you've recruited a lot, it's slightly better than before. Still a bit dubious even then.
  • Dungeon Ruin: Collection minigame. Easily the worst one, you can, uh... collect bandages here to sell?
  • Furnace (Smelter): Alchemy minigame. You can get Scalemail, but just buy it from a Smithy, its not worth the time wasted here.
  • Craft House (Workshop): Craft minigame. You can get Fine Silk, but just buy it from a Silk Winder, its not worth the time wasted here.
  • Hunting Ground: Hunting minigame. You can get Wolf Teeth, but just buy it from a Hunters Lodge, its not worth the time wasted here.
  • Mine Cave: Mining minigame. You can get Glowing Quartz, but just buy it from a Mana Crystal Mine, its not worth the time wasted here.
Other
  • Veterans Guild: There will never be Tier 1 Mercs in the Tavern here, but the amount in the tavern will be slightly less.
  • Mercenary Market: If you disband a mercenary here, you get paid a tiny gold stipend for it. I wouldn't usually go out my way to do this.
  • Craft Master: The cost of Upgrading is reduced by 5% if you do it here. Wow, five whole percent. Don't go out your way for this; it saves, at most, about 100 gold.
Weapons & Armour
WEAPONS
Spear: +2-14 ATK, +10-25% SPD.
Greatsword (Zweihander): +4-28 ATK
Katana: +2-14 ATK, +1-7 Min DMG.
Giant Axe (Bardiche): +6-42 ATK, -20% SPD (always)
Giant Sickle (Scythe): +6-42 ATK, -1 to 7 Armour.
Generally, the Scythe and Bardiche penalties are a little too severe; you want to go fast as a warrior, and you also don't want to risk insane damage from having negative armour.
I'd therefore always recommend the first three. Greatsword is the best all-purpose "get stronger" weapon; but a Katana lets you ignore a bit of damage decay, and a Spear makes you zoom faster. Doreen and Ratna are already uber-fast and are likely to suffer from decay, so may want a Katana, though a Spear does make them even faster. Myra, Sorith, and an MC warrior want that Greatsword usually, but can go with all three non-penalty weapons.

Broadsword: +2-14 ATK, +1-7 Armour.
Shortsword: +1-7 ATK, +3-21 Block.
Bastard Sword: +2-14 ATK, +2-14 Block.
Sabre: +2-14 ATK, +2-14 Thorns.
Chopper: +3-21 ATK, +1-7 Block.
Generally, tank girls are slow and won't deal much damage anyways. Hence, a Chopper is only ideal for Valar, who is stronger, and already has incredibly strong global defence. Licia and Tyslyl absolutely want a Shortsword or Broadsword (either is ok- Shortswords block is substantial, but Broadsword's Armour is permanent). Tiara wants a Sabre, since everything is guaranteed to hit her, so lots of thorns on her is great.

Spiked Shield:
+2-14 Parry, +2-14 Thorns.
Buckler: +2-14 ATK, +10-25% SPD.
Knight Shield: +4-28 Parry.
Tower Shield: +6-42 Parry, -20% SPD (always).
Heavy Shield: +6-42 Parry, -80 ZoC (always).
Valar wants a Buckler, without any doubt. Spiked Shield is generally the best on the others, especially Tiara. However, Licia and Tyslyl can have a Tower Shield if you want since they're both incredibly slow anyways. Losing ZoC from Heavy Shield is not usually worth it. Knight Shield is just kind of there, but it's fine.

Shortbow: +1-15 ATK, +1-2 Shoot.
Crossbow: +1-15 ATK, +1-2 Pierce.
Longbow: +3-21 ATK, +30-55% Crit.
Arquebus: +3-21 ATK, 20-45% Def Ignore.
Heavy X-Bow (Arbalest): +6-42 ATK, -1 Shoot (always).
Nobody really wants that awful penalty on Heavy Crossbow/Arbalest. For the Ranger MC, all the other choices have uses. Raicys should have a Shortbow as she has a powerful shot, but only once. Calarel vomits lots of arrows and really appreciates the crit on Longbow as a result. Arquebus is generally best for Virfy as she fires dozens of tiny hits, so making them much stronger and ignore defence is great, though the others are also fine.

Orb Staff (MagicBall): +0-7 MAG, +40-120 AoE Size
Lucent Staff: +2-14 Mag, +20-45% Dispel
Focusing Staff: +6-42 Mag, -40 AoE (always)
Energy Staff: +4-28 Mag
Teeth Staff: +2-14 Mag, +1-7 ATK
Most staves besides Teeth Staff are fine choices for the mages. If your Mage MC does most damage via AoE Cards (Meteors, Fireballs), Orb Staff is your go-to. If you deal most through pinpoint spells, and your Melee and Support Fire, then Lucent Staff or Energy Staff are your picks. Focusing Staff also has a niche if you purely use pinpoint spells. Teeth staff is mostly pointless.
Gricoria wants Energy Staff, as her bat cone has many little hits. Anma has no "AoE" as such since she fires lasers, so Focusing Staff is not a penalty to her and so is best. Allosa wants Orb Staff to maximise her Napalm zones. Elanil has low damage output normally, so also wants Focusing Staff.

Olivine Wand: +2-14 Mag, +20-45% Afflict
Moon Wand: +2-14 Mag, +20-45% Immune (Debuff Resist)
Magic Wand: +3-21 Spell
Star Wand: +2-14 Mag, +1-10 Spell
Crystal Wand: +4-28 Block, +25% Fort (always - Makes DEF 25% better, not worth it!)
Haalyn and Nirya MUST have Magic Wand (only); having higher +Spell makes a massive difference to their support abilities and their personal damage output is atrocious anyway; Star Wand isn't going to fix it, you're just nerfing the poor girls. Similarly, the only choice for Ulhen and Yoglyn is the Olivine Wand; they must make their debuffs land to be effective, and +Afflict does that.
Star Wand, Moon Wand, and Crystal Wand are basically only going to be used by R Support girls who mysteriously get offence-heavy perks. You might make an argument for Crystal Wand sometimes: that IS a lot of +Block, and Support girls only have medium HP, but completely losing potency in your card abilities is just not worth it, IMHO.

ARMOUR
One thing to generally keep in mind for armour is that HP bonuses are decent initially, but will very quickly become obsolete. Base HP doubles with Paragon/Epic/Demigod upgrades, as does HP from your Perks. Armour (the stat) is permanent.

Resists are fine for general damage reduction, but unless you have a supplementary perk like [Steel is my Body], it's often going to be a paltry effect on most attacks. Why? Well... it's much more common to take 3 x 10 damage than it is to take 30 damage in a whack in this game. 5 Armour will reduce each hit by 5 (and can reduce hits to 0), but 20% resist will only, and always reduce each hit by 20%, and never remove hits entirely.

Mercenary Armour: +0-70 HP, +1-14 Armour
Chainmail: +40-280 HP, -20% Speed (always).
Hardened Leather: +20-175 HP.
Studded Leather: +10-70 HP, +15-25% Phys Resist.
Runed Leather: +10-70 HP, +15-25% Mag Resist.
In most cases, Warrior MC and girls should favour Mercenary Armour. Flat +Armour is great. Chainmail is reducing Warrior's speed, so it's bad, since that's the whole point of the class.

Simple Breastplate: +30-210 HP
Breastplate: +50-350 HP, -20% SPD (always).
Full Plate: +1-21 Armour.
Plate Armour: +15-105 HP, +15-40% Phys Resist.
Bronze Plate: +15-105 HP, +15-40% Mag Resist.
For your Defender girls, Full Plate is generally the best, but in their case, you can consider the Resist options more carefully. There's mostly no point to the breastplates, Defender girls already have lots of HP.

Leather Armour: +20-140 HP
Leather Lamellar: +10-70 HP, +1-7 Armour
Archer Armour: +30-210 HP, -2 ACC (always).
Painted Armour: +15-30% Phys & Mag Resist
Gambeson: +10-70 HP, +10-34% Dodge
Ironically, Archer Armour is garbage for Archers. You absolutely don't want reduced accuracy for any reason. Leather Lamellar is the pick, but Gambeson is fine if combo'ed with Dodge Shoes.

Protection Robe: +20-140 HP, -3 ACC (always)
Travel Robe: +10-70 HP, +10-40% Immunity
Phantom Robe: +10-70 HP, +10-34% Dodge
Domain Robe: +5-35 HP, +40-120 AoE
Protection Robe is bad; ACC is used for basically everything you shoot except stuff like Meteors, making that worse just for HP is a big nope. Phantom Robe is the generic best defence option, though: if you're squishy, dodging really multiplies your survivability. Domain Robe is also generally good if you're using lots of AoE cards (and Mage normally is- though no mage girls except Allosa get anything out of it so keep that in mind).

Leather Tunic: +15-105 HP
Tribal Armour: +20-175 HP, -2 ACC (always)
Cloth Robe: +10-70 HP, +2-14 Spell.
Clerics Coat: +15-105 HP, +25% Fort (always - Makes DEF 25% better, not worth it!)
Hunters Gear: +15-105 HP, +15-30% Mag Resist
As you might surmise, Leather Tunic is overshadowed by everything else. Again, for Haalyn and Nirya, Cloth Robe is a requirement (with both this and the wand fully upgraded, that's +35 to Haalyn's buffs or +35 to Nirya's Heals, which is big). For the others, Hunter Gear is the usual pick (esp. Ulhen), though Yoglyn can have Tribal Armour if you want.
Social Mode
Added in 1.0, Social Mode can be accessed in Town with the [View Town] button above the usual facilities.

People you can get to know are shown on the bar at the bottom, though if you like, you can click around the town to hop around. Most NPC's will act like standard RPG NPC's and give you a throwaway line. Those who are on the bottom bar also glow in the map, if you prefer the standard means of finding them.
The idea here is to build rapport with an NPC, after which they can join you or provide perks to the party in general.
  • Each time you interact (even if you exit straight away), you use 1 whole day (!!) so don't go doing so when you're on strict time limits. Your food stocks will not reduce, however.
  • Chat can be used to gain +1 friendship with NPCs (their mood may reduce it, however). Each time you do, will also give you some info on the character, such as gifts they like, and most importantly, what their card is. I would make sure you review the benefits of their card to make sure it's worth pursuing, because gaining rapport is usually a bit of a grind. Chat does not give rapport with any Heroines, however.
  • Performing tasks for them can help you level up rapport quicker (usually +5-15), though be careful if they ask to be taken somewhere and you don't know where that is, as there is a strict time limit. "Homework" tasks are often impossible tries at one of the minigames, but you won't lose Rapport if you fail, so might as well try.
  • Firing a character gives them -20 Rapport, so don't expect a fired character to come back soon if they were at 0.
  • Once you've seen a person once, they will show up in the Social button on the right in any town, which acts as a summary list. It can be very crowded after a while.

  • At 15 Rapport, you can pay money to hire NPC's for 30 days. Generally a good idea if you intend to get them to Chum level, where they can permanently join. This means they're always on hand this way, and still offering their stats and perks.
  • NPC Perks can give you items every month, or offer a special store for you to access. Or, of course, some are similar to Tavern recruits (though can actually be Male more often lol).
  • Some just give you bonuses to your Support stats (i.e. +2 Alchemy). Once you've chatted once, these will be summarised for you on their card. This can be useful as you generally want to focus combat stats on your main character. Keep in mind, at most, you can have 3 NPC's buffing one stat.
  • Keep in mind, if they have the Civilian class, do not include them in your deck, they are very squishy! All non-combat NPC effects continue to work on missions even if they are sat at Camp (even bonus stats!) so let them chill.
  • If they're due to leave soon, pay attention and don't forget to re-hire them if you're enjoying the perks.


    ^^ This guy was hired by my Warrior and then befriended, he's really good, offering free cloth, +2 First Aid permanently, and even a Magic Armour shop. Most NPC's have less perks than this, but if you see one this good, consider snapping them up.


  • Generally, getting an NPC to the Friend (30) level is by far the most difficult; you'll generally have to find them the highest value gift that they want, and give it a couple of times (equipments generally). After that, you can do [Friend] actions to get free materials and other benefits and also get rapport generally faster.
  • Everyone loves Cookies & Chocolate (lol). You can find them for sale in high level farms sometimes, or make them yourself with high Cooking Skill.
  • Most R/SSR combat girls usually gain a specific "City Quirk" once they're at friend level (sometimes immediately on hire, or at 1-10 Rapport as well). I'm not certain if this set in stone for specific girls, but I've seen Elanil give random trade goods to me when I go to market (including once a Slave Shackle, saying it would look good on me, lol). I've also seen one girl constantly take me to parties whenever I click the social tab (lol). See Girl Quirks section below.

  • Friend actions include Hunting [Activity], Banquet which costs Wine, and Duel.
  • With Banquet, if the character has friends of their own (they gain them randomly whilst you're in town sometimes) then Banquet will invite all those people and you'll get +1 Rapport with all of them.
  • Hunting just gives flat +1-5 rapport, depending on performance. You don't get any meat or drops this way, just Rapport.
  • Duel is similar~ but keep in mind the character in question will use their own personal abilities AND random Boss abilities in a Duel (why they can't use this normally, who knows!?) so they'll actually be difficult fights (and you can't use your mercs).
  • As rapport with combat girls rises further, you'll also get further random events with them. If you're interested in making them a waifu, there is a specific event where you assure them they're not ugly and you're interested in them (pick "You are suitable for marriage!").
  • At 50 Rapport, you can hire an NPC for free via [Seek Help]. It burns 20 Rapport though, and still only lasts 30 days, so it's an awful deal, considering how hard it is to get Rapport vs. paying a bit of cash, and 60's not far. Don't do this.

  • At 60 Rapport (Chum level) an NPC that you're currently paying can be asked to join forever on retainer. They draw a small salary in this case (depending on their perks). Obviously, this is the main goal if you want NPC perks.
  • At 70 Rapport, if it's a heroine, they can teach you one of their class skills, replacing one of your own. This can be incredibly strong, since there's usually at least 1 mediocre class perk in every class that could be better replaced (as seen in class section). This costs 40 Rapport (bringing them back to Friend level) but this is worth it. Saving before attempting this is a good idea since the perks to switch are randomised and you may waste a few days otherwise.

  • At 80 Rapport with a Heroine, you can use [[Wedding Ring]] to marry them (they must be 18 years old - notably Yoglyn, Virfy, and Nirya are not options). You can get this from drops, marketplaces and events, but the drop rate is quite low. Female MC's can marry other girls and vice versa. Make sure their mood is good or you might be rejected.
  • After you've been with your wife for a while, she will get pregnant. You might want to keep her in Camp, as she'll temporarily lose her combat abilities when heavily pregnant (strange that). I haven't checked a Female MC & Male NPC, but I assume this applies to your MC in that situation.
  • After your child is born, they take 4 in-game years to grow up and then suddenly become a random combat NPC for you. Talk about hyper-capable child prodigies! Sadly, your child will use a random portrait and probably won't look anything like it's parents. :(
  • There is no limit to the wives/husbands you can have (in fact there's an achievement for having 30 on one character, which might take you a few hundred hours).

  • A bit dodgy, but you can also beat NPC's/girls up and enslave them with a [[Slave Shackle]] (item). Obviously this sets rapport to the minimum (and you lose rep in the town they're from) but as usual they can used in combat like a Slave Girl if they have combat perks, or give you their usual perks, if an NPC. If done on a R/SSR girl you already hired normally from a tavern, it will also set their salary to Slave girl level, if you really want to pinch pennies that hard. It will also reduce their level to 1.
Girl Personality Quirks
Quirks for girls. It seems to vary at what point these activate. They're guaranteed to be active when the girl in question is at 30 Rapport (see Social Mode), but many come into play as soon as she's hired.

There is no way to see a quirk in advance, so you're playing a guessing game for R girls, though SSR girls may have fixed ones. I haven't 100% confirmed this, nor exactly what SSR girl has what personality since that would require a tedious amount of re-starts, so those with ?? are guesses, and those without are only based on 1-2 data points. If you find an SSR displaying a quirk, let me know.
  • Voracious: When you go into Inventory, there's a 1/3 chance she swipes the priciest food item and eats it. She gets +3 Rapport. If you have no food, she loses -3 Rapport. Keep a wad of cheap food items (Apples, Wheat) and don't leave expensive cookies lying around. (Myra)
  • Tsundere: Dislikes you using items on her when below 50 Rapport <Tsun>, a chance of giving -3 Rapport. Goes <dere> over 50 Rapport, and instead chance to get +3 instead. (Doreen??)
  • Craves Violence: Hates you putting her in Camp or going on missions without her. Gives -1 Rapport when this occurs. Gains extra Rapport from being gifted melee weapons. (Sorith??)
  • Reliable: If she sees you're at less than 1/2 HP when going into inventory on a mission, she may give you a Medium Health Potion, once per mission.
  • Kleptomaniac: More likely to get in trouble in towns for stealing, but if she gets away with it, will give you free stolen potions. Will often give you quests to go see new places.
  • Zealot: Will often give you quests to go see new places for pilgrimage. Likely to attract trouble with the authorities. (Valar)
  • Mad Inventor: If a town has a forge, workshop or other crafty place, may mooch 500 gold off you to do mad experiments, gaining +3 Rapport in the process. Sometimes, she gifts you crafting materials instead. Very likely to give you tedious labour quests. Sometimes gets into trouble in a town and faces arrest if not rescued. (Tiara?? Ulhen??)
  • Socialite: 1/3 chance to be in the tavern in a town, village, or city. When you visit, she'll gain +1 Rapport. If you then also hire new mercs, she'll be happier, gaining +2 more Rapport. (Haalyn??)
  • Unlucky: Hard to tell, but if she's in the party, town events are 15% more likely to be an attack (like Necromancers, Demons, and Bandits raiding the town).
  • Jolly Adventurer: Loves going on quests. If she's in the deck, she'll immediately give an excited speech whenever you start a quest, and finish it, gaining +1 or 2 Rapport each time. Will often give you quests to go see new places. (Raicys)
  • Shopper: There's a chance when you're in the Market that she will appear and get you to carry her shopping, using a day. As a bonus, you do get several food or food ingredient items added to inventory for free.
  • Noble: There's a chance when you're in the Market that she will appear, having bought a random thing on a whim, and decide it was an impulse buy and give it you. Can be pretty much anything non-equipment, from a Gem, to a Bundle of Fabric, to a Slave Shackle. (Elanil)
  • Compulsive Gambler: When you go into inventory, there is a chance for her to mooch 400 or 800 gold off you (for +1 or +3 Rapport respectively). Basically constant, and never any other benefits (apparently she's also an awful gambler lol). (Gricoria)
  • Chunibyo: At markets and other shops, may appear having just found something in a junk pile. A vast majority of the time, this is in fact just junk. Very rarely, though (about 4% chance), it will be a magical item, sometimes a very rare one. Will also accept junk items as gifts for +1 Rapport as she makes up a story about it being a powerful charm. (Anma)
  • Community Worker: Hard to tell, but very likely to give you tedious labour quests cleaning the trash and carrying crates. (Nirya??)
  • Party Animal: When you go to the Social Tab in town, very likely to appear and drag you to a party, wasting a day but gaining +1 rapport with random people who arrive. May randomly spew some useless rumours at you when you open the deck screen.
  • Slothful: Hates taking her out of Camp or going on missions with her. Gives -1 Rapport when this occurs. Likely to get in trouble with the authorities (somehow). Might display as hating sunlight/being a neet (alternate version). Pretty much the worst personality. (Licia??)
  • Antisocial: Complains when you hire new people. No actual Rapport impact, however.
  • Normal: Does nothing.
Technically there a few others that are basically Normal but are tagged with bad events that don't seem to exist in the files. So, in effect, they're just Normal with a chance to get in trouble occasionally.

FAQ / Bonus Tips
Here's a collection of answers to questions I've given on the guide comments and forums since the game launch. It's kind of a bevy of extra tips, but I didn't want to make Hints & Tips III lol.
  • Bosses may have a number counter above their heads: this the amount of cards you can play this turn without causing the boss to start vomiting an extra (very dangerous) attack at you. If you see a boss with [R] is this a warning to not play any more cards. As you can imagine, spamming cards in boss fights is a nice easy way to get everyone killed, so be careful with your [Insight] plays.
  • Hence, cards cannot usually be your only damage source; I've said it before, and I'll say it again: support fire is king. So having more mercs to trigger it and provide it really helps a lot. Your MC is good at it regardless of their class.
  • You can run an all-girls deck, but since they always use 5 command points, you need a high command score to get an equivalent amount of support fire to several mercenaries, especially since girls are one turn wonders. Generally, a good all-girls deck requires your perks to support it (i.e. [Brainwash] and [Harem Wings] perks).
  • For Relics: if they specify a certain class, this does NOT include girls that are of that class, it only refers to Mercs. This is because internally, girls are the 'Heroine' class rather than of the 'Defender' or 'Warrior' class, even though they follow the same archetypes as Mercs do. However, to throw a spanner in that, Cards that specify classes DO include girls. For example, Quick Parry card is mildly better played on Valar than it is on Elanil. Of course, this shouldn't make a difference to your card playing logic in most cases; defences should go to those most in danger of being shanked.
  • [Strong] gives damage variance (It used to be called "Range" in Early Access, even more confusingly, and used to be attached to one of Allosa's abilities rather than +AoE), so your attacks may be X% stronger or weaker. It's honestly not a very good bonus.
  • [Immune] is a % chance to ignore status effects like Poison, Stun, Paralysis.
  • Products: Sell for money. (will be auto-sold with the Sell Goods button at the market, though you should check the market price by selling 1 first and comparing the offer to the actual items price). Markets with [Market Revenue --] or similar should be avoided as they're in a market crash.
  • Basic or Advanced Material: Used for item upgrades at Tier 3-6 for basic, and tier 6+ for Advanced. Make sure you upgrade items you're using frequently. They're very useful as time goes on, so I wouldn't sell them unless you're dead sure you're never going to have a girl that uses them (i.e. Support Material = Support Girls, in my guide)
  • Alchemy Material: Used if you (or a hired NPC from Social Mode) has the Alchemy Skill, to make potions. Sell if you never intend to get the skill, of course. Potions are dropped semi-often, so grabbing the skill access isn't huge priority if you're playing well.
  • [Sell Goods] button only sells Trade items and Junk Items. It will not get rid of your upgrade mats, alchemy ingredients, or equipment, so it's safe to use most of the time. If you intend to use the Sell All button, you will instead need to make use of the Padlock seen on the item details page to protect certain items from sale.
  • If you're having issues with stupid bosses, remember you can save just before going in to a boss node, and then ALT-F4 during the fight if it's really going to hell, reload, and pick up your save. The boss abilities are re-generated.
Video of High-Level Play & MC Portraits
Gameplay video of all the MC's at late-game:
https://youtu.be/dLZOSsvbJX0 0:00- Ranger MC first (Perks: Assault Rifle & Blessing of Eris, focuses on Split Arrow).
12:32- Mage MC second (Perk: Execution Time, fairly standard Mage build).
18:50- Warrior MC third (Perk: Taunting Face, focuses on Flash Kill).

Naturally, this was from early access, but only the names of things have changed since then (and boss stats/effects) so it's still a good overview of what things look like.
Want Portraits for your Main Character? Check out this Steam Forum Thread.
https://steamcommunity.com/sharedfiles/filedetails/?id=3043813814 https://steamcommunity.com/sharedfiles/filedetails/?id=3043813913
I'm also the maker of the Protector MC mod:
https://steamcommunity.com/sharedfiles/filedetails/?id=3073533202 Which adds a fourth main character type based on the Defensive girls. To be updated for the new workshop.
Hope you've found this guide useful!!
Please upvote if you do. Thanks!
142 Comments
eharper256  [author] Sep 10, 2024 @ 12:03am 
Posted a link from the Steam Forum over there for now as a temporary stopgap measure.
eharper256  [author] Sep 9, 2024 @ 11:53pm 
Oh is it released? I wasn't paying attention. I will when I get a moment.
-FF- Grif Sep 9, 2024 @ 2:25am 
Just want to ask of you're going to move this guide to the new version so that people who bought that one first can see this?
Zzyl_tsw Jul 20, 2024 @ 10:24am 
yes, it is this robe with MR (and i indeed do not use it)
eharper256  [author] Jul 20, 2024 @ 5:58am 
Squeezed in a small mention about NPC slaves at Slave market since that's two mentions of it now.

That's the robe with Magic Resist, right? I always kind of forget it exists lol. It's not usually very great unless you're running some weird Mage MC tank build.
Zzyl_tsw Jul 19, 2024 @ 11:52am 
btw, i did get a slave girl with a basic perk such as "mining" or "hunting"
Zzyl_tsw Jul 19, 2024 @ 11:51am 
Hello,
Just for info, i think you "forgot" the "Slient Robe" in the Robe armor section
Dodging Rain Jul 14, 2024 @ 10:15am 
Maybe split the guide into two sections.
eharper256  [author] Jul 6, 2024 @ 8:11am 
Oh they do, huh? I've never actually seen that happen, but I guess it's RNG hate like that one Ranger skill Arrow Rain that has never dropped for me in over 100 hours lol.

Sadly, I'm dead out of words for the town section and social section (steam guides and their weird section-based word limits), but it's nice to keep in mind.
Dodging Rain Jul 6, 2024 @ 5:27am 
Slave Halls are actually worth peeking into and doesn't cost you anything except a about 10 seconds of time. Sometimes they will have a Civilian type slave. You might end up lucky and find a III camp skill Civilian or an industry income % boost while costing a very modest 60 gold to keep in your camp; the awful stats of slaves doesn't really come into play as you generally don't put Civilians in your deck.