Black Reliquary

Black Reliquary

396 ratings
A Definitive Guide to BR (WIP)
By kikilute
I wanted to make a thorough compendium with as much necessary (and unnecessary) information as possible, with everything available at hand. Curios, enemies, trinkets, regions and all that jazz - all in one place.

Welcome to the Black Reliquary Guide!
27
26
14
26
8
4
2
3
5
2
6
6
5
5
4
2
2
2
2
   
Award
Favorite
Favorited
Unfavorite
== WELCOME TO BLACK RELIQUARY (WIP) ==

As of now, the official Black Reliquary Wiki (https://blackreliquary.wiki.gg/wiki/The_Black_Reliquary_Wiki) is in active development. I personally think it's going to provide better information and will do better in terms of updates, so I recommend it as a superior option to the guide you are currently reading. I also don't think I'll be updating the info anymore.

This guide is a tribute to this (inactive at the time of making the page you're viewing right now) guide in Russian by Кеммлер: https://steamcommunity.com/sharedfiles/filedetails/?id=3100365205

Check it out too! It provides good info and is quite thorough - especially if you have a translation engine at your side.
Brief introduction

Black Reliquary is a complete overhaul of basically everything you know about DD: the heroes, the dungeons, the enemies and bosses, the fights, the trinkets... No wonder that sheer amount of changes might make your head spin real hard.

The experience is vastly different from vanilla Darkest Dungeon. While the original game is about an heir of a not-so-good person trying to cope both with the eldritch horrors left from the old man's reign in the manor and the crippling house debts, the mod allows you to experience the same eldritch horrors, but on a cool vacation in a desert valley. Your old friend, The Captain, invited you to his expedition to uncover the secrets of the mysterious Black Reliquary (insert title card here); but first, you must clean the path to it - and that's when your journey to the Valley begins.

The gameplay is fundamentally quite the same: you have a hub place to manage (except now it's not a dirty and ruined hamlet, but a big beautiful airship), a roster of heroes to manage (except now they seem to actually have some kind of a personal belief (more on that later)) and, most importantly, a LOT of dungeon-crawling expeditions (to manage).

I would absolutely recommend enabling all of the addons except for the photosensitivity patch (unless you are not okay with bright flashes). The faster scouting & walking helps to speed up the more boring parts of the game while still being non-intrusive, and the heroes are just a nice support-oriented addition to your base roster.

For easier balance, all of the HP, DMG and SPD values are doubled. This includes heroes and enemies.
The Flameseeker & You


"I welcome you to my ship. Under this scorching sun, in this vast desert, on these hallowed lands, there is much to be done. Settle in quickly. The Reliquary awaits us."

Forget about horrors beyond human comprehension hidden in your ancestor's estate - you have accepted the invitation from the letter of your old pal Captain before that old geezer (who did everything wrong) could even do anyhting, so welcome to the Zeppelin Non-Observer - "The Flameseeker". Your boring and lame hamlet buildings have all been changed to different parts of the ship, which adds a lot to the aesthetic overall.


And now for the ship activities overview!

Captain
"My dear old friend... It is a relief my letter found its way to you so quickly. Settle in. Our task ahead is neither simple nor easy."

Replaces Ancestor's Statue. Is handsome and cool. Not married.
Funeral Site
"There will be losses, and they will be given proper remembrance, but we mustn't linger on our failures."

Replaces Graveyard. There nothing much to say about it, really.
The Ferry
"Our task is perilous. A small band of fighters will not suffice."
Upgrade priority: High (early on)

Just like stagecoach, it's the lifeblood of your expedition. I'd recommend getting Sails&Cabin up to five heroes per week and stopping; other stuff should be upgraded to maximum (you might not want Experienced Recruits, but i'd say it's a good upgrade considering how often things go south)
Forge
"It is not often you see a forge on a ship. Do not take this oddity for granted."
Upgrade priority: High

And this is the ACTUAL life blood of your expedition. I'd recommend maxing out the price upgrade before you get to Veteran dungeons, as upgrades take a lot of money. Rushing the armor & weapon lvl is not really neccessary, take your time and upgrade it when truly needed.
Training Hall
"Our enemies are disciplined, wild, or naturally savage. No amount of preparation is too much."
Upgrade priority: High

Much like the Forge, the Training Hall is also vital to your expedition. Maxing out the cost upgrade should also be your priority; your early game, as you see, pretty much narrows down to collecting as much resources as you can. Same as the Forge - no rush for skill level upgrade here.
Amber Workshop
"Amber is a curious substance. In its raw statem it is unstable. Volatile. We need every pair of hands available to convert it to a usable thing."
Upgrade priority: High

The most confusing of the bunch, but quite simple when you get a hang of it. This is, essentially, a stress relief activity with a lot of additional functions. First two rows are the bread and butter of this activity. Sending heroes to the Refinery (costs Amber) & Exchange (costs Dust) for a week gives Refined Amber Dust and Lost Tek respectively, healing some stress off in the process. Make sure to max out the amount of slots for both of these, as later on you will need TOO MUCH of Lost Tek and Dust, and send your heroes there before each expedition. Heroes of higher level give you more resources.
Amber Den is for getting 100 stress off your heroes instantly for the cost of Amber Dust.
Clinic
"Within one's mind can be a terrible place to be if it not cared for."
Upgrade priority: Medium

This place is the definition of middleground in terms of upgrade priority. Diseases and negative quirks are never welcome, so you'd want to have at least two slots for each activity during mid-game; the thing is, upgrading Clinic costs Jewelry, and you already want to spend it on the Forge and Side Decks. My general advice would be to upgrade the second disease slot ASAP (after you get the first weapon and armor ticks in the Forge, of course) and then to forget about it until you get the decks and forge sorted out.
Gaspard
"The Valley does not condone foolhardiness. They must be in tune with the land."
Upgrade priority: Low

Camping is useful, but you shouldn't worry too much about the cost of the skills; getting like one upgrade is more than enough.
Galley
"Our forces should find refuge here when the burdens of the worls become too much to carry."
Upgrade priority: Low

The mere existence of Amber Workshop makes this place obsolete. Use it only for urgent stress relief; i would definitely not recommend spending Matakh on upgrading this. Unless you wanna try gambling, but we don't advertise it here.
Oddities Dealer (Trinkets)
"Be it a prized gem, or unremarkable stone, these objects are invaluable to our success."
Upgrade priority: Low

If you have some spare amber, you might want to spend it on this place. Unlike vanilla Nomad Wagon, it is actually worth it to invest in here, as rare trinkets tend to show up quite often. If you feel like your wallet is sizeable enough - expand the trinket stock, decrease the price and stalk Rare and Very Rare trinkets (or simply +ACC ones if you have none)
Oddities Dealer (Contraband)

This femme fatale, being Oddities Dealer's sister, also sells trinkets, except these are Contrabands; specials, which drastically change the way you play. This is pretty much your Refined Amber Dust sink. But that sink is worth it.
Relics
One of the first things you notice when starting a new campaign is the revamped Heirlooms. In this mod, they are called Relics. Their main usage is upgrading your buildings and being a secondary resourse for side decks, however, some of them might be used as currency for in-dungeon vendors and even ship activities. There are six Relic types in total, with the last two being special.

Matakh:
It used to be the main currency
of the Kvarotz Empire. Used for
the Ferry and the Galley; Found in
abundance in the Catacombs,
this resource is great for for being
traded into others.
Valor Marks:
For Wildlanders, abundance of it
means power; for you, it means
paying less for hero skills. Used
for the Training Hall and Gaspard,
you will need a TON of this resource.
Thankfully, they are found everywhere
in EI and have a stacking of 16.
Salvaged Jewelry:
Being found across Cactonid remains
in the Treasury, you better hope it's not
alive like the rest of this region. It is used
for the most valuable and essential
upgrades - the Forge and the Clinic,
as well as for the two best Side Decks.
Make sure to have plenty of it.
Amber:
This glittering substance surely is
paid for in nothing but blood.
Continous exposure to it drives
anything alive to madness and
drastically alters their body.
Found mainly in Caverns and used
to upgrade the Amber Workshop &
the Oddities Dealer.
Refined Amber Dust:
A luxurious resource of the reach, used for
incredibly efficient stress healing in the
Amber Den or purchasing Contraband
trinkets/special provisions. You get it by
sending heroes to the Amber Refinery
for a week.
Lost Tek:
A special currency of the collapsed
Ostvengr Empire, it allows for interacting
with advanced machinery (Dredge's
gear) and constructing Side decks.
You get it from sending heroes to trade
with Red Herring Co. in the Amber
Workshop.

These two last resources are not expected to be found in the dungeons like the rest. Instead, you have to produce them in the Amber Workshop yourself, meaning you are basically in charge of how much amber dust and lost tek you are getting. Make sure to send out for refinement and trading as many heroes as possible before starting each expedition - the more of these two resourses you have, the easier mid-/late-game is going to be (and you really want it to be easier, take my word here).

Gathering relics should be one of the main goals for your dungeon expeditions early on, as later it would be both harder and costlier.
New Provision items
A good expedition starts with good preparation. Many changes are made to provisions to ensure they remain helpful in every dungeon across multiple stages of the game.


First of all, every single mission now has at least one Firewood given at the start. Medium missions give 2, long - 3. This is made to compensate added difficulty, providing players with recovery and buffs.
There are two more cells for items in your inventory now, allowing for storing more riches. Food also stacks up to 16.
A lot of provisions stayed the same compared to vanilla DD. Torches, Shovels, Antivenom, Bandages, Laudanum, Skeleton keys and special Aegis Scales are among them. However, there are new ones:

Cleansing Salt functions just like
Medicinal Herbs, curing your heroes
of any debuffs.
John
Alum Censer replaces Holy Water,
giving +33% Bleed, Blight, Debuff/Mark
and Symptom/Disease Resist to a hero.
Disease Kits stabilize symptoms and
diseases,drastically reducing their debuffs.
Using it twice on a hero with a fully developed
disease will turn it back into a symptom.
John
Archaeology Kits provide buffs to
Trap Disarm chance upon use, but you'll
find yourself spending them on curio
interactions much more often.
Honing Oil is great against tankier enemies,
as it allows for some short armor piercing
buff when used on a hero.
Ginseng Powder: Bought with
Refined Amber Dust, this wonderous
extract of herbs allows to cleanse
Blight, Bleed, Horror, Debuff and Mark
all at once.

There are some additional items as well, which are not available to purchase (at least not without a special side deck). Those include Reflex Serum, Amber Residue and Perfumer's Needle extracts (see Trinkets: Contraband for more info on how to obtain them). Extracts and Residue are not kept arter you finish expedition.

Reflex Serum gives its user a short
power spike,activating riposte. Unlocks after
building Adrenaline Manufactorium, allowing
for it to be purchased for 6 Amber Dust.
Amber Residue can rarely be found
in the Caverns & upon using shovels on the Amber Lily Curio. Upon use, it gives:
+10% damage,
+5% crit,
+10% damage taken

(halved for Religious and doubled
for Pagan). But do not use it too much -
amber is dangerous in its raw state.
Catacombs Extract

Debuff enemy team:
-20% PROT
+5% Crits Received
Interior Extract

Debuff enemy team:
-5% CRIT chance
-5 ACC
Caverns Extract

Debuff enemy team:
-15% Skill Effect Chance
(note: decreases chances for
applying effects like bleed, blight,
stun, move etc.)
Treasury Extract

Debuff enemy team:
-30% healing recieved
-30% blight resistance

Provisions are greatly improved upon, which makes preparation for each run invaluable. Advice on which to take for each region can be found in region-dedicated sections.

And finally, the last type of provision items are the very special ones. These include the affiliation-changing ones and the utems you get from very rare curios. All of them are also stored in your provision screen indefinitely if you manage to return home with them in your inventory, meaning they can be used just any time you want.

Soul Leech: gained after battle with Judi's Contraband trinket. Used to change the affiliation of a hero to Faithless.
Broken Halo: a rare drop from a Lost Legion encounter on Vet+. Changes the affiliation to Religious.
Truthbearer: dropped from the Flayed (both the original encounter and the roaming version). Just like the other two, changes the affiliation - this time to Pagan.
Order of Honor: Gained upon interacting with the ultra rare Slayer curio with any boss Trophy, which includes a set trinket, a sand charmer valuable or a Facade of the Formless. Gives EXP upon use (a LOT of it).
Miracle Fruit: gained upon interacting with a curio of same name. Gives a special quirk that heals even more after being critically healed.
New Riches
Preparing for a region is usually quite expensive. Upgrading gear, skills, buying trinkets, paying for stress relief and provisions spends a lot of money; but thankfully, there are plenty of ways to gain more. Speaking of...

Value of some valuables was tweaked:

Citrines are now worth 400 gold each, stacking up to 6.
Yes, a stack of Citrines is more expensive than a stack of gold now. That finally happened.
Emeralds - 1000 gold, stack up to 5.
Jades are worth 550 gold and stack up to 5.
Sapphires cost 1350 gold now and only show up in Veteran+ difficulties.
Onyxes - 750 gold each, stack up to 5.
Rubies are worth 1750 gold and stack up to 5, appearing only in Champion difficulty.

As you can see, a stack of gold is not worth keeping now. I would recommend throwing any regular gold away, instead getting as much of... um... basically anything, as possible. Citrine redemption arc, truly. ...Although building some side decks might change your mid- to late-game attitude towards this valuable.

Another valuable recource is Kvarotz Daric, which can be found mainly in Catacombs and from using Arch Kits on Primeval Vases.


This is basically gold+; there can be up to 20 in one stack (districts upgrade it to 30!), with each being worth 250 gold (one full stack nets 5000 gold (or 7500 with side decks)).


But the most valuable Kvarotz Treasure is Facade of the Formless, which you are guaranteed to get after killing a totally-non-existant Otekh miniboss. For more info on the enemy itself, visit the "Shared Factions: The Kvarotz" section. Each Facade costs 4,500 gold, making engagement with Otekh really worth it.

There are also some very special valuables:

Minor antique: just like the vanilla, having anti interact with curios/generally just exist makes these kind of teasure appear. Each is worth 400 gold and these stack up to 20.
Rare antique: absolutely unchanged from the base game. 1250 gold each, stacks up to 5. Good in early game, then gets outshined by Sapphires.
Bounty: dropped upon killing somebody with Bounty Hunter while he's wearing his Contraband trinket. Difficulty multiplies the amount you get per kill, meaning 1 on Apprentice, 2 on Vet and 3 on Champ, with maximum per battle being 4/8/12 respectively. Stacks up to 99(!!), making BH a better Anti. If you manage to kill consistently, that is.
Encased troglodyte: dropped upon interacting with a super rare amber curio in caverns. Is worth 1500 gold, but is actualy used best as a vendor currency. Poacher trades it for a lot of gems, purveyor - for a lot of amber dust (and possibly a trinket).

The mod adds a new kind of treasure, which gives passive effects to your team (positive or negative; the ones doing exactly the latter are thoroughly described in the Treasury section) while being in your inventory. Their buffs do not stack, meaning having more than one of each will not add to the effect.

Dune Lily:
[Value: 550 gold each, stacks up to five]
+4 ACC
+2% Crit
+10% Debuff/Mark Resist
Glassblown Fang:
[Value: 4,500 gold]
On Melee Hit: Buff Self:
+10% DMG (2 tns)
Vitrified Skull:
[Value: 4,500 gold]
On Mystical Hit: Buff Self:
+8 ACC (2 tns)
Shredding Stars:
[Value: 4,500 gold]
On Ranged Hit: Buff Self:
+5% Crit (2 tns)
Disease changes
Quirks
The Side Decks
Ship Events
== HEROES (WIP) ==
Heroes: Main Changes
Black Reliquary introduces an entirely new system of Hero Affiliations. Depending on the hero, it can be Religious, Pagan or Faithless.

  • Religious heroes are great at restoration and protection. Religious-based teams excel at damage & stress mitigation, allowing for more effective re-active gameplay (meaning, basically, that these teams are better at responding to enemy actions via healing and protection than preventing said actions from happening).
  • Pagan heroes are better as damage dealers. Pagan teams tend to lean more into glass cannon-ish style of gameplay, with many pagan-based skills buffing raw damage and crit chance. These teams are squishier and better at being pro-active (the reverse of re-active, basically). Pagan heroes also tend to suffer from more damage upon triggering Expiate and from some attacks of Lost Legion's units.
  • Faithless heroes are your blank canvas. They have no particular upsides and downsides and, as of now, there are not many skills and trinkets made specifically for Faithless heroes.

Affiliations by no means dictate the way you are supposed to play. They simply add another layer of thinking to your team building, allowing for some characters to synergize better with heroes of particular Affiliation. If you choose to not think too much of it or even ignore it - it's not the end of the world, as your heroes will simply not perform like they could have with that specific affiliation. That's why I absolutely love it: it's not a big deal to not have a perfect Pagan team, or to have some heroes Faithless, but when everything aligns and it clicks... It becomes simply satisfying.

Affiliations are also great for roleplaying if that's what you enjoy doing. Now your favourite hurt/comfort Jester/Leper ship is even edgier when Leper is Religious and Jester is Pagan.

But why can't Leper just reject monotheism and embrace nature & raw damage output?? That is because some heroes have Affiliation Restrictions, disallowing them from having certain beliefs:

Not Religious
Not Pagan
Not Faithless
Only Faithless

As you can see, your poor boy Leper is among the no paganism cult. Too bad!

To never get your hopes too high again and to find out more about what heroes can and can't do, make sure to check the Hero Info button, located above Combat Skills on the hero panel:


Hovering over this button reveals LOTS of useful information, including Movement, Crit Effects, Starting Supplies, Alternative Skill efects (if hero has any) and even more. Thoroughly read it when you get a new hero to get a more in-depth understanding of their role!


As you have noticed, there are Riposte effects in the Hero Info as well; the thing is, every hero can get riposte now - be that via a skill or a trinket - and some characters have additional effects on their riposte, like Shieldbreaker, who also applies Blight.


Another significant addition is the new damage type - Mystical. Basically, it's about magic. Main users of this damage type are Flagellant, Occultist, Vestal and Veiled; so, if you plan on making them your damage dealers, throughly check the damage type on skills you have selected - perhaps that warrior's bracelet is useless for your Mystical abilities, as it buffs only Melee? This third type just adds more stuff to think about while choosing trinkets, nothing too fancy here.

Let's get into specifics now and see what changes (compared to vanilla DD) were made to your precious heroes.
Heroes: Changes from vanilla
Hellion

description in progress
Bounty Hunter

description in progress
Leper

description in progress
Crusader

description in progress
Man-At-Arms

description in progress
Flagellant

description in progress
Shieldbreaker

description in progress
Highwayman

description in progress
Abomination

description in progress
Houndmaster

description in progress
Jester

description in progress
Occultist

description in progress
Vestal

description in progress
Grave Robber

description in progress
Plague Doctor

description in progress
Antiquarian

description in progress
Musketeer

description in progress
Arbalest

description in progress
Heroes: New Faces (Judicator & Dredge)
The Judicator


"It takes unbreakable resolve and devotion to the light to resist the corruption garnered from amber consumption."

The Judicator is a rank-flexible support/damage dealer. Her main gimmick is being very affiliation-focused: utilizing both expiate and amberblight, she can not be faithless and is supposed to be the core of a full matching affiliation party. Obviously, it is not required for her to be awesome, but it'd improve her performance for sure.

Her skill kit, just like herself, is evenly divided: there are 2 expiate-focused skills, 2 amberblight skills, 2 support moves and her main attack that kinda ties everything together. And, as you've already guessed, there are three main types of playstyle the character suggests right off the bat - amber teams, expiate teams and support Judi. Though remember It is generally a great idea to include at least one of her supportive abilities in the skill set, as these tend to be really good.

You can find some general skill recommendations below. But remeber: your skill choice may vary depending on what you want your character to do. These are just suggestions I myself find effective.

Expiate setup

Excels in religious teams, as it synergizes well with +DMG vs Expiated. It's usually better to use the riposte skill on Prep round unless you are running short on expiate (as your vestal is probably already the dedicated expiate bot). Rank flexibility is another good part of this skill choice - usually you'd want to put your Leper in the first rank.
Amberblight setup

The 2 turn omnireach stun is Judi's signature move at this point. This is a VERY good move both to prevent trogs from using swarm and to put down some nasty backliners. It requires setup, however, so bringing the Occultist and maybe even Plague Doctor with her Amber Grenade is essential. Needless to say this set is best used with pagan teams.
Support setup

Surprisingly, it is a good option, especially for the Catacombs. it has some enemy disruption, riposte and guard and debuffs on top. Her guard skill is best used on prep round for Pagan heroes as another +DMG buff.

Her camp abilities are amazing, honestly. At least 3 of them are for sure.

Gives necessary buffs to Pagan and Faithless heroes. Very nice to have it.
Party-wide stressheal? Sign me up.
Always have this move equiped. In some situations, having both +DMG on Judi and no ambush is better than pressing the prevent ambush skill on Occ or Vestal.
I personally find this skill not useful, as i like to hoard my inventory with various riches and simply don't have place for the Residue. +DMG Recieved on this item is also a major downside.


============================================================================

The Dredge


"A seasoned soldier. A mechanised demigod of death. Vestiges of the fallen land."

The Dredge is, basically, a much quirkier Abomination.

Her innate form is a backline support. In this state, she is:
  • Dodgy and fast (and i mean Jester-level of speed)
  • Able to mark and deal additional damage to marked targets
  • Capable of stunning and removing riposte(!)
  • Not really good at dealing damage. Her crit is awesome, tho, so if you plan to make her a damage dealer, focusing on increasing crit chance is a way to go.
However, using the Eldritch Core ability while On Foot will switch her to the Mech mode:
  • It pulls the Dredge forward and buffs PROT, heavilly debuffing SPD. Now the character's much more suitable for the frontline.
  • All of the abilities are now focused on dealing heavy damage to enemies upfront:
  • Using any skill besides the Eldritch Core adds to a special meter called "Heat": It does not do anything before it reaches 100%. Afterwards, the dredge will Overheat, resulting in getting damaged after each attack; also, a stacking +DMG Received debuff is applied, meaning the self-damage you get from fighting when over 100% heat will increase each time.
  • Use Eldritch Core again to quit the mech mode. The ability won't be able to be used again until camp.
  • You can only exit mech mode in battle. If you camp, you don't return to the on foot mode automatically - so plan accordingly.
Heroes: New Faces (Veiled & Hexer)
Heroes: New Faces (Philomath & Champion)
Team Building 101
So, with the basics done, we can now move on to Team Building - arguably, half of your expedition's success comes from your party compsition alone, so it's kind of important to understand how to assemble a team. Let's learn that, then.

But before we start, a major disclaimer:
  • any hero can work under practically any circumstances if you really want them to work. That's why the game has trinkets, which thouroghly expand upon and/or change the way the hero is played - which, obviously, affects your party as a whole.
  • that's why in this section, i will talk about the very baseline kit a hero can offer - without taking trinkets and quirks into consideration. there might be a couple of exceptions to this rule, however, but i will explain it later.
  • and lastly, i am aiming to give advice on a genereally balanced team. No gimmicks, sadly. Let the poor antiquarian squad rest while you are reading that.
And with these things out of the way, let's get right into it!

1. THE ESSENTIALS
While constructing a team, a multitude of factors should be considered:
- the region you're going to
- the goal of your expedition
- the role a character occupies in a team
- the gods a character prays to (affiliation).

Only the last point is a new variable in your team-thinking equations for BR when compared to the thinking process of vanilla DD.

2. THE REGIONS
Obviously, regions have their own threats. In subsequent sections of this guide I get into greater detail on that, but right now we're interested in the general idea of what's more or less viable in a region. Note that DOs and DON'Ts basically only underline the defining factors of a region and obviously heavily generalise them.

>>> Catacombs:
The Levantines prefer to form a very rank-dependant groups, where each enemy serves it's own important purpose. They like to guard and support each other. And the very existence of Terpsichoreans straight up nullifies mark-dependant teams. Prepare for a heavy assault on your frontliners and even rank 3. Taking the enemy backline first is heavily encouraged - the squishier a lev is, the more dangerous it is.
In higher difficulties, stress becomes a very major issue due to enemy mashes containing Sarcofagus. A reliable way to heal stress is very welcome, as much as lowering your stress income in general via camp skills or trinkets.
DOs: Generally balanced teams, Bleed, high PROT, Disruption and guardbreak, Riposte
DON'Ts: Mark teams, squishy frontliners

>>> Exposed Interior:
Night is significantly harder then day because of occasional Kvarotz, but regardless of the time of day high amounts of direct damage and stress should be taken into consideration. Wildlanders themselves are glass cannons, and honestly, it's much better to take the frontliners before the backliners, as left alone these poor fellas can't to anything to harm you in a serious way. Oh, and it's also your certified Blight region - this DoT works extremely well there.
DOs: Stresshealers (especially at night), Blight teams (!!), De-stealth
DON'Ts: Bleed, unprotected squishy heroes

>>> Caverns:
The trogs are, essentially, little timebombs. Fights become significantly harder if you don't manage to wipe out the swarmers before (or very shortly after) they duplicate. Thus, this region demands for strong and fast-paced damage bursts to wipe out the threats preemptively. In my experience, mark is a good way to do that, especially considering mark-applying moves tend to also debuff dodge and/or prot of the target.
Stress exists here first and foremost in the form of a horror DoT, so stressheal in general is not that significant when compared to the ability to remove horror.
DOs: Mark teams, Armor pierce & Debuff, a way to deal with DoT received
DON'Ts: Any damage-over time & generally too slow teams, Stealth

>>> Treasury:
This region is a one big endurance test. A good thing about it is that you decide whether or not you should take it and when it's good to end it. Regardless, this region is by far the most stressful of the bunch (pun absolutely intended). You'll need both good stressheal and horror management. You team should be able to sustain itself for long and tiresome fights, as the very existence of damage reflection in here makes heavy damage-dealers very fragile. It's usually best to destory backline casters, because the longer they are alive, the more stress you'll get. And we don't want this.
DOs: Stressheal (!!), DoT cleanse, good backline reach, Marks
DON'Ts: Blight, Glass cannon-like heroes

== THE REGIONS & THREATS ==
Battle & Dungeon Changes
"The battle in the Valley will be different from what you're accustomed to."

Black Reliquary aims to greatly enhance combat experience, expanding on tactical aspects vanilla combat has and improving upon various mechanics and options available for both your heroes and your enemies.


The most significant change is the addition of Preparation Round: now on the first round of each fight, both teams get a chance to buff themselves and debuff the opponent; If you refuse to use this round for strategy and rush headfirst into battle instead, you will be punished, as on prep round your accuracy on damage moves is halved and crits are non-existent. It is best to spend this first round buffing, not gambling for hits (although hitting is still possible, it's just very unlikely to happen).

Some enemy-targeting moves, however, can still be used; these have a special "Ignore Prep Round ACC penalties" tag in their description. Usually, these also do less damage if used on prep and/or have a unique effect available only on this first round. A good example would be Highwayman's Grape Shot:


Grape shot, just like all multi-hit abilities in BR, also has a Negative CRIT multiplier. Depending on the number of targets, these moves are less likely to CRIT. This works like this:
2 Target AoEs: -40%% CRT
3 Target AoEs: -60%% CRT
4 Target AoEs: -70%% CRT


No more Hound's Harry quadruple crits. On the bright side, monsters are also affected by this, so no triple Apex Predator crits as well.

Speed roll is 12. If you didn't know, in the start of each round, the game secretly rolls a dice for each entity on combat, adding the number on it to the base speed stats. That's why sometimes enemies outspeed you or have an unexpected order of turns.

Suprise mechanic was also reworked: now there's a set 15% chance for both the enemy team and your team to get suprised. As usual, sirprised party always goes last. What is not usual, however, is the Stumble effect applied on enemies, allowing for their party to be shuffled as well. Additionally, Suprised enemies get an accuracy reduction on their prep round skills as well, meaning they are not guaranteed to hit too.
Some quirks, trinkets and camping abilities influence suprise chances.

Enemy skills now show more detailed info on skill positions and effects.


Marks can be resisted, but now last for rounds, not turns, which makes multi-turn enemies more worthy of marking compared to vanilla DD.

============================================================================

The Torchlight now gives completely different bonuses. As you can see, low light is not directly profitable anymore; instead, you have to fight Kvarotz to gain any profit form torchless. Honestly, it's not worth it - the stress is unbearable. The Lost Legion is much more manageable, so if you are new to BR, i'd recommend sticking to high torch.


BR introduces some new actor DoTs: these are unique statuses which trigger upon action, just like Countess' letter from the Crimson Court DLC. All DoT's like Horror and Blight, as well as Damage form Expiate, scale with dungeon difficulty.

Enraged is a Hero-only status, available to Hellion with her Reckless Rage ability and for others via some contraband trinkets. The heal works on killing corpses as well.
Amberblight is a support status utilized mainly by Troglodytes. Is really good for multi-turn enemies.
Leeching's a very nasty debuff that makes friendly skills in Treasury really dangerous, as cactonids love to apply it with their prep round skills.
Expiate is really good for religious teams, because the majority of non-pagan heroes get a damage bonus vs. expiated. If this debuff is applied on your heroes during the lost legion encounter, pagan heroes, just like unholy enemies, suffer more damage form trigger.
Applied by ghouls.
The Perfumer

Secret rooms are no longer occasional treasure hauls. Instead, there is a special vendor in them - The Perfumer, which offers a unique region-specific trinket upon the first interaction and upgrades it upon any other encounter. Keep in mind:
  • Each region has its own trinket. To get it, interact with Pefumer by hand.
  • This interaction only gives a copy of the trinket if you already have one. 4 trinkets is your maximum.
  • You don't really want copies of the same trinket. You want to upgrade it instead.
  • To upgrade it, put the trinket on your inventory first (it won't let you put it into the slot otherwise)
  • You need to upgrade a trinket 3 times to reach the max level.
  • While getting new trinkets is tied to the region you are in, upgrading them doesn't (e.g. Catacombs trinket can be upgraded anywhere, not just in the Catacombs)

For a list of Pefumer Trinkets, check Trinkets: Perfumer and Specials.

Now what do you need to find Perfumer? Obviously, you need LOTS of Scouting.
Scouting, while still being the same mechanically, was greatly nerfed in BR: now it's much harder to consistently scout each room of the dungeon. To do this consistently, you need:
  • Scouting trinkets. At least one Survival Guide or/and Seer Stone should be on one of your heroes. It's generally best to put them on supports/healers, as your damage dealers want +DMG trinkets more. But this rule is by no means set it stone.
  • Larger dungeons. There is 0% chance of getting a secret room in a short dungeon, 50% in medium and 100% in a long dungeon.
  • Scouting camp abilities. Houndmaster and Bounty Hunter excel at scouting. Additionally, some heroes have a +15% Scouting chance skill for 2 respite points.
  • Scouting quirks: *Region* Tactician quirk gives +10% Scouting chance in a specific region. It's best to get it from using Arch kits on Kvarotz Tablets.
  • Critical Scouting. If you didn't know, there are two types of scouting procs: the one that scouts only 1 room and 1 hallway and the one that scouts 2+ rooms. The second one is called Critical Scouting. The higher your scouting chance is, the more scoutings are going to be critical.
Shared curios

Primeval Tablet
  • By Hand:
    40%: Scouting
    30%: Positive Quirk related to region: Adventurer/Tactician/Explorer
    30%: Nothing
  • Shovel:
    +15 Stress
  • Archeology Kit:
    Positive Quirk related to region: Adventurer/Tactician/Explorer
  • Archaeologist’s Compendium:
    2–16 Darics
    Gives Archeologist’s Compendium back

Primeval Vase
  • By Hand:
    50%: 0–2000 gold, 0–2 Gems
    50%: Nothing
  • Shovel:
    0–3000 Gold
    1–4 Gems
  • Archeology Kit:
    0–24 Darics
    0–3000 Gold
    4–10 Matakh
  • Archaeologist’s Compendium:
    2–16 Darics
    Gives Archeologist’s Compendium back

Waxed Penitent
  • By Hand:
    40%: -20 Stress
    20%: Nothing
    40%: +25 Stress
  • Torch:
    -25% Stress Recieved
  • Shovel:
    +25 Stress
  • Alum Censer:
    +25% Damage
  • Cleansing Salt:
    +10% PROT
Confessor’s Toolkit
  • By Hand:
    25%: Removing Negative Quirk
    25%: Nothing
    50%: +40 Stress
  • Skeleton Key:
    Remove Negative Quirk
  • Honing Oil:
    +12% CRT
  • Laudanum:
    +35% Virtue Chance

Dune Lilies
  • By Hand:
    10%: 1 Dune Lily
    50%: -20 Stress
    10%: Nothing
    20%: Fatigue
    10%: Any other Disease
  • Shovel:
    0–10 Amber
    0–8 Amber Residue
    0–20 Refined Amber
  • Honing Oil:
    Blight (8 pts over 3 turns)
  • Bandages:
    1 Dune Lily
  • Amber Extraction Kit:
    4–7 Amber
    Gives Amber Extraction Kit back

Stone Reliquary
  • By Hand:
    3–24 Darics
  • Skeleton Key:
    0–2 Gems
    0–4 Amber
    0–8 Matakh
    0–8 Salvaged Jewelry
    0–16 Valor Marks
    2–16 Darics
  • Archeologist’s Compendium:
    3–24 Darics
    Gives Archeologist’s Compendium back
Kvarotz Altar
  • By Hand:
    40%: Buff: +20% DMG, +5% CRT
    40%: Nothing
    20%: Any disease
  • Shovel:
    -20 Stress
  • Archeology Kit:
    Negative Quirk (Archaeomania)
  • Alum Censer:
    Buff Hero: +20% DMG, +5% CRT
  • Cleansing Salt:
    -20 Stress
    +20% HP
  • Archeologist’s Compendium:
    3–24 Darics
    Gives Archeologist’s Compendium back
>>>THE CATACOMBS<<<


"These ruins were once teeming with the Kvarotz people. Let us see what they have left behind."

Ah, the Catacombs. This introductary region teaches you basic mod mechanics and, because of that, might appear deceptively easy. But be not fooled: behind the individual simplicity of each Levantine unit lies their skill of working as a coordinated team. This faction excels at supporting each other, with the frontliners protecting the weaker units and backliners buffing the strong frontline even further. This faction is made to be an enemy counterpart to some of your playable heroes, after all.

This region is your primary source of Matakh.

What to expect from this dungeon?
  • Physical damage is prevalent here. Be prepared for hard hits, especially from Champions and Snipers.
  • This means having tankier heroes in the first two ranks is extremely helpful.
  • Grunts love to guard. Multi-hit skills as well as guardbreaks/bypasses are welcome.
  • The Levantine are very position-oriented. It is usually quite helpful to disrupt their team ranks (especially when Commander is present in the fight)
  • Stress should not be that much of an issue, unless your team is very crit-prone or you leave Firewalker alive for too long. Still, having some camp skills to ping off stress is welcome.
  • The dungeon itself is not really big, being closer to vanilla ruins in terms of the way it generates.
  • When constructing a team, DO NOT bring mark-dependant heroes like Arbalest or Bounty Hunter. Because of one particular enemy, marks are cleared and are more likely to be resisted after the Prep round.
  • Blight teams are also not that great because of Thaumaturges and their high blight resist.
  • Bleed, however, is quite efficient.

What provisions should I take?

I would recommend to ignore the provision screen's advice for Honing Oil. It is usable only on two curios and is used to buff melee/ranged damage & crit. Unless you are really struggling with damage on your heroes (which i doubt), it's not worth the inventory space. And what is worth taking...

(Note: the values here are displayed dependant on length of the dungeon as follows: short/medium/long. For the sake of not repeating myself, this is qualified before the actual list)

(Additional note: Cleansing Salt, while overlooked in this loot-centered type of guide, is actually quite useful, as it cleanses most of the nasty debuffs (like Musketeer's and Arbalest's -SPD upon using their camping skill or from that nasty trap in the Caverns) and can be used on Kvarotz Altar for -stress and HP buff. If you need a safer run, bring 4/5/6)

Torches: it takes 1 torch per hallway on average. 10-12/16-18/20-22 is a way to go. If you are not afraid of probably not having full torch by the end of your expedition, take the lower value.
Shovels: for the sake of comfortable traversing, 3/4/5 are required.
Food: take 16/28/44. So, 8/16/24 of it is for camping, the rest is for hunger checks (and, if you are not afraid of hunger, healing).
Bring all the Arch Kits. They are your prime source of Matakh and Kvarotz Daric, which are plenty here.
Bandages: bring 5/7/9. They are incredibly useful, as they allow to get a lot of Matakh from Electrum Scraps (bird levantines can bleed you, but it's not that scary usually).
Despite the tutorial, Disease kits are absolutely not essential. I would not recommend bringing any.
Laudanum: you might take 2/3/4 if you are REALLY afraid of the Firewalkers, but this item is also quite useless there.
Same goes for Antivenom. If you are afraid of Thaumaturges, take 3/4/5, otherwise do not bother.
You might want to take 4/5/6 Keys. Quite useful in this dungeon.
Alum Censer is useless.
Cleansing Salt is also useless.
Curios: The Catacombs

Amber-Corrupted Ward
  • By Hand:
    40%: 2–5 Amber
    20%: Nothing
    40%: -20% DMG
  • Shovel:
    -15% DMG
    +10% DMG received
  • Bandage:
    2–5 Amber
  • Amber Extraction Kit:
    4–7 Amber
    Gives Amber Extraction Kit back

Ancient Cannon
  • By Hand:
    40%: Buff: +15% Ranged DMG
    30%: Nothing
    30%: Disease (The Sweats)
  • Torch:
    Summon Levantine
  • Archeology Kit:
    0–3000 Gold
    0–3 Gems
    8–20 Matakh
  • Honing Oil:
    Buff Hero: +20% Ranged DMG, +5% Ranged CRT
  • Archaeologist’s Compendium:
    3–24 Darics
    Gives Archeologist’s Compendium back

Ancient Armory
  • By Hand:
    20%: 1 Trinket
    40%: Positive Quirk
    40%: Disease (The Sweats)
  • Food:
    Any Disease
  • Archeology Kit:
    1 Trinket
  • Honing Oil:
    Buff Hero: +20% Melee DMG, +5% Melee CRT
  • Archeologist’s Compendium:
    3–24 Darics
    Gives Archeologist’s Compendium back

Electrum Scraps
  • By Hand:
    40%: 4–10 Matakh
    20%: Nothing
    40%: Bleed (8 pts over 3 tns)
  • Honing Oil:
    Buff Hero: +20% PROT
  • Archeology Kit:
    8–20 Matakh
  • Bandage:
    8–20 Matakh
  • Archeologist’s Compendium:
    3–24 Darics
    Gives Archeologist’s Compendium back

Foregone Coffin
  • By Hand:
    1%: 2–4 Bandages
    19%: Nothing
    20%: +20 Stress
    40%: Any Disease
    20%: Negative Quirk
  • Shovel:
    0–24 Darics
    0–3000 Gold
    2–4 Bandages
  • Bandage:
    0–16 Darics
    0–2000 Gold
    2–4 Bandages
  • Archeologist’s Compendium:
    4–32 Darics
    Gives Archeologist’s Compendium back

Encrusted Sarcophagus
  • By Hand:
    40%: Loot: 100–1000 Gold, 2–16 Darics
    36%: +20 Stress
    24%: Negative Quirk
  • Shovel:
    100–1000 Gold
    2–16 Darics
  • Archeology Kit:
    300–3000 Gold
    4–32 Darics
    4–10 Matakh
  • Cleansing Salt:
    -10% Virtue Chance
  • Archeologist’s Compendium:
    5–40 Darics
    Gives Archeologist’s Compendium back

Levantine War Table
  • By Hand:
    60%: Scouting
    20%: Buff: -50% Hero Surprised chance, +4 SPD
    20%: Positive Quirk
  • Torch:
    Buff Hero: -50% Hero Surprised chance, +4 SPD
  • Archeology Kit:
    Positive Quirk (Catacombs Scrounger/Tactician)
Levantine Supplies
  • By Hand:
    40%: 0–10 Food, 0–5 Provision items, 300–3000 Gold
    20%: Scouting
    40%: Nothing
  • Torch:
    +5 Stress
  • Skeleton Key:
    0–10 Food
    0–5 Provision items
    300–3000 Gold
Kvartoz Vending Golem
  • Matakh:
    2 Trinkets
  • Archeologist’s Compendium:
    4–32 Darics
    Gives Archeologist’s Compendium back

Levantine Defector
  • Food, Torch, Laudanum:
    0–1000 Gold
    0–2 Gems
  • Skeleton Key, Honing Oil, Alum Censer, Cleansing Salt, Bandage, Antivenom:
    0–2000 Gold
    0–2 Gems
    0–2 Trinkets
  • Shovel:
    0–2500 Gold
    0–2 Gems
    0–2 Trinkets
  • Archeology Kit, Disease Kit, Firewood:
    0–3000 Gold
    0–3 Gems
    0–3 Trinkets
  • Dog Treats:
    -25 Stress
Your Team & Catacombs
Enemies: The Catacombs
Levantine Grunt

Priority: Low (High if guarding Terpsichorean)


=========================================================================================
Levantine Champion

Priority: Low


=========================================================================================
Levantine Rakshasa

Priority: Low


=========================================================================================
Levantine Firewalker

Priority: High


=========================================================================================
Levantine Captain

Priority: Medium


=========================================================================================
Levantine Terpsichorean

Priority: Highest


=========================================================================================
Levantine Thaumaturge

Priority: High


=========================================================================================
Levantine Pursuer

Priority: Medium


=========================================================================================
Levantine Sniper

Priority: Medium


=========================================================================================
Levantine Appraiser

Priority: High


=========================================================================================
Levantine Sacrofagus

Priority: ?

Only appears in Champion difficulty.
=========================================================================================
>>>THE EXPOSED INTERIOR<<<


"Work swiftly. Let the sun prove to be our greatest adversary."
"Let the moonlight be your guide among these crumbling ruins."

The Exposed Interior is the second region you are introduced to. It is drastically different from your average Catacombs experience: unlike organised Levantines, fierce matriarchal Wildlanders are feral and barbaric, relying on raw force and more... primal ways of fighting. Occasional wildlife can also be seen here, roaming in the sands.

This region is your primary source of Valor Marks. Long missions can easily net you ~70/mission.

The Interior features a unique torch system - like CoM or CC from the base game, light level is constantly high or constantly low depending on the mission. Light condition changes the way some enemies behave and provides different buffs for heroes.


What to expect from this dungeon?
  • As mentioned in the light level descriptions, besides wildlife and widlanders, you can encounter Lost Legion in the daytime and Kvarotz in the nighttime. Be incredibly aware of it, especially at night. This fact singlehandedly makes Night missions much more dangerous than Day.
  • It is also more dangerous due to some enemies being stealthed. This makes heroes like Highwayman, Vestal and ESPECIALLY the Arbalest vital for success (unless you want to spend a lot of torches)
  • This is the "You are getting critted in the face here" region. Bombards debuff CRT resistance of your party, Torchlight buffs CRT chance both for you and enemies, mark-focused attacks have high crit chance... Yikes. High-prot characters with self mark and Guard skills might save the life of your squishy rank 3 Occultist.
  • Speaking of. Hyenas are your worst nightmare. The longer they are alive, the closer you get to dying. Backline supports (and Wildlander Raptors) love to mark your heroes, and Grinhounds LOVE your marked heroes. To death.
  • Enemies here also like to bleed you. You are very likely to spend half of your bandages pinging off bleed. Having both mark and bleed as a prevalent threat makes a hero like Hexer shine with their AoE heal.
  • Wildlanders tend to have high Bleed resistance, medium (thanks kvarotz) to no Protection and rather high Dodge (you will hate hyneas). Their Blight resistance is low, so Blight teams work really good in there. You could make a bleed team work, just... don't do that at night. Kvarotz cannot bleed.
  • Stress damage is also a thing to keep track of and, again, it's worse at nighttime. Arbalest helps a lot.
  • The hallways are very long, with a lot of space between each room, so look out for hallway fights and traps.
  • It is usually best to kill the frontline first, as all of the backliners aren't really dangerous on their own. Leave rank 4 and sometimes even 3 until the main threats are dealt with.

What provisions should I take?

(Note: the values here are displayed dependant on length of the dungeon as follows: short/medium/long. For the sake of not repeating myself, this is qualified before the actual list)

(Additional note: Cleansing Salt, while overlooked in this loot-centered type of guide, is actually quite useful, as it cleanses most of the nasty debuffs (like Musketeer's and Arbalest's -SPD upon using their camping skill or from that nasty trap in the Caverns) and can be used on Kvarotz Altar for -stress and HP buff. If you need a safer run, bring 4/5/6)

Torches: In EI, torches provide buffs depending on the time of day. Honestly, i do not think torches are worth bringing unless your team doesn't perform that well in this region (meaning you have heroes with low base accuracy for day missions and no de-stealth moves for night). If you are not sure, bring 2-3 (day) and 3-5 (night).
Shovels: Bring 4/6/8. Those are quite useful: blockages are common and Skulls are a nice source of extra loot.
Food: Bring all of it. With those hallways you are very prone to hunger checks.
Arch Kits: Bring 2/3/4. Unlike the Catacombs, Arch Kits are absolutely not essential. While you may encounter some occasional vases among the sands, spending your money on arch kits is not necessary.
Disease kits: Bring all of them. All Corpse curios give you much more valuables if you use this item on them (and we always love some valuables). Using it on Cauldrons heals your entire party.
Bandages: Take 6/8/10. You will bleed a lot.
Antivenom: Take 4/6/6 (or none). Only needed for occasional wildlife, Cactonid corpses (if you ran out of Dis Kits) and Cauldrons (for extra food).
Laudanum: Take 2/3/4. Honestly, its only use here is purging negative quirks at the legion heads curio. Might be essential if you have some nasty quirks locked on, otherwise you should not even bother with it.
Keys: Wildlander Pillory curio heals stress upon using a key on it. Take 2/3/3 for this and some occasional Stone Reliquaries.
Alum Censer: I'd not recommend bringing it. Never used it myself in there and I am doing just fine!
Cleansing Salt: I'd recommend bringing 4/5/6 for Night missions if you are not sure whether or not you can outheal the stress. +Virtue chance on the Legion Decapitations curio is fantastic. Not really worth bringing for Daytime missions.
Curios: The Exposed Interior

Cactonid Corpse
  • By Hand:
    30%: 4–10 Salvaged Jewelry
    20%: Nothing
    20%: Blight (6 pts/3 tns)
    30%: Any Disease
  • Torch:
    -10 Stress
  • Shovel:
    Blight (6 pts/3 tns)
  • Antivenom:
    0–4000 Gold
    0–4 Gems
    2–5 Salvaged Jewelry
  • Disease Kit:
    0–5000 Gold
    0–5 Gems
    4–10 Salvaged Jewelry

Defiled Levantine Corpse
  • By Hand:
    30%: 200–2000 Gold
    20%: Nothing
    20%: Horror (5 pts/5 tns)
    30%: Any Disease
  • Torch:
    -10 Stress
  • Shovel:
    -20 Stress
  • Bandage:
    0–4000 Gold
    0–4 Gems
    2–5 Matakh
  • Disease Kit:
    0–5000 Gold
    0–5 Gems
    4–10 Matakh

Defeated Sandwurm
  • By Hand:
    30%: 2–5 Amber
    20%: Nothing
    20%: Bleed (6 pts/3 tns)
    30%: Any Disease
  • Torch:
    -10 Stress
  • Shovel:
    +20 Stress
  • Bandage:
    3–9 Amber
  • Disease Kit:
    0–5000 Gold
    0–5 Gems
    2–5 Amber
  • Amber Extraction Kit:
    4–7 Amber
    Gives Amber Extraction Kit back

Legion Decapitations
  • By Hand:
    25%: Nothing
    25%: Horror (5 pts/5 tns)
    25%: Any disease
    25%: Quirk (Thanatophobia)
  • Torch:
    -10 Stress
  • Shovel:
    -20 Stress
  • Cleansing Salt:
    Buff Hero: +35% Virtue chance (4 Battles)
  • Laudanum:
    Remove Negative Quirk

Wildlander Pillory
  • By Hand:
    80%: -20 Stress
    20%: Summon Wildlanders
  • Shovel:
    Summon Wildlanders
  • Skeleton Key:
    -20 Stress
  • Torch:
    +30 Stress (Party)

Sun-Bleached Skull
  • By Hand:
    50%: Positive Quirk (Exposed Interior Adventurer)
    10%: Nothing
    40%: Negative Quirk (Exposed Interior Phobe)
  • Shovel:
    0–4000 Gold
    0–4 Gems
  • Archeology Kit:
    +50 Stress
  • Alum Censer:
    Positive Quirk (Exposed Interior Adventurer)

Massive Cauldron
  • By Hand:
    1%: Trinket (Half-Cooked Hand)
    59%: +25% HP (Party)
    40%: Any Disease
  • Torch:
    +15 Stress
  • Honing Oil:
    Blight (4 pts/3 tns) (Party)
  • Disease Kit:
    +25% HP (Party)
  • Antivenom:
    4–16 Food
Steelpath War Cache
  • By Hand:
    10%: Positive Quirk (Exposed Interior Tactician)
    25%: +15% DMG
    20%: Nothing
    25%: Bleed (8 pts/3 tns)
    20%: Disease (Fatigue)
  • Archeology Kit:
    Positive Quirk (Exposed Interior Tactician, Explorer, Scrounger)
  • Honing Oil:
    Buff Hero: +20% Armor Piercing, +5% CRT
  • Bandage:
    Buff Hero: +15% DMG
  • Laudanum:
    -20 Stress

Warhawk Tribute
  • By Hand:
    30%: Nothing
    70%: Negative Quirk (Necrophobe, Exposed Interior Meanderer, Phobe)
  • Torch:
    -10 Stress
  • Shovel:
    -20 Stress
  • Alum Censer:
    Negative Quirk (Exposed Interior Meanderer/Phobe)
  • Bandage:
    0–3000 Gold
    0–3 Gems
    3–6 Valor Marks
  • Disease Kit:
    0–3000 Gold
    0–3 Gems
    6–12 Valor Marks

Silent Pantheon
  • By Hand:
    20%: Clear Bleed
    20%: Clear Blight
    20%: Remove Negative Quirk
    20%: Buff Hero: 15% Blight & Symptom/Disease Resistance for 4 battles
    20%: Positive Quirk (Exposed Interior Explorer)
  • Food:
    Heal Party for 20% HP
  • Firewood:
    Camp (+33% Heal Received, +20% Stress Heal Received, No Ambush)
  • Honing Oil:
    Buff Party: +10% DMG, +5% CRT
  • Alum Censer:
    Positive Quirk (Exposed Interior Explorer, Scrounger, Tactician)
  • Cleansing Salt:
    Remove Negative Quirk
  • Bandage:
    Cure Bleed
    Buff Party: +15% Bleed Resist
  • Antivenom:
    Cure Blight
    Buff Party: +15% Blight Resist
  • Laudanum:
    -20–40 Stress

Mountain God’s Blade
  • By Hand:
    Trinket (Runic Blade)

Vendor: Foreign Archeologist
  • Valor Mark:
    0–1000 Gold
    0–1 Gems
    5–15 Lost Tek
    2% Chance for Archeologist’s Compendium Trinket
  • Matakh:
    0–2000 Gold
    0–2 Gems
    8–24 Lost Tek
    2% Chance for Archeologist’s Compendium Trinket
  • Salvaged Jewelry:
    0–2000 Gold
    0–2 Gems
    8–24 Lost Tek
    2% Chance for Archeologist’s Compendium Trinket
  • Amber:
    0–3000 Gold
    0–3 Gems
    11–34 Lost Tek
    2% Chance for Archeologist’s Compendium Trinket

Vendor: Wildlander Thrall
  • Valor Mark:
    0–6 Food
    0–3 Provision Items
    0–3000 Gold
    0–3 Gems
Your Team & Exposed Interior
Enemies: The Exposed Interior
Wildlander Hellion

Priority: Medium


=========================================================================================
Wildlander Grinhound

Priority: Highest


=========================================================================================
Wildlander Reaver

Priority: Medium


=========================================================================================
Wildlander Bombard

Priority: Medium


=========================================================================================
Wildlander Powderclaw

Priority: High

On round one, marks a rank (just like vanilla DD Prophet). If left alive by round 3, fires a cannonball in the marked rank, dealing heavy damage and stunning the target. Then the process repeats.
=========================================================================================
Wildlander Corvid

Priority: High


=========================================================================================
Wildlander Druid

Priority: Medium (during daytime), High (at night)


=========================================================================================
Wildlander Hecatomb

Priority: High


=========================================================================================
Wildlander Harrier

Priority: Low


=========================================================================================
Wildlander Raptor

Priority: High


=========================================================================================
Wildlander Ripperkin

Priority: High

Champion-exclusive.
=========================================================================================
>>>THE CAVERNS<<<


"Filty and perilous as these tunnels may be, there is plunder left to be found. Collect what you are able."

Moving on from forgotten cities and scorching deserts, we reach The Caverns. These dark and cold passageways are home to the Troglodytes: tough environmental conditions and centuries of utilising Amber made human slaves of the fallen Kvarotz Empire evolve (or, more accurately, degrade) into terrible, unintelligent beasts, retaining only a mere fraction of their culture, twisting their humanity into something awfully non-human. Individually, Troglodytes are quite weak; but their strength comes in numbers - and these numbers are vast.

This region is your prime source of Amber. The nature of Amber-hungry flameseeker activities makes this region the lifeblood of your expedition. Getting as much amber as possible should be your #1 priority when delving into the deep.

What to expect from this dungeon?

  • The layout of Caverns is pretty much its signature at this point. It generates as a large set of rooms with one-tile hallways connecting them. Just one tile between them. It allows for this region to have the most amount of fights of all.
  • Another signature mechanic of this region is the new Swarm enemy type: these small enemies summon an ally on the third turn, essentially making them a 2-for-1 enemy pack. This also doubles their HP pool and heals. Try to kill swarmers as quickly as possible.
  • A lot of enemies use amber-dependant abilities here. Getting Amberblight on some of your heroes is a common occurance. And yes, it means Contraband Monkey gaming.
  • Trogs are squishy, but VERY fast (and i mean jester-level of fast here) and incredibly evasive. Their carapaces also tend to protect them from DoT effects, so both blight and bleed teams are not really recommended here. Some troglodytes also have reasonable PROT.
  • All Troglodytes ignore Stealth. Completely. Glass cannon Grave Robber is probably not a good choice.
  • Mark teams, however, shine in this region. Characters like Bounty Hunter and Occultist help a lot to debuff protection and dodge.
  • Diseases are everywhere. A lot of moves trogs use have a chance of infecting your character, so make sure to bring as much Disease Kits as you can.
  • Stress and especially horror are also very common and can get out of hand quickly if left unattended.
  • Position 3 is usually a safe zone, where your squishier heroes usually tend to be. In this region, it is not safe.
  • Scouting and prevention of your party being surprised is incredibly helpful in here with the number of fights you are going to take.
  • Mission goals are a bit more forgiving in Caverns: to finish a quest, only 80% of rooms need to be discovered and 90% of room fights have to be be completed to account for this dungeon having more rooms and thus being longer overall.

What provisions should I take?

(Note: the values here are displayed dependant on length of the dungeon as follows: short/medium/long. For the sake of not repeating myself, this is qualified before the actual list)

(Additional note: Cleansing Salt, while overlooked in this loot-centered type of guide, is actually quite useful, as it cleanses most of the nasty debuffs (like Musketeer's and Arbalest's -SPD upon using their camping skill or from that nasty trap in the Caverns) and can be used on Kvarotz Altar for -stress and HP buff. If you need a safer run, bring 4/5/6)

Torches: 1 torch allows you to explore 2 rooms and 2 hallways; be not deceived by this statistic, however, as there is an obstacle that requires a torch to proceed through. That's why I would recommend bringing 14/20/26 torches.
Shovels: take all. Needed both for obstacles and loot.
Food: you will backtrack a lot, so i'd bring 20/32/40.
Arch Kits: bring 3/4/5. If you have enough scouting and therefore don't need to use them on Broken Dredges, take less or don't bother.
Disease kits: Take all of them. They are your primary source of income; use them on amber farms for lots of loot. Diseases are also common here.
Bandages: Take 5/6/6. Nasty Lurkers will make you bleed.
Antivenom: Take 5/6/6. Hunters can blight you during prep round, backliners spit poison when upfront.
Laudanum: Horror is an issue. If you have no heroes who can heal it and are afraid of stress, take 4/5/6.
Keys: In my experience, Dredge unit loot is not that good, so it's not really worth it. I'd suggest you to take 2/3/3 for this and some occasional Stone Reliquaries.
Alum Censer: I would not recommend taking any if your goal is getting rich. Otherwise take if you have some awful negative quirks locked, there are plenty of remove quirk curios here.
Cleansing Salt: You can grab a couple, but it's not that important. Even less significant with scouting bonuses, as only traps can heavily debuff you.
Curios: The Caverns
Amber-Consumed Ward
  • By Hand:
    40%: 3–6 Amber
    20%: nothing
    40%: -20% DMG
  • Shovel:
    Debuff: -15% DMG, +10% DMG received
  • Bandage:
    3–6 Amber
  • Amber Extraction Kit:
    4–7 Amber
    Gives Amber Extraction Kit back
Squalid Burrow
  • By Hand:
    50%: 3–6 Amber
    50%: Troglodyte fight
  • Torch:
    Summon Troglodytes (Surprised)
  • Shovel:
    2–5 Amber
    1 Gem (Dependent on dungeon difficulty)

Pool of Amber Essence
  • By Hand:
    49%: 1–2 Amber Residue
    1%: 1–2 Amber Residue, Trinket (Amber Encased Specimens)
    25%: Debuff: -15% DMG, -10 Dodge
    25%: Any Disease
  • Cleansing Salt:
    Heal 10% HP (Party)
  • Bandage:
    98%: 1–2 Amber Residue , 2–5 Amber
    2%: Trinket (Amber Encased Specimens)
  • Amber Extraction Kit:
    98%: 4–7 Amber
    2%: Trinket (Amber Encased Specimens)
    Gives Amber Extraction Kit back

Amber-Ridden Cadavers
  • By Hand:
    50%: 3–6 Amber
    12.5%: +25 Stress
    12.5%: Negative Quirk (Amber Hoarder)
    25%: Any Disease
  • Shovel:
    3–6 Amber
    0–2000 Gold
    0–2 Gems
  • Disease Kit:
    6–12 Amber
    0–4000 Gold
    0–4 Gems
  • Bandage:
    3–6 Amber
  • Amber Extraction Kit:
    4–7 Amber
    Gives Amber Extraction Kit back

Crude Altar
  • By Hand:
    15%: nothing
    29%: Cavern Explorer
    28%: Cavern Meanderer
    28%: +30 Stress
    5%: Any Disease
  • Archeology Kit:
    Negative Quirk (Caverns Phobe)
  • Alum Censer:
    Cure Disease
  • Cleansing Salt:
    Remove Negative Quirk
  • Bandage:
    3–6 Amber
  • Laudanum:
    -25% Stress Recieved
  • Amber:
    Buff: +15% DMG, +5% CRT
  • Amber Extraction Kit:
    4–7 Amber
    Gives Amber Extraction Kit back

Oozed Cache
  • By Hand:
    40%: 0–3000 Gold , 0–3 Gems
    20%: nothing
    20%: Blight (6 pts over 3 tns)
    20%: Any Disease
  • Torch:
    Any Disease
  • Disease Kit:
    1–3 Trinkets
    0–2000 Gold
    0–2 Gems
    0–4 Amber
    0–8 Matakh
    0–8 Salvaged Jewelry
    0–16 Valor Marks
    0–4 Food
    0–2 Provision items
  • Antivenom:
    0–2000 Gold
    0–2 Gems
    4–10 Matakh
  • Archeologist’s Compendium:
    3–24 Darics
    Gives Archeologist’s Compendium back
Decorated Wurm Fang
  • By Hand:
    25%: Remove Negative Quirk
    25%: -25% Stress Received
    25%: +25% Stress Received
    25%: +25 Stress
  • Shovel:
    -25 Stress
  • Alum Censer:
    Cure Disease
  • Cleansing Salt:
    Remove Negative Quirk
  • Laudanum:
    -25% Stress Recieved

Half-Eaten Body Bag
  • By Hand:
    30%: Nothing
    30%: 0–3000 Gold, 3–6 Amber, 6–12 Matakh, 6–12 Salvaged Jewelry, 12–24 Valor Marks
    20%: Horror (4 pts over 5 tns)
    20%: Any Disease
  • Torch:
    -10 Stress
  • Shovel:
    -20 Stress
  • Archeology Kit:
    Horror (4 pts over 5 tns)
  • Bandage:
    0–1000 Gold
    0–2 Amber
    0–4 Matakh
    0–4 Salvaged Jewelry
    0–8 Valor Marks
    0–1 Gems
    0–1 Trinket
  • Disease Kit:
    0–3000 Gold
    0–6 Amber
    0–12 Matakh
    0–12 Salvaged Jewelry
    0–24 Valor Marks
    0–1 Gems
    0–1 Trinket

Broken-Down Dredge Unit
  • By Hand:
    10%: Nothing
    15%: 0–3000 Gold, 0–3 Gems
    50%: Scouting
    25%: +25 Stress
  • Torch:
    +10 Stress
  • Shovel:
    5–15 Lost Tek
  • Skeleton Key:
    0–3000 Gold
    0–3 Gems
    0–1 Provision Items
    0–2 Food
  • Archeology Kit:
    +25% Scouting Chance
Primitive Cave Carving
  • By Hand:
    50%: Positive Quirk (Caverns Adventurer)
    25%: -40 Stress
    25%: Negative Quirk (Caverns Phobe)
  • Shovel:
    -30 Stress
  • Archeology Kit:
    Negative Quirk (Caverns Phobe)
  • Alum Censer:
    +20% DMG
  • Laudanum:
    Remove Negative Quirk
Troglodyte Purveyor
  • Citrine:
    0–7 Amber
    0–8 Refined Amber
  • Jade:
    0–8 Amber
    0–9 Refined Amber
  • Onyx:
    0–9 Amber
    0–10 Refined Amber
    0–1 Purveyor Trinket
  • Emerald:
    0–9 Amber
    0–10 Refined Amber
    0–1 Purveyor Trinket
  • Sapphire:
    0–15 Amber
    0–18 Refined Amber
    0–1 Purveyor Trinket
    0–1 Amber Trinket
  • Ruby:
    0–18 Amber
    0–21 Refined Amber
    0–1 Purveyor Trinket
    0–1 Amber Trinket
  • Dune Lily:
    0–8 Amber
    0–9 Refined Amber
    0–2000 Gold
    0–2 Gems
  • Any Sand Charmer Trophy:
    22-60 Refined Amber Dust
    1 Contraband Trinket
Amber Poacher
  • Amber Residue:
    0–1 Trinket
    0–15 Lost Tek
    0–1 Trinket: Tome of the Depths (lower chance)
    0–1000 Gold
    0–1 Gems
  • Dune Lily:
    0–1 Trinket
    0–24 Lost Tek
    0–1 Trinket: Tome of the Depths
    0–1000 Gold
    0–2 Gems
  • Raw Amber:
    0–1 Trinkets
    0–24 Lost Tek
    0–1 Trinket: Tome of the Depths
    0–2000 Gold
    1–3 Gems
  • Reflex Serum:
    0–1 Trinkets
    0–24 Lost Tek
    0–1 Trinket: Tome of the Depths
    0–3000 Gold
    2–5 Gems
  • Refined Amber:
    0–1 Trinkets
    0–34 Lost Tek
    0–1 Trinket: Tome of the Depths (higher chance)
    0–3000 Gold
    3–6 Gems
Your Team & Caverns
Enemies: The Caverns
Troglodyte Hunter

Priority: Low


=========================================================================================
Troglodyte Lurker

Priority: Medium


=========================================================================================
Troglodyte Piker & Troglodyte Clubber

Priority: High (preferable to kill before round 3 starts)


=========================================================================================
Troglodyte Killerbite

Priority: High (preferable to kill before round 3 starts)


=========================================================================================
Troglodyte Saddleback

Priority: High (preferable to kill before round 3 starts)


=========================================================================================
Troglodyte Cultivator

Priority: High (Medium/Low if able to clean corpses)


=========================================================================================
Troglodyte Slinger

Priority: Medium


=========================================================================================
Troglodyte Pterotillus

Priority: Medium


=========================================================================================
Lesser Sandwurm

Priority: Highest


=========================================================================================
Troglodyte Spawn

Priority: Highest

Champion-exclusive. This enemy is a literal definition of a time bomb: if you don't manage to kill it before round 3, it will transform into a Perfect Prodigy. If you do, it will transform into an Aberrant Prodigy instead.
=========================================================================================
Perfect Prodigy

Priority: High

Champion-exclusive.
=========================================================================================
Aberrant Prodigy

Priority: Medium

Champion-exclusive.
=========================================================================================
>>>THE TREASURY<<<


"Greed is a dangerous thing. But we are good friends with danger, are we not?"

The Treasury is special. Used as a storage for all the valuables Kvarotz have had, it became infested with eldritch fern after the Empire fell; The Cactonids, now denizens of this place, quickly adapted to the environment... Perhaps, even too well: thanks to their immaculate mimicry skills, everything in this region is a cactonid. But this sinister mockery of nature does not attack unless disturbed, meaning you can safely traverse through hallways, unless starving carnivorous bugs and reptiles don't count as danger to you. How far can your greed go?

In this region, you are not meeting with its primary denizens until you decide to initiate a fight yourself. All of the fights usually consist of wildlife and, less commonly, other shared factions. Basically, you yourself decide how much value you want to get out of your expedition: if you want, you can simply skip all of the cactonid fights, kill some bugs, do the objective and call it a day, getting your free trinket. But you aren't a chinken, are you? If so, my brave friend, then let me introduce you to my buddy Alum Censer over there. What? You thought this item was completely useless, didn't you?

Interacting with cactonid curios always has at least three possible outcomes:
1. You can interact by hand and engage in a normal fight, getting decent loot afterwards;
2. You can use a specific item to apply a battle-long debuff or buff to the enemy team;
3. You can use an Alum Censer on it to make the summoned cactonid Maligned.

Maligned cactonids heavily debuff your party's healing and stress recovery capabilities as long as this specific enemy is alive. It is, in all honesty, a hard mode of sorts, as at least the amount of stress you'll receive is quite hard to recover from. Upon finishing a fight with a Maligned Cactonid, you are guaranteed to receive some Maligned Vestiges. These are extremely valuable, but they apply a non-stacking debuff on your party (with varied severity depending on the type and cost of the vestige). Effects of some are shown below:

Totem of Wails:
[Value: 1,000 gold]
+10% Chance Party surprised
+33% Chance of being Ambushed
after camp
Profane Tablet:
[Value: 1,375 gold]
- 4 ACC
- 5% Scouting chance
Gemini Sactificer:
[Value: 1,875 gold]
On Attack Hit: Bleed Self:
3 pts/1 tn (70%, +20% per Diff)
Umbral Rosary:
[Value: 2,500 gold]
- 15% Stress Healing Received
- 35% Virtue Chance
Corona of Torment:
[Value: 3,750 gold]
- 10% MAX HP
- 14% DBR
Marbled Sun:
[Value: 5000 gold]
+20% Stress Received

This region is your primary source of Salvaged Jewelry.

What to expect of this region?
  • The region itself is structured in a way that makes first completing the objective and then backtracking, slowly clearing each cactonid curio one by one, the most optimal way of playing. It gives you more control over retreating.
  • Do not use alum cencers right off the bat. Get through 1-2 fights first to see how your team performs, and only then start farming.
  • Camping buffs are extremely valuable, especially those which mitigate received stress.
  • No, really, there are TONS of stress in this region, and having a strong stresshealer or a religious team is crucial.
  • Do not underestimate the wildlife. Buzzers can be very painful, especially the Hives. Additionally, all of your animalistic foes are extremely evasive, so be prepared to buff your accuracy (or to miss)
  • Cactonids and animals tend to be quite blight-resistant. Bleed and mark teams should work fine here.
  • Vestiges are as valuable as they are painful for your party. I would not recommend having any in your inventory if you are planning to take a serious fight.
  • In this dungeon, the Leeching status effect is common. It makes your hero get blighted and gives restoration to enemy team upon using a friendly skill (kinda like reverse Expiation). Take it into account while choosing prep round skills.
  • There are A LOT of cactonid curios in the hallways. Defeating every single one nets you ~50k gold on average.
  • Move resist or position-fluid heroes are a blessing, because Cactonid Verterephiles like to apply a 3 rnd Stumble on your heroes as their prep round skill.
  • It is best not to fight the Decrepit Skeleton curio, but to use Cleansing Salt on it for stress relief.

What provisions should I take?

(Note: this dungeon is always of medium length. This means the provisions you take are less dependant on the dungeon itself and more on your heroes and trinkets. It also means that always getting the same set of provisions should work.

Torches: Bring as much as you usually take for medium Catacombs.
Shovels: Bring all of them.
Food: Bring all of it. Thank me later.
Arch Kits: Do not bring unless you want quirks from tablets.
Disease kits: 3 should be enough.
Bandages: Take 6.
Antivenom: Take all.
Laudanum: Take 6. Horror is common.
Keys: Do not take this item. Just don't get deceived by the stone chests you see in rooms.
Alum Censer: Bring ALL of it. This is THE Alum Censer region because of Maligned Cactonids.
Cleansing Salt: Take 4-6 depending on your stress recovery capabilities.
Curios: The Treasury
Simple Cactus
  • By Hand:
    Summon Cactonids
  • Shovel:
    Blight (6 pts/3 tns)
  • Antivenom:
    Summon Debuffed Cactonids: -20–30% Bleed & Blight Resist
  • Alum Censer:
    Summon Maligned Cactonids
Decrepit Skeleton
  • By Hand:
    Summon Cactonids
  • Shovel:
    Summon Buffed Cactonids: +10–20% DMG Recieved, -5–10 Dodge
  • Cleansing Salt:
    -20 Stress
  • Alum Censer:
    Summon Maligned Cactonids
Dangling Vegetation
  • By Hand:
    Summon Cactonids
  • Torch:
    Summon Debuffed Cactonids: -3–5 ACC, -8–12 Dodge
  • Honing Oil:
    Debuff Hero Party: Bleed (4 pts/3 tns), -20% PROT
  • Alum Censer:
    Summon Maligned Cactonids
Overgrown Corpse
  • By Hand:
    Summon Cactonids
  • Antivenom:
    Summon Debuffed Cactonids: -30–40% Healing Received
  • Alum Censer:
    Summon Maligned Cactonids

Mound of Riches
  • By Hand:
    Summon Cactonids
  • Archeology Kit:
    0–4000 Gold
    1–5 Gems
  • Disease Kit:
    Summon Buffed Cactonids: +30–50% Healing Received
    Get 2 Trinkets after battle
  • Dog Treat:
    Summon Buffed Cactonids: +5–10 ACC, +15–25% DMG
  • Alum Censer:
    Summon Maligned Cactonids

Unnerving Sac
  • By Hand:
    Summon Cactonids
  • Shovel:
    Summon Buffed Cactonids: +10–20% DMG, +4–8% CRT
  • Disease Kit:
    Buff & Stress Heal the Party: +15% Max HP, -10 Stress
  • Alum Censer:
    Summon Maligned Cactonids

Stone Reliquary (Treasury)
  • By Hand:
    Summon Cactonids
  • Shovel:
    Summon Debuffed Cactonids: -4–6 Speed
  • Skeleton Key:
    Summon Cactonids & Bleed (3–7 pts/3 tns) Hero Party
  • Alum Censer:
    Summon Maligned Cactonids

Vendor: Poison Peddler
  • Honing Oil:
    Buff Party: +20% Armor Piercing
  • Disease Kit:
    Cure Disease (Party)
  • Cleansing Salt:
    -17 Stress (Party)
  • Antivenom:
    Cure Blight
    Buff Party: +15% Healing Received, +25% Blight Resistance
  • Laudanum:
    Cure Horror
    Buff Party: -25% Stress Received
  • Ginseng:
    Cure Bleed, Blight, Debuff
    Buff Party: +10% Bleed, Blight, Mark/Debuff Resistance
  • Reflex Serum:
    Buff Party: +4 SPD, +15% DMG if HP<50%
  • Jewelry:
    Buff Party: +25% Max HP

Vendor: Mythical Warrioress
  • Totem of Wails:
    4–5 Citrine
    0–3000 Gold
    0–3 Trinkets
  • Profane Tablet:
    4–5 Jades
    0–3000 Gold
    0–3 Trinkets
  • Gemini Sacrificer:
    4–5 Onyx
    0–3000 Gold
    0–3 Trinkets
  • Umbral Rosary:
    4–5 Emeralds
    0–4000 Gold
    0–4 Trinkets
  • Corona of Torment:
    4–5 Sapphires
    0–4000 Gold
    0–4 Trinkets
  • Marbled Sun:
    4–5 Rubies
    0–5000 Gold
    0–5 Trinkets
Your Team & Treasury
Enemies: The Treasury
Cactonid Hemophyll

Priority: High


=========================================================================================
Cactonid Aspiciac

Priority: Low


=========================================================================================
Savage Duplicant

Priority: Low


=========================================================================================
Cactonid Imitator

Priority: Low


=========================================================================================
Cactonid Necrobiote

Priority: Medium


=========================================================================================
Cactonid Hominid Duplicant

Priority: High


=========================================================================================
Cactonid Verterephile

Priority: High


=========================================================================================
Cactonid Supterpath

Priority: Highest


=========================================================================================
Bristleback Baboon

Priority: ?

Champion-exclusive.
=========================================================================================
== SHARED ENEMY FACTIONS ==
Shared Factions: The Wildlife
Scout Buzzer

Priority: Medium


=========================================================================================
Oblivion Buzzer

Priority: High


=========================================================================================
Buzzer Hive

Priority: Highest


=========================================================================================
Horned Toad

Priority: High


=========================================================================================
Spitter

Priority: Low


Webber

Priority: Medium


Maggot

Priority: Low


Reinforced Snail

Priority: Low


Carrion Eater

Priority: Medium


=========================================================================================
Pliskin

Priority: Medium


Rattler

Priority: High


Death Adder

Priority: Highest


=========================================================================================
Shared Factions: The Ghouls
Ghoul

Priority: Low


=========================================================================================
Ghoul Painweaver

Priority: Medium


=========================================================================================
Ghoul Spellblighter

Priority: High


=========================================================================================
Ghoul Miser

Priority: Highest


=========================================================================================
Shared Factions: The Lost Legion
Cleric Errand

Priority: Low (High if guarding a dangerous enemy)


=========================================================================================
Pilgrim Levy

Priority: Lowest


=========================================================================================
Legion Judicator

Priority: Low


=========================================================================================
Legion Deadbolt

Priority: Medium


=========================================================================================
Legion Friar

Priority: Highest


=========================================================================================
Legion Missionary

Priority: Medium (Highest if anybody on your team is expiated)


=========================================================================================
Legion Fanatic

Priority: High


=========================================================================================
Legion Seneschal

Priority: High


=========================================================================================
Shared Factions: The Kvarotz
Kvarotz Mekhrub

Priority: Medium


=========================================================================================
Nerazz Mekhrub

Priority: Low


=========================================================================================
Kvarotz Tatuth

Priority: High


=========================================================================================
Kvarotz Totakh

Priority: Highest (KILL THIS ONE FIRST)


=========================================================================================
Kvarotz Apihr

Priority: High


=========================================================================================
Kvarotz T'Hanur

Priority: ?


=========================================================================================
Kvarotz Gagahl

Priority: Highest (KILL IT FIRST IF NO TOTAKH, KILL IT SECOND IF YES TOTAKH)


=========================================================================================
Kvarotz Golem

Priority: High (Highest if no Gagahl)


=========================================================================================
Kvarotz Otekh

Priority: High (Kill it first even if you have Gagahl)

To summon it, leave an enemy with the "Stonework?" tag to be the last one on the enemy team and prepare for a tough fight. Levantine Grunts, Wildlander Hellions, Trogloyte Lurkers and Cactonid Hemophylls can all have this tag, so look out for that.
=========================================================================================
== THE TRINKETS ==
Trinkets: Classless, Common rarity
Instead of a review: note that because all of these have no downsides, they are extremely valuable both early on and later, even in LVL5 dungeons. Here are some general recommendations:
  • Do not sleep on resist trinkets. In vanilla, damage race was a key to success, but in BR some nasty debuffs/status effects are unovoidable due to prep round. Add crazy +50% DoT effects applied by enemies per difficulty (Subhuman Bile does two target 6/3 Blight on prep round in Veteran Caverns) and those become your go-to choice for squishy heroes. Bloodied Fetish is REALLY good and Blight Charm saves you in Treasury.
  • Enemies also tend to scale their DODGE stat to insane numbers, especially swarmers in Caverns and wildlife in Treasury. Accuracy is the new absolute meta, so getting Accuracy Stone and Shady eyepatch will pay you back greatly in the future.
  • +Damage Trinkets are very good. Always a solid choice, be it a secific damage-boosting trinket or a Damage Stone. +CRIT is also always welcome.
  • Glimmering Pendant is a solid choice for somebody who can use a really good skill that causes stress damage. Like Antiquarian. It also generally excells in stress mitigation if you prefer to be a loot goblin like me.
  • +Bleed and Blight applied trinkets also scale well with difficulty. Extra DoT is always neat.
  • I cannot express how useful the Survival Guide is. And no, Seer Stone (Uncommon) is not a late-game replacement for it, it's genuinely an alternative.
  • That Which trinkets are literally Troglodyte Jesus' corpse parts.

Trinkets: Classless, Uncommon rarity
Trinkets: Classless, Rare
Trinkets: Classless, Very Rare
Trinkets: Twilight
TWILIGHT DEPARTED

description in progress
TWILIGHT INCENSE

description in progress
TWILIGHT ENAMEL

description in progress
TWILIGHT PULSER

description in progress
TWILIGHT FLAMBEAU

description in progress
TWILIGHT REGALIA

description in progress
TWILIGHT MASQUE

description in progress
TWILIGHT RAZOR

description in progress
TWILIGHT SIGNATURE

description in progress
TWILIGHT PENDANT

description in progress
TWILIGHT TAPESTRY

description in progress
Trinkets: Hero Trinkets
ABOMINATION

description in progress
ANTIQUARIAN

description in progress
ARBALEST

description in progress
BOUNTY HUNTER

description in progress
CRUSADER

description in progress
DREDGE

description in progress
FLAGELLANT

description in progress
GRAVE ROBBER

description in progress
HELLION

description in progress
HEXER

description in progress
HOUNDMASTER

description in progress
HIGHWAYMAN

description in progress
JESTER

description in progress
JUDICATOR

description in progress
LEPER

description in progress
MAN-AT-ARMS

description in progress
MUSKETEER

description in progress
OCCULTIST

description in progress
PLAGUE DOCTOR

description in progress
PHILOMATH

description in progress
SHIELDBREAKER

description in progress
THRALL

description in progress
VEILED

description in progress
VESTAL

description in progress
Trinkets: Memento
ABOMINATION

description in progress
ANTIQUARIAN

description in progress
ARBALEST

description in progress
BOUNTY HUNTER

description in progress
CRUSADER

description in progress
DREDGE

description in progress
FLAGELLANT

description in progress
GRAVE ROBBER

description in progress
HELLION

description in progress
HEXER

description in progress
HOUNDMASTER

description in progress
HIGHWAYMAN

description in progress
JESTER

description in progress
JUDICATOR

description in progress
LEPER

description in progress
MAN-AT-ARMS

description in progress
MUSKETEER

description in progress
OCCULTIST

description in progress
PLAGUE DOCTOR

description in progress
PHILOMATH

description in progress
SHIELDBREAKER

description in progress
THRALL

description in progress
VEILED

description in progress
VESTAL

description in progress
Trinkets: Contraband
ABOMINATION

description in progress
ANTIQUARIAN

description in progress
ARBALEST

description in progress
BOUNTY HUNTER

description in progress
CRUSADER

description in progress
DREDGE

description in progress
FLAGELLANT

description in progress
GRAVE ROBBER

description in progress
HELLION

description in progress
HEXER

description in progress
HOUNDMASTER

description in progress
HIGHWAYMAN

description in progress
JESTER

description in progress
JUDICATOR

description in progress
LEPER

description in progress
MAN-AT-ARMS

description in progress
MUSKETEER

description in progress
OCCULTIST

description in progress
PLAGUE DOCTOR

description in progress
PHILOMATH

description in progress
SHIELDBREAKER

description in progress
THRALL

description in progress
VEILED

description in progress
VESTAL

description in progress
PERFUMER'S NEEDLE

description in progress
PILEBUNKER

description in progress
THIEVING GLOVES

description in progress
AMBER-CONSUMING CAPUCHIN

description in progress
REFLEX MAINLINER

description in progress
GHOULSERUM INJECTION

description in progress
ESSENCE OF MALIGNITY

description in progress
DISSONANT RELIC

description in progress
Trinkets: Perfumer
----------------------------------------PERFUMER TRINKETS----------------------------------------

Catacombs Trinket

=========================================================================================
Exposed Interior Trinket

=========================================================================================
Caverns Trinket

=========================================================================================
Treasury Trinket

=========================================================================================
Trinkets: Yngolian
YNGOLIAN'S PENDANT
YNGOLIAN'S CELL
Descriprion in progress
Description in progress
YNGOLIAN'S TORCH
Really good for EI Night.
Trinkets: Boss Set Trinkets
Janissary

========================================================================================
Enchantress

========================================================================================
Warhawk Matron

========================================================================================
Steelpath Matron

========================================================================================
Gastrosaur

========================================================================================
Great Sandwurm

========================================================================================
Alraune

========================================================================================
Nucleic Core

========================================================================================
Ghoul Mother

========================================================================================
Trinkets: Specials
---------------------------------SPECIAL TRINKETS: FLAMESEEKER--------------------------------

You can get these from either Gambling Hall of Oddities Dealer.

Thief's Remorse
Strap it on a hero like Leper or Crusader and bathe in money.
Antiquated Glory
Good if you want to make somebody streamline to Lvl 3 or even Lvl 4 from Lvl 1.
Champion's Horn
Really good in Vet+, but it might be hard to manage the downsides.
Champion's Belt
Questionable, but might be good for an attacker with Essence of Malignity.
Lucky Coin
Just a decent trinket that offers practically no downsides besides being unreliable. Slap it on somebody with Gambler's Charm for extra gambling addiction (don't, actually).

------------------------------SPECIAL TRINKETS: RELIQUARY'S SPOILS----------------------------

Amber Extraction Kit
Obtained from the Purveyor in the Caverns if you give it a gem of onyx+ tier. A must-have for Caverns farming, especially for long apprentice missions. Must be used from inventory, meaning the hero you gave this trinket to effectively has only one trinket (unless you manage to find an extra one mid-run)
Archaelogist's Compendium
Foreign Archaeologist in EI gives this trinket. Allows not to pay for arch kits when buying supplies for the Catacombs, resulting in a even more profitable run. Must be used from inventory, meaning the hero you gave this trinket to effectively has only one trinket (unless you manage to find an extra one mid-run)
Cursed Golem Scraps
The Automaton's Accursed is definitely a curse. It gives 20% Chance for every Kvarotz fight to have a Golem and makes double Golem enemy mash a real thing.
Duneshaper
It is quite hard to make this trinket work. Perhaps a dance party (with everyone having a rank-fluid skillset) might be the best option for this trinket, but it's hard for me to come up with such a team. Jester seems like the best bearer of this trinket.
Poacher's Garb
You can get this trinket from Amber Poacher.
Amber Compass
You can get this trinket from Trog Purveyor upon giving him an Onyx+ gem.
Amber Incense
You can get this trinket from Trog Purveyor upon giving an Onyx+ gem.
Amber-Encased Specimens
You can get it from Pool of Amber Essence by using Bandages/Amber Extraction Kits on it.
Runic Blade
There is a super rare curio in EI. Interact with it to get this trinket.
Half-Cooked Hand
Interact with the Cauldron in EI by hand and pray you receive this trinket.
Adolescent Froglet
Would you look at that little gentleman! How whimsical he looks! Drops from Bullfrog encounters.
Freshly-Hatched Snakelet
Da snek be slitherin'. This fella is also VERY whimsical. Drops from Death Adder encounters.
Sinner's Wraps
Used to be dropped from Fighting Pit.
Tome of the Depths
You can get this trinket from Amber Poacher.
== THE BOSSES (WIP) ==
Boss missions have also received a change:

1. Instead of fighting the same boss thrice with different stats, you fight a boss only once. Imo, much better from story and gameplay standpoint - boss fights don't get too same-y.
2. There is no Apprentice boss. You get only two boss missions per region: the first is on Veteran difficulty, the second - on Champion. And, following the first point, these two bossfights are different encounters, not versions of the same.
3. Trophy trinkets are a quest reward and not a drop. No inventory clutter!
>>>CATACOMBS<<<
Janissary


description in progress
Enchantress


description in progress
>>>EXPOSED INTERIOR<<<
Warhawk Matron


description in progress
Steelpath Matron


description in progress
>>>CAVERNS<<<
Gastrosaur


description in progress
Giant Sandwurm


description in progress
>>>TREASURY<<<
Cactonid Alraune


description in progress
Nucleic Core


description in progress
>>>SPECIAL BOSSES<<<
Special Bosses: Yngolian
"We cannot permit this cosmic malformation to tread this earth!" (c) Captain

Yngolian is BR's version of Shambler.

This means two things:
1. It's a hard fight. I mean it. The rewards are very worth it, tho.
2. You can decide whether or not you should fight it - it cannot spawn on its own.

The curio to spawn it with can appear everywhere, except Exposed Interior.

To summon the boss, activate it's spawn curio with a torch.

BASICS:


Veteran Stats.
  • The fight begins immediately and shuffles your entire party, while also setting your torchlight to 0.
  • In the beginning of the fight, it will use Cosmic Alignment to summon a Cell. It will use this move again whenever there's spare place on the enemy team. (this also means that it spends the entirety of prep round summoning its minions)
  • After that, if the cells are alive, it will use one of its three attacks: a moderately damaging 2-turn stun (Errant Gravity), a heavy attack (Crater Creator) or a multi-rank cleave & horror (Cry of the Void).
  • The cells do not attack. Instead, a cell will spend its first turn of existence to transform itself. On its next action, it will explode, dealing medium damage, applying Blight (6/3 on Vet) and stress to your whole party.
  • When the boss dies, unlike shambler's tentacles, any cells alive immediately die as well.

After this fight, you will get one of the three Yngolian trinkets (See Trinkets: Yngolian for more info). You can upgrade them by using a trinket instead of a torch on the summoning curio. Just be wary that it will immediately start a fight and, if you retreat, you won't get the trinket back.

SOME THINGS TO NOTE:
  • Yngolian is quite tanky: it has pretty high resistances to DoTs as well as high PROT. Debuffing these stats is your best bet.
  • Why? Because DoTs work fantastic in this fight, especially if applied on a multiattack, like Flagellant's Rain of Sorrows or PD's Plague Grenade. Musketeer is also a great option.
  • Your party is always shuffled in the beginning of the fight. It is genuinely a good strategy to scramble it yourself before activating the boss curio - this way you have a chance of your heroes reshuffling themselves back at their preferrable positions. It's an old tactic used for vanilla shambler and it proved itself to be good.
  • Just like shambler, the fight is about shifting focus from minions to boss. Both of these things are dangerous if you don't work out a solution to this fight in time and leave everything unattended. Ideally, you don't want the cells to go off.
  • Whenever there is an empty place on the battlefield, Yngolian will spend its action to summon a Cell. This works *almost* all of the time. And that's your key to manipulating the fight. He's likely to summon a cell if there's an empty space on the battlefield, however, it won't happen all of the time.
  • Antivenom and laudanum are your best friends for this fight. The sheer amount of Horror Yngo can provide your party with is indescribable. Also remember that on crits the duration of Horror goes from 3tns to 5tns.
Special Bosses: Sand Charmer


Сhampion difficulty stats.
Special bosses: Ghoul Mother

"Eradicate this den of horrors, such that our posessions may be reclaimed".


Champion Stats.

description in progress
Special Bosses: the Flayed


description in progress
== EXTRAS ==


58 Comments
狗熊的树洞 May 28 @ 8:01am 
When I replayed the Black Relicquary today, I encountered a 936 error and it has not been able to fix or resolve it, so I removed it from the library and couldn't put it back in the library, I was very sad and didn't know how to recover it:steamsad:
Bearinthewoods Sep 24, 2024 @ 10:18am 
for the half cooked hand you dont have to interact by hand you can also get it if you use antivenon
Sea'Gummilian Aug 24, 2024 @ 7:58pm 
The Bristleback Baboon's priority changes, because when i've fought it, It becomes medium priority if there are at least one Cactonid around, but will become a higher priority if No Cactonids are there.
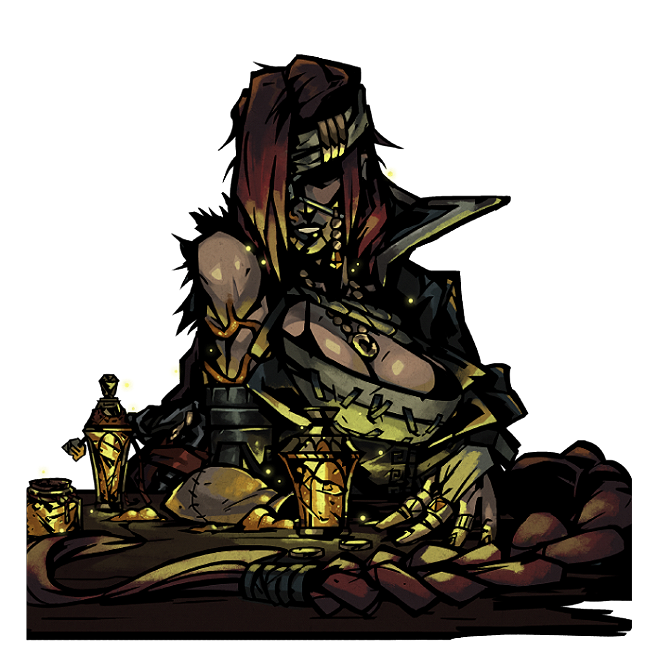
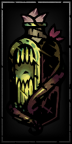
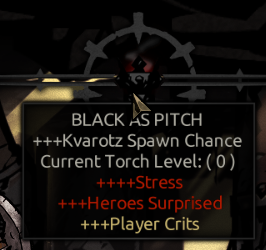
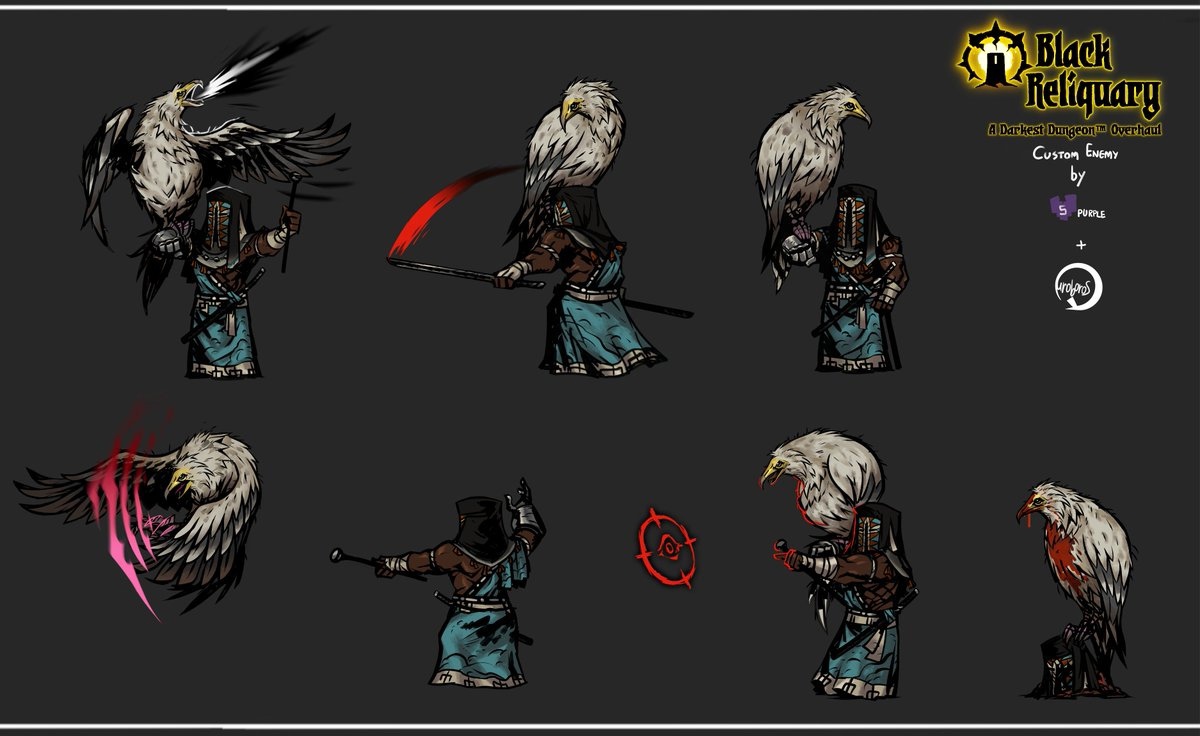
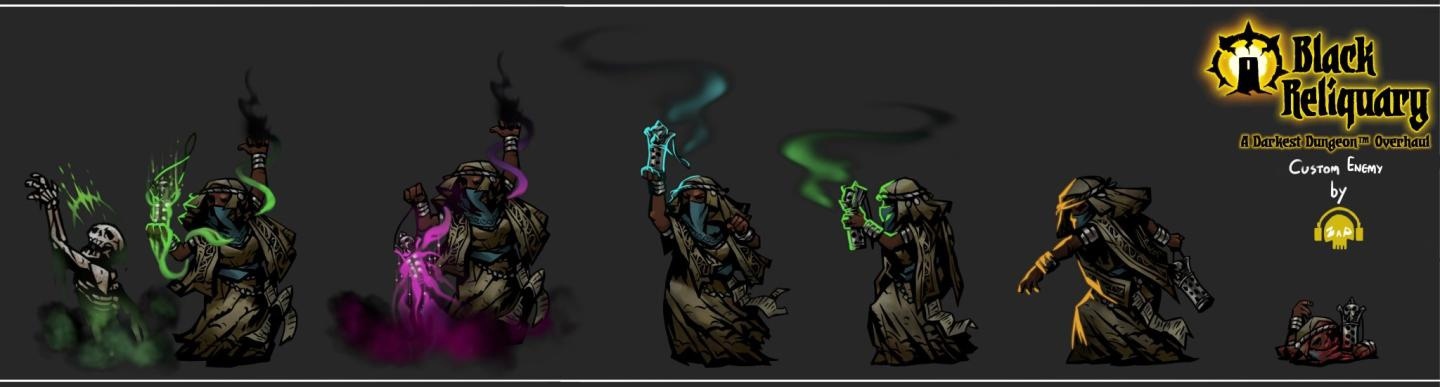
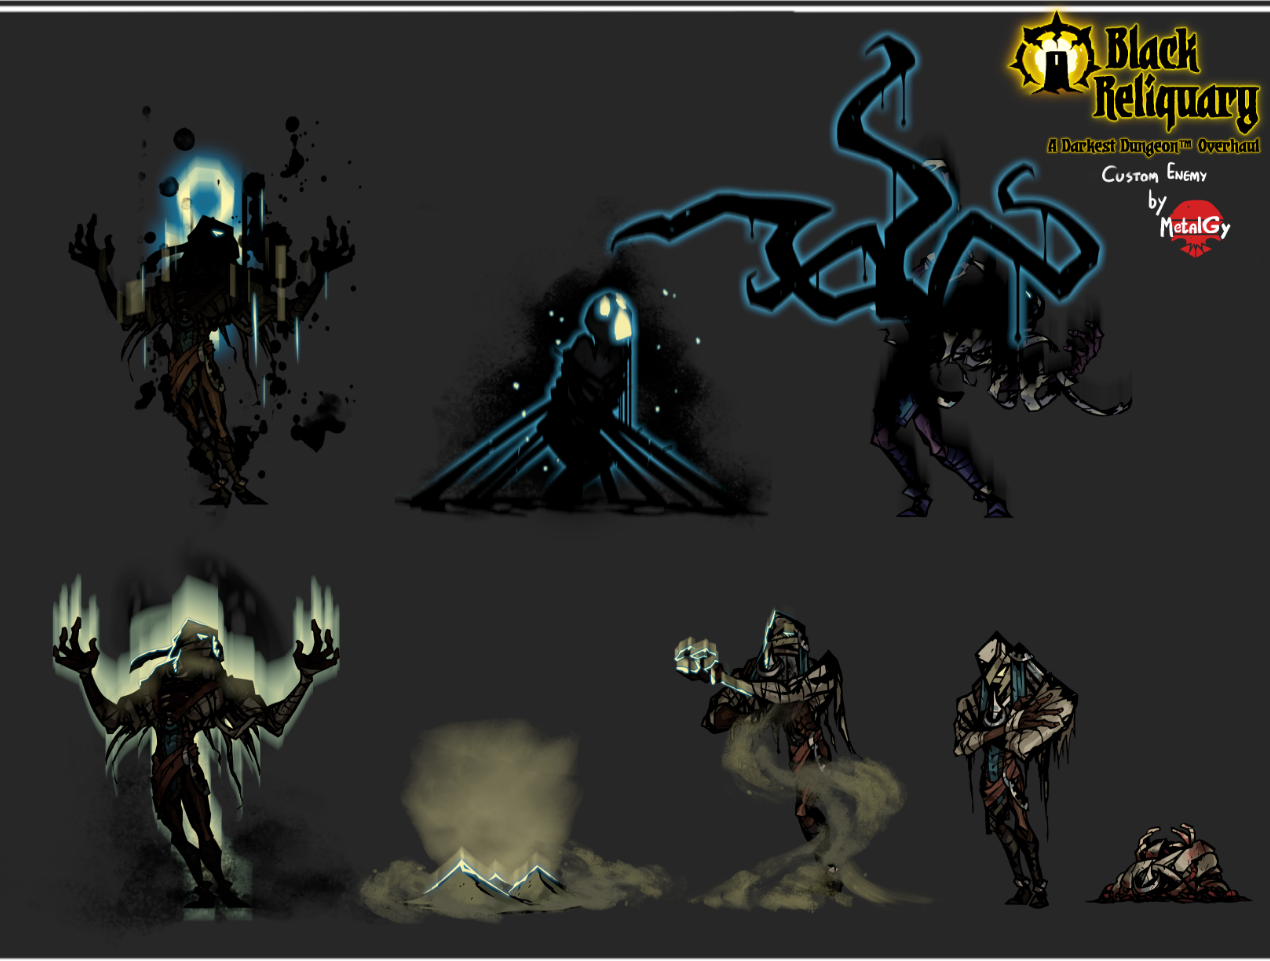
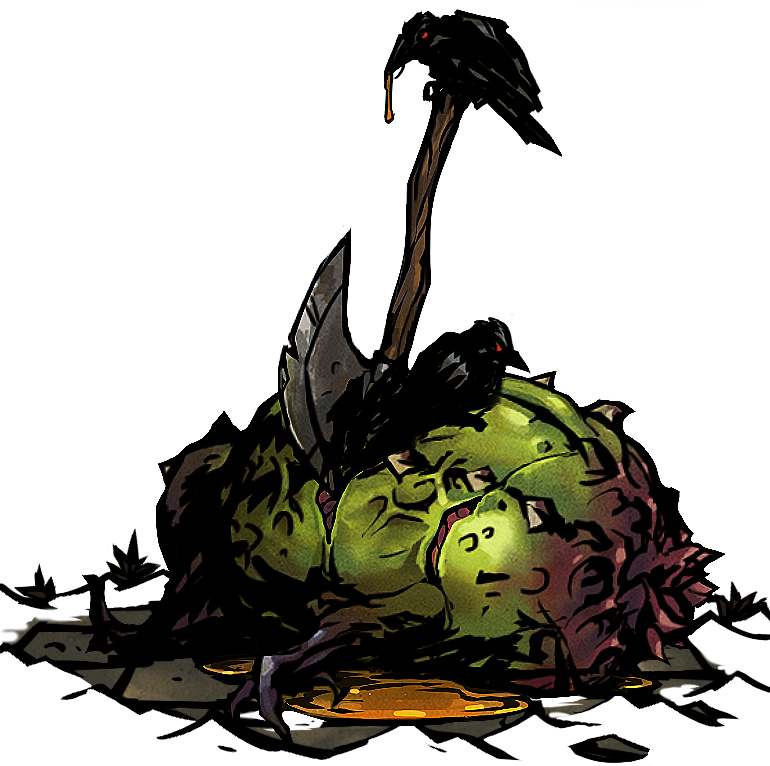
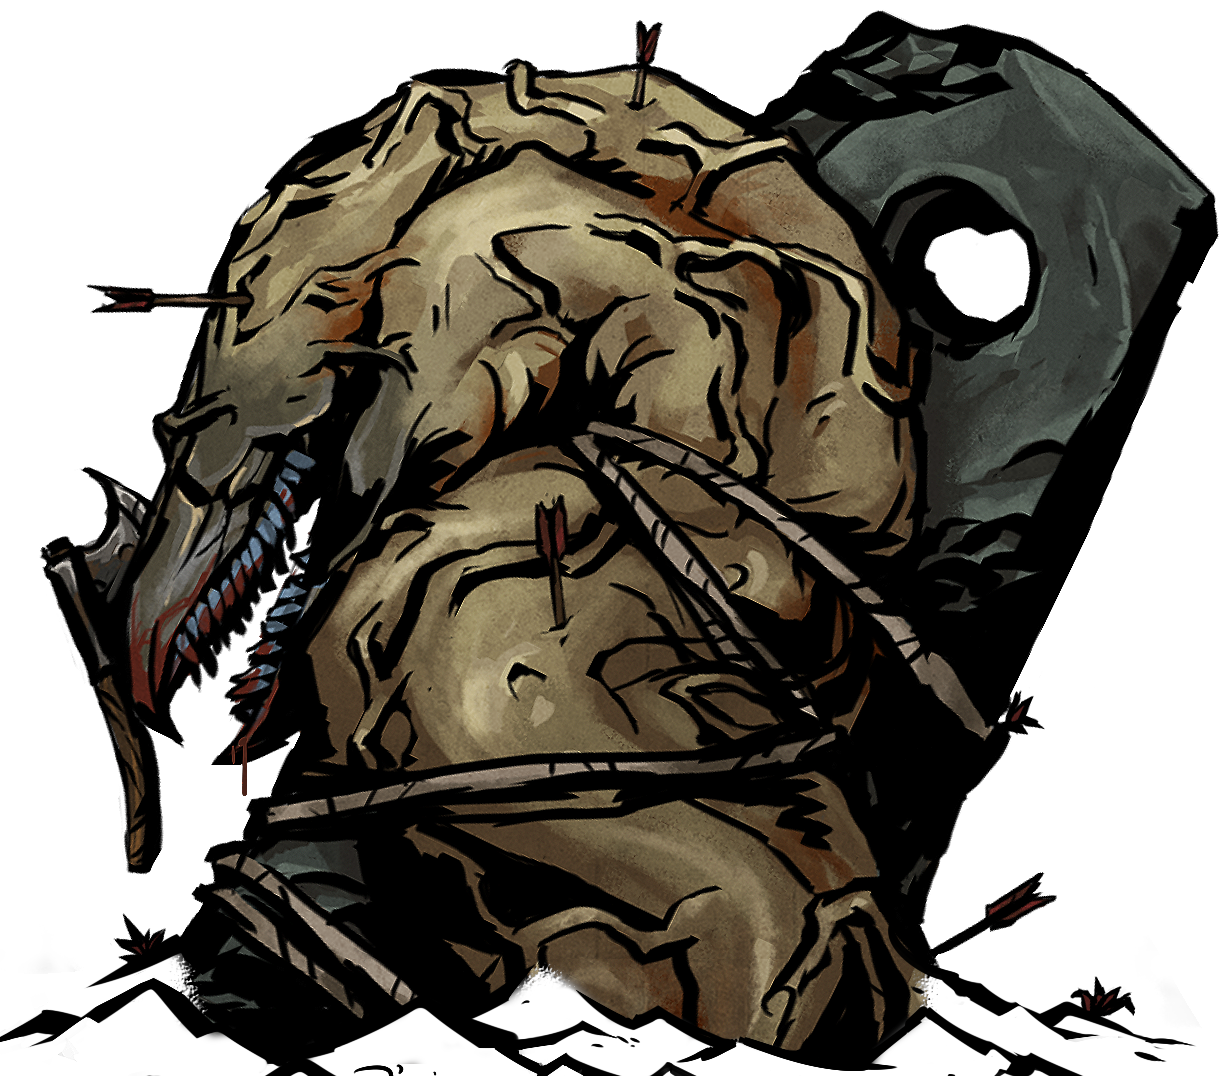
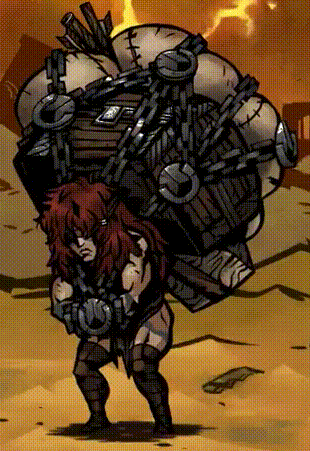
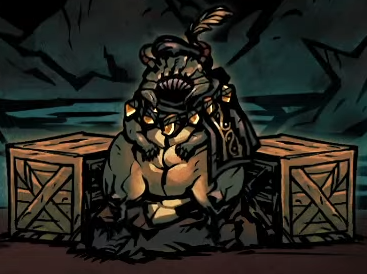
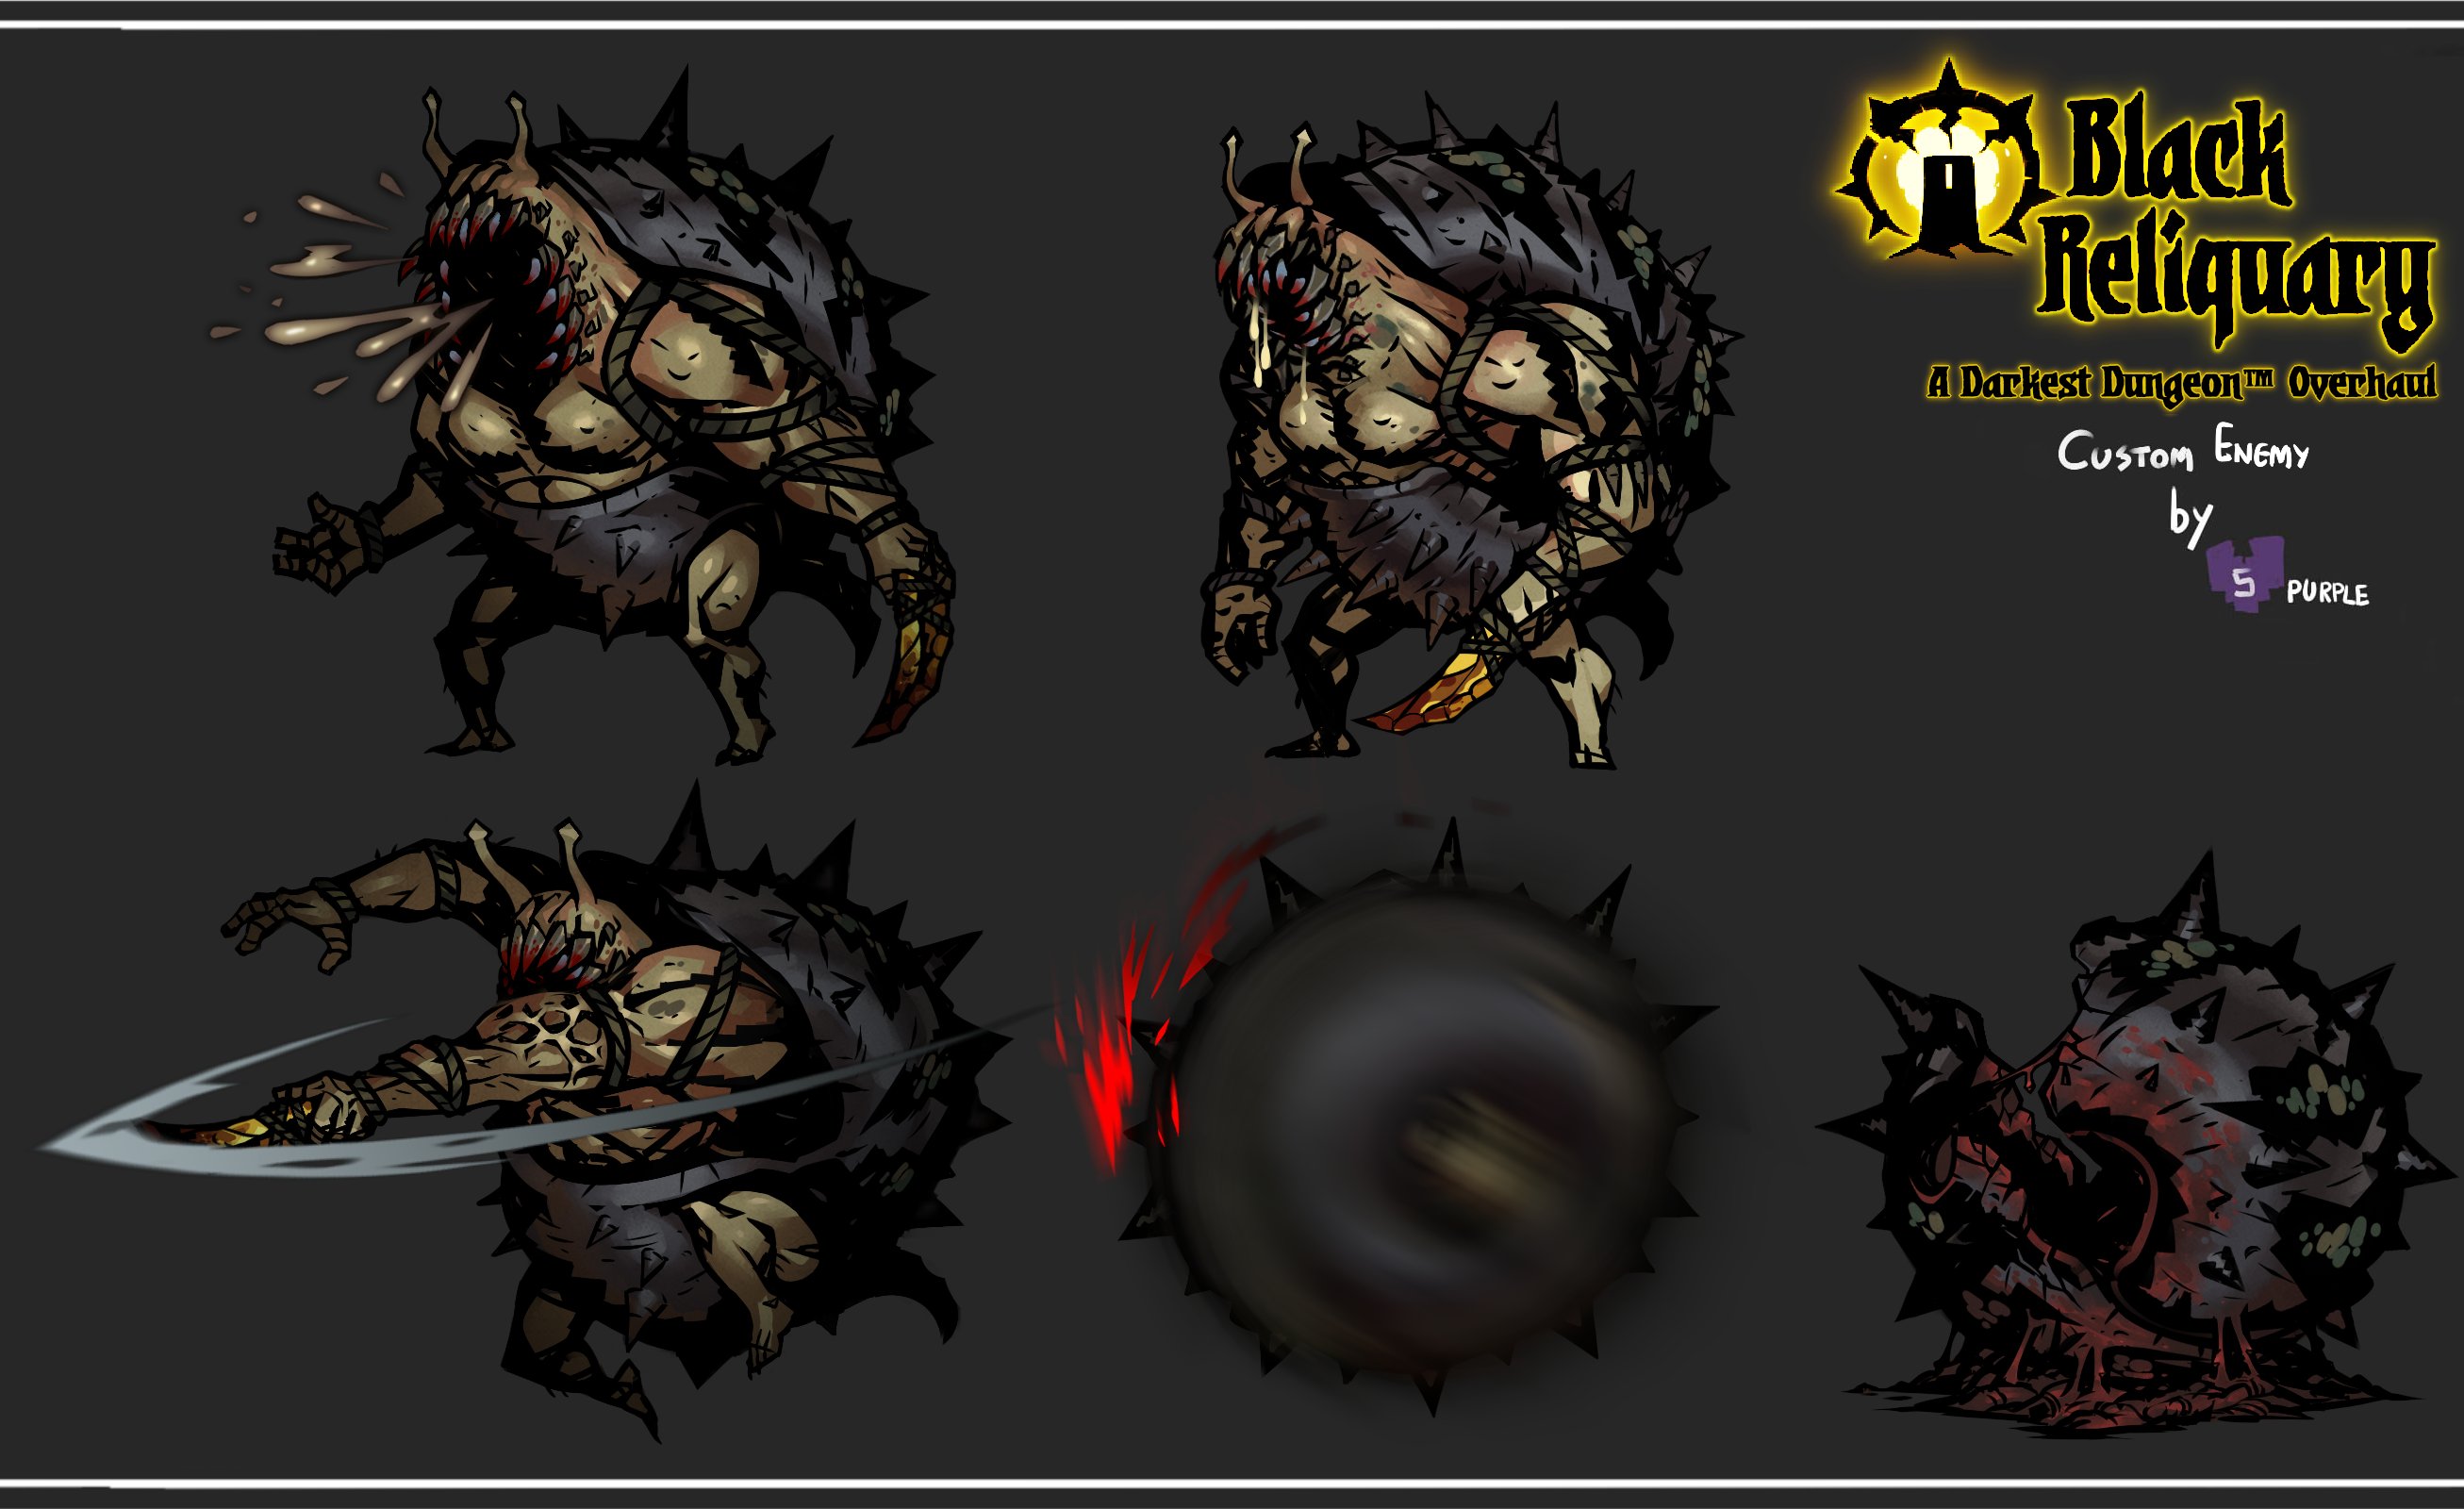
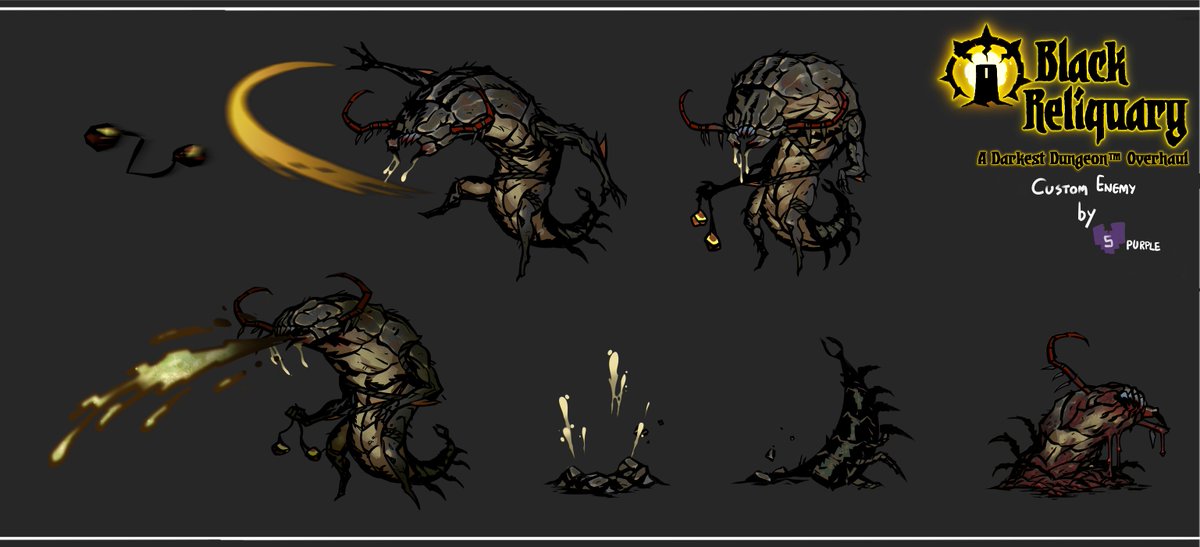
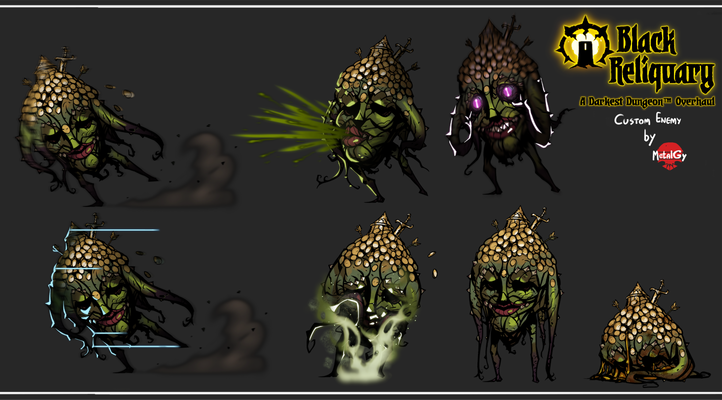
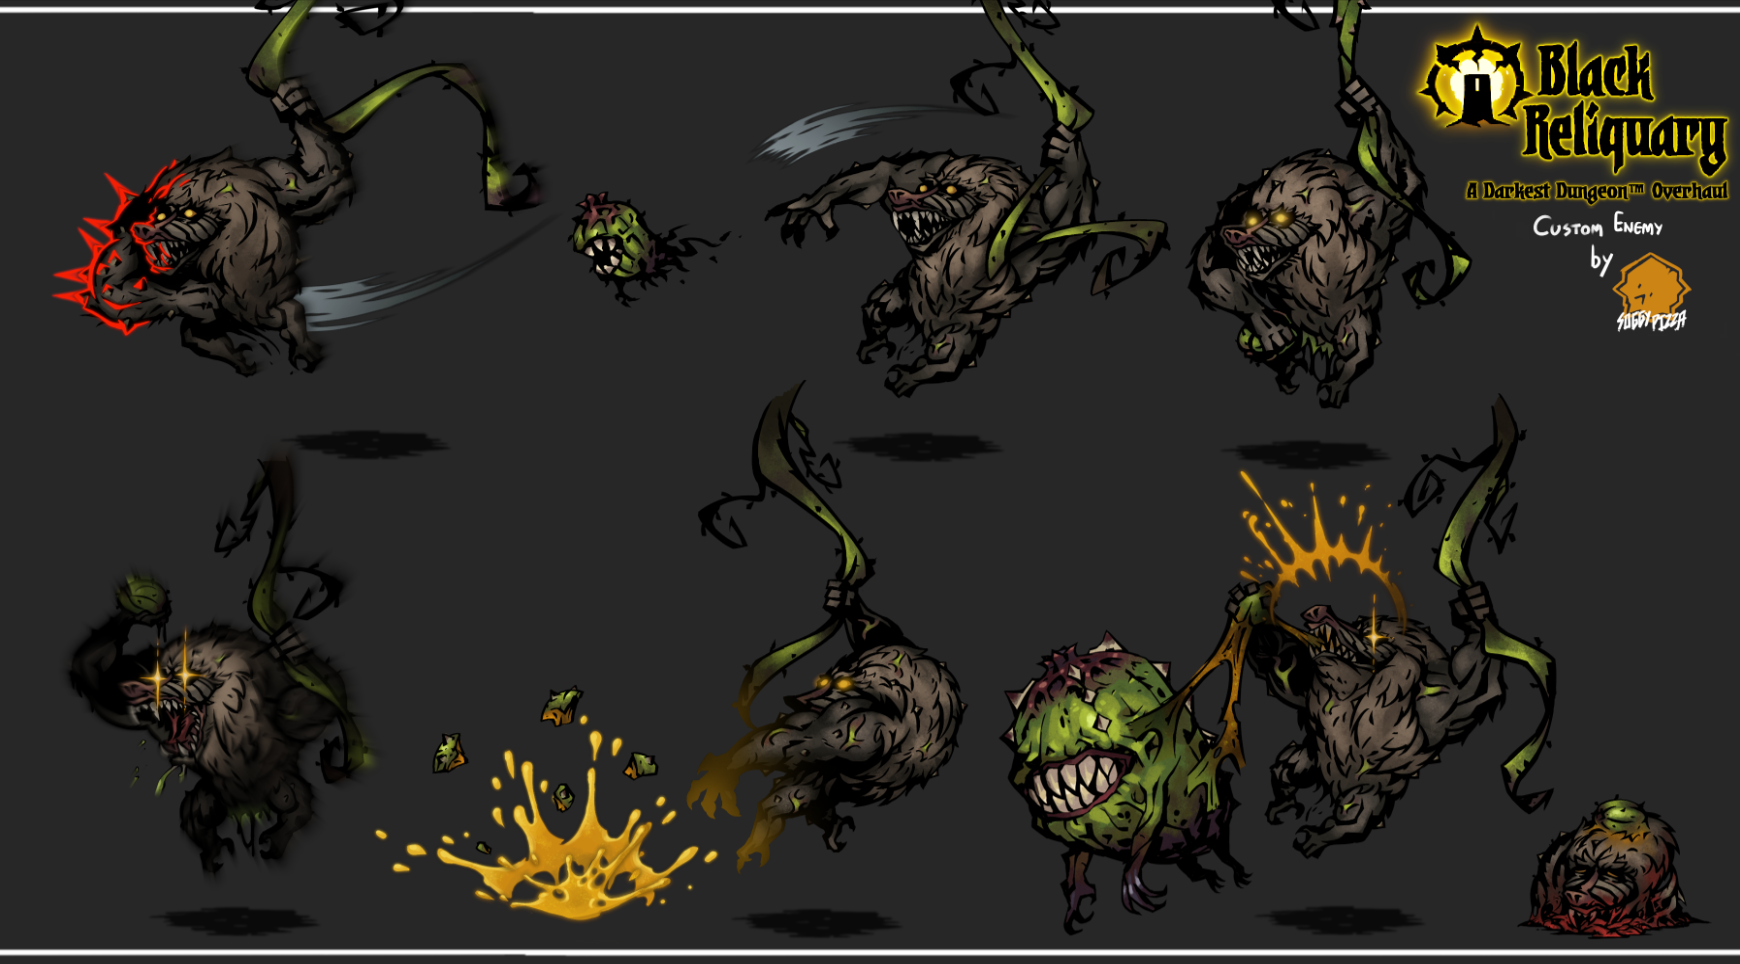
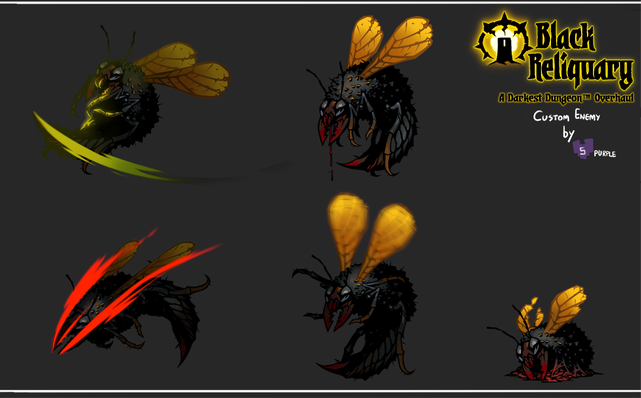
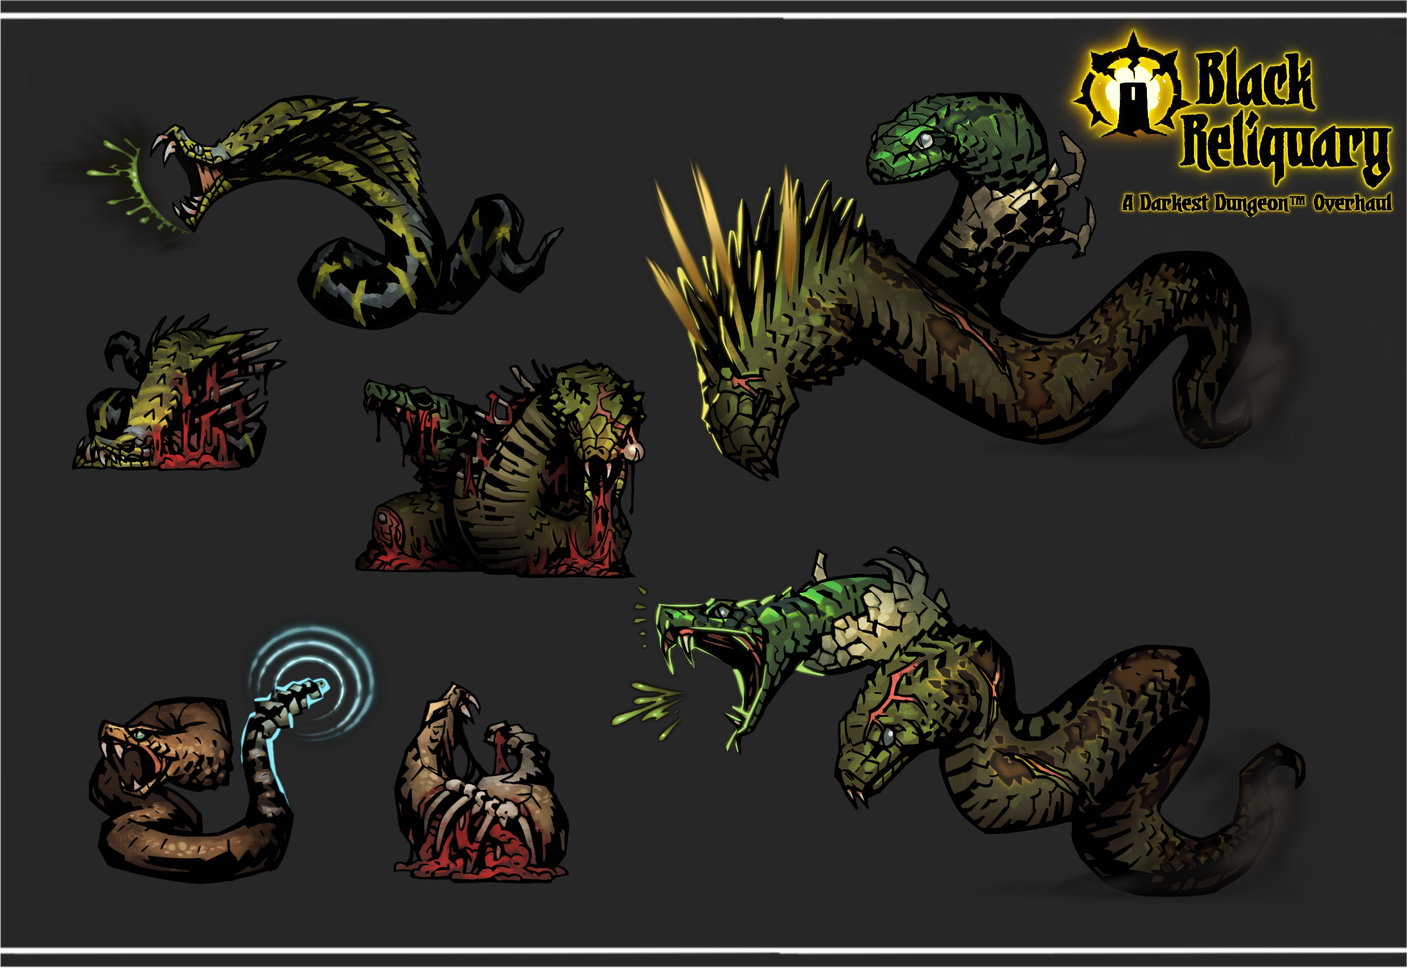
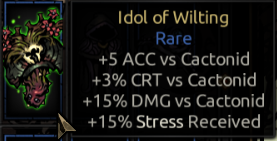
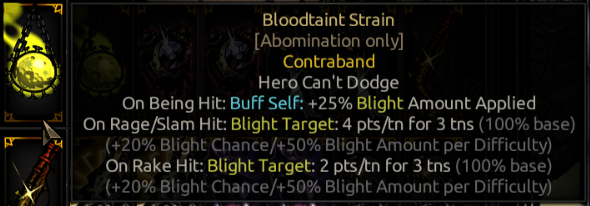
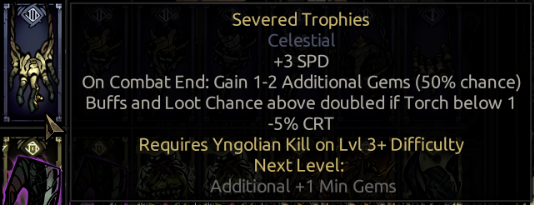
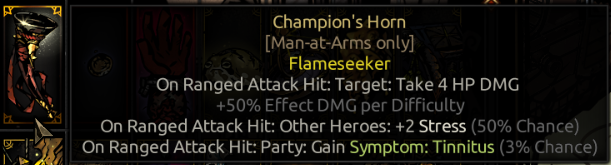
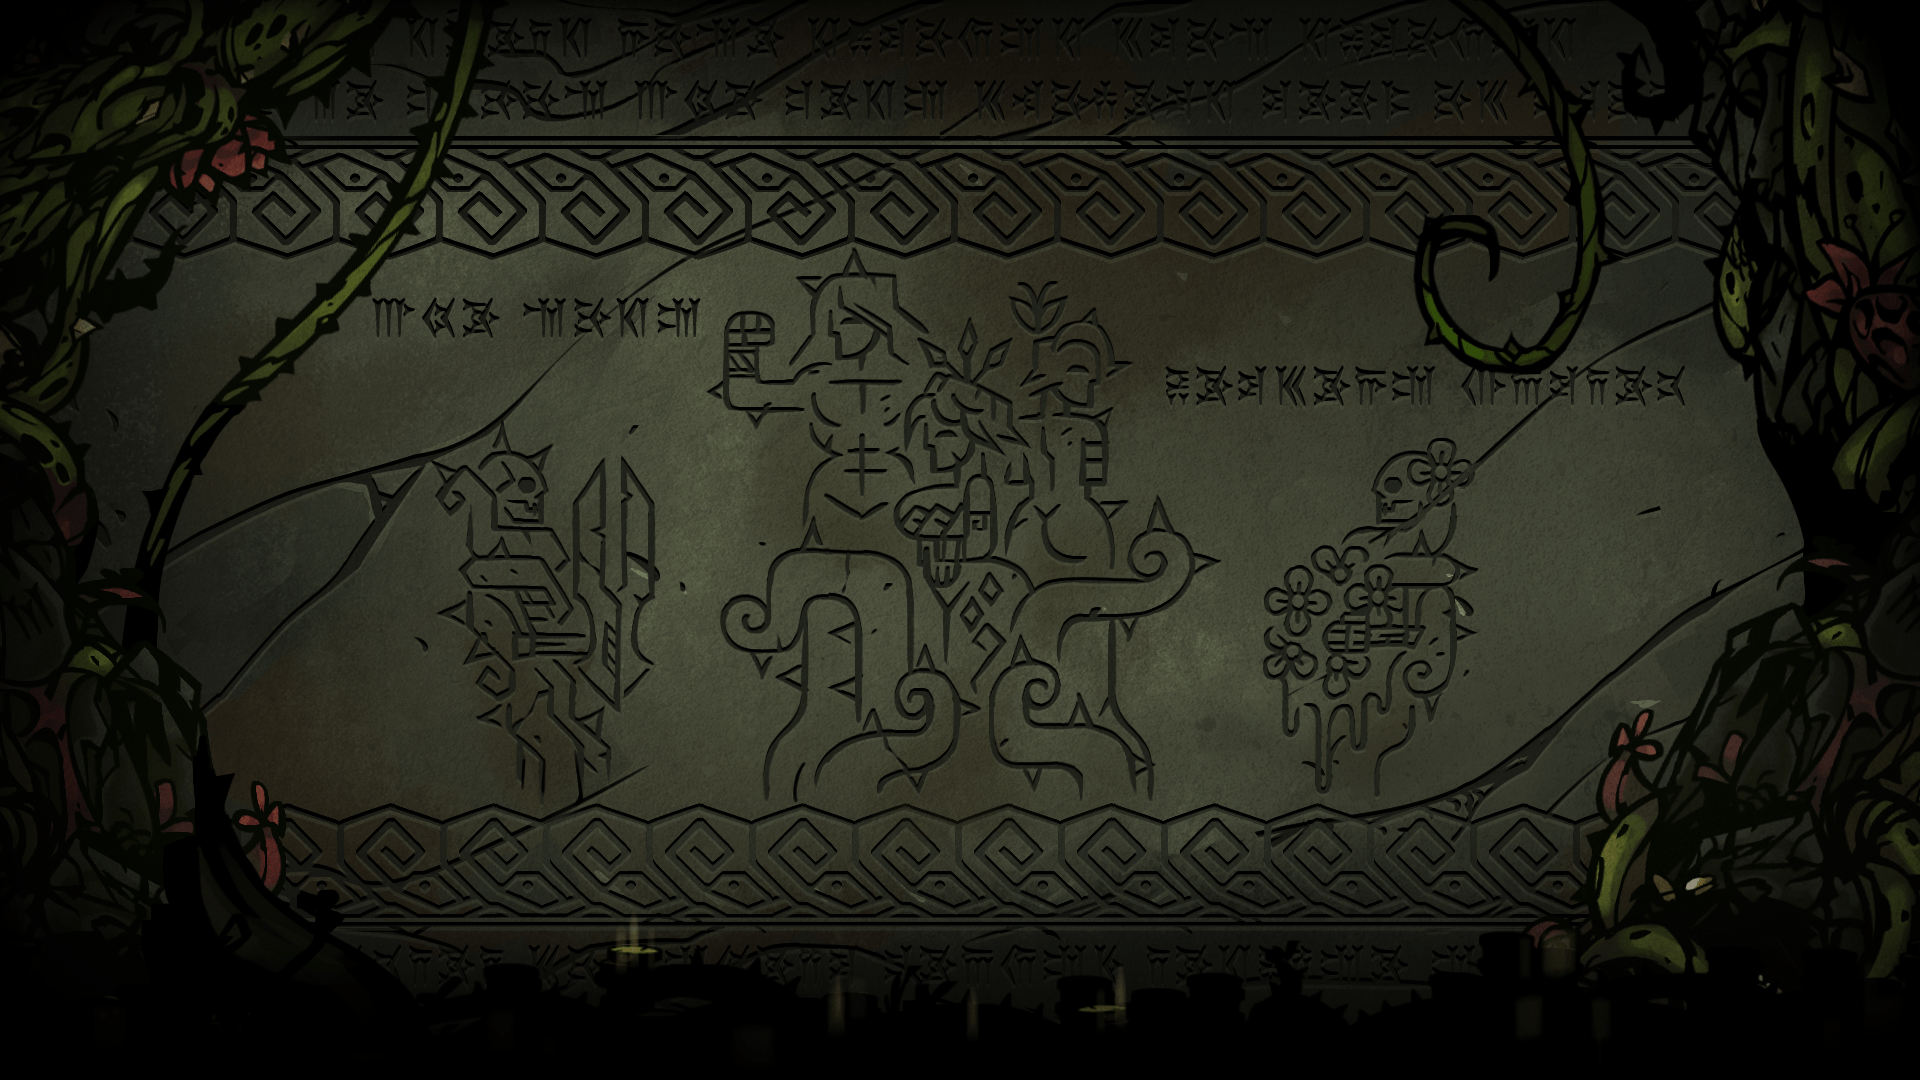
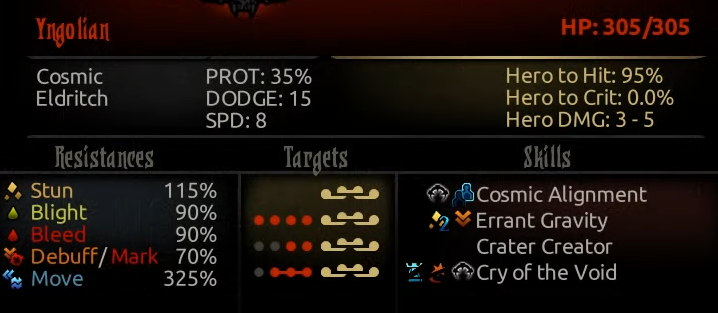
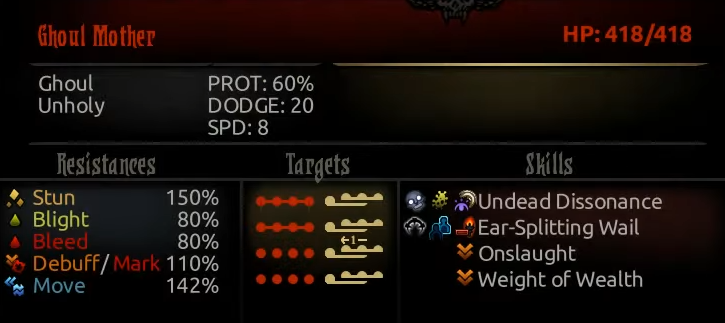
i'm not entirely sure if it goes for a specific Cactonid {Like the one it's harassing in its sprites} or if it's any Cactonid, i've only fought it once.
kikilute  [author] Aug 10, 2024 @ 9:12am 
Updated the introduction.

I strongly recommend you to check the wiki out! And to all the people who shared their feedback, their kind words and support - hell, even if you just enjoyed this big goofy thing i made while preparing for the exams and bingewatching Breaking Bad (no i am NOT joking. without the series manually making like half of all the enemy preview pictures out of the game sprites would've been painful) - thank you! I don't think there will be any further updates to this guide, as the wiki's objectively a better option.

That's a farewell, then!
Stalf Apr 23, 2024 @ 2:17pm 
Shovel does not work on Foregone Coffin
Riosthename Apr 21, 2024 @ 10:06am 
Hello!

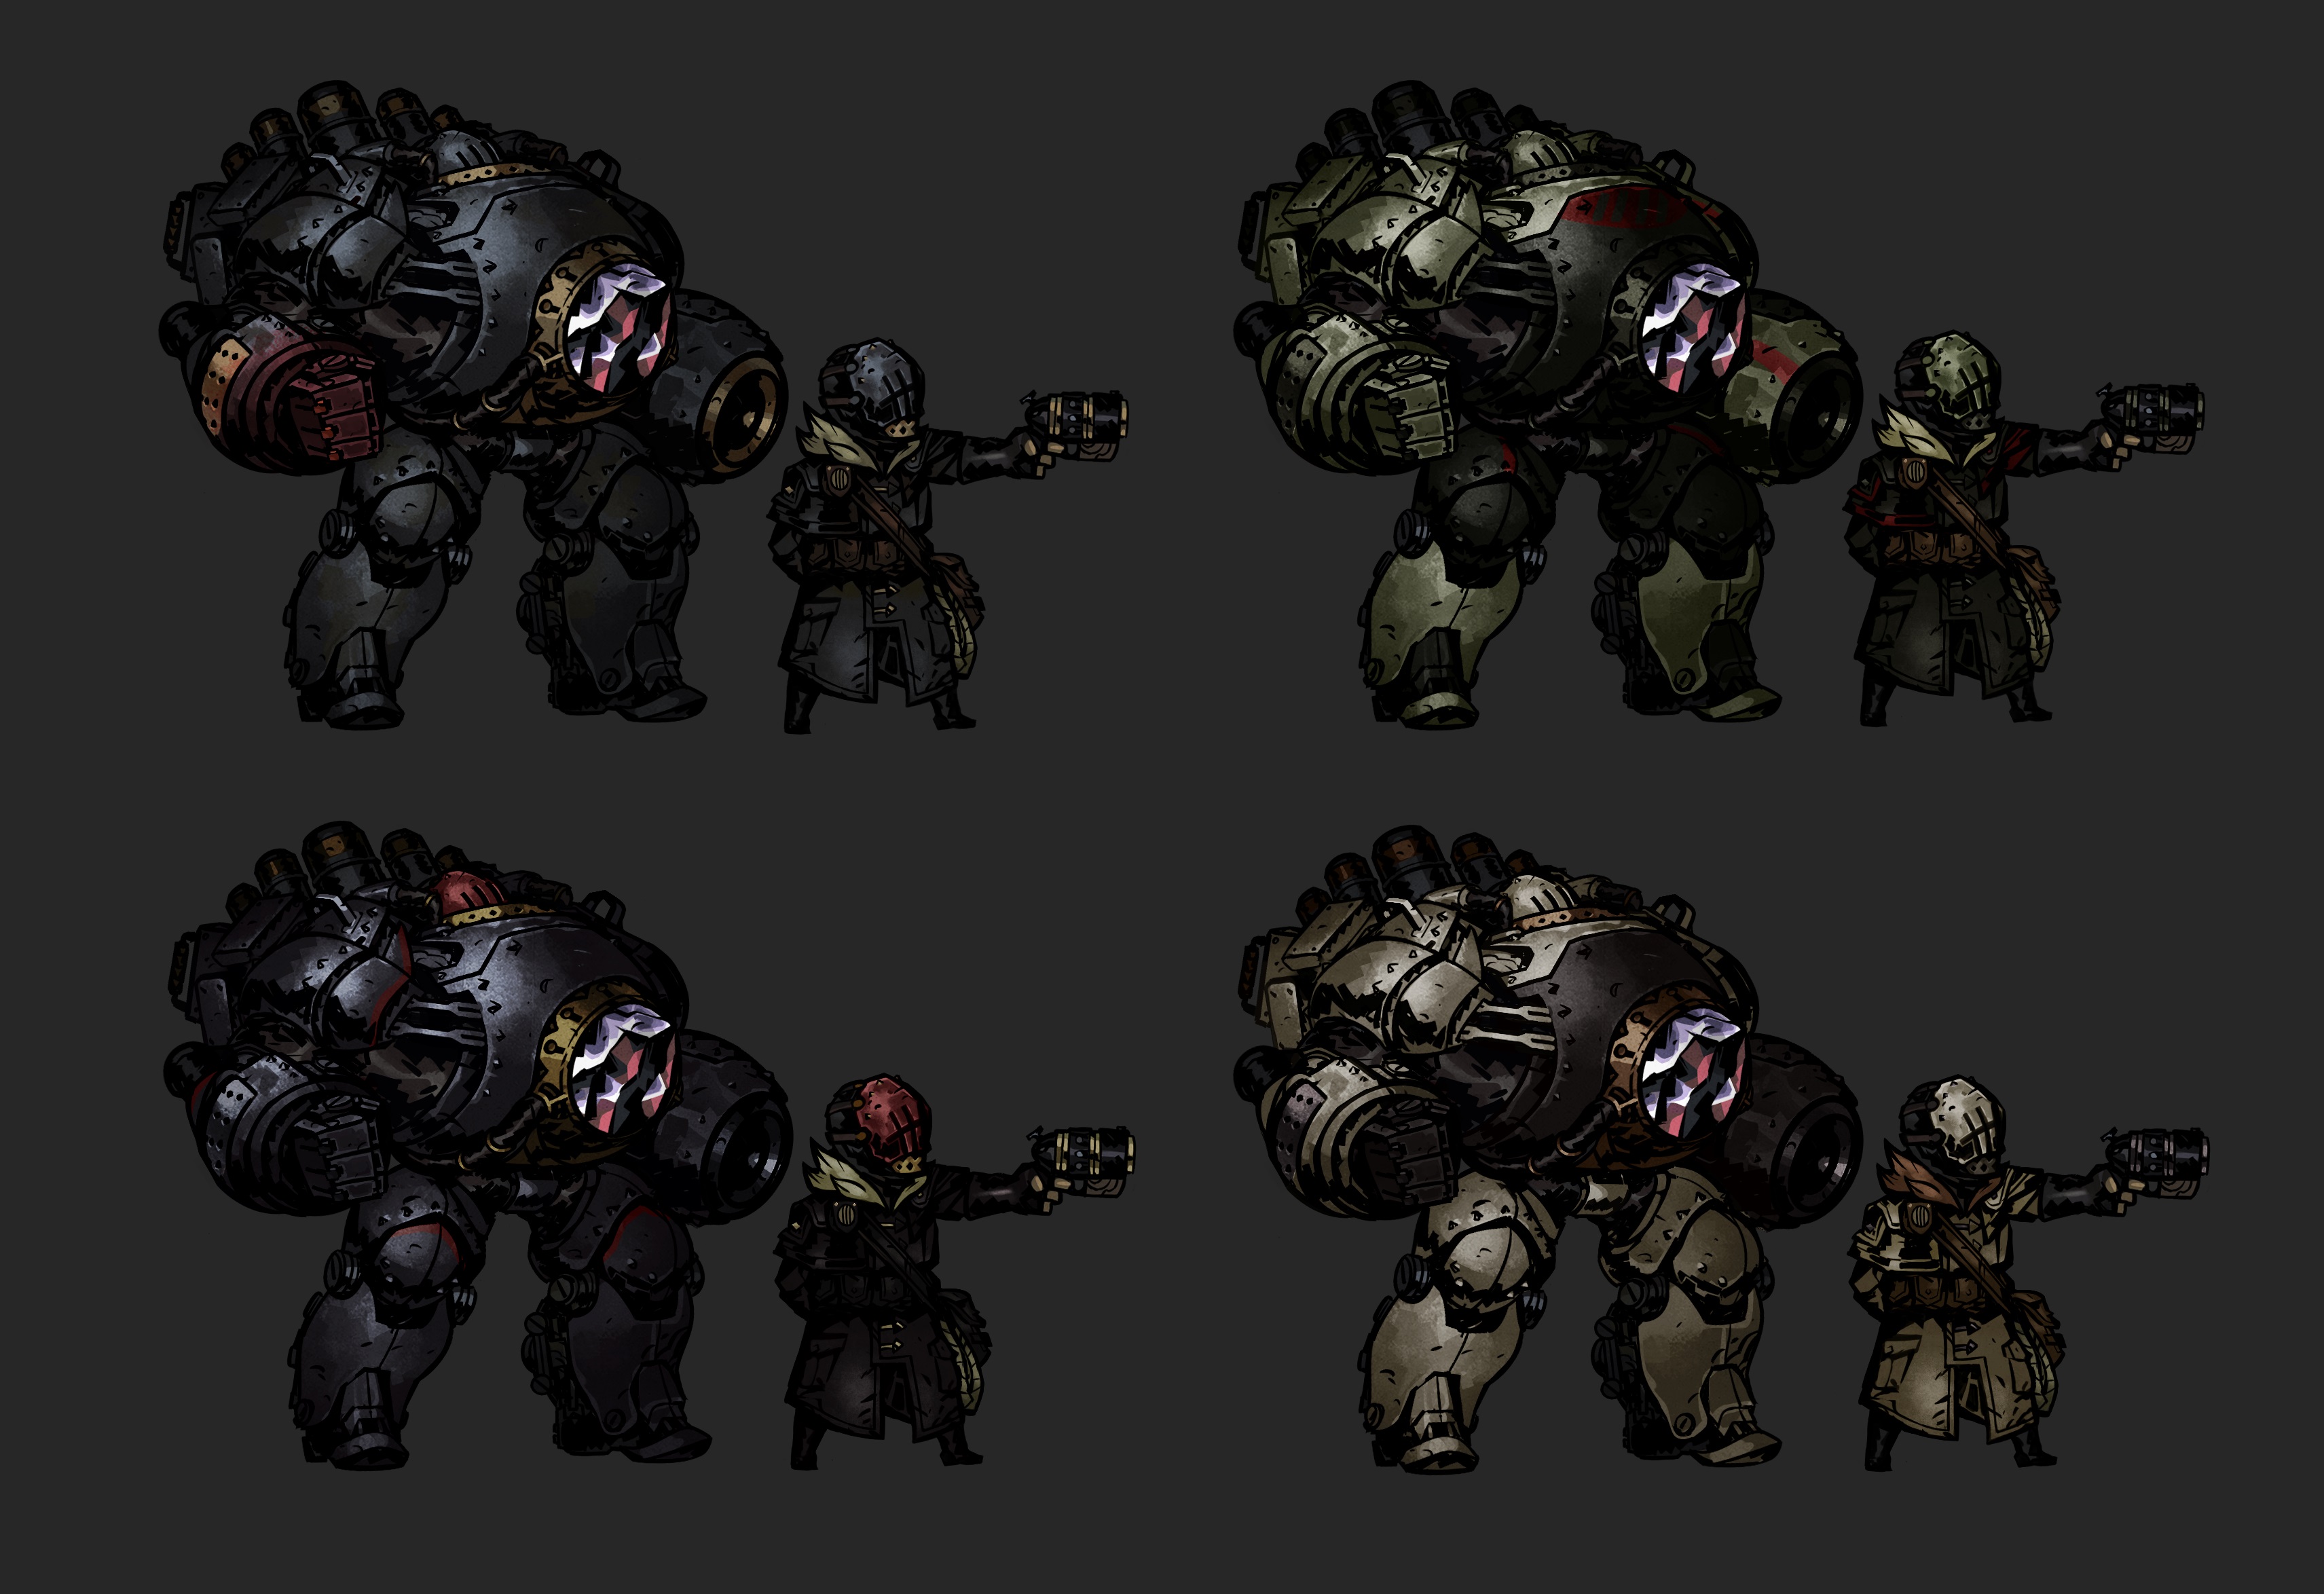
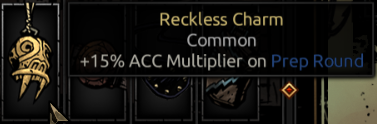
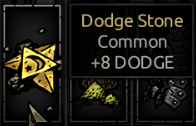
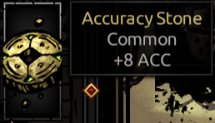
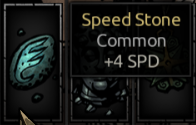
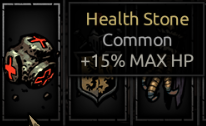
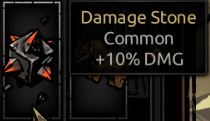
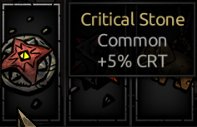
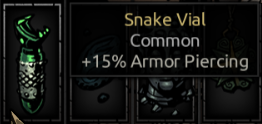
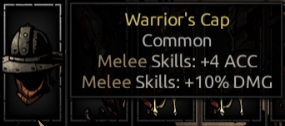
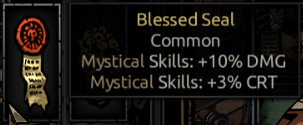
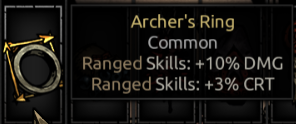
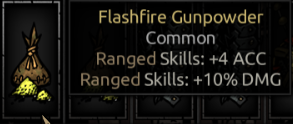
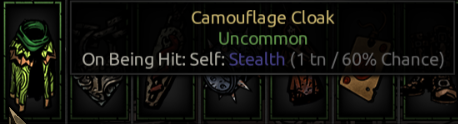
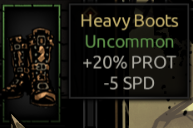
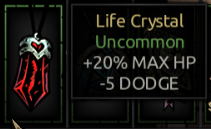
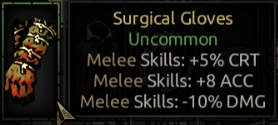
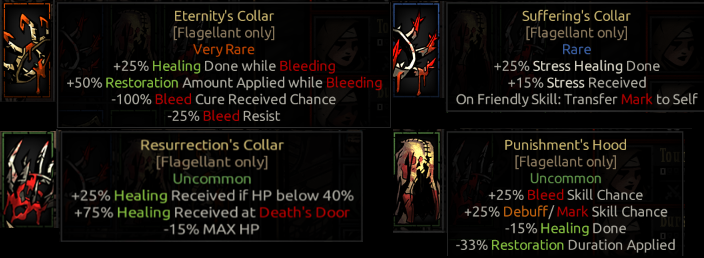
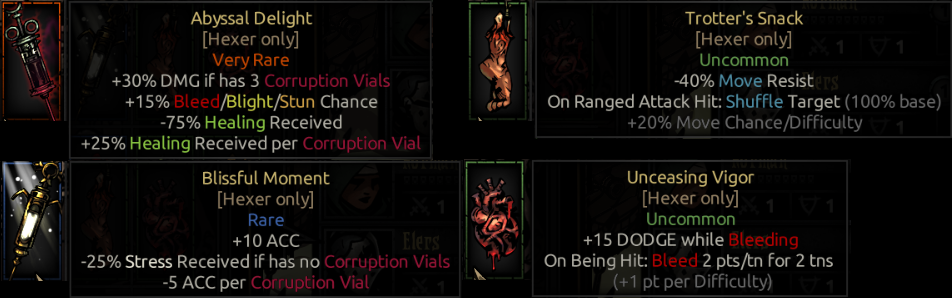
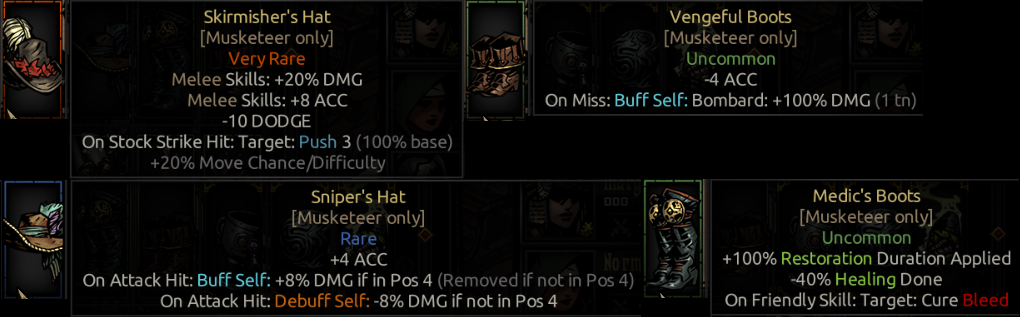
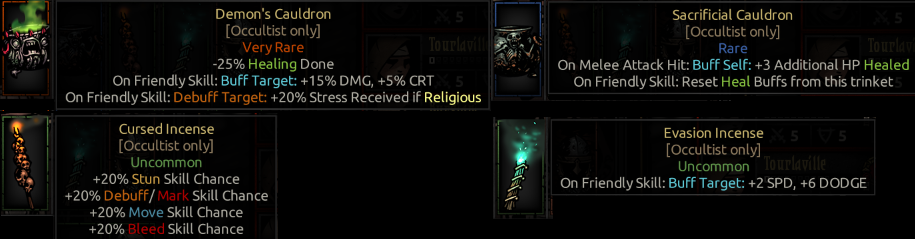
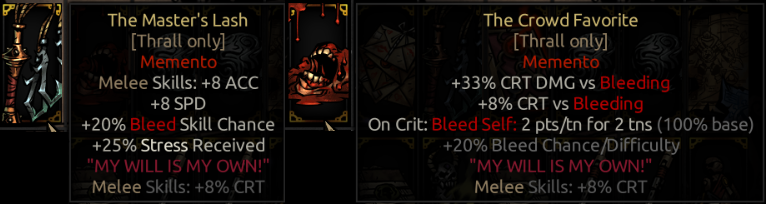
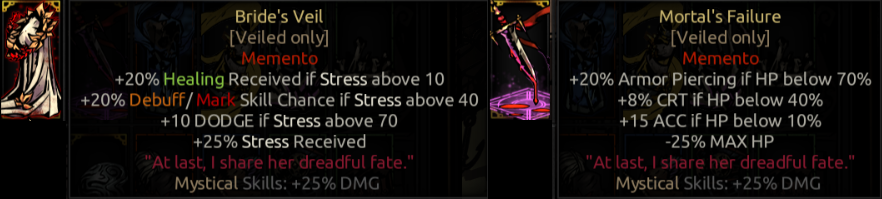
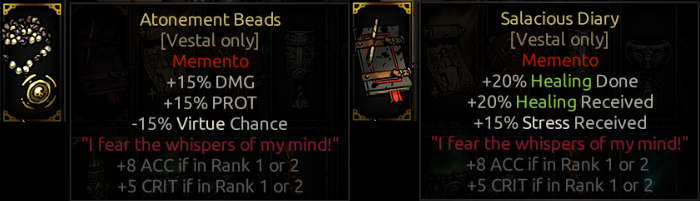
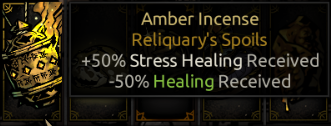
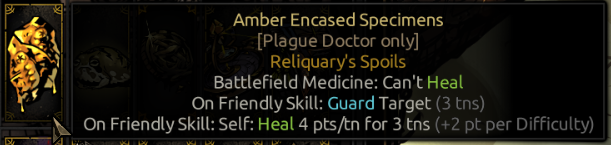
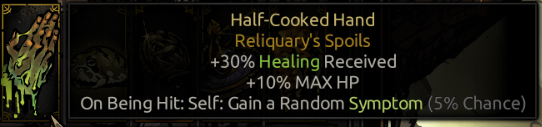
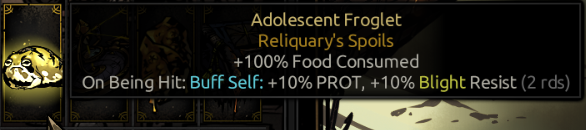
I went out of my way to make condensed graphics for the provision guides - if you want to use these images for this guide, you're more than welcome to! Otherwise, I'll put them here for the benefit of the people:

https://imgur.com/a/aqoCpXP
Кеммлер Apr 8, 2024 @ 11:49am 
Hi!
My guid don't innactive :-)
Your have old link to original DD folder, new guid ib BR folder: https://steamcommunity.com/sharedfiles/filedetails/?id=3100365205
kikilute  [author] Apr 1, 2024 @ 12:52am 
Hey there!

I stopped updating the guide shortly after the last time i posted here as another balancing update got announced. Now that the update's out, i'll try to return to updating the guide.

Thank you everyone for the kind words and the unbelievable amount of support my work's got :)
Siegmeyer Mar 7, 2024 @ 1:43pm 
thanks for your help!:steamhappy:
AceMarR Feb 15, 2024 @ 8:33pm 
"Whenever there is an empty place on the battlefield, Yngolian will spend its action to summon a Cell. Always. And that's your key to manipulating the fight: theoretically, if you can manage to have one cell dead at the beginning of the boss' turn at all times (assuming you also kill the other before it blows up), this fight can be completed without taking damage."

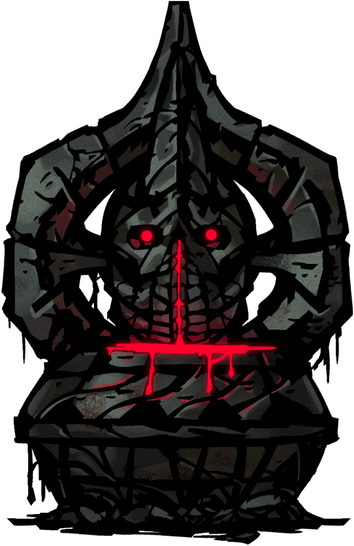
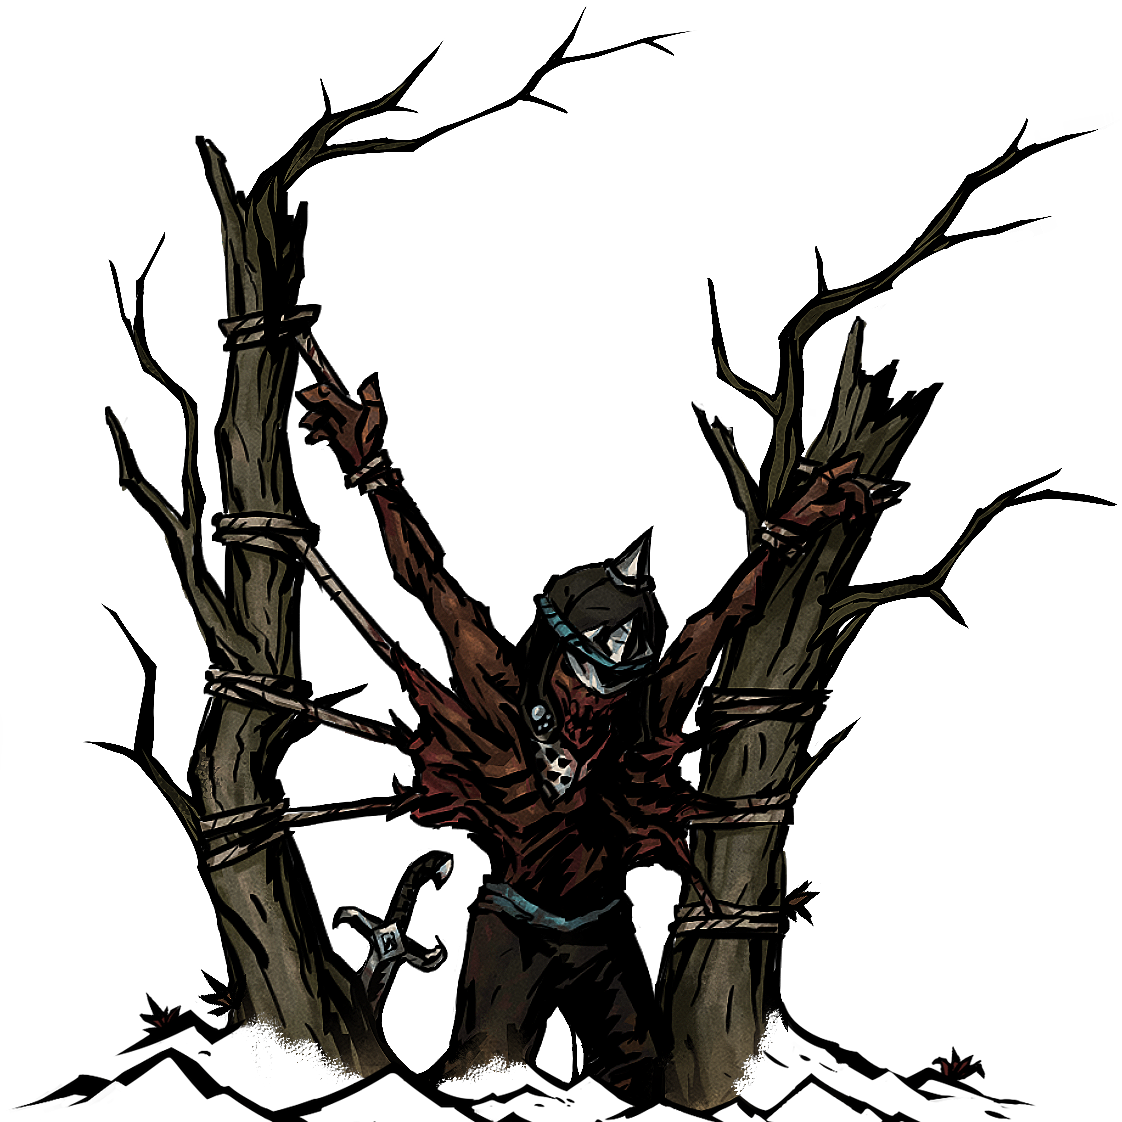
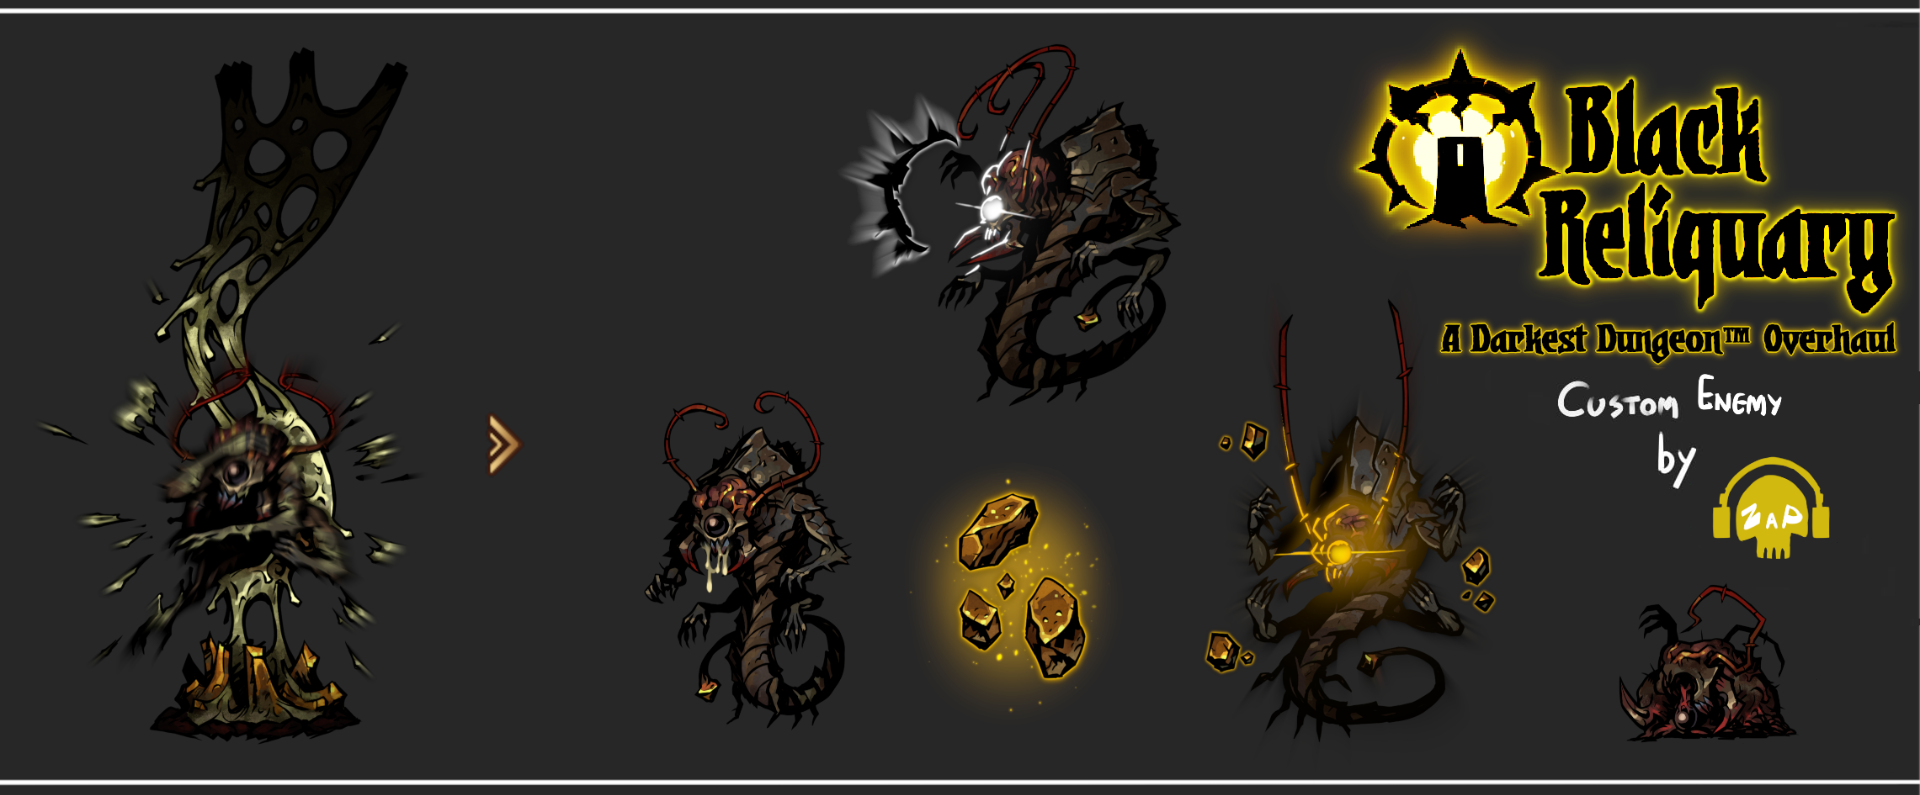
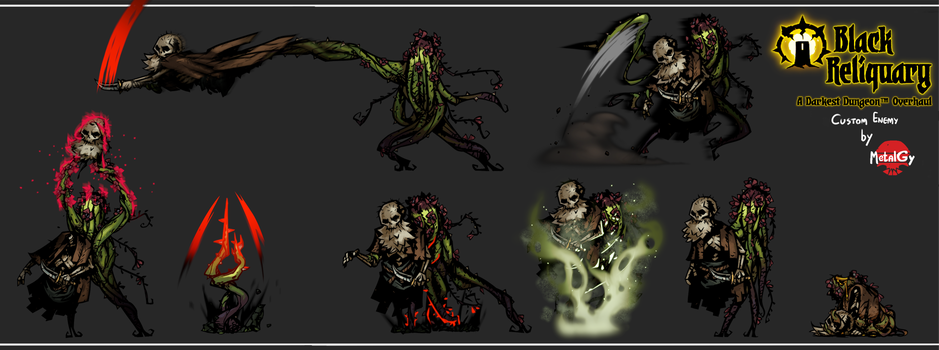
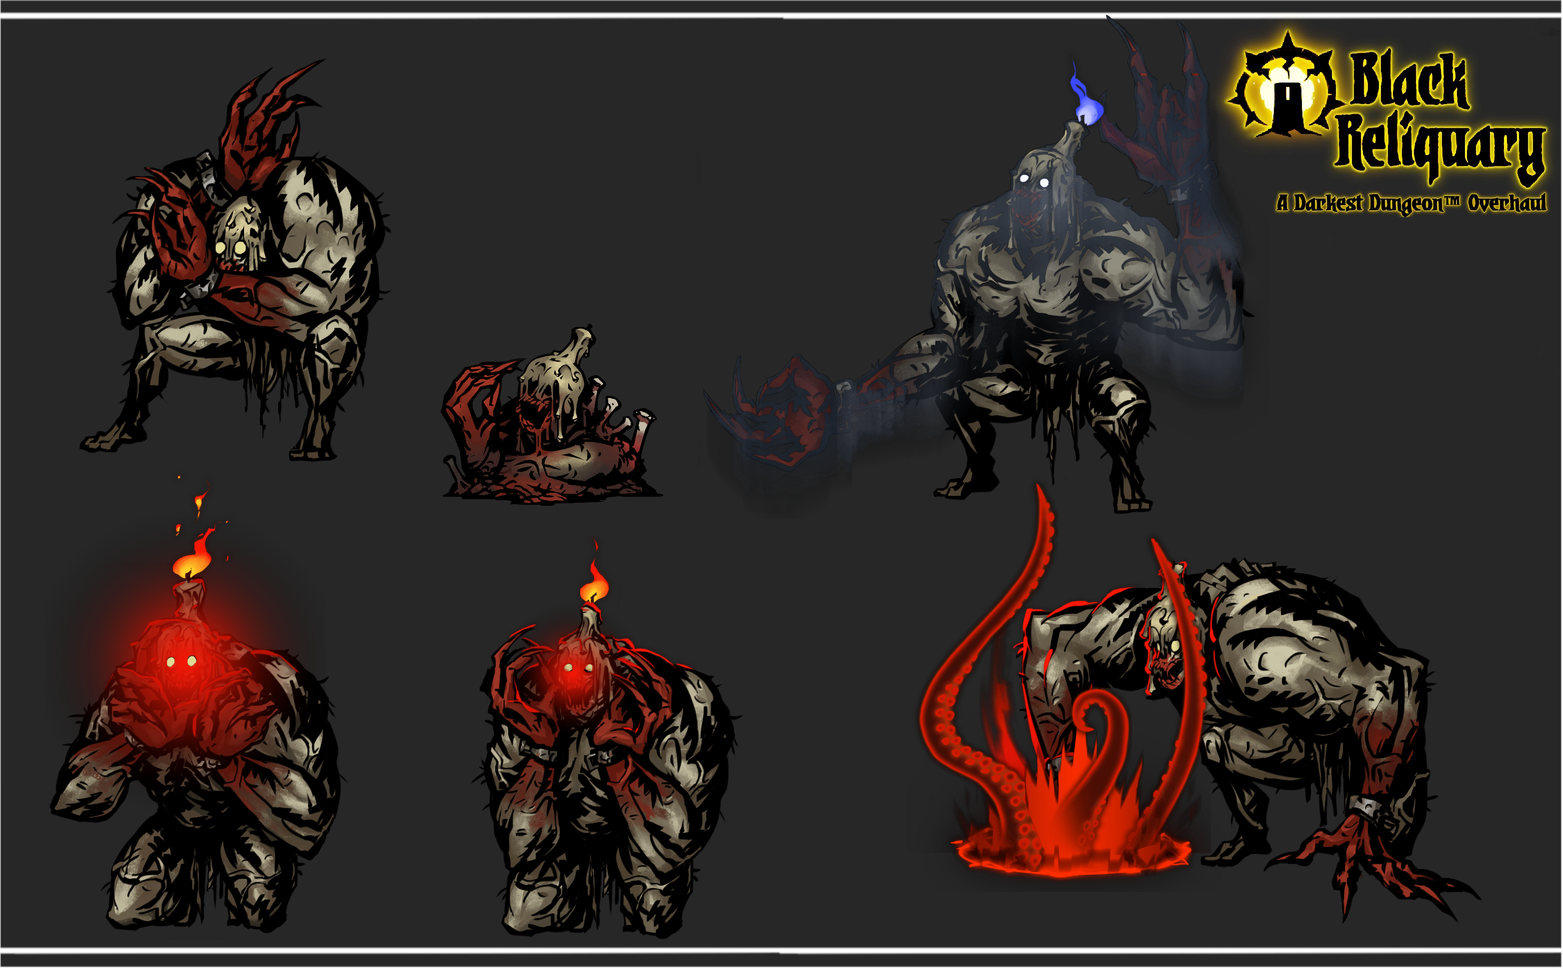
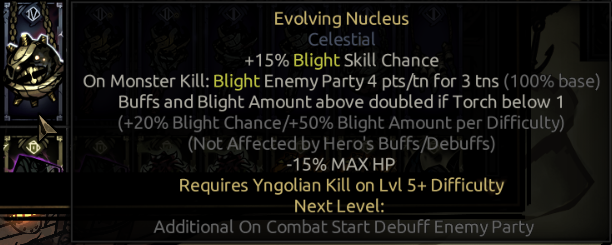
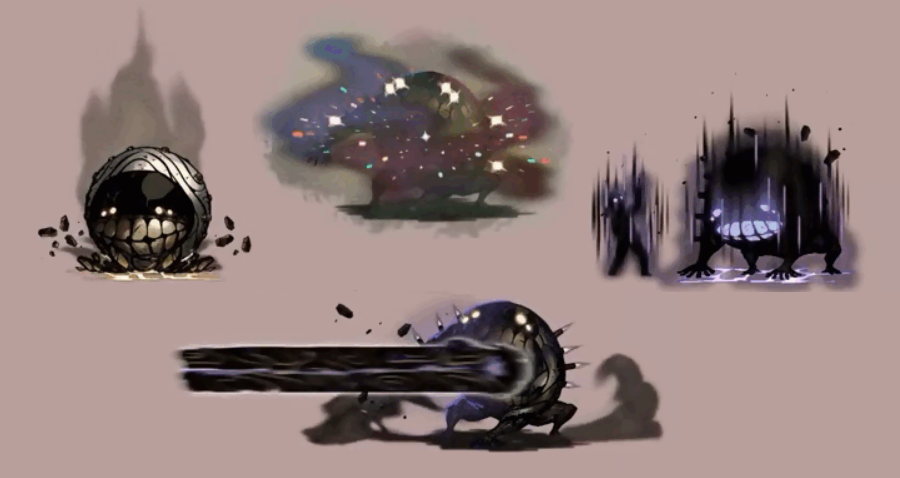
This is slightly incorrect. Y. can and will use other actions when an empty slot is present, sometimes even before summoning a cell (at least on the latest patch). He is prone to summon at least one cell a turn, though, which can be used to consume one of its actions, and reduces its damage output from catastrophic to manageable.