
Установить Steam
войти
|
язык
简体中文 (упрощенный китайский)
繁體中文 (традиционный китайский)
日本語 (японский)
한국어 (корейский)
ไทย (тайский)
Български (болгарский)
Čeština (чешский)
Dansk (датский)
Deutsch (немецкий)
English (английский)
Español - España (испанский)
Español - Latinoamérica (латиноам. испанский)
Ελληνικά (греческий)
Français (французский)
Italiano (итальянский)
Bahasa Indonesia (индонезийский)
Magyar (венгерский)
Nederlands (нидерландский)
Norsk (норвежский)
Polski (польский)
Português (португальский)
Português-Brasil (бразильский португальский)
Română (румынский)
Suomi (финский)
Svenska (шведский)
Türkçe (турецкий)
Tiếng Việt (вьетнамский)
Українська (украинский)
Сообщить о проблеме с переводом


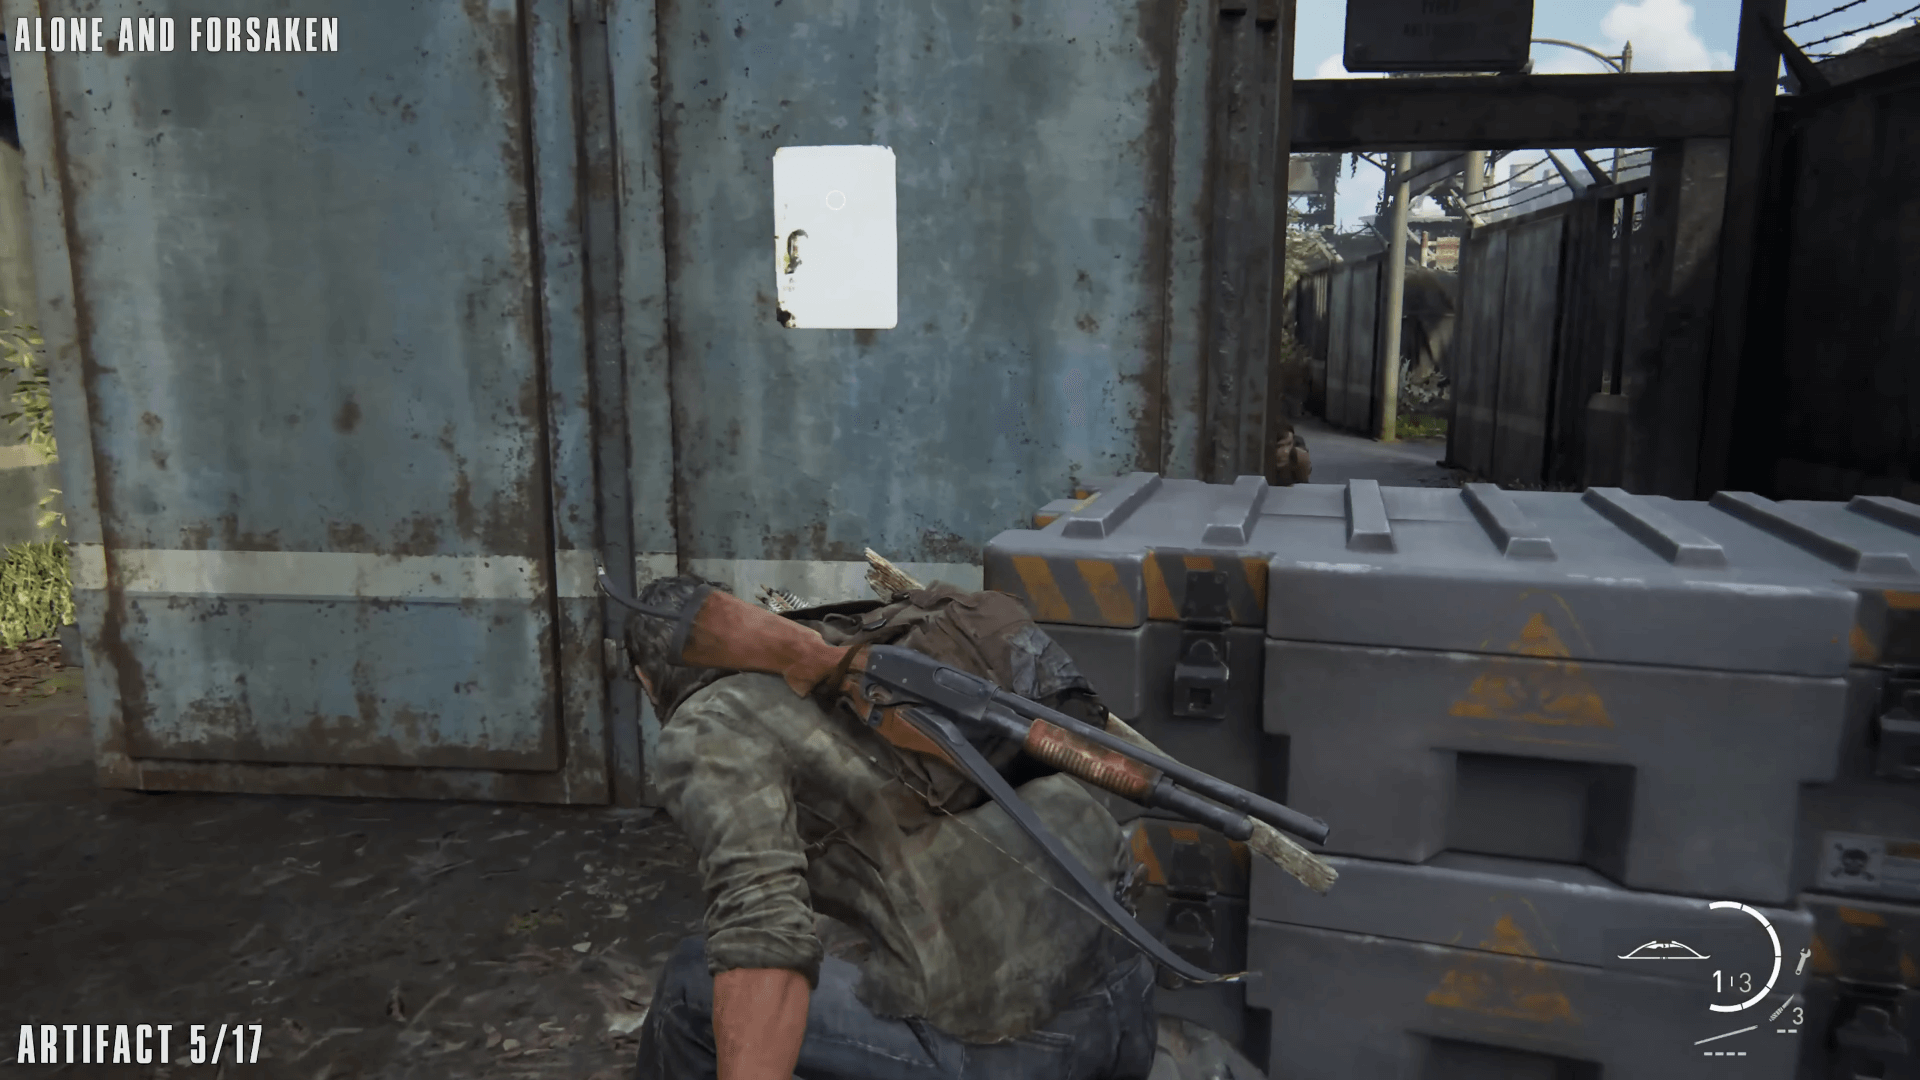


Thank you. That was the plan of the guide.
I aren't ready for it as I don't like it. I will however give it another shot to see if the story is still the same to me or not. Therefore I am making a guide for it. It probability wont be as good as I have only played it once, but will edit it if needed