NEBULOUS: Fleet Command

NEBULOUS: Fleet Command

92 ratings
So You Picked a Starter Fleet (Carrier Update In Progress)
By vren55
The Starter Fleets in Nebulous are the first ships people tend to play with in both Single Player versus AI and Multiplayer. However, the descriptions are not that descriptive. In this guide, OSPN tester Vren55 will explain the strengths and weaknesses of each Alliance and Protectorate Starter fleet and how to play them.
3
   
Award
Favorite
Favorited
Unfavorite
Introduction
The Starter Fleets in Nebulous are the first ships people tend to play with in both Single Player versus AI and Multiplayer. However, the descriptions are not that descriptive. In this guide, OSPN tester, and Captain Vren55 will explain the strengths and weaknesses of each Alliance and Protectorate Starter fleet and how to play them.

A very important note:

All Starter Fleets in Nebulous were designed by players and balance testers. However, while they were designed by some of best players around and established community members, none of them are what people will consider meta or high-end. In fact, if you participate in the Nebulous Discord, some would argue these fleets are just bad.

This is intentional. Starter fleets are not designed to be meta or high end.

Based on history of starter fleet picks and discussions with some of the Nebulous Discord Moderators, it appears that Starter Fleets are exactly what their name means: Starter Fleets. Being non-meta or not-high end or highly optimised is exactly why they were picked. Instead all Starter Fleets tend to do the following:

  • Showcase key Nebulous mechanics
  • Be relatively easy to micro
  • Have one specific specialization to show a faction's doctrine

As such, it is strongly encouraged for people to modify their fleets based on or inspired by Nebulous Starter Fleets. If you lose or overwrite that fleet, just re-verify your game files from Steam (Right click on Nebulous Fleet Command in library, Properties, Local Files, Verify Integrity of Game Files).
Without further ado, the current Nebulous Fleet Command Starter Fleets

Author’s Note: If you designed one of the starter fleets here and want to add your own comments please DM me in Discord and let me know so I can add.
Alliance Starter Fleets
Task Force Oak

Difficulty: EASY

Pros at a Glance
  • Heavy Firepower
  • Durable
  • Easy to Micro
  • Forgiving
  • Can hurt everything

Cons at a Glance
  • Slow
  • Easy to Ambush
  • Not the best against smaller ships

Designer:
Notsolonewolf, Nebulous Discord Moderator

Usage

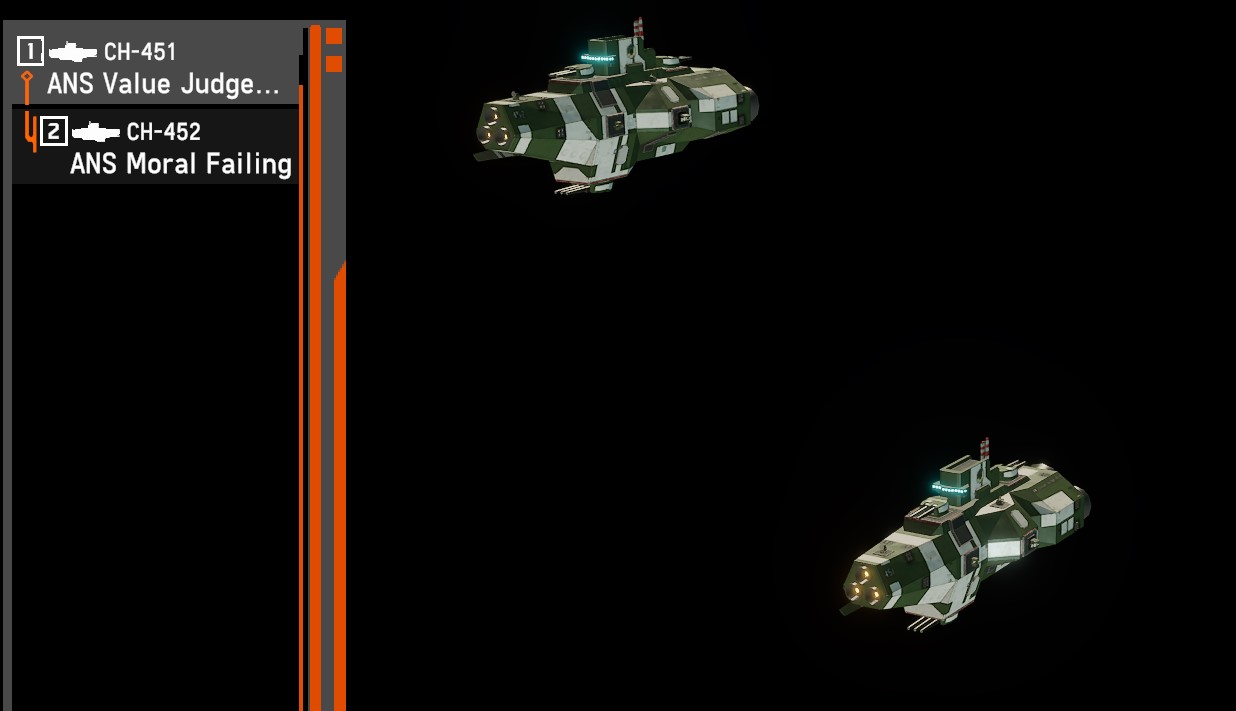
Task Force Oak was one of my primary introductions into Nebulous Fleet Command and is one of the easiest starter fleets to get accustomed to. It’s very simple to shoot something with it. You have two Axford Heavy Cruisers, they have a lot of 450mm guns that can fire both High Explosive and Armor Piercing shells, you SHIFT-RIGHT CLICK and shoot them.

Before I get into Task Force Oak and the fleet’s many strengths, let me get into its weaknesses so people who have trouble fighting this fleet learn how to beat this wall of metal.

First off, Task Force Oak is critically weak to Size 2 and 3 Hybrid Missiles with Terminal Manoeuvres as it has no Aurora point defense. It’s also not particularly fast or manoeuvrable as it can push 27 m/s but only on Flank speed. This means it can’t escape ambushes easily (which means you can catch them in a Beam ambush or a Line Ship Gun ambush). There is also no Secondary Battery or other armament other than the 450mm cannons, which means that the heavy cruiser pair might find it hard to defend itself against an ambushing OSPN Shuttle Group with rockets, or Sprinters with Size 3 Torpedo Launchers. Task Force Oak also has a decent point defense network, but it can be overwhelmed. As Task Force Oak is comprised of Axford cruisers and not Solomon Battleships, OSPN plasma will strip their armor in a single hit, and open them up to damage by lighter guns. Thus, there are ways to overwhelm Task Force Oak.

To prevent yourself from being overwhelmed as a Task Force Oak player, management of sight lines, map awareness, and team support is essential. You want to be firing the cannons at a single battlegroup and only be engaged or preferably not-engaged by your enemy battlegroup. As I have stated previously, use cover and manage the range of your weapons in relation to the enemy’s weapons. The Spyglass radar on one of the Task Force Oak cruisers is very useful to see what the enemy has at range so you can make your decisions. Note however that as a cruiser player, you need to think ahead. Do not, go somewhere just because. You must consider what might happen when you get to the place you are going to and why you are going there. As such, you need to monitor the map to see if you can see flanking enemy forces, and find out where your team is so you can be supported in your movements.

Move Task Force Oak properly she will treat you well and smash your enemies before you. Fail to do that, and you’ll get smashed. That being said, it'll take quite a beating before TF Oak falls, which is why it's considered one of the easiest and best Starter fleets to get into the game with.

Comments from NotsoLonewolf
TF Oak was designed for minimum micro, and it does that - all you need to do is lock target and fire away. But because of that mandate, it packs no detached scouts, jammers, missiles, or any other tools which make it more survivable in open space. As such, while Oak is minimum micro it is maximum decisions. Where is your fleet, which enemies have line of sight on you, is your rear end safe from enemy fire, are your broadsides pointed towards the enemy and ready to go?

The main aspect of Oak is positioning. You can get buzzsawed if the enemy catches you in a spot where they can bring their full force to bear - don't let them do that. Manage your sightlines to be visible to the enemies you wish to engage and stay in cover relative to those you do not. Whenever possible, stick with your allies to benefit from their escorts, ewar, and point defence. Position Oak well and it will carry you far. Good luck, commander!
Task Force Birch


Designer:
Enderminion. Updated by Notsolonewolf,

Difficulty: EASY

Strengths at a Glance
  • Fast
  • Maneuverable
  • Can Hurt all OSPN Ships
  • Relatively easy to micro

Limitations at a Glance
  • A bit fragile
  • Needs heading micro
  • Can get players into trouble easily
  • Not the best point defense
  • Can't fight capital ships head on


Usage:
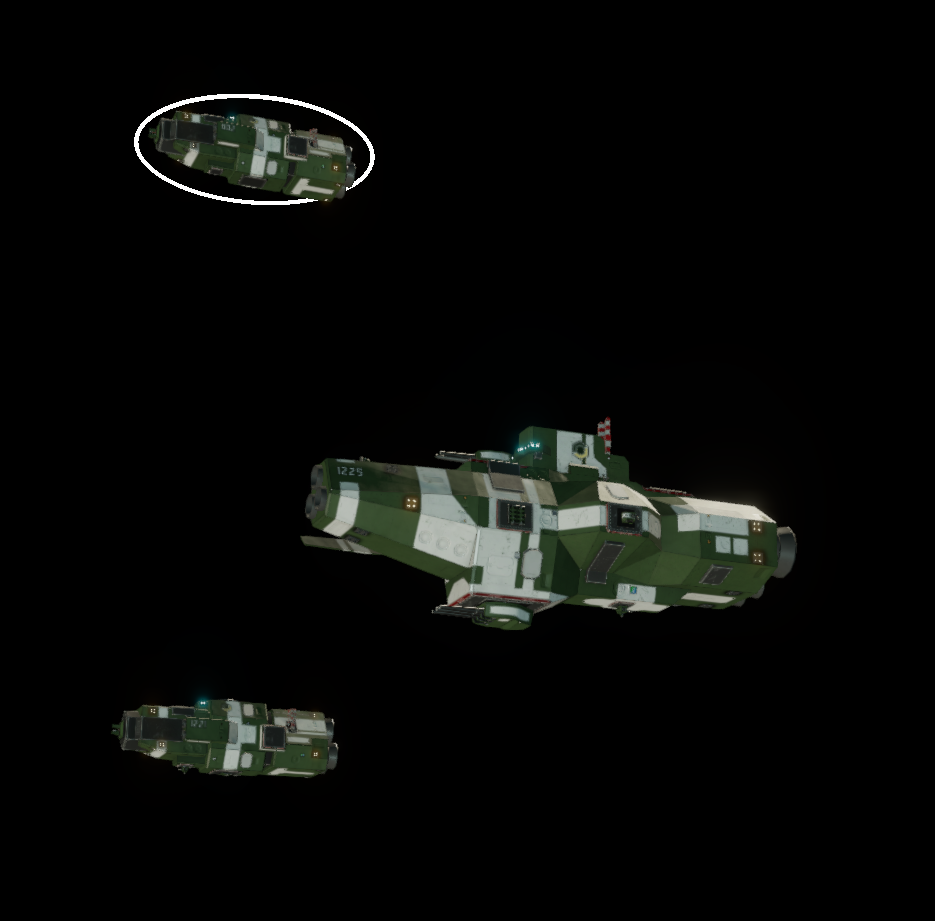
Task Force Birch is the stereotypical Alliance Navy Light Cruiser hunting pack, though perhaps not the most commonly built layout. Variations of this fleet were seen everywhere in OSPN testing and prior to that and the uses have not changed.

Vauxhalls are skirmishing vessels. They can fight ANS Axford Heavy Cruisers, OSPN Line Ships and Ocellos head to head, but they better not do it for long and be on Flank Speed and Evade Manoeuvring posture all that time. The MK64 250mm has received significant buffs that with careful management of the AP, HE and HE-RPF (HE Radio Proximity Fuse) shells, can damage every OSPN warship and at certain angles, every ANS warship. Note that the MK64 250mm gun is now currently dual purpose, meaning it will fire against missiles. You need to make sure to switch the ammunition from HE-RPF back to AP or HE after shooting at missiles. Alternatively, you can switch your point defense settings from AUTO to DEDI which will stop the MK64 from engaging missiles. The cost is... they don't engage incoming missiles

However, the MK64 250mm doesn’t kill the heaviest ANS or OSPN warships very quickly. You are a skirmishing vessel meant to apply pressure, scout and kick those lighter ANS or OSPN vessels off your friendly caps. Monitor the health of your Vauxhalls. Use cover and keep a retreat angle open. Don’t put yourself into situations where you will be focus fired down by from multiple angles. Birch is a powerful fleet, but it while it can fight everything you can’t win every fight.

Per my personal analysis, Birch might be most vulnerable to being missile spammed, though more from close range than at long range. As, the Mk64 250mm cannon is now fully dual purpose, it will target enemy missiles in its 8km range and shoot RPF rounds. This means that with good sight lines, Birch will intercept moderate amounts of hybrid or container missiles. The problem is that the MK64mm isn’t the best at defending from missiles at close range due to its reliance on defenders and with only one ship with some chaff. This means Birch is vulnerable to say Command Guided missiles, or missiles with validators and terminal manoeuvres. Additionally the MK64 as an anti-missile turret isn't always that accurate and often needs to use the ship's Bullseye fire control radar to lock onto incoming missiles for best effect.

Keep Birch at 7-8km range, moving fast, ducking into cover and dodging shots and it will treat you well. Fail to do that and you’ll get ripped apart. There's a very good reason it's rated as EASY as a starter fleet. It's not complicated and it gets the job done especially against OSPN
Task Force Hemlock


Design Lineage:
Created by Torpedodo, Reworked by Hunter

Difficulty: MODERATE

Strengths at a Glance
  • Deadly Missiles - Hemlock has a number of powerful Size Three Hybrid missiles that can be launched from afar and way-pointed into targets
  • Good up-close - Hemlock has a number of powerful up-close weaponry including short-ranged torpedoes and a beam
  • Vision - Hemlock’s main heavy cruiser may not be able to sit in the open, but it has a Spyglass frigate with a stealthy prowler drive that can detect targets up about 11km away. In addition, there is a Pinard module that enables the detection of enemy radar signals.


Limitations at a Glance
  • Reliant on missiles - as a missile focused fleet, Hemlock requires careful use of its limited weaponry
  • Lack of direct ranged weaponry - Hemlock has no guns, just missiles and a beam.

Usage:
Hemlock is an example of a beam-missile Axford. The Totemshould be deployed near a rock. Employ it as a ranged missile ship that uses its complement of 20 Size 3 Hybrid missiles to harass and target isolated enemy targets, and as a beam ship that guards a critical point behind cover. For larger targets, Totem has 8 Size 3 Command-Guided High Explosive Kinetic-Penetrators that will delete large warships when hitting head on. These must be fired using Target-Reference Point (TRP) function and cannot be waypointed.

Use the Chief’s eye to poke around rocks and provide vision from behind the rock you hide the Totem behind. The frigate's Bullseye can be used to lock onto the purple directional Pinard tracks, enabling you to get a good lock on any warship in the Bulleye's 9km range. It is advised to toggle your radar on and off to ensure your corvette isn't detected.

When the Totem is forced to engage up close, it has a set of two very powerful weapons. A close-ranged beam that under 5km can be used to eviscerate most enemy ships in seconds. It then has Active Radar/Command validated Size Three Torpedoes whose high manoeuvre terminals will dodge most point defence. Coupled with a strong point-defence network and a communications jammer to defuse Command missiles (CMD), the ship is very well defended.

All that being said, players should not employ Totem as a head-on combatant. It is a heavy cruiser with the hull’s good armor and durability. However, it cannot just charge at an enemy and expect to do well. It is a zone control warship meant to hide behind a rock, be very hard to dislodge, while also being a nuisance.

Trivia:
Taskforce Hemlock was originally a beam-gun Axford with two escorting jamming sprinters.

Task Force Redwood (Updated January 29, 2025)


Design Lineage:
Original Designer was Daniel_syy, Grand Duke of BB,. Reworked by Pyrope and Notsolonewolf

Difficulty: MODERATE
Strengths at a Glance
  • Long Range Rails combined with a tanky Axford is a good combination
  • Strong ability to support team
  • Good softkill and scouting suite

Limitations at a Glance
  • The Keystone destroyers are fragile
  • Need to manage battlegroups that are far away
  • You need map awareness

Usage:
The current iteration of Task Force Redwood is a derivative of the “Axford and friends” archetype where players would bring a single Axford-class heavy cruiser with supporting assets. In this case, Redwood fields fire support in the form of two rail destroyers.

The centre of the fleet is the Star of Atlas, an Axford heavy cruiser armed with 450mm turrets. This Axford is built to teach new players how to bowtank and softkill. It has a nose hardened with reinforced components and a softkill suite including an Interrupter communications jammer to jam out Command seeker missiles and a side-mounted Active-Decoy launcher. The maximum range of the 450mm guns is 11.24km, but they’re not actually effective at this range unless you have a Bullseye lock. Note that while Redwood’s nose is reinforced, it does this by using one of its magazines to tank, which is a useful tactic but make sure that you keep your reserve magazine in the belly healthy. Players should, however, still use the Orbit command to put the ship in an orbit when facing the enemy. This will throw off enemy fire when used at about 9km out.

The Star of Atlas is the easiest difficulty starter fleet on the Alliance with craft. The Axford features two Electronic-Intelligence (ELINT) Halberd Skiffs. These craft have 4km radar and an ELINT tracker of 10km range. Through use of cross-fixing the Halberd Skiffs can locate enemies and serve as scouts for Redwood. These show up as Red-marked E tracks which will get more accurate the farther the skiffs are apart. If alone only a directional Purple E track will appear. The skiffs also have a 35mm belly gun that can provide some point defense.

Providing fire support for the Axford are two railgun equipped Keystone-class destroyers, the Rime of Solitas and Singing Mantle. Railguns in Nebulous are debuff weapons that do minor damage. Hitting targets with railguns applies damage, and applies debuffing events on their modules and compartments, along with starting fires. Railguns can fire at 21km, allowing them to shoot almost anywhere on most Nebulous maps, but they do need a lock to actually be able to hit targets at that range. To ensure that some sneaky Protectorate tugboat doesn’t just show up and kill the rail destroyers, the Rime of Solitas has 8 Size 2 Hybrid missiles meant to kick small warships down as an emergency.

Play Redwood as far away from your enemy as possible while still hitting them and use your scouting assets. Your ships are designed to apply damage over time, and while their point defense is strong, massed 450mm armed liners or close ranged Plasma-100mm attacks from OSP monitors or lineships will overwhelm you quickly. The Skiffs and reading the ELINT tracks are thus essential to avoiding damage.
Task Force Ash


Designer:
Highscore

Difficulty:Moderate

Strengths at a Glance
  • Deadly at close quarters and thus able to create a short but powerful zone of control
  • Very strong Electronic Warfare
  • Varied arsenal
  • Battlegroup itself isn't that hard to micro

Limitations at a Glance
  • Quite fragile
  • Requires microing of different weapon systems and electronic warfare
  • High level of tactical and strategic thinking required
  • Reliant on Ambush Tactics

Usage
:As stated on the description, Task Force Ash is a close-range brawling fleet with a long ranged punch through its missiles. You don’t want to stand in open space and fight with this fleet. Ambushing, or popping in and out around corners with the assistance of your jamming is the key to winning battles. Alternatively, your beam fleet can be employed to hold and angle or point, with your mere presence in an area being a deterrent against enemy advance. For further reading on the usage of beams, I recommend Puppyfromhell's Beaming to Win Guide: https://steamcommunity.com/sharedfiles/filedetails/?id=3095508294


Ash’s Keystone-Class destroyers MK600 beam cannons are the most powerful weapon on this fleet. The maximum range is 6km, but ideally ambushes and engagements are to be conducted at 5.5km because beam damage has a significant damage falloff at its maximum range. An Axford or Solomon can be shredded in seconds under fire from three of these beams. Use the Battle Short Toggle to override the reload on the beam cannons in these engagements to make sure you stop getting shot at. Be careful about leaving the beams on Battle Short for too long though, as that will knock your weapon out.

Do note that the destroyer Apply Damage has an interruptor which you should turn on if you are being shot with missiles, particularly Command missiles.

Key to this force’s survivability though isn’t the beam Keystone Destroyers, but the Sprinter. The Static Noise on TF Ash leads the three identical Keystone-class beam destroyers. It primarily provides cover to the destroyers through its use of its two blanket jammers and two hangup. The Hangup is crucial as it stops people from receiving friendly radar tracks, rendering scouts outside of the jamming cone useless in many situations (exception is if you are attempting to jam a ship with an Ocello or Axford providing a friendly track).

The primary missile armament of Ash are direct-fire Size 3 Hybrid "Linebreaker" Missiles. The maximum salvo from all three destroyers is 6, which can hit pretty hard. I would personally advise they used to defend points and take out ships outside of your 6km beams.

Still, you do not want to just fight in the open versus enemies with 450mm big guns or 250mm cannons, or even 100mm with Plasma support. This fleet is a specialised ambush fleet. You don’t chase people, you pop up and beam them to death and then sink back into cover, leaving dead hulls in your wake.

All this being said, there is a good reason this fleet is rated "Moderate," as a starter fleet. It is quite deadly, but you rely on either ambushing people and positioning. Plus, you're not that squishy. So keep that in mind or you'll become a broken hull.


Comments from Highscore (vren55 edited to reflect May 28/24 Balance update):
- The Rain missiles are stress-application missiles I use primarily against, 1) scouts with no chaff or PD (they die), 2) the target you're attacking, to apply additional micro and threat pressure - they are not intended to hit, so much as to apply stress to the opponent;

Task Force Maple


Difficulty:
Hard

Designer: Wzsnipes

Pros:
  • Heavy anti-craft missile batteries
  • Many sensor assets
  • Strong bomber force

Cons:
  • Difficult to micro
  • Low fighter numbers
  • Bomber munitions can be softkilled.

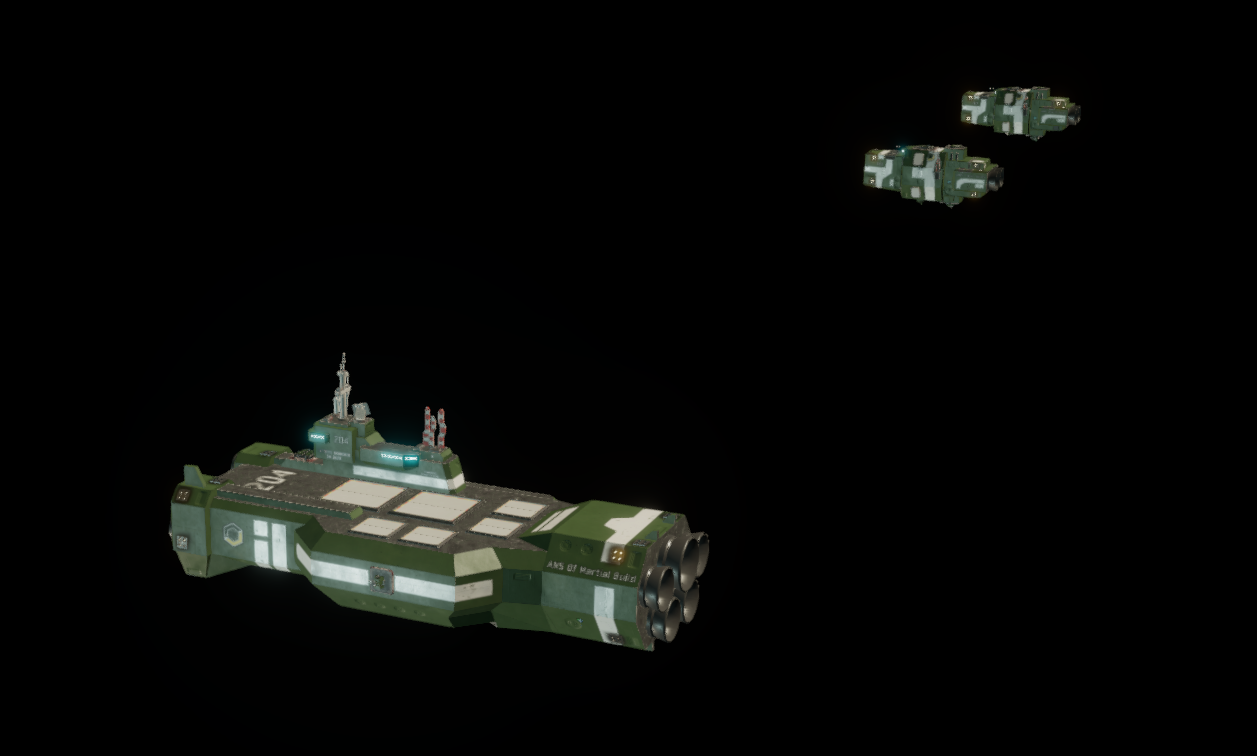
Task Force Maple is designed to compete against any Protectorate carrier force while being a forgiving, and versatile carrier that can support its fellow fleets.

The trick to Maple is not using its craft to win the void superiority/air superiority war, but by using its two frigates Clear Skies and Starlit Skies. The Alliance has VLS-2 pads which fire faster than the Protectorate Twin Arm and Single Arm Launchers, sport 48 Tornado SDM-200 series of anti-craft missiles. These can delete a Protectorate Barracuda in one hit and a Sturgeon in two. As such, deploy these frigates in open space, overwatching an area of space or near friendlies to protect them from craft attacks.

With the two frigates helping to secure space, Maple can then bring it’s craft to bear. Its 16 Katana type Tanto fighters are also equipped with the SDM-200 Tornadoes, able to launch them at Standoff range to whittle down enemy craft before engaging or withdrawing. Once the skies are clear, at least temporarily, employ Maple’s Longsword type Claymore bombers to throw torpedoes at the enemy. I generally recommend wing sizes of at minimum 4 and maximum 4. The Longswords are also quite stealthy due to the Claymore bomber frame.

To help spot the enemy, Maple’s frigates have a spyglass radar, and the carrier itself has 3 Hourglass type Sundials SEWAC craft with 10km radar. Launch these first to help your team locate targets and the enemy disposition.

All in all, Maple plays into the Levy’s support nature. It can hit hard, but it primarily does so by facilitating widespread map vision, void superiority through ANS missile systems, and then using its bombers to deal critical strikes at the enemy.
Task Force Sycamore


Designer:
Cik (Seeker Enthusiast)

Difficulty: HARD

Strengths at a Glance
  • Variety of deadly Missiles
  • Good Electronic Warfare

Limitations at a Glance
  • Fragile
  • Missile strikes require coordination
  • You need both map awareness and judgement to time missile strikes
  • Missiles are your only weapon. When you run out you are down to a single 120mm gun.

Usage:

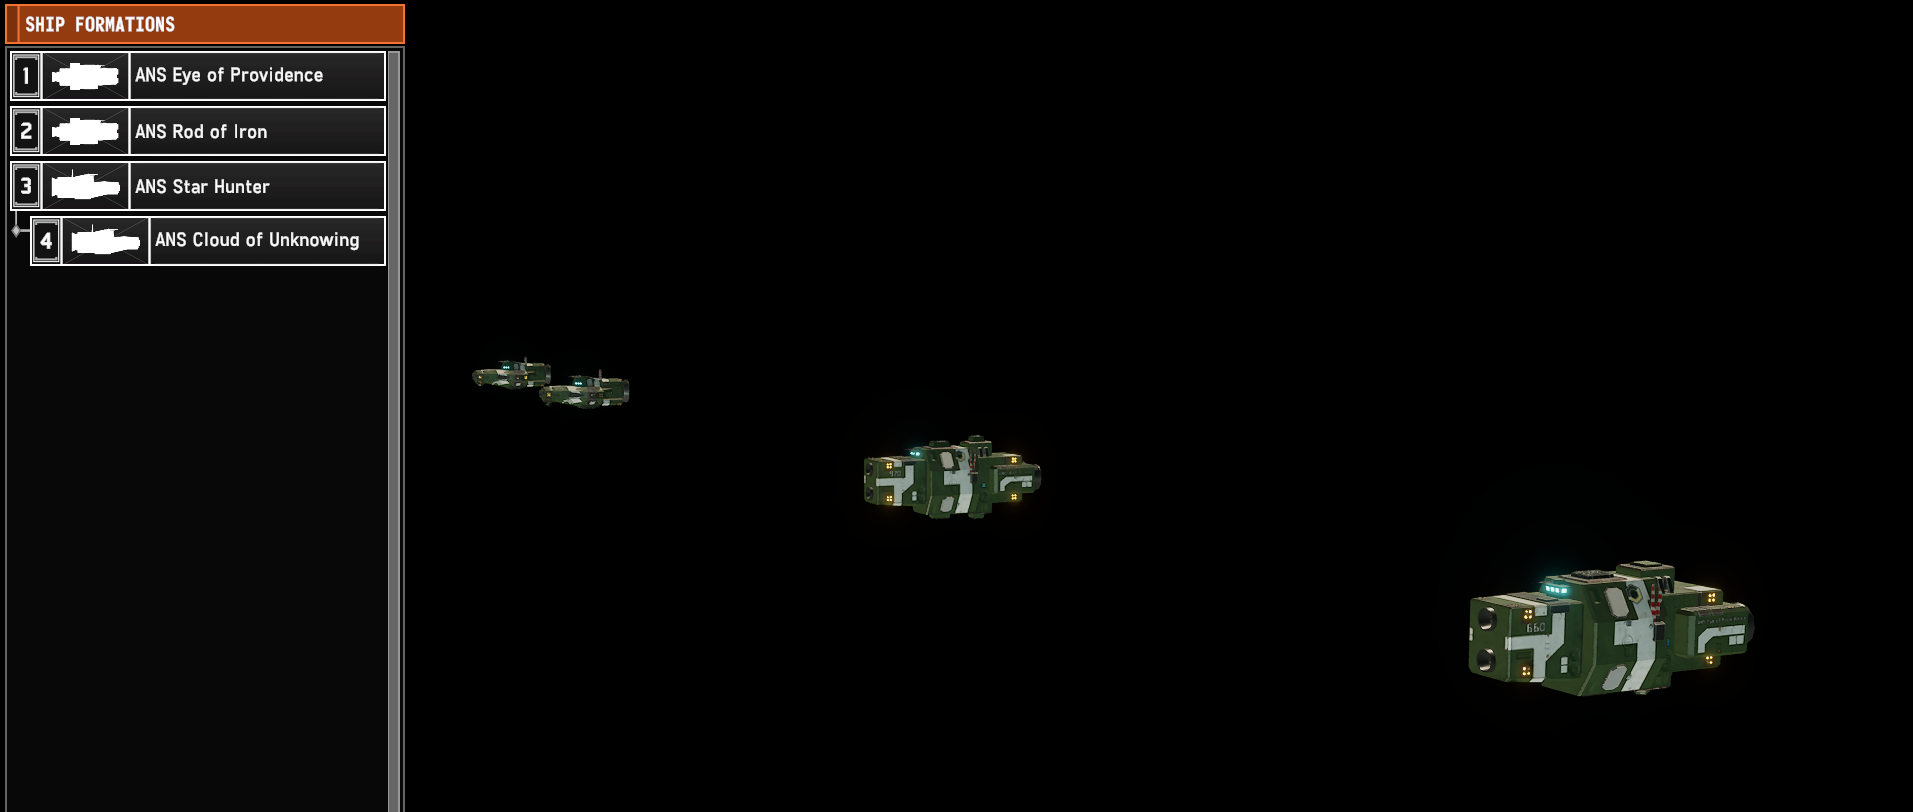
Now, I’m not a missileer, but I’ve seen Cik use his missiles in the testing with fleets similar to this. Sycamore has two frigates and a corvette group to be used in tandem.

Eye of the Providence is to be kept at standoff range and preferably hidden through careful management of your range and by using the Spyglass on this frigate to get an idea of where your enemy is. When an opportune enemy target comes up, you blast them first with your size 2 hybrid and then finish them with size 2 missiles. It is recommended however to only engage light warships with the Eye of Providence.

For heavier targets, you use the missiles on the second frigate in Sycamore is Rod of Iron a radar-less frigate with 6 programming channels and packed with “Shipwreck” Size 3 Hybrid cruise missiles of the High Explosive High Explosive variety. These missiles do not require a spotlight and can be waypointed around corners and cover. It is advised to use the Mixed Salvo Planner to waypoint the two different Shipwreck hybrids together as they have BSSJ and Hardened Skin penetration aids to break through enemy point defense. Therefore, frigate is to be hidden in a semi-central area behind cover and preferably not too far from friendlies. The frigate is purely a moving missile silo, with no other capabilities other than to fire huge expensive salvoes of deadly hybrid missiles at high-value targets. Keep this frigate safe as it has no radar and a single Rapid Damage Control locker, meaning it’s incredibly fragile and cannot see any ships approaching it until they approach visual range.

It is recommended the pair of Sprinter-class corvettes use range control and jamming to hide itself. It’s not a group you should or can easily split apart as keeping them together allows them to take advantage of their jammers and a larger salvo grouping. The Maelstrom Size 2 Hybrid missiles are for shooting at any targets you don't have a track for. Use the Whirlpool Size 2 Hybrid missiles should be what you use with these sprinters. They also are completely reliant on softkill to decoy missiles, which is the toggling of the Blanket Jammer, Chaff Decoys and occasionally turning the ship’s radar off to prevent enemy missiles from hitting them.

Again, this all depends on the situation. Don't get me wrong, this fleet is rated HARD, as it's all about missile management. However, it's fairly flexible in that it has so many different kinds of missiles, a coordinated salvo of the different types is going to get something through someone’s soft-kill or hard-kill point defense. The two things you want to keep in mind with this fleet though is that you want to fire and get the heck away lest you get targeted down. Each of these ships are fairly expensive and I personally recommend firing the cheaper missiles first to get an idea of your enemy point defense, before firing the more expensive Size 2 and 3 hybrids.

If you do carefully manage your range and manage to use your Sprinters or friendly team to scout out your enemies, though, you’ll be able to unleash a volley of spikers that will make even veteran players quite scared.
Task Force Willow


Design Lineage:
Created by Enderminion, Reworked by Xenophon of Athens

Difficulty: HARD

Strengths at a Glance
  • Powerful distributed light assets
  • Ability to grant vision across battlespace
  • Assets are compartmentalised and so can be disposed of to gain control of points
  • Light cruiser can defend points

Limitations at a Glance
  • Unable to directly fight an enemy fleet
  • High skill level and map awareness required
  • High micro/actions per minute is encouraged

Usage:
Within the multiplayer skirmish setting of Nebulous Fleet Command, the most common form of gamemode is the Control Point game mode. In this game mode, teams (usually of 4 versus 4) must fight for control over a series of capture points, which allow teams to accumulate points until a set amount, usually 1000. It has become common in this game mode to have players using fleets specialised in providing vision for their teammates and securing and defending capture points. These fleets are known as “Cap fleets” and the reworked Task Force Willow is a prime example of an ANS “Cap fleet.”


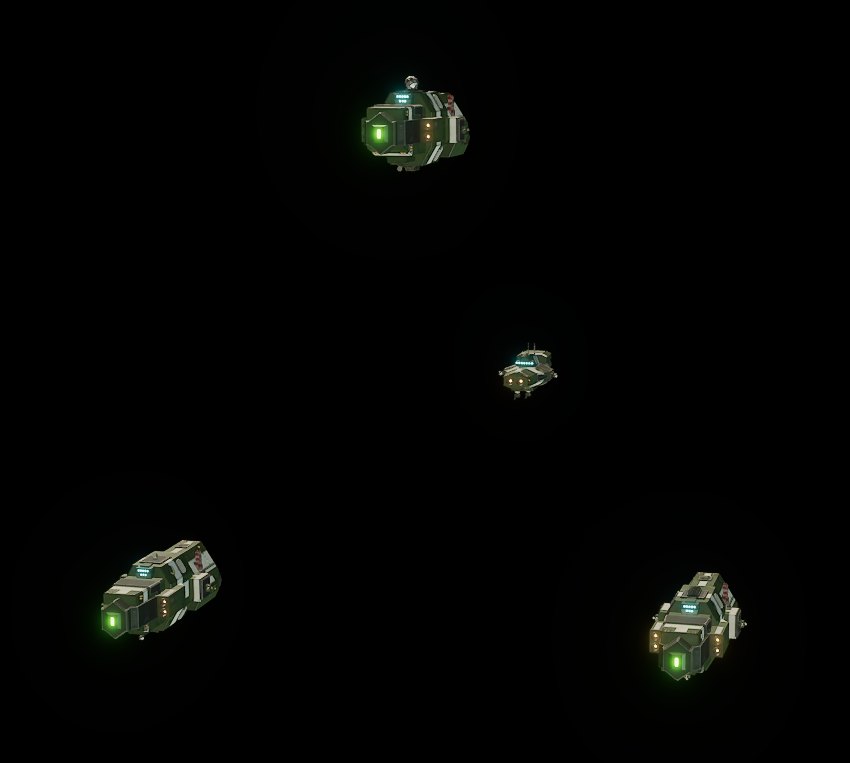
There are three main elements to Taskforce Willow. Chief among them are the four torpedo armed Sprinter-class corvettes. These don’t hold enough warheads, or powerful enough missiles to take down a large OSP warship, but they aren’t designed to do that. They are instead designed to take down OSP Ferryman-class shuttles and Dragur-class tugboats within 4km. Meanwhile, their 20mm Defender point defense turrets and anti-missile missiles will keep them safe enough for them to capture points. The fleet has four of them, which allows a skilled player to sacrifice a few of them to capture or contest important neutral points, and lurk the remaining around corners to protect important areas of the map.

The second element is the Word Cadence a frigate armed with the 11.5km Spyglass search radar, a Pinard radar-detection module, a Blanket radar jammer and Hybrid missiles. The Spyglass radar allows the frigate to be deployed as a watchtower that can overlook a large part of the map. Meanwhile, pointing the Pinard module in the right direction will give a player the type and direction of any active radar at all ranges, even outside of the Spyglass radar’s range. Players can also employ the the Word Cadence as an offensive scout hunter through using its sensor tools to locate targets, using the E90 Blanket radar jammer to jam them, and then firing its six Size 3 Hybrid missiles that can be fired at enemy light warships.


The third and final element of Taskforce Willow is the Vauxhall-class light cruiser Beyond Conventional. Equipped with MK64 250mm guns, the Beyond Conventional should be used to overwatch friendly or contested control points. Its MK64 guns can shred light targets with High Explosive (HE) or Radio Proximity Fused (RPF) shells. This makes the cruiser perfect for clearing contested or friendly control points of enemy vessels sent to capture points. While a lone light cruiser might find it difficult to fight heavier OSP warships head on, it is armed with a small “backpack” missile launcher of Size 3 torpedoes and Size 3 Hybrids of the HEKP variety meant to one-shot bow-on enemies. Please note that these particular Size 3 Hybrids are of the “instant-stage” or “insta-stage” variety, meaning they are best employed within 4km of the target when they can immediately go into the “Sprint” stage that make hybrid missiles so deadly. While the Beyond Conventional can certainly be used to skirmish and support the attacks of heavier Alliance warships, its intended use in the fleet is as a defender of points.

Overall, every element of Task Force Willow has been built to assist players in capturing points, defending points and getting vision around the battlespace. Despite compromises made to ensure the ease of the fleet for new Nebulous players, it is one of the hardest starter fleets to learn and master. It has many warships to control, requiring a higher amount of actions per minute. The fleet requires map awareness and some knowledge of the game’s scoring system to use to full effectiveness. It also cannot fight enemy heavy fleets head on and will lose to OSP starters such as Kyanite, Cobalt, Garnet and Zircon. However, this is not the intention of the new Task Force Willow. Instead, Willow will decisively deliver victory for the Alliance teams thanks to its supreme ability to provide map vision and control the capture points on a map.


Trivia: Originally Willow was an Axford fleet with railguns, beam destroyer and missile frigate, then it was a gun-beam Axford with a railgun destroyer and supporting missile frigates, before it became its current iteration.

The current rework of Taskforce Willow was made by Xenophon of Athens. She is widely known as one of the best capture point players and who has assisted me in reworking Kyanite Squadron.
Protectorate Starter Fleets
Cobalt Squadron

Designer:
Notsolonewolf, Nebulous Moderator

Difficulty: EASY

Strengths at a Glance:
  • Ease - As one tanky battlegroup with only two ships, it is quite easy to use
  • Simple - The fleet is incredibly simple. You take the Ocellos, you point them, you shoot them
  • Dense Point defense - Cobalt has both defensive missiles and point defense turrets
  • Anti-Jamming - Cobalt has two illuminators

Limitations at a Glance:
  • Vulnerable to the sides - Do not let the Ocello cruisers get hit from the side, they will die.
  • No Anti-light capability - the Ocellos have only one armament, and it is 450mm guns. These do not perform well against light warships

Usage:
Cobalt Squadron is the Protectorate version of Task Force Oak and is designed to be an incredibly easy and durable fleet for those getting into the Protectorate. Simple to the extreme, it still can play a role in shaping the battlefield and supporting your team.

The squadron is composed of Two Ocello-class Command Cruisers. These are the Protectorate equivalent to the Alliance Axford Class cruisers. In lore, the Ocello was the previous generation of Alliance Heavy Cruiser that the Protectorate seized from mothball yards.

That being said, the Ocellos are not as tanky and durable as their Alliance counterparts. You need to point their bows to their targets where their forward-facing 450mm turrets can do damage, and where your reinforced bow can take hits. It is recommended you use the Hold Heading (Track) command on the right-click menu to keep your ships pointed at their opponents. I recommend you use 450 MM High Explosive against broadside Axfords and anything less durable, whilst using 450A Armor Piercing against bow-tanking Axfords and heavier (Solomon.)

Furthermore, it is not easy to hit Cobalt with missiles. The two Ocellos have 8 Aurora anti-missile lasers that can softkill Alliance hybrids. This means these ships are immune to everything but the largest strikes especially if the BSHORT (Battleshort) function is toggled ON. However, this point defense loadout is vulnerable to close-range launched torpedoes.

Cobalt also has two pieces of utility equipment. The Interruption jammer which can send Command-seeker missiles flying, and the Floodlight turret. The Floodlight is an anti-jamming tool you can use to point at enemy jamming to improve your ability to see enemies hidden by jamming. If that still doesn't reveal the enemy, burn-through, and use the Bullseye fire control radar to lock onto the burn through ping.

Cobalt does have a few weaknesses though. From the side, Cobalt's Ocello's can be killed quite quickly due to its 30cm of armor. This means the armor will deflect most shots, but only when the bow is pointed at the enemy. The fleet is also optimized for durability and simplicity. It thus has a far lower damage output than some other Protectorate starter fleets such as Kyanite Squadron or Zircon Squadron. It’s also not particularly fast as its Raider drives are good at dodging and acceleration, but not at getting them anywhere fast. This makes Cobalt supremely vulnerable to say a close-quarters beam fleet such as Task Force Ash.

It is thus recommended to use this fleet in conjunction with cover to enable withdrawal and if necessary. Cobalt will always be able to hurt any Shelter Alliance fleet, just not quickly and so maintaining range and guarding an important position for your team is crucial to using this fleet correctly. All that being said, if a player does misposition by accident, Cobalt’s ease of use and durable construction means that it should survive your mistake.
Garnet Squadron


Designer:
Kryptic

Difficulty: Easy

Strength at a Glance
  • Easy to micro
  • Uniform fleet set means its easy to remember what ship does what
  • EWR provides it the ability to provide map awareness
  • Can punch above weight
  • Quite durable


Limitations at a Glance
  • Deals most damage at short ranged
  • Large weapon and ammunition variety to keep track of
  • Slow

Usage:
Garnet Squadron is an angrier and tankier version of Task Force Ash. The Plasma-100mm combination is powerful, but due to the range of the 100mm guns and Plasma’s armor shredding falloff, this is a formation built best to confront enemies at mid ranges of around 6.5-7km. This task is achieved through the two main groups of the Squadron.

Garnet’s main group is a formation of Five Cargo Feeders of two main types, but essentially, you generally just want to shoot everything at targets with a few exceptions.

The three Monitors with 600mm C90s spinal guns fire both High Explosive Squash Head and Bomb Shell munitions. The High Explosive Squash Head is good against large or medium sized targets. It does not care about armor angling, insofar that as long as the shell fuses, it will do damage to the target. Meanwhile, shoot the Bomb Shells against light targets such as Sprinter Corvettes, Raines Frigates or Keystone Destroyers.

The C90 monitors also have 1-2 T30 100mm turrets. They fire fast and so alone they are only good against light ships up to Vauxhalls (using the Armor Piercing Shell), but for maximum effectiveness they need to be combined with something that can strip the armor of a target.

Thus, Garnet has two C56 250mm Monitors with Plasma T81 turrets. The C56 250mm guns are very good dual-barrelled weapons that can shred medium weight warships with AP or light warships with their HE round. These monitors also have two T81 Plasma Turrets each. At 7.8km range, they will burn and strip the armor of a heavy warship. This stripping effect gets more potent the closer the turret is to the target and shows up as a blackened mark on the enemy ship's armor.

The T81 Plasma turret's stripping thus opens up enemy heavy warships such as Axfords and Solomon's to be damaged by the rest of Garnet's lighter arsenal. Once a ship is sufficiently plasma'd and burnt (which is shown in the standard view as a blackened marks on the ship), fire High Explosive High Capacity rounds from your T30 guns and High Explosive rounds from your C56 250 cannons at your enemy targets. The High Explosive High Capacity rounds do significantly more damage to armor-stripped targets, but have lower penetration.

In summary, the trick to using Garnet is to position yourself in a crucial space where you can overwatch a point, or a critical section of the map. You destroy any enemy warship that closes in. If your team needs to push, you need to lead the charge, preferably into an area where you are only confronting one fleet at a time.

This is because you need to be careful using this fleet. Cargo Feeders are built tough, but 250mm AP can penetrate them and 450mm HE and AP shells can rip them up. Isolate Solomon battleships, Axford heavy cruisers and try not to get kited by Vauxhall light cruisers. Also keep in mind that while Garnet Squadron has a comprehensive point defense suite with anti-missile missiles, laser, flak and defender point defense, it’s divided up between the different ships. You may not fair so well from being missile striked at from certain angles.

Set up ambushes with your OSPN radars, confront your enemies bow on, leave burning wrecks behind. That’s how you want to play Garnet Squadron. It's an overall EASY fleet to play especially when compared to Task Force Ashe as it's better recon elements and the tankiness of the Cargo Feeders enables it to not only slug it out, but choose when to slug it out.
Kyanite Squadron (updated Jan29/25)


Designer:
vren55 (hey that’s me) with assistance from Xenophon of Athens, Hunter, Dagaribus and Nekoboyblue

Difficulty: Moderate
Strengths at a Glance
  • Strengths at a Glance
  • Varied arsenal
  • Good long range firepower
  • Ability to get good tracks at long range, and locks at short range

Limitations at a Glance
  • Needs time to do damage
  • Relatively Fragile
  • Armament on One Side

Usage:
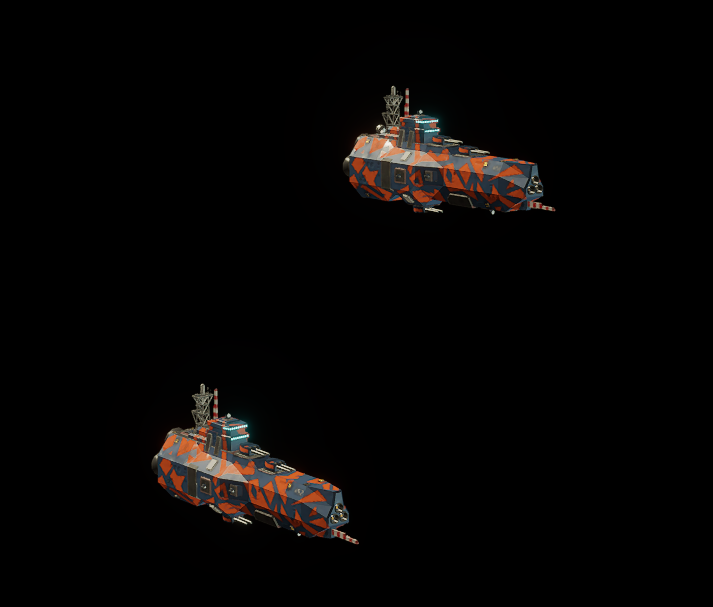
Kyanite Squadron is the archetypical 450mm liner fleet featuring a formation of three ships: two very similar Marauder-class line ships: No Other Way and Final Orders, and a Draugr- class Tugboat Until the End. It is the easiest ranked OSP starter fleet equipped with craft.

The primary armament of Kyanite’s Marauder-class line ships is a battery of 450mm casemate guns that fire 8 shells in a salvo before needing to reload. These weapons are good against Alliance Keystone-class destroyers, Vauxhall-class light cruisers, and are the only gun weapons that can kill Alliance Axford-class heavy cruisers and Solomon-class battleships. That being said, the weapons need time to truly kill Alliance heavy ships.

Employing these weapons requires careful control of the lineships heading and roll. In fact, I advise setting your heading and roll first right after you start moving. Don’t worry too much about the roll being precise, a command to fire your guns will override the roll command, but you do want to make sure the 450mm guns are facing in roughly the right direction.

Even without a Bullseye lock, the shots from Kyanite’s two lineships can be fairly accurate. To do this, players can select the formation by holding shift and right-clicking a target to bring up the formation targeting menu. Open the EW (Electronic Warfare) box which will bring up the tugboat Until the End’s R400 “Bloodhound” Long Range Tracking Radar. This radar is what enables Kyanite to get fireable radar tracks more than 6.5km away as the moment the Bloodhound brings its blue cone onto a track, it provides your fleet a track with a very high positional accuracy even at extended 10-11km ranges. At close ranges, employ the lineship’s Pinpoint fire control radar to lock onto targets.

With regards to durability Kyanite’s lineships can take a punch due to its Damage Control Complexes, and Damage Control Lockers. However, it is strongly advised that players judiciously use cover to protect the lineships from concentrated and sustained fire from Alliance heavy units. Kyanite is very similar to Task Force Oak in that range and sight line control are the most important aspects of using the fleet. Players must maintain their map awareness so they don’t end up fighting more than two fleets and getting shot at from the side. Kyanite however, does not have the armor of Task Force Oak, meaning that it cannot simply stand in the open and fight. It must duck in and out of cover and control its range to targets.

For missile defense Kyanite has 50 Anti-missile missiles to deplete enemy hybrid salvoes. Chaff and use of emissions control (EMCOM button on the new UI) can be used to “softkill” or decoy Radar and Anti-Radiation missiles, whilst high-end Alliance Electro-Optical (EO) missiles and Command (CMD) missiles can be jammed out by Until the End’s EO Dazzler and J75 Warbler. If that is not enough, the fleet has multiple P11 20mm Pavise turrets.

Kyanite shines in that it has a variety of anti-craft options that also extend its offensive anti-ship capabilities. T20 100mm Dual Purpose Secondaries on both liners are an excellent way to deal with light flanking targets as they can hammer Sprinters, Frigates, Destroyers and Vauxhalls with a range of munitions. The T20s also have 100mm Flak rounds that can automatically fire to help attrition approaching fighters.

Kyanite furthermore has 8 Barracuda K-variant fighters that can be launched from its “backpack” small mounted hangars. The ships can’t repair the fighters but they offer good utility at an affordable point cost. These fighters have three loadouts:

  • Main Escort / Anti-Light: is a multi-purpose escort and light strike loadout equipped with both anti-fighter missiles, 35mm flechette nose gun, jammers, and R1 ‘Perch’ rockets. Launch this first and have them escort the liner, peeling them off if you need to hit something small and fast like a corvette or destroyer.

  • Backup Bombs: is to be used if your fighters have expended their light munitions or, you have an alive, but badly damaged Alliance capital that needs to be destroyed. The KBU-22 bombs equipped in this loadout can deliver a knockout blow but do need a run up, so don’t use this carelessly

  • Backup Guns Only: is what you can equip your Barracudas with if you still have craft available but no munitions. Kyanite carries enough 35mm Flechette that you should still have enough for a sortie, assuming your craft are still alive.

In case of the rare situation where Kyanite’s fighters are all expended and the fleet is faced with a bomber strike, both of Kyanite's liners have two Single Armed Launchers (SALS) that fire Anti-Bomber Size 2 missiles nicknamed "Breadsticks." This missile is able to one-shot enemy bombers but has a limited range. It is a good idea to hit Z and click on incoming bombers to trigger the missile's launch.

It is highly recommended that if you, players, want to experiment modifying Kyanite, you really should. As with all starter fleets, these fleets are just to help you get into the game. You can totally replace parts and tinker with them.

In summary, Kyanite can hurt any fleet that gets on the wrong side of its cannons, but the fleet has limited armament on one side, and requires cover to preserve its lineships. Manage the threats you are facing and you are shooting at. Support your team. Think a step ahead before you use the fleet's superior mobility to move its ships and you’ll do just fine.

Trivia:
Originally Kyanite had a R400 Bloodhound tracking radar built into No Other Way but it reduced the firepower of that liner so much that I had to place it on a separate tugboat.

Kyanite originally had an MLS-2 backpack. This was always a compromise choice I’d made due to needing some way to reliably damage light assets. The Barracudas have replaced it to help introduce new players to craft and also to fulfil that role.
Azurite Squadron

Designer:
Tempest

Difficulty: Moderate

Strengths at a Glance
  • Good long ranged firepower
  • Has the ability to get Fire Control Locks and Good Tracks at range
  • Good point defense

Limitations at a Glance
  • Orientated towards firing at range
  • Lacks ability to cap contested points
  • Not the best in close quarter fights
  • The Abject Terror needs some micro in order to use it effectively


Usage:
The description for this fleet is quite accurate and as a battlegroup, this is incredibly formidable for ranged engagements while offering some seriously stiff missile countermeasures.

Beyond 9km Bullseye lock range, Azurite’s Tugboat has an R400 long range tracking radar, allowing for the Lineship and Ocello to open fire with 450mm cannons. The R400 doesn't pierce jamming though so much as it enables the fleet to outrange it by having all ships stay outside of the Alliance's 10km Blanket Jammer. Within 9km, the Ocello can provide a Bullseye lock to enable a very accurate track.

Azurite is however reliant on some degree of clicking-fu. The Ocello Rose Soul needs to have its bow pointed to the enemy at all times, so use the Heading Command liberally.

The Marauder-class lineship Abject Terror requires even more micro to use effectively, but it can be deadly if you get it off. The lineship has casemated on both sides and is buffed to fire all the missiles as quickly as possible. Players need to fire one side first, Cease Fire, and then command the other side of the warship to fire. This will cause the lineship to turn until it aligns its guns and fires again. At this point, you can repeat the process for maximum effect against your enemies.

Azurite also has a significant number of Anti-Missile Missiles, Auroras, Bastions and Pavises. It has less Auroras than Cobalt, but the number of Anti-Missile Missiles makes it quite protected against hybrids.

There are a few things that I can conceive this starter fleet being vulnerable to. One, it’s a fast fleet, both of the larger capital ships are dual-driven and can make faster than 37m/s. However, the Lineship is best used to pop in and out of cover is possible as it's though but not extraordinarily tough.

Two, the fleet is equipped without any illuminators, meaning its liable to be jammed. It does have an R400 Tugboat that can be offset to provide a track, but that can be shot down by a missile or by gunfire. To survive and do well, you will need cover nearby to make this fleet work and be able to watch your flanks.

Finally, you have to keep the battlegroup together which means you can't really spread it out to contest different points.

That being said, if you do watch your flanks and manage how many enemy ships you are engaging, Azurite Squadron is a deadly fleet composition for OSPN.

Trivia: Azurite used to have an omni-softkill Ocello with a rolling 450-250mm bulker and also used to be rated Easy.
Zircon Squadron


Design Lineage:
Original design by Hardworkingslacker
Rework by Kryptic and Notsolonewolf

Difficulty: MODERATE

Strengths at a Glance
  • Deadly Short-Ranged Armament
  • Good sensors
  • Able to defeat heavy and light ships

Limitations at a Glance
  • Limited effective range to 6.5km, and only able to fire at 7.2km
  • Not particularly durable
  • May require some micro due to lineship rolling

Usage:
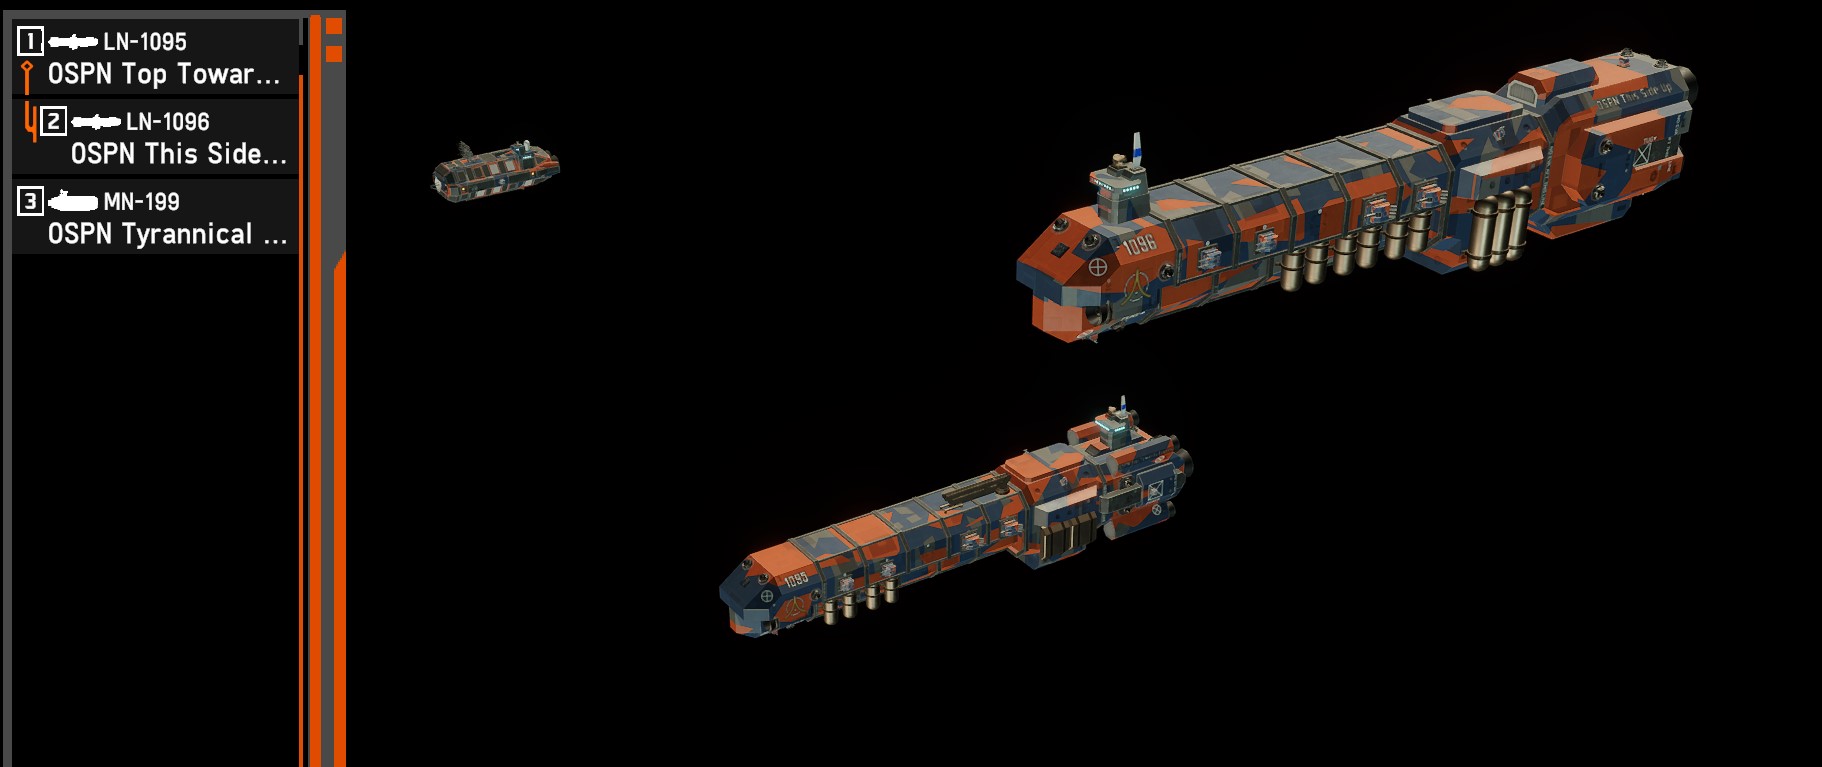
Zircon is a fleet of three ships that relies on ambush tactics to deal damage up close and personal within the 7km range bracket. Their primary armament are turreted T30 100mm cannons and T81 400mm Plasma cannons.. Unlike its similarly armed Garnet Squadron, Zircon does not have the same durability as monitors. However, don’t underestimate these lineships. They can deliver a lot of damaging fire through first using the Plasma guns to strip away enemy armor, and then using the 100mm to deal damage.

Against the most heavily armored targets, load 100mm Armor Piercing (AP) first. Then use the heading and roll commands, along with the weapon group commands to point the self-explanatory Top Towards enemy and This Side up Marauder class lineship at the enemy. Fire plasma and 100 AP at the enemy for the first salvo, before transitioning down to 100mm High Explosive High Capacity (HEHC) for the followup salvoes against armor-stripped targets. You may have to duck behind cover, but with CHI 7700 drives specialized for acceleration and turning, the two bulkers can do that easily.

Zircon Squadron includes an Early Warning Radar mounted on what the community colloquially refers to as an Intelimonitor, or a CIA monitor called Tyrannical Gaze. Use this Flathead-class Monitor’s EWR to find a target, the Long Range Tracking Radar to get a better track, and its intelligence centre compartment will break down the track and identify it and its status.

Do note that while Zircon is effective at eliminating both ANS heavy and light ships up close, careful location and judgement need to be used to position the ships to do so. Do not get into a long-ranged pursuit against enemy forces or a stand-off engagement above 7km. Use the Tyrannical Gaze to locate targets and position yourself accordingly using cover to leap out and douse the enemy in flame and cannonfire.

Trivia:
Zircon was originally a T30 equipped lineship with two pure plasma monitors and a scout shuttle.
Wulfenite Squadron


Designer:
Notsolonewolf

Difficulty: HARD

Strengths at a Glance
  • Varied arsenal with cannons, rocket launchers and shuttles
  • Great point defense
  • Has scouts available


Limitations at a Glance
  • Has one very valuable warship
  • Most damage concentrated in rocket shuttles
  • Lack of escorts for Ocello


Usage:

Wulfenite Squadron is what is known as a dispersed fleet with a single anchor ship. The anchor ship is one Ocello command cruise. The dispersed fleet are the five Rocket Shuttles. It is a starter fleet thus geared toward scouting and ambushing Shelter Alliance light assets while the command ship holds a point..

The twin RL-18s on the Ferryman-Class Shuttles are effective at about 3-4 km range. Use these shuttles to kill enemy scouts, or just scout for targets. The Piranha rockets have decent armor piercing and in volume will shred Alliance Vauxhall light cruisers and anything smaller. However, while they can annoy Axford, the rockets cannot be used to eliminate Alliance capital ships. The rockets also make these ships more expensive than your standard “cap’ or “capture point” ship meant to take points. It is recommended to put the Rocket Shuttles together in one formation if it's too hard for a player to grasp the fleet, or to micro only one or two shuttles at a time.

The Ocello Command Cruiser has Auroras for anti-hybrid point defense, enabling it to cover friendly ships as well as itself. 450mm Cannons can be used to engage heavy Alliance Capitals and Vauxhalls. It also has an all-important Interruptor type Communications Jammer meant to disable Command guided missiles. Keep this warship pointed bow on at the enemy.

In summary, Wulfenite thus specializes in controlling friendly capture points and denying enemy capture points, as well as providing scouting. However, a lot of its killing power is concentrated in the rockets the fleet carries. Be very careful not to lose your shuttles needlessly and note that the fleet doesn't have many ways to kill ships quickly without the rockets. The micro on this fleet is also much higher due to the separated Rocket Shuttles.

Otherwise though, this is a very good fleet for keeping map awareness whilst having a bit of punch.

Trivia: Wulfenite used to have an Ocello, a monitor equipped with decoys, and three rocket shuttles.
Tantalum Squadron


Design Lineage:
Principal designers: Xenophon of Athens and Good Nut.
Difficulty: HARD

Strengths at a Glance
  • Able to provide wide array of vision
  • Strong ability to contest and capture enemy capture points
  • Many tools to hunt enemy scouts

Limitations at a Glance
  • Not able to fight enemy ships greater than a Keystone-Class destroyer directly
  • High micro/actions per minute required
  • High map awareness and game sense required

Usage:

Within the 3k fleet point limit, Protectorate faction players have a vast array of tools to contest the capture points in the very common, “Control” point multiplayer mode. While Alliance capture-point fleets employ Sprinter-class corvettes and Raines-class frigates to provide vision and contest points, Protectorate fleets have a different suite of tools to win competitive multiplayer team battles.

Tantalum Squadron is a good example of the typical Protectorate capture-point or “cap” fleets employed in the Nebulous multiplayer where fleets of 3000 points each battle over capturing control points that grant your team score.

The lead ship of the squadron, Brainiac, provides the vision and intel. Equipped with an intelligence center, the Flathead-class monitor assists the player’s team in quickly identifying the tracks of ships. To locate them, Branianc sports an Early Warning Radar, a directional radar that can be used to locate the approximate positions of enemy Alliance ships. It does not provide tracks accurate enough to fire on, though, that is the job of the monitor’s Long Range Tracking “Bloodhound” radar which can be directed onto a target to provide friendly units accurate radar information to shoot at. Some Buckler anti-missile missiles and chaff protect the Flathead from long-range missile strikes. Still, it is important to keep the Brainiac safe because the monitor uses a Jury-rigged Reactor (JRR) to power its systems, which means if the compartment is hit, there is a 30% probability it will have a catastrophic event.

Yet, the Brainiac alone does not provide the sensor coverage and map presence for a skilled player to exploit. Tantalum has four of what the community has termed “Multi-mission tugboats” or MMTs for short. Each of these Draugr-clas Tugboats is equipped with a J15 “Bellbird” radar jammer, a C30 100mm casemated cannon, Pinpoint fire-control radar and 8 x Slider Size 2 missiles. With this arsenal, these MMTs can hunt Alliance Sprinter-class corvettes and Raines, using both the jammer, guns and missiles to blind and kill these targets. The jammer and the tug’s anti-missile missiles on the tugboat also serve as its defense as they have no point defense (PD) turrets or “hardkill” PD. Most importantly, the MMT has a Bulwark Huntress radar with a range of 10km and the powerful Burnthrough ability. Through selecting the ship using the BRN command, a player can make the MMT do slight damage to its own radar in return for lighting up stealthy Alliance warships. The Huntress’s 10km range also allows the MMT to provide a significant degree of vision, allowing it to both act as a forward scout, or overwatch corners. Moreover, for all this capability, each tugboat is only about 414 points each, which is very good for a scout considering the MMTs are built to even tank a Size 3 Hybrid shot and keep moving. Just don’t take sustained heavy fire in these warships.

Of course, while MMTs are highly capable scout hunters and scouts, they are far too expensive to take capture points, which are usually guarded by Shelter Alliance assets. Instead, Tantalum relies on its four Ferryman-class Shuttles, each armed with a T20 100mm cannon. This small gun can damage Alliance Sprinter-class corvettes and provides an outsized threat for its cost. A Pavise 20mm point defense turret and a VLS-1-46 chaff box carrying anti-missile missiles and chaff provide each shuttle a decent missile defence complement. Send these cheap 182 point scouts into capture points to grab them for your team, and if they survive, use them as vision or to sneak behind the enemy lines to grab their “natural” capture points they start with.

Overall, Tantalum is an excellent example of a Protectorate “cap” fleet. It is not however, not a fleet designed for fighting enemy Alliance capital ships in a head on slugging match. While the fleet’s missiles can finish off damaged Alliance capital ships, they’re of limited volume and shouldn’t be used to fire at them directly. In some ways, Tantalum is also a victim of its cap fleet specialisation. It is an amazing starter fleet for those who already have some game sense and knowledge of Nebulous Fleet Command maps. This does mean that it may not be the fleet for someone who just picked this game up for the first time. In addition, while you can mitigate the actions per minute required to control the many ships of Tantalum by hiding a few behind cover and only focusing on one or two, the fleet does reward a player who is used to intensive micro.

Find the enemy, capture the points, kill their scouts. That is what Tantalum excels at.

Trivia: As of May 27, 2024, Tantalum is the newest starter fleet in the game’s lineup. It is also one of two “cap” point starter fleets

Originally, Tantalum was going to have a Mass Driver liner, but this version was shelved.
7 Comments
CityScraper Dec 29, 2024 @ 9:27am 
There is a Bot in the Discord that respons with those outlines when you send in a .fleet file
CityScraper Dec 29, 2024 @ 9:26am 
On Hemlock, you accidently called the corvette a "frigate"
и∀! // Reading Rambo Jun 28, 2024 @ 1:07pm 
What program did use use to outline each fleet?
pyr0kid Jun 15, 2023 @ 1:04am 
Azurite Squadron has the wrong picture
vren55  [author] Mar 5, 2023 @ 11:40am 
@Base Delta Zero: No, it indicates how hard container ships are to use at 3k b/c they rely on waypointing missile strikes and a good pd net.

@hero with no name: You're welcome. Take your time learning, there's quite a curve, Try out some of Jdee's videos and ask the community on discord for help
Base Delta Zero Mar 5, 2023 @ 4:40am 
Should the lack of a container ship starting fleet be taken to indicate 'don't use container ships in 3k?'
Hero_withNoName Feb 28, 2023 @ 11:00am 
thanks for this guide, just finished the tutorial and have been trying to get experience with ai skirmishes but i keep losing all my ships before it ends.