CosmicBreak Universal

CosmicBreak Universal

Not enough ratings
Hamster's guide to building: Cartridges and F2P builds
By Parrotkeet and 2 collaborators
This guide aims to teach players the basics of choosing cartridges/parts, as well as showing off a few example F2P builds. Please read my tuning guide before coming to this guide.
   
Award
Favorite
Favorited
Unfavorite
So you've read the tuning guide...
You have read the tuning guide, right?

If not, here it is, because it's full of basic information that you'll need to know to understand how to build a working robot.
https://steamcommunity.com/sharedfiles/filedetails/?id=2841721673

Please make sure to read this one and not other, older tuning guides. Other people's guides contain outdated information. For example, there are no true TGH breakpoints in CBU outside of that for Stun Regain (25).
Ok, now what? A basic guide to selecting parts
- Are you able to dump a stat to 0?
yes = prefer parts that have -1 to dump stats, preferably ones with 0 in the other dump stat if you have two
no = good luck lol
Katana Max AM has a negative stat (-1 TEC) and gives nothing to FLY. This means that TEC and FLY are its dump stats.

- Does your build have stun regain?
yes = TGH > all other stats, 2-3 TGH or go home
no = TGH is a dead stat, don't bother with it
Katana Max AM is a good part for melee LNDs who need TGH, giving 3 STR, 1 WLK and 2 TGH at the cost of -1 TEC.

- Do you need every last bit of capacity to fit weapons and weapon tunes?
yes = 30 cost parts are there for you
no = 35 cost is the way to go
Examples of 30 cost parts are Syverlion and Hoverion HDs, and Air Raider AMs.

- Are you tuning HP on this bot?
yes = consider using 40 cost parts
no = 40 cost parts are trash
Example: Need TEC? Vector Eagle HD gives +3 tec. But it's 40 cost. Nova Dikaros HD also gives +3 tec but is 35 cost.
What do I mean by this?
The VE HD gives +25 HP and a total of 6 stats for 40 cost, with a dump stat of -1 TGH.
The ND HD gives +20 HP and a total of 6 stats for 35 cost, with a dump stat of -1 STR.
Essentially, choosing the VE HD means you're paying 5 cost for 5 HP. But if using the basic Life tune, you get +15 HP for 10 cost. That means the VE HD is only worth choosing over the ND HD when using High Life or Great Life tunes, since those are less cost-effective than the basic Life tune.


Steal this man's arms.


Thank you to Razekiel for this writeup!


Another thing you have to consider when selecting parts is the opportunity cost.
What this means is, not all parts with a main/subweapon are equal.

For example, Alvete BS is a reboost part which refills 50% of the boost gauge when used, and is 55 cost. This makes it the cheapest reboost part. This is useful when short on capacity.
However, it has bad reboost behavior in that it will force the user in a random direction if used while stunned. This can get you killed!
Alvete BS in my garage. It's usually a good idea to stock up on limited-time parts, such as those from Arena Coin robots. That said, not all Arena Coin bots have useful parts.

Royal Beezle BS is more expensive cost-wise than Alvete BS at 65 cost. However, it has good reboost behavior, and will allow its user to choose a direction to escape to no matter what. This part also refills 50% of the boost gauge when used, as is typical of most reboost parts.

Both parts are more expensive than a typical BS - 55 and 65 cost are 20/30 cost over the typical 35 cost a part has, respectively. However, the ability to restore boost without landing is worth it.

Another example of an opportunity cost is a weapon AM. As weapon AMs, such as Genesion AM2 and Gathima AM2 don't have the ability to hold anything, you are losing out on slots by choosing such a part. However, these types of parts try to make it up by being powerful.
Gathima AM2 in particular is a whopping 140 cost, but overranges spectacularly (more on that later), has a good hitrate, and deals out nice damage.
Gathima AM2, as seen in the shop. You can only buy it in the shop like this once you've rolled a Gathima in the Garapon, because CS.

Note that, because of how CS runs things, not all weapon AMs are useful. Parts such as Misty Hollow's scythe, Ogreil AM, Elme S AM and the like are absolute garbage, because free things for the most part aren't allowed to be good. Thanks, CS. Love the variety.

Also notable is that not even all paid parts are useful. Brickgale TOPAZ and SPINEL's AM parts are...bad.

What's that ⇆ symbol?
It means that part is a conversion part.
Conversion parts are only attachable to certain parts, meaning that you can't remove it and attach it onto any robot you like.

Bloody Star AM2@ can only be attached to Bloody Star AM or Bloody Star AM2.

Building for looks instead of function?

Fairys BS is cute, isn't it?

If you're building for looks instead of function, prepare for suboptimal performance. I chose to use Fairys BS here because I wanted a cute robot. But Fairys BS is one of the worst, if not the worst reboost part. It makes your robot do a small (and slow-moving, compared to other reboosts) turn in the air instead of moving them forwards, leaving them vulnerable to attack while reboosting. It also gives +2 WLK (undesirable for an AIR part) while being 65 cost total, which is among the highest of the reboost BS parts.

Likewise, I chose a battlepass reskin of the Gamma Lightning Gun, instead of the regular one. The battlepass reskin can't be modded, so it's weaker than a regular, modded GLG. But I think the battlepass one looks better on this bot, and so suboptimal performance it is.

But if you really care about looks, then go for it, you don't have to follow this guide. I'm not your boss!


Want to learn how to mod weapons? I made a guide on that too!
https://steamcommunity.com/sharedfiles/filedetails/?id=2899561170
What Cartridges to Choose?
BASICS

It's always a good idea to get all Capacity cartridges.
If your bot has Enhance Internal Weapon cartridges, take those too.
If you get Blast Guard, the 50% is a huge difference.
Beam Guard and Sword Guard are likewise useful.
NOTE: Sword Guard is a lot less useful for ranged AIRs, since it doesn't apply to AIR melee. They can skip it. AIR melee is counted as BEAM weaponry, meaning Sword Guard does nothing for it.

Shell Guard is...
Well, it's a 10% guard, the tiniest percentage of all guards, and it's the rarest ammunition type.
The only "pure" shell projectiles are used by LND gunners, which are nearly extinct. Other projectiles with shell attribute are only partially shell - these are used by ART type robots and the other attribute is blast.
Shell Guard is never worth taking.

Sniper Sight is a gimmick cartridge because people generally figure out where you're shooting from once you start shooting at them. It can still be useful on charge weapons.
Stealth System can be useful, but is always expensive to take. You generally trade HP or weapon tunes to take this.
Broad Radar can be useful, but is also always expensive to take. Generally not worth it because enemies your teammates lock onto will show up on radar anyways. Shows enemies with Stealth System on the radar.

ACTION

Sway (WLK based)
-Gives you a small sidestep in any direction. Has more ending lag when pressed backwards
-Not worth it unless tuning high WLK
-Outclassed by Assault Step
-Usable with 0 FLY
-Bad on large robots

Boost Run (WLK based)
-Not actually a dash action! You can pair this with Sway/Assault Step/Short Boost
-As it's not a dash action, it's not any good for dodging things
-It's basically normal running but faster
-Requires you to keep at least 1 FLY to work properly

Short Boost (WLK based)
-Requires Quick Land at minimum to work properly, Quick Jump as well for maximum effectiveness
-This means that if you want 2 guard cartridges as well, you need to take external short boost
-Has a breakpoint, unlike most other movement cartridges (33 WLK)
-Supposed to mess with the aiming system in CB, but doesn't work well with how prevalent homing weapons are
-Bad for map traversal, which means it's weak to melee as it can't escape them easily
-Requires at least 1 FLY to work properly

Assault Step (WLK based)
-Dashes when you press forwards or diagonally forwards, Hops backwards and to the sides.
-Try to dash forward and diagonally when using this cartridge, the hops are bad for movement
-Covers a lot of ground when used forwards
-Usable with 0 FLY when moving forwards - the hops are still affected by FLY
-Usually comes for free on LND humanoids, but mechas need to take it externally. Injustice!
-Although it has no true breakpoints, 28 WLK assault step is basically as good as 40 WLK assault step
-Bad on larger robots because CS hates mechs

Float Dash (FLY based)
-Makes you fly slightly above ground level instead of dashing
-More useful on SUPs and ARTs since AIRs will basically never need to land
-You can float dash into Accele Roll or Air Loop
-Needs at least 1 WLK to function

Glide Boost (FLY based)
-Literally float dash but in the air
-Only for AIRs
-Also needs at least 1 WLK to function
-If you get stunned out of it, you'll be stuck on cooldown. This means you're stuck to regular flight for a bit

Boost Step (WLK based)
-Basically Float Dash on crack
-Uses up more boost than float dash but also moves faster (does not move further than float dash)
-Boost Stepping to the sides goes further than forwards
-Needs at least 1 FLY to function, although it's a WLK cartridge

Slide Boost (FLY based)
-It's basically Sway for AIRs
-I've only seen one person use this
-I actually don't know if it needs WLK and can't be assed to test it

Accele Roll (FLY based)
-Usable by all types as an external cartridge
-AIRs can use it 4x, LNDS 1x, S and M SUP/ART 2x, L SUP/ART 1x before boost gauge depletes
-Makes you do a barrel roll in the air, covers good distance
-Usable even with 0 WLK
-Actually has a breakpoint - 34 FLY

Air Loop (FLY based)
-AIRs only
-Makes you spin in a loop in the air, potentially dodging projectiles that were headed your way
-Its main use was to extend the time alpha-AIRs had to use Moving Burst. It's now fallen out of favor
-Needs at least 1 WLK to function

Air Step (WLK based)
-Basically Assault Step in the air
-See: Assault Step notes
-Comes with certain humanoids, such as Therese and Killica

MOVEMENT-RELATED

Ascending Force is, as far as I know, exclusive to AIRs and certain chibis. It lets you gain elevation until the cap as long as you're moving in any direction. Take it on the AIRs, always. Not worth it on the chibis. Don't use chibis outside of chibi wars if you actually want to contribute to the team. Trolling is fine, be like JoZu and #em3 while firepillaring people. It's fun.

Tough Runner
-Decreases the chance of being stunned while using a dash action (dash actions are things like sway, short boost...)
-Does NOT actually do anything while you're running
-Does NOT work on forced stuns, such as Amy's Repeat Stun or Anko's subweapon missiles
-it's basically useless

Quick Land is useful for the following cartridges, as it decreases their ending lag.
-Boost Step
-Float Dash
-Short Boost
-Assault Step
If you're not taking any of these cartridges, there's no point at all in taking Quick Land.

Quick Jump is:
-used to hop to higher heights when using Short Boost
-can be used to ascend faster
-not worth it on AIRs as they have access to Ascending Force
-generally not worth it unless taking Short Boost

Quick Boost is useful for the following cartridges:
-Boost Run
-Boost Step
-Assault Step
-Accele Roll
-Float Dash
Basically it makes your boost gauge regenerate faster so you can use your dash action faster.

OTHER

Anti Slow
-Negates the effect of the Slow debuff
-Generally not worth it for PvP - how often do you see slow?
-More useful in Arcantus

Fast Recovery
-Halves the time you spend debuffed by anything
-More worth it than Anti Slow, since it works on all debuffs

Stun Regain
-Heals you a little based on how hard you get stunned, and how much TGH you have
-A full spin stun that knocks you down will heal you the most, compared to a light stun that barely affects you
-Heals cap out at 25 TGH

Revenge Shot
-Allows you to use your main weapon(s) without consuming ammo, based on how much HP you have left
-The less HP you have, the more likely it is to activate
-Cannot be activated if you're alpha-striking

Lifetaker
-Bestows a small chance of self-healing a small percent back of the damage you deal
-The activation chance and percent heal are so small it's near useless in PvP
-Great in Bastagant, use it against Haku
-Works on trees, for some reason

Soul Eater
-Every time you kill an enemy, you heal back 10% of your max HP
-The cooler Lifetaker, when playing aggressively

Absorb Bump
-Prevents people from colliding into you, so no more funny cliff falling
-This should really be a core tune instead of a cartridge
-In the lobby, you can also prevent people from colliding into you by going into your garage or the shop

Tough Wonder Bit
-Increases the HP of (doubles?) your wonderbit. Great on Rouche, the necromancer sisters, and not much else

Growing Wonder
-Makes you gain wonderbit gauge slowly over time
-Not really worth it

Moving Burst
-Gives you 1.5 seconds of movement when firing all main weapons
-Certain parts give it a longer cooldown time

Reached here?
Nice!
Basically, you'll want some combination of ALL capacity carts, 2 guards (non-AIRs)/1 guard (AIRs), and action/movement. Only after covering those bases can you go for other cartridges.
Land of the Free (to play) PART 1
Ok, so knowing about parts and cartridges is cool, but what about builds?
Well, here are 3 examples - enough to fill up a single commando. As it'd be stupid of me to expect the average CBU player to have a garage full of Garapon-exclusive parts, each of these example builds are completely F2P.

In my opinion, the easiest to obtain F2P character that's also still usable is the ART-type Nipako, who I'll refer to as Artpako from here on out.
Artpako in the mission coin shop.

Although she's available for purchase if you spend a whopping 150 mission coins, it's easier to simply get 15 medals on her mission, "Nipper Fist Fight" to obtain your Artpako. To do this, play her mission using 15 different robots. The same 3 robots junked and rebuilt again will count as different robots for the sake of grinding mission medals.

Artpako will be my example of a F2P Alpha ART.
What's an "alpha ART?"
It's an ART that makes use of alpha-striking - holding down both left and right mouse buttons at once to shoot all main weapons instead of just the one selected.

Since Artpako doesn't have any sort of barrier gimmick, we'll need to take the cartridge Moving Burst on her, which allows for 1.5 seconds of movement while alpha-striking. It may not seem very long, and can take some time to get used to. However, being able to move while bursting down the enemy team is very useful.
She'll also want both Blast Guard and Beam Guard, so that she takes less damage from other people shooting her.
Lastly, we'll take Boost Step as she NEEDS a way to move around or else she'll get killed before she gets to shoot at the enemy team.

Why Boost Step? Isn't FLY the superior option for ARTs?
That's true! Since LND types have the fastest ground movement, our Artpako can still get outmaneuvered while Boost Stepping. However, Artpako has more WLK than FLY to start with, and it's cheaper in cost to use her internal Boost Step cartridge than to add an external movement cartridge (Accele Roll) to her.

Also, unlike most other ART humanoids, Artpako has 2 utility subweapons: a stun shot and a dash. Both are useful for movement, and as such, useful for trying to stay alive. This makes her less reliant on a FLY build than others.

OK! Now with all that aside, we'll have to think about what stats to focus on Artpako before starting to build.
She's an ART. That means she needs TEC.
We'll also need to use weapon tunes to improve her hitrate. More hits = more damage = more score!
We also need some movement so she doesn't die. That means she needs WLK, because we're going for Boost Step, a WLK-based cartridge.
Lastly, we will use whatever capacity we have left over to tune HP.
STR can be pushed below 0 since she has a fixed performance WB, which means it doesn't depend on her stats.
FLY, we just need to make sure it stays above 0. This means that her dump stats are STR and FLY.

To start with, I'm giving my Artpako a BSJ (adds 1 extra slot for no extra cost) and a Build Arm BS.
Artpako with the above parts added.

Why the Build Arm BS?
Artpako is rather lacking in firepower. Also, an alpha ART needs an overrange weapon.
This means one weapon/part tuned with range that the other weapons follow the pathing of. The other weapons (Nipako Sword Wings and Ultimate Nipper) will not be tuned with range, but still follow that of the Build Arm BS.
IMPORTANT: Your other weapons will only follow the overrange weapon if you actually have it selected!
Make sure to have the Build Arm BS selected as your main weapon, using Artpako's other weapon's only to alpha strike.
Note that not all weapons are able to have their range extended in this manner. Bazookas, for example, can be used to lead, but their projectiles will always disappear once they reach their listed maximum range. Missiles and psyguns generally can be extended.

The Build Arm BS is something obtained from the tutorial, as it asks you to junk a Build Arm, among other robots. Hopefully you didn't sell it for points. If you did, Build Arm is available for purchase in the shop for UC.

Build Arm BS is high in cost. (110)
It has decent ammo. (320)
It has average range. (330)
It has average speed. (380)

We need to tune it with Great Reach for maximum range. However, since it's high in cost, I want to use either Alpha or Beta tunes to cut down on cost. 90 cost vs 60 cost is a fair amount!
I don't want my overrange weapon to run out early in the match. This reduces my attacking range significantly. Therefore, I can't use Great Reach Alpha tunes. This leaves us with Great Reach Beta.

3x Great Reach Beta tuned Build Arm BS. Speed isn't a priority on overrange weapons since we generally don't care if it hits or not. However, there's still damage potential with Build Arm BS thanks to its homing and acceptable speed.

NOTE: You can tune High Reach Beta instead if you're comfortable with shorter range. This leaves you with more capacity for HP or other weapon tunes.

Next, I need to tune Artpako's Homing Shot - the Sword Wings.
It has higher INT than the Build Arm BS. (800 vs 580).
That means it has a longer interval to fire, and thus uses up ammo slower.
This means we can use Alpha (-ammo) tunes on it.
It has lacking speed (320).
This means we should tune speed on it.

Artpako's Sword Wings with 3x High Rapid Alpha. This puts it a little above 400 speed, which gives it an acceptable hitrate on most things.

Now the Ultimate Nipper?
It has a lot of ammo (1200), but 3 shots are used at once, and it has low INT (300).
The 3 shots at once means it effectively has only 400 ammo.
The low INT means it's actually going to run out before your other 2 weapons.
Tune vanilla (the regular +15 cost) High Rapids on it if you want, but I'd rather use these slots for stat tunes.

Don't forget to Eternal tune Artpako's HD. Her AMs can't break (anymore), and her HD breaks fast otherwise.

Ok, so we've got our weapon tunes and an Eternal. It's time to start tuning TEC and WLK now, right?
Artpako should be looking like this about now.

But wait! Her TEC and WLK are uneven! The horror!
But remember the tuning guide?
You can use accessories to change uneven stats into even ones for easy tuning.

See? Everything is fine now. (You don't need to choose the exact same accessories as me. Just make sure you have 1 each of a 5/1/5 TEC and WLK accessory).
Ok, now we can start spamming stat tunes.

Since Artpako's dump stats are STR and FLY, that means the tunes we should use are High Technique Gamma and High Run Beta. Push TEC to 40, then get whatever WLK you can get with whatever FLY you have left without pushing it to 0. A 0 FLY Artpako won't be able to clear small inclines, which will cause frustrating and embarrassing deaths.
With TEC and WLK pushed as high as possible, the remaining slots will go towards HP.

This is what you should end up with.
So it turns out I didn't need the BSJ. Oops. I'll be removing that.

If you really wanted to use up all the slots, you could change one of the Great Reach tunes on the BS to a High Reach for an extra Life tune. If you don't care, this is fine.

The slightly different Artpako.

Managed to get through all this crap?
Congrats! You've built a completely F2P ART.
Land of the Free (to play) PART 2
In this section, we'll build an Izuna Kamui (Nagi).

I HIGHLY recommend looking at xid's Single Shooter AIR guide before continuing here.
https://steamcommunity.com/sharedfiles/filedetails/?id=2842821915
xid's guide.

First, we need an Izuna (either one) and Demonfox Haku LG. This means grinding for Fate Coins.
You can obtain Fate Coins by:
-Fighting Demonfox Haku on Planet Bastagant
-Using Coin Disks and selecting Casual Challenge
-Buying them from other players during Bazaar

NPC Izuna running the Fate Coin shop in the Ground Area.

I suggest using Coin Disks (obtained via the Arte Maid NPC), since they allow you to amass coins passively. Coin Disks are bought for 10 Arena Coins each.
You'll need anywhere from 127 (if buying Nagi) to 92 (if buying Alpha) Fate Coins.
The blue one is Arte Maid.

Why spend more on Izuna Kamui Nagi?
She has marginally better stats than the orange one. That's it. If you're comfortable with losing HP for some more tuning, or don't care to grind coins, you can get the orange one.

Izuna Kamui Nagi as she appears in the Fate Coin shop.

After completing the Fate Coin grind, you'll need:
-2x Cross Raptor AM. Cross Raptor can be purchased in the shop for UC.
-A BS part that gives stats we need. There are multiple, including:

-Baltheon BS (a GOLD one is given for free in Rouche's mission)
-Crescent Saint BS (Crescent Saint is obtained by beating the Operation Star Cluster mission on the highest difficulty)
-Harrier Accel BS (Past Arena Coin robot)
-Mecha Jetter/GOLD BS (obtained via Chaos Coin/Friend Ticket Garapon)

-Almost many joint parts as you can slap on your Izuna
-this means 2x AMJ, 1x LGJ OR 1x BSJ for a total of 3 joint parts.
-if using the Fractulus LGJ, this means you also need 18 Crystal Coins

NOTE: If you were (un)lucky enough to roll Tesladonna ALPHA from the Robo Garapon, you can use her LG as a reboost instead of Haku's.

So... why did I list these specific parts?
Izuna is a Stun Regain AIR, meaning we want to push her TGH to 25. No more, no less.
Cross Raptor AMs, and the BS parts I listed, all give TGH.
Our need for 2 reboosts is taken care of by Izuna's core and the Demonfox Haku LG.

The cartridges to use are:
-Ascending Force. We'll definitely need this because we're going to push Izuna's WLK past 0.
-Stun Regain. That's the whole point around tuning 25 TGH isn't it? There isn't any point to tune TGH on Izuna if we're not taking this cartridge.
-Beam Guard. Decreases damage taken from beam weaponry. Notable is that all air melees count as beam weapons, so Sword Guard is basically useless unless you're somehow staying on the ground.
-Accele Roll. As mentioned in xid's guide, always get this on your AIRs. This makes you way less of an easy target because you're rolling around like a jackass. You can get the 1-day version in the shop for UC. Or if you really like Izuna, spend a permanent one on her. You can get permanent ones via Rt or the battlepass.

Wait! That's only 3 cartridges + one external! You're not going to lvl 10?!
Yep, there's no need to go to level 10. Not every bot needs to reach level 10. Sometimes you're griefing yourself by taking up a 10th useless cartridge that just eats up capacity.

And the weapon of the hour is: Gamma Lightning Gun.
GLG is:
-Low in cost compared to other guns of its caliber
-Higher in force than the Plasma Gun
-Has a decent ammo supply
-Has average range
-Has average speed
-Obtained in the shop for UC.

That means the stats we want are:
40 TEC
40 FLY
25 TGH
As Izuna is an AIR, and has access to Ascending Force, we don't need to care for WLK. Or STR. So those 3 stats, plus some HP, are all we need.

After assembly, you should end up with something like this.
I used the Crescent Saint BS, which is a statclone of Baltheon BS. "Statclone" means that they are functionally the same, and only visually different.

But wait! That TGH! That FLY! We need to get TGH to an uneven number to reach the Stun Regain breakpoint, because we'll receive less HP back at TGH under 25, and for FLY to be at an even number to reach 40.
Worry not, for we haven't used accessories and handhelds yet.
Ideally, we'd go for +3 TGH with accessories and +1 FLY with the handheld. As mentioned in xid's guide, it's costlier to tune TGH on AIRs than it is to tune FLY.

After some customization, I got the TGH and FLY at more desirable points, thanks to a +1 FLY handheld and some accessories. I've also taken the liberties of adding a Gamma Lightning Gun and adding 1 day Accele Roll, as those are important before we start tuning.
It's kind of important to know how much capacity you have once everything is equipped.

Izuna with everything equipped. Still untuned.*
*Except the Fractulus LGJ I forgot was already tuned. Oops.


Remember how xid's guide said to always tune Eternal on your gun AM?
Well, turns out there is an exception.

Cross Raptor has AM and AM@. This isn't the only part like it - the Flapjacks are like this too.
What's important about the AM@ is that it will always break before the actual AM.

This means that your AM can basically take twice as much damage before breaking.
You know what this means? It means you can go without tuning Eternal when using Cross Raptor AM. A small cost-saving measure to be sure, but still a welcome one.
I'm also going to forego tuning Eternal on Izuna's HD since ranged AIRs don't really break their HD parts very often.
I mean, how often do you see an AIR getting melee'd repeatedly?

So now it's time to actually start tuning. Again, I'm starting with weaponry.
Since speed is king, especially when shooting from a range (I mean, as an AIR, you should be picking targets below you anyways), more speed = more chance to hit. I'm tuning this GLG 3x Great Rapid, because you can't really go wrong with that. If you're comfortable with dying, or if you bring your own ammo, you can tune Great Rapid Alpha instead.

The aforemented GLG.

Remember that, since Izuna is a single shooter AIR, and relies on FLY to move, she uses High Tough Alpha tunes, not Gamma. Even with a bunch of joint parts added she can't afford to use High Tough Gamma.
Luckily, the parts selection I have means that I only need to tune TGH 3 times. The rest of my slots can go to FLY, TEC, and HP.

Your tuned Izuna should look something like this.
I know I had a Fractulus LGJ on earlier, but I turned out not to need the slot so let's pretend it didn't happen.

Nice stats, right?
BUT WAIT! There's 5 cost left over! What do we do about this?
Option 1 is to do nothing.
Option 2 is to change the 5 HP/ 5 CAPA/1 TGH accessory to a 10 HP/1 TGH accessory.
If going for option 2, there are 2 10 HP/1 TGH accessories, both obtained via Friend Garapon. They're the Chevalier Helmet and Phantom Mask.

Izuna again, now with all capacity used.

Now all of Izuna's capacity has been used, and we also got 5 extra HP.
She's complete now, but you can switch her wonderbit to a Vulcan Unit (obtained via shop in the EXTRAS section) if you want. The Vulcan Unit acts as a decoy that you can drop once the WB gauge is full, so it could end up saving your ass.
Or if you're strapped for UC, don't.
Land of the Free (to play) PART 3
In this section, I'll be building a Kuten Jikun Long, who I'll refer to simply as Kuten from here on.

There's a series of steps to go through before we even obtain our Kuten, so this one requires more effort to get than just waiting around for coins.

For starters, we need to obtain a Jikun Long Alpha, since Jikun Long Alpha gets promoted into Kuten. You can buy a Jikun Long Alpha from the NPC Elme Sary for 60 Angel Coins.

This pink android with the twintails is Elme Sary.

And this is a Jikun Long Alpha.

NOTE: The starter Jikun Long obtained from the tutorial CANNOT be promoted into Kuten. You have to buy the Alpha version with Angel Coins. Sucks, I know.

After obtaining your Jikun Long Alpha, get her to level 10. How you get her to level 10 doesn't matter, nor do the cartridges you put on her. You don't need to bother tuning her, either, since Kuten counts as a completely different character from her.

A Jikun Long Alpha fully raised to level 10. I used EXP GAIN sticks as I'm lazy.

Now that she's level 10, we need to obtain the item to promote her.
The promotion drops from the Jikun Long NPC in ground area. Give her Angel Boxes for a chance at it. Good luck.

Once you've successfully RNG'd yourself into a Kuten promotion, congratulations! You have your very own Kuten.
But was it worth all the Angel Boxes?

Kuten will be my example of a F2P LND Diver.
This means that the stats to emphasize are TGH and HP with whatever STR you can get on the side being welcome.
The cartridges Stun Regain and Fast Recovery are likewise necessary as they lengthen the amount of time you can survive while diving into a crowd.
We also need Sword Guard and Blast Guard, since they, you know, increase survivability and we kinda wanna live as long as we can in the mosh pit before inevitably dying.

What is a "LND Diver?"
Basically, a melee LND who rushes into an area where the enemy team is all grouped up, with the goal of causing disruption. If they get a few kills on the way, great! If not, ouch.

Kuten, being small, may not seem like an ideal diver. And ideal she isn't. She lacks built-in shields, and is a small target, meaning that she won't soak up as many hits as a large sized one. However, she's free and has a usable built in weapon, which is about all that we can ask for. She also has empty hands, which means we can slap a shield on her.

Like with Izuna, I'm not going to bother tuning Eternal on any of Kuten's parts.
However, the reasons are different this time.
The reasons are that she's not likely to survive for very long. Her AMs don't break (anymore), and it's simple enough to find enemy PS even without radar. So Eternal isn't much of a big deal here.

Parts needed:
-Katana Max BS
-It's a F2P part that gives STR and TGH. That's about it.
-DOS Shield
-Obtained via the Union Coin shop if you're in the DOS Union. Otherwise sold by other players during Bazaar. Shields your front and bestows the Crimson Veil effect while in use. Crimson Veil is a buff that prevents you from being stunned while it's active, so it's useful when trying to escape.
If someone is selling a DOS shield for above 100k UC don't buy it you're getting ripped off.

NOTE: If going for the Bazaar path, you have to be at least Steel Hero (12) to participate in Bazaar.
-TGH or STR handheld of your choice, preferably weaponless so they don't mess up Kuten's subweapon order. This'll give us more slots to work with.
-BSJ of your choice for an extra slot

This is Arteris as seen in the DOS area. She sells Union Coin items, including the shield you want. Picture taken by my clanmate Kazuzu as I'm not in DOS as of the time of this writing.

This is what an active DOS shield looks like.

Here's what my Kuten looks like after equipping the parts needed. I used TGH accessories and a STR handheld.
Oh nooooo the stats?!

If you're worried about my Kuten's stats - this is actually fine!
I'm going to leave her at 23 STR, since tuning STR further would mean taking away from TGH and HP.
"But isn't it bad to leave STR so low?"
On a build like this, no. A diver needs to maximize diving time, which means HP and TGH are the most important stats. If we were to tune STR, we would be missing out on precious HP. Plus, as seen later in this section, we'll be getting in some damage from wonderbits, making up for the lack of STR.
Likewise, I'm going to max out TGH for full survivability this time instead of only maxing out Stun Regain returns. This Kuten is going to be a crowd diver, so 40 TGH is needed. In CBU, every bit of TGH added helps. Note that you actually have to get hit a lot within a short period of time for TGH damage reduction to activate.

This Kuten is getting tuned with High Tough (touch...) Gamma, which are the 5 cost TGH tunes.
"But then how will you move...?"
By right-clicking!
If you click on or hover over Kuten's LG, there's no bubble that mentions it's WLK-dependent. Her melee also has fairly good travel. That means we can move around with her melee combo instead of walking.

"Even up to 0 FLY?"
The 4th kick of her melee combo actually clears small cliffs.
As demonstrated in the Ground Area.

So yes! WLK and FLY be damned.

Fully tuned Kuten.

After tuning, Kuten should look something like this.
Note that, due to slot poverty, I had to use 7 High Life tunes and 1 Great Life in addition to 3 regular Life tunes. The previous 2 builds (Artpako and Izuna) only used regular Life tunes.

But wait! We're not done yet!
Not tuning STR means that Kuten kept her TEC stat intact. This means we can slap a wonderbit on her. Dual Slayers used to be the go-to, but they take up a long time to charge, so you'll have to farm trees before going in if you choose them. If you don't feel like cutting trees, you can try Dual Spike, Dual Lance, or Bigmoth bits.

The Bigmoth bit is obtained in the Quest Coin shop in the Ground Area, which is run by Manimo Girl, the one in the green dress.

This is Manimo Girl.

And there you have it! 3 builds, completely for free. Well, free of real money, anyway.
"But why are none of them robots? All of these are girls!"
The sad reality is, basically all F2P mechs in CBUNI fall into 3 categories:
-absolute trash
-i guess i could use some of its parts
-only usable once you slap Rt parts on it

Therefore, it's far more F2P friendly to start with humanoids. Though, once you build up a parts collection, mechs can be stronger than humanoids.

Also this is the end of the guide because healing isn't for poor people.
All good repair parts (minus Mediger AM2) are P2W.
BONUS ROUND: Prototype Nacchin
Ok, so there actually is a f2p mecha that comes pretty good out of the box, it was just event-limited and - wait, it's still obtainable!

The Order that you have to complete to obtain Prototype Nacchin.

Prototype Nacchin is a robot that's basically an upgrade to Victory RK - being an ART robot that is able to use the Rookie Memory stats and doesn't need to be tuned. It also has a built-in backstep, and, most importantly, FAT HP.

It can be obtained two ways:
1. By completing the Type-07 Nacchin Order (can only be done once)
2. By purchasing it with 100k UC in the shop

Prototype Nacchin in the Shop, among other things.

Basically the only thing it needs is a weapon. Luckily, the game provides you a Scram Launcher for free upon account creation. The Scram Launcher is a great anti-AIR weapon, doing good damage to and stunning those pesky AIR types. It's... not too great vs other types, but that's where Nacchin's built-in Dual Missile Bits will help.

A Prototype Nacchin who wants those pesky AIRs to SCRAM!

The Scram is tuned with:
2x High Shooter
1x Paralyze

This is because Nacchin has good amount of spare capacity, being a mecha that doesn't even need any tune-ups. This allows it to use High Shooters, which would be too costly to take on most characters. The Paralyze tune does what it says - it makes things stun harder. And "things" here is your Scram Launcher. With a Paralyze tune, you'll be knocking AIRs out of the sky.

As for level-up cartridges, you'll want all 6 capacity cartridges, as usual.
Blast Guard and Beam Guard are must-haves, because taking less damage means surviving for longer. Especially with Nacchin's large HP pool!

That leaves two cartridges left over for movement.
Luckily for us, Nacchin gets Boost Step innately at level 9. Pair that with Quick Land, and you'll be able to start running again sooner after dashing. Use Boost Step to move around, and use Nacchin's LG to escape any LND's who want to kill you.

You have a bit of capacity left after all of this.
Use it to put on some 5/1/5 accessories (I used TGH, because Nacchin already has 40 TEC/WLK) and a 10-cost handheld in Nacchin's free hand. I gave him a little cat friend (toreta handheld), but you can really give him anything.

Nacchin already has a cat tail, so it's only natural to give it a cat friend!

I 3x Life tuned the cat handheld. This uses up all of Nacchin's remaining capacity, and gives us some more HP to work with. Now our Nacchin is complete, ready to run around and drop some AIRs.

And don't forget to use the Wonderbit! It's innate to Nacchin, so you can use it as many times as you'd like without running out.
credits/changelog
Thanks to:
Razekiel - basic parts selection writeup
Ixuvia - organization, parts contribution
xid - single-shooter air guide, contributor
VSI - contributor (finder of typos)

2/15: uploaded guide
10/25 - added prototype nacchin section
9 Comments
Rudolfz May 25, 2023 @ 8:28am 
Very useful guide, managed to get an artpako built, and managed to build alcy as well through the other guide. Well worth reading!:IrisHeartRebirth3:
Montiblanc May 2, 2023 @ 2:32am 
i meant when i used a shield skill, dam i need work on conveying english better, anyway just did 3.6k(main weapons alpha), no deaths, still BR went down
Parrotkeet  [author] May 2, 2023 @ 1:43am 
Do you even use my builds, Monti?
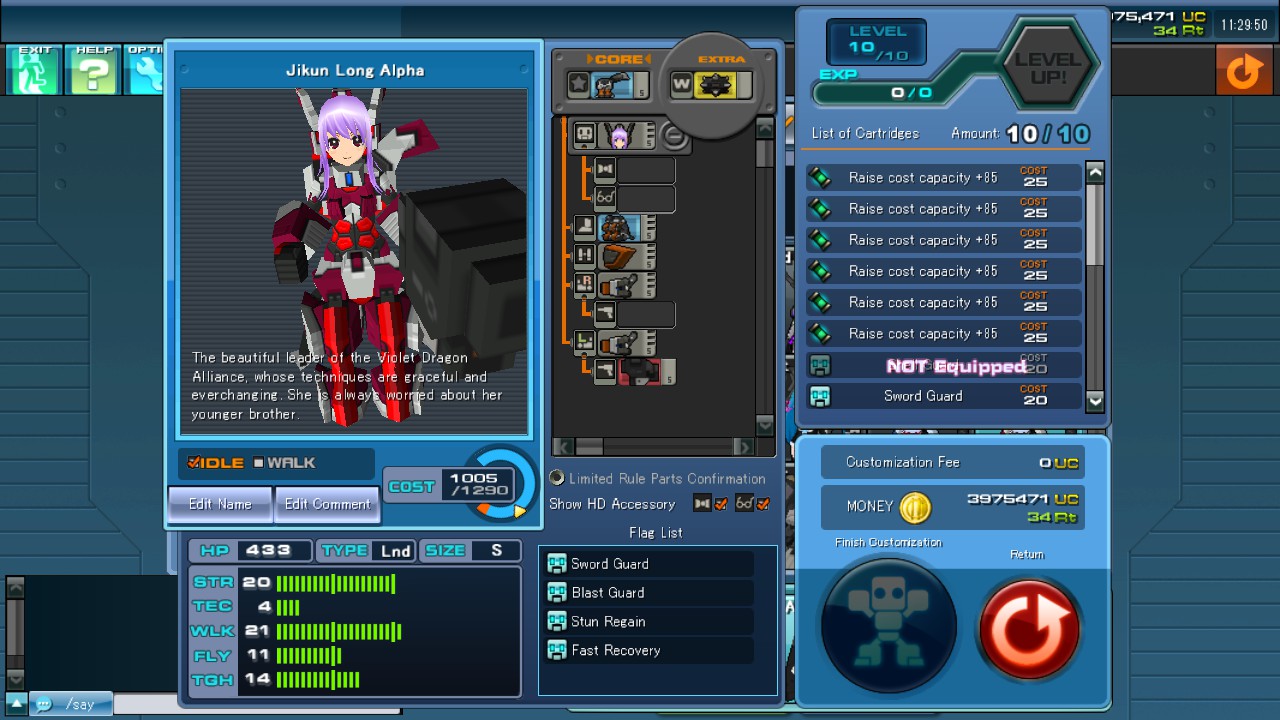
Every time I see you, you're always using the same few crap robots.

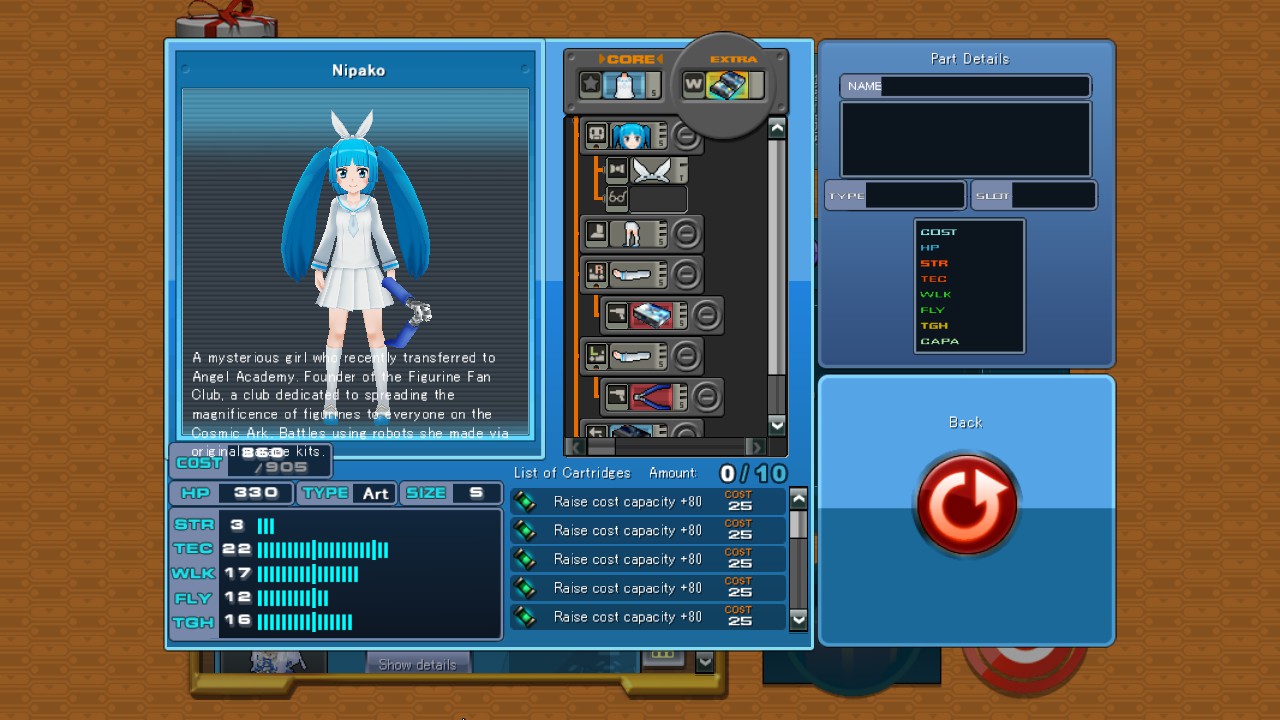
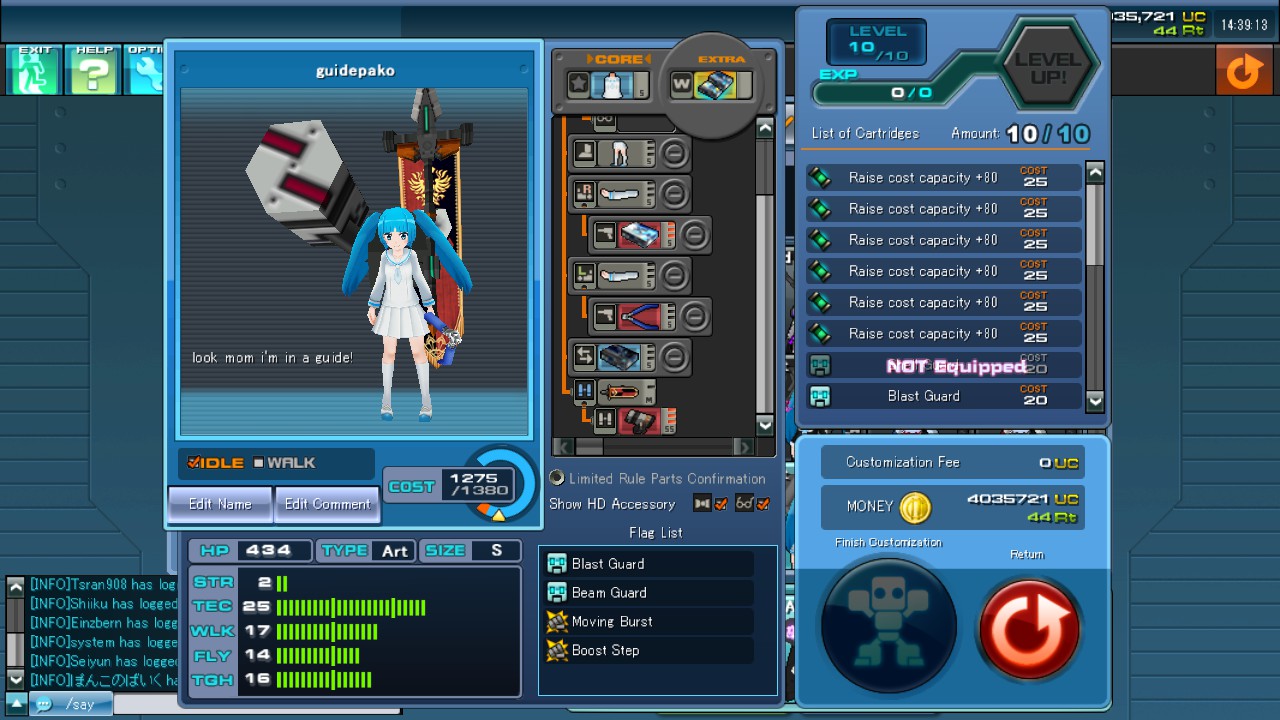
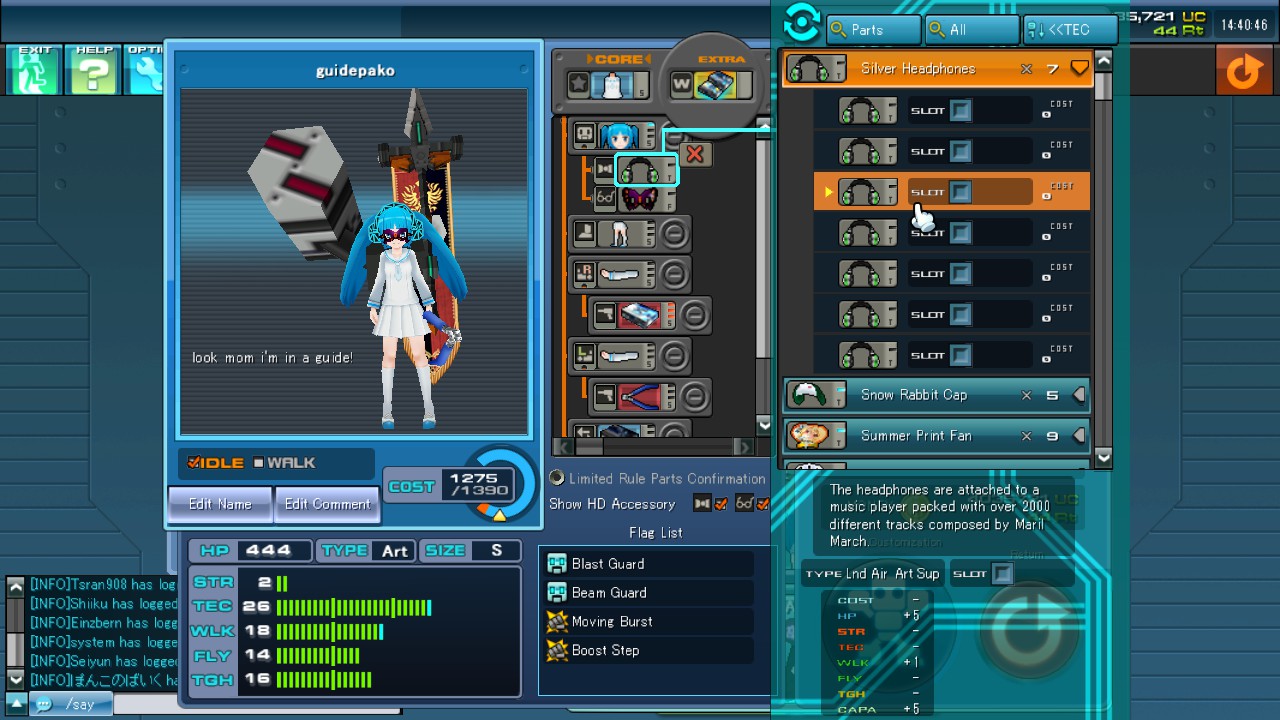
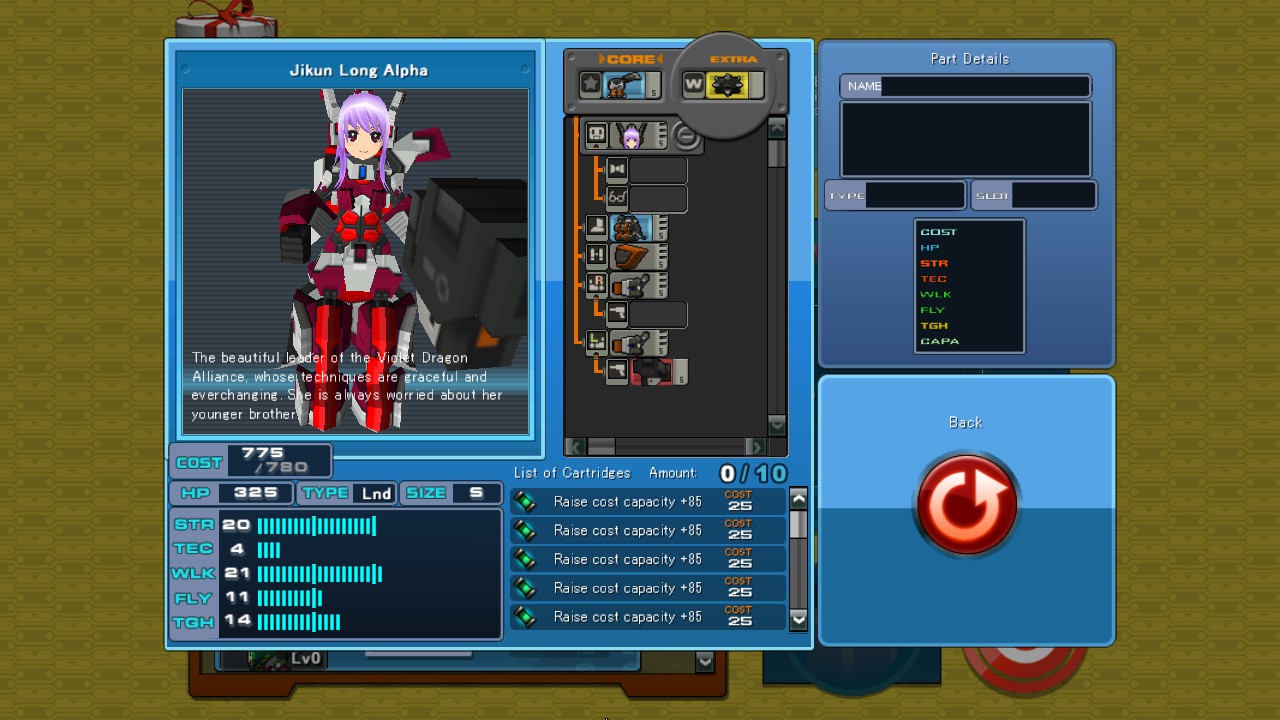
Nipako doesn't rely on her stun shot for damage, which is her only damaging subweapon. She alpha-strikes and gets supplementary damage from her wonderbit.
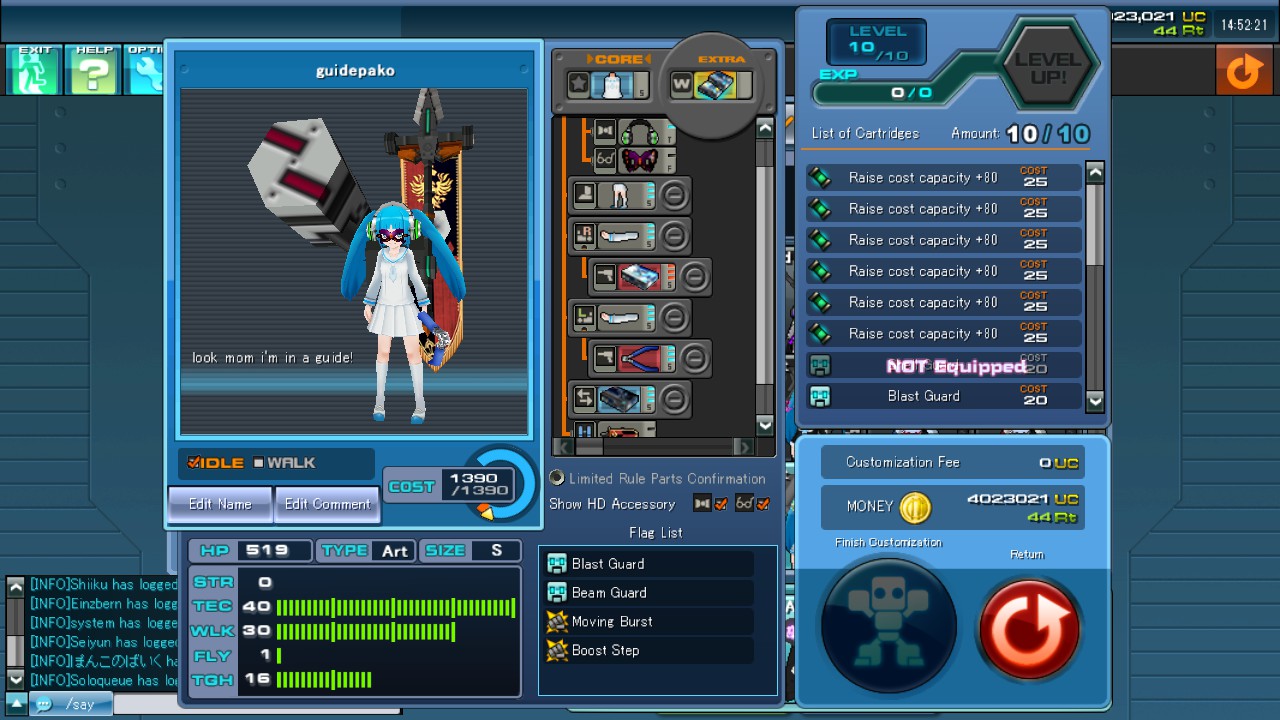
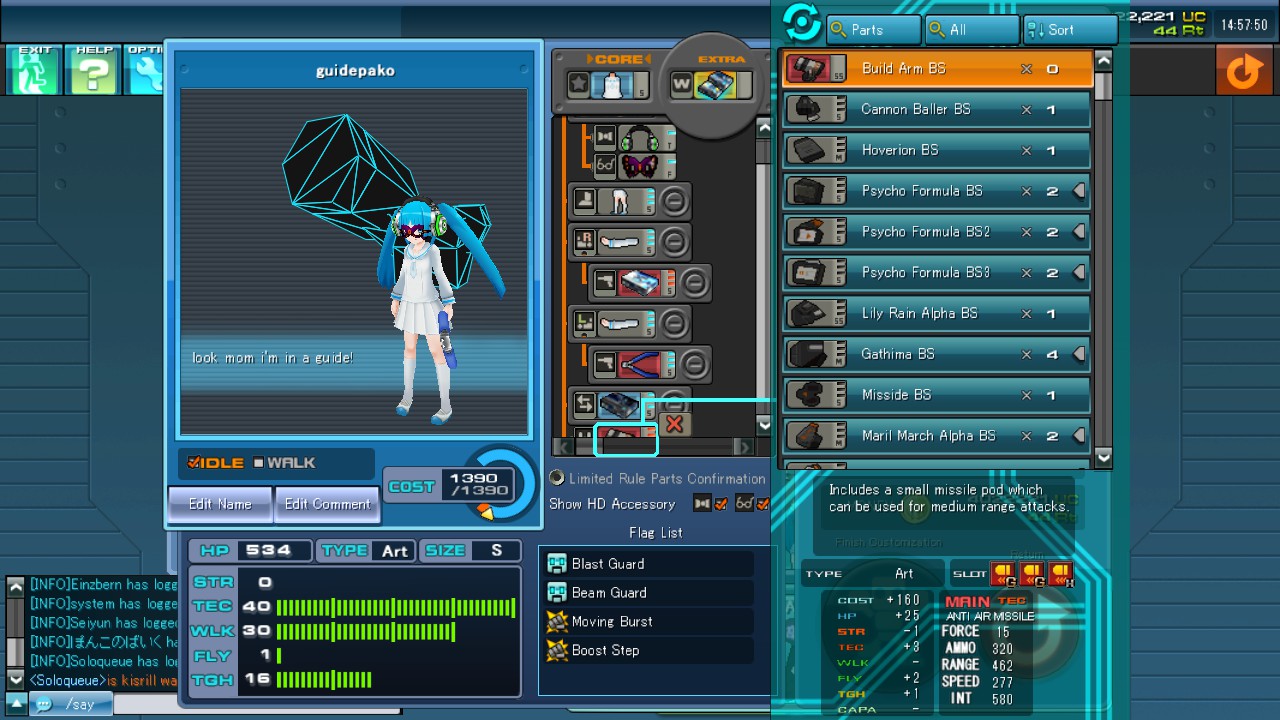
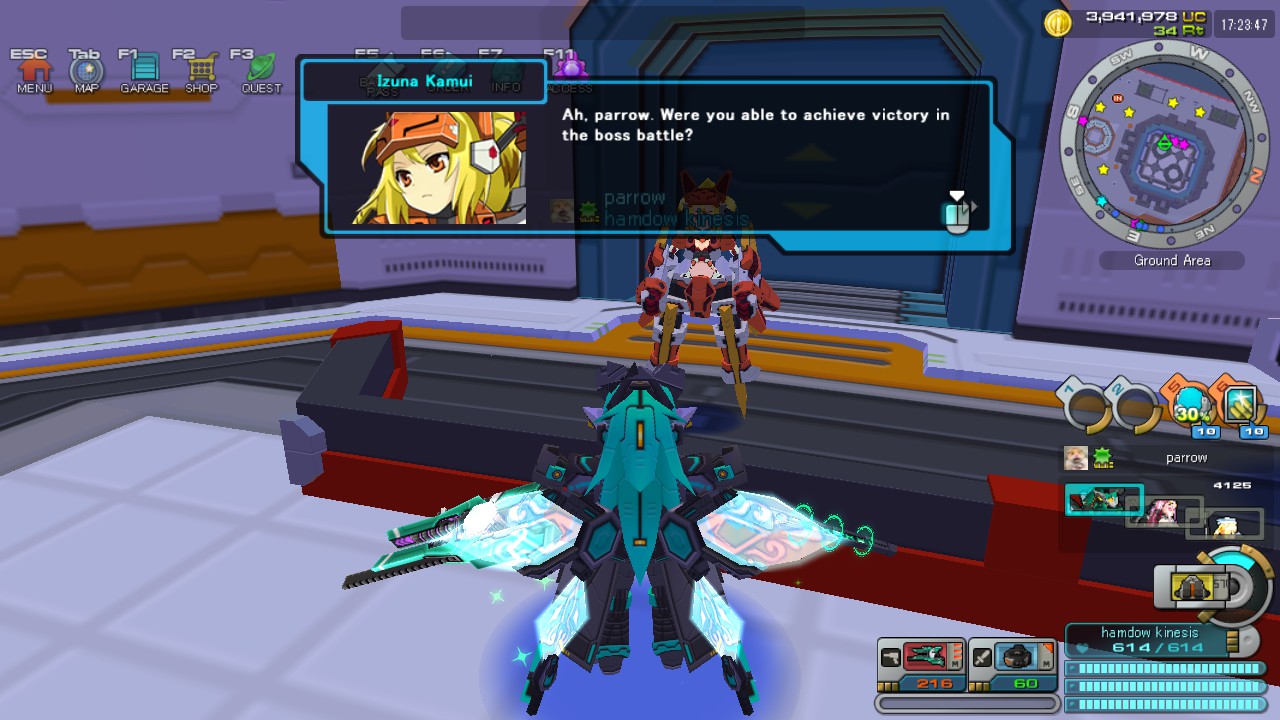
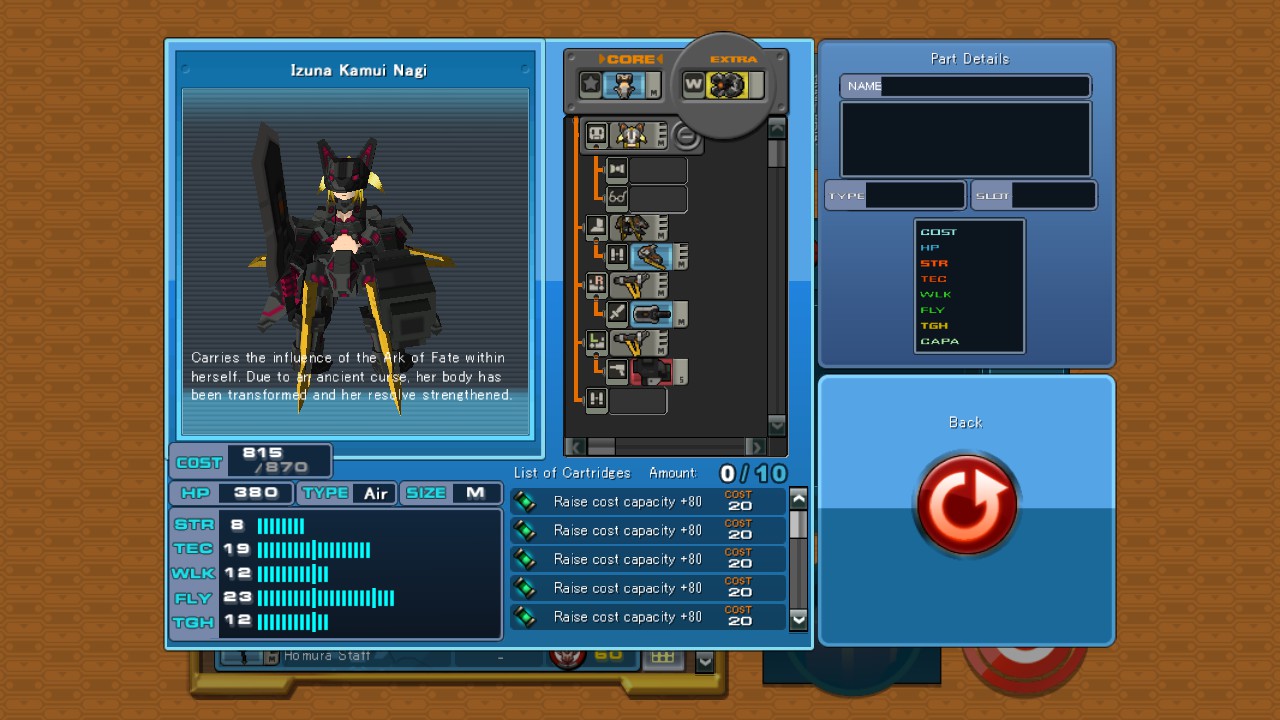
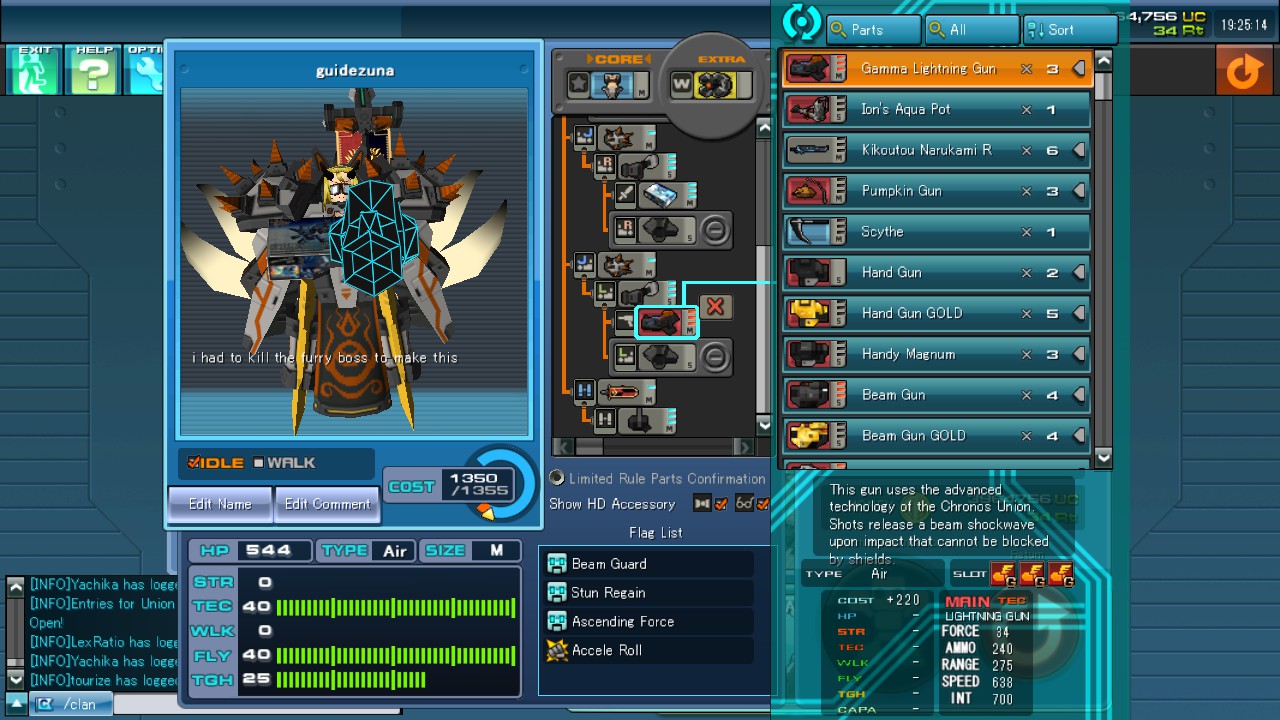
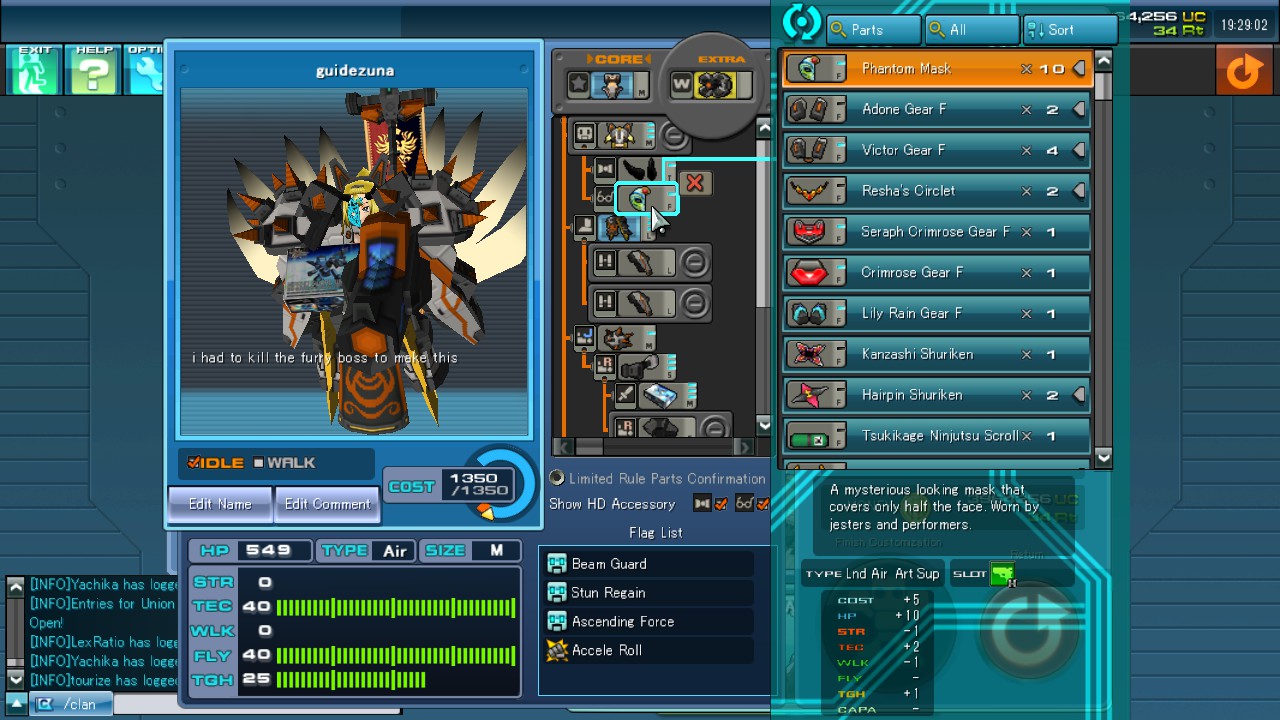
Izuna, shown here, has no damaging sub-weapons at all.
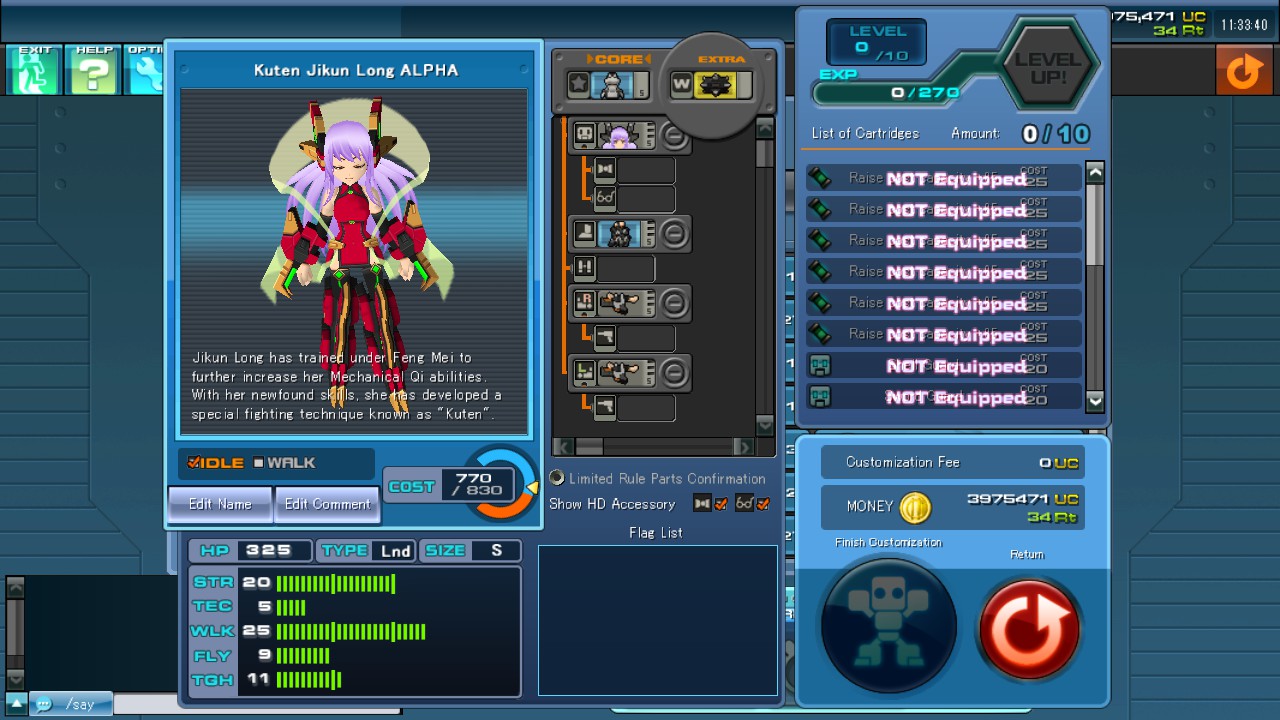
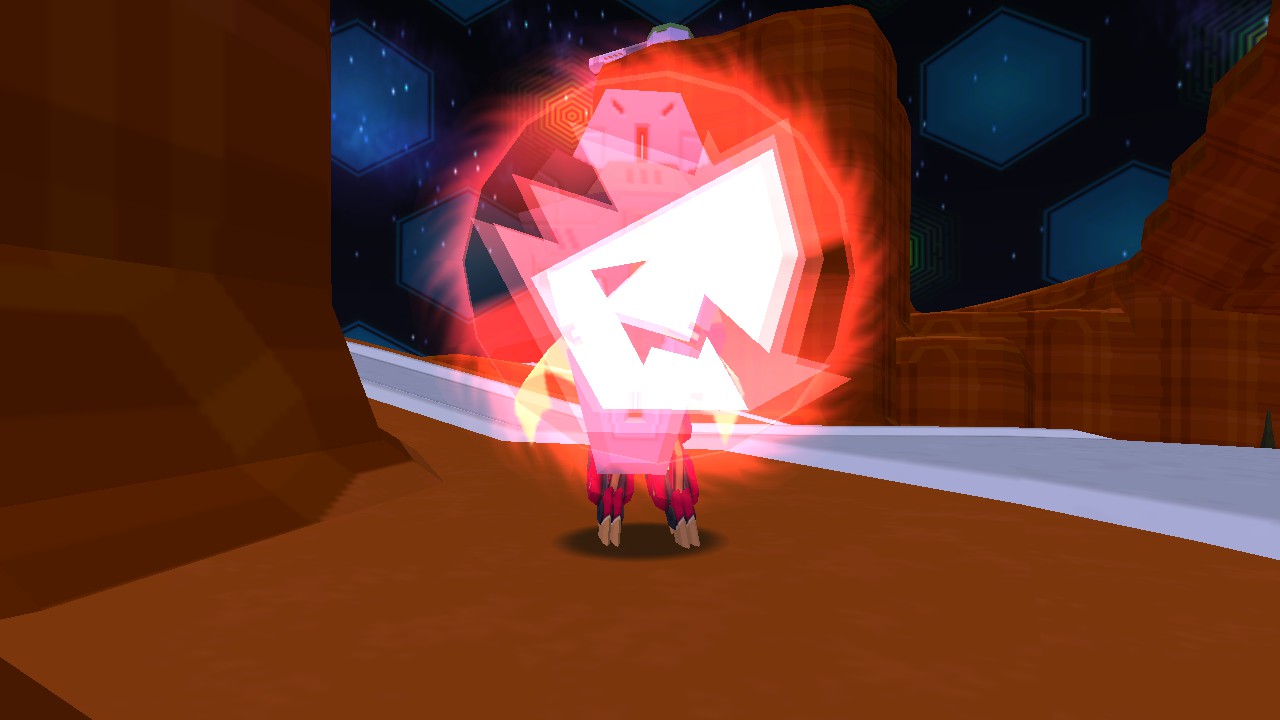
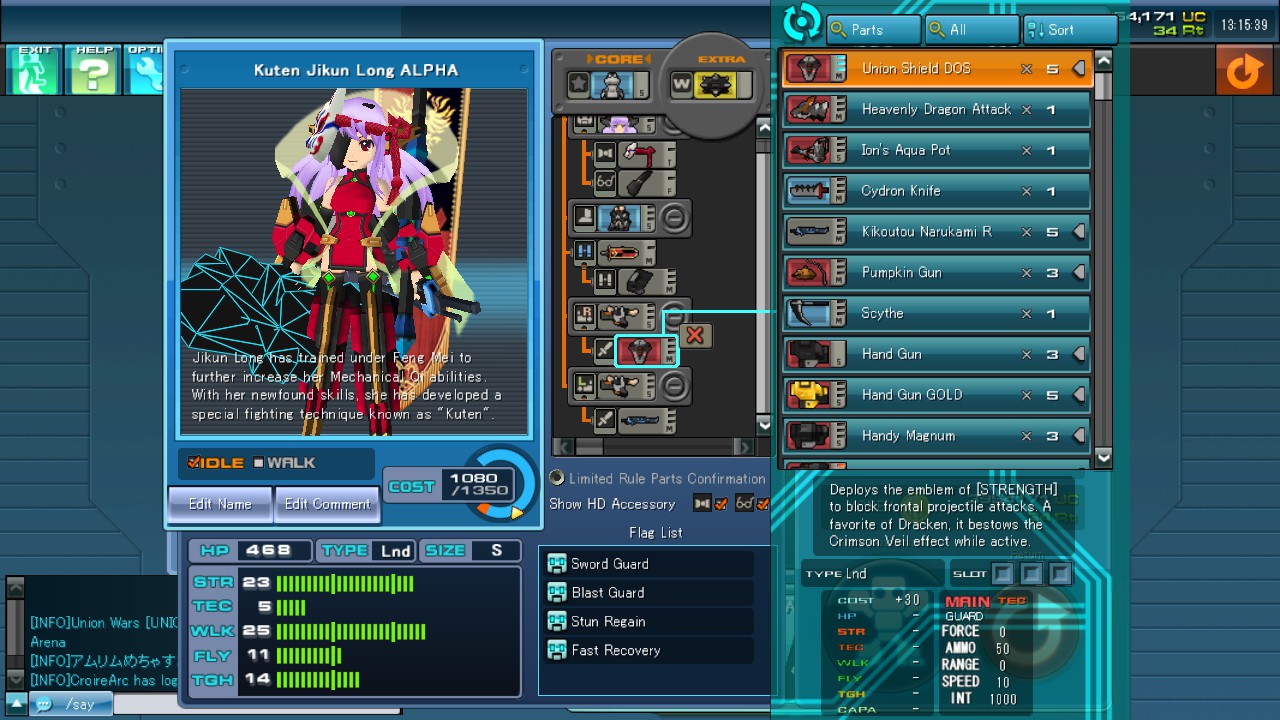
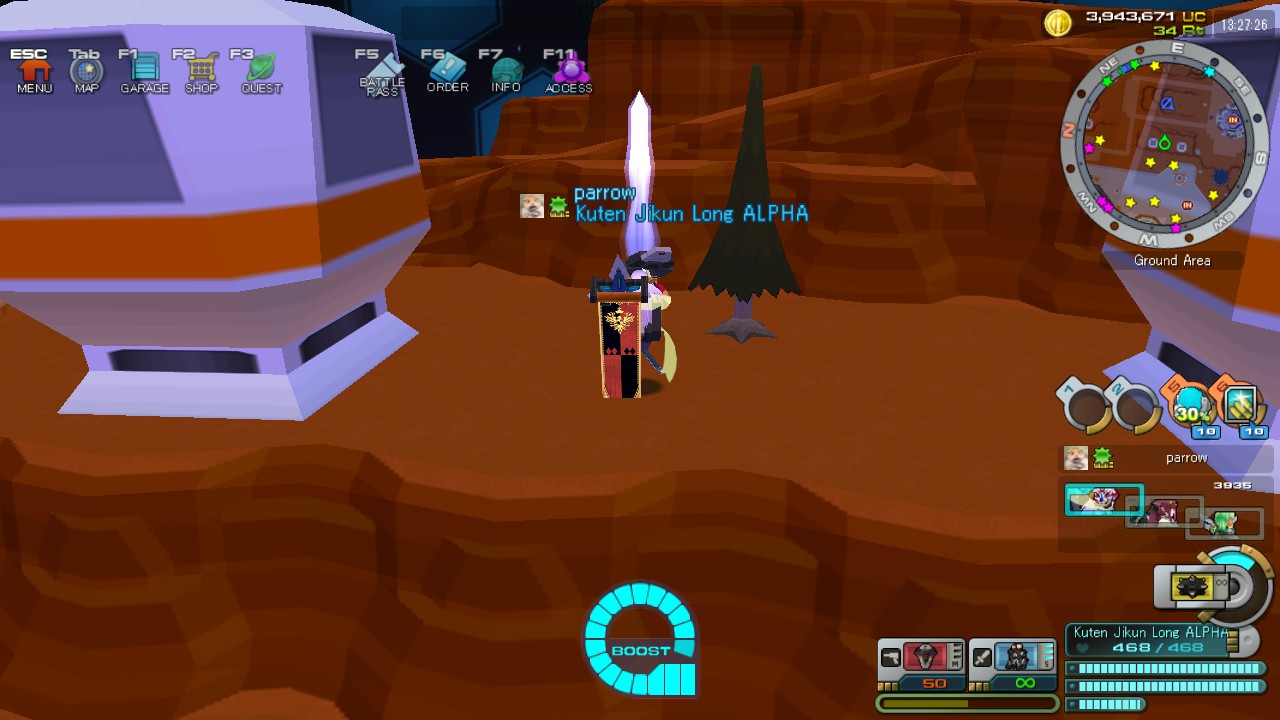
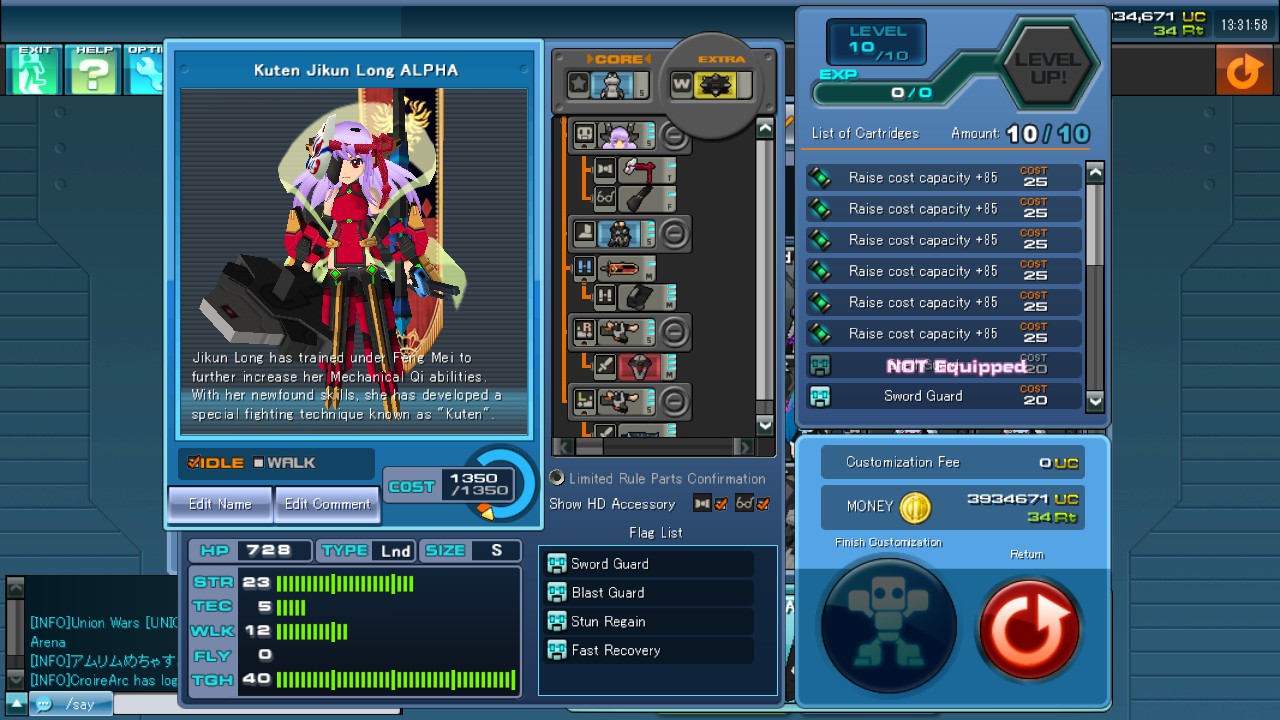
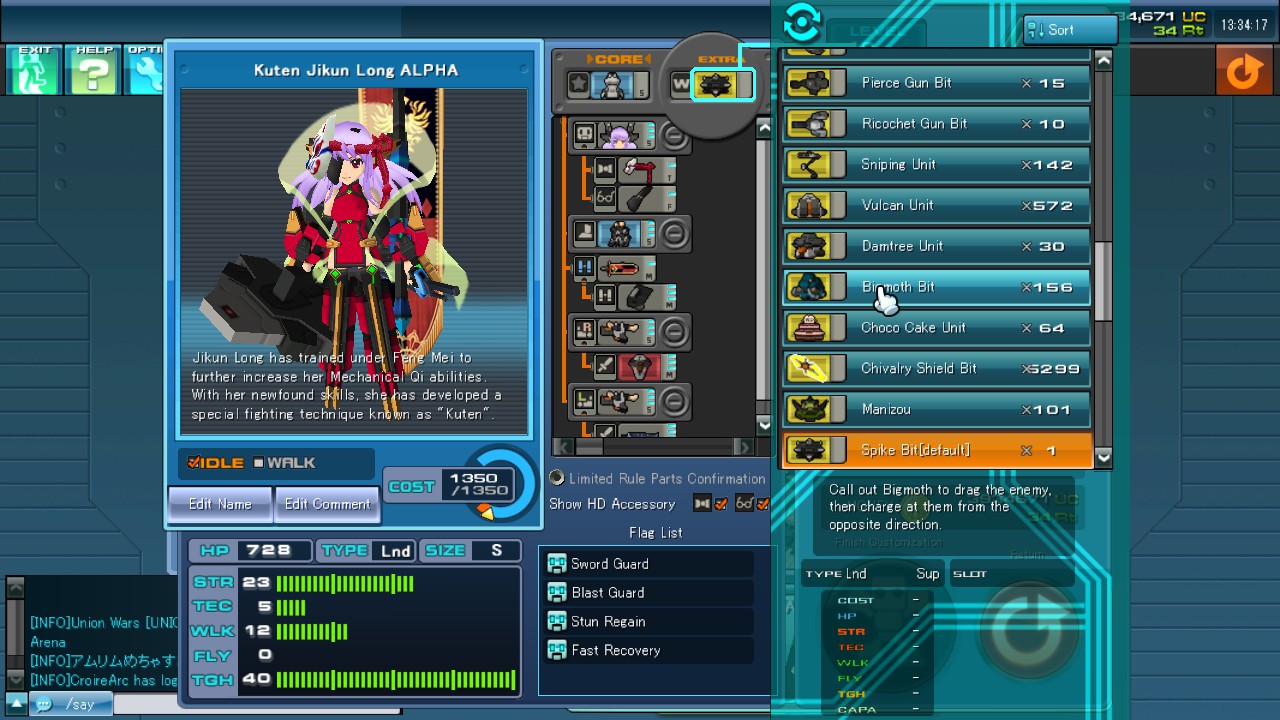
Only Kuten does.

If you're hitting people while they have shields up, that's on you for not paying more attention.
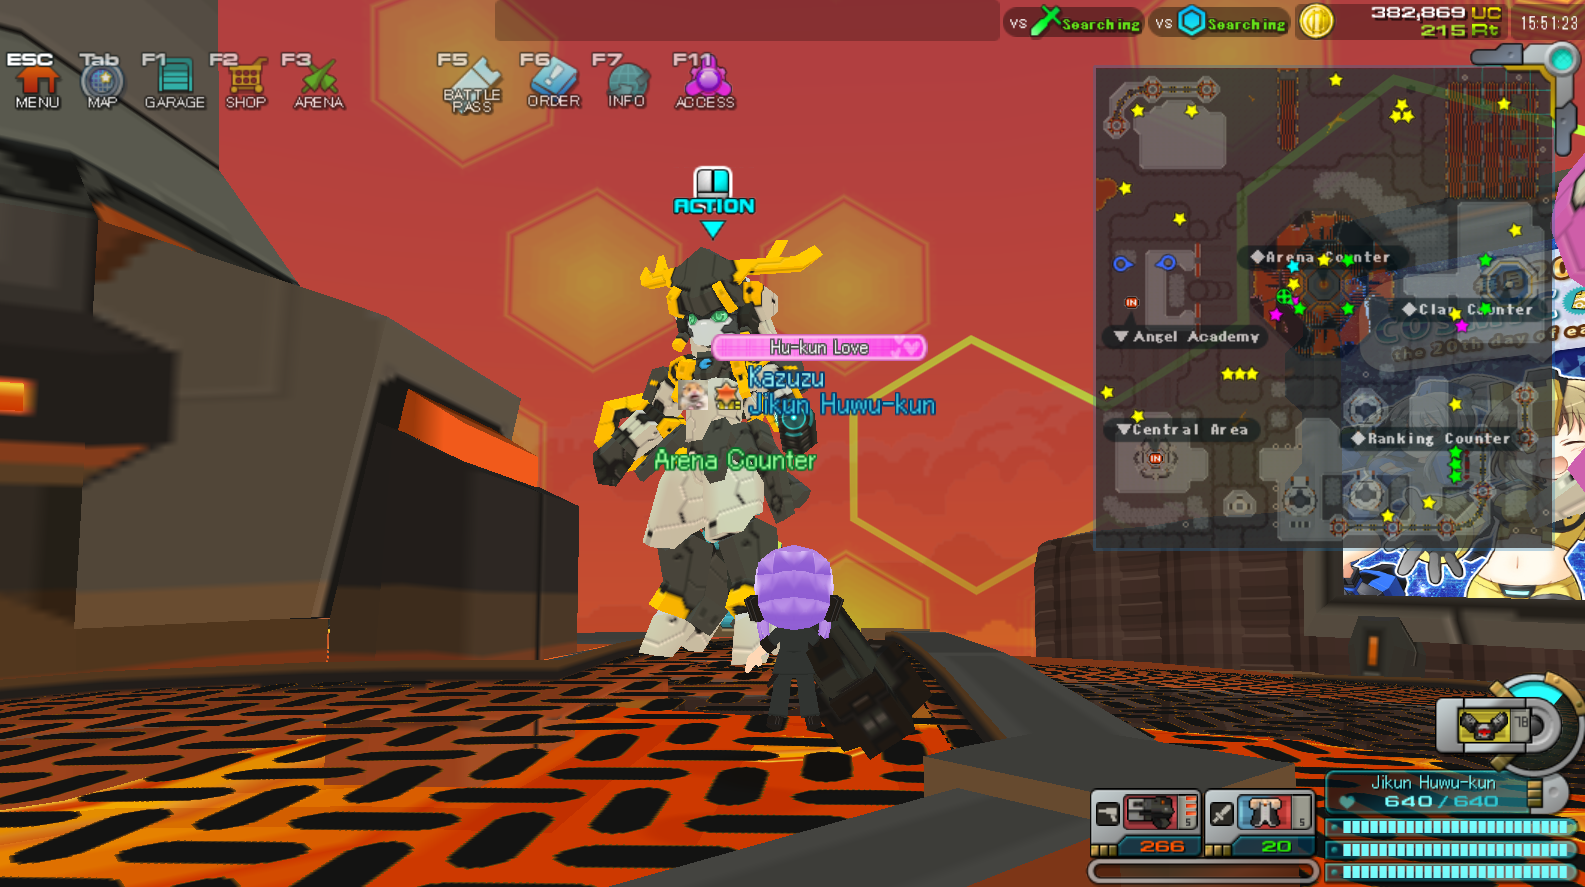
You can get into 2-3 BR using the RK robots given for free upon account creation.

It really looks like the issue here is that you're not very good at the game.
Montiblanc May 2, 2023 @ 1:20am 
also i noticed: 3k damage(mainly sub weapons), no death, BR goes down. Get hit a lot with a shield skill(block sound effect), no death, BR also goes down, yours may be the best f2p builds, but i don't think u can get into 2~3BR with em with today's playerbase
Montiblanc Apr 24, 2023 @ 3:07pm 
btw, the bad boost behavior, its the last direction press before let go of spacebar right? does that also apply to stun? or is that random no matter what?
Parrotkeet  [author] Apr 24, 2023 @ 2:29pm 
Kuten will die quickly but farms contrib points for score due to being shot at by many people.
Nipako can deal ~3k dmg before running out of ammo and having to die.
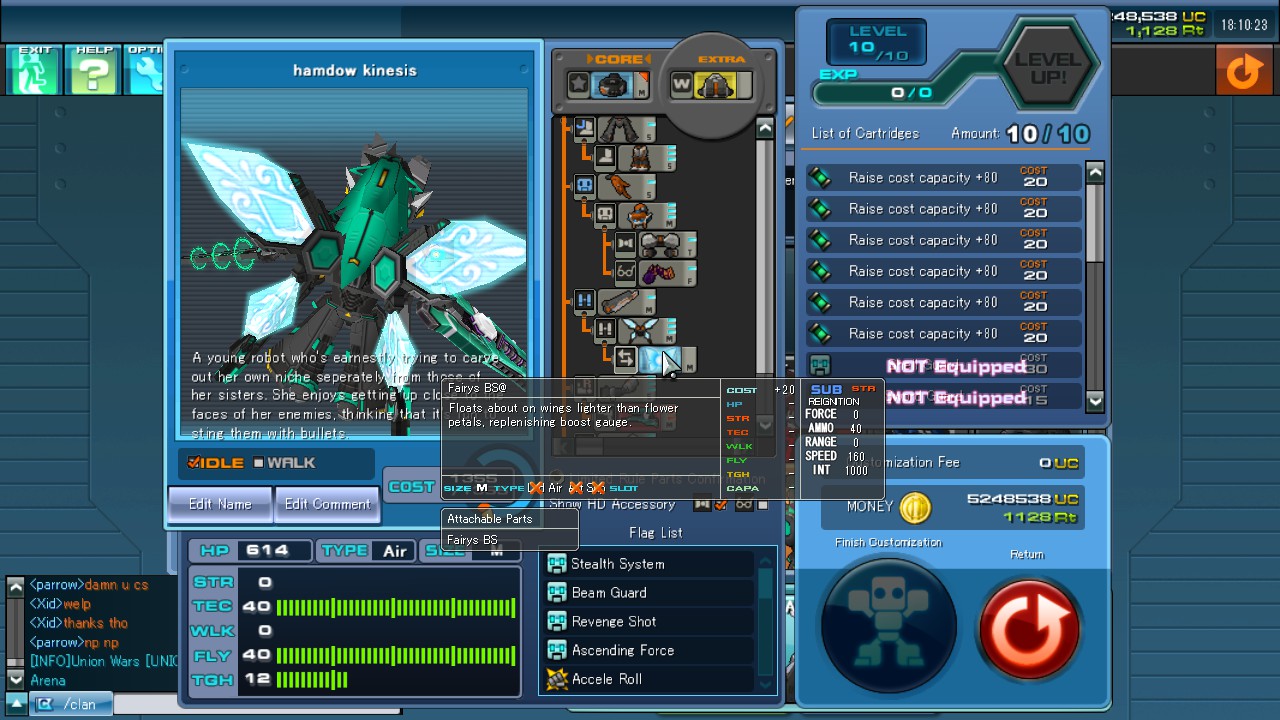
Izuna is a typical GLG build and is this great at killing. The double warp reboosts + stun regain also makes her difficult to kill.

If you're not breaking 1 br, it's not an issue with the bots but player error.
Montiblanc Apr 23, 2023 @ 11:56pm 
do any of your f2p builds break even 1 br today? try a new account & post it pls
Parrotkeet  [author] Mar 9, 2023 @ 6:28pm 
You can start "Nipper First Fight" by either going to Angel Force Base (accessed via the Central Area) or by using the Mission Counter that is in Central Area/Angel Academy. It's at the bottom of the missions list.
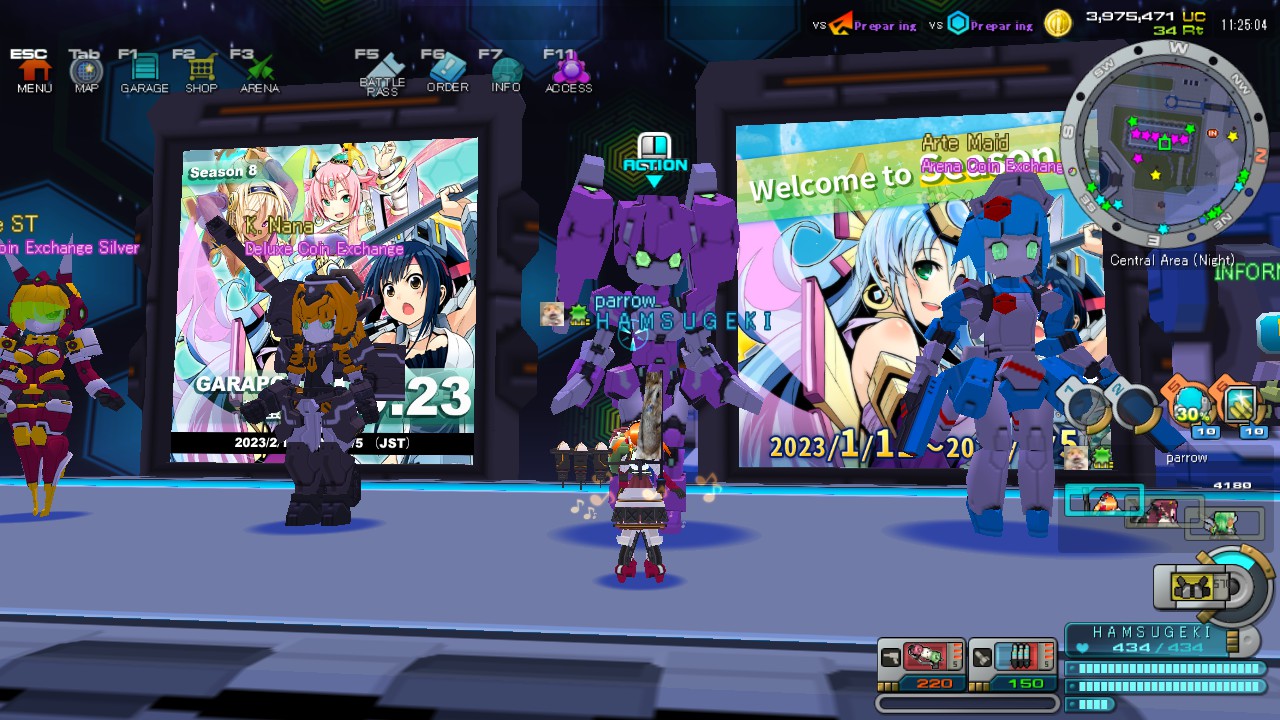
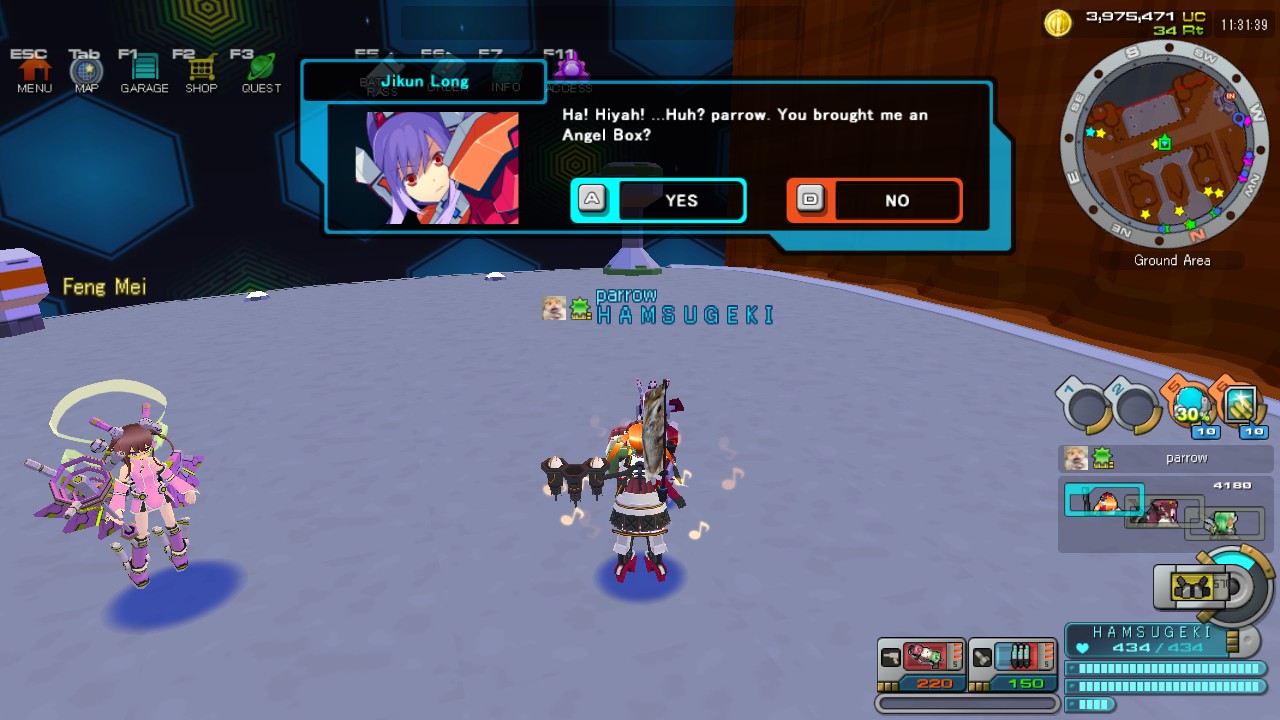
Angel Force Base is the large building in the middle of Central Area, and there are NPCs located in it that will give you mission rewards.
Nipako Destructor (2nd Floor of ADF) will give you your Nipako after 15 medals.
metalfiller Mar 9, 2023 @ 8:20am 
Where can I start the mission "Nipper Fist Fight" of Nipako. I couldn't find a single reference about it other than the old announcement page that didn't say that much.