Juno: New Origins

Juno: New Origins

82 avaliações
[Career Mode] The Junomicon I – A comprehensive guide of space flight
Por Neobab
This guide comes as an addition to the tutorials provided by Dev. Its main goal is to get newcomers up to speed with what is required of them, trying to remember my first encounter with KSP.

Feel free to critisize, comment, add and rectify. I'll do my best to update this guide so that anyone, regardless of its knowledge, might start to enjoy Juno.

If you speak english and would like to translate this guide into another language, feel free to ask me so I can send you the screenshots.
3
4
6
2
   
Premiar
Adic. a Favoritos
Nos Favoritos
Desfavoritar
About the Author
Hey ! I’m glad you stumbled upon this guide. It’s my first so feel free to criticize.
I’m just a guy who loves space engineering and started playing the infamous Kerbal Space Program (KSP) back in 2013. It is literally rocket science and youtube tutorials weren’t really a thing before Scott Manley’s so guides helped me a lot and I thought that one of mine might help struggling beginners.

Also, I’m French, and pretty proud to write this guide in English but you know… A French can only get that good in Shakespearism.

Did you read this guide in full ? Please mention it in the comment section :) Also, I wouldn't mind a rate up ;)
What this guide has to offer
I’d advise you to play the tutorials Dev granted us.

Whether you never played any related game in your life or you are a KSP enthusiast discovering Juno, you might want to take a look at this guide to get started with your space program.

Simplifications will be made and (as much as possible) highlighted, not to confuse knowledge with game mechanics. Also, I’m not a rocket engineer and I’ll explain things as I understood them. Don’t turn to me if you get a job at spaceX and crash a rocket on your first day.

This guide's goal is to leave you with the knowledge you’ll need to reliably send crafts from Droo (the main, earthlike planet) to Brigo and Luna (two of its moons), land some cargo there and safely return back to Droo.

The guide won’t cover Hohmann transfers going further than your home Sphere of Influence, nor will it go into Delta-V optimization. A little math is required, but we won’t go into pre-flight calculations. Also, it won’t cover grounded/atmospheric operations beyond getting out of it. Meaning no planes, no cars and no tanks.
The Wonderworld of Juno (Introduction)
Juno goes way beyond space operations, but we won't cover it so...

Juno is a space program simulator, meaning that you are put in charge of a business which will have to be profitable, make new discoveries and achieve remarkable deeds to stay afloat. It is of course a game but also a great learning tool which will challenge you and teach you about rocket engineering, space flight and orbital mechanic.

Have fun and learn.

There is an in-game tutorial that will teach you about the main topics you need to wrap your head around in order to make it off the ground but I felt kind of overwhelmed by all those data that I knew about but wasn’t used to pay much attention to in KSP.

Also, my intent is not to make a comparison between a game that went out 10 years ago and a game that just left early access.

Thank you both.
3D Rendering
As much as we live in a 3D world (IRL is, as much as we know), we mostly move on a 2D plane, that we can define by X (Left & Right) and Y (Straight & Back). Picture a chess board. Every position possible is identifiable by it's X (a-h) & Y (1-8) axis.


A plane for example can move on all 3 axis. X, Y and Z (Up & Down). Well this gets unintuitive enough that we felt the need to train the people operating those crafts and put a hell lot of regulation to make sure that Mr&Ms Smith would indeed get from point A to point B safely.

Now space is ALL about 3D, forces and gravitation. This makes for pretty unintuitive consequences on the way you move around.

Side-note : You might want to watch the movie Apollo 13 to get a sense of what space operation looks like. You might notice that it takes a lot of humans and a hella big rocket to get 3 of them safely forth and back to the closest body there is to Earth. Space is hard.

It is common to call the X, Y and Z axis, Roll, Yaw and Pitch. As we are always moving forward in one direction, we can only rotate on the X axis (Roll). Yawing will turn the craft left and right. Pitching will point it up or down.

I know this is far fetched, but try to project the above mentionned grid on a sphere and you in the middle of the sphere. Those 3 axis would allow you to pin-point any location on the sphere. (I'm not going into 3D vectors... I'm just not...)


A rocket is at a 90° angle compared to a plane. So, at lift off, what we'll consider the X axis would be the Z axis of the plane displayed.

A Vicious Circle
If you watched the TV show Chernobyl (if you didn’t, you should) you’re familiar with the concept of a vicious circle.
In rocket engineering, this circle falls as follow :


Lets say we want to put a satellite into space. It has a finite mass so it will take a finite amount of energy to send it at a finite altitude. We can store this energy as fuel, expel it through an engine to produce thrust and accelerate our spacecraft toward the stars. Great, so we add the required finite amount of fuel, an engine and… We won’t reach the target altitude, as we now have to account for the mass of our fuel and our engine.

No problem, lets just add more fuel and more engines ! Which now have to be accounted for…

This is why rockets are that big. IRL, they will usually start with just enough fuel, engine thrust & thrust to weight ratio (vocabulary is the next chapter) to lift their "m"ass off the ground, burning fuel in the process thus reducing their mass, giving them greater and greater thrust to weight ratio, achieving greater and greater acceleration, thus speed, thus altitude. This a cost efficient way to get to space.

But we don’t pay the bill, so, for now, we can afford a little margin.
Vocabulary
Now, you probably created your company, went through the career menu, the tech tree menu, bought The Droodman Side, Common Ground, Backyard Scientist and clicked on the build menu which looks … Well, like that :


Lets build our first craft

I’d advise you to follow the tutorial and build the tutorial craft, but don’t launch yet if you want to be in synch with the guide (don’t press the blue button on the right). Don’t forget the Volume for Gyros in the Part Properties menu. You should be left with this :


I think Craft Details is obvious so lets start with the Staging Analysis. We will come back to the left part of the screen in a minute. Right now, let me explain those values, as this is all we need to make sure our spacecraft is able to do what we want it to do.

Thrust
“To every action, there is always opposed an equal reaction; or, the mutual actions of two bodies upon each other are always equal, and directed to contrary parts” Isaac Newton's 3rd law of motion
A rocket gets what’s above its propulsion system airborne by sending hot, fast moving matter (combustion gazes) toward the ground, making the rocket go in the opposite direction. This force is called Thrust.

Delta V (ΔV)
As we want to move the rocket, say, from the launch pad to 30km Above Sea Level (ASL), we need energy. In order to move a given mass to this point, we will need a finite amount of energy.
Delta V is the total amount of energy our rocket stores, as fuel, in order to displace its mass. The fuel will be expelled by our engines, sending us in the opposite direction. When we reach 30Km, we will have expended a finite amount of fuel and achieved a certain speed in a given time. We will have expended a finite amount of Delta V.


Delta V map of the solar System:
This map is here to help you picture Delta V. It is not usable in game.
How to read : From a Low Earth Orbit, it will take 3260 m/s of Delta V to get an intercept with the moon, meaning reaching it’s SOI(Sphere of Influence. It will then take 680m/s to reach it’s Low Orbit.


Here is a look at a Delta V map of Juno, which will give you sense of it in game. Notice that those values might not be up-to-date


Delta-V map of Juno - Provided by mreed2

To summarize, our Delta V is a measure of how much we can accelerate (also meaning how far we can go). This is a great time to try the Droo Altitude slider (Environment) to see the difference: if our spacecraft started in space (vacuum), we’d have a lot more Delta V than on the ground(0km) as there is no drag in a vacuum.

ISP (Specific Impulse)
Don’t ask me about the I. Don’t ask me why it is expressed in seconds (forces cancel out etc…)
To give you a relative sense of ISP, it represents our fuel efficiency. As we said earlier, Thrust, (downward push by the engines) produces an opposite reaction, sending the rocket upward.
Well Impulse means how much Thrust we can give in a given time (I can push that much in Kilo Newtons, kN for 120seconds...).
Specific impulse now divides that number by the weight of the fuel. The idea is that producing more Thrust with less fuel weight is great ! (cf. The Vicious Circle). But don’t bother to much about it.
What you have to remember is : the higher the number, the better (This is not always true in atmospheric conditions…)

Burn time
Well this one is pretty straight forward. This is how long our engines take to expel our fuel. As a rule, the higher the Burn Time, the lower the Thrust.
Atmospheric operations (lifting off) requires low Burn Time, high Thrust ratios to counter act gravity and push through the atmosphere.
Space operations trade Thrust for longer, more efficient burns, meaning you will need to carry less fuel to achieve the same acceleration. It will only take a longer burn.

TWR (Thrust to Weight Ratio)
For now, we can consider it as a “go/no go” indicator. Values smaller than 1.00 means that our rocket engines can’t lift their weight + the weight above them in a straight motion, taking into account gravity. We just can’t lift off. So make sure that you keep it at least above 1.00 (I keep mines around 1.80-4.00)

Now without going into details, high values (5 is a no go for me) will result into high acceleration resulting in problems, due to friction in the atmosphere and due to precision in space. All in all, high values mean that our craft’s engines could be smaller.

To give you a sense of what's achievable, the Saturn V had a TWR of 1.2. Legendary.


Be patient and we will make crafts much, much cooler. (If Nasa had the US military budget, we would be martians).

As we will expend fuel, our craft will get lighter, so all along our journey, our TWR will increase. This will have to be considered when designing our rockets and will be mainly solved by staging. But lets not get ahead of ourself.
Building interface
Let’s look at the left side of your screen now.


You can hover to see a description of most labels. Going into Active Tools, you can see the followings (you won’t need part shape and part connection for now) :

Move part tool
The base tool. It allows you to move parts around, connect them to other parts, resize them and much more.

Translate part tool
This is already a more advanced tool and you won’t need it right at the start. It allows to move a part along one of the three axis (X,Y,Z) without changing the others.

Rotate
This is also a more advanced tool which allows you to turn a part along one of the three axis. This can be useful to connect part upside down (nose cones at the bottom of a tank for example).

Paint tool
Make your spacecraft beautiful.

Coming back to the main menu, further down we have the part menu which, you guessed it ! Let’s you choose your parts.

Now, here is where Juno gets interesting : The property menu. Click on any part of your spacecraft and enjoy all those data (data ?). I’d invite you to click on the fuel tank.
As always, you can hover over each label to get more information. Dead weight is not important for now.

Right now, we only have one type of fuel and we can let the Auto Select on but it will become primordial in the future. Priority will also become important later on, as our designs get more complex. Heat shield is also something we’ll take a look at but for now, getting back in one piece isn’t a concern at all.


Getting airborne (First rocket)
Why not press play ? As we can see, we have to select a launch location. We are not aiming for highly efficient operations so all that matters is the max size of the rocket and the cords (coordinates) which are built as follows : 26.60°N(orth) – 164.44°W(est).

Side-note : Those values are respectively called Latitude and Longitude. You could say that they reprensent the X & Y axis on the surface of the earth. Google it for more info.

Those value range from 0° to 90° for the Latitude and from 0° to 360° (or 180° to -180°) for the Longitude, allowing to pin point any location on a spherical body (which, conveniently, Droo is, thanks to Dev !).


If you want to display the bottom left values, click the blue “+”

All we need to know is that the closer to 0 the N is, the better (for most operations) as it means that we will be closer to the equator, which is itself (more or less) aligned with the surrounding bodies of Droo (I HATE you T.T), many other major bodies and even Juno itself! (the system’s star). Being aligned with all those bodies can only foresee success right ? Also, Droo is spinning from W to E so going E will “go with the flow” and we won’t have to fight against its rotation. (you guessed it, it’s a bit more complex…)
We don’t really care about our West longitude. Pick the Juno village launch pad. Click launch… And the Beast is ready for its first ride out !

Press Shift for a few seconds(muscle memory…), then space. Enjoy…
Now please press save flight
The tutorial does a great job at explaining what does what when clicking where. But then you have the Nav Sphere Panel (1st icon on the right menu) and the Flight Info Panel (don’t mind about the others for now). The Nav Sphere Panel is a pretty smart tool thought by Dev which allows us to point our spacecraft up or down and left and right. As we (usually) have forward motion on the X axis, this is how we get to where we want.

Right, so the long stick went up and then down again. Gravity is a… Force we have to contend with. But what happened exactly ? (Gravity is not a force... But don't get me started)
Dev is great so it took our engine a certain time to get to full power, then we achieved a certain speed, thus a certain altitude, in a given time by expanding all our fuel. And we now know that this is our…

Delta-V ! Considering the mass of our spacecraft, the fuel onboard, the efficiency of our engines, gravity and drag (we said we’d keep it simple), we achieved the best we could.

Be proud of it !

As you probably understand, we won’t have much influence on gravity and drag (Dev can!) so in order to achieve better results we will have to play around :

- The mass of the spacecraft
- The mass of fuel on board and it’s comparative mass to the total mass (The payload)
- The efficiency and TWR of our engines
Touching the sky (High altitude)
Let’s crank up that rocket, shall we ?

If you haven’t taken a mission yet, you should.

The scale is something I was (am ?) struggling with in this editor. So I dragged a Drood in the window and realized how that rocket was basically an expensive firecracker. We also know that our rocket can’t be higher than 10m and no larger than 3m.

Remove the engine and expand your tank down. Make sure to add some fins. Also, we can see that the TWR is quite close to 1 so lets put 2 engines at its back (Symmetry, Mode Radial x2) ! Remember, our total rocket height should be less than 10.00m.

This might be the moment to try out the paint tool and give our rocket a cooler look. This is entirely up to you but I went for Mono, which I just love. I also enjoy Europa & Delta themes. I’ll paint the fins white.


Now that’s more like it.

The 1st Tenet of Dev tells us to check our staging, so we shall go to Preflight Configuration panel on the left, first icon. For now, we only have one stage, but we will need this window later.

Never forget to check your staging, as Dev wills it !

Lets press play, choose the Village Pad, press Shift until reaching a 100% thrust (still useless because of solid fuel, but muscle memory) and press space. Let you spacecraft fall back, recover craft and save the flight
We achieved a greater altitude ! But as you might have noticed doubling the size and the number of engine doesn’t provide twice the altitude. Lets see how we can get around nature’s law.

Aim for your goals (Orientation)
Remember to take all the missions you can (which make sense with your goals) before launching any spacecraft. We don’t really care about money right now, but we need enough to get them engines roaring.

Once again, the tutorial will provide you with great info about this.
As we saw, the Nav Panel provides us with a smart tool to point our spacecraft. We also want to go east, so we don’t want to touch the orange circle.

Time for some orbital mechanic 😊


Pitching right from the start IS NOT the best way to go about lift off. To put it simply, drag reduces as you go higher up and the atmosphere gets thinner, so heavy maneuvering at low altitude will cause a lot more drag, costing precious Delta-V. Still, it will do for now.

Pitching our spacecraft toward the horizon will help us follow the curvature of Droo, which in turn will help us achieve speeds significant enough to “not fall back” or fall back away enough that we orbit around it. Remember that drag is a… force we also have to contend with so go easy on the stick as we only have a basic way to orient the craft for now. Try it out for yourself and launch with a pitch attitude ranging between 85° and 50°. Pitching more and more toward the horizon increases the radius of your trajectory, resulting in a crash further and further out from the launch pad, while your max altitude (Apoapsis) decreases.


Isaac Newton – Universal Gravitation

We should take a look at our Apoapsis. You might have noticed that it was increasing much faster than your altitude (AGL, ASL). Well this is the highest point you will reach once all your speed has been expanded. At this altitude, your vertical speed will be equal to 0 and you will start to fall down. Gravity is a… Force we have to contend with.

Meaning that what we want to achieve is a lateral speed (around the body) sufficient enough “not to fall down” while having an altitude high enough that drag won’t matter anymore (Air density = 0).
I think that, given the previous explanations, we should be able to decipher most of the Flight Info panel.

Battery and Mono are not important yet. Velocity tells you about your relative velocity given a certain reference point, X, Y or Z (cf. 3D Rendering). The rest of the values we know, and are now computed by stage.


This is all we need to get started with our first orbit.
Failures pave the road to success (Failing to orbit)
Disclaimer : The goal of this part is to make sure you have enough research points to make your first orbit easy.

Let’s unlock a few more parts ! Play around a little bit until you have 55 reasearch points and unlock Check your Staging and Chemistry Lover. If you don’t have enough points, start with Chemistry Lover and check the Career’s Milestones and exploration tabs to get some easy research points.
You should also make sure that you have some money. About 55K should do the trick. If you don't, try completing a few more missions.

Remember to take a few for this part too. We will reach 80km ASL and crash really far from the launchpad.

This is were the fun begins.

Now remember that we are in charge of a space program. This means that we will have to complete tasks for a given price. In order to be profitable we can either design :

- One expansive rocket that's able to complete several missions in one launch.

- Smaller crafts optimized to perform one particular mission.

There are much, much more ways to go about this, especially modular designs but that's not in the scope of this guide.

I'd rather have an expansive rocket, yet not so expansive that it won't be covered with 2 "medium" missions. You'll see that with a bit of know-how, they'll easily put you above 200M in funds.

As the design gets a bit more complexe, we will go about it step by step :

Top (Nose cone, monopropelant, battery & command)
Here, we have the command module and the nose cone. Make it pointy. Later on, this is where I like to put the "you'll need it" stuff (well I put my mono under the second stage because gyro and stuff... bla bla bla...)
As we now have the fuel lines, we can put some fuel in the nose. Remember to activate Fuel Lines on the nose cone AND on the Commande Disc. Uncheck "Auto Select Fuel Type" and choose Kerolox as a "Fuel Type".

Fuel lines allow engines to draw fuel from tanks that are not directly attached to them.


2nd stage (manoeuvers)
This is, for now, the last stage that will be put into action. The heavy lifting stuff will be gone by now, as well as most of the pesky atmosphere, meaning this stage will need a lot less thrust to accomplish the same Delta V, in term meaning that we can put a smaller engine, thus less weight, to achieve the same result. (cf. The Vicious Circle). Liquid fuel is a must, as we will need to start and cut the engines to manoeuver. We will go for a Gnome Engine at 50% size.


We also put an interstage under the engine, as we'll want to drop the 1st stage once all its fuel has been expanded. This is called staging.

As a rule :

- Big, powerfull, inefficient engines are meant for Atmosphere/Lift-off/ Landing on high gravity planets (Solid Fuel is a Solid option to lift-off)

- Medium engines are meant for orbiting / catching / intercepting / Landing on low
Gravity planets (this means getting close enough so that the body will "grab" you in it's Sphere of Influence.) Liquid fuel is a must, as only liquid fed engines are able to provide control over their thrust.

- Small, highly efficient engines for long distance travel across space and land on smaller bodies (small moons, asteroids...). As no atmosphere slows us down, time is the only constraint we have to worry about. A small engine will only take more time to get us to the speed we want, as acceleration increases exponentialy (as long as we have fuel).

1st stage (lifters)
This stage handles the heavy lifting. The first stage will have to lift our craft off the ground, through the thickest part of the atmosphere, providing it sufficient speed (and thus, altitude) so that our 2nd stage doesn't struggle. Solid fuel can be used to provided a cheap, powerfull boost at the start. We'll put 6 Goblin Solid Motors at a 150% size.


Then, we put all those pieces together.


Now remember the first tenet of god and ...

Check your staging !


We are ready to launch.

For every craft, there is a sweet spot (meaning a pitch angle at each altitude), where you will achieve optimal performance and get to a stable orbit. Using drag and a smart weight distribution, you can even orbit without any input after lift off. Scripts are way, way, way out of scope.

As we are not aiming for efficient mission though, we will just pitch for 80° right at the start and keep them engines roaring until running out of fuel.


When that happens, press Space to stage and burn until your APOAPSIS reads 91km. Then cut your thrust (0%). Remember, it will take some time to get there now, as it is the highest point we will reach. You can get fancy and pitch for 60° once you've staged. You still need to cut your engines when your APOAPSIS reads 91km.

As you play the game, you will get a feel for the next manoeuvers but for now, following those steps should get you where we want you to be.

Wait for your Air Density to read 0, then Pitch the craft toward the horizon, at 0°. Wait to reach a higher altitude...

Once the "Time to Apoapsis" reads 30sec, push your engine at full throttle.

Keep a look at your speed. We're aiming for 3000m/s...

And we fall a tiny 200m/s short :) You can't see it right now but this is what you've accomplished so far :


This is almost an orbit, I swear !

Rather than just going up, we acquired some lateral speed, sending us on our way to orbit.

You should have plenty research points by now so how about we make this circle complete ? This might seem like a long way to go but acceleration is exponential so a bit more Delta V in our second stage will get us where we want. Meaning that we also have to expand our first stage of course !

Lets get to it ?

Disclaimer (This is eyeball science) : You might end up burning up on reentry, not completing missions such as Going Sideways or Wet Rockets. In this case, pitch for 60° right at the start and try not to raise your APOAPSIS above 50km-60km. Start pitching toward the horizon after you staged (0°). You'll get a feel for it.

After some tests, the design seems sturdy enough that you can pitch for 45° a few seconds after lift-off. You should be able to cruise pretty easily at 40km ASL using the Nav Sphere. Don't let your APOAPSIS raise above 50km. Don't let your speed go above 1500m/s. If you want to slow down, press retrograde.


Around the world (Orbit)
With all that done, I had 200k in funds.

We will need some more parts in order to nail this orbit without breaking a sweat. Lets get back to the tech tree shall we ? We'll need 120 research points

Of course, our first go is Overcomplicating Things because who doesn't love unnecessary complexity ? Also, more stages means more control over our mass, while side boosters will help us crank up our rocket without making it taller.

Our next go is "RC Enthusiast" and then "Bird Wanna-be". This one's a tiny bit tricky as it is not in the Rocket tree per say. We don't care about the wings, but control surfaces will provide a significant improvement to manoeuvrability at low-med altitude.

Now we'll take "Old School" tech which allows us to make our engines bigger, and who doesn't like that ? We can't go for better engines right now as they would be too expansive to fit.

This should do the trick, and i'll stop there, but if you still have 30 points to spare, go for "Novice Managers". Then if you still have 50 points to spare, go for "System Engineers" which will help you picture what is going on. I'll do without them for now.

Side note : Be aware that engines have a pretty steep cost increase, so make sure you have the funds before unlocking them.

Back to building we go !

Lets see what we want to accomplish :
- Get off the ground and acquire some speed
- Raise our APOAPSIS to 120km.
- Get a lateral speed of 3000m/s ~= raising our PERIAPSIS to at least 80km = orbiting

Sounds a lot like a 3-stages rocket job. We might also add some solid boosters to give us that sweet, cheap little nudge at the start.

From top to bottom then :

3rd Stage - Utility + Propulsion
Here we fit the Command Disc and a Nose Cone full of fuel. Don't forget to turn on the Fuel Lines. It's light, so once in space, a small engine and some fuel will be more than enough to accelerate to the speed we want.

Lets add that, a tank full of Kerolox and a Gnome Engine at 50% size.


Add an interstage. That's it.

2nd Stage - Precision
By this stage, we will be high enough that drag will matter a lot less, so we will start to pitch toward to hozizon. It should be able to push itself and the above stage through what's left of the atmosphere so it should still pack up some heat.

Lets go for a tank full of Kerolox and a Gnome Engine at 100% size. Lets also add some fins and make sure we turn on control surfaces.


3rd Stage - Big Boom
Now, we only need to get all that at about 60km ASL (eyeballing). We know the recipe : Fuel + Engines. To keep it cheap, we can use two big, solid rocket boosters, each with 2 Goblin Engines at 250% size. We will also use the second stage to help us get clear of the pad but we will put it on low regime to keep our precious fuel for later on in the flight.


Adding all those parts we are left with :


Disclaimer : I noticed that my rocket is 10.1m, after I resized the Gnome Engine of the 2nd stage. Resize the 2nd stage tank so that the total lenght of the rocket is less than 10.00m.

We shall now honor the first tenet of Dev.


Side note : You could save a stage by combining the 4th and the 3rd stage. As we are limited in the number of stages we can have, this might prove useful.
However, I find it *bad habit* and counterintuitively, increases your workload as you might not have the throttle configuration that you'd like when you stage. On lower stages, you might loose some Delta-V if you do not do it properly though. You do you.


The first to go will be the Side Boosters. At this point, we will crank up the second stage to full throttle, pitch toward the horizon and accomplish a 120km Apoapsis.
20 seconds before reaching it, we will fire our engines to start gaining lateral speed. We will have to stage a second time, then watch as we make our first orbit around Droo.


Our craft should be standing like that. If it isn't, go back to the Editor and use the Rotate Tool to rotate the Command Disc. We will pitch for 75° right at the start, with 20% thrust on our engines. The solid fuel boosters will burn at max thrust no matter what.

Space it !

The craft will start to pitch by itself. Once you cleared a few meters above the pad, you can pitch for 65° and reduce throttle. Get a feel for it and remember that their is a sweet spot where we will achieve maximum gains in term of altitude / lateral speed ratio. Always watch your speed and ASL, they both need to increase, but not too fast.

Let the side boosters burn all their fuel, increasing throttle as the boosters loose thrust so that the craft keeps accelerating. Stage the boosters once they're empty and push throttle to 100%. You can start pitching toward 45°. Wait for you apoapsis to read 120km.

Now this is where the REAL eyeballing starts. And as we don't have the map yet, we can't even see what we are talking about. But no worries, I have great drawing skills ;)


TADA !! I promise you that Dev will provide us with a way greater tool to plan our space trips but for now, you'll have to suffer my drawings.

1 - As we lift off and pitch, we gain altitude and lateral speed, moving our Apoapsis to the East and increasing our altitude. This is a trade off as we won't accomplish as much altitude by going sideways. For every rocket, there is a sweet spot to achieve optimal performance in both regards.

2 - To have equal acceleration, and make the circle a circle and not some ovaloid shape, we want to push as much before the Apoapsis as we want to push after the Apoapsis... I have no idea how to compute that (I have a feel for it, but the exact equation is waaay beyond my skills). Do not worry though, Dev will soon bless you with its greatest tool.

3 - We achieved a speed significant enough that we don't "fall back" anymore, or we fall far away enough that there is no ground on our path. This is an orbit.

Take Off Procedure

Put the craft in a 75° pitch atitude right at the start, with 20% Throttle. Remember that the solid boosters will burn at 100% no matter what.

Once you've cleared the pad, you can reduce throttle to 10%. Make sure that you keep accelerating ! Once your side boosters noticeably reduce in thrust (you'll hear it), put the thrust to 30% and expand all the fuel that's left in them.

Stage them. Pitch for 45° and throttle to a 100% until your apoapsis reads 120km (lets get some margin...)

Wait for your Air Density to read 0. Pitch for 0°.

Put 100% Throttle at -30s Apoapsis. Don't forget to stage.

Keep a close look at your PERIAPSIS. Once it raises above 80km, you've accomplished a stable orbit.

Congrats !


Don't worry if you don't nail it right away. Get a feel for it and you should bag this in no time !
Map tool (Important side-notes)
Important : After fiddeling a bit with the game, I will continue the guide with the "Ali Pad" and the "GANTT Charts" unlocked. I did my first run without GANTT and it relied on shady estimations and some good ol' luck. No procedure here.

I also went for "Orbital Maneuvers", "Explosive with a Hole" and "Old School". This is achievable without leaving the SOI of Droo (I might have sent a craft straight up until it went hyperbolic, left Droo SOI and entered Juno's). If you're struggling to get there, ask in the comments.

We thank Dev for the GANTT Charts.


Ali Pad Unlocking the Ali Pad will have you make it to orbit in under 5min. The key is to push through the atmosphere as fast as possible. Pitch 85° until you reach 20km/30km ASL, pitch a bit more, push your apoapsis to 90km, wait until -20/-40sec to apoapsis, pitch for 0° and burn for 3000+m/s

It made me realise that I usually go for much flatter, longer orbits, meaning i'll meet my apoapsis at around 2000m/s already.


We talked a lot about Apoapsis, and a bit about Periapsis, but what does those values mean exactly ?

As we now have the maps, orbits and manoeuvers unlocked, we can just launch our previous rocket once again, this time tracking what's happening.

Follow the same protocol, pause the game if needed and track your trajectory using the map tool. You might want to get familiar with it as this is the greatest tool granted to us by Dev. This is what will use from now on and until we land on Tydos.

-- Apoapsis & Periapsis --


(I will take a better screenshot... I will take a better screenshot...)

Your Apoapsis is the highest point you will reach during your flight. (green arrow)

Your Periapsis is the lowest point you will reach during your orbit. (orange arrow)

But as I'm a genius, I took a screenshot of a circular orbit...

Once you're in orbit, your Apoapsis becomes the highest point in your orbit. This is what we want to increase to go to the nearest bodies.

-- Control tool --


Well... This part aims at providing a basic understanding of the tool you're looking at. HOWEVER, this I can't explain. This you have to feel.

Lets try anyway ...

There are 3 colors, representing 3 axis, X, Y & Z (cf. 3D Rendering).

We will arbitrarily decide that :
- X axis is green
- Y axis is blue
- Z axis is red

Simplification ahead. Also everything is relative... The reference point will be common sense.
Now if we were on this good ol' Droo's ground, increasing one of those axis would make us go forward, right, or up. But in space and relative to our SOI, we always have motion on at least 1 axis, due to gravity. Moreover, straight lines are not "straight" in space but rather follow the curvature of the planets, moons etc which are spherical. Yet, they are still straight. (haha)

! Joke time ! : A farmer goes to a physician because his cow broke a leg and ask for a treatment. To which the physicist answers : Well, assuming the radius of a cow is 1m...

Everything in the universe is spherical. If it isn't, just assume it is. Some might say : If it isn't, just wait...

So !

In space, we are always following those straight lines, that follow the curvature of the surrounding bodies (Einstein said... nothing you idiots ! Einstein's dead, he's locked in my basement).
As we orbit, we're only moving on the X axis. And we are always orbiting. If not Droo or another body, then at least Juno, which we are always orbiting anyway.

According to the screenshot, dragging the right, green button to the right will plan an increase in speed, in turn increasing the apoapsis. Draging the left, green button to the left will plan a decrease in speed, in turn decreasing the periapsis.

Now... Draging the top, red button up will plan a rotation along the Z axis. As we're always moving, this will "raise" half our orbit and "lower" the other half. Trying it out is this only way to understand.

Finaly, draging the blue, most-forward blue button will rotate your orbit along the Y axis. Once again, trying it for yourself is the best way to go.

-- Auto-manoeuver --


Fiddelling with those 3 axis is all we need to get anywhere we want. To correct our orbit or our trajectory, we have to execute burns, which will expand a certain amount of Delta-V. This can all be seen in Map Info. It also gives you the Burn time, of which half will be expanded before the manoeuver point, and half after, meaning your burn will start (in this case) 9 seconds before the point.

Conveniently, a dedicated button allows the game to execute planned burns by itself, without requiring any more input from our side, meaning that planned manoeuvers will be executed to (almost, Dev :p) perfection.

Now please remember that you'll use the tool looking "up", "down", "right","left"... changing the reference point... You'll get used to the green button pretty quickly.

Take some time to get used to the others axis. You HAVE to understand their impact. You'll usually play around 2 axis, this is key to achieve Isoorbits (alright I just made that one up) and get your orbit "parallel" to your target's one (Luna, Brigo).

You might use the "Y" axis to get to a perfectly circular orbit.

Aligning ourself correctly will greatly increase our probabilities of intercept and will help us save some of our precious Delta-V.
Leaving home (High orbit)
Depending on several factors, you might, or might not have the same funds and research points as I do. I'll try to keep the next rocket simple and affordable, but remember that it should fit your needs and thus your missions.

From now on, our craft will spend more time in space than it does in the atmosphere. As we know, space is empty, cold (well...) and vast. So we have to pack everything we'll need right from the start. Also, as there is no atmosphere, we will have to find a way to orient our spacecraft without using air. Gyros are cool and all for firecrackers, but they just won't cut it for much longer (RCS to the rescue !).

Our goal is to intercept Luna and Brigo. Remember to take missions !

If you don't have enough research points yet, you should definitly start to make your own designs and fly them around. Most importantly, try to get a feel for orbits. You should be able to achieve one reliably, with some Delta V to spare.

-- "Cheap" Powerfull design --


I decided not to make a guide on how to build this particular rocket but rather on the topics we should consider when designing one. Basically, from this rocket on (beside crafts assembled in space), you'll know everything you have to know in order to reach the furthest places you can think off. The rest is just experimentation.

Alright, so the first thing to consider when designing a rocket is its goal. Will it reach a low Droo orbit, a high orbit, intercept Luna, orbit Brigo, get out of the SOI of Droo... These are all things we'll have to consider even before placing the Command Disc. Remember that we also have to factor in our funds and our available contracts.

Sometimes, we might be willing to launch rockets without any specific contract (If possible, you should still try to complete one as a side job). This might give us an edge on research points. As we won't make any cash, we'll have to make sure that the launch won't bankrupt us AND that we will have enough cash left to send another rocket (make sure you can afford the engines you unlock !).

Right now, what we want is a rocket powerfull enough to reach Luna and Brigo. From my very, very rough estimations, based on feelings rather than hard data, I think that 6000-7000 Delta-V, if well spent, will get us anywhere in the SOI of Droo with this kind of payload.

Side note on Modular Design : As I know that after intercepting and orbiting Luna, I'll want to drop some cargo there, I'm already dividing my rocket into 3 stages :
- Payload (3rd stage)
- Orbiter/Intercepter (2nd stage)
- Lifter (1st stage + boosters)
This makes me able to save the "Lifter" as a reusable part. As the mass of the payload is likely to only go up, making sure the lifter overperfoms will save me time in the future. At some point, I'll know that it is reliably able to send a certain massX up to a certain distance without breaking a sweat, so every (stage2+stage1)mass design fitting this massX (and dimensions but well...) will just use this lifter.
The same process can be repeated with the "Orbiter". I might make a dedicated guide on Rockets & Modular design later on.


Let's get building !
I like to design my rockets from top to bottom following those steps :

Stage 3 - Payload

1 - How much of the craft should reach the objective ? (1 drood, a colony, a command disc...)
Space operation only. Efficient engine. TWR can be traded for Burn Time. Only need the command disc to reach it.

2 - What will I need at this point ? (fuel, monoprop, battery, control surfaces, parachutes, heatshields, docking port, solar panels...)
I will need battery until the end of the mission so this is where I'll put it. I'll need some fuel to start my way back to Droo. We don't have to think about it yet, but this is also where I want to put my 'chutes and my heatshield.
Keeping this stage as light as possible will help us achieve better efficiency in space (cf. Vicious Circle). Take what you need, but take ONLY what you need here.

3 - How will it make it there ? (fuel, engine, twr, burn time, delta V...)
Engine / Fuel tweaking

Now we can get to the stage that will support this one, and repeat.

Stage 2 - Orbiter

1 - Atmospheric + Space operation. Powerfull enough to send Stage 3 at least in space operation (100km Apo/Peri is a must), idealy on its way to intercept. Burn time and Delta V can be traded off for better TWR.

2 - As this rocket will be quite large, I'll need monopropelant for my RCS (Reaction Control System, ask about it in the comments if needed, displayed in white in the screenshot). This stage is much bigger so it might be a good place to put some secondary batteries too (we don't have them yet).

3 - Engine / Fuel tweaking.

Stage 1 - Lifter

1 - Atmospheric operation. Only power matters, to get those 2 stages up to at least 100km apoapsis, with about 1000m/s lateral speed, as to make orbiting easier.

2 - As I want to go lateral, i'll need some control surfaces. This is also when I decide if I'll use solid boosters or liquid fuel for my side kicks.

I usually go for solid boosters for cheap, inefficient, repetitive operations (just get that payload to 100km apo when I press space at 85° pitch)
Whereas I go for liquid "boosters" when I want to achieve high efficiency, trying to orbit has a single motion (it will also be easier to code, when we reach this part).

3 - Engine / Fuel tweaking.

As a rule, we should consider that, going up, each stage should be :
- As wide or less wide than the previous stage (as we won't look into fairings)
- Lighter than the previous stage

Rocket design is a science that I don't know much about, beside what I learned by doing. I just learned that a design I've been using for 10 years now is called an "Asparagus" design.

The design I like the best is : 1 main engine and two side engines, the side tanks (liquid fuel ofc) feeding into the main one, so that I'll stage them as soon as their fuel is expanded, giving me just enough altitude & mass that the resulting TWR gets me on my way (might have a name, I don't know :) ). Remember that drag reduces exponentially (I think.. Might be a nasty log of n or worse and not being linear...) as we get higher. Clearing a few thousand kilometers will help our TWR a lot. Try it out with the environment slider.

This is the design I used for the "Above and beyond" rocket displayed in the "Some Designs" section.

Using fuel lines and the side separators properties (remember that you can put fuel in your nose cap), you can experiment and see what fits you the best. The above mentioned design requires a bit of launch pad configuration and in-flight monitoring to get the best out of it, but has enough margin to work going "straight up, straight east".

The design displayed in the screenshot uses solid boosters, which uses way cheaper engines/fuel. It's also quite sturdy and way easier to start with. If you don't feel like building your own craft yet, this one should get you quite far.

Whether you used this design or made one of your own, you should try to complete a few contracts.

[...Loading...]

You should now be able to reliably send rockets to a 200km Apo / 200km Peri. I'd advise you to play a bit more if it is not the case.
It’s not rocket science (SOI, rendez-vous & orbit)
First video [Arvin Ash] : https://www.youtube.com/watch?v=tzQC3uYL67U
Second video [Destiny]: https://www.youtube.com/watch?v=3pZNzF6LBII


As we can see on the SECOND video, Earth " " " drops " " " the plane, resulting in curvature around it. The Moon, having lateral speed and not being slowed down by, say, an atmosphere, follows this curvature in an "infinite" motion.
However, the FIRST video shows us that Earth itself is in the " drop " of the Sun. Meaning that the Moon also is. This "drop" is called the Sphere Of Influence (SOI)

Side note : Newton defines gravity as a force and his formula works great for "local" calculations and outside of gravity pits (black holes, neutron stars, massive stars...). However, scientists found discrepencies (a few degrees in a century...) in the orbit of Mercury.
Einstein's tuned this formula and concluded that gravity was not a force but rather a curvature of Space-Time. That is why I felt the need to not call gravity a force.
The game however, follows Newton's law as the curvature of Space-time might be quite hard to compute... In game, gravity is a force.


Taking a step back...
IRL, SOIs are not well defined spheres as gravity is defined by Newton as an inverse square law, based on mass & distance. This simply means that any object with mass as an effect on every other objects with mass and that this force decreases exponentially with distance.
You are currently attracting Mars toward you. But this force is more than negligeable of course, as you are quite far away and not that massive compared to stellar objects. Yet, it is never equal to 0.

Important : As explained by mreed2 in the comment section however, Juno's physic is based on 2 bodies, your craft and the body related to the SOI your craft is in. You will either be in the SOI of Droo, the SOI of Luna or the SOI of Juno. No other objects will have an influence on your craft.


Side-note : I planned my burn toward Luna so that it would bring me back in a ovaloid orbit around Droo after the intercept. This makes returns way easier. Try it out for yourself.

You should also try to use all 3 axis and see how it impacts your orbit.


Now, using everything we learned, we are ready to make our first intercept with Luna. Check your craft, check your staging and get to a stable 120km apo, 120km peri (more or less). You can achieve that easily using the auto-manoeuver tool.

There is one more value we will want to pay attention to : Inclination. Inclination gives you, in degrees, the inclination of your orbit relative to the equator of Droo.
Click on Luna, then press "Target". It's inclination is also relative to the equator of Droo so making sure that we orbit on the same plane will increase the likelyhood of intercepting it. You can correct the inclination of your orbit with the Z axis (red button). Make sure to be on the same inclination as your taget.

Then, click on your orbit on the side opposed to Luna. Plan a raise in your apoapsis until it reaches the altitude of Luna. Remember that Luna is orbiting around Droo, so by the time we get there, Luna won't be where it is now. That's why we have to plan for it's movement and intecept a bit ahead. Drag your manoeuver around your orbit until you get an intercept. That's it :). Now you can wait for your manoeuver to be executed.


Notice that once we reach a certain point, the color of our orbit changes. This means that we reached Luna's SOI. Moreover, we have an Apoapsis, but we are coming in way to fast to "catch the curve". You can try it out for yourself. At -20s to Apo, get your craft in a retrograde attitude. Burn your engines at a 100% and watch what happends. (You won't be in synch we the guide anymore).

We won't cover landings on Luna or Brigo in this guide. However, take note of this retrograde burn. Of course, it takes some Delta-V and put you in orbit around Luna. Using what we've learned so far, you can then ajust your apo/peri and even crash on it. This is how we will orbit any other body in the solar system.
- We will come in fast (very fast, meaning a lot of Delta-V) and aim for their SOI
- We will slow down (by a lot, meaning a lot of Delta-V)
- We are now in orbit. From there, we can land, jump to the body's moons, get on our way to another body...

As you can understand, all that matters from now on is fitting enough Delta-V to get to where we want. You can reach any point in the Juno's system using those basic manoeuvers.

Hohmann Transfer Remember how we had to anticipate for the movement of Luna to reach it ? This is called a "Hohmann Transfer", https://en.wikipedia.org/wiki/Hohmann_transfer_orbit/
As you can understand, aiming for "Mars", or "Venus" SOI's, which, compared to space, are not that big, requires some planning. KSP had a great tool : https://ksp.olex.biz/ which might help you better understand what we are talking about.

Once you understand, you will be able to make more informed eyeballings. Notice that to go to an "Inner" body, we need to thrust against the rotation of Earth relative to the Sun, decreasing our periapsis relative to the Sun. To go to an "Outter" body, we need to thrust with the rotation, increasing our apoapsis relative to the Sun.


See, it's not rocket science :)


-- Preparing our way back --

Coming back to the intercept with Luna, you can see a green orbit. We now know that this orbit will be the one we'll have once we return in Droo's SOI. As we still have some speed, it will decrease until we reach our apoapsis, then we will start to accelerate toward Droo.


But before all that happens, lets plan a manoeuver at our apoapsis, reducing our periapsis to 30km. What we want is to catch the atmosphere, so that is slows us down (and burns us up). Atmosphere is great for braking ! As you can understand, planets without one and moons require other means of slowing down.


Just let the game run...

Here are the 200M I promised you. You made it back. Congrats !


All we need to do now is to make sure that we don't explode BEFORE touching the ground. And that my friend, is the job of the Heatshields. (added later : And 'chutes. But I always forget about those darned 'chutes....)

Home, sweet home (Coming back, in one piece)
Researches :
210 RP

(Catch Them All) 30
- Slow Descent 50
- Getting Hot 50
- Soft Landing 50
- Static Electricity (30)


You can also add a heatshield directly under the Command Disk. Notice that there are no 'chutes and that I payed for it later on.

1 Manoeuver Reentry
Slingshot back. Hope for the best.

Hope ain't a tactic boss !

This is what we've just done. Space engineers call this type of reentry a "Balistic Reentry". Meaning putting good ol' Newt' in the driver seat and "fall back" to Droo at full speed. No control whatsoever, just let gravity do the job.

Picture a plane going high up for half its trip, then cut its engines and use gravity to fly the other half. Some might call this "Tomber avec panache" (roughly translated as falling with style) but you probably figured that we can come up with better ways to go about it.

Once again, as we don't pay the bill, we can afford a bit of Panache.

Remember that Droo "drops" space around it. So the "higher up" the curve we go, the more "speed" (energy...) we'll gain "falling back". As our apoapsis is quite high, we will come back at significant speed, well over 3000m/s. At such speed, even a small amount of air molecules hitting our craft will result in significant drag, which will generate a lot of heat.

Heat is really, really hard to dissipate in the air, meaning transfering it from the spacecraft to the surrounding air. Picture a very, very hot metal bar, 5m away from you. You wouldn't burn up, as air won't transfer heat very well. In water, it would boil you up. (Ask the frog)

I don't know if this is modeled in the game yet, but Heat Management is a very important topic of space operations. As you have no medium around you (no air, no water, no nothing), it is virtually impossible to transfert heat via convection (meaning an atom of the medium gains the energy of an atom of the spacescraft, dissipating the energy, thus heat). So any spacecraft will only heat up across its mission.

As Humans can't handle T° deltas above 50° up or down, and will most likely start to complain way before that, this issue has to be handled.

Thanks to Dev however, Droods are much more resilient and won't complain at all. Tourists are a different bread, brittle and pesky, as all tourists are. They might spontaneously combust just to piss you off.

The spacecraft in the movie Avatar, the Venture Star (picture down below), does a great job at showing what an interstellar craft might look like. The sheer size of it is astonishing, and it's aspect can be considered realistic. Notice the big balls, which would host the fuel and the 2 big, red thingies. Those devices "Radiate" heat away. Radiation, opposed to convection, is a really, really inefficient way to dissipate heat. But it's the only way we currently know of to effectivly dissipate huge amounts of heat with no medium. As you can see, it is so inefficient that it takes well over 50% of the spacecraft total size.

Remember that we are constantly burning fuel to accelerate or slow down, generating a lot of heat in the process, that has to go... somewhere. As it won't get in space, it will heat up the craft. This is a nightmare to deal with for space engineers.

Energy is the last topic I'd like to talk about. As we go further and further from Droo, Battery will become another scarce resource.

Coming back to the movie Apollo 13 : No power means no burns, no spacecraft orientation, no 'chutes deployment => Balistic reentry : Hope for the best. And hope ain't a tactic.

We talked a lot about Delta-V and I told you that it was the only thing we'd need from now on. Well, I lied. We'll also need time. I'll call on the movie The Martian, which might help you picture the implications of long-flight operations. No matter how good you are, it takes two years to get there. (Hohmann transfer windows bla bla bla...)

Everything that you have at lift-off will cost Delta-V. Everything that you don't have, you'll have to do without for the rest of the mission.


Simply put : Even the command disc draws power to operate. We might not burn our engines for months, if not years, before reaching our objective, meaning that energy will either have to be stockpiled at lift-off or generated during flight.

As instruments need to be cooled down, they also need not to be "space cool" and kept within tolerable T°, which takes energy. Many rovers' life expectancy are computed based on their battery capacity. This is modeled by "Battery" in Juno. The central part of a Droodless craft, the Command Disc, will draw Battery at all point during the flight.

As space travel distances are gianormous, the small amount it draws will quickly exceed the amount of Battery we store in the Command Disc. Without any means to generate energy yet, running out of Battery means the end of the mission as the Command Disc won't be able to act on our orders anymore. For now, we can add a "Battery tank" to provide for our needs.

Solar panels are a good way to remedy this issue, but also come with their share of problems, as only their surface can increase, not their volume, resulting in football field sized solar arrays. As for radiation, it is a really inefficient way to produce energy. IRL, small satelites, telescopes... have huge panels compared to their size. The space station distinctive shape also comes from its solar panels.


This was pure knowledge-giving. I might have gotten carried away :). Let's get back to the subject at hand.

Speed + Atmosphere = Heat. Dissipating heat is hard. So how did the greatest minds our species has to offer managed to get around this issue ?

Well, they didn't. Spacecrafts just burn up on rentry. Yes, yes, they all do !

Only, those minds were smart enough to design a specific layer called a Heatshield, that would take the blunt of the impact and sacrifice itself for keeping those very-well-trained astronauts within tolerable T° limits.

Picture the Space shuttles. The black tiles under it are designed to heat up (they are made of ceramic, wich handles high T° well) as drag increases, but also to disintegrate, sending material and thus heat away.

As we only aim to bring back the Command Disc, we don't have to go for this kind of fancy-pants tilling.

Orbit Reentry
Lower apoapsis for slower reentry
This is a way more controlled way to get back to Droo. All you have to do is make sure that your Periapsis IS NOT in the atmosphere of Droo. Reach your Periapsis and burn retrograde. Highly efficient spacecraft might need to achieve this manoeuver several times, over several orbits. Coming back at a 80km apo/peri, you might not even need heatshields to get back down.

It will cost more Delta-V but reduces reentry speed by a significant amount. Remembering the Vicious Circle, it in turn means that we will need less heatshield, meaning less mass, meaning less Delta-V... It might not be a requirement to get back to Droo, but it might save us some mass, thus some DV, thus some cash... When intercepting other major bodies. Well as you probably understand now, we can't get further without talking about optimisation and Hohmann transfers.

Which is not in the scope of the guide. In term meaning that this guide is completed :)

I really hope you learned and enjoyed what you read. Please feel free to give your advice in the comment section.

(Oh, yeah, and fit some 'chutes...)

Post Scriptum : To reach T.T, once in orbit around Droo, use the "Red Button" to "raise" your inclination. You can even plan ahead at lift-off and Yaw "not for East" (try it out for youself). To be honnest, T.T is ... A body we have to contend with ...

Did you read this guide in full ? Please mention it in the comment section :) Also, I wouldn't mind a rate up ;)
Initiation to Scripts
Big Thanks to Falkenherz !

Disclaimer : As you can just copy this script and use it as is, I'd strongly advise you to get a basic understanding of programming logic before getting started with scripting.

It doesn't require you to know any programming language (Java, C++, C#, Python...) yet all those languages have the same logic, which you have to learn. You need to know about :

- Variables
- Condition structure (if... else if... else...)
- Loops (for...while...)
- Ideally, Getter & Setter (Object Oriented Programming. This is a bit more advanced)

Just reading about it should be sufficient to get started, as we will use a Drag&Drop tool.

Also, you SHOULD NOT use copy/pasted scripts right at the start. Try to make them once you've mastered a manoeuver and find it repetitive.


In my humble opinion, scripting is one of the greatest feature of Juno.

Since I began playing Space-based simulators, I felt that take-off manoeuvers were tedious and managing this part of the flight manually always felt wrong. IRL, no human is pulling on the stick for a simple reason : Humans make mistakes.

Now the slightest mistake while strapped to a controlled explosions device and all its fuel while going against gravity at 3600km/h (1000m/s) usually leads to what engineers like to call a "Catastrophic Failure". Anyway, highly efficient operations requires a degree of precision that is inachievable by a human taking that many G's.

Don't blame yourself for pressing Shift instead of Ctrl. You were never meant to handle the throttle.

Scripts don't make mistakes. Humans writting scripts might, but once it works, it works. Given the same parameters, they will always achieve the same result.


Orbit Script - Provided by Falkenherz

The idea is the same than with rockets.

A script such as the one provided by Falkenherz should get any simple rocket into a stable orbit. In this case, simple meanning no Space Shuttle craziness and no SSTO.

He(She?) has other, tailored for specific rockets, to achieve greater efficiency. Or to have fun coding, I don't know.

Once again, it all depends on your goal. You might like to use such a script to send all of the pieces of a Droo's Low Orbit space station (try to make payloads of relatively equal mass) but customize it when launching rockets out of the SOI of Droo. Iteration is the key in this case, unless you have two PHDs in related fields. As we don't pay the bill, trial and error is a great teacher.

A good script should take into consideration several if not all available (and relevant...) variables.

Once again, I dare to advise you to get a solid grasp of those variables before using any script.
Further goals
Some more math (mass, haha), a lot of visuals and less rocket design

Landing & Getting back
Making two needles meet( !! Space Stations !! )
Other planets

A guide on rocket design
Some designs
I'll just drop some designs here. Use at your own risk.

Orbiter


Cranking up the fuel


Above and beyond


This design doesn't make any sense and you shouldn't use it


Transparent staging


Getting fancy
Contributors
Alone we go fast. Together we go far.

Thanks to mreed2 for providing the Juno's Map of Delta V !

Thanks to Falkenherz for providing the Orbit Script !
[To be continued]
...
38 comentários
Neobab  [autor] 28 set. 2023 às 10:30 
ждун, I used to gravity pitch with a few of the designs I knew well on KSP. I'll be sure to try in Juno .
Neobab  [autor] 27 set. 2023 às 10:13 
Hope they were TON-618 !
ждун 27 set. 2023 às 5:52 
I am new to juno but played ksp for long time.
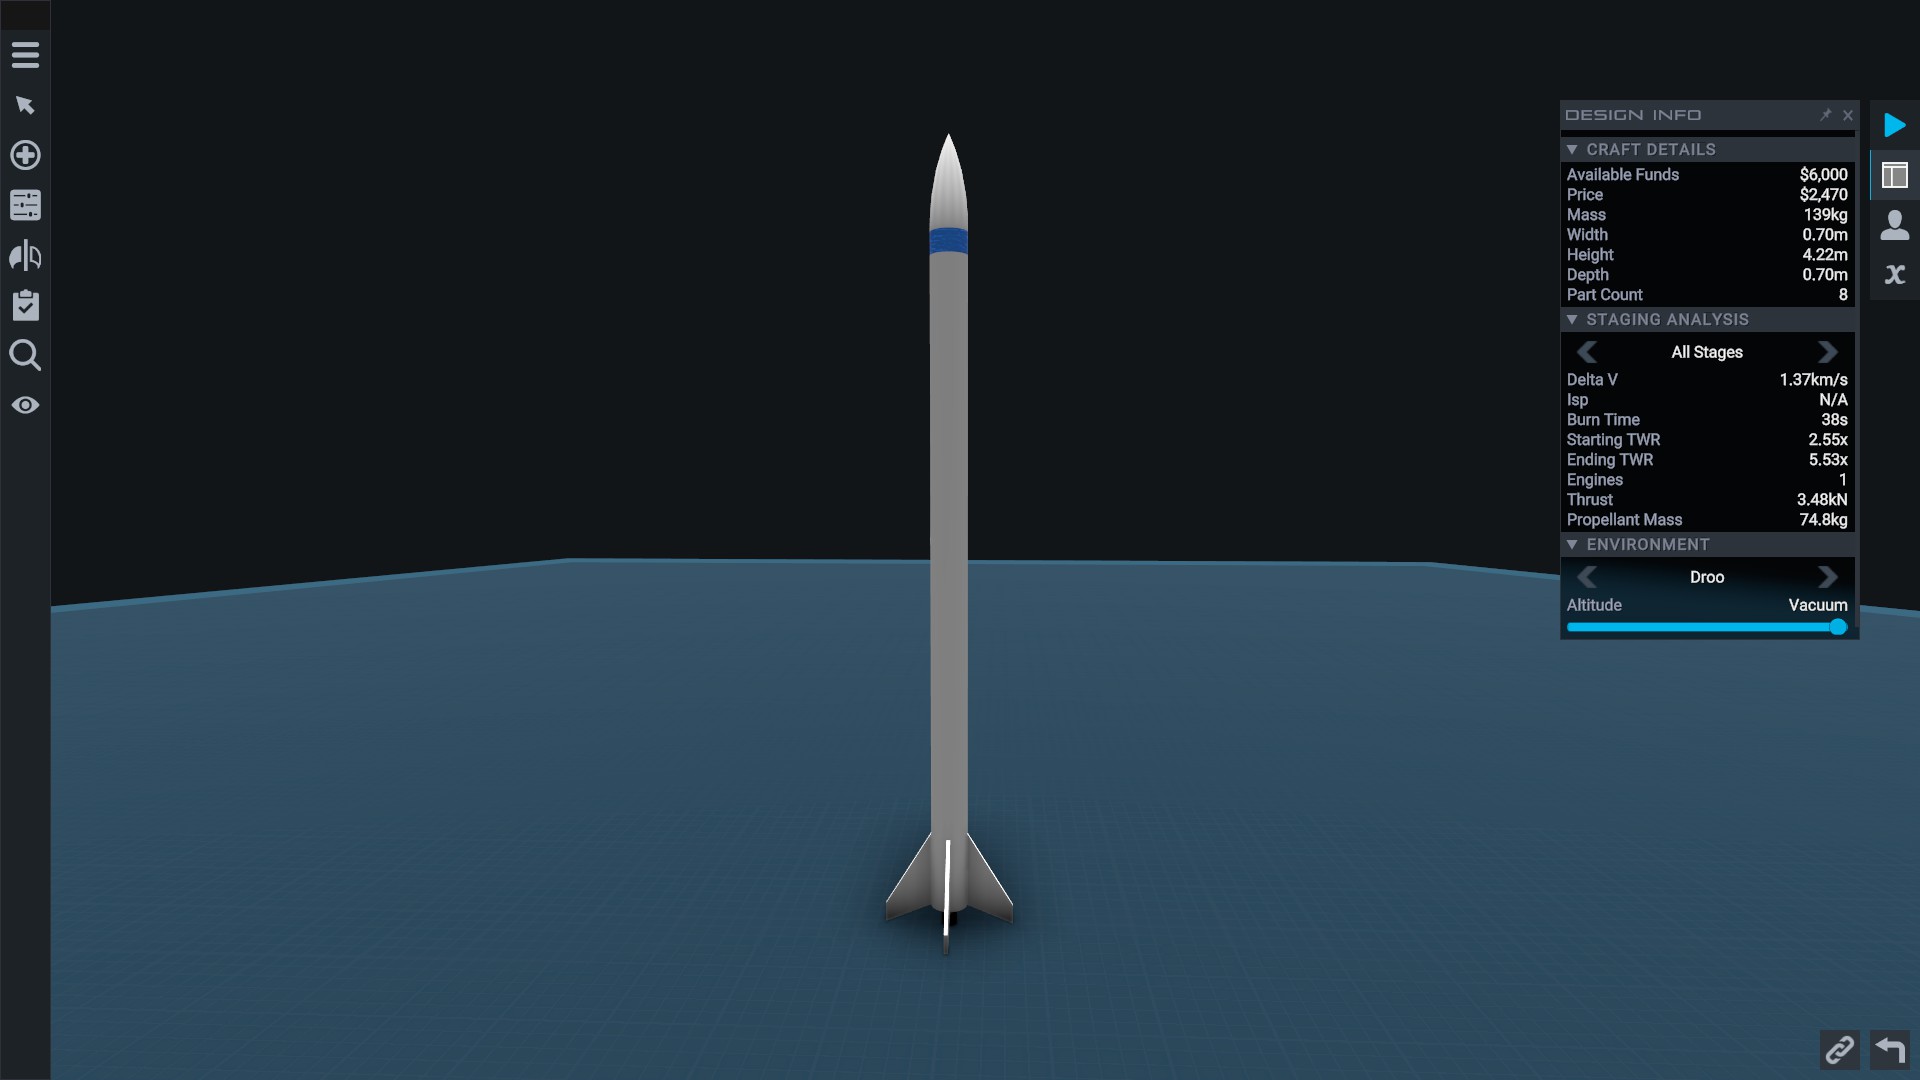
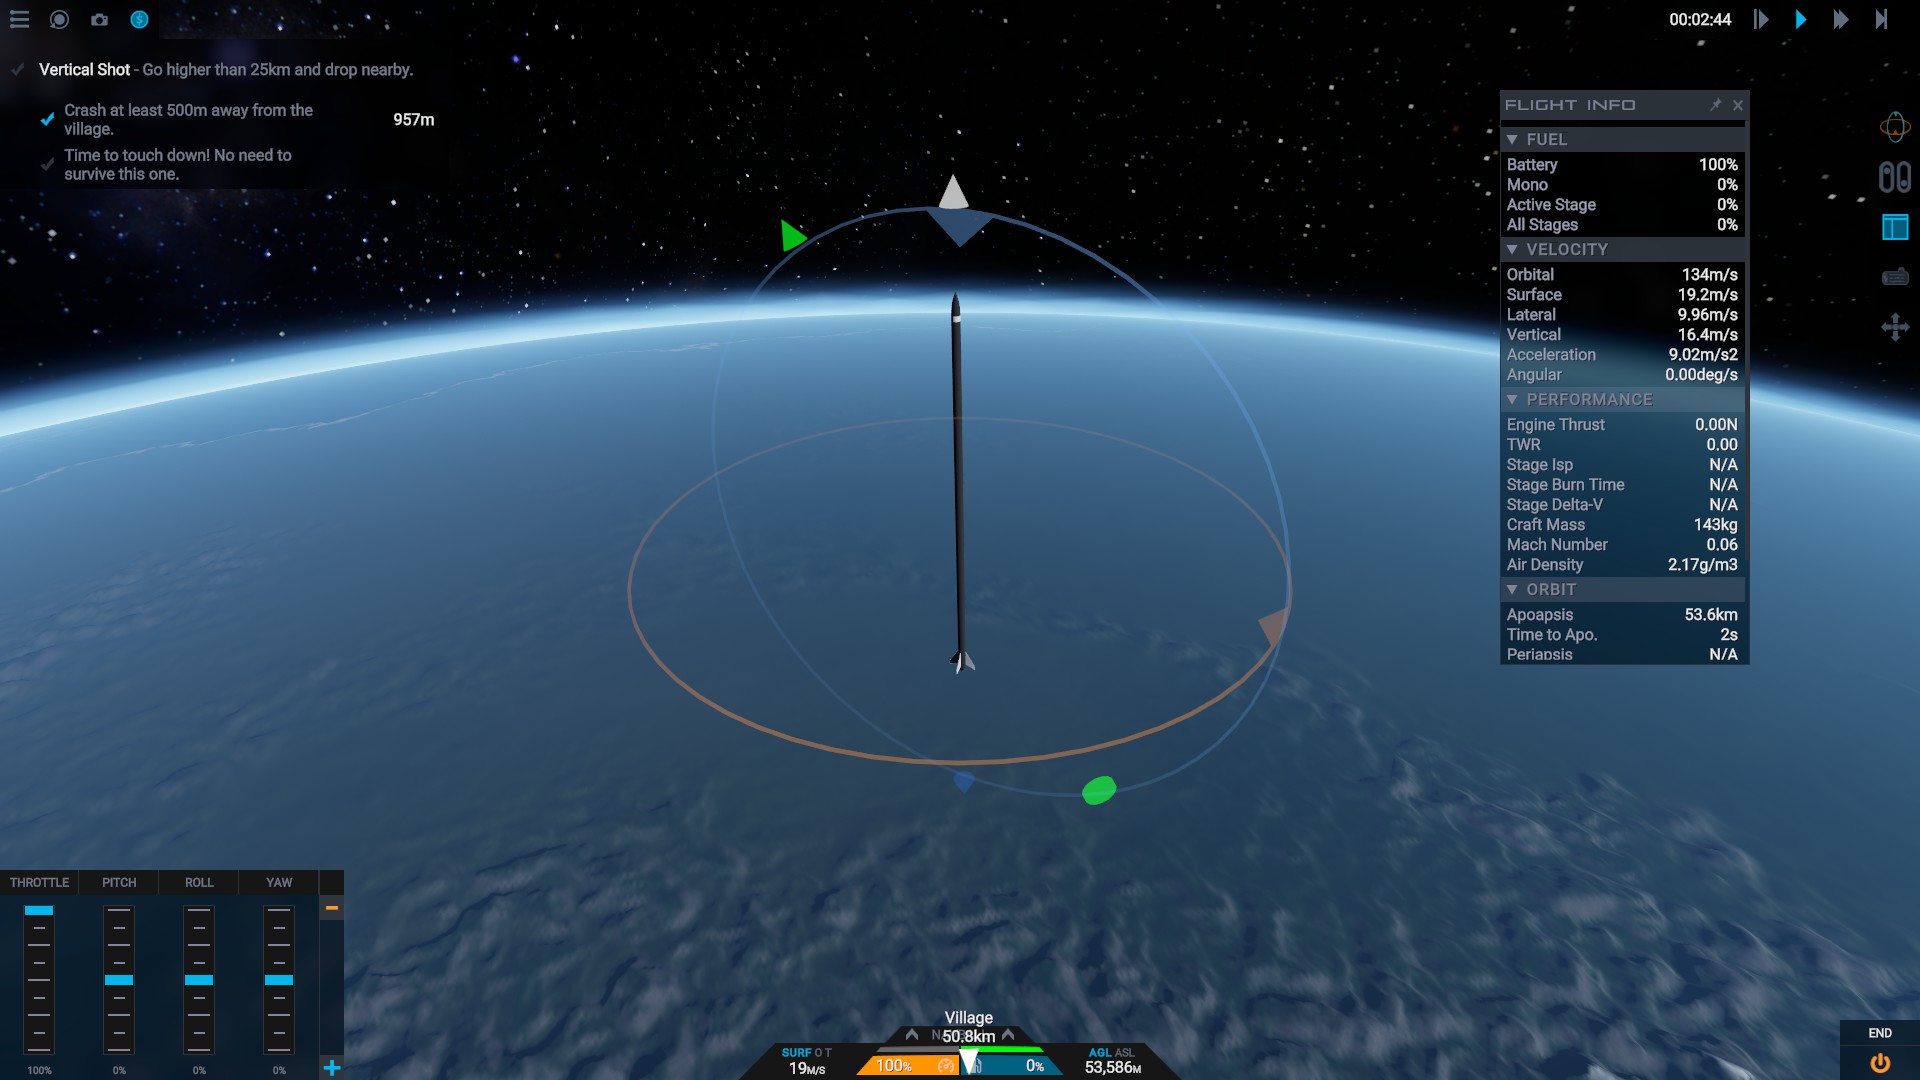
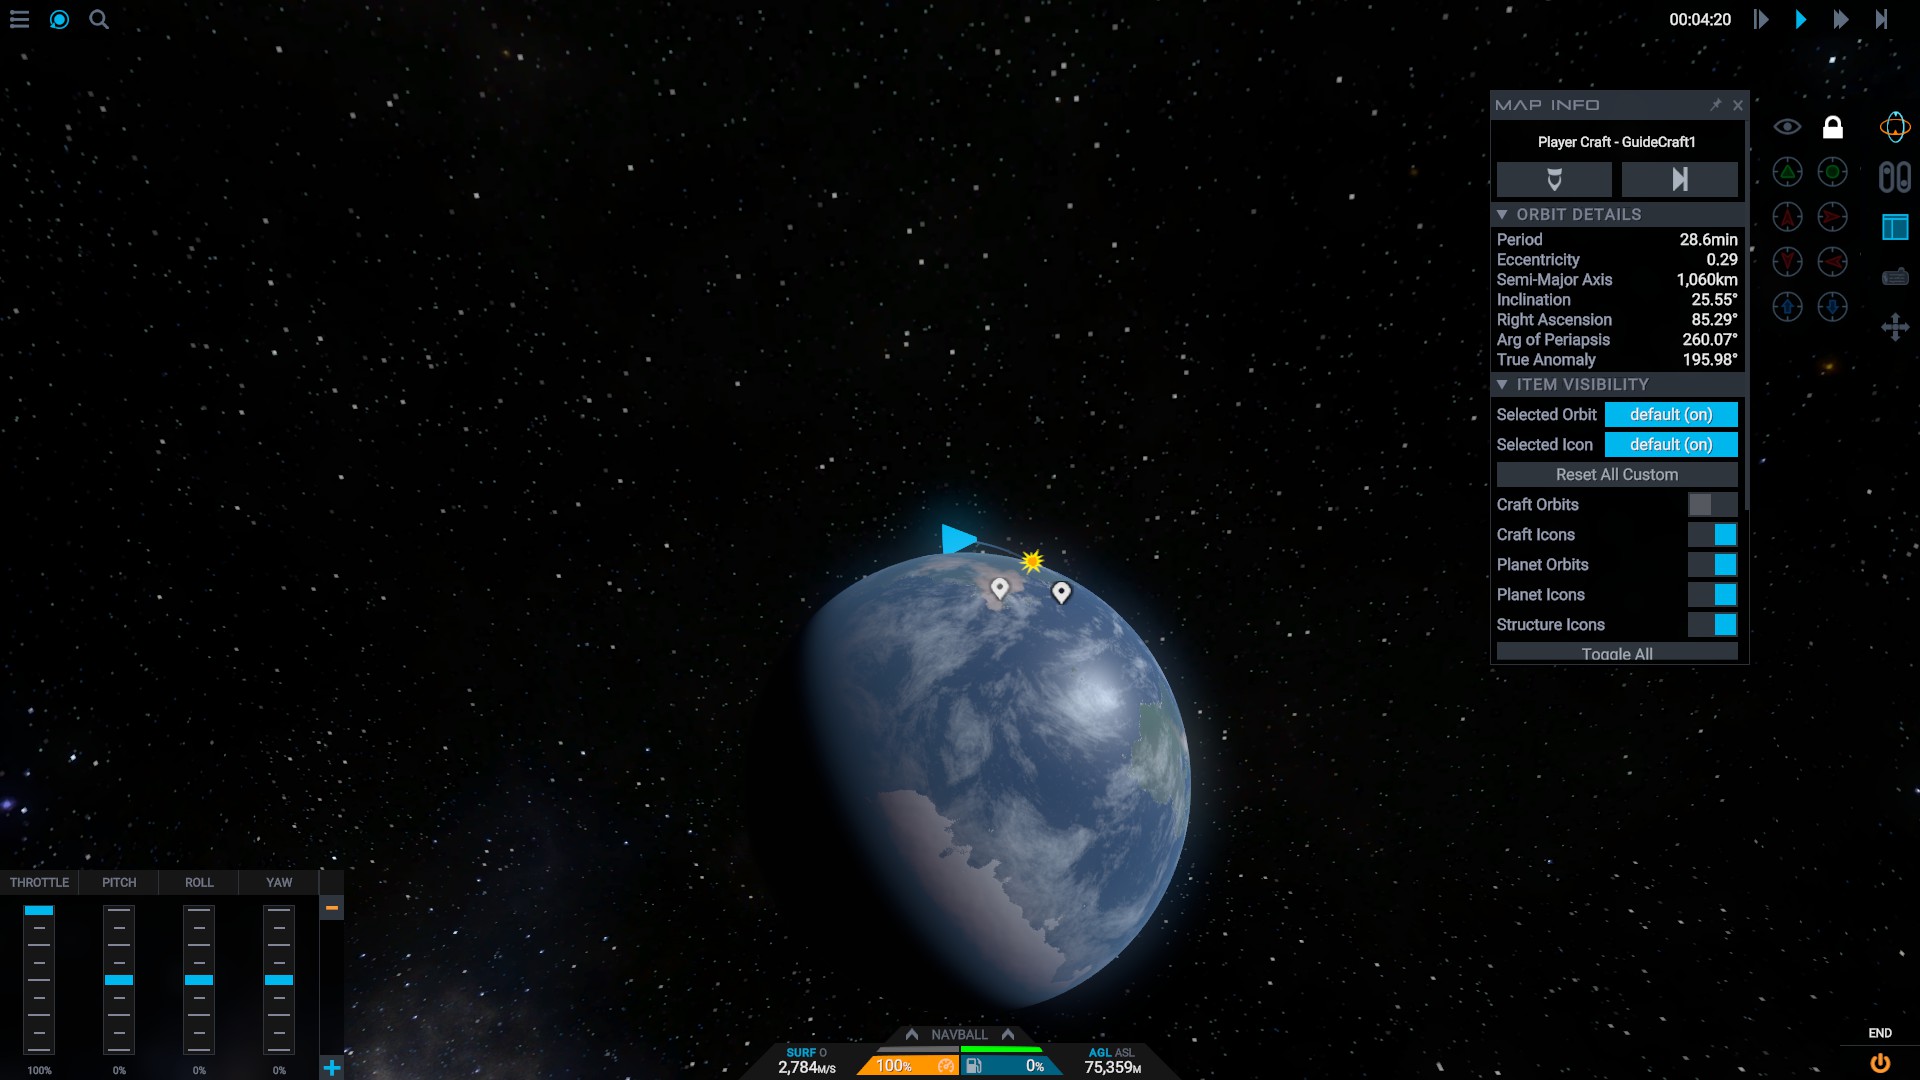
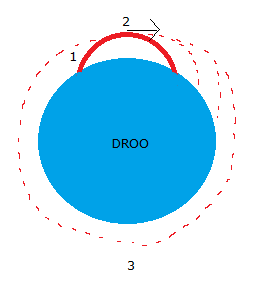
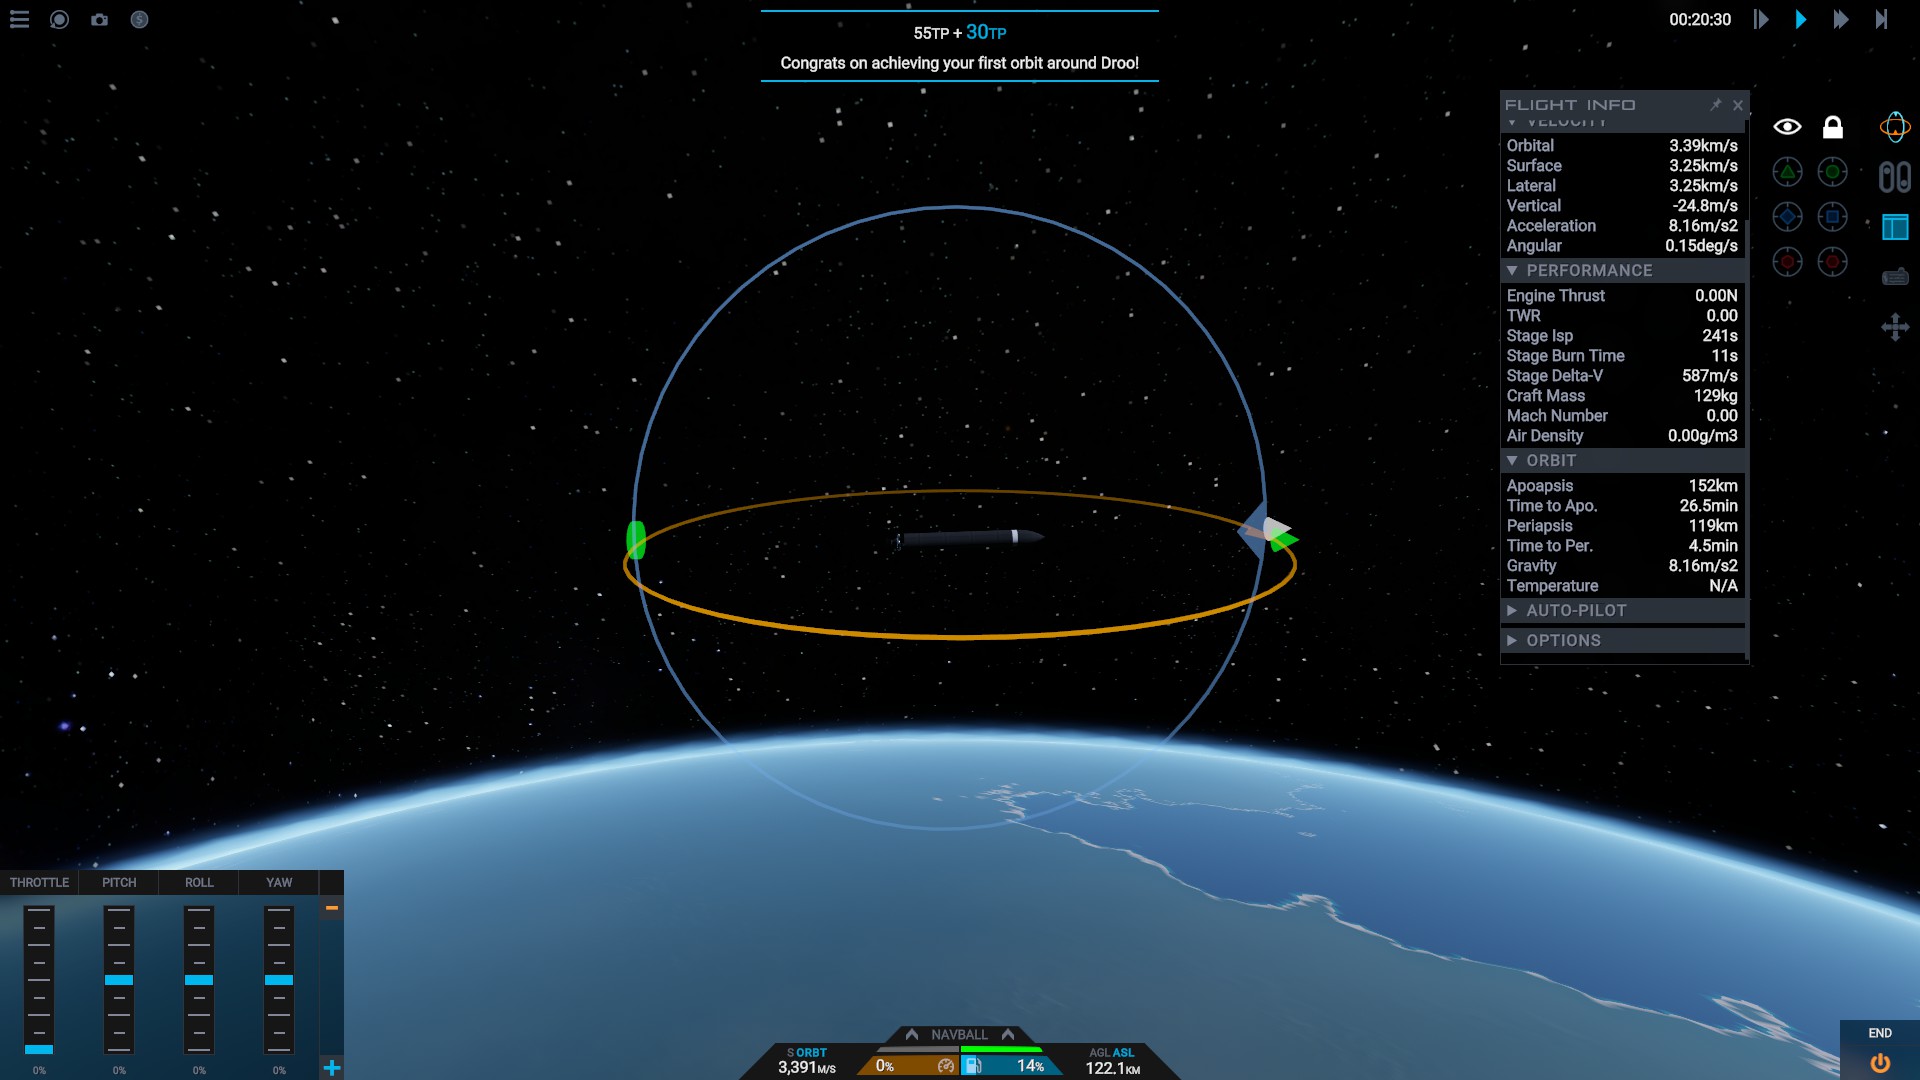
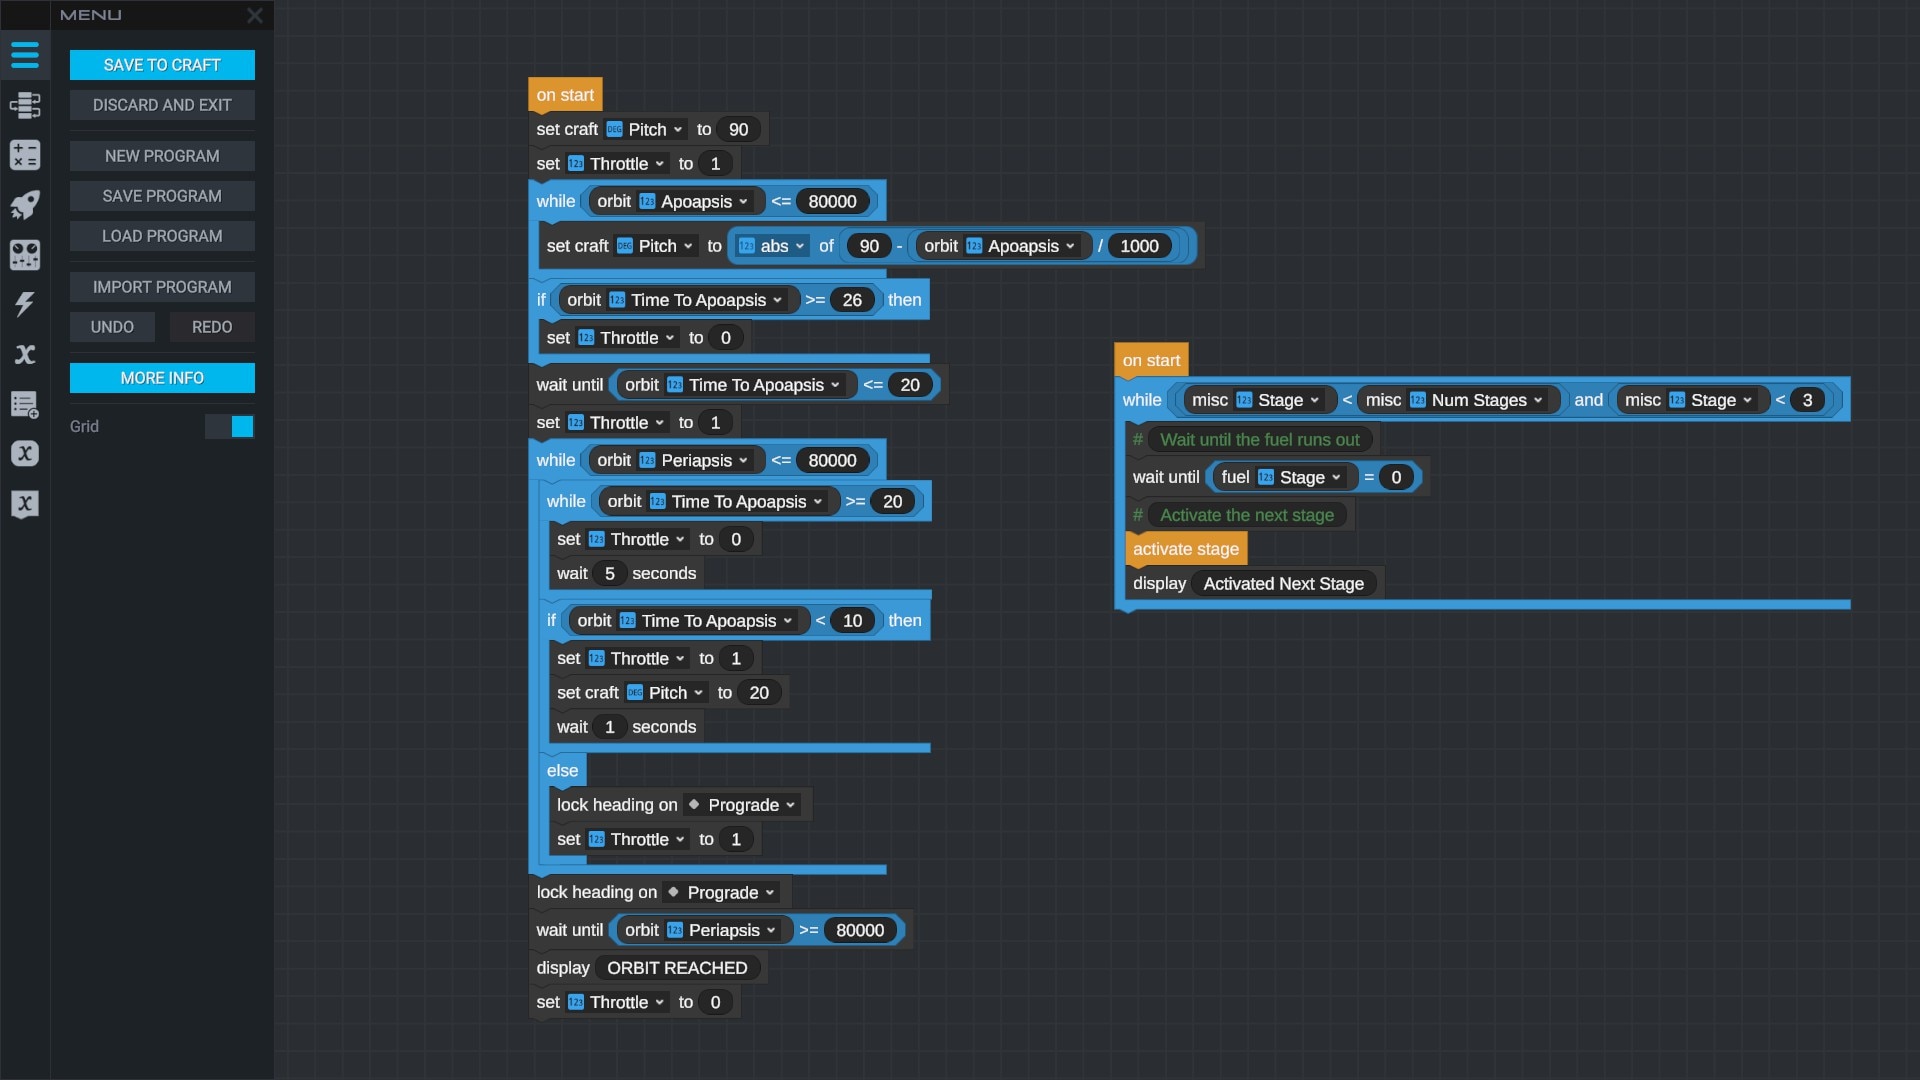
I would rather not pitch during lift-off at all but instead perform a gravity turn. This is the most efficient way to get into orbit, this is also how it is done in reality. I own juno only since yesterday, but perfomring gravity turns worked for me very well already.

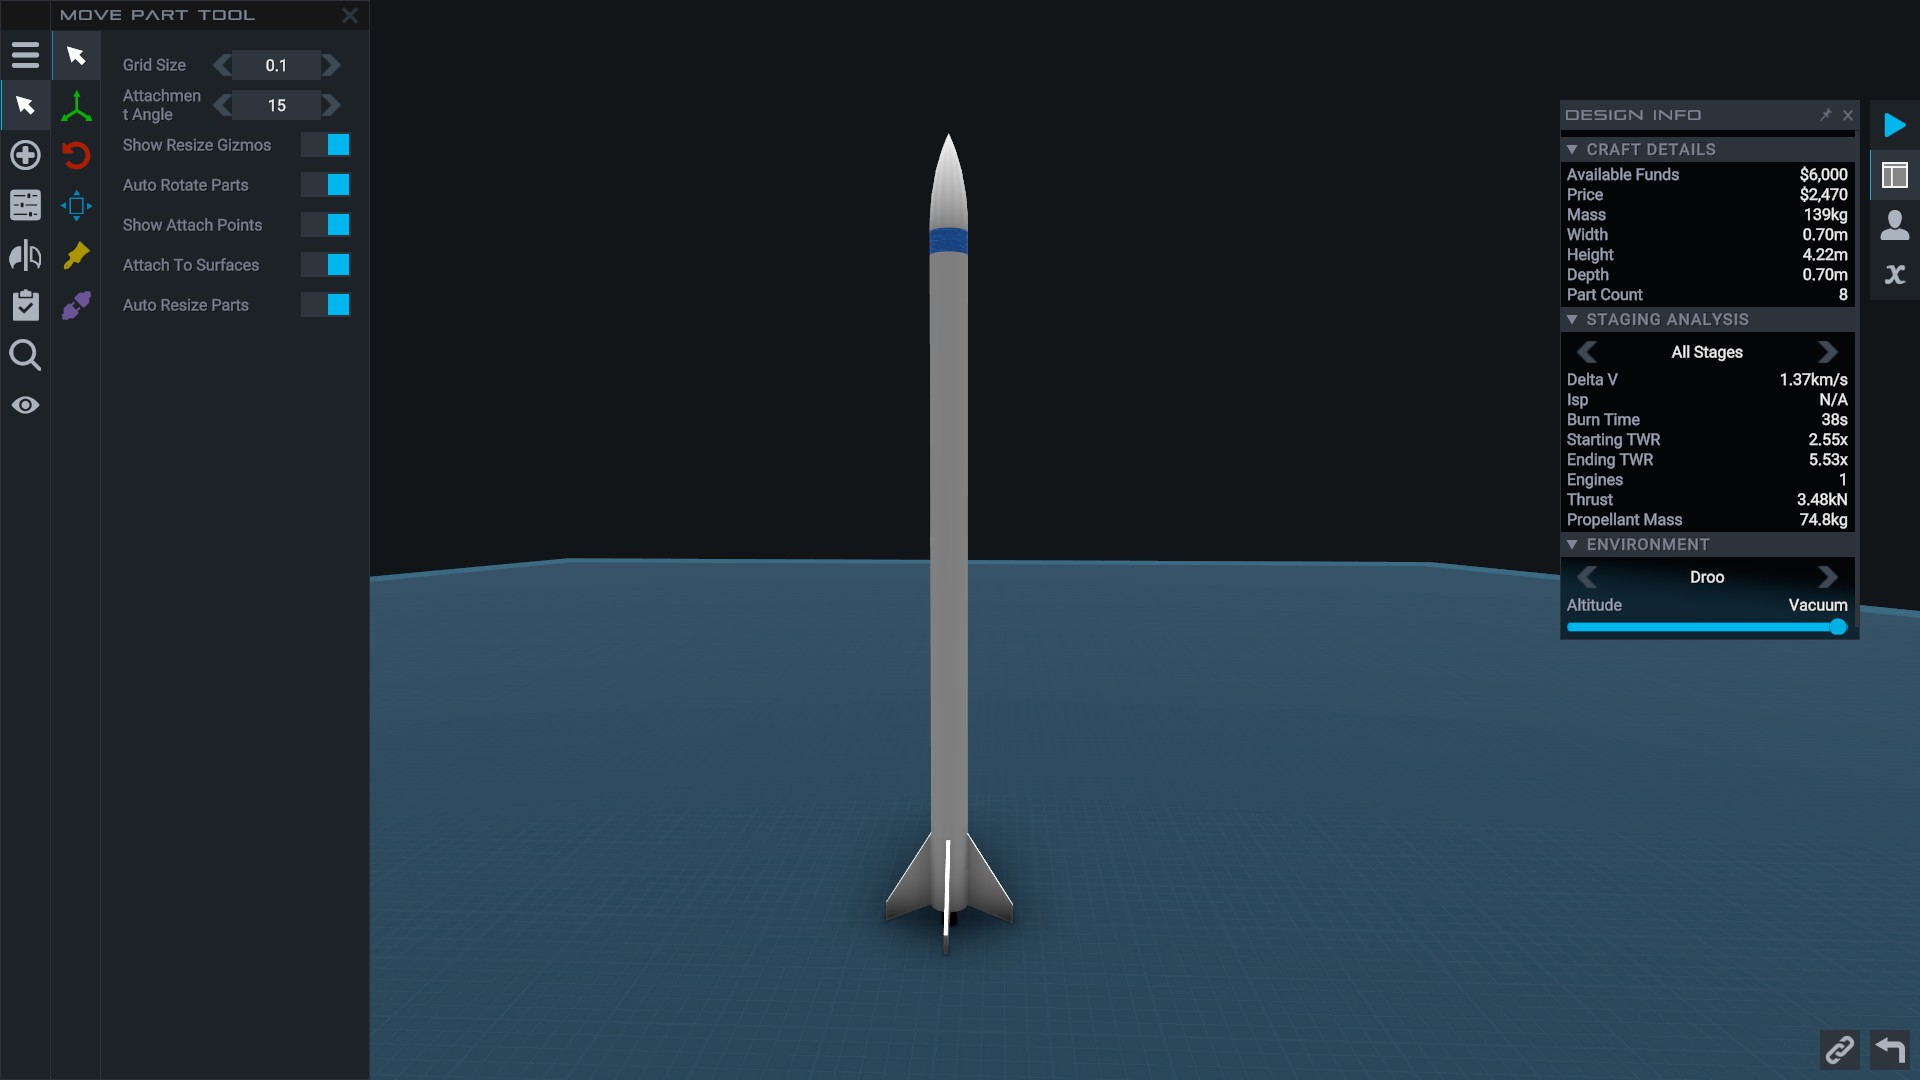
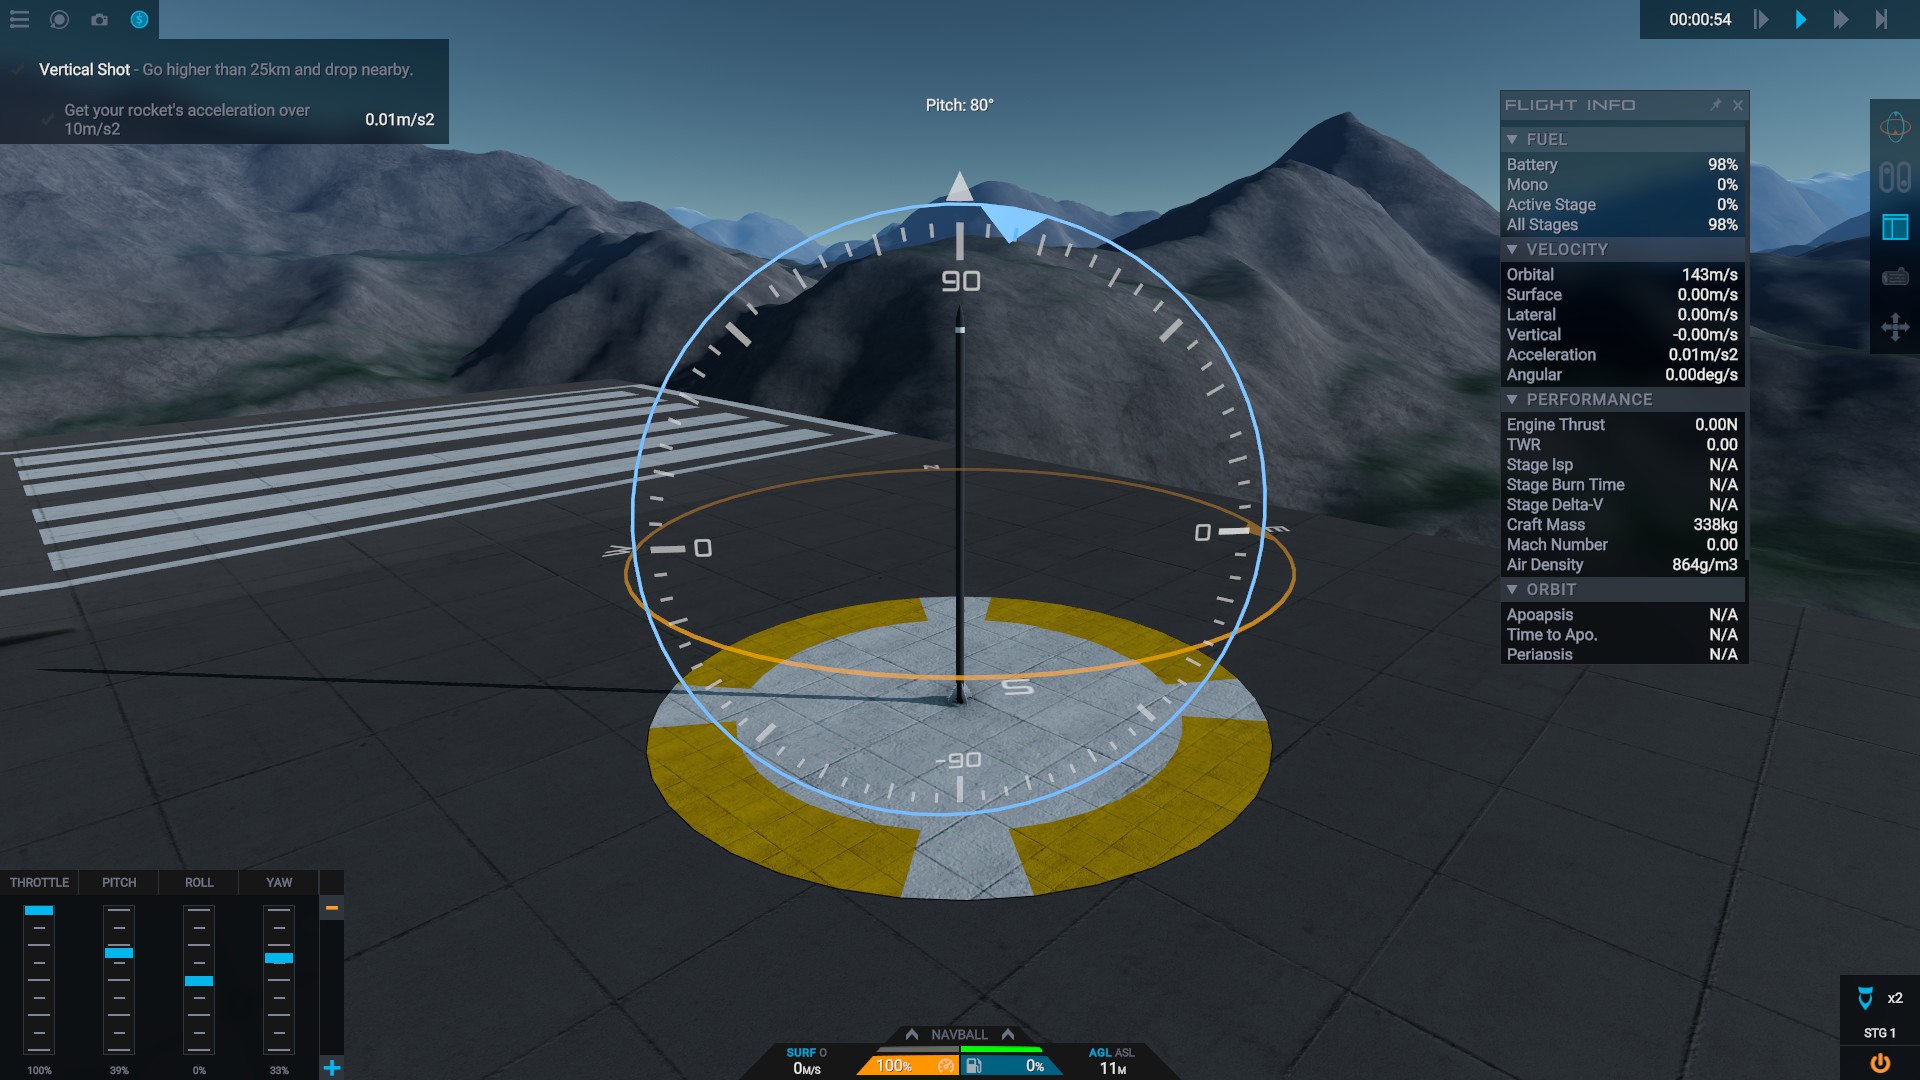
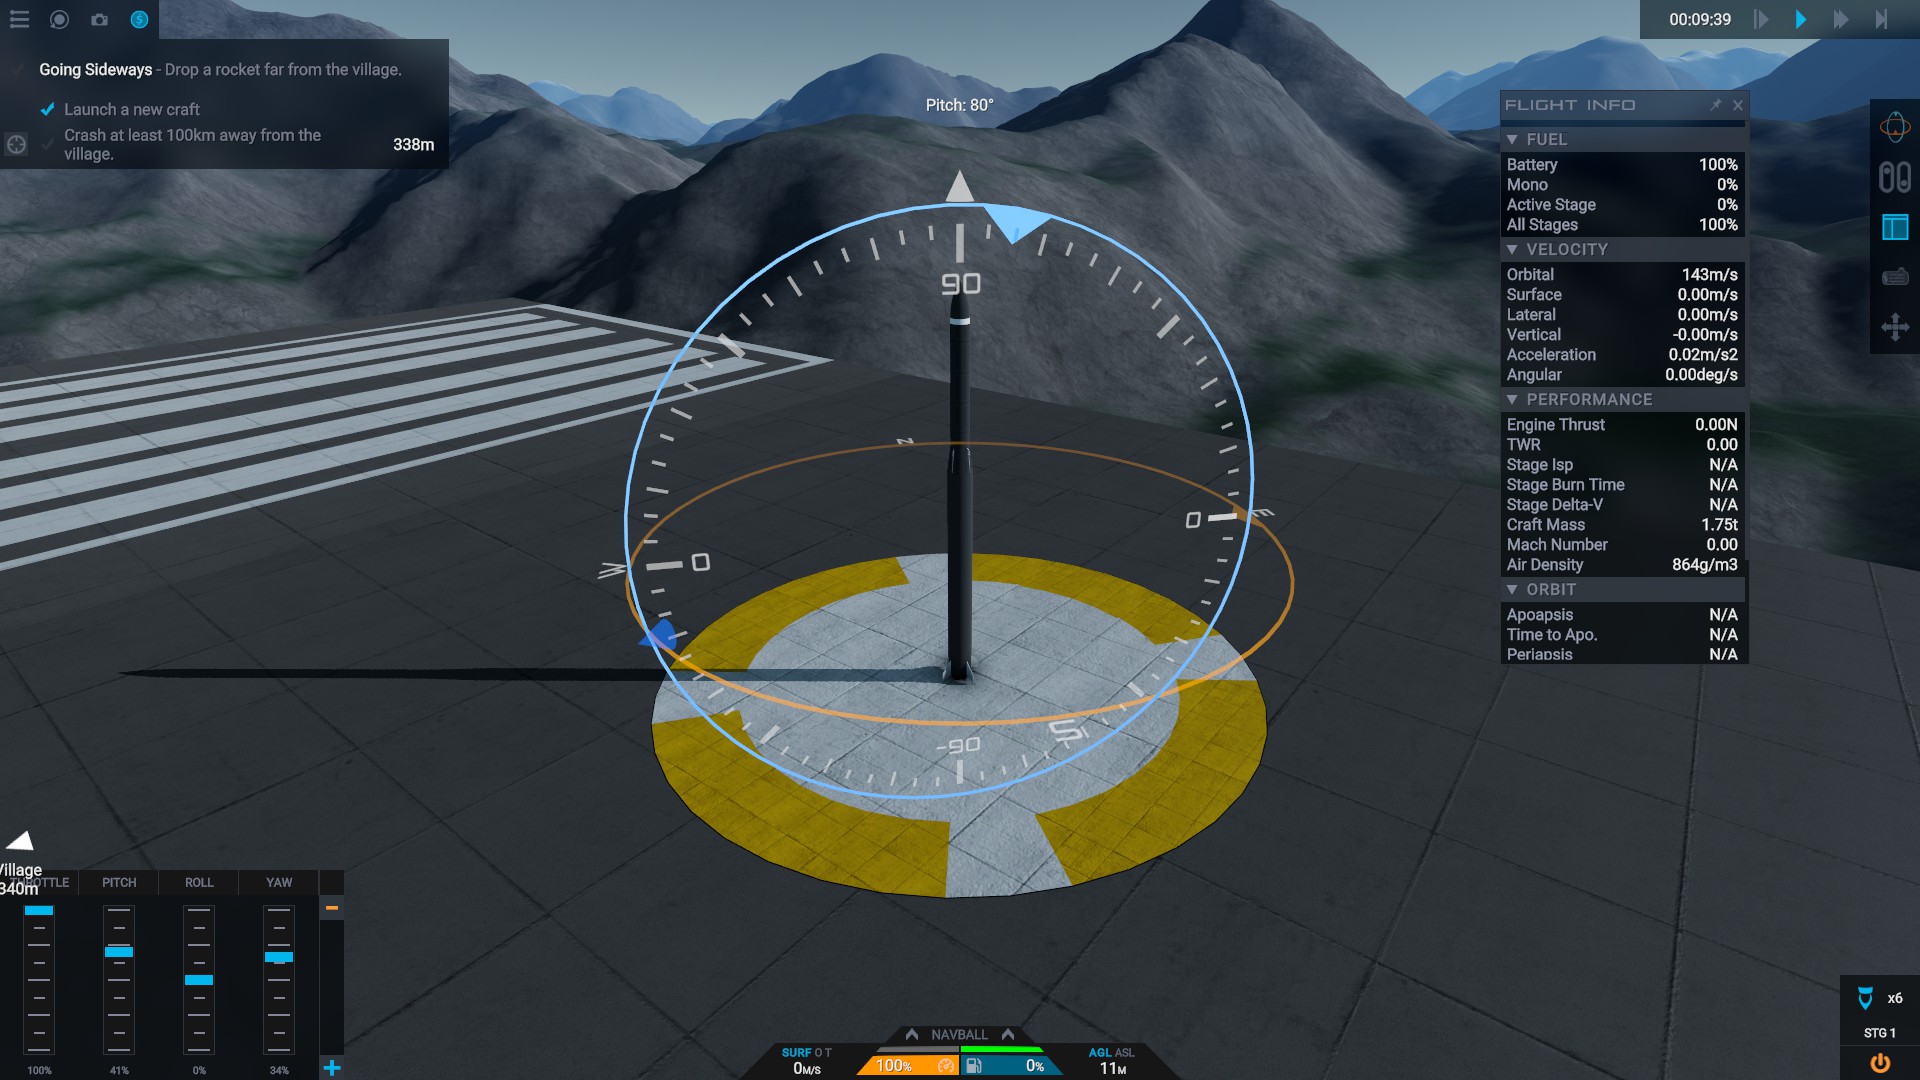
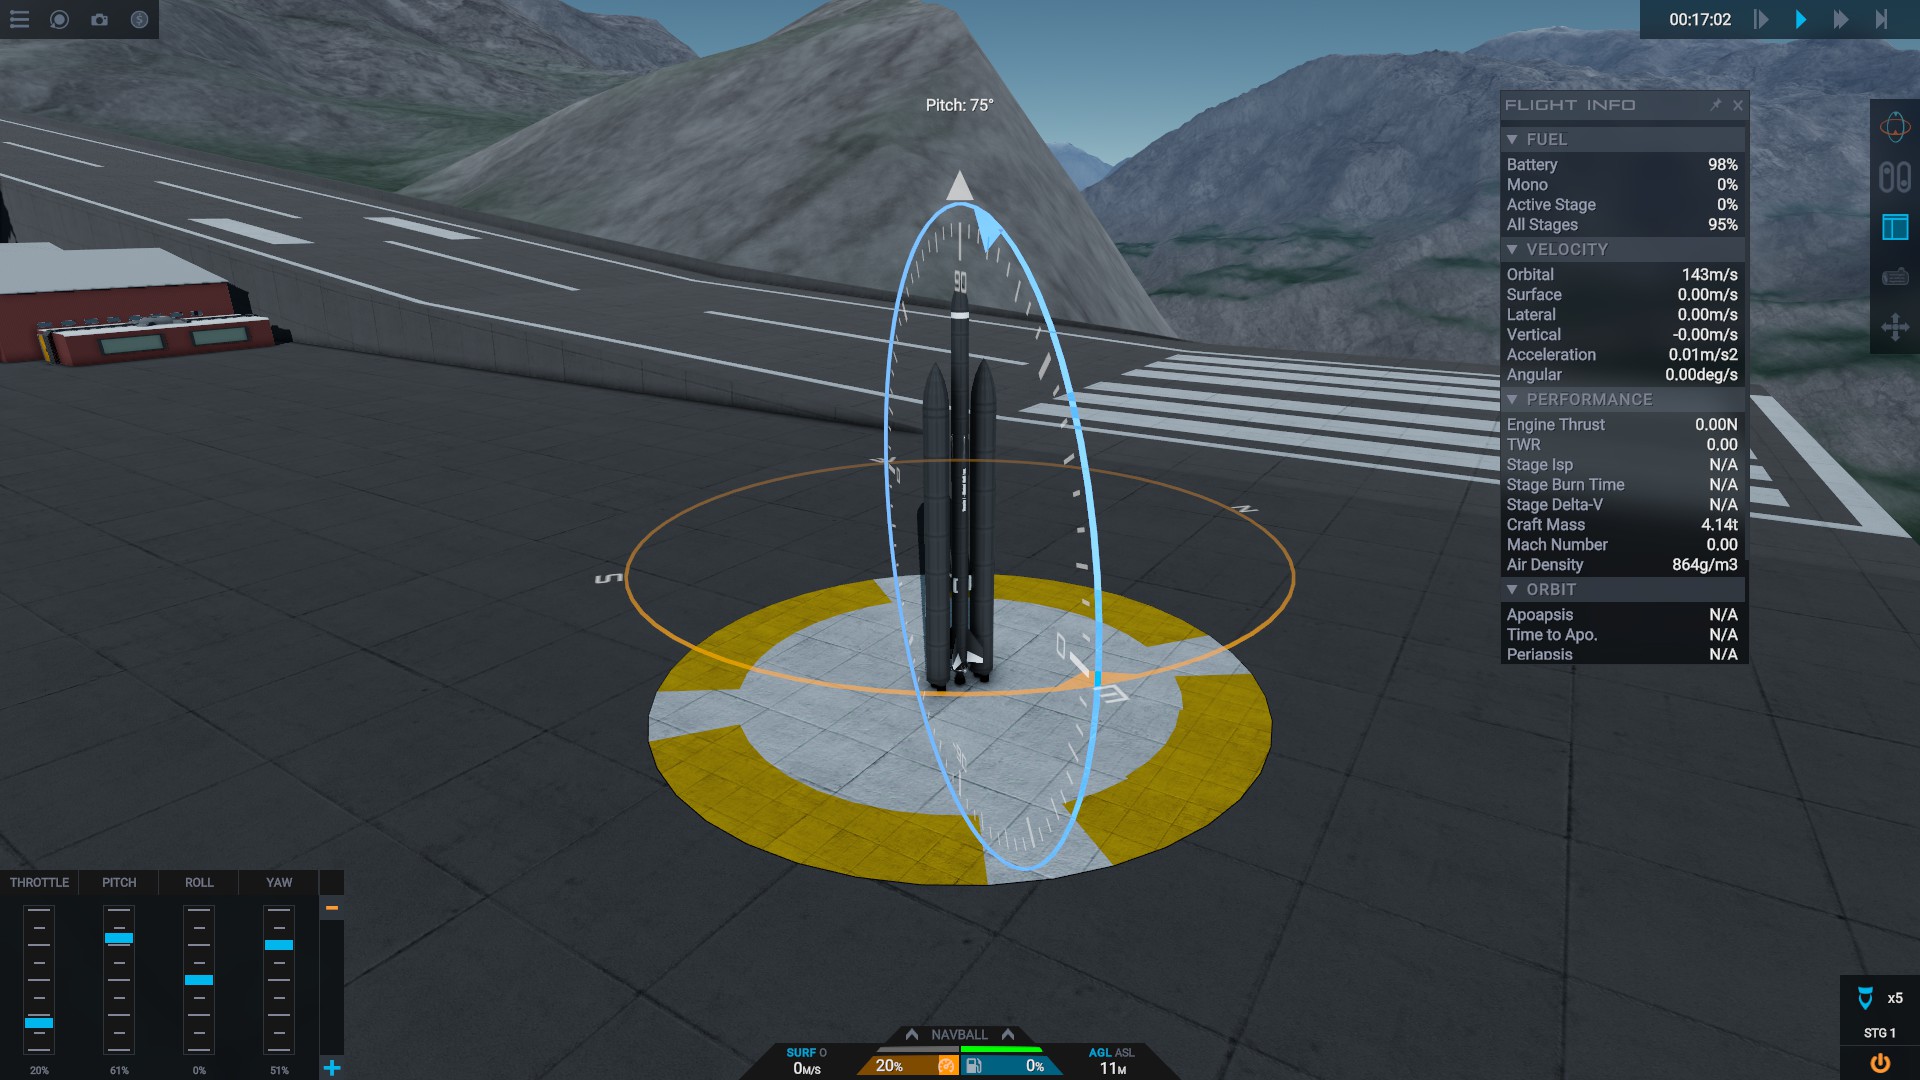
Just before liftoff i set pitch to ~80° (depends on rocket design and mostly on TWR).
Liftoff, and as soon the nose is pitched to desired 80% enable PROGRADE hold mode. Thats it. If you chose the initial pitch angle right, it will perform a perfect gravity turn.

If during climb I realize that it climbs too steep or to flat i restart the flight and adjust the initial pitch angle accordingly. You could calculate that acutally precisely, but i was not so bad with just guessing.
Sunlit 20 set. 2023 às 17:02 
my issues in career might finally have been solved
Neobab  [autor] 18 jul. 2023 às 12:42 
Thank you, I'd never have seen this one.
Corrected ;)
Mone 16 jul. 2023 às 9:29 
Hey there, just wanted to let you know that just below the image of the Saturn V, you spelled expand, not expend.
seanmcnall 30 mai. 2023 às 6:52 
Now apoapsis solwly decreases due to gravity, so my heavily elliptical orbits are now 1% less elliptical! Yaayy!
xcoder 9 abr. 2023 às 19:38 
Ah! I thought there were videos. I must have read that into your comment.

Thanks!
Neobab  [autor] 9 abr. 2023 às 5:15 
Hey ! My pleasure really.

Would you mean the tutorials ? They are ingame and you don't need to do anything particular beside playing, they'll just pop up when needed.

Hope this helped
xcoder 8 abr. 2023 às 14:32 
Thanks for your guide. I intend to read it all, but I would like to see Dev's videos that you mention. But I need to figure out where to find them. Can you tell me how?