Blender

Blender

26 ratings
Darktide asset ripping - Ninja Ripper 2.5, QuickBMS
By Janfon1
[2024 UPDATED FOR NINJA RIPPER 2.5]
Currently possible: textureless meshes, textures, audio

Similar to the one for Vermintide 2, this guide will explain the current possibilities of asset ripping models, textures and audio.
   
Award
Favorite
Favorited
Unfavorite
Introduction
You can read the Vermintide 2 asset ripping guide here


The artwork above is a lie, that's not what you will be getting from just the ripped assets.
Currently, the results will look more like this:


With the textures looking like this:


Yeah, we can extract backgrounds as well now! The textures can only be found in bundle files and must be handpicked from a basket of 14,000+. If someone has the patience of a saint to sort through it, kudos to them

WARNING: This way of asset ripping does not restore shape keys, vertex groups or rigs. The final result is a character model ready for rigging. The guide was made with the reader being equipped with basic Blender knowledge in mind and is not designed to teach someone how to use the software from scratch.
Necessary tools
Unfortunately, due to the updated version of the engine and the DX12-exclusive nature of the game, the same tools as for V2 can not be used. Programs required for asset ripping the game are as follows:

MESH RIPPING:

BLENDER 4.2[download.blender.org]

Ninja Ripper 2.5 and up[ninjaripper.com] (versions under 2.0.9 don't have DX12 support, PAID ON PATREON)

NR2 CAN IMPORT FILES NATIVELY, NOESIS IS OPTIONAL FOR A WORKAROUND - Noesis Model Viewer[richwhitehouse.com] with the RIP files plugin (comes with the downloaded version of NR 2)

Paste the RIP files plugin (.py) from NR2's importers/noesis folder into the noesisv4466\plugins\python folder. It allows the model viewer to read and export the meshes that NinjaRipper creates.

TEXTURE RIPPING:
limn by ManShanko on Github[github.com]

SOUND FILE RIPPING:

QuickBMS[aluigi.altervista.org] with the wav_scanner plugin[zenhax.com] (backup in case the zenhax attachment is lost[drive.google.com])

Full explanation on using QuickBMS will be in its separate chapter.
Setting up Ninja Ripper 2
Depending on your version of NR2, its settings tab undertakes many changes. In general, however, the settings remain the same, but are named differently or hidden in different tabs.
The guide will focus on the current newest version 2.5.

Pick the Ninja Ripper version from the bin64 folder and run it. If it's your first time, it will want you to verify the copy by using a Patreon-sent token key.

Since we're using Global Injection Mode picking the game's .exe is not necessary.


Open the Settings ---> Settings tab. In it, follow the default settings with a few changes:


  • Tick the box that enables the Global Injection Checkbox
  • Set the DXGI Hook Method to "Disabled (NO Ripper Logo)
  • Disable Save Textures as it doesn't work. It can extract some HUD elements, but otherwise we need to use other means

The next chapters help explain how Global Injection works and how to solve issues with enabling it.

Setting up the game in and of itself
In order for the Ninja Ripper to be able to extract files from the game, you will have to add a dxgi.dll file required to use by the tool.

Open up both directories:
  • Ninja Ripper 2.5 beta\bin64\wrappers
  • Steam\steamapps\common\Warhammer 40,000 DARKTIDE\binaries


In the wrappers directory:
Copy d3d12.dll (or dxgi.dll) to the binaries folder of Darktide.

Adding the steam_appid.txt file

Next up, add a new .txt file in the binaries folder, call it "steam_appid". We have to input the game's Steam ID in the file in order to run the game. Darktide's appid is in the code bracket below:

1361210

With the wrapper implanted into the game and the .txt file ready, we can continue with the extraction.
1. Launching the game w/ Global Injection Mode
There is one last thing you need to activate before doing the extracting. Starting with 2.0.13, there is a Global Injection Mode you need to activate in order to start the procedure.

Launching Global Injection Mode

Go back to the main window of Ninja Ripper. In the lower left, there will be a checkbox named Global Injection Mode.

As you can tell by the warning message, it will implant Ninja Ripper into every new process you open after enabling it as long as the setting is enabled and the NR2 window is active. Keep that in mind and make sure you have nothing else you will be opening besides Darktide itself.


In order to follow through with it, you have to press Yes, then give it administrator rights. It will restart the software, then you can click on Global Injection Mode again.

Optional step - solving the "unknown file version" error

There is a chance this error will appear. According to what I found online, the file DXCaptureReplay.dll is only used by Visual Studio Graphics Debugger, so it's nothing that will outright break DirectX or your operating system if you remove it or relocate it somewhere else. It's been a year and my computer didn't die from malware or BSOD'd yet, so I think we should be fine.


In order to achieve that, we must find a way to "unlock" the file as it is protected and can't be moved otherwise. To do that, an admin on the Ninja Ripper discord server suggested a tool named Unlocker Portable. Seeing as I'm the guinea pig of this whole process and nothing bad happened to my computer after using it, I deem it safe to use for now.

Link to the tool - https://www.majorgeeks.com/files/details/unlocker_portable.html (backup in case the access is lost[drive.google.com])


Following the tutorial from the linked website "How To Use Unlocker Portable", we will be using it to find two DXCaptureReplay.dll files and relocating them to the wrappers directory mentioned in the chapter before.


The file you're looking for, DXCaptureReplay.dll , can be found in two locations and must be moved from both of them. Those are:
  • C:\Windows\System32
  • C:\Windows\SysWOW64

Keep scrolling down until you find both .dlls, then the software will let you choose how to proceed. I prefer to move the files instead of removing them outright, I chose the location of the wrappers directory for that. Make sure to put them in two opposite folders so no accidental overwriting happens.


Once that's done, you can continue with the extracting!

Launching the game

Open the game's launcher. Now that it's ready, enable Global Injection and now attempt to run the game (press Play in the launcher).

If everything went fine, the game will launch as normal. Due to the nature of Ninja Ripper, FPS may drop dramatically and things will take longer than usual to load. In my experience, with No Logo chosen, loading times and performance appear to be unaffected, yet ripping still works.

If you receive a backend error, something went wrong. Go back to the previous steps and make sure the mode is enabled, the wrapper is in place and the correct settings were chosen.


The normal Rip will not function in this game, you will have to use ForcedRip instead. The default button is Insert. Upon pressing, the game should freeze for an indefinite amount of time, but generally under a minute. Depending on the complexity of the scene, I heard a friend reporting it taking 10 minutes. After ripping, the game will crash.

Go to your directory of rips. A successful rip will contain dozens if not hundreds of .rip files of varying size. If it doesn't you're most likely using regular Rip instead of ForcedRip or trying to use other methods for DXGI patching instead of No Logo.


1.1 Troubleshooting Ninja Ripper
If Ninja Ripper fails to extract enough meshes for a full rip (very short ripping time of 5-10 seconds), doing these steps helped me solve the issue (as of August 2024):

  • attempting to rip only World Space meshes (uncheck the Local space option in the settings), then vice versa,
  • changing the output directory to a different hard drive than the one Darktide is installed on.

After doing these steps, things somehow fixed themselves and I could revert back to normal settings. I have no idea why, but I am noting them down anyway. More testing needs to be done if this fix is consistent.
2. Importing to Blender
WARNING: If you are experiencing broken UVs upon importing, try using Blender 3.3.6 as suggested by a person in the comments

In order to import the .rip files to Blender, we're going to use the importer tools provided with the copy of Ninja Ripper 2. They get updated with every new copy, so keep those up to date by removing and installing the new .zip.

The .zip files you're looking for is io_import_nr.zip, it's contained inside the /importers folder. Install it like you would any addon.


Once you've done that, you are now able to Import in World Space and Local Space. How to use them? What is the purpose of each type?

For extracting backgrounds and characters for stuff like 3d printing, World Space is the clear winner.
For extracting characters in A-pose for animation or reference purposes, you can use a blend of both World Space and Local Space to get things done quickly. That will be described later in the guide, for now a few things must be explained about the importer's functionality.
2.1 World Space Import
World Space means that it will try to position the models based on their coordinates in 3d space, meaning finally being able to extract backgrounds!!!!!!!!!!!!!!!! However keep in mind that character will not be in A-pose.


There are three important settings to take into account when importing .rip files this way.


Darktide's default FOV settings are 65 Vertical, 97 Horizontal. Ninja Ripper uses Vertical FOV, so pick the former value of the two. If you're using a custom value for your FOV, input that instead or simply return to the default settings for the ripping process to keep things simple.

When you're importing rips from a cutscene or menus (character creation, operative selection, Melk, Hadron), you must input 1/4 of the total value. For 65, that means 16.25.

Upon importing (which will take a while depending on the amount of files), the result will most likely be flipped on its head, very large in size, but once that's corrected manually, it will visually look correct.


In the example below, I ♥♥♥♥♥♥ up. Incorrect FOV values may result in stretched meshes like this.


In my case, correcting the FOV to 1/4 of the value was also wrong. In order to solve this, we can take one of the meshes inspect it in Local Space/World Space to see how it should look like, then using a tutorial to solve this issue using Noesis.


Utilizing world space import for finding T-posing character models

Final results are most useful for extracting backgrounds and posed models ready for 3d printing. If you wish isolate the characters and find names of their A-pose meshes in Local Space, here's a neat trick.

After clearing up the import down to the character model you want, note down the name of every mesh the character is made of.


Having done that, you can find and import the files you want without having to filter through everything else.


Local Space means the usual route you're accustomed to if you worked with Vermintide 2, everything dumped right in the middle of the viewport however meshes are in their default T-pose.
2.2 Local Space Import
It's what you're familiar with from NR if you asset ripped stuff from V2 - default pose meshes that are set in the center coordinations of the viewport, oftentimes not correlating with how they would be positioned in the game. Best solution for importing characters because it's the only way to put them in the A-pose. Follow the mesh finding idea from above to make finding the right models easier.


Not all meshes are at the right position when imported, you will have to manually adjust the legs, torso and arms, armor, head etc. to be in the right position. Make sure to avoid clipping issues and attempt to put the pieces together in a way that you can try merging them later on.
3. Texture extraction
Download limn-0.2.0-x86_64-pc-windows-msvc (it has the .exe)[github.com]


1. Put the limn.exe in the same partition as the game itself (make sure to have at least 40+ GB and more worth of space for all the textures)
2. create a new folder called "out" to resolve an error with exporting
3. Input this code in the command line
limn -i "C:\Program Files (x86)\Steam\steamapps\common\Warhammer 40,000 Darktide\bundle" texture

This assumes your Darktide installation is in the usual location on the C: drive. If not, change the path to wherever it is on your machine.

4. Upon pressing enter the command line will start counting up as it goes through offsets and individual bundle files. Everything will be extracted in the out folder.
5. ???
5.1 If it says the extractor panicked, you didn't make an "out" folder
5.2 ???
6. Profit!

Extracting with dictionary.txt
NEW DICTIONARY W/ +6,574 ADDITIONS (but only 191 more textures)
You can find the dictionary.txt file here[gist.github.com]. Put it in the same folder as limn.exe and the tool will automatically use it.


Extracting with the dictionary.txt file in the folder finds 3272 3463 files (folders taken into account):
  • almost full textures for scab shooters, stalkers and captains w/ 13 facepaint masks,
  • upper body arms of the Chaos Cultist + face tattoos,
  • entire collection of Chaos Hound textures,
  • mutant clothing and tattoos,
  • partial ogryn crusher textures,
  • plethora of tattoos for humans and ogryns + NPCs from character creator,
  • tiling materials for outfits,
  • random materials for props, environment etc. (notably Rannick's revolver),
  • scripture, grimoire and pickup textures,
  • camo patterns, gear decals,
  • 2,000+ UI textures (portrait frames, achiements, inventory, shops etc.),
  • force sword grip, shovel heads for ogryn and humans,
  • and more.

Sorting the textures

Download DT_TEXTURE_SORT here[drive.google.com] (local archive since github entry is down)

The textures can be sorted into corresponding materials to save a lot of time. For example, a scripture will have its diffuse, normal and combined textures packed into a single folder.
Keep in mind that if a prop or a character consists of separate parts w/ separate materials, that means they'll be split up into their own camps and you still need to find them piece by piece. But now you'll have them in full!


How to use:

  • extract the .zip file into a folder
  • make a new folder that you'll use as output for the tool
  • right-click "DarkTide_Texture_Sort.ps1" and Run With Powershell
  • in the window, press S to sort
  • a window should open that lets you choose your existing "out" folder from limn
  • next, choose your second output folder that you made earlier
  • press M to move files (don't copy or you'll bloat your hard drive with unnecessary duplicates)
  • ???
  • if you're not seeing a progress bar, scroll up in the powershell window, it's probably at the very top
  • ???
  • Profit!
4. Sound extraction (+ download link to repository)
Extracted sounds repository
(google drive download link)[drive.google.com]
Voice lines, music, sound effects etc. sorted per character, per personality, with additions from new patches kept separately. Kept up to date as new patches roll out. This was no easy tasks and took months of manual labor to get done.
Huge thanks to Konny who's been doing this singlehandedly (and Vaas Yanovich for sorting the Ogryn lines)!

Recording audio in-game
Video guide for recording sounds in-game. All the relevant links are contained in the video's description.

Extracting audio from the game files
From my findings, the sound files appear to all be stored in the "data" subfolder of the "bundle" folder. They are not kept in giant bundles like in V2, but in individual .stream files per each singular voice clip. They also are not organized per character or per any function, but shuffled and mixed, making it even harder to sort through.

Preparing QuickBMS so it imports stuff into subfolders

Create a shortcut of the quickbms.exe
Open the properties of the shortcut .exe file - in the directory of the file, add an uppercase "-D" at the end as such:
D:\MyTools\QuickBMS\quickbms.exe -D
The uppercase -D will automatically create an additional output folder with the name of the input folder, eg. output/01/* (source[www.zenhax.com]).
It must be a shortcut, this window does not show up for the regular .exe file.

After that press Ok, then use the shortcut of the .exe with this change applied instead of the regular .exe.

Sound extraction process

  • Launch the patched QuickBMS
  • Select the wav_scanner.bms as the window asks you to
  • Go into the bundle folder, then into the data subfolder, and when viewing the data subfolder type and enter a symbol * so it extracts from everything within it (the bundle files are encrypted, split up and shuffled so there is no point in trying to go for specific ones like in V2
  • Select your output folder (pick a hard drive with enough space on it, a bare minimum of roughly 3 gigabytes
  • Let it run
  • ???
  • Profit!


Listening and converting to .lwav files using foobar2000

The extracted sound files are stored in .lwav. Thankfully there is an audio player out there with a plugin that lets us listen to this format and hundreds of other ones. On top of that, foobar2000 has a built in converter, allowing us to batch convert all of the audio files into .wav, .mp3 etc.

You can now listen to .lwav files using Foobar2000.

69 Comments
Alan da tinkerrrrrrrrrr Mar 30 @ 7:01am 
Question has anyone found the horde start sounds? Been looking for a bit but haven't found it.
TETZn Mar 20 @ 9:31pm 
For texture extraction, dictionary.txt allows me to rip only 3461 files(while there are 100k+ lines in dictionary.txt). These are not only textue files in darktide for sure and unfortunately these were not I wanted.
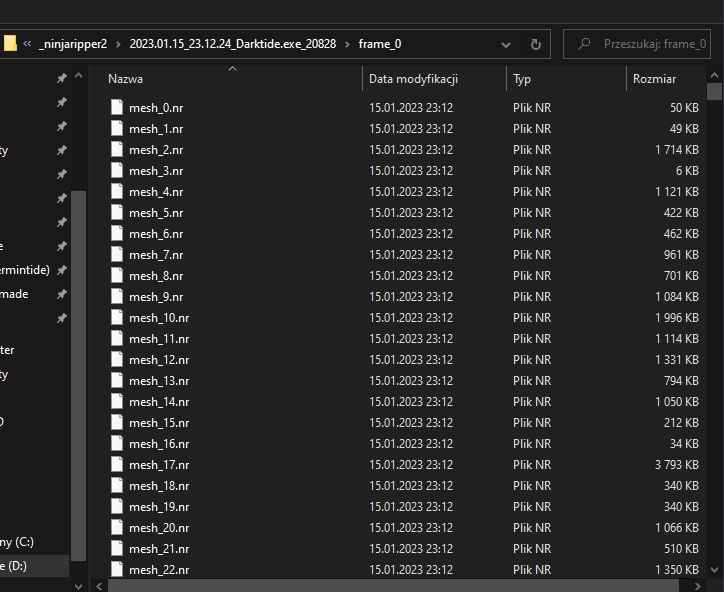
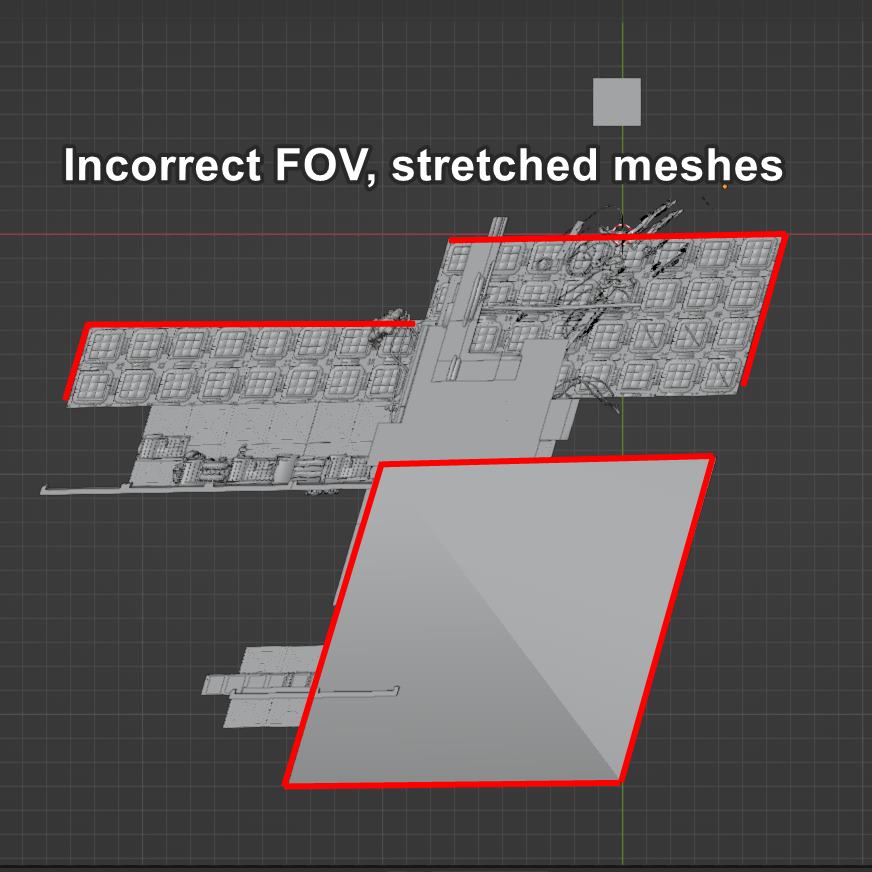
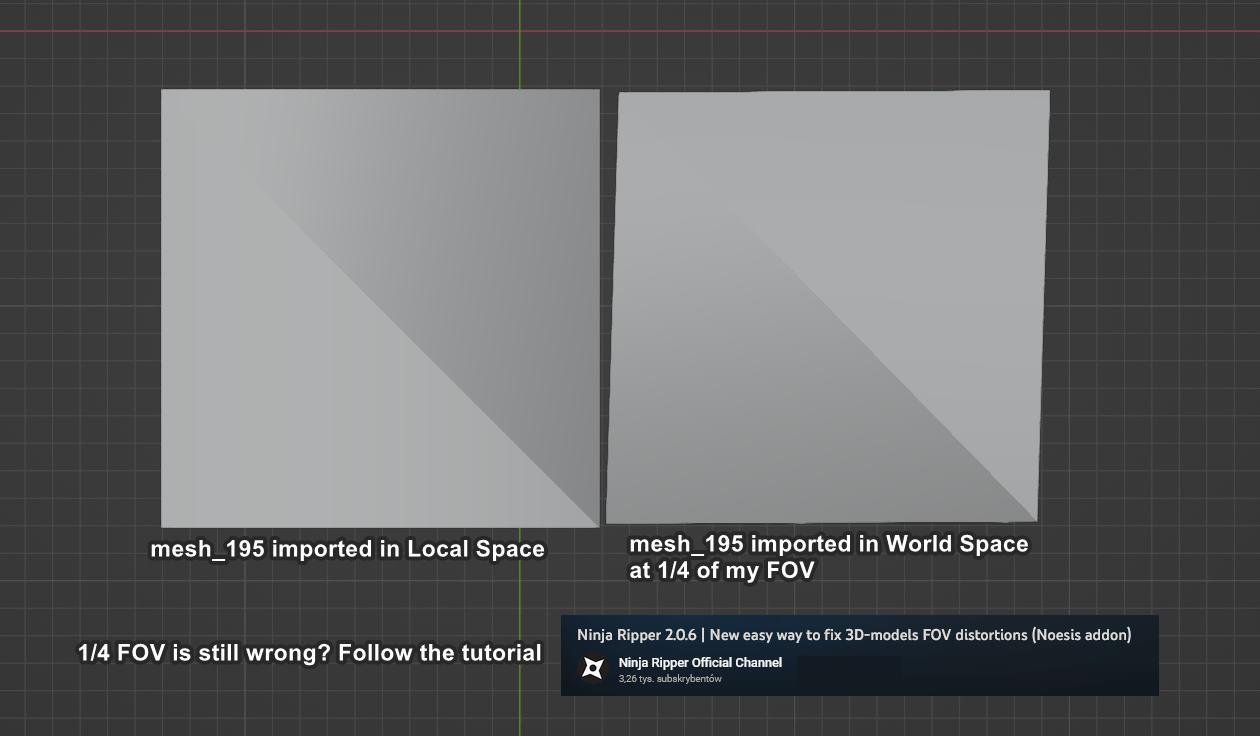
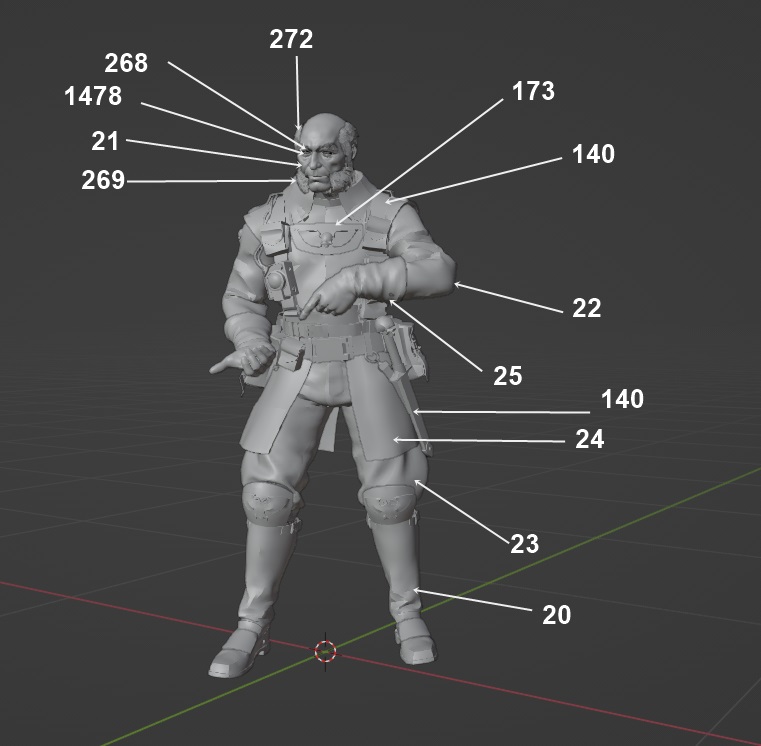
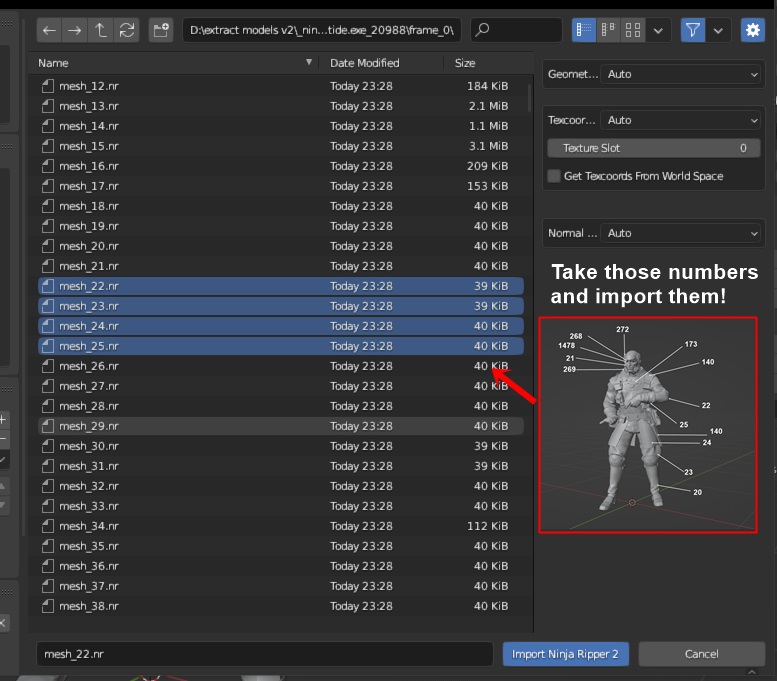
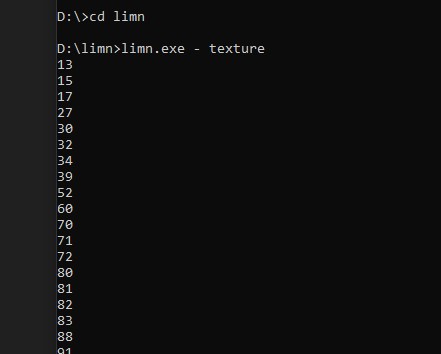
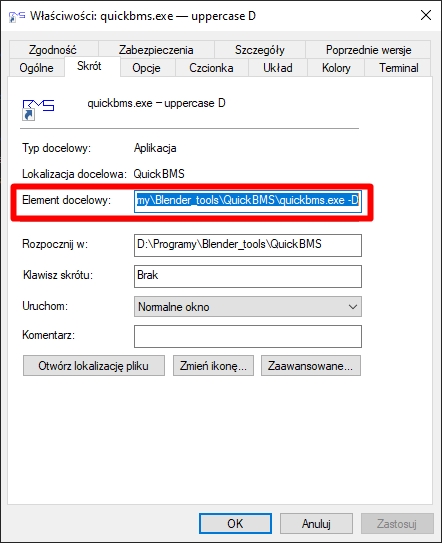
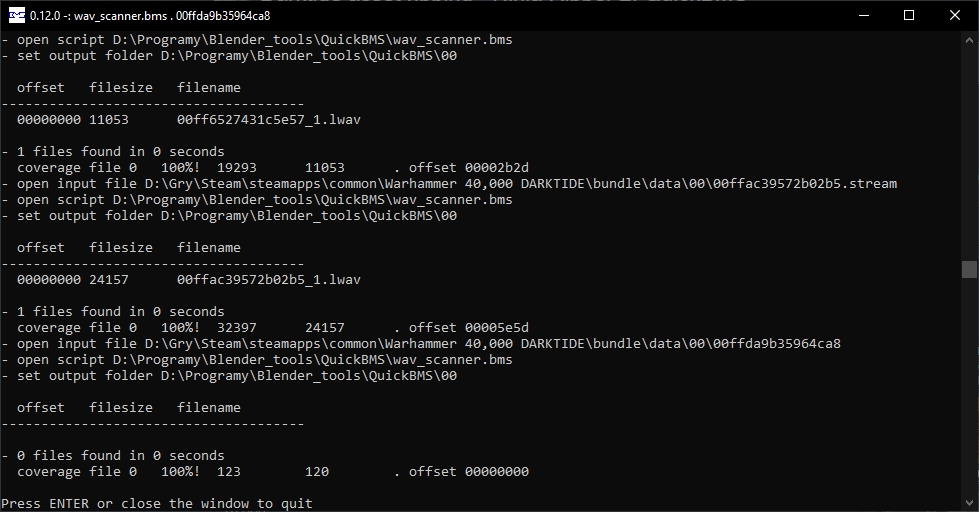
Is ripping all textures without dictionary.txt and manually finding texture files I want the only way to get what I want?
Ediker Feb 8 @ 4:18am 
yep it does, NR rips the full scene
MechaTails Feb 8 @ 4:15am 
Thanks for the guide! I got NR2 early on before it could even do anything lol, was frustrating to use. I now have the latest version so I'm going to try ripping some armors and weapons to 3D print for action figures.

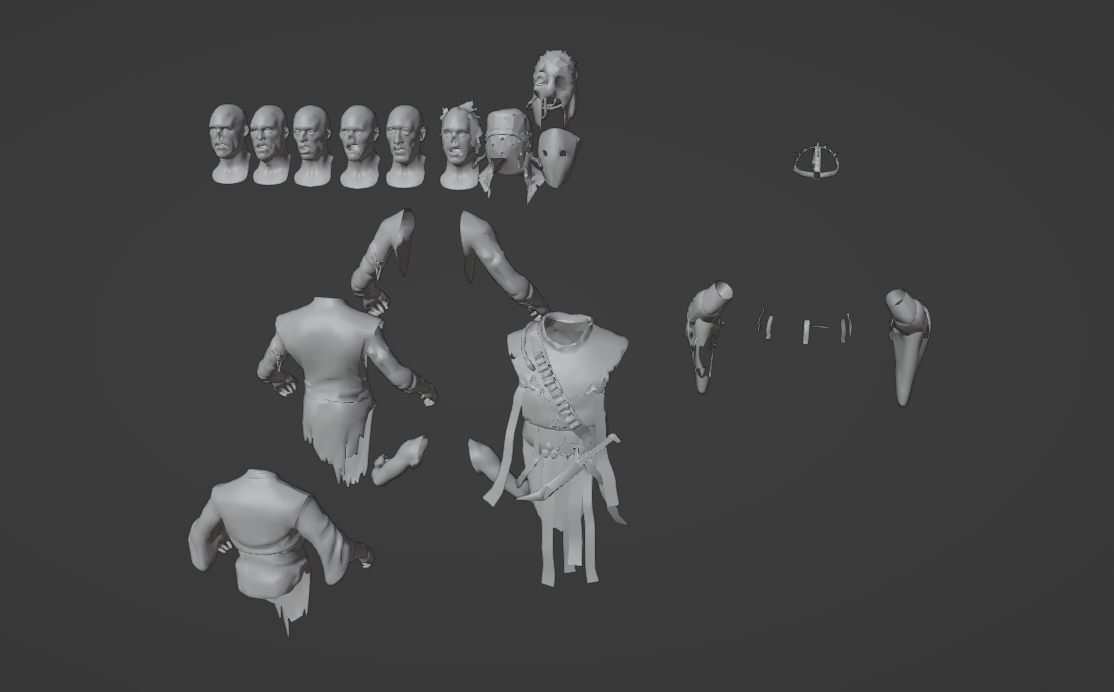
Anyone know if this works with a modded game? There's a mod that lets us equip anything we want, seems like a great way to easily rip everything we want all in one spot, simply rip from the character select screen.
Janfon1  [author] Jan 6 @ 2:58am 
@Tin-Man You'll be better off trying out Vermintide 2, the other Fatshark game, we've had groundbreaking improvements on that front. Can extract just about everything w/ 60% total discovered file names, including characters, props, animations and even entire levels. I reckon it'll take a few more years before similar discoveries are made for DT
Tin-Man Jan 5 @ 7:27pm 
Update when somebody yoinks good models, got a few uses for em
Janfon1  [author] Dec 15, 2024 @ 12:00pm 
@Intruder Chapter 4 links to a google drive for sounds, but no models or textures
Intruder Dec 15, 2024 @ 11:43am 
Is there any chance there's a folder filled with the models, audios, and textures by chance? Or is it not possible?
Janfon1  [author] Nov 27, 2024 @ 7:50am 
@Nephelus Using the dictionary (having it in the same folder as limn.exe) will only extract files that have their discovered folder directories and names while discarding the rest. Removing the dictionary file will just export everything, all with encrypted names. Sounds like you're doing something wrong (or something changed in the game again)

The dictionary results are very slim, only a few hundred/thousand textures at best. The remaining majority of textures needed to be explored and sorted manually is demoralizing. I never bothered to do this since the game's launch :cleandino:
Nephelus Nov 26, 2024 @ 8:18pm 
@Janfon1

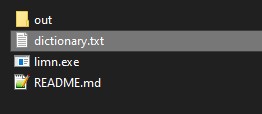
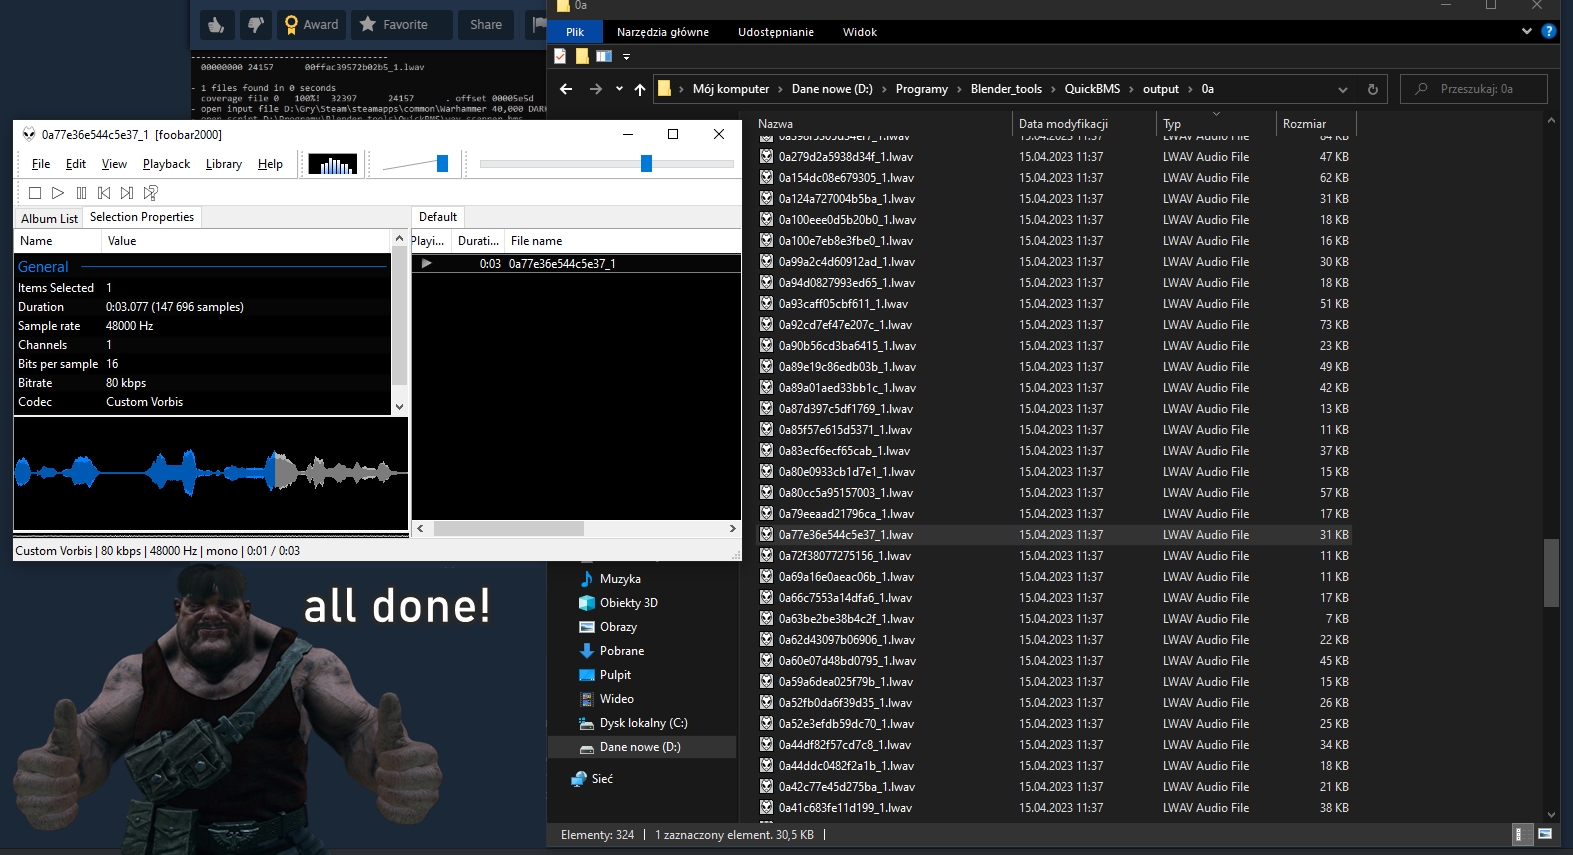
Not sure if I am doing something wrong related to textures. Is using the dictionary.txt with limn supposed to rename and organize the resulting files? All the files I get have random seeming hexidecimal names. Sorting them using DT_Texture_Sort does put many of them into their own folders but without meaningful names going through them to find textures would take forever. I think I must be missing a step because I got the same results of the limn extract without the dictionary.txt

@Kraken

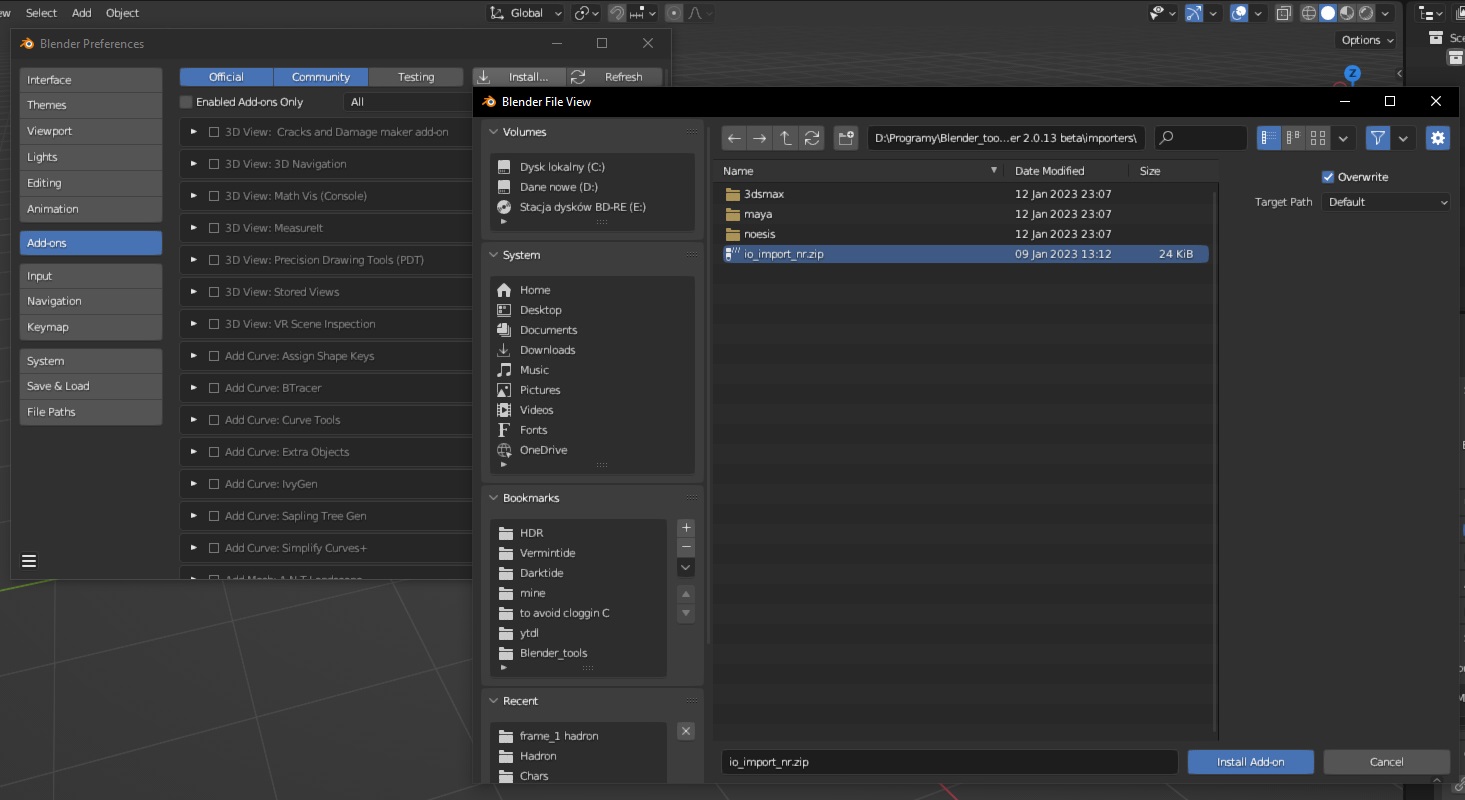
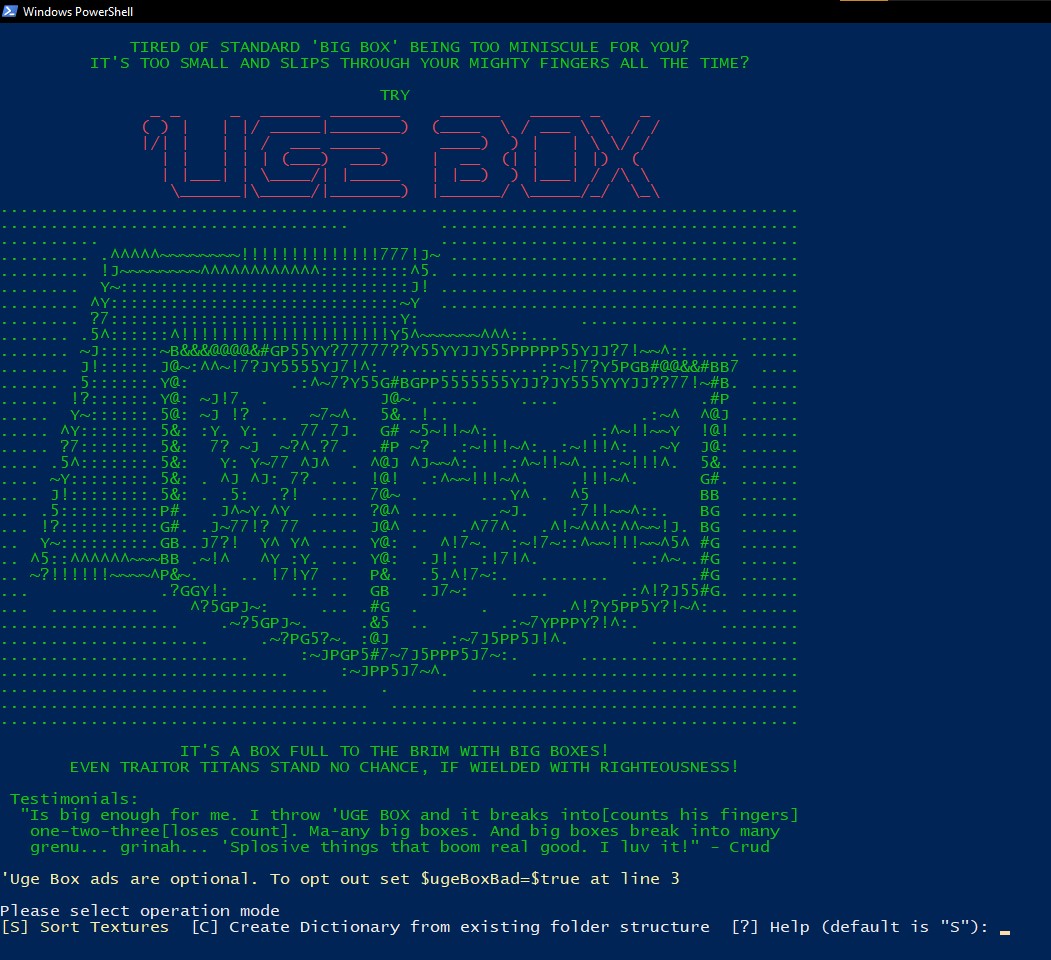
I am able to run the game and extract fine by putting the dxgi.dll file into the games binaries folder, then running the game. Did you try that way?