Warhammer 40,000: Darktide

Warhammer 40,000: Darktide

456 ratings
The Psyker Atheneum
By Pygex
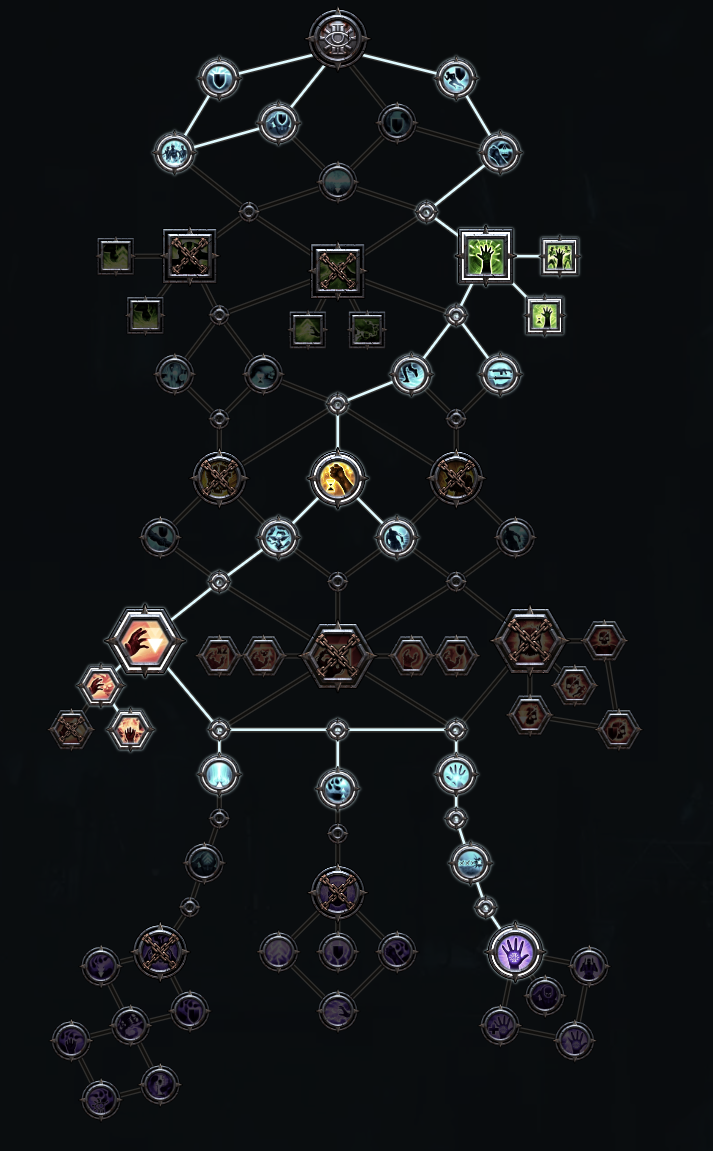
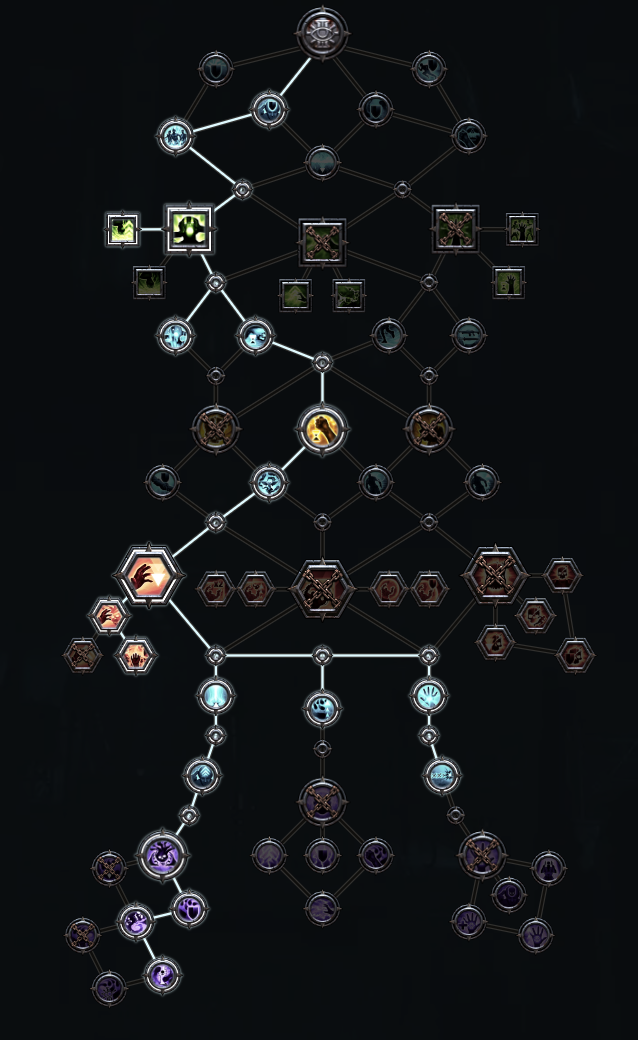
Everything that can be known about the Psyker class. A collection of discovered and hidden mechanics as well as synergies between things, talents, curios, weapons, current meta and example builds. All the information you find here has been verified with the live game and distinctions are made between what information is accurate and what is approximate.

If you are new to Psykers in Darktide, this guide may be a heavy read. However, if you are already familiar Psykers in the game and you are looking to step up your skills and knowledge, you have definitely found the correct place.
17
14
4
8
4
2
2
4
4
2
2
2
3
2
2
   
Award
Favorite
Favorited
Unfavorite
Table of Contents
Due to Steam's limitations on Section length, some parts are divided into multiple sections. Use CTRL+F (windows) or CMD+F (mac) to navigate where you want or then manually search the part using the Section titles on the right.

1. README

2. Special Thanks

3. Abbreviations

4. Blessings, Perks and Damage Buffs
  1. Critical Damage and Weaskpot Damage
  2. Rending, Brittleness, Power and Perks
  3. Unlisted Blessing Behaviour
  4. Blessings not behaving as described

5. - 9. Class Mechanics

10. - 19. Talents

20. Current Meta

21. Curios

22. Catachan Combat Blade

23. Regular Swords
  1. Cadia Assault Chainsword
  2. Catachan "Devil's Claw" Sword
  3. Maccabian Duelling Sword

24. Blaze Force Sword

25. Axes
  1. Combat Axe
  2. Tactical Axe

26. Trauma and Void Staves

27. Surge and Purge Staves

28. Shredder and Revolvers

29. Heavy Laspistol

30. Lasguns
  1. Infantry Lasgun
  2. Recon Lasgun

31. Autoguns
  1. Infantry Autogun
  2. Headhunter Autogun

32. Example Builds - Part 1
  1. Surge - Soul Smite
  2. Purge - BR Flame Pump
  3. Void - One Staff to rule them all

33. Example Builds - Part 2
  1. Fire Trauma - BR Stun Shield EP
  2. Gunker - Battery Gunner

34. Example Builds - Part 3
  1. Psylot - Psycho Killer
  2. Gunker - Sail Gaze EP

35. Example Builds - Part 4
  1. Revolver Gunker - Chandelier
1. README
1.1 Latest Updates

Guide up to date with Patch #18 (tox patch).

Some images went missing again... it seems to happen at times to steam guides. I added in already the missing build images, I will fix the missing weapon images next week.

If you want to help, the best way to find me is to ping me at the #psyker-class channel in the Darktide official Discord server.

Patch #18 (tox patch)

Tox Bombers introduced increasing the value of mobility weapons. Bulwarks got a health buff affecting BB breakpoints. Kinetic Presence and Empowered Psionics (smite) received some moderate buffs, however, the EP smite buff is still not enough to overcome the Creeping Flames + Warp Siphon Smites.

Disrupt Destiny 1 point got nerfed a tiny bit due to the base duration decrese, the duration upgrade path got dramatically buffed due to the stack drop change and the max stack upgrade still sucks as you are forced to chase blues and have a hard time getting any value out of it. Warp Siphon keystone and Psykinetic's Aura now correctly reduce the cooldown of an active Scirer's Gaze.

The Kinetic Presence buff was nice but it is slightly too low to introduce any meaningful breakpoints especially for the infantry lasgun family of weapons. It seems that only BB noticeably benefits from it for meaningful breakpoints against Bulwarks, as it is not enough to one shot a scab rager with EP on.

Bulwark Brain Rupture changes:
  • 3 shot at Damnation.
  • 2 shot with 2 EP charges, Kinetic Presence, Warp Rider and 30% peril
  • 2 shot with 2 EP charges, +5% ranged damage node, Warp Rider and 45% peril
  • 2 shot with 2 EP charges, Warp Rider and 70% peril

Changes to the guide:
  • Fixed the Void build image to the correct one, I recovered it from a back up that was unfortunately a bit older.

  • Added Kinetic Resonance stacking with itself. Thx Average Player (SEA), IroskTheOrc, AtlasUndead and SuTvVoO for pointing out and providing testing footage.

  • Updated Surge & Flame Trauma example builds to use Kinetic Presence instead of Seer's Presence.

  • Moved Curio Flamer & Bomber resist back to garbage tier (only apply to the melee attacks again...)

  • Updated Meta for Patch #18

Patch #17

Assail Weave was removed from the game

To keep it short, Assail was not nerfed to the ground, it is still very usable. Builds that used Assail as a tool or for example EP Assail spam were basically unaffected by this nerf. The only thing that changed for meta builds is things may not die as fast as they used to because of the perk damage bonus is lost and you cannot pre-stack Uncanny Strike nor deal with Maulers and Crushers with a fully stacked Uncanny Strike Assail.

Niche non-meta Assail centric builds that where already barely viable got basically nerfed to the ground and took the heaviest hit here, as some weapons and blessings were only viable as Assail stat sticks and that is now gone, limiting the amount good build options.

  • New build: 35.1 Revolver Gunker - Chandelier

  • Updated the following build: 33.2 Gunker - Battery Gunner

  • Minor edits for the following builds: 33.1 Fire Trauma - BR Stun Shield EP, 34.2 Gunker - Sail Gaze EP.

  • Revisited weapon guides for Patch #17 and updated the following entries: Shredder, Revolver and Infantry Lasguns.

  • Added mention of Illisi special spam for beefing up Creeping Flames, including the warp resist roll required.

  • Added info for True Aim proccing on lower stacks with penetrating hit scan weapons.

  • BB/BR damage animation speed up refers to the after cast animation lock. The time to deal damage was unaffected but the after cast animation went from 1 second to approximately 0.6 seconds.

  • BR scaling with Kinetic Resonance and EP was indeed "fixed". However, they both affect the charge rate, the "50% cast time reduction" on EP is a lie, it's +50% "charge rate". "Charge rate" and "fixed" in quotes, because Kinetic resonance and EP affect the actual charge rate and the after cast animation with different amounts and the listed values in the descriptions are only true for the total cast time (charge + after cast animation). The charge gets a lesser bonus while the after cast gets a greater bonus than what is listed in the description. In addition, the Kinetic Resonance 50% peril reduction is a lie, it's closer to 45% peril reduction.

  • Kinetic Resonance and EP now stack properly resulting in a total relative cast time (charge + after cast) of 1 / (1.0 + 0.75 + 0.5) = 0.44445, in other words around 56% reduction in time spent for each cast when you have both in effect.


1.2 Note on True Peril / Peril Gauge mod
If you are using the True Peril mod, ensure that you have at least one decimal point enabled for it. This is because with 0 decimals it uses default rounding which is dangerous and inconsistent with "at or below" thresholds since both 96.5% and 97.4% will round to 97% and you have no way of knowing if you are actually at 97% and below, or slightly above it.

The default UI does not have this problem since it always rounds up, so it is guaranteed you are always "at or below" the value you see on the screen.
2. Special Thanks
Thank you for all the Psykers in the Official Darktide Discord #psyker-class channel, but especially:
  • Pfhoenix, Blooddrunk, Json, Fyneas and ZazyMomba for the help with earlier versions of this guide.

  • Arcotash for providing the Assail damage tables for Patch #13.

  • Subhuman for helping to verify my calculations for the Deimos one shot thresholds for Patch #15 with their sword.

  • Boodendorf for extensive testing of Surge staff breakpoints for Patch #16.

There are still some open questions because not all the things can be tested as a solo player. If you are interested in doing some testing on your own and provide me hints for what to test, solid proof (video), or are willing to join me for some testing sessions you will definitely get your name here.
3. Abbreviations
  • BB/BR -> Brain Burst / Brain Rupture
  • DD -> Disrupt Destiny
  • DS -> Duelling Sword
  • IAG -> Infantry Autogun
  • LMB -> Left Mouse Buttom, primary fire
  • POW -> Perils of the Warp, the animation before self explosion
  • RMB -> Right Mouse Button, secondary fire
4. Blessings, Perks and Damage buffs

4.1 Critical Damage and Weakspot Damage
The damage calculation for +Critical Damage and +Weakspot Damage makes them quite lacking unless the amount gained is huge (closer to +100%) and the weapon in question already has a big baseline critical or weakspot multiplier. This is because these modifiers only increase the additional damage portion of the critical or weakspot attack and not the whole damage.

As an example, if your attack normally deals 100 damage and 150 damage on a weakspot hit, +10% weakspot damage will make this 100 + 50*1.1 = 155 damage instead of what you would expect (150*1.1 = 165).

4.2 Rending, Brittleness, Power and Perks

Rending and Brittleness do nothing against unarmoured and infested armour types. For other damage types it works as follows:
  • Bittleness is not 5% per stack, that's a lie. It's 2.5% per stack.

  • The maximum cap for Brittleness stacks on an enemy is 16 which contributes to +40% rending.

  • Rending stacks additively with Brittleness and they cap at +100% "rending".

  • Rending and Brittleness are additively added to the armour modifier until your weapon deals base damage, a.k.a modifier becomes 1.0 (NOT necessarily same value as unarmoured in the damage table but often it is).

  • Any leftover rending is converted into a bonus damage multiplier by dividing the amount of extra rending by 4.

  • To make it all more confusing, some weapons (like combat axes) deal bonus damage to a certain armour type. This bonus damage can be separate from the armour modifier, which is the case for combat axes versus unyielding. In the case of combat axes, a full 16 stacks of brittleness results in 5% increased damage against unyielding instead of the 10% what one might expect by looking at the damage table as it seems to hint that the armour modifier is already 1.0 or more.

    Currently, it seems that the damage buffs in the game stack as follows:
    base_damage * armour_mod * rending_bonus * power * vs_armour_perk * (all + other + buffs)
    where the vs_armour_perk is the up to +25% damage versus armour type perk. Unarmoured and Infested cannot benefit from rending or rending bonus even if infested would have an armour modifier less than 1.

    As a result of this, stacking Rending with a Power Blessing on a weapon with a perk against certain armour types can reach a huge multiplier for the damage it can deal.

    4.3 Unlisted Blessing behaviour
    • Blazing Spirit (staves): stack cap is 6.

    • Bloodletter: Applies on the first damage tick of Chainsword special attacks.

    • Executor: on a 2.5 second timer and drops all stacks only whenever you hit something else than a weakspot as your first target or when the timer runs out. You can get multiple stacks on a single swing.

    • Fire Frenzy: Triggers on kills made at 7m or shorter ranges by any means.

    • "On chained hit" blessings are on a 3.5 second timer and drop their stacks on a miss or timer running out, allowing you to push or even swap weapons and perform an other action without dropping the effect from the weapon. You can get multiple stacks in one swing if you hit multiple enemies.

    • "On repeated hit": blessings are on a 2 second timer. Any hit against any target after the initial hit will refresh the timer and grant a stack, this includes DOT effects.

    • Stripped Down: Only activates once you get up to sprinting speed after the acceleration. When combined with sprint slides, the transition from sprint to slide is immediate but after the slide there is a brief moment where you can get damaged by ranged before you are at sprint speed again.

    • Unstable Power: given as buff stacks at 20/40/60/80 peril.

    • Warp Flurry: The buff has a duration of 5 seconds allowing you to perform other actions and swap weapons in between if you desire. All stacks are lost on time out. The description is a bit miss leading - you simply gain a stack whenever you cast with RMB. Also reduces your charge peril cost by the same amount since peril costs are always per second.

    • Warp Nexus: given as buff stacs at 20/40/60/80 peril.

    4.4 Blessings not behaving as described
    • Efficiency: Reduces ammo consuption to 33% not by 33% and the "not shooting" is a lie, this will recharge even while shooting, so triggers only once every 4 seconds during continuous fire.

    • Haymaker: Stacks on any heavy hit, including the push attack on a knife. Does not require chained attacks, stacks are not lost on missing a hit nor with light attacks. Stacks are on a 5 second counter and drop one by one, the timer restarts on a stack drop.

    • Rending Shockwave: Actually gives 2.5% Brittleness per stack, not 5%.

    • Sustained Fire (staves): increases the damage of all first three attacks. Resets on a timer.

    • Sustained Fire (guns): increases the damage of 2nd, 3rd and 4th shot. Resets on a timer or on a recoil based duration which changes from gun to gun and between ADS / hipfire. Autoguns tend to reset extremely fast.

    • Tunderous: Actually gies 2.5% Brittleness per stack, not 5%.
5. Class Mechanics - The Basics

5.1 Psykinetic's Wrath (Default Ability)
  • Hits a cone in front of you with a range of 30m.
  • Stagger strength scales based on peril amount.
  • Can be used while performing other acitons. Does not interrupt them even though it overrides some of their animations.
  • Hits enemies through walls but has difficulties with edges, railings and verticality in general.
  • Can be used to remove dogs.

5.2 Peril and POW
  • The actual peril value is a floating point value under the hood while the UI is showing an integer value that is rounded up from the actual value.

  • Generated by BB, Staff primary & secondary attacks, FS special, FS push attack, Laspistol special

  • You do not immediately enter POW upon hitting 100% peril, you can "go over" without exploding depending on the source of peril.

  • Quelling any amount by any means during the POW animation will cancel it and save yourself from the explosion.

  • Notice that POW will make your currently active weapon non-active so blessings on them cannot help you.

5.3 Quelling
  • When you have not used a warp based attack for 3 seconds, you will start automatically quelling.

  • Automatic and manual quelling rate are constant but the default UI does some weird smoothing and interpolation for animating the value.

  • The quelling speed roll has exponential scaling for manual quelling in terms of time it takes to quell. With 50% quelling speed roll (including Blitz hands and FS), a full manual quell from 100 to 0 takes 3 seconds and with 80% quelling speed it takes 2 seconds, shaving off a whole second for 30% roll increase. With 21% quelling speed roll, which is -29% from the 50%, it takes around 3.6 seconds so from 21% to 50% the gain for 29% roll increase is only 0.6 seconds.

  • Staves have lesser movement speed penalty while manually quelling.

Table 1: Approximate automatic quelling speeds and times when going from 100 to 0 peril.
Weapon
Total Quelling time
Non-force weapons
9.5
Staves with 80% Quelling speed
9.5
Blitz hands, FS and 50% Quelling speed
12.5
21 % Quelling speed
15.5

5.4 Channeling
  • Channeling BB is not interrupted by damage, but can be interrupted with stagger effects like the bomber's bomb explosion.

  • Channeling with Staves is always interrupted by damage unless you have the Focused Channeling Blessing.
6. Class Mechanics - Brain Burst, Brain Rupture and Smite
6.1 Brain Burst & Brain Rupture

BB refers to both Brain Burst and Brain Rupture here.

  • The base damage of BB is set per enemy type and it does not scale with the difficulty.

  • LMB charging only needs LOS when acquiring the target.

  • You can always start to cast and finish another BB safely with LMB if you start at 97% peril or below.

  • BB damage is affected by armour and buffs.

  • Always hits the enemy weak point (twice, first is a stagger) and is calculated as a ranged attack that cannot crit.

  • After charging, the BB is cast followed by an approximate 0.6s after cast animation lock before taking further actions.

  • Does not anger Daemonhosts when attacking units that are near it with BB.

  • RMB will flash the enemy weakspot when it is ready to be cast with LMB.

  • Pressing LMB while charging RMB will lock in the current target and change the charge cost to LMB peril per second value the moment you press it.

  • Holding RMB after the charge is completed costs around 9% peril per second.

Table 2: BB base speeds and costs.
Version
Charge time
Charge cost peril/s
Cast finish cost
Total cost
Total duration with after cast
LMB
2.2s
10%
25%
45.2%
2.8s
RMB
3.2s
~ 6.3%
25%
45.2%
3.8s

Table 3: BB approximate damage and armour modifiers for all the enemies.
Enemy type
Base Damage
BR Damage
Armour Modifier
Sniper, Trapper, Bomber,
Lesser Enemies
OHK
OHK
-
Scab Gunner, Shotgunners
900
OHK
?
Flamer
1350
OHK
?
Scab Rager
765
1148
?
Crusher, Mauler
900
1350
?
Reaper, Bulwark
1125
1688
?
Dreg Rager
1148
1722
?
Mutant
1350
2025
?
Scab Captain Shield
675
810
?
Scab Captain
675
1013
?
Daemonhost
788
1182
?
Beast of Nurgle,
Plague Ogryn,
Chaos Spawn
1125
1688
?

Research Needed:
  • Armour modifiers


6.2 Smite

  • Initial cast range is 15m.

  • There is some RNG in play for the damage ticks.

  • The spread interval seems to be a bit randomized.

  • The lightning seems to be able to spread only within a +/-45deg angle cone forwards from the incoming beam.

  • A target can spread the beam to two other targets.

Table 4: Smite base values
Cast
Initial Targets
DPS per target
Charge Time
Charge Peril Cost
Upkeep Peril per second
LMB
1
~ 45 to 50
-
-
~ 17.5 %
RMB
3
~ 50-55
1s
5%
~ 17.5 %
7. Class Mechanics - Assail

  • By default the regeneration speed is 1 shard per 3 seconds.

  • The projectile automatically homes in towards an enemy weakspot even if you have a weapon active instead of the hands.

  • This is a projectile that can hit a body part and can crit. It can only hit once per enemy.

  • The projectile is destroyed upon hitting carapace armour or a Bulwark shield.

  • LMB becomes unreliable after 40m due to the hip fire spread. RMB can hit targets at least 63m away, possibly more.

  • The homing has around 10m range for LMB and after initial RMB hit.

  • Usually it's best to throw the projectile high in air to find a head but in confined spaces it can be easier to hit heads if you bounce them off the floor.

  • Be aware of throwing shards if there are Bursters nearby as a curving shard may knock the Burster into your team.

  • You can Quell Cancel Assail LMB casts to greatly increase the throw rate of the shards, just be careful to not do it too early as that may cancel the cast.

Table 5: Assail basic values
Version
Lifetime
Base max targets
Charge peril cost
Cast peril cost
Peril safe to cast
LMB
~ 2.5s
2
-
10%
99%
RMB
~ 2.5s
2
-
25%
99%

Table 6: Assail Armour Modifiers (by Arcotash)
Armour Type
Modifier
Unarmoured
1.0
Infested
0.75
Flak
0.75
Maniac
1.0
Unyielding
0.5
Carapace
0.05

Table 7: Assail damage values
Armour Type
LMB Damage
LMB Critical (1.9x)
LMB Weakspot (1.9x)
LMB Crit Weakspot (2.5x)
RMB Damage
RMB Critical (1.9x)
RMB Weakspot (1.9x)
RMB Crit Weakspot (2.5x)
Unarmoured
200
380
380
500
340
646
646
850
Infested
150
285
285
375
255
484.5
484.5
637.5
Flak
150
285
285
375
255
484.5
484.5
637.5
Maniac
200
380
380
500
340
646
646
850
Unyielding
100
190
190
250
170
323
323
425
Carapace*
10
46
95
125
17
79
162
213
* For some reason critical hits seem to apply a rending like effect but futher research is needed to know for sure. The actual damage value can be within [-1,0] from the Carapace value shown here.

Table 8: Approximate Assail boss and monstrosity damage values
Enemy
LMB Body damage
LMB Weakspot damage
LMB Crit damage
LMB Crit Weakspot damage
RMB Body damage
RMB Weakspot damage
RMB Crit damage
RMB Crit Weakspot damage
Beast of Nurgle
100
190
190
250
170
323
323
425
Chaos Spawn & Plague Ogryn
50
190
95
250
85
323
323
425
Daemonhost
60
133
114
175
102
227
194
298
Scab Captain
150
214
285
282
255
364
485
479
Scab Captain Shield
75
-
142
-
127
-
242
-
8. Class Mechanics - Soulblaze

  • Soulblaze counts as warp based attacks for talents.

  • Soulblaze lasts for 11 ticks, approximately 8.25 seconds. The tick interval is 0.75 seconds.

  • Soulblaze does damage monstrosities and bosses even though the blue fire visual effect may not always be visible.

  • When expired, Soulblaze starts to wear off one stack at the time, each lower tier ticking for 1 tick.

  • Damage scaling is using the smoothstep (S1) function, therefore, the damage has approximately exponential scaling with low amounts of stacks, approximately linear scaling with 11 or more stacks and then approximately logarithmic scaling with 21 or more stacks.

  • Soulblaze damage ticks take the damage modifiers (perks and blessings) from the currently active weapon and buffs, not from the buffs at the time of application.

  • Critical hits apply double stacks with Purgatus, but not with Blazing Spirit on FS, Void and Trauma.

  • The maximum amount of Soulblaze stacks on a target is 31.

  • Soulblaze stacks are shared across multiple players. The player that makes the first application is used for calculating the damage buffs as long as Soulblaze is kept alive on the target.

  • Purgatus staves can currently apply 1 stack more than what their burn % roll gives, but only if the last application is a critical hit. However, they cannot upkeep the extra stack.

  • Weapons cannot increase nor upkeep the amount of stacks on the target beyond their respective caps.
Soulblaze has the following damage formula for base damage per tick:
max_stacks = 31 x = stacks/max_stacks base_damage = x*x*(3-2*x)*500*0.5

Table 9: Tick base damage per stack for Soulblaze
Stacks 1 to 5
0.76
2.99
6.57
11.41
17.41
Stacks 6 to 10
24.47
32.48
41.35
50.98
61.26
Stacks 11 to 15
72.09
83.38
95.02
106.91
118.95
Stacks 16 to 20
131.05
143.09
154.98
166.62
177.91
Stacks 21 to 25
188.74
199.02
208.65
217.52
225.53
Stacks 26 to 30
232.59
238.59
243.43
247.01
249.24
Stack 31
250.00
-
-
-
-

Table 10: Soulblaze Armour modifiers versus different enemies
Armour type
Armour modifier
Unarmoured
1.5
Infested
1.25
Flak
1.5
Maniac
1.0
Unyielding
1.5
Carapace
0.1
9. Class Mechanics - Important Techs

Mastering these techniques is only vital if you intend to 'carry' at Damnation and Damnation+ as these techniques tremendously increase your survivability and slightly boost your offensive capabilities. The game is definitely playable without these at highest level, however, it is highly recommended for you to learn these evenutally.

Psykers have the shortest stamina regeneration delay. Sprinting and especially sprint sliding is an important part of our kit as it allows dodging ranged attacks while performing other actions on the move. Sprint sliding in rapid succession only marginally slows you down while allowing you to conserve a lot of stamina for a longer run. If you have a good dodge weapon, you can also turn your camera 90 degrees to the side and dodge to your movement direction at the end of your slide for even greater stamina efficiency for movement.

Remember that you can always sprint slide even when you are out of dodges, remember to use it as your last resort to dodge incoming ranged fire if you find yourself out of dodges.

9.1 Quell Cancel
  • Works on all staff LMB attacks and Trauma RMB attack.
  • Cancels the after cast animation to allow a faster follow up attack.
Immediately after the attack comes out, press your quell button and release the quell button as soon as the animation starts to change. The game has input priority, quell > LMB > RMB so you can leverage that and keep holding RMB with Trauma. The effect strength is more noticeable with LMBs and short Trauma RMB casts on a fast charge rate staff.

9.2 Channel, Casting and Quelling movement
You can sprint slide while channeling an attack. The effectiveness of this in terms of movement speed varies depending on the channel but it always grants you brief moments of ranged immunity. You can also dodge and dodge slide during channeling, casting and quelling actions for movement and avoiding attacks.

Always prefer using sprint slides during channeling as this will save your dodges for casting and quelling. Note that dodge slides cost two dodges and sprint slides reset the dodge regeneration time.

9.3 Slide techs
QC slide
It is possible to use one staff LMB attack during a single sprint slide or a dodge slide by performing a quell cancelled attack while holding the crouch button. Do not let go of the crouch button before you have quell cancelled the attack as you will otherwise loose your momentum after the slide. This tech functions as a single cast Run 'n' Gun blessing.

Quell slide
It is possible to manually quell a tick while performing a sprint slide or a dodge slide. This is a minor tech but can allow you to squeeze in a bit more of 'automatic' quelling while re-positioning and dodging ranged fire.
10. Talents - Top Passives


10.1 First Layer
Soulstealer
Replenish 7.5% Toughness on Warp Attack Kill.

Works from any attack that would normally cause you to gain peril as well as Soulblaze kills. Notice that melee kills yield 5% so warp melee kills yield a total of 20%.
Quietitude
Replenish 5% Toughness for each 10% of Peril Quelled.

Gives half of the peril % quelled back as toughness % immediately upon any amount of quelling. You do not need to quell a total of 10% to get toughness back.
Warp Expenditure
Replenish 2.5% Toughness for every 10% Peril Generated.

Peril that goes "over 100" does not give any toughness.
Mettle
Cirtical Hits replenish 5% Toughness. Also grants +5% increased Movement Speed for 4s. Stacks 3 times.

  • Once the timer runs out, all stacks are dropped.

  • Per hit, so you can gain all three stacks on one cast/swing.

Research needed:
  • Does not seem to stack with Warp Speed, however, this requires better confirmation.

  • Stacking with other buffs?

10.2 Second Layer
Perilous Combustion
Killing an Elite or Specialist Enemy applies 3 stack(s) of Soulblaze to nearby Enemies, causing Damage over time.

Requires: Soulstealer or Quietitude
  • Trigger radius is 4m from the dying target.

  • Cannot trigger from kills by Soulblaze ticks.

  • Seems to always trigger while "painting" the target with the Purgatus RMB.

  • Does trigger from kills made by Bleeding & Burning.

  • Max stack count is the global maximum, 31 stacks.
Battle Meditation
10% chance to Quell 10% Peril on Kill.

Requires: Quietitude or Warp Expenditure

  • Saves the player from POW explosion when it triggers.
Perfect Timing
+3% Warp Damage for 10s on Critical Hits. Stacks 5 times.

  • You will gain a stack even if the crit doesn't hit

  • Works from melee, ranged and Assail crits.

  • No internal cooldown, but triggers only once per attack/crit window.

  • All stacks are dropped on time out.

  • Increases the damage of Soulblaze and all attacks that would normally generate Peril.

Requires: Warp Expenditure or Mettle

10.3 Third Layer
Toughness Boost (L)
+15 Toughness.

Requires: Perilous Combustion or Battle Meditation
Toughness Boost (R)
+15 Toughness.

Requires: Battle Meditation or Perfect Timing
11. Talents - Blitz
Brain Rupture

Charge up your Psychic Power and release it to deal immense Damage to a Single Enemy. Effective against Flak & Carapace Armoured Enemies. This is an aubmented version of Brain Burst dealing +50% Damage.

Requires: Toughness Boost (L, Top Passives)
Locks: Other Blitz skills

Research needed:
  • Damage and armour values.
Smite

Unleash a torrent of Bio-Lightning - a fast, channeled attack that Locks and Stuns an Enemy while dealing Damage. Charge to increase Spread rate and Damage.

Locks: Other Blitz Skills
Assail

Throw swift, homing projectiles formed of psychic energy. Less effective versus Carapace Armoured Enemies.

Requires: Toughness Boost (R, Top Passives)
Locks: Other Blitz skills

  • This is an actual projectile that can crit and hit a body part or a weakspot.

11.1 Brain Rupture Modifiers
Kinetic Resonance
Using your combat Ability makes your Brain Rupture charge +75% faster and generate 50% less peril for 10s.

Requires: Brain Rupture

  • Affects both LMB and RMB

  • The "+75% faster" applies to the total duration (charge + after cast). So the total time spent for the cast is 1/1.75 = 0.57 of the original, that is 43% faster in time.

  • The total cast cost is not actually 50% less peril but around 45% less peril.

  • You cannot get the speed boost to currently active cast if you use the ability mid cast.

  • The peril discount is immediately effective upon activation.

  • You get the full speed bonus on any cast that starts while the buff is still active.

  • The peril discount will be lost as soon as the buff drops, but since cast cost is fixed peril/s you still generate less peril.

  • Stacks with itself for the cast speed and the peril cost reduction. Mostly viable when using double stun shields and spiking a monstrosity or clearing groups of Elite gunners.
Kinetic Flayer
All Attacks have 10% chance on Hit to Brain Rupture the target. This cannot occur while at critical Peril, and has a cooldown of 15s.

Requires: Brain Rupture

  • Critical peril threshold is 97% peril.

  • Can only trigger from direct hits that do not kill the target.

11.2 Smite Modifiers
Lightning Storm
Increase the number of times your Smite jumps by +1.

Requires: Smite

  • Increases initial targets for LMB from 1 to 2.

  • Does not seem to increase intial targets for RMB.

  • Seems to double the spread rate for both, but this is hard to determine as the spread seems to have some randomness to it.
Enfeeble
Enemies affected by your Smite take +10% increased Base Damage from all sources.

Requires: Smite

  • Increases the damage of Soulblaze.

  • Does not work with Surge Staff RMB

Research needed:
  • How does base damage function, multiply everything?

11.3 Assail Modifiers
Ethereal Shards
Projectiles from Assail now pierce additional targets.

Requires: Assail

  • From 2 to 3.
Quick Shards
Assail charges Replenish 30% faster.

Requires: Assail

  • 30% faster in time, so regen goes from 3s per shard to 2.1s per shard.
12. Talents - Before Aura Passives

12.1 First Layer
Peril Resistance (L)
-5% Peril Generation.

Requires: Brain Rupture or Smite
Toughness Damage Reduction (R)
+5% Toughness Damage Reduction.

Requires: Smite or Assail


12.2 Second Layer
Wildfire
When an Enemy dies while affected by your Soulblaze, nearby Enemies each gain up to 4 stacks of Soulblaze. They cannot gain more stacks than the dying Enemy had.

Requires: Peril Resistance (ML)

  • Only triggers after death animation. Most notably a bug.

  • Needs at least 2 stacks on the target to spread the fire.

  • Hard cap of 4. You cannot transfer more than 4 stacks total per dying target.

  • Can only target enemies with 4 or less stacks. Enemies with 4 will just refresh in duration and consume a stack.

  • Stacks are always spread evenly among suitable targets if possible.

  • 5m radius from blazed target.

  • Will be spread by corpses if they have been lit after death when the Soulblaze effect ends on them.

Research needed:
  • Does this actually follow the ownership rules of Soulblaze? ( the one to apply the first stack gets the ownership) or can you get it to proc by tagging someone else's blaze?
Psykinetic's Aura
Decreases Ability Cooldown for you and Allies in Coherency by 5% on Elite or Specialist kill.

Requires: Peril Resistance (ML)

Research needed:
  • Does the Psyker have to be the one landing the killing blow or is it by any if they are within Psyker's coherency?

  • Does this stack if equipped by multiple Psykers?
Mind in Motion
Your Movement Speed is not reduced while Quelling Peril.

Requires: Toughness Damage Reduction (R)

You should only consider this if you want to do a Scrier's Gaze build with a staff or if you need to access the left and middle Auras or Inspiring Presence from Assail. Otherwise it is recommended that you learn to sprint slide during channels and doge & dodge slide during quelling. That way you can still remain mobile while putting the talent point to somewhere else.
Malefic Momentum
+4% Damage to Warp Attacks for 8s after a non-Warp based Kill. Stacks 5 times.

Requires: Toughness Damage Reduction (R)

  • Any attack that would normally generate peril and Soulblaze is considered as Warp attack.

  • A stack is gained per kill, so multiple stacks per cast/swing is possible.

  • All stacks are dropped on expiration.

12.3 Third Layer
Toughness Damage Reduction (L)
+5% Toughness Damage Reduction.

Requires: Wildifre or Psykinetic's Aura
Inspiring Presence
+10% Toughness Replenishment for you and Allies in Coherency.

Requires: Psykinetic's Aura or Mind in Motion
Toughness Damage Reduction (R)
+5% Toughness Damage Reduction.

Requires: Mind in Motion or Malefic Momentum


13. Talents - Aura

Kinetic Presence
+7.5% Damage against Elite Enemies for you and Allies in Coherency.

Requires: Toughness Damage Reduction (L) or Inspiring Presence
Locks: Other Auras

  • Stacks additively with other buff bonuses.
Seer's Presence
+10% Cooldown Reduction on Abilities for you and Allies in Coherency. This is an augmented version of The Quickening.

Requires: Inspiring Presence
Locks: Other Auras

Research needed:
  • Does this stack with other cooldown reduction things or does it directly affect the "base cooldown" upon using your ult.
Prescience
You and Allies in Coherency gain +5% Critical Hit Chance.

Requires: Inspiring Presence or Toughness Damage Reduction (R)
Locks: Other Auras

Research needed:
  • Does this stack with other Psykers?
14. Talents - After Aura Passives

14.1 First Layer
Unlucky for Some
When an Ally in Coherency gets Knocked Down, Replenish 50% Toughness to all other Allies in Coherency

Requires: Kinetic Presence

  • This also triggers if the Psyker having the talent goes down themselves.

Research needed:
  • Test if the Psyker with this talent indeed needs to be in the coherency range of the downed person.

  • Does this stack with multiple Psykers having this talent?
One with the Warp
Gain Toughness Damage Reduction of +10.00% to +33.00% based on your current Peril.

Requires: Kinetic Presence or Seer's Presence
Empathic Evasion
A Critical Hit makes you count as Dodging against Ranged Attacks for 1s.

Requires: Seer's Presence or Prescience

  • Refreshes in duration.

  • The crit must connect with an enemy.

  • Works with melee, ranged and Assail critical hits.

  • Will dodge a sniper shot if you get lucky with a crit timing.
Anticipation
+50% Dodge duration. Increases the number of Dodges before Dodges starts becoming ineffective by 1.

Requires: Presience

  • Does not increase dodge duration at all. Confirmed with Numeric UI & Frame checking as well as testing dodging Scab Gunner fire.

  • In line with the above, does not also increase the duration of Empathic Evasion.

14.2 Second Layer
Peril Resistance (ML)
-5% Peril Generation.

Requires: Unlucky for Some or One with the Warp
Toughness Damage Reduction(R)
+5% Toughness Damage Reduction.

Requires: One with the Warp or Empathic Evastion
Ranged Damge Boost (R)
+5% Ranged Damage.

Requires: Empathic Evasion or Anticipation
15. Talents - Abilities

Venting Shriek

Unleashes a wave of warp energy that Staggers Enemies in front of you. Quells 50% peril. Base cooldown 30s. This is an augmented version of Psykinetic's Wrath.

Requires: Peril Resistance (L)
Locks: Other Abilities

  • Range 30m, shape narrow cone in front of you.
  • Stagger strength scales with peril, more peril results in bigger stagger.
Telekine Shield

Spawns a psychic shield in front of you for 17.5s. The shield blocks Enemy Ranged Attacks, while you and Allies can still shoot through. Base Cooldown: 40s.

Locks: Other Abilities

  • The cooldown is started already when the shield is casted.

  • Snipers will not take the shot through it.

  • If casted when a sniper is shooting it will block the shot as long as you have time to put it up before the round arrives.

  • Will not protect from Pox Burster explosions.

  • Scab Bomber bombs will drop down at the wall upon collision and burn there.

  • Will stop flamer flames as long as you are not standing on the border of the shield.

  • Will stop netter projectiles but will not block the pull if the net already collided with a player.
Scrier's Gaze

Triggers Scrier's Gaze. When entering Scrier's Gaze you gain +10% Damage and +20% Critical Chance. For every second in Scrier's Gaze you gain +1% Damage up to a maximum of 30%. This effect lingers for 10s after leaving Scrier's Gaze.

While in Scrier's Gaze you build up Peril. Build up is temporarily slowed down by enemy Kills. At 100% Peril, Scrier's Gaze ends. Base Cooldown 30s.


Requires: Ranged Damage Boost (R)
Locks: Other Abilities

  • The cooldown starts only after the buff ends.

  • Constantly generates peril at a slowly accelerating rate.

  • Can be used to generate massive amounts of toughness on demand with Solidity, Quietitude and Warp Expenditure and a fast quelling staff.

  • You always gain at least 12 stacks if you start at 0 peril and do no actions.

  • The slow down by killing enemies is very minor. Using a Devil's claw against perfectly stacked groaners it lasted up until 22 stacks, but in normal use you get around 16 stacks or so.

  • It is strongly recommended to use Battle Meditation and Blessings to quell while attacking in order to make the gaze last longer.

  • The buff cannot be ended other than by reaching 100% peril.


15.1 Venting Shriek Modifiers
Becalming Eruption
Venting Shriek now decreases Peril Generation by 1% for each Enemy hit, Staking 25 times. Lasts 5s.

Requires: Venting Shriek

Warp Rupture
Your Venting Shriek now also deals 100-200 Damage, based off of your current Peril percentage.

Requires: Becalming Eruption
Locks: Creeping Flames

  • Has damage fall off, deals less damage further away.

  • Extremely underwhelming as Groaners (weakest enemy) have 300HP on Damnation.
Creeping Flames
Venting Shriek applies 1-6 Stack(s) of Soulblaze to targets Hit based on your current Peril.

Requires: Becalming Eruption
Locks: Warp Rupture

  • Max stack count is the global maximum, 31 stacks.

Stacks
Above Peril %
Default UI lowest value to guarantee
1
-
-
2
16.66
18
3
33.33
35
4
49.99
51
5
66.66
68
6
83.33
85


15.2 Telekine Shield Modifiers
Enervating Threshold
Telekine Shield has a 10% chance to Stun enemies that pass through it. Specialist enemies have a 100% chance to get Stunned but also damage the Telekine Shield.

Requires: Telekine Shield
Locks: Telekine Dome

  • The shield can stun specials 3 times before being destroyed. This can be the same or different special but requires the special to contact the shield with their body.

  • The effect strength varies greatly from enemy to enemy. Poxwalkers and Crushers get knocked down, Ragers get tased, Mutant is only stunned for 1 second while the dog is briefly interrupted and needs to go through the acquire target animation.

  • Can be used to interrupt a Mutant that already grabbed a player.

  • Bursters that have not leaped will be pushed extremely far away but will not explode by themselves.

  • Bursters that leap into the shield get pushed very weakly and become very resistant to any staggers, causing them to explode directly at the shield. The shield DOES NOT protect from explosions.
Telekine Dome
Telekine Shield now forms a spherical shield which lasts 25s.

Requires: Telekine Shield
Locks: Enervating Threshold

  • Mutants touching the Dome will be stopped if their target dodges without damaging the dome. Most certainly a bug.

Bolstered Shield
Telekine Shield now holds up to 2 charges.

Requires: Enervating Threshold
Sanctuary
Allies inside your Telekine Shield replenish 10% Toughness each second. When your Telekine Shield dissipates, all Allies inside gain +50% toughness Damage Reduction for 5s.

Requires: Telekine Dome

Research needed:
  • Do the bonuses stack if you stack multiple shields?


15.3 Scrier's Gaze Modifiers
Reality Anchor
Scrier's Gaze now also reduces your Peril Generated by -20% while active.

Requires: Scrier's Gaze
Locks: Precognition

  • Affects peril generated by any means.

  • You will gain 14 stacks instead of 12 if you start with 0 peril and do do anything to affect your peril generation or quell your peril.

  • Stacks additively with the Peril Resistance Operative Modifiers.
Warp Speed
Scrier's Gaze now also increases your Movement Speed by ++20% while active.

Research needed:
  • Does not seem to stack with other movement speed bonuses.
Precoginition
Weakspot Kills count as 1s spent in Scrier's Gaze. For each second spent in Scrier's Gaze, you now also gain +1% Finesse Damage (+30% max) which lingers for 10s after leaving Scrier's Gaze.

Requires: Scrier's Gaze
Locks: Reality Anchor

  • No internal cooldown. You can get multiple stacks per swing/cast.

Endurance
Scrier's Gaze now grants ++20% Toughness Damage Reduction while active.

Requires: Reality Anchor or Precognition

  • Seems to stack additively with the Toughness Damage Reduction Operative Modifiers for up to 3 modifiers, fourth and fifth will have some diminishing returns, giving a total of 40% reduction instead of 45% when all five are selected and gaze is active.
16. Talents - Bottom Passives

16.1 First Layer
Peril Resistance (L)
-5% Peril Generation.

Requires: Venting Shreik or Telekine Shield or Health Boost (M)
Health Boost (M)
+10% Health.

Requires: Peril Resistance (L) or Critical Chance Boost (R)
Critical Chance Boost (R)
+5% Critical Hit Chance.

Requires: Telekine Shield or Scrier's Gaze or Health Boost (M)

16.2 Second Layer
Puppet Master
50% Radius for your Coherency Aura.

Requires: Peril Resistance
Warp Rider
Up to +20% Damage from all sources, based on your current Peril.

Requires: Health Boost (M)

  • Additive damage bonus is 0.2 * peril

  • This stacks additively with the Brain Rupture bonus, resulting in around 13% damage increase at 100 peril for Brain Ruptures.
Kinetic Deflection
While below critical Peril, Blocking an attack causes you to gain Peril instead of losing Stamina. Gained Peril is 25% of the blocked attacks stamina cost.

Requires: Critical Chance Boost (R)

  • Critical Peril is 97%.

  • The Peril on block cost is affected by Peril Reduction.

16.3 Third Layer
Toughness Damage Reduction (L)
+5% Toughness Damage Reduction.

Requires: Puppet Master
Toughness Boost (M)
+15 Toughness.

Requires: Warp Rider
Movement Speed Boost (R)
+5% Movement Speed.

Requires: Kinetic Deflection

Research needed:
  • Stacking?

16.4 Fourth Layer
Solidity
Increases Quell Speed by 30%

Requires: Toughness Damage Reduction (L)

  • Only affects manual quelling speed.

  • This is 30% faster quelling in time.
True Aim
Landing 5 Weakspot Hits grants your next Ranged Attack a guaranteed Critical.

Requires: Movement Speed Boost (R)

  • The stacks last until consumed.

  • The stacks can be consumed by Assail but not with Brain Burst or Smite.

  • Brain Burst will generate two stacks per LMB cast, once on stagger and the second no hit.

  • You can generate stacks against a scab captain shield by casting BB or landing melee hits on the head through the shield.

  • No internal cooldown. It is possible to generate multiple stacks with one cast/swing/shot as long as it cleaves through heads.

  • Hit scan weapons with penetration (like the Zarona revolver or Agripinaa IAG) will trigger this for any bullet that would increase the stacks to "6", causing all the targets to get hit by a critical strike even when below 5 stacks before firing a shot, consuming the stacks.

16.5 Fifth Layer
Toughness Boost (L)
+15 Toughness.

Requires: Solidity
Toughness Boost (R)
+15 Toughness.

Requires: True Aim
17. Talents - Keystone path: Warp Siphon

17.1 Warp Siphon

Killing an Elite or Specialist Enemy gains you a Warp Charge for 25 seconds, stacking 4 times(s). Your next Combat Ability spends all available Warp Charges to reduce the Cooldown of that Combat Ability by 7.5% per Warp Charge.

Requires: Tougness Boost (L, Bottom Passives)
Locks: Other Keystones

  • The stacks drop one at a time.

17.2 Warp Siphon Modifiers
Inner Tranquility
-6% peril Generation Reduction for each Warp Charge

Requires: Warp Siphon
Locks: Essence Harvest

  • Stacks with Peril Resistance Operative Modifiers but not purely additively or multiplicatively, there is some diminishing returns here. With all the three Peril Resistance nodes and 6 stacks, the Peril Reduction is around -45%.

  • Seems to stack additively with Reality Anchor but this is hard to confirm for sure.
Essence Harvest
Replenish 30% Toughness over 5s on gaining Warp Charge. Gaining a new Warp Charge during this time resets the timer.

Requires: Warp Siphon
Locks: Inner Tranquility

Empyrean Empowerment
Increases all Base Damage by +4% for each Warp Charge.

Requires: Inner Tranquility or Essence Harvest

  • Stacks additively with Brain Rupture bonus for Brain Burst

In Fire Reborn
Killing an Enemy with Soulblaze has a 10% chance to grant you a Warp Charge.

Requires: Empyrean Empowerment
Locks: Psychic Vampire

  • Does not require the Soulblaze effect to kill the target, it is sufficient that the target has Soulblaze when killed.

Research needed:
  • Does this yield charges if the Soulblazed targets are killed by other players?
Psychic Vampire
Whenver you or an Ally in Coherency kill an enemy, you have a 4% chance to gain a Warp Charge.

Requires: Empyrean Empowerment
Locks: In Fire Reborn

Research needed:
  • Is the proc rate shared with multiple Psykers?

Warp Battery
Can store up to 6 Warp Charges.

Requires: In Fire Reborn or Psychic Vampire
18. Talents - Keystone path: Empowered Psionics

18.1 Empowered Psionics

Kills have a 7.5% chance to Empower your next Blitz.

Empowered Brain Rupture:
100% Peril Cost Reduction
50% Cast time Reduction
+50% Damage

Empowered Smite:
+200% Damage
50% faster spread between enemies

Empowered Assail:
100% Peril Cost Reduction.
Base Damage increase from 100 to 150.
Does not consume any charges.


Requires: Toughness Boost (M, Bottom Passives)
Locks: Other Keystones

  • Casting a free spell will not cause you to enter POW but it will pause your automatic quelling.

  • Bonus Brain Rupture damage is an additive modifier to the Brain Burst damage and guarantees one shots on Ragers now.

  • The 50% cast time reduction is a lie. It is actually +50% "animation speed", so the total time spent for the cast (charge + after cast) is 1/1.5 = 0.6667 of the original, so around 33% faster in time.

  • Stacks additively with Kinetic Resonance, resulting in 1 / (1.0 + 0.75 + 0.5) = 0.4445 of the original total cast time, so around 56% reduced cast time.

  • The increased spread rate seems to only affect the RMB mode on Smite

  • Casting Smite at just below 100% will go into the quick quell animation, ending the cast while consuming a charge.

  • Assail will also gain the potential to hit double the targets (4, 6 with Ethereal Shards) when empowered.

  • The increase to Assail is actually 1.5x to the base damage value, therefore, this is a multiplicative bonus for Assail.

18.2 Empowered Psionics Modifiers
Bio-Lodestone
Increases the chance to gain Empowered Psionics on Kill from 7.5% to 12.5%.

Requires: Empowered Psionics
Locks: Overpowering Souls (Mod R)
Psychic Leeching
Using your Blitz while Empowered Psionics is active replenishes 15% Toughness to you and Allies in Coherency.

Requires: Empowered Psionics

  • Triggers once per cast.

  • Brain Rupture applies this when it hits.

  • Smite LMB appiles this immediately on cast start.

  • Smite RMB applies this on cast start after the charge time.

  • Assails apply this whenever a shard is thrown.
Overpowering Souls
Guaranteed chance to gain Empowered Psionics on Elite Kills.

Requires: Empowered Psionics
Locks: Bio-Lodestone

  • Does not work on specials, so working as intended.

Charged Up
You can now hold up to 3 stacks of Empowered Psionics.

Requires: Bio-Lodestone or Overpowering Souls
19. Talents - Keystone path: Disrupt Destiny

19.1 Disrupt Destiny

Every second, Enemies within 25m have a chance of being Marked. Killing a Marked Enemy Replenishes 10% Toughness, grants +20% Movement Speed for 2.5s, and adds a Precision Bonus for 4s.

Each Precision Bonus grants +1% Damage, +2% Critical Damage and +2.5% Weakspot Damage. Precision Bonus Stacks 15 times.


Requires: Toughness Boost (R, Bottom Passives)
Locks: Other Keystones

Maximum buffs from this: +15% Damage, +30% Critical Damage and +37.5% Weakspot Damage.

  • There can only be 1 marked target at a time.

  • The actual marking range is 40m.

  • Cannot target specialists, monstrosities, bosses, groaners, poxwalkers nor ogryns

  • Valid targets can only be marked if they are within a 120 degree cone in front of the player (+/- 60 degree from crosshairs, not affected by FOV). They can be marked through some objects.

  • A mark on a target will be removed if they are approximately 5 seconds out of the cone. If you need to reset your target, look into some other direction!

  • The stacks are dropped one by one and the timer reset according to your choice of talents.

  • The timer is reset without dropping a stack if you stagger the marked target.

  • You need to land the killing blow, have Soulblaze on the target or stagger it just as it is killed to get the stack.

  • It seems at times the game fails to show the visual effect on an enemy.

Research needed:
  • Does the movement bonus stack with other movement speed bonuses?


19.2 Disrupt Destiny Modifiers
Perfectionism
Maximum Precision Bonus stacks are increased from 15 to 25.

Requires: Disrupt Destiny
Locks: Lingering Influence

Maximum buffs from this are modified to: +30% Damage, +60% Critical Damage and +75% Weakspot Damage.
Purloin Providence
Killing Enemies Marked by Disrupt Destiny have a 20% chance to instantly Quell 15% of your Peril.

Requires: Disrupt Destiny

  • This is a separate roll, so with Battle Mediatation there is a 10%*20% = 2% chance you will quell 25% of your peril by killing the marked enemy.
Lingering Influence
Increase the duration of Disrupt Destiny from 4s to 10s.

Requires: Disrupt Destiny
Locks: Perfectionism

Cruel Fortune
Weakspot Kills grant 2 additional Stacks of Disrupt Destiny.

Requires: Perfectionism (Mod L) or Lingering Influence (Mod R)

  • Only works on weakspot kills against the marked targets.

  • Killing a marked target with a weakspot hit will yield a total of 3 stacks with this talent.
20. Current Meta

Here you can view the current meta as in Most Effective Tactic Available. It doesn't mean that you cannot be effective with other things, but simply means if you want to use the most performing weapons and talents, these are the ones that give you the greatest value with Auric Damnation in mind.

PATCH #18 META (tox patch)

Curios

Blessings
  • One +3 stamina
  • Two Toughness or Two Health

Perks
  • Toughness Regeneration Speed
  • Sniper Resistance

The one stamina curio increases your mobility and survivability by a huge margin regardless if you are running Kinetic Deflection or not. Stacking more than one does not really give any huge benefits.

For perks, even though there is a lot of toughness regeneration available from the talents, the Toughness Regeneration Speed offers some constant regeneration and allows you to make mistakes in quicker succession without taking chip damage to your health bar as it also reduces the coherency toughness regeneration delay after taking damage. Sniper resistance allows you to survive at times hard to detect sniper shots, which is the only enemy that can one shot you without you realising it's going to happen.

Due to the increased AOE pressure, one could think Bomber & Flamer resistance could be of any worth. Unfortunately they apply to the melee attacks only and not the flames and fumes!!!

Melee Weapons
  • Catachan Mk VI Combat Blade (best mobility, self-defence)
  • Maccabian Mk IV Duelling Sword (mobile all-rounder)
  • Deimos Mk IV Blaze Force Sword (single target burst, defence)
  • Illisi Mk V Blaze Force Sword (horde clear, defence)

Due to the increased positional pressure from the tox effects as well as the tox bombers, the mobile melee weapons are highly recommended over the force swords at the highest difficulties.

All the weapons above are capable of dispatching Mutants with sufficient speed. Deimos is your best single target burst option with the ability to one shot Mutants with a regular H2 to the head. Illisi excels at horde clear due to the purely horizontal H1L2 combo and good cleave.

The Combat Blade is a high mobility option with decent single target DPS and also being able to two shot a Mutant. In case you find it hard to decide, the DS4 is your all-rounder option, bringing single target damage, horde clear and mobility to the table with a bit lesser of effect than the specialised weapons. However, DS4 is sufficiently good in all areas such that you will not feel penalised for going out with the all-rounder option.

Ranged Weapons
  • Equinox Mk IV Voidstrike Force Staff (anti everything)
  • Equinox Mk III Trauma Staff as "Fire Trauma" (very strong CC with sufficient DPS)
  • Nomanus Mk VI Surge Force Staff (ease of use, strong two target CC with sufficient DPS)
  • Zarona Mk IIa Quickdraw Stub Revolver (fastest elite & special killer)
  • Columnus Mk V Infantry Autogun (best burst DPS, best monstrosity DPS)

The void staff is the all-rounder of the staves. It is good at everything and only struggles against a big pack of crushers or bulwarks. Fire Trauma allows you to hold your ground while clearing all the trash at a larger range around you.

The Surge Force staff is the newest addition to the current meta, purely because how annoying the special spam has become in the game. The Surge staff excels at dealing with specials all day long that get too close, especially when paired with the Warp Siphon keystone. You can even zap a monstrosity and the secondary target function often interrupts a special that can even be clipping with the monstrosity.

The best overall gun and the current Monstrosity DPS king for Psykers is the Columnus Mk V Infantry Autogun, which is able to deliver 5k+ sustained DPS to monstrosities during Scrier's Gaze with +unyielding perk, taking around 11 seconds to kill a Plague Ogryn in an ideal scenario and around 25 seconds if you have to duel with it.

The Zarona revolver is the best tool against singular elites and specials that need to be removed and works from a very far range. With Surgical and Hand Cannon it can even be used to 3 tap Crushers that are far away. Don't be afraid to finish a Crusher that is nearby with it as well as the weapon swap speed is almost instant.

Very Strong Talents

These are talents that either have a huge impact at the moment, or provide a very large bonus considering how easily they can be accessed.

  • Soulstealer, very strong for staves and Assail
  • Perilous Combustion, the more difficult the mission the merrier it gets
  • Mettle + Perfect Timing, any crit build
  • Creeping Flames, extremely good horde damage
  • Kinetic Deflection, major block boost and safe revives
  • Warp Rider, global damage boost especially for staves
  • Puppet Master, scales well with in coherency things
  • True Aim, any gunker or void build

Very Weak Talents

These are the talents that you should avoid at all costs unless you have to go across them. Don't waste your talent points on these unless you absolutely need to.

  • Mind in Motion without Gaze, learn techs
  • Warp Rupture, inferior to Creeping Flames
  • Kinetic Flayer, internal cooldown is too long
  • Anticipation, bugged: no duration increase
  • Unlucky for Some, extremely weak effect
  • Purloin Providence, on average it's a 3% quell for killing a marked target
  • Perfectionism, hard to get to 15+ stacks due to how frequently they drop

Very Build Dependent Talents

  • Bio-Lodestone, should only pick if you plan to spam Smite on Horde*. Otherwise it's inferior to Overpowering Souls.
*Even then, picking the left side and going all in on the Soulblaze talents with Creeping Flames provides more horde damage and control while allowing you to freely use Smite outside of hordes for utility CC and interrupts. This is true even with the recent damage buff.


21. Curios

21.1 Curio Blessings

One +3 stamina, then either two health or two toughness.

Psykers should always use one +3 stamina curio. They have a very low base stamina value, but good stamina regeneration delay. A single stamina curio boosts mobility and survivability regardless if you run Kinetic Deflection or not but more than one is not really needed.

While levelling it is better to use health curios until you get that talent tree more filled up, in which case you should lean more towards toughness curios. If you are learning a new peril intensive build or are pushing for a higher difficulty, you can run one wound curio as well, but do not use more than that. Wound curios have diminishing returns the more you stack them and it's more beneficial to not get downed in the first place. When it comes to Auric Damnation, reviving is not always possible so the optimal strategy is to avoid getting downed at all costs.

The currently maximum blessings are +3 for stamina, +1 for wounds, +21% for health and +17% for toughness. Don't be shy to pick up a curio that is a bit off from the maximum value, it's better to miss a couple % from the blessing and have a good set of perks than have a perfect blessing with completely garbage perks.

21.2 Curio Perks

Tier list:
S
Toughness Regeneration Speed
A
Sniper Resistance (especially if no health),
Grim Resistance (only for running grims, no health),
Toughness,
HP
B
Gunner resistance
C
Stamina Regeneration,
Ordo dockets (for farming)
Garbage
Corruption Resistance, Mutant Resistance,
Hound Resistance, Experience,
Flamer Resistance, Bomber Resistance

Psykers are a glass cannon class and having that extra Toughness Regeneration Speed is extremely important as not only does it give you more toughness but it also shortens the delay it takes for your coherency regeneration to kick in after taking damage.

Sniper Resistance is helpful in avoiding getting one shot by at times hard to detect sniper shots. Grim Resistance is only usfeul if you are doing grim runs and do not bring any health curios with you and the flat toughness and HP boosts are always useful.

Stamina Regeneration is not that beneficial on Psykers as it does not affect the stamina regeneration delay, only the regeneration speed. Extra ordo dockets can be handy when you are kitting out your fresh Psyker or farming dockets for rolling new gear.

Corruption Resistance is not really useful as it is generated by things which you should learn to avoid in the first place. Same goes for Mutant and Hound resistance. Flamer and Bomber resistance only affect the melee attacks and not the damage done by the fumes nor the flames. There is also no use for experience after you have levelled up to 30, which comes rather fast without the small experience bonus from curios.

Clarifications on Gunner resistance and claims against the above tier list
There has been some discussion that I am trolling with the curio perks here, and people claim Gunner resistance is really needed, so let me clarify a few things to provide some reasonings. These tier lists are made in the mind set of an experienced player at Auric Damnation. If you find yourself troubling to deal with something, there is nothing wrong in changing your build to help you out even if it is "against" the above tier list.

These tier lists exist so that you are aware there is a window of learning here. Once you get good enough in the game, you can swap those resistances for something else to gain more value out of your resources.

Gunner resistance (curio perk) only affects the following enemies:
  • Scab Gunner
  • Dreg Gunner
  • Reaper

If it affected shotgunners and regular ranged units as well, I would agree for it to be S tier. But the reality is that it doesn't and these three guys above do not really pose a threat to a Psyker, regardless of the build used.

Two Examples, simulated worst case and realistic in-game

In order to shed some light into this, I have recorded a video with a simulated scenario pulled a bit to the extreme using the void build here from my example builds and three curios with unimportant perks but having the 1 stamina 2 toughness blessings. There are 10 scab gunners, each focusing me, only me, and I allow them to catch me with my pants down with my good cover being extremely far away. The LMB in the beginning is to ensure that the AI is activated for all of them due to the supression making them aggro.

You can see how easily Psykers can traverse right from under their nose (without deflector!) back to good cover and start dealing with the gunners with dodge -> do something -> dodge combos. Yes, I could have used my shield here to make killing them a lot easier (and allow myself to regain more toughness) but as you can see, even without gunner resistance, I am only really taking around 15% toughness damage per peek which is still perfectly manageable. With triple gunner resitance, I would have taken 15% * 0.8*0.8*0.8 = 7.7% toughness damage per peek, but it would not have made any difference, especially should I have used the shield.

Yes, in real matches you have additional targets (= toughness packs) on the map as well but you also have allies to help you share the aggro and provide coherency bonuses. The point is, even when you get caught by a gunner pack, a good player can always recover without the need for gunner resist and it only very marginally helps you in fighting against them if you know what you are doing. In case you find yourself in such a deep pile of heretics that you cannot recover to safety, that's a positioning error and no amount of gunner resistance will be able to save you from that. At that point the only way is to learn from your mistakes.

https://youtu.be/A9xe_s2MUZg?si=TLLNZzpkL9HT2SV3

Then we have the realistic scenario recorded on Auric Damnation where I get surprised by a gunner pack and a flamer & trapper makes it risky to return to the team. There is not much to say about this one, learn to use sprint dodges and learn to use the environment and your current build to your advantage.

https://youtu.be/g9QXxkSajsQ

Summary
Even though we have a lot more ways of regaining toughness at the moment, the toughness regeneration speed, which also affects the coherency delay, offers the most out of the perks for a Psyker as the faster you top up to 100% the less chip damage you will take, and also the less corruption will bleed through from infested attacks. Sniper resistance is also very valuable due to preventing you from potentially getting downed in a blink and I highly recommend it especially if you don't bring health curios.
22. Catachan Combat Blade


Recommendations:
Variant
Mk VI
Blessings
Uncanny Strike + Flesh Tearer
Perks
Maniac, Unyielding, Carapace
Stats
1. Damage, Finesse
2. First Target, Penetration
3. Mobility

Blessing Tier list:
S
Uncanny Strike
A
Flesh Tearer, Riposte, Mercy Killer (with bleeds)
B
Executor
C
Lacerate, Ruthless Backstab, Precognition, Haymaker
Garbage
Smackdown

Combat Blades are extremely mobile melee weapons that have increased critical hit chance and are best used as a mobility stick with good single target damage and self-defence. The Mk VI is a direct upgrade over the Mk III for Psykers due to Psyker being able to spam the push attack freely and often. The stab attack on Mk VI is a lot easier to land consistently on the weak spots of larger opponents even from the side or from behind and the light and heavies have that much needed better cleave compared to the Mk III.

The best single target DPS, and multi target if the enemies are stacked, is push attack spam on both knives. The best multi-target DPS for Mk III when the enemies are spread wide is simply spamming the lights where as for the Mk VI the optimal string is H1H2 cancel but that is unsafe. For VI you can use L1H2 spam instead, it's only slightly behind of H1H2 cancel in terms of raw DPS but it is a lot safer combo to use if you are getting focused. Mix in some dodges here and there and you will do good enough against a horde.

The Combat Blade plays very differently with Psykers than for Veterans or Zealots as the very short stamina delay allows the user to spam the push attacks which deal the same amount of damage than the heavies but have twice the attack rate in addition to staggering all enemies in front of the user. Combined with Kinetic Deflection you will also be able to block as you need despite spamming the push attack. Note that you do not count as blocking when you perform the push attack but you do block during the push, so carefully time your attacks when fighting Crushers, Ragers and Maulers.

Executor is a decent choice for a blessing, however, the stacks are often dropped when fighting the horde or if the enemy moves a lot. Lacerate is not bringing any proper value on Psykers as we have nothing that scales with bleeds and the knife does a lot more damage on weak spot hits. Haymaker has too low of a proc chance to gain any edge in horde DPS while completely throwing single target DPS bonuses out the window against ogryn sized enemies and monstrosities. Precognition does not provide enough damage, however, this may change if DD becomes more reliable.

Psykers should not skate a lot behind the enemy lines so Ruthless Backstab does not get that much of use either, making Uncanny Strike the superior choice of rending. Flesh Tearer is able to hit the bleed cap on push attack spam, and thus is the best choice for the second blessing, providing you with similar single target DPS to Executor and better horde DPS than Haymaker.

The combat blade Mk VI has decent horde damage, safe and good single target DPS and decent monstrosity DPS. Pairing a bleed Blessing with Mercy Killer seems like a straightforward choice but Uncanny Strike actually provides better damage against monstrosities and especially against armoured targets as well as when rapidly killing multiple targets.
23. Regular Swords
23.1 Cadia Assault Chainsword


Recommendations:
Variant
Mk IV
Mk XIIIg
Blessings
Rev it up + Bloodletter
Perks
Unyielding, Flak
Unyielding, Carapace, Flak
Stats
1. Shredder, Damage
2. Finesse, Penetration
3. Mobility
1. Shredder, Damage
2. Finesse, Penetration
3. Mobility

Blessing Tier list:
A
Rev it Up, Bloodletter
B
Shred, Savage Sweep
C
Wrath, Rampage
Garbage
Devastating Strike, Bloodthirsty

The Cadia Assault Chainswords have decent horde damage while being able to deal heavy single target damage against soft targets and provides some mobility boosts. This is as close as you can get to an all-rounder mobility stick. The original Mk IV has better horde clear while the new Mk XIIIg gives up horde clearing power for even more powerful heavies and in return special heavies as well.

The special is a power up move which makes your next attack to stick on the enemy and saw for a while, with a bigger chunk of damage applied right at the end. You can end the attack early with a dodge for the cost of 3 stamina bars.

The special damage has trouble dealing with Crushers for the Mk IV, but the XIIIg is able to reach two shots with the +Carapace perk for special heavy attacks. Unfortunately, the crusher does not get staggered unless the special crits which makes it very unsafe. The special heavy can easily one shot Mutants even without the maniac perk for both and rip huge chunks of monstrosity health off with it as well but mind the animation lock. Since Bloodletter applies the bleed damage on the first damage tick, it is possible to apply bleeds on an enemy by using a special light into a dodge cancel immediately after the hit, although the majority of the special damage comes from the last tick.

For Mk IV use heavy attacks whenever you can and for XIIIg use push attack into lights for horde clear and heavy heavy cancels for single target damage when you cannot special up.

If you are going to pick a Chainsword as a Psyker, there is not really any other blessing combination that you should pick other than Rev It Up and Bloodletter, since you want to mainly pick it for the mobility. The B tier blessings are good to pair with Rev It Up if you feel you want some more horde damage from the sword, however, Psykers have better alternatives for melee weapons for dealing all-round horde damage such as Duelling Swords or the Illisi Force Sword.

23.2 Catachan "Devil's Claw" Sword

Recommendations:
Variant
Mk IV
Blessings
Savage Sweep + Shred
Perks
Critical chance, Maniac, Flak
Stats
1. Damage, Finesse
2. Cleave Damage, Cleave Targets
3. Mobility

Blessing Tier list:
S
Savage Sweep
A
Shred
B
Rampage
C
Skullcrusher, Wrath
Garbage
Trauma, Thunderstrike, Devastating Strike, Hammerblow, Vicious Slice

Devil's Claw family are horde clear weapons that excel against soft targets but has trouble dealing with Carapace armour.

The Mk IV is the best variant having the superior move set with safest horde clear and best single target DPS. Use L1H2 spam for horde clear and H1H2 strikes for single target DPS. The Mk I variant has purely horizontal heavies, however, they are too slow to be completely safe. After the targets in front of you die from a heavy swing, you need that quick light attack to stagger the new front and get yourself just enough time to safely do another heavy swing.

The strikedown heavy attack of Mk IV does good single target DPS against anything else than Carapace, although the monstrosity damage is a bit lacking. It is easily possible to two shot mutants to the head with the Mk IV, and with enough DD bonuses you can even one shot them to the head.

Shred increases the damage output tremendously and scales extremely well with the right side talents that benefit from critical hits while Savage Sweep increases your damage and control against the horde. The impact blessings are currently very underwhelming and not worth considering.

23.3 Maccabian Duelling Sword

Recommendations:
Variant
Mk IV
Blessings
Uncanny Strike + Shred
Perks
Maniac, Unyielding
Stats
1. Damage, Finesse
2. Penetration, Mobility
3. Cleave Damage (II, IV), Defences (V)

Blessing Tier list:
S
Uncanny Strike
A
Shred
B
Riposte, Rampage
C
Precognition

The Maccabian Duelling Swords excel at single target combat and are designed to find and greatly damage enemy weak points, providing also a good amount of mobility with excellent dodges.

Mk IV is strongly recommended as it has superior heavies compared to other variants, they are both stabs which are easy to land on a weak spot and deal a lot more damage than the heavies of the other variants.

The quick special stab deals low damage but has very high stagger, allowing you to interrupt a rager attack string if you cannot dodge out of the situation as well as allowing you to interrupt a Mutant mid charge with a head shot. It is also possible to weave specials between your heavy attacks for a minor DPS loss while stagger locking your opponent, as long as it's not a monstrosity or boss.

Unlike the combat blade, Duelling Swords have a good reach and can utilise that Riposte better, although if you interrupt an enemy instead of purely dodging it, Riposte will not trigger. Uncanny Strike and Shred are the best choices for the blessings due to how strong rendng currently is and you can keep Shred permanently up as long as you have enemies to hit. The monstrosity damage from DS4 is among one of the highest of Psyker's melee weapons and you can easily reach two shots with heavies against Crushers within realistic buffs.
24. Blaze Force Sword

Recommendations:
Variant
Deimos Mk IV
Illisi Mk V
Special Illisi Mk V
Flame Ilisi Mk V
Blessings
Uncanny Strike + Slaughterer

Uncanny Strike + Deflector
Uncanny Strike + Slaughterer

Deflector + Slaughterer
Slaughterer + Bloodthirsty
Shred + Blazing Spirit
Perks
Maniac, Unyielding, Specials*
Maniac, Flak, Infested
Maniac, Flak
Crit Chance, Maniac
Stats
1. Damage, Finesse
2. First Target
3. Mobility
4. Warp Resistance
1. Damage, Finesse
2. First Target
3. Mobility
4. Warp Resistance
1. Damage, Warp Resistance
2. Finesse
3. Mobility, First Target
1. Damage, Finesse
2. First Target
3. Mobility
4. Warp Resistance

Blessing Tier list:
Variant
Deimos Mk IV
Illisi Mk V
Special Illisi Mk V
Flame Ilisi Mk V
S
Uncanny Strike, Slaughterer
-
-
-
A
Deflector,
Unstable Power
Uncanny Strike,
Deflector,
Slaughterer,
Unstable Power
Bloodthirsty,
Slaughterer
Blazing Spirit 4,
Shred
B
Shred,
Riposte
Bloodthirsty,
Shred,
Riposte,
Executor,
Exorcist
Shred,
Riposte,
Executor,
Exorcist
Blazing Spirit 3,
Bloodthirsty
C
Precognition,
Superiority
Precognition
Precognition
-
Garbage
Bloodthirsty,
Blazing Spirit,
Executor,
Exorcist
Blazing Spirit,
Superiority
Blazing Spirit,
Superiority
Everything else
*In case the 2nd heavy does not reach the Mutant one shot threshold with the +Maniac

The Force Swords are the most defensive weapons in the Psyker's melee kit, providing single target, horde or mixed damage models with a strong push stagger and a knock down push attack. They all have access to Deflector, which is a very handy tool especially for new Psykers who are learning their ropes to have some safety with a glass cannon class that requires active defence in order to survive. The special attack does more damage when activated with a heavy attack rather than a light attack for all swords.

Currently, Deimos Mk IV and Illisi Mk V are the most viable options. For Deimos, you should always use L1H2 spam whenever you can, regardless if it is against a single target or multiple opponents. The key is to try to funnel the enemies in to a line. If you are surrounded, you will have to revert to push L1L2 combo on a repeat which is slow but rather safe.

Deimos can reach Mutant one shot headshot kills with the 2nd heavy with the following values without any additional buffs. Notice that the inspect UI seems to round values with default rounding so if the table shows exactly this value it is not certain you can reach the one shot, you have to test it:
Perk Combo
T4 Maniac
T3 Maniac
-
1067
1112
T4 Specials
970
1011
T3 Specials
988
1029

Slaughterer is the recommended perk for Deimos, but in some builds you can still use Unstable Power instead, especially if you have another solid horde clear option. In general, do not use the special attack since L1H2 does better DPS and does not lock you into the animation, even though you can break the attack early using a dodge for 1.5 stamina bars. The special does have a use case, with Uncanny Strike and Unstable Power you can realistically eat around 20-25% off from the Scab Captain HP bar once the shield is down if you have your perks and buffs right. You can also quickly stack up Uncanny Strike with the special after you are done with Purgatus staff to increase the Soulblaze damage even further.

The Illisi Mk V is a very good anti-horde solution with decent single target damage, best paired with Uncanny Strike and Slaughterer for any regular use. The special on Illisi simply increases the damage and cleave of your next swing and it is possible to build around the special spam and make it semi-effective mixed horde solution as well.

Differently to Deimos and Obscurus, the special activation on Illisi is actually spammable. In case you have an illisi with a warp resistance roll of around 30% or less, you might want to consider Slaughterer + Unstable Power for creeping Flames. The actual threshold depends a bit from your talents but 32% is too much if you are running all three peril generation reduction nodes. With a correct roll, you can quickly pump yourself up to 6 stack blaze with only three special strokes in a row and then top yourself to full with a couple more during the Venting Shreik knockdown, allowing you to stack a lot of power for those soulblaze ticks.

If you want to go for a fire sword build, Shred + Blazing Spirit on an Illisi is your best option as you need to hit as many targets as you can and you need them to survive the critical hits in order to catch on fire. However, this style of play is being held back a lot by the Wildfire quirks as well as Blazing Spirit being unable to trigger on a killing blow. You are always better off by going into a more direct damage approach.

Obscurus Mk II is the worst one of the three as it has worse horde clear than the Illisi, worse single target damage than the Deimos and shares the animation lock special with Deimos. It is essentially a downgraded version of the two other swords. If you are looking for a melee weapon that sits between Illisi and Deimos, check out Duelling Swords and especially the DS4.
25. Axes
25.1 Combat Axe
Recommendations:
Variant
Rashad Mk II
Blessings
Brutal Momentum + Decimator
Perks
Maniac, Flak, Unyielding
Stats
1. Damage
2. Finesse
3. First Target
4. Penetration
5. Mobility

Blessing Tier list:
S
Brutal Momentum
A
Headtaker, Decimator
B
Shred, All or Nothing
C
Decapitator
Garbage
Limbsplitter, Thrust, Thunderous

Where Duelling Swords are the nimble all-rounders, the Combat Axes are the brute force all-rounders providing decent horde clear and single target DPS with strong staggers while being a bit slow on the mobility department. Their niche is the ability to deal damage while stagger locking a single enemy, making them very straight forward and easy to use.

In short, you should use heavy attacks only against Carapace and Unyielding targets. You can open on a Flak target first with a heavy and then continue with light attacks, but for anything else just use the light attacks. Rashad Mk II is the best one out of the three and Brutal Momentum with is a must as it greatly improves your horde clear while also boosting the single target damage. Remember to mix in a couple push attacks and you can pretty much hold your ground against a horde, unless you get completely overwhelmed by Ogryns.

Headtaker and Decimator are your best options for the second blessing for some increased damage and cleave. Shred also scales somewhat with Mettle but due to the lower attack speed compared to swords the effect is not that great. All or Nothing is somewhat usable if you like to spam a lot of push attacks but it is hard to gain any proper benefit out of it due to the short stamina regeneration delay Psykers have and because the push attacks do not do any real damage.

Decapitator is very weak in effect, Decimator does everything better while also increasing your damage against bigger targets. Limbsplitter and Thrust are garbage on Psykers because we have very little to boost our melee damage to stack with these. Thunderous gives very little benefit to the actual axe and takes up an important spot for boosting horde clear, which is a must on these axes.

Combat Axes greatly benefit from Warp Siphon with a Warp Battery due to how Brutal Momentum works, so if your build already has those talents you should definitely give Rashad a try.

25.2 Atrox Tactial Axe

Recommendations:
Variant
Mk II
Blessings
Decimator + Shred
Perks
Maniac, Flak
Stats
1. Damage
2. Penetration
3. Finesse
4. Crit Bonus
5. Mobility

Blessing Tier list:
S
Decimator
A
Shred, Headtaker
C
All or Nothing
Garbage
Limbsplitter, Brutal Momentum

The worst melee weapons you can pick for a Psyker at the moment, not because tacitcal axes are bad but because Duelling Swords are just the better tactical axes in every way. Compared to Combat Axes, Tactical Axes give away damage against hard targets and cleave in return for faster attack speed, better crit chance, faster and stronger special stagger and more mobility. Tactical axes can stagger any non-monstrosity enemy with their special attack on a headshot, including a charging mutant, but so can the Duelling Swords.

The Mk II Variant has the best move set and the special is purely vertical which is easy to land on a head. The heavies are for cleaving while light spam is your top DPS no matter the enemy you are fighting. Special light and special light light can be used to keep enemies permanently staggered, including a mutant at a major cost for your DPS output.

Blessings wise, Decimator is a must and you should pair it with Headtaker or Shred. Due to the attack speed, Shred is the recommended way as it scales better with Mettle, which you definitely should pick if you decide to go with a tactical axe. All or Nothing can be somewhat useful if you want to do the Combat Blade way and spam push attacks. Limbsplitter and Brutal Momentum are absolute jokes on Psyker for the tactical axes. Brutal Momentum works a lot better on Zealots and Veterans.

If you like Tactical Axes on other classes, you should check out Duelling Swords. You might find your true love from DS4 as it is basically a Tactical Axe on steroids.
26. Trauma and Void staves
26.1 Equinox Mk III Trauma Force Staff


Recommendations:
Fire Trauma
Flurry Trauma
Blessings
Blazing Spirit + Warp Nexus
Warp Flurry + Rending Schockwave
Perks
Crit Chance 4% or 5%, Flak
Flak, Maniac, Carapace
Stats
1. Blast Radius 78-80%, Charge Rate 78-80%
2. Quell Speed
3. Damage, Warp Resistance
1. Damage
2. Blast Radius, Charge Rate
3. Quell Speed, Warp Resistance

Blessing Tier list:
Fire Trauma
Flurry Trauma
S
Warp Nexus, Blazing Spirit
Warp Flurry
A
-
Rending Shockwave
B
-
Warp Nexus, Focused Channeling
Garbage
Everything else
Transfer Peril, Surge, Sustained Fire,
Terrifying Barrage, Run 'n' Gun, Blazing Spirit

The Trauma staff provides heavy area control with moderate damage, only lacking against Mutants and Monstrosities. However, that lack is easily fixed with the choice of a correct melee weapon. Trauma staff can be played both front and back line.

There are two ways to build a Trauma. The easier way is to build a Flurry Trauma, however, it does not quite compete the versatility and damage output of the Fire Trauma. Unfortunately, Fire Trauma requires a very specific roll in order to work properly, therefore, it is very hard to reach. In addition, playing with Fire Trauma effectively does require mastering the Quell Cancel tech.

Regardless of your Trauma build, it is of utmost importance that you do not place the epicentre at your Melee Ogryn or Zealot member's feet. They require to hit mobs in order to keep their toughness up and avoid chip damage. Traumatizing their feet results in toughness starvation for your melee members and YOU will be the reason why they go down.

The correct way to place your Trauma blast is either under your Veteran, in front or behind of your melee front line such that you throw enemies at them (preferably directly in front of them) or then far away such that you thin the incoming horde before it even can touch your melee line.

For these reasons, Fire Trauma provides superior damage as the critical hits set ablaze everything on the outer radius as well, allowing you to keep up decent DPS while performing crowd control especially when combined with the left side Soulblaze talents.

Be aware of poxburster sounds and switch to LMB spam if there is a risk that a pox burster you cannot see is nearby the team. Pox bursters take extra explosive damage, therefore, they easily explode when hit with Trauma RMB, where as LMB applies good stagger and doesn't kill them as easily, often resulting in pushing the pox burster on an accidential hit.

26.2 Equinox Mk IV Voidstrike Force Staff


Recommendations:
Blessings
Warp Nexus + Warp Flurry
Warp Nexus + Surge
Perks
Carapace, Maniac, Unyielding, Crit Chance, Flak
Stats
1. Damage
2. Charge Rate
3. Warp Resistance
4. Quell Speed
5. Blast Radius

Blessing Tier list:
S
Warp Nexus
A
Warp Flurry, Surge
B
Transfer Peril
C
Blazing Spirit (with Nexus), Focused Channeling
Garbage
Sustained Fire, Blazing Spirit, Run 'n' Gun, Terrifying Barrage

The Voidstrike staff is the only proper ranged weapon of the staves which deals focused damage on a line. It is currently the meta staff as it can stagger all enemies on weakspot hits except Mutants. It it is able to chain stagger Monstrosities and bosses as well on Surge procs that are fully charged and hit a weak spot.

The Voidstrike staff does not have infinite cleave. There are some notes that the cleave value is around 12, however, the cleave is very inconsistent from shot to shot even when only performing fully charged shots and hard to verify other than it's not infinite. Nevertheless, it is definitely sufficient.

Warp Nexus should always be used and you should always run the talents Mettle and Perfect Timing as this scales your damage extremely well while providing a lot of toughness regeneration. The second blessing is a choice between Warp Flurry for sustained damage or Surge for more RNG burst against bigger targets.

If you got with Warp Flurry, Battle Meditation is something to consider as it allows you to shoot the horde without quelling as long as there are enough things to kill. With True Aim it is possible to do back to back Surge casts as long as you are hitting enough heads during a horde but you have to be precise with your aim.

With Voidstrike staff, you need to position yourself in a corner of the room or on a big hallway to maximise the enemies that are in a straight line. Try to always have your back against a wall when playing with Void.
27. Surge and Purge staves
27.1 Nomanus Mk VI Surge Force Staff


Recommendations:
Blessings
Warp Flurry + Warp Nexus
Perks
Flak, Elites or Crit Chance
Stats
1. Damage
2. Warp Resistance
3. Charge Rate, Quell Speed
4. Critical Bonus*

Blessing Tier list:
A
Warp Flurry, Warp Nexus
B
Focused Channeling
Garbage
Run 'n' Gun, Terrifying Barrage
* See Section 4.1 for why Critical Damage is bad, the benefit is so much lower than you would think. Any decent total stat Surge staff will have high enough Critical Chance through Critical Bonus to keep Perfect Timing running and make use of Mettle.

Known potential bugs/quirks:
  • You can skip the RMB cast animation by switching to your Blitz skill which immediately delivers the full damage.


Contrary to many other weapons, Surge staff shines when it has almost flat stats. The damage roll is the only one that you really want to stand out from the rest. It is a single target frontline DPS and CC stick with increased critical hit chance that lacks a bit on the blessings department. Surge staff is capable of interrupting a Mutant charge on RMB critical hit but cannot stagger monstrosities. It is strongly recommended to invest all the way to the Warp Battery for the Warp Siphon keystone for the reduced peril costs, however, even with a full Battery and proper perks, you cannot guarantee a one shot on Dreg and Scab gunners, it will be off by just a little even with realistic buffs in case it doesn't crit.

Even though Surge cannot reliably hit good one shot thresholds without crits, it can reach guaranteed kills within two shots on fully charged shots on all human sized elites and specials when using +Flak and +Elite, fully stacked Warp Battery, a fully stacked Perfect Timing and using Warp Rider talent as well. Having a fully stacked Battery and Perfect Timing is completely realistic given the nature of the staff as well as the increased critical hit chance of it.

The two shot breakpoint is a bit dependant on the damage roll and can be assisted by picking either the Kinetic Presence aura or the 5% ranged damage node next to Gaze. Without a 5% boost, the two shot breakpoint is somewhere around mid peril levels (40-60) but with a single boost and a good damage roll you can reach the break point when starting to channel at zero peril. Notice that Surge damage does have a small random component into it so it is hard to determine the exact break points.

The RMB has a 24m range and strikes a secondary target as well but only for a small fraction of the proper damage. It is very quick to charge and generates a lot of peril while being a surprisingly fast tool at removing specials and weaker elites quickly from your surroundings without the need to be very precise with your aim.

The LMB on the surge staff is the strongest of all staves especially when quell cancelled due to the increased critical hit chance and the right side of the talent tree. However, the Surge staff is unfortunately lacking all the blessings that could benefit that sweet LMB spam. Currently, Surge staff is usable, but a bit behind of Trauma in terms of DPS and CC output.

27.2 Rifthaven Mk II Purgatus Force Staff


Recommendations:
Blessings
Warp Flurry + Warp Nexus
Perks
Crit Chance, Flak, Maniac
Stats
1. Burn at least 76%
2. Cloud Radius
3. Warp Resistance
4. Damage, Quell Speed

Blessing Tier list:
A
Warp Flurry, Warp Nexus
B
Focused Channeling
Garbage
Run 'n' Gun, Terrifying Barrage

The Purge staff is an anti-horde and anti-monstrosity frontline weapon, providing very good horde control with decent damage and allowing to relatively safely deal decent monstrosity DPS while clearing out the ads, which is very important.

Critical hits with the Purgatus staff apply two Soulblaze stacks, therefore, critical chance is a good way of quickly ramping up that Purgatus staff damage as Soulblaze has exponential scaling for the damage per stack at lower stacks. Above 76% Burn you cannot increase the amount of stacks you can keep up with the staff, therefore, anything above 76% Burn gives very marginal gains for your damage output.

The LMB on the Purgatus staff has a strong stagger while the RMB has weaker stagger but applies burn stacks rapidly and more effectively in terms of peril usage. Do not let the after cast visuals of LMB fool you, it will always travel instantly in a straight line upon casting.

Monstrosities and bosses may not always show the visual effect, however, they will get damaged by Soulblaze, even the shield on the Scab Captain will take damage from it. Be sure to use Creeping Flames after topping up your staff stacks to get 21 stacks on the Monstrosity and switch to melee or BB for the next 15 seconds or so or focus on other targets.

You should not put +Unyielding on your Purgatus staff since Soulblaze is buffed by your currently active weapon, instead, you should have the +Unyielding perk on your melee weapon if you wish to go that route. This is also beneficial in case the monstrosity turns on you as you can defend yourself with the melee weapon while weaving in some quick Purge LMBs to add some stacks to the monstrosity.

28. Shredder and Revolvers
28.1 Ius Mk III Shredder Autopistol


Recommendations:
Blessings
Inspiring Barrage + Blaze Away or Cavalcade
Perks
Flak, Maniac
Stats
1. Collateral
2. Damage, Stopping Power
3. Ammo, Mobility

Blessing Tier list:
S
Inspiring Barrage, Blaze Away, Cavalcade
A
Pinning Fire
B
Raking Fire, Powderburn
Garbage
Terrifying Barrage, Speedload, Sustained Fire

The Shredder is a very defensive short to mid range crowd control tool. It is able to quickly suppress and stagger enemies, however, do keep in mind most of the melee enemies are immune to suppression. In the current game state, the Shredder is best used as an on demand toughness regeneration tool and a "get away" tool and it can fit your build if you are lacking a lot of on demand toughness regeneration while needing a way to deal with Ragers or a horde swarm at your face.

Inspiring Barrage got buffed some patches ago and provides a lot of toughness regeneration after firing for a couple of seconds even if you fire on a wall. This combined with True Aim or Cavalcade (or both if you want to over do it) and the talents Mettle and Empathic Evasion makes you practically invincible as long as you can fire your weapon. Note that the 'continuous fire' is quite forgiving, you can tap fire your gun to keep up the buffs, but you should still just continuously fire to take advantage of the crit timing window for multiple critical hits.

If you are running True Aim, you should go with Inspiring Barrage & Blaze Away and without True Aim you should take Inspiring Barrage with Cavalcade. In any case, you should be running at least Mettle with this gun which is very easily accessed but preferably Empathic Evasion as well. Pinning Fire is a decent alternative to Blaze Away, but Blaze Away really helps to quickly remove a Rager off your face when you need to which is what you want from this gun.

Psykers should not be running behind enemy lines so Raking Fire does not see that much use. However, when you can use it, it does provide a considerable damage boost especially if you can find an angle for True Aim as well. Powderburn is also a decent option when diving packs of ranged units even though it is not the best of the bunch.

Shredder is built on bullet rain, so trying to use Sustained Fire effectively will gimp your DPS as well as interrupt your True Aim chain. Terrifying Barrage is redundant given how the gun naturally suppresses things and Speedload is hard to use effectively.

Currently, you should only build Shredder for defense. If you are looking for pure offensive power from this gun, it will be just a worse version of the Columnus Mk V Infantry Autogun.

28.2 Quickdraw Stub Revolver


Recommendations:
Version
Zarona Mk IIa
Blessings
Hand Cannnon + Surgical
Perks
Flak, Unarmoured or Maniac
Stats
1. Damage, Critical Bonus
2. Penetration, Reload Speed
3. Mobility

Blessing Tier list:
Version
Zarona Mk IIa
Agripinaa Mk XIV
S
Hand Cannon, Surgical
Hand Cannon
A
Crucian Roulette
Crucian Roulette, Gloryhunter, Sustained Fire
C
Trickshooter, Point Blank, Gloryhunter, Sustained Fire
Surgical, Speedload, Trickshooter
Garbage
Speedload, Terrifying Barrage, Run 'n' Gun
Terrifying Barrage, Run 'n' Gun


Since the removal of Assail Weave, there is no point in picking the Agripinaa revolver over the Zarona. If Agripinaa had more cleave it could be a potential option, but at the current state of the game it is just worse for Psykers in every way except for the reload time.

The Zarona is the non-force equivalent of the Voidstrike staff, providing damage in a line with no ramp up time. However, it lacks the strong staggers and sustained damage that Voidstrike delivers but gives a lot more burst damage with higher down time.

With +Unarmoured and +Flak, Zarona is able to reach one shot head shot on Dreg & Scab gunners, shotgunners and all the specialists except Mutants with a critical head hit. With some Warp Charges, you can also easily body shot many of the specials even at further ranges, so going in all the way to Warp Battery is highly recommended. In case you are picking the revolver only for killing specials, having the +Maniac perk will allow you to reach one shot thresholds against the flamers with fewer Warp Charges.

Surgical and Hand Cannon are S tier for Zarona as Hand Cannon simply increases your damage to everything that is not infested nor unarmoured and Surgical can be used to stack a guaranteed critical hit while you are taking some time to aim. You can even effectively kill Crushers from far away with guaranteed critical head shots. However, Surgical is quite pointless for Agripinaa revolver as you might as well use Zarone if you are taking your time to aim.

Crucian Roulette acts in a similar way to Surgical but only gets more effective the less bullets you have left in the magazine. Since the reload is quite lengthy for Zarona and you cannot afford to make it faster, you should aim to have your gun always loaded for when you need to take some shots, giving very little value out of this blessing.

True Aim grants you guaranteed revolver shots during and after your melee spree, being able to quickly pull out the revolver and hipfire an elite or special down. Psykers do not have enough ammo sustain for the Trickshooter and Speedload to be of proper use for both revolvers and Terrifying Barrage and Run 'n' Gun are too weak to be considered.

With an ammo vet in the team, you can use your Zarona against ranged targets as well, but in case there isn't one in the team, you should save up your ammunition for those specialists and elites that need to go down ASAP.
29. Heavy Laspistol


Recommendations:
Variant
Accatran MG Mk II
Kantrael Mk X
Blessings
Dumdum + Infernus
Dumdum + Between the Eyes
Perks
Unyielding
Unarmoured, Flak
Stats
1. Damage, Stability
2. Stopping Power
3. Ammo, Mobility
1. Damage, Stopping Power
2. Ammo
3. Stability
4. Mobility

Blessing Tier list:
Variant
Accatran MG Mk II
Kantrael Mk X
S
Dumdum, Infernus
Between the Eyes
A
Reassuringly Accurate
Dumdum, Reassuringly Accurate
B
Ghost, Between the Eyes
Ghost
C
Raking Fire
Raking Fire
Garbage
Speedload
Speedload, Infernus

The Laspistols are mobile single target short to medium range filler weapons with accurate hip fire, increased critical hit chance, and good single target DPS against soft targets. The special on them is able to stagger hounds and human sized enemies, however, there is a slight delay in the cast so be careful with the timing. Like the other las weapons, these should not be used against Crushers.

The original Mk II has better DPS at short to medium ranges with better ammo economy as well. The faster fire rate will make use of Infernus against beefier targets, providing additional ammo efficient damage. The Mk X has greater alpha damage that remains more effective further down the range and amazing staggers on the shots. The Mk X is for example able to stagger a trapper on a body shot preventing it from firing the net.

Due to the more damaging shots and slower fire rate, the Mk X cannot effectively use Infernus and tends to have some ammo issues if constantly spammed, therefore Between the Eyes is really good as you will have better chances at making those shots count. No mark is purely better than the other, both of them are side grades compared to the other and perfectly usable.

Ghost and Between the Eyes improve your anti-shooter role, however, Psykers have access to 'Ghost' through talents as well via Empathic Evasion. Reassuringly Accurate interacts nicely with the right side crit talents while Dumdum allows you to get a good damage boost up close. Raking Fire is not that beneficial as you shouldn't be running behind enemy lines and Speedload gives very little benefits as the reload is already fast enough.

Laspistols are currently in a very balanced state. They work well but don't clearly over perform or under deliver so don't expect many changes to them in the near future. The only thing they are really missing is Run 'N Gun which could actually be put to S tier for Mk X if it was available, the hip fire on that gun is that good.
30. Lasguns
30.1 Kantrael Infantry Lasgun

Recommendations:
Variant
MG Ia
Blessings
Between the Eyes, Opening Salvo or Infernus*
Perks
Flak, Maniac or Unyielding*
Stats
1. Damage, Stopping Power
2. Stability
3. Ammo
4. Mobility
*These two should only be taken together.

Blessing Tier list:
MG Ia
MG IV
MG XII
S
Between the Eyes
Between the Eyes
Between the Eyes
A
Headhunter,
Opening Salvo
Infernus,
Headhunter
Deadly Accurate,
Headhunter,
Opening Salvo
B
Deadly Accurate,
Infernus,
Ghost,
Efficiency,
No Respite
Deadly Accurate
Ghost,
No Respite
Ghost,
No Respite
C
Falter
-
Falter,
Infernus
Garbage
-
Falter,
Opening Salvo,
Efficiency
Efficiency

Infantry lasguns provide an inverted damage model where shots further away deal more damage. They have excellent ammo economy and a good sight picture, making them excellent as an anti-ranged solution. All the three variants have very good maniac damage, being able to dispatch mutants from far away, but they lack a bit of power against armoured opponents, relying on headshots against flak targets in order to keep up the damage. None of them is good against Carapace. These guns are best fitted as all-around ranged weapons with focus on dispatching regular ranged units.

All of the infantry lasguns are a bit weak without additional damage buffs. However, with Warp Siphon and Warp Battery, they start to bring some actual value to the table. The MG Ia variant is the best one out of the three since the MG XII cannot be made to reliably one shot Scab Gunners with the currently available buffs.

With some warp charge damage bonuses, The MG Ia can two shot Scab and Dreg Gunners & Shotgunners and if you have Warp Rider with some peril and Opening Salvo active you can one shot Flamers and Bombers. Snipers, Trappers and regular shooters are easily one shotted on head even without the Salvo active if you have a full battery. MG IV is a lot behind in DPS compared to the other two and MG XII shares very similar "hit to kill" values with MG Ia while having more recoil and slower fire rate than the MG Ia. You should only consider the MG XII if you are shooting so much that you have ammunition issues with your MG Ia.

Regardless of the build you are running, you should always go with Between the Eyes. Since the removal of Assail the most effective tactic on these guns is to make sure you can land your weak spot hits as often as possible. Getting suppressed completely messes up your aim but with this blessing you can shoot even at a nearby melee enemy to get rid of that suppression.

If you are running Opening Salvo, the best tactic is to not care about it as it takes some time to reset causing you to drop a lot of DPS if you stay and wait for it. If you miss your one shot, just start shooting, as most specials and ranged units will be dead after two shot anyways. Opening Salvo will activate naturally when you switch to a new target and try to line up that head for the initial hit.

Using the Infernus with the MG Ia you can rack up some decent Reaper and Monstrosity damage with the MG Ia, where as the MG XII has too low fire rate for the blessing to provide any real benefit and you are better off with picking Deadly Accurate for that. In any case, your monstrosity DPS is highly dependent on your capability of landing those weak spot hits.

30.2 Accatran Recon Lasgun

Recommendations:
Variant
VId or VIIa
Blessings
Infernus + Headhunter
Perks
Flak, Unyielding
Stats
1. Damage, Stability
2. Ammo
3. Collateral
4. Mobility

Blessing Tier list:
S
Infernus
A
Headhunter, Dumdum, Deathspitter
B
Hit & Run, Stripped Down
Garbage
Sustained Fire, Punishing Salvo, Speedload

Recon Lasguns were designed to be a anti-horde focused ranged option with high fire rate. Instead, what they have become is absolute monsters that simply delete all regular and most human sized elites and specials in a blink with the down side of being very ammo hungry. Recon Lasguns have an excellent hipfire accuracy while being capable of damaging targets further away when using ADS at the cost of some wasted ammunition due to the spread of the gun. Similar to the other las platforms, firing on a Crusher is not really beneficial.

All three variants are perfectly usable, however, the VId is the best DPS option while being the least ammo efficient and the VIIa is the most ammo efficient option while still being able to get the job done. The major thing holding Recon Lasguns back is their ammo usage.

Infernus is simply the best in slot blessing for any Recon Lasgun. Weak targes die in a blink without it and those that don't will get burned to conserve some ammo. While Recon Lasguns can basically proc True Aim back to back, having Headhunter extends your effective range and increases the ammo efficiency a bit on further range shots.

Dumdum and Deathspitter are also worthy options especially if you find yourself hipfiring most of the time as they boost your close range ammo efficiency. Due to the extreme fire rates, it's rather hard to reliably burst fire your lasgun giving very little benefit from Sustained Fire and Punishing Salvo.

Recon Lasguns deal moderate monstrosity damage, but you should not go all in for spray and pray unless you absolutely need to. Weaving between applying burning and doing melee attacks is the best way to approach unless you can finish it off quickly by dumping a mag.
31. Autoguns
31.1 Infantry Autoguns

Recommendations:
Variant
Agripinaa Mk I
Columnus Mk V
"Boss killer" Columnus
Blessings
Punishing Salvo + Sustained Fire
Dumdum + Fire Frenzy
Dumdum + Raking Fire
Perks
Maniac, Flak
Flak
Unyielding, Flak
Stats
1. Damage, Stability
2. Stopping Power
3. Ammo
4. Mobility
1. Damage, Stability
2. Stopping Power
3. Ammo
4. Mobility
1. Damage, Stopping Power
2. Stability
3. Ammo
4. Mobility

Blessing Tier list:
Agripinaa Mk I
Columnus Mk V
Graia Mk VIII
S
Punishing Salvo,
Sustained Fire
Dumdum, Fire Frenzy
Punishing Salvo,
Sustained Fire
A
Dumdum,
Deathspitter,
Hit & Run
Deathspitter,
Hit & Run
Dumdum,
Deathspitter,
Hit & Run
B
Raking Fire,
Fire Frenzy,
Stripped Down
Speedload,
Raking Fire,
Stripped Down
Speedload,
Raking Fire,
Fire Frenzy,
Stripped Down
Garbage
Terrifying Barrage,
Speedload
Terrifying Barrage,
Punishing Salvo,
Sustained Fire
Terrifying Barrage

Infantry Autoguns provide raw damage from short to mid ranges with their hipfire while still being able to provide effective DPS down range when aiming down sights, except for the Columnus Mk V which suffers from a more sever damage drop off. These guns have heavy recoil, making them harder to use than lasguns but they reward a skilled player with extremely fast time to kill for all except Maulers and Crushers. Even with True Aim, you should not empty your magazine into a Crusher head.

Infantry Autoguns serve a role between The Shredder and Headhunter Autoguns, with Coulmnus Mk V being the more close ranged option and Agripinaa Mk I being the longer range option. Graia Mk VII cannot currently effectively use the best damage boosting blessings available in the blessing pool, as it is far behind Columnus in the short range damage and has too fast fire rate to greatly benefit from the salvos on further ranges like the Agripinaa Mk I.

Punishing Salvo and Sustained Salvo have extremely short reset times on Autoguns, which makes it really easy to enjoy their benefits by firing 4 round bursts and then having only a brief pause before the next volley with Agripinaa Mk I. You should always fire it in controlled bursts and learn the reset time into your muscle memory for both maximal DPS and efficiency. However, is still perfectly usable and powerful at full auto should you panic at closer ranges even with the salvo blessings.

The autoguns have really good hipfire accuracy and damage, therefore close range boosts are of higher value as well. On further ranges you should crouch, ADS and fire in bursts to greatly increase your accuracy and dramatically reduce the recoil from your shots.

Raking Fire is rated a bit lower as Psykers should not be adventuring around the enemy backline. However, if you intend to blow up a Monstrosity, you can use it with Columnus and Scrier's Gaze. If you manage to get the angle it is possible to pull off 6+k DPS chewing Beast of Nurgles and Plague Ogryns apart within seconds. Terrifying Barrage is simply terrifying bad as you will tear everything apart close range anyways. The reload speed is not really a problem since you still want to be a bit conservative with your ammunition, only firing the guns when you really need to.

The Columnus Mk V is best used at burst close range damage when you get overwhelmed by elites, specials or horde up close, while the Agripinaa Mk I is best used as anti-elite, anti-special and anti-ranged option from medium range.

31.2 Headhunter Autoguns

Recommendations:
Variant
Vraks Mk III
Vraks Mk VII Crit
Blessings
Deadly Accurate + Between the Eyes
Deadly Accurate + Surgical
Perks
Carapace, Unyielding
Maniac
Stats
1. Damage, Stability
2. Stopping Power
3. Ammo
4. Mobility
1. Damage, Stopping Power
2. Stability
3. Ammo
4. Mobility

Blessing Tier list:
Vraks Mk III
Vraks Mk VII
Agripinaa Mk IX
S
Deadly Accurate,
Between the Eyes
Deadly Accurate,
Surgical
Deadly Accurate,
Between the Eyes
A
No Respite,
Ghost
Opening Salvo,
Between the Eyes,
No Respite,
Ghost,
Crucian Roulette
Deadly Accurate,
No Respite,
Ghost
B
Headhunter,
Crucian Roulette
Headhunter
Headhunter,
Crucian Roulette
Garbage
Flater,
Opening Salvo
Falter
Falter,
Opening Salvo

Headhunter Autoguns provide damage at medium to far ranges, rewarding players who are able to consistenly hit weak spots with exceptional damage while being rather punishing in the hands who only hit to body with them. Due to the sight picture they are a bit harder to use at short ranges and their bloom rapidly grows when hipfired. The Mk III variant excels at picking out beefier targets while the single fire VII variant excels at picking out enemy shooters and specials, as long as you can land those head shots. Infantry Autoguns tend to be more easy to use than these and provide better DPS. If you are taking more than 2-3 seconds to kill a target with these, you would be better off spamming Brain Ruptures instead and picking something else for your ranged slot.

The IX variant is pretty much a direct downgrade of the III and VII variants due to how True Aim scales with Vraks Mk III and the strong recoil on the IX. The recoil becomes unmanageable quite fast, where as Vraks Mk III can just easily be kept on the target and VII is more forgiving due to the fire rate.

The headhunter rifles have enough base critical weaskpot multiplier to make building for crits really rewarding. Therefore, Deadly Accurate is extremely good on these rifles. For the Mk III variant you wan to pick up True Aim, while for the VII crit build it is not necessary. Between the Eyes is extremely important for Mk III if you want to challenge those Gunners and Reapers that are firing at you.

For the single fire Mk VII variant you should always invest in Warp Siphon keystone and get at least the Empyrean Empowerment modifier increasing your damage per Warp Charge. This is needed to achieve one shots on Flamers and in case you want it to be more of an anti-ranged gun, you can one shot body shot regular ranged units if you have Opening Salvo with +unarmoured and +flak on it assuming you have Warp Rider and some peril. However, VII can always one shot regular ranged units with head shots, therefore, the crit spec brings more value due to the one shots it provides against some elites and specials.

The burst rifles do not benefit as much from Headhunter due to how often they proc True Aim, but it can be swapped with Between the Eyes if you wish. Falter is not worth it as it can make landing follow up head shots rather difficult. Opening salvo only boosts the first shot of the burst, therefore, it's only good on the single fire variant, for which it resets extremely fast, allowing you to enjoy the benefits on pretty much every shot you make.
32. Example Builds - Part 1
These are some exmaple builds that do not exploit any current bugs. This is such that if you learn and like a build here, it will hopefully have a longer life time than a single patch and I don't like to encourage bug exploiting.

There is no right or wrong way to build out your Psyker. It all comes down to personal preference and what your team needs. Here you can find an example build for each very different Psyker "styles": Surge, Purge, Void, Trauma, Gunker and Psylot, with talents and loadouts that are capable of dealing with whatever enemy you will be fighting against, making them a good fit for Quick Play matches when you don't know what you are going to get paired with. I regularly run these at Auric Damnation Quick Plays and even most of the time when playing with a pre-made team.

32.1 Surge - Soul Smite
This build revolves around using the Surge staff to gather Warp Siphon stacks and using your Smite with Creeping Flames combo to deal with hordes. It can be used with any melee weapon, but I would recommend to use something with good mobility. This build is excellent if you have trouble aiming or want to kick back and relax with a controller, as no aiming is required!

Do not be afraid to charge up your RMB smite and then hit enemies only briefly to stagger and knock down lesser foes, creating an opening to Surge the specials and elites within them and causing area damage with Perilous Combustion to the ones that got knocked down. Just make sure you have enough peril to do the combo as the Surge staff will enter POW if you cast it at 100% peril.

The horde combo is to get to 85 or more peril (default UI) to get a full Creeping Flames off. After that, simply Smite the enemies, and if all, goes well, you can get the Smite going on for a long time due to Becalming Eruption, Battle Meditation and Inner Tranquility. The choice between Psychic Vampire and In Fire Reborn is personal. In Fire Reborn is better if you team is allowing you to solo the horde on one side as you can get some initial stacks back extremely fast while Becalming Eruption is still active. That being said, always pair In Fire Reborn with Wildfire. Psychic Vampire provides a more constant experience and can be played without Wildfire, saving you a talent point to put somewhere else if you wish. Only consider Perfect Timing if you have the two shot human elite staff.

Weapons:
  • Surge staff

Mandatory talents:
  • Perilous Combustion or Perfect Timing
  • Battle Meditation
  • Smite
  • Wildfire (if using In Fire Reborn)
  • Venting Shriek with Becalming Eruption and Creeping Flames
  • Warp Rider
  • Warp Siphon with Inner Tranquility and Warp Battery

Full example talent tree:


32.2 Purge - BR Flame Pump
This build revolves around using Purgatus staff for control and damage up close while using Brain Ruptures to deal with far away enemies. Creeping Flames can be used for quicker Soulblaze ramp up or to beef up your already existing blaze, allowing you to make fighting Monstrosities and bosses safer while also dealing damage to them at the same time. This build can control all enemies except Mutants, Crushers and Monstrosities.

This is a very versatile build that is easy to begin with but has a high skill floor as you can greatly improve the performance by learning the proper movement and quell cancel techs. The most important thing to remember is that if there are enemies in your Purgatus range, your priority should be to control them and then damage then, do not be afraid to spam (quell cancelled) LMBs on any elite packs that are close to you! You should use your BR only if you cannot hit anything meaningful with your Purgatus staff and don't be afraid of using that ultimate even at lower perils just for CC, you will get it back in no time.

The core of the build is using the Creeping Flames in many ways. If there are only elite gunners or shotgunners far away, you can ult at low peril and start casting those faster Brain Ruptures to deal with the Elite Gunners. In case there are regular gunners as well, you should do 2-3 regular Brain Ruptures before activating your ult, as the 6 stack Soulblaze will take care of the regular shooters while you are dealing with elites or specials with Brain Ruptures. Perilous Combustion and Wildfire will generate some AOE damage while you are Brain Rupturing targets.

The horde combo is to quell cancel LMBs to get your peril up and then use your ultimate for a 6 stack blaze in one direction while applying your RMB Purgatus staff to the other, allowing you to pressure two sides with your blaze. After that, you can keep alternating the direction you use your staff to utilize that 4 stack base provided by Wildfire. In case you get your ultimate back, repeat the process. In case the enemies come only from one direction, do not be afraid to ult to boost your staff flames, especially on top of elites.

The Monstrosity combo is to RMB with your purgatus staff on the Monstrosity at least 2 times to guarantee full staff stacks, then get to 85+ peril (default ui) to apply 6 more stacks of soulblaze with your ult. If it is safe to melee, you should do so, however, it is also completely fine to use Brain Ruptures on the Monstrosity at this point in case you feel unsafe or cannot reach the Monstrosity with your melee.

Mobility and Uncanny Strike are extremely important aspects for your melee weapon, as it allows you to both get in Purgatus range and boost your Soulblaze damage on Crushers after you have dealt with everything around them. I strongly recommend using the Combat Blade, but a Duelling Sword 4 or a Deimos Force Sword will do fine as well.

Weapons:
  • Combat Blade 6 (recommended), DS4 or Deimos
  • Purge staff

Mandatory talents:
  • Mettle
  • Perfect Timing
  • Perilous Combustion
  • Brain Rupture with Kinetic Resonance
  • Creeping Flames
  • Warp Rider
  • Warp Siphon with In Fire Reborn

Full example talent tree:


32.3 Void - One Staff to rule them all
The Void staff is very strong as it can deal with any target. It has the power to stagger lock Monstrosities and Bosses on Surge blessing procs against weakspots. Only Mutants are not staggered but they are often killed in a couple of hits.

This build is an example that uses the dome shield and then DD for some extra damage bonus for the voidstrike staff and your melee weapon. This build works with both Warp Nexus + Warp Flurry and Warp Nexus + Surge, but I recommend the variant with the Flurry just because it has a more constant experience.

Do not forget that you also have a Smite available to you. It can be handy if the horde is spread very wide and you cannot funnel them in for your void or your team is getting overwhelmed by a six pack of Crushers or Bulwarks. It is also an excellent tool in pushing away bursters without accidentially exploding them at your team mates who are going for the push, and it can be used to secure the area around the Scab Captain when the shield is still intact as well as to build up peril for nuking it when the shield goes down.

The dome provides a really good cover that allows the team to better deal with dangerous ranged enemies as well as to block special unit projectiles. I usually like the stun shield more, but since this build can already control any type of enemy especially when picking the Deimos for Mutant one shots, the Dome provides more value.

Weapons:
  • Void staff

Mandatory talents:
  • Perfect Timing
  • Warp Rider
  • True Aim

Full example talent tree:
33. Example Builds - Part 2
33.1 Fire Trauma - BR Stun Shield EP
This build revolves around creating a safe space for your team while dealing reasonable DPS at the same time. A regular Trauma is very flexible and can be used in many builds, even with the other talent trees presented here, therefore, I give the meta build here as an example even though it requires a rare roll. If you want a fully offensive Flame Trauma build, you can use the example build I provide for Purgatus as is, just swap the staff and you are good to go.

The build will use Trauma staff for horde clear and for controlling elites and specials. You have the Brain Rupture for dealing with targets far away that are too hard to reliably hit with Quell Cancelled Trauma LMBs and finally you have a melee weapon for Monstrosity and Boss damage as well as dealing fast with Mutants which the Trauma cannot control. You also have the option to stun Mutants, Hounds and block Flamers and Bombers with the Stun Shield, giving an amazing control over the battlefield.

Use fully charged Trauma shots to fish for Blazing Spirit procs, use mid-charged Quell Cancelled Trauma shots at your feet if your team gets pressured. When done right and combined with a dodge here and there, you should never have the need to switch to melee and block even if you were standing right in the middle of a horde. The key is to keep your nerves calm and tune your ears to the warning sound of a mob hitting you while staring at the floor. During down time, spam some LMB to stack up that Perfect Timing.

When your team hunkers down, be on a lookout for Bombers and Flamers and tune in your ears for Mutant and Hound sound effects. Use those Stun Shields to prevent them for over pressuring your team's location. Do not be afraid to use that first charge pre-emptively. You have two charges so always use the first pre-emptively if you think it might be needed and save that second when it is really needed. The Stun Shields combined with your Trauma spam makes it impossible for anything else than a Monstrosity or Boss to reach your team.

During the moments of intense ambush by Gunners, always first prioritise making sure your team is in a safe position and only then start to work on those gunners using EP Brain Ruptures. Even though it is enough to have 1 point in EP to get the chain going, having the multiple charges allows you to effectively deal with some far away specialists or down a couple Crushers from extremely far ranges.

Weapons:
  • Deimos, DS4 or Combat Blade 6
  • Fire Trauma

Mandatory talents:
  • Perilous Combustion
  • Brain Rupture with Kinetic Resonance
  • Wildfire
  • Telekine Shield with Enervating Threshold and Bolstered Shield
  • Solidity
  • Empowered Psionics
  • Overpowering Souls

Full example talent tree:


33.2 Gunker - Battery Gunner
This is a very straight forward back build that focuses on that anti-gunner role, providing a bit more veteran like gameplay with a Psyker flavour. During horde fights you should be constantly on the lookout for important targets that you can kill, such as bombers, netters, flamers, hounds, elite ranged units and regular ranged units.

Use your Bubble when you need it and the charges will come back in no time. That is, you get surprised by ranged units from multiple sides or a team member goes down and needs the bubble for the revive under ranged fire, snipers have a srong angle on you and so on.

During hordes, use your smite to build up the peril for increased damage. Do not hold onto the smite forever, instead, smite only for the couple seconds and let go of it for the knock back effect. This will knock back all human sized enemies so you can pull out your gun to kill a couple important elites or specials and repeat, keeping your damage up and granting you guaranteed toughness regeneration through warp charges. You should only hold onto your smite when dealing with Crushers and Bulwarks and you have a team mate to deal damage to them.

Outside of hordes, use your smite LMB for quickly interrupting important targets followed by gunning them down and pew pew your way to victory. If you do not have an ammo vet in the team, you should try to melee a bit more outside of horde fights and only really use your ammunition against specialists, elites and ranged units. With an ammo vet in the team you should be able to pew pew all day long without really picking up any ammunition, especially with an MG XII.

Weapons:
  • DS4 (recommended), Combat Blade 6, Rashad Combat Axe
  • MG Ia Lasgun (recommended), MG XII Lasgun, Agripinaa Mk I Infantry Autogun

Mandatory talents:
  • Perilous Combustion
  • Smite
  • Telekine Shield with Telekine Dome
  • Warp Rider
  • Warp Siphon, right side all the way to Battery

Full example talent tree:
34. Example Builds - Part 3
34.1 Psylot - Psycho Killer
Notice: This is a high skill floor build. Your effectiveness and survivability requires fast reaction times and mastering the movement and melee combat in the game.

This build revolves around using the high mobility offered by the Combat Blade and talents as well as the synergies for dealing increased damage with Assail after non-force weapon kills. It offers the best mobility out of all the Psyker builds and high burst damage up close, making it play a lot more like a Zealot, while still having enough Toughness regeneration to allow for the aggressive play.

The peril build up combo is to use 2-3 LMB Assails followed by an RMB assail. If you have time, you should kill a couple enemies with Columnus or knife at this point but if you are in a hurry, repeat and be ready to burst.

The burst combo is to ult at 85 or more (default ui) peril with Creeping Flames, then switch to your Columnus and gun down enemies that you need. Alternatively, if you are not safe, you should throw a couple Assails more during the knock back of the ult and switch to the combat blade and be ready to escape or defend yourself. Any regular mob will die to the 6 stack ult flames as long as your peril stays above 50% or you have some Malefic Momentum going on, so you should focus on other targets if you can. Only fight the flaming trash enemies for self-defence if you must.

While you are waiting for the Creeping Flames to refresh, alternate between your gun and Assails, throwing a couple shards here and there in order to keep your peril up and to utilise that Malefic Momentum.

When you see elites or specials, whatever you do, throw a couple Assail LMB shards to stagger them before you either shoot them with your gun or dive in with your knife. The safest way to deal with ragers is to block until they start attacking, then dodge back, throw a couple Assails and come in with push attacks or your Columnus. Repeat if necessary.

Utilise the sprint efficiency of the Combat Blade and the speed boosts of the heavies to dart around the map while stacking up Perfect Timing for your Assail. If you are waiting in an elevator just act like a maniac and keep swinging those light attacks on the Combat Blade to have a fully stacked Perfect Timing when the doors open.

Do not be too distracted by the Disrupt Destiny highlights and do not sweat for the stacks. Disrupt Destiny is only used for the movement speed, toughness bonus and increased awareness. If the environment is safe, you can RMB cast an Assail or two on the highlighted target, which usually gets the job done but this is not a priority!

If you need to regenerate toughness, your best option is to switch to Assail, start dodging and throw your shards at the ranged units that are firing at your or some trash mobs if you are not pressured.

Weapons:
  • Combat Blade 6
  • Columnus IAG (Dumdum, Fire Frenzy & +flak)

Mandatory talents:
  • Soulstealer
  • Mettle
  • Perfect Timing
  • Assail with Ethereal Shards and Quick Shards
  • Malefic Momentum
  • Empathic Evasion
  • True Aim

Full example talent tree:


34.2 Gunker - Sail Gaze EP
This build revolves around using high finesse weapons, popping that gaze often to either boost your melee, Assail or gun damage as needed. There is no need to try to stress over the Gaze stacks for this build, it's more important to use it often mainly for the crit chance. That finesse boost will quickly stack up by itself when you have some enemies to kill and it's completely fine to let it go into cooldown when that boost is not needed anymore. After all, the finesse and damage bonuses will still linger for 10 seconds.

The gameplay on this build is very straight forward but you have to be careful as the build is rather fragile. Swapping Warp Speed into One with the Warp can help with improving the survivability if you need that. You should alternate between your gun and Assails or melee and Assails and when you find the need, pop Scrier's Gaze. The reasons to pop the Gaze are:
  • Additional horde clear for melee
  • Dealing with a pack of elites with Assail spam
  • Bursting a Monstrosity with your ranged weapon

Don't be afraid to pop Gaze even at 40% ish peril for Assail spam, the beginning will have so mild peril generation that you can quell in between more than what you generate peril. However, towards the end of the Gaze you should give up completely on using Assails outside of EP stacks and move to your melee or ranged weapon instead. That being said, you should always make sure your gun is loaded before you enter Gaze.

Weapons:
  • Combat Blade 6 or DS4
  • Agripinaa or Columnus IAG, Heavy Laspistol

Mandatory talents:
  • Mettle
  • Perfect Timing
  • Assail with Ethereal Shards and Quick Shards
  • Malefic Momentum
  • Scrier's Gaze with Precognition
  • True Aim
  • Empowered Psionics with Overpowering Souls and Charged Up

35. Example Builds - Part 4
35.1 Revolver Gunker - Chandelier

This is a very straight forward do it all build. Abuse your Revolver and Brain Ruptures to get your Creeping Flames back faster and abuse your Illisi Special to quickly let out a 6 stack Creeping Flames, repeat. All you need is correct rolls for the weapons and you will be good to go:
  • Crusher, Bulwark or far away Elite or Specialist? Brain Rupture.
  • Lined up Elites? Revolver.
  • Elite or Specialist hiding within a horde? Revolver.
  • Ranged units? Creeping Flames.
  • Horde? Creeping Flames and melee.
  • Mixed Horde? Creeping Flames and Brain Ruptures.
  • Monstrosity (with horde)? Creeping Flames and Brain Ruptures.

It is even better if you have a Purgatus staff user in your team, as you can boost the flames already applied by the staff user since all the blaze applied by this build obeys only the global cap of 31 stacks.

The key is to get an Illisi Force Sword with around 30% or less warp resistance so that you can simply press the special button on it three times in a row to get a guaranteed 6 stack Creeping Flames going on. I have not yet found a sword at the exact limit so if you have near 30% warp resist roll, test if you can get to the 6 stack threshold with three strokes. In addition to that, you should really have Unstable Power and Slaughterer on it to maximize the damage output of your flames. Even that 4 stack Wildfire will do some decent damage when you have a fully stacked Slaughterer and you keep your peril high up by throwing in a Special or using the Push Attack every now and then.

For the revolver, the choice between Surgical and Crucian Roulette comes down to your personal playstyle. If you use hip fire more than ADS pick Crucian Roulette. If you ADS more than hip fire, pick Surgical. Remember to reload your revolver whenever you have the time for it.

If you are fighting a mixed horde, forget about boosting the flames with the Illisi and instead focus on killing the Elites and Speicals using Brain Ruptures and your revolver to trigger Perilous Combustions and gain back those Warp Siphon charges. This will also trigger Toughness regeneration for you.

Mandatory Weapons:
  • Illisi Force Sword (Unstable Power + Slaughterer, 30% or less Warp Resistance roll)
  • Zarona revolver (Hand Cannon + Surgical or Crucian Roulette)

Mandatory talents:
  • All except Quietitude and Seer's Presence, you can swap them into Soulstealer and Kinetic Presence if you prefer.

Full example talent tree:


50 Comments
Pygex  [author] May 6 @ 10:44pm 
@confused
Yeah I should probably update it to use DD and full Bubble instead. You can go Creeping Flames if you want but DD + Void with the duration upgrade has enough offensive power so might as well take the bubble. It's a clutch when Beast of Nurgle has your team cornered as you can deny the vomits.
Confused May 6 @ 9:01pm 
Hello Pygex, you might want to add Disrupt Destiny + Creeping Flame Void Staff build to the example builds. I think after patch #18 the buffed Disrupt Destiny keystone combined with Void Staff is arguably one of, if not the single most powerful meta psyker build. At the 15 Precision stacks which could now be easily maintained with Lingering Influence, RMB critical headshots triggering surge are devastating to everything including mutants and crushers. LMB and melee attacks benefits from it tremendously as well, so that LMB headshots becomes much more effective at eliminating specialists, and the Mk.IV dueling sword heavy is guaranteed to always one-shot head-shot mutants. With a DD Void build I achieve highest damage on scoreboard in at least 9 out of 10 auric maelstrom solo-queue matches. The damage output is much higher than the warp siphon variation.
F4llc0n May 3 @ 9:44am 
@Zenophilious , open guide in browser.
Zenophilious Apr 19 @ 10:27pm 
Hey, sorry to bother, but Steam seems to have accidentally ate some of the build skill tree pics again. Would it be possible for you to re-add them?
❛❛Véntea❜❜ Apr 2 @ 8:19pm 
Surprised there isn't mention of Combat Ability Regen in the tier list for Curios.
Pygex  [author] Feb 22 @ 9:01am 
Please be patient, I will need to properly test things before any conclusions should be drawn.
Strange_Wize Feb 21 @ 7:53am 
Is Assail still good now that it doesn't benefit from weaving anymore?
MeowBeep Feb 20 @ 12:31pm 
For the 32.2 Purge build, a Deimos with 0-20 warp resistance makes a huge difference to the game play as each special charge gives you a ton of peril, making it far quicker to get to 85 peril for 6 stack shrieks when you need them and not several seconds later. With a 10 peril resist I can get from 0 to about 90 peril in 3 charges. It also opens up concentration stim by allowing you to get back to 85+ peril for each ult in very quick succession. It is the real cherry on the top for the build that really helps take it to the next level, and so I think it should be the recommended weapon for the build.
Pygex  [author] Feb 11 @ 11:29pm 
yes, everything you find here has been made from the perspective of Psyker skills and talents since the class choice dramatically changes how weapons and some blessings scale
F4llc0n Feb 11 @ 2:14am 
So even sugested blessings and perks not gona work with vet then.