HITMAN World of Assassination

HITMAN World of Assassination

128 voti
HITMAN: WoA Redacted Challenges Guide
Da Shameless
This guide features all redacted challenges throughout the entire World of Assassination trilogy. Use the list on your right to select a specific location and mission. Note, that some redacted challenges may spoil the main story or a way on how to approach your objectives.
3
6
   
Premio
Aggiungi ai preferiti
Preferito
Rimuovi dai preferiti
--- HITMAN 3 ---
Dubai, United Arab Emirates / On Top of the World
Flying Monkey Business
This is so far the only redacted challenge in Dubai. In order to complete it, you have to make one of your targets slip on a banana peel and fall from the skyscraper. Either bring a banana with you by selecting it in your loadout* or find it in the level**.

First, you need to acquire an emergency evacuation keycard. It's stored inside a safe in the Security Room on level 3. The code is 6927. There's also a banana, if you haven't picked up one already.


Second, go to the nearby helipad and quietly dispose of the helicopter pilot. Hide his body behind the crates or throw him outside.


Now, it's time for finishing touches. Go to the penthouse on the very top. Here, you have to trigger an evacuation. Locate the first evacuation keycard reader and use your Instict [CTRL by default] to find the other one. You have to activate both readers in quick succession. If you have done everything correctly, the targets will start to evacuate and since the pilot is nowhere to be found, the targets will initiate Plan B - jump from the skyscraper with parachutes.


The jump takes place in the mini-golf area next to the penthouse. Place the banana [CAPS LOCK by default], so the targets slip from the edge. Use the picture below as reference. I have to admit, the challenge is a bit finicky. Sometime, none of the targets slip. Other time, a target slips but doesn't fall off. If you have difficulties completing this challenge, try placing the banana elsewhere.


*You can unlock a banana by completing one of the two Elusive Target Arcade contracts - The Thespians or The Tregetours.

**A banana can be located immediately by starting in the Meeting Room disguised as Event Staff. Alternatively, you may also find it in security rooms on levels 2 and 3.
Dartmoor, England / Death in the Family
Another Death in the Family
This challenge spoils the murder mystery story mission!

If you have not completed the Means, Motive and Opportunity Story Mission, I highly recommend you to do so. By now, you should've uncovered that the real murderer of Zachary Carlisle is Emma Carlisle. However, she also plans on killing Alexa Carlisle, our primary target. Instead of disclosing our findings to Alexa as the Scotland Yard detective, we are going to help Emma get away with another murder.

In order for Emma to kill Alexa, two conditions must be met - a Carlisle family gathering must take place inside the mansion and the lab equipment in the greenhouse must be repaired. The family gathering automatically starts after the Carlisles take a family photo. Only the photographer is missing a fuse. Find a replacement in one of the other fuseboxes (you'll need a crowbar to open one).


While the Carlisles are having their family photo taken, head to greenhouse and use a wrench to fix the broken lab equipment. Now, nothing stands between Alexa and a poisoned glass of alcohol, courtesy of Emma Carlisle.

I Find This Amoosing
Eliminate Alexa Carlisle with the antler chandelier hanging in her office.

Dogs Secrets
Steal the bulldog cane from Emma and Gregory's Room and use it to unlock one of many Secret Rooms in the mansion. You can detect a Secret Room on the map by looking for the strangely empty grey spaces between rooms.


Poison Ivy
Make poison using the lab equipment in the greenhouse. Unfortunately, the equipment is broken. Pick up the wrench by the fountain and repair it. Then, pluck any poisonous flower in the greenhouse and use the equipment to extract its poison.

A Matter of Justice, A Matter of Guilt & A Matter of Loyalty
These challenges spoil the murder mystery story mission!

All three of these challenges represent all possible outcomes of Means, Motive and Opportunity Story Mission. If you have trouble searching for clues, make sure to turn on the Mission Story Guidance in the Options menu.

For A Matter of Justice, you have to gather enough evidence to prove Emma Carlisle killed Zachary. It's essential to fully interrogate Emma herself and Patrick Carlisle, find all four pieces of evidence in Emma and Gregory's Room, break into greenhouse and scan the lab equipment and poison dosage table with your camera. Talk to the butler and present your findings to Alexa.

For A Matter of Guilt, you have to convince Alexa that Zachary took his own life. Throughly investigate Zachary's Room, then break into Emma and Gregory's Room and find the bulldog cane. Use it to unlock a Secret Room above the Library on Level 1 (circled in red). There, look for Montgomery's long lost letter, a crucial piece of evidence for the completion of this challenge.


For A Matter of Loyalty, accuse Alexa's butler, Mr. Fernsby, of murdering Zachary. To do so, get inside Mr. Fernsby's office on Level 0 and grab Zachary's half-burnt diary from the fireplace and Mr. Fernsby's sleeping pills.

A Private Moment
Covertly infiltrate Zachary's Room by any means. About 7-8 minutes into the mission, Alexa will come by and sit beside the late Zachary. Take a photo of her and the challenge should pop up.
Dartmoor, England / Dartmoor Garden Show
No redacted challenges.
Berlin, Germany / Apex Predator
Concrete Ornithology
Photograph all graffiti of yellow birds. In total, there are seven of them. Attached is MrFreeze2244's video guide.


Trophy Au Naturel
Take a photo of the almost naked dancing man.


Coconut Ball Surprise


Pacify the Florida Man with a coconut. The Florida Man is a recurring character in the World of Assassination trilogy, first encountered during The Finish Line mission in Miami, USA. The Florida Man roams around the Dance Floor and the Basement Bar. In that same bar, you can also find a coconut in the back kitchen.

Coconut location:
Berlin, Germany / Berlin Egg Hunt
No redacted challenges.
Chongqing, China / End of an Era
Stick It to the Man
Eliminate Hush disguised as a homeless man. A relatively quick and easy homeless man disguise can be acquired right next to the main entrance of the The Block building.


Venting Some Stress
Eliminate Imogen Royce by poisoning the ventilation system. The crucial part is to get her to take a break in the Break Room. To do so, find a group of analysts working at computer terminals pictured below.


Use your camera to hack the terminals. On screen, a giant sign will display telling them to take a break immediately. Reluctantly, they will obey the order. Hack all terminals and wait until everyone arrives in the Break Room.


Imogen will not be happy when she realizes that no one is working during peak hours and goes to the Break Room. She yells at everyone and orders them back. However, she seizes the opportunity to have a quick break of her own and lies on the couch. Enter the server room next door and poison the ventilation system.


A Hair in my Soup
Poison Mr. Pritchard's soup. Pictured below, Angus Pritchard is a board member of ICA due for a tour of the underground data center to look for potential security weaknesses. You can locate him inside the restaurant, talking to his tour guide. Before the tour, he wants to have something to eat. Infiltrate the kitchen through the back, get a cook disguise, make his soup and add a final touch of emetic poison. Don't forget to ring the dinner bell.

Mendoza, Argentina / The Farewell
Scandal
Loot the safe in Don Yates' villa basement. The code is 2006, referring to the year Don Yates and his wife got married.


Closing Statement
This challenge spoils large parts of the story!

Closing Statement is the fourth bonus Mission Story available only after successfully completing The Tour Mission Story. So, let's start with that.

In the main guest area overlooking the huge steel wine containers, you may overhear a conversation between a guard and Corvo Black, Don Yates' personal gun for hire. The guard relays a message from Don Yates, asking him to keep a close eye on Diana Burnwood during the tour of Yates' vineyard facilities. Follow Corvo until he takes a phone call in a secluded area and knock him out. Steal his disguise and talk to reception.

Diana Burnwood and Tamara Vidal (your second target) are going to be waiting for you at the entrance to the vineyard. However, they are unable to start the tour because the chief winemaker is busy with the harvest. Find a winery worker disguise and go talk to the chief winemaker, Gabriel Vargas. He informs you that he won't start the tour unless he's certain the Malbec grapes are ripe for picking. Go to the grape shed, pick up a grape knife and find 3 ripe Malbec grapes (use the map in the shed for referrence).


Bring them to Vargas, quickly change back to Corvo Attano Black and finally begin the tour. Throughout the tour, you will have many opportunities to set up accidental kills for Tamara Vidal. It's up to you, whether you want to eliminate her now or later. At tour's end, Don Yates makes a grandiose entrance inviting Diana and Tamara to a secret meeting. You need to get there, however, your current disguise won't do. You may notice Don Yates asking a guard to fetch a 1945 Grand Paladin, a very exclusive and expensive wine. It's locked behind a layer of bulletproof glass doors and alarm-triggering lasers. The easiest way to get inside, is to go to the room adjacent to the cask room and pick up tier 1 access dongle.


Drop down to the ventilation area and use your camera to open the vents leading to Grand Paladin's storage room. Inside, pay attention to the 2 sommeliers. They'll mention that the code to disable the lasers is 1945, the very same year Grand Paladin was made. Knock them both out, steal a sommelier outfit and pick up the Grand Paladin.

Speak with the guard by the hidden entrance Don Yates came from. Make sure to drop anything illegal you might be carrying, as you will be frisked! Upon entering the secret Providence meeting, present the wine and then wait. Don Yates is going to accuse Diana of plotting against Arthur Edwards, the new head of Providence and previous Constant. If you haven't killed Tamara by now, Don Yates will have her killed as she is the only one defending Diana.

When the meeting concludes, you have 10 minutes to reach Diana in Villa Bedroom before she is murdered. Avoid patrolling guards and infiltrate the villa by climbing the drain pipes. Knock out 3 guards imprisoning Diana (1 in bedroom, 2 on balconies). Diana then proposes a plan - hide their bodies, take a security guard outfit and wait for the right moment to strike. Pick up a silenced weapon if you haven't already. Wait for Don Yates and 2 bodyguards to arrive. When Diana stabs Yates, quickly kill the bodyguards, then deal with Yates personally. For the challenge to unlock, make sure to take 47's signature suit hanging at the coat rack.
Carpathian Mountains, Romania / Untouchable
A New Father
This challenge spoils the ending of HITMAN 3!

After reaching Arthur Edwards, he gives you a choice - either kill him now or take the serum and embrace who you were always meant to be. Pick up the serum and wait exactly 47 seconds. Edwards will then ask you if you are having second thoughts, after which a new choice will present itself to you to take the serum. Inject yourself and watch the cutscene.

This challenge also unlocks the Count Down From 47 achievement.
--- Freelancer ---
I'll Be Back
Fail a Freelancer Contract by getting wounded.

NOTE: This challenge unlocks The Gauze Suit.

Ave Maria
While it technically isn't a redacted challenge, I decided to include it in the guide, as the description of it doesn't specifically state the required criteria to accomplish it.

After you have reached a sufficient level in Freelancer and unlocked the Outside of your Safehouse, go towards the dock and head right. Along the lake shore, you will find a spot where you can meditate. Do so until the iconic Ave Maria song starts playing. After several minutes, the challenge pops.


Sometimes Maybe Good, Sometimes Maybe ♥♥♥♥
Fail a Freelancer Showdown 10 times.
--- The Seven Deadly Sins Collection ---
ACT 1: GREED
No redacted challenges.

ACT 2: PRIDE
Hubris, Humility & Ambivalence

Each level of this escalation offers you a choice between an easy contract or a hard contract. Depending on which weapon you pick up from The Peacock determines the difficulty of your assignment.

For Hubris, you have to choose and successfully complete all hard contracts on every level. This means you should pick up the following weapons:
  • LEVEL 1 - Tanto Sword
  • LEVEL 2 - Antique Syringes
  • LEVEL 3 - Classic Fibre Wire

For Humility, you have to choose and successfully complete all easy contracts on every level. This means you should pick up the following weapons:
  • LEVEL 1 - C4 Explosive
  • LEVEL 2 - The Majestic (sniper rifle)
  • LEVEL 3 - The Proud Swashbuckler (sword)

For Ambivalence, you have to choose and successfully complete a combination of easy and hard contracts. E. g., 2 easy contracts and 1 hard contract. Following the example, you should pick up these weapons:
  • LEVEL 1 - Tanto Sword
  • LEVEL 2 - The Majestic (sniper rifle)
  • LEVEL 3 - The Proud Swashbuckler (sword)

LEVEL 1: Tanto Sword (hard) & C4 Explosive (easy)


LEVEL 2: Antique Syringes (hard) & The Majestic (sniper rifle) (easy)


LEVEL 3: Classic Fibre Wire (hard) & The Proud Swashbuckler (sword) (easy)


ACT 3: SLOTH
No redacted challenges.

ACT 4: LUST
No redacted challenges.

ACT 5: GLUTTONY
Wafer-Thin Muffin

Feed The Pig a blueberry muffin. The only muffin in this level can be located in the vents by the Data Core.


Horsing Around

Feed The Pig a cowboy bust. The only cowboy bust in this level can be located on the staircase, one floor above the Arcade.


ACT 6: ENVY
No redacted challenges.

ACT 7: WRATH
No redacted challenges.
--- HITMAN 2 ---
Hawke's Bay, New Zealand / Nightcall
No redacted challenges.
Miami, United States of America / The Finish Line
Hot Shot
To complete this challenge, you need to make Sierra light herself on fire with Kronstadt Industries' Octane Booster. First, you need to find one. Try searching the back garage of the Kronstadt Expo Center or the Kowoon Paddock.

Octane Booster located inside the Kowoon Paddock


After that, disguise yourself as a waiter and poison the hot sauce in the VIP lounge with your Octane Booster. Then, disguise yourself as Moses Lee (Sierra's archnemesis) and go talk to Sierra (the race needs to be over). She will invite you to a Hot Sauce Challenge back in the VIP lounge.

When the challenge starts, be careful NOT to drink from the poisoned shot glass. Use Instinct to help you. When only one last shot glass remains, Sierra will catch on fire and the challenge is complete.

Explosive Liaisons
Infiltrate the event security building (on the right from main entrance) and enter the big room with security surveillance. On the table, you will find a safe combination. Pick it up and go to the interrogation room. Through the one way mirror, you will see 2 guards interrogating a race marshal about a failed plot to install a remote explosive onto Moses Lee’s car.


Next to the one way mirror is a safe. Use the aforementioned safe combination and steal the explosive. Disguise yourself as a Kronstadt mechanic and attach the explosive onto Sierra’s car during a pit stop.
After that, call Robert Knox from a phone booth (near food stands). Robert will want to meet you on the overpass. Go there, give him the detonator and watch him blow up his own daughter.

Shafted
Eliminate Robert Knox by dropping him in the maintenance shaft. Follow the exact same steps as in Explosive Liaisons challenge to the point where you give Robert the detonator. Knock Robert out and dispose of his bodyguard. Drag Robert’s body to the this shaft and dump him.


You Got A Fast Car
Enter the Kronstadt race car in Kronstadt Expo Center Showroom.


Tintamarresque
Blend in using the photo stand-in. Near Marina, you will find a bunch of food stands. Right in front of them is a photo stand-in where you can blend in. Do so and the challenge will pop up.


Mr. Tambourine Man
Blend in as Tambourine Man. Go to the underpass (left from the default starting location) with a man playing on tambourines. Kill him or knock him out, get his clothes and start playing on tambourines yourself.


Tanked
Go to the aquarium section of the Kronstadt Expo Center. There are 2 guards patrolling around. Eventually, they will stop by aquarium 11. Put a few bullets to the aquarium and the challenge is completed.

Narcissus
Acquire a flamingo disguise and pick up a photo of a flamingo in one of the photo stands right behind the main entrance.

Déjà Due
Start at the Marina and bring a silenced sniper rifle. Infiltrate this skybridge patrolled by 2 race marshals. Use your sniper rifle to shoot this pigeon, perched on the side of the Kronstadt Expo Center.


Sweet Victory
Sabotage Moses Lee's race car with a bag of sugar.

Infiltrate the kitchen in the VIP area and steal a bag of sugar.


Next, infiltrate the Kowoon team's garage and get yourself a Kowoon mechanic disguise. Initiate a pit stop by emptying a bag of sugar into the fuel supply.

Last Words
Enter the underground parking area beneath the Kronstadt Expo Center. After approaching the man in the flamingo costume, he will ask you to fetch his van keys.


Grab the keys from the other end of the hallway and give them back to the flamingo guy. Now, make your way to this alleyway on the other side of the map, near the medical center.


Use a lockpick or a crowbar to open the gate and hide in the open shaft by hanging from the ledge. A meeting between the flamingo guy and Sierra Knox will take place here after the race. The flamingo guy has incriminating evidence against Sierra and her father and wants to blackmail them. Needless to say, this doesn't go well for him.

After a while, Sierra asks her bodyguards to leave. She burns the evidence and threatens to kill the flamingo guy if he doesn't stay quiet. He refuses so she pushes him down the shaft you're hiding in. When Sierra notices you, let her stomp your fingers, making you fall to your death and earning you a completed challenge.
Miami, United States of America / A Silver Tongue
Atlantide Space Program
Launch a bottle of Atlantide to space. Reach the first vantage point (pictured below). It's the small platform with Robert Knox's satellite unit, overlooking the race track. Shoot the first hidden bottle of Atlantide.

First vantage point:


First hidden bottle of Atlantide:


Now, reach the second vantage point (also pictured below). It’s the bathroom next to Maxwell Rutter’s office. Shoot the remaining 2 bottles of Atlantide.

Second vantage point:


Second hidden bottle of Atlantide:


Third hidden bottle of Atlantide:


Afterwards, make your way to the Atlantide stand. A big red button will rise from the ground. Press it and watch the show.

Here's a full video guide from Hitman Series:


In Case Of Shortage...
Behind one of the Atlantide trucks is an empty Atlantide bottle and a faucet. Turn on the faucet and fill the Atlantide bottle with regular water.


Brokenhearted
Blow up Krish’s sports car. It's parked next to the trucks. Bring a remote explosive or shoot the tank.

Santa Fortuna, Colombia / Three-Headed Serpent
Secret Tunnel
Enter the secret tunnel disguised as shaman. This one is quite tricky. First, you need to knock out this shopkeeper (pictured below) and obtain his shop key. Using the key, enter his shop he just came out of and pick up the gold idol. Be aware that using lockpick, crowbar or anything else EXCEPT the shop key will not spawn the gold idol.


Secondly, you need shaman's outfit. Find him at the very edge of the map near 2 guards smoking by a small green truck.


Dressed as a shaman, make your way to this spot.


Put the gold idol on the pedestal and enter the secret tunnel. Make a save here. Afterwards, you will come across a set of pressure plates. Use the picture below to determine which ones are safe. At the end, pick up the sacrificial dagger.


This challenge also unlocks It Belongs in a Museum achievement.
Santa Fortuna, Colombia / Embrace of the Serpent
No redacted challenges.
Mumbai, India / Chasing a Ghost
No redacted challenges.
Mumbai, India / Illusions of Grandeur
No redacted challenges.
Whittleton Creek, United States of America / Another Life
No redacted challenges.
Whittleton Creek, United States of America / A Bitter Pill
No redacted challenges.
Ambrose Island, Andaman Sea / Shadows in the Water [PART 1]
Shadows in the Water has many redacted challenges which require long descriptions. For your convenience, the guide will be divided into two parts.

...I Thought About It
Arrange matters so that Noel Crest lights himself on fire. Find the "slapping tournament" area in front of Farah's Bar. Before you do anything else, puncture a nearby fuel barrel with a screwdriver.

A screwdriver can be located in the first floor projector room, overlooking the "slapping tournament" area.


Fuel Barrel


Participate in the "slapping tournament" and prepare for some button mashing. After you defeat all 4 of your opponents,* Noel Crest will be impressed and invite you to a private conversation. He will then inevitably light up a cigarette by the punctured fuel barrel.

*Winning the "slapping tournament" also unlocks the "Talk to the Hand" challenge.

A Kill to Treasure & Another For Good Measure
I decided to compile both of these challenges together, since "Another For Good Measure" follows up "A Kill to Treasure".

To complete these challenges, you must first complete Farah's questline. Approach Farah, the owner of Farah's Bar.


After a while, she will notice you and ask for a favor. Bring Farah a coconut.

Coconut location


Farah then asks you to retrieve a stolen cigar box. Head to a shack blasting disco music and emanating colorful lights. Climb through an open window of the shack opposite and pick up a shovel.


Using the shovel, dig up the cigar box at this exact spot. Note that the option to dig is only visible when holding the shovel.


Return the cigar box to Farah. Her final request is for you to find out, what happened to an associate of hers, Mr. Lance Hsu. He is being held prisoner at the colonial ruins. After you infiltrate his cell, you find him long dead. Take a photo of him and show it to Farah.


Farah shows the photo to Akka, one of your targets. Akka, enraged, proceeds to call Noel to meet her at the old tower ruin, next to Akka's compound. Use a wrench or shoot this gas canister once to start a gas leak.


After Akka throws Noel off the cliff, the "A Kill to Treasure" challenge is completed. When Akka lights up a cigarette by the sabotaged gas canister, the "Another For Good Measure" is completed as well.

Locksmith & Jumpstart
Both of these challenges are related to the same elimination method, so I decided to compile them together.

Infiltrate the Hostage Hut in Akka's compound. A familiar friend by the name of Carlton Smith is in need of your help, yet again. Free him from his cage by using a lockpick or a key in Akka's office. This unlocks the Locksmith challenge. He then suggests to use Akka's torture device, the car battery charger, against her, when she comes back.

Turn on the valve in the same room to spray some water on the cages. When Akka realizes the prisoners are loose, she quickly runs to investigate. After she enters the cages, start the car battery charger, completing the Jumpstart challenge.

A Pirate's Life For Me
Eliminate both targets with Jarl's Pirate Saber while disguised as the Buccaneer.

This redacted challenge is quite complex and requires preparation. Start on the western beach (default starting location) and pick up a wooden torch.


Make sure the torch remains lit. Do NOT throw it or pacify anyone with it. You are allowed to drop the torch.

Next, we need to activate an easter egg by igniting 4 braziers located around the map.

Brazier #1
Not far from the western beach, this brazier can be found overlooking the boat exit. Right next to it is a woman smoking a cigarette.


Brazier #2
Outside the Colonial Ruins, nearby the satellite control unit.


Brazier #3
Near the rope bridge.


Brazier #4
At the Old Colonial Tower outside Akka's Compound.


After igniting all 4 braziers, return to brazier #1. Walk towards the headstone. Use a shovel* to dig up a pirate chest. Inside, there are a couple of doubloons and Jarl's Pirate Saber.

*To find a shovel, refer to the "A Kill to Treasure & Another For Good Measure" challenges


Pick up the Saber and locate this small cave. Inside, there is another chest, this time with the Buccaneer disguise.


For the completion of this challenge, eliminate both targets with Jarl's Pirate Saber while disguised as the Buccaneer. A good opportunity presents itself when you trigger the meeting between Akka and Noel Crest by climbing the radio tower and hitting the light switch. Both targets are eventually going to meet up at the Old Colonial Tower by brazier #4.


A Bridge Too Far
Eliminate Noel Crest by making him fall through the rope bridge.

Infiltrate the Colonial Ruins and locate the antenna. Lucas Grey will remark that it must've took a long time to set this all up and Crest will likely come running if something happens to the antenna. Without getting seen, sabotage the antenna console.


As Crest investigates the antenna, pick up a crowbar and head towards the rope bridge. Use the crowbar to loosen some wooden planks and watch as Crest takes a fall.

Ambrose Island, Andaman Sea / Shadows in the Water [PART 2]
Penned Pal
Collect all 4 diary entries.

Diary entry #1
In a garbage bag inside Akka's Compound.


Diary entry #2
Stuck in a tree below the Old Colonial Tower.


Diary entry #3
In a small shack by the coast.


Diary entry #4
Inside Carlton Smith's cell.


A Bone to Pick
Pick up the Bone Lockpick. It is a single use lockpick made out of human finger bone... Yes. Some truly weird people work at IOI.


Talk to the Hand
Win the "slapping tournament" by defeating all 4 of your opponents. Refer to the ...I Thought About It challenge guide for additional info.

Get It Yourself
Knock out Farah by throwing a coconut at her. Refer to the A Kill to Treasure & Another For Good Measure challenge guide for additional info.

Maneki-Hitman
Activate the Lucky Cat easter egg in Ambrose Island by shooting 5 golden Lucky Cat figurines in specific order.

Lucky Cat #1
In a small hut in the village.


Lucky Cat #2
Next to a waterfall, right between the wooden bridge and colonial ruins.


Lucky Cat #3
On the shrine, close to the tourist who asks you if you are into bio-chemistry.


Lucky Cat #4
Standing below a water tower on the roof of one of the village huts.


Lucky Cat #5
Sitting on a rock, close to the River Boat Exit.


After destroying the fifth figurine, blend in using the fishing rod on the same pier to activate the easter egg and complete the challenge.
Isle of Sgàil, North Atlantic / The Ark Society
Rude Awakening
Rise from the coffin during Janus‘ funeral ceremony. Inflitrate the morgue in Constant's Tower and put on Janus‘ robe. Then, find your way to the stone circle where the ceremony is about to take place. Make sure to remain unseen. Tell the musician to start playing and lie down in the coffin. When the crowd gathers and the ceremony starts, stand up and give everyone a surprise of their lifetime.

Switcheroo
This challenge requires you to switch the Aztec necklace being shown at the centre of the Art Gallery with an apricot. I’d recommend to start somewhere near the kitchen. Once there, find an apricot. Afterwards, make your way to the Art Gallery and start a fire alarm. Guards will begin to evacuate all visitors. Use this time to turn off a fuse box below a staircase in the adjacent room. This will disable the security systems and open the glass box protecting the Aztec necklace.


When no one’s around, switch the Aztec necklace with an apricot. The challenge will be completed after the guards turn the security systems back on.
New York, United States of America / Golden Handshake
The Other Frank
Dress up as a bank robber. Directly from the main entrance, turn right and walk to the toilets. There are two people arguing in one of the cubicles. Use a lockpick to get inside, knock them both out and pick up a nearby disguise.

Due You Even Care
Shoot the pigeon flying in the main lobby. Use a sniper rifle that can slow down time. The stairs leading to the vault provide a good vantage point.


Show Me The Money
Knock out an NPC using a gold bar. A gold bar can be obtained by inflitrating the bank vault.
Haven Island, Maldives / The Last Resort
Plenty Of Fish In The Sea
Pick up a fish from the sea before it swims away.


Sleep With The Fishes
Let the man gain enough courage to jump into water. Behind Tyson Williams‘ villa, there is a large pool with a wife trying to convice her husband to not jump into water because of sharks. Knocking her out or killing her will cause the husband to jump and the challenge to unlock.


Hi, Steven!
Arrange matters so Ljudmila invites Steven to the jacuzzi. In order to get Ljudmila to meet with Steven, you need to accomplish two tasks – get Jason Portman out of his hut and acquire the USB drive below Tyson Williams' villa and give it to Ljudmila. The first task is easy. Jason Portman is accommodated in the Turtle Hut. Infiltrate the hut, knock out Portman and hide his body.

After that, go to your hut and call Ljudmila on the phone. She will ask you to meet with her in the restaurant. Go there and talk to her. She gives you an important task of recovering a USB drive containing sensitive data. It’s located in one of the lockers (pictured below) in the underground facility below the villa. Use a lockpick or a crowbar to get inside the locker.


Talk to Ljudmila and agree to meet with her in the massage parlor. Once there, give her the USB drive. This will give you some alone time with her. Do not eliminate her just yet! Instead, wait a while until she invites Steven to the jacuzzi. Drowning both of them also unlocks the Synchronised Drowning challenge.

A Great Source Of Comedy
Use a banana peel to knock out an NPC. A banana can be found in the restaurant storage area but you need a key or a lockpick to get inside. You can also unlock a banana in your loadout by completing one of the two Elusive Target Arcade contracts - The Thespians or The Tregetours. Then, simply place a banana on the ground and wait for an unlucky NPC to walk by.

NOTE: You can place items by holding [CAPS LOCK].

Total Server Collapse
Cause a system shutdown in the underground data facility. Infiltrate the facility below the villa. There are 4 server terminals you need to disable. Once you disable a server terminal, a tech crew member will be sent out to reset the terminal, undoing your progress. You can either knock out individual tech crew members working near the terminals or gas the entire data facility by poisoning the ventilation system. The challenge is completed when all 4 terminals are disabled at once.

Here's a full video guide by Hitman Series:
--- SNIPER ASSASSIN ---
Himmelstein, Austria / The Last Yardbird
Agnomaly
Shoot 6 hidden gnomes.
Video credit to MrFreeze2244.


Kiln Time
Destroy 47 plant pots.
Video credit to MrFreeze2244.


Prometheus
Ignite a campfire by shooting it pictured below.


The Higher You Climb
This is one of the most difficult, if not THE most difficult Sniper Assassin challenge. Be prepared to restart the mission regularly. Locate the skydiver at the top of the waterfall, drinking a bottle of beer. In order to make him jump, you must first shoot his bottle of beer without killing him or hurting him. Then, use the "Marksman" ability of your sniper rifle [hold down SHIFT by default] to slow down time and improve your aim. Your goal is to kill him while he's in the air.

The video below highlights a few tips on how to accomplish this feat. Video credit to BSD Gaming:


Take A Hike
Free the path for the hiker. Shoot this fence when the hiker approaches.


Are You Pondering What I’m Pondering?
Kill the two rats in the kitchen.


NOTE: This challenge is a reference to a popular cartoon Pinky and the Brain.

Art Critic
Shoot the painting pictured below. After a while, the mansion’s butler will replace the painting with a new one. Shoot it again to complete the challenge.


Faithless
Shoot priest’s wine glass.


How Do You Due?
Shoot 10 pigeons.
Video credit to MrFreeze2244.


Quacker Than The Eye
Shoot 10 rubber ducks.
Video credit to MrFreeze2244.


And He Shall Rice
Shoot the bag of rice.

Hantu Port, Singapore / The Pen and the Sword
On The Waterfront
Liberate an old friend from a cargo container. Shoot this lock:


Ghost Ship
Shoot every light on the cargo ship.


Codename Crane
Release the cargo crane on numbers 4 and 7.


No More Happy Hour
Shoot a mechanic’s bottle of beer.

Siberia, Russia / Crime and Punishment
No redacted challenges.
--- HITMAN 1 ---
ICA Facility, Unknown Location / Freeform Training & The Final Test
No redacted challenges.
Paris, France / The Showstopper
Bull In A China Shop
Destroy the large vase in one of the storage rooms.


Careful What You Wish For
Throw a coin into the entrance fountain.

Paris, France / Holiday Hoarders
No redacted challenges.
Sapienza, Italy / World of Tomorrow
An Eye For An Eye
Eliminate Silvio Caruso by shooting through the telescope in the observatory. It is recommended to bring a silenced sniper rifle on top of Sapienza Church Tower.


Shoot the electrical box pictured below. This will result in observatory's large dome opening. Wait for Caruso to take a look through the telescope and take your shot.


.45 Therapy
Shoot Silvio Caruso disguised as Dr. Lafayette during his psychiatric session. First, dress up as Dr. Lafayette. He can be found speaking on the phone in front of the ice cream parlor near your default starting location.

Dr. Lafayette


You can easily disguise yourself as a waiter or a chef and slip an emetic poison into his drink.
As Dr. Lafayette, infiltrate the mansion in a way so you keep your silenced pistol (guards at the front gate will frisk you!). Follow the butler to Caruso’s bedroom. Once Caruso’s psychiatric session begins, get up and put a bullet in his head.

The Living Dead
Infiltrate the morgue next to Sapienza Church. Without being spotted, lie in the empty coffin and have someone pass by you (usually, the priest goes there to pray). The challenge unlocks shortly after.

NOTE: Completing „The Living Dead“ unlocks a new starting location inside the morgue.


Unleash The Kraken
Awaken the beast lurking in Sapienza waters. This challenge refers to an easter egg that can be activated in this mission. Bring a silenced sniper rifle and look towards the sea. Find a boat with 4 golden bells on it. Shoot them in the following order:


Watch The Skies
Open the dome in the observatory. Refer to the „An Eye For An Eye“ challenge.

Luck Alone Is Worthless
Throw 5 coins into the fountain at Town Hall Square. You may find additional coins in the public toilets area.

Sapienza, Italy / The Icon
No redacted challenges.
Sapienza, Italy / Landslide
How About A Magic Trick?
Eliminate Marco Abiatti by impaling him on a pen. A lockpick is strongly recommended for this challenge. Abiatti wants to set up a meeting with a local lawyer Salvatore Bravuomo, however, Bravuomo is so scared of Abiatti, he locked himself up in one of the public toilets near town's marketplace.


Use a lockpick to get inside and knock Bravuomo out. Take his clothes and talk to Abiatti’s bodyguards standing in front of the Town Hall. They will take you to Bravuomo’s office where a meeting between Abiatti and you is going to take place. Wait until Abiatti orders his bodyguards away and do the rest.
Marrakesh, Morocco / A Gilded Cage
Dance Till You Drop
Eliminate General Reza Zaydan as he dances. This challenge is related to an easter egg that can be activated only in Marrakesh. To do so, you need to disguise yourself as a military officer (soldiers with red berets). As an officer, you have the ability to dismiss lower-ranking soldiers stationed inside the school building.

Military Officer outfit


Once you have dismissed all possible soldiers, head to the room with school's intercom (the room where you can encounter two soldier gossiping about Reza Zaydan). If you have done everything correctly, a radio will appear with the option to "Commence Dance Off". Playing the radio will also unlock another challenge titled „Let’s Dance“. While everyone dances in school's backyard, General Zaydan will slowly make his way to the podium and join the party. Kill him while he's on the podium and be prepared for a quick getaway.

Video guide made by MrFreeze2244

Floor It!
After you’ve completed all your primary objectives, head to the Swedish Consulate. Facing the reception, enter the room on your right. Pick up Consulate Staff Car Keys from the table. Infiltrate the underground garage and escape in the black car.


Begging For It
Donate five coins to the fortune teller. You can find him begging for money nearby your default starting location.


You may also find additional coins in Strong's shoe shop.


Let’s Dance
Refer to the „Dance Till You Drop“ challenge.

Slam Dunk
Dunk a pool ball in the basketball hoop in school's backyard.

Marrakesh, Morocco / A House Built on Sand
Dropping the F-bomb
After a few minutes from mission start, Matthieu Mendola, one of your targets, passes under the neon Cafe sign (pictured below). Snipe it down in just the right moment for the challenge to unlock.


License to Ill
Eliminate both of your targets by poisoning a shisha pipe. First, get yourself a bodyguard disguise. An easy bodyguard disguise can acquired in the upper left corner of the map. A bodyguard there is suffering from food poisoning with his colleague watching over him.

As a bodyguard, approach Matthieu Mendola and escort him to the meeting place (the building next to the central shisha cafe with lots of guards around). Get to the rooftop and use some lethal poison on the shisha pipe.
Bangkok, Thailand / Club 27
Oh Snap!
Knock out Jordan Cross using the ventilation system and snap his neck. First, you need to dress up as a bug exterminator. You can easily obtain this outfit by pacifying the bug exterminator on the ground floor near manager’s office, talking to a member of hotel's staff.


Make sure to pick up an insecticide from the bug exterminator’s van parked behind the hotel.


When everything’s set, become a real Karen and talk to Mrs. Mookjai, the hotel manager.


The manager will request everyone from the recording studio to come down to the entrance hall while you investigate it for pests. Wait until Jordan Cross comes down and poison the ventilation system using the insecticide you picked up. This will knock out absolutely everyone currently in the entrance hall. Make haste and snap Jordan Cross‘ neck.


Smooth Operator
Eliminate Jordan Cross and Ken Morgan as the stalker. The Stalker outfit can be found on the top floor of Queen’s Suite (the one opposite to the recording studio).


Oops! I Did It Again!
Have Jordan Cross push Ken Morgan off a balcony. Neither Jordan, nor Ken know they are accommodated in the same hotel. You need to get them to meet each other. Follow the „Oh Snap!“ challenge guide so Jordan Cross comes down to the entrance hall.

Disguise yourself as hotel staff and tell Ken Morgan Queen's Suite is ready and he can move in. Ken will begin to follow you. Make sure to walk by Jordan Cross. This will trigger an arguement between the two and they will both agree to continue the conversation in private in Queen’s Suite.

Follow them and observe. After a while, Jordan will get triggered and push Ken off a balcony. This will complete the challenge and provide you an opportunity to get rid of Jordan as well.

Ordering In
Use the telephone in 47’s room to call room service.


Power Chord
Play the guitar on the top floor of King’s Suite.


Put The Lime In The Coconut
Obtain 5 coconuts. You can find plenty of coconuts hanging from palm trees in the entrance hall by reception. Use a firearm to knock them down.


Looking Into The Distance
Eliminate the golfer on the opposite riverside. This challenge is very time consuming. Bring a sniper rifle. After exactly 10 minutes from mission start, a golfer will appear on this spot pictured below. Kill him to complete the challenge.


I Will Cry If I Want To
Destroy 18 golden elephant statues in Queen’s Suite.

Video guide made by MrFreeze2244


La Cucaracha
Follow the „Oh Snap!“ challenge guide, but this time, actually visit the recording studio as the bug exterminator. There is an electronic keyboard behind the recording booth. Play it* and go outside for a surprise.

*NOTE: The option to play the keyboard will appear only if you are wearing the bug exterminator's outfit.
Colorado, United States of America / Freedom Fighters
The Long Way Out
Exit via the underground tunnel. It is located inside the tornado shelter and impossible to miss, since you have to access the tornado shelter on your first playthrough.


Plot Twist
Infiltrate the tornado shelter. Similiarly to "The Long Way Out" challenge, it is impossible to not complete this challenge, as you have to access the area on your first playthrough. There are 2 possible ways of gaining access:
  • Dragging the body of Sean Rose to the face scanner.
  • Using a 3D Printer to make a mask of Sean Rose's face.

NOTE: Using Sean Rose's body to unlock the tornado shelter also unlocks the "Body Double" challenge.

First option


Second option


Body Double
Enter the tornado shelter by scanning Sean Rose’s face. See the challenge "Plot Twist" for more details.

Rep Tires
Exit in the toy car. This challenge is related to an easter egg, that can be activated only in this mission.

I recommend to start as an undercover hacker, so you have an immediate access to the main house. First, pick up Hallucinogenic Drugs from the Chemistry Shed and Quad Bike Keys from a shed by the main gate (the one near your default starting location).

Hallucinogenic Drugs in the Chemistry Shed


Quad Bike Keys by the main gate


Then, find and pick up 10 apricots from around the farm (explore the orchards and the kitchen area).


Complete all your primary objectives and make your way to the first floor of the main house where a couple of militia members are playing a familiar video game. Find Mr. Raptor, pictured below, and feed him 10 apricots.


You might have to kill or subdue both soldiers on the couch, as well as a nearby patrolling officer, because feeding Mr. Raptor apricots is considered an illegal action. Once you have given Mr. Raptor enough apricots, he will suddenly vanish and a new exit location will appear on the map.


Wicker Man
Gain supernatural powers as the Scarecrow. This challenge refers to another easter egg, that can be activated only in this mission.

Smuggle a silenced sniper rifle on top of the water tower. Before you go there, disguise yourself as a Scarecrow.


Carefully sneak on top of the water tower and with a silenced sniper rifle in your hands, shoot these golden bells in the following order:

1. On a power mast by the main gate, near your default starting location.


2. Next to three stacked hay bales, near Garages.


3. Above the wooden roofed bridge, near the main house.


4. On a power mast across the river.


Video guide made by MrFreeze2244


No Birds Here
Hide at every scarecrow stand disguised as the Scarecrow. It’s very unlikely you will be able to avoid combat while completing this challenge. To make it easier, select Casual difficulty. Move undetected, as you will not be able to hide at a scarecrow stand while in combat or being detected.

Locations of all scarecrow stands:

BLUE SQUARE - Scarecrow disguise location
RED SQUARE - scarecrow stand location

Howdy Partner
Similiar to the „Let’s Dance“ challenge in Marrakesh, this challenge also involves making soldiers dance.

Start as an undercover hacker in the main house. Go to the back of the house where three soldiers are doing push ups. Pick up an apricot and throw it on the head of the commanding officer. Then, quickly turn on a nearby radio.

Video guide made by Hitman Series
Hokkaido, Japan / Situs Inversus
A Personal Goodbye
Eliminate Erich Soders by shooting him with a firearm on the operating table.

I Think He Is Dead Now
Destroy Erich Soders' replacement heart and then eliminate him by sabotaging Gama Hospital's AI.

The replacement heart is safely stored in a secured container in the morgue and guarded by two bodyguards. Dispose of them both, open the container and destroy the heart.


Now, we need to sabotage the hospital's AI that's performing Soders' operation. To do so, we have to gain access to KAI Mainframe above the operating room. However, only the hospital's Director is allowed access. Get his outfit or use a disposable scrambler or electronic key hacker.


Once inside, sabotage any of the four mainframes. This will cause the AI to reboot itself. Notice the rebooting order of the four mainframes. Now, sabotage the mainframes in the exact order of the reboot sequence. Approach the operating controls opposite the KAI Mainframe and cause a malfunction.

Overkill
Eliminate Erich Soders and then destroy the replacement heart.

Shoot him while he's on the oprating table or use any other elimination method of your choosing. After Diana confirms he's dead, go to the morgue and destroy the replacement heart as well.

Namaste
Make the people in the spa area meditate.

Find a wrench or select a Handyman Wrench in the loadout screen. Infiltrate the Spa Maintenance Room. Do the following in this order:
  1. Increase the temperature in the sauna.
  2. Use a wrench to turn off cold water.
  3. Trigger a fire alarm in the Spa Maintenance Room.

Wait until the fire alarm stops and the challenge should pop up.

Techman
Play DDR as 47.

Find a screwdriver (there is one inside the morgue). Go to the staff area. There are two hospital staff members playing DDR (Dance Dance Revolution).


Cause a distraction to lure out one of them. Knock him out and hide his body. Then, cause another distraction to lure out the second staff member. While he's investigating the distraction, sabotage the dance pad using the screwdriver and turn on expert mode by interacting with the game console.

Once the second staff member starts playing again, he will start to sweat uncontrollably, resulting in him electrocuting himself. After that, repair the dance pad using the screwdriver and show off 47’s moves.

Guardian Angel
Infiltrate the Medical Staff Sleeping Quarters and pick up a Neurochip Remote Control.


Find a way inside the morgue and locate the Curator (pictured below, on the right).


Activate the Neurochip Remote Control. This will cause the Curator to go into an ecstatic state. He will enter the room with Soders' replacement heart and order the two bodyguards outside.

Activate the Neurochip Remote Control again. The ecstatic state will start to wear off and the Curator will be feeling depressed and suicidal. Follow him. After a while, he will attempt to commit suicide by jumping to his death. When he vaults over a railing and starts his goodbye speech, increase the dosage using the Neurochip Remote Control again, thus saving him. The challenge will unlock only after you complete the mission and the Curator is still alive by the end.

Impossible Heights
Reach the highest point of Gama Hospital. This challenge is completable only by infiltrating the hospital along the mountain path, disguised as a Ninja.

Make your way down to this pillar. The pillar is only climbable while wearing the Ninja outfit. Climb on top to complete the challenge.


We Meet Again
Select a disposable scrambler or an electronic key hacker in your loadout and make your way to this pod in the morgue. Open it to see a familiar face.

NOTE: You can also open the pod with a non-descript keycard located in the Director’s office.


Hanami Hitman
This challenge refers to an easter egg that was added later to Hokkaido as part of The Season of Awakening.

Disguised as a patient, sit down on the sofa by the cherry blossom in the restaurant area. Wait, until the light on the table turns pink.


Afterwards, infiltrate the security room on the main floor. A small cherry blossom will spawn there. I recommend knocking out the guard by the monitors and the other guard who regularly visits the security room. When you are alone, sit down by the cherry blossom until the nearby lights turn pink (you will also see a challenge progress notification).


Another cherry blossom spawns in the other security room, by the morgue. Again, wait until the light turns pink.


The final cherry blossom spawns in the staff showers.


Lastly, return to the very first cherry blossom in the restaurant area and the challenge is complete.

NOTE: This challenge unlocks the Cherry Blossom Baller.
Hokkaido, Japan / Hokkaido Snow Festival
No redacted challenges.
--- Patient Zero ---
Bangkok, Thailand / The Source
No redacted challenges.
Sapienza, Italy / The Author
The Pen Is Mightier Than The Sword
Similiarly to "How About A Magic Trick?" challenge in mission "Landslide", eliminate Craig Black by impaling him on a pen. A pen can be found inside Sapienza Church, on the right side of where Craig Black interacts with his fans. Be aware, that this area is restricted.


Colorado, United States of America / The Vector
No redacted challenges.
Hokkaido, Japan / Patient Zero
You Know the Number
Eliminate at least 47 infected people. Another time consuming challenge, as you have to wait for a very long time for people to transfer the disease amongst themselves. Once at least 47 people are infected, be prepared for a killing spree. Be aware that without a hazmat suit, you will incur the disease yourself.

Lucky Shot
In the event you get to a close proximity of an infected person, you also become infected. A 5 minute timer will be counting down until you succumb to the disease. The vaccine is located in the Stem Cell Supply storage by the morgue. Take it with less than 10 seconds remaining.

--- The Sarajevo Six ---
Paris, France / The Director
No redacted challenges.
Sapienza, Italy / The Enforcer
No redacted challenges.
Marrakesh, Morocco / The Extractor
No redacted challenges.
Bangkok, Thailand / The Veteran
Call Interrupted
Assassinate The Veteran as he takes a phone call.
Colorado, United States of America / The Mercenary
No redacted challenges.
Hokkaido, Japan / The Controller
No Thanks, Captain Exposition
Approach The Controller waiting for you in the spa area. As soon as he starts his monologue, kill him.
Updates and Patch Notes
February 5th, 2023
  • Added redacted challenges for Freelancer game mode
  • Added redacted challenges for missions set in ICA Facility, Paris and Sapienza
  • Updated a guide for "The Higher You Climb" challenge in "The Last Yardbird" mission

February 17th, 2023
  • Added redacted challenges for missions "A Gilded Cage" and "Club 27"
  • Added redacted challenges for "Patient Zero" bonus campaign

March 12th, 2023
  • Added redacted challenges for missions set in Colorado and Hokkaido

April 18th, 2023
  • Added redacted challenges for "A House Built on Sand"
  • Added some redacted challenges for "Shadows in the Water"

January 2nd, 2024
  • Added "The Sarajevo Six" bonus campaign
  • Added "A Pirate's Life For Me", "A Bridge Too Far" and "Penned Pal" challenges in Ambrose Island
  • Added 2 missing redacted challenges in Miami - "Déjà Due" and "Sweet Victory"
  • Rebranded the guide from "HITMAN 3" to "HITMAN: World of Assassination"
  • Minor grammar corrections

February 16th, 2024
  • Added the "Last Words" challenge in Miami

July 10th, 2024
  • Rewrote the description for the "Last Words" challenge in Miami that mistakenly guided towards the "Sympathy for the Bird" challenge (credit: mr.law)
  • Added a notification about dividing redacted challenges in mission "Shadows in the Water" into two parts

February 3rd, 2025
  • Added the "Maneki-Hitman" challenge in Ambrose Island
  • Moved the Ambrose Island location from HITMAN 3 to HITMAN 2 so as to follow the chronological order of events in the trilogy

February 17th, 2025
  • Removed the "Ectoplasmic" challenge in Whittleton Creek because it was cut from the game (credit: Lady Neravin)

April 16th, 2025
  • Added the "Hanami Hitman" challenge in Hokkaido
16 commenti
Shameless  [autore] 17 feb, ore 10:24 
It used to be a challenge in H2 but they decided to cut it in H3. It was an annoying challenge anyway.Thank you for pointing this out
Lady Neravin 16 feb, ore 7:45 
"Ectoplasmic" is not in the game (anymore?)
K 9 lug 2024, ore 23:29 
Yeah, I kept trying the Last Words challenge and only got Sympathy for the bird and when I saw the comment below mine it finally unlocked.
mr.law 23 mag 2024, ore 7:47 
The "Last Words" challenge in Miami is wrong. I think you confused it with the "Sympathy for the Bird" challenge.

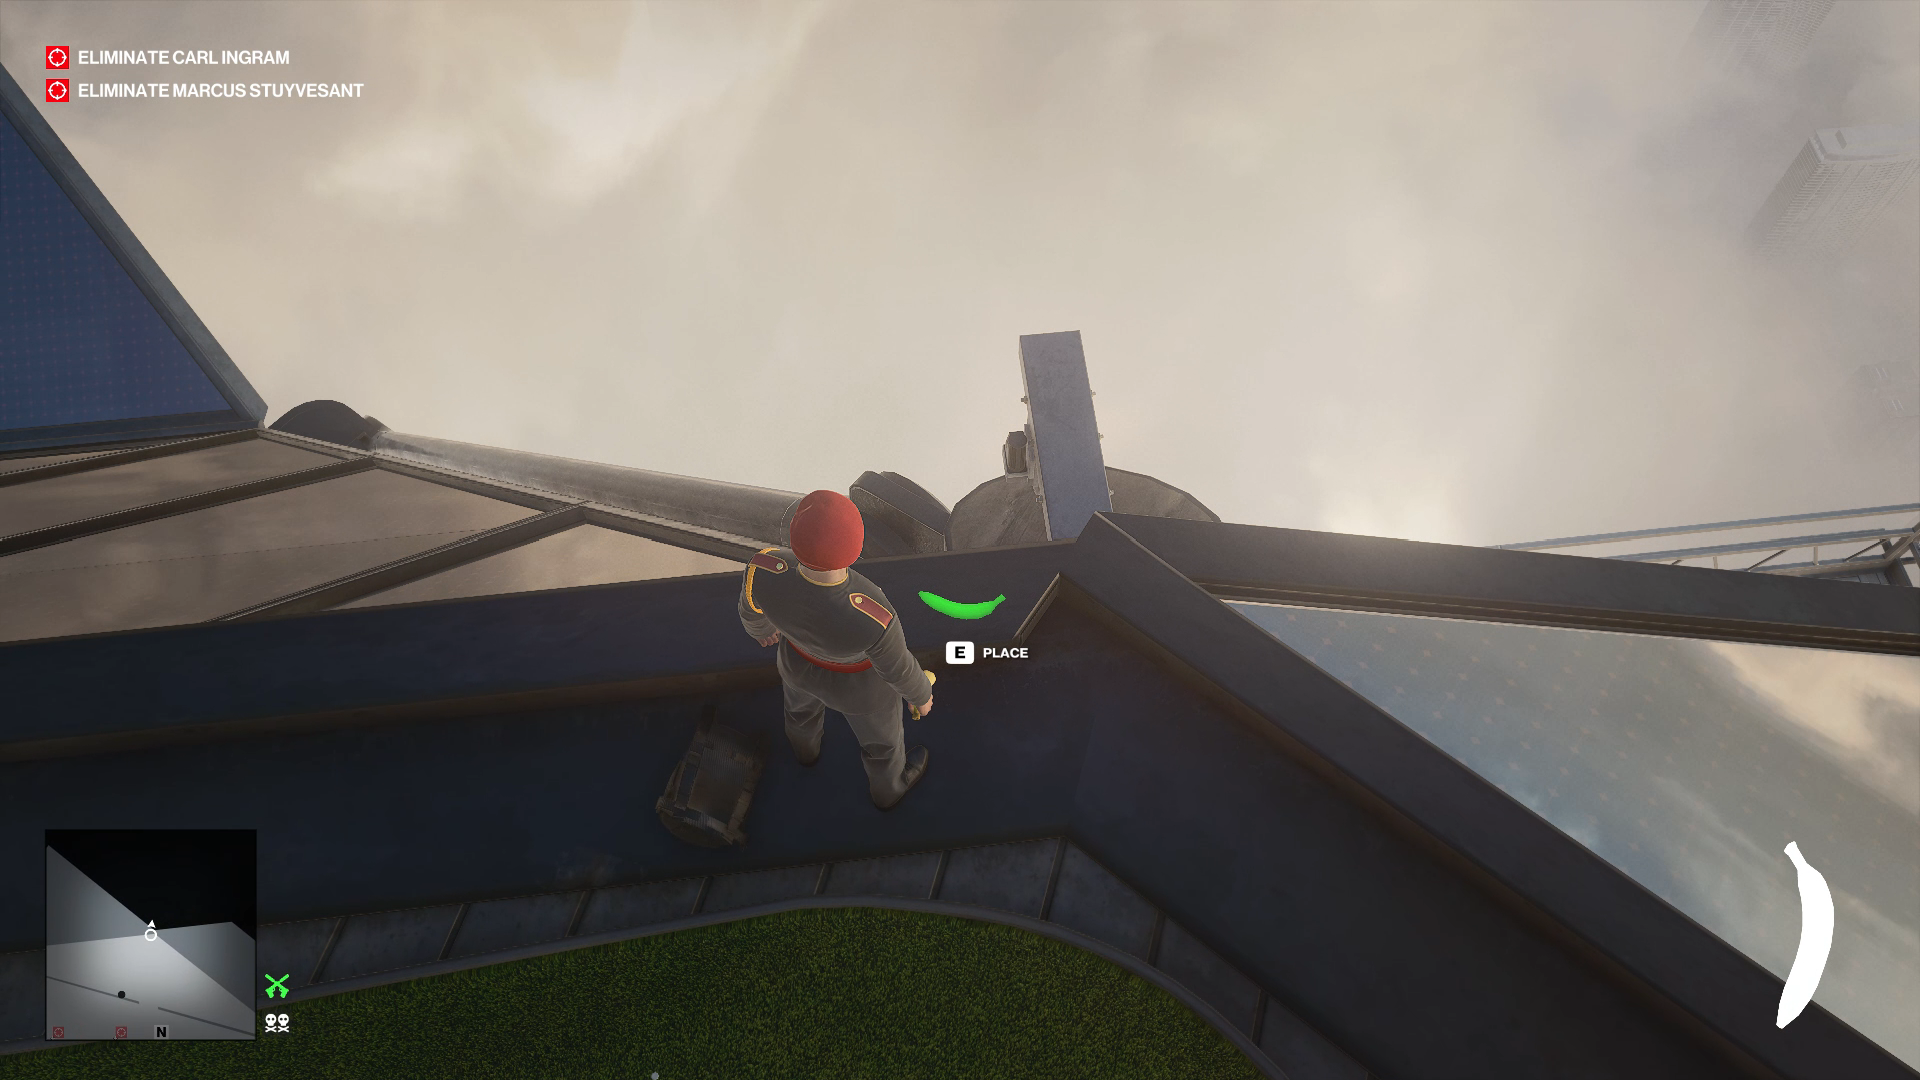
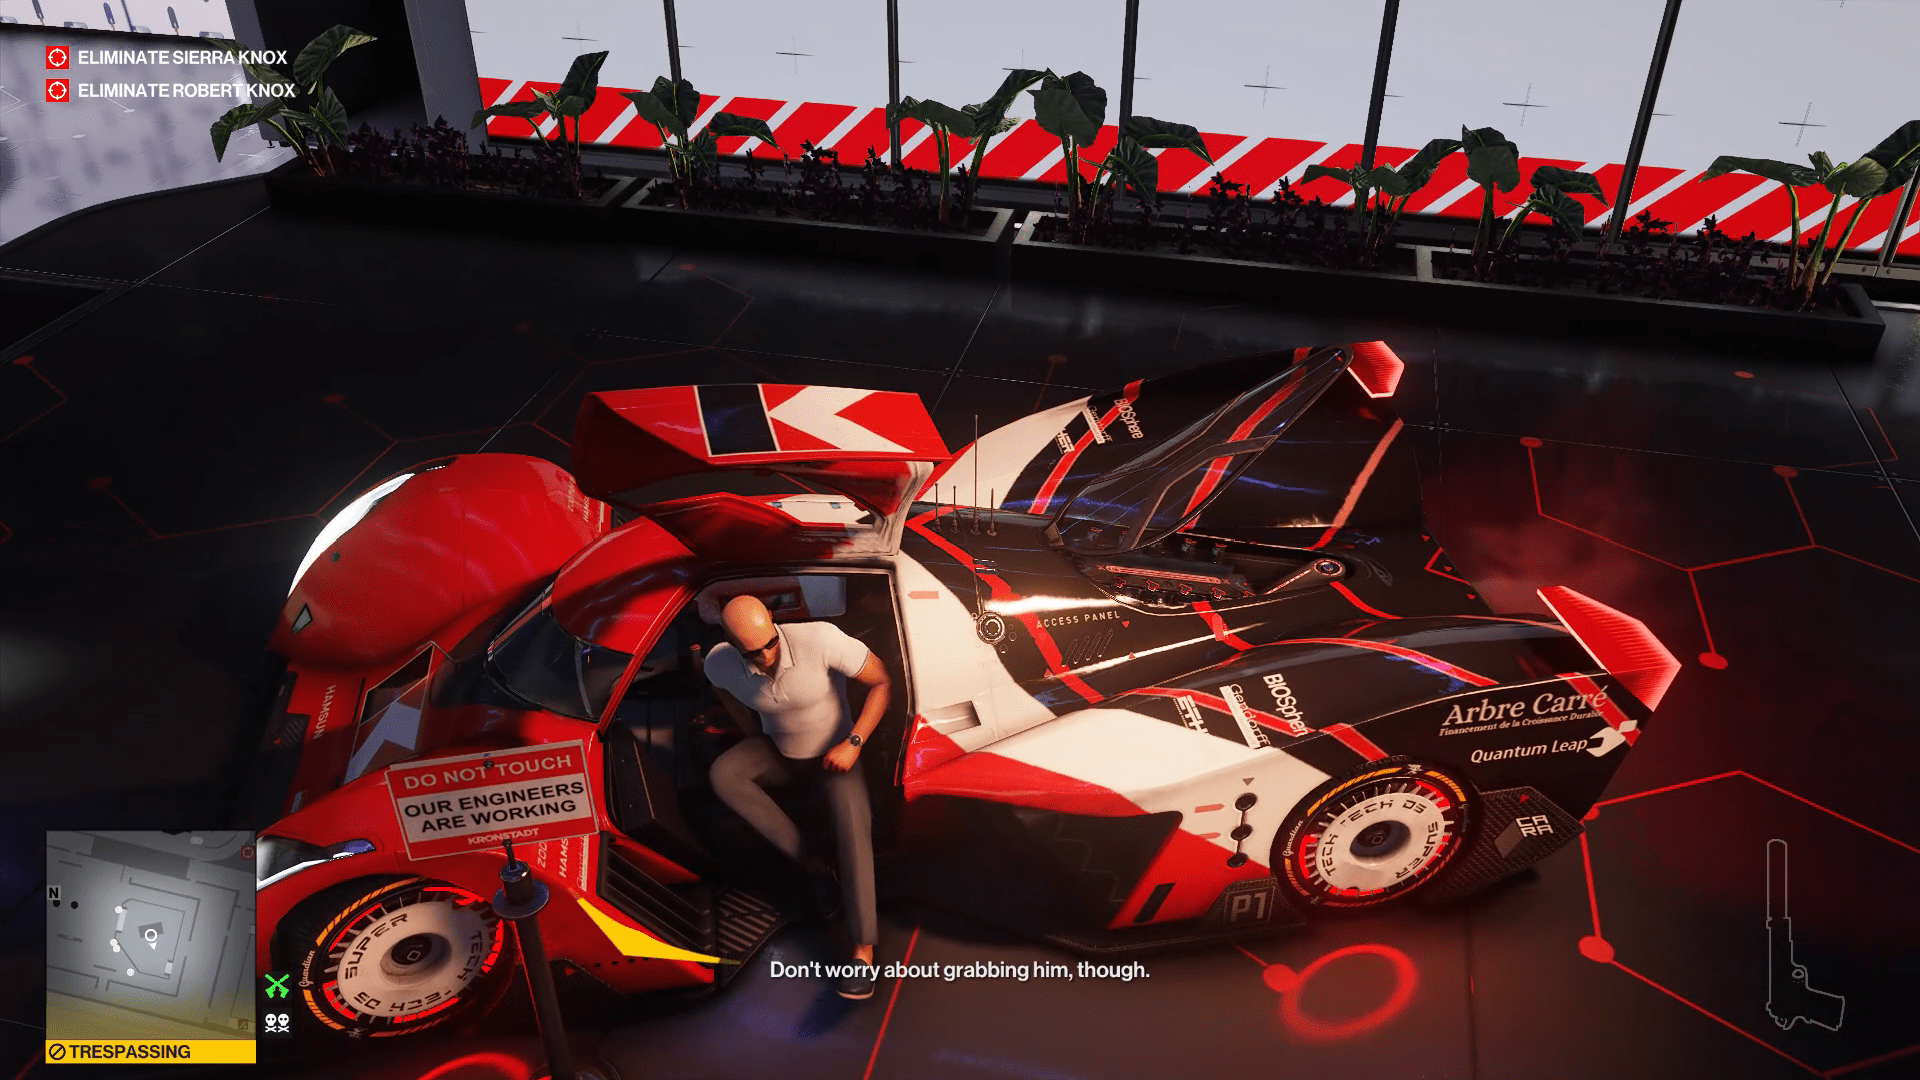
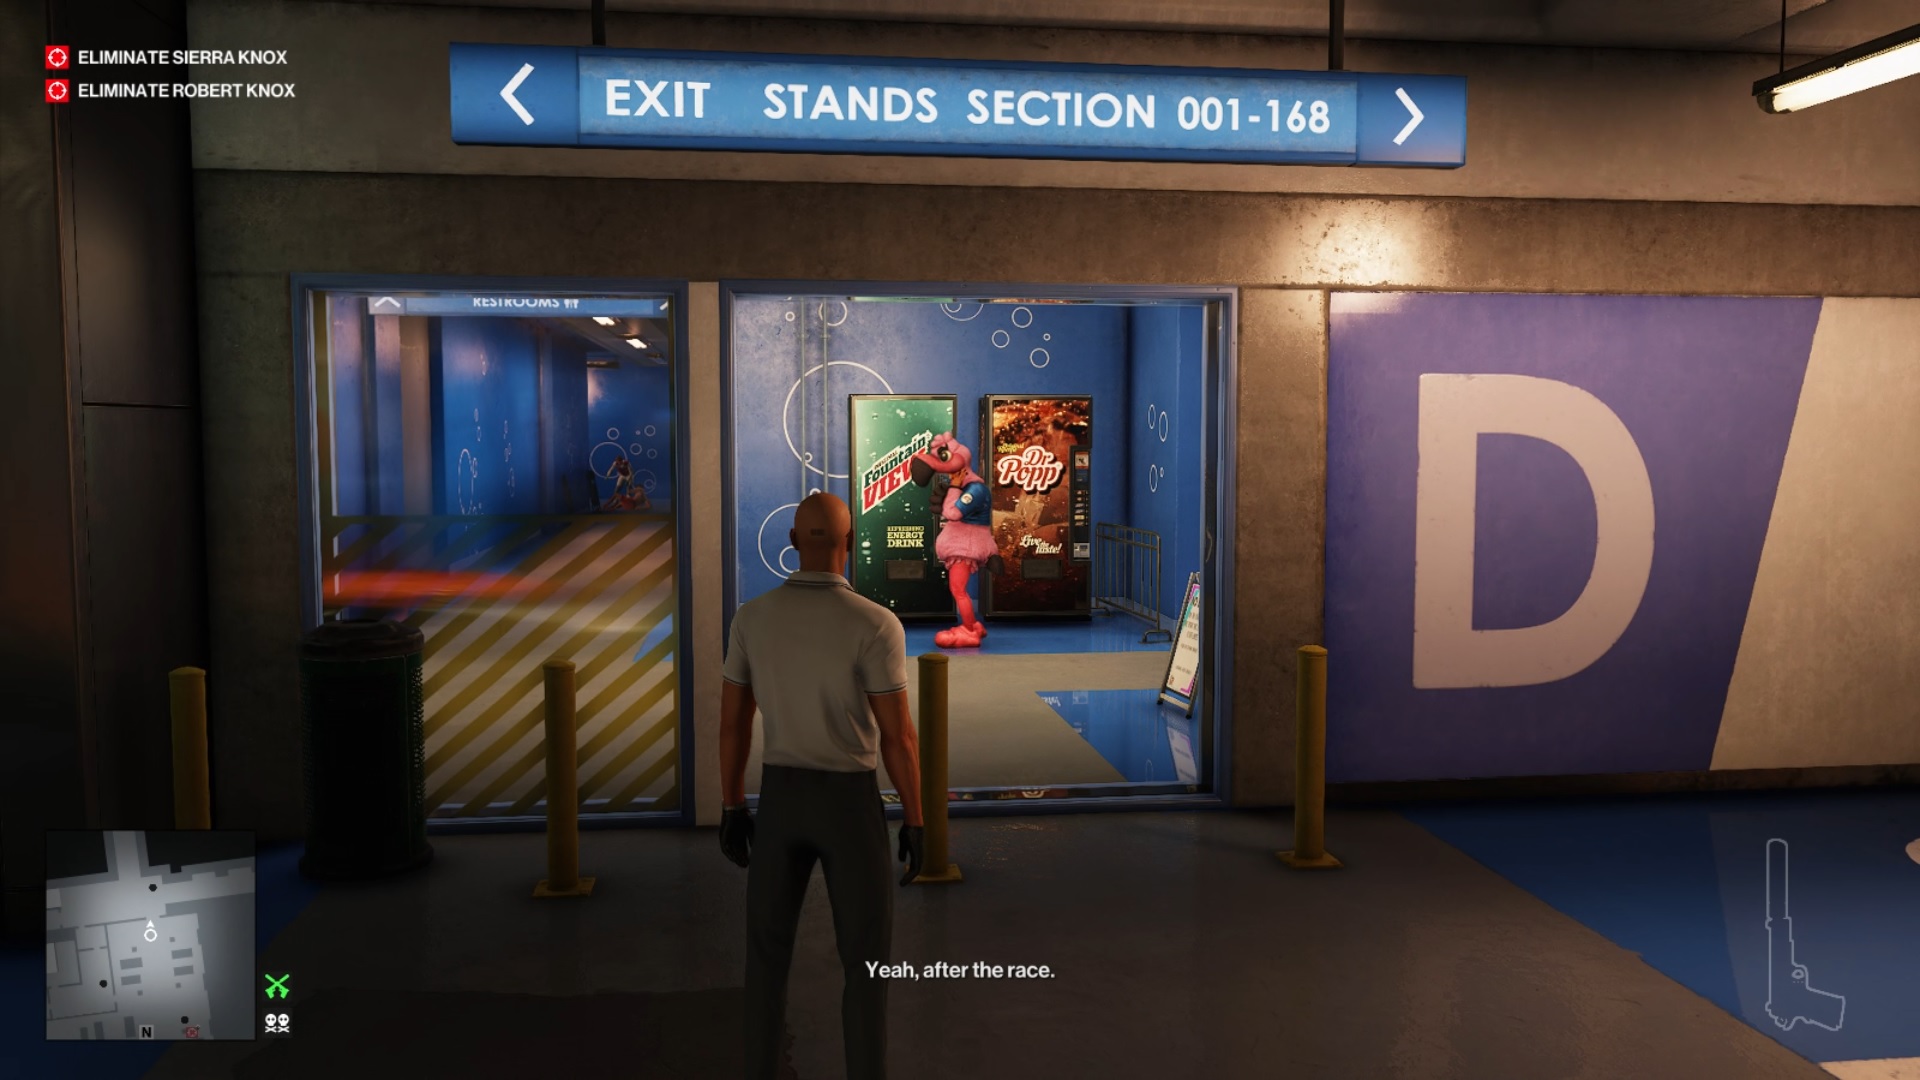
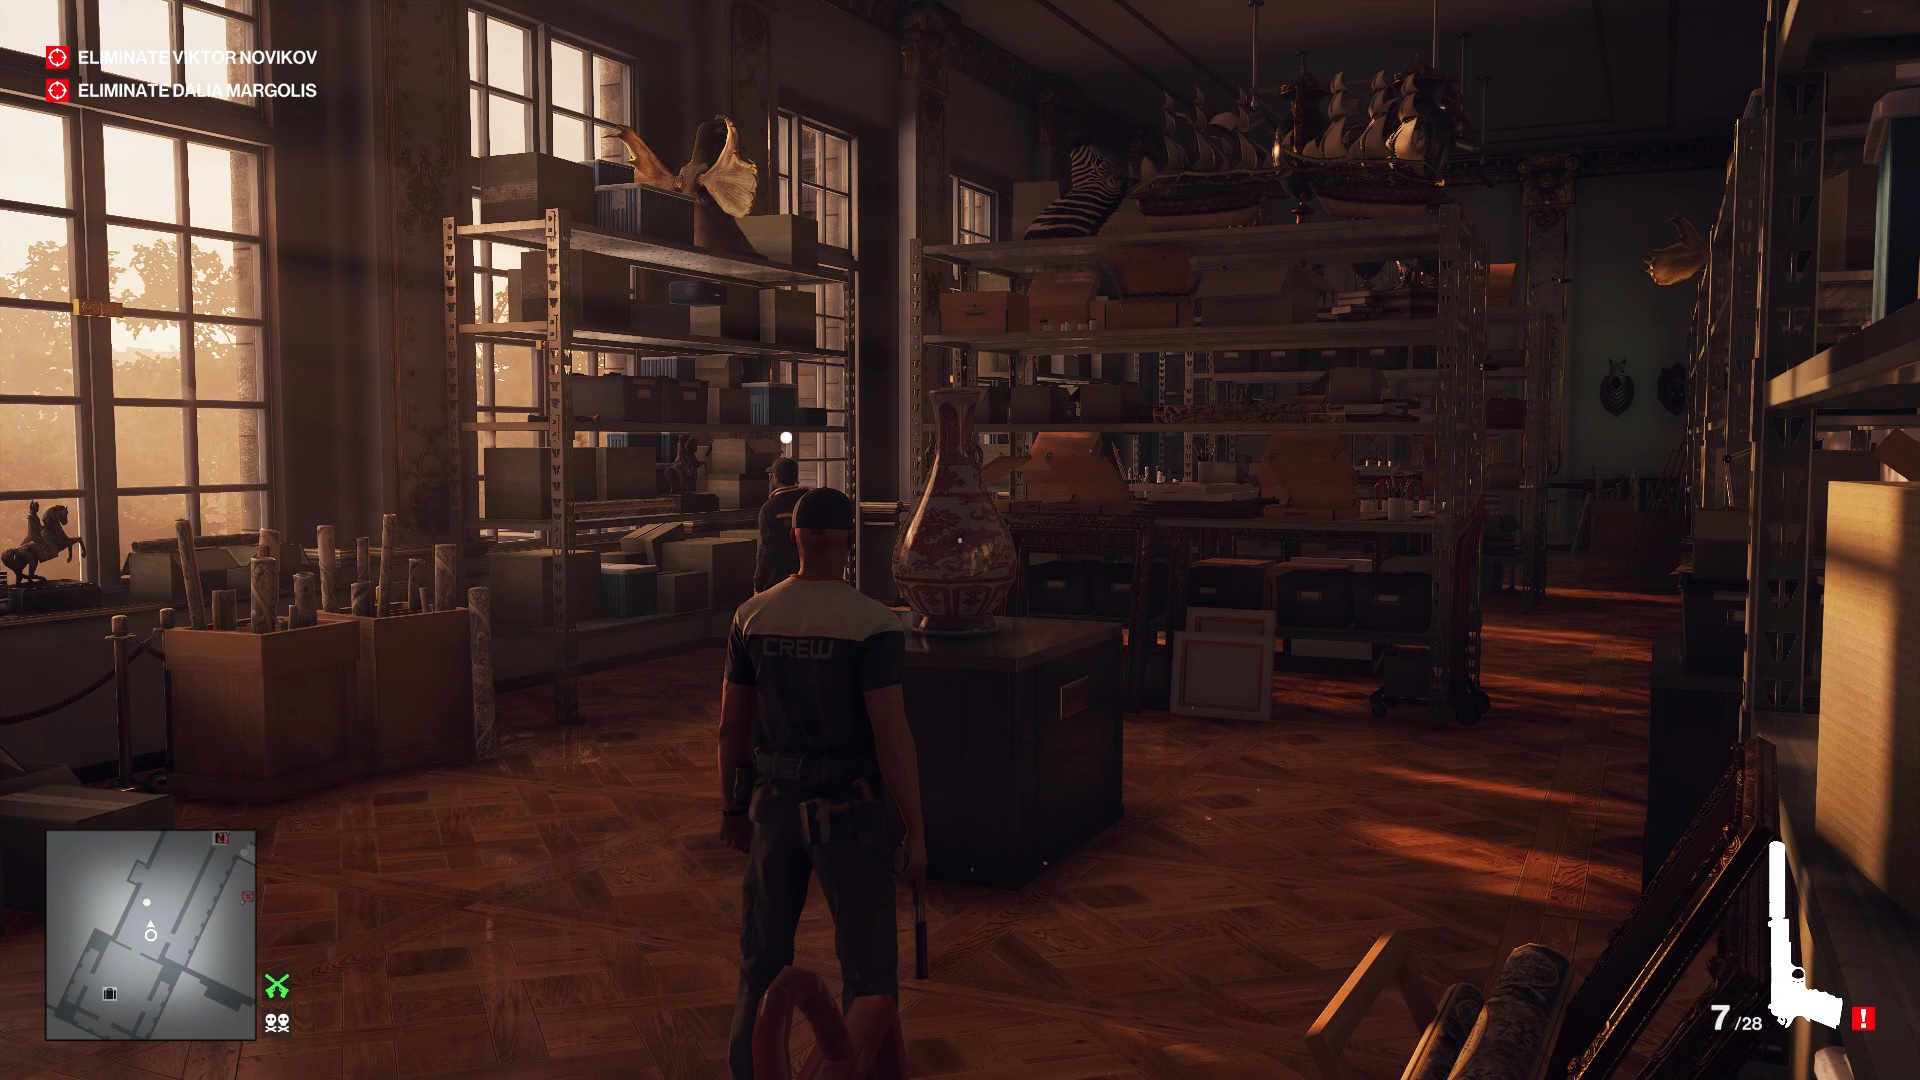
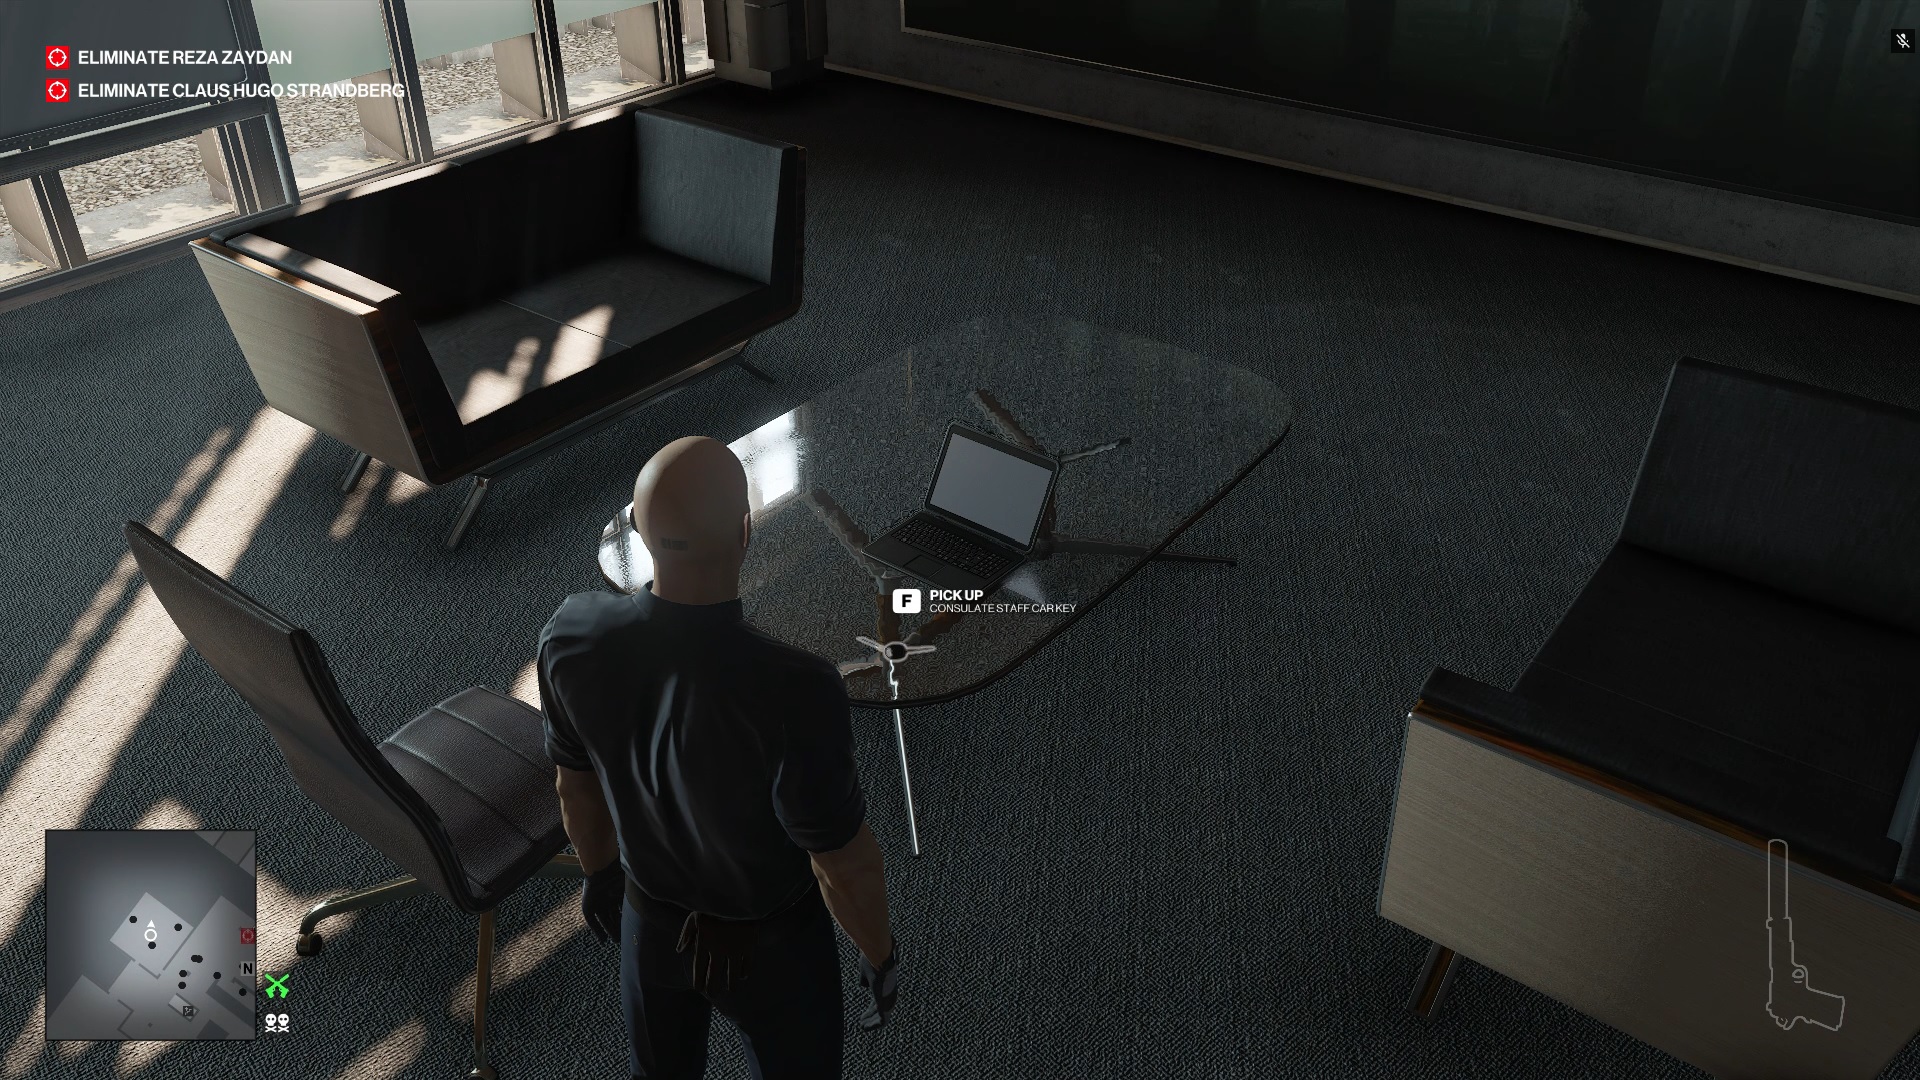
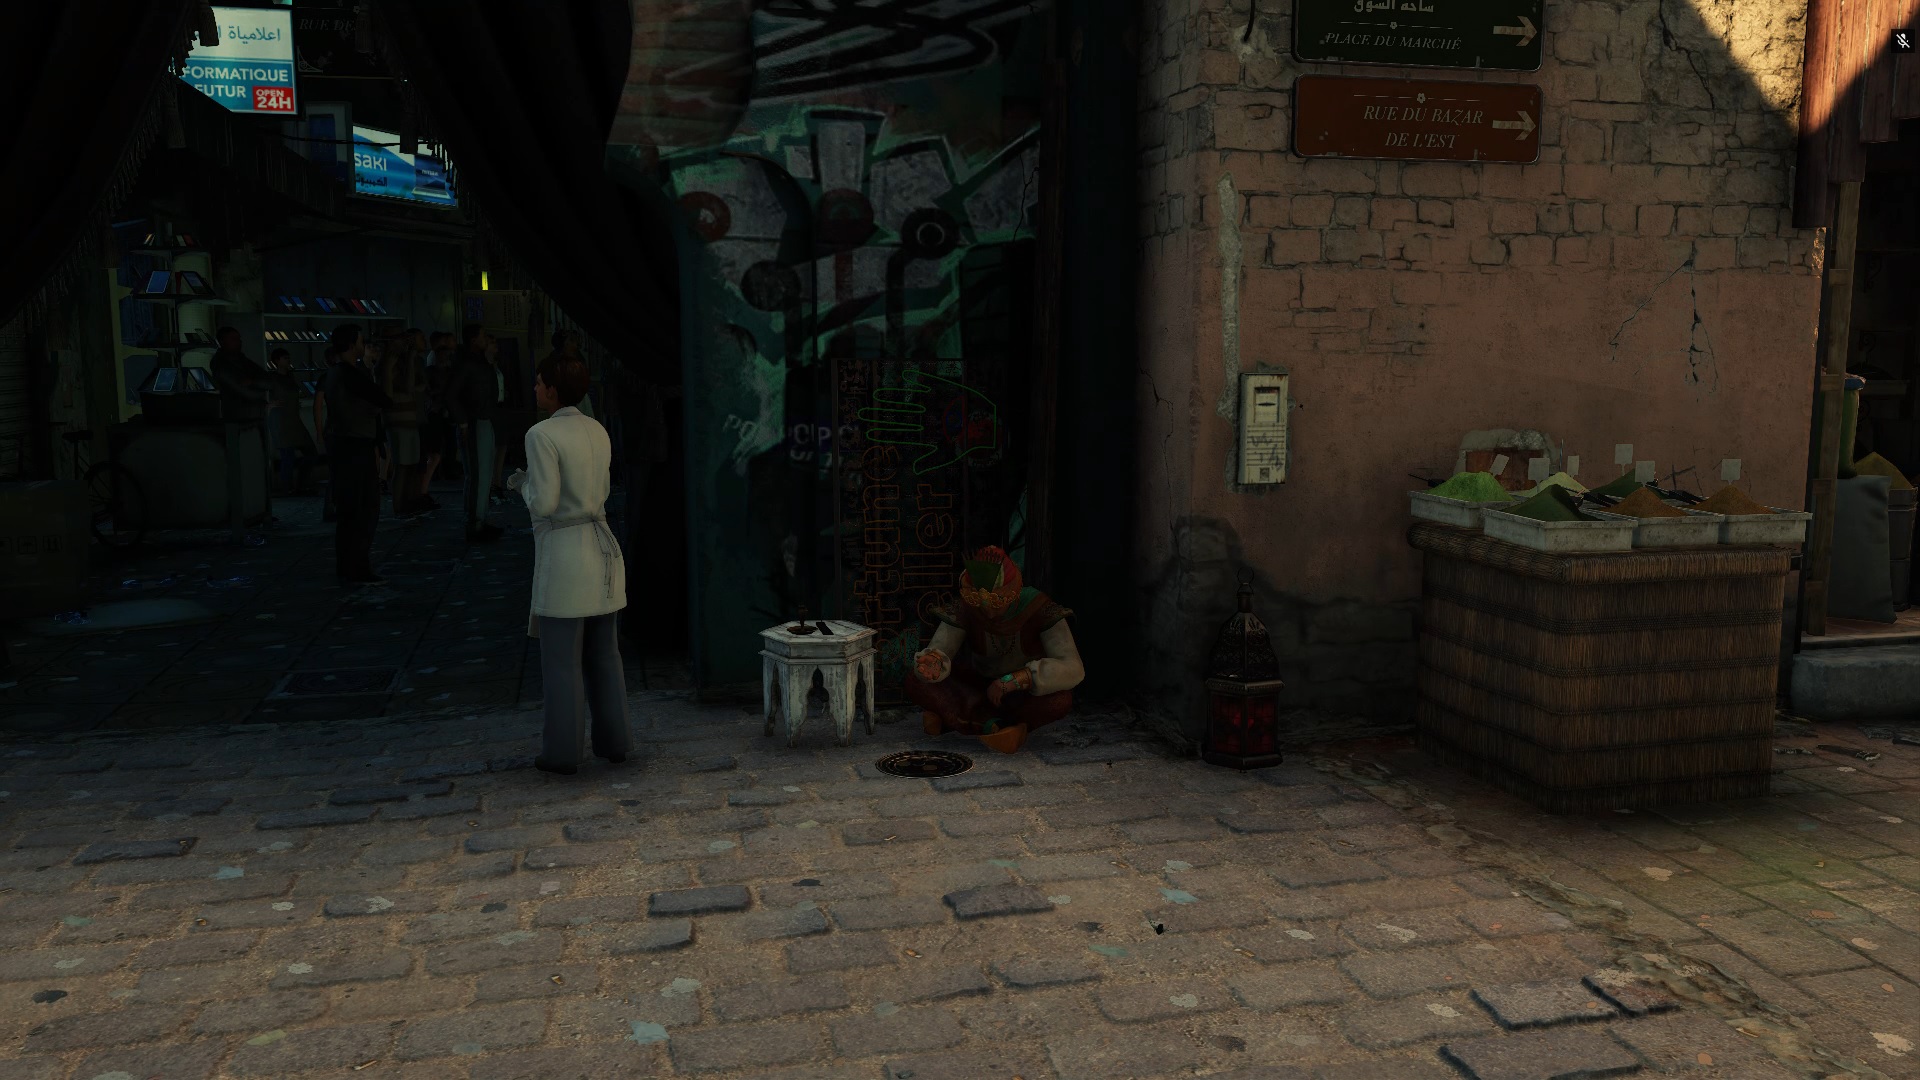
To do the Last Words challenge, give the car keys to the flamingo guy, but don't incapacitate him. Instead, leave him to meet Sierra and you just go first to the meeting point and hide by hanging off the ledge of the hole/shaft near the van. Make sure your disguise is prohibited on that area.

When Sierra finally met the flamingo guy, she will kill him by pushing him off the shaft. After Sierra pushed off the flamingo guy, she will see you hanging beneath on the ledge. Just let her stomp on your hand and kill you and the challenge will be completed.
Stone Cold Jane Austen 15 apr 2024, ore 20:25 
ya know, I'm somewhat redacted myself, so this guide was very helpful
mors 25 mar 2024, ore 4:35 
great guide
Shameless  [autore] 16 feb 2024, ore 6:58 
@DemoniacDeath I swear, when I think I've finally done all redacted challenges, more and more pop up
DemoniacDeath 29 gen 2024, ore 5:18 
Missing "Last Words" from Miami
Shameless  [autore] 2 gen 2024, ore 9:49 
@Lady_Neravin Whoops, you are correct. Thank you for pointing this out. I'm not sure how I missed those. They will be part of the next update
Lady Neravin 17 set 2023, ore 14:33 
There are some missing in Miami like the one with sugar or the one with the pigeons