Fear & Hunger 2: Termina
This Community Hub is marked as 'Adult Only'. You are seeing this hub because you have set your preferences to allow this content.

Fear & Hunger 2: Termina

159 ratings
The first day | Detailed walkthrough + FAQs
By KrystalCroft
Hello there!

SPOILERS AHEAD! Be warned! This guide applies for Version 1.7!

THIS GUIDE IS FINISHED!
This guide will explain how you recieve "Ending A" within one day and without resting.
Also there are a lot of FAQ´s about the game mechanics!

I also started documented some stuff about the MasoₓMode!

Also, it feels somewhat of a play-through document. I try to add as many pictures as possible to it.
I play it on the "normal" difficulty named "Fear & Hunger" with the mechanic.

If you find anything by yourself, feel free to contact me! <3
I will add this with your name here on this very list!
7
4
2
2
6
2
2
2
   
Award
Favorite
Favorited
Unfavorite
Thanks to...
...following people for their help!
  • Voronavirus
    ... for adding stuff about dismemberment!
  • Kanosis
    ... for adding stuff about dismemberment!
  • Chee
    ... for telling how to kill Bobby´s!
  • Smartest Lesbian 50 IQ (lol)
    ... for adding some insight about Crimson Father spawn!
  • Cullen
    ... for adding stuff about Doppelgangers!
  • Templar Headless
    ... for adding stuff about the Raid!
Character & Difficulty
You can find hints, tips and tricks way down this guide. Also interesting discovery thoughout my walkthough, including my experience with bosses and items. I started and finished this run with the mechanic Abelle on the "Fear & Hunger" difficulty and learned with her "eletronics" and "weapons craft".


A brief hint at the very beginning:
Never skip the character introduction.
You can skip the intro tho, it does not have any impact, I believe.

And remember to stay determined. :)
The goal in mind | Reaching Ending A
In order to reach the "best" outcome, this is a checklist of things we need to accomplished:
  • Make sure that all the other people get back to train and remain alive (I will focus on this)
  • Get all the three effigies and place them in the Alll-mer church
  • Get all the three Telelectronicscopes active and connected to the Logic
  • Get to the Logic
  • and ...
=============== FAQ´s ===============
How does time work?
You got three days until the festival "starts". If you reach the end of the third day after resting, you get a special cutscene and it´s "Game Over" for you. Each day is segmented into three phases:
  • Morning Phase
  • Evening Phase
  • Midnight Phase (Your range of vision is considerably limited)
Every time you consider resting, the game progresses to the next phase. If you are at the "Midnight Phase" and decide to rest, the game progress to the next day at the "Morning Phase" and announces it with a short animation.

Between Phases and Days, there can be minor to major changes happening in Prehevil. Certain characters might change their mind about the Festival and offer you their help or can even attack you without warning. It is also possible that you can run into unique dialogs or witness certain confrontations between characters or even discover some dead.

On the very last day at the night phase, you lose all your current party members and just be completely alone.
How can I save?
You can save the game by resting in any bed. Take care and read your character's insights about the bed you are about to use. They give a vague hint of how safe it could be. Also make sure no enemies are loaming around otherwise you will get ambushed while resting. The only safe location is the train. Remind yourself that resting will take time and thus progress the game to the next "time phase".


Another way to save your game is to use any perfection circle to draw the symbol of the god of "Fear and Hunger". Of course, you need the Skin-bible of the God of "Fear and Hunger" and a piece of chalk. Just remind yourself that once a symbol is drawn onto a circle, you cannot use it for anything else. A huge advantage is that time does not pass, so you can save and continue the current day.


Another way is to find the really rare "Book of Enlightenment", which allows you to save anywhere you like. The book is a one-time used item and gets destroyed after usage. This item also does not continue the current day and is therefore a really powerful and helpful item.

How can I create Soulstones?
You need to get a bone saw first.


Every time you beat an enemy, you can use the bone saw, so you can cut their heads off and keep that as a trophy. Be aware that the heads of certain enemies with certain physical traits (Pillarman) will cause the bone saw to snap. There are also enemies which do not have heads (Hounds) because of their (now twisted) anatomy. So think twice when you hunt down enemies for their heads.


If you managed to collect three heads, you can get to any imperfect cycle and summon there the "Trainted One", one of the so-called "New Gods". The "Trainted One" will give you for each head a "Soul stone shard".


In the crafting menu, you can create one "Soul stone" out of three shards. Sometimes Soul stones can also be dropped by foes with otherworld powers like Priests, but it is not a
guaranteed drop.
The Hexen Table | New Skills FAQ
In order to learn new skills, you need to use the "Hexen". The "Hexen" is a table, which allows you to use "Lesser souls", which are stored in "Soul stones" to learn new skills or increase certain stats slightly.


Where can I find Hexen tables?
  • Everytime you rest, you can access it in your dream
  • St. Domek´s Orphanage
    Easy mode: Accessable without limitations
    Normal mode: Not accessable
    Hard mode: Can be used once and you get attacked by two Maul Crawlers

  • Donnovan´s house

How does the Hexen table work?

The Hexen table can be seperated in two areas:
  • The first area contains all (passive) skills of all the contestants in "Fear & Hunger 2".
  • The second area contains all the spells/miracles that you can learn from the Gods of "Feaf & Hunger 2"

1: Contestants
At the very beginning, you can only learn those skills of the character you choosed at the start of the game. Even when you gain new party members, you cannot activate their respective skills at the Hexen. The only way of allowing your protagonist to learn those skills is to kill other contestants during the festival and take their soul afterwards:


Once you took their soul, you are allowed to learn their skills at the Hexen table. Each skill requires one soul stone.

2: Gods
By doing certain actions, you can increase the affinity towards a certain god. Mainly by drawing their symbol onto their corresponding circles. This will be visual represented by the aura you can see around their symbol:


Each circle around the symbol itself represent one level of "dedication" towards this god. So if you do not see any circle at all, that means you have no dedication/affinty towards this god and cannot learn anything at all. As you afinity towards gods grow, they allow you to use their gifts like powerful healing spells, miracles that summons blood swords which can hurt "otherworldly" beings or allow you to read other peoples mind. Keep in mind that for some skills you need to choose a character, which will learn the new ability. Choose wisely, because you can learn each of those skills only once.
You need one soul stone for each skill you want to learn from gods.

Rev Up FAQ
Using "Rev Up" allows your character to boost their stats during battle. Certain skills (like "Hurting") needs Rev Points to be used, too. Character´s gain after the first turn every turn one Rev Point. YOu don´t recieve Rev Points during extra turns.


  • One Rev Point
    Boost ATK to deal more damage with your next physical attack
  • Two Rev Points
    Boost ATK to deal more damage even more with the next physical attack
    Boost AGY so you act quicker (needs to be verified)

  • Three Rev Points
    Additionally to the previosly boost, the character will attack twice this turn
Hunger FAQ
Hunger works in five stages. As long as you remain over 50%, you won´t suffer from any downsides. I never went down to Stage 3 and below. If I get here for some reason, I will document it.


Stage 1 will be entered when Hunger drops below 51%
  • MaxHP drops by 10 points (so MaxHP is "90" now)
  • Attack will be halved
Stage 2 will be entered when Hunger drops below 41% (needs to be verified)
  • MaxHP drops by another 10 points (so MaxHP is "80" now)
  • ... and more?
Infection FAQ
As soon your character gets infected, there seem to be no downsides until the effect takes place. The game allows you to change the location three times with a final warning about the condition of your infected body part at the current location you are in.


If you then get to a new location without treading your infection, you will die.
You can cure infections with "green herbs" and their mixed variants of it.
In a last-ditch effort, you can use a bone saw and get rid of the infection (and save your life) by seeing the infected body part of your body. So try to avoid that at all costs and make sure you have some green herbs at your disposal.

In the last dish effort, you can use an imperfect circle to draw the sign of Sylvian to fully recover your health and remove all infections your characters are suffering from. But this requires of course the "Skin Bible of Sylvian".

Dismemberment FAQ
Characters of your party can lose their bodyparts during their visit in Prehevil. Losing a body part is always a downside in this game. Losing body parts is permanent and cannot be healed!
Use the "defense" option in battle to get half damage and get a higher resistance for losing limbs when your foes using sharp weapons. But there are enemies (like Death Mask) which seems to ignore that Defense-Bonus. So be aware!

You will have those disavantages:

Leg(s)
  • Losing one leg: seems not to have any noticeable effect (needs to be verified)
  • Losing two legs: Character will crawl on the ground and is unable to run at normal speed.
Arm(s)
  • Losing one arm: Two-handed items (like rifles or large weapons like Spear) cannot be used any longer. During a fight, the items will be "dropped" and the character fights bare-handed.
  • Losing two arms: Not able to wear any weapon which requires a hand.

If you lose one arm and all legs, you can still move at reduced crawling speed. Fleeing is pretty much impossible, but you can still continue "playing"...

But if you losing all your arms and all legs, you cannot move at all and your only option at this game is suicide. The game offers you "To hold on" but according my patience nothing will happen...


How can I lose body parts?
  • Fighting against enemies which wield sharp weapons like blades or chainsaws
  • Running into bear traps
  • Using a bone saw (to "heal" infection)
  • Getting attacked by certain spells like "Hurting" from Priests
How to recover missing arms/legs:
You can draw on any asymetric cycle the symbol of Sylvian to replenish all your health and also missing limbs back. But this requires of course the "Skin Bible of Sylvian".

Misc Tips & Useful Items & Hints
Story progression hints
It seems that at certain points you can encounter butterflies, flying around in circles. Maybe they provide a hint of story-related progression? Or do they also have lore meanings? It is unknown for now...


Really helpful items
Pep pills
Boost AGY which allows you to act faster AND gives the character an Extra Turn. This is helpful during important fights and gives you an extra edge for additional damage or strategic options like using the Extra Turn for healing. Extra Turns do not increase your REV points.


Booby trap
The booby trap allows you when used to place a stun mine. Foes walking above it will get stunned for a brief moment. if you rush at this brief time window towards the stunned enemy, you start the battle with a "First Strike", which allows you to strike without the enemy doing any action. Smart enemies (like Needles), foes with unnatural bodies (like Pillarman), or "otherworldy beings" might not be affected by the Booby trap.


Rifle Mk1
The rifle is really helpful! It allows you to dismember foes their arms if you hit them "on the map" just once! When the rifle is used during a battle encounter, it can deal a lot of damage but it does not guarantee an dismemberment of limbs. This works on nearly every enemy except unique one, like "Needles" and foes with a unnatural strong physical body (like "Pillarman") or those with an "otherworldly" body (like Ghosts). Everytime you land a shoot, you will get a messege promt, telling you about the results of your shoot. Just remind yourself that shooting the rifle will cause you to stand still for a few frames, so make sure there is enough room between you and your target.


Mxed Herbs
Always try to keep "Red Herbs" and "Blue Herbs" until you will find "Archemillia Vol. 1".

This book allows you to create the extremly potent healing item "Mixed Herb" which just needs 1x Red Herb and 1x Blue Herb. It heals 75 HP!


Glass shards
One of the most useful item you can use against boss monsters. This item can be found scattered around Prehevil by interacting with glass shards you can see on the ground.

You can use those shards by throwing them into your foes head and blind them and reduce their accuraty when they use physical attacks dramatically. There are a fix number of shards, so use them wisely.


Hardened Heart
You can get this item for 99 Shillings at "Dr. Kefers Tricks & Magic" at the Prehevil Shopping Street. This item allows any character with low HP to gain a really strong defensive buff in battle, nearly negating all incoming damage. Get this item if you want your character becomes tough to be beaten.


About having more party members
Just keep in mind that as your party might grow and gain more power because you can deal more damage in one turn and have therefore more options to overcome your opponents, you also might notice that avoiding enemies while exploring got also become more difficult - Enemies need to touch you or one of your party members to force you into a battle. Be aware of this "downside" when you managed to gather a four-member party.


Map of Prehevil with important markers:
The statue-like symbols are locations of important items which need to be collected.
The X-marks are ... Important too. More info following on that.

Side Quests
Wretched Being
In the Old City you can encounter in one of the houses the Wretched Being. He asks you to bring him the Head of the Priest, which is located at the "Mayor´s Mansion" and the Head of the Woodsman, which is located at the "Outskirts of Prehevil".


If you successfully bring him both, he will hand you the Accessory item "Shield of the Four", which is a decent defense item which also boosts otherworldly defense noticeable.
Important NPCs Encounters
Jki Turso
When you try to find a way though the trees in Maiden Forest, you will encounter two trees growing strangely, resting atop of a little hill. If you interact with that very hill, you will encounter Jki Turso.


Ask he asked that "It is his time", I asked him honestly what he ment by that instead of telling him that Jki Turso is right. He reacted slightly mad and told me that he is waiting for Vanushka and that I should not wake him up again from his slumber. Nothing bad happend, he turned back into his original position and seems to continue his slumber.

I will get back here as soon I learned more about Jki Turso his purpose.

Kaiser
If you getting north from the crossing at Mainroad Junction, you can spot Kaiser and one of his Elite Soldiers walking towards the Tower.


Kaiser will stop briefly and look over his shoulder to look at your character. There seem also to be a small chance that the elite guard turns around and shoot at you. Watch out, this shoot can take ~40 HP.
Random Battle Encounters
Needles
In the city of Prehevil, you can encounter outside areas "Needles". If you get the dialog line of cold and life-less laughing (also to be heard in audio), you need to hide in any building (by entering it). This will reset the random encounter with Needles and therefore avoid any physical contact with Needles. Needles is a smart opponent and does not step into your traps!

"Needles" is a strong foe that can deal poison, bleeding, and infection. He can knock out your protagonist with one "deadly" attack which can be avoided by a lucky coin flip. Needles is vulnerable to fire (at his body part) and get continuous damage by burning. I was able to beat Needles with two characters and focused all my attacks on his torso.

If you beat Needles, you receive three shots of Heroin and his head. And you might never be hunted again by Needles. :D


Raid
In Prehevil you can encounter certain areas around the "Prehevil Shopping Streets". The raid will be triggered by some glass vial breaking on the streets, followed by chainsaw sounds and three enemies chasing at the same speed as you. Once spawned, the Raid will remain there and chase you as soon you enter the area! This fight is incredibly difficult but here is some insight I was able to gain:
  • Rifleman (left) - Can sometimes skip turns by aiming, deals great damage with his skill "Critical Shot"
  • Chainsaw guy - Attacks multiple times with one attack and can dismember your characters
  • Mallet guy - Deals noticeably high damage
Hint: You are not able to aim any body parts, everyone is just a "single target". So disarming single enemies is not possible. All foes got high HP values. Taking Pep pills can help massively here. Use glass shards to blind your enemies. They can get poisoned. Focus on the "Chainsaw" guy first!


You don´t get any special rewards (except their heads), but they won´t hunt you down again. So yay? :)

Check out this video to see how you can weaken the mob easy by "TheGraveyardWatchdog"! Leave a like and drop a comment there if you like their videos! Thanks!
https://www.youtube.com/watch?v=hpWPkqoreU4

Death Mask
Sometimes the really strong foe "Death Mask" can jump out of one of the wooden coffins laying around the game. They are fast (the same speed as the protagonist) and keep the same position even when the player changes his location.


Death Mask their arms take a lot of hits and are vulnerable to poison Making him blind by throwing glass shards at his face is also a really helpful way of avoiding his attacks. Death Mask got two short sword-like weapons. He can attack twice with each available weapon and get a decent chance of dismembering arms of your party. Using the "Defense"-Option against Death Masks will not protect your party from the loss of their body parts!

I was able to beat him with a full party (four members). If you manage to beat him, you get his Death Mask, a helmet-class item that slightly increases defense & m-defense but greatly increases M-Attack.

Death Mask is not a "unique" encounter. He can spawn at certain locations and once spawn, remains there until it has been slayed. This means you "can" encounter multiple Death Masks in different areas! It seems that certain "milestones" trigger Death Mask his spawning. Locations I encounter Death Masks so far are:
  • The Old City (where the Moonscrouched living near the bridge)
  • The Old City (near the store by the wooden coffins)
  • South from the St. Domek´s Orphanage (near the store)
Important/Interesting Battle Encounters
Doppelgänger
During your playthrough, you can encounter (at the moment 1.7v) three Doppelgangers. Those are:
  • Levi - Can be found at the sewers
  • Tanaka - Can be found in Tunnel 1
  • Marina - Can be found at the Book Store (but not during a One-Day-only run)
Interestingly "Mataneko-kone-Magnificat" told us something about doppelgangers and that the humans itself caused this madness and tearing up time and space itself:

  • Marina will comment about the existence of the Doppelganger when she meets her own.
  • You can saw their heads off, and they count as having a contestant head, which means they're viable as currency for Pocketcat
You can learn more about the doppelganger by watching this video from "NoCommentary". Leave a like and drop a comment when you like their content!
https://www.youtube.com/watch?v=WNEWxl4CCrI

Irrational Obelisk
<coming soon>

The Ratman
As soon as you reach the western exit and enter the "Sewer Mid-tunnels", you may encounter a person which looks like a rat man.

You can follow him, it will always run away, but you can use a moveable box to cut its escape routes.

If done correctly, you can confront it. If you learned "Mastery over vermin", you can talk with the Rat-Man to learn more about him and his kind. Be aware his attacks can infect you. A few slashes on his chest end this fight relative quick.
Blood Portals FAQ
This list contains all possible blood portals, which can be created when the Skin Bible for Alll-mer has been found and the "Pefection circle" has been found. You need one piece of chalk to draw the cycle correctly.


There are currently no downsides noticeable when using those blood portals. The downside for creating blood portals is not being able to use the sign of the god of "Fear and Hunger" for saving your game. Consider which blood portals might be smart choices for your playthough. I recommend the Church of Alll-mer, since this is a central place to get fast to several places.

Train cabin


Old town


Prehevil Book store


Church of Alll-mer


PRHVL Bop Speakeasy


Donnovan´s house
Golden Doors FAQ
This list contains all possible "Golden Doors", which can be opened when your affinity with Rhea reached maximum level. You can only increase your affinity if you find the "Skin Bible for Rhea", some chalk and you draw Rhea their symbol on "Asymetrical circles"


Once you reached maximum affinity towards Rhea, you need to get the skill "Golden Doors".

Once you got the skill, you can then enter any golden door, you will find yourself at the "backrooms", allowing you to "fast travel" between the different golden doors which exists thoughput the "Otherworldly" locations:

The golden doors are located at following places:
  • Church of Alll-mer, Level 2


  • Tunnel 7 - Level 2


  • Schoolyard (at the orphanage)

Masoₓ-S/M Mode FAQ
I also started playing after all my +100h experience with "Fear & Hunger 2" the Masoₓ-S/M-Mode - the "Hardmode" of the game - to experience the differences and decide also to write these down.


The experience differs noticeably and I recommend finishing the game on any other difficulty before jumping into this hell. Here are the discoveries I made so far:

You are alone
Normally, you would wake up on the first day at the "morning"-phase and see all the other characters. In Masoₓ-S/M that is not the case. You wake up in the middle of the night on the very last day it seems. Nobody is at the train - even worse - they all "mutated" to their moonscorched form. It seems you are all alone.

You will also slowly lose sanity (mind points so to speak) so watch out.


Resting
Resting does not grant you any of the advantages you experience in the other difficulty settings. Yo get mocked by Per´Kele and wake up immediately.

After you wake up, you are about to witness how you die. Don´t rest, there is no benefit in resting anymore.


The Moon is watching you
As soon as you reached "Riverside" or the "Outskirts of Prehevil", you will receive the following text prompt:


From this moment on, as you walk in the open while the moon is shining upon you, you will receive after ~30 seconds a visual "warning", that something nasty will happen. This visual and audio warning will repeat every ~6 seconds until you are exposed to the moonlight for roughly one minute. After that you see a cutscene and you just die. You can escape this effect by hiding from the moonlight and staying there for some time. So watch out.

Enemies are way tougher
Dealing damage to your foes is substantially more difficult. While in "Fear&Hunger"-Difficulty Mode it was beneficial to attack most enemy's torsos to deal with them, the torso part of most enemies are way together. Some examples - The "Villager with the Sickle" can take ~500 damage on their torso before they die, 100 points more as on the difficulty "Fear and Hunger". The "Villager with the Rusty Pipe" needs ~300 damage to disarm him, his torso takes now ~900 damage before he dies - That is roughly 400 more as in "Fear and Hunger"-difficulty.

It is now way more efficient to attack their legs to make them lose their balance and then attack their heads. Your foes will also deal more damage, so take care.

Trusty nails
Watch out for those rusty nails which stick out from boards laying on the ground. They will deal infection and bleeding. You don't want this, so watch your step.
=============== WALKTHROUGH ===============
The Train & The Contestant
You start at the train, waking up all of the sudden from your nightmare. Make sure that you pick up the map, which will help you navigate through your adventure at Prehevil.


As soon you get out, you see all the characters on the train, which decided to stay. Listen to the conversation and talk to the people to learn a bit or two about them:


Now, we going to list every character with a few pieces of info and if they are at the train present as you wake up or not. Again, we are trying to save everyone in this run. So we are dealing with 13 contestants plus ourselves (so 14 contestants).


Daan, the Doctor

Can be found at the beginning of the train.
Daan will leave the train to explore the "Old Town" to learn more about the "moonscorched sickness".

Abella, the Mechanic

Can be found at the beginning of the train.
Abella will leave the train to explore the area of the bunker west of the "Old Town".

O´ssa, the Yellow Mage

Can be found at the beginning of the train.
O´ssa will leave soon on the train to explore the "Church of Alll´mer".

Olivia, the Botanist

Can be found at the beginning of the train.
Oliva will stay on the train since she cannot move without a wheelchair.

Karin, the Journalist

Can be found at the beginning of the train.
Karin will leave the train very soon after the introduction and travel towards the "Old Town" to investigate the "scoop".

Pav, the Officer

Already left the train and rushed towards Prehevil.
He will hunt down Kaiser, which is also somewhere in Prehevil.

Marcoh, the Boxer

Can be found at the beginning of the train.
Marcoh will stay on the train.

Levi, the Ex-Soldier

Already left the train and rushed towards Prehevil, most likely overwhelmed by the events that took place in Prehevil and panicked.

Marina, the Occultist

Can be found at the beginning of the train.
Marina will stay on the train.

Samarie

Already left the train and rushed towards Prehevil for some reason.

Tanaka

Can be found at the beginning of the train.
Tanaka will leave the train very soon, regardless if you tell him to stay or not. He heads towards the "Old Town".

Henryk, the Cook

Can be found at the beginning of the train.
Henryk will leave the train and head to the "Mayor Mansion" to find food.

Caligura

Already left the train and rushed towards Prehevil. He will be at his store in Penhevil in the Shopping District.

August

Can be found at the beginning of the train.
He will leave the train soon and can be seen exploring Prehevil and the woods.
Old City & Karin Bauer
As you introduce yourself to the other people, get as quickly as possible around the train to the north to catch up with Karin Sauer to get some interesting dialog lines. You can follow her along the way, just make sure she will get to the next area first, then you will see her continue walking along the way.

Karin will travel from the Train towards the Lake and from there on to the "Old Village" near the Lake. Be aware of the enemies around the area. She will stop near the Lake and watch the waters. If you revisit the area, she will be gone.


Continue travel through the "Old Town" until you reach the entrance to the "Derelict house". Watch out for traps (they can dismember you and put a short end to your adventure). You should avoid fighting against the moonscorged since they can deal "infection" with the attacks, which is at the moment pretty devastating.


You can find Karin near an entrance to the "Derelict house". Exhaust all dialog options to learn more about her motives.

Get your way through the "Derelict house". Avoid fighting against the armed foes just by rushing through the kitchen and rushing to the west exit.

The Major´s Mansion & Henryk
Once you leave the house, head north to the Mansion.


Watch out, a villager is loaming around this area. Make sure that you disarm his arm with the sickle first otherwise there is a high chance you get an infection and bleeding. If he places a bear trap, attack it to disable it. The torse can take up to ~400 damage before dying.


There is also a variant version of the villager with a rusty pipe as a weapon which can stun characters for 1-2 turns. This version is tougher and can tank more damage (like ~600 damage on the torso), so be aware.

Henryk the cook can be found on the first day at the Mayor´s Mansion. When you reach the first floor, you will find Henryk:


Follow Henryk and talk with him again:


Follow Henryk again and yell at him that he needs to "Snap out of it!". You will learn that Henryk is looking for food and ask you to tell him when you find the hidden food storage so he can feed himself and the others.


If you get to the east of the first floor, you will spot a praying priest in dark robes. Try to get past him and head directly for the ladder in the next room to the north.


Don´t worry: The dark priest will not follow you down here. If you managed to get down, you will find there the key to the Mayor´s Mansion, which allows you to open all doors at the Mansion,


You can open nearly all doors with this key in the Mansion. We need to get to the entrance of the mansion to open this door:


Once you reached the cellar, go down the stairs and head towards west to find the hidden food storage room:


Get back to Henryk and share your findings with him:


As you get back with him to the food storage room, you learn that he will prepare food for all the people on the train. Henryk will also give you the sewer keys, which he found while checking the mansion.


Important: If you leave the mansion and the priest is still alive, the priest will roam now outside near the entrance of the mansion. Try to avoid confrontation for now, since the dark priest is a strong foe for now and can preform a deadly attack.

If you get back to the train you will discover that Henryk will now cook meals for all the people on the train, including yourself (and refill your Hunger Meter).


This will also avoid Henryk from turning into the "new major" of the Old Town and also kidnap Marina later. :) So we saved both.
The Old House & Levi
Before we get to the sewers, make sure that you enter south from the "Mayor´s Mansion" the "Old House".


Inside the "Old House" you can see a trap door that leads down to a basement:


As soon as you progress to the basement to the east, you can see someone barely, looking frightened. You can choose any of the dialog options - both will cause Levi to run off. I think this is important, otherwise, you might not see him later again.


Important: If you going to explore this area any further, be aware that foes loaming in this area. Watch for the female villager, which is equipped with to knives, and facing her alone is not recommended.
Getting to Prehevil City by using Southern Sewer tunnels
After you receive from Henryk the Key to the Sewer, you now being able to access the sewers with it. Just head from the train north as you would go to the lake. As soon you reach the broken marble figures buried in the ground, walk north instead of east until you reach an iron gate. Be aware of a madman shooting with a rifle at you.


Once you open up the gates to the sewers, you gotta walk your way through. Be aware of enemies lurking in the dark. Those husks are durable and also deal a great amount of damage. Fighting those beasts alone can be a tough challenge. Remember that you can dismember foes with a Rifle if you own one. Those foes can be avoided pretty easily, tho.

You can find the exit ladders at the west junction of the "Sewer Mid-tunnels" which leads to the city. Here is a video showing you how to get to Prehevil quickly:
https://youtu.be/PmSL1oJ42eA
Prehevil | Restaurant Bílý Vul & Levi
Make sure before you going to do this that you have one syringe of Heroin with you, otherwise you cannot do this. We are going to save Levi, which will join our party and be a great addition!

As soon you leave the sewers, you find yourself at the crossing near the Alll-mer church at the "Main junction".


If you want to get a hint for a later puzzle, get inside the "Old Hotel" on your way:


Write this time down. Trust me, it can be helpful. :)

Get west and leave to leave this area and then get south. Check out the screenshots to see where you need to go. Important is to mention that you can get ambushed by Needles, so watch out.


Watch out, the policeman (aka Bobby´s) are walking around the City of Prehevil. They have three arms, each equipped with one baton and they deal a good amount of damage.
The odd thing about Bobby is that he cannot be killed. You can defeat Bobby in battle and if you are quick enough, you can "beat it" and then saw their head off. Finally, a way to get rid of them!


When you finally reach the restaurant, get east and go downstairs. Once at the basement, seek the kitchen north. At the northeast corner, you can find the Ex-Soldier Levi, not in his best shape dealing with the withdrawal of his drug addiction and not able to help himself. You can offer him Heroin - Levi will take it.


He will ask you if he can join your party. Of course, you can, Levi! :)


Levi - What do you need to know:
Levi is suffering from Heroin addiction. When you allow Levi to inject a shoot of Heroin, Levi get a noticeable boost of ATK, DEF, and AGY (which applies to other party members too). The downside is when the effect of Heroin wears off (and it does relatively quickly) that Levi suffers from "Stage-1 Withhdrawl" and then from "Stage-2 Withdrawal".

The Withdrawal Phases in detail:
  • One !-Symbol
    ATK/DEF/AGY reduced (needs to be verified)
  • Two !-Symbols
    ATK/DEF/AGY noticeably reduced


Levi is due to his withdrawal problems physically weaker, slower than usual, and receives more damage from attacks. If you like to protect Levi, give him more protective gear and equip him with items that increase Levi´s AGY so he can act faster - otherwise he will most likely act last in every round.

If you having "Small Thing´s Amulet", I suggest give it to Levi. Even with his withdrawal debuff, he acts slightly faster and allow him to be more useful in battles.


After you bring Levi to the train, he will ask you if he can settle down here with the others:


You can ask him to tag along with you. In my case, he agreed and joined the protagonists' party.

Maiden Forest | Tunnel 7 & First Telelectroscope
After getting Levi for our party, leave the restaurant and get directly south (and hope that Needles with not ambushed you). As you reach the "Old Town", get directly west to reach the first bunker we going to discover. The bunker is located at "Maiden Forest". If you reach a fork, you are on the right way. Continue to head west.

On your way, you will get attacked by two headless hounds. They can cause poison which can be healed using a "White Vial". Focus on the torso! The body of the Headless just takes ~400 Damage and can be quickly dealt with. Just remind yourself that Levi might be at the moment slow due to the Wirthdrawl effect, so Levi might act last.


As I explore the Tunnel, I noticed that I did not encounter Needles there. The reason might be that I saw Needles at the City of Prehevil and therefore he is no longer here present. Therefore, it was really easy to get to the west area of the tunnel and restart the generator by pouring in some diesel.


Get now to the now-powered elevator nearby to use it.


Interesting to notice is that Tanakas Hat can be found laying around:
If you enter Tunnel 7 before getting to Prehevil City, you can witness Needles mercilessly cutting off Tanakas head, killing Takana in the progress. Since we take the route through the sewers, that seems to have an impact on the story.

When you exit the elevator and enter "Tunnel 7 - Level 2", you can see a woman, dressed in a lab coat walking ever faster to the right until she walks out of sight. Maybe a researcher?!


When continue walking east, you will see the relatively fresh remains of the soldier Jonni and a letter was written for his loved one, but never being able to send some interesting information about the Kaiser himself and Prehevil. You will also find here the Eagle Key (which does not have any use for me now, but, interestingly, the key is still here).

Regardless, right next to poor Jonni is an interesting machine you can operate with.
When the instruction manual has been read, you learn that there are three devices named "Telelectroscope" which need to be turned on. If done correctly, they will connect to "The Logic". Once turned on, this process cannot be reversed.


Walk south to the adjoining room and you will discover a Rhea circle. Enter it.
Otherworld | Tunnel 7
Once you enter the "Otherworld"-version of Tunnel 7, you noticed as you went north, that there is also an "Otherworld"-version of the Telectroscope, which is interesting to know. This means that whatever Kaiser researcher developed at Prehevil, seems to make an impact on the "Otherworld" realm. Or maybe it created the Otherworld realm in the first place?

Head to the west to further explore this otherwordly realm but watch out - you will spot in the shadows "Ronteal" which is buried in the ground. You can easily avoid them by taking as much distance as possible. If done correctly, you might avoid any confrontation in this area.


But you can choose to fight them for an interesting award - Take a rifle and shoot those Ronteal, which have large guillotine-like arms to disable their devastating attacks. Their biting attacks can cause bleeding, so watch out. Attack their stomach mouth to disable their "Bite"-Attack. Focus afterward on Ronteal's torso which can take 1000~ damage before perishing. Make sure you saw their head off for soul stone fragments.

Once beaten, get to the "hole" the Ronteal emerged from and take the rusty pearl. Those pearls can be used later by a special vendor to exchange those for powerful items. If you are interested, take on this challenge.


Continue walking until you will find a hole in the wall. Enter it:


Now use the ladders to climb up and continue following the path:


You will eventually find a fork:


Golden Door
Check out the "Golden Door FAQ" in this guide to learn more about those if you want to use them.


You will eventually you will find another fork:


Get to the Exit
When you exit this area by using a wooden ladder, you find yourself outside again.
Abandon House & Black Kalev
Before we head now to the "Church of Alll´mer", you can consider getting an additional ally. To get this ally, you need chalk and the Skin Bible of Rhea, otherwise, you cannot do this.

If you collect all items above, you can takedown the Huntsman in front of the "Abandon House", which is located north of the Train. The area is called "Outskirts of Preheval". We need to open this basement door.


There are two ways to enter the basement:
  • Bolt Cuttters:
    If you found the Bolt Cutters inside the Alll-mer Church (or if you are lucky and found them randomly) you can break the iron chains of the basement door. This avoids the confrontation with the Woodsman at all.

  • Easy bear trap:
    You can beat the Huntsman with one character and a bear trap easily. :)


    Just aim - after the Woodsman stepped into your trap - for his head. One attack should bring him down. If you defeat him, you get the keys to open up the basement.

  • Normal Fight:

    If you need to fight the Woodsman head-on but you have a rifle, use it. If you don´t have ammo (or the rifle D:) focus on his axe arm first, because it can deal a good amount of damage. It would make sense to aim for his both legs and then deliver a deadly blow to his head. If you want to play save, use "Glass shards" to blind him! If you defeat him, you get the keys to open up the basement.
Get to the cellar of the abandoned house and head left, until you find an imperfect cycle, which will be used by the old gods. Draw Rhea´s sigil onto the cycle to get to the "Otherworld" version of the abandoned house.


There will be no enemy encounters, just a mysterious man dressed in black. He will ask you a question which I answered with the first option. He will tell you his opinion about "good and evil" and his remarks on the new god called "Science" and offers you his help.


As soon as you walk out of the "Otherworld"-Version, you will spot the Black Goat standing on the pouch and you will then get the chance of recruiting Black Kalev for your party.


Important note: Black Kalev cannot be controlled in battle. He cannot use items nor Rev-Points. Black Kalev cannot equip any items (except one Accessory slot which I was not able to use so far). Black Kalev also sometimes stops randomly and eats grass. You can convince him by giving him a carrot.

Also, if you get to the Train, Black Kalev will rest at the end of the first cabin, so you can tag with him along if you like having him around.


The same applies when you get to the PRHVL Bop. You can pick up Black Kalev here.
The Church of Alll-mer & O´saa
I would suggest - if you get your new party members first - to reach the "Church of Alll-mer" though the sewers - again - to avoid Needles in the Prehevil City. As soon you leave the sewers, you find yourself at the crossing near the Alll-mer church at the "Main junction". We need to find the "Church of Alll-mer" which is located east.


Eventually, you will reach the Church entrance. Enter the Church:


When you walk north, you will see an altar with three sockets. At this place, we need to place three effigies which we still need to find. Keep this location in mind, we get back here later:


When you walk into the doorway left from the altar, you can find a stairway and a toolbox with a letter from the craftsman. It explains the location of a hidden toolbox in the church and the location of three effigies which we need to receive and place at the altar to reveal a hidden pathway:


Get the toolbox and get the chandelier down by climbing to the wooden planks on the upper level of the church.


Just make sure that you avoid Pillarman if you just have one character. They take some damage and bullets seem not to have any impact on them. If you are in danger, you could also just jump down the ceiling. You received ~25 damage and it did not have any additional "downsides".


O´ssa
Important is to address, that you can take the confession booth and have a dialogue with a "deep-voiced man" about your sins. I "sinned" in that I committed a lie towards a stranger and keep it for myself.

As you walk out of the booth, you see the Yellow-mage O´ssa is also stepping out of the booth and will have a conversation, most likely determined by the sin you told O´ssa about.
He reacted laughingly and I joined his laughs. O´ssa apologized afterward for being rude and bade his farewell.


Jump down to reach the lower levels of the Church of Alll-Mer.


Important: Once you jumped down, you cannot get up. Make sure you loot the area and prepare yourself.


Cellar of the Church of Alll-mer & Effigy of Martyr
As you jumped down to the lower levels of the Church, head towards the west.


When you see a crossing, try to avoid using this left pathway. Once you step though that room, that will trigger spawning a mind-controlling foe. You don´t want this. :)


Just a few moments later you will reach a large room with a golden statue looming in the dark.
Reach the statue and take the Martyr effigy with you. (Addendum: it could be that after you picking up the effigy, that one of the "mind-controlling" priest named "Crimson Father" could spawn. Take care. A bit later on that guide I explain some weaknesses about them.)


Now go south until you see a corpse near the iron gates and take the Chruch keys with you.


Now walk the way back to the cells and open the one, where you see the Pillarman sitting on a bench. He did not attack me.


Head south until you see an asymmetric cycle. Use it to get to the "Otherworldy"-Realm.
Otherworld | Church of Alll-mer & Samarie
Before we start, an important hint: Staying in otherworldy realms will slowly drain your mind points (your sanity, so to speak). Should your Mind drop to Zero, your character will receive the fear "Panphobia", a fear of everything. You don´t want this. :) So try to look at your mind level now and then!

As you enter the Otherworld version of "The Church of Alll-mer" head to the left until you reach a room with stone pillars. I did not encounter any enemy here and use all the clay to create a copy of myself. Reminds me of allowing me to define at the very first day the world partly, too. This might have some significance later, but I cannot confirm this so far. If you have "Black Kalev" with you and mold all the figures, you can get an interesting dialogue line. :)


When you reach the room with the stone pillars, there are three important discoveries to be found:


North | Statue of Flesh
When you go North, you can discover a statue made of human flesh. There are no interaction options for me thus far.


East | Golden Door
If you walk for a bit, you will discover a pit and next to it a huge golden door. Check out the "Golden Door FAQ" in this guide to learn more about those if you want to use them.


West | Samarie
You can find a little girl in the corner, crying about killing someone by accident. I comfort her which allows me to help her get back to the train. She refuses any assistance tho getting to the Train, she will do it by herself "with the red arc", which could be a reference to the blood portal through Alll-mer.


After this, I took the way back to the asymmetrical circle to get back to the "normal version" of Alll-mer´s church:


If you get back to the Train, you can find Samarie in the second train cabin, resting in one of the seats. You can exhaust all dialog options to learn more about her.


Interestingly, she does not tag me along. At least for now. But she is safe now, so that is another one now in safety! :)
Leaving the Cellar of the Church of Alll-mer
Once getting back to our world, head west:


Watch out - this area is got a few twisted priest-beings who use a crude dagger which can cause bleeding and infection. The foes are also able to mind-control single targets and make them attack their party. If you are alone, you will attack yourself and you won´t be able to control your character! I would suggest shooting down their arms by using a rifle or using traps to weak them massively. The torso can take ~1200 Damage before they die, so make sure that every attack counts. Using glass shards seems to avoid them using their mind-control magic.


If you deal ~300 Damage to their torso, the "Crimson father" will transform into a more dangerous version. On the plus side, mind-control abilities will be resolved, so you can attack each character. Watch out - their "BIte" will also cause bleeding and infection.


You will get to a bigger room - but be wary - in most of my gameplays I encounter here - when I get too close to the coffin - a "Death Mask", which definitely can end your story here. Make sure to keep your distance and try to get to the west entrance to open the gate and then head south to continue getting out of the church:

As soon you reach the corner, stay near the wall and rush east to avoid any further conflict. Pass the room with the asymetrical circle.


Head north until you see a perfection cycle. Pass this room and pull the lever to open up the iron gate. Get then south to use the elevator at least once. it allows you to get quicker to the "Church of Alll´mer" - a shortcut so to speak.
Getting to PRHVL Bop
After finishing with the "Church of Alll´mer" and getting the first effigy, we head now to the PRHVL Bop, a local bar that can be considered one of the safest places in Prehevil.

This trip is rather dangerous since we need to travel through a decent chunk of the city of Prehevil. Since it is really difficult to screenshot everything while on the edge, I will put here a video on how to get there asap.

https://youtu.be/T2FowyLxgrI

Important to say is, that I always try to avoid "Needles". If you read that one line, you know that Needles is around.
Always reminding yourself where you can enter buildings to escape Needle his hunt. Every time you leave the current area where Needles chase you, Needles will despawn and you can safely walk back to the previous area.

As you reached "Prehevil - Back alleys" you will encounter "Fecal hound". They have a rather weak torso (around ~300 damage) and can cause infection with their bite. You can also easily take them down with a shoot of your pistole.


Eventually, you reach the entrance of PRHVL Bop:


As soon as you enter the PRHVL Bop, your party will browse through the bar. Before you continue your adventure, make sure that they join your party again:


Check out the floor in this area at the bar to reveal the speakeasy of the bar:


Make sure that you check the table at the east to collect a pistol and the weapon rack to the west to get a rifle. Also, make sure to check the map at the northeast location - It will reveal the three locations of the Telelelectroscope and another really important location : The White Bunker.


Also an important hint:
This location can be really useful in creating a blood portal by using an Alll´mer symbol.
Getting to St. Domek´s Orphanage
As you leave the PRHVL Bop, make sure that you walk at the crossing north and avoid getting into any confrontation with the "Executioners".


Continue walking north and walk up the set of stairs and continue walking west:


Be careful: When you walk through the tables and seats, three "Sew Job´s" slowly descend from the skies. If you run quickly enough, you can avoid any confrontation and reach the door to the "Department Store".


IF you need to fight them, be aware of their three heads - They are rather weak (~200 damage per head) and if you can kill all three of them, you can kill their host. So focus on their heads. They can cause bleeding and can attack you multiple times. Those enemies do not give you any meaningful rewards whatsoever. :(


Check out the "Department Store" for some goods and continue walking northwest to leave the Store and enter "Prehevil - Northwest".


Before we continue heading to "St. Domek´s Orphanage", check out your inventory if you got this item - you need a Purifying Talisman to get the second effigy:


If you don´t have a "Purifying Talisman", you can enter "Dr. Keter & Co." and buy one:


Just as a reminder: If you still looking for a "Small Thing´s Amulet", you can buy it here for 50 Shillings. This can help Levi act faster in battle and allow him to attack before most foes can.


After you are done shopping, continue heading west until you see a crossing. I suggest opening the door to the south and then heading north.


Continue heading north until you reach "St. Domek´s Orphanage".

St. Domek´s Orphanage
We need to fight the schoolyard, which is located at the center of the orphanage. Heading north until you find a crossing and turn west. You will find a door on the west wall.


Be careful:

From here on now certain tiles cause a coin flip. If you fail, you will fall through the floor and get to the cellar. Try to avoid that. I walked in front of the lockers and nothing happened to me, so maybe that trick will help you too. If you fall into the cellar, just a few words on that: Try to navigate to the northeast. You can find a set of stairs there which leads out of it. The cellar is filled with "Fallen cherubs" which have a weak torso (~400 damage) but sharp claws which cause bleeding. You can also use your Pistol to shoot them down - it just needs one bullet per Cherub to get rid of them.

In any case, this guide continues if you would never drop down to the cellar. :) You will also encounter during your explorations ghostly figures. Those ghostly figures cannot be attacked with physical attacks. You need otherworldly abilities to attack them, but you don´t need to . You can escape fairly easily and who would hurt that sad being? :( But be aware that those ghosts can deal mind damage. Avoid getting down to 0 mind points.


Follow the hallway to the west until you get to a turn to the north. Follow it and try to avoid those "Xs".
Enter the first door to the west and work your way through the two classrooms, heading to the north:


When you exit the upper classroom, continue head to north and open the door on the north wall:


Hug the left wall when you enter the new area and walk your way north until you get to a left turn.


As you continue walking east, you will see a bright entrance on the south wall - The way to the schoolyard! Get through that door.


There is a little house in the school yard, protected by a seal. Use the Purifying Talisman on it to lift the seal and enter the little house.


Inside that small house, you will find an asymmetrical circle with a Rhea symbol. Use it to enter the "Otherworld"-version of the schoolyard.
Otherworld | Schoolyard & Effigy of Hunger
Once you reach the Otherworld, exit the building and follow the path until you see the next effigy we need to collect, but we cannot get to it that easily.


Again, we will meet again "Ronteals". This time it is not possible to avoid confrontation as in the "Otherworld"-Version of Tunnel 7 - This time they will get provoked easily.

As already suggested during our visit at "Tunnel 7", take a rifle and shoot those Ronteal, which have large guillotine-like arms to disable their devastating attacks. Their biting attacks can cause bleeding. Attack their stomach mouth to disable their "Bite"-Attack. Focus afterward on Ronteal's torso which can take 1000~ damage before perishing. Ronteals are vulnerable to burning and poison effects.


When you reach the first crossing, continue walking south and then east.


Follow the way and turn east when you arrive at the next crossing: Prepare for your first Ronteal conflict.


Continue walking the path until you meet your second Ronteal without guillotine-like arms, which makes fighting easier:


After being the second Ronteal, there is pretty near the third one already waiting for you:


Continue walking the path and you will again see the very last Ronteal - for now. :) This one also does not have any guillotine-like arms.


Continue following the path to the north. You will here also encounter a golden door. Check out the "Golden Door"-FAQ to learn more about them if you like to use them.


As you continue working your way through this area, you will finally arrive at the golden statue and receive the Hunger effigy. :) Good work!

Getting to the Apartments
Travel back to the "Prehevil - Shopping Street" (where PRHVL Bop is also located) and travel east to get back to the "Prehevil - Back Alleys".


Be aware - There is a chance that you can encounter the Raid here and by surprise. If you hear breaking glass and you feel having no chance left, use "Prep pills" to boost your team and read the FAQ on "Random Battle Encounters" to prepare yourself. If you beat them - Good work!

Regardless if you are lucky or managed to take care of the raid, continue walking south:


At the east buildings, you can see a house door. Open that door and access the building. You reached the "Apartments 1F":
The Apartments
Before you take a few steps into the apartment: As soon you step on the carpet (or the tiles next to it) the doors will close. You won´t get out here until you get the effigy. So make sure you feel prepared. There might be a fight, but you can avoid them.


In this area, we need to do a little puzzle before we can access the Otherworld version of the Apartments where the last effigy is located.

First, get east when you see the first turn and open the first door you see on the north wall.


Get north and take the "Master key" from the wall.


Get back to the hallway and continue walking east and open the door where you can see the flickering light and static sounds coming from. You will spot a flickering television. Interact with it.


You will now see a documentary of Karin Sauer (yes, the same you met on the train and also saw at the "Old City"). She will talk about the massacre which happened at those apartments (the same place you are right now D:). If she mentions the exact apartment numbers, write them down on a notepad file or a piece of paper. They can vary with each playthrough, so don´t write those down you see on that screenshot.


Once done, get out of the room back to the hallway, and head west until you see stairs. Take the stairs up to "Apartment 2F". Now head east and you see another hallway. You need now to find those apartments with the same numbers you wrote down. The apartment number can be spotted over the doorframe:

Try to write next to the number you wrote down something which reminds you about the room the most. You can use the master key to open the door, but this might cause spawning relatively strong and tough enemies, so are aware (this needs to be verified tho):

Those enemies are named "Neighbors" and they attack with both of their meaty fists. They can deal a good amount of damage. "Neighbors" are vulnerable to poison and burning. You can blind them with "Glass shards" to avoid their attacks better. Their torso can tank around ~1200 and 1400 damage.


Once you made sure that you got some sort of "apartment description" for those four rooms, make your way to apartment 10, which you can find at "3F". You can find it by walking east in the hallway. Open the door by using the "Master Key".


You can see on the west wall a destroyed wall, which allows you to get to the adjusting apartment. You spot there a huge statue, which can be moved by you. Here is a little video showing where it needs to be moved:
https://youtu.be/RgeIH0shm2U

Once you got down to the lower apartment, take the "Diary of a madman".


Now let's get back to the one room, where we found initially the "Master Key" and let´s open the door next to it to get down to the basement of the apartments - B1F:


Follow the only path through the cellar until you hear a loud sound which is coming through a door - it is coming from a running washing machine:


As you observe the washing machine, you can find a lock pad there which holds 6 numbers you can punch in:


It´s puzzle time!!
Now you should have the:
  • The apartment numbers from Karis report
  • Your own description of the apartment rooms
  • The diary of the madman

Open up the "Diary of the madman". You need to get to the one passage, where the madman (also murder as you learned) is counting the four "ritual" murders they did at those apartments. This determines the sequence of the apartment numbers we need to punch into the padlock we will later see in the basement of the apartments.

So, if the "first murder" describe a certain person - You need to find out if the person the murderer describes matches the apartment. And if so, the apartment number is the first number you need to punch in. If that number got two digits, you punch in both digits at the padlock.

Continue with the "second murder" - Again, try to match the description of the victim with the matching room and punch in their apartment number in the padlock. Repeat until you punched all four apartment numbers into the padlock.

If done correctly, the padlock will open and you can now crawl into the washing machine:
Otherworld | The Apartments & Effigy of Fellatio
After you reached the Otherworld-version of the Apartments, make your way south to find a ladder:


Continue walking south and as soon you pass through the opening of the iron gate, turn directly west:


You will see a set of stairs. Walk up to reach the "Apartment 2F"-Area. You need now to get to the other side of the hallway by heading east. You will spot "Neighbors" there. Don´t forget to use all your tools like Rifles, Traps, and Items to overcome your foes if you need to fight them. If you managed to get to the other side of the "hallway", get the next set of stairs up:


As soon you reached "Apartment 3F", walk west and try to find at the north iron fence an opening. Watch out, you are not alone here! Get through that opening!


Try to find a ladder that leads down. As you decent, you directly see our destination - The third and last effigy. Take it.


As soon as you pick up the last effigy, you can walk south to open the iron gate cell. As soon you open the cell door, walk west to get to the stars. Get down one level. Now walk to the east and get through the first open entrance at the iron gate to get back to your world. Don´t forget that you need to get into THIS opening at the end:


As soon you reach your world with the effigy in your possession, you see a little cutscene, which shows that the door to the exit has been unlocked.
Way to Tunnel 1
Now or a long way to Tunnel 1 will begin. This guide wants you to get back to "Dr. Kefer Magic and Tricks" - We will start from this point on. As a little overview, we will travel through the following locations:
  • Start: Dr. Kefer Magic and Tricks
  • Prehevil - North West
  • Prehevil - West
  • Prehevil - Ruined streets
  • Deep woods
  • Deeper woods
  • Deepest woods (lol, I'm not kidding)
  • Destination: Tunnel 1
"Prehevil - North West" to "Prehevil - West"
As soon as you walk out of the store, walk west until you reach the iron gate. Open it and head south. Be aware that you might see Needles here, so watch out. Continue walking south to get to the next area.


"Prehevil West" to "Prehevil - Ruined streets"
A brief hint: There are mines in this area. Mines will kill you the moment you step on them. No joke. So try to avoid them as best you can.


Now, with this out of the way - As soon you reach the new area, walk south between both cars:


You will see a destroyed building with a kitchen. Enter it and try to locate the western broken wall and step through it:


Get shortly now on the back alleys and get inside another broken house heading south:


You will see another destroyed wall near a car. Be careful, a "half-cocooned man" is ready to attack you. He is fairly durable at his chest, but beatable (~1200 Damage). He´s weak to fire and poison. Watch out for his weapon "Meat Mallet", it can deal a good amount of damage. If you want to play safe, disarm him first.


You can avoid him tho easily but watch out when you continue getting south - there are mines! There can sometimes be difficult to spot due to the color of the cobblestone paths and the mines. So watch your step.


"Prehevil - Ruined streets" to "Deep woods"
As soon you reach the new area, continue walking south and get past the opening between both buildings as seen in the screenshot:


Continue walking south and head briefly southwest. You will see the border of Prehevil very soon but be aware of foes with rifles. If you are quick, you can escape them easily.


Continue walking south - Again, watch out for mine:


"Deep woods" to "Deeper woods"
A small hint: There are deadly traps in the "Deep woods". If you step onto them, you will drop into a spike pit and die. Watch out when you walk through the leaves for "circle-shaped" spots. Those could be a hint for a possible trap. Here is a video on how to get through the "Deep woods":
https://youtu.be/doOz9glCdtM

"Deeper woods" to "Deepest woods"
Once you reached Deeper woods, continue walking south.


Continue walking south until you see an opening between trees like in this screenshot:


Squeeze in and follow the path. It will lead you to the "Deepest Woods".

"Deepest woods" to "Bunker 1"
Continue walking west until you see a tree. Go south and look for a way that leads west.


Take care! A really strong "horse" foe is looming in the fog. As soon you walk over the red area, you will trigger the horse to attack:

Listen for trample sounds and as soon you can hear them, step one tile up/down to avoid battle and continue running west, like in the GIF shown:


Hurry up and step into the opening and you will very soon see our destination: "Tunnel 1". Get in!

Tunnel 1 & Second Telelectroscope
Good work! You managed to reach "Tunnel 1"! Before we going to talk about how you got where let me tell you that you probably have one battle encounter with two foes: Stiches and Living Flesh.

Stitches is a rather strong foe. She can stun your characters with her right hand and her left hand can strike twice and deals a good amount of damage. Her torso can take up to ~1000 damage as well. She is also vulnerable to poison and fire.


Eventually - after three rounds passed during battle - (or somewhat random) "Living Flesh" will also join the battle. While "Living Flesh" can take a lot of damage (like ~5000 damage) but you cannot aim at certain limbs. "Living Thing" is just being able to tackle you, which is rather weak. It is vulnerable to poison and fire.


Okay, with that out of the way, let´s get through this tunnel. :) Continue by walking down the stairs.


As you walk down, you see again the shade who wears a dress or lab coat and vanish while she gets to the nearby elevator. That is the one we need to take later once power is restored.


Continue walking south until you reach a door, open it and walk east.


As soon you see a door that leads south, open it and continue walking east:


As you enter a room that contains a crossing, walk south:


Get around the fence and continue walking east.


Following this path, open two doors on your way and head to the southwest corner until you find another room. Enter it and look for the generator.


Now get back to the entrance to use the elevator to get to the lower levels:


Get east and take the first turn north to see someone again since "Chuch of Alll´mer": O´ssa! But this reunion is rather unpleasant because O´ssa is badly hurt. As you can see, he seems to be hit by a golden arrow.


Tell him the following dialog options to make him ask to join your party:
  • "You look hurt..."
  • "I can´t just leave you behind hurt like that."
  • "What is your business?"
  • "I´m interested in what this bunker is hiding from the world."
  • "I try..."
  • "Good idea."


Make sure to check O´ssa his health before you continue! Now with the Yellow Mage joining your cause, continue walking north and turn east to see the next Telelectroscope you need to activate - Two out of Three are now active, and we can head to our next location!


Time to get to the very last Telectroscope!
Sewers | The Mid Tunnels
After we activated the second Telelectroscope, we need now to get back to the Mid-Tunnels of the sewers to get to the last Telelectroscope. You can get there by getting to "Prehevil - Central" near the "Church of Alll-mer":


You can also enter it through the "Riverside" near the train, where you used the "Sewer keys" which you received from Henryk. But this guide starts at "Prehevil - Central". :)

So, as soon you reached the Mid-Tunnels of the sewer, step down the ladder and follow the path east:


Continue walking north and take the path behind the "waterfalls":


Continue walking east until you see an iron gate entrance. Walk through it and continue walking north until you enter a new area - the "Sewage treatment plant"
The Sewage Treatment Plant
It´s puzzle time!
We need to get to the north-eat door to continue our journey to the last Telelectroscope! Get west and you will see an old console that can be used to steer/control the sewage system.


The sewage system is divided into two areas - left and right. You can always turn down one switch on each area, but never both. every time you turn one switch off, two sewage water streams (the "waterfall") will stop flowing and therefore allow you to pass the catwalk. if water is still running it will block your path.

So what we trying to do is to use this sewage system to make our way to the top-left door.

Step One:
Task: Shoving the iron crate away from the door.

https://youtu.be/vK1HJWp1K9c

Step Two:
Task: Moving the iron crate so it can be pushed down by the water stream later

https://youtu.be/OqyaZKx4tRs

Step Three:
Task: Just activate the water flow by pulling the third lever to let the water flow push the iron crate down.


Step Four:
Task: Get back up and push the second iron crate to the east wall, so you can open the door and reach the "Sewers - Backrooms"!


Continue to follow the path until finding a iron ladder. Climb down.
Foundations of Decay
Continue climbing down the ladder until you reach "rock bottom".


You will encounter some rat folks here, but if you walk all the way east and then south, you will get through this area safely and without any battle. Just walk this path you can see here:
https://youtu.be/R0KaI7EYe2I
As you reach the end of the caves, make sure that you hold for a moment - As soon you get over the red area, you will get into a boss fight, so prepare well! Because you will fight against "Moonless", which could join your party in the first installment of "Fear&Hunger".


This fight can be split into two phases, so read carefully:

First Phase: Moonless is still on her way
Prepare your first turn and throw "Gasoline Container" and attack them as soon as possible. Moonless is vulnerable to fire. She takes burning damage each turn during this phase. You cannot attack her physically (but I´m not sure if long-range weapons like rifles work, please tell me) but you can use otherworldly skills like "Hurting" to hurt "Moonless" or "Pyromancy trick" to try to cause burning. If you have characters that are weak to Magic, buff them with items.


Second Phase: Moonless is close now
As soon "Moonless" is getting THIS close, you can attack her as you use to.
"Moonless" can do the following attacks:
  • Gaping bite: Hurt one character three times and can cause bleeding/infection
  • Miasma cloud: Hurts your entire party and can cause poison
  • Left/Right Paw: Hurts one character with relative low damage
"Moonless" is vulnerable to burning and poison. If you focus on the torse, you can take her down by dealing ~6500 Damage. Make use of the "Guard"-option while "Moonless" suffer from burning/poison effects.

When you successfully take "Moonless" down, you will get a cutscene. You will get interrupted by "August" who will ask you and "Moonless" to stop fighting and calm her down


August will give you some very powerful healing items to aid your wounds and will swiftly disappear again.


Continue walking north to enter "Tunnel 4" - The place of the last Telelectroscope!!
Tunnel 4 & Last Telelectroscope
As soon you enter "Tunnel 4", you will find a crossroad. Take the left elevator and climb down:


As soon as you reach the lower floor, walk east. You will - unexpectedly - meet Tanaka here. But something is off with him. You can attack him to fight against his Dopplegaenger version of him. You can take him down easily (his torse takes ~500 damage).


Regardless if you want to take him down or not, you will see the very last Telelectroscope right next to Tanaka. Activate it and let me congrats you - You activated all three Telelectroscopes!


Let´s return to the elevator and climb up again. Now get east and climb up.


Follow the way south until you leave the Tunnel. You will get now back to "Foundations of Decay".


Continue walking west until you see a tight opening on a pillar. Squeeze yourself into that.


As soon you reach the Crypt, you will see our trusty-rusty elevator, and yes - you guessed right - this thing will bring us back to the "Church of Alll´mer". Take the elevator and let it transport you to 2F!


Let´s go now to the White Bunker!
Way to Mataneko-kone-Magnificat
As soon you step out of the old elevator, head to the Altar of the "Church of Alll-mer" and put all three effigies onto their altar:


As soon you did this, a secret way that leads under the church will be revealed. Get down there and follow the path until you reach a lewer. Pull it.


You will see a fork that offers you two paths. We will take the easy path. So open the right gates by pulling the right lever.


Behind that gate, you will encounter a "Crimson Father". Remember that he can cause bleeding/infection and can mind-control one of your party members. You should be able to beat "Crimson Father" relatively quickly with three party members.


After beating him, continue walking north and you will see another fork. Open again the right iron door. You will encounter behind that door another "Pillarman". Remind yourself that you just need to attack his torso to dispatch him quickly.


Continue walking north and you will see stairs that lead outside to the "Mausoleum Alley". Rush - as you see in the screenshot - through this alleyway, to avoid conflict.


As soon as you see a folk, turn west and continue following the path until you see an entrance. Enter the building.


You reached now the "Altar of the One God", which is a direct throwback to Alll´mer. As you continue walking north, you will see a corpse on the altar. Be aware - As soon you reach the red area, you will encounter your next boss fight:


As soon you get close to the altar, you will be greeted with this little cutscene:


Then you encounter this ancient being: Mataneko-kone-Magnificat Rancid the Sergal!

"Magnificat Rancid the Sergal" can do the following moves:
  • Throwing spear - Dealing a great amount of damage
  • Spear swing - Dealing damage and can cause limp loss & bleeding
"Magnificat Rancid the Sergal" is vulnerable to burning and poison. If you can focus attacking on one hand, you can end the battle and get a nice reward - So focus on one hand, which can take around ~2000 damage to finish this battle quickly. Throwing glass shards can also be helpful if you like to play safe. Using Pep Pills also can help you with "extra turns". Using "Guard" can help you avoid losing limps when "Rancid" using their "Spear swing"-move.

After you tear "Magnificat Rancid the Sergal"´s hand, you will get some exposition and also this sweet reward:


Get now west to leave the altar and continue towards the tower.
The Tower & Pav
As you successfully beat the ancient "Mataneko-kone-Magnificat" get west until you see stairs. Step those down.


Before we get to the tower to the north, get first south so we can push a certain iron crate, allowing you to get faster to this area if needed.


Important Hint: Before you continue walking towards the tower, make sure that you have a piece of "Cloth Fragment". If you don´t have one left, make sure you loot the area and "find" one.


As soon you push the crate, get back north - continue walking north until you get this certain textbox:


Continue walking a few steps north, then you will get a cutscene. You will finally catch a glimpse of Kaiser and an interesting statement from your protagonist:


Suddenly the situation escalated as Pav - one of Kaiser's officials - shows up and you learn about Pav´s reason to take revenge on Kaiser and can deliver a headshot - but learn a second later how powerful Kaiser is.


As Kaiser leaves the scene, get as quickly as possible to Pav to thread his wound - Choose to "Examine his condition" and you learn that Pav is bleeding badly. Choose now to use a "Cloth fragment" to stop his bleeding. To save his life, carry Pav "back to the train".


If everything is done right, you will see that your protagonist managed to bring Pav back to the train so he can recover from his wound.


With Pav´s life saved, get back to the tower and turn west until you see this huge building that leads to the next location: The Museum


Important hint: Do not touch the door of the tower while having party members with you. Something naughty might happen. We want to save all the characters, do not forget. :)
The Museum
It´s puzzle time! For the last time! :(

As you enter the Museum, get north until you meet "Jeeves", a character you could have met in the "Major´s Manor" if stuff would go bad, but since we are still playing on Day One, this is the place where you see "Jeeves" for the first time.

"Jeeves" will tell you about the masquerade, where people enjoy the end of times - the festival of Termina - and will suggest you look for three of his closest acquaintances, as you can read in the screenshot:


As you walk left and walking the floor north, you will eventually see a bigger room with two sets of stairs, leading up to a grandfather clock.


If you interact with the grandfather clock, you see that you can interact with it:


So, you need to find those three people that "Jeeves" talked about and they will tell you one of the following three hints to solve this puzzle - where the three needles need to point at. You can spot the right person since they are slightly animated.

Since I believe that there are slight variations, I think you gotta seek those people by yourself, but you can take this opportunity to loot the place. The dialogs which help you get to the solution should look like this:

If you get to the bottom of this puzzle, you can open the door to the "Ballroom" of the museum.

You will see, that some digging jobs have been preformed here. You can descent down by using the ladders, which can also be found here. Get to those and climb down to the darkest place.
The White Bunker
When you reached rock bottom, follow the tracks north until you will see the huge bunker door. You can interact with the terminal to check if you activate all Telelectroscopes:


If you missed one of the Teleectroscopes, let me help you out:
  • WEST_TEL_ELEC : Can be found in the "Deepest Woods" at "Tunnel 1"
  • EAST1_TEL_ELEC : Can be found in the "Maiden Forest" at "Tunnel 7"
  • EAST2_TEL_ELEC : Can be found in the "Foundations of Decay" at "Tunnel 4"
Check out the previous steps in this guide to learn how you can activate those Telelectroscopes!

If you activated all Telelectroscopes - Congrantiualtions!
You reached the last stage of "Fear & Hunger 2" - The White Bunker!

Be aware: Once you enter the "White Bunker", you cannot leave! So if you feel you want to discover some other areas, this is your last chance.

As soon you enter the "White Bunker", you hear the entrance closing and read this message:

Before I continue how to navigate through this area, lemme explain what enemies you can encounter here:

Fire Trooper:


First of all: Keep your distance! The fire trooper can burn you alive even before you encounter them in battle.

But you can disarm the "Fire Trooper" by shooting him two times and then beating them in battle. The "Fire Tropper" torso can take up to ~1000 damage which can be dealt with quickly by your party. The only attack "Fire Trooper" can do is "Tackle" which deals less damage.


Elite Trooper

The "Elite Trooper" is a heavy enemy and can be dangerous for your party in battle. The following moves can be done by "Elite Trooper":
  • Low Bayonet - Dealing high damage, cause leg loss and bleeding
  • Bayonet - Dealing high damage, cause arm loss and bleeding
  • Shoot - Deals moderate damage
  • Raise shield - Increase defense noticeably for his entire body
  • Shield bash - Deals moderate damage
  • Rapid fire - If "Coin Flip" fails, the party received moderate damage
  • Tackle - Deals low damage
The "Elite Trooper" torso can take about ~1300 damage before dying and are vulnerable to poison and burning. Remember that using a rifle can help you shoot down both hands. The first shoot will render their shield useless and the second shoot will disarm their rifle.

With this out of the way, take the stairs up and open the door located north.


Follow the path until you find a fork and walk west:


What your step and ready your rifle for an advantage, as you spot an "Elite Trooper" lurking in the shadows. Try to take him down and continue heading west.


As you see a folk, take the way down and prepare yourself to encounter another "Elite Trooper".


Follow the way south to get to "The White Bunker - Connecting bridge". Continue walking west to get to "Level 2" of the "White Bunker".


Follow the path when you enter "Level 2" until you reach another fork. Take the west path.


You will again encounter a folk. Continue walking north now and follow the path,


You will see a door located on the east wall. Enter it and you will find a generator. Fill it up with gasoline.

If you missing Gasoline, walk back to the last fork and walk west, do not open any door, and continue walking north as you see a metallic walkway. Open this door and continue walking north and follow the path. You will find one gasoline container there.
If you can start the generator open the door to the south and follow the path:


As you walk through this door, be aware - A "Fire Trooper" is looming in the dark! Just get down to this area and shoot blank shoots in the dark to lure the "Fire Trooper" towards you.


After beating the "Fire Trooper", continue walking south and get through the door. After that, walk west. Be aware, the last "Elite Trooper" is waiting for you here.


After you managed to survive, you will see a door. Since you restore electricity in this area, you can open this door now. Follow the path until you get to the last "Connecting Bridge", which leads to "Level 3" of the bunker.


As soon you reached "Level 3" follow the path until you see a humanoid person dressed in a latex suit. Take this opportunity as a hint to prepare you for a battle.


As you continue walking north, you see a huge bolder-like tank rushing toward you:


As you face the "Commander" and the "Platoon".


The Commander:
The only attack I witness so far was "Whip" which deals less damage. You should focus on the "Commander" first. It seems that "Commander" can enhance the effects of the "Platoon" more efficiently. Their torso can take ~1400 damage and is vulnerable to poison. If you kill the "Commander" quickly, you will get this line:


The Platoon:
The Platoon is way stronger and more durable than the "Commander". It can be poisoned and take ~10000 damage before dying. It cannot be blinded and set on fire. The "Platoon" is a single target, so you cannot aim for its limbs. His move set seems without the "Commander" relatively short (which is cool).
  • Take Aiming - If the coin flip is missing, it deals massive damage (I suppose, I was able to avoid it every time so far if you know more, let me know!)
    [+] - Platoon charge - Deals moderate damage

Once you killed the duo, you can proceed to the next room. Good work!
Kaiser
Continue walking north and descent into darkness...

You will witness now a glimpse into the realm of gods. They all wait eagerly for the "Climax of the Birth of a new God and the Death of the Innocence" and that "Humanity showed their true potential". Walk a few steps in those halls and you will get overwhelmed by this realm.


As you regain your conscience, you find yourself in a seemingly large room, just a few light sources showing you Kaiser, sitting on a couch and next to him another door. Be aware: As soon you get closer to Kaiser, you cannot prepare anymore for this upcoming battle. So prepare well!


You will get a cutscene where Kaiser explains to you, that you came too late (even on day one) and that you are about to witness the birth of a new god - The Logic - a machine god created by humanity by themself to rival the gods. Kaiser explains that the pursuit of "power" led humanity nowhere, eventually what Kaiser realized himself too. So, to break out of this cycle, humans needed to "birth" something new ...


But you learn that the machine god is still frail and Kaiser prepares for battle as he cannot allow you to continue reaching the "Logic". In that brief window before you clash with "Kaiser", you witness that he gets attacked out of nowhere:

August seems to shoot special arrows which are especially vulnerable for people with can use those "otherworldly" powers or even "new gods". The very moment August's body drops, the battle against Kaiser starts.

Kaiser:
Kaiser is a strong foe but due to August his arrows "blinded" and weaken. This is our chance to strike! Kaiser can use the following skills:
  • Asterisk - Seems to deal "otherworldly" damage
  • Loving whispers - Heals one of the body parts with around ~200 Body points
  • Leg sweet - Attacks the entire party, dealing damage and can cause leg loss and bleeding
Kaiser's torso can take ~4000 damage before Kaiser dies. Kaiser is vurnable to poision. Your character might lose limbs, it seems that the "Guard" option does not protect against the lose of limps here. But since August helped us weaken "Kaiser" noticeably, you should be able to get the upper hand on "Kaiser" quickly.

As you beat him, you see "Kaiser" disintegrate into a grey soup and vanish. Continue walking north and open the final door to the "Logic".
Finale | The White Womb of Logic
As you enter the last room, you can again prepare yourself before heading towards the battle. This is the final battle so prepare well. Use everything which gives you an advantage.


The Machine God "Logic"
"Logic" is properly the strongest enemy in "fear & Hunger 2". "Logic" can withstand a high amount of damage and seem to have a high defense. Additionally, "Logic" can use its "exhaust system" to heat up, which is regulated by the six tanks surrounding it. Those tanks allow "Logic" to perform the high-damage skill "Overheat" with attacks on the entire party. You don´t want that. You can avoid this by attacking the tanks instead of "Logic".

"Logic" is also able to use the following abilities:
  • Red arc - Attacks the entire party with moderate damage
  • Red arc - Attacks one party member with moderate damage
  • Red arc X2 - Attacks one party member twice with moderate damage
"Logic" can tank up to ~22500 damage and as I mentioned before, has a high defense. "Logic" can be set on fire, so do that as quickly as possible, because each time a new round starts, "Logic" gets 1400 damage due to burning. Make sure that you use "Guard" to reduce incoming damage to the tank more damage. It seems to talk to "Logic" as no use here.

As you finally beat "Logic", you will get a final cutscene and see the artificial green hue, that seemingly "Logic" created and shows that "Logic" created the same green hue as it already exists in the lore of "Fear & Hunger".

You seem to become part of the machine god and you reached this "Ending A".


You also get at the end a special screen and you see how many people survived the horrors.


Even at the moment, when I fight with Abella alone, I´m not able to save August - For now. That means I´m currently able to save at max 12 people - not being able to save myself and August so far.

If you know how you can save August, please lemme know. :)
26 Comments
Troy87 Feb 21 @ 9:13am 
i tried the day 1 mornig stuff to get levi but, is there any point where i can save? i don't want to have to start everything all over every time because of bad luck. can i save before entering the sewers?
Drehtür Oct 8, 2023 @ 3:34am 
I haven't actually tested this but, if you don't get to the white bunker on day one, you should be able to save August as he won't attack the Kaiser. He only does that on day one or (sometimes) if you tell him to. I think, could be that he does that on day 2 as well but I thought it was only a day 1 thing which is backed up by the wiki at least. This would mean you'd have to likely "save" some characters so that they don't die on day 1.
uuuhdavid Sep 30, 2023 @ 11:47pm 
Book of Rhea for black kaleb and not playing O'Saa so you can recruit him later definitely help this route. I sadly couldn't get the rhea book for shit.

Also august didn't shoot his arrows at the end. Didn't really matter much but yeah.
madi Aug 25, 2023 @ 7:28am 
anyone has any idea of what is the thing with a big crow inside white bunker? i couldnt find any info online
PyrrhoKun君 Jul 23, 2023 @ 9:59am 
i just beat the game with this ending, and only august and marina were saved. i have no idea what i did to keep august alive, but i beat the game on the afternoon of the third day, and he didn't show up and shoot kaiser in the face
THE MUNCH Mar 25, 2023 @ 8:54pm 
ALSO!
Tanaka will stay (at least for Osaa, maybe he doesn't take Woman seriously...) If you just tell him to stay at the train.
THE MUNCH Mar 25, 2023 @ 8:53pm 
August is savable by fighting Kiser on night one (I did it then and I got no August)

In order to assure Maria survives, kill the woodsman before then, apparently he can kill her.

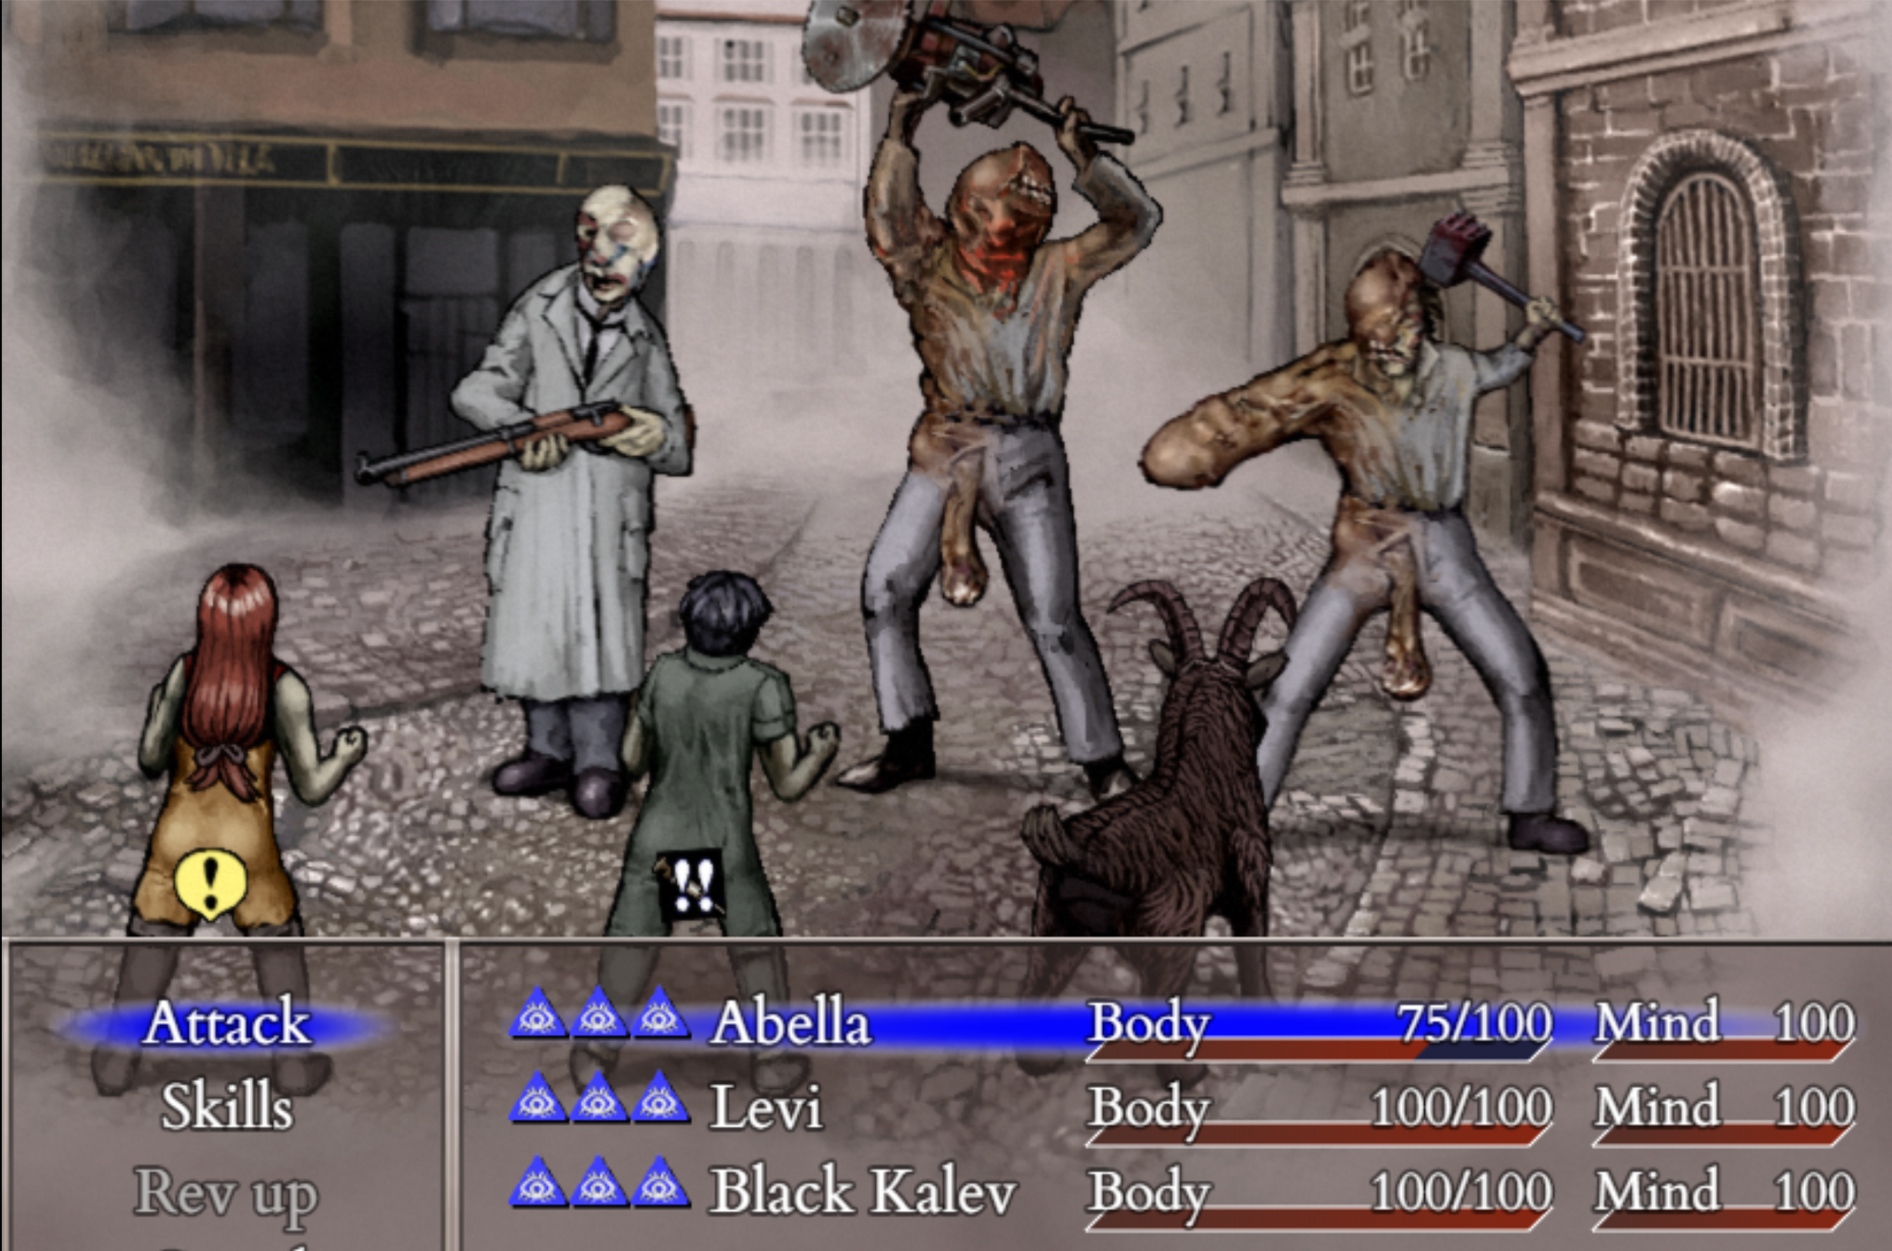
Killing needles is easier said than done:
Set fire to his torso and guard.

If not playing Abella, she will turn into Chaugner (apparently) however she is still counted as saved if you do not kill it.... Does that mean that Chaugner is just her alter ego or something?
potassiumking Mar 16, 2023 @ 1:11pm 
Olivia does react, at least when I saw Olivia's doppelganger playing today. She voices her disturbance about it while first talking to it, and during combat she asks if she is really like this. She doesn't say anything else afterwards, though.
Viviar Mar 11, 2023 @ 2:28pm 
There is 4th doppelganger - Olivia. You can find her in the woods south to new town, she is circling around on orange leafs in western part of the map. You can definitely tell that something is wrong with her, by the speed at which she runs in circles. She will tell you that she is botanist and she have some 'condition' and not be hostile. You can attack her to get her head. Real Olivia will not react when you have this encounter and no one seems to be bothered when you encounter the doppelganger.
Artiljerija Mar 10, 2023 @ 12:02pm 
Шрубник разбань на тау ките