IXION
498 ratings
Points of interest, dialogue and reward !
By Kporal
/!\ This guide is updated for the version 1.0.1.4 of the game and will be updated with time. /!\
It is confirmed that, both choice and science upgrade do change result in situation.
43
36
6
24
9
3
5
3
3
4
4
4
2
   
Award
Favorite
Favorited
Unfavorite
Tiqqun progression ( Tips & Tricks )
This is a presentation of my guide, with some rules and explanation.

Each chapter contain a Tips & Tricks section, wich include a Starmap, an overall view of my Layout & Technologies used and ( i hope ) some usefull informations under the Tips & Tricks section.

Tips & Tricks informations
/!\ Disclaimer, most of the information in the guide are provided from my own experience and do not necessarily represent the best and / or the fastest way to play Ixion. /!\
  • The Starmap just include a complete view of the chapter you are in with location marked and named.
  • The Layout & Technologies used is just a little help to show how i have managed to finish the chapter and represent the final result just before using the whole engine.
  • To finish the Tips & Tricks section regroup my own experience but also yours if you will to share it to help other people who struggle at some point. ( Other information can be paste as quoted directly in the POI section ).

Chapter and POI
Each title use a little rule as each POI have a formal name ( like Earth ) and an event name.
To provide a bit more clearance i've organize them like that :
Chapter_id ({ location_name } event_name ) wich lead to : Prologue ({ Moon } Moon - Abandoned Base ).

I've tried to cover all possible choice made through the event, but, depending on your tech the order of the other POI you interact with and choice you have made, a lot of things may differ, meaning : don't be surprise ! ( That also act on further chapter ).

I've also placed some ascii logo to improve the first view and reading of event :
  • 🗘 Mean you can continue after a choice
  • 🔒 Mean the area will be locked after the choice
  • 🏆 Mean theire is a reward / secret / achievement by doing this choice

Gameplay / Mechanics
  • Always try first to upgrade the Tech Lab with Assistant Promotion, Intelligent Lab and Computing Optimization ( by default the lab produce 1 science every 15 cycle, reducing that by 3 / 5 then 5 / 5 then 5 / 3 wich help a lot )
  • Same for the Science Ship with Advanced Analytics, Disruptive Study Protocols and Dedicated Exploration P.A. wich increase the amount of science generated by the ship by 5%, 10% and 15%.
  • The DLS Center is a must have, nothing more to said ...
  • Using the Waste Treatment Center is overall nice, but be aware, using it without any knowledge will may provoke some desaster in your sectors / station, because you also need the DLS Center to use the Waste Recylcing policies ( not a problem ) but if you produce more waste than recycling them, your industries will may have no more room to store theire resources and stop producing.

"Bug" that is not a "Bug"
Seem like a title for an achievement !? I'm gonna be harsh and i apologize for that !
Theire is some point people are angry about, they are called, bug or unbalanced mechanics. This is my word : before spit on the game, have you tried to learn it ? Because i feel like not !
  • Starvation, sometime it seem some people continue to starve even if you have the food, so what the heck if it's not a bug ? Just like Injuries & Strike people stop working, to avoid that send more worker to counter the number of starving people, or, if you have the DLS Center built, use the Keep Working policies under Starving Population.
  • Injuries, just build 2 Infirmary in every sector even if you have a Health Center built and ready ( less needed in that case but why not be sure ? ). People stop working when injured, just send more worker to keep an Optimal condition
  • Strike, an easy way to manage Strike ( even if it happen in your whole station ) ... is to disable some struture untill its better, if you have enough worker all around, just send more to the sector to keep the Mess Hall and Infirmary up and running ( reducing the strike over time and stabilize the situation ).
  • Deconstruction is sometimes locked with ~2 alloy left for exemple and nothing seems to happens, try to reload the save, try to cancel the destruction and then desconstruct it again ... Well you just need to be patient untill all your worker have made theire task and finish the deconstruction, they will always transport and build things before deconstructing ( or just add another stockpile ) !
  • Ship being destroy on storm, some people said the technology from the Cargo Ship ( Improved Repair Protocols ) and the Mining Ship ( Self-Welding ) are useless, and of course theire is none for the science ship ! Ok first off did you read both description ? They are more likely to endure dangerous weather conditions wich doesn't mean they can survive without any issue ! Must be confirmed but i also think the ship level will help a bit, theire is only one exception to that, at chapter 3 the storm is made to be deadly and do not care about upgrade or ship level. Some people also suggest to allow us to place some marker on the map or just tell the ship to turn around, ok without thinking a sec it's a good idea, but after thinking just a bit you understand that will just destroy the base game mechanic itself by avoiding the tiqqun to move and broke the survival effect linked to that, so again no bug here.
I aplologize again if you get hurt or being directly concerned by what i said, i just hope it will help you enjoy the game as it is.
Prologue ({ Moon } Moon - Abandoned Base )
🗘 Exploit the security vulnerabilty :
🔒 Dismantle the base :
Prologue ({ Mars } Mars - Healthy Competition )
🔒 Repair the fault in exchange for resources :
🔒 Repair the fault in exchange for research data :
Prologue ({ Saturn } Saturn - Dark Side of Saturn )
🔒 Send a team to investigate :
🔒 Attempt to locate debris in orbit :
Prologue ({ Unauthorized Access } Outer Hope - Out of Sight )
🗘 Naomi protocol : create a temporary easement, contact the station 'Outer Hope' :
🔒 Naomi protocol : create a temporary easement, contact the station 'Outer Hope' > Send resources to Outer Hope :
🔒 Naomi protocol : create a temporary easement, contact the station 'Outer Hope' > Refuse the Deal :
Prologue ( Tips & Tricks )
Starmap
-------------------------------------------------------------------------------------------------------
Layout & Technologies used
-------------------------------------------------------------------------------------------------------
Tips & Tricks
Just one thing, send a probe South East to discover the only location available here !
Chapter 1 ({ Earth } Earth - What Remains of Us )
🗘 Investigate dolos headquarters :
🗘 Investigate personal location :
🗘 Scour the globe in search of survivors :
Chapter 1 ({ Urshanabi } Ghosts of the Urshanabi )
Chapter 1 ({ Debris Field } Debris Field - Immensity )
🗘 Investigate the core of the structure :
🗘 Investigate the core of the structure > Investigate the ruined assembly area :
🗘 Investigate the ruined loading dock :
🗘 Survey the dense area of debris :
Chapter 1 ({ Asteroid Belt } Asteroid Belt - They Call It a Mine )
Originally posted by Vardis:
Weird. I honored the dead in Chapter 1, and basically nothing happened. Wonder if it's from researching the memorial tech first.
Originally posted by Raven:
Honor the Dead and then Eject murderer on return flight = 30 Science Points, but you lose the ship.

🔒 Dismantle a part of the facility :
🗘 Force entry into the control center :
🔒 Force entry into the control center > Let the dead rest in peace :
🔒 Force entry into the control center > Honor the dead :
Chapter 1 ({ Uranus } Uranus - Tane Mahuta )
🗘 Carry out ecological analysis :
🗘 Carry out ecological analysis > Harverst the edible elements of the tree :
🔒 Naomi protocol : Cut down the tree : ( Lock the location )
Chapter 1 ({ Mars } Mars - Richter's Facility )
🔒 Investigate storage area :
🔒 Inspect scientific study center :
🔒 Perform a full sweep of the facility :
🔒 Prepare the site for ressource extraction :
Chapter 1 ({ Saturn } Saturn - Black Market Society )
🗘 Make contact :
🔒 Make contact > Attempt to restart the station's heating system :
🏆🔒 Make contact > Break through the ice :
Chapter 1 ({ Neptune } Neptune - Thiaki )
I've put Neptune here because if you want to open the sealed room you must finish Saturn first.

🗘 Collect what's usable from the remains of Thiaki station :

🔒 Provoke a structural collapse and salvage what is left of Thiaki station :

🗘 Use explosives to try and breach the sealed room :

🗘 Use Oulixes' biometric data to open the sealed room :
Chapter 1 ({ Venus } Venus - Morbihan )
Originally posted by Raszagal:
... Also, with regards to the Venus event in Chapter 1, if you restart then the planet will generate 10 Polymer over 10 cycles 3 times so 30 Polymer total
🔒 Restart the assembly line :
🔒 Dismantle the assembly line :
Chapter 1 ({ Outer Hope } The End of Outer Hope ) - Quest /!\
This is a quest mission !
I havn't tested both situation, but starting first by searching the battlefield allow to continue :
🗘 Search the battlefield :
🗘 Search the battlefield > Search Outer Hope :
🔒 Dismantle Outer Hope :
Chapter 1 ({ Jupiter } Jupiter - Hepaestus ) Quest /!\
It's straight forward, just follow the dialogue.
Chapter 1 ( Tips & Tricks )
Starmap
-------------------------------------------------------------------------------------------------------
Layout & Technologies used
-------------------------------------------------------------------------------------------------------
Tips & Tricks
  • You must research ASAP the Assistant Promotion upgrade for the tech lab as it produce 3 science every 5 cycle ! ( A must have )
  • Open ASAP your second sector, just accept the mission directly when people ask for it, then build a second docking bay and farm all you can.
  • Take your time in chapter 1, you can harvest a lot of ressources, unlock tech and upgrade, and prepare your station for chapter 2
  • Try to never stop to awakens humans from cryonic pods, first it will help you to improve your overall production in your station ( just upgrade or add new quarters if required ), second is about trust, keeping too much cryopods will create a lot of trouble, 250 -1,at 500 you have -2 trust, 750 -3 trust ... be carefull !
  • When you want to move Tiqqun, check first by mouse overing thoose battery bar under the energy one ( the six smaller one for each sector ), it'll show you how far you can keep it powered, you can also temporary disable your industries that's not required to increase the range / time you can travel !
Chapter 2 ({ Falcon 74 } Falcon 74 - Business as Usual )
🔒 Perform intrusive analysis :
🔒 Set up a temporary study center :
🔒 Etablish infrastructure to support exploration ang geological analysis :
Chapter 2 ({ DO-G-0202 } DO-G-0202 - The Lost Sheep )
Originally posted by Deathus:
Chapter 2 DO-G-0202, in addition to determining the Sheptel's destruction, I had the option to repair and receive the ship for free. Not sure if this option is locked behind a research option or not. ( Maybe by doing another location first ? need to be confirmed )
Originally posted by Popiyopi:
About the option, i think its because locked behind automatic repatriation on Science Ship.
And you should first determine the cause of destruction, then repair and reclaim the sheptel
Originally posted by ThatGuyFuryan:
Hi there, just to confirm the hidden option to repair the Sheptel is locked behind Science vessel: Automatic Ship Repatriation technology option.
Linear choice, just don't leave and finish all task.
Chapter 2 ({ Fargo 39 } Fargo 39 - In the Balance ) Quest /!\

🗘 Deploy the entire crew in reinforced exoskeletons :

🔒 Recover archived digital data from the cargo ship and return to the maxwell :

🔒 Survey the cargo ship, recover any archived data and return to the maxwell :

🔒 Recover data from the cargo ship and attempt EKP repair for the cargo recovery :

🔒 Send a small team of specialists to the signal's location :

🗘 Send all of the maxwell's crew to the signal's location :

🗘 Send an experienced scout to the signal's location :
Chapter 2 ({ Valiant 71 } Valiant 71 - Ashes to Ashes )
Originally posted by Popiyopi:
Attempting to recover all the cryopods :
If you have researched science ship - emergency criopods, don't lose people, only the ship
Originally posted by Daendrokos:
Not sure if anyone has said this but you get a permanent -1 to stability from completing the valiant 71 objectives for discovering the fate of the protagoras

🔒 Recovering materials from the huizinga :

🔒 Attempting to recover the closest cryopods :

🔒 Attempting to recover all the cryopods :

🔒 Analyzing the wreck of the huizinga :
Chapter 2 ({ Plymouth 37 } Plymouth 37 - What Lies Beneath )

🗘 Performing intrusive analysis :

🗘 Set up a temporary study center :

🗘 Establish infrastructure to support exploration and geological analysis :
Chapter 2 ({ Perenti 85 } Perenti 85 - Wind Dispersal )
Originally posted by RobOda:
The game will not let you pick any options with the science ship for Perenti if you do not research deep dive.

It will allow you to leave and come back later without penalty. If you click the magnifying glass it even tells you that you can't do anything until you get deep-dive tech so, no one should have any issues with it. :)


🔒 Release micro-probes into the atmosphere :

🔒 Establish a weather station :

🔒 Set up advanced infrastructure for meteorological analysis and simulation :
Chapter 2 ({ Mack R } Mack R - Ice and Fire ) Quest /!\
Originally posted by Raszagal:
Thaw the ice by venting the maxwell's fuel cells >> Use Emergency Cryopods
Recover all people, science ship is lost and -5% trust
Emergency Cryopods upgrades must be researched to get this option


🗘 Thaw the ice by venting the maxwell's fuel cells :

🔒 Thaw the ice by venting the maxwell's fuel cells > Abandon the maxwell and declare its crew lost :

🔒 Thaw the ice by venting the maxwell's fuel cells > Naomi protocol : send a team to rescue the maxwell's crew and destroy compromising mission reports :

🔒 Drill through the ice and investigate the wreck using a borescope :

🔒 Set up excavation equipment :
Chapter 2 ({ Tatra v8 } Tatra v8 - Adrift )
Originally posted by GoJuRyuDo:
if you choose NAOMI PROTOCOL you will loose -1 stability permanent (but you find out some story dont know if this is relevant to the over all choices or story relevant things)
Originally posted by ThatGuyFuryan:
a possible note of mention: when you recover the cargo ship and send it back to the Tiqqun, it comes with some cargo: in my run it had 36 alloy and 14 food.


🗘 Get close to the cargo ship :

🗘 Board the cargo ship or hailling it :

🗘 Naomi protocol : interrogate the P.A : ( You will be able to recover the cargo just after ! )

🔒 Ramming the ship will lead to :
Chapter 2 ({ Rockatansky D79 } Rockatansky D79 - Twin-Tailed Comet )

🔒 Use explosives to clear the path :

🗘 Set up a temporary study center :

And then remotly initiate the maxwell's self-destruct sequence : ( Bad choice again ! )

Using naomi protocol, updating the tiqqun's crew manifest to include the new biometric data :

🔒 Establish infrastructure to support exploration and geological analysis :

🔒 Descend to the cavity and study the sphere :
Chapter 2 ({ Chevy 34 } Chevy 34 - Metallic Bracings )
Originally posted by Sleeps~Darkly~:
It seems that to test the events on a planet behind the space thunderstorm you need to fly the station to it or to Rokatansky comet so the cargo ship will avoid the thunderstorm.. Cargo ship always ended being destroyed for me before even carrying the full load, so I've never finished any options outside first one.

First off, i confirmed that is better to send Tiqqun to Rokatansky to do quest and minning around Chevy ( thank to @Sleeps~Darkly~ ).

🗘 Perfom intrusive analysis :

🗘 Set up a temporary study center :

🗘 Establish infrastructure to support exploration and geological analysis :
Chapter 2 ({ Protagoras } Meeting Protagoras ) Quest /!\
Nothing to said !
Chapter 2 ({ Deville 59 } Deville 59 - Pioneers ) Colony /!\
That colony is just a "test" do not hope too hard !
Colony produce science over time, so doing the advanced one should generate more over time, need to be confirmed !
Originally posted by Raszagal:
With regards to the Colony test mission in Chapter 2. You generate science there at 1/cycle. Don't know the limit of minimal set-up but the large set-up caps at 30 science. ...
* Basic Infrastructure : The limit of research gen is 15
2nd part is no differenct except you just recover 30 instead of 60 colonists when repatriating them


🔒 Establish basic Nyokond colony infrastructure :

🔒 Establish advanced Nyokond colony infrastructure :
Chapter 2 ({ Protagoras } Man is the Measure of all Things ) Quest /!\
Next part of Protagoras main quest.

🗘 After repairing the superstructure of the protagoras, If you meet the leders directly after :

🗘 Then research and built the "retractable telescopic pole" and continue the reparation : ( you need to put Tiqqun in orbit of Protagoras, be prepared this phase is hard ! )

🔒 After this, if you meet the elders the result is the same ...

Chapter 2 ({ Deville 59 } Deville 59 - Pioneers ) Stage 2 /!\
Originally posted by Tregas:
If you take colonists home in chapter 2 you will get +10% trust.
Dont know, but if you abandoned them there you can get trust penalty

🔒 Before leaving the system you can reitreive or abandon the collonist : ( or leave them ? )
Chapter 2 ({ Protagoras } Thoughts of the Protagoras )
Originally posted by Zaigan:
For Chapter 2 your missing Thoughts of the Protagoras (I've got a save at that point if you want me to message you the results of it along with images for the list)
Originally posted by ylsun:
you CAN do this even if you did not meet the elders.


🔒 Installing a copy of edden :

🔒 Naomi protocol : Save a copy of the protagoras' P.A. :
Chapter 2 ( Tips & Tricks )
Starmap
-------------------------------------------------------------------------------------------------------
Layout & Technologies used
-------------------------------------------------------------------------------------------------------
Tips & Tricks
  • Promise not more 5 casualities will allow you to talk to the elder ( insteed of 0 casualities )
  • To access chevy, just send a scientific ship to rokatansky or plymouth with some upgrade on your cargo you will be able to do it ( just performe an analysis is good enought while taking 0 risk )
    I've updated the map for chapter 2, again just like chapter 1, take your time to harvest as many as you can ( upgrading stockpile and unloking the t2 will help a lot ! )
  • Do not worry about the penalty in each sector of the -1 by staying too long, you can easily manage with memorials, alternative life, and later the exo-fighting drone and the hull temple ( as long as you also get the train station, that's why you must be prepare to construct everything asap )
  • As always in tech focus the Tech lab upgrade, it will help you a lot during your run.
  • You may also need to use the waste to produce a bit more alloy depending on the time you stay here and how you farm.
Chapter 3 ({ Destroyed Command Center } Ruins - Command Center ) Quest /!\
As it is a quest you can do it straight forward !
Chapter 3 ({ Industrial Zone Wreckage } Ruins - Trapped in Time and Steel )
You can do all task in order

🗘 Explore the industrial zone :

🗘 Investigate the storage area :

🔒 Look for the source of the yellow particles :
Chapter 3 ({ Cruc-P-38 } P-38 - Corroded Hopes )
For this one, i will not cover all possibilities ( they are too many of them and always end by a death if you force task ), because of that, i'm gonna show only the best science output !

🔒 Bore through the mountain : ( Skipped, best science output 60, end to death at second choice )

🗘 Perform topographical analysis : ( Best choice )

🏆🗘 Perform topographical analysis : investigate the command center : #First choice ( Retreive a data drive ? )

🗘 Perform topographical analysis : investigate the field operations area : #Second choice ( Looking a some species - Then leave )

🔒 Ignore the signal and focus on sample collection : ( Lock the location )
Chapter 3 ({ Reactor Wreckage } Ruins - Reactors )
You can do all in order :

🗘 Investigate the thrusters :

🗘 Inspect the engine room :

🏆🗘 Investigate the engine supervision area :
Chapter 3 ({ Cruc-P-42 } P-42- Yellow Smoke ) Colony /!\

🔒 Establish advanced nyokond colony infrastructure : ( I will always do the heavier colony in the guide )
Chapter 3 ({ Collapsed Food Production District } Ruins - We Are What We Eat )
Just don't do the caution approach, and finish all other choice :

🗘 Investigate the vegetal zone :

🗘 Investigate the animal pens :

🏆🗘 Investigate the animal pens > Naomi protocol : provide a new home for the dog :

🔒 Make a cautious approach towards the self-contained area : ( Don't do it, also lock the location )

🔒 Invasively breach the self-contained area : ( Last choice then leave )
Chapter 3 ({ Depressurized R&D District } Ruins - Orne-8 )
Originally posted by Piasecznik:
Quick tip: when you investigate Orne-8 in Depresurized R&D District, Tech Lab event will eventually occur asking whether you want to implement Orne-8 P.A. Assistant Protocols to aid you in research. If you answer Yes, you will unlock Tech Lab upgrade Orne-8 which makes upgrades research cheaper.
Dunno what would happen if you refuse UN technology use on board of Tiqqun.

You can do all in order :

🗘 Search the residential area :

🗘 Search the laboratories :

🏆🔒 Open orne-8 security room :
Chapter 3 ({ Cruc-P-51 } P-51 - The meier site )
Originally posted by Destroyer733:
With the P-51 event, I had a continuation where the last guy was in a cryopod. When retrieved there's a station event mentioning his body is heavily biologically contaminated and asks to destroy or analyze. I never got any follow-up from that though so not sure where else it leads.


🔒 Perform intrusive analysis :

🗘 Set up a temporary study center :

🗘 Set up a temporary study center > Conduct Further tests on the Meier bacteria :

🔒 Conduct further tests on the Meier bacteria > Authorize transportation of the Meier bacteria :

🗘 Set up advanced analysis infrastructure : ( End up like above )
Chapter 3 ({ Cruc-P-41 } P-41 - Resonance )
Originally posted by Neunzehn:
if you ignore the first naomi protocol choice, you will get a second naomi protocol choice. I've yet to determine the outcome of that but it's missing in the guide.


🔒 Naomi protocol : Override security protocols for the deuterium team :

🗘 Continue exploration of the formation, implementing strict psychological monitoring : ( End up like above )
Chapter 3 ({ Medical District Wreckage } Ruins - Doctors )
Originally posted by 醉仙望月:
If you let zy6073 return to the Tiqqun, when the science ship arrives at the dock:
If you choose to sterilize it, you get 15 science points.
If you choose to try to capture it, you get 30 science points at the cost of 12 workers at the dock being killed.


🗘 Investigate the medical district :

🗘 Investigate the research facility :

🗘 Retrieve ZY6073 :

🏆🔒 Retrieve ZY6073 > ( Any choice lead to this direct result )
Chapter 3 ({ Habitation Sector Wreckage } Ruins - Swarmed )

🗘 Recover the floating cryopods :

🗘 Push deeper into the structure to reach the source of the unusual readings :

🏆🔒 Push deeper into the structure to reach the source of the unusual readings > Proceed throught the laser-cut piping :

🏆🔒 Push deeper into the structure to reach the source of the unusual readings > Continue drilling :

🏆🔒 Push deeper into the structure to reach the source of the unusual readings > Proceed throught the reinforced tunnel :
Chapter 3 ({ Destroyed Docking Bay } Ruins - Lethal Weapon )

🗘 Investigate the communication area :

🗘 Investigate the intact docking port :

🔒 Investigate the intact docking port > Initiate a controlled detonation of the missile :

🏆🔒 Investigate the intact docking port > Defuse the missile :

🔒 Investigate the intact docking port > Transport the missile :
Chapter 3 ({ Cruc-P-43 } P-43 - Mesohyl )
Originally posted by Miesha:
After use explosives to quickly clear a path, you can choose 2 of the following 3 and leave (the 3rd investigation will kill them all):
Examine the sphere: 50 points, then lose a crew when choosing to leave.
Analyze the crystal formations: 30 points
Study the concentric circles: 40 points

After drill through the crust of P-43:
Continue the expedition into the caves of P-43: 50 points
After that, if you choose to continue, the entire crew will die.
It's time to leave.

Theire is multiple ending here, the main result act on the science reward. ( You can leave after the second choice at the sphere )

🗘 Use explosives to quickly clear a path :

🗘 Use explosives to quickly clear a path > Examine the sphere :

🗘 Use explosives to quickly clear a path > Analyze the crystal formations :

🗘 Use explosives to quickly clear a path > Study the concentric circles :

🗘 Drill through the crust of P-43 :
Chapter 3 ({ Cruc-P-37 } P-37 - Desolation )

🔒 Perform intrusive analysis :

🔒 Set up a temporary study center :

🔒 Establish infrastructure to support advanced analysis :

🗘 Analyse impact area :

🔒 Analyse impact area > Authorize invasive recovery and analysis of the object :

🔒 Analyse impact area > Set up a drilling rig :

🏆🗘 Analyse impact area > Excavate the object manually : ( End up with above choices )
Chapter 3 ({ Cruc-P-42 } P-42- Yellow Smoke ) Colony Stage 2 /!\
Chapter 3 ( Tips & Tricks )
Starmap
-------------------------------------------------------------------------------------------------------
Layout & Technologies used
-------------------------------------------------------------------------------------------------------
Tips & Tricks
First some important point to know :
  • The geomagnetic wave while advance each time you finish a POI
  • Ever keep a eyes on the edge of the wave to mark "avoid" dangerous location, here the wave is far more powerfull than the one in chapter 2 !
  • Take the time to harvest all you can and follow your main task ( more importantly, be sure to have the power to travel to the other side ! The task said your 5 cycle of autonomy )

POI order before the wave fill the start area : ( Forget the colony untill the wave leave the area )
  1. Destroyed Command Center
  2. Cruc-P-38
  3. Reactor Wreckage
  4. Collapsed Food District
  5. Move Tiqqun to Industrial Zone Wreckage ( Start to recall your ship as soon as you are going to start the POI )
  6. Industrial Zone Wreckage
  7. Recall your science ship and fly to Depressurized R&D District ( or any other one )

The order can be different, the rule is to make sure you finish all POI in border of the wave first, always do the farthest one !

Do not forget to build enought batteries, i've made 2 medium per sector, with upgrade, i've also max the tiqqun engine and hull ! after that you are pretty free but it require a bit of preparation, so take your time to farm before starting the adventure !
Chapter 4 ({ PSR B1257+12H } 12H - Bigger on the Inside )

🗘 Perform intrusive analysis :

🗘 Perform intrusive analysis > Locate Zhen Zhou :

🔒 Locate Zhen Zhou > Naomi protocole : enter the house :

🗘 Set up a temporary study center : ( Lead to Zhen Zhou dialogue above )

🗘 Establish infrastructure to support advanced analysis : ( Lead to Zhen Zhou dialogue above )
Chapter 4 ({ PSR B1257+12D } 12D - High Temperature )

🔒 Perform surface analysis :

🔒 Establish a basic research station on the promontory :

🗘 Establish heavy research infrastructure on the promontory :

🔒 Establish heavy research infrastructure on the promontory > Save the deuterium :

🔒 Establish heavy research infrastructure on the promontory > Rescue the crew :
Chapter 4 ({ PSR B1257+12G } 12G - They Might be Giants )

🗘 Authorize basic analysis only :

🗘 Authorize basic analysis only > Approach the area where the tube formation rises from the cloud layer :

🗘 Approach the area where the tube formation rises from the cloud layer > Authorize analysis of the tubing :

🔒 Authorize analysis of the tubing > Initiate invase analysis of the tubing :

🔒 Set up measuring devices :

🗘 Launch an autonomous analysis drone : ( Lead to above choice )
Chapter 4 ({ PSR B1257+12J } 12J - Reflections )

🔒 Study the crystalline formations :

🗘 Study the electromagnetic activity :

🔒 Study the electromagnetic activity > Continue to the end of the tunnel :

🗘 Study the electromagnetic activity : Break the mirrors :

🔒 Break the mirrors > Repatriate the deuterium :

🔒 Break the mirrors > Declare the crew of the deuterium lost :
Chapter 4 ({ PSR B1257+12F } 12F - Icy end )
Originally posted by Vinfixer:
On Chapter 4 ({ PSR B1257+12F } 12F - Icy end ), if a crew member got swallowed by the sphere on CRUC-P-43, you can pick up a signal on the planet and look for this person as an extra option.
🏆

🔒 Perform intrusive analysis :

🔒 Set up a temporary study center :

🔒 Establish infrastructure to support advanced analysis :
Chapter 4 ({ PSR B1257+12C } 12C - Fractals )
Originally posted by Gor Mor:
If you retrieve the crew in the orange suit and then send the ship back to the station, a station event will be available with additional story text and 3 more options.

One kills the crew in exchange for some science research points (something around 6-10, don't remember exactly), the other puts the crew to the hospital and nothing yet latter. I haven't tested 3rd option.
Originally posted by ylsun:
like what Gor Mor said, you get 3 options when the science ship returns:
1. send them for intensive munchian psychotherapy --> in my case this option killed those 3 crews without any science point. (this prob is what Gor Mor hadn't tried)
2. they will find their bearings --> like what Gor Mor said, nothing immediate. we'll see.
3. quietly remove them and perform autopsies on the bodies --> said 3 crews killed, and i got 2 (lmao) science points.


🗘 Study 12C's moons :

🗘 Analyze the storms of 12C :

🔒 Analyze the storms of 12C > Leave the others :

🔒 Analyze the storms of 12C > Naomi protocol : Bring back the whole crew :
* Nothing *

🔒 Analyze the storms of 12C > Repatriate the deuterium :
Chapter 4 ({ PSR B1257+12E } 12E - Colonization ) Colony /!\
Chapter 4 ({ Unknown Structure } Wrecks - Remnants )
Originally posted by AquiloSpiritus:
Investigate the wreck : I received the Nuclear Reactor Improvement Technology (Nuclear Reactor Accident Prevention)
Perhaps a core technology is required?

🗘 Investigate the wreck :

🔒 Dismantle the wreck :
Chapter 4 ({ Pïranesi } Piranesi - Child of Ambition ) Quest /!\

🗘 Locate the Remus coordinates :

🔒 Keep moving! :

🔒 Stand and fight! :

🔒 Retrieve the deuterium :
Chapter 4 ({ PSR B1257+12A } Pulsar - The monster's Avakening ) Quest /!\

🗘 Analyze the pulsar :

🗘 Construct Icarus III :

🔒 Wake up the pulsar :
Chapter 4 ({ Piranesi } Body of the Beast ) Quest Phase 2 /!\
Chapter 4 ({ PSR B1257+12E } ) Colony Phase 2 /!\
Chapter 4 ( Tips & Tricks )
Starmap
-------------------------------------------------------------------------------------------------------
Layout & Technologies used
-------------------------------------------------------------------------------------------------------
Tips & Tricks
Piranesi will trigger few small event on the Tiqqun, only one is real if you don't take care, it will hack your mess hall, don't panic, just restart the power !

Another important point : this chapter will consume a lot of polymer, when triggering Piranesi, you must have 500+ polymer stored to be "safe" !

Jump sequence :
  1. Evade piranesi swarm by jumping to 12F ( the drone swarm do nothing untill you don't stay in )
  2. Jump to 12J When Piranesi's swarm is coming
  3. After a bit of time, the Piranesi itself will chase you, wait a bit of time untill he's near then jump to 12G
  4. He will lunch another sarm targeting 12G wait a bit and then jump to 12D or 12H to avoid the swarm
  5. Last jump ( if needed depending on how fast you are ) to 12H or 12D
Chapter 5 ({ Romulus } Romulus - Another World )
This is the second ending, who can lead to 2 achievement, to do it, "take the time" to discover Romulus, it will lead you to few small event.

I exeptionaly do a complete event section for this one ( as it's a secret ending ).

Originally posted by Derpatron:
Clarification on Chapter 5: Romulus: You need to move the TIQQUN to Romulus, not just a science ship.

  1. First send a probe to discover romulus ( first screen of the POI )
  2. The first event will occur soon after in Tiqqun ( second screen )
  3. The team will ask you to send a scientific ship to the location, do it, it will lead to the second small event ( third screen, you just need to wait a little bit untill the event occure )
  4. Then they ask you to remove Eden ( fourth screen, then it will active you a new objective : "The Promized Land" )

This occur only if you've made a copy of P.A. during Chapter 2 at Protagors POI :
Chapter 5 ({ Palatine } Palatine - Metallic Mélange )
You can do everything here

🗘 Locate the source of the river :

🔒 Establish meteorological analysis infrastructure :

Chapter 5 ({ Remus } Remus - A New Home )
Chapter 5 ({ Vulcan } Vulcan - The green comet )

🗘 Analyze the sphere :

🔒 Perform suggested experimentation :

🔒 Naomi protocol : Allow the team free rein :
Chapitre 5 ({ Aventine } Aventine - Filling the void )
Originally posted by Zemurin:
To build Aventine's Namschach transmitter you need to get a transmission from the ship you lost back in C2 on Rockatancky, bit regardless if I do Aventine before Vulcan, or do Vulcan (study sphere ->allow them free reign - in order *not* to release that ship, or study sphere->suggested experimentation to release it) I cannot get the transmission and I can't build Namschach nor get the achievement.
Originally posted by Zemurin:
I just got that damned Natschach transmitter. New run, studies circles + sphere in C3, HAD to do Vulcan first and pick Naomi: allos the team free reign option, only then opened Aventine and the option was there. Going beefore Vulcan is a no-go, same as vulcan + getting the ship back. Tad convoluted.

Do all in order : ( To be confirmed, but i think you must do vulcan first to reach the last sphere )

🗘 Study the surface of aventine :

🗘 Study the core of aventine :

🗘 Build the natschach transmitter :

🗘 Build the natschach transmitter > Deploy the natschach transmitter :

🏆🔒 Balance will be our doctrine : ( Lead to 'Beyond Time and Space' achievement )

🔒 We will go beyond the stars :

🔒 We will give birth to the machine :
Chapter 5 ({ Lupercal } Lupercal - Diamonds are forever )

🔒 Perform intrusive analysis :

🔒 Set up small extraction and study base :

🗘 Set up advanced infrastructure for analysis, exploration and resource extraction : ( Continue like above )
Chapter 5 ({ Numitor } Numitor - Heat sources )

🔒 Initiate invasive analysis of the area :

🔒 Create and use specific analytical tools :

🔒 Set up a floating research center :
Chapter 5 ({ Plutarch } Plutarch - Relativity)
Originally posted by kron155:
If you want to make choices with delivering steel you need to be fast when your science ship arrives on the planet an invisible countdown starts (time is running more quickly on this planet) and you need to deliver steel before the crew dies (I think it is 5-10 cycles). You can test it when the science ship arrives on the planet and leave it there for some time and you get only the options where your crew died.


🔒 Perform intrusive analysis :

🔒 Set up a temporary study center :

🔒 Establish infrastructure to support advanced analysis : ( Then abandon the expedition or Rapatriate the ship )

🔒 Establish infrastructure to support advanced analysis : ( Alternative version, must be confirmed how to do it, actually don't do it )
Chapter 5 ({ Temple of X } Temple of X )
Here i cover the 3 temple because in my case they all lead to the same. ( If you explore first you'll loose all your crew and can come back later to retreive the fragment )

🔒 Temple of Merit :

🔒 Temple of Free Will :

🔒 Temple of Common Sense :
Chapter 5 ( Tips & Tricks )
Starmap
-------------------------------------------------------------------------------------------------------
Bonus
Here both Layout & Technologies used and Tips & Tricks section will not be presented as ( and for now ) it's the end game.

I will continue to update the guide as the game progress and as we discover new / better things to share. I also want to thank everyone who share theire situation here and help the guide to be alive.
So thank you again for your participation !

Is it the end ? I don't think so, and i will cover anything new to help everyone just like now.
I will share you here a save, it will be a complete and empty station ( with official cheat from the dev, no need to get some extra tools ) to allow you to create some Layout for later.

https://mega.nz/file/BZRHGIZI#il7hPj6k2MMFBYr_wdAty5sF7kLO9AUegQ05tRsstNo

The KporalSteamGuide_LayoutBuilder.zip contain a readme.txt and a save folder ( index : 10000 ), the save is at the start of chapter 1, all available tech unlocked and ready to build your layout.

Exemple of layout using this save ( compared to my actual layout on the picture of right ) :
342 Comments
HeathenSW Jul 25 @ 4:51pm 
Funny think about asteroid belt in chapter 1: if you have automatic ship repatriation then if you decide to honor the dead and 4 people die - you do not have an option to eject the last one. It's just not there, you can only repatriate that person back.
ForCom5 Jul 14 @ 8:32pm 
Can't believe I didn't copy the Protagoras PA - ah well, I'll just have to reload and do it again. I love the idea of surviving.
TDarkShadow Apr 23 @ 12:20am 
In regards to Chapter 4 ({ PSR B1257+12C } 12C - Fractals ), if I select the first option (Study C12's Moons) as my first action, even with I have the second option (Analyze The Storms of C12) unlocked, it will discard the second option and go over to the three options regarding the different coloured workers.
Grunthex Apr 2 @ 8:47pm 
In Chapter 2 the Mack-R planet, if you allow the science ship to be lost (even though you save the crew) you lose a permanent -1 stability.
Colonel Sanders Lite Feb 3 @ 3:23pm 
Just to follow up on the 'Better Him Than Me' achievement -

Replayed the last chapter from a save and figured out where I was going wrong.

This option appears in one of the event popups relating to destroying the Piranesi. It seems that if you haven't uninstalled edden yet, the option will *not* be available.

In order to ensure that this option is possible, uninstall edden as soon as possible.
Colonel Sanders Lite Feb 3 @ 8:23am 
@neKKoru Thanks for saying this. I was getting kind of frustrated looking allover the game and then the net trying to figure out how to actually do that one.

Though now that I know, I suspect I missed the event popup... TBH, the notification system in the game kind of sucks.
neKKoru Jan 30 @ 11:38am 
Chapter 5 [Better Him Than Me Achievment] - I finally done it in 3rd try. No guide is telling that actual option of replacing Edden with Protagoras P.A. is on RESEARCH LAB (magnifying glass) somewhere during building batteries and shuttles.
livinghell Jan 24 @ 5:03pm 
Chapter 5 ({ Plutarch } Plutarch - Relativity)
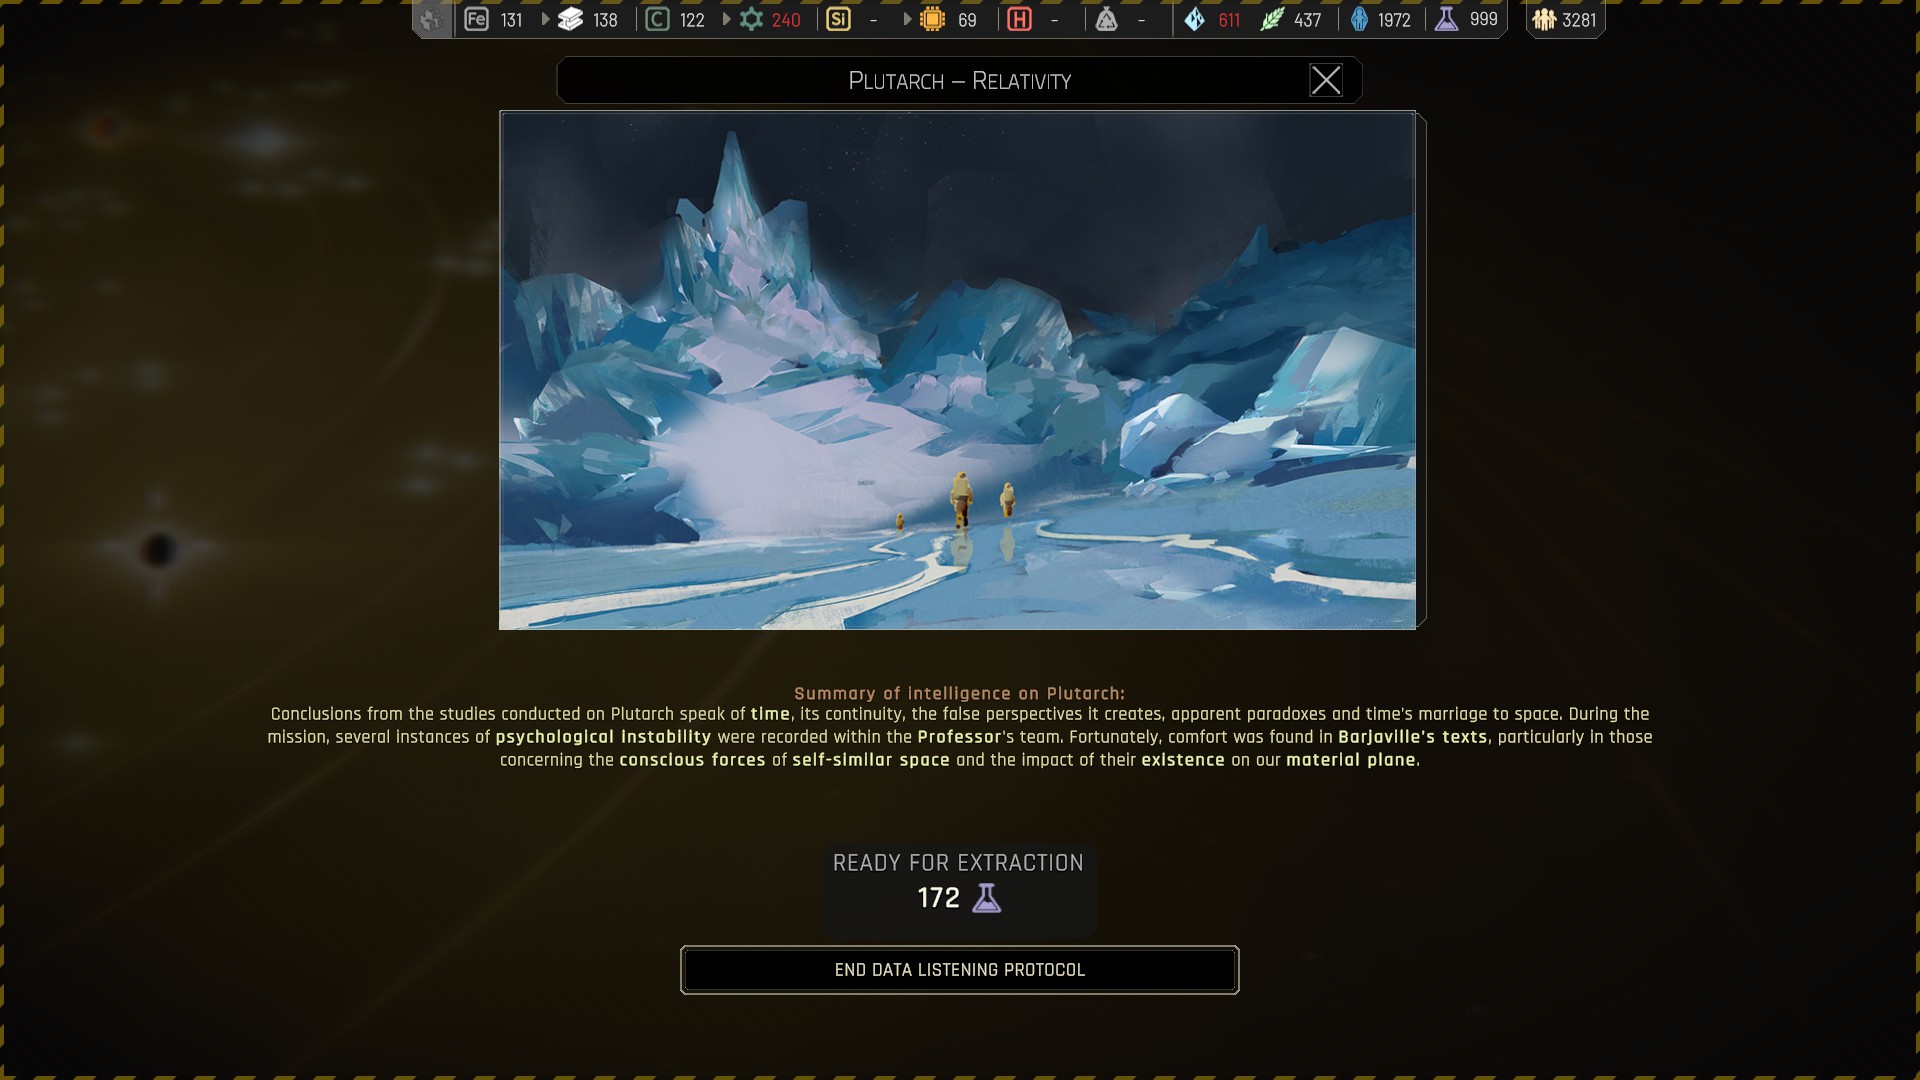
secret alternative outcome say: BARJVAILLE textes = means you allowed cult of the hull before.
If cult of the hull was allowed can be checked in DLS policy setting menu,
Shadow Dec 19, 2023 @ 10:14am 
@gungrifin: To retrieve the ship at DO-G-0202 you need to have researched Automatic Ship Repatriation technology for the science ship.
cermiosi Nov 24, 2023 @ 3:59am 
idk if the devs chaged it or what, but in chapter 1 on Neptune, i opend the door with the bio data as my first action, and it closed the event!