Crash Bandicoot™ 4: It’s About Time

Crash Bandicoot™ 4: It’s About Time

85 ratings
Crash 4 - N.Verted Hidden Gems
By FluffyCobra
This guide details every N.Verted Hidden Gem in Crash Bandicoot 4: It's About Time, how to find and collect them.

Hidden Gems are hidden in the levels, in obscure places where you can't see them most of the time.
There's two for all the standard and Timeline levels: one for the Normal version and another for the N.Verted version, both found in completely different locations in the level.
2
   
Award
Favorite
Favorited
Unfavorite
N. Sanity Island
Rude Awakening
At the start of the level. Head down to the shoreline and then go right past to find it

N. Sanity Peak
In the same area as the normal one: during the Guardian chase.
When you get to the second Checkpoint Box of the chase, you'll need to jump onto a rope. Climb up to the top of the rope and you'll collect the Gem as you swing.
The Hazardous Wastes
A Real Grind
In the first side-scrolling section, in an oil drum platform you can phase in and out with Lani-Loli. Hidden above it is a Box. Jump onto the oil drum, then do a Crouching Double Jump to get above the box, before phasing the box in with Lani-Loli. You'll then bounce off the box and get the Hidden Gem.

Crash Compactor
At the end of the level. At a certain point you'll use an Arrow Box to bounce up and through a platform you'll then phase in with Lani-Loli so you can land on it.

To your right will be an intangible wall with some intangible platforms beyond it. Use a Sliding Double Jump through the wall, then Flip the platforms in once you're through the wall. Now head upwards and you'll find a Golden Bumpa Box at the top, with the Hidden Gem above it.

Hit the Road
Located just after the Bonus Round platform.
Go around a cover and over a grate to spot the first Chop Shop brute of the level. On the other side, Slide under the grate, where the Gem is.

Truck Stopped
Found by getting to the top of the tall metal structure with a Golden Bumpa Box on top. The Gem is on the far side of the structure.
Salty Wharf
Booty Calls
Located in the pirate town, after the timeline event. Head down the right path and get onto the raft platform.
On your right is a jetty with some boxes on it, the Hidden Gem is located behind the boxes.


Hook, Line and Sinker
Found just after the third Checkpoint. There will be two cannons with a cutlery grate between them, then a short drop, two Sword Lizards, and then two more cannons with the Hidden Gem above. Bounce off Sword Lizards when it's as far left as possible, then Double Jump left to grab the Hidden Gem.

Jetboard Jetty
Found after the long platforming section where you use Lani-Loli. When you drop down onto the dock with the final Jetboard, make a U-Turn to the left to find the Gem hidden by the wall of the stone walkway.

Thar He Blows!
Found after taking control of Crash to continue the Booty Calls portion of the level. Check behind the left-hand pillar of the gate that Dingodile blew up to find it.
Tranquility Falls
Give It a Spin
Located at the Timeline Event where the door opens up.
Pick up 'Akano, then go back and Dark Double Jump to the right to pick up the N.Verted Hidden Gem hiding behind a banner.


Potion Commoton
When you rejoin the Crash / Coco portion of the level, jump off the left edge and Belly Flop to fall down the vent's updraft. Backtrack a bit through the old Give It a Spin section and you'll see the Gem atop a high wall. Use a Sliding Double Jump to reach it!


Draggin' On
Found after the spot where you have to face two Stone Lions.
Dark Spin up the side of the tower where the Dragon is, then when you're at the top, glide as far right as possible to get this Gem near the right-hand lantern.


Off-Balance
Located after the first Lani-Loli section. After it you'll run across a broken wooden bridge guarded by two Stone Dragons.
The Hidden Gem is under the section of the bridge guarded by the second Dragon.
Mosquito Marsh
Off Beat
When you get the Checkpoint 3, check between the dumpster and the wooden Arrow Box to get it.

Home Cookin'
Found at the end of the level.
After you destroy the utensils in the giant wumpa cauldron, you'll then go right and glide onto a slanted conveyor belt.
From here, glide into the background to land on a bridge, then go left to grab this Gem at the end!

Run it Bayou
Found at the start of the level.
When you get to the Jetboard, ignore it and instead do a Sliding Double Jump to reach the small stone dock. Get on top of the awning, then Double Jump back to land on a high wooden balcony with the Gem on it.

No Dillo Dallying
Found when you take control of Crash for the Run it Bayou portion.
Use a Sliding Double Jump to jump off the dock towards the camera and land on an elevated platform circled by mines.
The 11th Dimension
Snow Way Out
Located in the first ice flow section.
Hidden waterfall cave at the end of the section, directly across from the next Checkpoint.

Ship Happens
Located early into Crash's section of the level.
At the end of first ice platform, you can jump right to a stone pier with a tall stack of boxes on it, with an Arrow Box on top. Bounce high off the Arrow Box to get the Hidden Gem.

Stay Frosty
Found in the grind rail section.
After the "slamming door" ring where you need to use Kupuna-Wa to pass through, you'll encounter a second ring with icicles on it.
Jump through the ring, then immediately drop under the rail to get the Hidden Gem.

Bears Repeating
Found early in the side-scrolling section of the level.
Bounce on the Arrow Box to get onto the next pair of platforms and get onto the right-hand one.
Use a Sliding Double Jump to get onto it, then do another one to the left to get the Hidden Gem.

Building Bridges
Found during the Polar-riding section.
When Cortex shoots his first tree, jump left to land between its stump and another tree to collect it.
Eggipus Dimension
Blast to the Past
Found in the section before the second grind rail sequence.
At the end of this section you'll run across some leaves guarded by some plants.
After the second one will be an Arrow Box on your right with a Bounce Box and two Locked Boxes. Spring jump off the Arrow Box going around the Locked Box.


Fossil Fueled
Found immediately after the bit where you cross a giant lava river.
Once you get to the other side you'll find a Bounce Box and a TNT Box on the right.
Morph the Flytrap into a Bounce Block, then spring and Boost over the TNT Box to get the Hidden Gem.

Dino Dash
Found at Checkpoint 3, after the first vine grind but before you encounter the T. Rex.
Jump over the mushrooms and the pit, then walk up to the rib bones you can Spin through.
Walk left into the log to collect the Gem.

Rock Blocked
Located in Dingodile's main side-scrolling area where he ascends the cliff.
At a certain point you'll reach the rightside and bounce up some Arrow Boxes.
Here, bounce right and over the Tricera Beetle to Spin him into the Nitro Box.
Walk Dingodile into the cliff-face to get him as close to it as possible. Then, spring as high as you can off the Box on top of the stack to the right, then Glide on the spot, you'll get the Gem hidden under the leaf.
Bermugula's Orbit
Out for Launch
Found at the start of the level.
Jump up the steps into the circular room, then use a Crouching Double Jump at the top of the steps to get behind the large disc-shaped object above.

Shipping Error
Found just before the final grind rail section.
When you get to the elevator up to it, don't step on it. Stand in the doorway and use a Crouching Double Jump to get up behind it where the Hidden gem is hiding.

Stowing Away
After making it to the cockpit and descending down the elevator, turn around and walk towards the camera to find it.

Crash Landed
Requires: Blue Gem, from Draggin' On
Found in the Blue Gem path just after the first riding section.
After you get past an ! Box on a slippery sloped section, you'll land in a normal area. From here, jump towards the camera and jump across the platform with the Starro on it to find another platform with a small box tower on it.
The Sn@xx Dimension
Food Run
Located at the end of the Lani-Loli secion, before the final Checkpoint of the level.
It's hidden inside one of the platforms you can phase in and out.

Rush Hour
At the start of the level will be four platforms to cross.
The Hidden Gem is inside the fourth one, the one slightly higher than the rest.


The Crate Escape
Located during the first side-scrolling section.
At the start, ignore the Golden Bumpa Boxes above as you cross right to the Iron Arrow Boxes.
On the third one, spring high and then bounce off the ? Box on the left to land on top of the ventilation shaft. From here, jump down and bounce on the top of the Golden Bumpa Boxes: this will let you get close enough to Charge left into a small alcove with the Gem in it.
Cortex Island
Nitro Processing
Located just after Checkpoint 3.
At some point you'll encounter some Boxes and a Countdown Box.
Hidden in the left corner will be the Hidden Gem.

Toxic Tunnels
Found at the last quarter of the level.
After a side-scrolling section as you go "upstream" against oncoming mine carts, you'll hit the second-to-last Checkpoint in the level. The Hidden Gem is directly above the Checkpoint, climb up the wheel platforms to get it.

Cortex Castle
Found at the Checkpoint where you have a view outside the castle.
The Hidden Gem is high above the Checkpoint Box.
Use nearby TNT Boxes to get a Spring Jump up to the gem.

Seeing Double
Found early into the crazy laser-and-mask gauntlet.
You'll Glide with Akano, then pick up Kupuna-Wa to safely land on spinning spiked discs.
Ahead will be an ? Box: spring high off of it into a Double Jump to get the Gem.
4 Comments
JaredX7 Jun 7, 2023 @ 5:14pm 
Blast to the Past

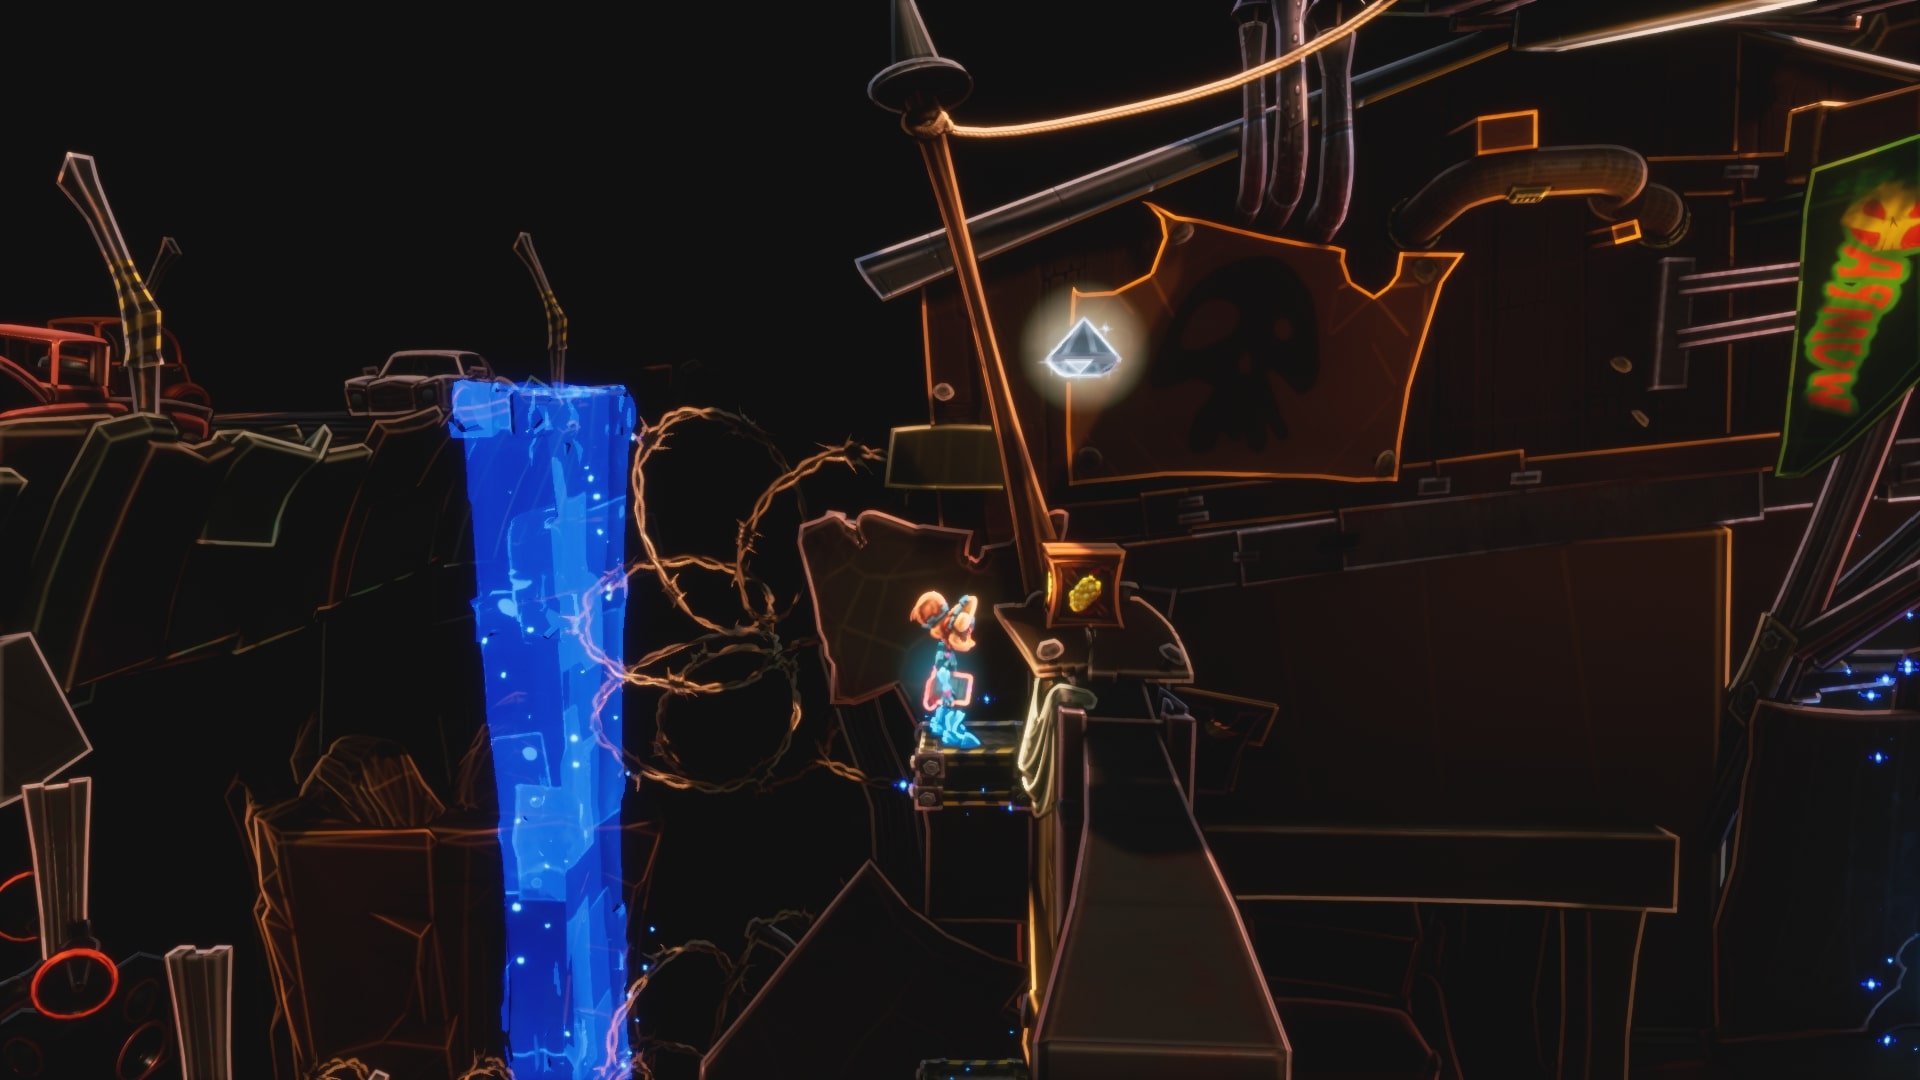
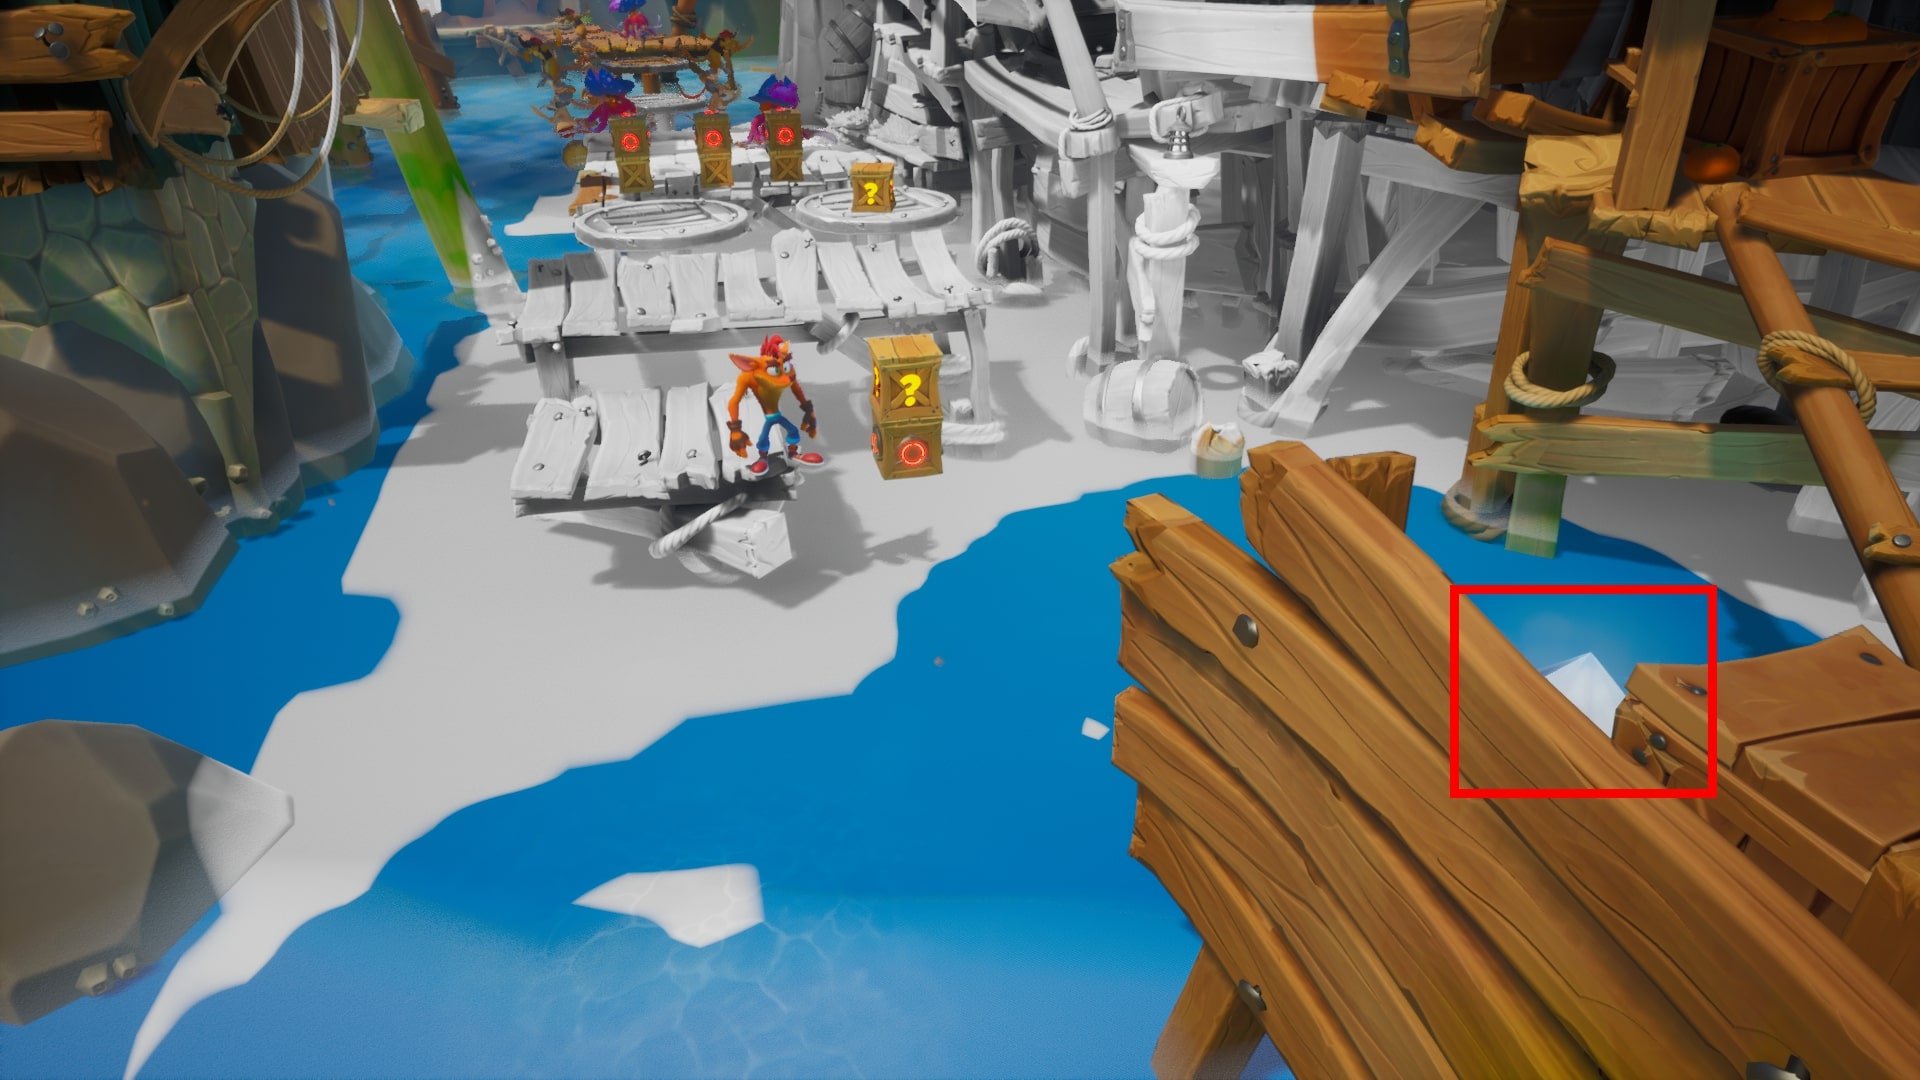
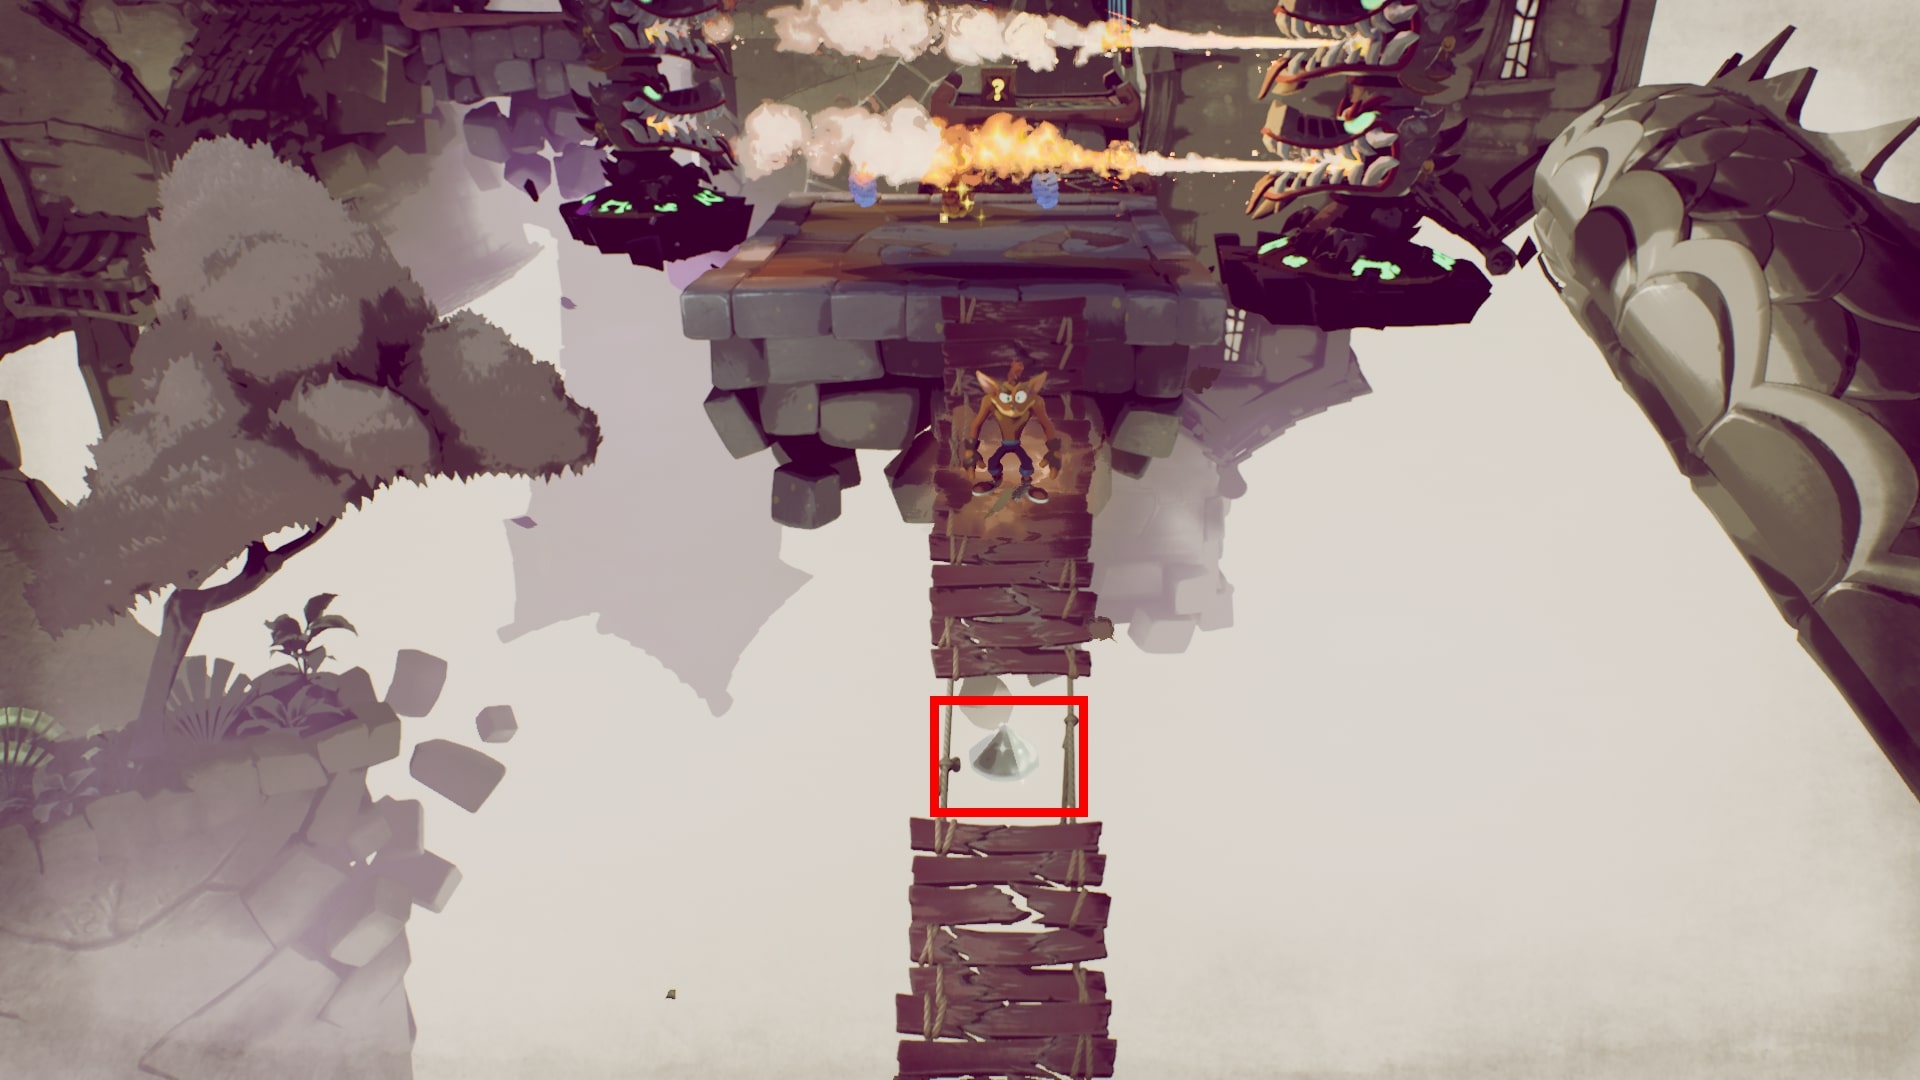
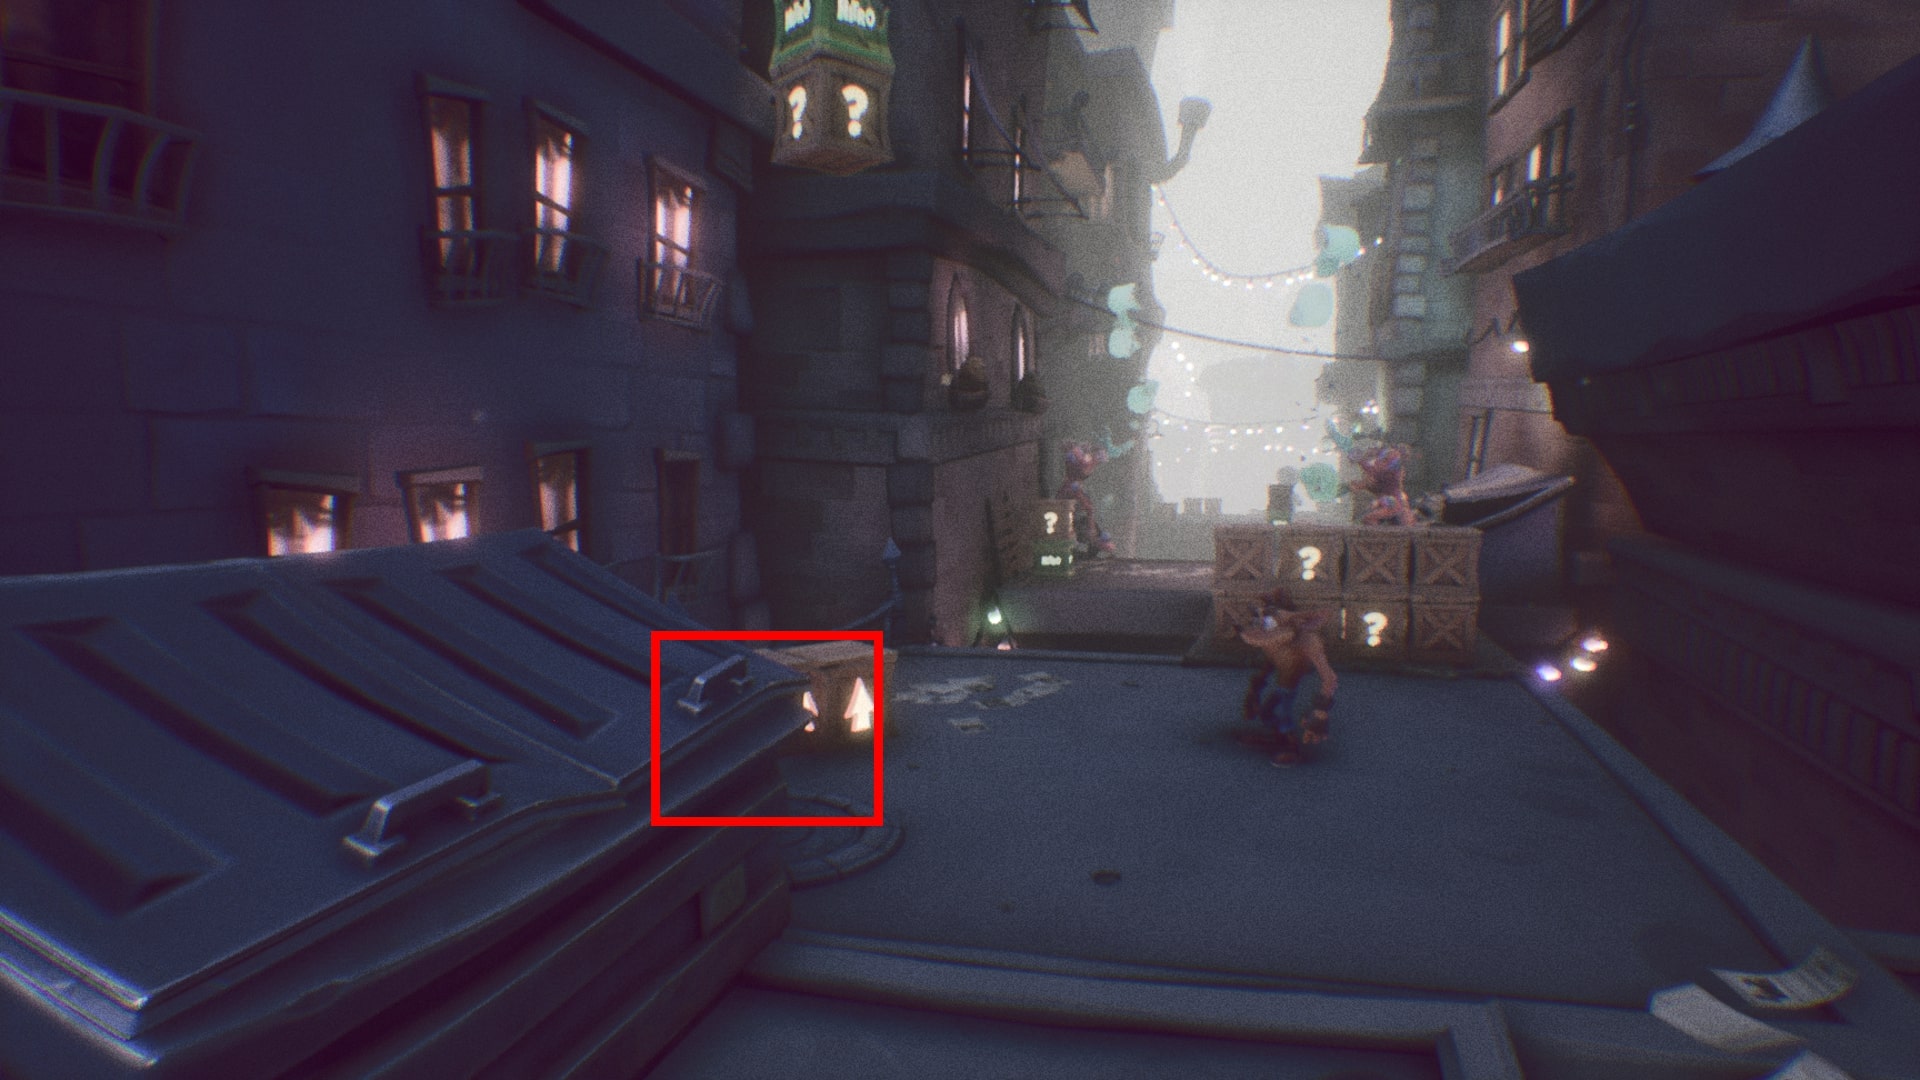
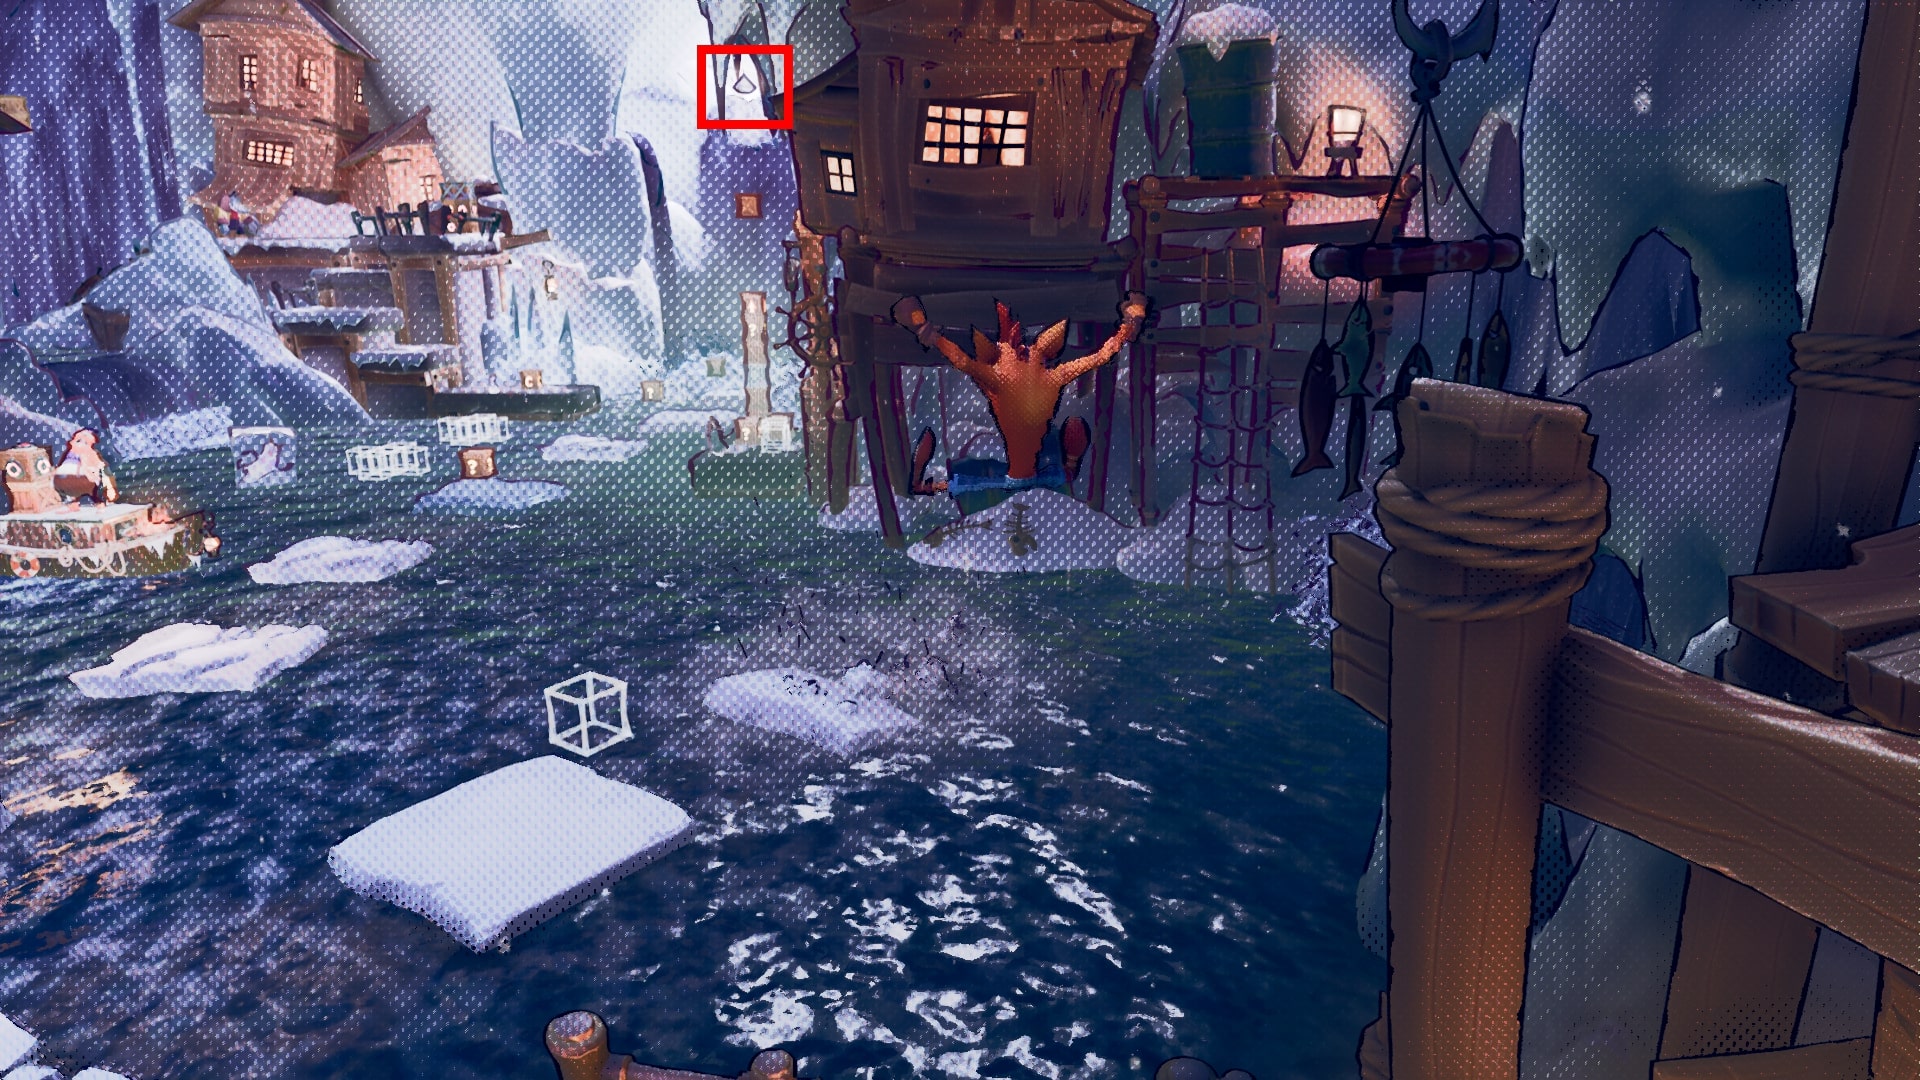
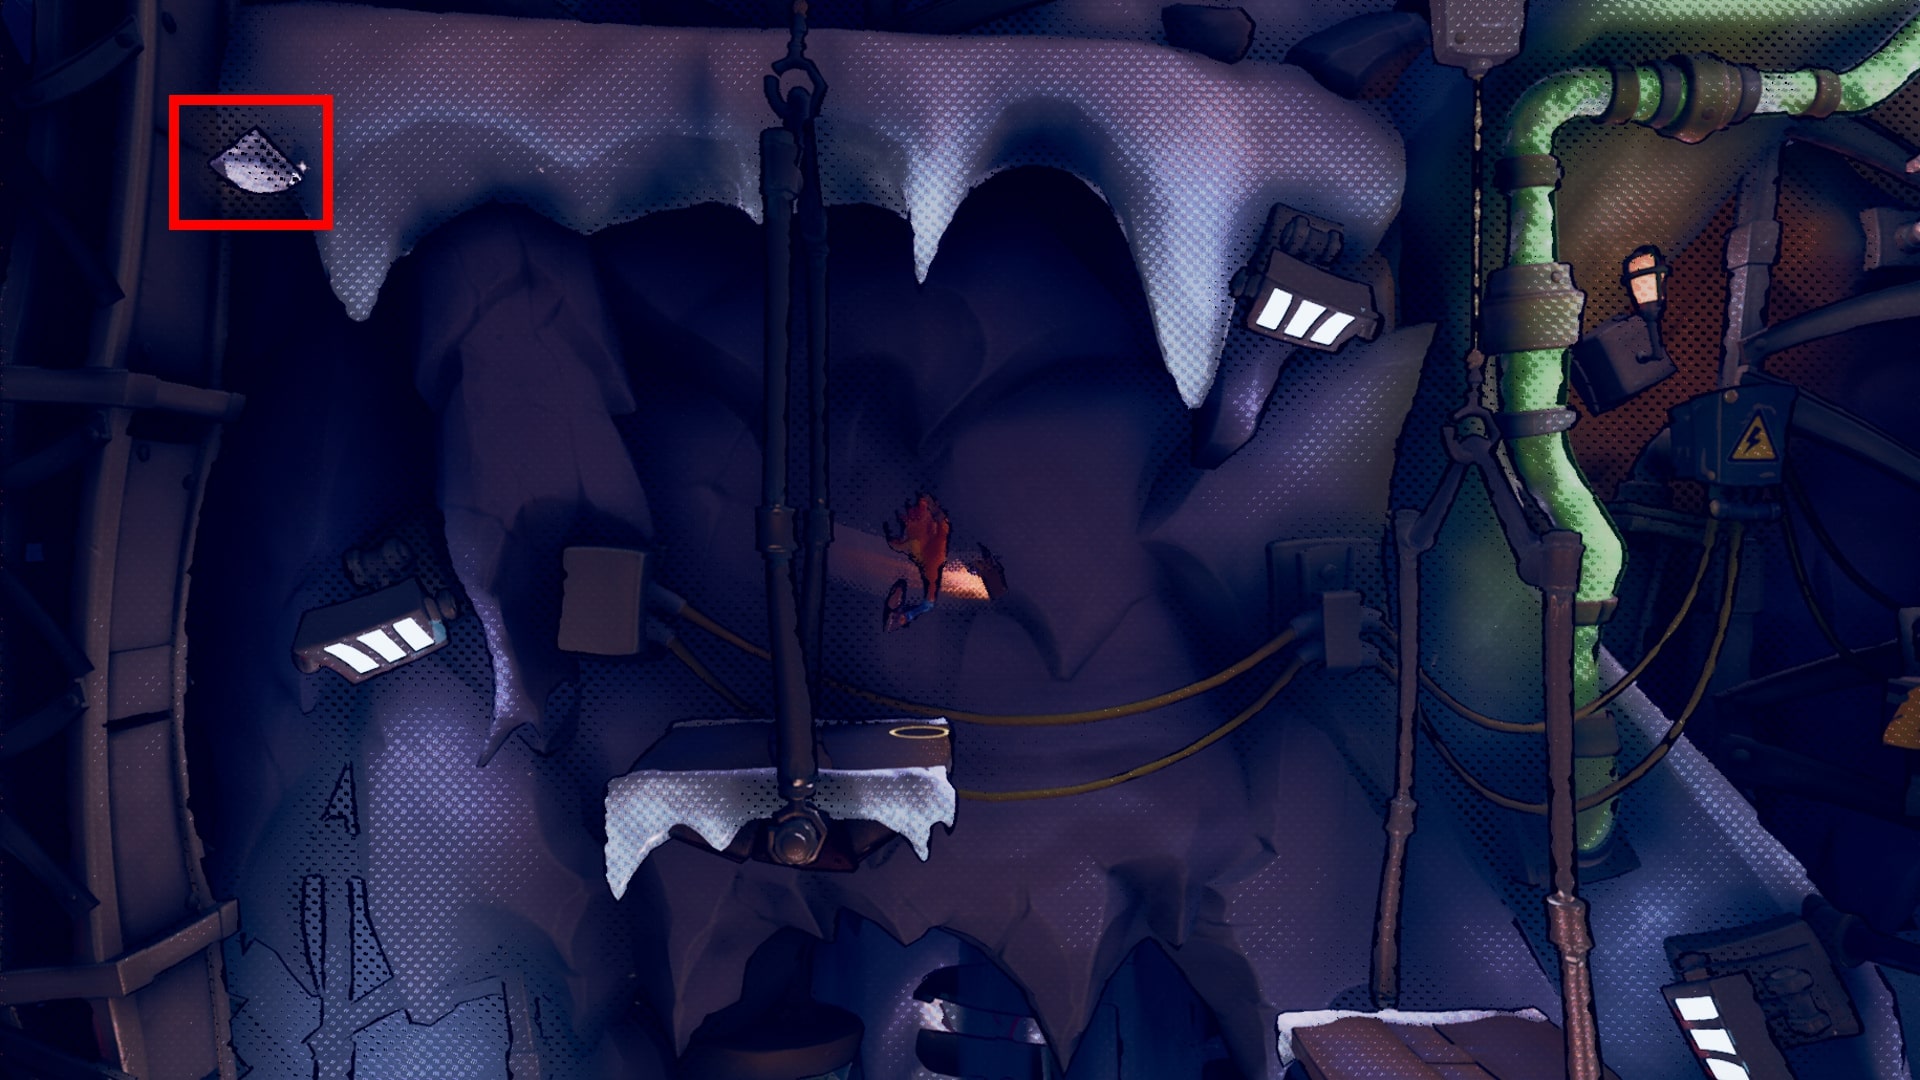
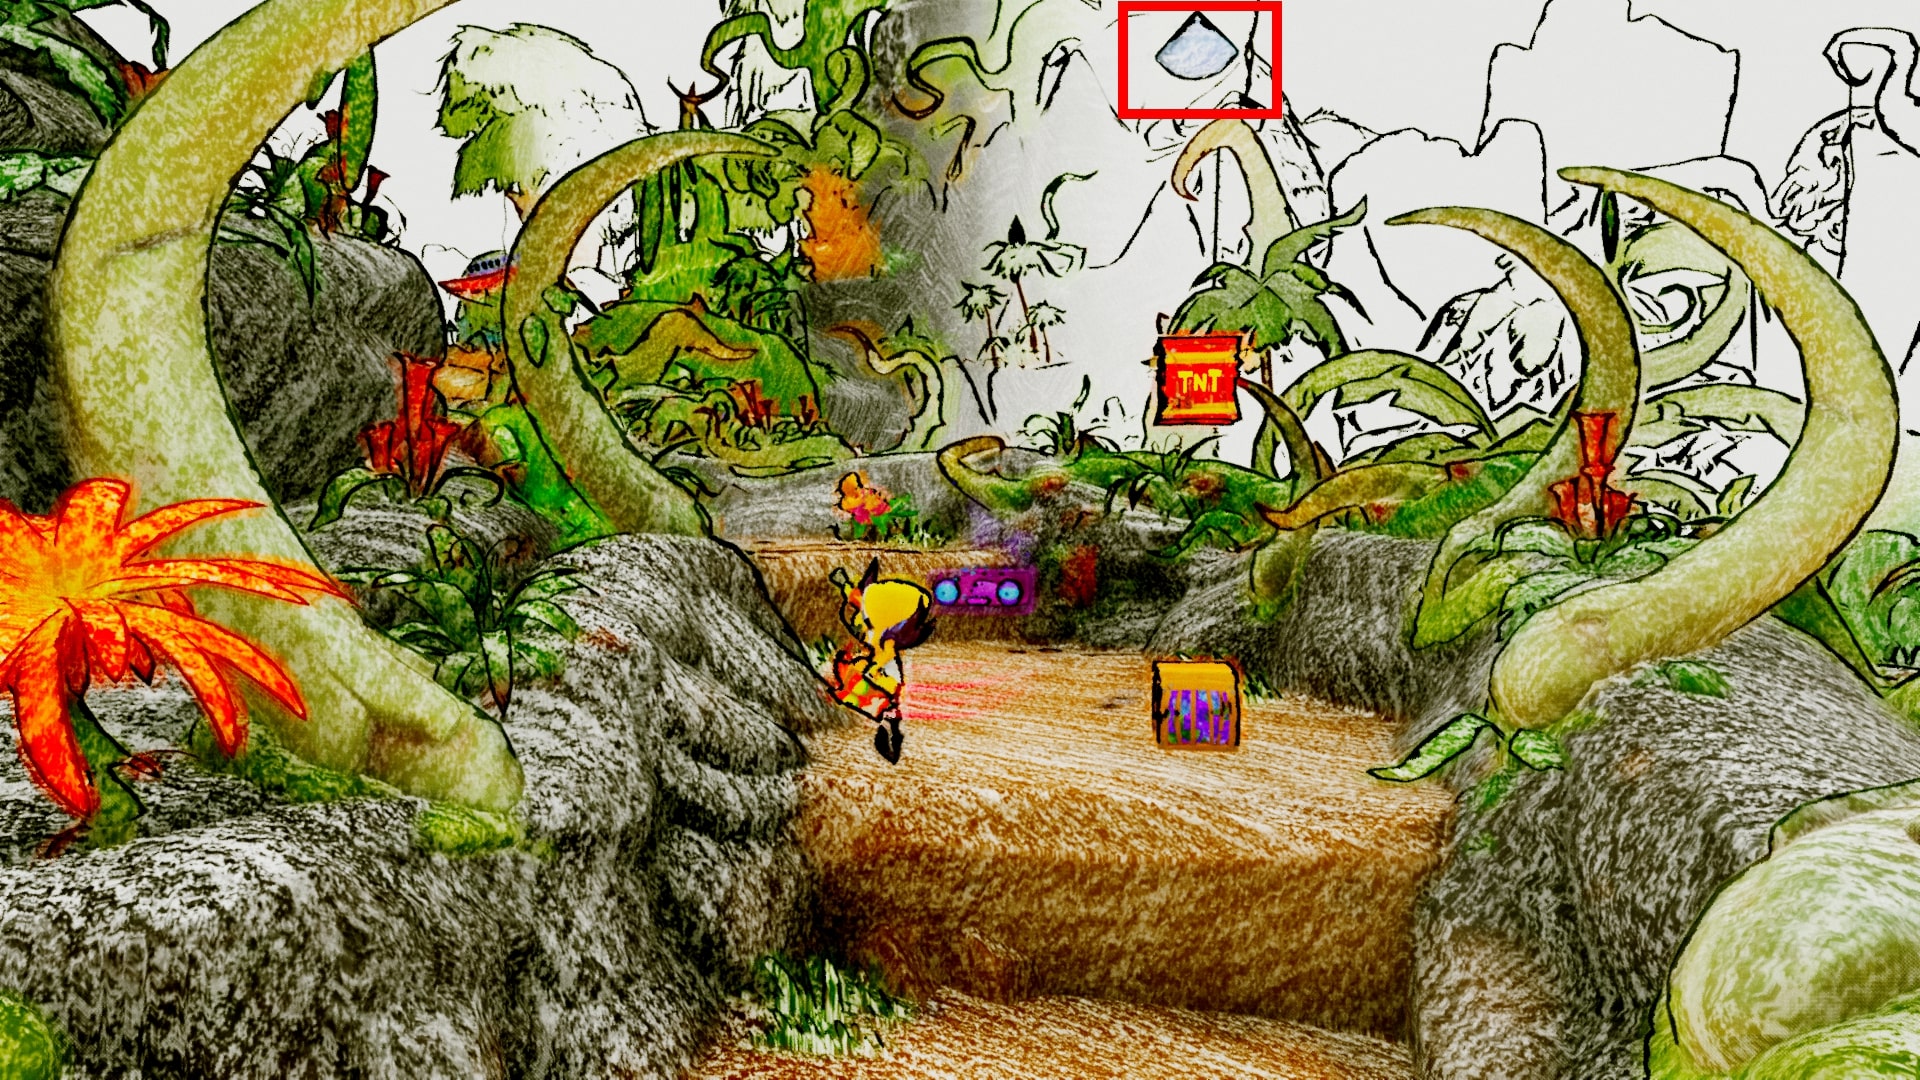
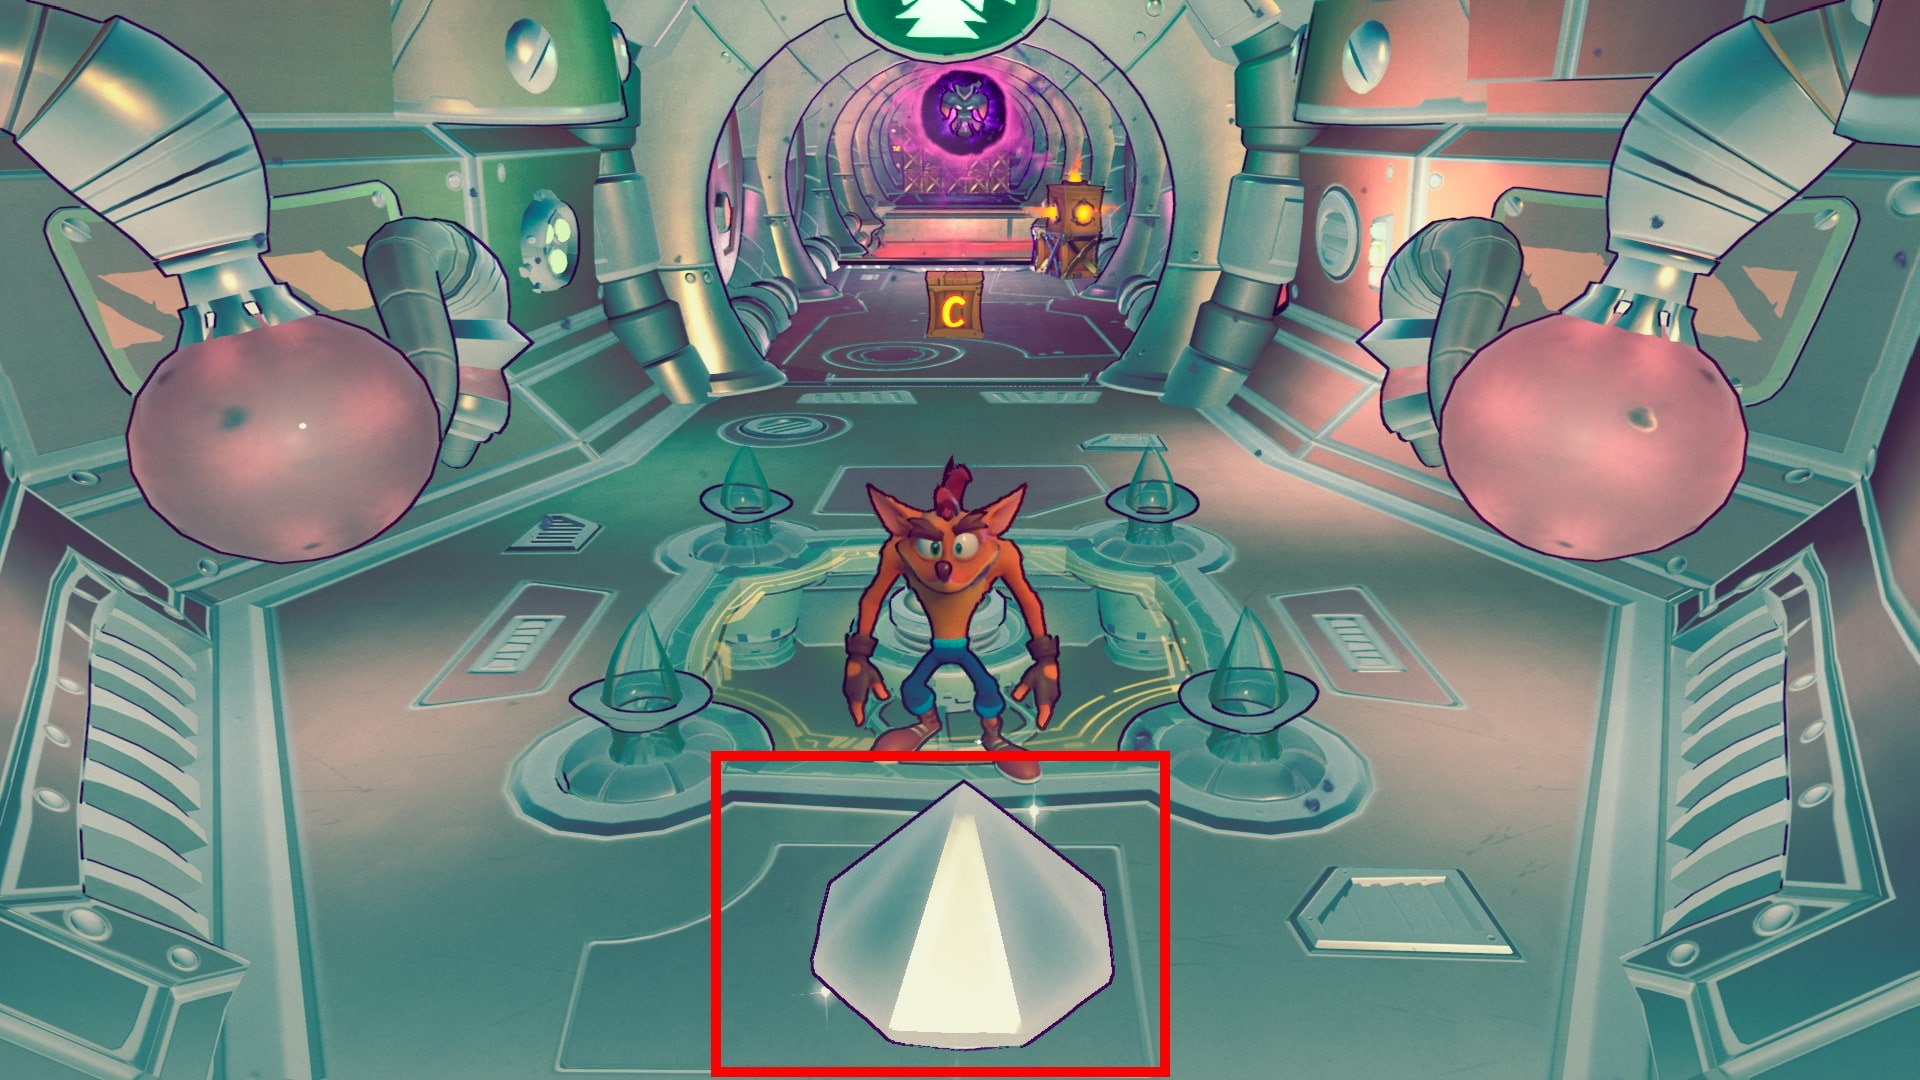
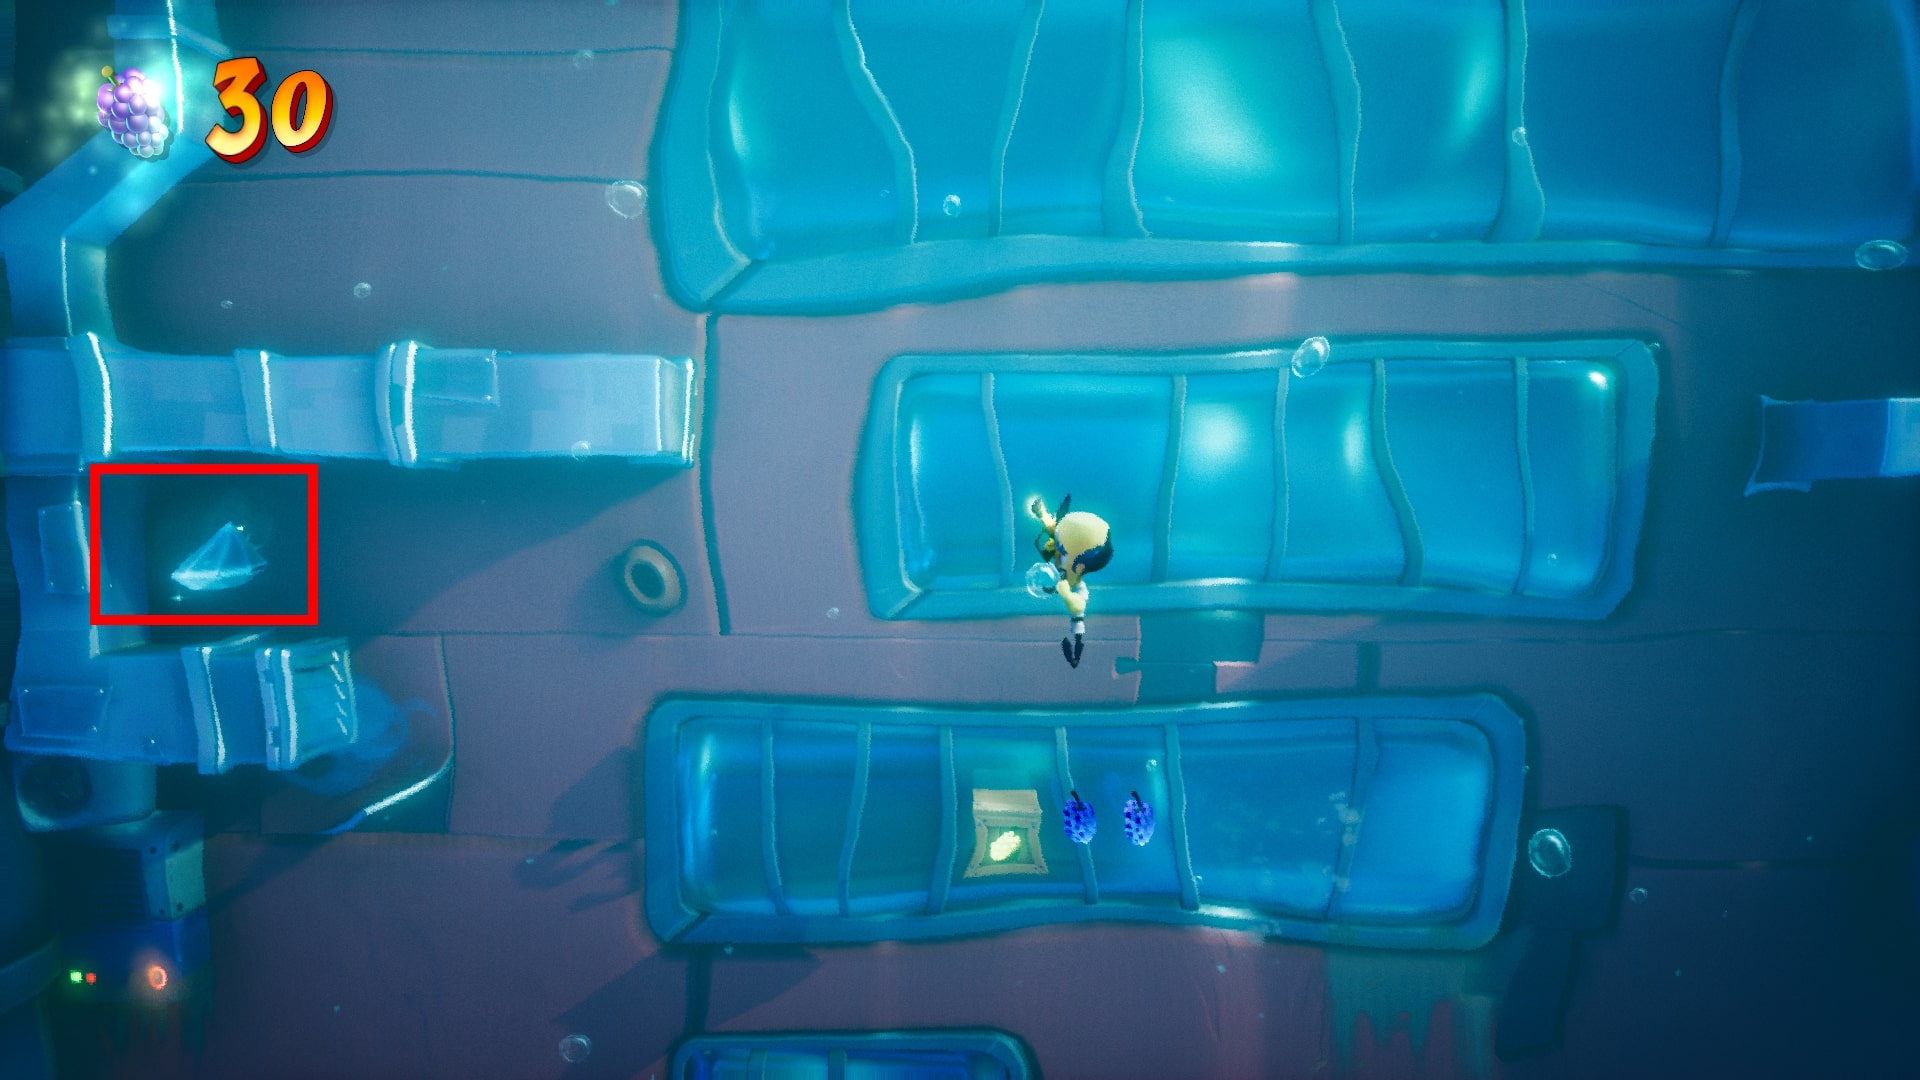
If you manage to keep Aku Aku invincibility, you can get the gem a lot easier.

You can bounce off the arrow box while under the influence of invincibility, the metal crate above will be destroyed, allowing you to obtain the hidden gem with ease.
JaredX7 Jun 5, 2023 @ 4:46am 
Give It a Spin
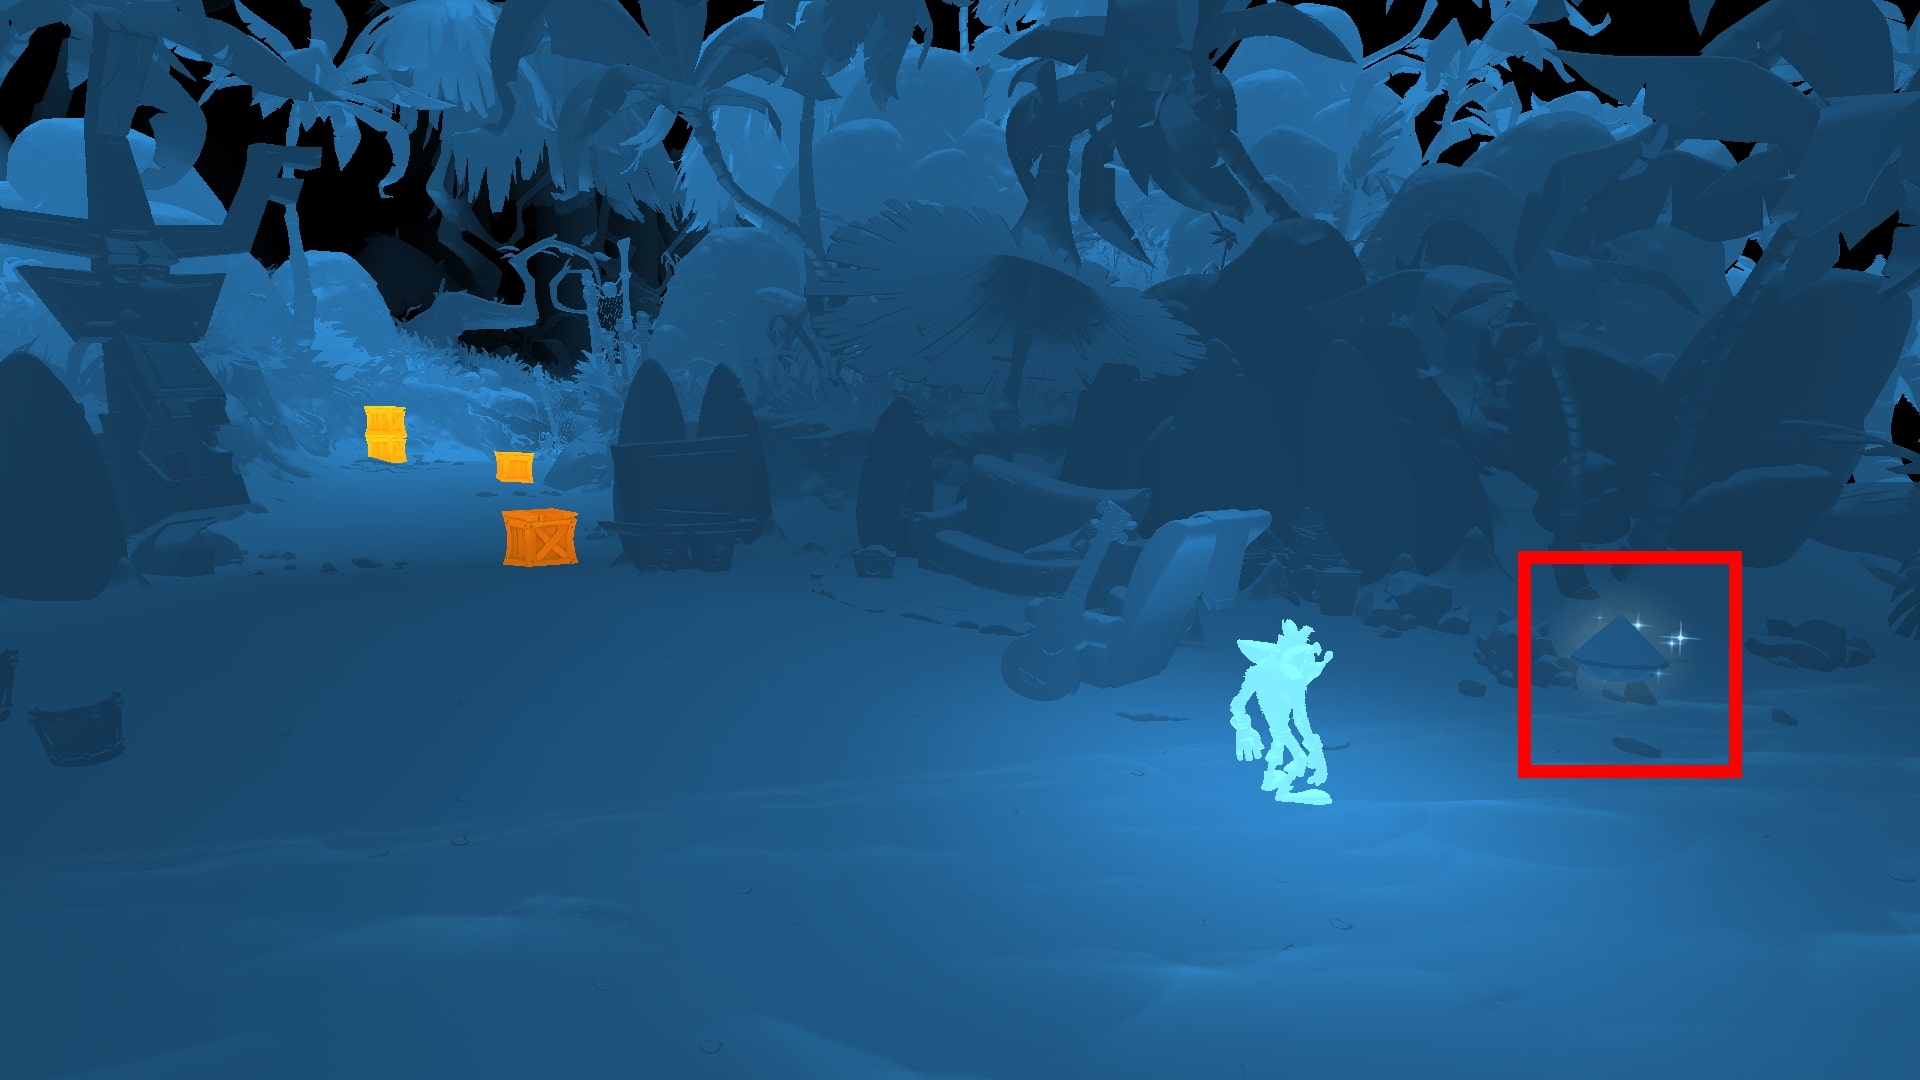
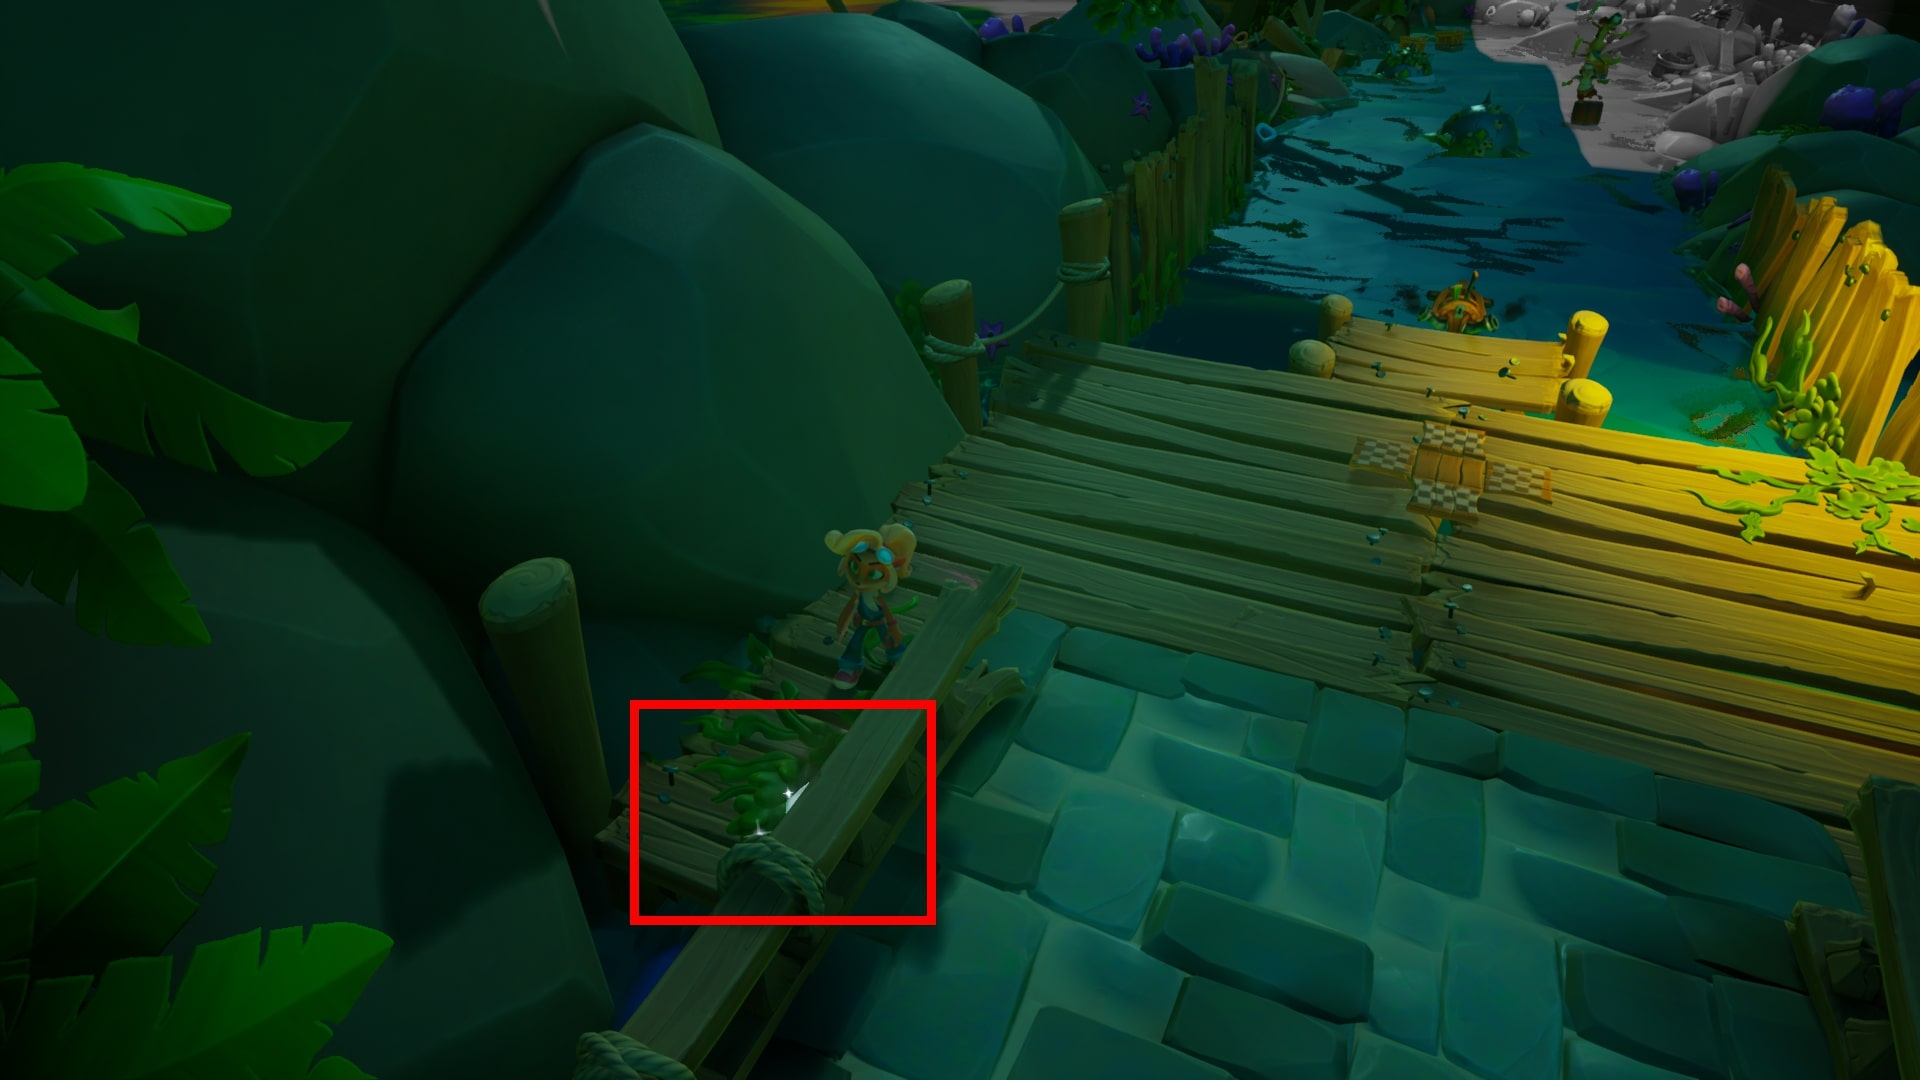
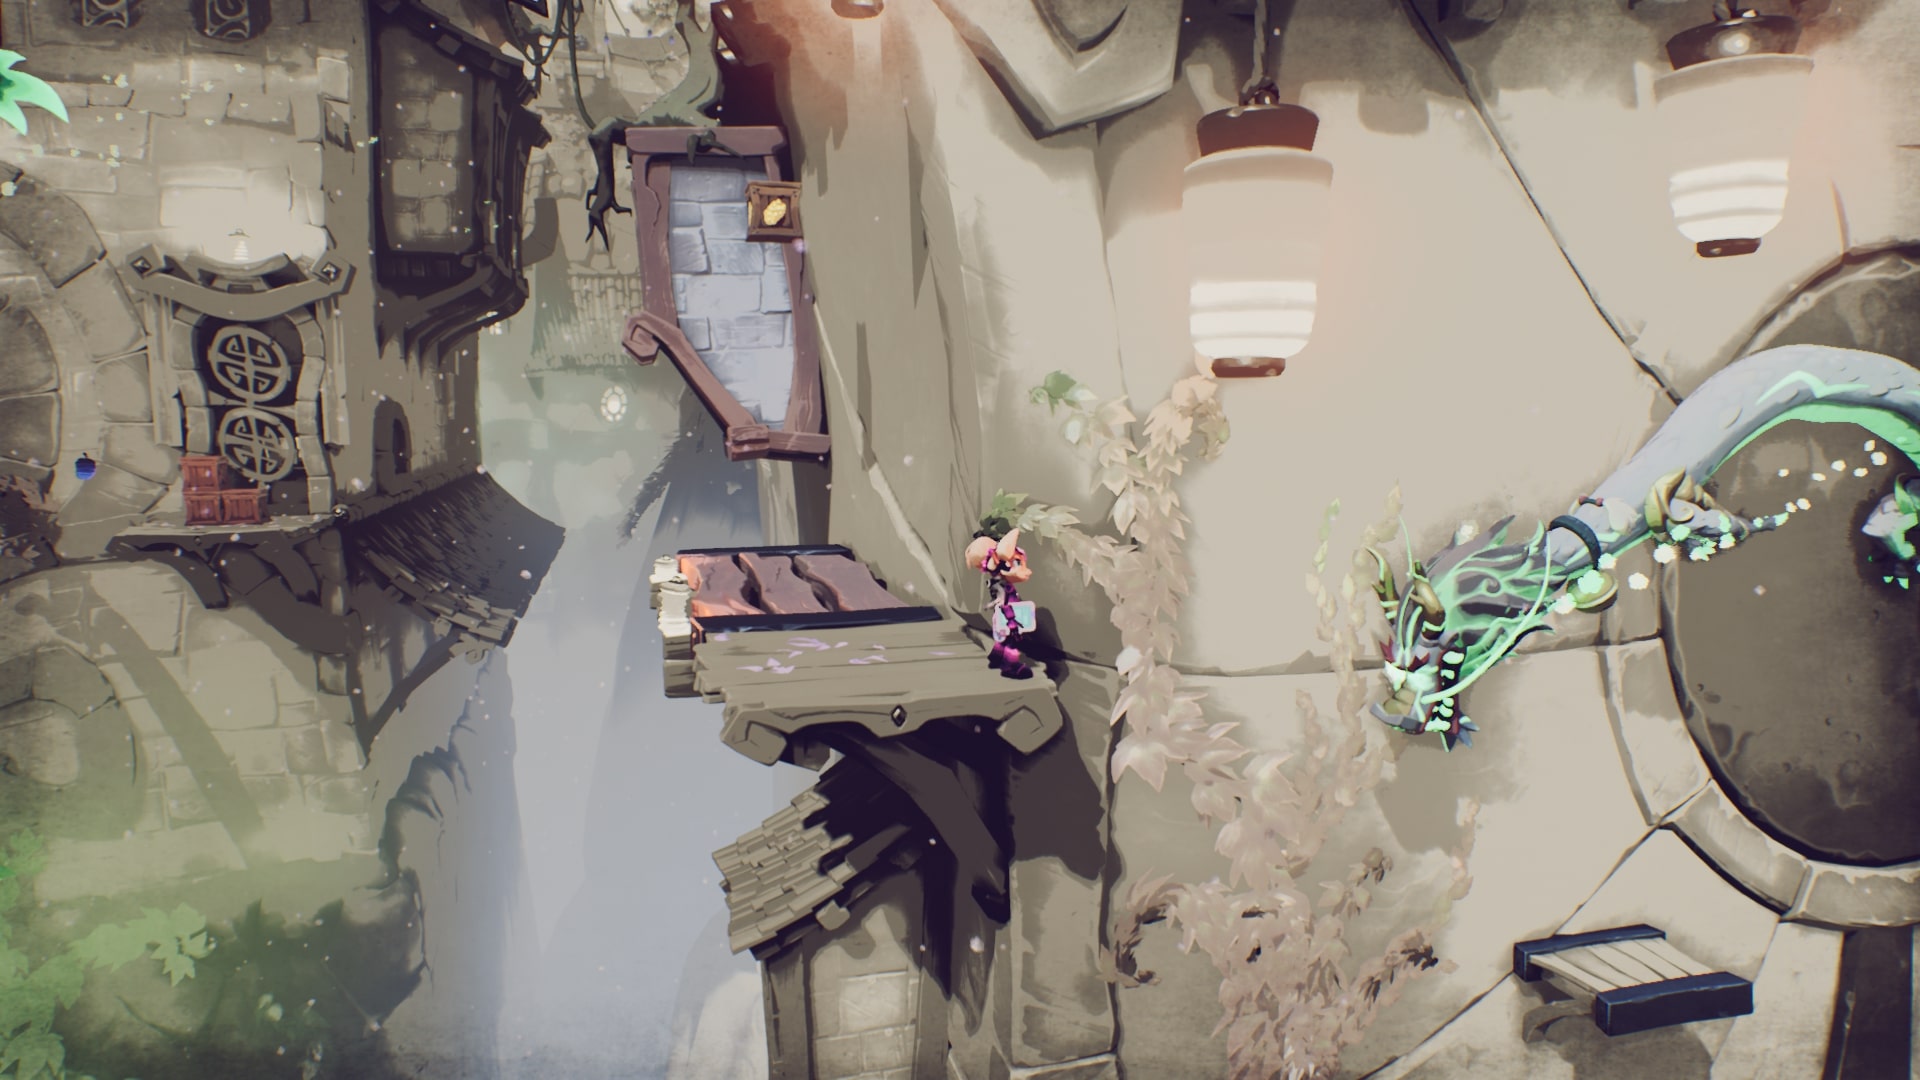
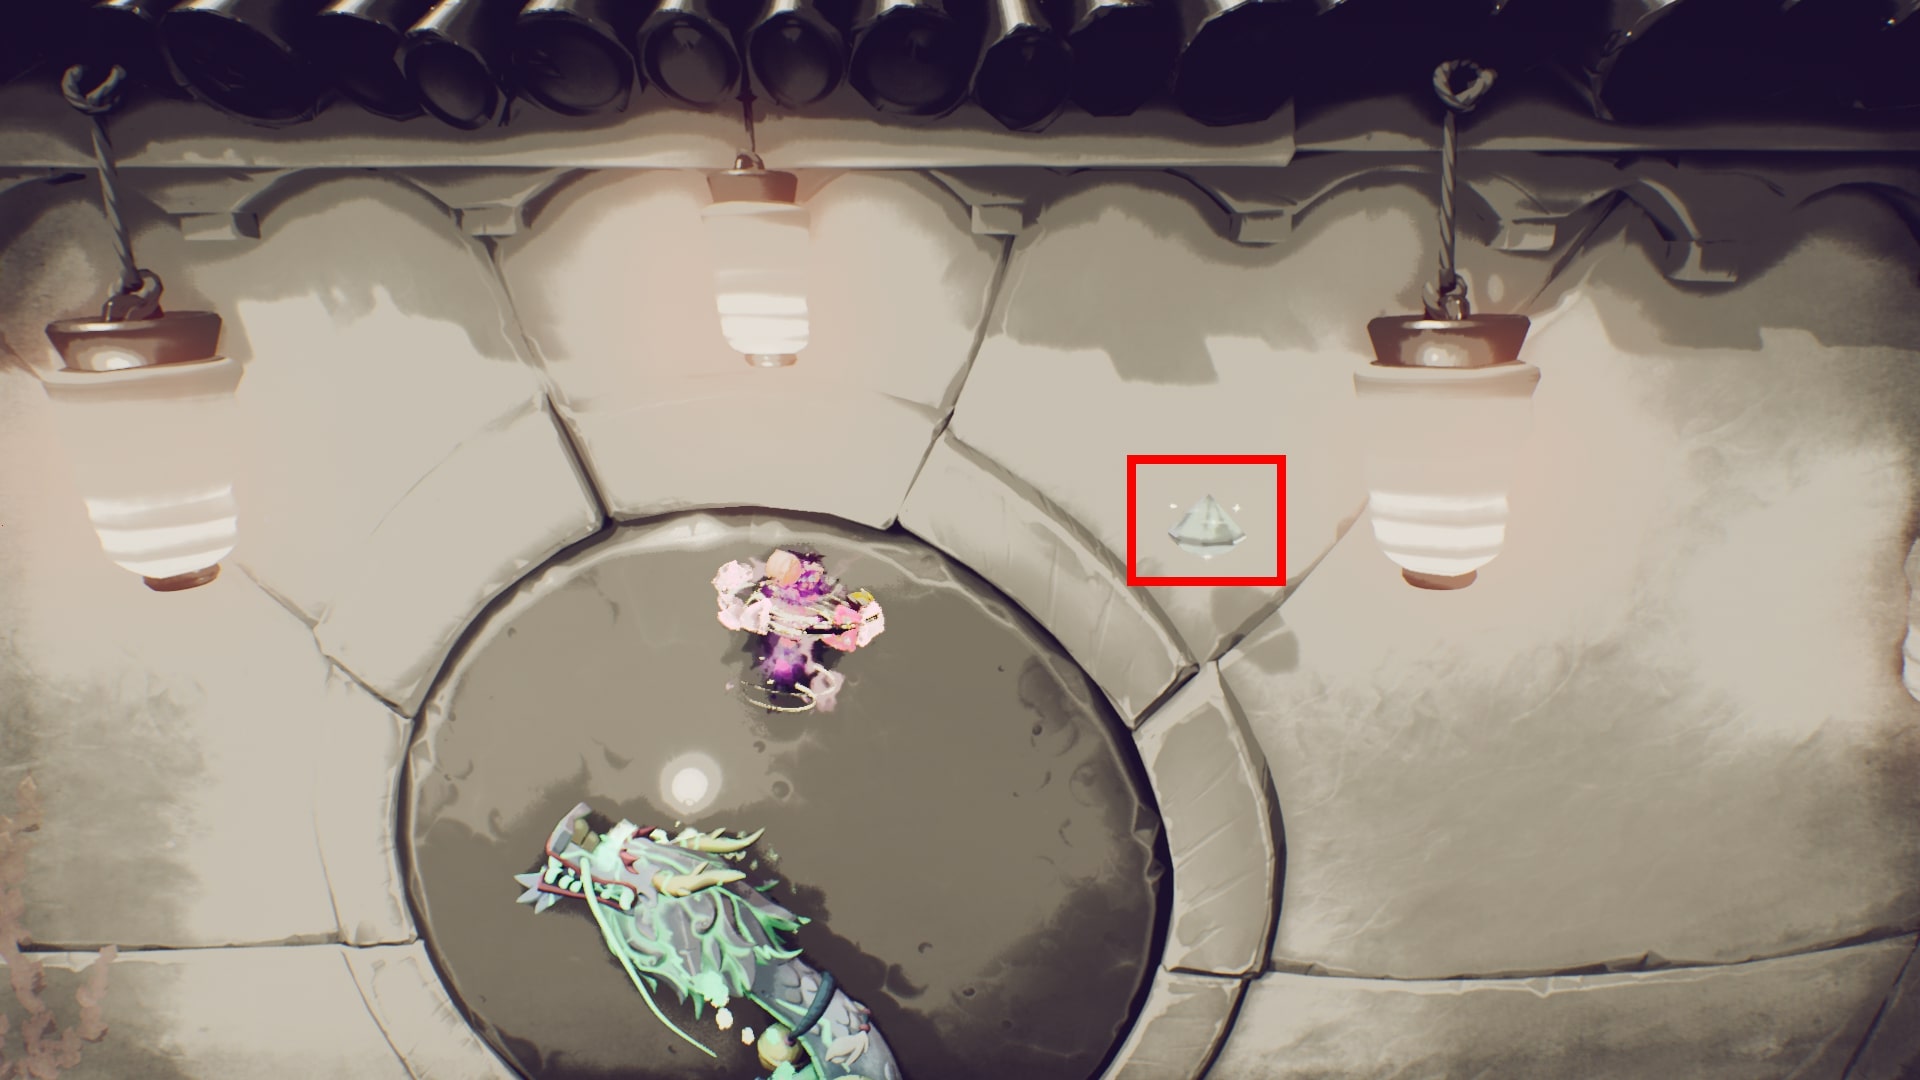
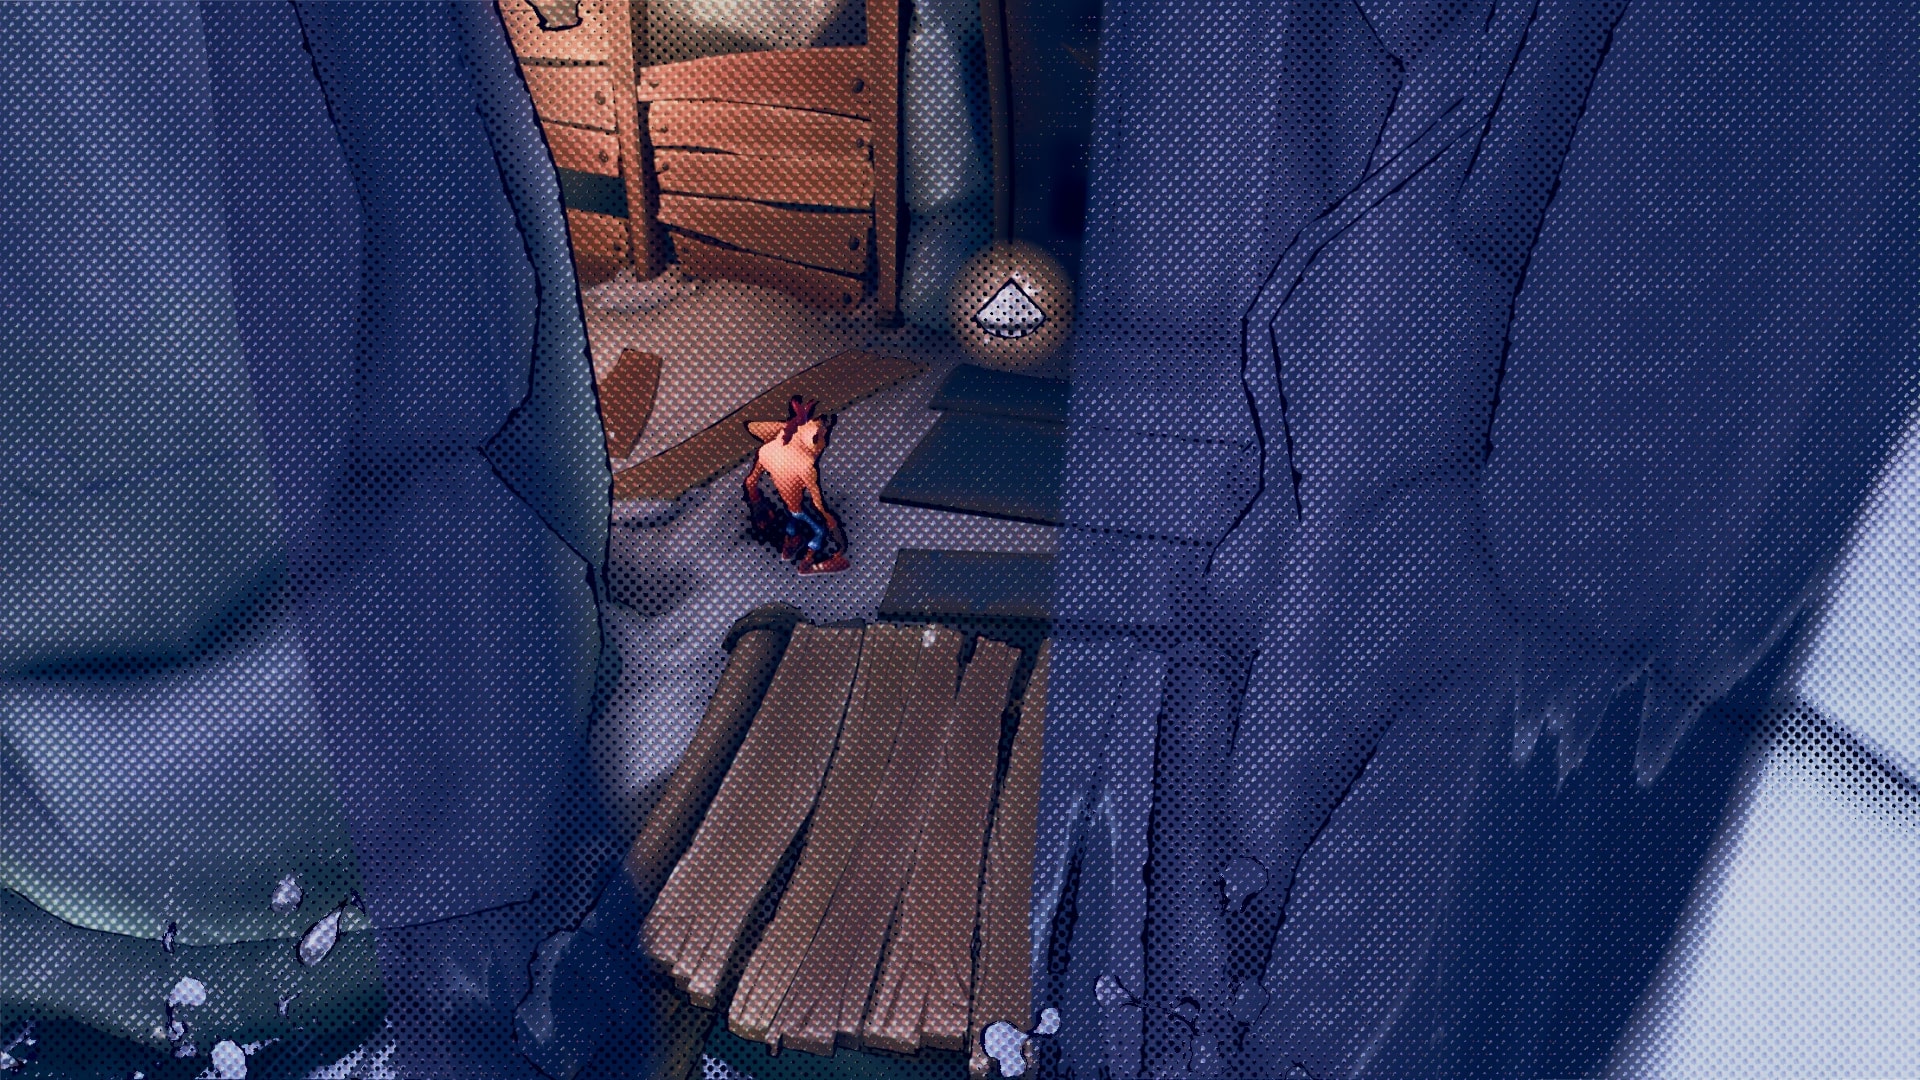
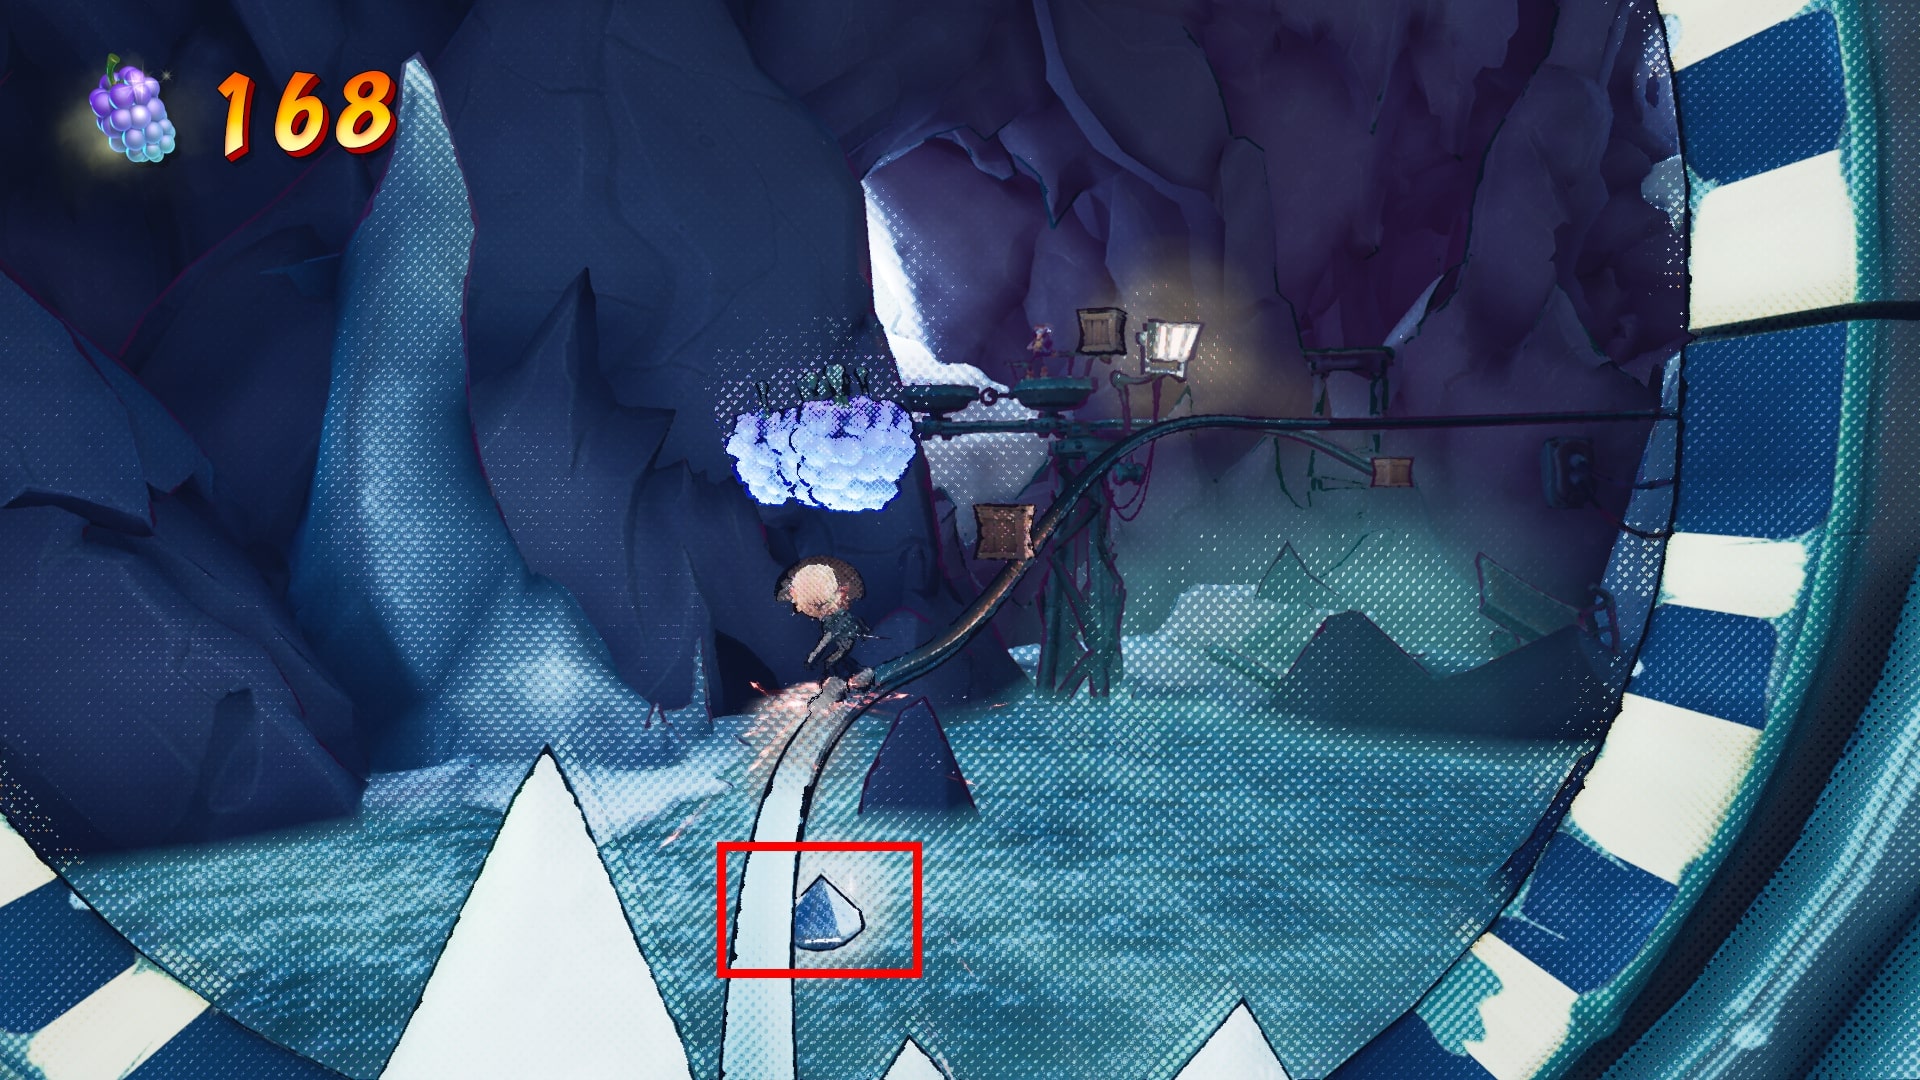
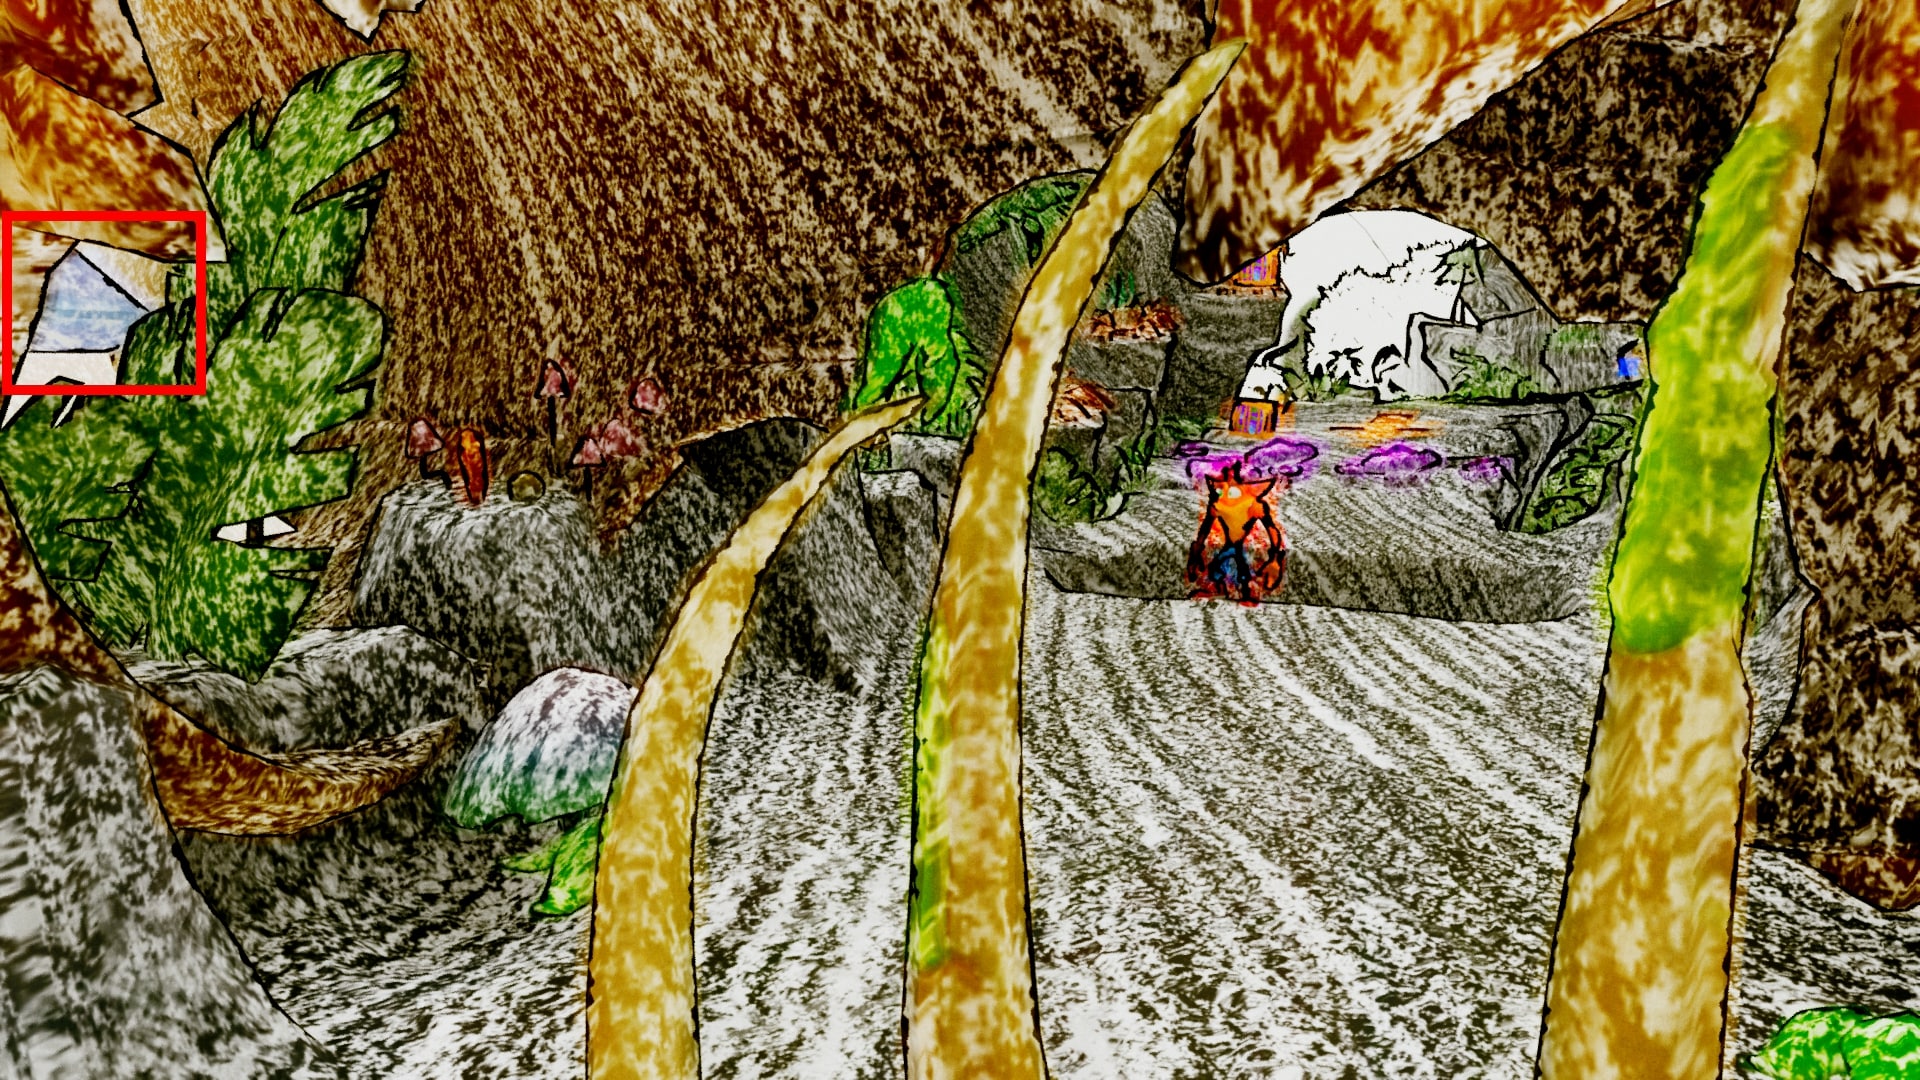
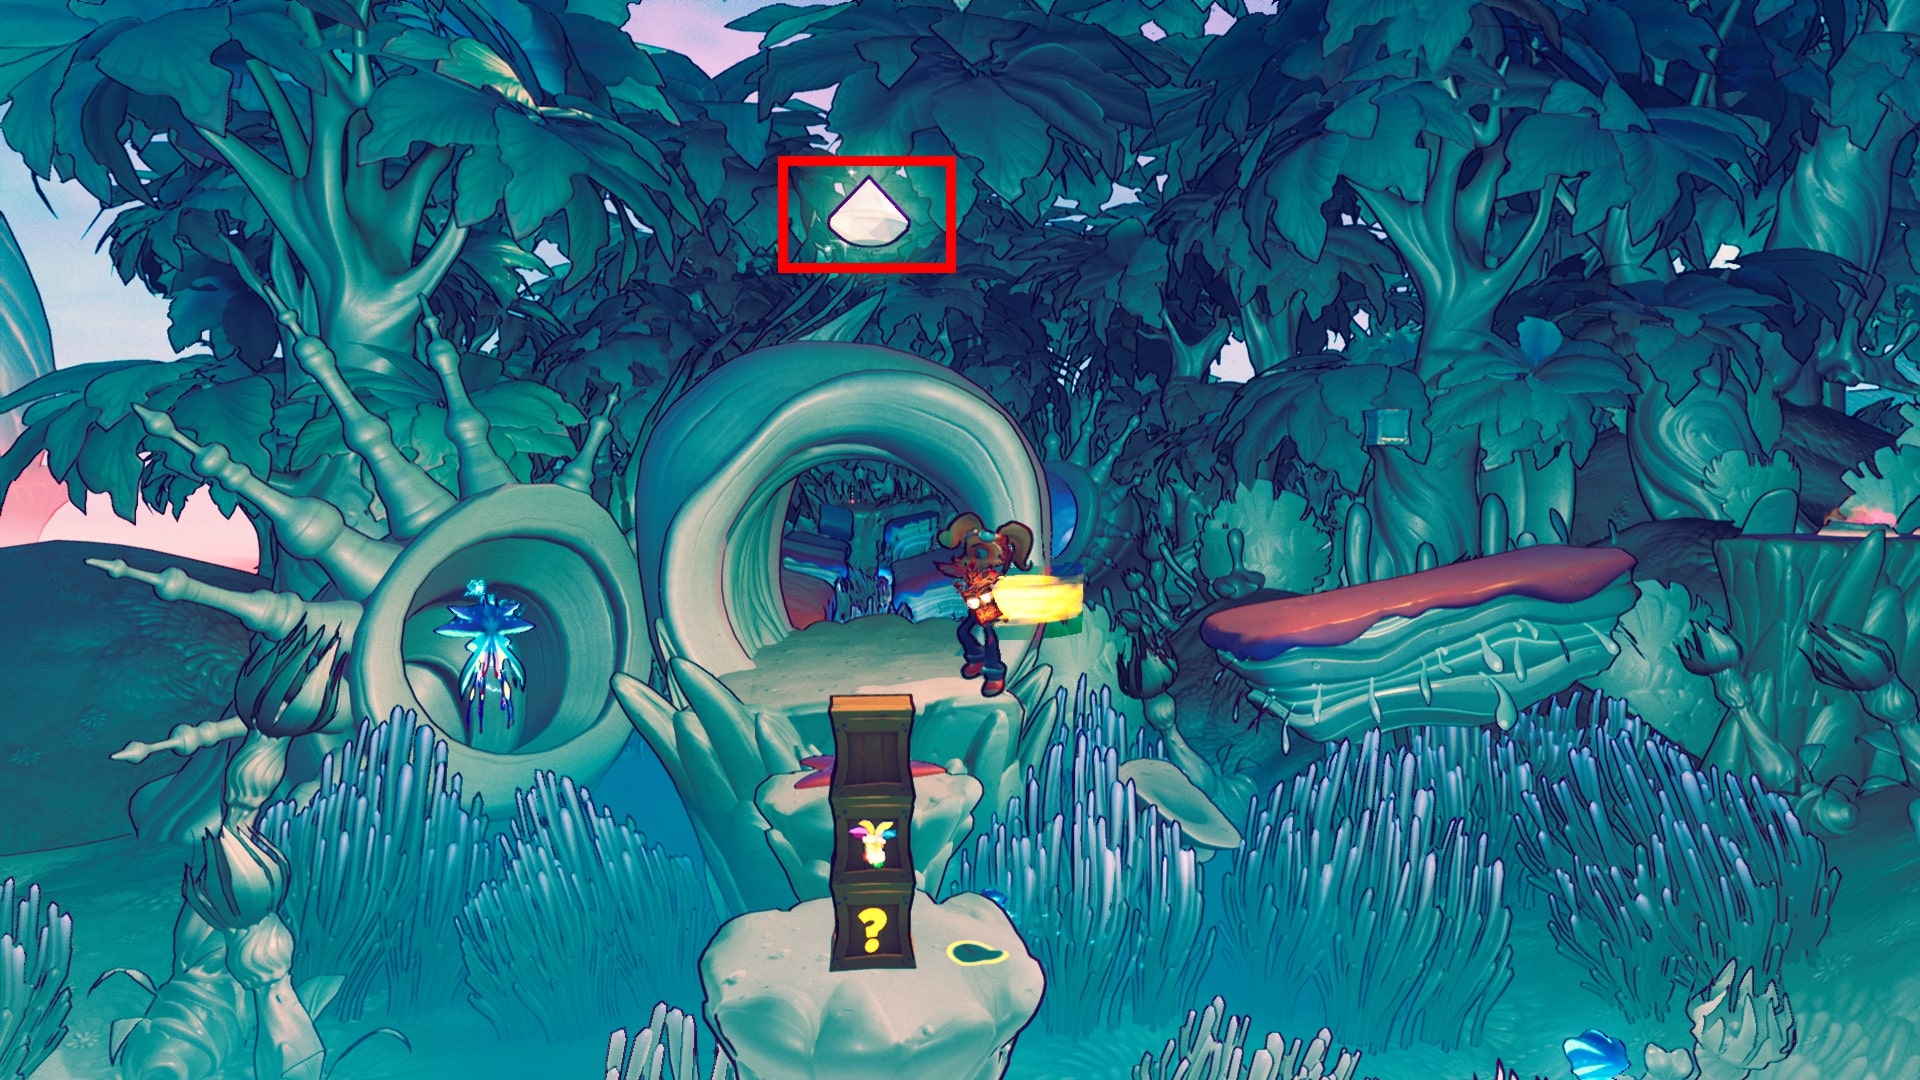
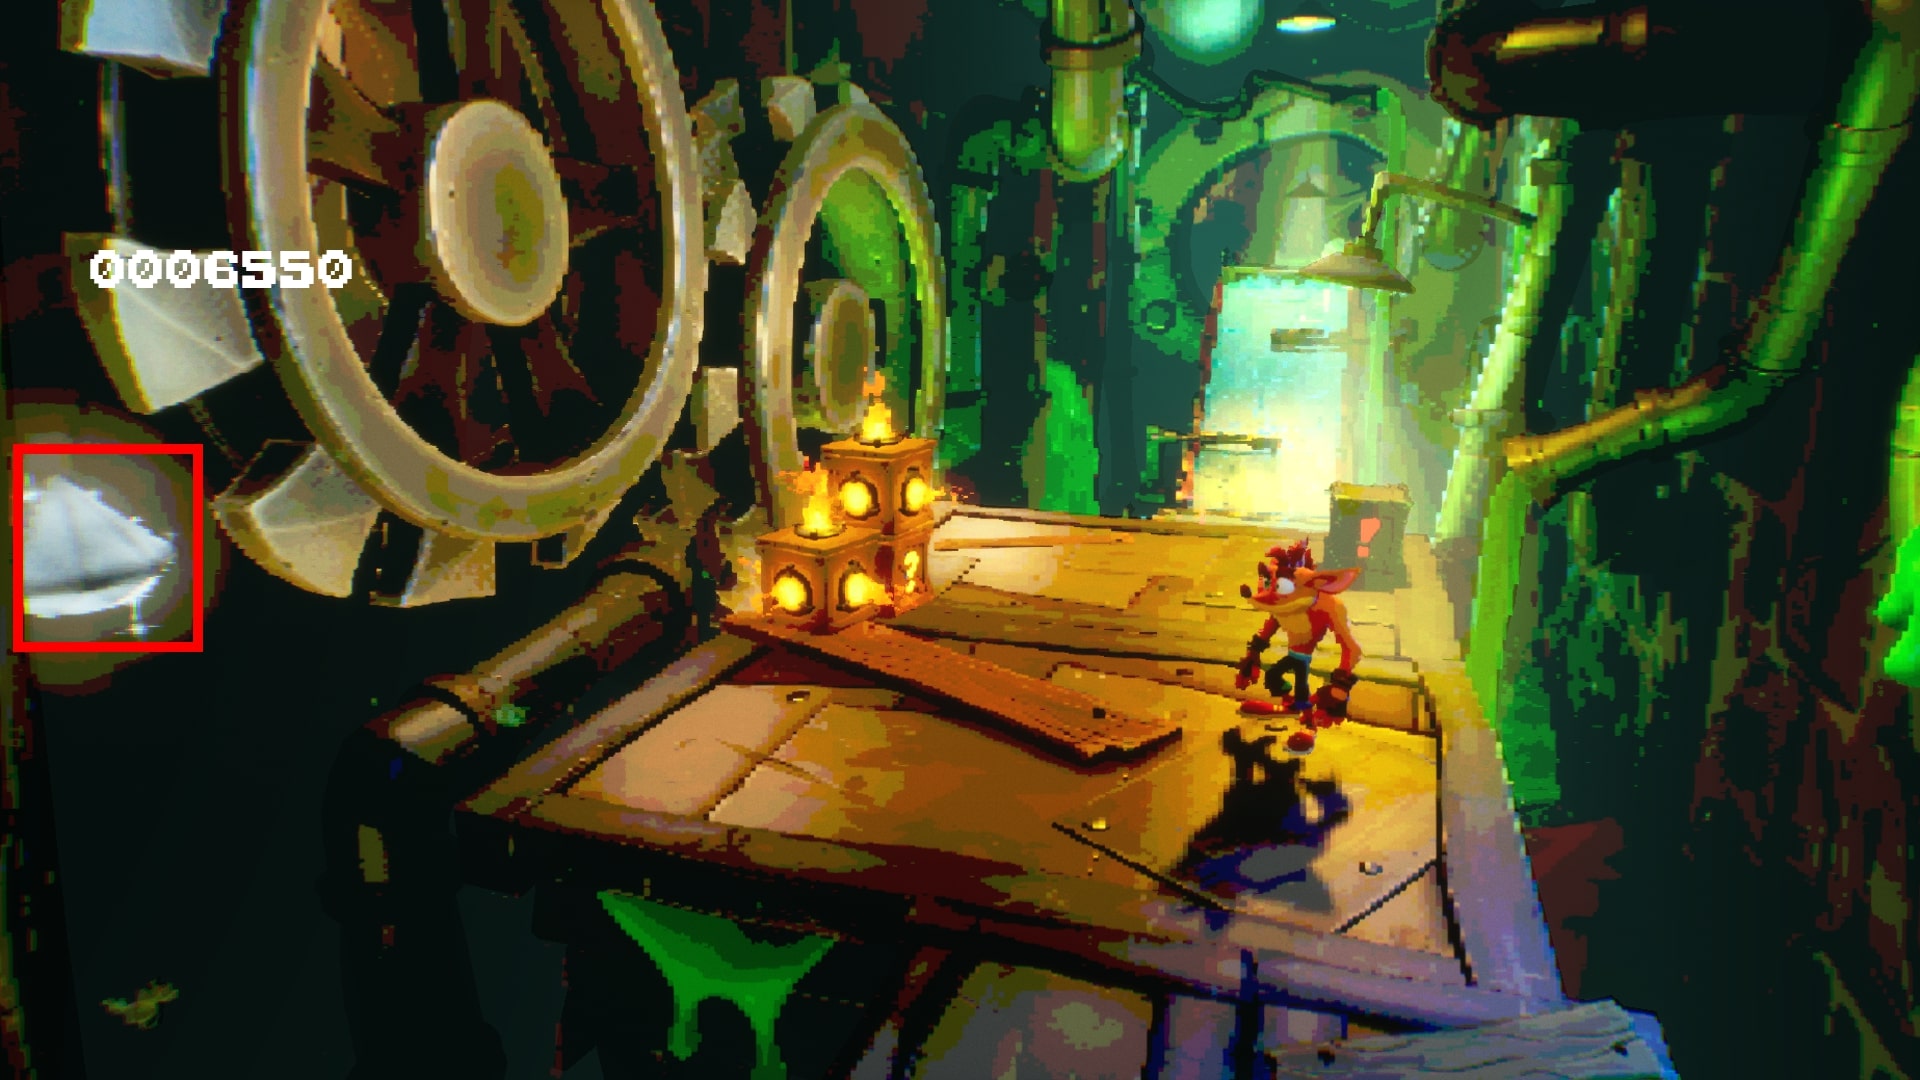
You can reach the Gem without Akano. You can slide & then double jump.
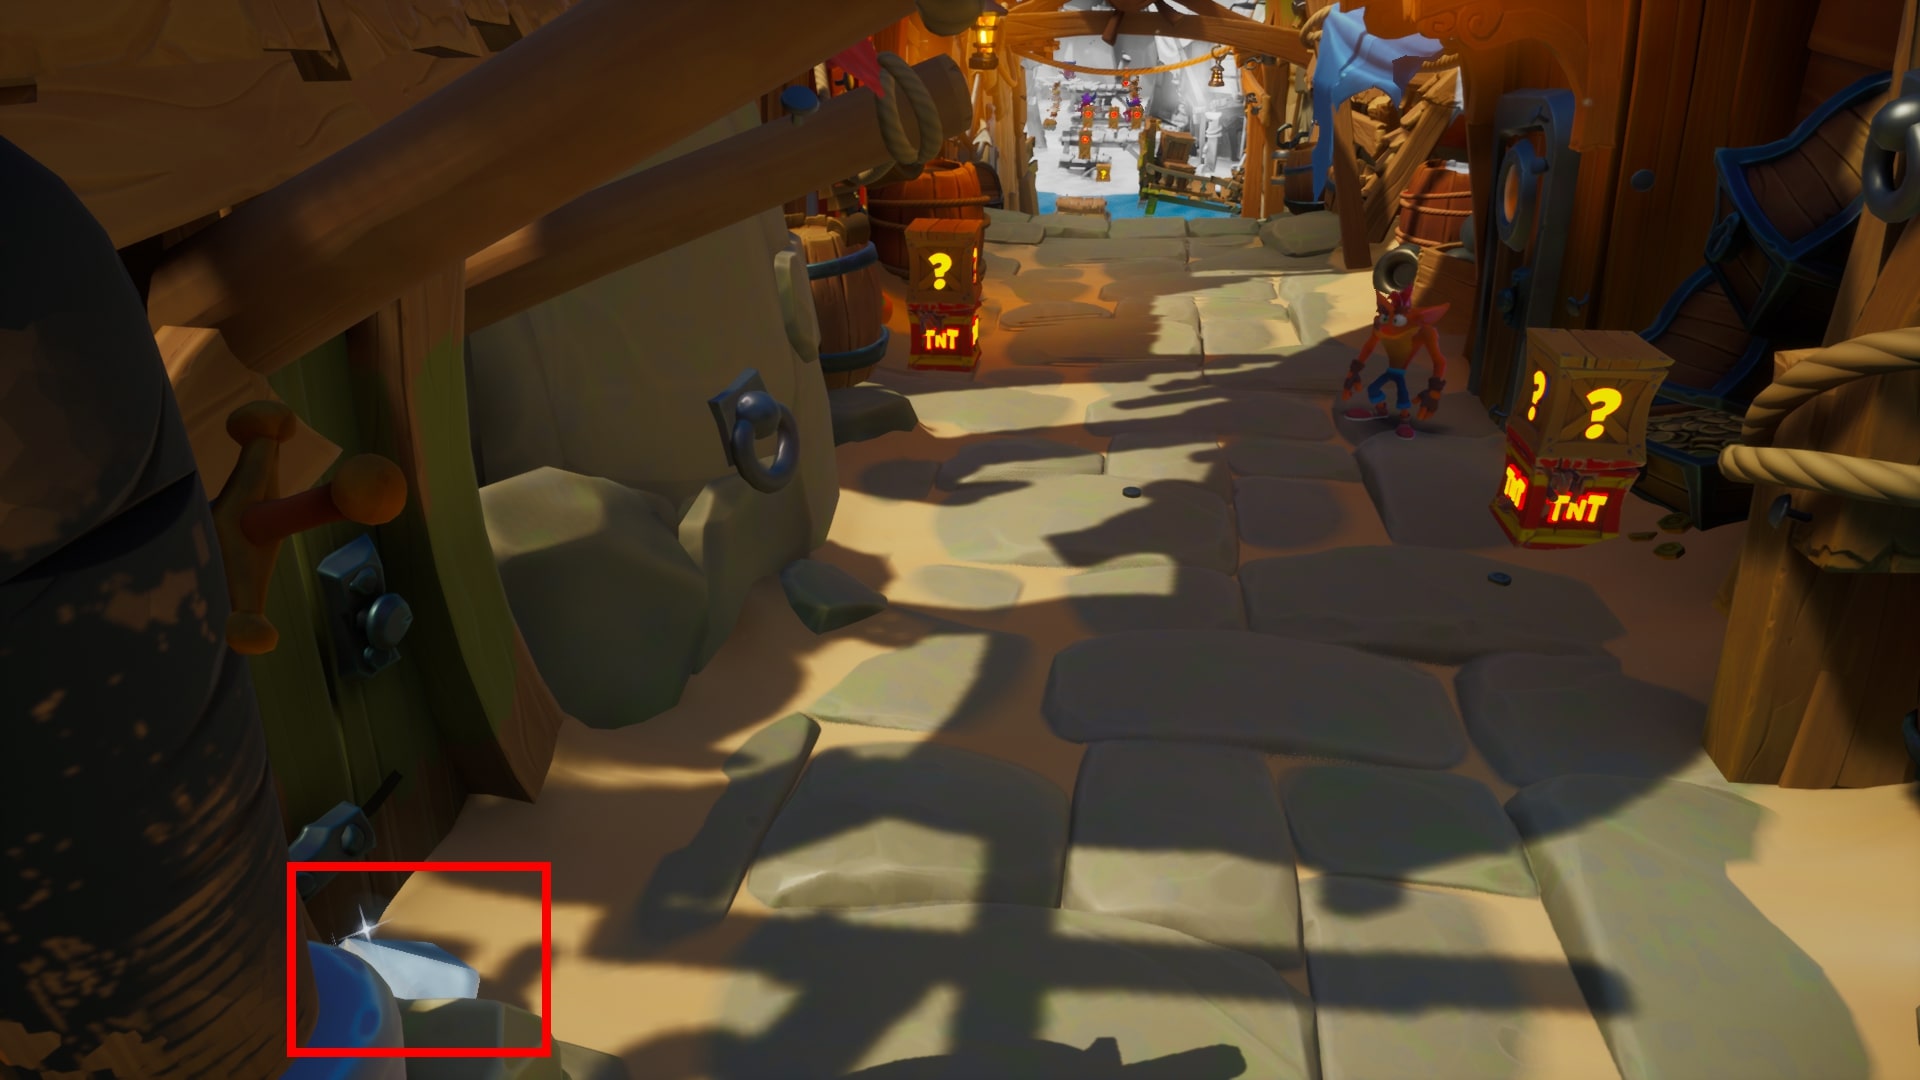
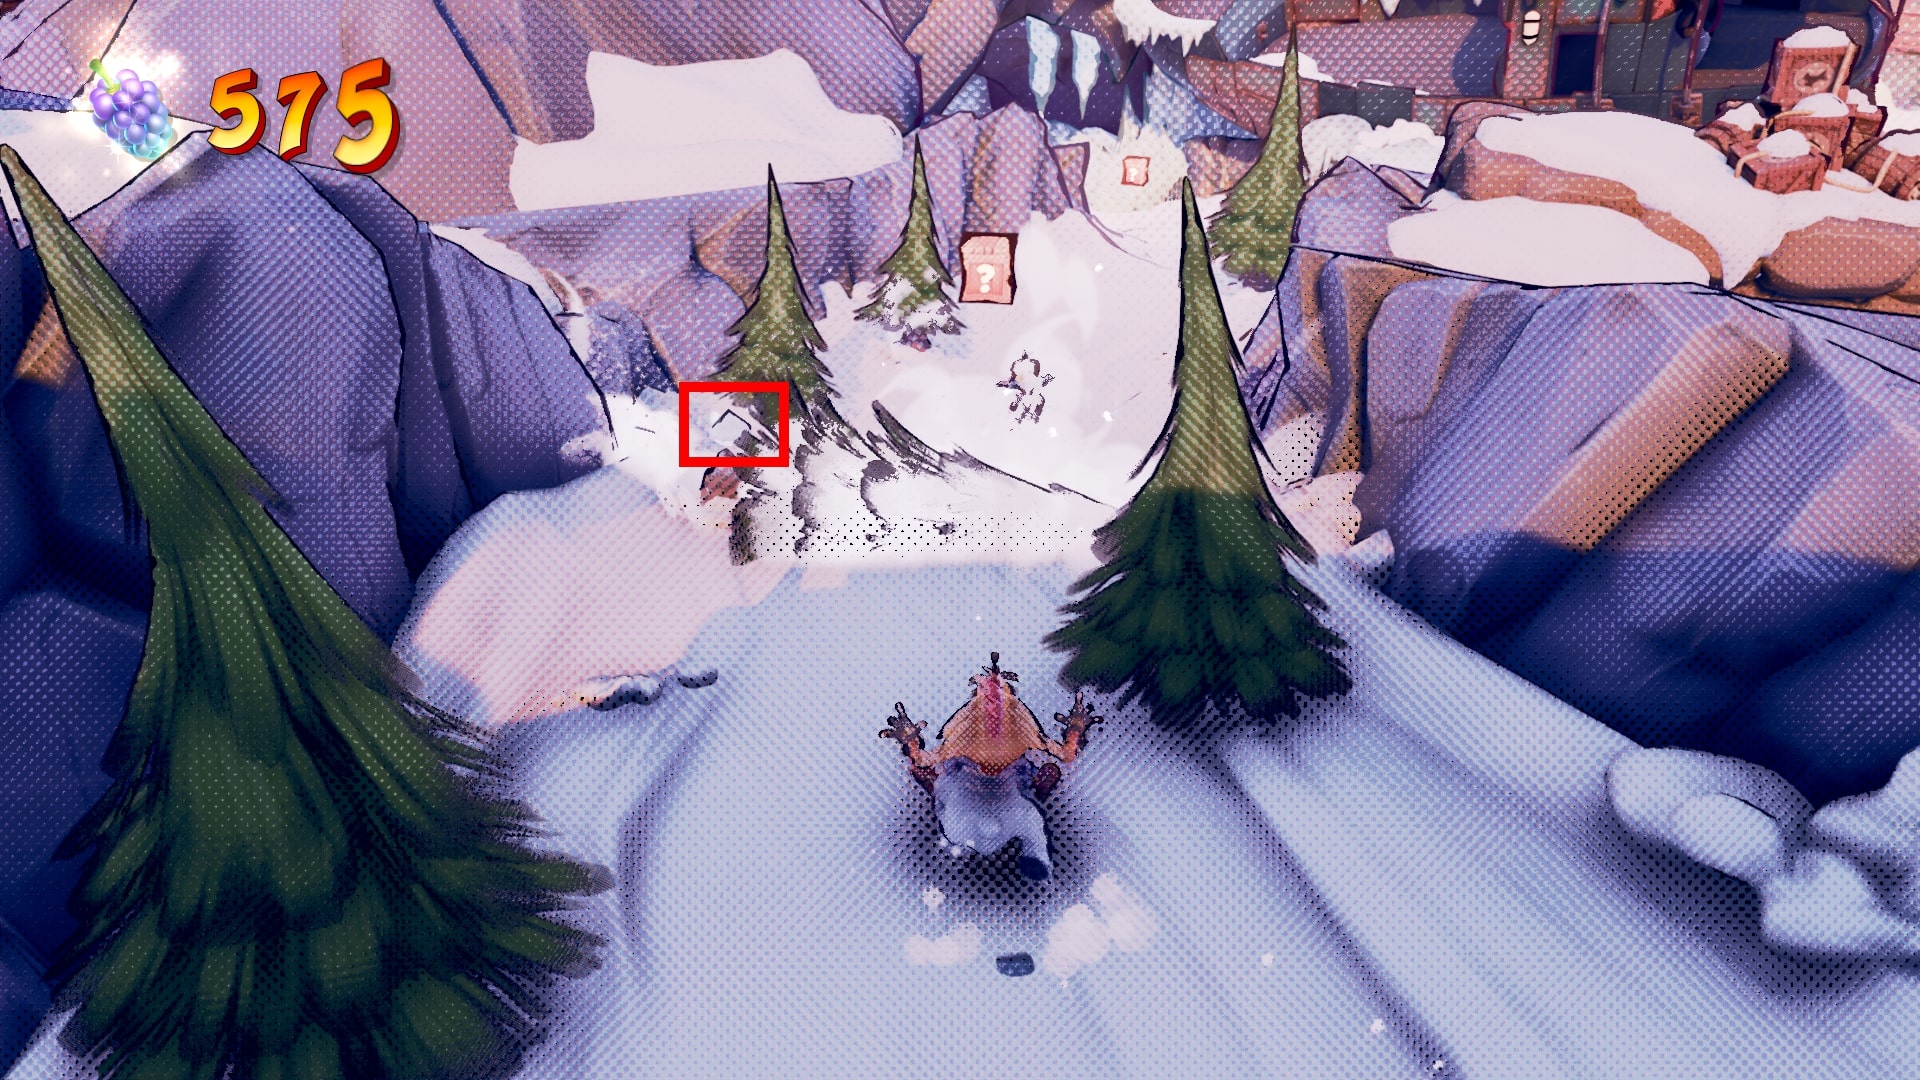
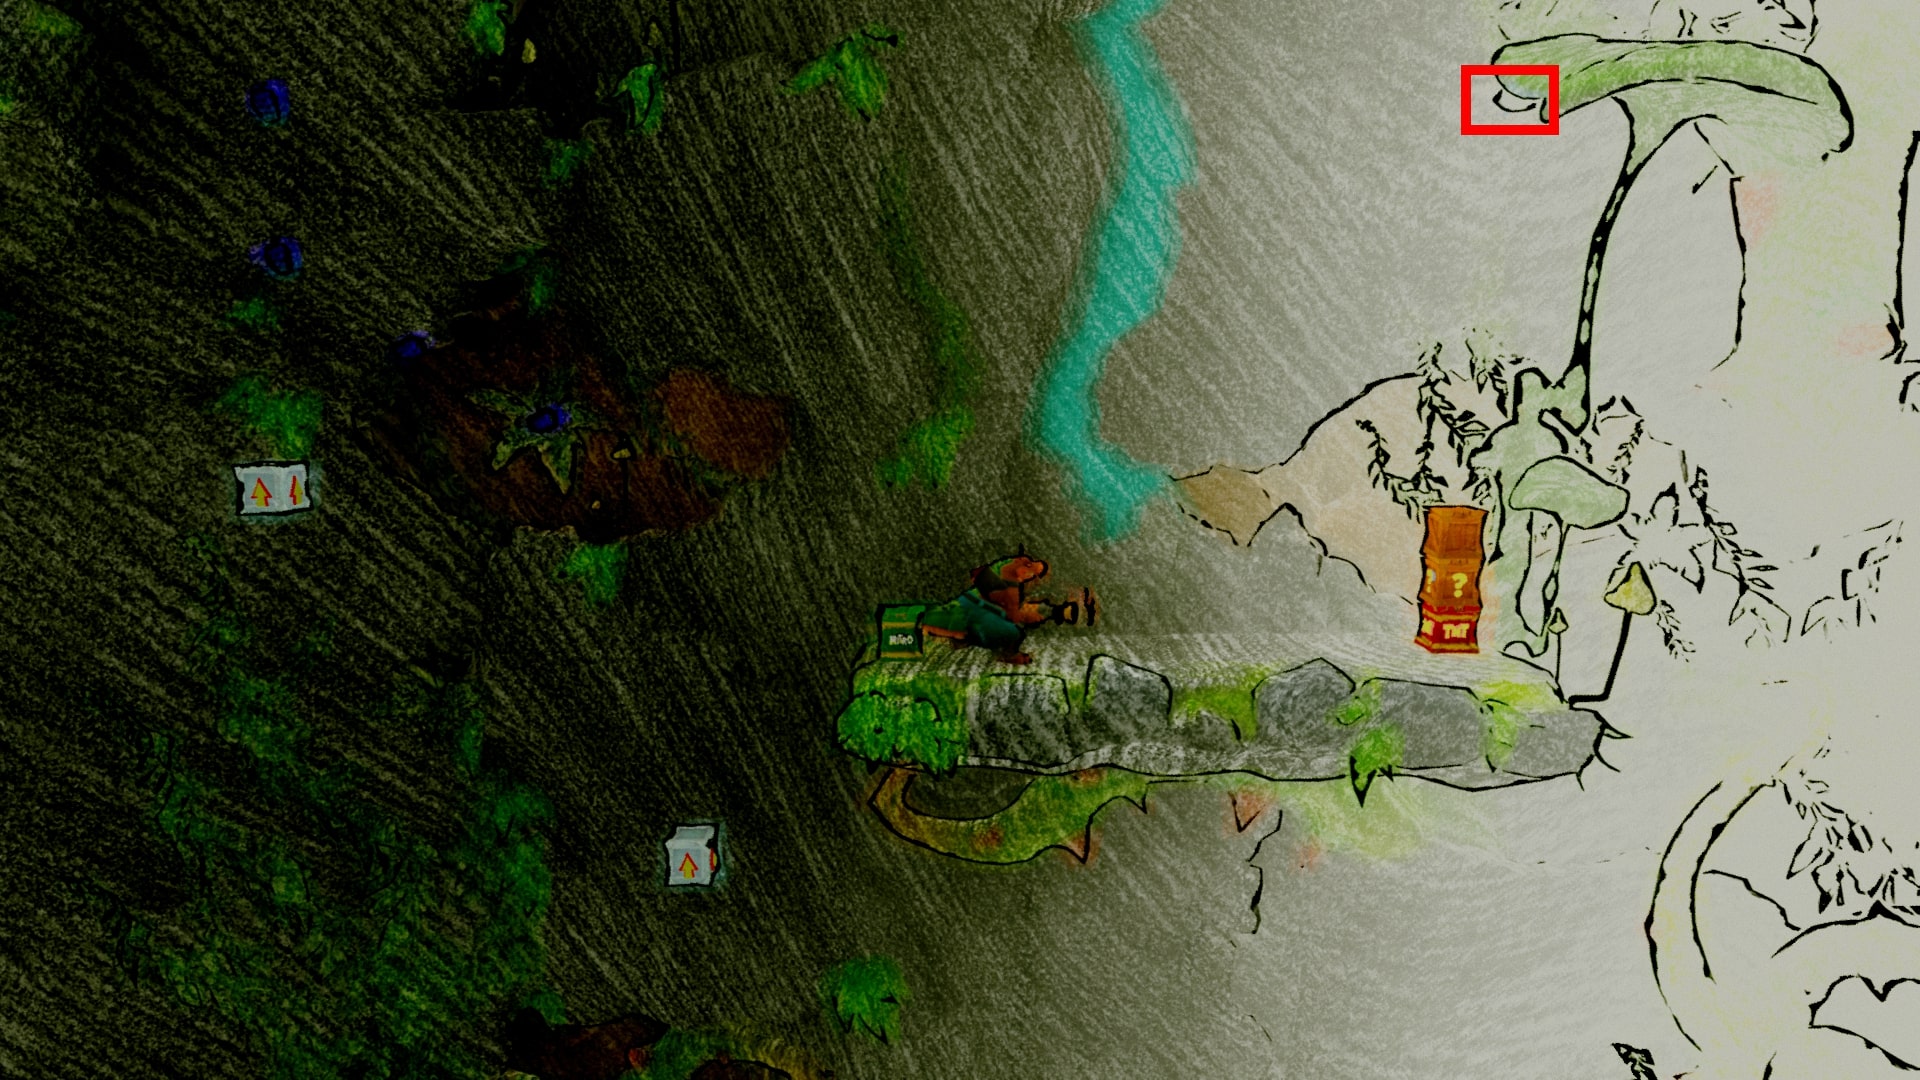
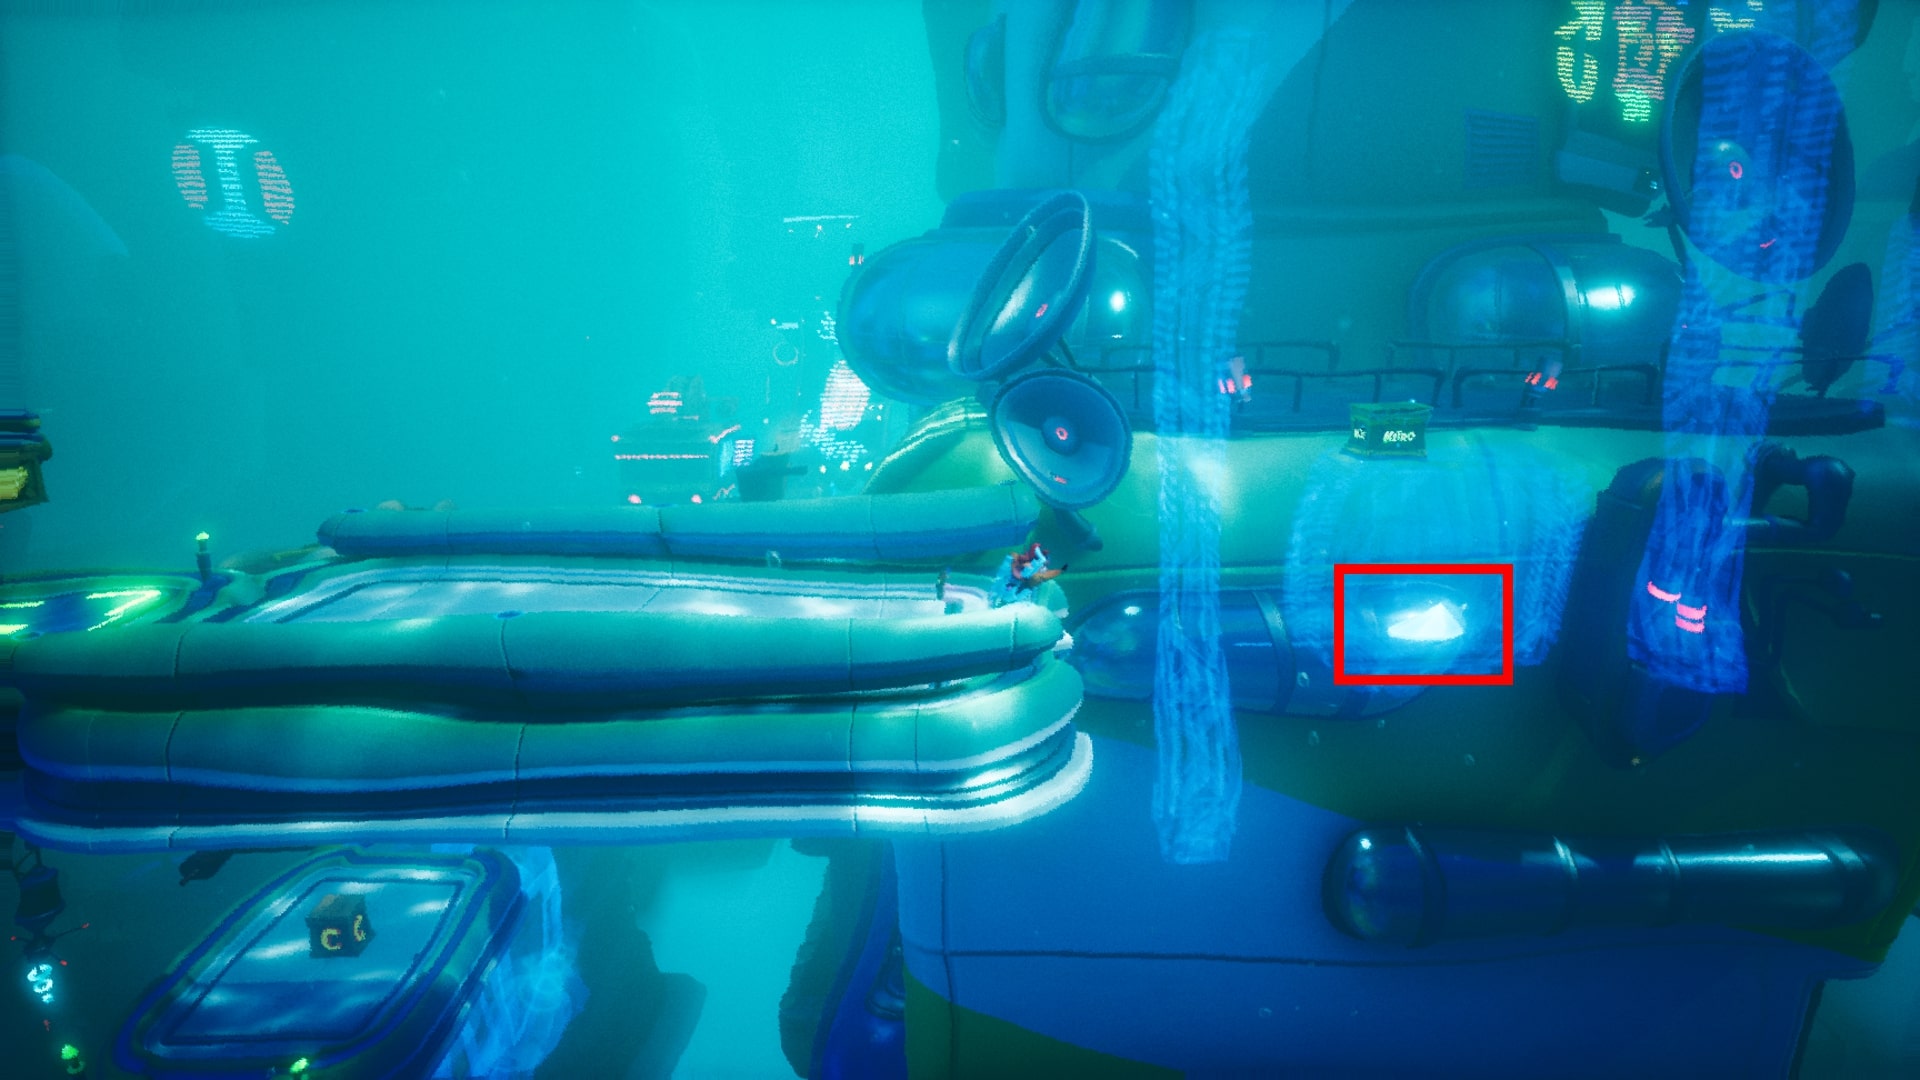
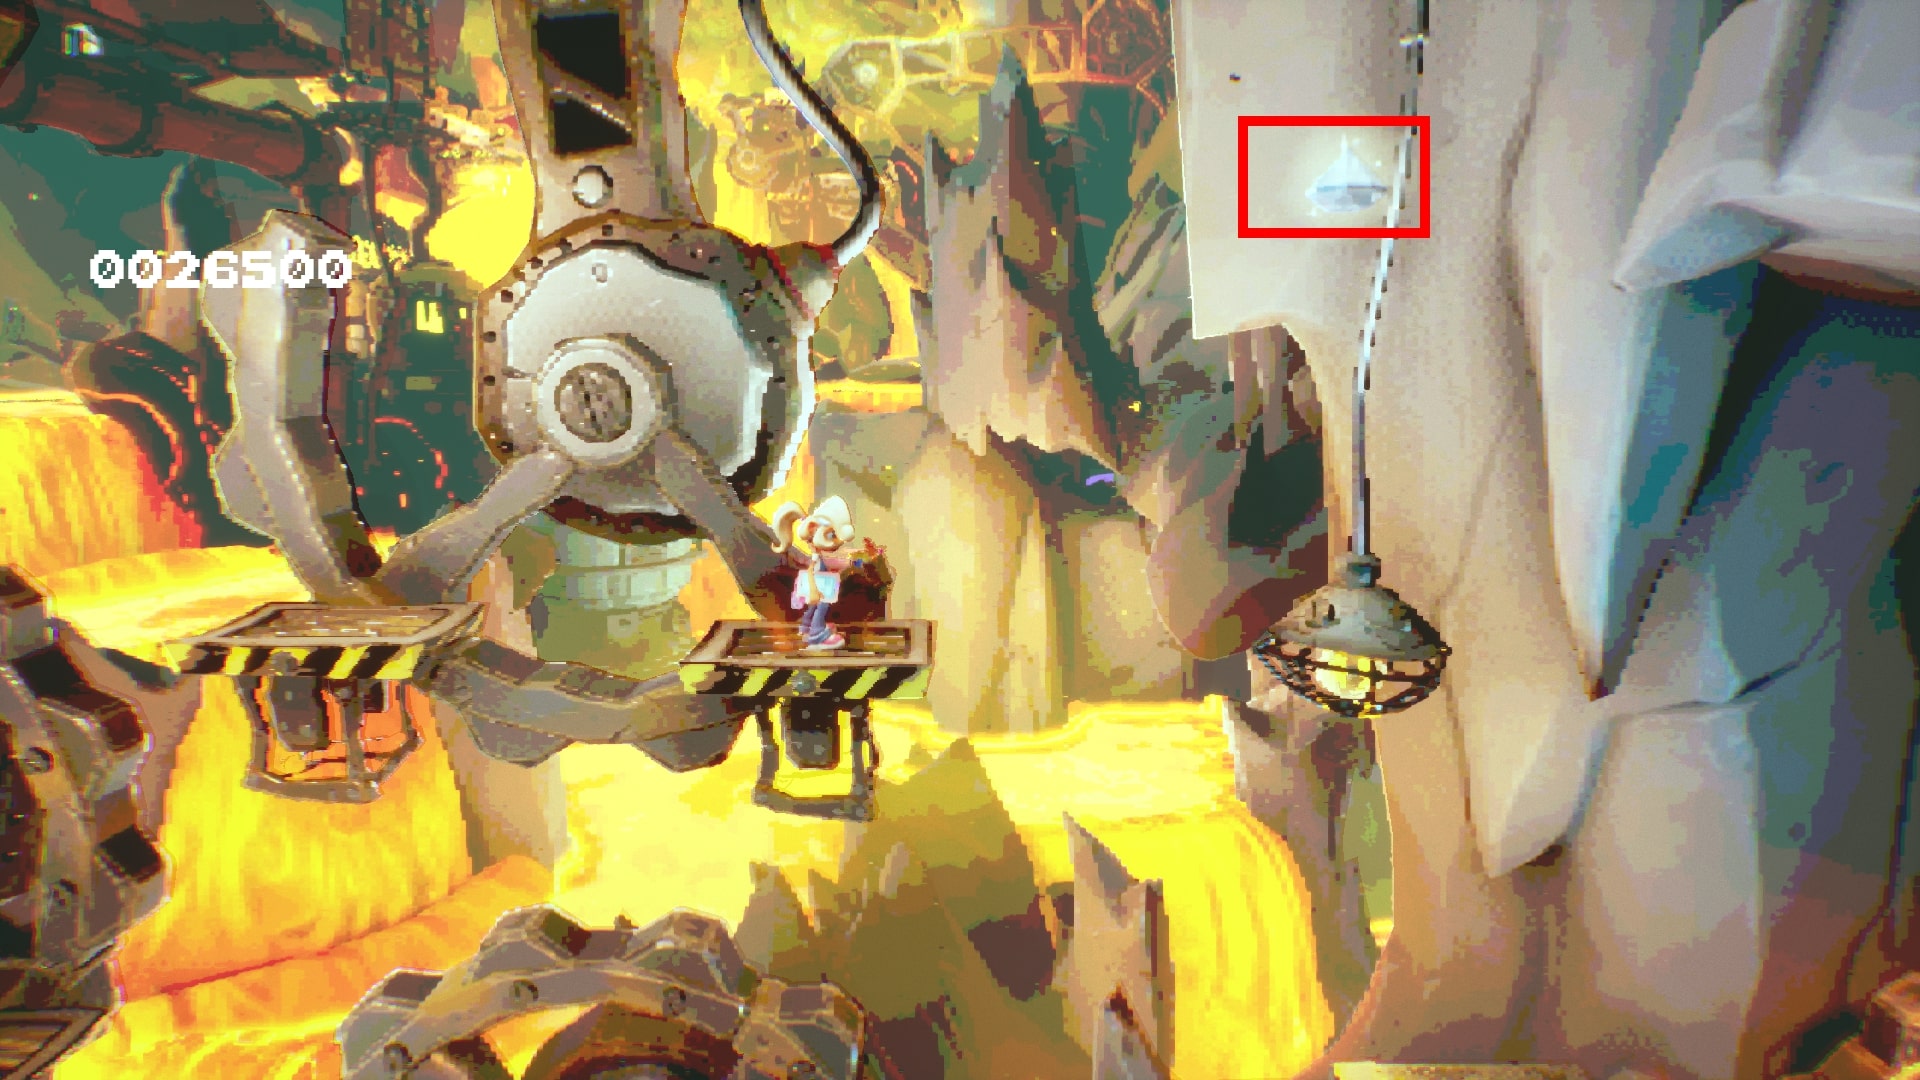
Draggin' On
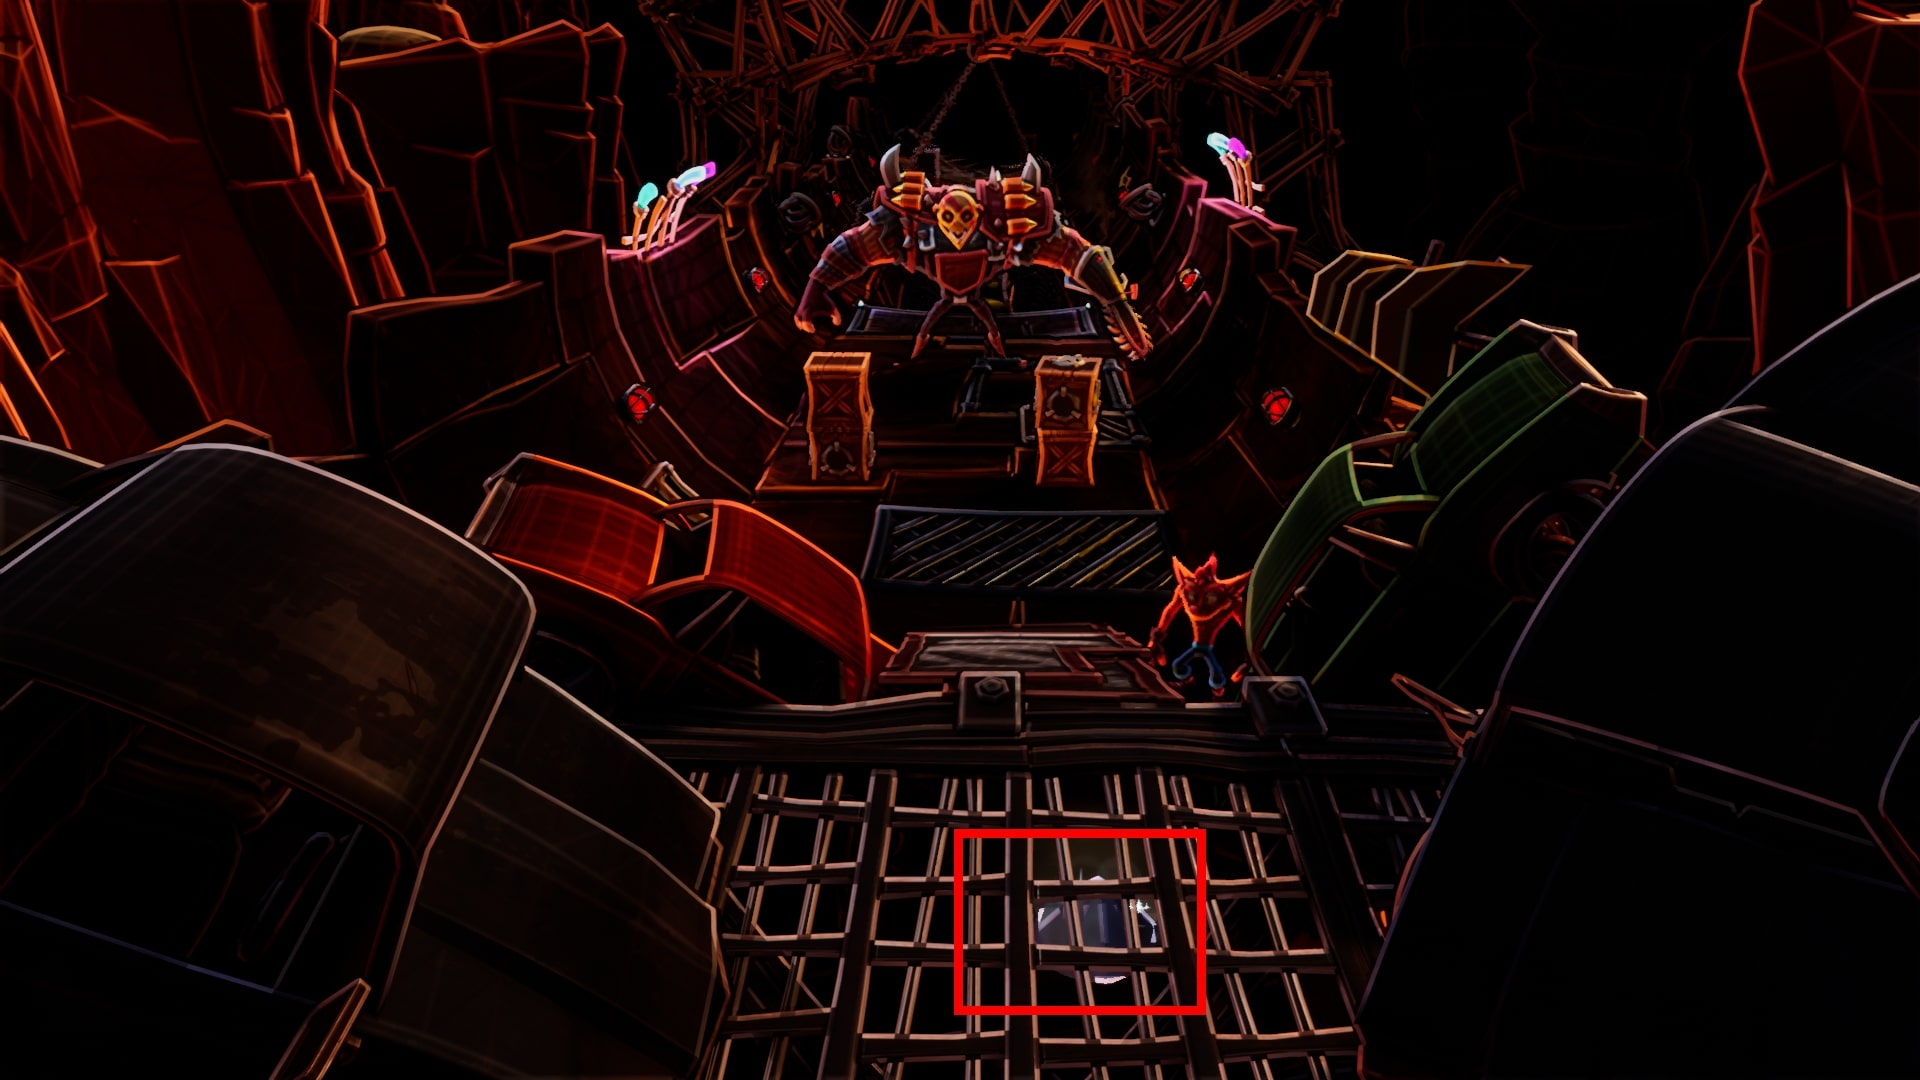
Make sure you kiss/go up against the wall. Otherwise you may hit an invisible wall when attempting to traverse to the Gem.
JaredX7 Jun 3, 2023 @ 5:48pm 
Hook, Line, and Sinker
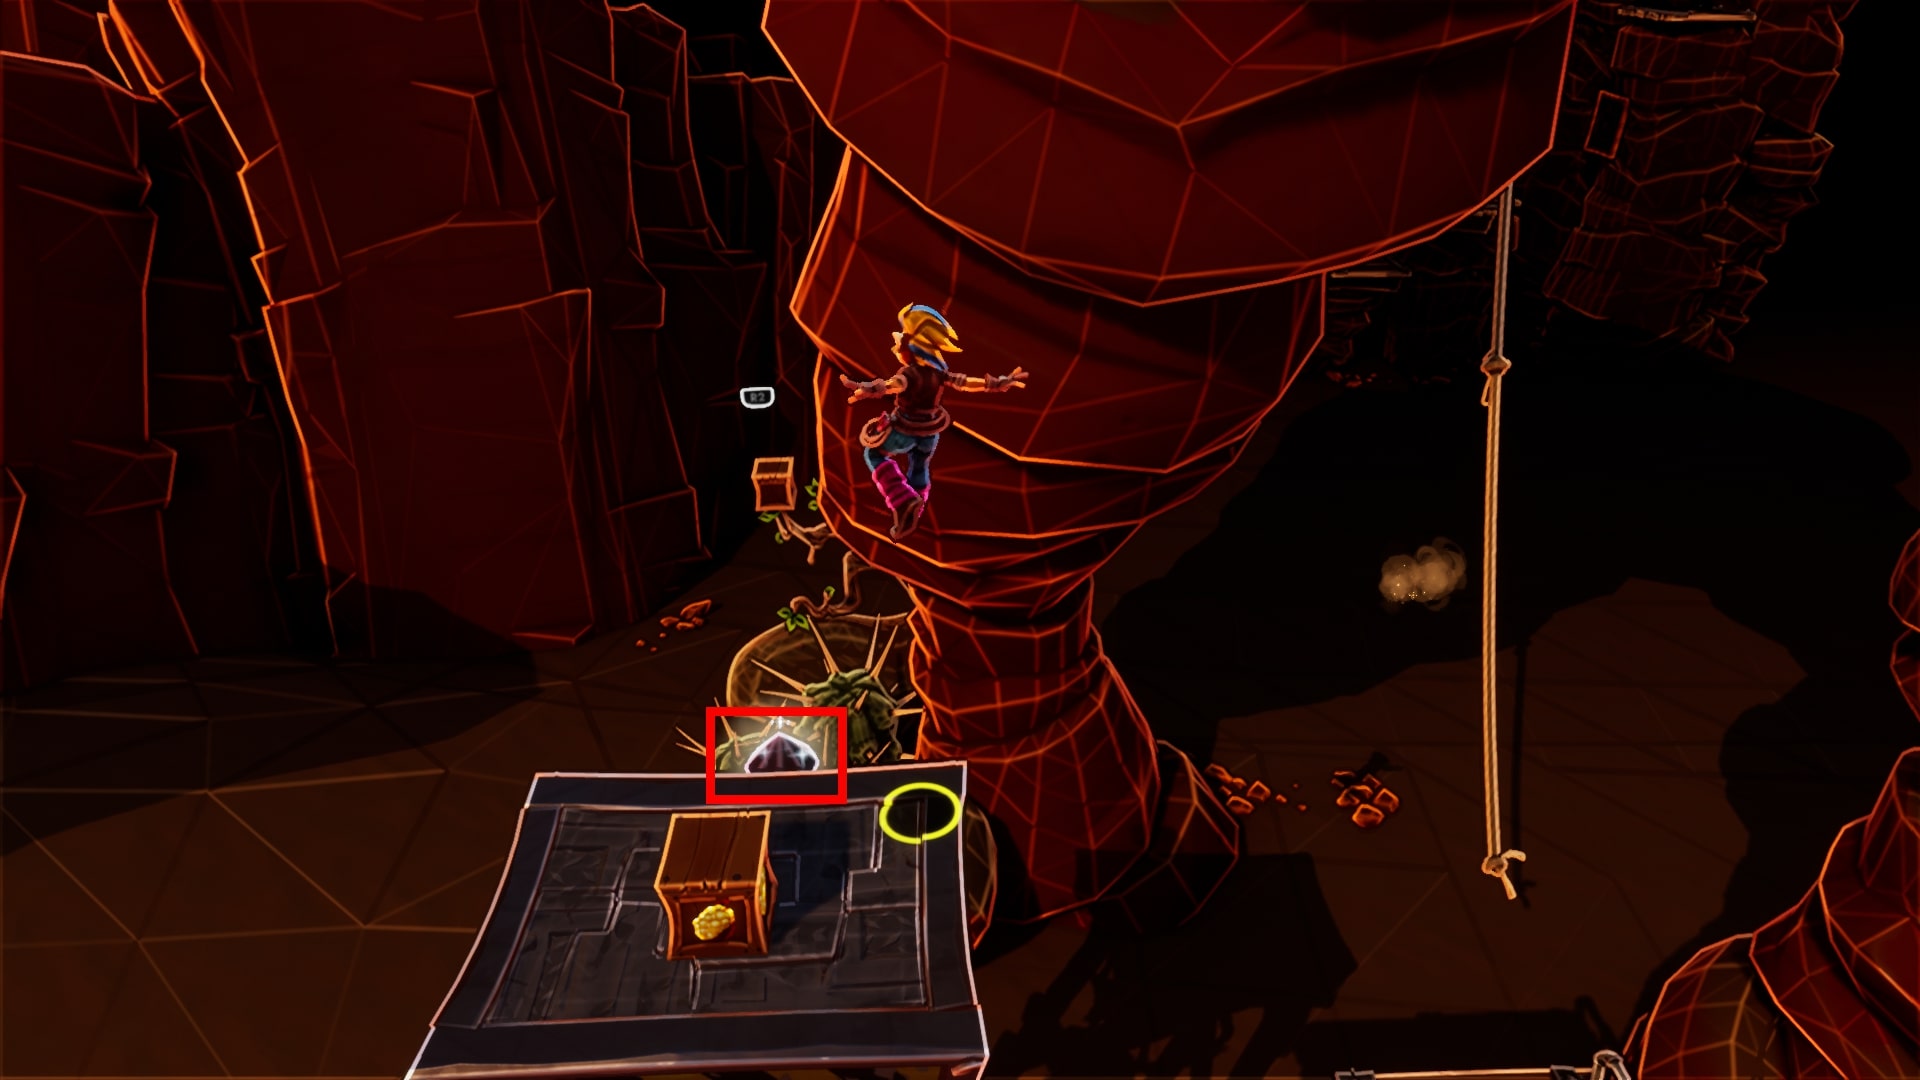
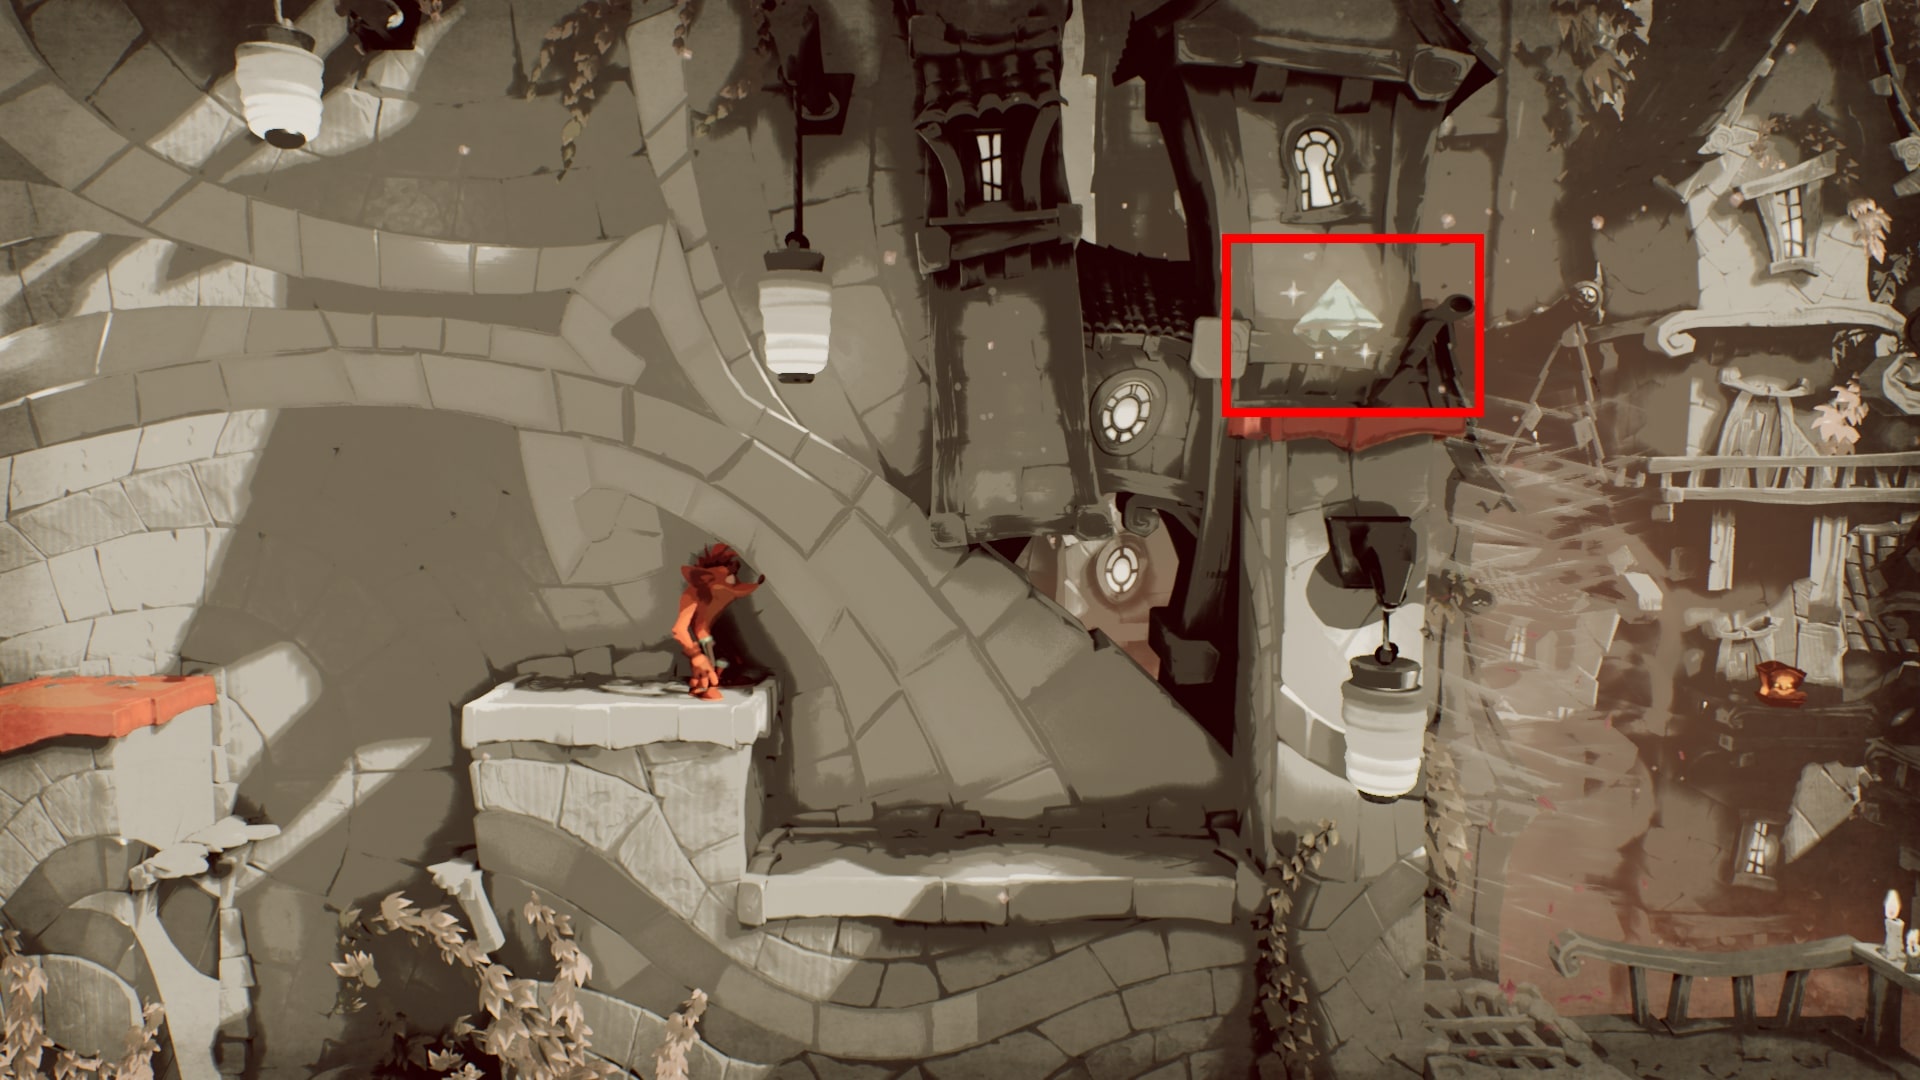
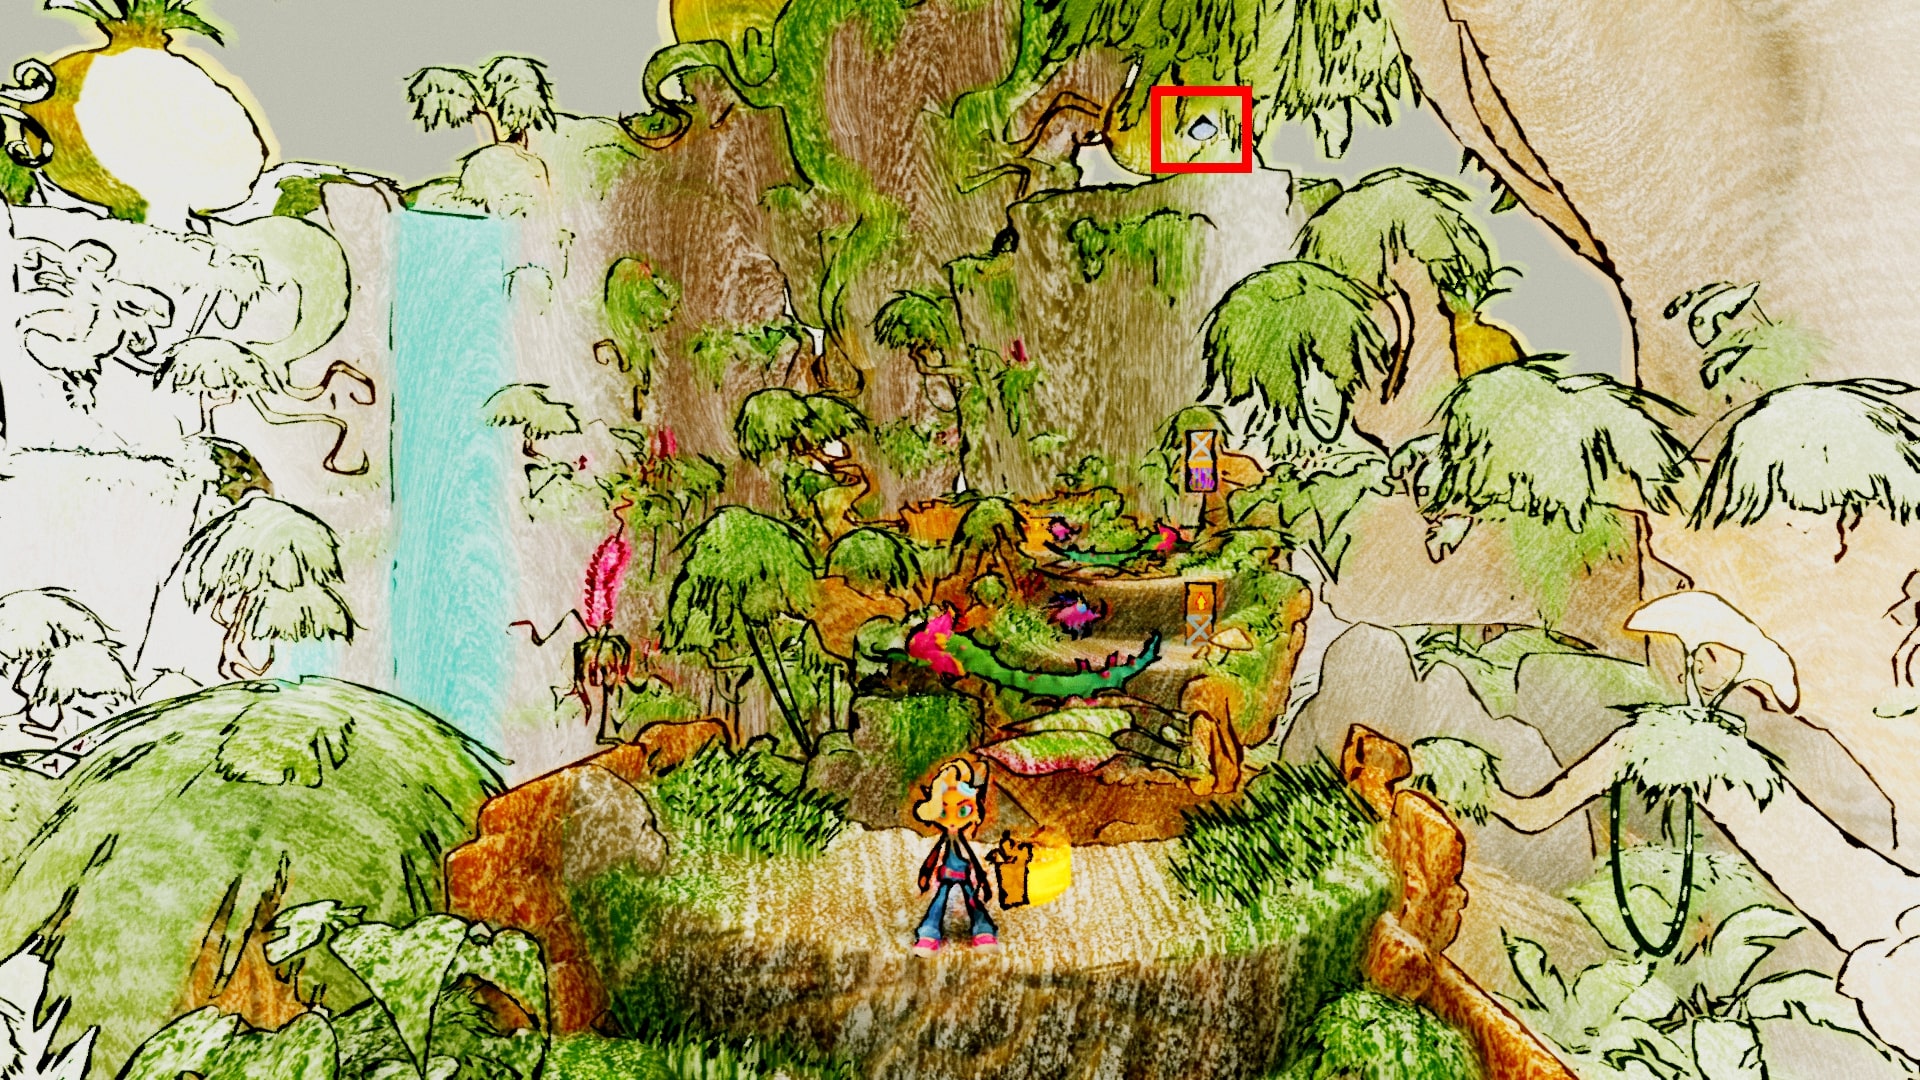
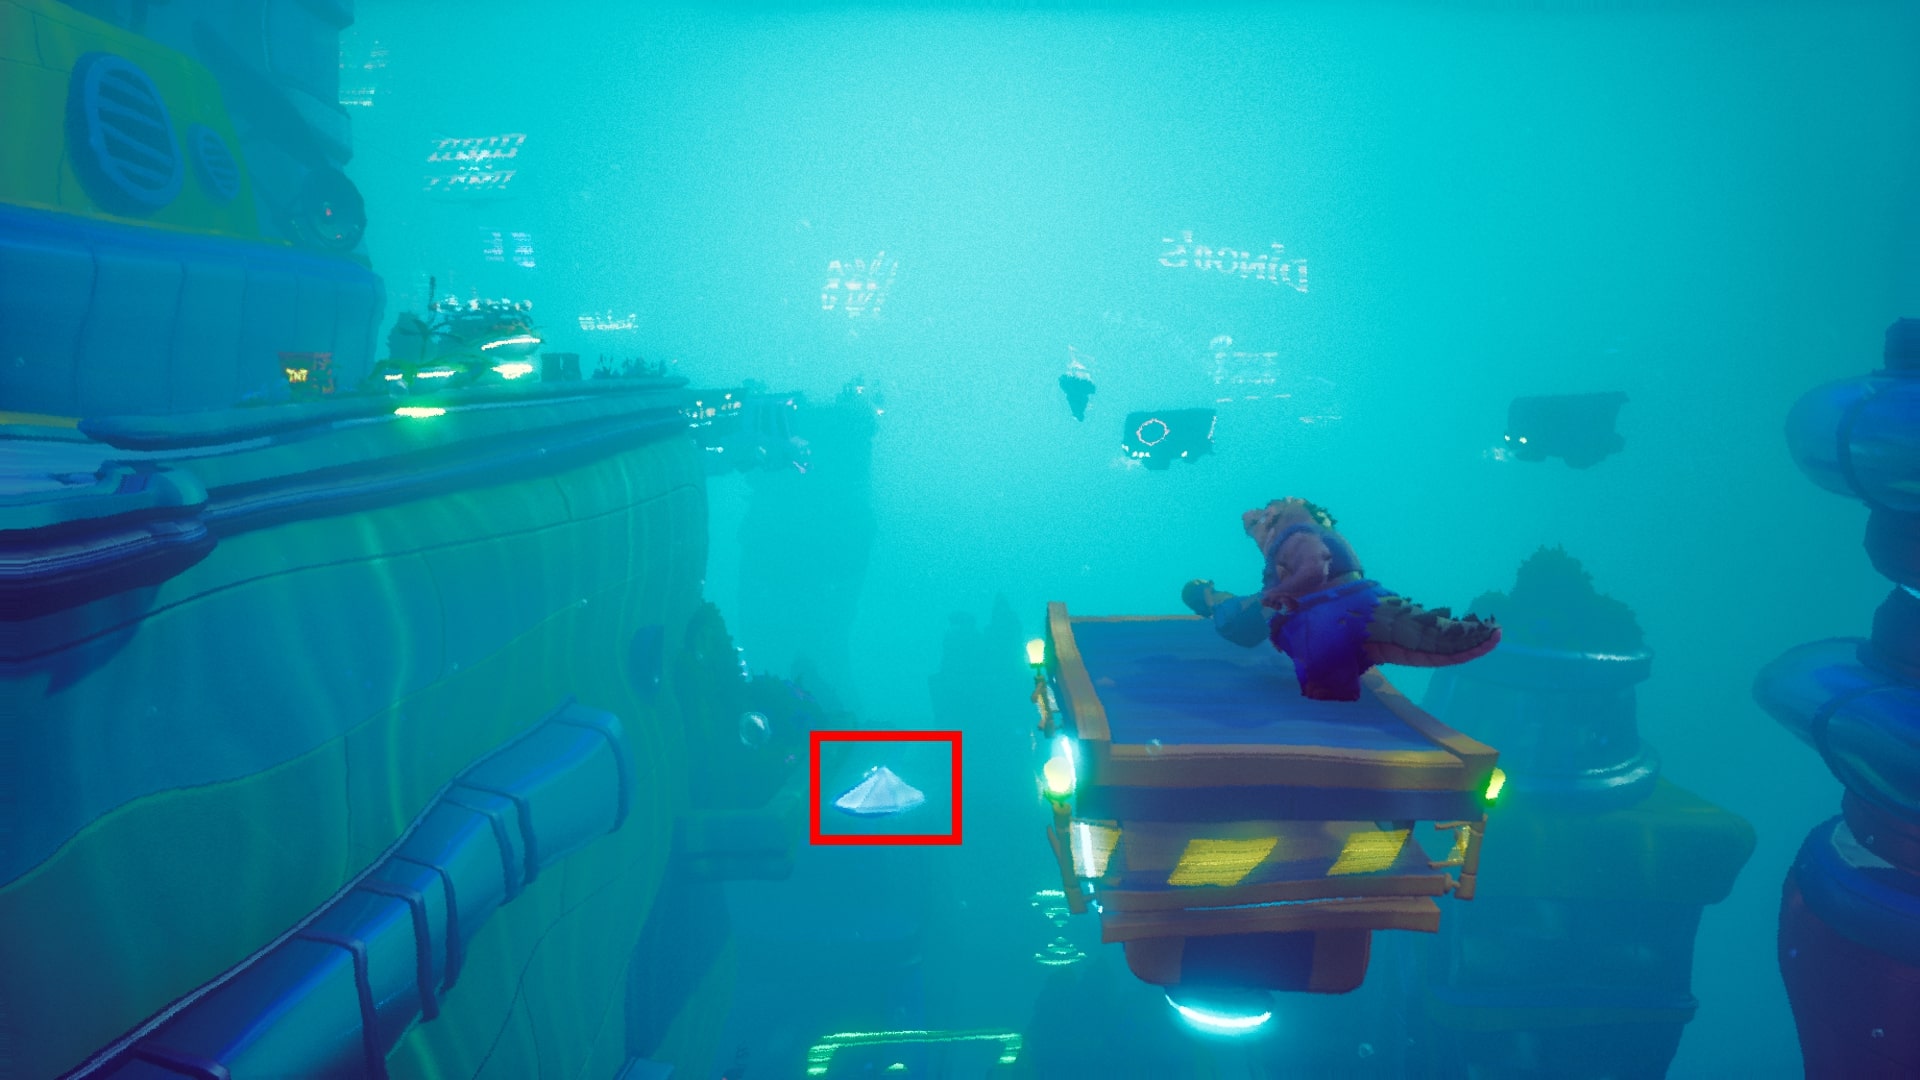
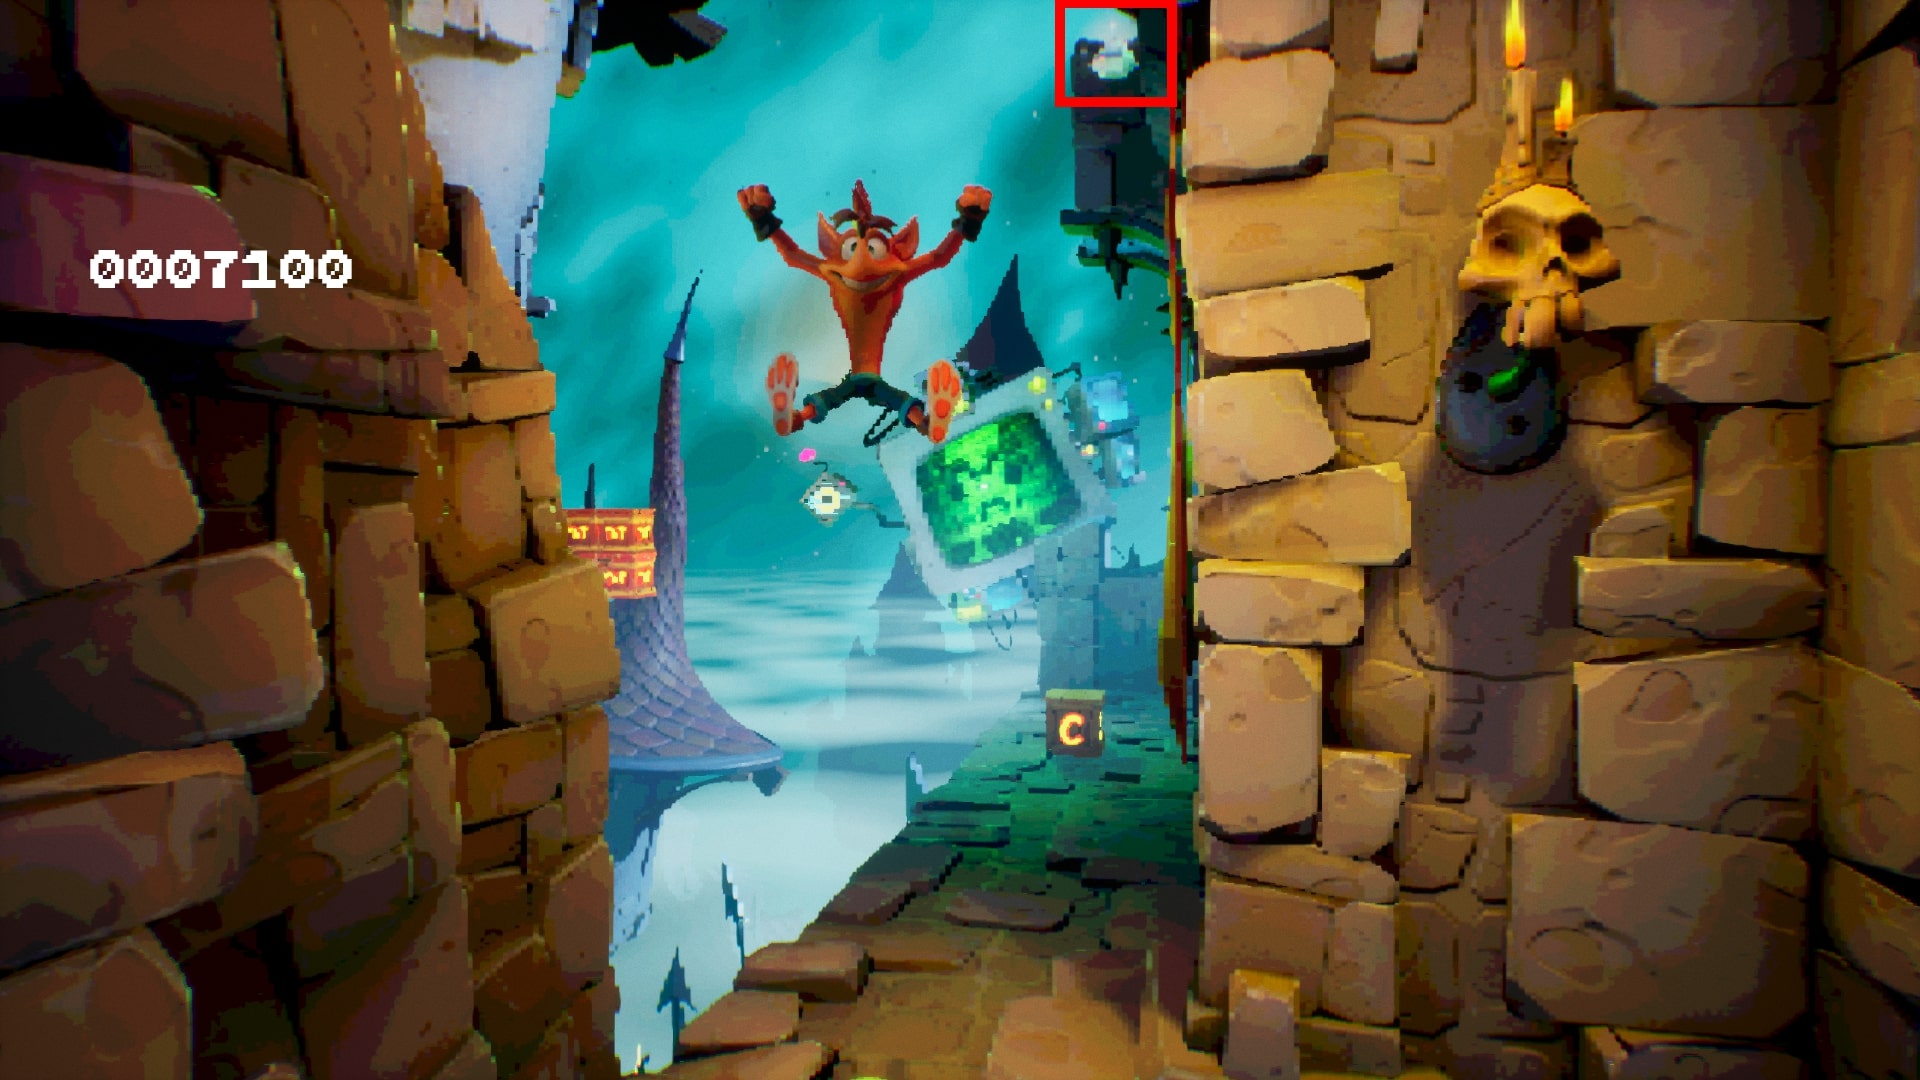
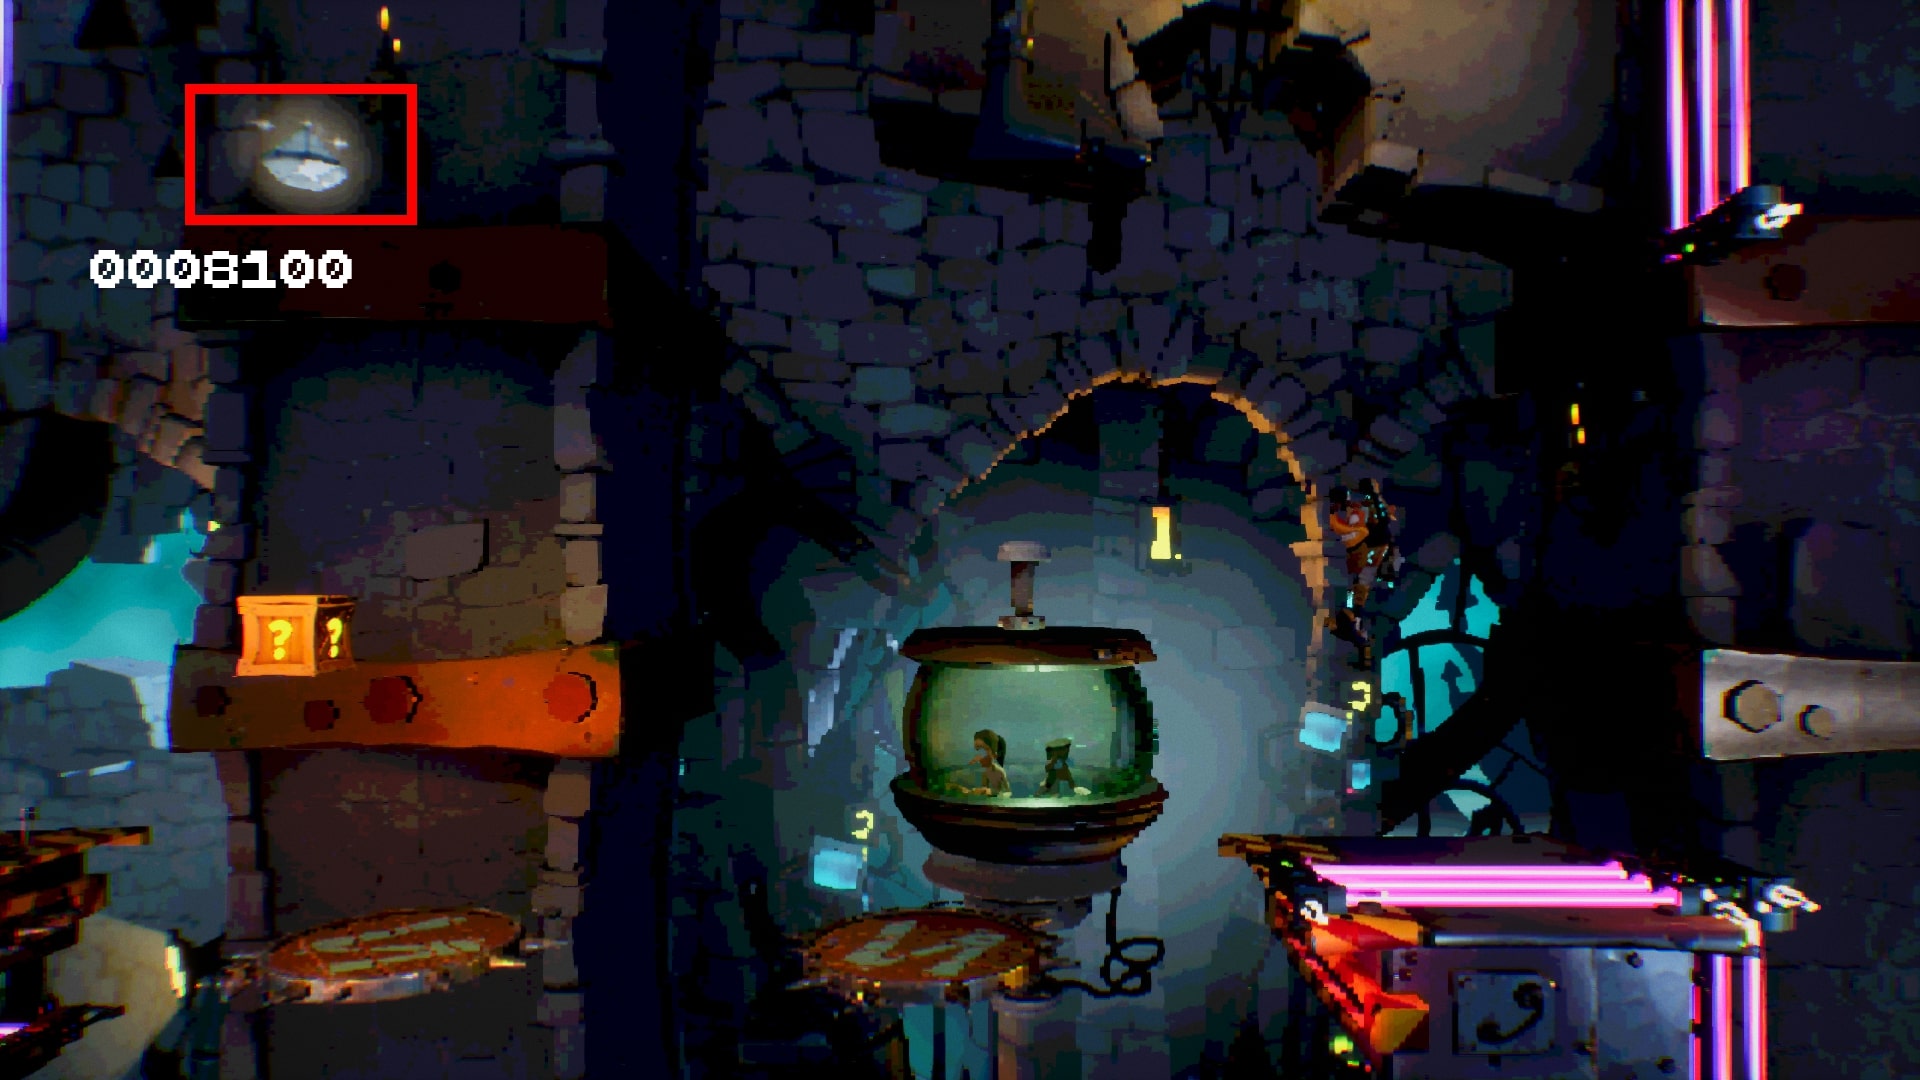
You can also reach the gem where you're standing in the screenshot.
ShiftyMarmot Dec 12, 2022 @ 8:30am 
Thank you!