Symphony of War: The Nephilim Saga

Symphony of War: The Nephilim Saga

189 ratings
Symphony of War - Tips and Tricks for Success
By Nitroglycerine
Useful tips and tricks for new players, created during Version 1.01.1.

This guide is now considered complete (barring requests for additional information in the comments, or the release of a future patch which changes some mechanics).
2
2
3
3
5
2
2
   
Award
Favorite
Favorited
Unfavorite
The Almighty Tilde Key (~)
In the current version 1.01.1, there is a hidden speed faster than "turbo", which happens if you press and hold down the ~ key.
It will save you an enormous amount of waiting when the AI is taking their actions.
Squad Templates (Example Images to be added later)
Chapter 12 Squad Overview:
Total: 15
4x Tanking Squads: Diana, Lindly, Rakusha & Warlord Tatar
1x Thievery: Stefan
2x Cavalry: Sir Rolante and Barnabas
1x Cannon: Lysander
1x Dragon (non-flying): Abigayle
4x Horse Archer Squads: Jules, General Bizen, Narima, and Emeric
2x Medics: Isolde, Sybil

Chapter 30 Squad Overview:
Total: 19
3x Tanking (Cavalry): Lindly, Tristan, Isolde
2x Thievery: Stefan, Diana
4x Cannons: Lysander, Lt. Archibald, Warlord Tatar, General Ragavi,
5x Dragon (Flying): Beatrix, Abigayle, Sybil, Emma, Brom
3x Horse Archer Squads: Jules, General Bizen, Otto
2x Cavalry: Jaromir, Sir Rolante

The following are the generic "templates" squads I used during my campaign.

Tanking Squadron:
The key factor is that the squads should have the lowest threat rating. This means you should stick to low threat artifacts that increase survivability (I use Officer's Regalia, Donar's Treatise of War, and sometimes Donari armor).

The basic combination is 3 front-line tanks and 2 healers.
For an infantry version, you will use a frontline of 3x Sentinels or Paladins (who have guardian), with 2x Priestess/Exemplars for healers.
For a cavalry version, you will have a front-line of Valkyries (who have higher HP), with 2 hospitallers.
The remaining 5 units are up to you.
If you are worried about assassins, you should use a rear line of valkyries/paladins, or centurions / champions. Their armor will make the damage they take insignificant.
If you are worried about magic damage, giving warrior's hubris to units or just using valkyries/paladins will dramatically reduce magic damage taken.

Thievery Squadron:
High skill units, with a frontline that has Valkyries for some healing.

Horse Archer squads:
Recommended: 5 horsebows/raiders, 4 archers/warbows. It will have light cavalry movement, so it can move 7 tiles, and retreat after attacking.

I don't recommend full warbow squadrons simply because cannon serve that role, and do far more damage (one-shotting everything but frontline enemies).

Cannon Squadron:
Early game: 4 cannons with Giant's Thresher (+25% damage vs larger units). The main issue with this squad is that it is very vulnerable to getting attacked, although proper positioning can keep it safe.

End-game: 5 cannons, 3 paladins, 1 priestess: A cannon squad that can tank hits, and has healing. Positioning is far less relevant as a result.

Flyer Squad:
Maximum AoE output with 3 dragons on the frontline, a fire mage for more AoE, and 2 healers for survival.

Cavalry Squadron:
3 valkyries/knights on the frontline, 2 hospitallers, 3 fire wizards, and 1 (anything).
This squad will have cavalry mobility be able to smash anything it faces, and sufficient healing to stay healthy. The ability to attack and retreat will prevent these squads from being targeted by the AI.
Squad Movement Type
Directly from in-game's "Tutorial and Info" section

Interesting Squad Examples:
1. A unit with 5 horsebows and 3 archers will have light cavalry mobility. Similarly, a unit with 5 Cavalry and 4 infantry will have cavalry movement (which can make Tier 2 Hospitallers worth using over Tier 3 Templars in certain squads!)

2. Dragons and Horses don't mix. If they are together in a party, it will become infantry class (5 cavalry, 2 infantry, and dragon = infantry class)

3. Cannons will similarly make a unit instantly either slow or infantry class (depending on techs).

4. If your # of dragon riders = # of other unit types, it will be flying. However, if 1 of the other units is a cavalry, it will become infantry class (Dragons cannot make horses fly!).

5. "Light" Classification comes from the number of light units vs heavy units. For example, this Stefan squad is "Light cavalry" because Stefan + Blademaster + 2 Raiders + Hussar = 5 light units.
Unit Stats
Unit starting stats are random, but unit stat growth is fixed, which is dependent on the class of the unit, modified by the affinity of the unit (more on affinity later).
For example, Archers, Swordsmen, Spearmen, etc. all growth STR at 0.4/level, gaining 2 STR per 5 levels.

The impact of each stat is as follows:
STR: Improves Physical Damage and Physical Resistance
MAG: Improves Healing / Magic Damage / Magic Resistance
SKL: Improves Crit Chance / Dodge Chance / Deflection / Status Effect Application
LDR: Only used by the squad leader, the squad's maximum capacity is equal to his/her LDR.

Additional Notes:
- In general, weapon value is combined with STR or MAG to determine damage output. However, there are exceptions, which are listed below:
1) Gunpowder weapons and crossbows are weapon values only (but that value is very high)
2) Dragon damage is based on the sum of their STR and MAG stats (not sure if it is affected by weapon value, but I assume so).
Class Affinity
Affinity has 2 main effects:
1. Affects character stats
2. Affects hit and crit chance, depending on the weather of the turn (thus, cannot be controlled since weather is mostly random)

The effect of affinities is shown in the image below, but what you need to know is this:
Earth: For Front-line tanks (typically Sentinels, Valkyries, and Paladins). Note that Earth actually has --SKL, not just -SKL.
Water: MAG-based units. Also increases HP slightly.
Dark: MAG or STR units, where HP is not an issue. Very powerful on back-line Dragons.
Lightning: High Skill and STR units (thievery units primarily, but also swordmasters, rogues/assassins, etc)
Fire: Physical DPS. It's quite generic, and basically worse than Lightning or Dark.
Light: Squad Leaders. They are great to place in a squad to benefit from mentorship, before forming their own separate squad once LDR is high enough.

Finally, affinity stat changes are applied retroactively. For example, if you change from lightning to light affinity, you will see a big increase in your leadership stat, but your STR, SKL and HP will drop.

Maximizing Hit Points
Unit hit points are affected by their starting class.

That is:
Fighters = Militia > Medic > Bowman

Example 1: Cannons
If you want high HP gunpowder units, make them from fighters or militia, ideally with earth affinity (++HP), with Water Affinity (+HP) being a good 2nd choice.
307 HP Fighter / 317 HP Militia
259 HP Medic / 200 HP Bowman

Example 2: Samurai
High HP Samurai should be made from:
Fighters > Spearmen > Samurai, instead of Bowmen > Archer or Horsebow > Samurai
Note: To class up these Water Affinity Samurais, I had to use "Roast beefs of strength" to raise their STR to 45+. Thus, the ideal affinity is Fire Affinity, since it doesn't lose HP (unlike Lightning). Dark affinity is worth noting in that it provides ++STR, so you could have samurai faster, but with -HP.

366 HP Fighter / 275 HP Bowman
Earning Gold!
In SoW, there are 4 main methods to earn gold. Using these methods can allow you purchase all the mercenaries and artifacts you come across in the bazaars and markets.

1. The thievery squad
The thievery squad should be your initiator in combat.
They earn gold based on the skill of the characters in the squad with thievery, and the amount of damage these units deal. Thus, the more units with thievery, the more gold you earn.

Best units to give thievery to:
Swordmaster, Scouts/Hussars, Horsebow/Raider, Lightning Wizards.
They should all be lightning class for maximum SKL (aka. maximum profit!)

Important characters that can benefit from thievery:
Rakusha, Beatrix, Narima, General Ragavi

Named Mercenaries that are good with thievery:
- Konrad the Cold (Arcane speed gives SKL based upon MAG. Can change to Lightning Affinity for maximum SKL, with reduced MAG).
- Teriq the Wicked (Lightning Affinity results in high SKL growth. ~70 SKL by end of campaign).

An early-game (Chapter 8) thievery squad could be the following, with 3 thieves in the mid-line.

An late-game thievery squad would look like this (only 2 Valkyries don't have thievery):


2. Surrenders
At the end of battle, every enemy unit that has surrendered will give you 1 tech point, and a large amount of gold.

To make a surrender succeed, you need to damage/destroy the enemy morale, with 100% chance of a successful surrender if they have "Shattered" Morale.

Thus, an effective tactic is to:
1. Attack with a party to reduce their morale.
2. Have a 2nd party (preferably with a leader with "Silver Tongue" and/or "Treasure Hunter") do a "surrender attack"
For a quick example, see: https://youtu.be/dqaVEa1kVPwFinal tip:
To maximum surrenders, you should use a party with many melee units with the overpower trait (Deals morale damage based on STR). The melee units will generally target the same enemy, reducing the number of killed enemies and leaving more alive for the surrender.

3. Treasure Hunter
This perk only applies if it on a leader (not a regular squad member). If your unit perform surrenders (or enemy army kills) and the leader has Treasure Hunter, you are more likely to have items drop. They can be artifacts, or the really profitable Arena tokens.

4. Arena Fights
Every arena fight gives gold, XP Codex, CP Codex, and some random items.
Thus, buy the tokens in the market whenever you see them! They can also drop as a reward item from combat during battles.

Here are sample rewards from each of the 4 arena
Bronze / Silver

Gold / Platinum
Unit Capacity Costs
Note: Squad leader's capacity does not change from 10. A "knight captain" leader in cavalry class will still have 10 cap, rather than 8. Similarly, even if the squad leader is loyal, his capacity
cost remains 10. Below is an image of Warlord Tatar, who has 10 capacity despite being loyal.

Squad Members
For squad members, their capacity costs are affected by the following factors.

1. Leader perks, like "Knight captain", "Archer captain", etc.

2. The squad member's "loyalty status"
Mercenary = 12 cap
Non-committal = 11 cap
Normal = 10 cap
Committed = 9 cap
Loyal = 8 cap

3. The number of units in your squad.
1st-5th unit: No extra cap cost
6th unit: +2 cap
7th unit: +4 cap
8th unit: +6 cap
9th unit: +8 cap

Therefore, for a 9-unit squad that is fully loyal with 0 artifacts or cap reductions, you need 94 LDR:
Leader & 4 members: 10 + 8*4 = 42
6th: 40 + 8+2 = 52
7th: 50 + 8 +4 = 64
8th: 62 + 8 + 6 = 78
9th: 76 + 8 + 8 = 94

This is why having characters that are knight/archer/infantry captains, artifacts that reduce capacity, and mentorship to boost LDR on squad members are all so useful.
Increasing unit capacity (aka. LDR stat) and Loyalty.
There are several key points to understanding how Leadership gain works.

The above leadership gain occurred when I stayed within the time limits of each battle, simply from clearing 5 Gaiden missions + numerous arena battles.

- Think of Leadership as having a "Hidden" LDR XP Bar.
- Combat and captures increase LDR XP.
- Mentorship: A squad leader will provide LDR XP to all units in his party, until they reach [The Leader's LDR -10]. Mentorship only applies with combat.
- When a LDR XP bar is filled, the unit gets +1 LDR. Light affinity has a smaller LDR XP bar, while Dark has a higher one.

Loyalty (which affects unit capacity cost) functions the exact same way, except there are only 5 states: Mercenary, Uncommitted, Neutral, Committed, Loyal.

Thus, the best way to increase both leadership and loyalty is:
1. In bronze arena, set up a unit with the lowest threat rating, which will ensure it is the target of attacks.
2. Don't hurt the 2 archers on the map. They will constantly attack you every turn (note: the more attackers, the more XP is earned).
3. If you wish to grind, you can farm this for as many turn as you want to maximize your LDR stats (you don't have to finish within the recommended turn limit).

You can also (indirectly) increase leadership via equipping 5 artifacts:
Elegant blade, Sergeant's Uniform, Imperial Battle Armor, Imperial War Banner, and Ataraxia

Important:
1. Lindly (the MC) always gets some capture XP when allies perform captures, so he/she should not perform any captures. The MC will have more than enough LDR without it!
2. The best units to perform captures are Diana, Stefan and Jules.
Bazaars
Always check them out.
They are nearly identical to markets, but you have a higher chance of getting rare items and named mercenaries. They also offer Drakelings for sale, which can be grown into mighty dragons and eventually, dragon riders.

Note: You can have a maximum of 15 dragon riders (11 from bazaars + Nibbler, the mercenary Cloudrender Athelis, Azuros, and 1 "surprise" dragon rider)

There are a total of 11 chapters with bazaars, which are the following:
3, 6, 9, 10, 12, 16, 18, 19, 21, 24, and 26
AI target selection
There are 3 simple rules that the AI follow when it comes to targeting.

1. The AI moves towards the closest target.
2. If there is no path to the closest target (e.g. all your units are already surrounded by enemy units), they will choose to take the "longer" path by wrapping around. If you are aiming to get the ... How? achievement for Chapter 12, it is crucial to avoid getting surrounded since enemies will march into the fort/castle, and seize your fortress base, resulting in an instant loss.
3. If there are multiple targets in range, the AI will target the lowest threat value.

In practical terms:
1. A squad of 5 priestesses/medics is a great archer bait in the early-game, drawing away attention from other units, due to its very low threat, and ability to heal the damage taken. However, melee attacks are generally too dangerous and will kill some priestesses/medics.
2. The Noisy Cricket Artifact reduces the threat rating of a squad by 15%.
3. Threat value is manipulable because some artifacts are worth a lot more than others.
Below is 4 screenshots of the exact same party, but with 4 different artifact configurations, with the threat rating ranging from 15K, 19K, 23K and 33K.
29 Comments
Heaven has even sheep spread Oct 15, 2024 @ 7:58am 
re: bronze arena grind. In my games, I find that all xp/class mastery/loyalty etc unchanged if i let the same unit shoot at me repeatedly. (And regardless of which of my squads are shot at.) Maybe that's since an update after the post?
Innominatus May 23, 2024 @ 3:08am 
The arena grinding trick doesn't work anymore...
Nitroglycerine  [author] May 14, 2024 @ 9:17pm 
Added to squads. The more the squad fights, the more loyal they become. Don't need to be leaders to gain loyalty.
Rafah♥ May 14, 2024 @ 8:49am 
Friend, I know the post is a little old, but I have a question. Should mercenary characters be squad leaders to be able to become loyal or should they just be added to squads with existing leaders?
Old Raven Jun 15, 2023 @ 6:58am 
Ah ok I'm sorry then. The main difference was between the three nephalim, the rest was somewhat similar, but I didn't get good rolls on +LS items and didn't cap a lot with Stephan since I was occupied trying to get a stackwipe with him per round. Jules was somewhat similar, Lindly (and Diana) a bit lower though which I found weird since there isn't a lot of additional LS she really can get if you let others cap, so I presumed that you archer-cheesed arena. I'm sorry I was mistaken.
Nitroglycerine  [author] Jun 14, 2023 @ 5:27pm 
@Old Raven.
I did played it normally. However, I do max-min (in terms of having which units attack/kill enemy squads). There was no grinding of Arena (just normal clearing of the fights when they come up). The whole series is actually on my Youtube channel.

I'll likely re-play the game and update this guide when the DLC comes out, since the version I played is a while ago.
Old Raven Jun 13, 2023 @ 12:27pm 
@Nitroglycerine I didn't really mean it as criticism, if you want to grind it out or want to go for the achievement on 12 that's perfectly fair. Overall I think it's a good guide, don't get me wrong.

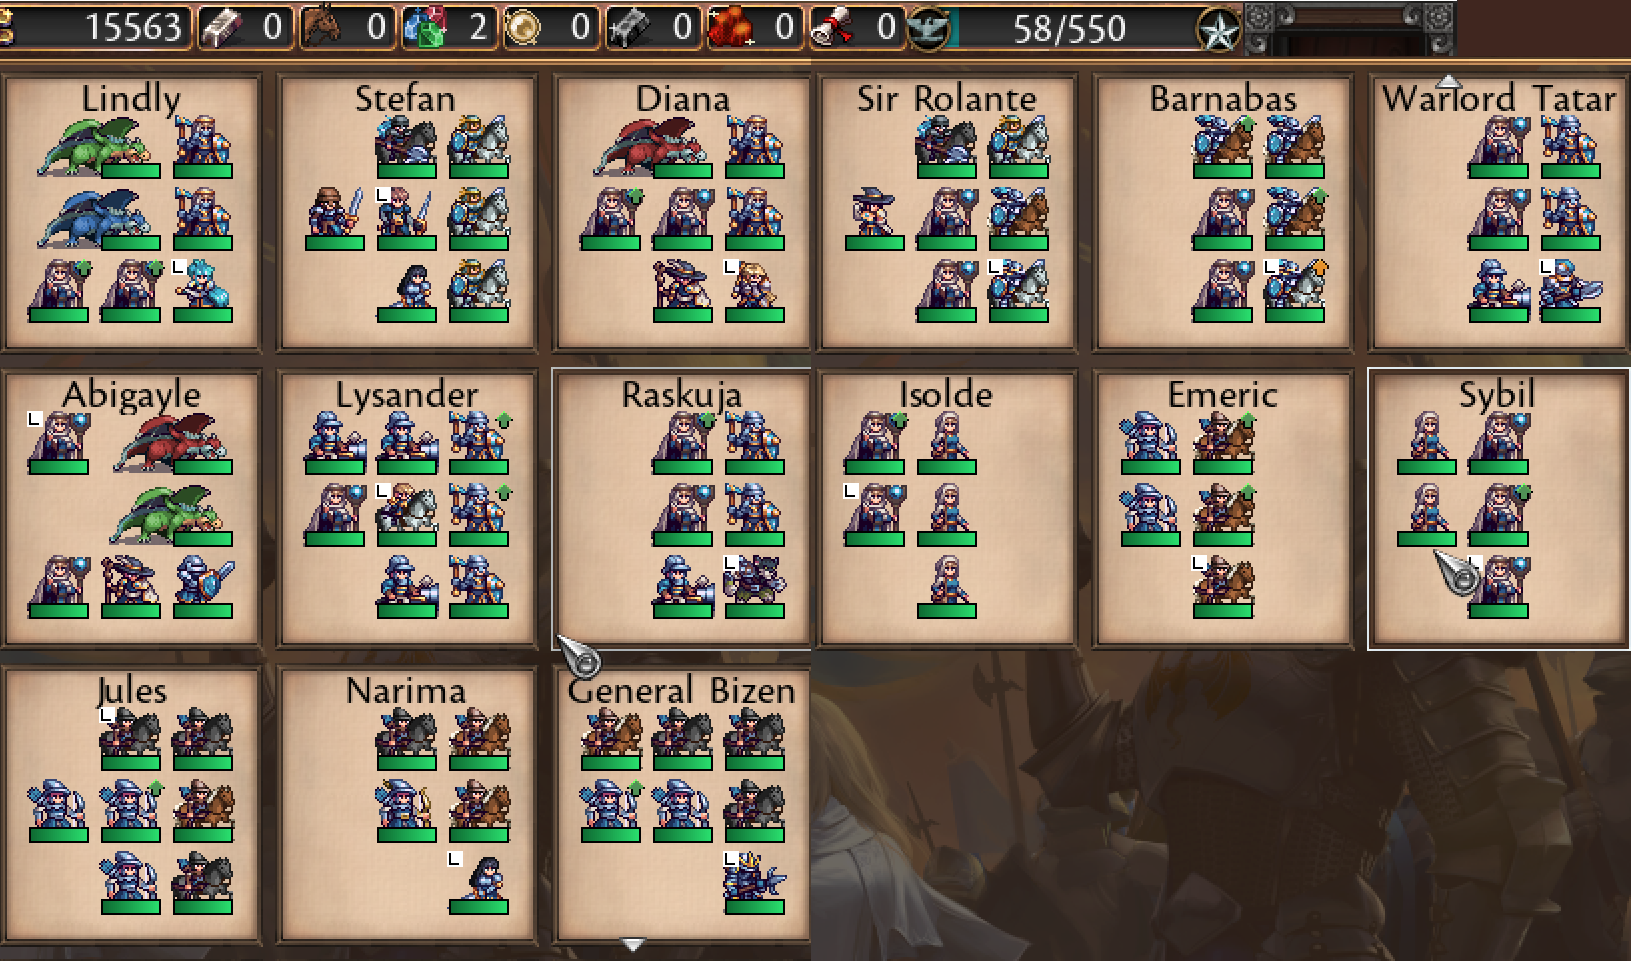
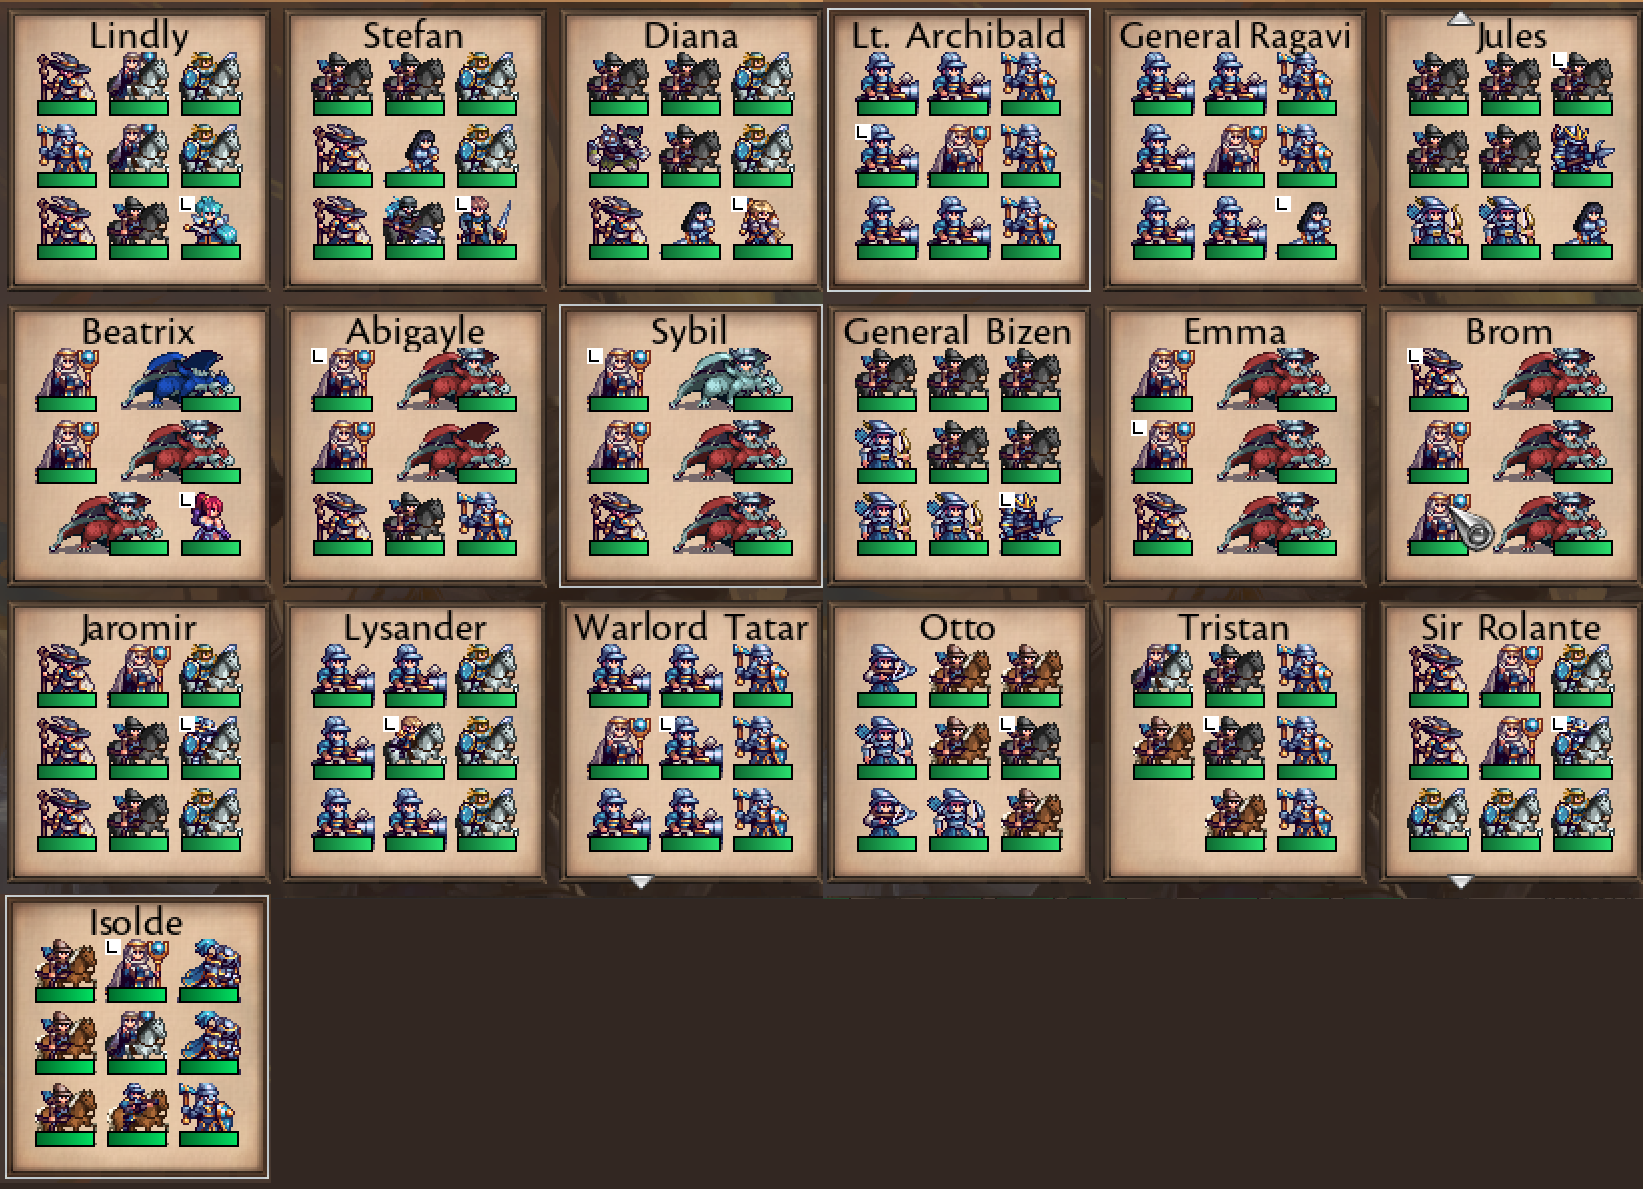
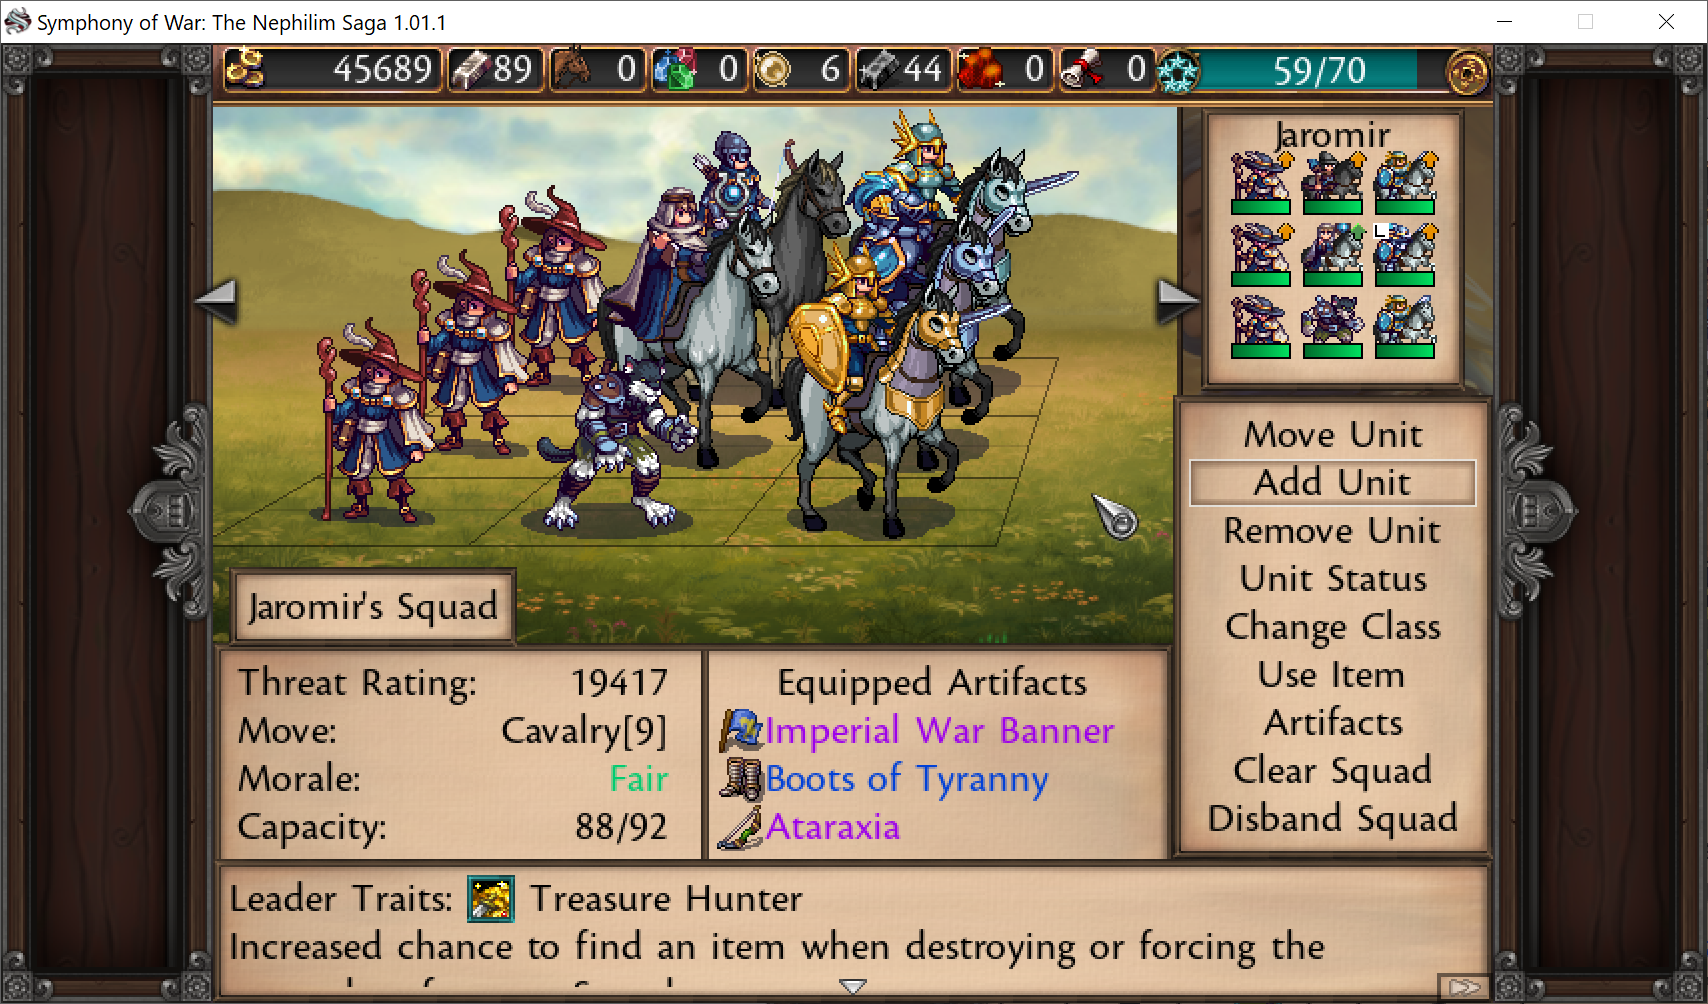
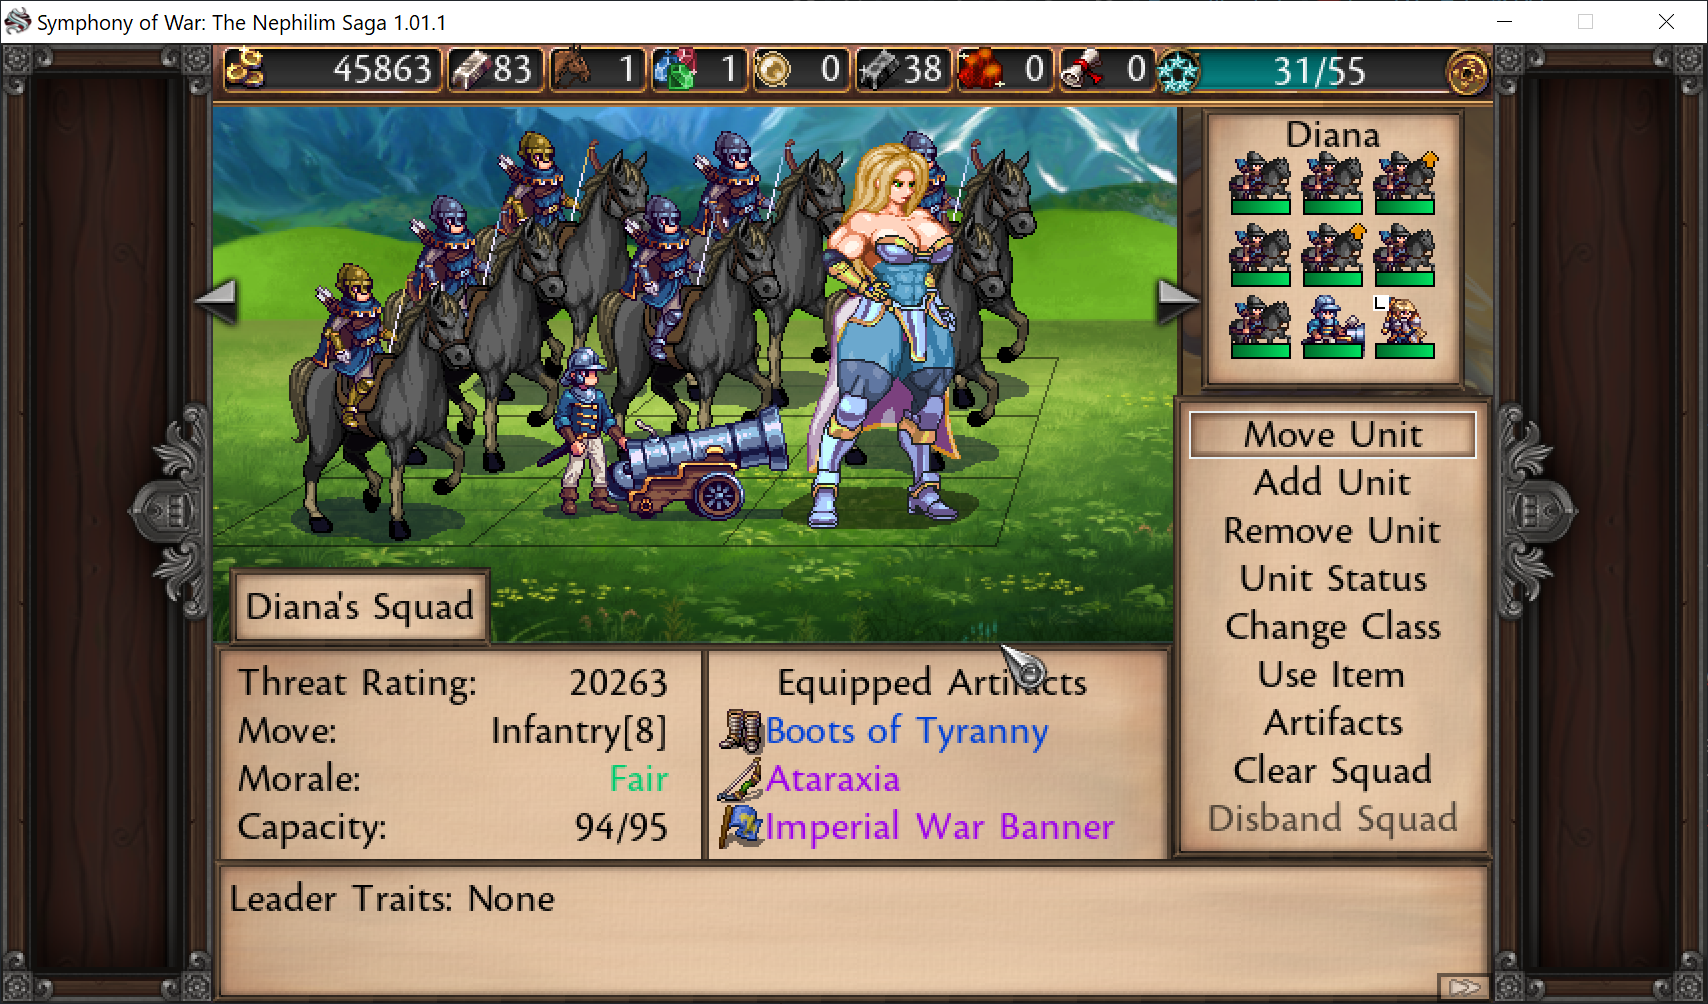
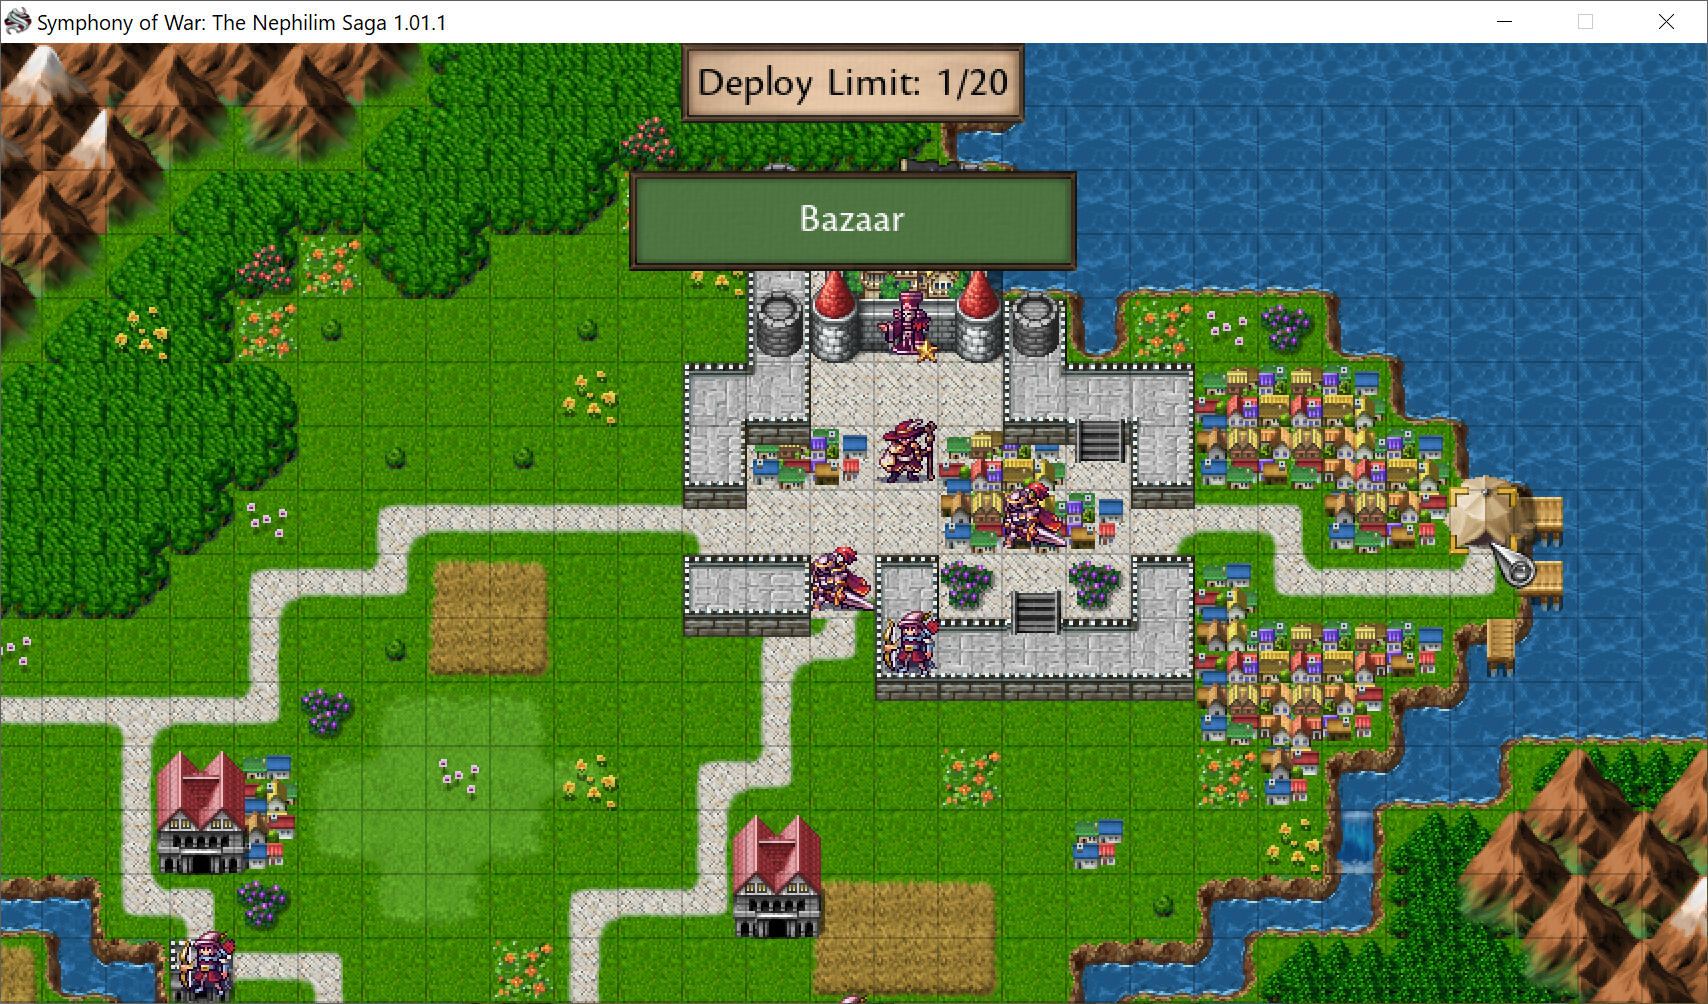
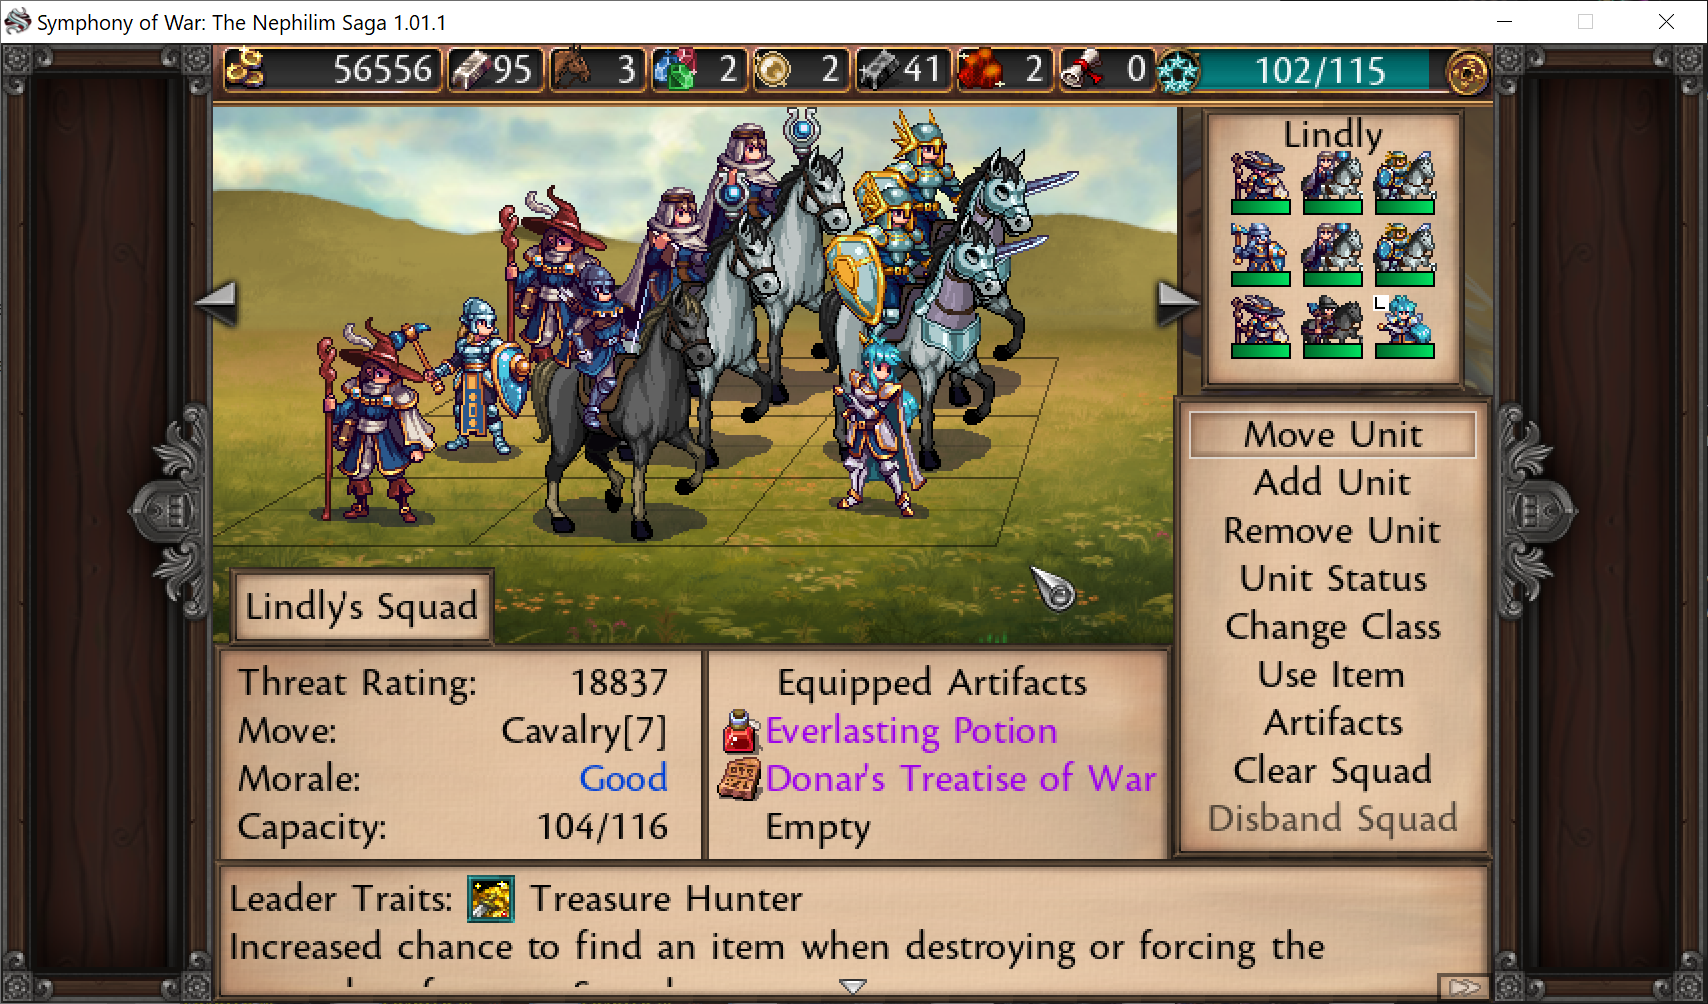
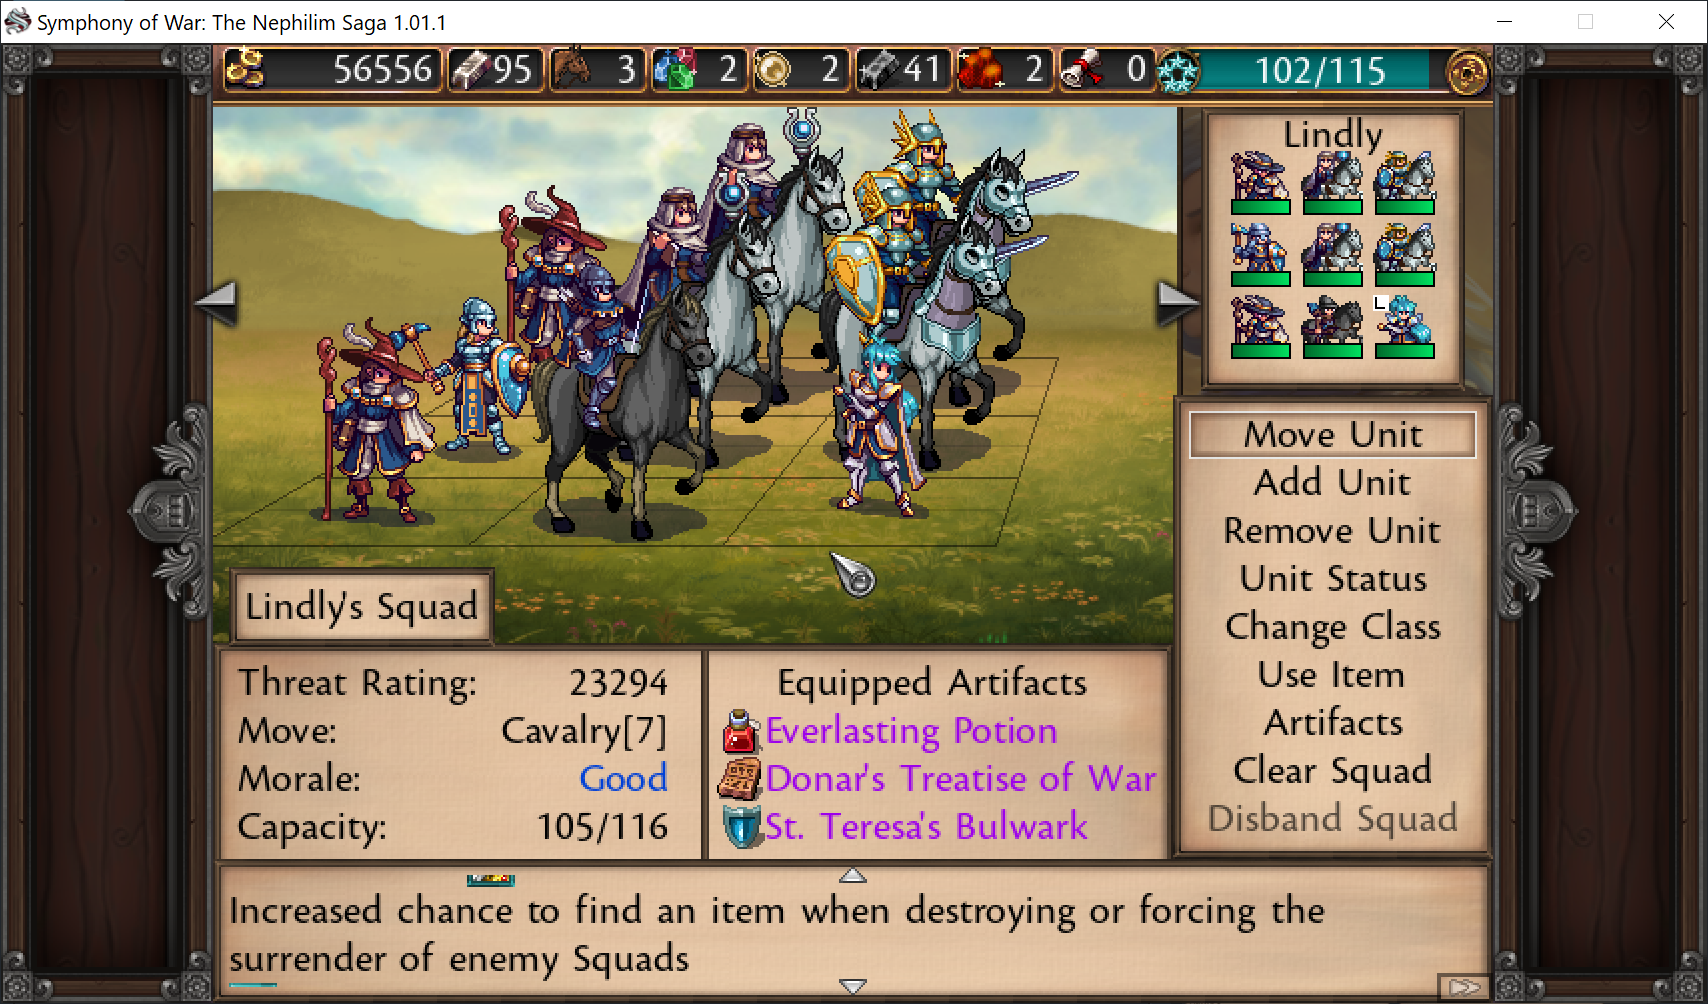
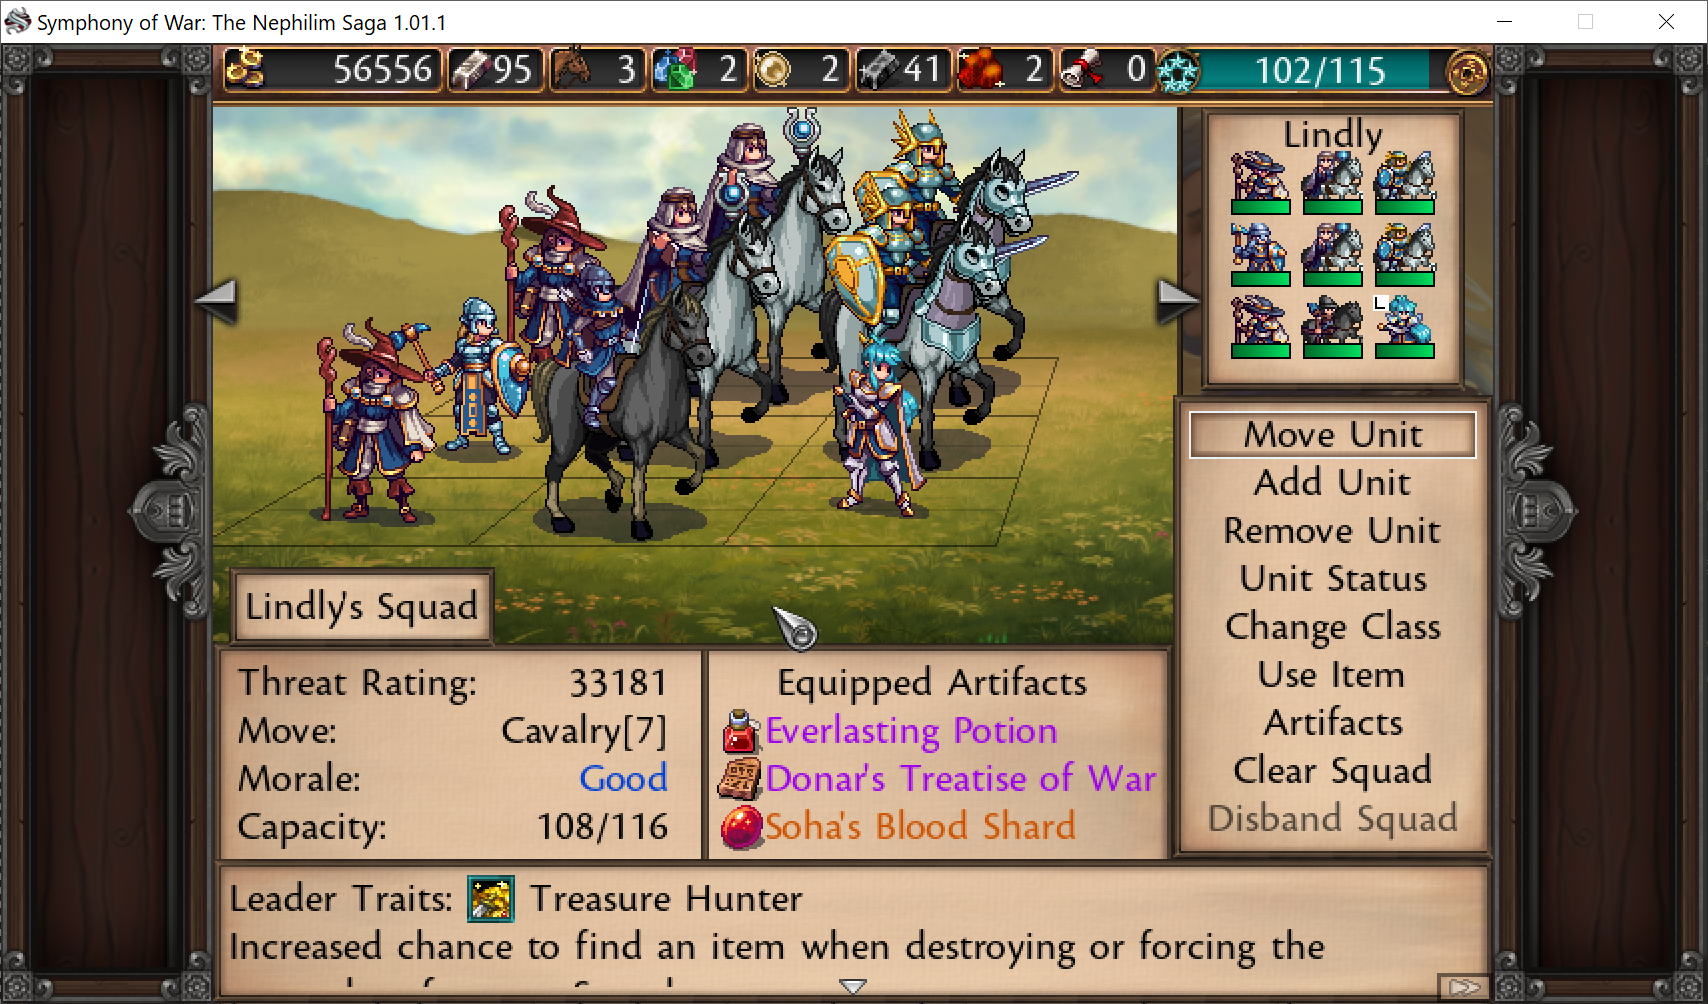
I'm currently doing a hard run though and I had maybe 65 LS on Lindly by chapter 12 and high 50/low 60 on the rest and hard already means more LS because chars are higher level. Which unless you find a ton of LS gear means you have 6-7 units and maybe 5 on a stack with dragons by chapter 12. So the expectation from Nicrome that you just cap out on squad size early on in the game which would make light useless is wrong if you just play through the game normally, light is excellent on leaders.
Nitroglycerine  [author] Jun 12, 2023 @ 9:06am 
@Old Raven
The leadership values weren't really suggested, but simply examples from my run.
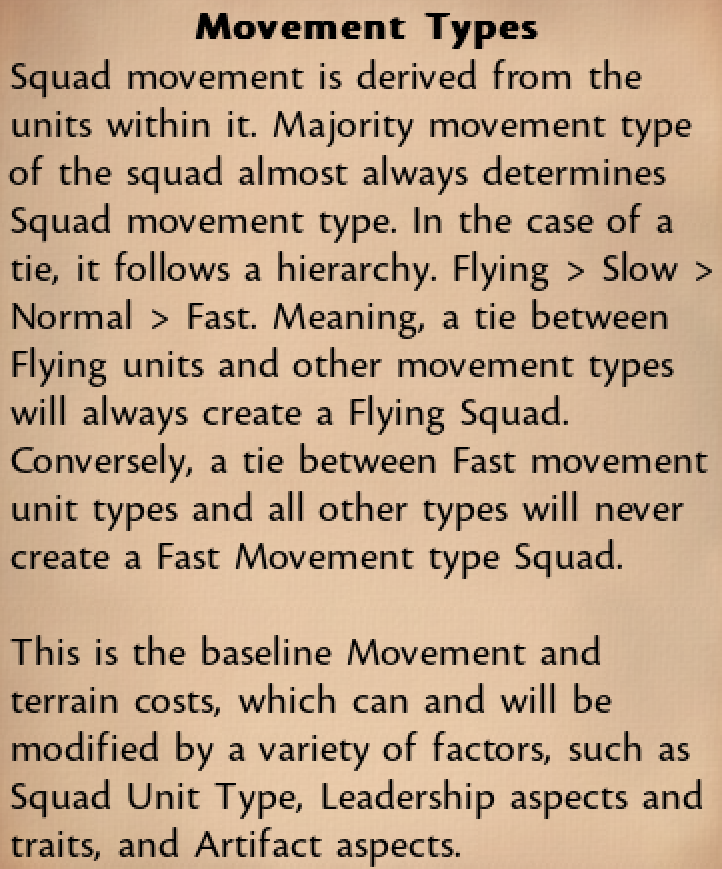
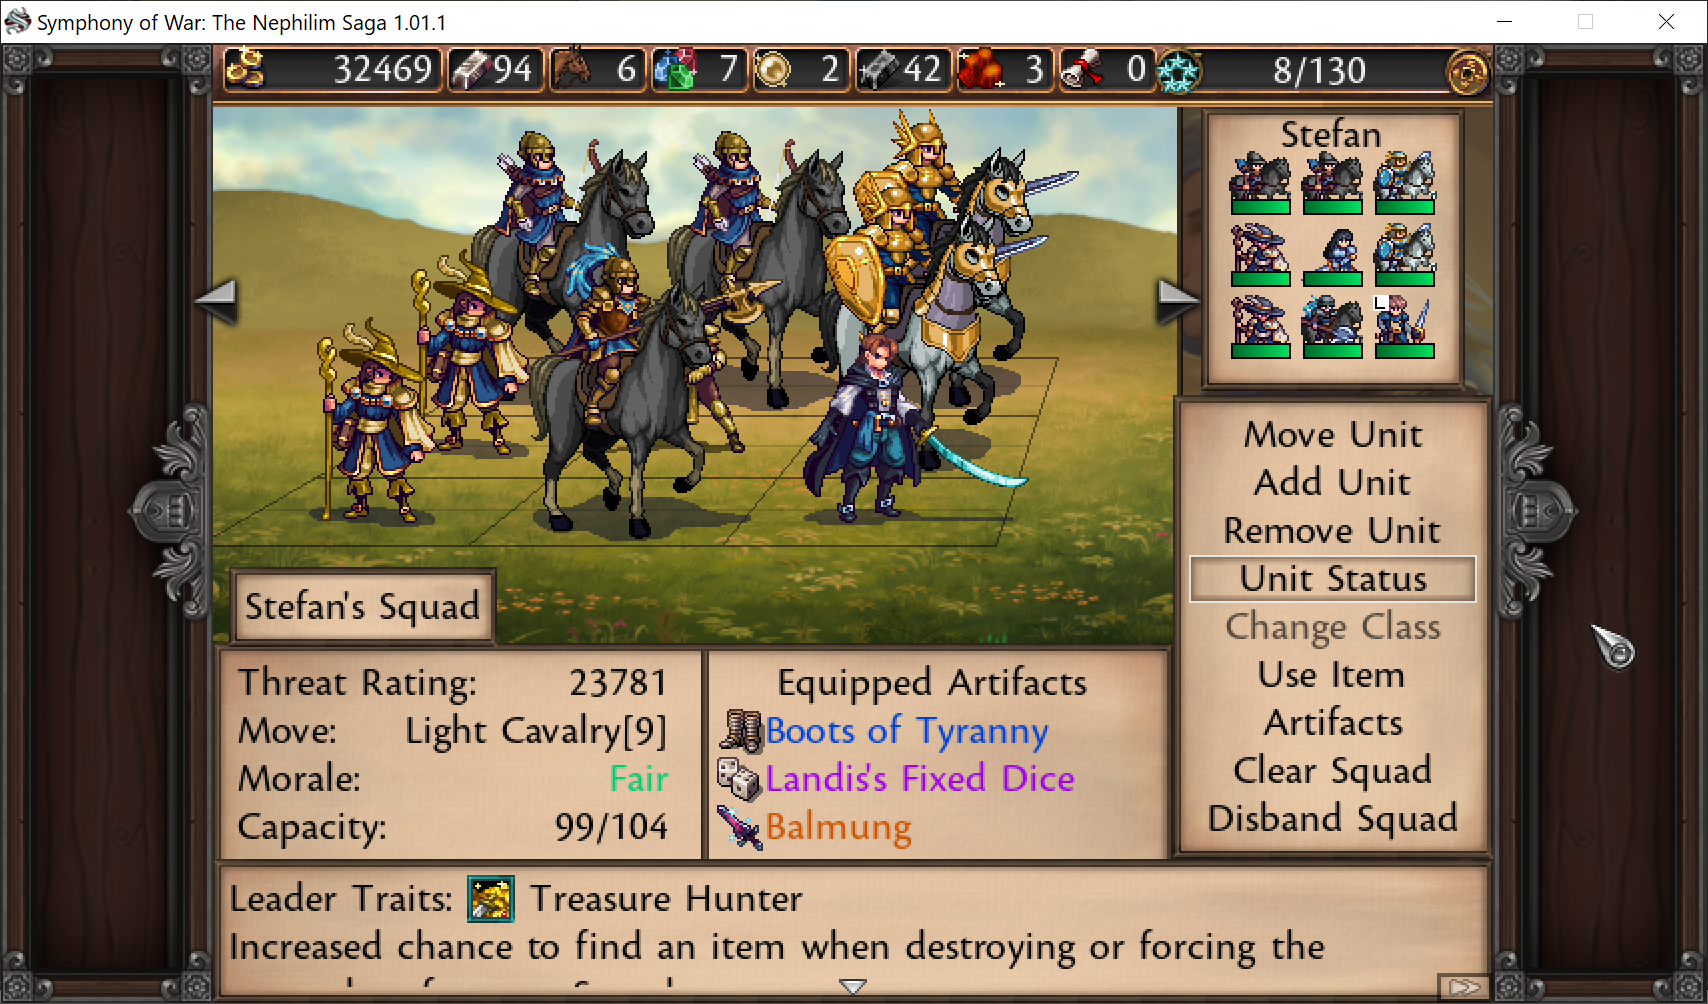
Most squads at 7-8 units, which also came about from having +leadership gear. None of the squads were filled out?
Old Raven Jun 10, 2023 @ 9:24am 
Also the leadership values suggested for the squad templates for chapter 12 are completely unrealistic if you don't abuse bronze arena, on average you'll have ~60-70 LS on the higher squads by then, which is nowhere near enough to fill out a squad.
Old Raven Jun 10, 2023 @ 9:22am 
@Nicrome - Dark gives hefty penalties to loyalty and leadership, so unless you grind out bronze arena against archers (which imo is both unnecessary and boring unless you're doing a challenge run for achievements) light is by far the best leader affinity.

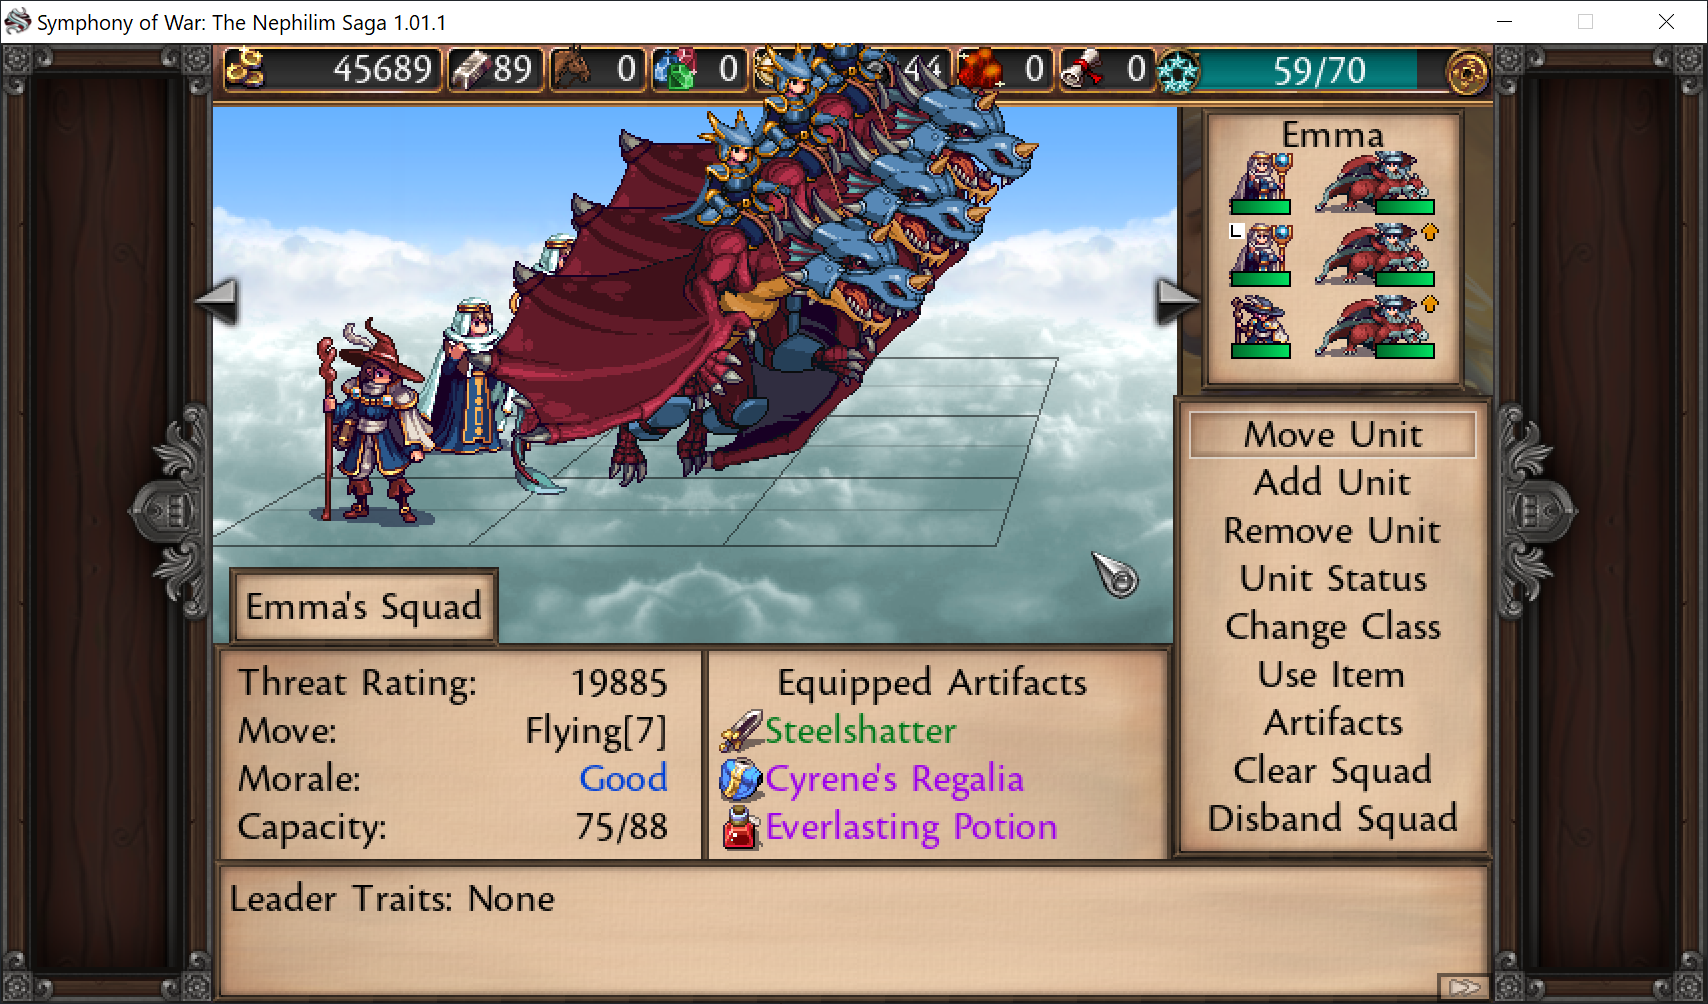
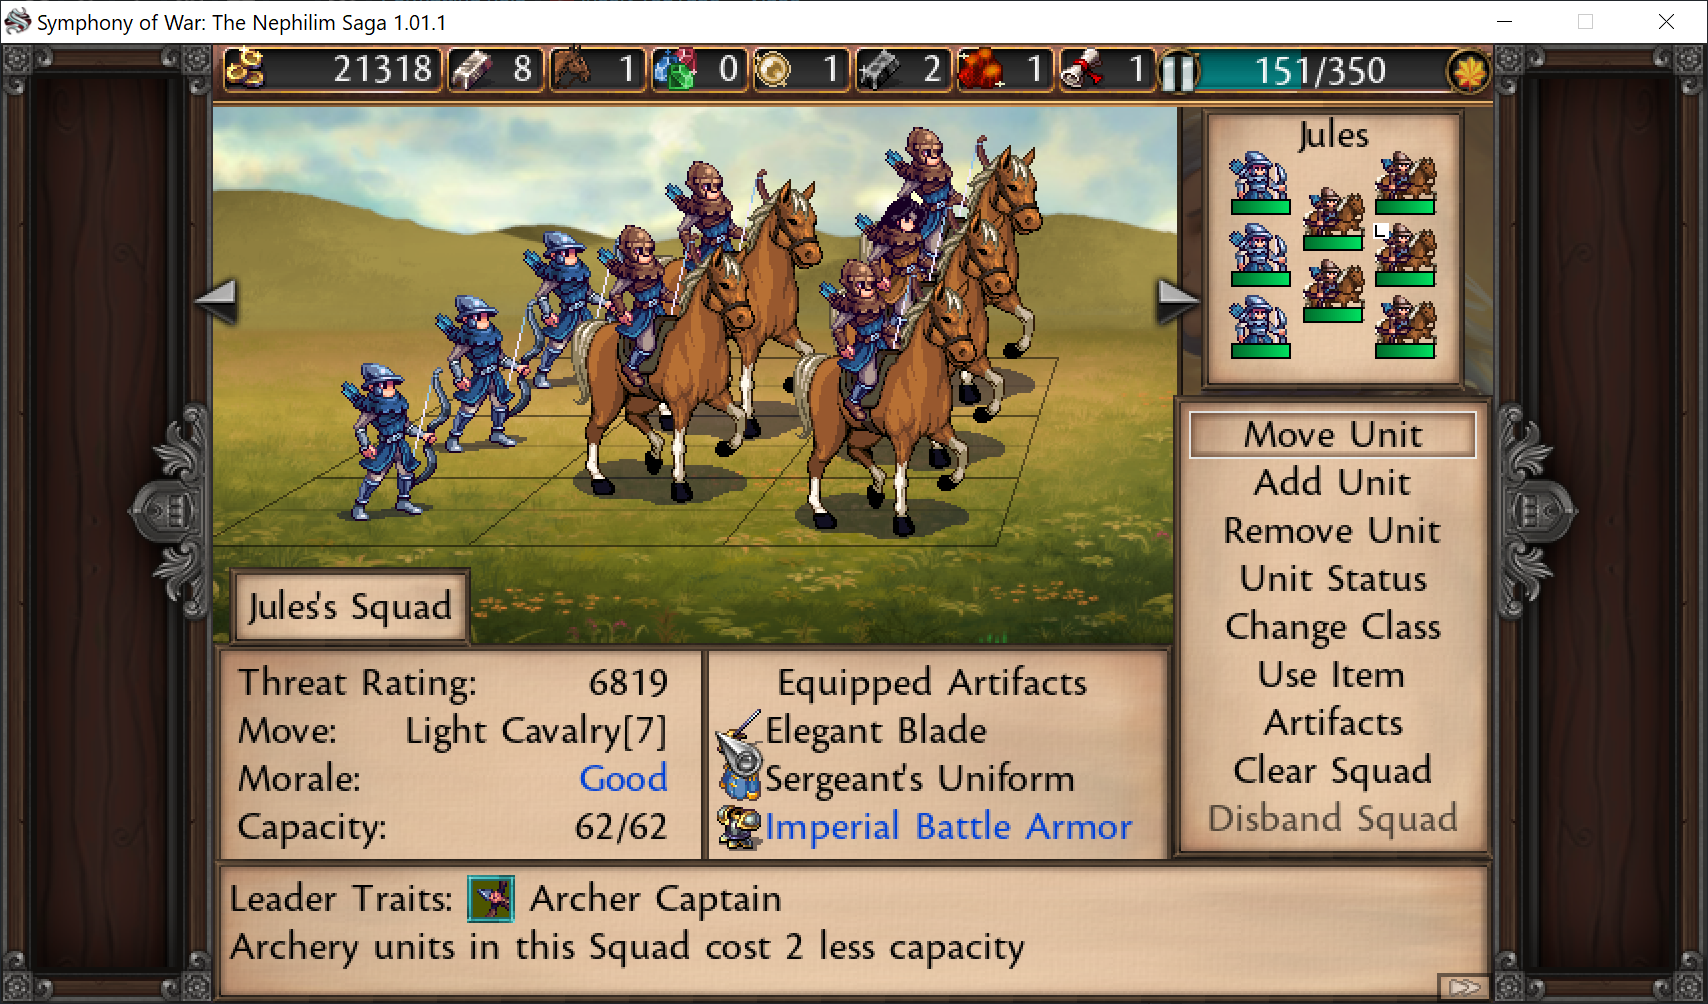
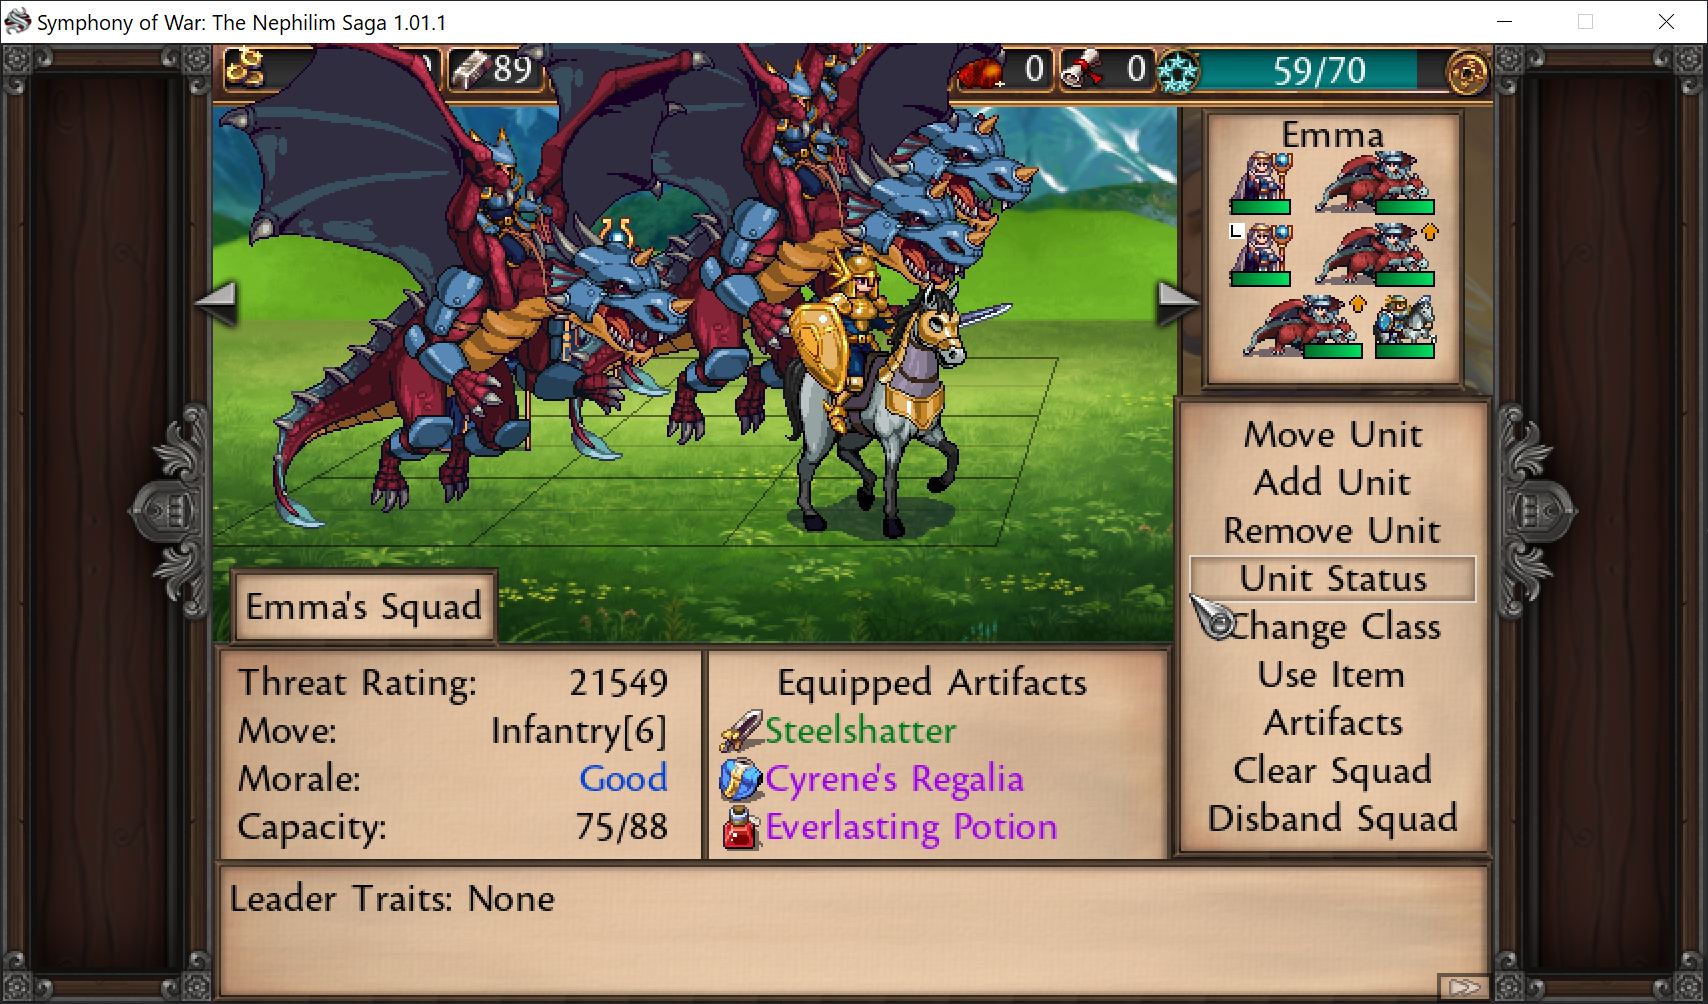
Dark is imo the best affinity for dragons, for which loyalty is slightly less important and whose damage benefits from both strenght and magic. Dark is generally very strong for non-leader non-tanks and not bad f.e. on valkyries either, who use both stats, but it's also notoriously rare, expensive and takes time to really come into fruition, especially for mercs where loyalty is often a bottleneck early on.