Arma Reforger

Arma Reforger

224 Bewertungen
Start Creating a New Map
Von Tobeh
Step by step instructions on how to start creating a new Island for ArmA Reforger. Learned most of it from Lou Montana's tutorial on the Bohemia wiki - added some of my own information and cleared some points for new ArmA modders like me.
14
7
5
3
5
4
2
2
2
   
Preis verleihen
Favorisieren
Favorisiert
Entfernen
Introduction
Thanks to Lou Montana for the first documentation I could find on how to use the editor to create terrain. I have put together this tutorial mostly because I like Steam Guides, prefer written guides over video guides, and also to note some of the things I have found through experimenting with the editor.

This Guide will probably become outdated quickly as the game is going through changes, but I have fully published a 1KM2 map (Abbey Island), and so hopefully you will find something useful.
Create New Project
Launch ArmA Reforger Tools in the Steam Library.

Click 'Create New' and enter a short name for your project. Name it after the terrain you will be creating. The only dependency needed is 'ArmA Reforger' as that will give you access to all assets in the base game, so no need to check any more boxes than the one forced option.

Click OK and the project will open. Find the folder in the 'Resource Browser' with the name of your project and select it.

Now in the area below which shows 'addon.gproj' and 'resourceDatabase.rdb', right click an empty space and click 'New Folder'. Name the folder 'worlds' - this will be where we save the world file.


Now click on the 'World Builder' button and we can start making the map.
Creating Terrain
Save First
The World Editor should open with an unnamed empty world. Hit File/Save World As and go to the worlds folder you made inside your project folder earlier. Name the file to whatever you want your island/map to be called. For example, in the base game, they name theirs 'Eden'. Hit OK to save.

Later on if you close the project you will need to open the world again using the open button and finding the file again.

Create Terrain
Click 'Create' in the lower left of the screen.

Type 'Terrain' into the search box and locate 'GenericTerrainEntity'.


Click and drag this into the large grey viewport.

GenericTerrainEntity should now appear in the hierarchy.

Select the GenericTerrainEntity and find 'Coords' in the Object properties. Set X,Y and Z to 0.

Right click on the GenericTerrainEntity and select 'Create New Terrain' all the way at the bottom.


The default values in the pop-up menu will create a small area. If you want a larger terrain, alter the terrain grid size values. It may be good to pick a value which is a power of 2 (e.g. 128, 256, 512, 1024). The size of the terrain will show at the bottom so you can change it to cover whatever km2 area you like. Try to make it a little larger than the area you want if you want to create an island as a lot of the terrain will be underwater.

Click OK.

Flat terrain should appear in the 3D Viewport.

I've had a look at some values set in Eden - to get your island working like theirs, it may help to copy some of these values. Select the 'GenericTerrainEntity' again in the hierarchy and adjust the following settings:
Close Distance Max: 200
Close Distance Blend: 200
Middle Distance Max: 750
Middle Distance Blend: 400
Layer Preset: Terrain

Lighting / Required Entities
Now that your terrain is in, we need everything else: lighting, sky, ocean, fog, etc. It doesn't matter where they are placed in the world as they can be selected from the hierarchy and affect the world globally. Remember to save your work often, in case it crashes.

Warning
I have encountered a bug which could affect you if you click the wrong thing so let me explain how to fix it. Do not double click on any of the prefabs named here - opening some of them will cause Enfusion to crash, and then keep crashing every time it opens. For whatever reason, you cannot preview these entities in the workbench browser and it will attempt to re-open them upon relaunch.

If this happens to you, you need to open the registry editor (search for it on Windows) and go to:

Computer/HKEY_CURRENT_USER/Software/Bohemia Interactive/Arma Reforger Workbench/ Resource Manager

Locate 'lastSessionFilePath' and right click to Modify. Delete the text saved as data. This will stop workbench from trying to reopen the file.


Prefabs

You will need some prefabs to make various world settings work. Go to the Resource Browser and Search for the following entities and drag them into the scene:

'Lighting_Default.et' (This sets up all lighting, post processing and fog)
'TimeAndWeatherManager.et' (This allows you to adjust lighting/weather)
'SCR_CameraManager.et' (This has something to do with making cameras work in play mode)
'EnvProbe_Default.et' (This helps material reflections)
'ProjectileSoundsManager.et' (Not sure if needed, but it's in Eden)
'SCR_AIWorld.et' (This will enable AI - if you don't want your map to work with AI, don't make one)

You can rename things to easier to find names by selecting them in the hierarchy after placing and going to the top right of Object Properties to enter a new name.

World Settings
There is already an entity in your world called 'world' - select this in the hierarchy. This has many settings for the world. You could drag in a prefab to replace this and delete the original, but editing it is easy enough.

Set the following values by clicking the '...' button next to each field and entering each required value into the searchbar.

Sky Preset: Atmosphere.emat (after selecting this the screen will go white but it will adjust to the new HDR settings soon)

Planet Preset: Click the plus button 4 times so that you have 0,1,2,3. For each item click '...' and find the following:
0: Stars_01.emat
1: Sun_01.emat
2: Moon_01.emat
3: Clouds_Distant.emat

Clouds Renderer: SkyVolCloudsRenderer

CloudsPreset: Clouds_Volumetric.emat (clouds should appear in the sky)

OceanMaterial: ocean.emat (The ocean should now be textured)

Ocean Simulation: oceanSimIsland (this is how rough the water is)

Lens Flares Config: LensFlares.conf (JJ Abrams)

Lighting
If you've made the TimeAndWeatherManager prefab, you should be able to adjust lighting settings via the weather button at the top middle of the screen. In the pop-up menu you can adjust time of day with a slider and then click OK to apply the settings and close the menu.
Testing
Remember to save your work in case it crashes.

Before doing any work on terrain, test the project in the editor. To do this, click the drop down menu next to the green play button and select 'Play from Camera Position' so that it is checked.

Once this is on, position the camera over the terrain somewhere and click the green arrow to play. Press Escape to exit play mode.

Also, I haven't mentioned that you can Hold Right Mouse in the viewport to look around and use WASD to move. Scroll mouse up/down to change speed.


Currently the terrain is inline with the water and so it's full of puddles. If you can't see the terrain, remember to adjust the coordinates of the terrain entity so that it is at 0,0,0.
Terrain Sculpting
To enter terrain sculpting mode, click the mountain icon near the top middle of the screen. The 'Terrain Tool' tab will appear at the bottom right - click this to view more options.

You can import a heightmap to make terrain editing easier. Heightmaps are black and white images (png file format) which will shape your terrain as if it is a top down map - black for low terrain and white for high. To do this go to the manage tab of the terrain tool and click Import height map. I won't be using a heightmap for this tutorial, but if you are it should give you a good starting point. Many programs can output heightmaps for you to use, such as Blender, image editing software and some websites. If you are making an island in the real world, heightmaps are essential for accuracy. Later on I will mention satellite maps - if you do get a heightmap of an area, try getting a satellite image (a basic photo image) of the same area at the same time so that they line up with eachother.

Before you can edit anything, you need to 'Generate normal map' by clicking the 'Generate Normal Map...' button. Click OK with default values.

After this, you should be able to go to the sculpt tab of the terrain tool and play with some of the settings.

Sculpting
Go to 'Sculpt' and change the radius to be quite large. Now mouse over some terrain and click the left mouse button to raise the terrain - you will notice the ground texture change as it leaves the water (I think this is based on the 'Wetness' settings you will find in the GenericWorldEntity called 'World' in the hierarchy.)

Alt+left Click will also subtract using the current brush. I found a good approach to making a small test island is to use the 'flatten' tool to lower terrain around the island to a low level. Then use the smooth tool to smooth out the coast. Do not use the smooth tool for too long as it is very CPU intensive. The Noise tool is also very good for rough terrain. Holding Shift and moving the mouse will adjust settings on the current tool.


Painting
When you paint different materials onto the ground, it will add details such as grass and small rocks/plants. First go to the Paint tab and look at available materials. Only one (default) is available, which is a sandy texture.

Before you are able to add more materials, you may need to select the paint tool and click anywhere on the terrain and confirm the pop-up message.

To add more materials, go to the resource browser and go to ArmaReforger/Terrains/Common/Surfaces. Here there are a variety of materials including grass, pebbles, sea bed, etc. Drag one of these to the right-hand panel (next to the default material already there). It should now appear as a selectable option. Select it and you can now paint on the terrain. I recommend using one grass material, one rock material, one forest material, and one dirt material to start with.

Warning: the editor crashes a lot when painting large areas. Remember to save often.

There is one material which looks a bit strange: the default material. This material will display whatever is on your satellite map image, which is stretched out to fit the entire terrain. The satellite map is an image of your entire island, as if taken from a satellite. This is easy to get if you are making a 'real' island, as you can use a real satellite image. If you are making a fictional island, you may have to make your own. The reason you need one, is due to the way the game engine works. Not only does the satellite map image display on the 'default' material, but also when you are very far away from your map, it will actually not render any of your applied materials and instead will show the satellite map. This means that distant terrain will just be coloured in with basic blurry bits of your satellite map image.

Satellite Maps - AKA: How to fix your glowing grass
Thanks to searching on the ArmA Discord, I found the problem with my grass/foliage being too bright. This is because you don't have a satellite map. To create one, you will have to export your map to a png image and then re-import it. Save before you do this, just in case.

If you don't have a satellite image, first go to the terrain tool and then the manage tab. Select 'Base' on the drop down menu and click on the 'Export Height Map' button next to it. Choose png as the file type and save it somewhere on your PC (the desktop will do, you will just need to find it again).

You will want to adjust this image to make it appear like your island, as a heightmap is just grey. What I did is took screenshots of my map once it was done and layered them over the image before re importing it. It doesn't need to be very accurate is it will only be visible to people at about 700m and under foliage/through fog. You can just leave it grey, as I did when I had no idea what a satellite map even was, and the map will still work. The only thing you will notice is that terrain will go grey in the distance.

Now click on 'Import Satellite Map...' and find the finished image file again using the '...' button. Click OK with default settings. See below an example of an imported image, you can see errors and other weirdness but it works.


Material Limit

One last note - if you tick the box at the top of the paint tool ("Show diags for block under cursor") it shows a grid on the terrain and some information on which materials are in each square. This is important as each grid square can only contain 5 different materials. Try to not use too many materials in one area or you will hit the limit and be unable to paint any new materials in that square.

You can use the 'Info & Diags' tab of the terrain tool to adjust any applied materials if you are having problems with hitting the material limit. For example, if you accidentally make a tiny mark with a material and don't know where it is, go to the Info and Diags tab, click on the section of terrain containing the extra material, and then look at the window on the right. Find the materials with percentages next to them (which shows the percentage of the square they occupy), right click and select 'merge with' and whichever other material you want to replace them with.

Objects
Placing objects is very simple. Search for an entity in the Resource Browser and drag in a prefab.

Forest and Foliage
I have recently discovered how to create forests through experimentation as there is no documentation - it is possible I am doing this wrong. Here is my method.

First click the 'Vector Entity Tool' from the top toolbar.

Now Click 'New Polyline'

Click somewhere in the world where you want some trees.

Now draw a shape around where you want there to be trees - do this by using Ctrl+click to add new points.

Now you have defined an area to spawn trees in. To spawn the trees, you will need a forest generator component. You could make one from scratch and define everything to spawn but this would take a while. Fortunately, you can use one which was used in Eden/Everon.

Go to the Resource Browser and search for 'FG_'

Select any Forest Generator (ending in .et) and drag it ONTO the PolyLineShapeEntity in the hierarchy which was made when you converted the polyline. This should make the Forest Generator as a child object of the area.

Trees should appear inside the area - adjust settings in the FG entity to change density, adjust the seed to randomise positions, or just swap with a different FG prefab to try different settings.


There are other generators if you look in the prefab library folders - they can spawn decals, rocks, bushes, etc.

Roads
You can make roads in the same way you made forests. As roads are in a line and not an area, you can use the 'Spline' setting on the Vector tool. A spline is basically just a curvy line and so the path you draw will be smoother.

Click 'New Spline' and click where you want the road to start.

Use Ctrl+Click to draw nodes for the road to follow. You can also delete nodes by clicking the delete button in the vector tool. Note that new splines will spawn with 2 nodes already - I usually delete one as soon as I make a new polyline/spline so that I can place the second node myself.

Once done, search 'RG_' in the resource browser. Select a road type and drag it onto the 'SplineShapeEntity' in the hierarchy. You may need to change the terrain materials to make the road blend in better with the terrain.


You can layer splines and create 'DecalEntities' with appropriate materials to blend roads together and add details such as concrete pothole repair patches or dirt marks. Roads will deform terrain by default, but this can be disabled in the object's properties. This can be useful when getting multiple roads to join together at a junction, or go over terrain you have already carefully smoothed yourself.
AI Pathfinding (Navigation)
If you spawn AI on your map you might notice they run into walls and move in straight lines. If you ever notice this, it means the nav mesh is broken.

A nav mesh is a series of shapes on the floor which tell the AI how to move around your environment. Making one is quite easy, you just click a button and it works it all out for you.

To start, you will need to make sure your world has the prefab named 'SCR_AIWorld.et' (we made it earlier). This entity has the NavmeshWorldComponent in it which we will need later.


Generate

First click the Navmesh Tool:

Now go to the bottom right of the screen and click the tab which says 'Navmesh Tool'.

Where it says 'Navmesh' with a drop down menu, select 'Soldiers'. This means you are editing the nav mesh for foot-soldiers. You may notice in the game as of the time of making this guide, AI cannot operate vehicles. In the future, you may need to generate a nav mesh for vehicles.


Click 'Connect' and then under the 'Local' tab choose 'Soldiers'. This means you are connected to the file which you are editing and changes you make to the nav mesh will be saved. Click Ok.

Now all you do is hit 'Generate' and confirm the default options on each window. You will see the black box on the right fill up to show progress. Once done, click save.

Enable your Nav Mesh

Finally, you need to connect your nav mesh to that 'NavmeshWorldComponent' I mentioned earlier. Find the SCR_AIWorld entity in your map and click on Object Properties to find the NavmeshWorldComponent. There may be 2 NavmeshWorldComponents, just select the one which is enabled (the other is for vehicles and is not implemented yet).


Find 'Navmesh File' and click the '...' button. Find your nav mesh file (ending in .nmn) and select it.

Now if you spawn AI (by completing the next section, they should be able to navigate the terrain. AI is not great at the moment, but they should be able to avoid obstacles and climb over fences when they are ordered to move or alerted.

Updating

Note that if you make changes to your map you may need to repeat this process, except instead of generating the entire map, just rebuild the changed tiles (with the 'Rebuild Changed Tiles' button). Just remember that if your AI starts to teleport through walls or run into things, there may be a problem with your nav mesh and it needs rebuilding.
Game Mode
For your island to appear in people's games you will need to assign it a game mode before you publish. Alternatively, you could publish it without any game modes and allow other developers to make the modes and include your addon as a dependency.

There are some tutorials out there on how to make a scenario (e.g. for Capture and Hold) and so you could follow one of these tutorials, but instead of using Eden as the map, use your own map. Here I will just describe how to set up the basic game master mode. This is the mode where one player can spawn in AI/prefabs and set objectives/time/weather.

Allowing Your Map to be Many Modes
If you want your map to be able to support lots of different modes, you will want to use sub-scenes. Sub-scenes allow you to have your world in one file, with each of your different game modes in a sub scene file. The benefit of this is that if you ever need to fix a problem with your terrain (e.g. a building has terrain clipping through the floor and grass indoors), you can fix this is the base world file and it will be fixed in all of your subscenes!

To create a subscene of your world, click the 'new' button in the top left of the world editor and select 'subscene'. You can save this subscene in the same folder as your world - I added the letters 'GM' to the end so that you can see it is the Game Master world. Now you can edit this GM version of the world to add in your game mode objects.

Be careful when you have subscenes open - don't accidentally edit the layers in the base world, as this will affect all your other subscenes you build off of this world also. Check the layers to see which layer is 'active', and right click on layers to open the menu which allows you to make a layer active. You can also 'lock' layers, by right clicking on them, to stop you accidentally editing them. Make sure the layer on your game mode world is active when adding game mode entities, as shown below.


Required Game Master Mode Entities
Here is how to set up your required entities to get the game mode working. You can test the game mode in the editor to see if it works.

Go to the following folder in the resource browser (or just search for the prefab):
ArmaReforger/Prefabs/MP/Modes/Editor
and locate 'GameMode_Editor_Full'. Drag this prefab into the 3D viewport and now the game knows to start the game in the 'editor' game mode (game master).

This is the 'full' version of the prefab, which contains all the other prefabs you need (you don't need to make anything else). Note that anything which says 'editor' on it is referring to the editor game mode, which is the game master or zeus game mode. Here is an explanation of what was made in case you want to edit things:

-FactionManager_Editor (This defines what factions you can play as)
-TaskManager_Editor (Allows the game master to assign tasks to each faction, e.g. defend)
-LoadoutManager_Editor (What you are allowed to spawn with as a player)
-ScriptedChatEntity (Defines chat groups available)
-RadioManager (Seems to make radios work in the map)
-GarbageManager (deletes bodies/wrecks to stop the game from crashing (as much) )

Finally, search and create the following prefab:

-TagManager

I don't know what it does but it is probably used by something else when searching through entities. Fun Fact: If you mouse over one of the object properties for TagManager there's a drunken tooltip left by one of the devs.

Note: players will be unable to spawn in your map until the game master has designated a spawn point. This means that if you disable 'play from camera position' in the drop down menu on the green play button, and then test your map, you should spawn as the game master (a floating camera). To allow anyone to spawn, you must create a faction using the game master HUD, and then set a spawn point for the faction. One done, hold Y to go back to play mode and then you should be able to spawn as normal.

Additional Game Master Entities

When in the Game Master mode in-game as game master, you can double click on white circles/boxes in the world to spawn prefabs easily. These locations can be set by you, and I recommend placing the entities for this in a base world layer (and not the subscene), as they could be used by multiple modes (anything with a zeus player).

Go to ArmaReforger/PrefabsEditable in the resource browser.
Here, you will find slot prefabs such as 'E_SlotFlatLarge'. If you place these around your map, it allows game masters to quickly spawn in whatever they want in predefined locations. Note that the facing is important - you will want the blue Z-axis arrow to be pointing up the roads for road slot locations. Remember the hotkey for snapping objects to the ground is Ctrl+Down Arrow. Don't overload your map with them though - even though they can only be seen by the game master, they can look a bit distracting.

Your mode should now work in the world editor when you play in the viewport. To get it to work in-game, see the next section (it will not appear in menus in-game yet).

Publishing
Mission File

There is a special config file called a mission header which you will need to have your mission appear in-game. This needs to be placed in a specific directory: a folder called: "Missions" within the main folder of your mod. Create this folder now, and you might need to ensure it has a capital 'M' in Missions.

Inside your new Missions folder, right click and create a new 'Config File' resource. Enter the name of your world file you will be using (in my case 'Abbey Island GM'). Then in the pop-up window search for 'SCR_MissionHeader' and click ok once you select SCR_MissionHeader.


It will create a config file with your map's name followed by '.conf'. Double click it to open.

Here you will set everything you want your mission to use:

-'World' should be set to the world you want it to load. For a specific game mode, choose the world you saved with the game mode entities in it, not the base world file.
-'Path' - I am unsure on this, but I have heard someone say this is the path to the config file (the one you are editing). Seems strange to me - if it is in the file surely it knows where it is. I put "Missions/Abbey Island GM.conf" for mine - replace the file name with your own.
-'Description' and 'Details' are for what displays on the menus/workshop and on the loading screen. I forget which is which. Can you blame me? Details is supposed to be more in depth.
-For 'Game Mode' I put 'Game Master', but I think this is just what displays in menus and has no other effect (the game mode is set by the prefabs you made).

Images
The main cause of crashes/errors when publishing/testing your map is from images - they need to be the correct file type and in the correct location. You cannot use placeholder images from other directories in the mission header file.

For simplicity, I recommend making one image for all of these required images(Icon, Loading Screen, Preview Image). The dimensions I have used which work are 576 x 324 pixels, in JPG format. If this doesn't work, try PNG format (note that PNG images work best when they are small or contain flat areas of exactly the same colour. Do not use PNG on large screenshots). Make this image from a screenshot (you could take a screenshot in the world editor using print screen) and edit it to the correct size/file type. I use GIMP as it is a free image editing program.

Now drag this image into your root folder on your project (the one containing your Missions and worlds folders). It should automatically create an edds file (a game material). This is the material you will then need to assign to Icon/Loading Screen / Preview Image in your mission header file.

With that done, your mission *might* appear in-game (depending on where you save your project files. Otherwise, to get it to work, publish it as a private item (see below).

Publish

To publish, go to the workbench. Go to Workbench>Publish Project and enter information. It is all fairly self-explanatory, except for the following:

-Your working directory is where you will output your finished project. I am still having some problems with this, but found the following directory to work:
**Your User Name** /Documents/My Games/ArmaReforger/publish/ **Your Addon Name**

-Version is set automatically and will be updated every time you release an update (it says the current version on the right)

-Visibility can be:
-Public: This is the normal 'everyone can see it' setting
-Unlisted: This is a special setting for if you want to include your addon in another addon but don't want people to be able to find it in any way on the workshop
-Private: Only you can see this in the workshop (good for testing before you make public)
-Test: Strange setting - it makes it public, but also makes it so you can only find it by activating the 'test' filter in the workshop. Good for if you want to do a multiplayer test with someone else.

-Change notes is for when you release an update.

Click 'Bundle' when done, and 'Publish' after to publish it. If you want to update your map, just bundle and publish again and everyone who is subscribed will update their files to the new version. If you go to the workshop and sort by most recent, you should be able to find your post and subscribe. If you are having problems downloading, see the next section as you might need to move some files around.

Directories

I originally saved my workbench files in the My Games/ArmaReforger/Addons/ directory and then when I published the addon, was not able to view my scenario in-game. This is because when you subscribe to an item, it downloads it to that addon folder and was confused that I already had the developer versions of the files. I don't fully understand what's going on, but basically don't save your workbench project in the addons folder. I created a separate folder: My Games/ArmaReforger/dev. This means that to test your map in-game you will need to publish an unlisted version and download it. Once you do download it, the files should appear in the addons folder.

You can move your directory quite easily if you need to. First go to workbench and don't open your project. Instead, right click and click 'remove from list' on your project. This will not delete your files, just remove it from your list of projects. Then move the project files to their new location in Windows File Explorer. Go back to the workbench and select 'add existing project'. Locate your project file's new location and select the gproj file and it will appear back on the list. You will have to do this if ever you want to revert to a backup version of your project.

Let me know if you have any problems, as I'm still learning about the publishing process. In the future, Bohemia are thinking of moving to the Steam Workshop, which will be a big help to everyone - especially when getting feedback, as the current workshop has no comment feature or easy to use managing tools.
Notes
As I was writing this, I learned a lot - I have removed some details from earlier in the guide which I found were unnecessary and will store them here for reference in case you need them.

Setting up Entities without Prefabs
At first, I thought you had to set up various basic entities yourself using the Create tab(e.g. lighting), when instead you can just drag in a default prefab which would get all your values set up for you. Here are some of the settings I noted for entities if setting them up manually and not using the prefab.

Lighting Settings

Select the GenericWorldLightEntity and enter the following settings (the rest can remain default)

Global Light Color Properties:
Direct Light LV: 15
Indirect Light LV: 14
Indirect Light Color: 255,255,255,255 (fully white with maximum opacity)
HDR Properties:
Target EV: 1.75
Target EV Limit Bright: 0.5
Target EV Limit Dark: -0.5

See the Terrain Sculpting section for how to fix grass rendering too bright.

Environment Probe

Select EnvironmentProbeEntity and adjust the following settings:

Type: Global Placed
Far Plane: 250
Rendering: Sky, Ocean, Terrain, Roads and Specular checked
LV Reflection Brightness: -1
Reflection Desaturation: 0.4
Top Angle Max: 8
Top Angle Min: 0
Bottom Angle Max: -5
Bottom Angle Min: 0

Post Processing

There are 9 GenericWorldPPEffect entities in the map put out by Bohemia Interactive. Here are their settings if you are not using the prfab. I also noted that some of these are not in the default prefab (PPAA and heightmapAO)

Priority: 0, Profile: SSR
Priority: 2, Profile: GodRays
Priority: 15, Profile: HBAO
Priority: 16, Profile: HDR
Priority: 1, Profile: Custom, Under 'Material' search/enter: "HeightmapAO.emat"
Priority: 17, Profile: PPAA
Priority: 4, Profile: Rain (It will start raining when you do this)
Priority: 14, Profile: SSDO
Priority: 3, Profile: UnderWater

You can then drag 8 of them onto the first one you made to group them together, and minimise the stack.


I temporarily adjusted the Rain entity to stop it from raining by changing the profile to custom, until I get weather controls to work.

Others

Unsure if needed:
Select the ProjectileSoundsManager and adjust subsonic to 60.
Click 'Add component' on the ProjectileSoundsManager and search/add 'Sound Component'
Click the plus button twice next to the Filenames array and then click '...' for each of these fields to add the following two files:
Weapons_BulletFlybys.acp
Weapons_BulletSonicCracks_Rifle.acp

Select TimeAndWeatherManagerEntity and click 'Add component'.
Search/add an 'EventHandlerManagerComponent' and in it's properties add two Event Handlers:
For the First enter 'OnDayStart' and on the second enter 'OnNightStart'
This is most likely used to send event messages to let things know when night is starting.
Click add component again and search/add an 'RplComponent'.
Set 'Streamable' to Disabled. This component is to do with servers/clients syncing the time/weather

If you want to set spawn points on your map manually, here are the prefabs needed:
-SpawnPoint_FIA
-SpawnPoint_USSR
-SpawnPoint_US
These will appear on the map as selectable spawn points at all times (cannot be removed by game master).
45 Kommentare
Desconocido 24. Feb. um 17:31 
Thank you very much for the guide, it is very good. It has helped me a lot. I am currently having a problem with the publication of my project, I would like to "test" it with friends but I am getting errors when trying to publish. Could someone help me a little? Maybe I'm just missing some detail or configuration. The error log does not say anything "400 Bad request" or "500 Internal server error" And nothing else. Could anyone help me please? Thank you.
Ph0eniX^ 14. Jan. um 16:19 
Great guide! A noob question though that I've been searching for, is it possible to somehow import the satelite map as a ground texture for the whole map?
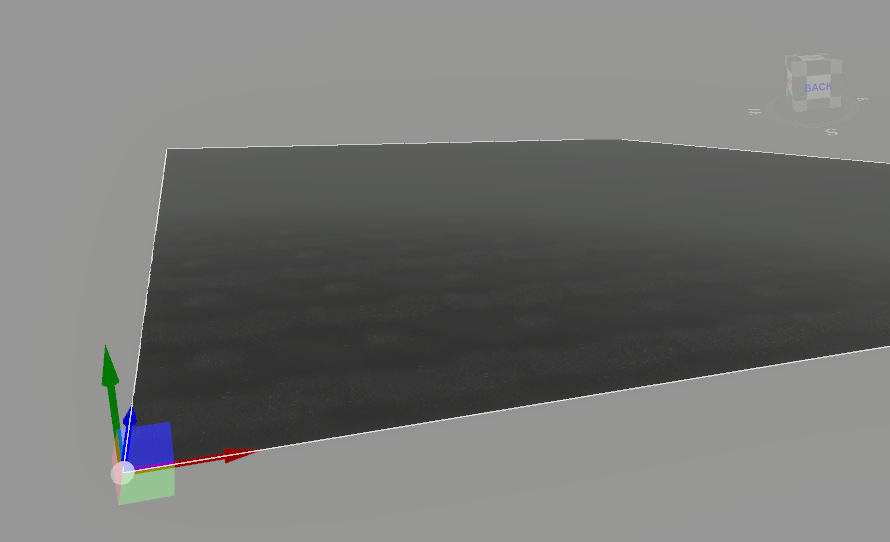
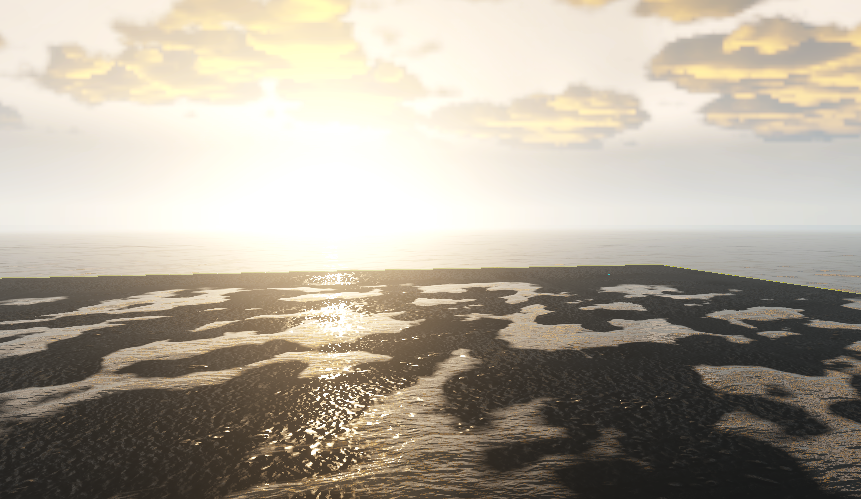
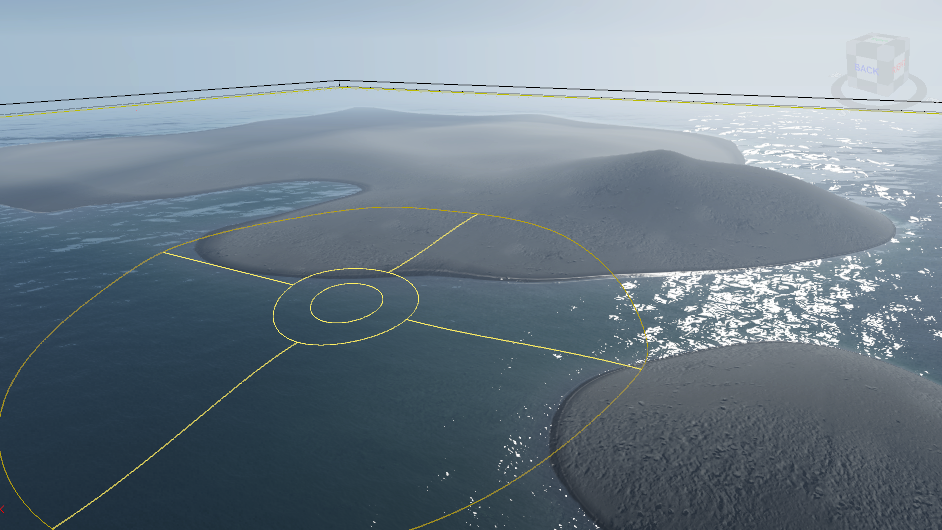
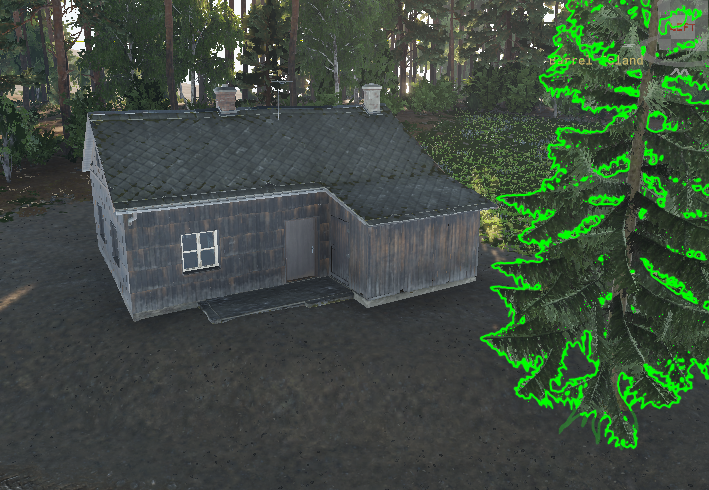
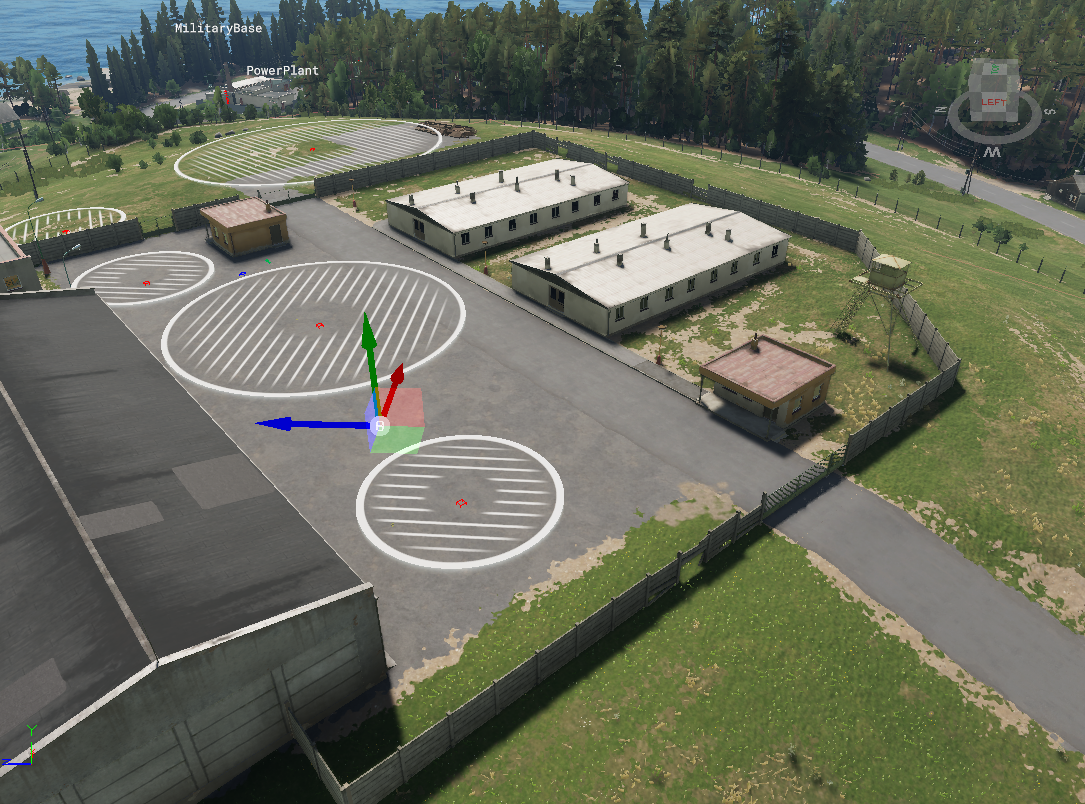
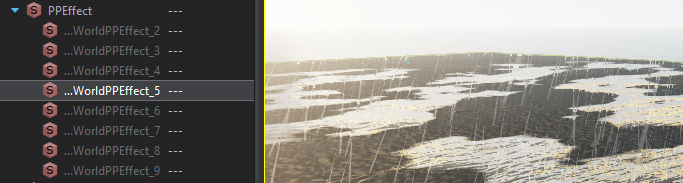
Right now, when I fly close to it it just disappears. Would be nice to have it as a ground texture reference while painting.
R@ 6. Nov. 2024 um 8:21 
Fantastic write up on an undocumented Engine. Thanks for the knowledge drop!
乂 Rogues 11. Apr. 2024 um 17:15 
Hi, Im trying to build my own custom map but I am wondering if I can install custom modded structures to use in building the map? and if I can how
Tobeh  [Autor] 24. März 2024 um 4:10 
Thanks, it was released but a patch corrupted it and I've uninstalled the game lol :steamsad:
MidnightMedic 23. März 2024 um 18:01 
Will this island ever get released as a mod on the workshop? It looks very nice
RawrtexX 12. Dez. 2023 um 4:44 
Iz Khalifa 31. Okt. 2023 um 16:03 
I found a way to get more detailed SAT maps by using composites. I posted info in workbench section if anyone is interested.
treendy 20. Aug. 2023 um 15:43 
"save world as" disabled in the 0.9.9.47 update: https://reforger.armaplatform.com/news/update-july-20
why?? :(
Мурой 18. Juli 2023 um 1:36 
Can't you save the project either?