Help Will Come Tomorrow

Help Will Come Tomorrow

29 valoraciones
Helping Hand for Help Will Come Tomorrow
Por aristeros
Description of the core mechanics, strategies that will help you to be more successful, and specific guidance for how to last until help actually comes.
5
   
Premio
Favoritos
Favorito
Quitar
A Helping Hand
This game was on my recommendations list and it looked like the sort of thing I like to play. It absolutely is, and I've played a few times. Overall, it's quite enjoyable but I notice there aren't many guides on here, let alone something approaching a walkthrough.

I found myself wanting a helping hand; not everything is intuitive and I found myself repeatedly having trouble in the mid- and late game until I learned some things others may prefer to not learn by being repeatedly killed by the renegades or a giant bear.

Note that the late game stuff provides pretty specific recommendations and the late game guides in particular have major spoilers that some players may want to avoid. The parts that describe the mechanics and the early- and mid-game are designed to make the learning curve a lot less steep and explain things the tutorial didn't explain at all, or didn't explain it in a way that I found satisfactory.

The New Game Menu and the Three Scenarios

On starting a new game, the above options appear. You have the three difficulty levels on the left--I died repeatedly before picking "Passenger" difficulty and completing the game for the first time--and can select your four starting characters.

The banners represent the different "factions" (e.g., "Socialist") which will determine in part how the characters interact with one another. If it's your first playthrough, I'd ignore these and just leave it at "random" for each. Later on, if you're going for the "story" achievement for each of the characters, or like particular characters, you can choose them. Certain characters have in-game events that can make the game easier.

At the bottom of the menu are two more options-- "chance of serious wounds on start," which can make the early game more challenging, and the "scenario," which determines the challenge that faces the survivors after a certain period of time. Achievement hunters can pick their scenario, which makes replaying the game for achievements easier.


Shots Fired: Starting Out

After the initial sequence, we have our four starting characters sitting in a circle in the snow with nearly nothing to hand, with gunshots in the background. At this point, you can choose to have the game walk you through the tutorial or not.

I'm not going to make any assumptions about your experience with the game, and will walk you through my typical "Day One" actions--and talk about a few mechanics.

Day One Actions
I have one character clear one patch of snow each, costing one of their three action points. This clears four of the five patches of snow. I don't necessarily know all of their traits yet, and some receive a morale bonus or penalty for repetition of actions, or cooperation.


Now to clear the snow from the fifth area. As actions are completed that "trigger" a trait, such as the "Focused" trait for Anna, triggered by repeating an action, the trait is revealed to the player. I know now that I can increase her morale by having her perform an action multiple times on a given day. Some traits reward particular types of construction, cooperation with another character, repairs to existing structures, etc, and are a great way to do more with the same amount of action points and materials.


Day One Projects and Upgrades
Clearing away the snow has also revealed some "food" and materials, which are automatically added to the inventory. There are three categories of items--consumables, raw materials, and tools. I have two "pairs" of characters construct the Campfire in the middle, and the Small Water Filter upgrade, both at "Solid" quality. More on that in a moment.


Our initial projects have identified that Anna and Maria are not fond of each other because of their factions--Anna is a noble and Maria is a Socialist--so the morale loss for their working together is -10 instead of -5 in this case. This is fine for now but is something to watch as events affect morale. The "Solid" quality projects, successfully completed, increase the group's opinion of those who were working on them.


I have a few materials left over, juuust enough to construct the Palisade wall at "Makeshift" quality. A full yellow bar represents the structure's "quality" or durability--which degrades over time and in response to in-game events--and this costs few resources but has very low durability. The "Makeshift" barrier decreases the group's opinion of the two characters involved. I'm more concerned with the renegades than the cold right now, or else I'd have constructed the "Seats" from the campfire's upgrades list.

With my remaining action points I click the campfire, select "actions" and "filter water." Characters with a level of thirst receive one unit of water each (not all require one today) and characters with hunger can receive either some bugs or edible moss. Welcome to Siberia.

The tutorial recommends lighting the fire then reducing it from 10% to 5% -- I expect this is to demonstrate the mechanic, as 10% has never caused a negative (or positive) event for me on the first day. It can later on, though!

Conversation Guide and Tips

Conversation Basics
For campfire conversations, you generally have two "topics" a night -- sometimes you are unable to choose two due to in-game events. Conversations can reveal character traits, affect their feelings towards one another, and increase or decrease morale. After a few playthroughs you'll become quite familiar with the results of some of the options.

Ultimately, improved relations between group members, maintaining decent individual morale, and raising group morale improve your chances of survival somewhat.

Conversation Tips:
1) Allowing a character to introduce him- or herself to the others, such as "Maria's introduction" in the conversation above, will increase others' approval of them somewhat. When in doubt, this is a good option for a conversation choice.

2) While it is not always clear what the best option is, being more diplomatic is generally better for relations between two individuals. Understanding the "faction" of the character vis-a-vis the others can help you to choose responses better-- maybe Anna is better off not insulting Grigorji's odor, and instead saying she's concerned about his health, for example.

3) Revealing all three portions of a character's "story" unlocks the achievement for that character and makes the others like that character a great deal more. This is only an option if a character's relationship with all of the others is high enough.

4) Some conversation options, such as "Let's check the northern river," propose a goal for the group, almost always tied to an expedition to a map location. Many of these yield items, but some are not worth the effort. These suggested goals can be rejected by another group member; if you're surrounded by renegades today, maybe don't go all the way to the end of the tracks tomorrow.

5) Some conversation options, such as Wadim's Socialist sermons, deliberately wade into politics. These can reduce relations between group members--but can also improve them, depending upon the faction). Wadim's rants can improve his own morale. Depending upon relationships and morale, this could be helpful, but I often avoid them until relationship levels are decent.

6) Some conversation options yield items -- a dialogue between Dimitri and Grigorji can yield up to two bottles of vodka. A piece of string, or cigarettes, are other results I've seen. The first time through, it's fairly hard to predict the results.
Construction Guide and Tips
Construction Basics:


For a structure, click on the "area" for that structure to bring up the construction menu--this enables construction of the basic structure and any upgrades. Clicking on the campfire shows me what I've built, and what I haven't, and I can choose between "solid" and "makeshift" quality items.

Above, I see what the "Makeshift" quality grill upgrade to the campfire will require in materials. "Makeshift" quality items are of much lower durability and affect others' opinion of the builder, but if I have a character whose traits refund AP or materials occasionally, or am low on materials, this might be okay. I can improve the durability of an existing structure with the "repair" action.


For a given project, like this "Solid Hardened Table" we see the required material categories. I need nine "points" of wood (such as pine needles or sticks), twelve "points" of a 'structure' material (such as stone or clay), and six stones.


Clicking on an ingredient automatically lists the items in that category and how many I would need to satisfy that item on the list. Clay provides a lot of "structure" points; stones provide less but I have more of them. I choose the clay as I don't need it for anything else at the moment. Strategically selecting ingredients is a key component to succeeding in this game -- if means fewer and shorter expeditions.


Campfire Upgrades
If you looked at my "Shots Fired - Day One Actions" portion you'll notice that the basic Campfire was the first project I recommended you consider constructing, and the Small Water Filter was the second.

From there, the earlier I can upgrade from the Small to the Large Water Filter, the better--this will save a lot of action points over the course of several days, and facilitate the middle item in the second row, the cooking pot.

The Large Water Filter requires a single unit of charcoal, and the pot requires two units of clay. These upgrades should both be completed by the third day if possible. The seats I add fairly early if I have enough pine needles, but the grill can generally wait until we're hunting and are generating way more food than our survivors can eat.

Workshop Upgrades
The Workshop allows for the construction of tools, which save on effort and materials. I don't always build one on the second day, as it requires six pieces of string. Once it's up, the first upgrade I build is the Hardened Table, which enables me to make the knife, shovel, and bow.

The knife helps with a number of projects and butchering animals, and the shovel helps digging things out from the snow and mushroom hunting on expeditions. The bow (and arrows) require feathers and string to make but are critical in felling most game. After that, the Game Flaying Point (the highlighted item on the left) enables butchering of hunted and caught animals, yielding bone, meat, and hides--no need for me to do this until I have an animal to butcher, though.

The next tier in the middle row allows for the creation of snares and traps; I honestly usually don't bother much with these--between hunting and mushrooms, food is usually covered.

Upgrading the table with metalworking tools (right hand column) allow for expanded lists of tools, to include the sack, hatchet, and clothing. The next tier for the right hand column allows for the repair of firearms. Clothing and firearms are often important to success in the late game.

Quarantine Point Upgrades
Often, the Quarantine Point is the second or third thing I build. The basic structure just enables the "gather strength" option, which recovers health and fatigue--a good way to reduce fatigue if I haven't built the shelter yet or it is full. Adding the surgical tools (right hand option) enable the production of bandages and limb braces, which takes care of many minor injuries to include the most common things that go wrong on expeditions and I do this immediately after building the basic structure if I can.

Adding the cover (middle column) increases the quality of the rest from "gather strength" to include the amount of warmth it adds, and the Caretaker's Post upgrade allows for the recovery from unconsciousness or more severe ailments. The "small washtub" third tier upgrade under the Caretaker's Post is a must for recovery from serious injuries, but I usually wait until I have one to bother.

Palisade Upgrades
For upgrades to the palisade, many of them aren't as good as they sound. "Gather brushwood" from the Marked Paths (left column) doesn't produce a whole lot, but is necessary to unlock the Camouflage upgrade past it. Camouflage makes the campfire harder for the renegades to detect, so helps you keep the fire higher--and your survivors warmer.

On the right hand side, the improved barrier increases weather resistance for the structure and protection for the group. The middle column enables snares, which is an unreliable source of small quantities of meat if the workshop has the capacity for you to butcher them--saved my bacon once or twice but usually not worth the action point.

Shelter Upgrades
Of the basic structures, the shelter is often the last one I build because I can use "gather strength" in a pinch as the quarantine point and higher levels of fatigue take about three days to build up. The left hand column upgrades, starting with Simple Cover, provides protection from the elements. The middle column allows to you rest two characters simultaneously--three if both the tier two and three upgrades are built. The right column adds blankets, increasing the warmth of resting characters--particularly useful if you don't have enough winter clothing to go around.

Ultimately, the exact order is going to depend upon available materials and your survivors' strengths and weaknesses. Build everything and you get an achievement-- "almost like home" --even though it isn't really almost like home.


Expedition Guide, Map, and Tips
.
So, this map shows what's generally where for key resources. Note that your playthrough may vary, but the above is what I've seen most of the time. However, I will occasionally be surprised to consistently not find coal where I expect it to.

One major thing not captured here: the one hex unexplored on this graphic, as well as the one to the west of it, is a place where you can find string and rope--yields can be much lower than the train cars, but this is helpful if the renegades are squatting on those hexes for several days..

Preparing for Your Expedition
Selecting survivors brings up their portrait and gives you an option to drag up to three items into their inventory each, such as weapons or tools. To start, my survivors go empty-handed, but later on I want to bring a shovel when looking for mushrooms, a hatchet when looking for lumber, etc. Ideally, you've given these survivors food and water, in case they get stuck out there, but if you're careful this won't usually be an issue.

When selecting your survivors to send on an expedition, it is preferable to send two survivors with 3 action points if possible. Fewer AP mean less flexibility and likelihood of getting what you're after, and one person have a larger chance of getting lost, lower carrying capacity, and random events that waste your time--however, send a single survivor who is "hallucinating" to catch two rare events and an achievement.

Thick forests tend to yield wood, pine needles, and mushrooms. River tiles tend to yield clay, water, stones, and the occasional fish. I try not to hit the same hex two days in a row, and repeated searches of a hex provides lower resources or even nothing at all. If you've been there before, mouseover the hex to see what you can expect--"low" or "depleted" for a resource means you're not likely to get that one thing.

Movement often does not use up any AP unless you're doing it several times. Searching often but does not always use up an AP. If you don't get an event, you can click "search" (magnifying glass) to search the hex.


As you find stuff, it appears in the top part. You can "take all" if you have the space. You have limited carrying capacity, and whatever you are bringing along takes up space, too--you may have to leave some items behind. Note that you cannot consume food or water on this screen--too bad!--so you'll instead be deciding what you'd like most to bring back to camp.

You can click "Return to Camp" with both characters at zero AP without issue. If you continue to move and search when you have no AP, however, you may be spending the night out in the wilderness, which likely means some AP lost tomorrow. I try to "save" some AP on one or both survivors if I can for rest or water filtering.


A "good haul" doesn't always mean full packs. The purpose of this journey was to get some feathers for arrows and ammunition--everything else was a bonus.

Renegades
Note that while searching in the hex adjacent to a renegade icon is usually (not always!) safe for the first 2-3 days, after that it means you're pretty likely to get an encounter. Fighting usually doesn't work, and giving up never works, so best to run off into the woods. This brings you to camp immediately with whatever you have to hand. It is possible that only one of two survivors escapes.

Note that you're almost always able to move through hexes adjacent to renegades without issue. Also, if your object is a game animal in a hex adjacent to a renegade, moving into the game animal hex generally triggers the hunting event--recommend hunting with a bow rather than a rifle in this case!
Early Game Survival Tips (Days 1-7)
Up front, survivor traits are different, found resources are different, and injuries are different each playthrough. Expect to have to adapt a bit.

Day One:
Clear away the snow. Build the campfire and small water filter at a minimum and build an additional structure or upgrade if resources allow. I've sometimes received one unit of clay from the initial clearing of snow. Check each character's welfare (portraits on the left) and if there's any hunger or thirst, give that person one unit of food or water respectively. If you give a character food or water, you may identify certain traits, like "Starveling," that mean a character is more prone to hunger or thirst.

That evening, recommended conversation choices are either related to the initial violence or "character introductions."

Day Two:
This is the first day you can send out an expedition. Do that right away. Characters with the "Observant" trait may bring in a bit more resources, but you probably won't know who that is until you take that character on an expedition! Either way, you want to bring in some "food" such as bugs or moss, some pine needles, some sticks, some metal, some string and fabric.

The most important things to bring back are one unit of coal and enough clay so that you have two units total if possible.

First Expedition
Search on the locomotive or the coal car behind it in the hopes of a piece of coal--necessary for the large water filter--and possibly some canvas. The two cars behind that on the tracks often provide more string, scrap metal, and canvas. Some spots south of the tracks occasionally yield clay--necessary for the cooking pot. With your remaining action points, search the forested areas near the camp.

Hopefully there are now enough resources to hand to produce the large water filter and one other structure at a minimum. I usually have enough resources to build the filter or the pot, not both, and one other structure. From there, filter water (you might need to do it twice if you couldn't get the coal for the large filter and also want to make soup) and ensure everyone has had enough food and water.

For campfire conversations, I'll get another introduction out of the way. I'm unlikely to take a "let's do X" at this point unless I need clay -- at which point sure, I'll hit the river.

Day Three:
If I don't have the cooking pot by day three, I send an expedition to the river for clay, and search the forests and clearings south of it for more sticks and pine needles. I want to have the workshop up with the hardened table upgrade so I can start producing tools. The knife and shovel are the first ones I'm after. Canvas and branches can yield a multitude of sticks and rags or string at the workshop, and I'll often break down these resources from here out.

By the day's end, I'll have the basic palisade up because most days I'll want a fire at 10% for cooking soup or tea. I am "saving" lower quality foods that don't expire where possible and trying to maximize the use of mushroom soup and berries.

This evening, I hope to have all the basic introductions out of the way.

Days 4-5:
Before day five is done, I want all the basic structures built in the camp. The shelter should be able to hold two sleepers, and the quarantine point should have the capability of making bandages. A workshop with basic tools helps preserve resources, and a palisade working towards having the camouflage upgrade. By now I've identified who is good at building, who I typically send on an expedition, and so on.

One of these evenings, I might be looking for a task. Sir Edward's "Betty" conversation is an easy one that has a good reward.

Days 6-7:
I've shifted to building upgrades that will help me in the mid- and late game such as the metal shop and caretaker post. The camouflage upgrade keeps the camp visibility low and enables a fire nearly every night. I douse it if the renegades are adjacent to the camp's hex. If I've bought down an animal or two I'll skin them at the game flaying point to provide meat and hides.

Mid-Game Preparation (Days 8-14)
So You Survived a Week--Now What?
By now, I generally know where different resources may be found now from several days' worth of expeditions. If I've searched in a hex before, I can see what I'll expect to find if I go there. Wait a day or two before revisiting an area, and if you need a thing, if it says "depleted," you're not likely to find it.


In the above map I've highlighted where to get a few key resources. I plan out expeditions by working around the renegades, as a search in an adjacent hex at this point will often result in an encounter and the potential for injury. Unless I'm trying to hunt an animal, I avoid those hexes, too--instead of the option to search there I'll usually get an animal encounter event. Because several upgrades require a lot of wood or pine needles specifically, if the renegades are blocking my way to the train, I'll often head that way.

The Hardened Table enables breaking down of Branches and Canvas into sticks, rags, and/or strings. Rather than rushing to build something inefficiently, it's generally better to break down the resources, even if it means building the upgrade one day later. I find I often have enough pieces of metal that breaking rocks down for stones with sharp edges isn't necessary, however.

The hardened table allows for the construction of basic tools. You should definitely have the knife and shovel by this time--take the shovel, and when you get it, the hatchet, while foraging in the woods. A bow and arrows provides the capability to hunt game, which is an excellent alternate source of food and materials in the mid game, and if you haven't made one yet, you should go ahead and do so.

Construction


So, you'll likely have several upgrades built by this time and are able to cook food, rest at least two survivors, and treat at least some injuries and illnesses. In the mid game, try to complete one upgrade per day minimum. If there's a problem to hand--such as needing an Antidote to cure a survivor--address the immediate problem, but otherwise, just try to upgrade at least one thing a day if you can.

If you don't have it yet, upgrading for the metal workshop as soon as possible is important because it's going to get colder and the basic metal workshop allows for clothing production. Upgrading to the 3rd tier "well-equipped workshop" enables the repair of broken firearms, which you'll likely need by the late game--I don't prioritize this upgrade until I've got a broken firearm from in-game events.

I've often neglected the "blankets" upgrade for the shelter and may not even have the "simple cover" at the quarantine point, but getting these in before the weather sets in is now a priority--especially because I haven't started making winter clothing for the survivors yet.

After I'm nearing the two week mark, if I haven't made it yet, I'll build the 'grill' campfire upgrade. This upgrade usually isn't necessary until you're hunting, but once you are, it's a good way to preserve meat and mushrooms before they rot--a problem you increasingly face in midgame.

Crafting
Build the metal workshop upgrade to the workshop station if you haven't yet, which unlocks the ability to create some additional tools--the hatchet increases the amount of wood expeditions bring back, and the sack increases carrying capacity a bit.

The metal workshop also enables production of clothes. I recommend you skip the other sorts of clothes and go right to "Warm Durable Clothes" for crafting, with the goal of making one for each survivor -- start with the survivors that seem to get the cold status most. I start on the first of these as soon as I've brought down a large game animal--a musk deer and some rags will provide enough material for one set, understanding that each set will also require 4 units of string.

You may have found a lower-quality set of clothes earlier from in-game events, you can pass this off to another survivor and give the survivor that's frequently cold--looking at you, Anna!--the warmest set first.

Spotted! (Spoiler)
Around the middle of this week, between the night of days ten and twelve, a renegade will discover the camp. Elect to give chase with a healthy survivor who isn't injured or suffering from an amputation and you'll probably be successful.


The survivor who runs after the renegade is likely to be injured (with a "stomach wound," requiring the "perform wound dressing" action at the quarantine point). You will receive the "Payback Time" achievement--and the set of clothes is usually welcome.

Hunting
My mid-game hunting party focuses on musk deer, which generate more meat and fur than the smaller game animals. I take two survivors, equipping one with the bow and some arrows, and giving the knife to the other. Between the deer, the event where you get a deer and a wolverine, and the incidental game animals, I rarely find myself needing snares or to fish with the harpoon.


A rifle is a must for bringing down the moose. I can prepare for this event before day 15 by searching for ammunition--I'll usually look at the train's engine, the tree stump where the renegades practice shooting just north of it, or the westernmost tracks.

The moose appears on Day 15 or later. I will usually bring the rifle *only* if I'm going for the moose when it appears at day 15 or later. Note that in addition to the rifle, you should bring two ammunition. On the first encounter, approach the animal and attempt to engage with the rifle. Most likely, you will wound it, have to give chase on the map, and engage it with the rifle a second time.

Because the moose provides a *lot* of meat and fur, it is a good way of finishing two of the four sets of clothes. You'll also get the "King of the Taiga" achievement.
Late Game General Survival Tips (Minor Spoilers)
Minor Spoilers Ahead

Save Vodka and Cigarettes
These items allow for reduction in thirst and cold (vodka) and minor morale recovery (cigarettes) and do not spoil. I balance use of these items overtime with the "rest" and "gather strength" actions to try and nurse a freezing or miserable character back to better functionality--and higher AP.

Obtaining the Rifle or Pistol
There are several ways to obtain the "broken rifle" or "broken pistol" items. The easiest way to get the broken rifle is the Sir Edward Gray "Betty" quest, which is available as a campfire conversation if he's amongst your survivors. Similarly, a broken pistol and some ammunition may be obtained from campfire conversation with Sokolov's after introductions and the level of trust has gotten to a certain level. Rare map events and The automatic "Spotted!" can also generate one.

Confrontation is Bad
You are outnumbered, and each icon represents several thugs. Even once you are decently armed, I don't recommend a direct confrontation with the renegades on the map under most circumstances. I have absolutely lost two survivors with firearms attempting this more than once--if your experience differs I'd like to hear about it!

Equip all Characters with Warm Durable Clothes
I cover starting this process in the "mid game" portion of the guide. Hunted game animals roam the map and yield hides, which can me used to make clothing; string (or canvas made into string) is another key ingredient. Lower "levels" of clothing are generally a waste of materials--if you find lower "level" clothing, give those to characters less prone to getting the cold status. If you find the weather is getting ahead of you, use a mix of vodka and "rest" or "gather strength" to keep the levels managable.

Some Foods Don't Rot
Food, particularly in the "Final Showdown" scenario, can be a real problem. While preserving a quantity of meat and mushrooms with the "grill" upgrade is a technique and helps manage food spoilage a bit, I also stockpile food items that do not expire--moss, insects, and edible roots in particular.

I avoid mold unless I have to because it induces nausea and indigestion, often with a single serving. You can give one of a type of "foraged" food like this without causing indigestion. Another non-spoiling food item is "lard," the fat harvested from meat--which satisfies a decent amount of hunger. Rather than using it for the "scambled eggs" food, I feed survivors a single raw egg, similar to moss.

Rotten Food Is Also Edible
Spoiled meals and eggs will turn into "rotten food," which will inflict negative statuses on a character such as "nausea" and/or "indigestion," just like eating multiple of "foraged" food like insects. I keep a bit on hand anyway; if a character otherwise has no negative statuses he or she can eat the rot and still not lose AP if the stomach upset is the only issue.

Keep Building Durability High
In the late game, certain events can damage or destroy buildings, and their durability is key to getting it through other events while minimizing the chance of the worst outcome such as very serious injury. Repair them regularly, and if you have a character with the trait that allows for repairs to be done with the occasional refunded AP or bit of materials, so much the better.

If You Have an Extra Action Point...
There is always a use for that action point. Are the buildings are in good repair? No one needs rest? Okay, consider using the "filter water" action as the resource doesn't spoil and you'll need it eventually--my last action point often goes to making a bit of water to finish the day, or to set me up for tomorrow. If you don't need water, consider making a bandage, as someone will need one and it potentially saves you a "wound dressing" action later depending upon the injury. Only if all those things are satisfied should you consider using "fraternize" at the campfire to unlock character background stories (unless you really want that acheivement).
Late Game Guide: Shatun Scenario (Major Spoilers)
Scenario Set-up
Prior to the two week mark, I like to have the Workshop with Metal Shop complete, a Quarantine Point capable of making Antidote, and the Snares upgrade on the Palisade. A rifle, some ammunition, and a dead animal that yields three pieces of meat are also useful to have.

In this scenario, the renegades get more aggressive up to the two week mark or so, and then move to the southeastern hexes on the map. It's safe to go resource-hunting on expeditions for a few days.

Day 17 Event
On Day 17, you have a nighttime encounter with an injured renegade, who explains that evil bears are evil. You can ask questions until he dies to not-deal-with-him. You'll receive some items from the dead renegade. Survivor conversation reveals the Grand Plan -- use Leaf Springs from the train wreckage and the Metal Shop tools at the Workshop to build three traps at spots the bear frequents.

Once the renegades are off the map, have your fire level as high as you like at night, and it'll generally be pretty cold, so this is a welcome change.

After this point, there aren't any more prey animals for you to hunt wandering the map, though.
The other downside is that the "Shatun Meter" appears in the upper left, and progressively fills up during expeditions until you encounter the bear, which will kill at least one member of the expedition--I've lost one or both survivors, to include when one was armed with a rifle and ammo and the other had a bow and arrows.

The Sickness
Another complication is that after the Day 17 renegade encounter, one survivor comes down with a disease. The tooltip explains how to delay death with medicine, but your best bet is to create an Antidote with one each of water and Golden Root -- Golden Root is obtained on the western end of the map.

Preparing the Traps

Send an expedition south to the marked train wreck spots on the map out to get five Leaf Springs -- the maximum possible. It may require two separate expeditions to do successfully. Regardless, there is a bug where the "icons" for where the Leaf Springs can be found can disappear after you get the first one.

For the bear traps, in addition to the Leaf Springs, you'll require sharp items such as sheet metal, and a piece of meat. The metal, if you don't have it, you'll likely pick up while looking for the Leaf Springs. The meat can be either fresh meat from a slaughtered animal or smoked meat preserved by the grill.

There's an event while looting Leaf Springs at the train wreckage where you can choose to use the dead in lieu of animal meat. If you have no animal meat after the game disappears, you can "check snares" at the Palisade to have a chance get a small animal once a day. You have several days to get this done, so you needn't resort to human flesh unless you expect to be pressed for time.

Emplacing the Traps

At this point, this is where it gets challenging, because you'd normally have to wander the map looking for where to place the traps--as the meter fills up, with deadly consequences--potentially losing critical equipment if your expedition becomes bear chow. Going to the spot where an expedition is killed off doesn't necessarily get you all the items back, either.

I lost in this scenario twice--once having lost all my traps because I was carrying them all at once, and once losing two separate expeditions wandering around looking for the correct places.


Note that hitting the right "spot" on the map starts an event, and marks that spot on the map once the trap is placed with a diamond that has a trap icon. Above is a map with all three traps emplaced.

Send a two-person expedition with at most two traps. You can usually emplace one northeast of the camp at the nearest spot (Fell Pine), and the other at the far east of the map (Stone Embankment) in one trip. "Return to camp" when the meter gets nearly full or after the two traps are set.

Have a separate expedition move west to the third spot (Felling Furrows), and if you're low on ammo, move south to the tracks to try and obtain some before returning.

Finishing the Shatun Scenario
After a few days, your survivors will hear the howl of the bear, who bumbled into one of your clever traps. Send an expedition armed with the rifle and ammunition. You receive word that the bear is injured and if all goes well the meter disappears.

From here, survive another few days, keeping morale and Palisade condition high, and cure the plagued survivor with an Antidote if you haven't yet. For the final confrontation sequence that occurs at the end of Day 25, there are -no choices to make here, it is about who and what you have to hand. I've read in forums that a Harpoon is important, but in my successful playthrough, it refers to what sounds like a spear or harpoon even though I didn't have one (I had the knife and the hatchet, though).

Note that failing to emplace all three traps and check the one that "worked" results in automatic failure and horrible death no matter how well-armed and prepared you group is--I've died with a bow, two rifles, a pistol, and max durability on my structures.
Late Game Guide: Wind of the Damned Scenario (Major Spoilers)
Opener
You'll have to contend with the renegades, who'll get progressively more aggressive over the second week. In my playthrough, they liked to hang out on or adjacent to the train tiles with string and canvas, making clothing production difficult. On the few days I could have a fire, I burned a lot of AP smoking meat or preparing stuffed roasts from animals hunted north of the camp.

If you know you're in this scenario because you chose it, before Day 17, I try to have the workshop with the ability to make clothes, the quarantine point with the surgical tools, and have a bow and arrows. To improve your situation going in, anything the makes the camp warmer for your survivors helps -- building the seats, the cover and blankets for the shelter, and the upgrade to the palisade that keeps the wind out.

Try to have a bandage, a limb brace, and two units of "high-calorie fuel" such as coal by Day 17 if you can.

Cold Enough For Ya?

On Day 17, you'll see a survivor make reference to the weather, and another explain the phenomenon. This is your signal that you're locked into the "Wind of the Damned" scenario.
You'll not have to be contending with the renegades anymore, so move quickly to recover the resources to build the upgrades you want.

I recommend the following upgrades to structures as soon as you can build them: quarantine point's caretaker post and small washtub, and the shelter with blankets and the ability for two survivors to rest at once.

Mitigating Weather Effects
Warm Durable Clothes for all survivors is the single most important thing but may take you several days to achieve; hunting animals with the bow is the easiest way to do this. Because I had hunted more animals than I needed prior to Day 17, I just skinned the "oldest" corpses before they spoiled. Musk deer are particularly good, and you can supplement with rags, but save your canvas to turn into rags or string as needed.

Once I had a few sets of Warm Durable Clothes, I rotated the survivor who wore it and used the "rest" and "gather strength" actions to increase warmth for those who didn't have it. Remember that expeditions expose your survivors to the cold--give them the best available clothing for the duration and try to keep expeditions short and return to camp with some AP so they can rest and regain some warmth. The chance of becoming lost seems to go up a great deal quicker than it did before -- I brought the torch to try and keep this under control.

For the survivors not hunting for materials, try to be repairing one structure a day to keep as many over 75% as possible -- overnight weather events will cover snow and damage structures. A shovel will come in handy after Day 17 because it may save AP as you clear snow away from buildings -- this will potentially happen several times.

Falling Down
On the night of Day 20, there's an unavoidable event where one survivor is seriously injured by a weather-caused collapse--the lost foot will prevent leaving the camp on expeditions. This will happen regardless of the condition of your buildings.


On the following day, you'll see that the injured survivor, in addition to the lost foot, also is bleeding and has a necrotic hand. Treat the necrotic hand first; this will require the caretaker post and small washbasin at the quarantine point and use 3 AP. If you made a bandage beforehand, you can use it to stop the bleeding. You'll notice the injured survivor's appearance changes and the chance of double AP loss for actions. If you have fewer than four survivors, this can really complicate sending teams out.


Finishing the Purga

On the night of Day 22, campfire dialogue reveals a concern about signaling to the other stations via large signal fires at either end of the tracks.. You can see in the graphic that it requires wood x5, structure x3, and high-calorie fuel x1.

Move the items into the inventory and use a pair of survivors for the expeditions. The game is slightly picky about what qualifies so try to make the most conventional choices. The game accepted split wood and logs, but did not accept tree bark, for example.

For teams that are going out on expeditions, understand that loss chances are higher and chances of injury seem greater, as well I was unable to make it with a solo survivor without getting lost overnight and used two limb braces and a bandage stumbling around in the snow on a playthrough.


The above image has a "completed" signal fire on the left and a group heading towards the other spot on the right. After emplacing one fire the expedition automatically returns to camp, but you can definitely place both in the same day.

From here, you just stay alive until the night of Day 25. While there was a message about returning to maintain the fire, sending a group back a day or two later didn't do anything.
Late Game Guide: Final Showdown Scenario (Major Spoilers)
Background and Preparation
This is the hardest of the three scenarios in my view as it is the one that relies the most upon luck. You m

If you chose this scenario, and know what you're heading into, a good way to prepare is to make the bow and arrows and hunt game to get meat and hides. The meat, and any mushrooms, you can smoke on the grill so it is preserved indefinitely--during this scenario you will be over a week without a fire, so enough preserved food to last your survivors until then makes this far, far easier. If you cannot manage to make enough for all survivors and all days in advance, you can supplement with foraged foods, but over time this will have a negative morale impact.

Having a firearm and some ammunition is also important in success for several of the ambushes. While you'll want warm durable clothes for Day 17 and later, having a great deal of string and hides is usually sufficient--you can make the clothes after.


Day 16
On the night of Day 16, a party of renegades stumbles on the camp and the survivors put out the fire in a hurry. If you didn't know before, you know now you're in the "Final Showdown" scenario. You'll now have renegades on hexes adjacent to the camp and fueling the fire is no longer an option.


The survivors suggest a decoy fire, which is constructed out of any sort of fuel--even bark will do--at the workshop. I recommend doing this immediately--it may involve working your way around the renegades--because it enables future ambushes.


You'll notice a "renegade" icon representing the ones that have died, to include those who have died in events (you may have one "kill" for events prior to Day 17).

Additional ideas for ambushes will come up in campfire conversation over subsequent days until you have several. I've had a max of five going at once. For these, icons appear on the map, and navigate a pair of survivors towards the icon. These characters should have warm durable clothes because they're walking around outside--rotate who's wearing what if you don't have enough for everyone yet.

I recommend carrying a "decoy fire" item as well, because there are unmarked ambush sites. For the ambush in the woods in the northwest near the river, bring a rope, otherwise you'll have to make two trips!


The following day after emplacing the ambush/decoy, you may see a renegade icon on your trapped ambush site. Time to go hunting. I equip two survivors as best I can, one with a rifle and some ammunition, the other with a pistol and some ammunition, and a knife if I have one. Having experimented with several of the ambush events, some ambushes that fail with the pistol succeed with the rifle.

Super important: When equipping your party, you can use the left shift key to "split" the stack of ammunition.

The ambush entails sending your party to the "trapped" ambush hex. This will bring up an event. There are about ten different events, and many entail random number generated chances of success. Where you have a clear advantage--the renegade is asleep (never failed with rifle), chasing after a deer without a rifle (never failed with rifle), or an inexperienced youth (failed about 1 in 4 with rifle)--you should press the advantage.

Success means loot, such as more ammo, weapons and clothing, failure means injury or death. I typically skip stripping the bodies, but your mileage may vary. Note that I've seen success or failure on events regardless of the characters involved, but character traits seem to play a role. Moving on a non-ambush renegade icon almost always results in death-- I've never had success in the "lone hunter" event, and often my group is instantly killed.

Super important: If you die horribly, after the event, you can just quit to menu and select "continue." Is this save-scumming? Yes. Did I do it? Also yes.

Around Day 20 an expedition will encounter a dying renegade who'll provide the location of the renegades' base, a cave in the southeast corner of the map. This adds a quest "Into the Lion's Den." This is worth talking about in detail because it's easy to get right.


For the cave, you have two options. Searching for the entrance always moves you to the next choice. Looking around for guards typically spends time and moves you to the next choice. From here, you can kill a renegade "with a weapon" (presuming silently) or throw rocks. Don't throw rocks.

You can stumble upon sleeping renegades--I've killed as many as two in here--which I think is based on random chance.

The Final Countdown


On Day 23, a survivor expresses concern that the next train will come any day now. From here, success seems to be based on high morale, high health, and having enough survivors. There are often plenty of renegades left on the map and it seems hopeless, but it seems like your best bet is to hole up unless you have an easy ambush.

I've prepared frantically and had knives for everyone, two rifles, two pistols, two bows, bandages and power tonics ready with six renegades dead, and I've had three renegades dead with fewer than four survivors, and had the "good" ending under either circumstance.


Conclusion
This is my second guide and I'm open to feedback/comments. Was I off on something? That's a great reason to "comment," too. Feel free to give it a thumbs up if you found it at all useful.

If I get enough internet points, I will fulfill my life's ambition of getting enough internet points, but won't quit my day job.
4 comentarios
Angle Droit 5 JUN 2023 a las 3:15 p. m. 
Awesome guide ! I mostly enjoyed it on the late game, as I was struggling against the Shatun (Did I press exit to menu when someone died ? Maybe..)

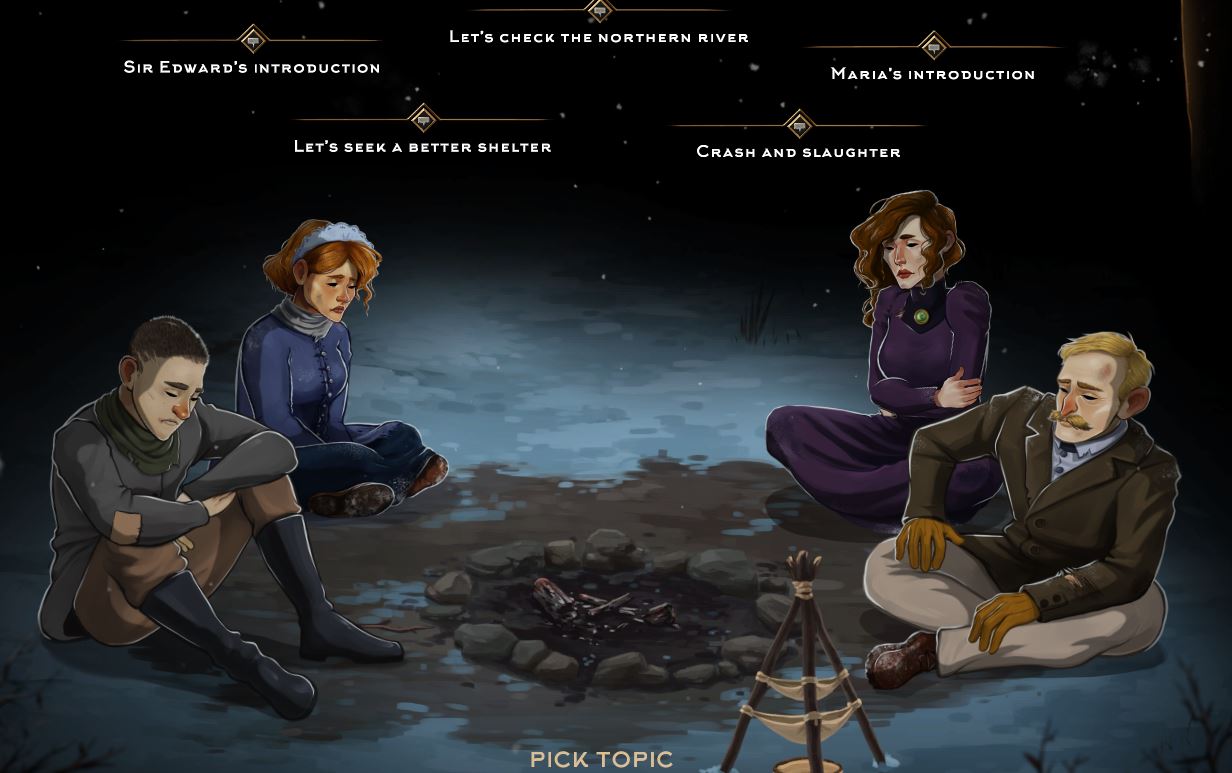
For the encounters, I noted that in some scenario, Maria dreamed about her brother.
It leads to a quest to find him.

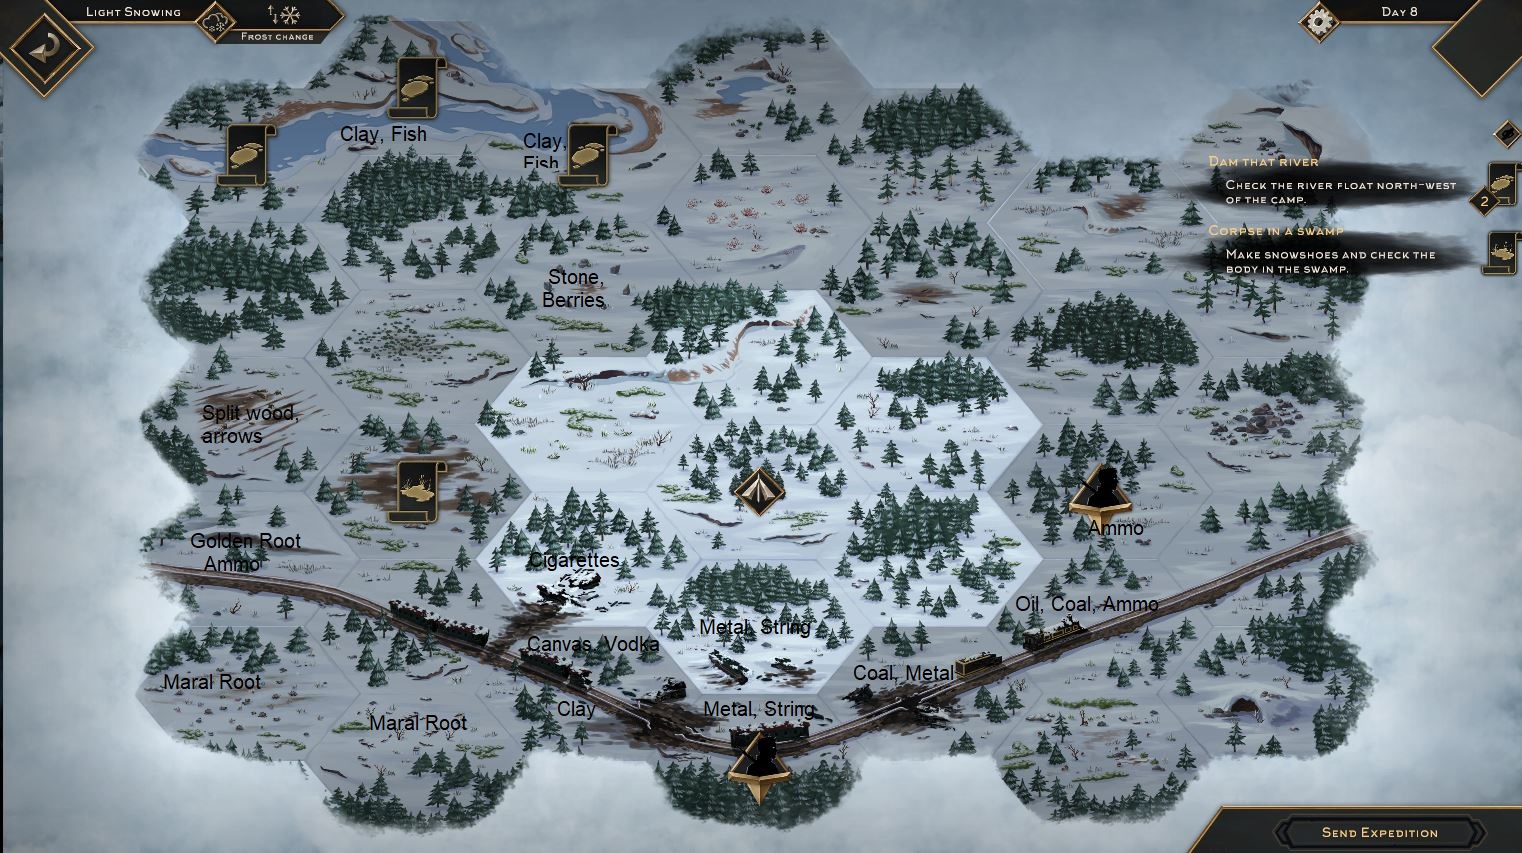
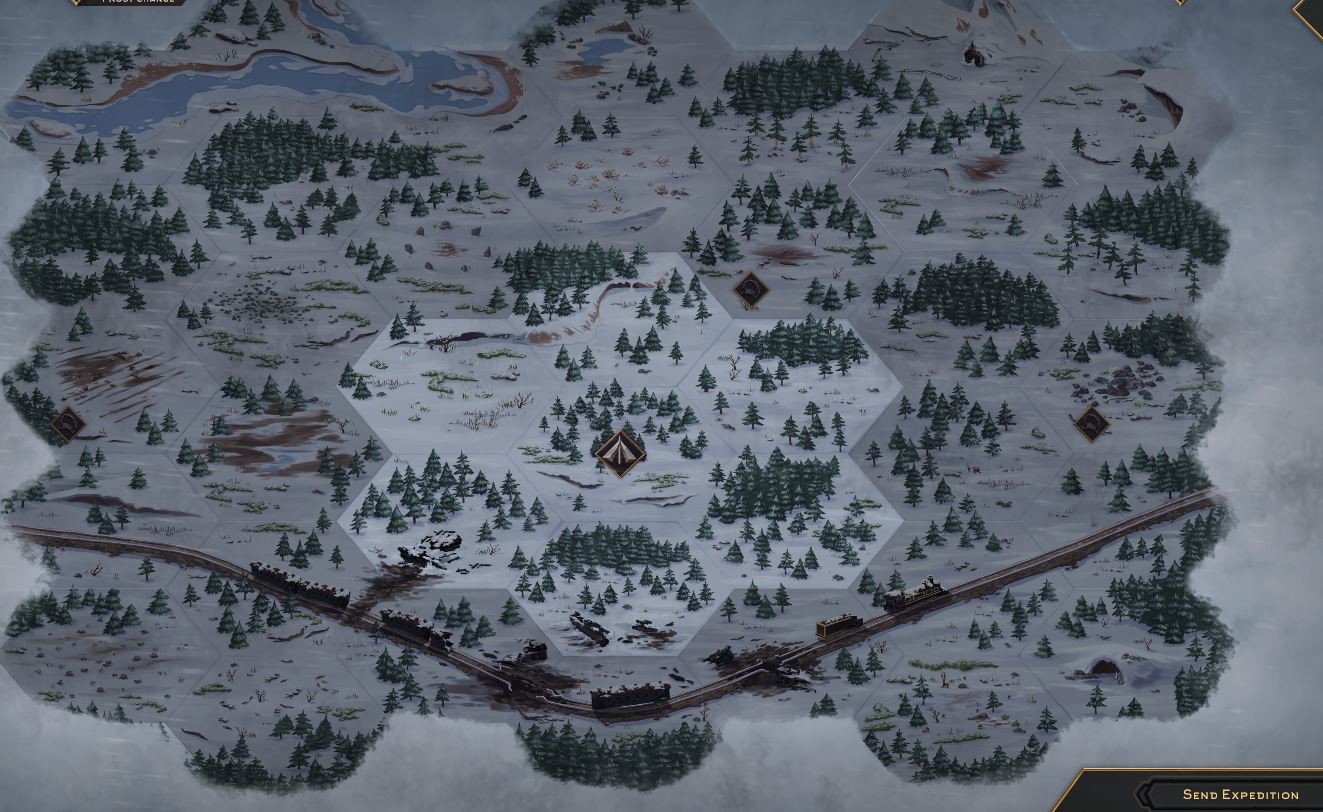
In one scenario, she wrote stuff on the train during expedition.
In another she asks to go alone check the train

And in both, I arrived late in their camp, the next expedition found their traces pisted by thugs, leading to :
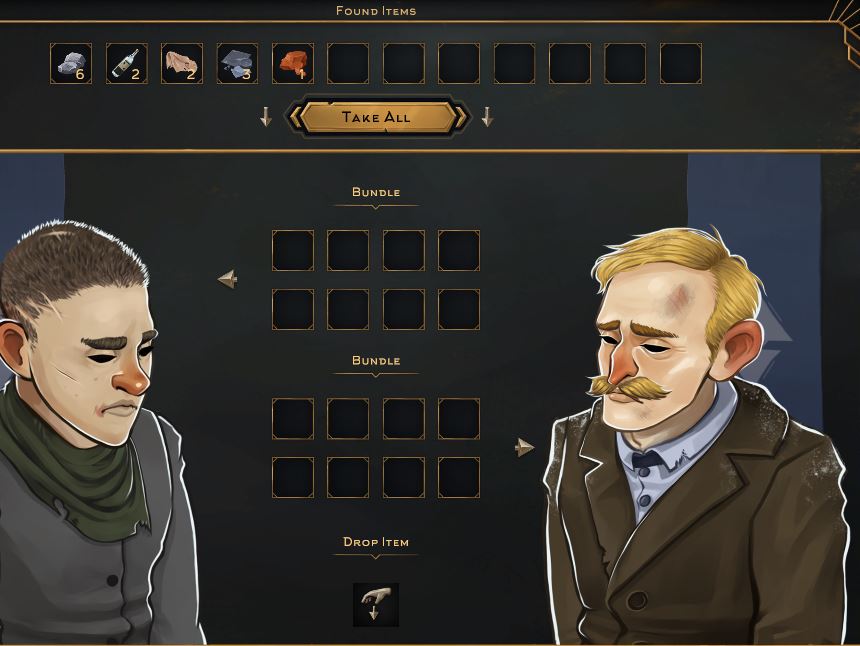
- One thug dead by big cats in one game
- Or a lady joining us

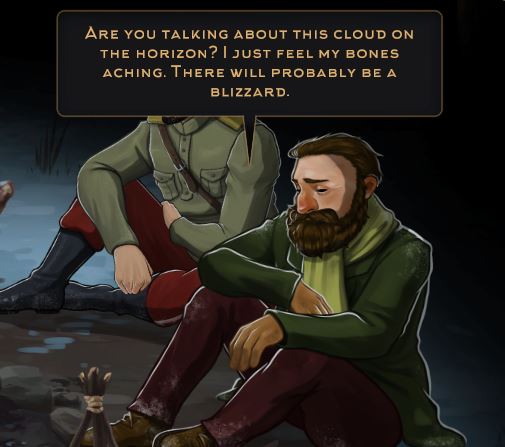
Lastly another expedition found pietro cold body.. Poor soul and poor sister I had to tell her..
aristeros  [autor] 8 JUL 2022 a las 8:00 p. m. 
So, good comment by Jay_Dick about increased detail on encounters. A real walkthrough would totally do this. I will consider adding specific encounters (which depend upon the scenario for the most part!) to provide this as it doesn't currently exist anywhere I've seen.
DiamondTear 4 JUL 2022 a las 12:52 p. m. 
Good job with the guide!
Jay_Dick 19 JUN 2022 a las 3:41 p. m. 
Found it very useful
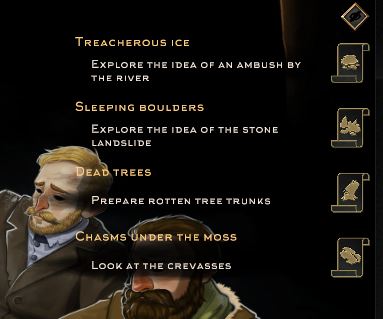
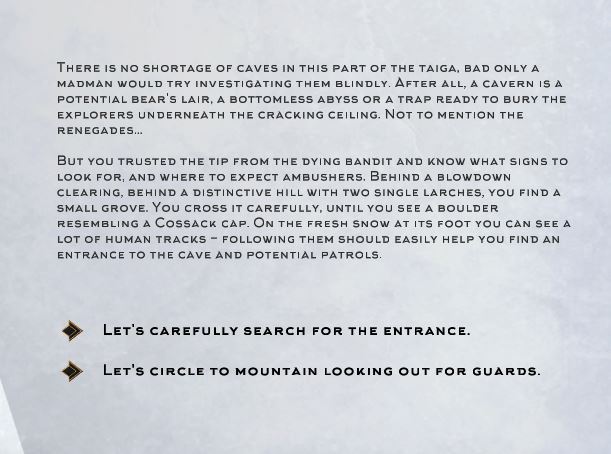
Would appreciate more details on different encounters