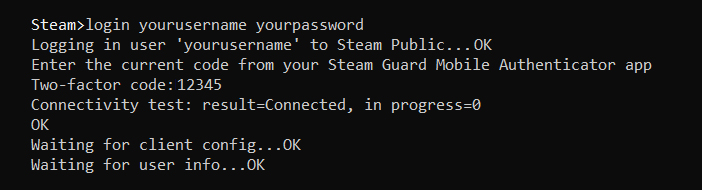
Police Simulator: Patrol Officers

Police Simulator: Patrol Officers

95 ratings
🛠️ Modding Guide: How to create, test and upload your mods!
By wladi | astragon and 2 collaborators
Starting with The Holding Cells Update, Police Simulator: Patrol Officers will support some basic modding. This includes the customization of names, uniforms, and cars.

In this guide, we will explain how you create, upload and download your mods for Police Simulator: Patrol Officers!
3
2
2
2
   
Award
Favorite
Favorited
Unfavorite
Example Mods and Modding Kit

Welcome to our Modding Guide!

To help you kickstart your modding career, we've put together some example mods and a Modding Kit.

Check out the Example Mods Collection in the Steam Workshop.

You should also take a look at the Modding Kit that includes:
  • 3D Models for police officer uniforms and the police cars (in FBX format)
  • Textures for police officer uniforms and the police cars
  • Examples for ELS Sounds and Lights
Taking a closer look at the content of the example mods should help you in creating your own ones. After you have downloaded the mods, you can find their files here:

C:\Program Files (x86)\Steam\steamapps\workshop\content\997010

You will probably wonder what the different numbers mean when looking at the folders. Well, these are just the workshop numbers with the following content:
  • 2780493511: Different Police Officer Uniforms
  • 2780816249: Different Police Officer Names
  • 2780823816: Different Patrol Car Skins
  • 2809303016: Different Siren Sounds
  • 2810388930: Different Lights
  • 2782471905: Modding Kit

In addition, the community has already created dozens and dozens of mods! You can take a look at them for more inspiration.

One more thing: If you want to have a visual guide, we've also created one for you! Take a look here:
How to create a Modpack
Your mod is ready? Now you need to create modpack! To create one, you have to provide the game with a certain file: “manifest.json”. Every modpack should be located in its own dedicated folder to avoid naming conflicts with other modpacks.

First, you have to create a dedicated mod folder (as a placeholder, we'll call it <ModDir> for now). Create a text file inside your mod folder and name it manifest.json (make sure the extension is actually a .json file and not .json.txt or the like. Enable showing file extensions[stonehearth.github.io] so you can see the actual format of the file).

Example:
<ModDir>/FancyMod/manifest.json <ModDir>/AnotherModButNotAsFancy/manifest.json

This manifest should contain metadata about the mod pack itself, like who created it, the description, the version etc. It also contains a definition of all features of the game that this mod pack wants to modify.

The folder is set up, the manifest.json has been created - now, open it with the text editor of your choice, and let's continue by filling everything in...

Let’s take a look at an example manifest.json:

{ "ModPackAuthor": "Aesir Interactive", "ModPackUrl": "https://aesir-interactive.com", "ModPackName": "Sabrina Watson Officer Pack", "ModPackDescription": "Changes the uniforms of female officers and the name of one officer.", "ModPackVersion": "1.0.0", "Overrides": [ { "OverrideKey": "FEMALE1_OFFICER_NAME", "OverrideValue": "Sabrina Watson" }, { "OverrideKey": "FEMALE_OFFICER_UNIFORM_TEX_DIFFUSE", "OverrideValue": "%MODPACK%/PoliceUniform_Female /T_PoliceOfficer_Female_PoliceUniform_D.png" }, { "OverrideKey": "FEMALE_OFFICER_UNIFORM_TEX_NORMAL", "OverrideValue": "%MODPACK%/PoliceUniform_Female /T_PoliceOfficer_Female_PoliceUniform_N.png" }, { "OverrideKey": "FEMALE_OFFICER_UNIFORM_TEX_ORM", "OverrideValue": "%MODPACK%/PoliceUniform_Female /T_PoliceOfficer_Female_PoliceUniform_ORM.png" }, ] }

The ModPackName field is mandatory. It will be used by the modding system to identify the mods defined in this pack. Try to give it a unique name that doesn’t conflict with other mod packs players might have installed.

The other fields are optional, but they provide the players using this mod with useful information.
What are Overrides?
To create an override mod in your modpack, you first have to be aware of the things you can override in the game. All of these features will be identifyable via an “OverrideKey”. You can find a list of all available keys in the How to create Override Mods section of this guide.

Overrides always consist of a key and value. The key is used to tell the modding system what to override, the value is used to tell it what to override it with. So for example the OverrideKey "FEMALE1_OFFICER_NAME" is used to change the name of one of the officers. The
OverrideValue is replacing the default name of that officer when the mod is loaded.

Texture overrides must provide the texture as JPG/PNG/BMP file located in a subdirectory relative to the manifest.json. The OverrideValue is then used to tell the modding system where to look for that file, so it must contain the filepath relative to the manifest.json. These relative paths must always start with “%MODPACK%" as seen in the example above.

All additional files (like override textures) must be provided together with the manifest.json for other users. Just giving them the manifest.json without the referenced files will not work for them.
How to create Override Mods

As explained above, you need to provide the game with an identifier of the feature that you want to override.

Important: Override Mods are only local and not synchronized through the network. In multiplayer, your partner will not see your overridden content!

Here is a list of all supported override keys:

Police Officer Names

OverrideKey
OverrideValue Type & Example
Description
MALE1_OFFICER_NAME
"OverrideValue": "James Ford"
Replaces the name of officer Frank Miller
MALE2_OFFICER_NAME
"OverrideValue": "Hugo Reyes"
Replaces the name of officer Danny Lopez
MALE3_OFFICER_NAME
"OverrideValue": "Jonathan Locke"
Replaces the name of officer Noah J. Jones
MALE4_OFFICER_NAME
"OverrideValue": "Sin-Soo Kwon"
Replaces the name of officer Aroon Saeli
FEMALE1_OFFICER_NAME
"OverrideValue": "Claire Littleton"
Replaces the name of officer Emma Davis
FEMALE2_OFFICER_NAME
"OverrideValue": "Ana Cortez"
Replaces the name of officer Mia Torres
FEMALE3_OFFICER_NAME
"OverrideValue": "Naomi Dorrit"
Replaces the name of officer Olivia Smith
FEMALE4_OFFICER_NAME
"OverrideValue": "Sun-Hwa Kwon"
Replaces the name of officer Ashley Cheng

Police Officer Uniform Textures

Please check the README inside the ExampleMod folder from either the modkit or the example mod.
Override Names for Patrol Cars, #1
Police Car Body Textures

OverrideKey
OverrideValue Type & Example
Description
POLICE_CAR1_BODY_TEX_DIFFUSE
"OverrideValue": "%MODPACK%
/PoliceCar_Cruiser/T_PoliceCar_
Cruiser_Paint_D.png"
Replaces the diffuse texture of the Cruiser
POLICE_CAR1_BODY_TEX_NORMAL
"OverrideValue": "%MODPACK%
/PoliceCar_Cruiser/T_PoliceCar_
Cruiser_Paint_N.png"
Replaces the normalmap texture of the Cruiser
POLICE_CAR1_BODY_TEX_RMA
"OverrideValue": "%MODPACK%
/PoliceCar_Cruiser/T_PoliceCar_
Cruiser_Paint_RMA.png"
Replaces the roughness/metallic/ambient-occlusion
texture of the Cruiser
POLICE_CAR2_BODY_TEX_DIFFUSE
"OverrideValue": "%MODPACK%
/PoliceCar_Interceptor/T_PoliceCar_
Interceptor_CarPaint_D.png"
Replaces the diffuse texture of the Panther Z
POLICE_CAR2_BODY_TEX_NORMAL
"OverrideValue": "%MODPACK%
/PoliceCar_Interceptor/T_PoliceCar_
Interceptor_CarPaint_N.png"
Replaces the normalmap texture of the Panther Z
POLICE_CAR2_BODY_TEX_RMA
"OverrideValue": "%MODPACK%
/PoliceCar_Interceptor/T_PoliceCar_
Interceptor_CarPaint_RMA.png"
Replaces the roughness/metallic/ambient-occlusion
texture of the Panther Z
POLICE_CAR3_BODY_TEX_DIFFUSE
"OverrideValue": "%MODPACK%
/PoliceCar_Utility/T_PoliceCar_
Utility_CarPaint_D.png"
Replaces the diffuse texture of the Gladiator 6
POLICE_CAR3_BODY_TEX_NORMAL
"OverrideValue": "%MODPACK%
/PoliceCar_Utility/T_PoliceCar_
Utility_CarPaint_N.png"
Replaces the normalmap texture of the Gladiator 6
POLICE_CAR3_BODY_TEX_RMA
"OverrideValue": "%MODPACK%
/PoliceCar_Utility/T_PoliceCar_
Utility_CarPaint_RMA.png"
Replaces the roughness/metallic/ambient-occlusion
texture of the Gladiator 6
POLICE_CAR4_BODY_TEX_DIFFUSE
"OverrideValue": "%MODPACK%
/PoliceCar_UTV/T_PoliceCar_
UTV_CarPaint_D.png"
Replaces the diffuse texture of the UTV
POLICE_CAR4_BODY_TEX_NORMAL
"OverrideValue": "%MODPACK%
/PoliceCar_UTV/T_PoliceCar_
UTV_CarPaint_N.png"
Replaces the normalmap texture of the UTV
POLICE_CAR4_BODY_TEX_RMA
"OverrideValue": "%MODPACK%
/PoliceCar_UTV/T_PoliceCar_
UTV_CarPaint_RMA.png"
Replaces the roughness/metallic/ambient-occlusion
texture of the UTV
POLICE_CAR5_BODY_TEX_DIFFUSE
"OverrideValue": "%MODPACK%
/PoliceCar_CPV/T_PoliceCar_
Compact_CarPaint_D.png"
Replaces the diffuse texture of the CPV
POLICE_CAR5_BODY_TEX_NORMAL
"OverrideValue": "%MODPACK%
/PoliceCar_CPV/T_PoliceCar_
Compact_CarPaint_N.png"
Replaces the normalmap texture of the CPV
POLICE_CAR5_BODY_TEX_RMA
"OverrideValue": "%MODPACK%
/PoliceCar_CPV/T_PoliceCar_
Compact_CarPaint_RMA.png"
Replaces the roughness/metallic/ambient-occlusion
texture of the CPV
Override Names for Patrol Cars, #2
POLICE_CAR6_BODY_TEX_DIFFUSE
"OverrideValue": "%MODPACK%
/PoliceCar_GPV/T_PoliceCar_
GPV_CarPaint_D.png"
Replaces the diffuse texture of the GPV
POLICE_CAR6_BODY_TEX_NORMAL
"OverrideValue": "%MODPACK%
/PoliceCar_GPV/T_PoliceCar_
GPV_CarPaint_N.png"
Replaces the normalmap texture of the GPV
POLICE_CAR6_BODY_TEX_RMA
"OverrideValue": "%MODPACK%
/PoliceCar_GPV/T_PoliceCar_
GPV_CarPaint_RMA.png"
Replaces the roughness/metallic/ambient-occlusion
texture of the GPV
POLICE_CAR7_BODY_TEX_DIFFUSE
"OverrideValue": "%MODPACK%
/PoliceCar_MPV/T_PoliceCar_
Compact_CarPaint_D.png"
Replaces the diffuse texture of the MPV
POLICE_CAR7_BODY_TEX_NORMAL
"OverrideValue": "%MODPACK%
/PoliceCar_MPV/T_PoliceCar_
Compact_CarPaint_N.png"
Replaces the normalmap texture of the MPV
POLICE_CAR7_BODY_TEX_RMA
"OverrideValue": "%MODPACK%
/PoliceCar_MPV/T_PoliceCar_
Compact_CarPaint_RMA.png"
Replaces the roughness/metallic/ambient-occlusion
texture of the MPV
POLICE_CAR8_BODY_TEX_DIFFUSE
"OverrideValue": "%MODPACK%
/PoliceCar_WPV/T_PoliceCar_
WPV_CarPaint_D.png"
Replaces the diffuse texture of the WPV
POLICE_CAR8_BODY_TEX_NORMAL
"OverrideValue": "%MODPACK%
/PoliceCar_WPV/T_PoliceCar_
WPV_CarPaint_N.png"
Replaces the normalmap texture of the WPV
POLICE_CAR8_BODY_TEX_RMA
"OverrideValue": "%MODPACK%
/PoliceCar_WPV/T_PoliceCar_
WPV_CarPaint_RMA.png"
Replaces the roughness/metallic/ambient-occlusion
texture of the WPV
POLICE_CAR9_BODY_TEX_DIFFUSE
"OverrideValue": "%MODPACK%
/PoliceCar_IPV/T_PoliceCar_
IPV_CarPaint_D.png"
Replaces the diffuse texture of the IPV
POLICE_CAR9_BODY_TEX_NORMAL
"OverrideValue": "%MODPACK%
/PoliceCar_IPV/T_PoliceCar_
IPV_CarPaint_N.png"
Replaces the normalmap texture of the IPV
POLICE_CAR9_BODY_TEX_RMA
"OverrideValue": "%MODPACK%
/PoliceCar_IPV/T_PoliceCar_
IPV_CarPaint_RMA.png"
Replaces the roughness/metallic/ambient-occlusion
texture of the IPV
POLICE_CAR10_BODY_TEX_DIFFUSE
"OverrideValue": "%MODPACK%
/PoliceCar_SPV/T_PoliceCar_
SPV_CarPaint_D.png"
Replaces the diffuse texture of the SPV
POLICE_CAR10_BODY_TEX_NORMAL
"OverrideValue": "%MODPACK%
/PoliceCar_SPV/T_PoliceCar_
SPV_CarPaint_N.png"
Replaces the normalmap texture of the SPV
POLICE_CAR10_BODY_TEX_RMA
"OverrideValue": "%MODPACK%
/PoliceCar_SPV/T_PoliceCar_
SPV_CarPaint_RMA.png"
Replaces the roughness/metallic/ambient-occlusion
texture of the SPV
POLICE_CAR11_BODY_TEX_DIFFUSE
"OverrideValue": "%MODPACK%
/PoliceCar_EPV/T_PoliceCar_
EPV_CarPaint_D.png"
Replaces the diffuse texture of the EPV
POLICE_CAR11_BODY_TEX_NORMAL
"OverrideValue": "%MODPACK%
/PoliceCar_EPV/T_PoliceCar_
EPV_CarPaint_N.png"
Replaces the normalmap texture of the EPV
POLICE_CAR11_BODY_TEX_RMA
"OverrideValue": "%MODPACK%
/PoliceCar_EPV/T_PoliceCar_
EPV_CarPaint_RMA.png"
Replaces the roughness/metallic/ambient-occlusion
texture of the EPV
POLICE_CAR12_BODY_TEX_DIFFUSE
"OverrideValue": "%MODPACK%
/PoliceCar_FPV/T_PoliceCar_
FPV_CarPaint_D.png"
Replaces the diffuse texture of the EPV
POLICE_CAR12_BODY_TEX_NORMAL
"OverrideValue": "%MODPACK%
/PoliceCar_FPV/T_PoliceCar_
FPV_CarPaint_N.png"
Replaces the normalmap texture of the EPV
POLICE_CAR12_BODY_TEX_RMA
"OverrideValue": "%MODPACK%
/PoliceCar_FPV/T_PoliceCar_
FPV_CarPaint_RMA.png"
Replaces the roughness/metallic/ambient-occlusion
texture of the EPV
ELS

To learn more about ELS Modding, please check out our dedicated guide in which you can find examples and all override keys:

https://steamcommunity.com/sharedfiles/filedetails/?id=2808924041
How to upload your mods to the Steam Workshop

Step 1: Download SteamCMD

SteamCMD is the official command line tool from Valve that needs to be used to publish workshop content.

  1. Visit https://developer.valvesoftware.com/wiki/SteamCMD#Windows and download the latest version of SteamCMD
  2. Extract the downloaded package as described, for example in D:/SteamCMD/
  3. Execute the steamcmd.exe file once. This will start the auto-updater and download all required files automatically.
  4. Make sure it works. Start steamcmd.exe and enter login <myLoginName> <myPassword>.

This is what the SteamCMD should tell you

If you use Steam Guard, you may need to enter your authenticator code behind the password like:
login <myLoginName> <myPassword> <authCode>

If successful, it should look like this

If you receive other errors, please consult the Known Issues section of the SteamCMD documentation or the Modding Troubleshooting section at the bottom of this guide.

Step 2: Create app_config.vdf

The app_config.vdf file is used by SteamCMD to determine which game and workshop item is being targeted when publishing a mod.

  1. Create a new folder in your SteamCMD directory (from Step 1) called publish
  2. Create a new text file in that directory called app_config.vdf and open that file with a text editor, for example with Notepad++
  3. Put the following lines into your newly created file:
"workshopitem" { "appid" "997010" "publishedfileid" "0" "contentfolder" "D:\\SteamCMD\\publish\\content" "previewfile" "D:\\SteamCMD\\publish\\content\\preview.jpg" "visibility" "0" "title" "The title of your mod" "description" "The description of your mod" "changenote" "1.0.0" }
Note: If you get a message that says the upload to the Steam Workshop has failed due to missing content, it might help if you remove one \ from the directory source. So, instead of "D:\\SteamCMD\\publish\\content" try "D:\SteamCMD\publish\content".

A quick explanation about the stuff you need to fill in:
  • “appid” is the id of the game in Steam. For Police Simulator: Patrol Officers, that is 997010
  • “publishedfileid” is the id of the item/mod that you want to update. If you want to upload a new mod, leave this empty or use the id 0. If you already uploaded a workshop item that you want to update, you have to enter the id of that item here.
  • “contentfolder” is the directory whose content will be uploaded when publishing.
  • The remaining fields are optional and can also be modified in your Steam client:
    • “previewfile” is the filepath to a preview image for your workshop item. This should be a small PNG or JPG. If the image file is too big, the upload might fail. This image will be displayed on the Steam Workshop page of your mod.
    • “visibility” is a number that represents the visibility of your item
      • “0” = public
      • “1” = friends-only
      • “2” = hidden
      • “3” = unlisted
    • “title” is the title of your mod
    • “description” is the description of your mod
    • “changenote” should be used to describe what your upload did. You can enter a version number or a change description for updated mods.

Step 3: Prepare Content to Publish

“Content” means the actual mod files that you want to publish. These include the manifest.json and any additional resources like textures.

  1. Create a new folder in your SteamCMD/publish directory (from Step 2) called content. So in our example that would be D:/SteamCMD/publish/content
  2. Put all the files your mod pack should contain into this folder. The manifest.json (see further above) should be placed directly into the content folder. Other resources can be put into subfolders. In case you reference additional resource files in your manifest.json, make sure the relative paths from the manifest to these files are still correct!

Let us summarize what a folder structure from our example could look like:

  • D:/SteamCMD/
    • steamcmd.exe
    • publish/
      • app_config.vdf
      • content/
        • manifest.json
        • SomeOverrideTexture.jpg
        • preview.jpg

Step 4: Publish Content

Publishing your content means that your content files will be uploaded to the Steam workshop and a workshop item will be created (or updated) for your Steam profile.

Important: In case this is the first time you publish to the Steam Workshop, you might have to agree to the workshop agreement.

  • Start the steamcmd.exe (from Step 1)
  • Enter the following command and replace the placeholders inside <>. You may be prompted to enter your 2FA code. Otherwise, enter the code behind your password.
    login <myLoginName> <myPassword> +workshop_build_item publish /app_config.vdf +quit
    An alternate way would be not to put the commands all at once but step by step:
    login <myLoginName> <myPassword> [enter] workshop_build_item publish/app_config.vdf [enter] quit [enter]
  • Wait for the upload to be completed. If any error occurred, please consult the Known Issues section of the SteamCMD documentation or the Modding Troubleshooting section in this guide down below.

Step 5: Check Your Workshop

  • Open your Steam client, click on your user profile and check out Workshop Items
  • You can change title, description, images, videos, links and visibility of the mod in there.
Download Mods from the Steam Workshop

Visit the Police Simulator: Patrol Officers Steam Workshop.

Find a mod you like and subscribe to it. Make sure your Steam client actually downloaded the files from the mod.

You can manually check if the files are present by looking into your Steam library in the explorer. Visit <PathToYourSteamLibrary>/steamapps/workshop/content/997010/. When you see sub-folders with files in there, you are good to go.
Troubleshoooting
Subscribing mods in the Steam Workshop does not download them

Make sure your game folder is named “Police Simulator Patrol Officers”. If you are one of the very early testers, your game folder might still be named “Project Bavaria”. If that is the case, delete the game folder and re-download the game through the Steam client.

You can check if workshop items were downloaded if the following folder exists and is not empty:
<PathToYourSteamLibrary>\steamapps\workshop\content\997010

Error when uploading mods to the Steam Workshop: Login FAILED (Invalid Login Auth Code)

This can happen when your Steam Guard is set up to send you verification codes through e-mail. It is recommended to use the mobile authenticator.

You can try to put the authenticator code behind your password when entering the upload command.

Error when uploading mods to the Steam Workshop: ERROR! Failed to update workshop item (Failure)

You may experience this the first time you try to publish to the Steam Workshop. In that case, you have to agree to the “Steam Workshop Agreement”. You can do that in your Steam client by visiting your profile content.

If you already agreed and still receive the error, please consult the workshop_log.txt file in your SteamCMD/logs folder for more information.
18 Comments
Disturbed Mom Jul 5, 2024 @ 3:52pm 
nice!
ST/\HLi / Lucas ™ Jun 23, 2024 @ 12:42pm 
DE: Gibt es diese neuen Skins als Datei damit man diese für neue Skins benutzen kann um eine deutsche Variante darus zum Beispiel zu machen?
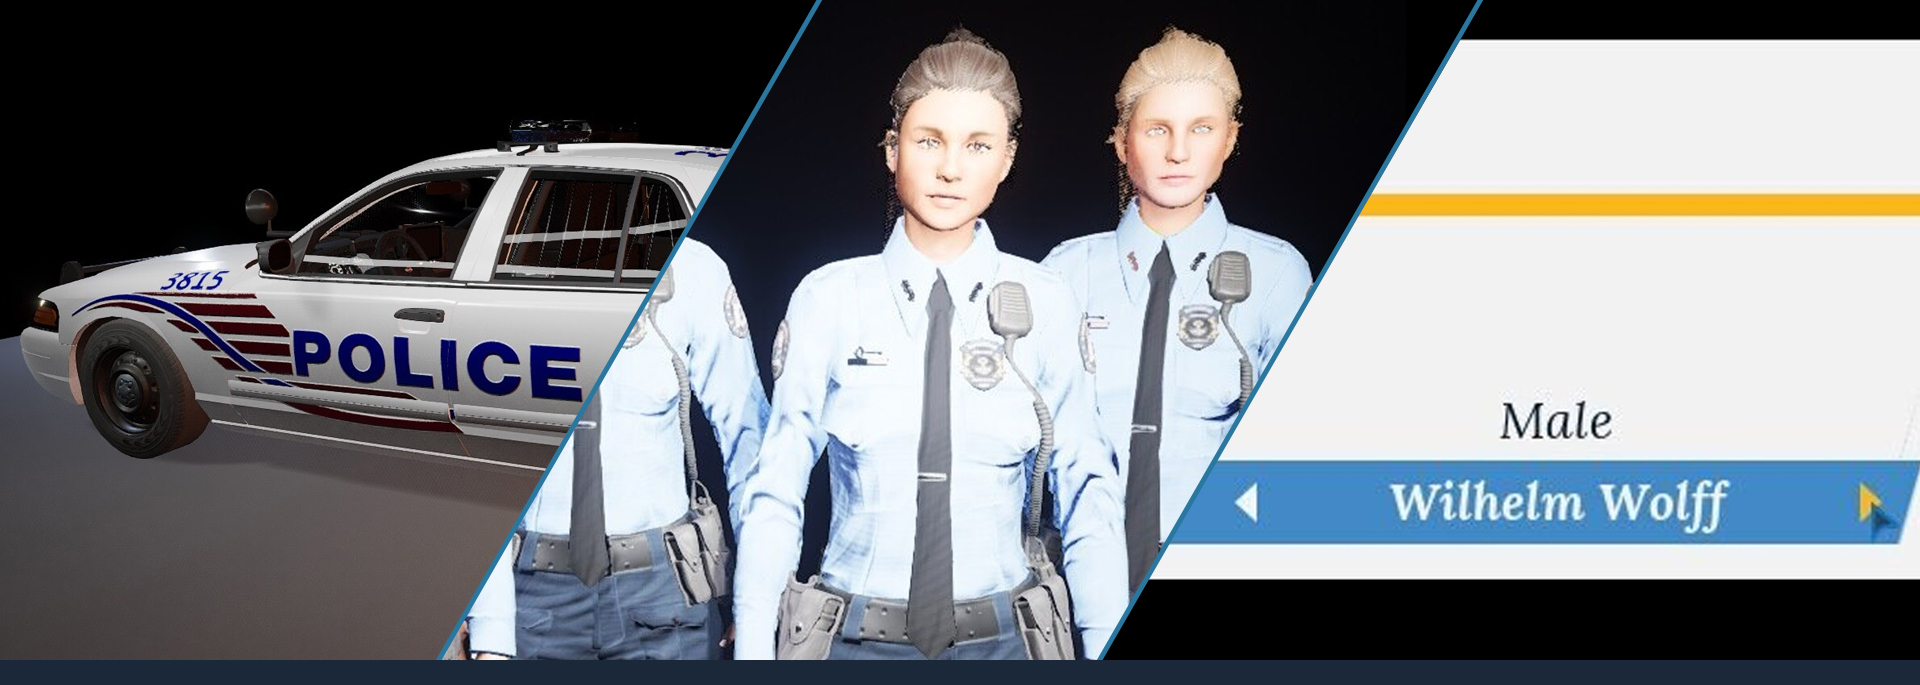
Und die Skins für die neuen Fahrzeuge EPV und IPV als Datei wäre auch schön zu haben um Skins für diese zu erstellen.

EN: Are these new skins available as a file so that you can use them for new skins to make a German variant of them, for example?
And the skins for the new EPV and IPV vehicles as a file would also be nice to have in order to create skins for them.

DE: Zum Bild

EN: To the picture
IkbeNick0 Jun 17, 2024 @ 3:36pm 
When is this gonna be updated?
Snaky_Cake Jan 14, 2024 @ 6:15am 
Thanks for the guide, looking forward to making some aussie skins for the cars and uniforms eventually xD
gunguru357 Dec 14, 2023 @ 6:31pm 
I have updated my mod to include the MPV files but the skin is not applying but the others do. I have no idea what i did wrong.
Wolf Nov 20, 2023 @ 11:24am 
You or anyone, doesn't happen to know the Override Key for Officer Helpers, right? I want to change their uniforms too, but without the Override Key, is impossible..
Chris_2502 Nov 11, 2023 @ 11:38am 
Ive downloaded some mods in the workshop and I cannot select them in the main menu. when I start a game, the police vehicles and characters have different textures. But it is randomly choosen from what ive downloaded and I cannot select what skin mod I want to use. I dont know what im doing wrong. How can you select the skin mod which you want to use? is there a setting for that somewere?
RHETRO Jun 7, 2023 @ 8:04am 
The video doesn’t help. When designing car liveries, is there a template that has to be used? And what software is best to use?
Geggi Jan 16, 2023 @ 11:51am 
Hello

Is there anyone who can give me instructions on how to get this to work with FBX files i have done everything in Blender but when i save Texture image then all my Logo and stuff like that i have shrinkwrap on cars and unifor does not come out it is only the paint

i have tryed searching on this on internet but does not find any tutorial and i am not so good in photoshop thats why i was thinking this was more easy for me and i can`t get the shrinkwraps out with the image so i hope there is someone here that can help me :-)
Nick Matthews Aug 19, 2022 @ 6:55am 
Howdy folks.

I have followed these instructions to the letter exactly. And I kept getting the failed to update error. I checked I had agreed to the workshop agreement.

When I looked into the logs for steamcmd it was telling me that there was no content when I was using your example files directly.

Now this could be an error with steamcmd or something wrong with your example. Either way I do not know what to do next as this is an undocumented error.