LISA
109 ratings
Analyzing and Ranking Every LISA Party Member (Original Version)
By V_V
A quick and non-spoilers guide on the fellow man you hire to your party, explaining their strengths, weakness, and how to best utilize them.
2
9
2
   
Award
Favorite
Favorited
Unfavorite
Introduction
LISA has a lot of party members, some good, others bad, and a couple in between, how good they are? Let's see!

Ranking Merits:
  • Strength and Weakness.
  • Role in the Party and Synergies.
  • How easy or hard is it to get the character in your party.


S - Tier: Characters that are amazing and perform well in literally all situations, some may call them borderline broken.

A - Tier: Strong characters with a lot of uses, only slightly held back by only one or two weakness

B - Tier: Good characters that fit very well on most teams and are generally very solid and reliable.

C - Tier: Useful characters, with notable strengths and weaknesses, tend to fit more specific roles than characters in the tiers above.

D - Tier: Characters with specific niches or that have something really holding their utility back, can perform well, but mostly only in specific teams.

F - Tier: Characters that are just… bad.

Terry Hints
Rank: A - TIER
How to Obtain: Story Related

Despite being basically the joke character of the game, Terry is a unique and useful party member, he is mostly a supporting character who can learn some disgustingly strong offensive moves in the late game.

Terry's healing is very solid and his Weather Alert is one of the most reliable stun moves you can hope to get, he also has the Hype up! skill, one of the few two skills capable of enraging your allies which increases their critical hit chance by 30%, if paired with any character with multi-hit moves Terry can effectively double or even triple their DPS depending on your luck and to warp all this off, Terry's final move is Hottest Dance and is, with no exaggeration, the most powerful single-target move in the entire game, capable can obliterate even the toughest foe if used correctly.

Unfortunately, Terry is still, well… Terry, not only he is almost useless in the early game, but some of his flaws don't go away after that, Terry is very squishy and can't take damage very well, his speed is mediocre at best and his SP Pool do leave something to be desired, especially because his normal attacks never stop being weak which leaves him relying solely on his Hints to be useful, while Cool Pose and the Knuckle Drops help alleviate that to an extent, strategy and resource management is very important if you plan to make the most of our beloved Hint Lord.

Tips:
  • Like previously said, any character with multi-hitting moves works great with Terry, characters with Combo Dials have a natural synergy too.
  • Always have some Perfume in hand to revive Terry as he is very prone to be knocked out in battle, especially against mutants.
  • Leveling up Terry quickly is a good strategy to bypass his initial lack of use, you can try to grind the Shadowed Figures in Area 1.


Nern Guan
Rank: B - TIER
How to Obtain: Talk with him in Area 1

Olathe's Mercenary Tao is a very solid support character, Nern's most interesting skill is his ability to regenerate his allies TP and SP, including his own, not only this makes him very self-reliant but facilitates the use of other characters as Nern can quickly replenish their special bar so that they can keep causing havoc, Nern is also very useful to stall opponents during a battle with Sleep, Pissed and Fear in order to give your team time to recover or set up combos, and he does all this while still keeping a decent offensive presence in the fight with Finger Beam, this advantage is pretty neat and really distinguishes him for other support characters who tend to be more passive.

As you would expect for someone who only works out 40 minutes a week, Nern is not very durable and while he is an all-around solid character on his own he only truly shines when paired up with the right teammates, who can make the most out of his abilities, if your team doesn't have them you may want to look for another support as the Tattleman lacks stat buffing moves.


Tips:
  • Characters that struggle with SP pair very well with Nern.
  • You can mostly skip buying new weapons for Nern as his Finger Beams uses special attack.
Olan Hoyt
Rank: S - TIER
How to Obtain: Area 1 Bar, buy him a drink for 20 mags

Olan is your bread and butter character, yes he is excellent, yes you are going to be performing well with him, and yes, you can fit him on practically any team.

With great all-around solid stats across the board and an awesome speed Olan is one of the most consistent damage dealers around and arguably the best TP user of the game, with his arrow arsenal he is capable of dealing fire damage, cause poison, or just straight up brute-force his way thought foes with Multi-Shot, the latter getting particularly devastating if Olan is Drunk or Enraged, Robin Hood guy can also hide himself using Vantage Point which greatly increases his longevity.

Unlike other characters, Olan doesn't really have a real weakness other than having a slightly longer Hangover time, his TP playstyle can also sometimes leave him unable to use his strongest skill from the get-go, but this is minimal compared with the huge amount of advantages Olan has, there's no situation where Olan is a bad idea, he is just really damn good and offers a lot for the measly price of 20 mags.

Tips:
  • Like previously stated, Olan pairs well with characters that can boost his critical hit chance, like Terry, he also pairs decently with Nern as he facilitates the use of Olan's more expensive skills.
  • Avoid using Deep Poison Arrow, the Deep Poison status was not properly coded and actually deals less damage than standard Poison.
Rage Ironhead
Rank: C - TIER
How to Obtain: Area 1 Bar, pay him 70 mags and he will join.

Ironhead is this game bonafide Glass Canon, he is strong and fast but frail, and that's pretty much it.

Rage is the most straightforward and simple character of the game, he is a speedy damage dealer who can't take hits, Rage specializes only in dishing out huge bursts of damage and nothing more, which is both good and bad as while his damage output is great, he lacks versatility, almost all his skills are stronger versions of the last one and despite having a Stun and a Fire move they are pretty mediocre compared to other companions.

This doesn't make Rage a bad character, tho, because despite only doing one thing, he is good at doing it.


Tips:

  • Like all Combo Dial characters, Rage benefits immensely for being Critic boosted.
  • Stunning foes to protect Rage is a good strategy and can buy him time to dish out even more damage.
Beastborn
Rank: C - TIER
How to Obtain: In the first cave of Area 1.

If Rage Ironhead is your bonafide glass canon, Beastborn is your typical tank: high bulk, high attack, but slow as sh!t.

Beastborn is REALLY STRONG, his normal attack can deal over 300 damage at the beginning of the game and when you take into account his special skills things get even better as he can reach over 1,000 damage easily in a single unboosted move, his AOE's are very powerful, and he can also cause Weirdness, Paralysis, and Poison to boot, although Beast is not the best in the latter two, finally, his natural bulk and high target rate combo well with him being a TP user as he can absorb a lot of attacks for the team while charging his TP bar at the same time.

Beastborn's main downside is his speed, he is undoubtedly the slowest party member in the entire game and is almost guaranteed to always attack last even against Joy Mutants, while this may not look too bad it can really hinder you in battle especially against multiple enemies who can pile up and overwhelm Beast before he even gets a chance to do anything, Beastborn's skillset is also rather expensive and without items or party support he heavily relies on getting hit to use them.

Tips:

  • Beastborn pairs exceptionally well with any character that has access to speed control, especially one that can buff Beast's own speed, a fast Beastborn is an absolute MONSTER.
  • Characters who are naturally fast are also a very good choice.
  • Nern in specific is a great pair for Beastborn as he can take care of his TP problems and increase his longevity with healing.
  • Beastborn skills deal animal damage, which is strong against certain enemies.
  • Critter Clamp does nothing useful, do not use it.
Mad Dog
Rank: A - TIER
How to Obtain: Factory Town on Area 1, give him a Spiked Club, one can be found in a secret cave before you reach the town.

Mad Dog can best be seen as a more balanced version of Beastborn, while both have practically the same amount of bulk Mad Dog trades a bit of power for significantly better speed, he is also much more self-reliant and requires less support to work well as he can gain TP very easily with his Taunt ability enabling him to unleash his most powerful moves more frequently.

Mad Dog's problem is that he is a rather one note character, his skillset is shallow as everything he learns are just stronger versions of Fireball and Rake Comb, he lacks the same support or crowd control potential as Beast.

However, don't let this turn you down, Mad Dog is a great and reliable character who adds power and defense to any team he is in.


Tips:

  • Mad Dog taunt was not coded properly and doesn't actually attract the attention of the enemies, it is still a great source of TP thought.
  • Watch out for The Road Scholars, as they will kill the Mad Dog if you let them destroy the town before you can hire him.
  • If you don't want to take 500 points of fall damage to get the Spiked Club out of Mad Dog. Jr corpse, you can wait till the torture section with Rick to get one.
Fardy Hernandez
Rank: D - TIER
How to Obtain: Story Related

Fardy is basically the real joke character of the game, but surprisingly enough he is not completely useless, and you can actually get good use out of him.

Fardy is a one-trick pony, his signature and only real move is Truck Slam, a ridiculously powerful AOE move that has a very high chance of causing Fallen, Truck Slam is an absolutely deadly move that decimates crowds of enemies and is so strong that it works even against single targets, this move is the sole reason to use Fardy, especially in the early game where AOE moves are rare to come by, Fardy also has Weep, guaranteeing him infinite SP at the cost of crying.

This is where the good things end for Fardy, while Truck Slam is awesome, Fardy has some severe drawbacks, he has very below-average stats along with his Depression which reduces them even further, he severely lacks versatility as everything he has under his man boobs are Weep and stronger versions of his AOE move, Truck Slam is also not the most reliable move in the world and gets less accurate with each version, starting at 80% hit chance in Rank 1 and going down to around 64% with the strongest versions, this accuracy issue can make Fardy a bit of a chance character.

To summarize, Fardy excels at crowd control but sucks at everything else, should you want to use him it's really important to pick Teammates who can cover up his weakness.


Tips:
  • To best use Fardy is recommended for you to unequip his Dry Stick and not use any other weapon on him again, Sticks in LISA have a hidden stat where they decrease the user's accuracy, removing it makes Truck Slam slightly weaker but it vastly increases its reliability.
  • In Area 3 you can find Glasses in a cave that increases the user's accuracy, Fardy is one of the best characters to use the item and I think even the game hints at this because they imply he is near-sighted in one of his quotes.


Rooster Coleman
Rank: C - TIER
How to Obtain: Area 1 Crossroads, get the Golden Chicken near to the area where you fought the Hair Presidents and give it to him.

Rooster has well-balanced stats all-around along with great speed and luck, he is an offensive fast character who doesn't mind taking a hit, his skillset is also very interesting as he is the only character in the game who has access to priority moves, most of the abilities also have the advantage of generally being just as cheap as chicken meat, making them easily spammable thought battle with little thought, later on he also unlocks a quite powerful AOE attack giving Rooster some decent crowd control capabilities.

Rooster's drawback is that his damage is rather lackluster, not bad by any means, but not powerful either, is pretty average for an offensive character, his stuns are also the worst ones of the game, with the strongest version capping out at max 40% stun chance, not counting if the enemy has any resistance to it, although this is probably for game balance reasons because if someone as fast as Rooster could reliably stun foes it probably would be pretty overpowered.


Tips:
  • To make up for Rooster's average attack, you could try pairing him up with strong damage dealers like Mad Dog, Beastborn, or Olan.
  • Despite the fireball icon, ♥♥♥♥ Blast doesn't actually count as fire damage.
  • You can try to take advantage of Rooster's high Luck by boosting his Critical hit chance.
Percy Mosoon
Rank: C - TIER
How to Obtain: Story Related.

Being the world's most average man, Percy is a Jack of all Trades Master of None that can be slapped on practically any team and work on it, despite his averageness, Percy is more useful than he seems, he has mediocre but balanced stats across the board and works both as a support and an attacker which makes him quite versatile.

Percy's Fire Balls and Body Splashes do good damage, and he is a surprisingly competent healer, while he lacks the other helpful moves of more dedicated support characters Percy is actually capable of taking a hit and do damage in return which is something that most healers can't boast about, he also has a weird trait of leveling up faster than other party members so if you are particularly bloodthirsty Percy can reach level 25 by the end of Area 2.

Percy doesn't really have any drawback other than the very own nature of being a Jack of all Trades, he deals good damage, but others do more, he is a solid healer, but other support characters can do more, and he can take a hit but is not tanky by any means, Percy is better used as a generalist role compression fighter, one that can add decent damage to the battle while keeping his teammates alive with heals.


Tips:

  • As I said, Percy works decently with basically anyone, although you may prefer using characters who can cause status effects.
  • Some people use Percy as a temporary party member, which is not a bad strategy actually, even if the game is perfectly beatable with him.
Geese Thompson
Rank: B - TIER
How to Obtain: Area 2, inside the hotel in Construction Site, sleep four times and talk with him.

Much like his mind, Geese is a simple but consistent character that plays much like a bird without a head.

Geese is a balanced fighter with nice Speed and Luck, he is primarily a damage dealer with a very solid output and generally cheap skills, he can also provide decent support by causing Poison and Paralysis, to top it off, Fowl Thompson here also deals the so-rare animal damage, and he is arguably the best user of it.

Geese don't really has any weakness other than being a simple, borderline braindead character, when you are not using Poison or Paralysis you will most likely be just spamming his strongest moves with little thought until the opponent dies, which to be honest I think might have been an intentional design choice considering the game's site basically calls Geese stupid.

While Geese's simplicity may seem bad, it really isn't, while this means you cannot go nuts with him, it also means you will not be underperforming either, Geese is a very consistent character with good reliable damage and easy to use status moves, he is very beginner-friendly, and I recommend using him if you are not that good at the game, after all, there's nothing that can go wrong with Mister Birb here.


Tips:

  • All of Geese's skills use his special attack for some reason, so buying new Wristbands for him is worthless.
  • Geese is a good choice for the Tiger Man fight.
♥♥♥♥ Dickson
Rank: F - TIER
How to Obtain: Area 2, Construction Site, once on the second screen, head down to the bottom left down a rope, and you will meet the Rangers.

♥♥♥♥ is a character that looks like has a lot of potential, he is fast, has good stun moves including AOE versions of them, a very strong attack that can deal over 1,000+ damage in a single turn, TP recovering techniques and a unique buff in Party Mode which only him can cause.

Unfortunately, ♥♥♥♥ it's held back by two big drawbacks that completely ruin the character.

First: He is a Joy Addict and one of the worst cases of the game, when under the effects of Withdraw ♥♥♥♥ becomes a sitting duck, he loses his speed and all his attacks either miss frequently or do not deal damage at all since ALL OF THEM ARE PHYSICAL, the miss rate and lowered speed also means that ♥♥♥♥ can't reliably stun foes anymore and becomes limited to only giving Party Mode to allies, which leads to the second problem.

For some reason, Party Mode doesn't work quite right, what it's supposed to do is increase ATK, SP. ATK, Speed, and Luck by 10% for 1-8 turns, but apparently due to an error in the game's code it only really seems to increase Luck, not only that, it seems to actually DECREASE your attack power if you don't score a critical hit, I wish I could show you the game files but my trial with RPG Maker expired :/

♥♥♥♥ has good upsides but his Joy Addiction and glitchy Party Mode REALLY brings him down a peg, he can still be useful when not craving for the Blue Ketamine, which is the main reason why he is probably the “best” F tier character, but overall, ♥♥♥♥ is unreliable and will let you down constantly, there's nothing worse than suddenly having a character become literally useless due to a die roll.

ALSO, STEAM FOR GOD'S SAKE, WHY DO YOU KEEP CENSORING HIS NAME? THIS GAME IS FULL OF CURSE WORDS, DEAL WITH IT.

Tips:
  • If you plan to use ♥♥♥♥ I highly recommend you to throw honor out the window and use Joy, the game only gives you a specific amount of it so micromanage it carefully.
  • Like Olan, ♥♥♥♥ has slightly more Hungover time.
  • If you pair ♥♥♥♥ with Nern you can constantly regen his TP and spam his machine gun attack to do a lot of damage, although this only works when ♥♥♥♥ is not under Withdrawal.
Bo Wyatt
Rank: C - TIER
How to Obtain: Area 2, Muddy Waters, get the old record in a cave and give it to him.

Bo Wyatt is a simple but great support character and one of the few two party members capable of using AOE healing.

Bo's songs can cause a plethora of status effects varying from Bleed, Fear, Weird, and Sleep, his Siren's Call is one of the best status alignment cure moves around, and Muscle Call is LITERALLY the only thing in the entire game capable of giving you Ironbody.

Bo's weakness lies in his unimpressive defenses and that the fact that he is EXTREMELY passive due to his virtually nonexistent damage output, he is great at messing with the enemy and keeping everyone alive, but contributes very little offensively and can slow you down sometimes.


Tips:
  • Bo's Combo dials are not worth using, each one takes 5 SP and contributes to nothing, it is better to just use his skill direct from the select screen.
  • Bo's Hell's Call has the same combo input of Siren's Call, performing it will always lead to this move, so here you have another reason to never use combos with Bo.
  • To compensate for Bo's lack of power, bring heavy hitters with you.
Harvey Alibastor
Rank: B - TIER
How to Obtain: Area 2, Muddy Waters, there's a safe pitfall where you can fall and it leads you to a secret town, steal the map and Harvey will be your lawyer.

Harvey is one of the most balanced and all-rounded party members in the game, he has good all-round stats and despite his appearance, he is surprisingly bulky.

The mutated tuna(?) has good offensive presence with his normal attacks and water kamehamehas but where he really shines is a utility character, Harvey's law attacks can cause a huge amount of status effects and all of them have an extra chance of causing bleeding too, he also has access to a fairly decent support ability in Soak which heals a good amount of status effects.

Harvey doesn't have any noticeable weakness other than some of his skills being a bit costly and that Water Gun extinguishes enemies who are on fire which often means Harvey will have to hold up his offense if paired with Fire characters, although this is not all-bad due to his utility, overall, Harvey is a great addition to many teams, he's a generalist and a darn good one.

Tips:
  • Despite being a fish, he does not deal any Animal damage, only Water Damage.
  • While not absolutely necessary, having some Cocolas can help you with Harvey.
Queen Roger
Rank: F - TIER
How to Obtain: Area 2, Muddy Waters, talk with him in the Beehive and prostitute yourself plenty of times.

Queen's popularity in the fandom sadly doesn't translate to his usefulness in-game.

Roger is quite bulky and can do a huge amount of damage with Beatdown, this skill also has the advantage of taking the special properties of whatever weapon Roger is using so if you pair it with a certain bat that causes his normal attack to have a chance of stunning foe's, Beatdown will also have this chance for each successful hit which somewhat compensates for Queen's mediocre built-in stun move.

This is where his upsides end because like Brad, Roger suffers from Joy addiction, and much like Dickson this brings his whole character down due to all of Roger's moves being physical, and also like ♥♥♥♥'s Party Mode, Roger's Threaten was not coded properly and do not increase the number of magazines you get by the end of the battle.

I brought these comparisons because Queen Roger is in a similar position as the 40-Year-old Genitalia guy, they are both characters with interesting upsides that are completely ruined by their addiction and spaghetti code, but unlike Dong, Queen is not that useful even when sober, the high damage and stun gimmick may look appealing, but he only really has that and can't do it often not only due to his addiction gimping his power and accuracy but also because the later versions of Beatdown are very expensive, so as it stands currently, Queen Roger is a strong but extremely unreliable damage dealer who requires heavy support to perform decently and is only really worth using if you really like the character.

Tips:
  • Like Fardy, Queen benefits from using Glasses and if you are REALLY sick of missing constantly you can also attempt unequipping his bat to increase accuracy.
  • A Joyed Roger is absolutely BRUTAL, if you can micromanage your Joy and are willing to throw your dignity out of the window, then go for it, because Joyed Roger can break bosses in half.
Carp
Rank: A - TIER
How to Obtain: Area 2, Construction Site, get the Green Paste in Fish Town and give it to him.

Carp is a great and unique party member, he is a fast glass canon capable of dishing out heavy damage while providing a great amount of utility with his other moves.

Carp's most notable upside is his ability to decrease the opponent's Attack and Speed with Wrist Slash and Ankle Slash. Decreasing these stats on foes is HUGE and can take A LOT of pressure out of the team while simultaneously enabling slower characters and increasing the survivability of frail ones including Carp itself, the fish head also has a generous amount of SP which helps soften up the fact that his normal attacks cost 5 SP to use.

Carp is unfortunately a Joy addict, but he just happens to be one of the most capable junkies in the game, while he loses his trademark speed when under withdrawal, his damage stays largely the same since most of Carp's damage moves are special and are unaffected by his cravings of Blue Pellets. Carp REAL weakness is against enemy groups, he is great at gimping big strong adversaries but since he is frail and all his moves are single target Carp struggles against crowds who can easily prey on his low defenses, the loss of speed caused by Withdrawal certainly doesn't help, it's also important to notice that Carp is not exactly a support character and more of a Pivot, someone that helps his team get momentum by dragging the enemy down and harassing important targets, in some ways you can sorta see him as the Spy from TF2 but with a lot more of firepower and less French.

Tips:
  • Most of Carp's skills are special, so he doesn't get many benefits from equipping new Knives.
  • A Critic Boosted Carp is a scary mf.
  • Carp pairs well with tanky characters like Mad Dog or Beastborn as they can take blows for him, his ability to reduce the enemy attack also means they can take more hits than usual.
  • Running Carp with other frail characters can be a High-Risk, High-Reward strategy, don't forget that Carp can only gimp one enemy at a time.
Yazan Barghouti
Rank: D - TIER
How to Obtain: Area 2, Bob's Dojo Village, to the West.

Yazan is an interesting party member, he is a fast offensive character that can deal pretty good damage whilst causing bleeding and paralysis, his most appealing quality lies on his access to two of the rarest types of moves in the whole game: Speed Control and the Fear status,

Yazan's speed control is unique as it's an AOE one, which means he can speed up the entire party in a single turn, his Fear skill is also not shabby and can be a godsend in some fights, this is backed up by an aforementioned good offensive presence and HP and SP recovery skills, all these advantages can make Yazan one of the most useful characters of your party and irreplaceable in certain teams.

Notice that I said CAN because Yazan is still in D - Tier for a very good reason.

The Cat Shephard is frail, and I mean REALLY frail, Yazan's HP and defenses are absolutely pathetic and probably the worst in the entire game, it is not uncommon for Yazan to take loads of damage or to just get plain one-shot even by weak enemies, his HP recovery move helps reduce this penalty a little, but it doesn't change the fact that Yazan can be a really hard character to play especially because he starts at a rather low-level and only learn his best skills later on.

Despite all his good upsides our beloved neckbeard struggles to find places on teams due to his glass bones and paper skin, I don't recommend him for newer players unless you feel confident or have someone to help you, he also faces competition with characters like Carp who also has speed control, although Yazan still retains the advantage of his one being an AOE.

Tips:

  • Yazan thrives in teams with slow bulky characters like Beastborn, Mad Dog and even Brad, he only needs one turn to speed all of them up so that they can wreak havoc.
  • Despite having animal damage, Yazan is not a very good option for the Tiger Man fight, as he will die in literally one hit every time.
  • Bad Mews is glitched, don't use it.
  • Make sure to have some spare Perfumes to revive Yazan.
Tiger Man
Rank: F - TIER
How to Obtain: Area 2, Bob's Dojo Village, you need to defeat him in a fight.

You know that old joke about defeating a boss in a video game, they join your party, and they are a lot weaker than the time you fought them? Tiger Man is that joke INCARNATED, what was once one of the hardest bosses of the game became one of the most flawed characters you can hope to play as.

Tiger Man is a fast glass canon with a Combo Dial that can cause bleeding, while this looks solid on paper you would be quickly proven wrong the moment you start playing with him, because for some unknown reason Tiger Man's dial moves deal very below-average damage, and against stronger foes they may not even cause damage AT ALL, your only hope of causing decent damage with him comes from Tiger's limited skill set, which are alright but nothing to brag about especially because Tiger Man's skills are costly and will drain thought his SP pool quickly, limiting even more his already disappointing damage output.

And as if all this wasn't bad enough this last one genuinely made me think Tiger Man being this pathetic was some sort of joke of the developer to mock the player, because guess what? Our Feline Boy is A F*KING JOY ADDICT, so if you think his damage output is already unimpressive, wait till his addiction kicks in, and you will be dumbfounded on how much worse he gets.

As sad as this makes me feel, Tiger Man just sucks, he is completely outclassed by El Rage as a glass cannon and by many other party members, he is an offensive character who fails to deal damage and this is where you know you have failed.

Also, how many times did I said the word “damage” on this guide?

Tips:
  • If you REALLY want to use Tiger Man, forget your honor and use Joy, it's the only way to make him a halfway decent character.
  • Stock up some Cocolas, you are going to need it if you want to keep dishing out damage with Tiger.


Jack
Rank: B - TIER
How to Obtain: Area 2, Bob's Dojo Village, give him a set of Playing Cards, they can be brought on the same village.

Jack is a bit expensive but totally worth it, not only he is a very useful party member but probably one of the most fun characters to play as.

Jack is a simple character, he is frail but has strong AOE moves in Juggle and an effective scary move, but his main skill lies in Magical Hat which applies a random effect on the enemy or in Jack himself, the list of effect are:

  • Giving himself the stink status effect.
  • Making an enemy wary.
  • A strong attack.
  • Scaring an enemy.
  • Confusing an enemy.
  • Nothing.
  • Putting an enemy to sleep.
  • Poisoning an enemy.
  • A strong and paralyzing attack.
  • Making an enemy blind.
  • Giving an enemy depression.
  • Shooting the enemy for high damage.

All this makes Jack a great character both for dishing out damage and providing utility via debilitating foes with Scary and whatever comes out of his hat, it's worth mentioning that Magical Hat is not the most reliable move in the world due to its random effects, although it can also save you in a pinch if by some miracle of god you get EXACTLY the right result.

Tips:
  • Jack can pair well with characters who can protect him like Beastborn or Mad Dog, his AOE moves also solve their problem of being overwhelmed, it's also wise to try to use Fallen or Stunned on enemies to stop them from attacking poor sweet Jack.
Birdie Hall
Rank: S - TIER
How to Obtain: Area 2, in the Cave leading to Bob's Dojo Village, give him Olathian Whiskey.

Bird is rather infamous in the LISA community for being the most broken character in the entire game, but why is this? How this silly drunkard can have so much power?

The answer is simple: Alcohol.

In all seriousness, Birdie owns his infamy for one move really, but let's talk about his other attributes first because he has a lot of good stuff on his kit.

Birdie is a balanced and diverse character, he lacks a normal attack and has instead a TP recovering move that also makes him drunk, his main source of damage is with Drunkard Tumble which does a respectable chunk against foes, he also has decent longevity not only due to his respectable bulk but also due to Pass Out which recovers all his HP at the cost of putting him to sleep, making him one, if not the least frail support char in the game.

In terms of support Birdie is no slouch either, he has the ability to cause Drunkenness on other party members, vastly increasing their critical hit chance, his Lil Didy is a great status curing move and Secret Stash is an amazing AOE healing that works just like Bo's Wyatt's one, although Birdie's reliance on TP may make it a bit unreliable at times.

Now let's go for the moment you all were waiting for, and this moment it's called Gasoline Spit.

Gasoline Spit is a strong contender to literally the best move of the entire game, it's a status move that causes the opponent to become Oiled up and has a chance of causing Blindness too. When the opponent is covered in Oil they will take 350% more damage from fire, a whopping 3.5X multiplier!

If you can't quite picture how insane this is, Percy, the most average man on earth, can deal upwards of 7.000 DAMAGE with his fire moves, so you can already imagine what will happen if you use Gasoline Spit with Fire Bombs and stronger Fire moves likes Brad's Fire Ball, or Terry's Hottest Dance., it's absolutely ♥♥♥♥♥♥♥ nuts and can single-handedly carry even the worst LISA player to the end of the game.

Overall, the only reason why you shouldn't use Birdie is if you want a more balanced experience, since this character literally burns the game in half.

Tips:
  • Any character with Fire moves pairs well with Birdie, Mad Dog, Jack, and Terry are particularly great choices.
  • Even if Birdie is a great healer, getting some healing items it's still recommended, on the occasion his TP gauge stops him from healing the party in a pinch.
Garth
Rank: D - TIER
How to Obtain: Area 2, in the Cave, give him 150 Mags.

Garth is generally seen as the weakest support member of the game, but this doesn't exactly make him a bad character, although he is quite expensive for what he does.

Garth's main niche lies on his ability to buff a party's member attack or defense for 4 Turns, the buff starts at 1.5X and stacks up until 3X, it's a very useful skill and works well with all sorta of characters, especially frail or Dial Combo ones.

Garth is also no wuss when it comes to status effects, he can cause a vast array of debuffs to the opponents with his kit also including a great Stun and Fear move, even his normal attack has a decent chance of causing Poison.

Garth's drawbacks come from his fragility and virtually non-existent offensive presence, one of his skills it's also glitched and HELPS THE ENEMY instead, Garth also lacks healing moves and faces a lot of competition with other support characters especially because they aren't as expensive as Garth and many of them can heal, overall, Garth has some good attributes but struggles to find real niches on teams.

Tips:

  • Garth works well with Dial Combo characters.
  • If you are willing to not give your items, you can spend all your Mags buying Garth since they will be taken anyway.
  • Please, don't look at the tumblr of the guy who designed Garth, he is the avatar of that artist, save your sanity.
Clint Olympic
Rank: C - TIER
How to Obtain: Area 2, in the desert town, give him 500 Mags.

Clint is a really hard character to judge, on one hand he has an amazing movepool with lots of useful skills, on the other hand, he is extremely expensive and has some very noticeable drawbacks.

Clint is a mix between offense and utility, while his dial moves don't deal much damage the special one are significantly stronger and pack a variety of statuses like Paralysis, Burning, Blind, and Fallen, Clint is one of the few characters in the game that has access to AOE's stuns and this gives him an invaluable niche in many teams, the best way to describe Clint is as a weaker version of Brad, which, despite the name, is actually a good thing, since Brad is one of the best characters in the entire game.

Now for his weakness, to start, Clint is a Joy Addict and when it hits he loses pretty much all his utility, which also adds to the fact that, unlike Brad, the pretty boy is frail and can't take hits very well, while he has a chance of getting Cool Pose before the fight, his 200% target rate means Clint will be taking more hits than normal, and also for some weird reason, Clint always spends 5 more SP when performing his special moves, so a move that costs 15 SP will actually cost 20 instead, I'm not sure why this happens, if it is a glitch or intentional, but it means that Clint will burn thought his SP pool fast faster than expected.

Overall, Clint is a character of extremes, his moves pack a good punch and have extremely useful utility, but he is also extremely expensive, frail and addicted to joy, using Clint requires some strategy but if done correctly he is a force to reckon with.

Tips:

  • In all areas of LISA there's a spot where you can grind for mags in order to get Clint.
  • Due to his Joy Addiction, Clint pairs well with characters that deal solid, reliable damage to cover him up when it is suffering from Withdraw.
Ajeet Mandeep
Rank: A - TIER
How to Obtain: Area 2, in the desert town, talk with him and he will join your party if you haven't taken Joy.

Ajeet is a strong party member with a lot going for and there's even an argument to put him in S - Tier, his main gimmick are his "Punjabi Pokes" which Ajeet has instead of normal attacks, he has a total of four, they cost zero SP and each one can inflict different status effects, these being:

>Blind: Reduces the Hit Rate to -70%.
>Weirdness: Reduces Attack to -20% and Defense to -30%.
>Waryness: Reduces Defense to -70%.
>Burning: Deals 5% of the Max Health per turn.

The ability to easily inflict these status effects so easily and at literally no cost is HUGE and can make even the ♥♥♥♥♥♥♥♥♥ team get the upper hand in a hard battle, but this is not the only thing Ajeet has going for, as his abs would imply the Punjabi playboy is very strong with great stats all-around, he backs all this up with some devastatingly powerful attacks coming from his Finger Beams and Elbows that take away massive amount of health from even tanky enemies.

With all this being said, Ajeet has some drawbacks, and it all comes down to his fingering skills.

Due to Ajeet's lack of a normal attack he is forced to rely on his special moves, which, while powerful, are VERY expensive and can quickly drain through Ajeet's SP reserves in a few turns, his Punjabi Fingers also means he will often need to switch between gimping the enemy and attacking which requires some strategy to be performed optimally, especially against crowds, don't let this discourage you thought, Ajeet is a great party member and works well in practically any team he is.

Tips:

  • Ajeet's Joy count is glitched, he is supposed to not join you if you take two or more joy, but if you took more than two Joy the game still counts as less than two (probably used the "=" instead of "<=" in the game code).
  • Ajeet can pair well with Nern due to the latter's ability to regenerate SP. He also pairs well with other frail characters due to being able to cause Blind and reduce the enemy's offenses with Weird.

RT
Rank: A - TIER
How to Obtain: Area 2, The Beehive, talk with him in the Beehive after getting his Duffle Bag nearby the desert.

RT can best be seen as a variant to Ajeet, both sport high HP and defenses and come with the upside of being able to use a lot of status effects, but unlike Ajeet, RT status moves actually deal damage at the cost of not being free, he also has a bigger variety of debuffs under his arsenal and probably one of the best Sleep inducing moves in the game in Nightmare Hold,

Mr. Hobo damage output also shouldn't be underestimated, he is not as powerful as Ajeet but still deals strong damage and can keep putting pressure on the enemy without needing to stop gimping them like Ajeet, this, coupled with his sleep-inducing moves, makes RT easier to play than Ajeet and overall better at dealing with crowds as he can temporarily neutralize adversaries by putting them to out of commission with Sleep, RT is also great at stalling fights for his team either to set up a big combo or to give them time to recover, a well-timed RT can completely change the tide of the battle.

Overall, while he does face competition with Ajeet, this California resident has unique qualities of his own to stand up, RT is a very useful character, just don't forget to hire him before something happens with your items and poor sweet Duffie gets lost forever.


Tips:

  • Against single-targets, one of the best ways to play RT is simply to keep stacking status on the adversary with each turn and watch as they pathetically try to get their ♥♥♥♥ together under the imposing and overwhelming power of the Homeless.
Fly Minetti
Rank: A - TIER
How to Obtain: Area 2, Garbage Island, win the Cart Race four times and talk with him.

Fly has good stats across the table coupled with high speed, his Cart Slam moves are basically a weaker but more accurate version of Fardy's Truck Slams which gives Fly some decent crowd control capabilities.

Now I want you to forget everything I said because it's all garbage (pun intended) compared to Fly's second signature move: Puke.

Fly's Puke is one of the most busted moves in the entire game, up there with Birdie's Gasoline Spit, what it does is apply a bunch of random negative status effects on the enemy all at once, which includes Blind, Poison, Paralysis, Scared, Rage and Stink, words can hardly explain how much this move absolutely F|_|CKS with the adversary which is why you often see Fly being used to defeat the overpowered unbeatable bosses of the game like Buzzo and Demon X, this perfectly shows how broken Puke is and it single-handle elevates what already would be a decent character to Top-Tier status.

Despite this insanity, Fly does have some drawbacks, the first one is that Puke is a bit unreliable due to its random nature, and two of the status it causes can actually help the enemy, Puke also looses some of its usefulness against enemies that have resistance to debuffs which means Fly will be forced to rely on his own damage to be useful, which, while decent, it's nothing to write home about, especially when compared to Ajeet and RT.

With that being said, Fly is still a great character and totally worth using!

Tips:
  • Have some Cocolas in hand so that you can keep spamming Fly's Puke and Cart Slam.
  • Fly can absolutely demolish some bosses like Satan.
Ollie Nickels
Rank: B - TIER
How to Obtain: Area 2, Garbage Island, go to Ollie's and pay his HUGE debt.

The three last party members we went thought are a bit similar to each other, they were all offensive characters that can cause a variety of status effects against foes each one with their ups and downs, Ajeet is very powerful and can cause status for free, but his only means of offense are costly, Fly has a busted move but only an average/decent damage output and RT is, well, RT.

So what about Ollie?

Much like the others, Ollie is capable of stacking debuffs on the enemy, what differentiates him from the others is that he specializes in crow control, Ollie is capable of causing Fallen, Fear, and Bleed toward entire groups of enemies all while dishing out respectable damage, his single-target moves are nothing to scoff at too, with his last one, Sister Kiss, causing Depression, Crying and a chance of Fear too, making it great against big strong targets… if you can get over the incestuous implications.

Ollie's drawbacks, however, are quite noticeable, to start, he suffers from Depression which lowers his stats considerably and worst of all, he has a PATHETICALLY SMALL SP BAR, topping out at two digits even at level 25, this means Ollie needs to recharge constantly and requires good resource management to get the most out of him, but even with this, Ollie is still quite useful and worth a spot on your team.

Tips:
  • Ollie pairs very well with Nern, who can constantly refill his SP pool.
  • You're going to need a decent supply of Cocolas to get the most out of Ollie, nearby Bob's Dojo, there's a guy who sells Diet Cocolas for 5 mags, the cheapest you can get.
  • Make sure to have some hard hitters on your team to capitalize on Ollie's debuffs.
Buckets
Rank: B - TIER
How to Obtain: Area 2, Win all rounds in the Russian Roulette.

There's a good reason why the achievement you get by unlocking Buckets has less than 8% in the Game Global Statistics, few people are bold or crazy enough to risk loosing so many party members, but the question is: Was it worth it? The answer is: Yes!

Buckets is a good party member, he is a glass cannon that can dish out a lot of damage, and I mean, a lot of damage, seriously, A L O T O F F U C K I N G D A M A G E! This is due to his strong skillset and the unique ability to equip two weapons at the same time, vastly increasing his attack stat, this is further augmented by the Sunsetter, a weapon you get by beating the Russian Roulette and which just happens to be the type of weapon Buckets uses.

However, as you probably already have learned by playing the Roulette mini-game, there's no Reward without Risk, and Buckets is that incarnated (heck, he even has a move that has 50/50 of failing or dealing damage). I already mentioned his fragility, but Buckets is also a Joy Addict which greatly hinders his attack power (although his damage is so high he likely will still be able to do something) and unlike other junkies, Buckets actually don't get a boost for consuming Joy, which is probably a glitch or for balance reasons, this makes Buckets a character that can be hard to play and require a decent amount of strategy to be used effectively, but hey! If you came this far to get him, might as well go for it.


Tips:
  • Characters who can debuff adversaries to protect Buckets work great with him, like Ajeet, Garth, and RT.
  • Making Buckets Drunk or giving him Rage makes him an unstoppable force of destruction.
Shocklord
Rank: B - TIER
How to Obtain: Area 2, win the EWC Tag Team Championship.

Remember when I said that El Rage was the most one-note character in the game? Well, I was wrong, this honor belongs to Shocklord, at first glance this may seem bad, but he is actually a pretty good fighter.

Shocklord only does one thing, and I mean it literally this time, his signature move is Big Shock!, a really powerful AOE attack that costs 20 MP. Big Shock! is a great move and makes Shocklord strong at crowd control, and it works even against single targets due to its high base power, one may compare Shocky with Fardy, but the wrestler is far better due to his better bulk and good attack.

Shockmaster… I mean, Shocklord drawback is obviously his simplicity, Big Shock! also doesn't have the best accuracy in the world and may miss a bit during fights, this however is not enough to discredit our beloved fighter, the masked man shouldn't be underestimated and can prove to be a valuable asset to many teams.

EDIT: How many times you misspelled Big Shock as Big Shot while reading this section? Go ahead, admit it, I will not judge.

Tips:
  • While not absolutely necessary, having some Cocolas in hand can help, the bartender in Bob's Dojo has the cheapest Cocolas in the game.
  • In the cave leading to the Snow Area you can find Glasses, equip them on Shocklord to make his move connect more reliably.
  • Shocklord is great at farming XP in the Dystopian Rumble championship, if you want to level up some party members then by all means don't sleep on him, Fly and Fardy are also good picks for that.
Sonny Backluwitz
Rank: B - TIER
How to Obtain: Area 2, in the camp-side nearby the EWC, get the Champion Belt at EWC and show it to him.

Sonny is similar to Mad Dog, both are simple powerful TP fighters with a generous amount of defense and HP, while Mad Dog is a bulkier and has Fire moves, Sonny focuses more on the offense and utility with his cheap but strong TP skills and the ability to debuff the adversary with Scary, Crying and Stun, and despite the similarities, he can actually pair really well with Mad Dog to become a devasting duo of destruction.

Sonny doesn't have a real weakness other than his simplicity, although it is worth mentioning all his attacks are linked with his base hit rate, so if he gets afflicted with accuracy debuffs all the moves will be affected, but that's minor, if you need to add some POWER! to your team, Sonny got you covered.

Tips:
  • Pairing Sonny with a Support character who can keep him alive during the fight is a great idea, like all TP characters, he pairs well with Nern.
  • Before hiring Sonny, you should know that getting the Champion Belt will get you kicked out of the EWC, make sure to have gotten Shocklord and a stable party before doing it, as you will also lose the Dystopian Rumble, one of the few places in the game where you can grind.
Buffalo Van ♥♥♥♥
Rank: D - TIER
How to Obtain: Story Related

Buffalo just makes me sad, he has so many good attributes that would make him a great party if it wasn't for the fact he shows up so late in the game.

Buffalo is a warlord, and it shows, he has amazing stats and a nice speed tier, his moves deal good damage and while his normal attack cost TP it has a chance of making the enemy Fall, he also has some very decent Stun and Burning moves on his special skill set.

However, all this is gone to waste due to Buffalo showing up SO LATE in the game and depending on how you do Area 3 you may not even get the opportunity to unlock all his skills without grinding, or worse, just plain not being able to use him outside side quests, it does'st helps that by this point of the game you likely already have an established team and Buffalo will have no space to fit in, especially because he is a kind of simple character without much depth.

It pains me to say this, but Buffalo is simply not worth using most of the time, you are better off sticking up with your current team instead of trying to open room for him, this guy is such a weird case because if it wasn't by his location he would easily be a B – Tier character, maybe even an A.

ALSO, ♥♥♥♥♥♥♥ STEAM, ♥♥♥♥ IS ALSO A SURNAME, SAME WITH D1CK, THE PINK RANGER, GROW THE ♥♥♥♥-UP.

Tips:
  • If you really want to use Buffalo make sure to head to Snow Mountain first, so you can get the most out of him, I also recommend saving side quests to get more playtime.
Crisp Ladaddy
Rank: F - TIER
How to Obtain: Area 3, rescue Toby from the Bathhouse and give to him in the Stone Village.

Saving up the trash for last Crisp is a strong contender for literally the WORST character in the entire game, not only his personality is basically just being gay, he also sucks from a gameplay standpoint.

Why Crisp is so bad? Well, many reasons, let's start with the positives tho.

Crisp is a fast glass canon that deals good damage along with Bleed and Fire, and that's it, now let's talk about why he is so ♥♥♥♥♥♥.

1- For some reason (possibly homophobic enemies) Crisp has the HIGHEST target rate of the entire game with a whopping 300%! While this doesn't seem so bad, don't forget that Crisp is FRAIL and the high target rate makes enemies pile up on him constantly, this means he is likely to get knocked out really fast, maybe even faster than Yazan.

2- Laddady's move set is really limited with only three skills + his normal attack, again, this doesn't seem so bad until you realize how expensive these skills are for their cost and how other characters can deal similar damage using much less SP.

3- Speaking of SP, Crisp normal attack not only costs 10 SP to use, but one of his skills: Wet Cutter is LITERALLY his normal attack, I'm not kidding, it has exactly the same base power, accuracy and elemental property, the only difference is on the cost.

4- Crisp starts out at a really low level for his area, which AGAIN, wouldn't be so bad if it wasn't literally at the last area of the game, this also means if you want to use Toby Fox's boyfriend, you will not get to play with him for very long.

Overall, Crisp sucks, he is not worth using unless you want to hinder your self on purpose, he just feels like an incomplete character, some sort of last-minute inclusion, which probably explains why he only has four skills and one of them is just his base move again, is that or Austin ran out of ideas.

Tips:
  • Fun Fact: You can sell Toby for 150 mags even after hiring Crisp to your team, if you don't want to feel like a lying piece of ♥♥♥♥ just sell him and do not hire his monobrow boyfriend.
  • Crisp high target rate makes him a great character to use in the Satan fight or against any other character with a high chance of using a Perma-Kill move, he is taking it for the team and protecting the actually useful party members, good job!
  • Crisp may actually be the strongest character in the game, according to this Reddit theory.
  • Is it just me or Crips's head looks like a penis?
  • In all seriousness, if Crisp has any niche, it is in the Hawk Hollywood fight since he is weak to Water, but other than that, bleh.


The Tier List

And that's it, thanks for reading everything, hope ya enjoy the game, anything I got wrong please comment.

Thumbnail Source: https://www.youtube.com/watch?v=Q7uefaUgyMQ&t=692s
EDIT: I fixed most of the typos, if I missed any, please tell me.
27 Comments
V_V  [author] Sep 24, 2023 @ 5:25pm 
@Rinzler Thank u!
Rinzler Sep 23, 2023 @ 1:14pm 
AWESOME, helped alot on my journey! :yazdwink:
SVOttoman Aug 12, 2023 @ 8:16am 
Great list
V_V  [author] Aug 2, 2023 @ 9:12pm 
@STFUNOOB

I plan to update the guide once everything is found out, and the DE patches are over.
STFU NOOB Aug 1, 2023 @ 11:03pm 
In the Definitive Edition, Ollie uses TP. This makes him pretty extremely usable as he'll start every battle ready to use a move and gives him the ability to juice up by being hit or hitting things even though his basic attacks kind of suck. Lucrative Tea is kind of a sad option for getting TP back but it'll give him enough TP to use any move at least once.

I think Mad Dog's taunt also works as intended. I'd wager a lot of the bugs are fixed in the Definitive Edition but I'm still testing.
V_V  [author] Jul 28, 2023 @ 5:48pm 
@Canti Good ideia, going to add it in Shocklord's bio.
canti ^ > ⩊ • ^ Jul 28, 2023 @ 5:09pm 
I believe you should make note that Shocklord, Fardy, and Fly Minetti (on their own and when paired together) excel at farming in the Dystopian Rumble due to their AOE attacks. Truck Slam's potential to force enemies to fall over is an insanely powerful tool and absolutely critical to efficiently farming levels. Honestly one of the most overlooked things when it comes to Fardy's character as he really only begins to show usefulness very late into the game :hintlord:
V_V  [author] Jul 22, 2023 @ 9:41pm 
@piranha

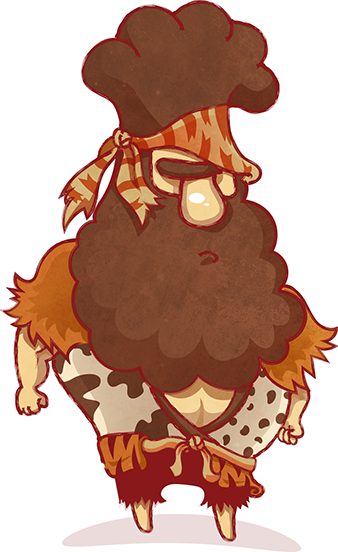
Fardy isn't horrible, but he faces competition with other characters with AOE attacks, and he really can only do that.
Piranha Jun 22, 2023 @ 6:53pm 
Amazing guide!

Just a tiny thing, I think Fardy could use being slightly above. He fails his attacks most of the time but WHEN IT DOES, oh boy. Against groups, only the Bath Boys maybe barely survive one successful hit, and even against single targets, dealing way over 1k damage AND stunning the enemy with Fallen is crazy good. (Also is it just me or does he crit most of the time for no reason?)

Also it baffles me you put Crisp so high up
V_V  [author] Apr 19, 2023 @ 9:26am 
@bot#2000 It's all okay! The important part is to have fun.