SYNTHETIK

SYNTHETIK

396 ratings
Synthetik Fanmade Strategy Guide 2 (v26)
By uetzelgruetz and 2 collaborators
This is the 2nd Fanmade Synthetik Strategy Guide, coming from the same corner of the internet as the last one, but written a lot more freestyle and more importantly: Up to Date.
19
7
18
4
3
3
3
3
3
3
2
2
2
2
   
Award
Favorite
Favorited
Unfavorite
Intro
The goal of the guide is to raise your completion rate as high as possible and give you everything you need to know to even push further. For this reason crazy combinations and meme-builds are only presented as a side note here and I will instead focus on the most consistent and reliable builds. This also includes playing around bad RNG. For people who prefer their game to be more randomized, or for “off-meta-enjoyers”, this is probably not the right guide.

While it’s not too difficult to find builds for every class, I think that’s just not enough. There is too much this game doesn’t tell you, and simply copying a loadout won’t make up for that lack of information. It’s important to create a foundation to work on, which is why I will first cover Everything before I move on to the classes.

Make sure you have the wiki https://synthetik.fandom.com/wiki/SYNTHETIK_Wiki at hand while reading this guide, as I will not go over basic game mechanics. Unfortunately not even the wiki is correct with everything, but it’s constantly getting updated and it’s faaaaaar better than in the game.

Often there is a part of a module/weapon/whatever that’s either too unimportant, useless or too self-explanatory for me to mention it. I will let you know if there’s something wrong with the tooltip, but whenever I just ignore stuff then that happened on purpose.

Expect some further changes and additions to come in the future.

There is a beta which is essentially an updated version with lots of bugfixes and it can make your game run more stable. However since it has to be enabled manually and thus a lot of people don't use it, I have not yet done the effort to update my guide according to the changes in the beta. The vast majority of them are not strategy relevant anyway.

I would recommend it to everyone EXCEPT those intending to play coop, as the 2.3.7 version will only be able to play coop with others using the same version AND I personally experienced more bugs in coop, but that has to mean nothing (might just be bad connection). Just turn it on and off depending on what you do.
Stats
Simply your Androids stats. They should be self-explanatory, but they already contain the first wrong tooltips and simply are not as simple as they should be. I will first cover the stats which can be upgraded via stat upgrades, roughly sorted by their priority when confronted with said upgrades and then the remaining stats.
The number next to the stat’s name is how much per stat upgrade you get without and with hard core 1 active

Movement Speed [40/50]
Inarguably the best and most important stat. Simply impacts how fast you can move, which has a heavy impact on your ability to evade bullets, get away from enemies, deal with bosses and so on.

Dodge [6/8]
Percentage based chance to evade ALL sort of incoming damage. Dodge has a cooldown of 0.25 seconds, something which should definitely be stated somewhere in the game. Dodge can be seen as a multiplier of all your defensive layers. as in, if you have 500 shield and 10 dodge, you can now tank 550 damage. Obviously, this is an oversimplified example, but you get the idea. Some may say dodge is less powerful than one of the upcoming 2, given the existence of some fast-firing enemies, but it definitely is a powerful stat. It’s also one of the few protections from offscreen attacks.

Shield Max [60/75]
Determines how much shield you can have. Attacks will first decrease your shield before dealing damage to Health and everyone with a brain will understand that it’s a good idea to try and keep the shield higher than the incoming damage. If you can’t lose HP, you can’t die. Keeping your shield up has another advantage, DoTs (Fire, Acid and Bleed) are blocked as long as you have shield, the same applies to enemies. At some point in the game, pretty much every enemy will be able to wipe your shield in one hit, however, even then, one shield upgrade will still equal 60/75 less HP lost, EVERY time you lose your shield. For this reason I give Max Shield 3rd priority.

Luck [20/25]
Affects pretty much everything. Unlike in many other games, luck actually does something in Synthetik. Everything that has a chance to trigger, which can be anything from crit, an item, a module and so on, to the chance of applying a DoT to an enemy is affected by luck. It also affects chests, only Dodge is excluded. The most important thing to understand is that luck is worthless if you have nothing it scales with. If you just take luck in order to get better loot from chests, you’re wasting stat upgrades, since you need several hundred before you notice a change. It really depends on class and build how good luck is, so I decided for number 4, however it’s interchangeable with the 2 stats above.

Health Regen [4/5]
Simply determines health regen per second. Note that the number displayed is your health regen multiplied by the Healing stat (later). Following the concept of “better to not take damage in the first place than to heal it afterwards”, Health regen loses to all the stats above, but is still very worth taking. The importance of this stat is directly tied to your skill, while I’ve beaten this game without losing HP at all, it may be the single most important stat to you. I’d say that until you completed Riot Guard’s class challenge, this is the most important stat, but then falls off significantly.

Max Health [200/250]
The goal is to not take HP damage; thus this stat is rather unimportant. However, 2 classes have damage caps and there are some healing items which scale with max HP, so in certain situations, max HP can actually take priority over movement speed.

Currency [15/19]
Leaving the area of actually important stats, currency (taken as a percentage) is multiplied with all your money income (recycling not included) and thus increases the amount of money you get. In other words, taking this means trading a stat upgrade for money, which is not worth it. However, if the other choices are useless, this is still somewhat useful.

Ammo Gain [20/25]
Affects the amount of ammo gained from ammo packs, but also the speed of ammo regeneration effects and the chance of ammo-based perks (like the ammo tp attachments) to trigger. If you have a weapon which consumes too much ammo to be sustained or play Heavy Gunner, this stat skyrockets in usefulness, but aside from that it’s more of a filler stat. Take it when need arises, but ignore it otherwise.

Critical chance [4/5]
Chance for any shot to be a critical hit. Crit caps at 50, however certain things can increase that cap (Taro artifact), while others simply ignore it. The main problematic with this stat is that you simply don’t get enough from one stat upgrade. It’s just not worth it. With enough base crit, a luck upgrade will give you more crit than a crit upgrade. It’s a wasted stat, but unlike the upcoming 3, it still does something.

Armor [10/12]
Upon taking HEALTH damage (shields not included), the armor penetration value of the incoming attack gets subtracted from your armor and THEN that remaining amount gets used to determine how much damage is reduced. Note that the remaining amount cannot exceed 75. Pretty much everything in the game has at least 10 AP, about 30 is average and our friend the Ion Trooper has 100 AP while also getting bonus damage based on how much armor you have. Having armor still doesn’t stop various difficulty modifiers like flinch, fragile or hard core 1 to trigger and you would need to sink in a lot of upgrades before you start seeing an impact. All DoTs ignore armor btw, so does Overheating. There is just too much wrong with this stat for it to be worth upgrading.

Shield Regen [50%/62%]
Determines shield regeneration per second. This doesn’t sound bad right? Yeah, missing tooltip. Hovering over the stat displays the shield regen delay, but it doesn’t tell you how it works exactly. Upon taking damage, the shield regen delay timer starts counting down, being reset every time you get hit again. Once the timer is done, your shield starts regenerating. In other words, you have to effectively end the fight before you can make proper use of shield regen. During boss fights it’s possible to evade the attacks for long enough, but not during the average floor. You either get hit in rapid succession or not at all. In either case, upgrading this stat is worthless. However, an exception exists. The weapon 98k Human Model permanently regenerates shields at 20% of shield regen speed, completely ignoring shield regen delay. IF you find that weapon, it’s worth investing into shield regen, otherwise not.

Scavenging [20/25]
We have a loser! The tooltip claims that it impacts chests, which would already make it questionable, but instead it only affects Powerups and Pickups. That’s a wrong tooltip over there. The best use of this is the scrap plating module and the field supply item, but you need quite a lot of scav to get a noticeable impact. The only time this stat can come to shine is when playing demo who gets a ton of it for free.
- Misc Stats
Moving on to the remaining stats, those cannot be upgraded by stat upgrades and it’s often rather hard to change them.

Critical and Headshot damage simply determine the damage multiplier when you score a critical hit or headshot.

Damage Absorb
This stat works as a multiplier for incoming damage, with 0 being double damage taken and 200 being half damage. It caps at -300, however the game keeps track of how low your damage absorb actually is, which then results into some weird interactions. Decreasing this stat is easy, all you have to do is proceed in the game. Increasing it is a totally different story, but given how quickly this stat gets decreased in loop, increasing damage absorb is only a viable strategy preloop.

Damage Output
Similar to damage absorb this acts as a multiplier for your damage output. This stat rarely gets changed, but if you do, keep in mind that explosions don’t scale with this stat and will always deal the same damage.

Healing
All incoming healing is multiplied with this stat. Health regen, healing items, healing crates, class perks, lifesteal, they all go over this stat first. E.g. if you have 4 health regen and 50 healing stat, your total health regen is 2, which will be the number displayed.

Accuracy
Slightly impacts deviation of your weapon and movement accuracy. This stat rarely gets changed and if it does, the impact is small.

Terror Level
A lot of ways to increase this and very few to decrease. What does it actually do? Impacts the the movespeed and the reaction time of enemies. At around 300+ terror level, there will be no noticeable delay in between their actions and at around 700, they move that fast, it looks like they’re teleporting. Additionally Bosses gain more max health as terrror increases. If you struggle with bosses you might find fault for that in the potential habit of always going high alert that some people have. Commonly asked question, is it worth to increase terrorlevel? No. Unless it’s for fun, it’s never worth it to intentionally increase terrorlevel.

Those were all the character stats, in case you don’t know it, you can view them by pressing C. There are too many different things impacting stats and I will explain them when I get to that specific thing. Doing it here would make the section go overboard.
Modules: Overview
Before I start listing and addressing modules, let me first cover some things regarding them. Most of this should be common knowledge, but as always, SHOULD.

First, just because a module is empowered by the daily module research, it’s not necessarily a good idea to take it. Some modules are just trash regardless of power and more often than not, one good module on base power is better than 2 bad ones on 200% power.

Second, if you have random modules in your loadout, the first module core will drop on the first kill on the second floor, the second will drop from the first boss, the 3rd will drop from the second boss and the 4th… Never. If you take 4 random modules in your loadout, you are only guaranteed to get 3 (not saying that you can’t get 4, it’s just no longer guaranteed). The first 2 random modules in your loadout increase the power of all modules you find by 15% each, for each additional random, you get 10% more, for a total of 50%.

Generally speaking it’s not advised to ever start with random modules. Too many of the starter items are too good to be skipped and the risk of not finding your good modules clearly overweighs the benefit of 50% more module power. This is even worse for Commandos/Specialists, who both only have 3 modules worth finding AT ALL.

Moving on to the actual modules, they’re first listed by class and then again roughly by how good/important they are. All numbers will assume base module power.
- Guardian: Good Modules
Shielded
Increases Shield Max and every kill refreshes shield. The 70 shields equal a stat upgrade, which already makes this module an ok pick. The shield regain effect got nerfed (halved) and no longer serves as a “I-win-button”, but is still among the better shield regain methods in the game. After all, each kill now reduces the damage you take from upcoming attacks by 100. While Shielded is not as powerful as Scrap Plating or Warmup, it has no requirement and is not specific at all, so I put it first because of how generic it is.

Weapon Mastery
Basically fixes all ammo problems, especially on Shotguns and SMGs. Riot Guard and Breacher really like SMGs and Shotguns and both these weapon types really tend to have ammo problems. The other effect increases stun duration, which very useful if you try to stunlock people. DUH! Once again, this module is weaker than Scrap Plating and Warmup (unless you play a stun build), but it once again is very generic and will especially early on help you with sustaining ammo.

Scrap Plating
Makes plating randomly lay on the ground. Each plating blocks one hit and plating cap for all classes except Breacher is 2. Arguably the strongest of the guardian modules, however it requires you to be able to handle all weak scrubs without losing your shields, otherwise you won’t be able to keep the platings for the actual threats. One could say that this module is skill locked.

The other problem is that most classes only can have 2 of these, so a lot of the time the platings laying on the floor will go to waste. But IF you are able to use it and IF you are able to raise your plating cap (by for example playing Breacher), this will make you immortal. It will also hard carry you through Hyper Adrenaline. Higher module power will make more plating drop, droprate is affected by scav.

I-Frame
Taking Health damage over 100 grants I-frames (Invulnerability frames, time in which you can’t take damage) for what claims to be 2s, but in practice it's a bit longer, with a cooldown of 12 secs. This is a really powerful effect, however it doesn't block the initial shot which means there is always the risk of getting oneshot without having this trigger. Another minor downside is that it doesn't stop flinch, fragile or hard core 1. Despite that it makes HP tanks in loop somewhat viable. I don't like it cause I like to keep my HP untouched, but it can be great.

Warmup
All newly found items start with 3% more item power for each conquered level. This is multiplicative, not additive. This means an Ultra or divine item will benefit from this much more than a normal one. This is the definition of an overkill, starting off useless, but ending up making the items drop at 750% item power (which is the cap) after several loops.

This is the single best currency increase in the game and given that it also affects upgrade kit, it’s also a massive damage boost. However, it will only come into effect after you’ve beaten the game. As I said, overkill. If you are confident in your ability to make it to loop 2, this is definitely a good choice for you, otherwise it’s questionable at best. The heat increase is extremely small and unless it’s on very high power, it can basically be ignored.

Bits and Pieces
It’s wrong-tooltip-time! The module says the buff lasts 10 seconds and refreshes on plating pickup, but that’s wrong. Instead…. Sorry, I’d much appreciate if someone helps me out here, because I can’t make out how long this thing actually lasts. Definitely longer than 10 seconds and the duration increases with every additional plating picked up, but from what I’ve tested, it doesn’t appear to be linear. From experience I can say that this is long enough to keep it active through multiple floors, but not long enough to get it through bosses.
Its actual effect works just as it’s supposed to. It is a powerful effect, but because of how hard it is to keep it up, I rarely ever use it.

ePush Forward
The buff to pistol damage 10% is good but ignorable. The movespeed increase effect is also kind of pointless, since you either reload after combat, a point where you don’t need movespeed anymore or you reload in combat and then want to attack right after. And if you attack, you usually don’t run around and instead stand somewhat still. The speed buff just happens at the wrong time, it should be like switch position. If your weapon is empty it’s the right time to reposition and get into cover, but after reloading? Nah.

Wicked
On the one hand, this module has the exact same problem as I-frame, however the payoff is much lower. On the other hand the game acts weird and getting shot can cause you to take Hp damage despite having shields. This means this module can be pretty good at stopping incoming attacks. Nonetheless this is a weaker I-Frame and also unreliable, but an even better training wheel. Give it a try.

Aegis MK5 Platinum
Basically see this as 40 movespeed. The shield regen delay reduce is pointless, since it doesn’t remove it. Unless you have it at maximum daily module power at which point it will pass 100% delay reduction! At that point it's like a better shielded (But you won't ever get me off scrap plating). The heat requirement is super low, it will basically be active the moment you start shooting.
- Guardian: Sub-Optimal
Now leaving the area of actually useful modules. There is no point in further sorting them.

Recovery
If you have some sort of lifesteal this is not bad and it synergizes with RG’s abilities, but not exactly a good module.

Into Battle
Let me tell you: If you are within 175 range (which equals 175 pixels on a 1080p screen) you have other concerns than those laughable amounts of damage absorb and output. If you hug enemies to a point where this module takes effect, 15% less damage won’t be able to make up for the inability to evade effects. If you get inside enemies to abuse their hitboxes, then you don’t get hit at all and this module is once again useless. To all those funny dudes who think that this module has great synergy with shield bash shenanigans or the shield burst meme build: Neither the damage from shield bash nor the damage from shield burst is affected by your damage output stat. The ONLY time when you can make use of this is during the last defender bossfight. Trash module.

Fortify Position
Barricades and destroyable objects are a dead feature. They do like nothing. Just pretend they don’t exist. Oh, and make sure you stay away from these wooden boxes, it’s possible to get stuck on them and their collision is more than weird. The ammo effect is pretty much useless.

Shield Overclock
Bad for the exact same reason shield regen upgrades are bad. It can be a part of meme builds, but that’s it.

Stimulants
Neither Riot Guard nor Breacher have any problems leaving the 30% HP area very quickly, this does next to nothing. Definitely not worth sacrificing 10% damage output for that.

Berserk
Given that you want to avoid getting hit, this module is not very sustainable. Simply because you don’t WANT to sustain it. The payoff, firerate and decreased firing slowdown is not worth the effort.

Enrage
Here is our first detrimental module. Increasing heat generation is a very bad idea. The payoff, if it just gave 15 crit permanently, would already be not worth it, but 15 crit, for 3 seconds, ONLY if you actively reload….

Those were the guardian modules. As you might have noticed, there are a lot of good options there. And only one bad option. Quite impressive. Don’t get used to that, from now on the ratios will keep getting worse and worse.
- Rogue: Good Modules
Evasive Maneuvers
“5 dodge is not much, why is this here?” You may ask. Well, dodge has a cooldown and even if you hit 100 dodge, you will always have that problem of being unable to deal with most fast-firing enemies. This module fixes that. Every time you dodge, this grants you a speed buff. This speed buff conveniently lasts longer than 0.25 seconds and because of that, once it ends, you can dodge the next shot that hits you again. All you now need to do is use that speed buff to move out of line of fire. This module is what makes dodge builds viable and since both Rogues have a lot of dodge and since dodge is one of the few good defense strategies, this is a well-deserved number 1 Rogue module.

Switch Position
I already mentioned this when talking about Push Forward. This time it’s done right, it’s the perfect tool to leave combat and escape into cover. Additionally grants 60% damage absorb, which funnily is the same as Freeze. So on command (pressing space), you get one of the biggest movespeed increases and the biggest damage absorb increase among all modules. All of that with just 5 seconds cooldown. Granted, that cooldown is throwing me off quite often, but that’s just me not using this module very often. Great module.

Shadow Dance
Incomplete tooltip. YAAAY! We’ve all been waiting for it. Unlike it says, it only resets upon taking health damage, not just any damage. This does also not consider the random HP loss upon being shot. As long as you don’t lose all your shields, you’re fine (Shocking concept, I know). Gives 3 dodge, stacking 3 times. The idea is to combine this with Evasive to get as much dodge as possible right at the start of the game. This is not nearly as strong as some other modules on this list, but the combination with evasive for a dodge build places it this high. (10 basic dodge + 12 dodge from shadow dance in overdrive slot + 5 from evasive + either 10 from sniper or 15 from assassin, for a total of 36 starting dodge. DO NOT ask me how that’s supposed to work, test it yourself.)

Keeping Cool
Just read the tooltip. That’s crazy amounts of shields you get from a single reload. On sniper that’s like a thousand shield in a single click. Also helps with heat issues. Unfortunately the Rogue modules have a tough competition, I’d love to rank this higher.

Discipline
I don’t really care about the 100 health or the shield regen delay reduce, I want the heat reduction. Which is massive btw. This module is on par with powershot, depending on the gun you use. I hate heat, so I like this module.

Die Hard
This is one of the few protections from getting one-shot and if you suffered from snipers like I did, you will know why this is a good module. However the trigger requirement “while at full health” is often just too hard to fulfill. Also neat damage boost.
- Rogue: Sub-Optimal
Now leaving the area of actually useful modules. As already said, the competition in the Rogue modules is very tough, pretty much all modules except the top 2 are interchangeable. A lot of the follow modules could also be considered useful, I just don’t like to do it, because calling everything useful kind of makes the title “useful” worthless.

Perfection
Now this would be in the “actually useful” area, but I decided to kick it out, since it’s massively overrated by pretty much everyone, their mother and their mother’s uncle’s ape. Now don’t get me wrong, this is pretty good on ASSASSIN, but I haven’t seen a single person talking about this on anyone but sniper.

Every 5 headshots you heal for [20%] of your HP. Sniper specializes in killing everything in a single headshot. In other words, you won’t be able to score many headshots on sniper. Assassin on the other hand specializes in the use of SMGs, which mostly have rather low on-shot-damage, so piling up a bunch of headshots is no problem for him. This is made worse by the fact that sniper already heals on headshot kills. He already has the 3rd best healing in the game, he absolutely has no need for this module. On assassin this is a completely viable choice if you want more healing, but definitely not of sniper. The crit chance and crit damage boost are like there but not really significant.

Backstab
The damage boost accumulates to a total of 100%, no matter the module power. The counter only resets if you actually are in combat. If you one-shot and enemy, or shoot somewhere without having the enemies see you, it remains active. Pretty dope when combined with Mjolnir. The stealth you gain after teleporter usage is not the same as from umbra, it has no visible effect and getting close to enemies will still make them detect you, but it drastically reduces detection range and if you’re unlucky enough to spawn very close to enemies, they won’t attack you immediately. Not bad, just outclassed.

Against the odds
Yeah I forgot that. If you want to play a healing build on the rogue classes this will be core of your build. Also getting a lot of max HP and potentially a lot of healing if you can heal 100hp consistently is pretty decent for any class. But healing/tank builds are far from where the rogue classes are headed, so you'll rarely pick it.

Blood Borne
This is somewhat a terrible I-Frame, the cooldown is longer, you need to take 3 times the damage and you don’t get damage immunity, you get lifesteal. There is no point in having lifesteal if you’re dead. Still, this can be massive healing sometimes and it’s definitely better than some things which are about to come.


Freeze
Switch position but terrible. Double the cooldown, no movespeed and you can’t control the activation. It says “Standing still” but essentially means “accidentally not pressing one of the 4 movement buttons for a split second”. Worse in every way.

Head Hunter
Another pseudo Sniper staple. Someone tell me, why is a module good for Sniper, just because it has “Head” in its description? Anyway, Sniper is not really known for his ammo issues, the massive damage boosts he gets fix that quite well. The other part, the shield regain, is once again already a part of sniper’s perks. He ALREADY regains shields on headshots. There is literally no reason to take this on Sniper. Much better on Assassin, but there are a ton of better options.

Keeping Distance
Does kinda nothing tbh. But nothing is better than doing harm. Plus firerate is alright.

DMR Conversion
Reducing your weapon to semi is not an upgrade. There is literally no reason why you would want a semi over an auto weapon. Reducing firerate completely counters the damage increase. Why does this exist? The ONLY use I can think of is to turn Battle Hymn or AN-94 semi auto to then later turn them full auto. But aside from that, I just want to know why. Why? Sniper already sucks against bosses, why shoot yourself in your already broken knee? Just why?

Power Tuning
I haven’t seen ammo regeneration on sniper or assassin a single time, nailgun excluded. Sniper already drowns in headshot damage; the actual damage increase you get from that is pretty much not noticeable. The cost, increasing heat generation, is one I’m not willing to pay, especially not for a useless effect.
They fixed it, noooooooooooooooooooooooooooooooooooooooooooo. This used to be one of the funniest modules in the game, but now it works how it’s supposed to. Eek.

If someone asked me, “which class modules are the best designed ones” I would name Rogues. They have a lot of good options and it’s really hard to actually choose something. Of course they also have some useless or bad ones, but it’s not nearly as bad as on the upcoming classes.
- Commando: Good Modules
Charge
So first, I would like you to very carefully read the tooltip: “Dashing grants [15%] increased critical chance for 2 seconds AND damage immunity while dashing.” As you can clearly see, the damage immunity part clearly comes after the 2 seconds of the critical boost part. They are not related, you only get I-Frames for the duration of your dash, not for 2 full seconds. That urban myth aside, let’s get to the actual module. The crit buff can basically be ignored, only thing worth mentioning is that it doesn’t last 2 secs and instead scales with power.

The other effect… Holy crap. NOTHING else in the game makes you immune to damage as much as this module does. According to my info, a dash lasts for ¾ seconds. Just think of how much damage this can block if timed right. This is also a good point to mention that Heavy gunner has a longer dash than other classes, making this last for over a second on him. Raider already has I-Frames on dash, however they only last 1/3 seconds. I say that’s enough if you time it right and you can get more benefit from other modules, but it’s not a bad choice to take this on Raider.

Routine
Wrong tooltip!!!! Wapadapaduh!!! Instead of having 15 max stacks, it has 16. For the upcoming calculations I will assume you have full stacks and I will explain some tricks to stay at max stacks afterwards. Also note that it’s possible to double the effect of the module, but you need really high module power for that. [16%] Movespeed increase is quite a lot, I dare say. Behind switch position (which is only a temporary effect with a cooldown), this is the highest movespeed increase among all modules. And it’s permanent. Routine makes Raider the fastest class in the game by far and puts even HG above average. Additionally it increases armor penetration. If you payed attention during the stat section, you will know that increasing your armor penetration equals increasing your damage. Quite a lot enemies have armor and if you play with the deflect diff modifier, they will have even more.

IF you can keep it up it’s one of the best modules in the game. But how to actually do that? The first option is to just practice. By far the best, but also the hardest option. The second option is to no longer attempt to actively reload once you reached max stacks. Just let the reload run through without clicking space again and you won’t lose routine. “If you don’t try, you can’t fail.” – Idk, Sun Tzu probably. The third option is to simply never reload. On HG and with magic mag, this isn’t too difficult.

Madness
Incomplete tooltip!!!! Wuhu, never getting tired of these. The combo stacks up to 5 stacks at once, that should be stated somewhere. This effectively means you get [75%] more money on base power as long as you kill something every 5 seconds. That’s quite a lot of money, I have to say. The debuff, namely the accuracy decrease is counteracted by the road flare item commandos have access to, so this can be fully ignored.

Done. Those 3 were the useful Commando modules. Some of the upcoming modules are not really useless, but they just can’t hold up with these 3.
- Commando: Sub-Optimal
Scarred
The 4th good module. At least I thought that until I re-read it. I thought it gives shield upon hits. I think I confused that with the reason why it’s bad on Heavy gunner. So yeah, lifesteal is something very rare in this game and neither HG’s healing on shots nor raiders knife classify as lifesteal, that’s flat healing. Neither Raider nor HG really have problems with regaining their shields, this module just won’t stay active for any meaningful duration and if it is active, it doesn’t do much.

On the Edge
If you’re below 35% health, you have other concerns besides that [15%] critical chance. And if you’re above 85% HP, you’re already at a very high percentage of Hp. You don’t need to heal more. If those 2 effects where switched, this would be a pretty decent module. But right now, all it does it counteracting the downside of Armageddon and Incubus and that’s it. But oh wait, what’s that. DO I SEE A WRONG TOOLTIP????? This module additionally gives 50 Shield Max. Thanks wiki. I didn’t even know that. After all an okay filler module, just not something you would deliberately choose in your loadout.

Take Cover
50 Shields.

Pack a Punch
Assuming the unlikely scenario that the first weapon you find is actually a weapon you want to keep; this module equals a total of 5 upgrade kits. Let me tell you, if you take madness and then use the money you got from that to upgrade upgrade kits, you get more value. Garbage.

Press the Attack
Push Forward but slightly better.

Field Rations
This one is actually not useless, they fixed the 2nd effect and now it actually doubles the amount of ammo you get. If you have a weapon with bad ammo economy and if you find this during a run it’s actually worth taking.

Specialized Ammo
The critical damage buff is additive, which means your crit damage will go from 200 to 240, making this a 20%, not a 40% buff. ONLY on your crits, which means we additionally have to multiply that damage increase by our crit chance, which should be 10% most of the time. In other words, unless you increase crit chance, this equals 2% !!!! damage increase. If you have a weapon which could use a special ammo type which you don’t already have and you find this during a run, it might be worth taking it in order to roll for that ammo type. It’s just… Not very likely.

Killer
Story time. Some guy in coop was playing Raider when I was playing Sniper. He put Killer in the team slot. I asked him to replace it with something good, but he said I need it because I was playing Sniper. Story time over. Ahem. So yeah, 15% more headshot damage is pretty much nothing, that’s like 5% more damage or something similarly ignorable. And Powerups. Dude, powerups. Why are they even in the game?

Drone Mod
Not much help in combat. Also useless in coop.

Drill
Bosses. Forget about sustaining this on anything but Bosses. The payoff isn’t even worth it.

Hold Breath is such a meme.


Weapon Drop is such a meme. They had to give you a free upgrade kit to justify the existence of this module. I wish they did that with more terrible modules.

These were the Commando modules, I couldn’t stop myself from memeing around, I’m sorry. They’re completely overshadowed by the dominance of Charge and Routine. That’s like a competition between 10 people making their first attempt at the game and 2 who took turns winning the championships for the last 20 years. It’s not even funny anymore. One noteworthy thing, Commandos have no detrimental module. But that’s going to change for the next class. Oh yeah, that’s definitely changing.
- Specialist: Good Modules
Unceasing
What does this module do? Everything. That’s the most complete answer I can give. Let’s start with the worst effect, it gives 5 dodge. Randomly for no reason. That’s the same you get from evasive. Reduces dash cooldown. This funny little line would already make this worth using.

There are 2 things in the game which influence dash cooldown. Being able to dash often directly translates into movespeed increase and survivability. I could stop here, but it only gets more broken.

Dashing refreshes shields. A single click refreshes about 300 shields. Remember that dash cooldown is reduced. That makes a total of 300 shields every 2 seconds or something stupid, I don’t know the exact dash cooldown.

But oh wait, the module has a downside. Heat generation is increased and since I hate heat, this should be a terrible module, right? Yeah wrong. Dashing also reduces Heat. Remember that dash cooldown is decreased? This module is literally on the list for best heat reduction tools in the game. THERE IS NO DOWNSIDE.

There is one better class combo than Demo + Breacher and that’s Charge + Unceasing. The classes don’t matter. The disparity between some of the specialist modules is that insane, I decided to make 4 categories. That right now was the extremely good category.

Overdrive
Permanently increases movespeed by 30 which is the reason why I take it. Keeping heat over 40 is quite a task because of Unceasing, but the payoff is quite busted, you get your items to cooldown faster. Items in this game are king, so everything that makes them cool down faster is somewhat good.

Grenadier
It effectively allows you to fully ignore mortar turrets and drones. Quite neat to have, especially if you play demo and can’t aim. The second effect is ignorable, there are only 2 good grenades, mines or traps and one of them is a guardian item and the other one has no cooldown. The other target for the 2nd part is Psy-Field (which counts as a trap, thanks tooltips), but that item is not too good.

Well Oiled
All item items grant [4] max HP and heal for the same amount on activation – stacks 50 times. This can be somewhat misleading and may cause people to think that only the max HP increases stack 50 times. But no, you will only get Healing and HP 50 times from this, afterwards it’s dead. In other words, this is simply 200 max HP.

The seconds effect is more interesting. 2% is kind of nothing, especially considering that nobody guarantees you that it actually triggers while you have cooldowns running. But is scales with luck and powershot counts as an item activation, so it’s possible to throw some funny build together which can utilize this. It’s not good, but there is always the chance to run into devils dice and then this really pops off.

Force Unleashed
The powerup duration doesn’t bother me at all, but percentage-based healing in this game is very good. Specialists already have field supply, so I don’t see why you would need this, but it’s not useless which is why it gets the last spot on the “Not useless list”.

Transmutate
The single most overrated thing in the game I’ve ever seen. To sum this module up, it’s just money. Less than Madness or Warmup once they go off. Yes, you might get lucky and roll a good item from this, but that’s nothing different from a good item appearing in a shop.

Focus
To understand why this module is not particularly impressive, you need to understand how cooldown reduction works. It doesn’t take time from the cooldown away, it makes time for the item tick faster. So in other words, this module makes the 2 seconds count as 4 for your current items. Not exactly sure that that’s worth a module slot, but hey.

That was the list of the Modules which are somewhat useful, now moving on to the modules which just do nothing. Which is a good thing by Specialist standards.
- Specialist: Sub-Optimal
Inner Fire
Let’s begin with the good part. In best case scenario, this heals 200 HP (base power). For that you need combat to last 10 seconds. I assure you that if you need 10 seconds to finish a fight, you will have way bigger concerns than 200 HP. As long as you finish fights in less that 10 seconds the negative effect doesn't trigger, but with engi's many summons or in bossfights this can come to bite you. The main reason this is hardly useful is field supply, which already is more than enough healing.

Chromatic Alloy
Let me recreate. I-Frame was considered sometimes not good enough. Armor was considered useless. The cooldown of this thing is 20 seconds. YOU HAVE A 25% CHANCE OF DOING NOTHING?????

Weapons Deal
I am tempted to put this in the upcoming "detrimental" category, because some variants like cursed or prototype make me want to rage quit, but given that you don’t really plan to stick to your pistol, this does like nothing. But wait, it also makes weapon upgrade shops cheaper. As I said, this module is in the “does nothing category”. Don’t waste your money on weapon upgrade stations. It’s not worth it. You get enough upgrade kits to max out 2 weapons during the average run. If you want damage, upgrade your upgrade kits, it is way more cost-efficient.

Multiply
This is ok-ish for HG, but HG is a commando, so this does nothing. It does less nothing than the former 2, but still nothing. I know you want to remind me that I forgot engi's Level 20 class Talent. It regens ammo OUTSIDE of combat. Do you know what I do outside of combat? I press space twice. What’s the point of regenerating ammo when you don’t need it?

Elemental Power
Tooltip moment incoming. What it says it does is making DoTs last longer. But instead it increases the amount of stacks of DoT applied. Say, if you apply Fire for 3 seconds, this will make you apply 4 instead. The reason this is pretty ineffective is that pretty much every source of DoT is already able to sustain the Debuff on your enemy, without any need for this.

Sun Rising
Just like Specialized ammo, this eventually translates into 20% more crit damage. After the run is over since it takes 10 billion years to charge up. The burn damage increase doesn’t even affect Flamethrowers. Such a scam. And the healing can fully be ignored, healing you once is nothing, especially since nobody guarantees you that you don’t have full HP when it triggers.

Status Extender
I've been underestimating this for quite a while, due to the annoying shield mines, but they really don't matter enough and what are 4 seconds if you already fked yourself. Stuns and bleed aside, there are very vew actually impactful debuffs in the game but a ton of positives. Especially raider can tell some stories about that. Outside of him Status extender isn't really impactful, but it's not bad to find it in a run.

Forged by Fire
It's somewhat risky because increasingly higher firerate with heat makes it more likely to overheat, but if you can keep that under control, this is a rather small firerate and crit boost. Ok-ish.

Calculated
Unceasing does a pretty good job at keeping you below 50 heat, so this is a pretty solid [15] more damage. Seems worth it to me. To all those bigbrain guys who think they can avoid the overheat damage with this module: No. You only get to keep your shield. Just kidding, you don’t have any shields when you’re dead.
HOWEVER plasma weapons have absolutely absurd heat gen, so if you don't do anything to change that, you can permanently stay overheated by having your ammo regenerated before you cooled down. Top tier copium, BUT a valid use case for this module. (Don't. Just don't)


That was the final part of the Module section, Specialists. I think that it’s important to know what every single module does. Not because you will frequently encounter them in your game, but because the more people know which modules are good and which not, the less people will annoy me later. It also makes my job of explaining loadouts a lot easier.

Finally I was able to throw in a lot of knowledge about the game. I could make a whole “things the game never tells you but you need to know” section, but I prefer to have all that info spread somewhere. Don’t worry, I will explain why overheating is a bad idea later.
Artifacts

Very similar to modules, except they’re a lot rarer and they (often) do much stronger stuff.

Cario
One. Additional. Dash. I doubt I need to say anything. On top of that, consider charge and unceasing. Anyone could tell that this is the best artifact in the game. The additional dodge part does work, but you gain 1 instead of 5.

Zion
Reduces all cooldowns by 25%. It got patched and now finally works again, yay! Items are overpowered and there’s not much that reduces cooldowns, making this easily one of the best options available.

Mael
Removes movement speed penalty, in other words, you can now happily shoot your gun around and no longer care about getting slowed down. Also grants immunity to slowing effects (although I have no clue what that wants to mean or if it actually works). It’s basically an indirect movespeed increase, but you only get it when you really need it – in combat that is. Great artifact.

Aeon-FFD
I don’t know about item and weapon shops (although I assume they do work), but weapon and especially item upgrade stations do work. Since item upgrade stations are my only real money sink, I’ll focus on those. This artifact not only reduces the cost, it also reduces the cap for the cost. From 2500 to 1650. It’s a gigantic money increase which will result in your items having much better stats. Items are op, ergo this is good to have. Just not as good as the 3 above.

Taro
This is one of the few ways to get above that critical strike cap of 50. Raises crit damage, chance and cap all by 15%, which is a considerable amount of damage increase. Not nearly as good as the options above, but definitely one of the better artifacts.

Ensiferum
The ability to carry an additional weapon means you can have an additional backpack effect. It CAN be extremely powerful, but most of the time you’ll just take it for the 2 free upgrade kits.

Rhett
I find myself still dying to myself from time to time and this really makes unintentional suicide harder. Not exactly powerful, but good to have.

PU-55
Less terrorlevel and more damage to elites, basically just makes the game easier. Nothing too big, but just like the one above, quite helpful sometimes. (I know there are a bunch of people who do nothing but to raise terror, those don’t take this ofc)

Savnt
I've been underestimating this for quite a while, due to the annoying shield mines, but they really don't matter enough and what are 4 seconds if you already fked yourself. Stuns and bleed aside, there are very vew actually impactful debuffs in the game but a ton of positives. Especially raider can tell some stories about that. Outside of him Savnt isn't really impactful, but it's not bad to find it in a run.

Kokova
30% Healing is really good if you just want to beat LD, in loop it does nothing. The 3 charges for healing items basically only affect methadone and field supply, but that’s still helpful.

Pure 759
Powerups I guess. Yay. Always wanted that. Subbi. Moving on.

Kevv
Next weapon comes in an ultra variant. Yay. I really wonder why that thing doesn’t say divine, because ultra is not really remarkable. Like, not bad, just nothing really special.
Anyway, just like with pack a punch, it’s very unlikely for the next gun to be a gun you actually want, but this time it’s even worse, by the time you get this artifact you most likely have already committed to a main weapon.

Rynn
I have legit no idea whether it does what it claims to. If it does… I’d still put it down here.

Those were the useful artifacts, although the last 3 are only there because they don’t cause harm. USEful is not really the word for them.

Hobb-S
Neat idea, but not with me. If it was a 100% chance to ricochet I’d argue about it, because things that are guaranteed to happen are easy to predict, but this doesn’t even do that. I’m really not a fan of ricochet and this is a clear no for me.


Luka
Increases minimum heat by 25. Lmfao. Moving on.
Weapons

Weapons are a big part of this game (who would have thought) and I figured it’s very controversial to talk about “good” or “bad weapons”. Ultimately the weapons you should use are the ones you like. Nonetheless, certain weapons perform better than others and I’m not afraid to piss off people.

I want my weapon to:
- Take out enemies asap
- Be able to fire over a longer duration if need arises (single shot weapons are just too slow)
- Potentially have some unique upsides
- NOT hinder or harm me

In addition to that, there’s the question of RNG. The chances for a certain attachment to appear among all 4 kits is about 43%, which means you cannot rely on that. Weapons that have powerful effects built-in, like penetration are considered better because of that, while weapons like shotguns, which have huge downsides which require certain things to come true are considered worse.

I will first say a few words about the general weapon type, but most of the time weapons are too unique, making this more of a general idea of how these weapons generally can look like.
The weapons will be displayed as following:

Weapon name
Pros:
Cons:
My opinion on the weapon, tips and tricks, class recommendations, etc.

Before I start listing the weapons, I first want to cover upgrading weapons in general and say a few words about how the damage on weapon works. Because guess what, the game doesn’t tell you and there are a lot of people who get it wrong.

First, how to upgrade weapons and what exactly does it do? Simply click an Upgrade Kit. The first 4 will increase your weapon’s damage by 5% and grant a selection of attachments. Various factors can influence how many options you will have, but most of the time it will be 3. After these 4 attachments, upgrades will now impact the weapon’s stats directly. The first 12 upgrade ticks will improve various stats, like recoil, reload, magazine size and so on. Afterwards, each upgrade tick will say “Maxed! Damage increased” and simply increase the weapon’s damage by 1%. Just because it says maxed, you can (and should) keep upgrading forever. Every upgrade kit grants 2 + (Item power divided by 50, rounded down) upgrade ticks, ergo 4 on 100% power, 5 on 150%, 6 on 200% and so on. Using a weapon upgrade shrine grants 6 upgrade ticks every time you purchase an upgrade, as long as at least one of the 12 initial stat upgrades remain available. Afterwards every purchase will simply grant one upgrade tick (ergo 1% damage). Both Modular and demo’s Level 25 perk simply double the amount of upgrade ticks, all other sources of damage are not affected.

Now, should you actually stack up and upgrade your kits? The answer to that depends on a lot, mainly on how much bonus money your class gets and how high your base damage output is. For example HG and Breacher are poor but have some of the highest base damage. Sniper is rather rich but doesn't have a lot of bonus damage. Raider is very rich and gets free extra upgrade kits, so while he doesn't need it, it's good value. In the end it depends on how much you feel that you "need" it.
Also it depends on how good you are with the game. If you just started you get no benefit from upgrading kits since you'll likely die before it becomes worth it. If you can beat the game blind you likely also don't need it, cause by then you know how to deal damage effectively. Thus, for most people it's likely a good idea to upgrade their kits, at least for a while.

Everything that says it increased weapon damage by a percentage only adds that much damage modifier to your already existing damage. It’s additive, not multiplicative. This holds true for upgrade ticks, Variants, class perks, Modules, attachments, basically everything. Because of that, the respective value of these upgrades (or downgrades) will permanently decrease, as your total damage goes up (20% damage is just not much when compared to 500% base damage).
- Pistols
Your pistol is more important than many people might think. The longer you can make it through the game with just your unupgraded pistol, the longer you can wait for a good gun. Some pistols are even powerful enough that they easily can take the spot as a good weapon. On some classes the choice of pistol is purely preference, on others there is a pistol that is clearly superior than the other options. I will only list the pistols which I believe to be the best for one or more classes, too many of the pistols are all kind of *the same in a different color* and I don’t want to say the same over and over again.

XM2 Coil Pistol
Pros:
- Counts as a shotgun and thus has increased range and free penetration while playing on Breacher.
- High damage per pellet
Cons:
- Guardian Exclusive
- 0 Armor Penetration
- High damage falloff
- Small magazine
- Very high reload time compared to other pistols

If there is one thing we can all agree on, then it’s that this pistol is an absolute monster on Breacher. Unfortunately however it’s only a monster on him, on RG it’s ok but not broken.

Titanium Eagle
(Short Teagle)
Pros:
- Next to no deviation
- Insane damage per shot
- Headshots grant a temporary damage buff
Cons:
- Extremely high recoil
- Hard to obtain

This pistol is PERFECT for Sniper. In fact, it’s better than the average sniper. No other pistol enables shield farming via headshot kills as easy as this one. Unfortunately you need to either buy one of the dlcs (don’t know which one) or to get 4 referrals. (The latter one can’t be reasonably completed unless you want to piss off everyone around you, just buy the dlc, it supports the devs and I feel like they need it.) If you don’t want to spend money, there is another guide on steam which explains how to unlock stuff like this pistol.

57 Fusion Classic
Pros:
- +50 max shield while held or in backpack
Cons:
- Low damage
- Loooooooong reload

Basically only here for that 50 extra shield. In long terms, this is the best choice for every class, however I prefer having a stronger pistol which can carry me further by itself, because it makes me more resilient to RNG. Only exception is Assassin, he desperately needs any shield he can get and he doesn’t need a good pistol, he has a dagger.

For the commando classes there is Kaida Model H and for specialists there is PPQ-H, which are both very strong, but they don’t really have anything special about them (except being good), so there is no point in going in detail about them. Ofc if you prefer another pistol, go for it. For Riot Guard, all there is to consider that some pistols can use soft point ammo and some others can’t.
- Sub-Machine-Guns
They’re mostly automatic weapons with high rof, but usually low damage per shot. A very reliable weapon type, almost all weapons in here are usable.

Viking Riotshield
Pros:
- Riot Guard’s starter weapon
- Allows you to shield Bash
- Increases Armor by 30 and dmg absorb by 20 while held
- Increases Armor by 15 and dmg absorb by 10 while in backpack
- Can make full use of soft point ammo
Cons:
- Reduces Movespeed by 150 while held and by 50 while in backpack
- Semi-burst 4
- Too much heat
- Too little ammo gain
- Too little damage

Armor and dmg absorb are pointless if the price is to get hit more often because you move slower and shield bashing requires you to get close to enemies, something that is a big cost by itself. Keep this until after the first boss, then get rid of it.

AKS-74U
Pros:
- Temporary crit boosts that can be combined with refresher or synergize with the crux of the laser caster item
Cons:
- Trash weapon. Could be worse tho

Kaida Nailgun
Pros:
- Prints ammo after not being shot for a while
Cons:
- Low damage
- High Damage falloff
- Magsize too small
- Can randomly shoot 4 times at once, causing you to magdown without you wanting to

Mostly a meme and just for fun weapon. There is no real reason to use it other than to brag about it afterwards.

Spectre
Pros:
- Soft Point ammo supplier
- Can make full use of soft point ammo
- Gives 7 doge as backpack effect
Cons:
- Neither firerate, not damage, nor recoil are anything special and all below average

A consideration for the Rogue classes as they both benefit from having more dodge. Assassin additionally gets a damage boost for SMGs and Sniper can really use the ability to stun people, it makes headshots a lot easier. Aside from that, the weapon is mostly too weak, but if everything goes wrong, it can serve as a main weapon.

KI Vector
Pros:
- Very high firerate
- Can make full use of soft point ammo
Cons:
- High heat generation
- Special ammo which makes you unable to see your bullets and appears to deal less damage. Switch to other ammo type asap

Pretty decent, nothing too special except for that high firerate which, in combination with soft point, allows you to stunlock enemies easily. Another pick for RG, a maybe for assassin, otherwise there are other weapons that can easily outperform this one.

K3 Boltcaster SMG
Pros:
- Shock arrows have the highest stun chance and duration of all ammo types in the game
- Built-in twin link effect
- High damage
- Additionally counts as marksman weapon for Sniper’s bonuses (which makes it really good on sniper, duh!)
Cons:
- Low Firerate

The Soft point version of the Tungsten arrows Boltcaster uses are called shock arrows, which are optimal for stunlocking. A must have on RG because of that.

K7 Competition
Pros:
- High Firerate
- High Damage
- Increased crit damage
- Extremely low burst delay
- Can make full use of soft point ammo
Cons:
- Reduces Luck by 25 while held
- Slightly problematic heat

Dps wise, this is one of the best guns you can token. But what about its downside? Most people are overestimating luck by far. It’s extremely unlikely that you’d be able to tell the difference between 100 and 75 luck, simply because the difference is incredibly small if existent at all. And even if, you can just switch to another weapon while doing anything luck related.
A solid pick on everyone, but especially RG who has free soft point ammo and for sniper, who has guaranteed crits to take full advantage of K7’s increased crit damage.

LS Laser Sub
Pros:
- Gives Difficulty / 2 Shield per kill (e.g. 0.7 on 140% and 1 on 200% diff), halved once in loop
- Very low heat per shot
- Very accurate
Cons:
- Low damage (as if that mattered)

Broken. Broken. BROKEN. This weapon has been nerved every single patch so far – at least it feels that way – and is STILL one of, if not the best weapon in the game. What makes this gun busted is its passive ability, which increases your max shields with every kill. More precisely, with everything that dies, regardless of the cause, including your summons.

In addition to this “normal” effect of giving shields on kill while holding it, there is also a broken interaction with effects that trigger on kills. If you switch to another weapon, kill something while holding it and then switch back to this weapon, the LAST kill made still counts as if it was made with this weapon in hand.

Ergo you can go around, killing things with another weapon, while still stacking max shield for free. Whether you decide to main or to abuse this weapon’s switching mechanic, Laser sub will always provide you with a busted amount of max shields and turn the game into a walk through the park.

Medic FMG-9
Pros:
- Gives Difficulty / 20 health regen per kill (e.g. 0.07 on 140% and 0.1 on 200% diff), halved after a total of 10.
- Can make full use of soft point ammo
- Increases movespeed while held (unlisted)
Cons:
- Low damage, low firerate, high heat generation, bad ammo gain

Laser Sub’s small brother. The weapon is weaker, the stacking effect is weaker, but it’s an infinitely stacking effect nonetheless. The ability to use soft point makes it a specifically good pick for RG, anyone else equally doesn’t care.

UMP-10 Tornado
Pros:
- +75 max Shield while held or in backpack
- Regains Shields on hit
Cons:
- Semi-burst 3 with very high burst delay and thus low firerate

The increased max shield in combination with that shield regain makes this a very powerful weapon for assassin, who already needs every bit of shield he can get. A maybe for raider who has reduced burst delay, but there are better options.

Chaos Launcher
Pros:
- Rofl
Cons:
- Uncontrollable burst
- Said burst results into potential ammo and heat issues
- High bursts end up being very inaccurate
- Damage per shot is extremely low

Another weapon that entirely exists for the memeing purpose.

P9000 Supernova
Pros:
- Very high firerate if you manage to sustain the heat
- Low Heat per shot
- Starts at 0 instead of 10 Heat
- High Dps
- Very accurate
- Grows more and more powerful with every teleporter used
Cons:
- You need to keep your heat in check, but that’s not really a con imo
- Red and thus hard to obtain

Powershot will singlehandedly turn this into a monster, but reducing heat even more never hurts. Very good weapon, would recommend it on everyone, it’s just red and thus there is no point in recommending it.
- Assault Rifles
Very similar to SMGs, although they mostly deal slightly more damage. Again, just like SMGs, ARs are an overall very good weapon type with most of them being usable or good.

Enforcer Carbine
Pros:
- +100 max Shield while held or in backpack
- Actually quite good given that it’s a blue weapon

Mostly something you are happy to find during a run for 100 free shield. If everything breaks loose you can even main it, but that’s definitely not what you should be aiming for.

QBZ Type LAS
Pros:
- Starts off very powerful, especially given its rarity
- Burst once certain thresholds are reached can make this really powerful
Cons:
- While it starts off powerful, its scaling potential is awful and won’t achieve anything awesome
- Burst based on heat can equally mean that you get pushed into overheat

Tactical Observer
Pros:
- Soft Point ammo supplier
- Can make full use of soft point ammo
- Improves over time
Cons:
- Weak af unless you wait 10 years for it to get strong
- Semi-burst 3

Yes yes, you can sit next to a healing station or drone turret and afk this thing into oblivion, but honestly just taking a good gun instead would have the same effect – minus the 10-year waiting.

Type-98 ‘Tokko’
Pros:
- Uses 8.8 Ammo (remember to switch)
- Receives double upgrades from demos level 25 Talent
Cons:
- Slightly inaccurate
- Less of an AR and more of a marksman rifle

I definitely feel like this ended up in the wrong category. Also in the wrong rarity group, this gun is waaaaay better than a blue should be.

AMD 65
Pros:
- Uses 8.8 Ammo (remember to switch)
- Supplies Bleeding ammo
Cons:
- Either low firerate or accuracy

While not particularly powerful, this weapon is very resilient to bad Variants or Attachments.

A-5C Test Version
Analysis by tactu:
Pros:
- Due to its ability to fire multiple shots, it’s one of the few laser weapons that can power
through shielded enemies on pure firepower alone.
- Has very strong synergy with twin link type effects
Cons:
- All heat based mechanics in the game have poor risk/reward ratio and this one is no
different
- Effectively long windup due to needing to build up heat means in scrambles against
certain enemy types (red snipers) can be problematic to take them head on without
excessive risk
- Very sensitive to heat and firerate changes

"Very interesting gun but mostly will be relegated to the fanatics and masochists. Gun has a, uh,
unique firing sound that some people liken to electrified water being fed into your ear. If you try
to use it like a conventional gun will not provide good ROI, use as long range gun to blanket
areas with laser bolts."

Object 29
Pros:
- Shoots rockets every 6 shots, every 5 after 75 kills are achieved.
- This means it benefits from demolisher’s level 25 Talent
- Massive scaling potential, can end up extremely powerful
Cons:
- Rockets can hit you if you stand too close to enemies
- Rather slow due to low firerate in combination with burst-delay

I really like this one. The missiles make sure it’s not weak against bosses despite using fusion ammo and when used on demo, this weapon can end up with some lunatic dps. The missiles also fix potential accuracy issues this gun can have if you take offload cycler. A must have on demo and a solid choice on Raider due to his reduce of Burst delay.

SCR Laser Socom
Pros:
- Increases damage and firerate as well as decreases recoil and deviation with every floor cleared -> ends up extremely powerful
Cons:
- Starts off weak
- Very bad ammo economy

Another weapon I really like. It starts of really wacky with its auto-burst 3 and pretty mediocre stats. Not exactly a good weapon if you just want to beat the game, but if you get it very early or expect your game to last very long, this weapon will end up being one of the most satisfying and powerful guns in the game (imo).

Specialist M16-A5
Analysis by tactu:
Pros:
- 20% grenade cooldown if combined with other effects can be insanely good
- Underbarrel launcher has strong combo with reload vent and since it only fires on a fresh
magazine is very predictable so it won’t kill you by accidentally firing when you don’t
want it to
Cons:
- Gun only has so so recoil control so 3 round burst on top of having burst delay tends to
be a little inaccurate
- So so damage even with grenade means you REALLY need your grenade items to
supplement your burst down potential otherwise you may find tougher enemies more
threatening than they should be

"A reasonable backpack weapon, it can be used as a primary if you have grenade items that get
the synergy. Is very strong with Zion's item cooldown and Eminence's backpack bonus, borderline
broken if ⅔ found for level clear but tough bosses will be your downfall unless you boost the
crap out of the damage."
|
AEK Special Elite
Pros:
- Supplies Armor Penetrating ammo
- Overall very good stats
- Additionally increased damage against elites
- Killing elites heals for 60 HP
Cons:
- High heat generation

This is the picture of a good gun. It’s not particularly outstanding except for being good at everything. Which is quite outstanding. This is one of the weapons you can token on every single class and never regret the choice. The only downside is heat, but that’s why powershot and reload vent exist.

An-94 Deathstalker
Pros:
- Overall very good stats, even better than AEK
- Headshots deal more damage
- Landing double headshots heal and deal more damage
- Additionally counts as marksman weapon for sniper’s weapon bonuses
Cons:
- Semi-burst 2, which may mean that you can’t make use of the high firerate, however that can also be seen as a plus, because it makes sniping significantly easier.

A weapon very similar to AEK. Even a bit stronger if used perfectly. The double headshot simply mean 2 headshots in a short time span, you are neither required to hit 2 enemies with the same shot nor are you required to hit the same enemy twice. It takes some practice to use, but it’s well worth the effort. An-94 is a must have on Sniper.

Damnation
Pros:
- Supplies Bleeding ammo
- Additionally shoots homing projectiles
- This means it benefits from Demolisher’s level 25 Talent
Cons:
- Extremely inaccurate due to high recoil and auto-burst 5

It’s similar to object, except it shoots blood bolts instead of missiles and it’s even more inaccurate. Best on Demo and Raider, but even on those there are better options.

Eminence AR
Pros:
- Reduces all cooldowns by 20% while held or in backpack
Cons:
- Wait, this thing can shoot? Nah, I don’t believe that. (Seriously, haven’t fired that thing in like half a year or smth.)
- Extremely inaccurate due to high recoil and auto-burst 5
- Loooooong burst delay

This is the best backpack weapon in the game.

Kaida Medic ACR-X
Pros:
- Increases health regen by 5 while held or in backpack
Cons:
- Very low damage output

This is basically a bad Medic FMG, except it can’t abuse soft point ammo and it’s higher rarity.

SS58 Plasma Charger
Pros:
- Bruh
- High damage against enemies with armor and plating, I.e. bosses
Cons:
- Is a plasma weapon
- Awful heat generation and cooling


Okay seriously now. Let me start with the problems plasma has. It deals only 30% damage to shields. Given the existence of B Defenders, Chrono Troopers, shield drones and a bunch of other stuff with shields, that’s already awful.

The next problem is that ejecting a plasma weapon overheats you and sets you on fire for a short time. This means ejecting can just mean death. Or in other words, you can’t reload. This bring a bunch of other problems with it, you can’t use various attachments or modules which trigger on reload, most importantly reload vent.

In addition to that, you completely lose access to the active reload boost and reloading decreases heat. Or in short, you have a massive heat problem and you give up on a ton of power. And since that alone isn’t enough, both plasma weapons additionally have insane heat generation. They’re just begging to kill you.

But what about the upside of plasma, the ammo regeneration? Well, by the time this regenerated its ammo, you could just have reloaded. You literally have no upside, but a ton of downsides. The same counts for the plasma shotgun, except that one is extremely inaccurate in addition to the problems plasma charger has.

Also counts as a special weapon. -OA

Sturmgewehr 44
Pros:
- 8.8 AP
- Large magsize
Cons:
- Less attachment choices
- Really high heat generation

Don't just ruin your attachment selection, they're too important.

X512 Experimental
Pros:
- Uses a special ammo type that has infinite range and is slightly target-seeking
Cons:
- Can’t headshot
- Critical hits don’t receive the crit damage boost
- Putting Hyper Accelerator on this doesn’t make it penetrate enemies
- Low damage

This is a very interesting weapon. Mostly it’s pretty weak, but having infinite range allows some pretty cool stuff. You can just shoot into the open and if any enemies are in line, they’ll get hit. This is especially broken in combination with gps. The only requirement is that you fix the low damage, making this the ultimate weapon for Hyper Adrenaline and an option for Heavy Gunner.
- Shotguns
I don’t think I need to explain how shotguns work. High range is super important in this game. Maybe not early on, but the further you advance, the more important it gets to take out enemies fast. Having to get close to enemies first is not fast. Half the shotguns are inconsistent because of that.

Most shotguns use buckshot ammo which has the following downsides: low range, high damage falloff and low armor penetration

Super Shorty
Pros:
- Breacher’s starter weapon
- Once prestige, the first shot will be a guaranteed crit
Cons:
- Terrible ammo gain
- Usual shotguns problem

Coil Pistol is unironically the better choice as a main weapon. This one may deal more damage, but it’s very hard to sustain the ammo and the short range really limits it to being a secondary.

Pressurized Impaler
Pros:
- Big damage
- Can’t overheat unless it’s burst or jams
Cons:
- Supplies Powerbolt ammo (yeah, I consider this a con, I hate having to switch no other ammo on all my shotguns after picking this weapon up, screw that thing)
- Requires a spinup before it shoots
- Usual Shotgun problems

No, this is not a sniper. The deviation is way too high for that, you absolutely can’t headshot consistently with this. This weapon is built in a special way, you have to hold the mouse button to make it spin up. While spinning up it generates heat (even if you currently can’t shoot because you’re jammed or stunned!!!). After a short time (less than a second, but still far too much imo), it shoots and reduces heat back to the initial value.

This means the weapon can’t overheat unless you jam or get stunned. It also deals a ton of damage. But that spinup time, even for how short it is, is just too much for this gun to be good. The funny Ion trooper over there won’t wait for your clunky gun to spin up, he’ll destroy you regardless of how nice you ask him to wait for your funny gun.

Spas 12
Pros:
- Supplies dragon’s breath ammo, which removes the range reduce
- First shot is pin-point accurate
- Good magsize
Cons:
- Rather weak, however Burn fixes that

Spas is all about that dragon’s breath ammo. Its damage is really low, but the other stats are all pretty good, it’s the perfect weapon to deliver Burn. This is one of the better shotguns, thanks to that special ammo, however some other shotguns are simply stronger and IF you have dragon’s breath, they’re a better choice as main weapon. But since this is the only ammo supplier for that ammo type, spas takes the place as one of the best shotguns.

KSG 2000
Pros:
- Big magsize
Cons:
- Low damage
- Semi-burst 2 with extreme burst delay
- Low firerate
- Low spare ammo capacity, causing ammo problems
- EXTREME Deviation
- First shot has even more deviation, cause why not
- Usual shotgun problems

Trash.

Super 90
Pros:
- Pretty good, nothing special, it’s basically your average shotgun
- Last shot is a guaranteed crit
Cons:
- Usual shotgun problems

Feels very average to me. It’s basically a stronger super shorty without the ammo problems. The last shot crit can be combined with titanium eternium rifling, but I always reload after fights which means I don’t really shoot my last shot often.

T 8-00-Gauge
Pros:
- Big damage
- For some random reason this weapon has a bit higher range than the other buckshot weapons, but still less than “normal” ammo types
Cons:
- Single shot weapon
- Low total damage
- High heat per shot
- Usual Shotgun problems

Let’s be honest, this thing is weak. Yea, damage per shot is rather high, but it stands absolutely no chance when compared to a shotgun that can shoot several times in the same time this gun reloads. You could try to fix this by increasing the magsize of T80 or by stacking no ammo consumed effects, but then another problem arises, namely the high heat, which can make you overheat in 3 shots. Also, another problem, single shot weapons don’t work with twin link.

PSG ‘Emerald Sword’
Pros:
- Does not suffer a range decrease
- Since it’s semi it’s much harder to accidentally eject. Kind of sad when “being less likely to accidentally commit suicide because your gun sucks” is something worth noting as something positive
Cons:
- Read SS58 plasma charger
- 222 recoil??? This must be a joke. It just must. But isn’t. Why? Who thought this would be a good idea? I don’t understand
- High heat generation
- Unaffected by Breacher’s level 15 Talent
|
Raider Scrap Cannon
Analysis by tactu:
Pros:
- Increases plating cap by 2 WHILE HOLDING it
- Also counts as a special weapon
- Deals meme level damage when charged
- Can one-shot most enemies (all if things done correctly)
Cons:
- Plating goes away if you switch weapons
- Even “single” shots have small delay due to charging mechanic
- Can one-shot most players (including yourself if you have bouncing rounds)

"Strong weapon on the commando classes who can use it best, it’s a very strong shotgun with a
charge mechanic. Unlike impaler, you can release it much sooner for a shot and then shots
increase in power as more heat/longer charge is built. Honestly a really strong gun, especially
for being a shotgun but the charge mechanic puts people off. Like a supercar with an automatic.
Hold your nose and murder some robots."

‘Raptor’ Laser SG
Pros:
- Does not suffer a damage falloff
- Insane damage, shooting 10 projectiles at once
Cons:
- Lunatic heat generation
- Has decreased range
- Unaffected by Breacher’s level 15 Talent

Deciding to use this weapon is a big gamble. You have to deal with unsustainable heat and short range. As payoff you get to oneshot pretty much everything. Now if you get very lucky and roll pretty much every heat reducing attachment and item, as well as Lithium cell ammo (removes the range decrease, just like dragon’s breath), you have an absolute monster. Just very unlikely to happen.

Road Warrior
Pros:
- Full auto shotgun with high firerate
- High damage output
- Low heat generation
- For some reason the max ammo size increase never stops, you’ll end up with hundreds of spare ammo
Cons:
- Low magsize
- Usual Shotgun problems
- High recoil and deviation

This is the very definition of burst damage. One click, everything just dies. This is basically the better T80, you have more shots but low enough heat to use them, the gun is auto and is extremely fast. Try to get this in combination with Hyperfeed, it’s a magnificent sight (just a bit pointless, nobody will be able to watch it because they’re all dead after the 2nd shot). Only problem is that it’s quite inaccurate, which in combination with the reduced range, can really cause troubles.

RRX Coil Shotgun
Pros:
- Does not suffer a range decrease
- Very good base stats
- Permanent damage stacking effect
Cons:
- Usual shotgun problems minus the range

Of all shotguns, this is the least “shotgun-like” option. Its accuracy is absolutely top tier, it has high range and both magsize and firerate are well above average. But it still keeps all the good parts about shotguns, namely the big damage. This is the only shotgun I’d even token outside of Breacher, 10/10.

Viciator Ultra
Pros:
- Extremely good base stats
- Lowest heat generation among shotguns
- Short speed buff every kill and short damage buff every 4 kills
Cons:
- Usual shotgun problems
The usual shotgun problems aside, this is currently the best shotgun in the game. Especially in combination with refresher, this is just broken.

Battle Hymn
Pros:
- Extreme damage output
- Good stats
Cons:
- Semi-burst 8 either requires you to waste an attachment slot or fumbles with your heat and ammo economy
- Red weapon and thus hard to acquire
- Reduced range, just like other shotguns
- Does not benefit from Breacher’s level 15 Talent

This probably the weapon with the highest dps in the game, but it has some flaws that need to be fixed first. There is that burst 8 which causes you to waste your ammo like crazy because everything is dead in the first shot anyways.

There are 3 ways to deal with this, the first option is the hair trigger attachment, but you first have to find that and it means that you can’t take another potentially good attachment. The second option is DMR conversion but that’s probably the biggest gamble of the universe, because it makes your other guns much worse. The last option is to manually fix it, switching weapon causes the burst to stop. Ergo you can achieve the hair trigger effect by pressing Q and having a lot of practice.

The other problem there is to fix is the short range, which, just like raptor is fixed by finding the weapon Eraser DMR.

I have not really said much about classes while talking about these shotguns. I wouldn’t use them on anyone but Breacher, simply because he’s the only one with a weapon bonuses for them and because most shotguns just need too much to happen before they get good if you don’t have said bonuses.

But wait, there is more. Sniper, against common believes, synergizes incredibly well with shotguns. More about that when I get to the classes themselves, but basically he fixes their range and accuracy problems while also being able to abuse that all shotguns shoot multiple projectiles at once.

- Marksman Rifles
Snipers and DMRs, idk whether these are official terms of not. Mostly consist of weapons with extremely low firerate, high recoil but low deviation and extremely high damage per shot. Some of these weapons come with incredibly good ammo, which fixes a lot of their problems. Most marksman rifles are significantly harder to use than the former 3 weapon types, as you are required to hit heads and to take care about your positioning, otherwise you’ll get overrun. That doesn’t mean they’re bad, some of them can easily compete with the better weapons of other types, if used properly.

K98 Classic
Pros:
- Sniper’s starter weapon
- 8.8 Ammo
Cons:
- Deviation is a bit too high to be good
- Heat gen is extremely high

Honestly, Teagle is better. You can’t really use it efficiently to take down armored enemies because the heat is too high and against enemies with heads, teagle is just better.

Ballistic CRX-Bow
Pros:
- Each Headshot-kill permanently increases damage
- Increases crit chance by 10% while held or in backpack
- No heat generation whatsoever
Cons:
- Single shot weapon

Being a single shot weapon really kills this. Even if you get it to the point where it one-shots everything, it’s still too slow to be used reliably. You basically MUST get Hyper accelerator to be able to use this at all, otherwise you just die to the first big group of strong enemies. The other problem is that oneshotting everything is not something unique and there are a bunch of other guns that can do the same but better.

R2000 ‘Sour’ DMR
Pros:
- 8.8 Ammo
- Acid ammo supplier (make sure to switch to basic until you get HA or fight bosses)
- High recoil but also high recoil control, allowing some of the fastest accurate firing among all DMRs
- Extra money on headshots

Definitely one of the better marksman weapons, having access to both 8.8 and acid means you an answer to both bosses and groups. Another blue that’s not really a blue gun.

Twin Mill MKII
Pros:
- Improves in boss rooms
- Movement stabilization
Cons:
- Low damage
- Low recoil control

It’s just weak, no idea what to say here.

Human Model 9800K
(short 98k)
Pros:
- Supplies cold fusion ammo
- Said ammo penetrates enemies at 0.5 effectiveness and slows enemies down
- Very good base stats
- For no particular reason this gun increases your headshot damage by 50 while holding it
- 75% more boss damage
- Permanently regenerates shields at 20% speed of shield regen delay regardless of shield regen delay

No joke, this is the only marksman weapon which has no downside. The best Sniper in the game. Most other snipers are usually weak against bosses or just die to big groups, but not this one. It’s simply effective against everything and even if you don’t plan on using it, it’s still one of the best backpack weapons in the game. As you might have noticed, your shield regen delay rarely gets to tick down completely during fights, but this weapon’s backpack effect just ignores that. It’s unironically better than nemesis and token-able on top of that.

M75 Heavy Support
Analysis by tactu:
Pros:
- Uses its own unique laser ammo that gives bonus damage vs shields, removes extra plating and gives unit piercing at 75% efficiency
- Boosted damage is insane
Cons:
- Need to stand still for a lengthy amount of time to boost damage
- 2 round sequential burst not like AN-94’s

"This weapon can’t really be used to its full potential without a good working technique of
weapon switching. The stand still status, once met, is saved in the backpack. So after standing
still, you can switch weapons and go on your merry way. Even better, if you stand still before
switching, you can fire the gun without losing your damage bonus.

This combined with the OP nature of the special yellow ammo the gun gets, means the gun is absolutely murder for bursting down groups of enemies or single hard targets. Another much more minor saving grace is that the weapon loses it’s status proportionally to the amount you’ve moved, so you can move a little and not lose the entire bonus, but it is a small distance. Highly recommended as a secondary/boss killer gun if you find it. Ammo isn’t really sufficient to be used as a primary."

Tuned M14 EBR
Analysis by tactu:
Pros:
- Unlisted passive speed bonus, movement stabilization bonus
- Good accuracy and decent all around package
Cons:
- Bad recoil on multiple shots
- Smallish overall ammo capacity which can be problematic during tough boss fights
- Lackluster starting damage

"Very much a force multiplier type weapon, this weapon will shine in the hands of skilled players. The movement bonus is very powerful early game and players with good fundamentals will find alot to like, but the gun needs damage damage damage to help compensate for lowish ammo supply. This presents somewhat of a dilemma for the player as the gun requires commitment to shine but if you don’t get sufficient resources to invest in it, it may be found lacking in the toughest boss fights."

AS-VAL
Pros:
- Full-auto
- 8.8 Ammo (remember to switch)
- Killing enemies has a chance to drop plating
Cons:
- Extremely bad ammo economy

I’m fully convinced this is an AR which randomly ended up in the marksman category and you can’t change my mind on that. This weapon is extremely good, provided you can fix the ammo problem. Platings are one of the best defenses is the game and getting them just by killing enemies is extremely valuable if you want to loop or play Hyper Adrenaline. A must have for all HA runs, but also a good choice on Breacher and HG, who both have far less ammo issues, as well as Sniper, who gets his weapon bonuses on this weapon and can be preservative with his ammo thanks to increased accuracy and headshot damage.
|
‘Eraser’ DMR
Pros:
- Supplies Lithium cell ammo (required for Raptor and Battle Hymn)
- Low recoil
- First shot deals 300% damage
- Each kill regains 2 bullets for the current mag and increases heat by 5
Cons:
- Low recoil control
- Since it’s a laser weapon which have their accuracy based on heat and because of that ammo effect, in combination with the low recoil control, this weapon ends up extremely inaccurate after a few shots
- Quite low damage after the first

If you properly use the first shot 300% damage, it becomes pretty decent, otherwise it’s just too weak. However that also means that you always have to wait a bit before you do your next shot, which isn’t exactly great either.

GM6 Lynx Evo
Pros:
- Similar to Sour DMR it allows rather fast firing thanks to high recoil control
- Very good ammo type

Another very good Sniper, having built-in penetration and a ton of damage buffs to various types.

R5000 ‘Sudden’ DMR
Pros:
- 8.8 Ammo
- Supplies Armor Penetration ammo
- Every 5 headshots increase max ammo, ammo gained and most importantly firerate
Put a Hair Trigger on this and you have a shotgun. My highest firerate with this was somewhere around 3k, but theoretically you can go as high as you want. In other words, this is the weapon with the highest firerate in the game. It’s insanely funny to instantly magdown a DMR into the head of a poor enemy. Definitely something you should try, but nothing reliable.

Yoko-Lagann
Pros:
- Inspired by the anime Gurren Lagann
- Shots explode on impact, which makes this weapon be affected by Demolisher’s level 25 Talent
- Very high damage
Cons:
- Insane recoil and insanely low recoil control
- Can’t be shot while moving
- Slows you down while holding it

The best part about this weapon is that it’s an anime reference and that it deals rather big damage, aside from that it’s garbage. No, playing demo doesn’t fix that.

420 Sniperdragon
Pros:
- 360-Noscope makes you a “Gamer”, at least I’ve been told that
- More damage to elites and extra crit chance
Cons:
- Bad ammo eco

On Sniper it’s definitely far more important to headshot than to get the 360-damage bonus. Unfortunately the time window for the 360 is extremely short, which means you effectively can’t aim after spinning and you almost have to shoot immediately. Ofc it’s cool, but not really usable from a min-maxing perspective. Yes yes, I’m a tryhard. Most people who use this don’t really care anyways, but lynx and 98k are definitely better.

Liandry Rail Gun
Pros:
- Can shoot through walls
- Extremely good ammo type
- Big damage
Cons:
- Semi-burst 5, resulting in ammo problems
- Ejecting removes shields
- Red and thus hard to find

Just like the weapon with AS-VAL, I’m convinced that this isn’t a marksman rifle and instead a special weapon. On the one hand it’s super difficult to hit heads with this thing and it’s burst 5 on top of that. On the other hand it can shoot through walls. Hard to use but super fun and worth the effort.

Nemesis Prototype
Pros:
- Beeeeeeeeeeeeg damage
- Extremely good ammo type with full penetration and high armor penetration, as well as double damage to bosses
- Active Reload heat vent
- Lifesteal on shots with bigger effect on headshots (maybe, might also be that that’s nonsense and it just heals more because headshots deal more damage)
- Ricochet allows you to potentially shoot around corners or deal massive extra damage by bouncing into more enemies
Cons:
- Single shot weapon (which does not nearly matter as much as on CRX-Bow due to built-in penetration and ricochet)
- Ricochet can easily kill you
- Red and thus hard to find

It is single shot which can put you in a tight spot against groups, but thanks to its massive damage and the free penetration, that shouldn’t be a problem most of the time. I recommend you look for a secondary when you use this weapon. Important note, keep this away from Breacher and don’t put any “no ammo cost” effects on this, otherwise you’ll end up overheating because you can’t active reload after ejecting a full magazine. Putting AP or acid ammo makes this weapon unable to richochet.
- Machine Guns (LMGs)
I’d like to remind everyone that damage is more than just dps. Ultimately the only thing that matters in this game is to kill enemies before they get the chance to shoot you. No matter how powerful a weapon is after 3 seconds of spinup, a weapon that already killed everything in those 3 seconds in objectively better.

This is a flaw a lot of LMGs have, they prioritize the ability to fire for a long time and high dps after a spinup over high, short term burst damage. Synthetik is just not a game where that’s what you want, there is virtually no need to shoot for a long time if you can just oneshot everything. In other words, a lot of LMGs fail at what’s important.
In addition to that, almost all of them decrease movespeed while holding them, which is arguably a bad thing.

I know a lot of people love LMGs and think they’re great, but this is a guide and I’m here to tell the bitter truth. No amount of pseudo arguments about LMGs being good will change my mind, don’t even try, plenty of people have tried in the past.

LG-2 ‘Onslaught’
Pros:
- HGs starter weapon
Cons:
- 100 Movespeed reduction while held
- Low Firerate
- Spinup required before it shoots AT ALL
- Does not gain ammo from ammo boxes

Ah yes, good old LG2. It makes for a decent starter weapon, but that's what it is in the end: a starter weapon.

Bren Anti Air
Pros:
- High Firerate, doesn’t need spinup
- Low deviation, reasonable recoil
- Unique Split Shot ammo which greatly synergizes with HG’s level 5 Talent
- Additional attachment selection, giving you the highest chances to find good attachments in the game
Cons:
- 0 Armor penetration (fixed by having routine or by playing HA, then low damage doesn’t matter)
- High damage falloff
- High heat generation
- 30 Movespeed reduction

Another one of these weapons which I feel like are in the wrong category. This feels much more like an AR instead of an LMG. Unfortunately the weapon has a ton of flaws and in order to fix them, you need a bunch of stuff to happen (have routine, find titanium rifling, reload vent and hyper accelerator) which basically means you can only rely on this weapon while playing HG, otherwise the odds of getting the stuff you need is just too low. Plus there is that split shot, making this a must have for HG.

Apollon 5 LMG
Pros:
- Decreases shield regen delay by 25% while held or in backpack
- Cons:
- Does not require a spinup, instead it has that strange inverted recoil mechanic
- Can be good but it requires a lot to come true
- Reduces movespeed by 30 while held

Reducing shield regen delay sounds great, but 25% alone won’t do anything. In any fight where you can wait for 75% of your regen delay without getting hit, you can easily wait the remaining time as well. You either get hit often in rapid succession or only once/not at all, in either case this thing doesn’t do anything.
The weapon is a bit of a gamble, you either get firerate increases and twin link to counter the high recoil at the start as well as good heat management tools, or this weapon will perform very poorly. If you do it can begood, but so are many other weapons if you get these things.

Mag47 Heavy MG
Pros:
- 8.8 Ammo
- Surprisingly accurate, as long as the firerate stays low
Cons:
- Reduces movespeed by 50 while held
- Extremely low base firerate
- Extremely inaccurate at higher firerate
- “Overheat Overdrive” - Any "upside" that requires you to overheat cannot be called an "upside"

Lmfao, AEK has a higher firerate than mag47 after overheating. This is extremely sad and funny at the same time. First, you have a weapon that’s very weak, with low firerate. Then, after shooting for like a minute and overheating once, you have a weapon that still performs worse than some other options.

RPK-12 Tundra
Pros:
- Supplies acid ammo
- Has no movespeed reduce, unlike other LMGs
- Both firerate and recoil are reasonable
Cons:
- Reasonable firerate is not good firerate, that thing is still slow

The only thing special about this is that it doesn’t reduce movespeed and that it has a constant (constantly low, but still constant) firerate, unlike other most other LMGs.

Armageddon
Pros:
- Insane damage
- Extreme firerate without spinup
- 8.8 Ammo
Cons:
- Reduces movespeed by 30 while held
- Heat generation is problematic due to the extreme firerate
- Each shot deals a small amount of damage which really adds up due to high firerate (to be precice, it heals by -2, which means Invulnerability of any sorts won’t help you, but it scales with the healing stat and thus gets reduced in loop)
- Red and thus hard to obtain

Finally some good stuff. This is how I wanted a machine gun to look like. I mean, no joke, there are snipers with more firerate than some of these other LMGs. But not Armageddon. This really is a monster which has no time for a spinup, it jumps directly to slaughtering. Only problem, the heat gen is quite high, so you have to find powershot and it deals damage when you shoot, so you’d better think twice before you use this.

The best-case scenario is if you find incubus or black berserker charm, they give lifesteal which greatly synergizes with this. If that doesn’t happen, you better be playing HG for that healing on shots or have another sort of healing that can deal with the damage. If you don’t this isn’t really usable in the long term.

Gladiator
Pros:
- Red and thus hard to obtain
- Can’t overheat
- Once it finally starts firing, it’s quite strong
Cons:
- Reduces movespeed by 100 while held
- That spinup is no joke
- Probably the slowest ammo regeneration this game has to offer, if you can’t kill the enemies in one magazine, you’ll have to wait a year before you get enough ammo back to continue fighting

It’s quite ok, unless you have to fire very quickly because an enemy just appeared from somewhere and you have to kill him before he kills you. Luckily that’s not something that happens often in this game, RIGHT? (Laughs in ballbots, shotgun rivals, nemesis snipers, Hyper troopers, Ion troopers, Chrono troopers etc.)
- Launchers
A very interesting weapon type, with a very limited field of usage, but great power in that limited area. They’re very effective against big groups, but fall short against single enemies and bosses. It’s best to use them as a secondary weapon alongside a more reliable weapon.

Ares GL-16
Pros:
- Demo’s starter weapon
- After 50 kills are obtained (regardless of which gun you had equipped) the gun gets upgraded to a point where the ammo is sustainable, if hell breaks loose this can be the launcher you choose to main
Cons:
- Single shot weapon
- Heat can be a problem if you main it

Obviously the main source of explosions during demo’s early game. It won’t be possible to shoot at every scrub with this, use it against threats and bigger groups, otherwise you’re out of ammo faster than you can say boom. Basically like with super shorty, except this weapon is stronger.

M79 Terminator
Pros:
- Plating looter effect that’s even stronger than on AS-VAL.
Cons:
- Basically just another ARES, except you don’t get to start with it

Really the only good part about this is the plating thing, but since you can’t really main this weapon, you’d have to do that constant weapon switch thingy.

M32 Multi Purpose
Pros:
- While it doesn’t look like it as long as the gun is unupgraded, the damage output is insane
- Good magsize and firerate

This is the best of the tokenable launchers, it can wipe out entire groups nearly instantly.

Heavy Flak Cannon
Pros:
- The only launcher that doesn’t really care about whether you fight a group or a single enemy, the ammo allows both and it can’t friendly fire
Cons:
- Only when landing a critical hit, a resonator target gets placed

This is less of a launcher and more of a generally usable weapon. Which by itself is a good thing, but the “generally good” category is already stuffed with ARs and SMGs, so it’d be better if this was more “launcher like”, because the way it is there is not much reason to use it.

Human RPG-7
Pros:
- Big damage
Cons:
- Single shot weapon
- Small total spare ammo, even with that effect which increases it you need to beat half the game before you can use this even half reliably
- Takes a year to reload

It’s not something you can really use. Early on it deals a ton of damage but you rarely get to use it because ammo, later the ammo is fixed but by then you have things that deal even more damage.

ML7000 Plus
Pros:
- Homing missiles can be abused
- Good magsize and firerate
- Gives ammo to currently held weapon on teleporter usage
Cons:
- Low damage
- Missiles fly slow

There is a way to abuse this weapon, but if you decide to not do that, it’s pretty bad. Even with demo’s double upgrades, you need a lot before it really deals enough damage and then there is still the problem of missiles being slow. It kind of is the same problem as with LMGs. Now how to abuse this gun: The missiles basically fly in spheres around your cursor, with the radius being the distance between you and the cursor.

**But what if we click ourselves and make the radius 0? What could go wrong? What would happen if we then slowly move our cursor? Into a bunch of enemies? ** I don’t see any problems, that’s for sure. You totally can’t shoot around corners using this exploit, trust me. It’s basically an iteration of the grenade cheesing strategy.

HIG-S Particle Cannon
Pros:
- Reduces dash cooldown while held or in backpack
- Built-in twin link effect
Cons:
- Again, not really a launcher anymore. But unlike with Flak Cannon, you can hit yourself with this and you have to deal with accuracy.
- Small AoE

The backpack effect is op, but the weapon itself is pretty eh. Like Eminence.

Annihilator Anh-5
Pros:
- Who though an automatic launcher was a good idea?
- This weapon is the picture of overkill, wherever it shoots, everything just dies
- It fires really fast for how much damage it does
Cons:
- Consumes shields on shot
- Problematic heat generation
- Problematic ammo economy
- Red and thus hard to obtain

It’s like with Armageddon, another monster which will obliterate everything that dares to cross your way, but it has drawbacks. You mainly want to get the item magic mag and the attachment backup printer, then you should be fine. Oh, and probably turn down the volume a bit, this thing can get quite loud.
- Special
There is no point in saying something about the weapon type when each weapon is an entire weapon type on its own.

Makeshift Firecannon
Pros:
- Quite high damage
- Inflicts lots of Burn
- Shoots 2 projectiles at once
Cons:
- Reduced shield damage

The better one of the flamethrowers by a mile. Unfortunately the damage is not yet enough to consistently one-shot enemies and even with that double shot, the firerate is usually too low to consistently deal with groups. Another problem, DoTs are blocked by shields, which means that reduced shield damage is really hurting the performance of this weapon. Ok-ish, but nothing worth tokening.

FS5 ‘Flametongue’
Pros:
- Increases max HP by 250 while held or in backpack
- (Does that fire resistance part even work?)
Cons:
- Basically a weaker Firecannon

In case you wonder how flamethrowers in synthetik work, here they just shoot a projectile like any other gun, which can headshot and even ricochet like any other gun. It’s just that they fly slower than other projectiles and have significantly less range. Yeah, the whole flamethrower thing is kind of a scam.

HMN Laser Cannon
Pros:
- Infinite range
- No recoil, no deviation
- Does not have the concept of “bullet speed”, instead it checks which enemies currently standing in the beam
- Extreme power once upgraded, due to entirely different functionality than other weapons
- Despite being laser, it deals 200% damage to shields
- 0 Base heat and low heat generation
- No firing slowdown
Cons:
- Problematic ammo economy
- Can’t headshot (as if that mattered)
- Arena weapon

So first, yes it has infinite range. Even if the visual range of the beam is quite short, it will still hit anything that stands in the direction you point at. Then, please just take a look at this gun and its advantages. Infinite range, full penetration, no recoil, all these 3 things would ALONE justify this gun a place in the good weapon category.

And it only gets worse the more you learn about it. Because of the lack of recoil and deviation, all twin link effects make this weapon deal double damage instead of shooting another shot. You can just go and token this weapon on every single class, provided you have it and it will be broken on literally everyone. Last patch this weapon’s heat system got reworked and I expected some balancing, but now the weapon is even more consistent.

Ion Obliterator
Pros:
- Extreme damage, capable of dealing 5 digits unupgraded without further damage buffs
- Extremely good ammo type, giving this full penetration and good damage against bosses
- Fully automatic despite saying it’s semi
- 10% more crit while held
Cons:
- Heat problems
- Red and thus hard to obtain
- Short spinup

This is basically a sniper, except it doesn’t struggle against groups or bosses. You have to be careful about the heat, this thing can shoot much faster than the firerate would imply. And you have to be wary of the short spinup, but this time it’s much shorter than with most the LMGs.

‘Mjolnir’ Chain LTN
Pros:
- Walls are an illusion
- Aiming is an illusion
- High damage
Cons:
- Removes all shields with each shot
- Range is slightly lower
- Titanium rifling and hyper accelerator have no impact on this
- Big heat problems
- Very big ammo problems

Basically you click and stuff dies. You don’t need to aim, you don’t even need to be in line of fire with enemies. Yeah yeah, problematic heat, but that doesn’t matter if entire groups are dead in 2 shots. Also magic mag and backup printer exist.

The real problem this weapon has are phaser and bosses. Against the former you better have something explosive or a secondary weapon. Against the latter you either know their attack pattern very well or have a secondary weapon. Also you might get screwed in the Armageddon room. Special stress on might, Mjolnir is just too broken.

‘Ripjack’
Pros:
- Special ammo type with free penetration, high armor penetration and good damage
- Inflicts a ton of bleeding on hit
Cons:
- Ricochet which is the gimmick of the gun
- Red and thus hard to acquire

Funny ricochet memes aside, this weapon is actually quite powerful. And the Blades fly really slow, it really isn’t too hard to predict where they fly and dodge them.
Evergreen Weapons
Every class gets to token 4 weapons and unlike many people assume, you are not required to take weapons that fit your class. Instead many weapons are that powerful by themselves that you can use them on any class without suffering any downside. Doesn’t meant that you must not use weapons that fit your class ofc. I will use this section to tell you what the most reliable/best/consistent weapons are. Red weapons and pistols not included.

Powerhouses that don’t care about class:
AEK Special Elite, An-94 Deathstalker, Laser Sub, HMN Laser Cannon

Still Powerhouse but not as Evergreen:
Coil Shotgun, AS VAL, Human Model 9800K, K7 Competition, Medic FMG-9, AMD 65, M32 Multi Purpose

All these have one or another downside making them a bit less consistent.
Ofc this doesn’t mean that you can’t use other weapons, they just usually need more things to come true and I wouldn’t consider tokening them.

Later when I get to classes, you can either just pick the 4 broken weapons or go a bit more class specific which will be specified for each class individually.
Variants
You don't get to choose your variants anyway, no point in going overboard. All weapons in boss rooms will be Alpha, Ultra, Cursed or divine. Use this as described with unstable randomizer. Most variants are either positive or neutral, but some are that bad that they just outright ruin your gun.

But before that, some really good variants:

Alpha gives heat vent and a lot of buffs for almost no downside. Best Variant you can get.

Lightweight and Mil Spec offer very powerful upsides at no downside.

Ultra, Divine and Modular greatly improve weapon performance/dmg ouput but come at the risk of ruining your ammo.

And now bad stuff.

Taiga Hunter cripples magazine size, firerate and ammo gain and, since heat is related to the former two, also your heat management. AWFUL. In some rare cases it's fine but too often it makes the gun not worth using anymore.

Overclocked raises minimum heat and heat generated, basically ensuring you a death by overheat on nearly every gun with very few exceptions. Sometimes you can get away with a low heat gun and reload vent, but mostly it just ruins it.

Prototype. All my homies hate jamming. Also the stats really aren't great, increased heat and reduced firerate really do no good. Not catastrophical but still sad to have.

Cursed is one of these "just why?" Moments. Why would you want a gun that damages you? Why does it have to increase firerate, recoil AND ammo gain by this much? Why? Honestly this is the last Variant I would consider using.

Finally some warnings on the "usually good but sometimes bad" modules: Hyper Burst increases heat generation which combined with the bursts can cause serious heat problems.

Stabilized, Siege and Crit Charged increase deviation which is really bad with snipers or on Sniper.

Printing doesn't directly impact your gun but almost ensures ammo problems.

Remember that you can always use the safe file in order to remove the 2 researches that add variants if you like to.
Heat Management
Overheating:
- Strips your shield
- Deals some damage, but it scales with damage absorb so in loop or HA it just oneshots you
- Drastically reduces your firerate and decreases Accuracy
- Gives an annoying screen effect

It appears overheating does not deal damage if you're using a weapon that was originally picked up by your coop partner.

Note that the damage part comes with potentially triggering flinch/fragile/hard core 1.

After reading this you can probably agree that overheating is a bad idea and if not you'll eventually oneshot yourself by overheating at some point and then you'll know what I mean.

Avoiding overheating means that you will have to factor heat in your long-term damage output. If you don't have a way to vent heat (get it?), you will want to stop shooting and thus lose damage. This simply means that you have to think about ways to keep your heat low and it also means that some weapons aren't as good as they could be.

Now before I start with listing things that deal with heat, let me explain how it actually works. At the bottom of your screen there is a heat bar, it starts (usually) at 10, when it's full you overheat. Each weapon has a heat modifier stat, but that basically means nothing. Instead when you hover over it you see values for heat gen per shot and cooling rate. Interestingly enough, firerate and magsize are connected to the heat gen stat and by increasing them you decrease heat gen and vice versa. Generally the cooling stat is less important because it usually is too low to be meaningful and because there are better tools to reduce heat.

The goal is to be able to hold down the trigger until your mag is empty without overheating and then to have a way to reset heat in order to go again with the next mag. If both things are true you can shoot as long as you want without ever having to spend a thought on heat.

Beginning with attachments, there obviously is reload vent. As stated it vents all heat and reduces heat gen by 10%. This is the optimal way to deal with heat, as it basically single-handedly achieves both goals at once. Then backup printer, which essentially can be viewed as a 20% heat reduction. Finally attachments that increase firerate/magsize also help, but keep in mind that more firerate = less time to cooldown between shots and more magsize = more bullets in mag = more potential heat.

Then for items there is magic mag which once fully resets heat, but since it also refills mag, it's only a temporary Solution if you can't kill the enemy with 2 full mags. I.e. in bossfights.
Heat vent and hyperfeed do similar things, but they're both much weaker than magic mag so they can be ignored.
Then Powershot. Since it reduces heat based on shots, it’s most effective with high RoF, high magazine and low heat per shot weapons. For a lot of SMGs and ARs this is enough to deal with heat consistently and if you manage to get heat per shot low enough, this will almost cancel heat gen entirely. Because of that and because of its additional damage effect, this is the optimal tool to deal with bosses. Lastly you can recycle refresher or use custom upgrade kit to permanently reduce heat.

There a number of other heat reducing effects spread between all sorts of categories, like unceasing, raiders knife, picking up ammo on HG and stuff like that. You’ll eventually get a feeling for how much heat management you need for which weapon on which class.
Ammunition
You can’t look at weapons without looking at the ammo types, as they often have a massive impact on how powerful and how consistent the weapon is. Additionally there are special ammo types which further complicate the topic, which means instead of listing every possible combination, I’ll just direct you to the wiki and tell you what to look at.[synthetik.gamepedia.com]

Damage
Base damage of the specific ammo type, gets multiplied with the weapon’s dmg multiplier to create the total damage. Unfortunately these values are outdated, but you can still use them to compare ammo types. Keep in mind, damage is not the most important thing to look at and the final dps depends on a lot more than just ammo damage.

Armor Penetration
Used to calculate the damage reduction enemies with armor receive. Most weapons have an AP of 10 or 15, which is already relatively low if you play with the deflect diff mod. Anything below that can be seriously problematic and obviously the higher the AP, the higher the boss damage.

Innate penetration at (x) efficiency
There are a number of ammo types which come with penetration. The “x efficiency” shows how much damage is lost with each penetrated enemy. (half at 0.5x, none at 1x, above 1x damage increases with every hit) Getting that built-in penetration is a gigantic upside and you have to be careful with the 8.8 ballistic ammo, as only 8.8 Kurz and 8.8 AP have it, other special ammo types lose it.

Ricochet
A bunch of ammo types have a small chance to ricochet and imo that’s extremely annoying. Either always ricochet or never, but please not those pesky 16.6% which are just there to screw you up but don’t actually do something useful.

Those were the ammo stats to look at, now the special ammo types:

Armor penetration/Sabot ammo
Increases Armor penetration and crit chance. This special ammo type is collectively the best everywhere, with only some exceptions where soft point is slightly better.

Soft point
Gives your shot a chance to stun or slow. Both the chance and whether the shot can slow or stun and how long the effect lasts depends on the caliber you’re using. 8.8 and 5.57 have a low chance and give more slow than stun, while the pile of ballistic soft ammo which is used by pistols and smgs have a significantly higher chance and duration for stun. This is where this “can make full use of soft point” comes from. Taking soft point for the slow effect is not really worth it. The exception are tungsten -> shock arrows, which have a gigantic chance to stun and a massive stun duration.

Bleeding/Acid/Burn
They all trade damage on shot for DoT. Bleeding ticks very fast but with lower damage per tick, acid has a very long duration, ticks very slow but deals a ton of damage and burn is in between them, but a lot closer to bleeding. Another important thing to look at is on which guns you can get those ammo types. E.g Burn is limited to laser and shotguns. Which ammo type is better exactly is hard to tell, but I can tell you where they’re used best:
Acid against bosses
Bleed if you want as much damage as possible as fast as possible
Burn if you want damage as fast as possible but also want to ensure that they die from the DoT

Then there are a bunch of rarer special ammo types, which I don’t want to spend much time on.

Triple slugs gain crit chance an AP, but only fire 3 instead of 8 shots. Bad due to massive accuracy loss.
Cold Fusion grants innate penetration and applies slow, one of the best ammo types to be found.
Hypersonic ammo is supposed to reduce noice/aggro range but I’ve honestly never noticed that. It usually has slightly worse stats than the base ammo, but the thing that kills the ammo type for is that I can’t see the bullets which cripples my accuracy because I can’t see where I shoot.

Grenade types where the basic ricochet ammo deals a lot more damage and has a bigger impact radius (explosion AoE) than the impact grenade.
And finally some rockets nobody cares about.

As stated in the shotgun section, putting special ammo types on shotguns removes their range reduction. Unfortunately triple slug is pretty bad, which leaves Burn and Bleed as desirable ammo types.
Attachments
Among the attachments, there are a TON of missing info. I will no longer call out every wrong tooltip, there would be too many. Go check the wiki if you are confused.

Reducer
This is the one and only attachment which does not care about what weapon you use or what you need to fix it. Items are 10 times more important than weapons, to a point where some items make the weapon interchangeable, while some other make weapons completely unnecessary. Take this. Discussion over.

Reload Vent
Now this will surely surprise you. In addition to it’s full heat venting effect, it also passively reduces heat generation. Why do I rate this that high? As you might have noticed, I really dislike heat. Whenever I don’t roll this attachment, I find myself dying to overheat later. Well, not always, but still fairly often. Most people would definitely rank this waaaaaaaaaaaaaaaaaaaaaaaaaay lower, but I say it’s crucial for survival. After all, it’s the best heat managing tool in the game.

Hyper Accelerator (short HA)
Adds full bullet penetration. In other words, multiplies your damage output by the number of enemies which stand in a straight line. If you have spent more than 10 seconds playing this game, you will know that that’s a lot of damage increase. The best among all attachments by far. Additionally it allows some strategic tricks like abusing one enemies as cover while shooting the rest through him. Naturally this is not required on weapons which either already penetrate or better off without penetration (like grenade launchers).

Titanium Rifling (short Trifling)
Removes damage falloff, which, depending on your ammo type, can be a massive damage increase. The more important part is the range increase. Most people don’t know about the value of range and thus absolutely won’t understand why this is here, but let me tell you, high range is invaluable. The ability to take out dangerous enemies like chronos or stinger gliders from safe distance, as well as the ability to outrange snipers are crucial to your survival. ONLY refractor crystal (an item) can replace this attachment in certain situations. I will dedicate a section to the importance of burst damage, but for now know that Synthetik is a game that’s all about killing the enemies before they can shoot you. Trifling does just that perfectly. There are a few guns which already have infinite range, those don’t need this.

Lucky Dangle
Once it reaches max stacks, this equals 100 Luck, which is a ton. Really worth taking for just that, but it also grants you a chance to deal double damage and remember, chances scale with luck!

Digitalizer
This one is difficult to understand; the tooltip is not exactly clear about what it does. Instead of taking their normal path, which may be way off where you want them to be, your bullets now have a chance to fly closer to the middle to your cursor, hence, more accurate. This attachment allows you to somewhat ignore the accuracy system and among all attachments, this is the biggest accuracy increase.

Twin Link
Gives you a 12% CHANCE of firing an extra projectile. Since the question comes up quite regularly, yes, this doubles the entire shot on shotguns, they don’t just add another bullet to the already existing 8 (or whatever else you have).

Backup Printer
Every 50 Heat generated, this removes 10 of your current weapon’s heat and prints bullets to your spare ammo. In other words, this sets you 20 Heat away from overheating and fixes ammo problems. Whether or not you want this depends on whether or not you already have reload vent or need ammo.

Tac Grip
Passively decreases Recoil by 5% and additionally by 20% when standing still. What the heck does an attachment that requires you to stand still this high on the list? It’s here simply because of how strong it is. More often than not this singlehandedly negates recoil on your gun. Firing perfectly accurate while standing still sounds pretty dope, doesn’t it? Of course you don’t plan on standing still permanently, you only do it while actually shooting. Simply following the hit and run strategy. In most cases you either want to negate recoil or bring movement accuracy to 100%. So depending on class and variant, this one is interchangeable with the upcoming 2.

Angled Grip
Apparently, a lot of people misread this. Heavily reduces movement speed penalty while firing. Double negative. Somehow everyone thinks this slows you down and that’s definitely not the case. As stated on the last attachment, movement accuracy is the other way to go and this is what you want most if you go that route.

Silver Bullet Alloy
Some people seem to think this is the single best attachment in the game. Assuming 1k base HP for most classes, this gives 20% bonus damage ONLY to Elites and bosses. Bosses are learnable and there is no point in building for something that can’t beat you because you know what’s going to happen anyways. The Plating removal effect is much better. For weapons which fire slowly, namely snipers and grenade launchers, this is pretty much mandatory, otherwise you won’t get down enemies with plating.

H-P Laser
Basically Angled Grip, but it doesn’t decrease your movement speed penalty. I don’t know which one gives more movement accuracy, so unless the disparity is really gigantic, angled grip is the better option.

Directional Disperser
You get damage, firerate, recoil reduction and movement accuracy at the cost of only deviation. However that’s a lot of deviation and it can break some guns. Depending what gun you use, this is either completely fine, or an instant death sentence.

Caliber Reduction
Reduces Recoil and damage and increases magazine Size. As you might have noticed, I like reducing recoil a lot, so this is one of my preferred attachments. It really is a lot better than you might think, the accuracy boost completely counters the damage decrease (which is small anyways) and really helps with a lot of guns. Try it.

Ammo TP and Ammo TP MKII
Gives you a chance to not consume ammo. Scales with luck and ammo gain. This is effectively an increase of magazine size, with the upside of being able to stack with other ammo tp effects which then CAN reach 100% no ammo chance and the downside of not decreasing heat generation. The fact that you don’t consume ammo will also fix ammo problems. It’s just that magazine size is not particularly important in this game. What’s the point of shooting long if everything dies instantly?
|
Offload Cycler Ultra
While increasing your firerate and thus your dps is a good idea, it also means that your accuracy will go down the chain, more often than not. More often than not you don’t want this, simply because it may make you unable to shoot straight.

Titanium Eternium Rifling
Base Critical strike chance is 3. If we take just that, it makes you unable to crit. Snipers class challenge adds 3 and the deflect diff modifier adds 4. With all those and this attachment you end on 5. So you half your chance to crit but deal 75% more damage, which once again is an additive buff which and in truth is a 37.5% buff. So you half your damage from crit by halving your chance to crit, but increase it by 37.5%. Doesn’t sound worth. Unless you have a lot of crit, or a way to guarantee crit, this is never worth taking, but if you do, it becomes a massive damage boost.

Power Link 4x4 Pin
Not particularly impressive when it comes to taking out crowds, but the buffs it gives are very strong and if you find a single shot weapon and decide to use it, you can stack up a lot of buffs and really abuse this.

Hotswap
Unlocks all ammo types for all weapons, which can be extremely good in some cases, but you don’t want this on your main gun (and you don’t want to split your upgrade kits, thus don’t want a secondary), so you will barely take this. Plus you can get the ammo type from other sources.

Vital Data Collector
Gives you 400 HP, which following the concept “kill it before it kills me”, has absolutely no place on a gun.

Last Straw
On about 95% of the guns you never get to shoot your last shot and even if, it only affects one enemy. However there are guns which have extremely small mags and also have considerable spread. The only weapons which fall in this category are Road Warrior and T80. On these 2 this attachment is busted and can easily be put in the top 5, on anything else it’s pretty trash, since it never does anything.

Backup
Increases max ammo and ammo gain, so if your ammo eco sucks, this is what you want, however keep in mind that increasing your damage output reduces the amount of ammo you need, which also fixes it a bit.

Impact CPU
Basically just 25% more damage to turrets and that’s it.


Barebone Allocator
Before you ask, no this is not triggered by Mjolnir. Does basically nothing, it just gives ammo regen which requires you to lose your shields first, which is pretty terrible.

Those were all attachments which are not bad. Some don’t do much, but unlike the upcoming ones, they either have no downside or an upside which clearly overweighs the downside.s I’m not sorting anymore, you'll want to avoid them all equally.

Dynamic Reflector
Now this is a hot take, but I really dislike blowing my own head with my own gun. This is technically not a bad attachment, you can learn how to play around ricochet and even use it to your advantage, but I’ve died way too often to some stupid ricochet to call this good. This, I have to say it, is my opinion. If you want to place it somewhere else, do it. Also gives 10 armor penetration, which can be quite a big damage increase if you use a gun with 0 ap.

Muzzle Compensator
You deal more damage but you hit less, which means you deal less damage. There are some guns which don’t have a recoil or deviation system and always shoot the same regardless of stats and there are the single shot weapons, on all these this just equals 15% added damage. This would put it a slight notch below twin link. On everything else, this is a downgrade.

Short Magazine Spring
The inability to eject and thus fix your heat WILL eventually kill you at some point. There are exactly 4 weapons in this game on which this is a good attachment, namely both plasmas, gladiator and nailgun.

Cranial Targeting CPU
Once again, added bonus. 100% bonus is only a 50% damage increase. That at the cost of 15% damage. This really doesn’t do much, especially considering that the majority of your shots won’t be headshots. Most people will make the mistake and take this on either sniper or on a sniper, where it is even worse, since both already have increased headshot damage, making the total buff from this even smaller, while also already being inherently weak against bosses, which gets made worse by the 15% damage reduction. If it was just that I would call it useless and leave it at that, but it also takes 10 shields per shot.

Eternium Amalgam
No description needed. If you take this on an LMG with an already big speed reduction, this will invert your controls. No joke. 2nd Worst attachment in the game.


Eraser Cell
This one might surprise you, but given that each orb increases heat by 5 and given how big groups get in loop, this can overheat and thus kill you in a single shot if you gun is strong enough. If you aren’t afraid of that, it’s pretty good, fixes ammo problems and even regains some shields.

Super Heavy Compound
There is a reason I gave Titanium Rifling 4th place. This does the exact opposite of it. Worst attachment in the game. Some guns have infinite range, on these it still slightly reduces movespeed, making it still not worth taking this.

Trifling's falloff negation doesn't work on SHC, if you were curious on that.

Multiplier
So burst weapons have several disadvantages, they suffer from burst delay, they are often less accurate since there is no time for the recoil control between the single shots and they can cause heat problems. I would never want to turn a weapon into burst mode, but if you do, go on, take this.

Wormhole Mags
Decreasing magsize = Bad. I guess if you are really desperate for some ammo this is still fine, otherwise not.
- Special Consideration Attachments
Those attachments aside, there are some attachments I want to rank outside of the others, because they have an effect which entirely depends on the gun and can either be good or detrimental.

Hair Trigger
On basically all auto or burst-guns, this is a downgrade. On Semi weapons this is a massive upgrade, given that auto weapons don’t have burst fire delay, unlike semi weapons. On semi-burst this is mostly good, given that most semi-burst weapons have really weird burst number, just look at Battle Hymn and Liandry. Also grants a 30% damage boost, so if you have a semi-burst weapon, it’s mostly the right choice to take this. For the weird weapons, since they stay auto even if you make them semi, this is 30% more damage with no downside.

Custom Fitting
Going by weapon type:
Pistol: you barely upgrade them anyways, but if you do, this is awesome on them
Shotguns: Pointless
SMGs: Full ap on a weapon type that tends to have really low ap? Depending on what you’re fighting, this is like a 50% damage increase
Marksman Rifles: All marksman rifles except an-94 already have low enough deviation and recoil to not care about this. On an-94, this is just busted
Assault Rifles: Pointless
LMGs: Yeah yeah, they really needed even more magazine. Not like that’s the only thing they already have more than you could ever need
Special Weapons: Dude 50 movespeed. Unless you can have one of the top 5 attachments, always grab this
Launchers: Max ammo capacity (unlisted)

Multi-type weapons gain both bonuses

Unstable Randomizer
This Attachment basically does 2 things, the first is doubling all bonuses your weapon get from its perks. Classes like Demo, Sniper or Assassin get really powerful buffs for some weapon types and some weapons have powerful perks themselves. In either of this cases this is a very powerful attachment.
The 2nd thing is adding another variant to your weapon. Unfortunately some of those are extremely bad and weapon-ruining, which normally means taking this gives you a chance to completely ruin your weapon. However since you are guaranteed to get alpha within boss rooms (or sometimes cursed, ultra or divine), you can simply wait for a boss room after being given the choice for randomizer instead of taking the attachment immediately, giving you a very very high chance to get alpha.

Reload vent is a very powerful attachment and this has the potential to be it but better. Don't try taking this outside of boss rooms tho, the odds to get a bad variant are too high.

Tri-Bolt-Carrier
Adds 2 additional pellets per shot. Take note of the wording, this will only add 2 pellets to shotguns, which means for example 10 instead of 8. With that being the upside, you lose 20% damage, 20% firerate, get 30% more deviation, 10% more recoil and 10% more heat. This means you deal less damage, fire slower and are way less likely to actually hit something. I would even go as far as to argue that this is not a dps increase. The really big problem is that you also consume 3 ammo per shot, so this is destined of ruining the ammo eco of almost every gun in the game.

Now why is this here? Normally this is a very bad attachment but some guns have enough ammo to make this usable. However weapons with built-in twin link effects like boltcaster or annihilator do NOT use triple ammo with this attachment. Which means for those few it's a very powerful attachment worth taking. Only imagine the beauty of anni + tribolt + twin link.
Items
The class core items are not included and I will get to them when I cover the class itself. Unfortunately the item section on the wiki is severely outdated, so I recommend you only check the notes while keeping in mind that not all things there are correct.

Before getting to the items themselves, I want to begin with talking about how to “build” with the 8 item slots you have. You get 4 Supply Tokens to set, leaving 4 more to play with. Then you have 3 starter items and depending on class, you even want to keep them in most cases, which essentially means 7 item slots are set. Of course It can happen that you run into a lot of very good items and then it’s completely valid to get rid of some starter items IF they’re worse than your other options. Don’t underestimate them just because they’re starters tho.

The way I choose my items is by sort of filling slots for different purposes. Just piling up good items is not really profitable, instead I usually go like: One way to manage heat, enough items to make everything die instantly, two defensive tools, maybe a healing item, maybe a summon. If you look at some of the items that are about to come, you will understand why it’s pointless to for example pile up 6 damage items.
I will do this now so I don’t have to do it when I get to classes: Items tokens on every class are: Magic mag, twin link, refractor crystal, shock impulse. With these 4 you essentially have 1 heat items, 2 defensive items and 3 weapon enhancing items (because some fill multiple roles, I can math). Twin Link and shock impulse will ensure everything dies instantly and refractor is the best defense you can get. There are some exceptions and I will explain them for the respective class.

These items are optimized for looping and for example refractor or shock impulse won’t be very valuable if you just want to beat the game once. I recommend using rosarius instead of refractor and tsunami talisman instead of shock impulse if you’re just getting started, as they’re easier to use.

I decided to put the items into categories, say a few words about the importance of that category and then list the items in order how they appear in the wiki.
- Damage (Starter & Active)
These items are these which have no other purpose than dealing damage themselves directly to enemies. Items which have other beneficial effects or which enhance your gun are not listed here. Because of 2 of these gun enhancing items, almost every single of these is a filler item at best.

With filler I mean something you keep until you have found more than 8 items and have to trash something. Actual items are these which have a chance of ending up in your final 8 items, everything else is marked as filler.

You have to ask yourself; “what does this item do for me which my weapon can’t”. If it just shoots in a straight line and deals a bit of damage, it will get outclassed and made useless by your weapon very quickly. If it has a downside or a high chance of hurting you, it becomes an easy recycle, those are marked as trash.

Generally passive damage items (next section) are better than active. Since damage items are not overly important, I will quickly skim through them, lose a few words on everything and not even bother to sort them.

Auto Taser
Additionally stuns, ok filler item


RV Rebuke System
Triggers upon getting hit, deal like no damage, bad filler item


Shieldburst
Strips your shields and deals damage based on shield removed, trash, doesn’t grant guardian stacks, trash

Tomahawk
Semi-passive, deals good damage and causes bleeding, good filler item


'Helsing' Power Bolt
Good filler item


Laser Mine
Trash


Plasma Grenade
Deals trash damage to shields, doesn’t draw attention, ok filler item


Acid Grenade
Trash


Dragon's Masterkey
Semi-passive, ok filler item


Composite 4
Bad filler item


Neutrino Bomb
Bad filler item


HE Grenade
Doesn’t draw attention, chance to not be set on cooldown, extremely good item. If you upgrade this to very high level, it will reach up to 75% chance to not go on cooldown. You can abuse this to cheese the biggest portion of the game, although Disco/LD and arma kill the strategy. This is called grenade cheesing

Heavy Steel Trap
Semi-passive, bad filler item


M26 MA Shotgun System
Increases Heat on activation, semi-passive, trash


Eclipse
Deals damage centered on one point and draws aggro to the player, bad filler item


Kunai Throwing Knives
Increases Heat on activation, semi-passive, ok filler item if you don’t mind the heat, trash otherwise

Magnum
Additionally stuns, ok filler item


Air Com
Deals a lot of damage, good filler item


Infinity Drill Piece
Pierces 10 times and target seeking, ok item


Redline
Trash


Z1 Sundering Shuriken
Ricochets and multiplies each time, ok filler item
- Damage (Passive)
Biting Throwing Stars
ricochet, ok filler item


G87"BEAMER"
follows enemies, ok filler item


M205 Launcher
Extremely dangerous to use, trash


Orb of Iron
Additionally stuns, ricochet, I’m sorry tactu, trash


Orb of Wind
Deals damage directly to enemies, ok item


Power Array
Deals a ton of damage in a straight line, bad item


Ripjack Hyper Blade
Deals extreme amounts of damage, but with the risk of hitting you. Trash or good filler, depending on how you can deal with the ricochet
Drops suspiciously often in Hyper Adrenaline.


Heart Seeker
Target seeking, triggers on shots, ok item


Sidewinder
Target seeking, increases Heat on activation, ok filler item


Blood Bolt
Target seeking, triggers on kills, ok item


Fan of Knives
Triggers upon losing all shields, trash


Icarus
Somewhat weird to explain, ok filler item


Maverick MKV
Dumbfire, increases Heat on activation, ok filler item


Orb of Fire
Increases Heat on activation, ricochet, trash


ZK77 'Sticky Bomb'
Each Bomb explodes 4 times, extremely buggy in coop, bad item, but trash in coop


Akira
Upon dealing damage, triggers explosions below the cursor, ok item, unless you play Breacher then it’s S++ tier

Crux of the Laser Caster
Charges up when scoring crits or headshots, deals damage directly to enemies, extremely good item
There is a problem with this item that causes it to not drop for most players. See here for fix: https://www.synthetikuniverse.com/forum-1/synthetik-1-discussions/script-to-fix-crux-drop-issue

Facemelter
Causes explosions on Headshots, bad item


Fire Prism
Just shoots lasers, ok item


Orb of Lightning
Additionally stuns, deals damage directly to enemies, good item


Reality Ripper
Deals damage directly to enemies, good item


Uranium 235
Applies DoT on hit, reduces health regen by 0.75 on base power, trash
- Healing
While it is better to not take damage than to heal it, it is also true that it’s nearly impossible (but not completely, I did it) to avoid taking damage. For various reasons it is not a viable strategy to just play an HP/Healing tank (unless you play a certain balanced class), but being unable to heal at all is equally terrible.

Depending on class, skill and progress in the game (completing the class challenge on Riot guard grants you 2 permanent health regen on all classes) you want and have a varying number of healing items.

Cell Replacer
Requires you to beat the entire floor for it to have an effect. On top of that you can only obtain it on 2 classes which already have more than enough healing in their perks. Can trigger Hard Core 1. Trash

Overdose
Unusable in combat due to removing shield. Heals way too little HP with too long cooldown. The damage it deals is actually not a thing since you can just dash to block it, but that doesn't fix the problem of overdose being a terrible healing item. Little more than training wheels, replace asap. Can trigger Hard Core 1. Trash.

Field Supply
So given that I trash-talked the other 2 starter healing items, this one has to be bad too, right? No. This is the single best healing item in the entire game. Every time you pick up ammo, this heals you for a percentage of your HP. I will get back to this when I talk about demo, but for now I will just say that it ended up healing around 3000 HP. Per group I killed. In loop. Any question?

Unidentified Potion
Not usable as a healing item, it triggers poison too often and heals less than field supply. However its strength lies somewhere else. Using it can give you permanent stat upgrades, however it is one of 5 possible results, the stats you get can be trash and you luck stat has no influence on the result. It combined with Shaker this essentially breaks the game, but I must say the one attempt at this “strategy” was the most painful and boring experience I ever had. I say it’s severely outclassed by Field supply, it just can’t keep up with it. Can Trigger Hard Core 1. Recycling the seth-up suitcase sentry grants you one of these, at the cost of 700 credits.

No, I didn’t miss Methadone, I intentionally ignored it, as it will be listed under Buffs in the next category.


Chaos Potion
Since it has a limited amount of uses, it can’t be used as a healing item, but using it gives 1 permanent health regen. So when you get it use them all.

Lifeblood
One of the Synergy items, but it’s basically just a healing item. The way it works is you shoot stuff and then the number next to it increases. When you use it you get health based on the number, although I unfortunately not know whether it’s equal to or just based on it. This one is not suited if you need health very often, but if you just want to restock your health every once and then, it’s pretty good and heals a ton.

Healing Crystal
Grants health regeneration and grants even more while you’re next to enemies or your own summons. If you recycle it, you get permanently 2 health regen. I recommend just buying and recycling it when you come across it, there are just some better options.

Tsunami Talisman
Has a chance to activate on shot, healing for a % of max HP and granting extreme recoil control for a short duration. Very strong healing item since % HP healing is op and it can be activated even out of combat by just blank firing a weapon. The recoil reduction will make even the most inaccurate weapons shoot in a neat line, making this item a great choice on any class and especially sniper, who cares about accuracy.

Fangs of Mordigan
Triggers on hits, deals damage, causes bleeding, heals and increases your max HP by a tiny amount. What else could you possibly want? (It to be not red, so we can token it, but that doesn’t work unfortunately)

Incubus
Now this is an interesting one. Permanently drains your HP, but grants massive lifesteal. Whether this item is good at all, fully depends on various factors. It depends on your damage output, how fast you can go through levels and if you have other sources of healing to counter the damage.

Since lifesteal depends on the damage you dealt, damage is the limiting factor. If you play Hyper adrenaline, take curse of the wicked or simply have a very powerful gun, this will heal for a lot.
Note that the damage from explosions doesn’t count for this, only the impact damage of the grenade.

The next limiting factor is how fast you are. Since it constantly drains HP, you have to be fast. Just kidding. It caps at 50 HP, thus it can’t kill you and if you have any gun that deserves the name, your first attack will get you back into reasonable numbers. Your damage is really the only limiting factor. If you have On the Edge, or play Breacher after completing the insanity challenge, you will have enough healing to out-heal the life drain from it, provided you are at full HP (and only preloop ofc).

One important thing to know, it permanently reduces your damage absorb by 25 if you pick it up. So don’t even think about dropping it at the teleporter to counter the life drain. You'll regain that damage absorb once you recycle it.
It says it drains life from everything including enemies, but in order to see the damage it deals to enemies, you need a magnifying class. It does something, but that something might as well be nothing.

Those were healing items, the last 2 are both rare so you will rarely stumble upon them. If you’re new to the game, take whatever healing item your class starts with, token (once you can) healing crystal and tsunami talisman and try to get used to the game. Later you replace them for actually good stuff.
- Weapon enhancing items/Buffs
These items don’t do anything directly, they improve either your gun or your own stats in various different ways. These are the go-to offensive items and some of them can turn literally any gun in the game into a killing machine. (some very terrible exceptions aside)

Methadone
There is a reason why this isn’t in healing items and that’s because it gives you a massive boost to damage absorb when you use it. The use of this item allows you to survive nearly all encounters preloop, but doesn’t fall off in loop because of a weird mechanic that makes this item give even more damage absorb in loop. I don’t understand how exactly it works, but it is a massive damage reduction during the entire game. Dying while this is active is rather challenging. The best way to use it is during combat, when you’re about to take damage. That damage then gets reduced and additionally healed.

Road Flare
Sets up an area of effect which increases your accuracy stat, your damage output stat and inflicts Burn to all enemies touching it. Both the damage and accuracy buff are at around 30, so the damage increase from this is significantly higher than you might think first. The accuracy is pretty relevant, it beautifully counters the accuracy decrease from the madness module. It doesn’t have an effect duration, so if you get the cooldown very low and have a reducer attachment, you can stack these and gain multiple instances of this effect. The way the buffs work is that you get the buff for 3 seconds, every 3 seconds. Regardless of whether or not you already have it. Trust me, this isn’t causing any problems WHATSOEVER. The potential of this item is mind-blowing.

Stim Pack
Firerate and damage are dps, movespeed and dash cooldown are survivability. Remember that commandos don’t take damage while dashing. The cooldown is insane, but it practically serves as an I-win-button.

Flare Gun
The same as Road Flare, but with a higher cooldown and you can’t control its activation.


Special ammo Supply
Unlike field supply, this is really just ammo. Gives a crit boost for like 60 shots when used, pretty bad overall. If you’re really desperate to shoot more on HG this is fine, but HG is the last class which needs ammo and taking this is mostly memeing around.

Brawndo
I have literally no clue what this does, I never use it. Either you have shaker, or you recycle it, it’s that simple.

Heat Sink
Vents heat on activation, but it is a semi-passive item, so it might trigger randomly and be on cooldown when you need it. Overall just a worse version of magic mag.

Target Cogitator
You should be able to aim yourself and the aim from this thing is not always where you want it to be. Imo the best use for this is in combo builds, where you go through the map at lightning speed to clear it before your buffs run out and where you don’t have time to aim. Also gives a firerate and recoil buff and permanently increases accuracy.

Custom Upgrade Kit
Just an overall buff, although nothing strong or special. It’s always good to run into this, but nothing worth tokening.

Hyperfeed
One of the most overrated items in the game. Someone tell me, what’s the point of shooting for a long time if you can kill everything in an instance? Especially when there is an item of the same rarity which does just that? The best use of this item is for heat management, but outside of bossfights you don’t really have heat problems. It also happens to decrease the damage output stat, further defeating its purpose. But it looks cool.

Intensity Chamber
Has a chance to give ammo to the weapon you’re NOT using. 10/10 always wanted ammo on guns I don’t use, amazing. Using it grants one single powerup. I have literally no clue why this is purple rarity.

Magic Mag
Fully reloads your mag, creates ammo out of nowhere and thus fixes ammo problems, resets heat when used and thus helps a lot with heat issues, grants a buff on use, which increases damage, firerate AND shields (plus movement accuracy according to the wiki, but I never tested that) and all that for like no cooldown. Seems balanced to me. Because this item does a bit of everything, I recommend to token it on every class.

Madness Glasses
Adds lifesteal, damage and eyecancer. Sorry, had to say that. You can counter the screen effect by shortly opening the map (tab or M by default), it will be gone afterwards. Aside from that, having lifesteal combined with extra damage makes for good healing. Unfortunately this item is extremely rare, so you should use the item just because of how rare it is, regardless of what your other stuff looks like.

Heat Spreader
Passively increases cooling by 10%, so it’s a non-useless filler item. Oh what, it has another effect? Nah, pretty sure I never saw this thing do anything.

Powershot
Hidden effect, decreases heat by 5 every activation. This is the best heat-managing tool in the game, at least among items. Closely followed by magic mag, but a step better at just managing heat. Magic mag definitely is far more powerful in many regards, but sometimes just heat management is more important. I ended up deciding for magic mag tho.

Twin Link II
Okay, now we’re taking a step up. Or should I say, 2 steps? Ahahah, I’m sorry. Doubles all shots for one second after the first while having a chance to shoot a 3rd shot. With this thing, 1 second is more than you could ever need to annihilate entire groups. This is one of the 2 items that invalidates the need for any other damaging item in the game and makes waiting for enemies to die completely unnecessary. Doubles the entire shot on shotguns, not just one bullet and stacks with other twin link effects. Also scales with luck like crazy.

Fast Sling
Actually pretty ok, just switching weapons before you shoot can be a bit annoying. You don’t get locked out of switching weapons, don’t worry.

Air Horn
Mööööööööööööööööööööööööööööp. This item is pretty much purely aesthetical. If you want to describe loud noise as aesthetic. In terms of actual effects it doesn’t do much.
- Shock Impulse


Here we go. Best item in the game. There is another competitor, but that other competitor needs a lot more things to come true before it breaks the game. Shock Impulse just slaps instantly. What does it do? (wiki page is wrong, need to fix that) Shooting at enemies triggers this item for 1 second and every shot during that second, including the one that triggered it, causes a splash. That splash removes shields from all enemies in it’s AoE and deals damage to them. The first part is pretty neat, there are some very annoying enemies with a ton of shields and especially if you use a gun with low shield damage, this can really safe your life. Just that shield removal would already make it one of the better damaging items.

Now the other part. Damage is (weapon damage) * (item damage modifier) on every enemy hit. For every splash trigger. (Item base damage modifier is 35, I’ll use that for now). So if we say there is only one enemy, this increases damage by 35% for one second. If there are 2 enemies, damage increase is 70%. If you have penetration and thus hit both enemies with each shot, damage increase is 140%. With 3 enemies, that makes 105% without and 315% with penetration. Or in a term: Weapon damage * damage mod * enemies * enemies hit. With 20 enemies, if you hit 5 of them at once you end up with a 3500% damage increase. Just saying.

There is nothing wrong with this item. Nothing whatsoever. Remember twin link doubles your shots, which further triggers this item. Unfortunately the damage modifier got decreased and the cooldown increased up to 6 seconds last patch. Some people now say that Shock impulse is an item you only use if you want to loop. So first, cooldown is 3 seconds at 250 which is completely doable preloop. Second, you need this against the B defenders in arma, they’re cancer otherwise. And third, even at 6 seconds, you still get to wipe out an entire group every 6 seconds, what’s the problem with that? Not enough or what? So yeah, confirmed best item in the game. If you prefer to keep your game difficult, stay away from this item.
- Summons/Distraction
Things you summon that fight for you and/or distract enemies from you. Having one of these is an incredible survivability boost and depending on what you are playing, taking one becomes mandatory. It is easily possible to beat the game with just summons and any class can do it if you just find the right items. Take note that summons are not a reliable defense against Chrono Troopers.

Decoy
Rogues starter item, not to be confused with the Shielded decoy. It doesn’t shoot and only serves as a decoy. This version dies way too fast to be usable and taking it would mean not taking the 2 other good rogue starter items.

Missile Drone
This drone, unlike all other summons, spawns right next to your cursor, which catapults it into the top 3 of the summons. Rather fragile, but the damage output is great, especially since it gets stronger with each item recycled. The fact that you can place it wherever you want allows for perfect distraction by just placing it behind the enemies.

Spider Mines
This is a damage item. Seriously. Not even a good one at that. If a spider mine dies right after it spawned, it won’t explode (the same counts for enemies). Before this item does anything, it has to crawl all the way to the enemy and then doesn’t even deal big damage. Bad right when you start but literally unusable once in VR.

Guardian
This summon is really weak. Maybe tanky, but if you want that, you’re better off taking a turret. It does throw stun grenades sometimes, but never intelligently and that was the only thing going for it.

‘Seth-Up’ Suitcase Sentry
Somewhere between bad and ok, depending how you use it. The main thing this has going for it is that it has 2 stacks and that you can get it on every class. Because of that, this is the summon I ended up using the most, but I only replaced it when I got another (good) summon during the run. If you recycle it, you lose 700 credits and gain the unidentified potion item. Type “ /HEYHEY ” in global chat to obtain this item without paying its data cost.

DMR Sentry Turret
Very tanky turret with penetration. The best of the turrets and I really like it, it’s my summon of choice if I decide that I want a summon in my build.

Phaser
Something that’s going to be the case rather often when it comes to summons: If this thing had a brain it would be awesome. But the way it currently is, it will just shoot a few times, deal no damage and then die for no reason. Unfortunately not worth using.

Shielded Decoy
Similar to decoy, but with significantly better stats. This time around you can actually use it to place it in front of enemies and kill them while they’re busy fighting the decoy.

Stinger Jet Glider
The strongest of the summons in the game. Works just the same way other gliders do, so it comes with a taser and more importantly that annoying shield. While its damage output is only 2nd (or 3rd, if you count the drone with its scaling) in line, it’s top notch in terms of defense, especially with that shield which protects it from the biggest threat to your summons: yourself. You honestly won’t believe how often I killed my summons by accident right after I spawned them. It’s also the only summon that can stand to an Ion. Only problem, it has a habit of floating right above you, which sometimes is not exactly healthy for you.

Gun Drone Spawner
While the individual drones are very weak, put together this is the best distraction and summon item in the game. The summons can proc of their own deaths, from the death of your partner in coop and it scales with luck. Additionally if your partner in coop has this it is still active, even if he is dead. At enough power and luck, this item can clear entire floors all by itself. (Stinger Glider could do the same, if only its AI wasn’t as bad) The biggest flaw to this item is a similar one as with the Stinger, they will randomly float in your face and maybe even explode. Very enjoyable.

High Command
Has the highest damage output of all summons, but an absurdly long cooldown and it looses to both Stinger and Gun drone spawner in terms of room clearing power.

Order 322
It isn't a summon, but since it basically turns an enemy into one I put it into this category. Very powerful as you basically get to choose an enemy to die instantly while also creating distraction in the middle of a group. At least it would be that way if it worked properly, instead enemies finish their last action before getting mind controlled which means it's basically worthless on groups that already spotted you. It can be great, it can be trash. I wouldn't risk it.

Turrets versus Drones:
Any summon that can move has the serious advantage of being able to go from fight to fight and be more or less “reused”. The moveable summons are also commonly stronger. However they also have several flaws, the main one being their terrible AI. It’s very unlikely for the to actually move from fight to fight, they will spend most of their time even in fights floating above you or somewhere around you and they have a tendency of exploding on you. Additionally they are placed randomly when you use them (safe the missile drone), which means it is possible for them to be placed somewhere where they’re not helpful at all. Yes, even outside of your screen.

Turrets on the other hand have the advantage of being reliable. When you use them, they drop right in front of you and do exactly what I want them to do: Block shots. Reliably block shots that is. Neither the DMR turret nor the seth up suitcase explode on death and since they’re placed in front of you, they won’t friendly fire you. Overall turrets are weaker than moveable summons and they won’t win the game for you, but they do a much better job at protecting you. Which is what I want. The reason why you could choose a decoy over a turret is its low cooldown.
- Recycling items
These are items which don’t really serve a purpose as an item other than being recycled. Some of them are actually usable, but their recycle effect overweighs their value as a normal item.

Bloodthirsty Ring
Kill 50 enemies (counter is on the item), then recycle it for a Divine Reconstructor item

Ring of Experience
Accumulates a % of all Experience you get, which you then obtain when you recycle this. If you die, it’s lost. Dying in coop doesn’t count for this, only when both players are dead. What it doesn’t tell you is that it decreases damage absorb while you hold it, so make sure to get rid of it

Ring of Glass
Obtain 750 Experience (counter is on the item), then recycle it for a random item. Taking health damage destroys the ring. Don’t worry, unlike with Wicked, you need to actually take damage for this to trigger. I have no clue anymore which rules apply when, this game doesn’t make any sense. Anyway, just kill some stuff, shouldn’t be too difficult.

Blood Rite
Recycling it increases healing stat, scaling with item power. All interactions with curse shrines have a chance to give you this item. The actual item itself is trash, it deals more damage to you then to enemies (at least it feels like that, never tested).

Lightning Boots
Holding this item and recycling it gives 40 Movement speed. Some people will surely come up and say that this is the best item in the game or some other funny stuff, but dealing damage by dashing in enemies is neither consistent nor reliable. If it kills the enemy, you’re standing in the middle of some other enemies without cover and with your dash on cooldown. And no, this is not amazing on Raider, he can kill everything from considerable distance much faster. Just like any other class. Just get it for the free speed.

Last Stand
Recycling it grants max Shields equal to item power. The item itself does something, but it’s not very good at that. Dropping below 35% HP can mean that it never triggers because you just die and it also has a delay before it actually heals, so it’s very likely that this thing just does nothing when you really need it.

Black Berserker Charm
This is the 2nd worst item in the game. First, having flinch, fragile or hard core 1 enabled means you cannot use this item without drawbacks which overshadow anything else in this game. Aside from that, just think about it. If you get hit for 700 damage in fight one and have 700 shields, you take 0 damage. If you take 700 again in the next fight, you took 0 damage in total. With this you may have 500 more HP, but also 700 less shields. Total damage: 1400. After subtracting the HP, that’s still 900. This drags on for every single time you get hit. More damage absorption sounds cool and stuff, but it’s up to 40 or something at best, which absolutely won’t do anything if you give up your entire shields for it.

Then there is the funny problematic of certain enemies in the game. Snipers, Ions, ballbots, the disco room floor tiles and surely a lot more all deal reduced damage to shields. PLUS, they deal massive damage in total and it’s not unlikely for one of them to get you in a single hit if you have this. (Not like they sometimes do that anyways, even with shields) Taking this means saying: “I want to die, please hurry up and help me”.

However, all that said, it has the best recycle effect in the game. Kinda funny, the 2nd worst item has the best recycle effect, I wonder what that means for this item? Maybe we should recycle it or something? Okay, what it does it gives you lifesteal. 0.4% on base power and scaling with power. Once you find and recycle this, you will easily be able to sustain your HP just by shooting at things. One could even say that this is the best healing item, because it doesn’t take a slot and he’d not be wrong about it.

Devil’s Dice
Recycling it increases luck by a percentage which is based on item power. So the more luck you had before, the more luck this item will give. It’s definitely worth to buy this, upgrade it to like 300 percent and then recycle it. The active effect randomly in- or decreases crit, but having more luck also means more crit. Forget about the curse cleanse part, it will only confuse you and is not important anyways.

Divine Reconstructor
Okay, hear me out. Doesn’t actually prevent death and instead triggers when you reach a certain percentage of HP. In other words, this is a better but one time use Last Stand. “Using” or recycling it increases max HP by 250. But still, why is this here? Money. If this item triggers, you already survived anyways, so you might as well have taken the money from recycling it instead.

Gold Nugget
It gives 50 luck while you hold it and you should do that until you get good items but I'm putting it in this category to remind you that it's not an item you actually want to keep and for its recycle effect which really is just a load of money.
- Defensive Items
Not dying is just about as important as killing things. If you kill everything before it kills you, you can't die. Unfortunately it doesn't always work like that, so you'll need some ways to stop you from dying. A lot of the items in here could also be called utility or something.

Stun Grenade
Stuns all enemies in the AoE, strips their shields and additionally grants guardian stacks. The shield removal part already puts this item on par with a mediocre damage item. The stun part allows you to hard counter every single enemy in the game except bosses. Sounds balanced? I have no doubts saying that this is one of the best items in the game. While it says using it grants 5 guardian stacks, it’s nowhere near that simple. On RG and on base power it gives 5, but with further higher item power, it will give more. On Breacher it gives 2 on base power and again scales.

Smoke Grenade
What does this item do? Everything. Using it fully refreshes your shields, which can be a lot, given that sniper has access to this. It also refreshes your dash, but that’s not 100% correct. Instead of refreshing your dash you can also use this and then dash twice if you haven’t used your dash yet. This dash part hard counters doombas and gives the Rogues all the mobility you need. On top of these 2 effects it also places a smoke screen. Enemies in this smoke screen get the same effect as from TP Grenade Flash. Standing in it yourself gives you a buff which increases dodge chance and I-frame duration.

In case you don’t know, whenever you lose HP, you get immune to damage for a very short duration and this buff extends that. This buff works the same way as road flare and trust me, there is not a single item in the game which can abuse that. Just trust me here. Nothing wrong with this. Taking this item on both classes is mandatory and I would take it on any other class if I had the option to.

TP Grenade Flash
Disorienting enemies doesn’t sound great at first, but this item literally makes it impossible for shoot enemies in a straight line. Sniper has a really hard time dealing with turrets and this item completely fixes that. Both Rogues are weak to large groups and this item fixes that (by making every single enemy unable to shoot properly). Dodge has a cooldown and this item fixes that. If enemies don’t hit you consistently, you won’t need to be afraid of them hitting you too often for your dash cooldown. It is a worse stun grenade, but it still is as serviceable in next to all situations. There is one additional use, it also deals some damage. Not particularly much, but that bit is just enough to allow sniper to one-shot enemies which would normally have survived a headshot with his pistol.

Hard Light Cover
I call this cement. Cover in this game are things enemies can’t shoot through. This item is a scam. This is anything but cover. The actual use for this is an exploit, you can stand in it to cover your own hitbox, making enemies not shoot at you. Decide for yourself if you're fine with this, if yes take it on both commandos. Note that it has anti-synergies with road flare, but road flare is too good to not take it, so just remember that you can't flare while cementing.

Bandana
Decreases dash cooldown, but also just gives you 2 (was it 3?) more dashes for the duration. Obviously great mobility thus defense increase and greatly synergizes with Raider/the charge module. Dashing also grants a short damage buff with this, which is a minor side effect, but still there. Pretty good item, but my slot for defense is already filled with refractor.

Psy Field
Slows enemies down, effectively locking all but the fastest enemy in place. This makes for great crowd control, but only proactively which is not optimal. Its damage is only enough to deal with platings, otherwise it's not relevant. It does count as a grenade for Demolisher, but he is the last class to care about crowd control. Decent item but often outclassed by just killing stuff.

R-Plating
Rather similar to scrap plating, except you get platings by killing enemies. This not only means ton of plating in loop, but it’s also one of the few ways to obtain plating in arma room. Anyone who intents to play loop should keep this under next to all circumstances, platings are THAT good. If you get more than one of it it’s still good as recycling it raises the plating cap by 2. That’s worthless if you don’t have a way to gain plating but busted if you do, which is why you keep the first one you get. If you don’t plan to loop buy and recycle anyway. Also op in HA obviously.
|
Refractor Crystal
Fully absorbs any incoming damage for 3 seconds. On command you cannot take damage for 3 seconds. This is the ultimate ‘I-win-button’. 3 seconds sound like not much when you start the game, but when you consider the existence of twin link/shock impulse/the hyper accelerator attachment, 3 seconds can be more than an entire fight. It is not an item that is meant to be used every single fight, it is meant to cheat death when you need it to. Naturally you will need the reflexes to activate this in time and you need to judge quickly whether you actually want to, plus on low power the cooldown is very long, so if you don’t expect to make it far anyways, you may prefer rosarius, which is weaker but does its thing more often.

In my eyes this item allows me to make a lethal mistake every half minute without actually having to pay the price for it. And when the game decides that it’s just time to die, by for example spawning 4 snipers in disco, you can just dab on it and leave the normally lethal situation unharmed. The way this fumbles with the way causality between your actions and the results work is very balanced.

Unstable Current/Direct Current
Your fully automatic close combat defense system. Both discharge a lightning strike at enemy that get close to you, which stun and strip shield. They are an instant win in virtual reality, as almost every single enemy in there has to get close before it can do something. Outside of VR they’re equally lifesaving in many situations.

The difference between unstable and direct currents lies mostly in how often they activate. While unstable current only activates once and then goes on cooldown for a while, direct current has several stacks which all go off before it goes on cooldown. However unstable has a chance to not be set on cd when it activates, ergo with enough luck and item power, you can get more value from it, but the chance caps at 75%. Most unfortunate that that was nerved.
I don’t feel like tokening these, they do really save my life in some situations, but imo there are others which safe my life more often. But I would never reject them if they appear in my run. (Only one, 2 is too much)

GPS
No-one cares about the position of chests and shrines, but the knowledge about the position of enemies can be absolutely game-changing. Not only is it reliable protection from Headhunters and drones which wander around the map without you seeing them, it also gives you some measure of protection from enemies which can attack you from offscreen. Everyone who ever died to a Sniper or Railgun glider he didn’t see before knows what I’m speaking off. In addition to that, it also serves offensive purposes.

If you have increased range and thus higher range than the screen yourself, you can combine that with GPS to attack enemies you can’t even see. Now of course you could say that you could just memorize where enemies spawn instead of using gps (don’t laugh, I do know the spawnpoints for every map), but that doesn’t tell you whether any enemies survived your attack or whether you triggered another group. Running completely unprepared into a group is unhealthy, that’s for sure. I say this is a must take on Hyper Adrenaline and a good choice on Sniper, as he has increased range.
(It also gives some scav, but who cares)

Rosarius
This item could be summarized as a permanent shield increase. It has a very low cooldown and instantly triggers when in combat, granting a buff which massively increases max shields for the duration. This is the alternative to refractor crystal, not as impactful per use, but active much more often. As long as you don’t plan to step into actually dangerous areas, like loop or Hyper Adrenaline, taking Rosarius is probably the better choice.
Additionally increases Luck, which is always nice.

If you don’t want to keep it, it’s still worth buying, as it gives 100 max shields when recycled. I decided to not put it in the recycle category, because it’s active effect is actually good.

- The Rest
Special Ammo Supply
We all know, Raider and HG are well known for their ammo problems (they’re not). There are next to no weapons in the game which justify using this, especially on HG who already fixes all ammo problems. The other part, that ammo boost, loses to road flare when it comes to damage increase.

Black Market Teleporter
A semi-passive item which additionally triggers when you fall below 25% HP. This item is exclusively useful if you have enough health regen to heal up after you escaped combat. Otherwise it is literally refractor crystal but worse with a longer cooldown. Additionally it may just teleport you directly into headhunters, which spawn on either of the 2 teleporters. Plus the flash blinds your partner if you play coop. If you use this during the Last defender bossfight or in disco room, you just lose, unless you use a bug. Terrible item. If you have time to react and use this, you can also do something better with that time instead.

Heart Core
Found by acquiring 4 cores (40% chance per room)

Increases max health based on kills acquired over a 12(?) second period upon activation, scaling with item power. Best way to use this is during Unstable Mass fight, Spider Truck, Massacre Quest, or Alarm Pole activation.

If your inventory is too full to save it for those moments, just use it immediately and hope for the best. Note that you can always choose to not pick up the last core in order to wait for loop where you get a lot of enemies. Also keep in mind that the armageddon shard counts as 1 core.

Madness Button
“Just click it, it will be fun”. I ended up with 2815 Terrorlevel thanks to this item in one run. The fight against LD took me about 15 minutes and I only survived thanks to Breacher being a well-balanced class. Otherwise my ammo would have ran out years ago. It was a coop run and for some reason things aligned perfectly. I had an akira and my partner found this button. The resulting cooldown abuse made for a lot of terrorlevel. I later found this item myself in a shop, now akira was reducing on 2 buttons. Obviously I upgraded all of them. It was very enjoyable, the long bossfight aside. We even survived the first fight in loop, which consisted of me clicking the button and then having the entire map stacked up on one point: on me. Right after that I got one-shot by a railgun turret, I didn’t even get to see it. Story time over.

As already explained earlier, this won’t make you level faster and will most likely just result in you dying earlier. It will make your game harder, but that’s exactly what many people want.
There actually is a use for this item. It alerts all enemies in a certain radius (which is far bigger than your screen, but not always the entire map), but if the terrorlevel is high enough, they will instantly move to your position. Since they were too fast, they had no time to take aggro on you. Now they’re all beautifully stacked up and you can kill them all with AoE or piercing attacks. Just make sure you have a refractor, otherwise you will get butchered by death explosions and/or ballbots.

ZR99 ‘Living Bomb’
Now this is an interesting item. Using it causes 2 explosions on you which have a rather small AoE and deal laughable damage for its cost. The first explosion deals an amount of damage directly to your hp which scales with damage absorb, but can never kill you. That’s what I thought until I accidentally clicked it to oneshot myself through my full 1.2k HP. The second explosion fully removes your shields. Both slow you down for a moment. Awful. This is one of the worst effects I can think of. Luckily it doesn’t trigger itself, otherwise it would be worst item number 3.

There are several things wrong with this item which go above just the damage it deals. The fact that it strips shields means you’re akin to get inflicted a DoT afterwards and the slow from both explosions means that you won’t be able to properly evade attacks or go back into cover when you use it. Using this item means spreading your arms, showing yourself to the enemy and crying: “kill me”. It’s literally an invitation.

There is one and only one use for this item, the damage it deals triggers the I-Frame module. Thus you could use this item as a refractor with half cooldown. Still means you pay a few hundred HP for that, which turn into a few thousand if your damage absorb is high enough. I-frames can’t protect you from receiving DoTs, so this is also asking to get bleeding/poisoned which will then deal damage after I-Frame runs out.
Oh yeah, it also says it grants brief invulnerability. If that even is true at all, the effect is too short to be noticeable. Please don’t try to block shots with that, thanks, it’s for your own good.

Metal Detector
Free money. I don’t even know whether the damage absorb on mines actually works, I just keep this for money until I need to trash items for inventory space.

Armageddon Shard
Quote from Shrike the developer: “This item is meant for people who want to end the run”. I am not joking. This is MEANT to kill you. It is the only item in the game with a 100% chance to kill you and thus gets ranked number 1! On the list of worst items in the game.

It drops after you’ve beaten the final fight of the game. Picking it up and recycling it in the arma room SHOULD be fine, but I heard from people who got killed by it even in arma room. Once you get teleported into loop with this in your inventory, a counter appears next to your modules and buffs. With each floor it counts down, so you are destined to die after 3 floors. Even if you survive the explosion, it sets your health regen to -150 (affected by healing stat, so it will show something else), which will assure your death. Recycling it once in loop has the same result.
I personally feel like I want to end my run whenever I want to end it by hitting esc and then quit and I think there is no style included in getting ripped apart by a massive, inescapable explosion, but hey, each to their own.

Oh yeah, don’t let yourself get fooled into thinking loop is easy by this, for the little time it lasts it gives massive stat boosts.
- Synergy Items
There are a bunch of items which can’t appear in normal item shops and instead appear in special alchemy/Synergy shops. They’re supposed to have a special texture and sometimes they do, but some other times they just use the same as any other shop. Classic. Most of the synergy items have the fundamental problem of requiring at least 2 items to do something, but in very rare cases that one enhanced item is better than 2 non-enhanced items. On top of that, most synergy items don’t affect good items anyways. These don’t hold meta relevance and instead are meant for fun builds.


Elemental Resonance
I cannot tell whether this item even does anything, sorry. I tried, but the spreading DoTs either didn’t happen, or I was unlucky enough to just not see it. Whether the DoTs dealt more damage is something I simply cannot tell. Maybe one day someone finds time to record a burning enemy and see how fast he dies with this, compared to the same enemy without this.

Even if it does everything it claims to, DoTs are not exactly the go-to damage mechanic and Fire Water is a better option for the same purpose among the synergy items anyways.

Energy Link
This is what I was speaking of “the fundamental problem of requiring at least 2 items to do something, but in very rare cases that one enhanced item is better than 2 non-enhanced items”. If I was able to control the item it improves, it would be a maybe, but the way it currently is, it loses just to simply taking another good item instead.
Impossible to drop due to permanently being either active or on cooldown and dropping all items but it crashes the game.

Fire Water
Burn is the best DoT in the game. Combined with this item, it actually kills enemies rather quickly, especially compared to other DoTs. The best thing to combine this with is the dragon’s breath shotgun ammo, as it is the best way to transfer Burn. Outside of that combination this isn’t really worth using tho and for the dmg buff on plasma and explosions, it is not worth taking either. For both cases there are better options to increase damage.

Missile Control
In addition to missiles, the items Heart Seeker, Blood Bolt and Infinite Drill Piece, as well as the projectiles shot by cursed variants and the Damnation gun are affected by this. This with Drill Piece yields some crazy results, but is once again overpowered by just taking 2 good items instead. At least this is fun to watch, so give it a try.

Nitroglycerine
The explosions from this are very large, so the risk of friendly fire is high. This is a no go on Breacher with his Breaching charge. On demo it’s just poor mans resonator and every other class doesn’t really use explosions. Enemies death explosions can trigger this, but that really doesn’t make it worth using.

Orb of Fusion
No, I don’t know what this does on every single orb. All I know is that this with orb of wind was the most broken thing in the game, but then got fixed. IF I’d run into orb or wind AND reality ripper, I’d probably take this and keep the 3 over other items, otherwise not. The other orbs I recycle when I get them. Yeah, I really don’t care about making funny builds, I just want to tryhard.
There is a one time use code which gives some of the orbs.
|
Orbital Relay
All Beamers suck and this thing doesn’t change anything about that. But it looks cool.


Shield Link
Your turrets are there to protect you, not to steal your shield. Not a good trade. DEFINITELY not worth an item slot.

Shaker
Most people are probably already familiar with this. Taking from the wiki:
“Cannot Affect Divine Reconstructor,
Custom Upgrade Kit can only be used twice,
Core Upgrade Kit can only be used twice,
Module Cores can only be used once.”

The most effective use of this are methadone, field supply, chaos potion and unidentified potion, with the latter 2 giving (or at least having a chance to) permanent stat upgrades. You COULD sit in a room for 10 years, spamming this item on u-potion and stacking stats until infinity, but I have a desire to actually play the game and not just sit there, turning it into an idle clicker. For anyone who thinks that’s a broken build or something, just take a look at the wins per hour of the shaker abuse strategy versus anything else. Looking probably not very good. If you are absolutely desperate to win, just play summon engi, it’s easier, takes way less time and needs less RNG to work.

Taking it only for upgrade kits is not worth it, there are other ways to increase your damage and raw weapon damage is not something I would want to spend item slots on.

Trapper’s Teleporter
Luckily Psy Field counts as a trap, otherwise I wouldn’t even have considered for even a second. Turns out, trapper’s teleporter can place traps on the enemy which you just killed to trigger its activation just as well as on enemies that are alive. I tried to combine this with psy field and grenadier on demo, but while psy field worked as expected and was ok, trapper’s teleporter was just trash.

Underbarrel Mod Chip
Getting some extra damage on filler items means this is a bad filler item. In order for the firerate increase to work, you’d need to use the items which trigger this, ergo that’s not going to be active very often.

Refresher
Okay, here we go. Time to pop the bomb. While everyone jumped on the shaker train after ultimate was released, there was a person who saw potential in this item which nobody else saw. That person… Was not me, HA! Gottem. But he told me about it. Here we have the second-best item in the game, Refresher.

The way it works is by stopping the timer on all buffs and debuffs while it’s active. A lot more items than you may think first give buffs. Methadone, Stim Pack, Overclocker, Rosarius, Magic Mag, Tsunami Talisman, Bandana, Target Cogitator and a lot more all grant buffs, with some of them being really strong. Then there are the 2 harbingers of doom; smoke grenade and road flare. Because of how these 2 work, you will receive the buff even if you already have it, causing them to stack if you have Refresher active.

With Road Flare that results into several times normal damage output, as well as an accuracy stat that makes all your shot fire in a straight line, no matter what you do. Smoke grenade pushes you over 100 dodge nearly instantly, while additionally having that neat increase of I-Frames after taking damage. Since that buffs stacks, you just need to catch a bleeding effect and you are literally immune to damage for the entire effect duration of refresher. The I-Frames got extended and bleed repeatedly triggers them. Easy.

Then there is Breacher who receives a very short speed boost near explosions. I surpassed 5000 movespeed with this. Obviously any other type of buff will get extended as well, be it snipers damage increase after killing targeted enemies, raiders damage buff after opening chests, the buffs from the 4x4 pin attachment and so on. Note that modules are not affected. One Refresher does more than several hours of shaker abuse.

Unfortunately it has a flaw. If it did what it says it does and only affected debuffs other than stun effects, it would be completely fine. Sure, something like stun mines or slow can be annoying, but thanks to the broken buffs from this, you won’t die to that.

Now you may guess that I tell you that it makes stun permanent? Yes, but it’s not that simple. It only does that on certain classes, (someone tell me, I only know that breacher and sniper are not included). That’s what I call top-notch consistency in game-design. Anyway, if you ever got stunned by a stinger glider, you will notice that you don’t really take damage while the stun is active. For some reason, stun seems to include a massive damage reduction buff. I only ever died once so far from Refresher extending stun, it was always afterwards. I really wish the devs cleared things up with how that works, but I guess I will just have to live with my own test results.

-Recycling Refresher reduces heat generation. -OA
Curses
There are various things which count as curses or cursed and it’s very easy to get things mixed up.
First, the item rarity cursed does nothing other than raising the base power of the item by 50, just like superior or ultra (with respective 25 and 75 power). Cursed weapons are just weapons with the cursed variant and although it really feels like a curse to get them, they don’t count as curses.

There are 2 curses which are displayed on the top right of your screen, among your buffs and debuffs. Those are “Cursed Flesh” and “Loop”. Do NOT confuse with “Curse of the Flesh”, thanks a lot.

Loop is the indicator for how many floors you cleared in loop and how often you looped. Every time you beat Armageddon, you get an additional stack of this curse. Every floor you clear, all loop stacks are raised by one. Every new loop curse halves scavenging, decreases damage absorb by an amount (which I don’t know) and slightly reduces movespeed. It also increases terrorlevel. Every floor cleared while having this curse, you lose damage absorb and healing stat. Note that movespeed caps at 280 (cannot go below that, unless you make it), damage absorb caps at -300 and healing caps at 18.

Cursed Flesh is obtained by either opening cursed chests or by dying in coop. Obtaining this curse permanently reduces max shields by 50 and raises terrorlevel. WHILE this curse is active, you additionally have reduced damage absorb and further decreased max shield. (Wiki says status effects last longer, but idk). You can only have 2 instances of this curse at once. This is the ONLY curse you can get rid of. Beating a boss causes this curse to be cleansed, praying or taking “Curse of the Partisan”, or reaching max stacks with a devils dice (???) causes this to disappear as well. The 50 shields stay lost!!!!

Now to the interactions at a Curse Shrine. Those are all more stat trades than curses and unlike loop or cursed flesh, they aren’t displayed anywhere. Also they cannot be made undone.

Prayer
The option you take when you don’t know what to take.

Curse of the Flesh
Decreases maximum HP by 400, caps at 200. Little did you know, there are some enemies which deal damage to you even when you have shields, hell even when you have refractor on. No matter how safe you feel behind that wall of shields or behind that army of drones, one of them always gets through. Somehow. And if not, a boss will do that. The payoff, 40 more currency is laughable. Especially given the credit cap.

Curse of the Lethargic
Or should I say, blessing of the engi-main. Decreases dodge chance by 15 and increases reload duration. As a payoff, you get 40 luck. While I’m against giving up dodge, it really is a good idea to increase luck on engineer. He’s our special little patient, so it’s fine to take some un-conventual routes with him. On anyone else this is really not a good idea.

Curse of the Wicked
Decreases damage absorb by 40, while increasing damage output by 30. From experience I can tell that this increases damage output by 30% instead of adding flat 30 to it. This is the go to option once you can handle it. In a game that’s objectively about killing things before they kill you, this is the best available curse. Especially given the existence of various things that let you outright ignore incoming damage. Obviously this is nothing you take until you know how to use it. I recommend playing HA as practice before taking this. In HA itself, this is not too great, it’s still fine to take like once to make sure the corpse is really dead, but aside from that, there is not much benefit to be gained from having even more overkill.

Curse of the Partisan
Instead, take this one. It reduces damage absorb stat by 50, but raises maximum shields by 250. This is the go-to in HA, it takes away a stat that’s already negative anyways, while drastically increasing your shields. Outside of HA, it loses to Wicked. Keep in mind for both of these that damage absorb caps at -300 and loop reduces damage absorb, so basically wicked and partisan are free powerups with no downsides. More or less. Also this curse removes the “cursed flesh” curse.

Curse of the Ignorant
Reduces currency stat by 50, which yes, can go negative. This is a proof that the money from recycled items is not affected by currency stat, as you still get money from doing that despite having negative currency gain. As a payoff you get 30 damage absorb. This is basically the “I want LD and nothing else” curse, there is literally no reason to take this when you plan on looping, as all your efforts to raise damage absorb will end up being worthless at some point. Also don’t try to take this in HA, you won’t get around actually getting good in that mode. But for what it does, for helping you with beating LD when you’re not experienced with manually evading attacks, this is a great choice. My recommendation for beginners.

Tribute of Flesh
-200 Max HP, which again, caps at 200. Refills health and ammo, grants 2 vial charges (which each grant one stack to charge based healing items) and gives 2 upgrade kits. I see no reason to ever take this.

Tribute of Copper
Consumes UP to 666 credits, if you don’t have that many, it removes 100 data. For that price, it refills health and ammo.

This is a good time to mention that all interactions with a curse shrine have a chance to give you the Blood Rite item. (Which is red and increases healing stat when recycled) Prayer has the lowest chance to do so, tribute of copper has the highest. By far the highest. For anything in between I don’t know. This means if you don’t want to make any trades, it’s a good idea to just take tribute of copper for a chance of having more healing for the rest of the run. If you play engineer, demo, or have the warmup module, this can even result in you getting free money. Same counts for when you take this while being at less than 650 credits (cause that’s the amount you get from recycling it).
Blood Rite will immediately recycle itself if you don't have space. -OA

I mostly just click wicked or partisan, depending on what I’m doing. Lethargic for engi players, ignorant for when you desperately want that class challenge and copper if you don’t know what to do.
Shrines & Chests
I'll use this section for advice and additional info regarding some of the Shrines and Chests.

Starting with weapon shops, you might already have heard of something called "forcing weapon shops". The idea behind is that the game tracks whether you already found a weapon so far and if not it tries to give you one. This can be used to drastically increase the chances of a weapon shop to appear, however note that when you supply token less than 4 guns that chance gets lower, down to I believe 60% with only 1 token.

Said shop will appear on the 4th floor of the first area, if you did not pick up weapons before. Timed weapons and rewards from random crates are included. Note that this doesn't count in starter weapons except for snipers starter, which means this doesn't work on him.

Quests
On the 4th floor of the first, the 3rd floor of the 2nd and the 4th of the 4th stage(?) There will be a quest shrine. You can use this to track when you're about to fight a boss, as it's always the floor before the boss. I primarily want to give 2 warnings here, first make sure to clear the map before you start with quests and second NEVER do defense quests in loop. I occasionally thought I can ignore those and I often got to regret it. Once I died while running away from a defense quest in loop. JUST DON'T.

What happens is you get a defense quest but instead the enemies that spawn are headhunters, chrono troopers and assassins which are obviously on steroids bc of loop. Clear the map, activate teleporter and then take a shot a the quest, so you can get away if necessary.

Weapon Upgrade Shrines
Just here to remind you that they're an absolute waste of money. Don't use them.

Other "service" shrines:
Injury Treatment additionally increases luck, always take.

Weapon and Accessories:
Gives you a random weapon and 1 to 3 upgrade kits, as a Breacher main I often have money problems so I've concluded that they're not worth taking, unless you have a lot of credits to spare.

Test Medication:
Random buff or debuff/healing or damage.
Whatever, but the damage scales with damage absorbs which means this will kill you in Hyper Adrenaline.

Blood Donation deals damage which can be dodged or blocked with I-frames like charge.

Raise Alert Level for money is technically not a worthwhile tradeoff as terror increases boss HP but nobody cares. This post was made by the Ackschuallly gang.

Self Destructing Weapon and Test Nemesis Prototype both give you a timed weapon. Note that using timed weapons increases terror level. Also note that this counts towards the drop counter, making nemesis way less likely to drop normally. I advice you don't take the nemmy and only take other timed weapons for the small chance of a special ammo supplier, but drop it without shooting it.

Random Item Trade:
Drop all items but the one you want to trade. In coop you can drop all items, giving you a free one. In single you can drop all but an upgrade kit, then use it to give you an empty inventory as well.

Gear Up Unit
Gives you the R-Plating item, always buy.

As for chests I only want to quickly talk about Cursed Chests. Sometimes chests spawn hidden behind objects making you unable to identify their type, however you can usually identify cursed chests by the pentagram around them on the floor.

So, they set your HP to I believe 60 and give you the curse "cursed flesh". As stated in the curse section, this comes with an additional decrease of 50 max shield. Theoretically it is possible to get an item or weapon that makes that trade worth it, but the average drop quality is worth faaaaaar less than 50 shield. I generally advice never opening either of the 2, unless you are REALLY desperate for a weapon. And with really I mean REALLY REALLY.

Boss-kill Guide
As you might have noticed, my entire strategy revolves around killing enemies as fast as possible, even groups won’t be given a chance. But what about bosses? Those can’t be taken down as fast and the normal cover strategies don’t work, how to deal with them?
Getting a secondary weapon which is effective against bosses will not solve the problem, because that means that you had to split your upgrade kits, which means that unless your main weapon is something with insanely low armor penetration, you’d just get better results by upgrading just one gun.

Building against bosses is also not a good solution, as it will expose you to the rest of the game, which is arguably harder. Instead, the solution is to learn how to deal with the boss regardless how long it takes, by learning the attack patterns.

The game is separated into 4 stages, which all have a bossfight at the end. The first stage haves you either fight against the experiment 57, or makes you do a server hack sequence. The second stage puts you either up against the raptor, the transporter which is basically a pinata, or the infamous conveyor. The 3rd stage has either the 3 Arena masters or the unstable mass, also called blob, as boss. The final boss is always the same, a sequence of 3 rooms, which is finished with the Last defender. Afterwards you enter the Armageddon room to save the world!

Check the wiki’s page on bosses as well, it’s really well made, but it lacks some sneaky breaky strategies: https://synthetik.fandom.com/wiki/Bosses
Right after you enter a boss room, there is a short window where you still can move before the boss appears. Use this to dash in a better position, which is extremely helpful against the experiment and the raptor boss, as normally you’d be faced with their attacks directly, but now you can just dash to the side and be safe.
- First Floor(s)
Experiment 57
It’s basically a spider with 4 legs and a massive cube on top of it. The boss shoots lasers from his sides, which are slightly target-seeking. The way to avoid these is to always stay on his edges and never to the sides. Also make sure you don’t get too far away, otherwise the lasers will hit you anyways.
The next attack are bombs, which function the same way as mortar turrets do. These force you to permanently be on the run. Aside from that, the boss spawns missile drones, which can make things very messy, so I recommend you kill them when they spawn. This Boss is very easy to deal with and any class can easily beat him with an un-upgraded starter pistol. All you need to take care of is to not be too close when he dies, his death explosion is massive.

Server Hack
Only appears if you get Kaida Training Floors.

While the “hack” part may make you think like you actually have to do something, all you need to do is stand in a certain area until the bar on top of your screen is filled and you’re done. This area is the square the walls around the server form. Moving out of it causes the timer to tick down.
To make things difficult, enemies will spawn in set time intervals. You can see where they will spawn, thus killing them is an easy task – unless you get surrounded. To avoid this, you hide left to the box that stand left to the server. This way only the enemies that spawn on the left side can attack you directly, all others will either simply not take aggro, or have to first move towards you, which gives you all time you need to be prepared.

Once the server is nearly done, a hovertank will spawn. Those enemies are very weird, sometimes they kill you nearly instantly with massive damage, sometimes they don’t hit you even if you wait in front of them. But since we can’t rely on option 2 to happen, it’s important to delay the fight with him until everything else is dead (unless you have enough dps to take him out immediately of course). Afterwards you can either bait the hovertank around corners or just dash inside him, which will make him unable to hit you. Just make sure to not get killed by the death explosion.
- Ballistic Silos
Raptor Type-E
A plane that will follow your movements and permanently shoot lasers at you. In addition to that, it is armed with 2 additional guns on its wings, but those can be killed and it’s a good idea to do that first, as they’re hard to evade. From time to time it will stop following you and instead move from one side to the map to the other, while sending rockets all over the place. It also sometimes throws a couple of bombs at you, make sure you have your dash ready for that. To top that off it will summon workerbots, although not very often and only 2 of them each time.

While this may sound very menacing at first, all you really need to do to deal with this boss is dash to one side, keep moving in that direction until you hit the wall, then dash through his laser attack and move to the other side instead once he reaches you. Rinse and repeat. Then you need to react to the bombs and the workerbots, the missiles can pretty much be ignored. While you do that, you just keep shooting at him, although keep in mind that shooting slows you down, thus some classes may need to stop shooting for their own safety.

Armored Transport
By far the easiest boss in the game, because you don’t have to kill it to stay alive. However damaging it will drop loot whenever it reaches a certain HP threshold. As I said, pinata.
While the transporter makes its way to the right into safety, you are free to shoot it. However keep in mind that whenever it drops loot, it also spawns 3 enforcers to the left of it, as well as one room clearing unit to the right of it. My strategy is to position myself right to the transporter’s left side, slightly above the middle, in a position that makes me shoot directly at the enforcer when they spawn. Then I wait for the room clearer to come around or I just kill him by shooting through the transporter.

In addition to these summoned enemies, there will be a total of 5 turrets on your way through. First 2 (drone turrets, idk), then after crossing a bridge 2 (big shooty turrets, idk) and finally one laser turret. While the first 2 don’t really make up a thread, the upcoming 3 do. The best way to deal with them is by killing the bottom (big shooty turret) from outside its range, then you can stay below the transporter, using it as cover against the 2 remaining turrets. If you have penetration, you can even kill them for free.

Conveyor
Used to be hell, but now they nerved it to the point where you can fall asleep and still win. Do not step into the red area left and right of your screen, keep in mind that the game occasionally spawns 2 or 3 drones on the top/bottom of your screen and make sure you don't get in line of fire with a railgun turret. Take note that the turrets have no collision during the conveyor fight. Easiest way to deal with this fight is to stick to the very bottom of the screen, until something spawns or appears, then quickly take that out and return.
- V-Reality Chambers
Arena Masters
Instead of one big boss, you fight 3 androids. One Riot Guard, one flamethrower and one sniper. Kill the sniper first, he stands on the right side. He’s the only one that’s really capable of attacking you, the other 2 can easily be defeated by running in circles around them. The entire fight is literally gun down the sniper or die.

Unstable Mass (Blob)
Unlike many people will try to tell you, this is neither a penetration check, nor a dps check. It’s a “know what you have to do and then it’s easy af and you can do it with your eyes closed” check. The fight consists of one big blob which will follow you, but unlike you might think, he doesn’t deal damage on contact. Only when the boss jumps, he will deal damage in an AoE where he lands, so make sure to dash away from that spot (the target of the jump is always your position the moment he jumped, so just move a bit).

Then there are 3 medium-sized blobs. Those randomly move around and summon mini-blobs. Those are nasty little things which try to bump into you and they do deal damage. They also get faster the longer they’re alive. Dealing with this boss is simple, all you need to do is kill the medium blobs, while killing the small ones before they overwhelm you. Once the medium and small ones are dead, the big blob is free real estate. Just be careful, at 50% HP he spawns another 3 medium blobs. This means, if you first go for the big blob, you’ll face 6 medium and tons of very fast mini ones, a situation which will most likely result in death.
- Military Bay & Beyond
The Final Bossfight
After you left military bay, you enter a long sequence of bosses and bossfights, split in a total of 4 parts. Once you’re done with that, you successfully stopped Armageddon!

The first part of the fight consists of 2 tanks, which will appear once you advance far enough in the boss-room. Especially the right tank is a dps monster and has to be dealt with carefully. Luckily there is an extremely easy solution for these 2. Right after entering the room (you first have to pass a gate), move to the left until you hit the wall. Then move up until the tanks spawn. From this position right at the wall, you’re just out of aggro range of the right tank. This means you only have to beat the left tank, who luckily isn’t very strong. Then you either outrange the right tank, or approach him using the concrete pillars and step inside him. This makes your hitboxes overlap and the tank can’t shoot you. He’ll still call down an airstrike tho, so having range is the safer option.

The second part is called disco room. I don’t know who came up with that name, but it’s very fitting. The room consists of 4 servers which have to be hacked - the same as you sometimes get as a quest. After completion the gate to the Last Defender will open. To make things challenging, enemies will spawn, always 4 at once, split over the 4 servers. With proper positioning you can take out 2 of them at once while being safe from the 2 others. This is important, as one of the possible enemies that can spawn are nemesis snipers.

The name-giving part about this room are the floor tiles. Those can turn purple, which will then deal damage if you stand on them. About half the tiles are purple at the same time and they’re randomly turning on and off. The tiles deal no damage until they fully appeared, but they still do until they fully disappeared (they have a fading in/fading out animation), so don’t get too greedy with new space. It’s also important to note that the lines between 2 tiles are safe. Unfortunately I can’t give much advice on this room, just stand right in the middle below/above each server, kill the enemies when they come in line of sight and dash over tiles to avoid taking unnecessary damage.

As a final stage of this long room, there is Last Defender (short LD). This is the boss you need to defeat for your class and insanity challenges and the turning point for the writing on your death screen to say “mission completed?” instead of “missing aborted”.

LD is a big machine that floats on a horizontal line on top of the screen. He shoots lasers from his left and right side, which actually are cold fusion ammo and thus slow you down when they hit you. Since they spread the further they fly, it’s safest to get as close to him to the ceiling as possible, as the chance to get hit by these lasers is much smaller.

The majority of the fight is rather similar to the raptor fight, you move from one side to the other, while dashing through the lasers. In addition to these lasers, there will be a beamer which follows you and deals massive damage on contact. This beamer will also reset itself to your position every now and then. After some time passes, a very big beamer will appear in addition to the normal beamer, which behaves the same way but deals way more damage and has a bigger AoE. Luckily it disappears after some time.

Next some of the floor tiles will turn purple and act just like in the disco room, but to me it seems they deal a lot less damage and give you far more time before they hit you. Sometimes one of the tiles will turn green, afterwards an explosion will happen on every tile but the green one. Luckily, they don’t deal nearly as much damage as you might expect, so I recommend you just ignore them and instead tank it. Yes, even in HA or loop.

Then LD sometimes replaces his laser attack with a bunch of rockets, but as long as you stay close to him, you’re safe from them. Speaking of rockets, if the fight drags on, 2 rockets will spawn on each side of the map and try to explode in you just like spider mines. Just gun them down. Finally he’ll sometimes throw laser mines around, which randomly either do nothing when you step on them or deal a ton of damage. I don’t know when they do what.

All this sounds like way too much, but most of it can either be ignored or avoided by just moving all the way up and then constantly moving to the left/right just like with raptor. It is possible to stay in between his 2 lasers, just keep an eye on the beamers. If you move at the same speed as the beamers, you can move between the beamer and one of the laser (since LD permanently follows you, even if that means that he’s not hitting you), but the area is very tight. Make sure to preserve your dash for when you need to get through the lasers and don’t try to get through both lasers at once.

Once he’s dead, you get healed to full HP and the usual bossloot drops. Make sure to pick it up fast, as you will get teleported shortly after (there is still enough time to use the upgrade kit, just make sure you don’t think about whether to keep funny item x that dropped without pressing esc to pause time). If the fight took too long, you’ll get a bunch of poison debuffs, but they don’t deal damage. However you do not take damage from the lasers after you defeated LD, which means you can go collect your loot without having to worry about them.

Afterwards you’ll enter:
Armageddon Room
It’s time to save the world – and catch eye-cancer in the meantime. The fight is basically a copy of the server hack boss, except the layout of the things around the server is a bit different, other enemies spawn, the server (or Armageddon device as it is called here) exceeds a beam of light which doesn’t harm your android but your eyes and a new bar is added to the former progress bar. This bar can be found right below the other one, is visualized by a toxic sign and shows the progress of the arma device. Once it’s filled arma makes boom and you’re dead. It’s basically just a timer, which scales with difficulty. The higher the diff, the less time you have, but it’s still enough to mess around a bit.

Just like in server hack, enemies will spawn from like 6 or 7 set spawnpoints and you once again can see whenever they spawn. Unfortunately the scale is a bit bigger now and no matter where you place yourself, you can’t observe all spawnpoints at once and even if you do, now there are snipers which can shoot the moment they spawn.

The best place to position yourself is right below the crate that’s right above you when you enter the room. From this point, only the spawnpoint right below you takes always aggro and the ones to your left and right only do sometimes. Then you can use that crate to cornerpeak all the other enemies to death.
The Armageddon fight is truly the demise of all bad builds.

HP tanks get raped by Ion troopers, (many) shotguns have too little range to kill enemies quickly without leaving the area, LMGs are too slow to deal with fast enemies like snipers, plasma weapons die to the B Defenders, anything that tries to be close combat get’s invalidated by the need to stay close to the arma device, any low DPS “builds” get overwhelmed by the sheer amount of strong enemies.

This fight is truly the turning point from the funny game synthetik is preloop where you can do whatever you want and get through with it unpunished, to the inferno that is loop, where you have to know what you’re doing and where the differences between builds really get visible – unlike in preloop.
Difficulty Modifiers
The purpose of this section is to help you find the right modifiers for your desired %. Read Fragile.

Base
Core Feature of the game

Manual Ejection
Core Feature of the game

Jamming
I'd call it a core feature as well and it's not too big of a problem, but it can really screw you in Hyper Adrenaline

Flinch
To sum this up, taking damage sometimes makes you unable to get away. This isn't a big deal if you take damage rarely, but for classes with low shield or in tactical mode (or if you're very new) this will really bite you. One of the harder diffs

Scorching
No big deal, just don't overheat. Always use.

Haste
I would call this a core feature and you should have it enabled early to get used to the speed and the reloads. However if you're new or you struggle with Hyper Adrenaline turning this off helps.

Deflect
Can be bad if you struggle with dealing damage this is bad, but after reading this guide those problems shouldn't exist ;). I.e. this can basically be always on

Hard Core 1
Plating does not block DoTs. DoTs scale with damage absorb. If you play HA or have a plating reliant strategy, turn this off. The poison part can randomly wipe your HP but it doesn't come up often. The shell shock can be super painful for classes that get in close, like raider and especially Breacher. One of the harder diffs

Critical
Do not pretend you died because of a random crit. This diff is meaningless, it's a mathematical damage increase of 5% and you'll only notice the crits if you actively search for them.

Fragile
How this works: When you take damage a small portion of that gets reduced from your max HP. The game tracks how much you lose. Every bosskill or healing crate you get HP back (75 and 50 respectively) up to the amount you lost. HOWEVER it doesn't cap at your initial max HP, meaning you can go above it. Unless you play like HP tank riot guard, this is an always active.

Lightning Start
Mainly impacts the first 4 floors, afterwards it increases the rate elite enemies spawn. Generally this is one of the easier difficulties but it can be very difficult for newbs.

Ofc 220% is the goal, but until then you need at least 140% or 200% for various challenges.

60% + 30% Base + 10% Manual ejection + 25% Lightning start + 15% Critical or Hard Core 1 are the easiest 140% you can get. Alternatively you can use Jamming and Scorching instead of one of latter 2.

Pick your modifiers based on what modes you want to achieve. I recommend running haste anyway for practice.

For 200% it doesn't matter much, but I recently came to hate hard core 1 and thus I will recommend it to be the one you turn off.
Special Gamemodes
Here you can find some strategies to specifically deal with the special game modes.

Starting with Madness, this isn't really a challenge as the bonuses gained by it outweigh the terror level increase. As long as you can defeat the 2 headhunters the game spawns right at the start this shouldn't be a problem at all.

Hyper Adrenaline
This is by far my favourite game mode, everything dies super smoothly and it really forces you to take a way more *tactical* approach to the game. First of all, if you attempt to balance out the damage absorb decrease by increasing it in order to play "normal" you are already dead. Instead you have to 1. make sure you are the who kills enemies first and 2. find ways that sort of set a hard stop to the damage you're taking. Those include but are not limited to:

Refractor Crystal, Charge, Dodge, Platings, Damage caps (those are the most reliable)

Turrets are also very good. Gps also does exceedingly well in this mode.

The I-Frame module is NOT good, as it doesn't block the initial shot which is FAR worse in HA.

However more importantly than those things you want to learn to avoid getting hit in the first place. I know it's not exactly okay to just say "just don't get hit", but I will cover that topic later in the guide, so I might as well.

Let's quickly go over classes, I'll point out all ways they have to help with HA:

RG and Breacher get scrap plating, stun grenade and sseth up turret. I-Frame as already said isn't helpful and methadone does not scale with HA as it does in loop. RG wants to step away from his stun focus and instead play more "normal" and Breacher definitely doesn't want to run any of the shotguns that suffer range decrease.

Assassin and Sniper will primarily lean into dodge and you definitely want smoke grenade. I'm unsure about flash grenade, as its primary use is making you get hit LESS, so it's probably just suitcase again, but give it a try before you abandon it. Assassin definitely has it easier here with his damage cap and if you can't do HA on him, you'll probably never do it. Sniper has it a little harder since you don't have as much time for shield farming, so you'll have to lean into shooting from range a lot more than normal.

Raider and HG have it pretty easy, they both get I-Frames on dash. I would actually recommend using charge on Raider, as the extended I-Frame duration is way more meaningful here and madness can hurt a bit with the accuracy reduce. They also get to cheese with cement, so easy game. If not I'd still hang onto road flare and stim pack, bc they're great. Remember that knife doesn't get the bonus damage and make sure you don't screw yourself by slowing yourself with the onslaught system.

Demo also has it pretty easy, damage cap and field supply roll hard. He also has the easiest answers to phasers and stinger gliders. I recommend you just play normal but use less explosives as they don't get increased damage.

Engi. Oh engi. Summons and then pray. Easily hardest HA there is and nothing I can do about it. Make sure to recycle the overlocker to get your platings back.

There are some weapons that are really strong in HA, mostly weapons with rather weak normal damage output but extremely strong bonuses get to shine now. These are:

Laser sub, obvious.
As Val, also obvious, probably the best weapon you can get in HA
x512 allows you to just kill enemies offscreen like they don't exist.
And ofc many of the stock good weapons perform good here as well, except for launchers which will usually do very bad in this mode. Since damage is taken care of, accuracy and especially is even more important now.

Important note, the disco room floor times appear to hit a lot faster than in normal mode, making it impossible to dash over them without getting hit. Make sure you wait for tiles to disappear or very carefully maneuver around them.

Exemplary HA run on Breacher: https://youtu.be/rOxo8z9C0Bc

Tactical
Aka cbt. My honest advice is to cheat and skip this mode. If you don't want to/know how, here some ways to make it easier:

Right after you spawn you can drop your starting items to keep them before you get the tactical items.
The game will either hand you a stun grenade or a flash grenade, just restart the game until you get a stun grenade.
The shield debuff is applied after you spawn, which means stuff like 57 or shielded will not give their shield boost.
For some ♥♥♥♥♥♥♥♥ reason RG starts with 0 shield and I have no idea why. At least in my game.
Going over classes again:
I-Frame for RG and Breacher gets really good now, scrap plating gets significantly worse. Still take shielded for the shield refresh tho.
Sniper has it easy with shield farming, assassin didn't have shield anyway. Shadow dance is very bad now, so I'd go over to double reload modules aka switch position and keeping cool.
Raider just cries because how tormenting it is for him, HG just does the same as normally.
Engi is absolutely not bothered by tactical and demo just does the same thing as usual as well.

You primarily want stuff that gives you shield back, like laser sub and rosarius.

And then it's just same gameplay as usual except extremely boring.

Looo (Wip)
Classes
Something in between a guide to each class and a simple list of loadouts. Expect these to get more detailed in the future.
- Riot Guard (short RG)
A very sturdy and tanky class, with a lot of healing and the ability to stun. Unfortunately his tankiness and healing become worthless in loop, making him almost a preloop-only class. On the other hand, he is the best choice for people who start the game, for 2 reasons. Reason 1, tanky and healing, makes the game a lot easier. Reason 2, upon beating the game on at least 140% diff, all classes permanently get 2 health regen, which makes further progress much easier.

In terms of general gameplan, RG is focused around stun. Healing and tankiness can’t get you through the game and shield-bash builds are more of a challenge-run builds than suited for survival. That said, everyone should try to get as far as possible with just the Riot Shield, it’s very enjoyable.

Core: Unyielding
First caps at 25 stacks, later at 50. Killing enemies grants stacks, which then increase health regen and movespeed. Because of this, RG is secretly the 2nd fastest class in the game and nobody knows about it. It also means that the only thing you need to do in order to heal is kill stuff.

Baseline
Painkiller increasing your max HP, so far so simple. DON’T bother with the “depending on heat” part, it’s not worth the effort and will drive you insane. I already addressed how pistols and the Riotshield should be handled, no need to repeat that.

Level 5
Start with Soft Point ammo. This little line is far more important for RG’s build than you might expect. As you know, soft point on SMGs is busted and since RG also gets a damage on recoil buff on them, the weapon choice for him is set.

Level 10
I’m having my silent doubts that the damage upon destroying platings even works at all, but I never tested it. Also ten plating. Yay

Level 15
Nothing to explain here.

Level 20
Suddenly you have 250 instead of 125 movespeed at maximum stacks. Pretty bonkers if you ask me. Plus 5 of the stacks are now permanently active. Reaching these 100 painkillers is the biggest power spike RG has and it’s even worth to intentionally take some extra damage if you really need it.

Level 25
Stuns last 40% longer. Did somebody say stunlocking? Your Riot shield is now able to one-shot most scrubs, but scrubs weren't the problem anyway.

Prestige
You can tell that the dev really wanted us to use that shield. But not with me. Riot Shield builds take a part in the “fun-builds” section, but not here.

Insanity challenge
Useless. Not a single person on earth uses the Battle cry to deal damage.

Riot Guard has 5% less accuracy as unlisted debuff.

Loadout

Battlecry Module
The damage is almost non-existent and the stun duration is too short to call it a duration. And the AoE is nothing worth speaking of either. The way to use this is to interrupt enemies which rush you like ballbots, shotgun rivals or chronos and then take the time you get from that you kill them. Works with anything that chose to get close to you, but please don’t use it offensively, it’s just to weak for that. If you want you can recycle it later when you have good items and need to get rid of something.

Stun Grenade
Now everyone should have seen that coming. Everyone. There is no excuse to not take this. None based on actual arguments at least.

Methadone
Once again, massive surprise to everyone. That’s what I get for praising these 2 items as 2 of the best items in the entire game, nobody is surprised to see them here.

Weapon Mastery
As a class which centers around stun effects, this module does everything you want. It also rescues the SMGs which RG primarily used, many of them have terrible ammo eco.

Shielded
RG has the 2nd smallest shield in the game, he desperately needs at least one way to protect himself from Ions.

Those 2 were the best choices if you want the most consistent build for beating the game. If you are just starting and want to experience the tankiness everyone is praising RG for, take I-Frames and Wicked instead. You can go afk in between a group of enemies and still survive. Only on the first few floors tho.

Item Tokens:
Refer to the start of the item section, maybe maybe maybe tsunami is really good because RG gets more max HP, but I wouldn’t know what to cut since his damage output is frequently low.

Weapon Tokens:
Because RG gets soft point ammo and some buffs for SMGs which often happen to be very good with soft point, you want those. Boltcaster SMG, K7 Competition, KI Vector and Medic FMG probably are the best to fall under this category. But of course it’s always viable to just take the usual set of broken weapons, for those look at the end of the weapon section.

Strategy:
You start out by using both your shield and pistol to get to the first boss pretty easily. Use stun grenade, start shooting, eventually bash over something, repeat. When you reach the boss you drop your shield because movespeed starts getting relevant. From now on you can expect to take more damage, so use meth in combat to counteract that.

If you’re just working towards your first victory and thus don’t have any healing, use stun grenade for free guardian stacks instead of wasting meth stacks. Eventually you roll along like that until you get your weapon and items and from that point on RG basically plays like any other class. In VR you get to stop chronos with Battlecry. The real fun is in military bay where you first start to see the issues of trying to rely on a tanky build. Instead spam stun grenades and kill stuff first.
- Breacher
Go read the author's Breacher Guide lol -OA
https://steamcommunity.com/sharedfiles/filedetails/?id=2347954928

Tldr:

Coil Pistol, stun grenade, methadone, shielded, scrap plating,

Same items as always.

Coil Shotgun, AS VAL, Spas 12, Viciator or any amount of Evergreen weapons.

Strategy: Just throw your stun grenade at everything and then kill it.
- Sniper
Video I made for Sniper, including proof that the drone doesn't "betrays you":
https://youtu.be/JeDCm4IYWPA
If I had to describe this class with one word, it would be scaling. Not only does it have several talents which permanently increase something, the power of the class is also directly tied to your own skill. If you can’t play the class well, the class will feel very terrible. If you can play it well, it will be the best class in the game. I say that, knowing that I can’t play the class to its full potential, yet still realize that it’s the best. At first glance sniper looks absolutely garbage. A weak early game, no mobility, no way to deal with headless enemies, no way to deal with big groups, fragile, an annoying drone that messes with your aiming. But let me tell you, not a single of these impressions are actually true.

Core: Spotter
Ah yes, the infamous sniper drone. But before that, the actual effect. It is absolutely not worth to hunt for the targeted enemy. Just kill him if he’s in the group you’re fighting right now anyways, otherwise ignore him. Too much risk for too little outcome.

Now the drone itself. Most people accuse it of shooting while you’re aiming at an enemy, ruining your stealth and putting you in a situation you can’t handle. However, the drone NEVER attacks out of combat. There is a delay between the moment the enemy notices you (thus combat starts) and the moment he starts reacting to you. This means, when the drone shoots “by itself”, the enemy already noticed you and would attack you just a moment later. This info is confirmed by the developers, who implemented this precisely because of how many people complain about the drone. Ultimately the thing that ruins your “stealth” is yourself, by not aiming and shooting fast enough. And once you shoot, the other enemies will attack you anyways, so no point in blaming the drone for anything.

Baseline
“Headshot always penetrate targets” You get a free hyper accelerator on everything that has a head. Not only the enemy you “headshotted”, but the entire shot gets penetration. This and the general headshot damage increase are a massive damage boost.
Now please carefully read the next half of that talent. Each headshot refreshes 200 shields. Every headshot kill increases max shield by 3 (by 1 once you hit 1k shield, regardless of how you got there). This mean Sniper has the highest shield in the game, 1000 before the final boss is average, 800 before the first boss is good, my best was 15 hundred before the final. (excluding other shield sources ofc). That shield gets refreshed by headshots and smoke grenade. Did someone say Sniper is fragile?

Level 5
Having high range means you can outrange snipers and attack enemies from offscreen. And it allows you do kill enemies before they even can get in range of fire. It also means you can use shotguns without their downside.
Dropping below 25% for 2 seconds of invulnerability can safe you sometimes, but it’s not something you can rely on.

Level 10
Headshot kills drop a laser mine. Doesn’t sound too impressive, but damn, they really are. They stun enemies which walk over, so if an enemy takes the same path as the guy you just killed, he gets stunned in the EXACT same position. Free headshot without aiming again. They also remove shield and deal considerable damage and it’s really crazy how much they can do sometimes.
Free healing is always nice.

Level 15
10 dodge and 20 damage absorb. Sniper is the only class that benefits from standing still and this just adds to it. Having to stand still also means that positioning is much more important. Of course if you’re under heavy fire you should reposition, dodge and damage absorb won’t make up for the inability to evade attacks yourself.
Free sniper, however you can have a better one.

Level 20
The majority of marksman weapons are not really good. More on that when I get to weapons, but most of them really don’t synergize with Sniper. There are a few exceptions tho and these are really really powerful.
Having the drone fire twice as often will probably make most people angry, but let me tell you, that thing is secretly a turret.

Level 25
Ahhhh, there we have it. Hitting 2 targets with one shot instantly reloads the striker drone and grants it 1.50% increased damage. That damage increase is permanent. Hitting 2 targets with one shot does actually mean 2 enemies being hit by the same projectile, be it your gun, an item, themselves, or your drone. Hhhhmmmmmmmm. A drone with infinitely scaling damage. A class that gives your headshots free penetration. A funny insanity class challenge. What could go wrong. It may be annoying, but as a payoff you get a drone that single-handedly takes out entire groups by itself. Later of course.
Hitting 3 just means healing from the level 10 talent and free credits.

Prestige
Pretty sad bonus, but it does make sniper’s early game better

Insanity Class Challenge
I’m sure you all waited for it. This…
Does nothing.
It’s bugged. In order to receive the bonus from this, you need to complete the insanity challenge on assassin, which will then give the bonus for both assassin and sniper. Nobody knew about this until one day a hero appeared and randomly asked me how to remove insanity challenge progress.

You can tell whether the bonus is active based on the color of the attacks of the drone. If it shoots red laser, you don’t have it. If it shoots white, you do. Now the drone fully penetrates enemies, which means it can now enable itself and fire again. It also increases its own damage. This funny drone goes nuts in loop.

In addition to these talents, sniper has some one thing the game just doesn’t tell you about. Every headshot kill has lifesteal. It’s listed nowhere, but it exists.

Loadout

Pistol
The single best pistol you can have on Sniper is Titanium Eagle. It hits like a truck, gets temporary damage increase on headshots and I would not hesitate to say this pistol is stronger than half the Snipers in this game. Probably even more. In combination with Flash grenade, you can one-shot nearly all enemies on the first 8 floors, provided you hit their heads – if they have any.

Unfortunately this pistol is not available for everyone and I was asked to not run around, telling people how to get the pistol for free, but luckily there is a guide on steam which does just that which the devs don’t seem to care about.

Next in line is Last Breath, which is similar to Teagle, but less powerful. You can’t expect enemies to die in one hit anymore, but the handling is much better and it can’t jam.
Both Rogue pistols go even further away from Teagle and move to handling instead. That’s not what you want, you want something that can reliably oneshot enemies if you hit their heads for maximum shield gains. They are much better against armored enemies, but using them means taking a massive hit in survivability later on.
Teagle is that powerful, I still use it against everything with a head until I reach VR, even if I find another weapon by then.
|
Targeting Laser
Using it reduces deviation and recoil, but also reduces your movespeed. This item has heavy influence on your weapon choice, among other things. While this item is not on cooldown, it gives 100 crit chance, which gets set on cooldown and thus removed with every shot. Some people believe that it’s a good idea to increase crit chance on sniper, which is hilarious, as he already is the class with the most crits because he fully ignores crit chance.

Smoke Grenade
Now this should be more than obvious. Given his permanently increasing shield, this item is a thousand less damage in a single click. It gives sniper much needed mobility and should allow you to get out of dangerous situations. It gives dodge and is just generally pretty busted.

TP Grenade Flash
Fixes sniper’s weakness against anything that doesn’t have a head by making it unable to shoot at you. With this you can just take your time aiming, even if enemies are rushing you. Plus softens enemies for easier headshot kills.

Instead of Flash, you could take Decoy. It has a similar purpose (taking pressure off you), but it dies too fast imo.

Modules

Evasive Maneuvers
Getting dodge, playing around dodge cooldown, yep. Take that.

Shadow Dance
Even more dodge. This is the full dodge option, which I think is the best.

Switch Position
Completely invalidates any complaints about sniper being slow. I personally don’t like this module, but it’s definitely the best choice if you don’t want shadow dance.

The loadout is centered around not getting hit. Be it via getting out of line of fire yourself or by dodging. If you want healing, take helsing bolt and/or Cell replacer, but I definitely think sniper has more than enough healing from his headshot lifesteal and spotter takedowns. Plus dodge + high shields make him take less damage anyways.

Item Tokens:
This time I'm very creative when it comes to items, so we'll change some things now.
Replace twin link with tsunami talisman. An item that almost negates recoil on a class that heavily benefits from hitting a lot of heads? The problem with twin link is that it increases recoil and on sniper you can’t just spray and pray as on other classes, you want those heads. Tsunami is just the single best item you can get for that purpose.

What I also do is tokening gps instead of refractor, but I wouldn’t recommend that to anyone who doesn’t come to that conclusion himself. Knowing where enemies are on a class that has range bigger than your screen is pretty op, but only if you know what you’re doing.

Weaponry:
The most obvious choice would be to use Snipers and DMRs. They get the massive bonus from sniper’s level 20 talent and they’re very accurate. However they’re also weak. Terribly weak, with some exceptions of course. Thanks to his targeting laser and tsunami talisman if you find it, most guns in the game are accurate enough when you play sniper. Using a Sniper or DMR on sniper would simply mean taking double the upside, while having double the downside: Low damage against armored, headless enemies. In addition these weapons are not exactly known for their high dps. You’re shooting yourself in the leg by using them.

Instead, Snipers weapons of choice are automatic, accurate weapons and shotguns.
SMGs and Ars that are accurate enough or can be made accurate enough are:
LS Laser Sub, AMD 65, SCR Laser Socom, K7 Competition, AEK Special Elite

Weapons worth special note, because they would fall into the category, but also count as marksman weapons and thus receive the level 20 bonus:
K3 Boltcaster SMG – Normally too slow to be good, but Sniper completely fixes that
AS VAL – As already said, this is a broken weapon if you can make it work. Since most of your shots should hit on sniper, the ammo should be sustainable here. The free penetration from 8.8 greatly synergizes with the spotter drone.

An-94 Deathstalker – What if you gave one of the best ARs in the game a massive buff and drastically increased its accurate and damage? This is what we have here. This weapon stands above any tokenable weapon you can get on sniper. And above all but one red.

Now what about Snipers and DMRs, they can’t be all bad, right?
There is sour DMR which deals acceptable damage to bosses thanks to its acid ammo while having penetration on normal ammo. It also gives free money and is much stronger than its rarity would imply.

Then there is Human Model 9800K, which is the only Sniper I would token on Sniper. It just fits too perfect for him. Boss damage, shield regen, slows enemies, more shield damage, high base damage. This Sniper is better than nemesis.

This is a good time to mention that it’s impossible to land headshot on shields. Unless the shot dealt at least enough damage to break the shield, the shot does not classify as a headshot, even if you hit the head. For this reason, 98k takes a further step up, while all laser weapons take a step down. Luckily there is a certain balanced item which fixes shields, so this is not too much of an issue, but something to keep in mind, especially given that that funny thing called RNG exists.

The final option for Sniper’s tokens are Shotguns. Why these, you may ask? Sniper gets countless bonuses on headshots, many of them on headshot kills. For some reason, when 2 shots kill the same enemy simultaneously, they BOTH count as kill. This holds true for every single of the between 4 and 10 bullets of shotguns. Imagine getting 30 max shields in a single click. That’s how I got 1500 shields in that one run, I rolled a road warrior on the first floor and this went out of control very fast afterwards. Additionally Sniper has increased range on all weapons, so you can even go around sniping with a shotgun.

Coil Shotgun and spas 12 have increased range, but only 4 and 6 shots (spas gives dragons breath ammo which has these properties, if you switch to normal it will have the same as other shotguns, same vice versa with other shotguns and dragons breath). I am not satisfied with the base range of shotguns, even with the range increase from sniper. Thus I am very willing to take a hit in power for more range. But I know I am pretty alone with that opinion.

Road Warrior, Viciator Ultra and Battle hymn are where the money (rather the headshots) lies. 8 and 10 shots, but terrible range. Luckily you get 20% shields per headshot back, so you can literally walk up to enemies, aim for half a year, ignore everything, shoot once and repeat. It doesn’t matter what you do with that, lifesteal on headshots will negate any damage you take.
My tokens are Boltcaster, AEK Special Elite, AS VAL and an94, although I don’t know whether that’s optimal or not. (Probably not)
|
Strategy
You start by farming headshot kills with your starter pistol. Usually 800 shield by the time you reach the first boss is a good headline to aim for. Obviously, you will need a lot of practice before you get there consistently and sometimes the game just doesn’t want you to get there by giving you a lot of “headless” enemies. You want to be using your pistol for this, the sniper rifle he starts with is too inaccurate.

Your fights go like: flash grenade, aim for a head, kill it, repeat. Keep dashing backwards to make enemies line up and use smoke grenade when you start taking damage.
After that you want to get your hands on a weapon. It is possible to the 3nd stage with pistol, but it’s incredibly tedious. Especially because the 2nd stage contains some of the strongest of the headless enemies it’s important to farm up shield early on. VR is basically free and military bay isn’t much harder, most enemies there have heads.

The hardest part about of the game for sniper are the bossfights, especially last defender and raptor will most likely stuff you at first. For both fights you have to remember that you get slower while firing. Also keep in mind that smoke grenade refreshes dashes and shields.
- Assassin
Assassin is a very easy class. Playing him has probably the least skill requirement in the game, only maybe demo is easier. He’s not particularly outstanding, he just throws around with things that don’t require you to do anything for them to activate.

Core: Professional
Free damage and healing. DON’T even try to keep them up, it is impossible outside of bossfights.

Baseline
Thanks to this perk, you can slam your head on the keyboard instead of playing and still win. 10% (wrong tooltip time) more dodge, cannot get oneshot and gains a full shield refresh and even more dodge when falling below 25% health, which will now come into account reliably, because of that damage cap. If you want to play as an HP tank, this is your class.

Level 5
Self-explanatory. Just means that SMGs, which are a good weapon type anyways, are now better.

Level 10
Turns your dagger into a boss-dps machine. Poison deals the biggest damage over time (just loses to Burn in short terms, which is why Burn is much better) and all DoTs ignore armor.
Getting one plating per Elite kill means that Assassin combines all 3 of the best defenses in the game: Damage cap, dodge and Plating. If you don’t fail somewhere, you just can’t die on this class.

Level 15
Every interaction with a shrine (excluding shops and upgrade stations) or a chest (including boomboxes) gives some money. Quest shrines included. Farm with this for the first 8 floors, then go back to playing normally.

Level 20
More smoke for more protection.
Refunding one bullet per dodge is not much
Having your Umbra Cloak reload half your magazine can be a dps increase, but can also cause heat problems.

Level 25
Just ignore

Prestige
Even more boss dps. You can use it against against normal enemies, but most the time the damage is not worth getting that close to enemies.

Insanity class challenge
The enemies will still shoot at the decoy, and spray shots as well as piercing shots will still git you. Same goes for AoE attacks. This is a downgrade, but you need the challenge for Sniper.
Assassins Talents provide insane survivability and, thanks to the core, sustain. The only problem is a small shield, so you should seek to change that.

Loadout

Pistol
The best choice here is the 57 Fusion Classic, the shield boost is just too important. Its low damage output doesn’t matter thanks to assassin’s dagger.

Scoundrel’s Dagger
In combination with assassin’s talents, this is massive boss dps, free money and healing. The dagger itself is enough to one-shot most weak enemies early on. But once enter military bay, the number of suitable targets drastically decreases and in Military bay it’s just too dangerous to get that close to enemies and the payoff is not worth it here. The best use after that is to speed up bossfights and to intentionally break stealth.

Umbra Adaptive Cloak
While this is active, enemies no longer shoot at you. Shots that were already shot will still hit you tho, bosses ignore the stealth and mortar turrets and drones will still attack you if there is something for them to aggro on. Having any item activated (not just using it yourself) or shooting breaks stealth. This effectively means that you lock yourself out of a number of good items if you decide to keep this.

If you recycle it, you gain 10 dodge. It does scale with power, but very poorly and you need to invest several upgrades for a single point in dodge (still worth doing it once or twice tho). Arguments for keeping it is that gives you money from chests, works as a poor-man magic mag by reloading your magaize and obviously the ability to escape from combat. That is only really useful if you have healing and are willing to wait for it or you want to reposition, but in that case, you could have dodged as well. Arguments for recycling are getting your dodge build going (with this you are above 50 dodge right from the start) and the extra item slot. I choose to recycle it in military bay, until then I keep it for free money.

The rest of the loadout is the exact same as on Sniper for the exact same reasons.

Items
Same list. Because of his damage cap, you may consider to choose a healing item, but I wouldn’t know what to swap out.
For what items to keep in the run, you have to keep in mind that any item that triggers itself can cause umbra cloak to be deactivated, the good items which would cause that problem are both currents, gun drone spawner and rosarius. Same for the majority of passive damage items, but I don’t consider most of them good items.

Weapons
Assassin gets a few bonuses to SMGs, but aside from that you’re free to take whatever you like. The only gun worth special note is LS Laser Sub to compensate his low shield, but that note is pointless, as laser sub is already one of the best weapons in the entire game. The other consideration you can make is that guns which heal you (AEK, an94, AMD) will synergize with his damage cap, but that once again is pointless to say, since these 3 are already good guns and you may choose them anyways.

Strategy
You start by farming money with backstabs, then you use flash grenade and smoke grenade similar to sniper. The dagger becomes pretty redundant after the first stage, but it’s still a great tool to increase boss dps. Most “difficult” part about assassin is learning to time your smoke grenade right, you want to use it just before you lose your shield, but good luck doing that. Luckily assassin has next to nothing unique which means I’m already done with this section lol.
- Raider
Raider is another class that scales well. Just like sniper, playing him poorly will yield terrible results and he has some scaling talents as well. His merits are high mobility combined with invulnerability on dash, as well as insane synergies with temporary buffs

Core: Looter
Kills drops Dogtags, which are funny green things floating on the floor. Picking them up will fully refresh your shields and give a 200 shield increase for a short duration. They additionally give further bonuses thanks to his talents. Picking up any pickups grants a core stack, which caps at 3, which increase firerate, scavenging (10 per stack) and decrease burstfire-delay (would make absolutely no sense for it to increase it). This simply means that your gun fires faster, with a stronger effect on burst weapons.

Baseline
Dashing grants brief invulnerability which last for 20 frames recorded on 60 fps. You also have 2 of them. This baseline ability singlehandedly makes Raider a good class. You don’t really need much else with this. It takes a lot of practice, good timing and good reaction speed, but in the end, you will be able to negate most incoming damage. Either by dashing away or by just blocking the damage with the dash.

Level 5
Decreasing burst fire delay effectively means faster firerate for burst weapons. Decreasing movement inaccuracy and firing slowdown means that you can run around, basically ignoring half the accuracy system of the game. Standing still while shooting? Nah, not raider.

Level 10
Killing enemies with the blade resets its cooldown. Now you are finally no longer reliant on that unreasonably long cooldown and can instead use it to finish off enemies as much as you want.
Ignore the buff, running headfirst into enemies because you want to use some stupid buff is not worth it.

Level 15
20% Chance to crit, which scales with luck but is completely unaffected by your crit stat. There is no point in taking charge just for its crit increase, the knife will not benefit from it.

Level 20
30 dogtags, free bomb. I don’t hang on to this item for long, so it’s free money for me, but if you want to use it, go on.
60 dogtags, 1000 credits and 2 upgrade kits. Those 1000 credits are affected by credit gain, which means madness and potential temporary buffs can result in you getting max credits in a single instance.

Level 25
More scavenging, effectively gives you 25 scav and no more due to diminishing effects.
All weapons have a 15% of firing an additional shot. Do you realize what that means? Every single gun you use has a twin link built-in. That twin link effect stacks with the 2 other twin link effects, for magnificent results. In short, it’s 15% damage increase (not that additive fake from upgrade kits, true multiplicative increase).

Prestige
Whenever your class core goes from 2 stacks BACK to 3 stacks (I.e. not the first time you hit 3) all buffs are extended by 7 seconds. Since the core loses 1 stack 5 seconds after picking up a pickup, you can theoretically keep up buffs forever. Additionally you can activate buffs like road flare or magic mag just before you go back to 3 stacks, adding them to the list of buffs you keep up. This requires a lot of player attention, as well as the skill to kill new enemies fast enough while avoiding to make pickups before the core loses a stack, since that would reset the timer. But if you can handle it....
Trust me, road flare is not a balanced item.

The Prestige has another hidden effect, reaching 45 dogtags will from now on drop a random weapon.

Insanity Class Challenge
By the time you have 111 dogtags you should already have committed to a weapon. This just comes too late to be useful.

Raider secretly reduces firerate on all weapons by 10%, but his core increases firerate by more than that, so most of the time you will end up shooting faster than other classes.

Loadout

Pistol
I’ve been using Kaida Model H since day 1, only using the deagle a few times to test it.

Reverbing Blade
Deals increased damage while dashing. You dash in, click this while dashing and have your dash protect you from potential death explosions. That’s the plan.
Deals damage based on enemy missing health. The way this works is that of all enemies you hit with this, it takes the enemy with the lowest health to calculate the damage for all enemies. So you start by attacking one enemy, get him down to low health and then one-shot the entire group.

The actual damage from this item is complicated. It has a maximum damage and every second the damage on the knife charges up. That damage is displayed on the item. Upgrading the knife increases the maximum damage and the damage increase per second. Using the knife halves the stacks. With every teleporter you use, the max damage increases. This means the knife starts of terrible and unusable, but ends up oneshotting nearly everything except bosses. Note that it deals plasma damage, which means it will deal next to no damage to enemies with shields.
Finisher heal for a bit. Heal, not lifesteal.

Stim Pack
Decreasing dash cooldown when dashing grants you invulnerability? Yoa, seems balanced. The item is overall a massive power boost, not just with that dash cd reduction.

Road Flare
It may seem like that an item which gives you a buff while you stand in it is bad on the fastest class in the game, but you still get the full buff for 3 seconds, so that doesn’t matter. The damage increase is desperately needed for your knife early on and being able to deal some extra damage is always nice.

This + Refresher + Raider. Just saying. There is nothing wrong with this.
If you want a healing item, there is only Overdose and it sucks. But you shouldn’t start playing with Raider anyways, he’s not exactly beginner friendly. Just use it as a training wheel and replace it as soon as possible.

Routine
No explanation needed.

Madness
Remember that the credit gain from his Level 20 Talent scales with currency gain. This is a MASSIVE income increase and the accuracy decrease is countered by road flare.
The reason I am not taking taking Charge is because Raider already has I-frames on dash. With charge they would last over twice as long (20 without versus 45 with), but for your needs the duration of Raiders base I-Frames should be enough. Given that the crit boost doesn’t really do anything, there is not too much of a reason to take this. It’s not bad, just crippled to half its effect. Because of that I judge madness, which further synergizes with one of raider’s talents, as better on him.

While the loadouts from the guardians and rogues were focused on not taking damage/drastically reducing it, the commando loadout is focused on not getting hit at all/blocking it with I-Frames. While that is more effective, it is also significantly more difficult to pull off. Every single hit you take on Raider can have devastating results in situations where other classes wouldn’t even notice that something happened. On the other hand, you also damage way less often at all.

Items
Same as always, unless you want to fully lean on refresher. In that case replace the refractor with a rosarius, twin link with target cogitator and then you pray to actually get refresher.
I just want to talk about lightning boots. Sacrificing your mobility and your invulnerability, as well as the protection that distance from enemies gives is a price NOTHING is worth to pay for. Especially not for an item that doesn’t even one-shot all enemies. It is fun to use, but that’s the only reason to use it.
|
Weaponry
Raider has no weapon specialization, except for the decreased movement inaccuracy and firing slowdown and the burstfire delay reduction. The latter one is optional, but the first 2 mean that you mostly benefit from weapons that allow you to move while shooting and vice versa. Since that’s already what you want, Raider specializes in good weapons. Yay.
Just take the full list of good weapons and pick whatever you like, there is not really much of a restriction here.

The only guns worth special note are Bren Anti Air, which thanks to routine no longer suffers from 0 AP and is no usable if you want to and HMN Laser Cannon, which really benefits from his built-in twin link effect.

Strategies
Raider has somewhat of a rough start and there’s not too much to say about it. You start your fights with road flare, then shoot one enemy down, knife him, repeat. Stim pack is saved for big groups and dangerous situations. Later when you get your weapon you only use your knife to reduce heat and to finish the leftovers after you emptied your gun.

Remember how the knife works when using it and don’t expect it to give great results before you upgraded it. Remember that when you reach 60 dogtags you get credits which are affected by credit gain, so do your best to have madness up when you get there.
- Heavy Gunner
I already stated what I think about LMGs, so this shouldn’t be shocking anymore. Heavy Gunner is a class that focuses on dps while simultaneously having charge to completely dab on that funny thing called damage. He is the other class that’s very easy to play and the other choice for new players.

Core: Suppression
Basically means that enemies you shoot at don’t shoot back. I haven’t experienced any changes in this between low and high heat, but I wasn’t paying attention either.

Baseline
Dashing is slower but lasts longer. Or in other words, using charge makes you invulnerable for about a second whenever you dash. Balance is something else.

Level 5
Armor and crit chance are funny and ignorable, but 10 shield and 3 HP per shot do make quite a difference, especially with the doubled effect while the onslaught system is running. Combine this with any fast-firing gun to obtain both great protection and healing; another reason to not use LMGs.
The cooldown increase really slaps.

Level 10
A free custom upgrade kit, shorter reloads, less upgrade kits which nobody cares about because weapon upgrade shrines suck and the ability to choose from a larger attachment selection. The last one is really powerful. With the new attachments the chance for each attachment to appear on all 4 got pushed below 50% and not hitting hyper accelerator/reload vent can really ruin your gun. Being able to choose from one more raises the chance for each above 60, which means your gun are far more likely to be good, especially with all the other gun improvements HG has to offer.

Level 15
My opinion on this one is really divided. On the one hand, those are really some powerful buffs. On the other hand, the price for them is an increased jamming chance. Most people wouldn’t see that as a downside, given all the buffs jamming now gives, but I just don’t like it. Yes yes, I know unjamming is fast. You can even press esc and unjam while the game is paused.

Level 20
All projectiles gain one bounce. Another curse and blessing at once. Most of the time it increases your damage in one or another way and allows some shots around corners which other classes can’t do. Because of how spread works and because of how poorly the ricochet mechanics are made, you have to get very unlucky to hit yourself, unless you make a mistake. Unfortunately I corner peak a lot, so even half a millimeter can be my end. Quite literally a double-edged sword, that ricochet.
Aside from that, damage and more damage.

Level 25
Ammo regen buffs reset heat when you get them, so picking up ammo will do that now, because of the ammo regen effect.
“Supplies onslaught system with 5 missiles” means that shooting your gun will now cause missiles to trigger while the onslaught system is active.

Prestige


Insanity Class Challenge

Actually I have no idea and need to ask
Heavy Gunner’s Talents are focused entirely around weapons and dealing damage. This is a good thing, since offense is the best defense. All that’s left now is to set up a working defensive system and the onslaught can begin.

Heavy Gunner has reduced heat generation and reduced overheat damage and regenerates shields while dashing regardless of shield regen delay as unlisted buffs.

Loadout

Pistol
The only considerations to be made here is that 57 and tec 9 have a bigger magsize than other pistols (yes, I am ignoring p25), aside from that just take whatever you like.

Onslaught System
No explanation needed. You click it, you click at enemies, the rest happens by itself. This is probably the 3rd biggest dps increase behind shock impulse and refresher with the right combinations. The only downside is the movespeed decrease, which means you can screw yourself, but your dash should take care of that.

Stim Pack
Similar as on Raider, reducing dash cd on a class that gets immune to damage for a second each dash is just busted.

Road Flare
Moar damage.

Charge
As already explained, charge on HG is literally a free victory. Unlike on raider you don’t need timing for this, you just press shift and win. A full second is more than enough for the class with the highest dps in the game to win fights unharmed.

Routine
Need. Moar. Damage. People meme around with HG being a slow class, but that’s only true if you don’t use routine and take LMGs. Because of that, he is only really slow while the onslaught system is active, otherwise he is really fast.

HG is a class that clicks buttons until he wins. Stim pack and charge take care of that. Keep in mind that HG gains the most weapon bonuses of all classes, making almost all of them function well on him. If you ever want to see how good a weapon is, don't do it on HG, it will give no meaningful result.

Items
Exactly the same items, except powershot is likely more useful than magic mag here, because HG fires a lot without reloading.

Weaponry
Just the same list of SMGs and ARs as on Raider.

Strategy
Road flare, onslaught system, start firing. Every single fight. Early on you’ll primarily lean into your pistol while using the lg2 to deal with the big groups. Also have a look at this short video showing how powerful the ricochet can be put to use: https://youtu.be/UrxqdB86sgc
- Engineer
No matter how much I enjoy Sseth’s content, he is responsible for this unbearable “Gamble-Engi” and “RNG-Demigod” thing and I can’t forgive him for that. There are way too many people out there, slamming their head on the keyboard, recycling a shock impulse while hoping for a uranium and thinking they’re “gambling”. If you use your entire lottery win to gamble again, but the price to win is only the money you spent to win the lottery win in the first place, then that’s not gambling, that’s just stupid.

Next, engi gets significantly more items than other classes, for various reason. Because of that, his chances of actually finding a good item are significantly higher. Repeatedly rolling a dice more often than it has sides is not gambling, it’s waiting for the undeniable to happen. Finally (any sane person at least) you only recycle items you would have recycled at some point anyways, thus engi does not actually pay to gamble, he just wins for free. To me this doesn’t seem like gambling, but maybe someone can enlighten me here.

Engineer’s strength stems from how broken the items in this game are. But that doesn’t make himself better. While he has the highest chances of getting them, his ceiling is much lower than others, because unlike the other classes he doesn’t have any meaningful talents which are not related to getting items. After all, any class can get any number of broken items with enough RNG.

So in my humble opinion, engi is the opposite of gambling and the class with the lowest power ceiling in the game. Before you start crying at me, engi is my 3nd most played class and I’ve seen how stupidly easy it is to beat the game with an army of drones. It’s just that that’s not an engi only thing, he just relies on less RNG to get to it.

Core: Drone Zeal
The drone deals laser damage ergo half to shields and shots inflict Burn DoT. The best part about the drone is that they briefly slow enemies, but because there are that many shots, it can almost stunlock a few of them. It won’t really do much against a big groups and won’t help you against enemies that already are in range, but at least something.

Baseline
Start with Auto-Overclocker item.
Starting weaks means 10 less damage output, as well as 20 less scavenging and luck. Quite ironic that the “gambling” class has less luck. The increased character upgrades are the only thing engi has really going for him aside from all these item related effects.

Level 5
Neither that laser weapon nor that special weapon buff is strong enough to justify taking a weaker weapon for that buff.
Overclocking a player grants 6 additional core stacks instead of 5.

Level 10
Here is what engi does best: getting items.
Recycling 3 items grants a new random item.
Just trash every item you don’t want to keep, you won’t miss them. Upgrade kits also count as items, but the entire stack counts as one and you can’t separate them, so make sure you recycle them immediately if you decide that you want to recycle them at all.

It says the new item is at 75% of the combined power of the recycled 3, but while it is true that recycling items on higher power results in slightly higher base item power, it is definitely not 75% of anything. Just ignore that part.
Item shops containing one more item just means that engi has even higher chances of getting items he wants. Gambling.

With minimum stacks the game means that those are always active, even if you don’t activate items, but that doesn’t raise the cap. In other words, after you recycle 40 items, you will permanently have 30 core stacks. And another drone after 10 of course.

Level 15
This talent makes your turret skyrocket in usefulness. Make sure to place it last, in order to give all other summons that heal. Keep in mind that the orange “cooldown” is actually effect duration and not affected by this, ergo it’s better to wait in some cases.

Level 20
Ammo regen. 10 years after everything is dead. Yaaaaaaay. I hope I could transfer my un-enthusiasm, because ammo regen outside of combat is not really useful. Aside from that, engi is not exactly a class that shoots much.
"Headshots scrape off one scrap" refers to the automatic overclocker, I.e. headshotting charges it up.

Level 25
The 25% chance to deploy 2 turrets can trigger twice (maybe more often, idk) resulting into 3 turrets being deployed at once. Happened twice so far for me. Otherwise, solo spawned turret lasts 10 seconds longer and I have no idea what that is supposed to mean. It has no impact on active effect duration, the turret starts losing health once the duration is over like everything else and if it means that it increases HP of the turret, why don’t they just state that? I have no idea what that means.
Drone Zeal maximum stacks are now 30, replacing the old 20.

Prestige
Does actually work, formerly damaged items are now revised and have less cooldown compared to items of the same power. Unlike all the other item variants, this one actually affects something other than the base power, making it the best item variant.

Insanity Class Challenge
Killing an enemy has a chance which seems to be anything but 5% but I haven’t tested to revive it as friendly permanently despite the game saying for a duration. It has the exact same problems as order 322, but now it is random and can do some funny stuff. During an item only run this revived a medium blob, which then continued to spit out small ones.
My own turrets didn’t shoot at it, since it was “friendly”, but it kept spawning mini blobs to attack me. I had to decide between throwing the challenge run or ignoring it. Other funny things this does it reviving one of the arena masters, making the bossfight unable to end unless you kill him again, reviving alarm bots which still spawn enemy chrono troopers, mortar drones and turrets it resurrects still keep targeting you and some funny other stuff. But these flaws aside, this is probably the strongest insanity class challenge bonus, maybe behind sniper.

Engineer really supports that summoner playstile, which is the safest way to play engi, as you don’t need to risk yourself in combat if everything is fighting for you. Because he has the highest chance of getting items, engi is the class for meme builds and the class you pick if you want to mess around with stuff. The moment he tries to fight fair and square (although nobody would call my playstyle fair for the enemies), he puts himself on the same levels as the other classes, where he can only lose in comparison.

Loadout

Pistol
I really like the ppq-h and a lot of people do as well, but since engineer doesn’t really shoot much once his build gets going, the 57 is probably the best choice in the long term. However you need something that gets you through your weak early game.

LMG Sentry Turret
It’s weaker than the LMG turret, however combined with engi’s level 15 talent, this is one of the best items in the game.

Missile Drone
Scales with recycled items, a summon, can be placed wherever you want, big damage, what else could you ask for?

Field Supply
Even in a summon build, damage is unavoidable. This is just the best healing item in the game, the conclusion is obvious.
|
Auto-Overclocker
Instead of buffing your summons, you should prioritize buffing yourself. It gives 400 HP and a ton of firerate for 5 seconds. The 400 HP really are a lifesaver for engi’s weak early game and the firerate…. Well, refresher exists. How many thousand firerate can you amass?
Unfortunately it has a severe drawback, it makes you unable to obtain plating. If you pick them up, they get dismantled into scrap, which is the number next to the overclocker, which it uses whenever you activate it. Platings you already have when you pick the overclocker up just disappear.

For this reason, I recommend you recycle it once you enter loop, as giving up plating means you will take a lot more damage in there than the 400 HP you get from overclocker.
You could take Seth up suitcase, but it’s much weaker than the drone and I don’t feel like giving up all my healing for a filler item. Similar to that, the u-potion. I don’t want to give up the free victory I get from field supply for the chance to get stat upgrades. Especially since things have to go very, very well if u-potion wants to keep up with field supply.

Unceasing
Surprise surprise. Even IF you make the argument that in a summon build you don’t need to be mobile, don’t need to vent heat and don’t need to refresh shield, don’t need to get 5 dodge for free (seriously, even if I was able to never get hit, I would still take it for just the dash reduce), you just will encounter situations where your summons just can’t help you.

Overdrive
30 movespeed and faster cooldowns on an item-based build. This is clearly the best choice behind unceasing.

Well Oiled
All item items grant [4] max HP and heal for the same amount on activation – stacks 50 times. This can be somewhat misleading and may cause people to think that only the max HP increases stack 50 times. But no, you will only get Healing and HP 50 times from this, afterwards it’s dead. In other words, this is simply 200 max HP.

The seconds effect is more interesting. 2% is kind of nothing, especially considering that nobody guarantees you that it actually triggers while you have cooldowns running. But is scales with luck and powershot counts as an item activation, so it’s possible to throw some funny build together which can utilize this

Items
And once again, magic ma…
NO, just kidding. Playing engi means playing a different game, thus we need completely different items. Summons that is.

Stinger jet gilder, DMR turret and gun drone spawner are those I’d call really good. You could throw in the last one, phaser, but that thing never satisfied me. Instead I prefer either gps, which allows me to observe the fight on the entire map or powershot, because it fuels the Drone Zeal. Alternatively Icarus for the visual effect.

Weaponry

What weapons to take on a class that doesn’t want to fight?
The first option are backpack weapons or weapons which give effects while you hold them.
These would be laser sub, medic fmg and AS VAL for those with active effects, however you need to get rid of overclocker before VAL can do its wonder.

For backpack weapons there is the must have Eminence AR. Undeniable the most important thing on this item-based class. Then there is 98k, Hig-S, Flametongue etc.
The other option are weapons that don’t require you to participate in combat for them to deal damage.
The only weapons that fall into this category are:
Human RPG-7, for its ability to shoot one big rocket
ML7000 Plus, for its ability to shoot a bunch of homing rockets
X512 Experimental, for its infinite range and homing missiles
Liandry Railgun, for its ability to shoot through walls
‘Mjolnir’ Chain LTN, for being broken and completely out of balance

But honestly the only thing your weapon needs to be good for you is the reducer attachment. I say the best way to handle upgrade kits on engi is to upgrade random guns until you roll reducer and then recycle the rest of them. Alternatively you can keep them, hoping for a gun with a good effect on it.

Strategy
Place summons, done. Congratulation, game over. Very interactive.
- Demolisher (short Demo)
I have no idea what to write. Demo is quite unbalanced and has an easier time in loop than in preloop if build correctly.

Core: HE-Ammo
All explosions, regardless of the source, grant one stack. (Note that resonator after prestige creates 2 explosions). As long as you have stacks all shots will deal 50 bonus damage aswell as 20% more to bosses and turrets, but they also remove one stack each. It's basically an almost permanent damage increase.

Baseline
Works as the tooltip states.

Level 5
Because of the scavenging gain on ultra-kills, demo is the only class that can keep his scav increased despite the loop debuff. Normally that wouldn’t matter, but thanks to a certain balanced healing item which works on enemy drops, this effect skyrockets the further you get in the game. Given that field supply scales with max HP, you are guaranteed to heal to your max HP every single fight once you looped two or 3 times.
On top of that 100 healing on Triple kills, demo’s healing just stands above everyone else’s.

Level 10
Double grenades makes grenade cheesing easier and has no further purpose. It doubles psy field, but then that’s still not enough to stop enemies.
All items starting at 15% more power works the same way as item variants (superior, ultra, etc) work. It simply increases the power the item drops at.
And you take less damage from explosions, stop crying over m32.

Level 15
Crit and more crit and I don’t know how that is supposed to be useful.

Level 20
Never take more than 600 damage in one hit. Hmmmmmmmmmmmm.
Damage cap? Field supply? Infinite scav increase? Hmmmmmmmmmmmmmmmmmmmmmmmmm.
I cannot see any problems here. Virtually none. All you need to do is take 2 field supply, upgrade them, get some max HP increase and you can’t die anymore. Balanced class

Level 25
The 50 kills don’t need to be done with the launcher, it just needs 50 kills with any gun. After that upgrade, the launcher becomes sustainable.
Launchers, Rifles and Launchers always gain double stat upgrades. This part of this talent is always active regardless of your level. It means that all weapons that are affected by this will quickly be upgraded beyond the point where damage matters anymore. It affects more weapons than you may think, but it also doesn’t necessarily justify using them, if the gun is just not good enough, even with double damage upgrades.

Prestige
With this you can finally use the resonator more than once every ten years.

Insanity Class Challenge
No clue.
Demo’s talents focus on multikills. Fortunately for him, there will be a lot of opportunities in the game, making him a class that very effectively counters a big portion of the game. He also secretly has immortality in his talents.

Loadout

Pistol
Ppq-h or 57

Seismic Resonator
The way this works is that every explosions, regardless of what or who caused it, will create a temporary target on the floor. The one closest to your cursor will be highlighted (although it is nowhere near as clear as it could be) and using the resonator triggers an explosion on the target. The damage is rather high and makes for a massive dps increase. It also makes grenade cheesing much easier.

Field supply
Best healing item in the game on a class with a damage cap? Sure

Missile Drone
A great summon overall, but in addition to that, it creates explosions for your resonator. It loses to double field supply, but when that’s gone, this is the best other choice.

For modules: Unceasing, Overdrive or Grenadier, I don’t want to write anymore, leave me alone.

Items
The same. Only possible deviation is to remove shock impulse if you want to go full explosives, because SI only triggers on the impact of the grenades, not on the explosions, which is really not much.

You can take HE Grenade and cheese your way through the game, but I will not recommend that. You also need some way to deal with bosses consistently and you need to keep in mind that you can still get killed by a bad spawn if you can’t handle it.

Weaponry
A lot of the launchers have the problem that they’re kinda weak against individual enemies or the usual lone survivors, so I really don’t like using too many of them and instead I only token object 29 and m32 and take other weapons, especially laser cannon which gets affected by the double upgrades.

Strategy
Playing demo is pretty straight forward, you just kill everything. Early on you start with your pistol and take the launcher to kill the bigger stuff and groups, then once it gets upgraded you can shoot once into every group. Together with the drone and the resonator you get to roll through the game pretty easily like that. Then after you get your weapon everything is pretty dead anyway, so gg. Unlike other classes Demo wants some max HP upgrades but aside from that he plays pretty much like the rest.
How to not get hit
“Just don’t get hit” alongside “git gud” are statements you might encounter when asking for help or when complaining about your death. Mostly that’s just a lazy joke, but it actually is the correct answer, although it obviously isn’t just done with that one statement. This section goes over enemy movement pattern and behaviour, talk about cover, present ways to use that knowledge and finally I’ll go over the most effective defensive systems to deal with the remaining damage that goes through.

Warning: This is very advanced stuff, you definitely want to play the game a bit before you read through this if you’re new.

Let’s start with enemies. All enemies always shoot at your position. This means if you’re constantly moving away from your original position you are a lot less likely to get hit. Most people would try to react to enemies’ shots, but it’s a lot better to simply move proactively. For example, constantly alternating between moving left/right or up/down (only one at a time, depending on enemy position) will significantly reduce the amount of shots that go in your direction at all. Of course you have to find the right amount between too much and too little and obviously this is only something you can only do if you don’t care much about accuracy. However even on sniper or with a sniper you still want to do this while you are not shooting.

Next way of moving is circling around enemies. I don’t mean getting close to them, that’s another strategy. This is the safer version of the one above, but it doesn’t work at all against some enemies and you need space for it. About getting close to enemies: Specifically turrets have a hard time dealing with you if you get close, but there’s also the fact that you can overlap hitboxes with enemies to hide. This however is dangerous, as it may mean that it gets you very close to other enemies that still can shoot you or you may fail to get into the enemy you wanted (this sounds wrong). I would only advice this to fast classes as a way to deal with turrets and only if your weapon is lacklustre.

Then moving backwards, which generally is a really good idea. For once it has the advantage that it brings you out of the range of enemies and it also allows you to get into cover/a better position. Here we can abuse the enemy AI, which will simply follow you and if you’re far enough away, simply take the shortest path. This means they will all line up, making it very easy to kill. It also means that you can shoot them while they’re running after you, since they run into your shot, but you stay well out of their range. The advanced version of this would be hit and run, but if you can try to get a weapon that doesn’t care about whether you move or not.

Speaking of range, this is another very important topic. For most projectiles the range is about the distance between you and the left or right edge of the screen (while having your cursor there ofc). This for once means you basically always want to be fighting horizontally, as it means that you get to see enemies earlier and before you get in bullet range with them. (That’s to be preferred ofc, but you don’t always get the choice) You can then shoot at them while moving backwards yourself. It also means that you very rarely will be able to out-range enemies, which for example with certain turrets or snipers means you have to find other ways to stay out of their range. This is where cover comes into play, but more on that later.

Now as you’ve surely noticed, movespeed plays a very VERY big role. You aren’t required to play one of the fast classes to use these tricks, but it definitely makes it easier and more reliable. But what about movement inaccuracy you surely ask? Basically the idea is to be moving at all times during which you are not shooting. Some weapons, depending on class and attachments, can afford to be shot while moving and that makes them very powerful (laser cannon btw), but this isn’t the general rule and killing enemies fast definitely has priority over dancing around. Learning that hit and run and getting that feeling for the balance between shooting and moving is not something I can teach with words. I have a lot of Videos about Breacher on my YouTube channel where you can see the extreme examples of that way of playing, but in the end, you have to simply practice it.

If you play around with movement a little, you will notice that you get hit less but still relatively often. It just reduces the hits you eat, but enemies have deviation, you can always get unlucky and some enemies simply don’t care about what you do. For this reason we need a more reliable way to not get hit, which would then be cover. Obviously, I don’t mean the item hard light cover here, my definition of cover are things enemies can’t shoot through. The idea is to reduce the time during which you can get hit at all as much as possible by only being in line of fire with enemies while you are actually shooting. You always want to be next to a corner that allows you to pause the fight at any time you wish.
|
This then opens a lot of ways to play with enemies. The enemy AI kicks in again and makes them have very predictable pathings, just like they do at range (except for shotgun rivals). They will once again take the shortest path towards you which would mean they line up and then move around the corner as closely as possible. You can then do corner peaking or you wait for them and shoot them while they’re moving around the corner. Corner peaking has the up and downside that enemies try to shoot at you while you are doing this. If you keep that in mind you can play with their magazines, but it also means that if you peak too aggressively, you will get hit by a shot that was fired before you peaked the 2nd time. It also has the problems that some enemies shoot too fast for this to work. This is an excellent way to deal with phasers, as it baits their magazines without really risking to get hit.

Waiting for enemies to go around corners has the advantage that they simply cannot shoot at you, but it comes with the downside that if something makes it through, you have to decide between killing that guy or continuing with shooting the corner. Either case is bad, so you’d have to reposition. Because this can happen, it’s a very good idea to still stay as far away from the corner as possible (but close enough to ensure that you actually hit). Keep in mind that some very fast enemies will only take a split second to make a move after they passed the corner, which means if your timing isn’t good enough, you probably want too shoot a lot more than necessary just to make sure nothing bad happens.

As you can see, cover is a really powerful tool in this game and the reason why I insist of having a turret in all my HA runs. Make sure to learn what actually counts as cover, there are some things that will let shots pass through, or things that can be destroyed. Finally it is a very good idea to move from cover to cover instead of from group to group, because some enemies have really high aggro range and it also helps with practising. But also during fights you want to move with cover in mind. Just moving *somewhere* surely helps, but actively moving towards cover to get into a better position is much more rewarding. Especially when your mag is getting empty you want to go somewhere else, there’s absolutely no justification for staying in front of enemies while you’re reloading. (If you can help it ofc, if not at least make sure you move while doing it)

Another thing that could be treated as cover are enemies. As you can see in the enemy section of the guide, some enemies are just stronger than others and your experience will likely agree with that. Especially their speed plays a big role in this, as slow enemies can perfectly be used as temporary cover to deal with the more dangerous ones. This gets even better if you have access to penetration. Basically, line up enemies and you’ll both deal more damage and take less.

Combining good movement, knowledge about range and the use of cover will significantly reduce the amounts of hits you take. However not all of them unfortunately, which is why we still have defensive systems to deal with the last bit of damage. With this I don’t mean something like shield, but instead stuff that sort of sets a hard stop to the damage we’re taking. For example platings block one shot, regardless of how much damage it would deal.

I already mentioned platings, so let’s start with them. There are 3 ways to get a constant supply of them, which are the module scrap plating, the weapon AS VAL (and technically M79 Terminator but ehh) and the item r-plating. Each of these are extremely powerful IF you don’t lose your shield to every fart that comes your way. The idea is to use the combat tricks from earlier together with your shield as a buffer to deal with all sorts of weak scrubs, leaving you the platings for the real dangerous enemies.

The next thing is refractor crystal and after reading through this you will probably realize that 3 seconds are basically an eternity in this game. Theoretically you’d want to activate it when you are about to take damage, but most of the time you’ll take damage before you realize that you will take damage (that’s my problem at least) and then something very annoying will happen, namely flinch can block you from activating your items for a short moment. For this reason I do something I call “proactive danger-assessment” (I came up with that while writing, I’m not that insane), which essentially means you take the size of the group of enemies approaching you, their composition and you check how good your cover is and if it looks like you’re not going to make it without problems, just hit the refractor, the fight will be over after. Of course this requires just as much experience as doing it with reflexes, but it reduces the risk of dying bc you got overrun out of seemingly nowhere.

Finally there’s charge or Raider’s baseline and I have to admit that I am not good at this. Since I don’t play these classes often I haven’t put practice into timing my dashes properly, but here the idea is using your dash during the times you are in line of fire with enemies, like for example while corner peaking and also generally to just block shots with the right timing. If you play an extensive amount of raider this will get second nature to you just like that sidestepping is for me, but unfortunately I can’t help here more.

A level below that are the “soft defensive system”, like shield or dodge. Dodge eventually turns into a hard stop, but you need A LOT of it for it to be consistent. These serve to reduce the damage you take, but in HA or loop they won’t do as well as the 3 above, but this is far detached from what most people will experience, so investing in dodge and especially shield is a very good idea. If all damage that passes through after all that movement and cover first has to pass an 800 shield wall before it can start really hurting you, you can end up taking very little damage very fast.

This was all I could come up with regarding not getting hit. I know it’s very theoretical and I will try to provide with examples and videos to showcase what I mean and I really hope I was able to help you improve. Maybe one day you’ll be the one telling others to “just don’t get hit” ;)
Enemy Guide
There are some enemies that are really hard to deal with if you don't know how and this is what this section is for.

For reference I will be using the names from the wiki: https://synthetik.fandom.com/wiki/Enemies
For enemies that I normally use different names for, I'll tell you.

First the scrub category. In here go all enemies that don't do anything unique. You'll be a bit surprised how many enemies I put in here, but as long as an enemies nothing special with completely predictable behaviour I consider them scrubs. Keep in mind that this assessment is mostly for preloop and not for HA, obviously there even the weakest among scrubs can get you. Nonetheless, they are still easier to deal with due to being easier to predict.

Breach Ceta, B Defender, Workerbot, Enforcer, Headhunter (yes), Executioner Glider (they become extremely terrifying in loop), Frontline Medic, Gun Drone, Missile Drone, OM6 Overseer, Rocket Prism, Tracked Flame Unit, Assassin (look careful, you can always see them), Devastator (yes), SPDR Explo (usually spider mines, just walk over them), Spider Deployment Truck, Medi Ball, Assault Prism (Pineapples), Crystal Charger, Retractor, Particle Drone, Red Guard Protector, Incinerator, Rocketeer, Particle Mortar Drone, Striker-X Glider and the Razor Bots

All of these enemies are either simply overpowered by your weapon or simply too weak. Most of these just die to staying at distance while shooting or similar strategies.

Second turrets, a good way to deal with them is by moving all the way up to them, they can't shoot you if you do. The exceptions are the mortar turrets - but they aren't a problem anyway - and the H-I Laser turret which can still shoot you if you stand by its corners.
This also doesn't work for the 2 turrets in VR but they aren't strong anyway.


The more problematic turrets are the 12.7 mm Turret (Railgun turret), the Vierling HMG turret and the laser turret, as they have some serious damage output. Luckily there are set spawnpoints for turrets, so once you learn them you won't get surprised by them. Still, you won't always be able to just rush to the turret because of other enemies, so I recommend fighting the others before you get to the turret. Unless you have enough burst damage ofc, then it doesn't matter.

Now let's get to the more problematic enemies.

FMX Ballbot
Prepare to get slapped by some balls. Their small size makes shot pierce through it which means grenade launchers can't explode on them. They also come with plating making sniper weak against them. Their main problem is their speed, especially in loop. The best way to deal with them is to take a moment to look at the group to make sure you don't miss anyone and then place yourself far away in a way that will force the bots to pass your line of fire on their way to you.

SG Rival
Despite of them using a shotgun, their range is far higher than it should be. Even if they only barely hit you they still deal massive damage implying that there's no dmg falloff. Neither plating nor dodge are effective against them as they shoot multiple projectiles. They also come with high movespeed and a dash, which often means they're way closer to you than you'd want.

Worst of all however (for me at least) is that their movement patterns differ from most other androids which can be very problematic.
They appear during all stages of the game which really is a testament to their sheer power. Best way to deal with them is to kill them fast from far away and once they start coming for you move backwards while shooting.

Kaida Sniper
Thanks to their targeting laser it's very unlikely to run into them unaware, but due to their high range they're still hard to deal with. Because of their pesky shield mines that always come with them it's often very risky to get close. Best way to deal with them is to use a corner to bait their shots and then to kill them while they're reloading.

Hovertank 808
Their missiles don't hit the player, they can only hit you with their impact explosion when they hit a wall which means staying away from walls is the way to deal with them. Hiding inside them also works, but beware death explosion.


Chrono Trooper
One of the hardest enemies in the game. They will need to be in a certain range to you in order to teleport, which means you can deal with them by staying at maximum distance. They will also not teleport if you get very close to them, but that's risky. If you stick to a wall their AI sometimes freaks out and if not it still reduces the area where they can teleport to. Having one of the currents deals with them very nicely. But after all of this the best option is still to stay far away and to kill them before they teleport.
Turrets and summons are not a reliable answer to them!!!

During earlier stages they can be spawned by alarm spiders. Try to kill them fast but don't run over half the map aggroing everyone only to chase down one of them.

Stinger Glider
Another extremely powerful enemy, but even more devastating if you don't know how to deal with them. First you need to know that its taser won't shoot before it takes damage. This means you can shoot it while its tip is not pointing towards you and thus won't get stunned. You can also dodge the taser if your reflexes are good enough.

Its shield can be dealt with by hitting them once, then running away while waiting for their shield to go away. DoTs will outright ignore the shield. These guys have comparably low range, so just keeping your distance should usually do it. Remember that explosions slow enemies down. Summons are great against them.

Hyper Trooper/Red Guard Hyper Trooper (Ion Trooper)
They have probably the highest damage output in the game and their ammo type invalidates armor. In addition to that they fire very fast. They aren't really tricky to deal with, you just have to be careful.

Shield Gen Drone
While very weak by themselves, they give shield to everything around them (including you), which can mean if you have a weak gun or something weak against shield (plasma smile) you might end up dealing no damage at all. Another problem is that they like to fly around the entire map, eventually getting behind you and getting you when you least expect it. Usually they’re not a problem but if they spawn in giant groups you’ll have to power through them first before you go against the other enemies.

Railgun Glider
One of the few things in the game that still scare me. Preloop they’re mostly fine, they have a sort of targeting laser, but in loop…. Suddenly a blue light strikes your android, you hear that terrifying ZOOM sound and you’re dead. No warning, no chance to escape. There is a reason I put this much emphasis on protection from stuff that oneshots. You either have some protection, or you play very smart and remember where they can spawn and don’t get in line of fire with those spots unprepared, or you die. Luckily, they’re very rare (which makes it only scarier).

Room Clearing Unit
They would fall under the scrub category, but I’m consistently surprised how strong they are. Especially by how big their range it. Just make sure to stay far enough away.
|
ME5 Phaser
If there is one thing we can agree on is that we all hate those guys. In case you don’t understand them, they only take damage from most things while they are reloading. This means there are 2 options to deal with them, namely either baiting their magazine or killing them with something else. All explosives and a big number of items don’t care about them. This includes Breaching charges, raiders and assassins knifes, the currents, shock impulse, etc. As far as baiting their mags goes, just look up in the last section and do some corner peaking. You can also just sort of ignore them and kill them while doing your casual fighting, but that won’t work in HA or loop.
For reference, normal and elite 2 (red skull) shoot twice, elite 1 (shields) shoot 3 times.

Red Guard Nemesis (Nemesis Snipers)
Another one of our favorites. Can someone explain me how a sniper has the same movespeed as a shotgun rival, while also shooting his sniper perfectly accurate WHILE RUNNING only to then throw a grenade at you, provided they didn’t just destroy you on sight ofc. This enemy poses a big problem on multiple layers, they deal very high damage from high range, threatening to oneshot you, their fast shots make manual dodging next to impossible, their high speed making running away often difficult and their grenades require very good reaction speed which may sometimes not even be enough. Killing them fast is the best you can do here, since as long as they live, they will hurt you. Aside from that, cover and all sorts of “hard stops” in your defense are your best options, unless you have some sort of turret or decoy to deal with them.

B Offender
They fire target seeking projectiles at you which ignore all sort of other summons, making them nigh impossible to dodge. Your only hope is using cover and even that might sometimes not work. Then they have a massive shield which may (will, if no shock impulse) hurt plasma and some laser weapons and after dying, they spawn a smaller version of themselves (twice). Fairly enough those smaller versions have the exact same damage capabilities. And because almost all of their HP is in shields, they don’t flinch like a lot of normal enemies. Basically just gun them down instantly or get hit a lot. They’re pretty rare outside of the armageddon room, but in there they’re a big problem because there’s not much cover. Get. A. Shock. Impulse.

Z277 Madness Accelerator
That’s the same tank as during the first stage of the LD bossfight, they rarely appear in military bay. If they do, an exclamation mark will appear over your android when you enter the floor. Unless you have absurd burst damage, you want to get inside them to avoid their attacks. Unfortunately that won’t stop them from using an airstrike, but you can either just tank that or shortly dash out to dodge it. Make sure you dash in a direction the tank is not looking and keep the death explosion in mind, then they’ll be easy to deal with.

Doomba
Only enemies I’m actively happy to see. Move towards them with welcoming arms, give them a hug, then dash away and have fun. Before they explode they stand still for a while, that’s your time to get away, otherwise they’ll keep following you while charging. For the rogues who are a bit slower, remember that smoke nade refreshes dash, so use that to get away. All classes are able to get away unharmed, some may need some good timing tho. If you’re not confident enough, you can also just get them with any sort of summon, but where’s the fun in that.


Gatling Glider
They rarely spawn on the 2nd area and 3 of them are guaranteed to spawn halfway through armageddon room. During the beta for u26 shrike asked during a stream whether he should add the new enemy to the fight because we were complaining that it was too easy. Nobody could expect he'd make 3 of them spawn at once... They are really tanky, fast and especially fire fast. Unless you have absurd damage output, don't expect to win against all 3 of them. Try using the arma device and the boxes around as cover to fight only once at a time. This is a good point to use all items you have, especially summons if you have any. If you struggle you can hide inside them again, but their high speed can make that difficult. To fix that wait at a corner for them to get close.

Specialist Squads:
Sometimes they spawn next to shrines and they're not tied to specific floors. If they appear late in the game it's fine, but they can also spawn on the first floor. The Spearhead SG are simply a slower version of the Shotgun rivals with less range, making them no problem. The Medics and razor bots are on scrub level.

Black Snipers
They're essentially kaida snipers except with a huge shield and they can move. Stun nade classes get a free win, everyone else has to play around with cover, which is relatively easy since they're slow.

Fusion Railgunners
Essentially Hyper Troopers but with shields. While they are the strongest of the special enemies they often aren't a big deal UNLESS they spawn extremely early. Well, sometimes the game just wants you to die. Make sure you clear as much of the map as possible to have enough room to fight them, you'll need it. Try to keep them lined up, so you can fight them one by one and abuse corners, then you should win even on floor 1. Unless ofc you have a stun nade.
Afterword
Man, what a ride. I did not quite expect making a guide to be this much work when I started working on it A YEAR AGO.

Thanks so much to all the people who helped me git gud at the game.

Thanks so much to tactu and Oil Ace for helping me with this guide, especially to the latter one for doing all the work I didn't want to ;).

And thanks to the community of this game for making bad take after bad take so I always have to laugh something about. We'll see in the comments, shall we?

Speaking of comments, any comment regarding grammar or typos will be thankfully applied and then deleted, so don't get confused.

In case anyone cares about sources, these are: The Synthetik Wiki, The official Synthetik Discord, The game and my memory. Have fun.
44 Comments
Vaarelsauce Apr 4 @ 3:14pm 
Just wanted to add that Missile Control also affects Maverick MKV, Sidewinder, and Onslaught System (at least according to wiki.gg).
Simonsis13  [author] Apr 5, 2024 @ 4:53am 
Unfortunately the people managing the Wiki had some difficulties at one point and it wasn't updated since then. My guide was created quite a while after that happened meaning it's more up to that. Not perfectly unfortunately but about 95%. The game pretty much didn't have any relevant changes since this released.
ChronosK Apr 5, 2024 @ 1:33am 
Hello, I discovered this game last Wednesday and I really like it, I felt like I needed a bit more help because i was really struggling at stage 3.
This guide is amazing, It's such a great ressource, you covered everything and I will take it as the bible for my next 100 hours until i can make my own decisions about what is good and what not.

Reading you and comparing with the wiki it seems like this game was patch often enough to balance things out, do you feel like certain things changed so much its outdated or overall things are within the same balance range ? Especially on Item and weapon token, i will strictly follow your advice until I can get really get the feeling of the game, i will get to play every weapon randomly anyway.

Thank you for the great guide, really helpful.
Banana Feb 13, 2024 @ 5:52am 
After I read this guide Zir gave me the modular 98k with best atachments, Fangs of Mordigan, shock impulse, twin link. Best sniper run ever. But funny ion guy in arma chamber said: "1000 crit"
Simonsis13  [author] Oct 8, 2023 @ 12:44pm 
"Just because it says maxed, you can (and should) keep upgrading forever."
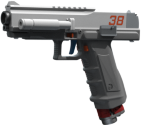
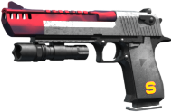
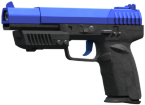
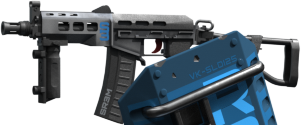
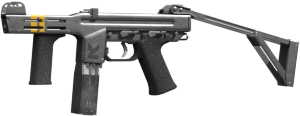
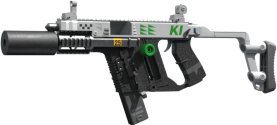
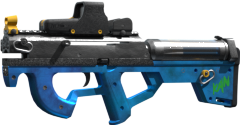
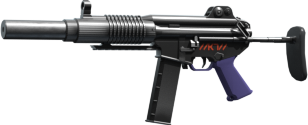
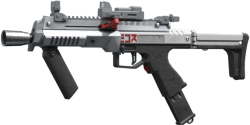
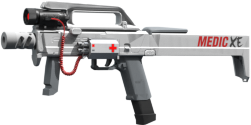
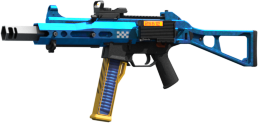
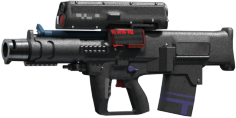
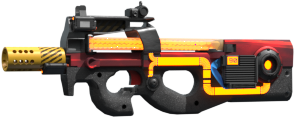
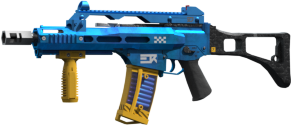
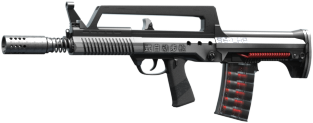
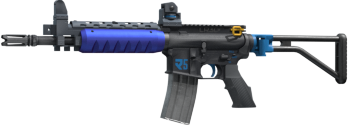
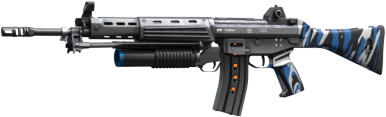
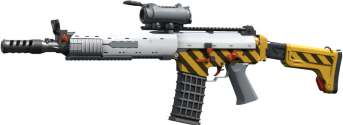
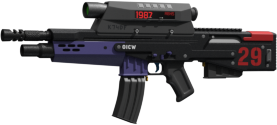
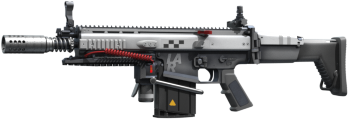
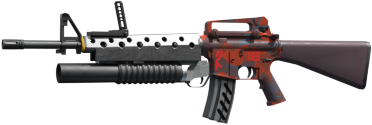
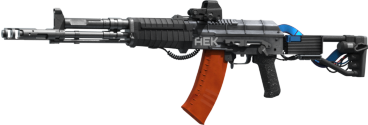
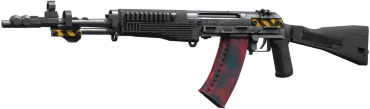
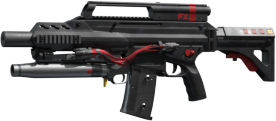
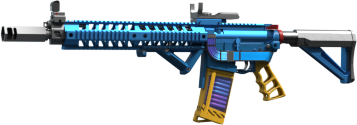
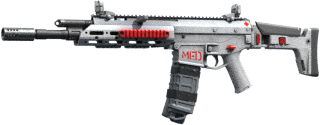
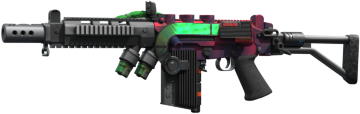
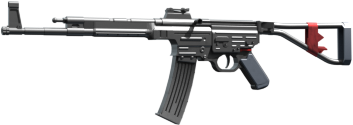
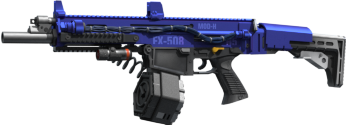
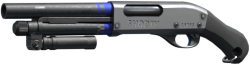
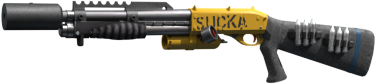
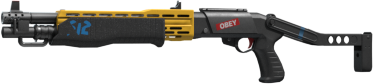
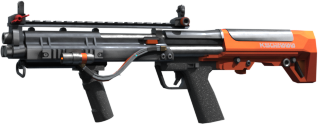
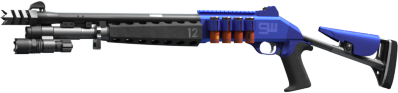
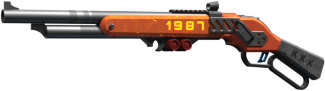
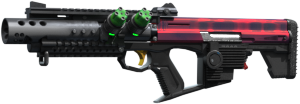
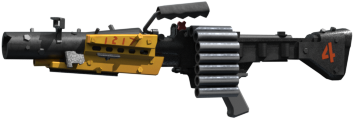
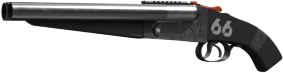
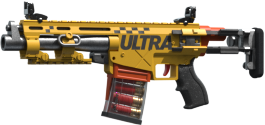
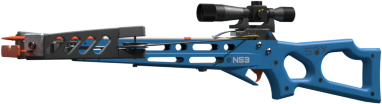
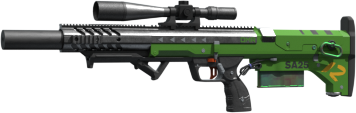
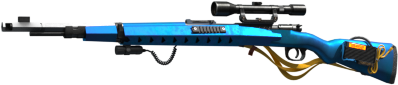
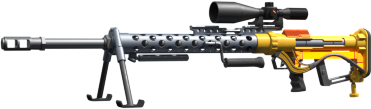
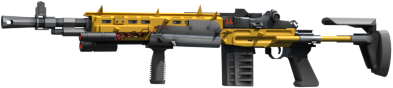
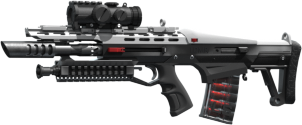
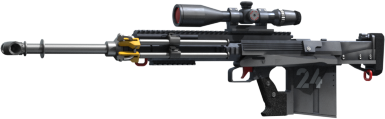
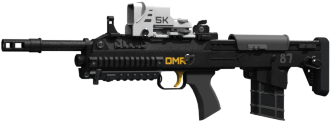
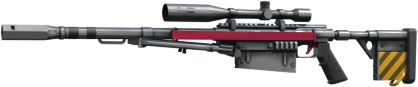
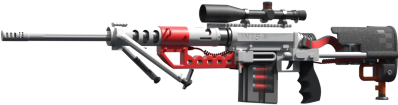
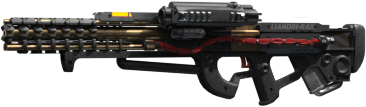
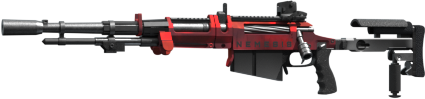
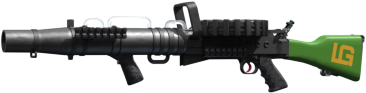
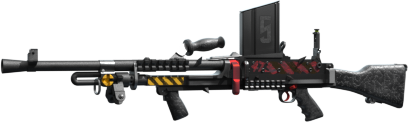
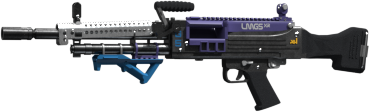
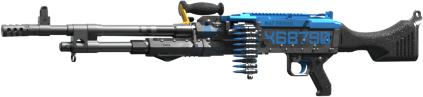
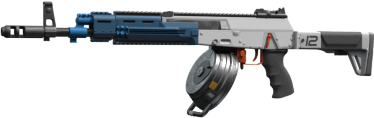
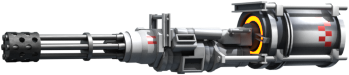
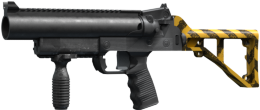
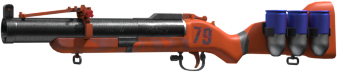
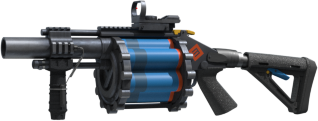
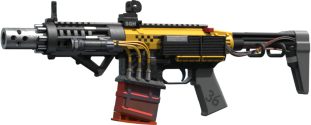
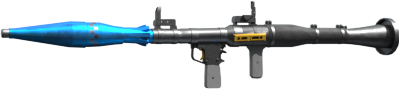
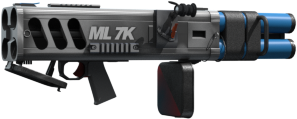
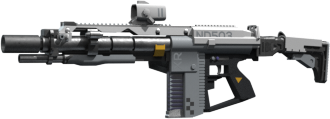
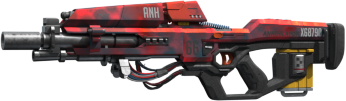
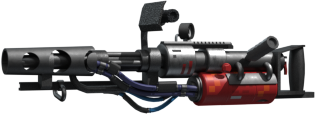
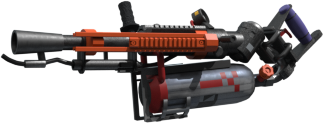
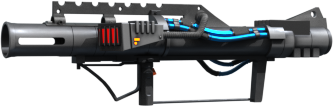
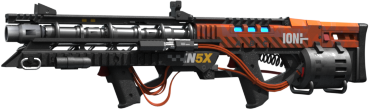
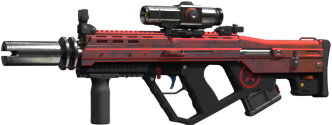
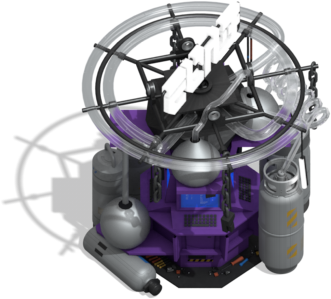
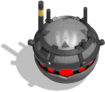
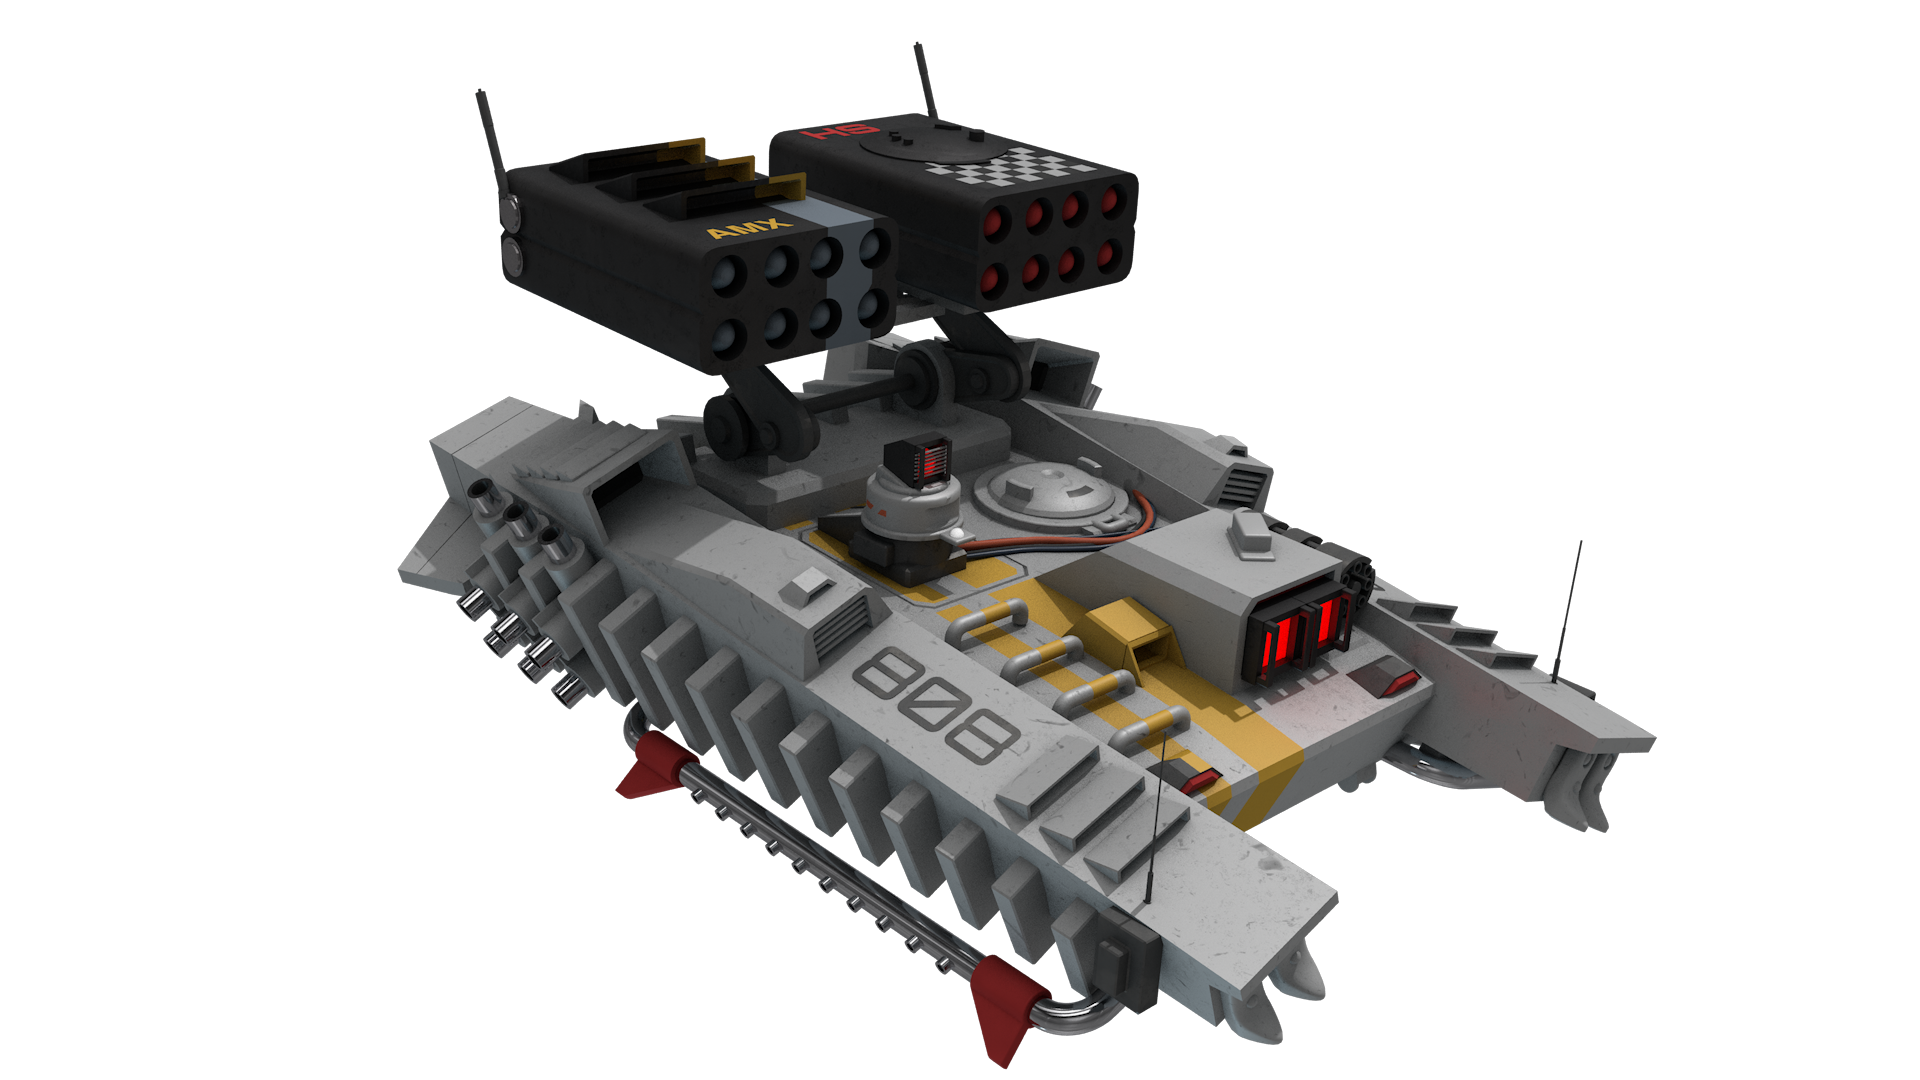
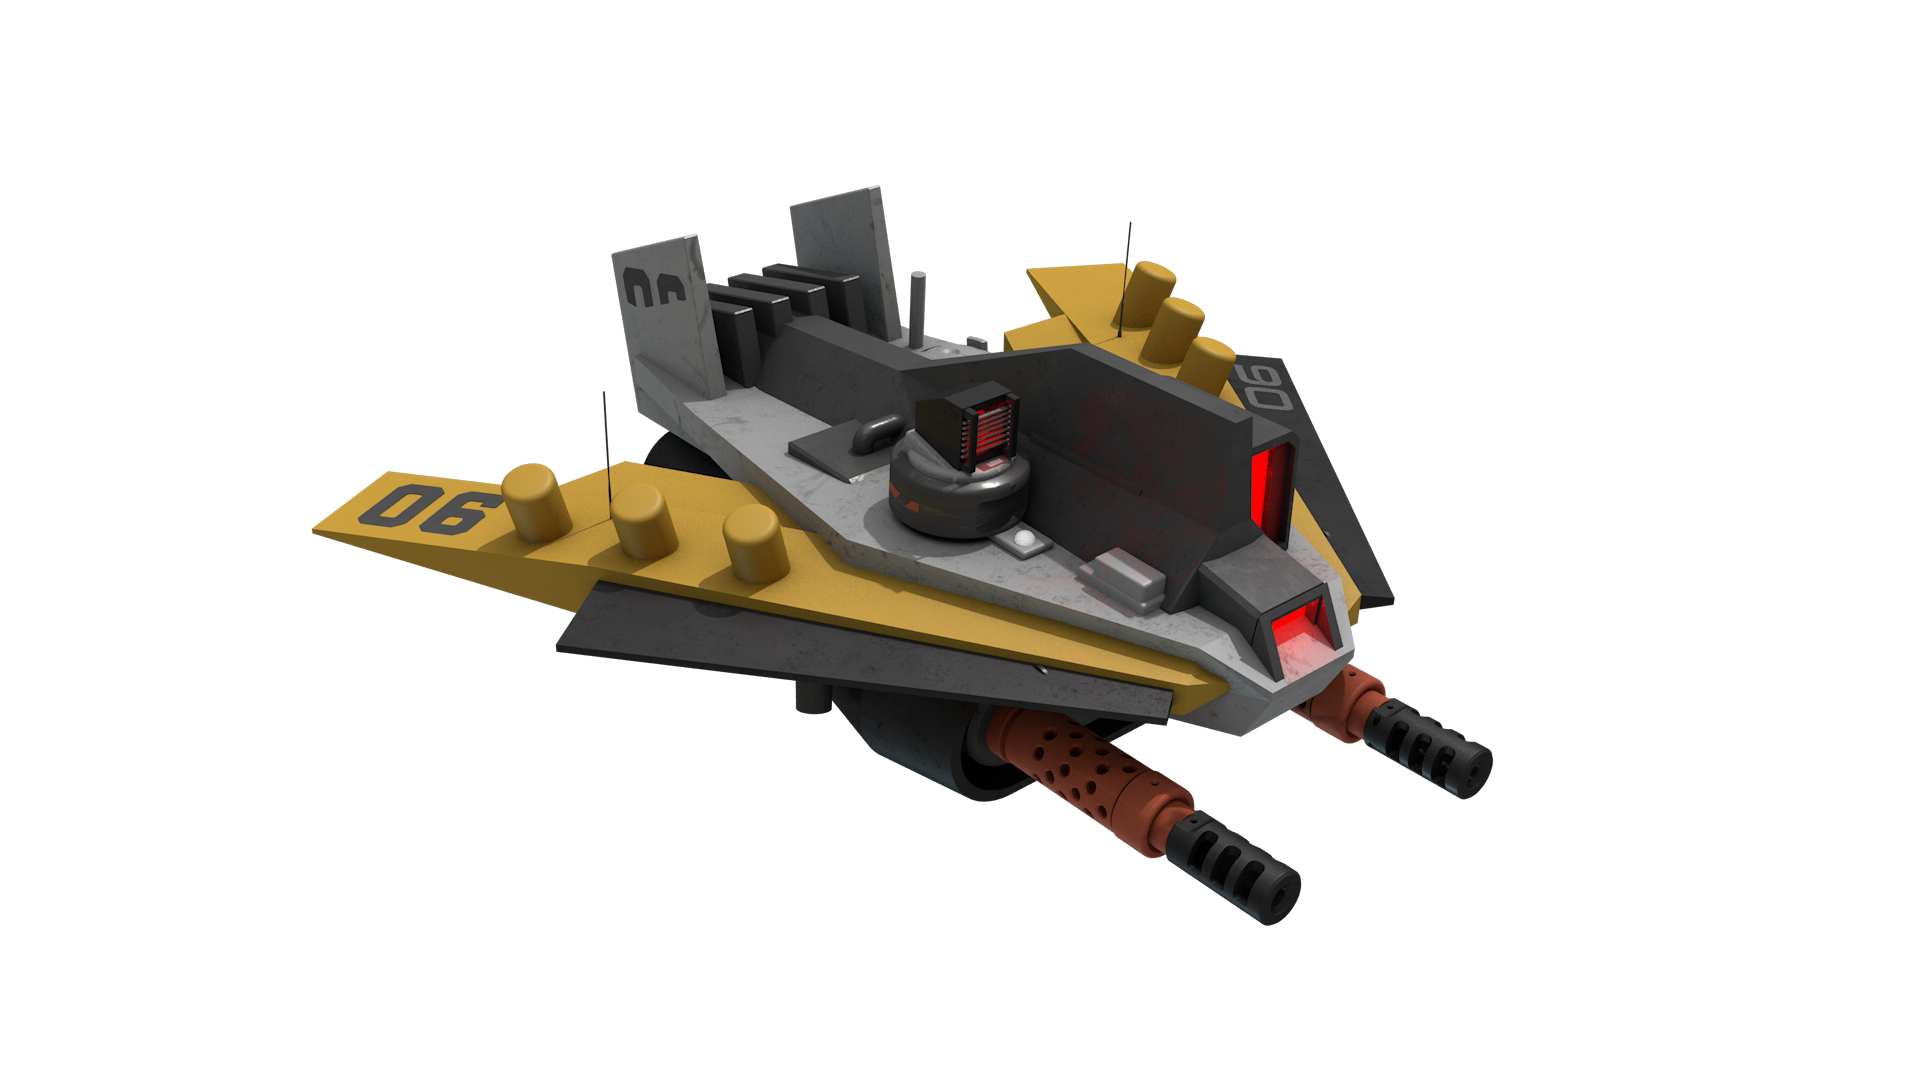
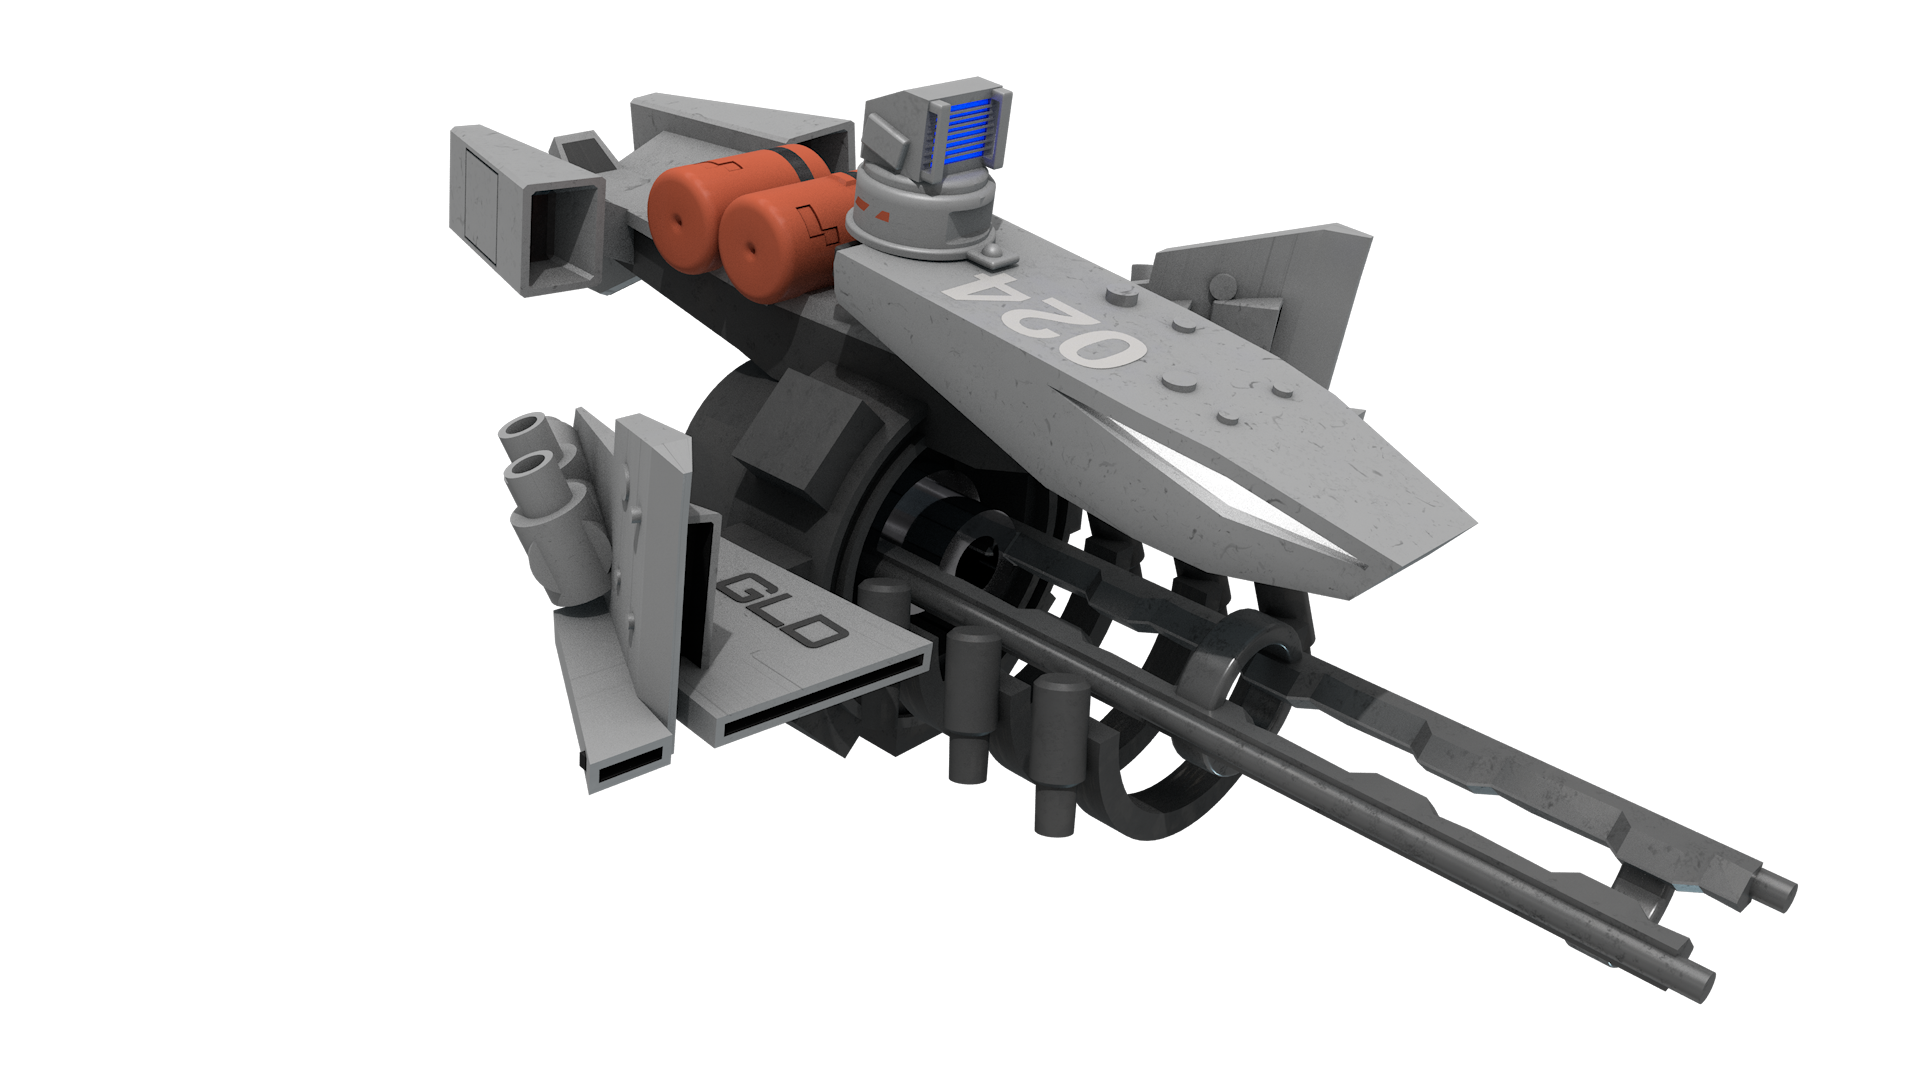
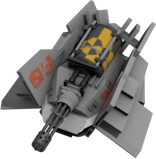
Start of the weapon section
Boby Oct 8, 2023 @ 9:11am 
and what about weapons, should you still use upgrades once it says "maxxed dmg"?
Simonsis13  [author] Oct 7, 2023 @ 11:27am 
Generally there is are diminishing returns when you upgrade items. The first 4 are really cheap, while the next 2 already cost about as much as the first 4. Because of this I try to steadily upgrade all items I actually use at the same time. Of course the stronger/more important items take priority and may well be 50% ahead of others.
I don't really *stop* upgrading items, I just run out of money. The exception would be breachers starter items which I have nerded out the optimal amount of upgrades for, but most items simply don't have these thresholds where they get significantly better.
Boby Oct 7, 2023 @ 11:16am 
thanks for the guide
Boby Oct 7, 2023 @ 11:16am 
at what % should you stop upgrading items like summons? what about key items like twin link and all that?
Simonsis13  [author] Aug 7, 2023 @ 4:40am 
Thanks to you for reading.