Kenshi
171 avaliações
Kenshi Automation Guide
Por jbra1
A full guide to Kenshi's job automation system, including squad and town management, and how to remotely control and read what's happening in your empire. Takes care of 99.9% of any micro-management.
8
4
3
10
2
2
   
Premiar
+ favoritos
Nos favoritos
- favoritos
Intro
This guide hopes to help you get the most out of the deep automation functions in Kenshi. These tools are super useful, and when used fully, basically change how you play the game, from frantically clicking everything like you're playing an RTS in 1998, to calmly setting up and running an empire while you sip bloodrum. If you're daunted by the 'micro-management' in Kenshi, this guide is for you. Because actually, there is no micro in Kenshi, the automation is there to take care of all of that. It's also full of tips and tricks that even veteran players might find useful.
Wandering Squad Set Up
Here's the squad menu, you can access it via the SQD button on the UI.


Here you can create squads, and drag the character portraits in and out of them. The name you give the squad will be the name you can see on the tabs on the main UI when you are playing. You can also drag the portraits around within a squad to change the order. This will be useful in a bit.

So, set up your squad here. In the beginning you'll just have one, but as you grow you'll probably need more. I recommend having one squad per location, be that a town, or caravan, or wandering adventuring party, even if it's just one person in one place, and another in another. It's easy enough to form and rearrange them. So, when a wandering squad returns to your outpost, you can just mix them into the outpost squad unless you are thinking of sending out that exact squad again.


BASIC SETUP

Once you've got your squad there's a basic set up to always use.

1) Select all members of the squad with the '~' key. Holding down Left Shift, push the 'Medic' button on the UI:


Now everybody has a medic job, so everyone will automatically heal anyone who needs it if they need it. Great.

2) With all of the squad members still selected, and still holding down shift, click the 'Rescue' button on the UI.


Now everybody has two new jobs: automatically picking up any of your characters if they get knocked out, and another job to put them in a bed to heal if there are any beds about (camp beds in camp sites work too!)

All characters, whether they are wandering or not, should have these jobs at the top of their queue. Having all this at the top of the queue means they will always drop everything (except any current combat around them) and heal anyone who is injured, and will also prioritize picking buddies up off the ground (where they could be eaten or enslaved).

3) Now, still holding shift, click the portrait of your squad 'leader', the first person in the squad, to deselect them but keeping everybody else selected. (You can change who is first in the squad window shown above above, by dragging the portraits around). Keep shift pressed and right click on that leader, and choose 'follow'.


Now everyone but the leader will stick close to the leader wherever they go. The leader sticks to the leader by default, because the leader is the leader, and that's just how bodies and physics and selfhood work in general.

So, now your squad is ready to rock. The leaders job queue should look like this:


And every one else's job queue should look like this:


Notice how the leader is set to 'walk' speed, but everyone else is set to 'sprint'. More on this below.

So, with this set up, your squad will move as one unit. To move the whole squad, just select the leader (press '1'), and issue a movement command on the map:


They all head there. If you want to scout ahead, run into a town and buy something, loot a downed enemy, or do anything quick, send one of the followers (you can press the number 1-9 that corresponds to their portrait position). If you directly issue an order they'll go and do it.


When they finish that order, whether it's move, or talk, or check a container or whatever, and suddenly have nothing to do, they will auto-run back to the leader. It's like they're on an elastic tether.


They can track them down across the entire map. This is useful if you want to send a character to a place where you have others characters over long distance (like, send someone back to your base). Just give them that follow job of someone back home, and they'll make their way there.

If you need a follower, or the whole squad to do more intricate work, just cancel the follow orders. Because they are always at the bottom, it's easy to shift+click them back on.

If you set the leader to sneak, the whole squad sneaks. If you change the leaders speed, the whole squad will move faster to keep up.

There's a bunch of key-binds you can set up in the settings. Here's my recommendations:

'Next/Previous Character' = < and > (respectively). This allows you to quickly cycle through characters in a squad, great for checking inventories quickly, or damage.

'Sneak' = C. For crouch, get it?

'Change Movement Speed' = R. This cycles the movement speeds. Really useful for changing the squads speed by just cycling the leader's speed.

'Cancel Last Order' = Backspace. This is useful for controlling how the leader reacts to combat. See below.
Wandering Squad Behavior
Now the squad is moving along, but it's moving slow. The leader is set to walk, remember? If you set the leader to sprint, anyone who is slower than the leader will be left behind, which is silly. If you are actively playing the squad, jog speed is a good choice, because all characters (after Athletics level 10 or so) all jog at the same speed. If you're in a hurry, jog at F4 speed works well. Sprinting at F4 throws the game into a meltdown anyway. Personally I walk around the map, and just speed up the game but let the characters walk if I'm in a hurry. But, I know that's not everyone's pace. But if you are sending the squad off and don't want to baby sit them, then walk is great because of how the above AI set up works for the following reason:

You encounter enemies. The way the Kenshi AI works is that if someone has a 'move order' and they detect i) nearby enemies just chillin', ii) nearby enemies running at them, or iii) a fight breaking out among NPCs, they'll begin to sprint:


As you can see in the pic, the leader has detected danger so starts sprinting, even though (as you can see on the UI) his speed is set to walk. The Hivers are overencumbered (or just have subtly less athletics), so they are already falling behind.

But when the danger is passed, the leader goes back to walk speed, so anyone left behind will sprint and find them quickly (remember the followers were all on sprint speed). This means they don't get spread out all over the map - the leader always eventually slows down, and everyone get's back to them:


This is crucial if you are sending a squad long distance and don't want to baby sit them, like sending workers between your towns, or a trading run across the island.
---

COMBAT

What happens when combat breaks out?

Well, same as before. The leader begins to sprint, because they have a 'move order', they won't engage at all unless hit. The followers, though, will engage enemies:


(See the leader running off).

Note that any followers with the 'Passive' button pressed will follow the leader in running off rather than engage (generally). In low threat environments, this behavior is overall okay. The leader gets well clear and stays on the path, along with any 'Passive' team mates, and the other followers dispatch the enemies, utilize their medic jobs to heal each other, and their rescue jobs if anyone has fallen over, and run off back to the leader (who is now walking because the threat is gone, so they find him/her quickly). But if you're watching in game or even from the map (more on this below) then maybe you want the leader to help out too. Now, there is a TON of keybindings that are empty by default in the game settings. One is 'cancel current order' or something like this, you can bind it to the Backspace key. If you hit that with the leader selected, they'll lose their move order, and then come and help out their buddies:


For characters not on 'Passive', combat and defending allies always takes priority over any jobs in the list. So first they fight till it's over. Then, after the combat, they all heal each other up, pick up anyone who is unconscious, and regroup on the leader (moving through their list of jobs top to bottom). If you cancelled the leader's move order so they helped out in the combat as well, they will now be 'Aimless' so you know it's time to issue another move order (this is more for when you are not watching and running things from the map).


This means for your wandering squads, the leader is going to see combat the least, because by default they'll run at first sight of trouble, so keep that in mind when you select a leader. A medic character makes a good one, or a super high level character who doesn't need the training against every meager bandit group. This is the advantage of setting the leader to walk, even encountering enemies and so on, the squad will keep together as they traipse across the map. I like it even if I'm actively playing the squad, because when the leader begins to sprint, you know that something's coming so can pause and check around - they'll react often much quicker than you the player, alerting you of any dangers.
Wandering Squad Additional Set Up
ADDITIONAL SET UP

There's a bit more set up for the squad to get them into a really self sufficient machine, but some of these commands require situations to emerge so you can access the menus.

1) First time you see a downed enemy, select a character (or all of them) and Shift+Right Click on them, choosing 'loot':


This will give the 'foraging animals' job, which is awesome (and also kills the animals). The characters will now pull meat and skins off any unconscious animals they come across, which means your squad is basically pulling food automatically as they cruise.

One thing to keep in mind, and there is more on this in the next section, if characters can do a job that is higher in their list (following someone, healing someone, etc) then they won't do anything else lower on the list. So, looking at the screen shot above, this character won't ever forage animals because following Zeet is always possible (unless Zeet is dead, unconscious, or asleep). So, we have to click and drag that job up one rung:


Now the character will, if they can, forage animals over following the leader, grabbing meat and skins. In base, they'll prioritize what you have storage for. On the road, it's a mixed bag, but meat seems to be the priority. Once all the animals are foraged (or their inventory is full) they will go back to following the leader. Basically keep the 'staying close' job at the bottom, it means 'follow the leader unless there are other jobs to do (i.e., medic, rescuing, foraging)'.

2) First time you get any serious injuries in a fight, and you have a splint kit, Shift+Right Click on the injured characters and add 'Splint injuries' as a job:


Especially nice for the wandering squads, because injured legs can cause problems. The 'Splint injuries' job is so precious, because it's really hard to find the situation where it comes up, so don't accidentally delete it!

3) Not a really thing a to do, but a thing to keep in mind. Characters will eat out of their own inventories first, but then can freely eat from any character in their squad who has food in their back pack. This means you can stock one character with food to be the food horse, and everyone, animals included, is fine for food as long as someone has some in a backpack. Animals packs work as well. Note the food needs to be in the bag, not the base inventory. You can use that to your advantage by, say, putting raw meat in the base inventory of a character who can't eat it (human, shek) if you want to keep it cook later and not have the hivers and animals snacking on it as you wander. This also means picking up a bag for your team should be a high priority early game task. They're worth their weight in copper for how much micro they save shuffling food around.


---
ADVANCED SQUAD SET UP

If you want to go really intricate, in the AI setting tab (open the map, it's the tab across on the right) you can set different formations that your squad, set up in the above way (with the follow commands), will take. The default is 'Random', which means they all wander together in a random dispersion. It's the formation that the hungry bandit squads use:


---
'Military' is the formation the holy nation patrols take. The leader is out front, followed by any animals, and then the followers form a 'square' behind them:

(not so clear here because only 5 followers, but when you get to 20 it looks awesome)

---
And lastly, 'Caravan' is what the traders use. The squad forms a line with the leader first, then animals, then the followers, all in order of their squad portraits:


This formation, despite being a bit goofy for pathfinding, is actually very useful because of the AI behavior discussed above: with this formation you know the 'lower' someone is in the order, the more fighting they will be doing, because when the enemies emerge, the leader runs, the 2nd stays close on their tail, and by the time the enemy hits, they usually hit the tail of the formation, with the upper members doubling back to engage. But, usually I just stick with 'random' because my faction just are chill folk wandering the wastes.

Once you've set all of this up, you can just issue squad movement commands from wherever you are, just using the map and issuing the commands to the leader). And with all the jobs set up, and how the AI handles combat situations, they'll be fine.


(Back at my base, I tell our squad up in Dreg, who have just finished combat, to head for the hive village).

You just need to pay attention to their 'states' (the 'goal' and the portrait colors). More on this below.
Town Set Up
HOMEBODIES

The automation gets the most interesting and intricate in your settlements. Having fun working out different orders and job queues is a whole level of the game, so this won't go too deep into it, because it's fun to work out what works best for your base, but I will just explain the basics and give you some tips.

The important principle to remember is characters move through their job logic from top to bottom. Their thinking is like this:

Is it possible right now for me to do job 1.? Yes? Then I'll do it forever until I can't anymore.

No? Then I'll do job 2. forever until I can't anymore (or I suddenly can do job 1. again). I can't do job 2.? Then I'll do 3. forever until I can't anymore. Etc.

For example, here is a worker processing stuff with steel and iron:


Her first thought is to do Medic, but if nobody needs healing, then she forgets about that and thinks about finding and rescuing (picking up) someone, but if nobody is unconscious in the dirt, she thinks about putting some one in bed, but if she's not holding anyone then she can't do that, so she gets into her proper job queue. Those top three jobs basically only kick in when there is combat at the base, and she'll stop doing any work and do all those things.

No bleeding friends, she's onto jobs 4, 5, and 6.


Her first thought is: I wanna make steel at the steel refinery. That's possible so long as there is iron plates available, and free space to put steel bars.

Side note: You do not need to ever use 'Haul to' as a job. It's only for very specific cases where you literally want someone to just haul for a living (like filling up a water tank). If you have the proper storage containers, all characters will grab and haul and store until they can't anymore (because the materials they need aren't available, or the storages are full). Basically, every job includes the logic of doing that job start to finish (picking up, processing, dropping off).

So, anyway, she is going to happily make steel bars forever, stopping occasionally to grab food from a food barrel, or sleep off serious injuries, or heal or rescue anyone who needs it. But, if she can't make steel bars because there are no iron plates (or the steel bar storage is maxed), then she goes to the next job, which is making iron plates, and then she will do that until it becomes possible to make steel bars again (i.e., because maybe she just made that iron plate that she needed for the steel machine). If she can't make iron plates, it's probably because there is no iron ore, so, as a last ditch, she's gonna go dig iron. But notice I have that iron worker on the left, who just takes care of that, only stopping once the iron is all full because the only job he has is digging iron. So the worker we are looking at will only be digging iron in an emergency (mr Iron miner is in hospital). This production loop is stable, and will eventually fill the steel bar storage. Once that is full, she can't make steel bars anymore, so will start making iron plates, until that storage is full.

I'm making steel bars because my armor smith needs them for chainmail at the minute, but this production queue will eventually convert all of my iron plates into steel, which is not always ideal (iron plates tend to be more useful than steel). Once I feel I have enough steel, I can just reorder the jobs with a single click and drag:


Now iron plates are above steel, she won't make steel until she can no longer make iron plates. With that iron digger supplying ore, she'll now make plates forever (or until the storage is full). You can switch these things from anywhere.

So, you can control production either through the queues (switching jobs up and down), or by limiting the amount of storage you make. With the armor smith not working, the steel storage will soon be full, then, with the original queue, she will get back to make iron plates, when that's full, she'll dig ore, when that's full, she'll rest.

FARMING

This is a farmer. He has a busy queue.


The farming job includes watering the crops from any available water (wells) and harvesting them when they are ripe, and storing the crops in the relevant storages. But since crop harvesting is time sensitive, you don't want crops sitting waiting to be harvested too long. You can think about it like this:


When you issue the 'farm' jobs on the fields to the first farmer, issue it 1-2-3-4-5-6-7-8-etc. For the second farmer do it in reverse: 16-15-14-13-12-11-10-etc. For the third farmer, evens then odds, 2-4-6-8-10-9-7-5-3-1 etc or something. Basically you want each farmer to prioritize each field differently, that way there is always at least one farmer who prioritizes, say, field number 4 over field number 8 in case both come up for harvesting at the same time. This means that even if a farmer has 16 farms in their job queue, chances they don't often have time to get to the ones in the bottom, but in an emergency (maybe after an attack) they can, but that's not problem because another farmer has those at the top of their queue.

Here is a chef:


His job queue is simple. When there's wheat about, he makes grog. Once the harvest has been used up, he'll switch to making sandwiches from bread and cactus. Once the cactus is all gone, he rests. Notice how he is set to walk speed. The guys making the flour for the bread are set to jog. When the wheat is being harvested, there is a competition between the grog makers (who needs tons of wheat) and the flours grinders. Since food trumps beer, unfortunately, in regards to survival, slowing down the brewers and speeding up the flour guys means most wheat ends up as flour. Once food is abundant, you can switch it. When you have these chains that rely on the same resource, you can use movement speed to prioritize production. Alternatively (or additionally) you can move things further away from the storages to balance the production ratios using walk time.

Also worth noting that here, certain contradictions can enter the job queues. Notice the chef is making grog, then making dustwiches. Why don't I have him handle the whole production process, so also running the bread over AND grinding flour? Well, if I had that queue, he would never grind flour - if wheat is available he turns it into grog because that's higher priority in the queue. If I put the flour job above the grog machine, he will never make grog, just grind flour. Be careful of this with production chains that compete over the same resource. You need multiple people to automate them effectively.

When characters cannot do any of their jobs, because they don't need doing, they 'rest'. How do they rest?


Make sure you have seats in your towns. Anyone without anything to do will sit down. It looks nice, and lets you know who doesn't have work to do, perhaps indicating production chain issues. Don't ever issue 'sit' commands directly, because the characters will keep to them even if their buddies are being attacked. If you want someone to 'rest' in a specific spot, you can Shift+Right Click and give them a 'sit' job, and place it in their queue at the bottom (once all work is done, go sit at this spot). With the sit job, the characters will still jump up and defend their friends, but they'll go back to the specific spot you set. Good if you want to park some guards and fighters at the outskirts of town. Or if you want one of your wandering squad to chill in a bar for some days.
Running things from the map
GETTING READINGS

So, the town is all automated, and the squad is wandering up north to the hive village. Here is another town I set up, called Doom Point:


There is a couple of farmers and Shek commander, and some animals, as permanent residents, but the main use for the town is for sending new recruits out there because there's a ton of starving bandit and other wandering squads who breeze through and attack. So I send new members out there to live for a while, and they train up automatically through all the ambient combat. I send the new recruits in little squads from the map, the survivors arrive (I can see from the map), I cancel the follow orders, and since they now have no jobs they sit around the fire and chill.

The whole thing takes care of itself.

Often I'll see they're getting attacked. That's the point. When that happens the squad tab (everyone in Doom Point is in the same squad) flashes red:


I check out the tab to see what's what.


The game gives info on three combat states:

If the portrait has a flashing red background, an enemy is targeting that character.

If there are red lines, it means the character is targeting an enemy.

If there is both, it means the character is currently fighting an enemy.

In the image above, you can see the robot is currently fighting, and one character must be running out to help.

Keep an eye on the character in combat (red lines and flashing BG), and see how fast they are taking damage. The speed of the damage tells you the level of the trouble:

(It's okay, and the animals are now running out to help)

Eventually everyone gets involved, so you can know that it's a probably a large group of enemies attacking:

But, the farmers are set to 'passive', so they're not getting involved. Let's take just take a sneak peak at the situation to see what that looks like:


Haha. Just sitting. With this set up (some characters set to passive - but with medic and rescue jobs) if the fighting gets fierce and someone goes down, they'll quickly get up and run and heal them and put them in bed, all in the chaos of the battle. As long as there are actively engaging fighters still standing, the enemy mostly ignores them.

Once the portraits stop being red, the enemies have been destroyed:


You can see that the Shek commander is now busying being a medic, meaning the enemies are all dead. The Hiver is still hitting something, probably a legless enemy, but the fact that their portrait background isn't flashing red means the enemy is not hitting back, and the fact that no one else cares means there's not much danger. There it is, an entire raid on a settlement and you can just keep tabs on it from the UI. You don't need to run off and freak out for every attack. This happens multiple times per day at Doom Point. All the characters are slowly leveling up. Since the Shek is quite high level, and a few others too, there's always someone standing to heal up and put the new recruits in bed. I only check in on the town when if I want to actively play the characters there.

This all works best when you don't have walls, which I can't recommend enough. But that's a topic for a different day. With walls things get a bit more complicated, but the basic idea of monitoring the states from afar should still hold. You will want to watch the engineer's 'engineering' job to get a sense of attacks on the gates, and, of course, the harpoonists. If everyone in a walled settlement is engaged in combat, sorry, your walls have been compromised. Might be a good idea to go over and take a look.

You can also use the same principles for monitoring wandering squads. If they flash red, use 'Backspace' (remember to bind it!) on the leader's move order to stop them running off (unless you want to keep them 100% safe). Keep an eye on the damage and portraits. When the leader goes back to 'aimless', re-issue the move order on the map. If you didn't stop the leader, they'll be walking now, and the followers will find them quickly. You can glance at the map and check the blue dots just double check no one got left behind (or is currently being carried off by a fog man).
Conclusion
Kenshi's automation tools are quite deep. My little empire can carry on quite well without me, and if I intervene it's because I want to play with some characters doing something. I often switch up who's story I'm riding with, and let the automation handle the rest. Sometimes I set up a party to go adventuring, and follow them while back at home everything is cool. Or sometimes I want to produce new great armor, or do some building, then I let the wandering squads take care of themselves and focus on the base.

Doom Point is resting after the attack:


Main town of Zeta is still pumping out all kinds of food and beer (got to set up another trade group to take that beer to the swamp):


The little fishing village of Pitopikam (where my original main retired to) is still reeling in them fish:


And that squad in Dreg is finally pulling up on that hive village, where they'll set up camp for the night before heading further north:

19 comentário(s)
Tristis Oris 2 de mai. às 16:29 
- foraging animals don't work.
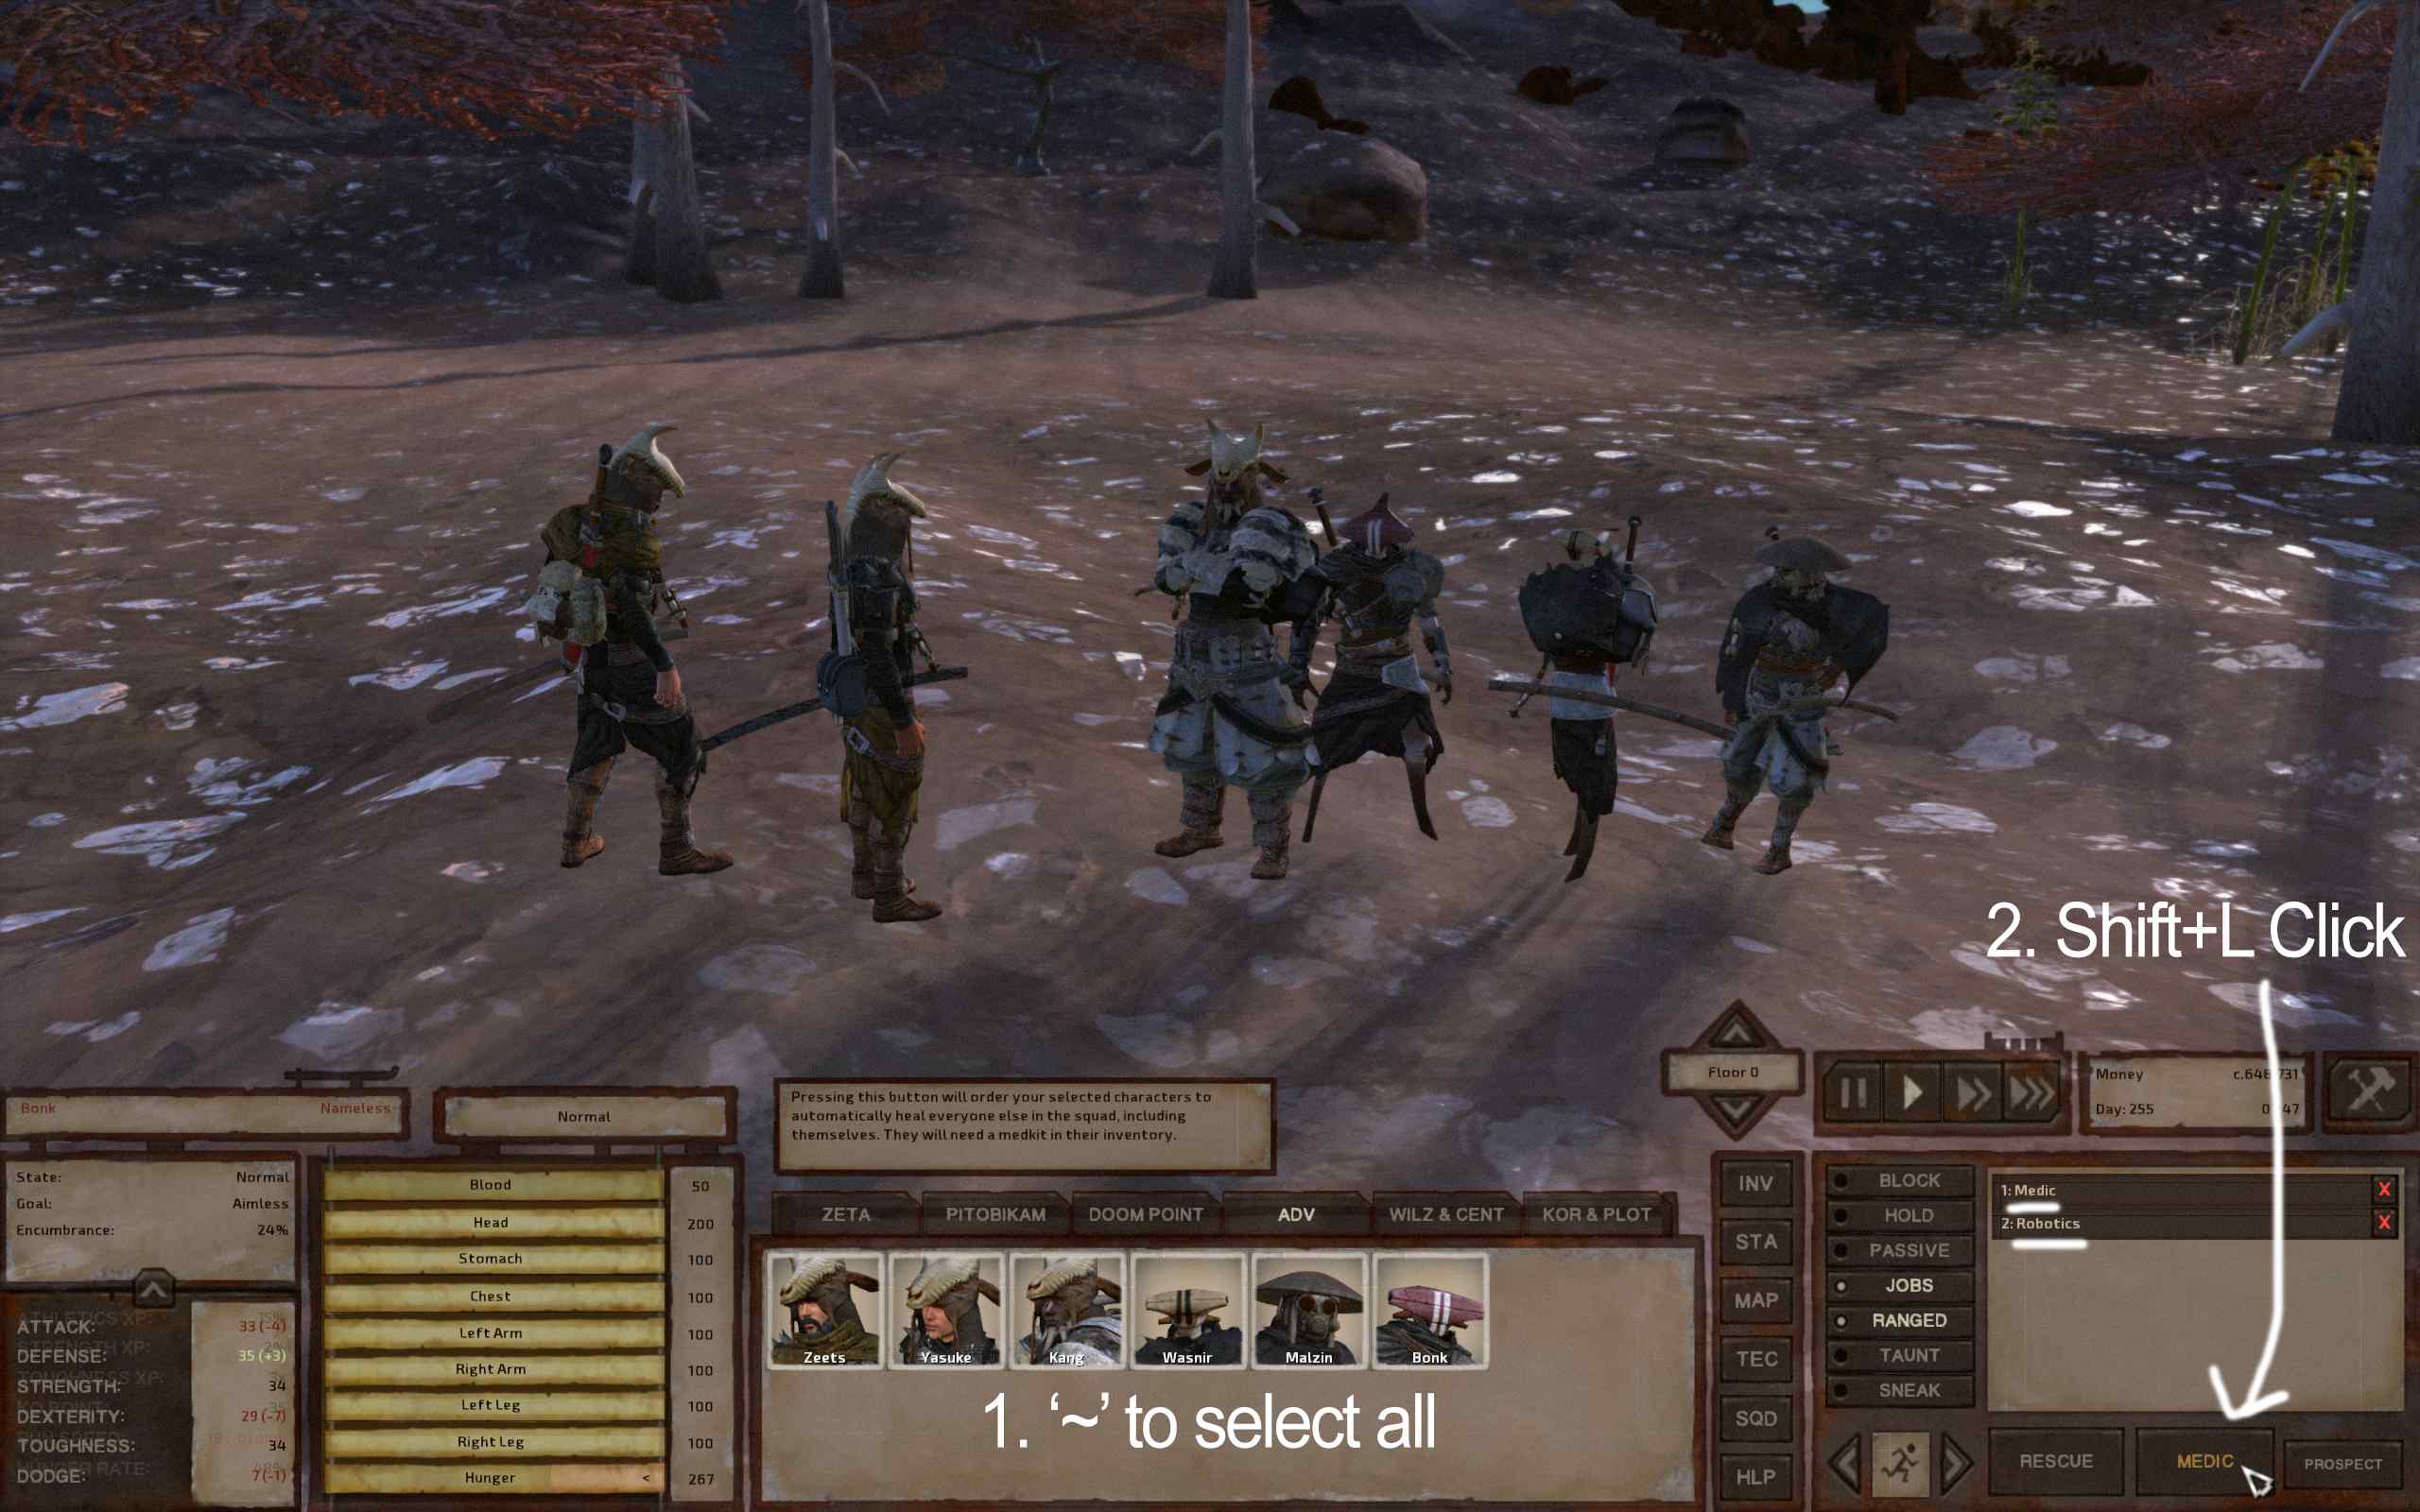
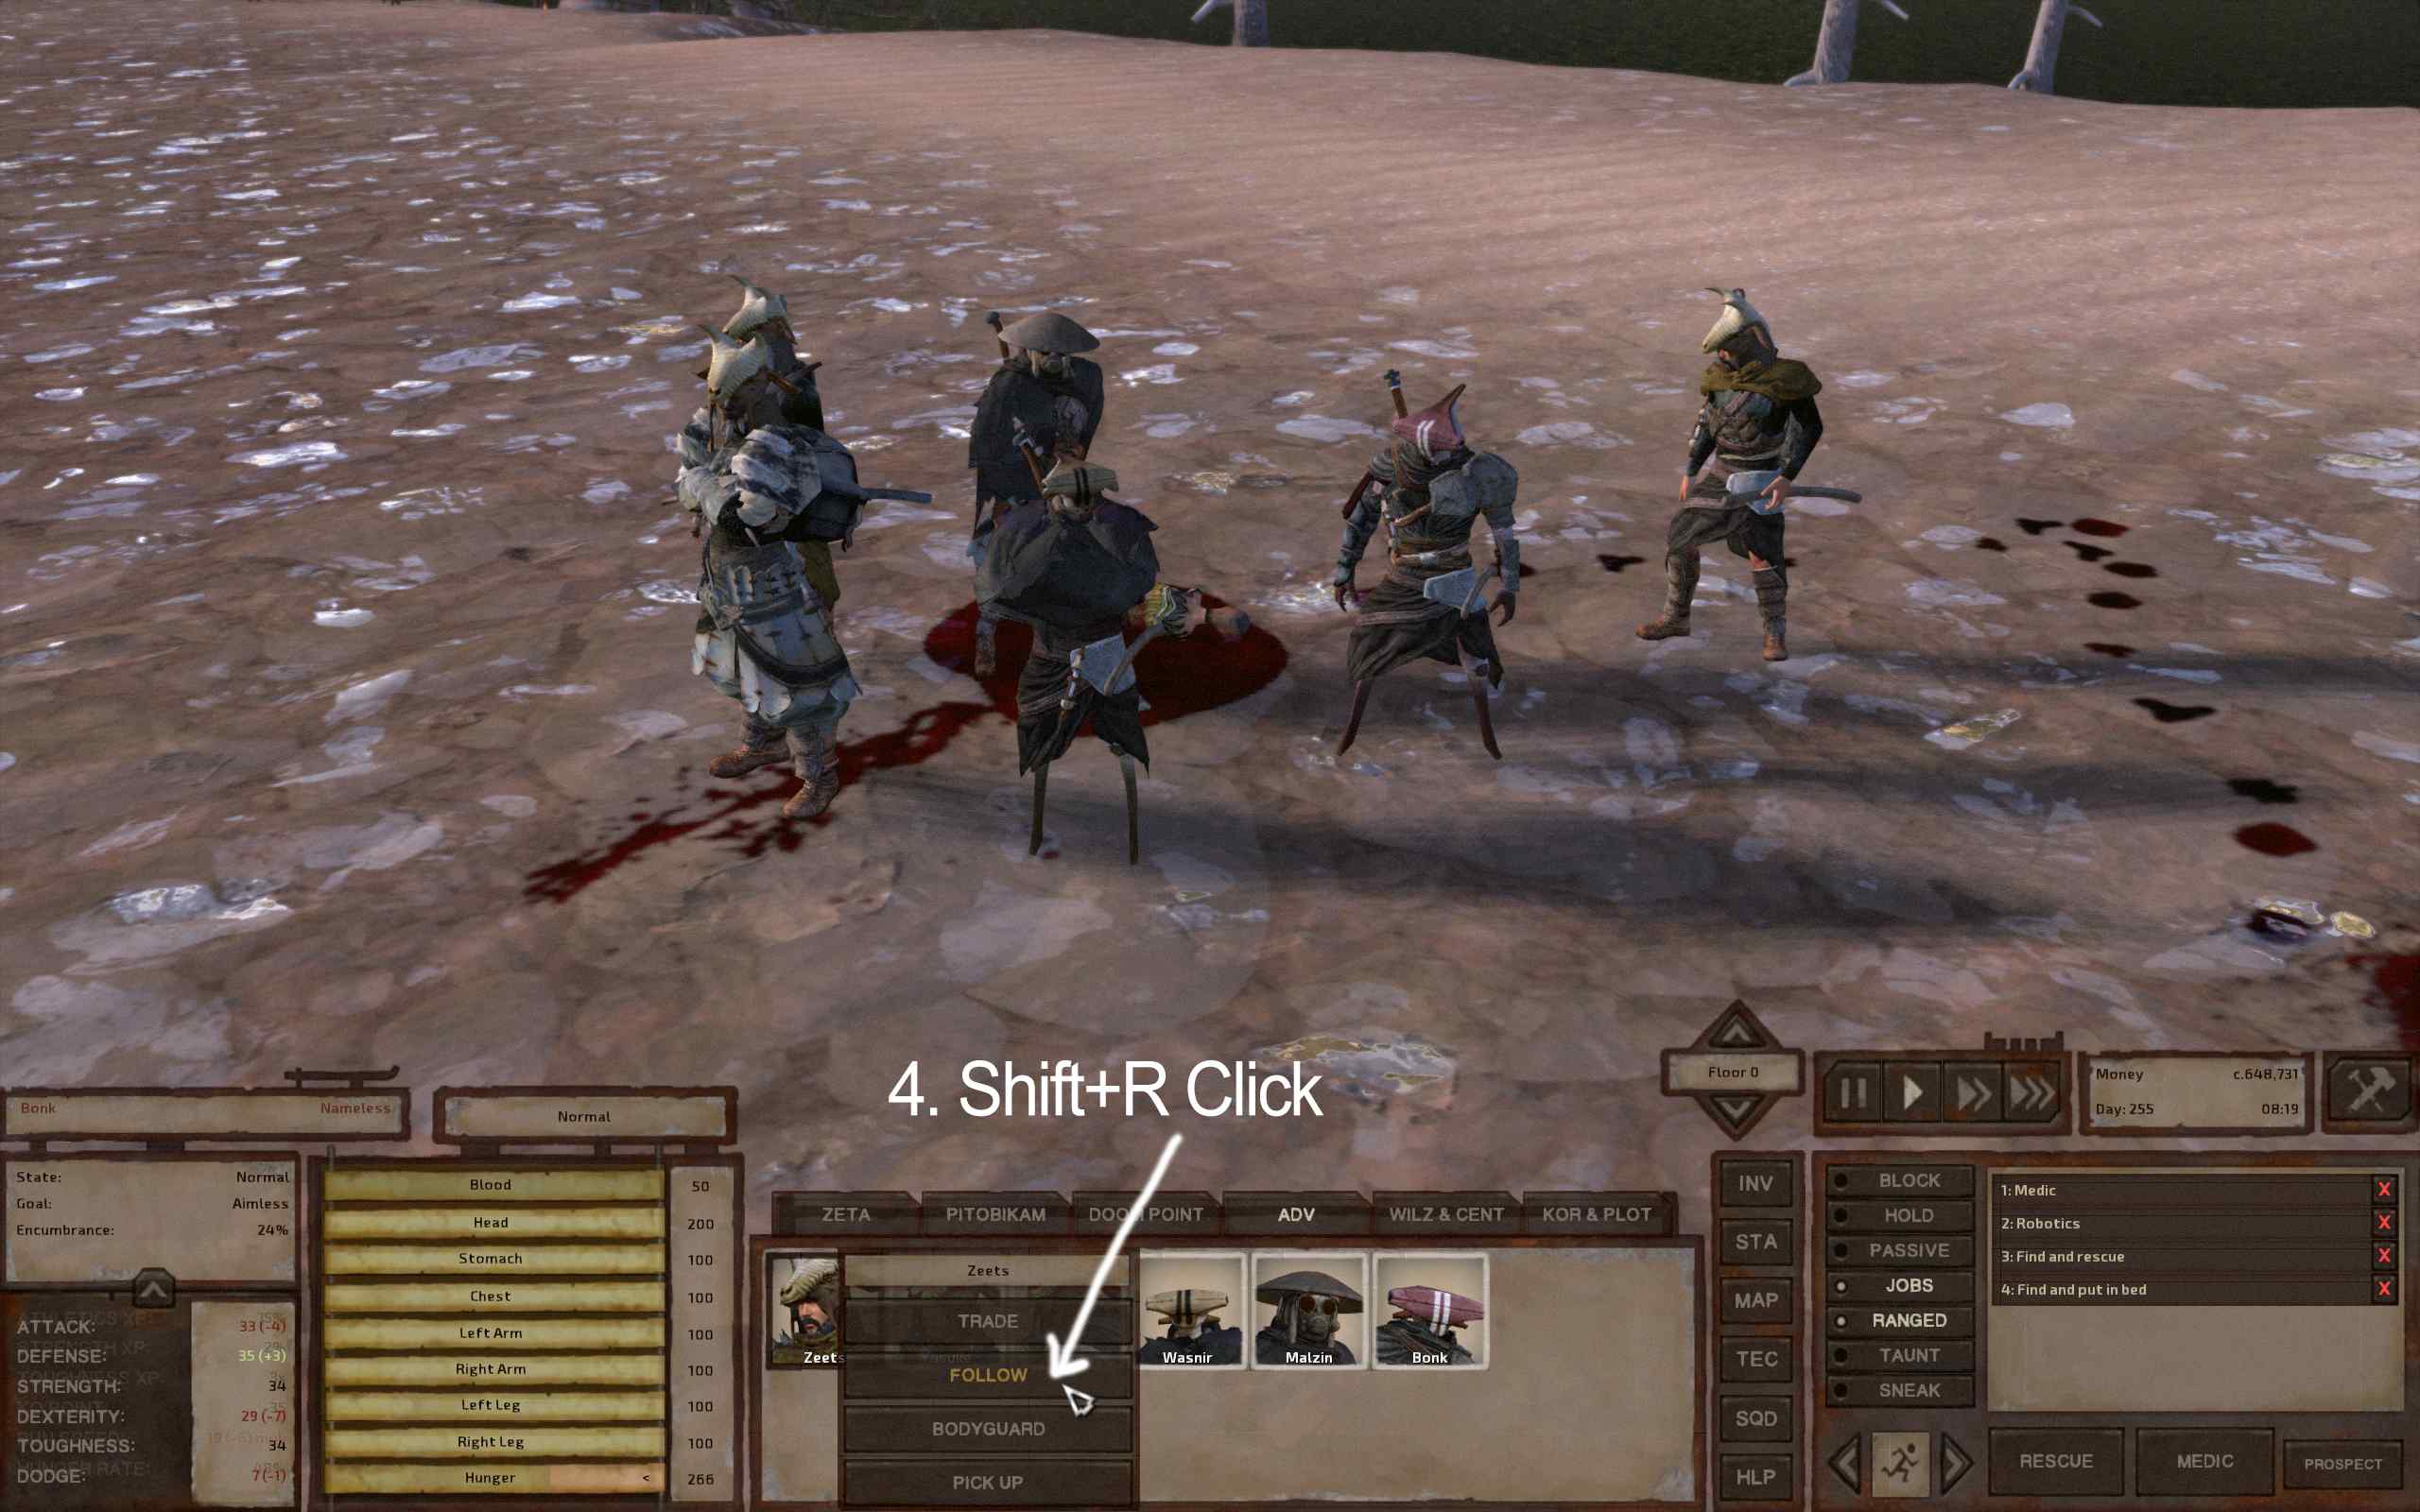
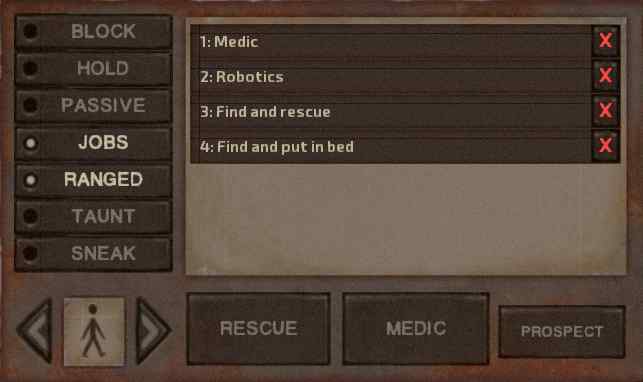
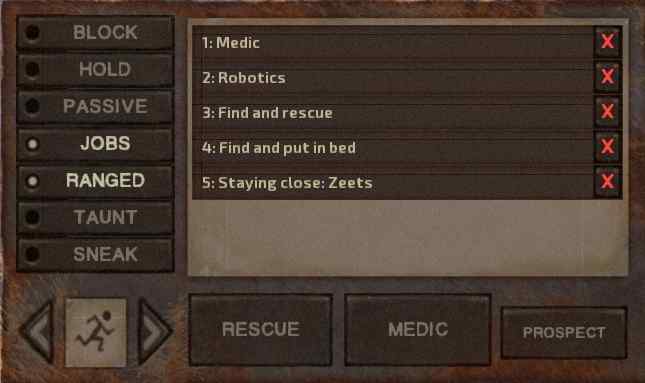
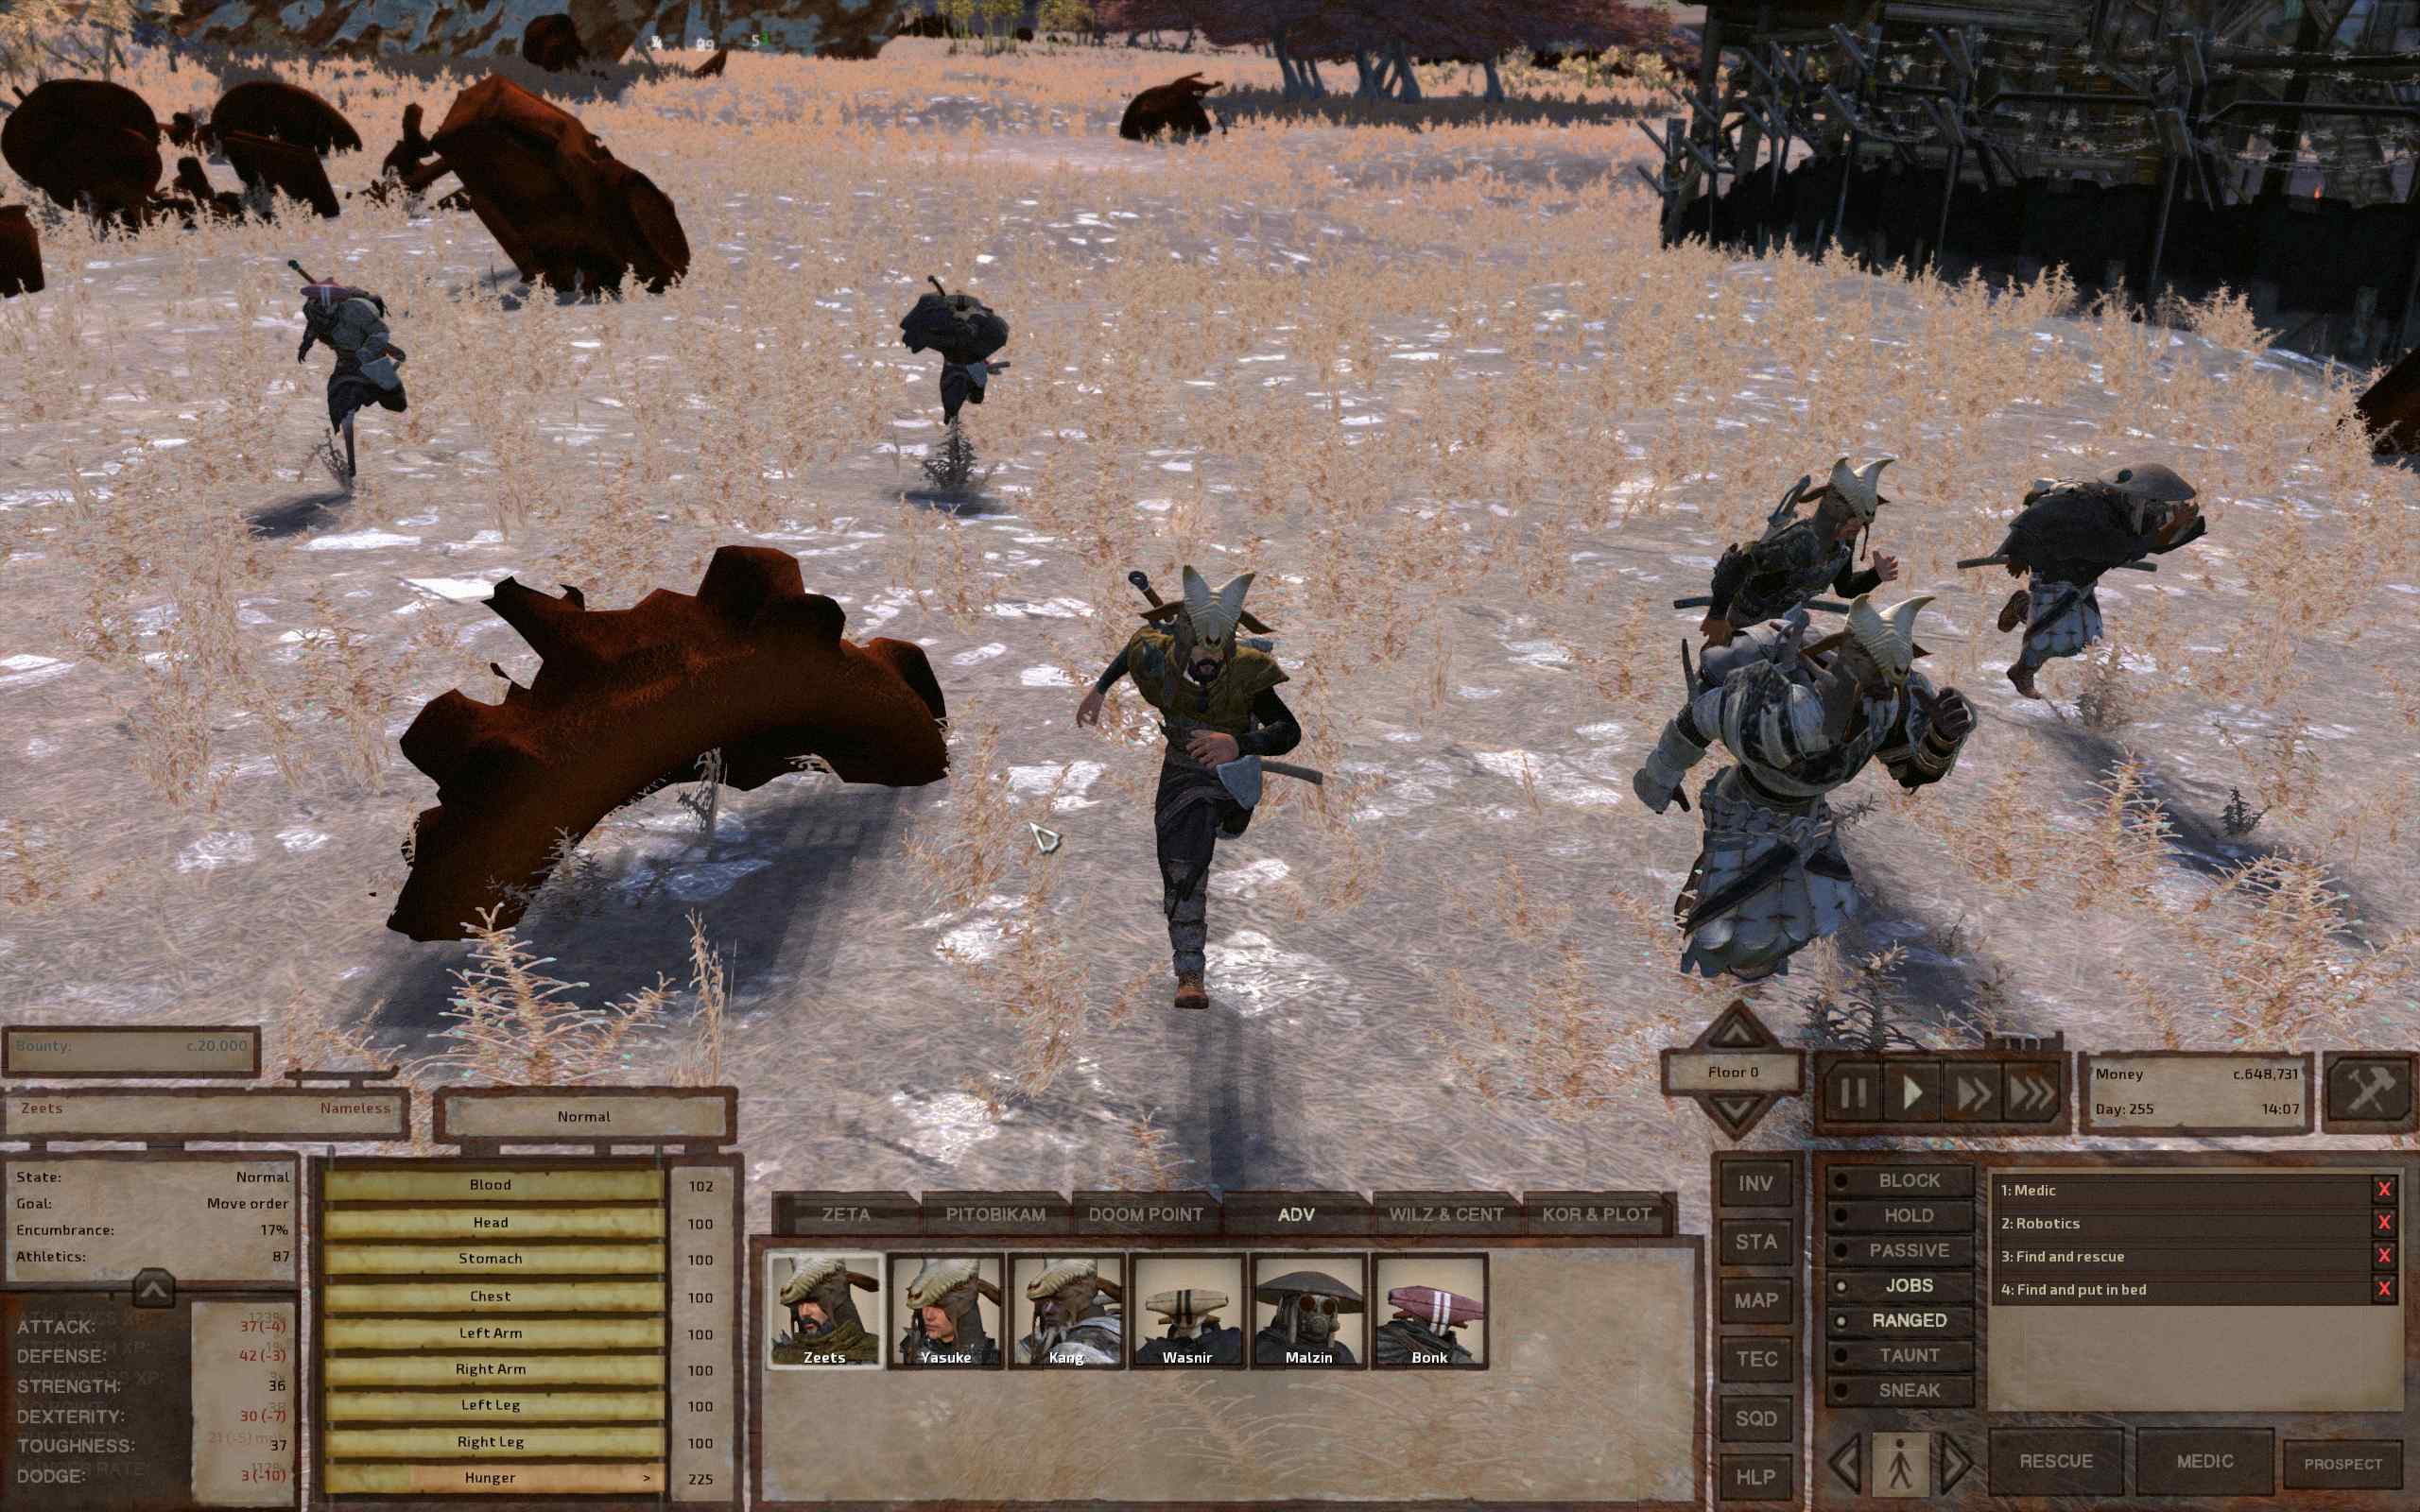
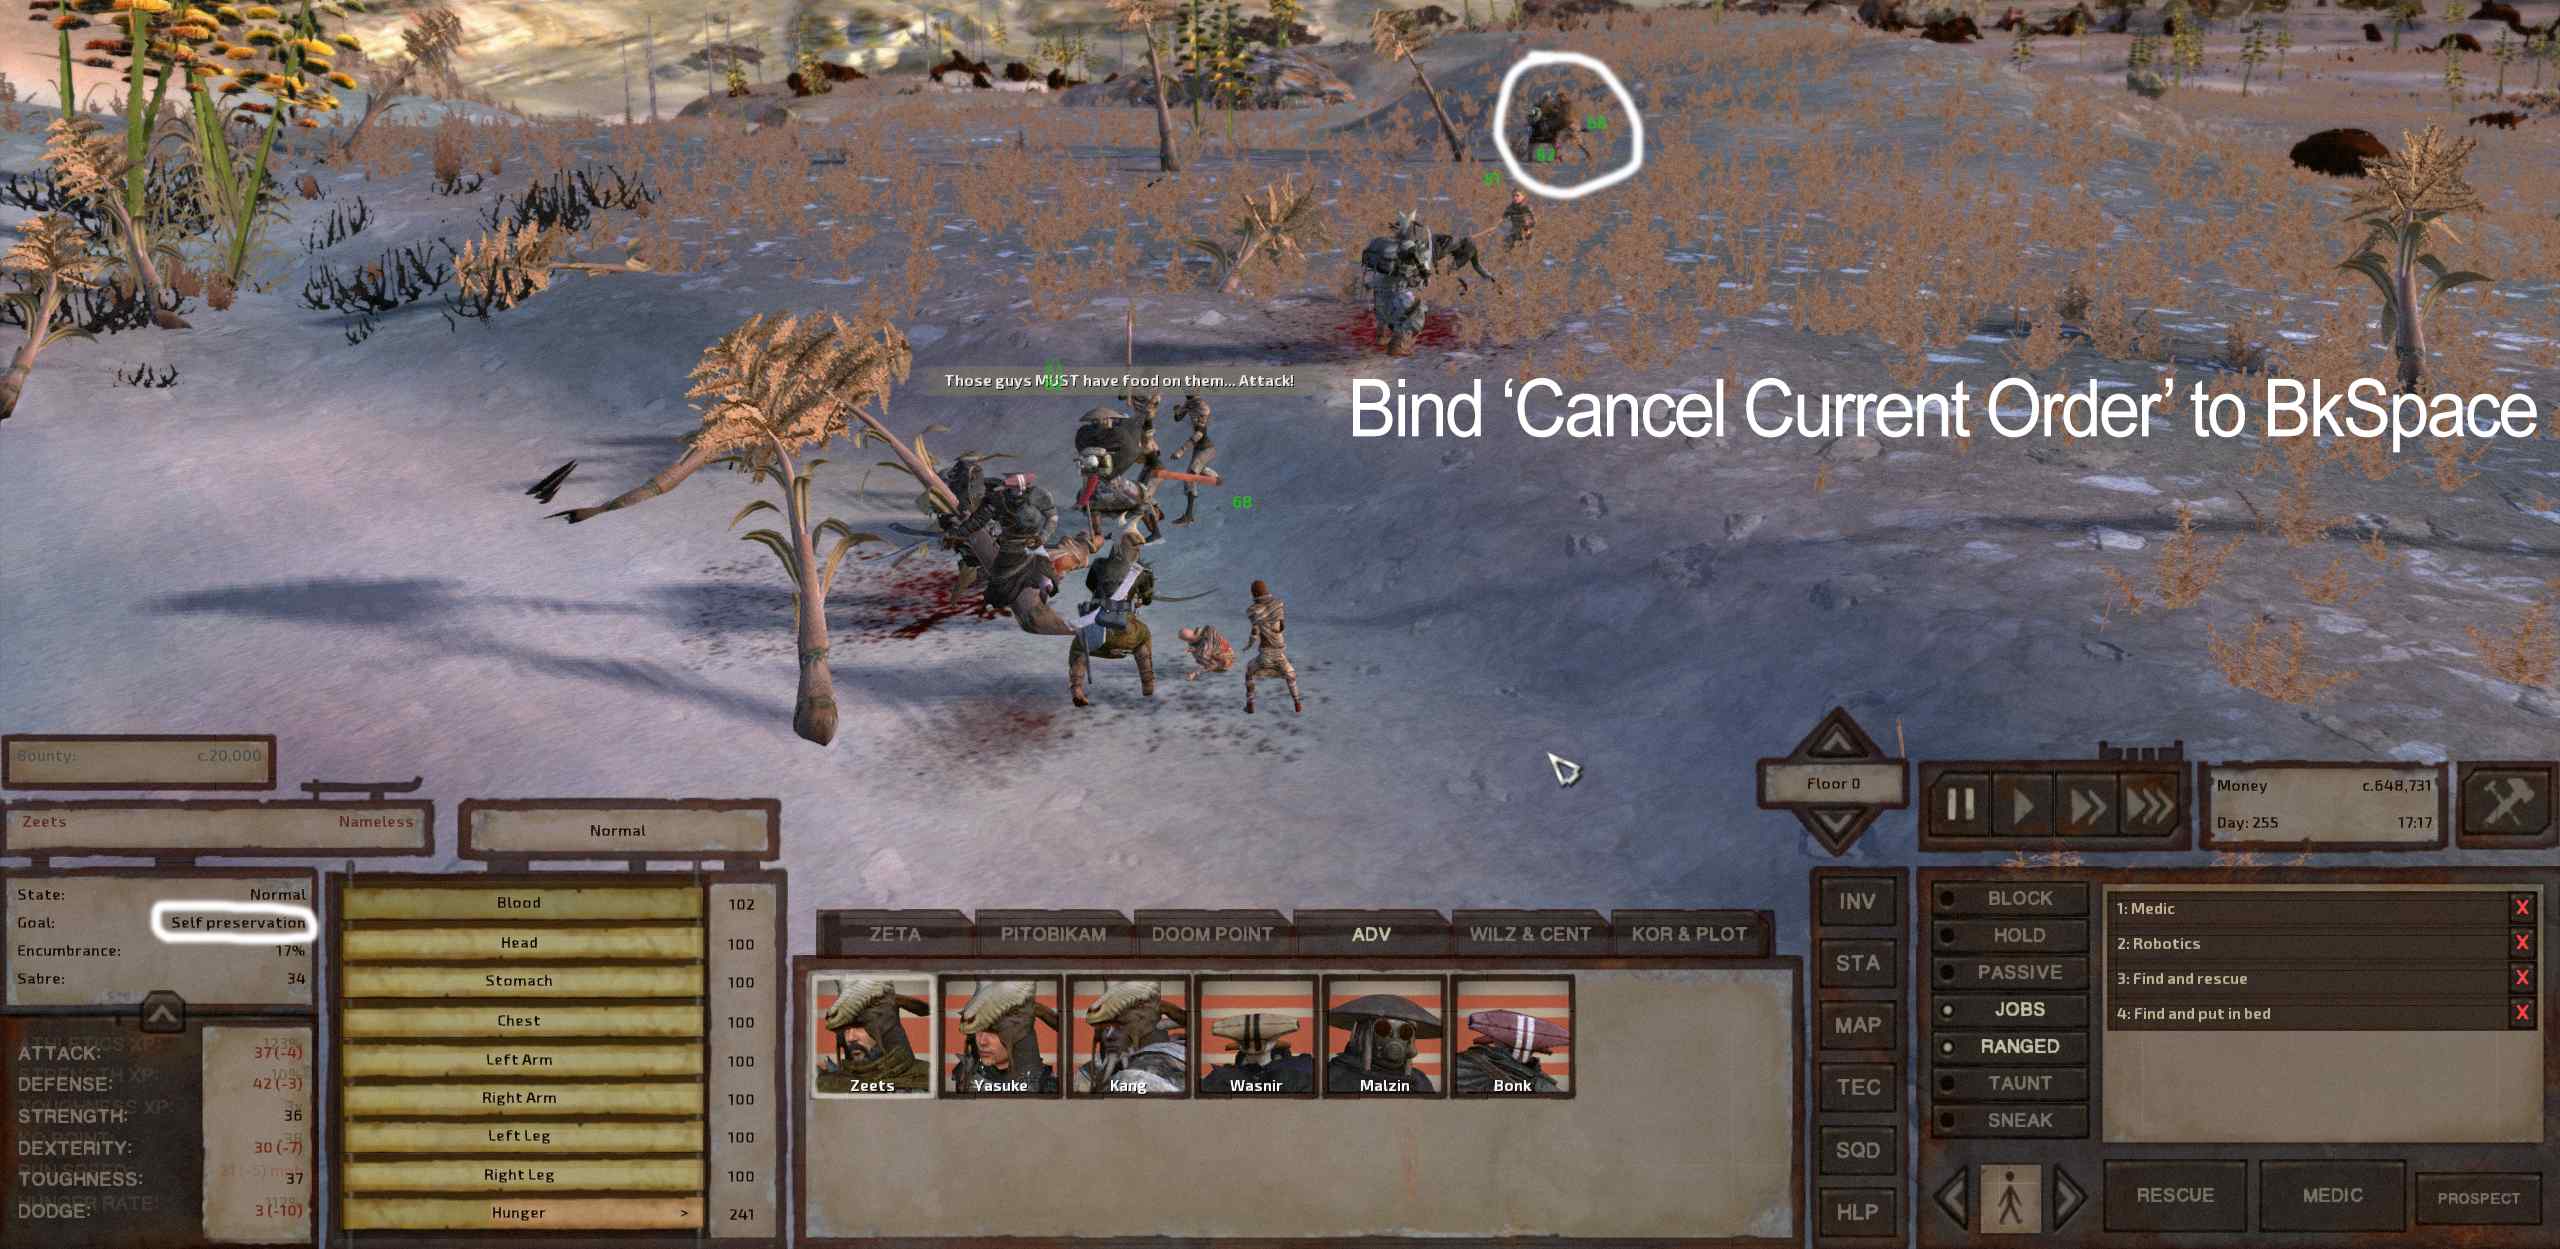
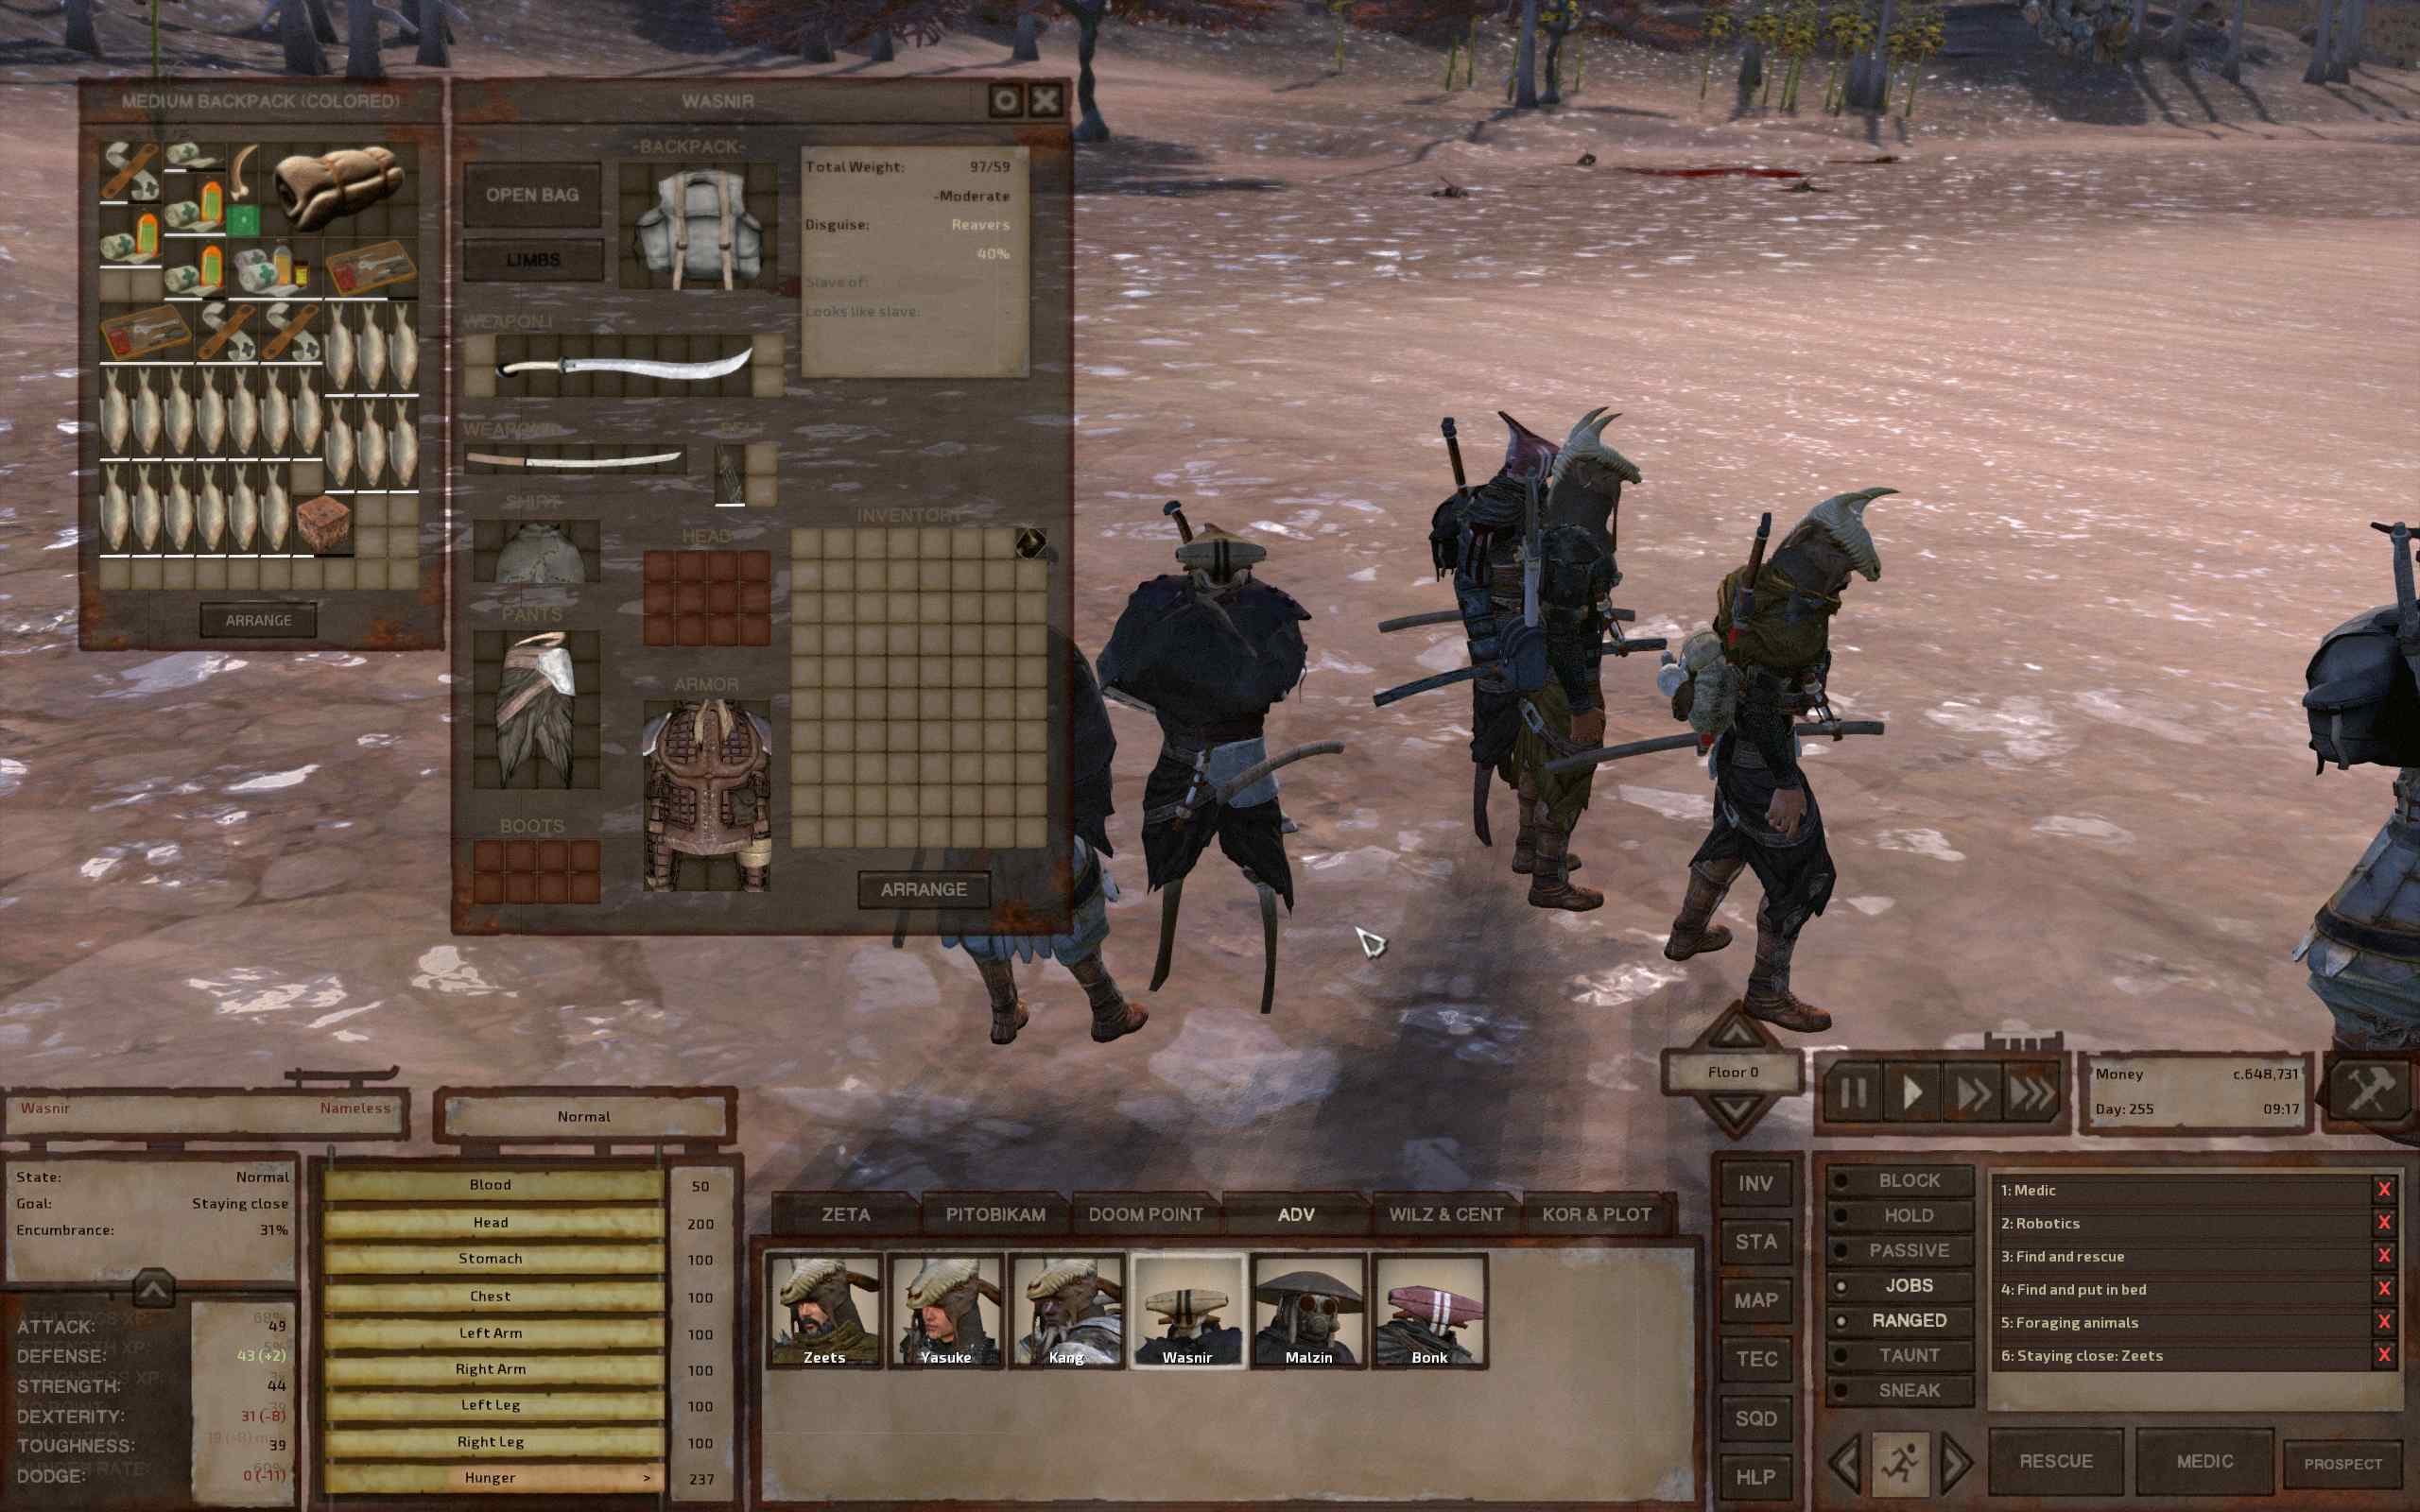
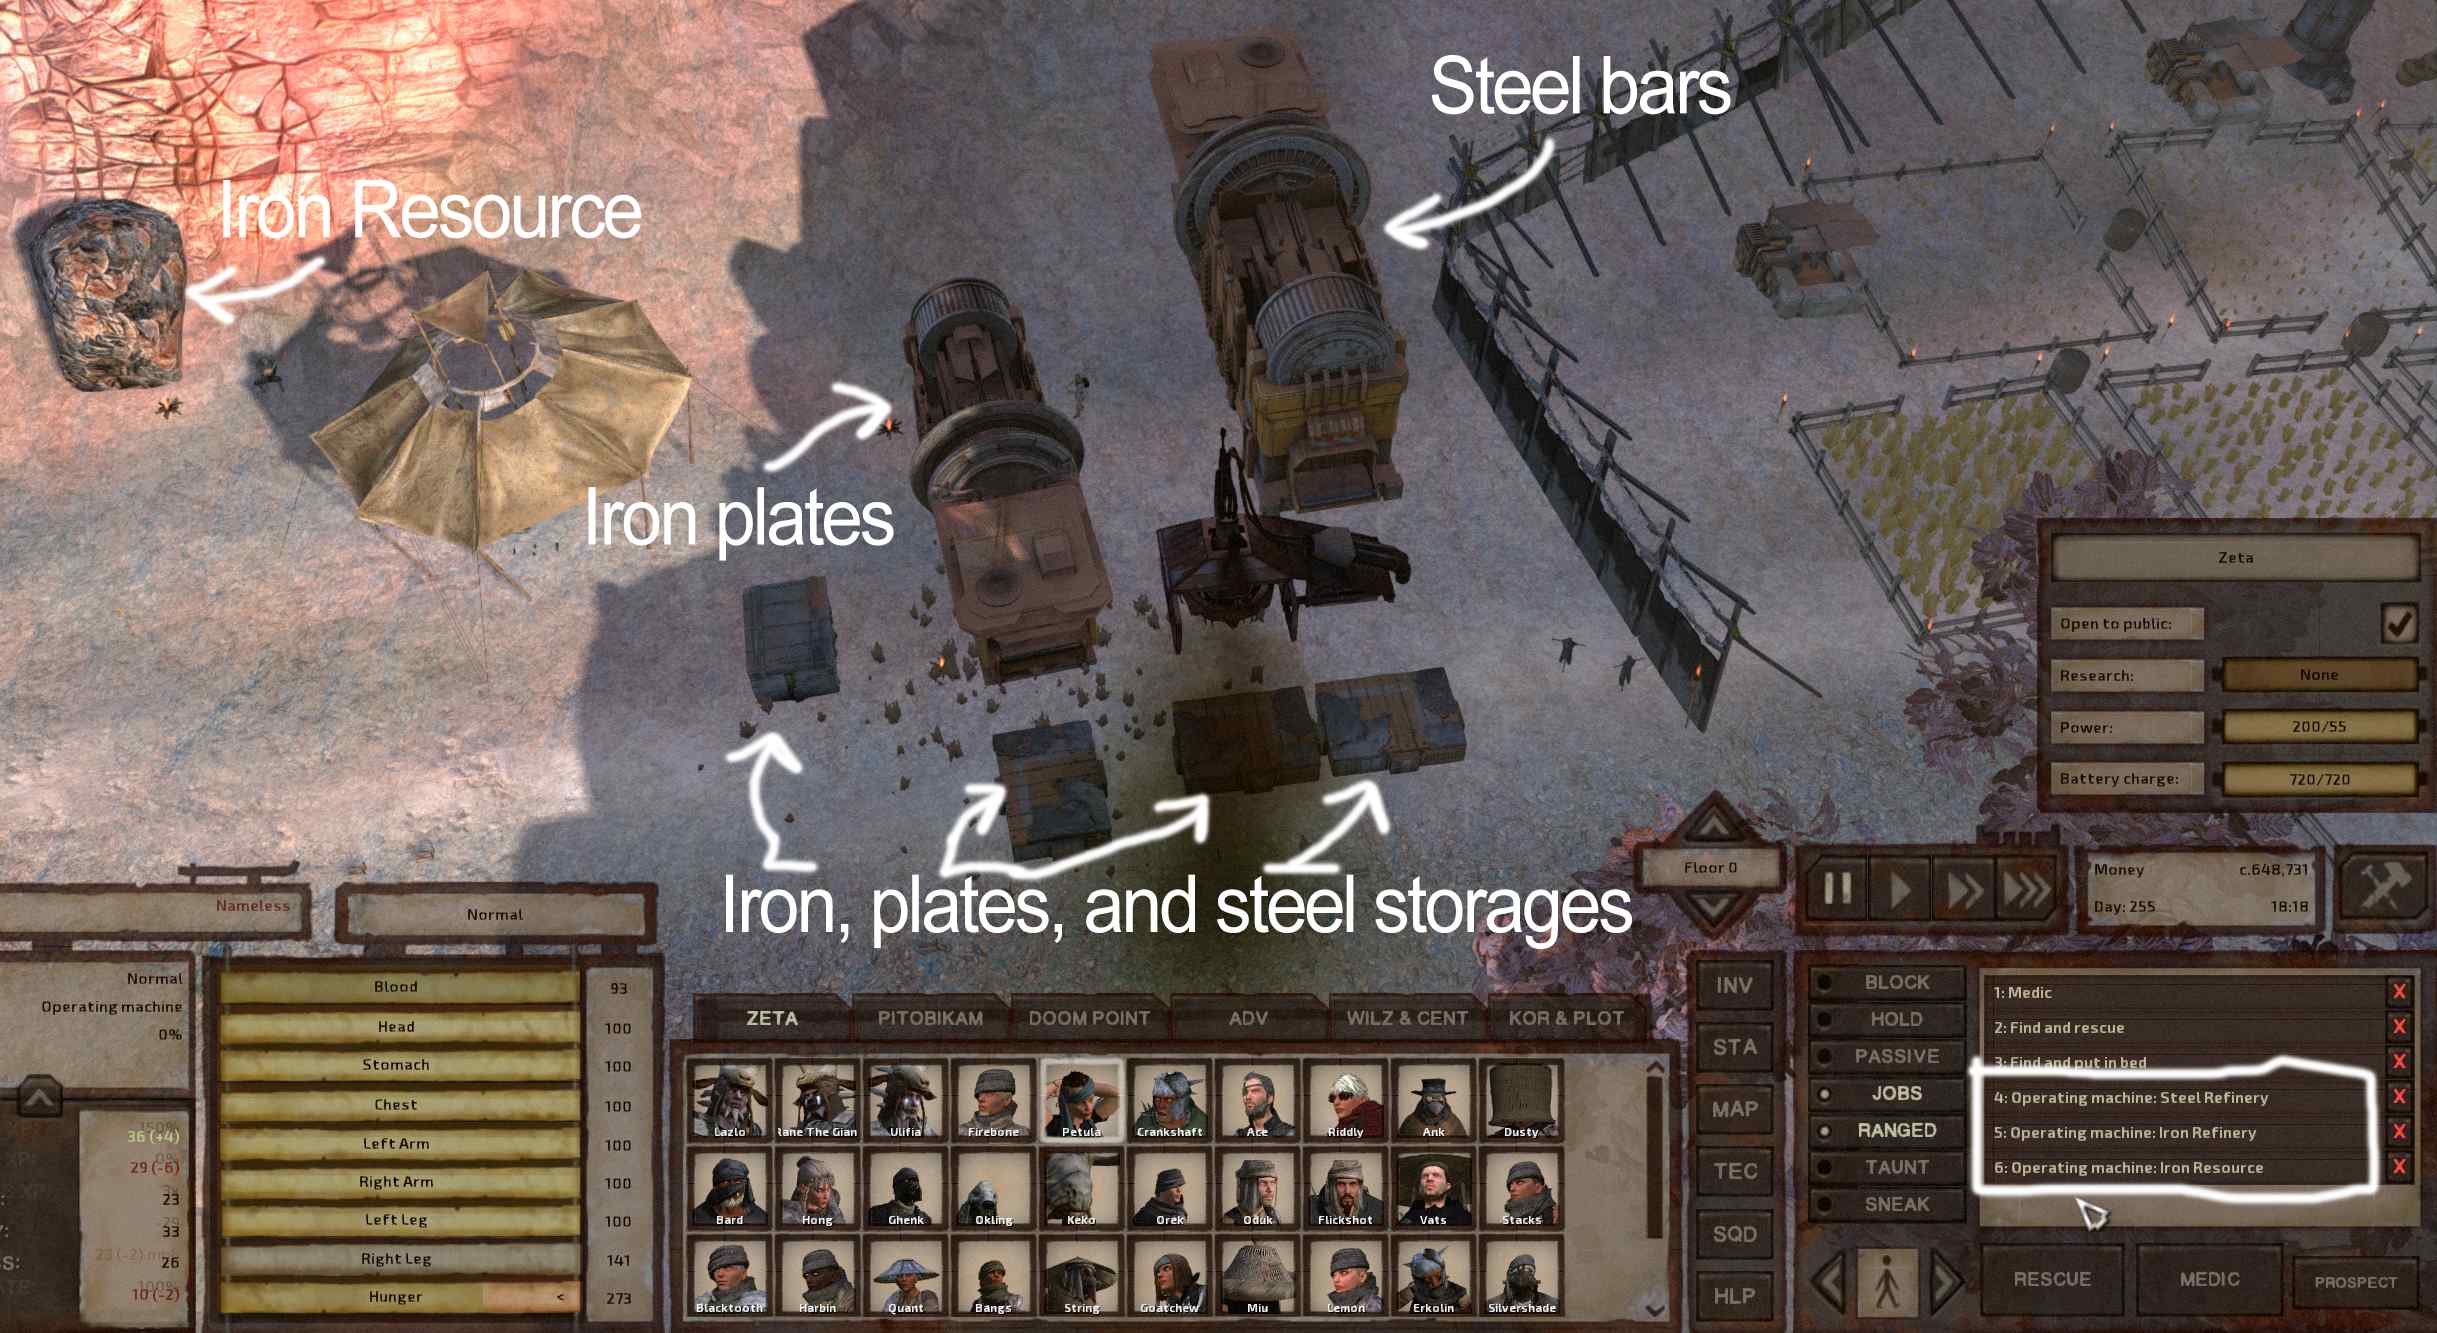
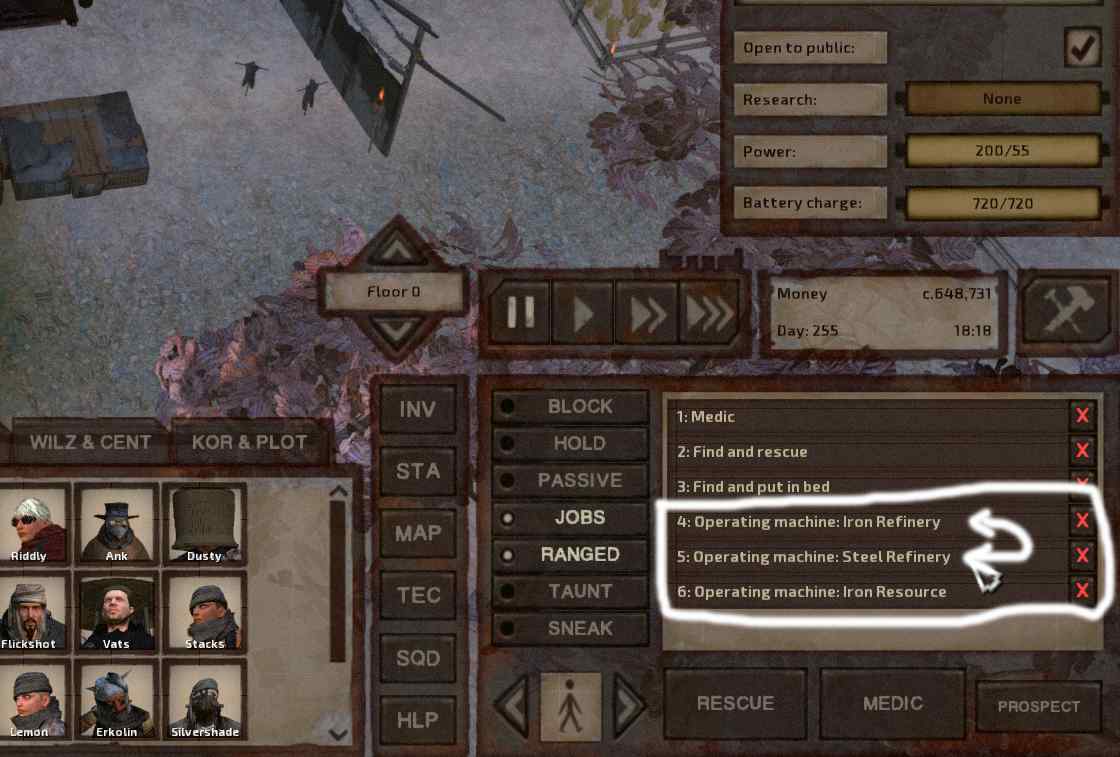
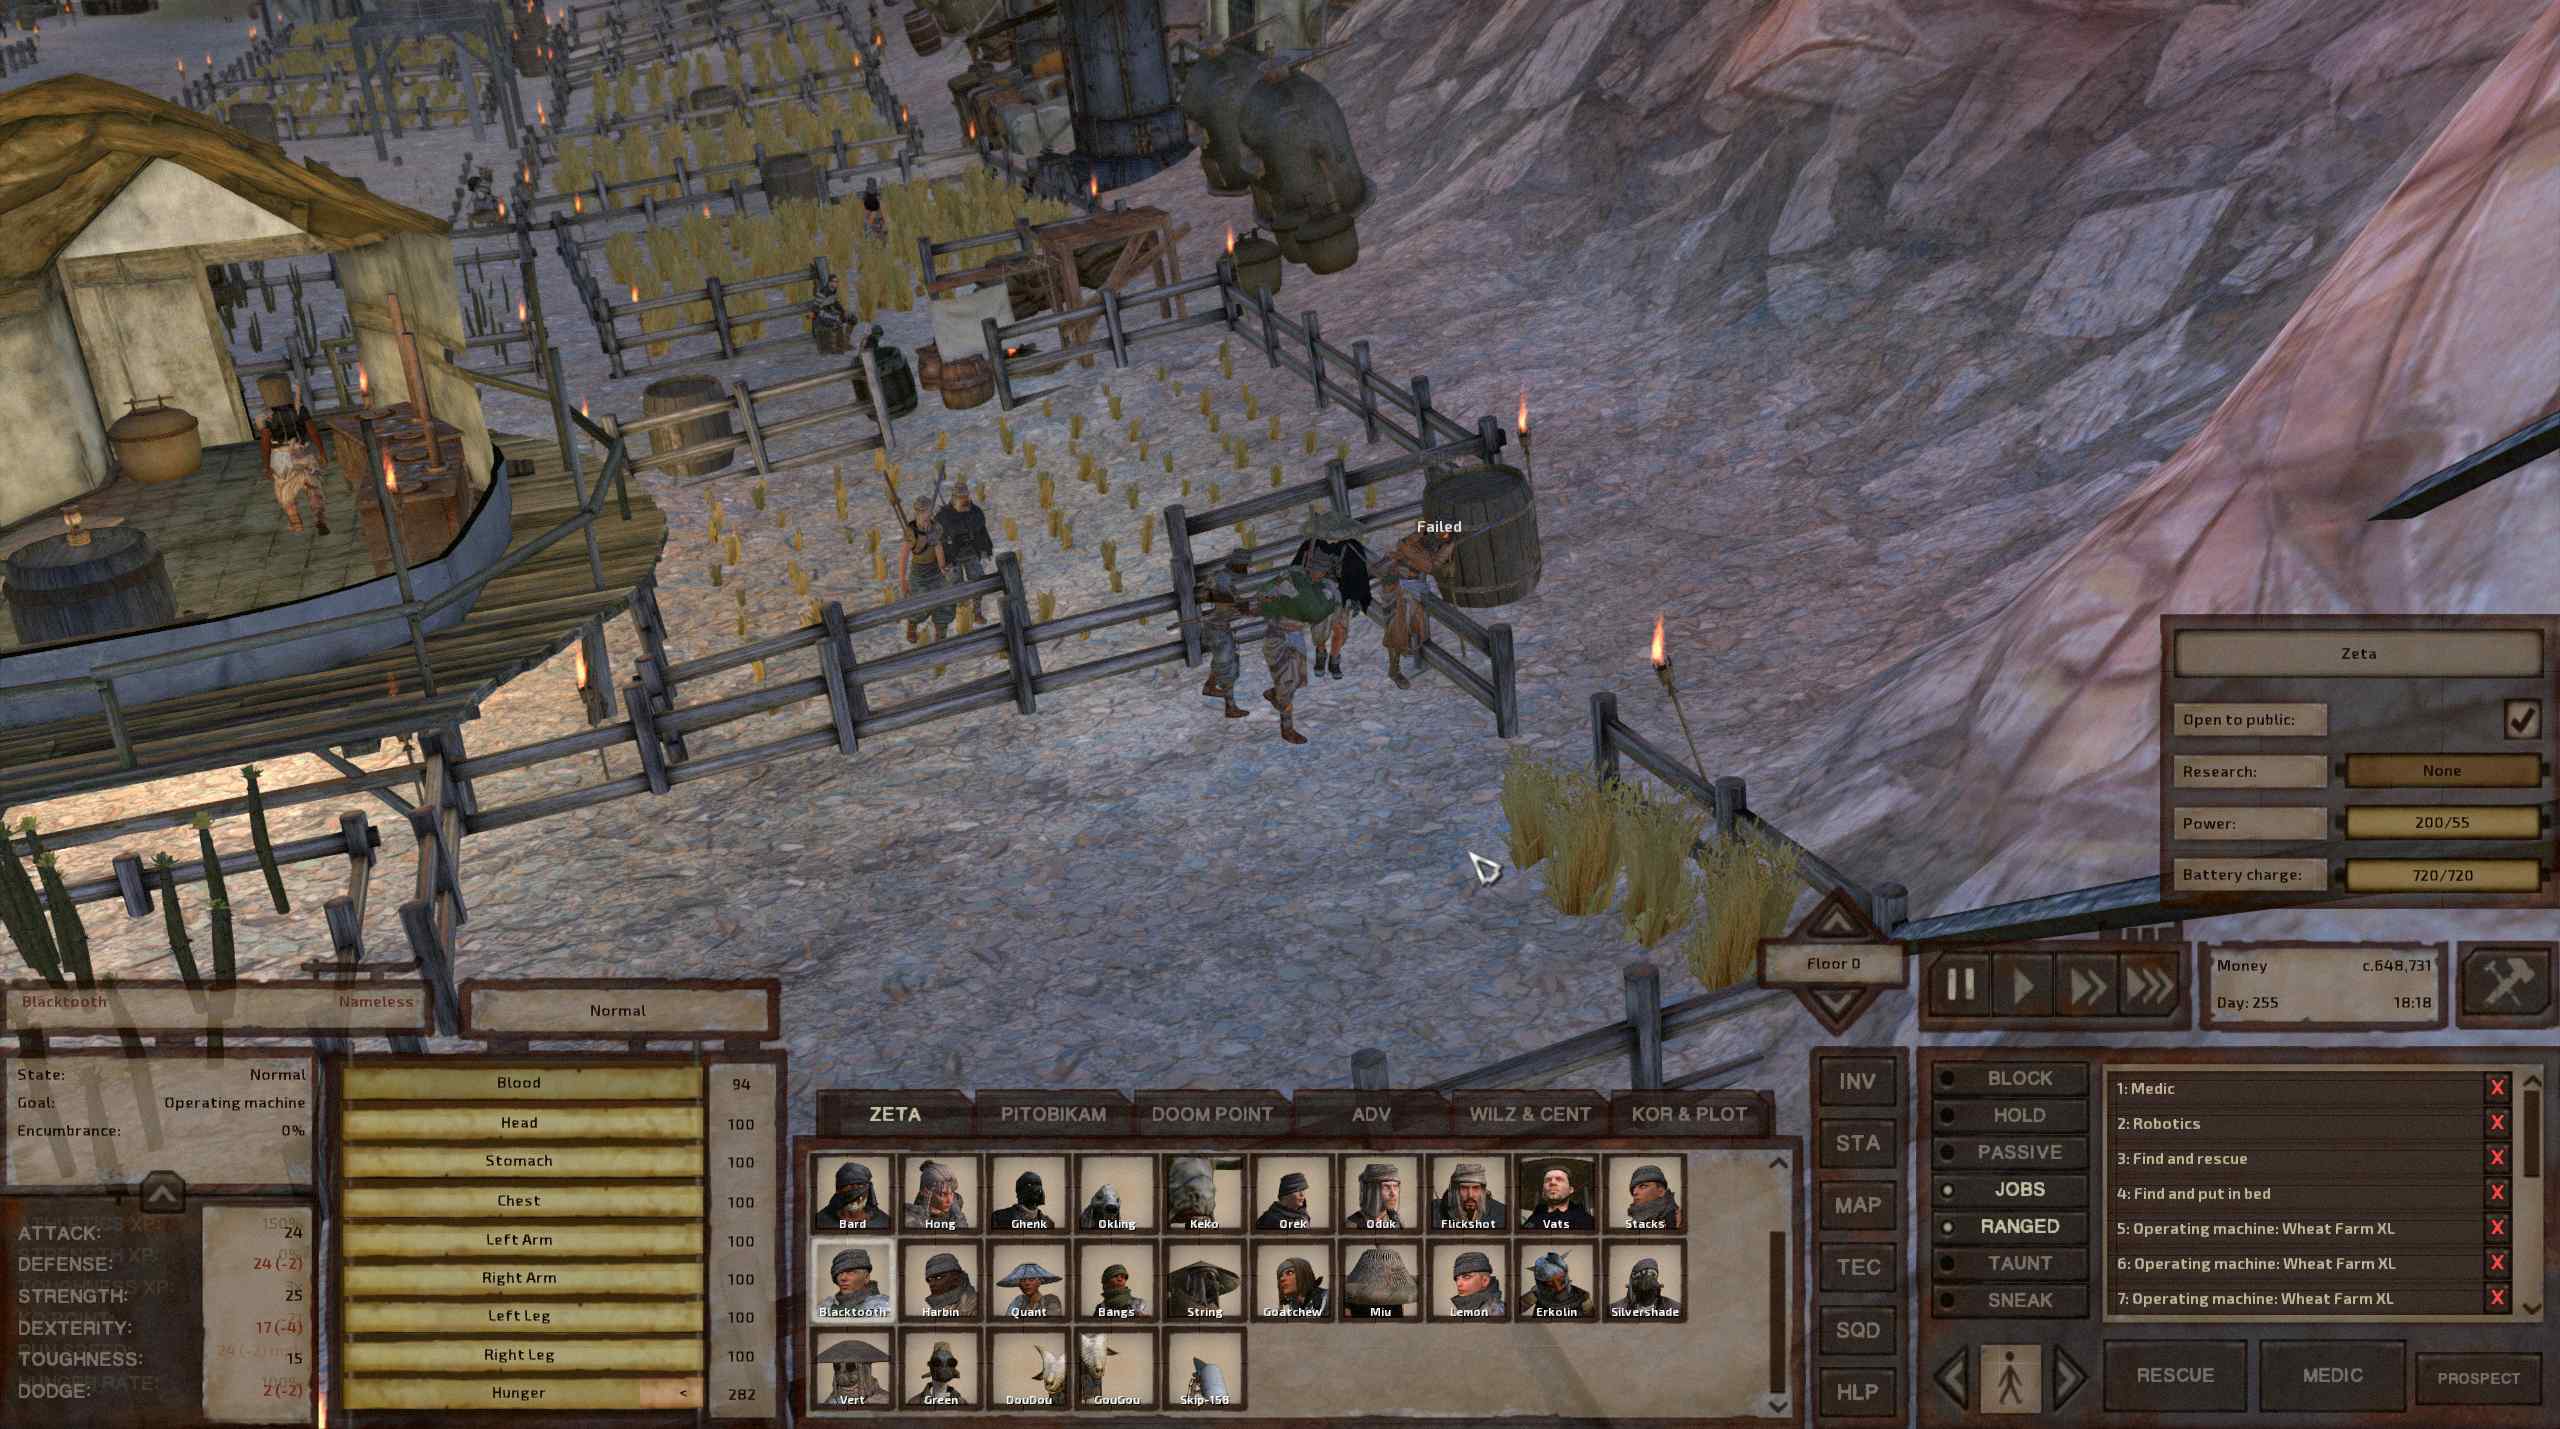
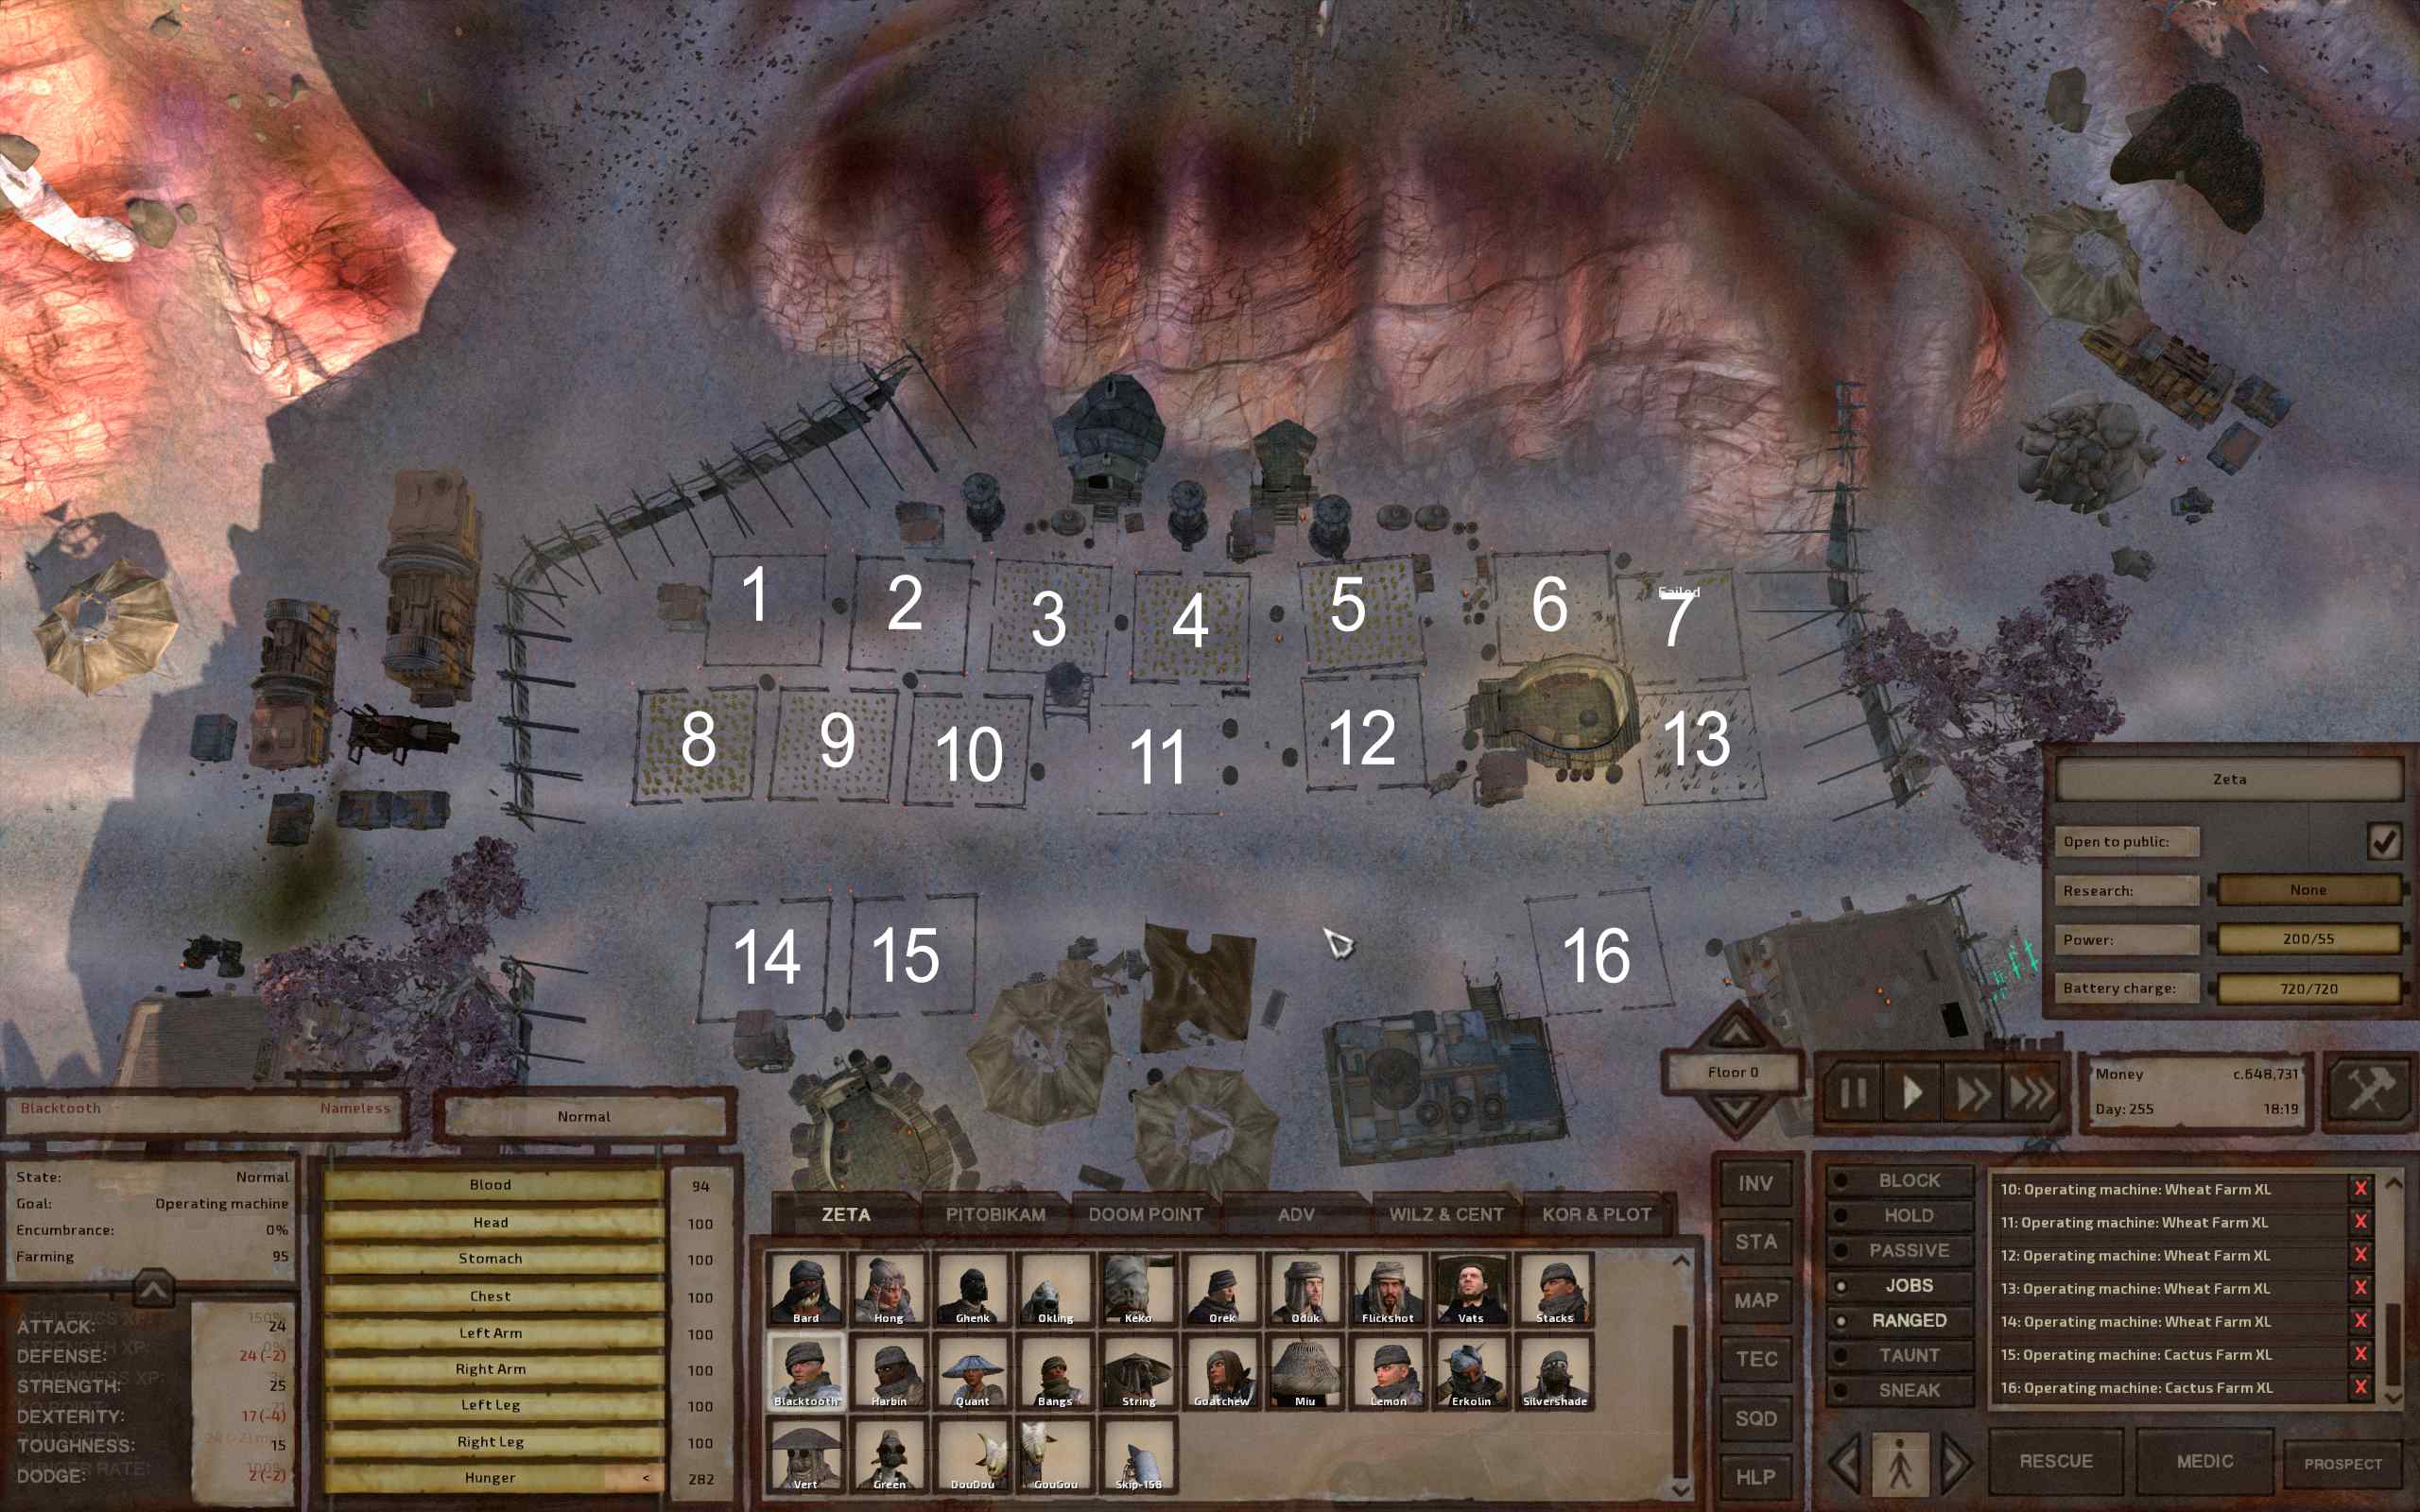
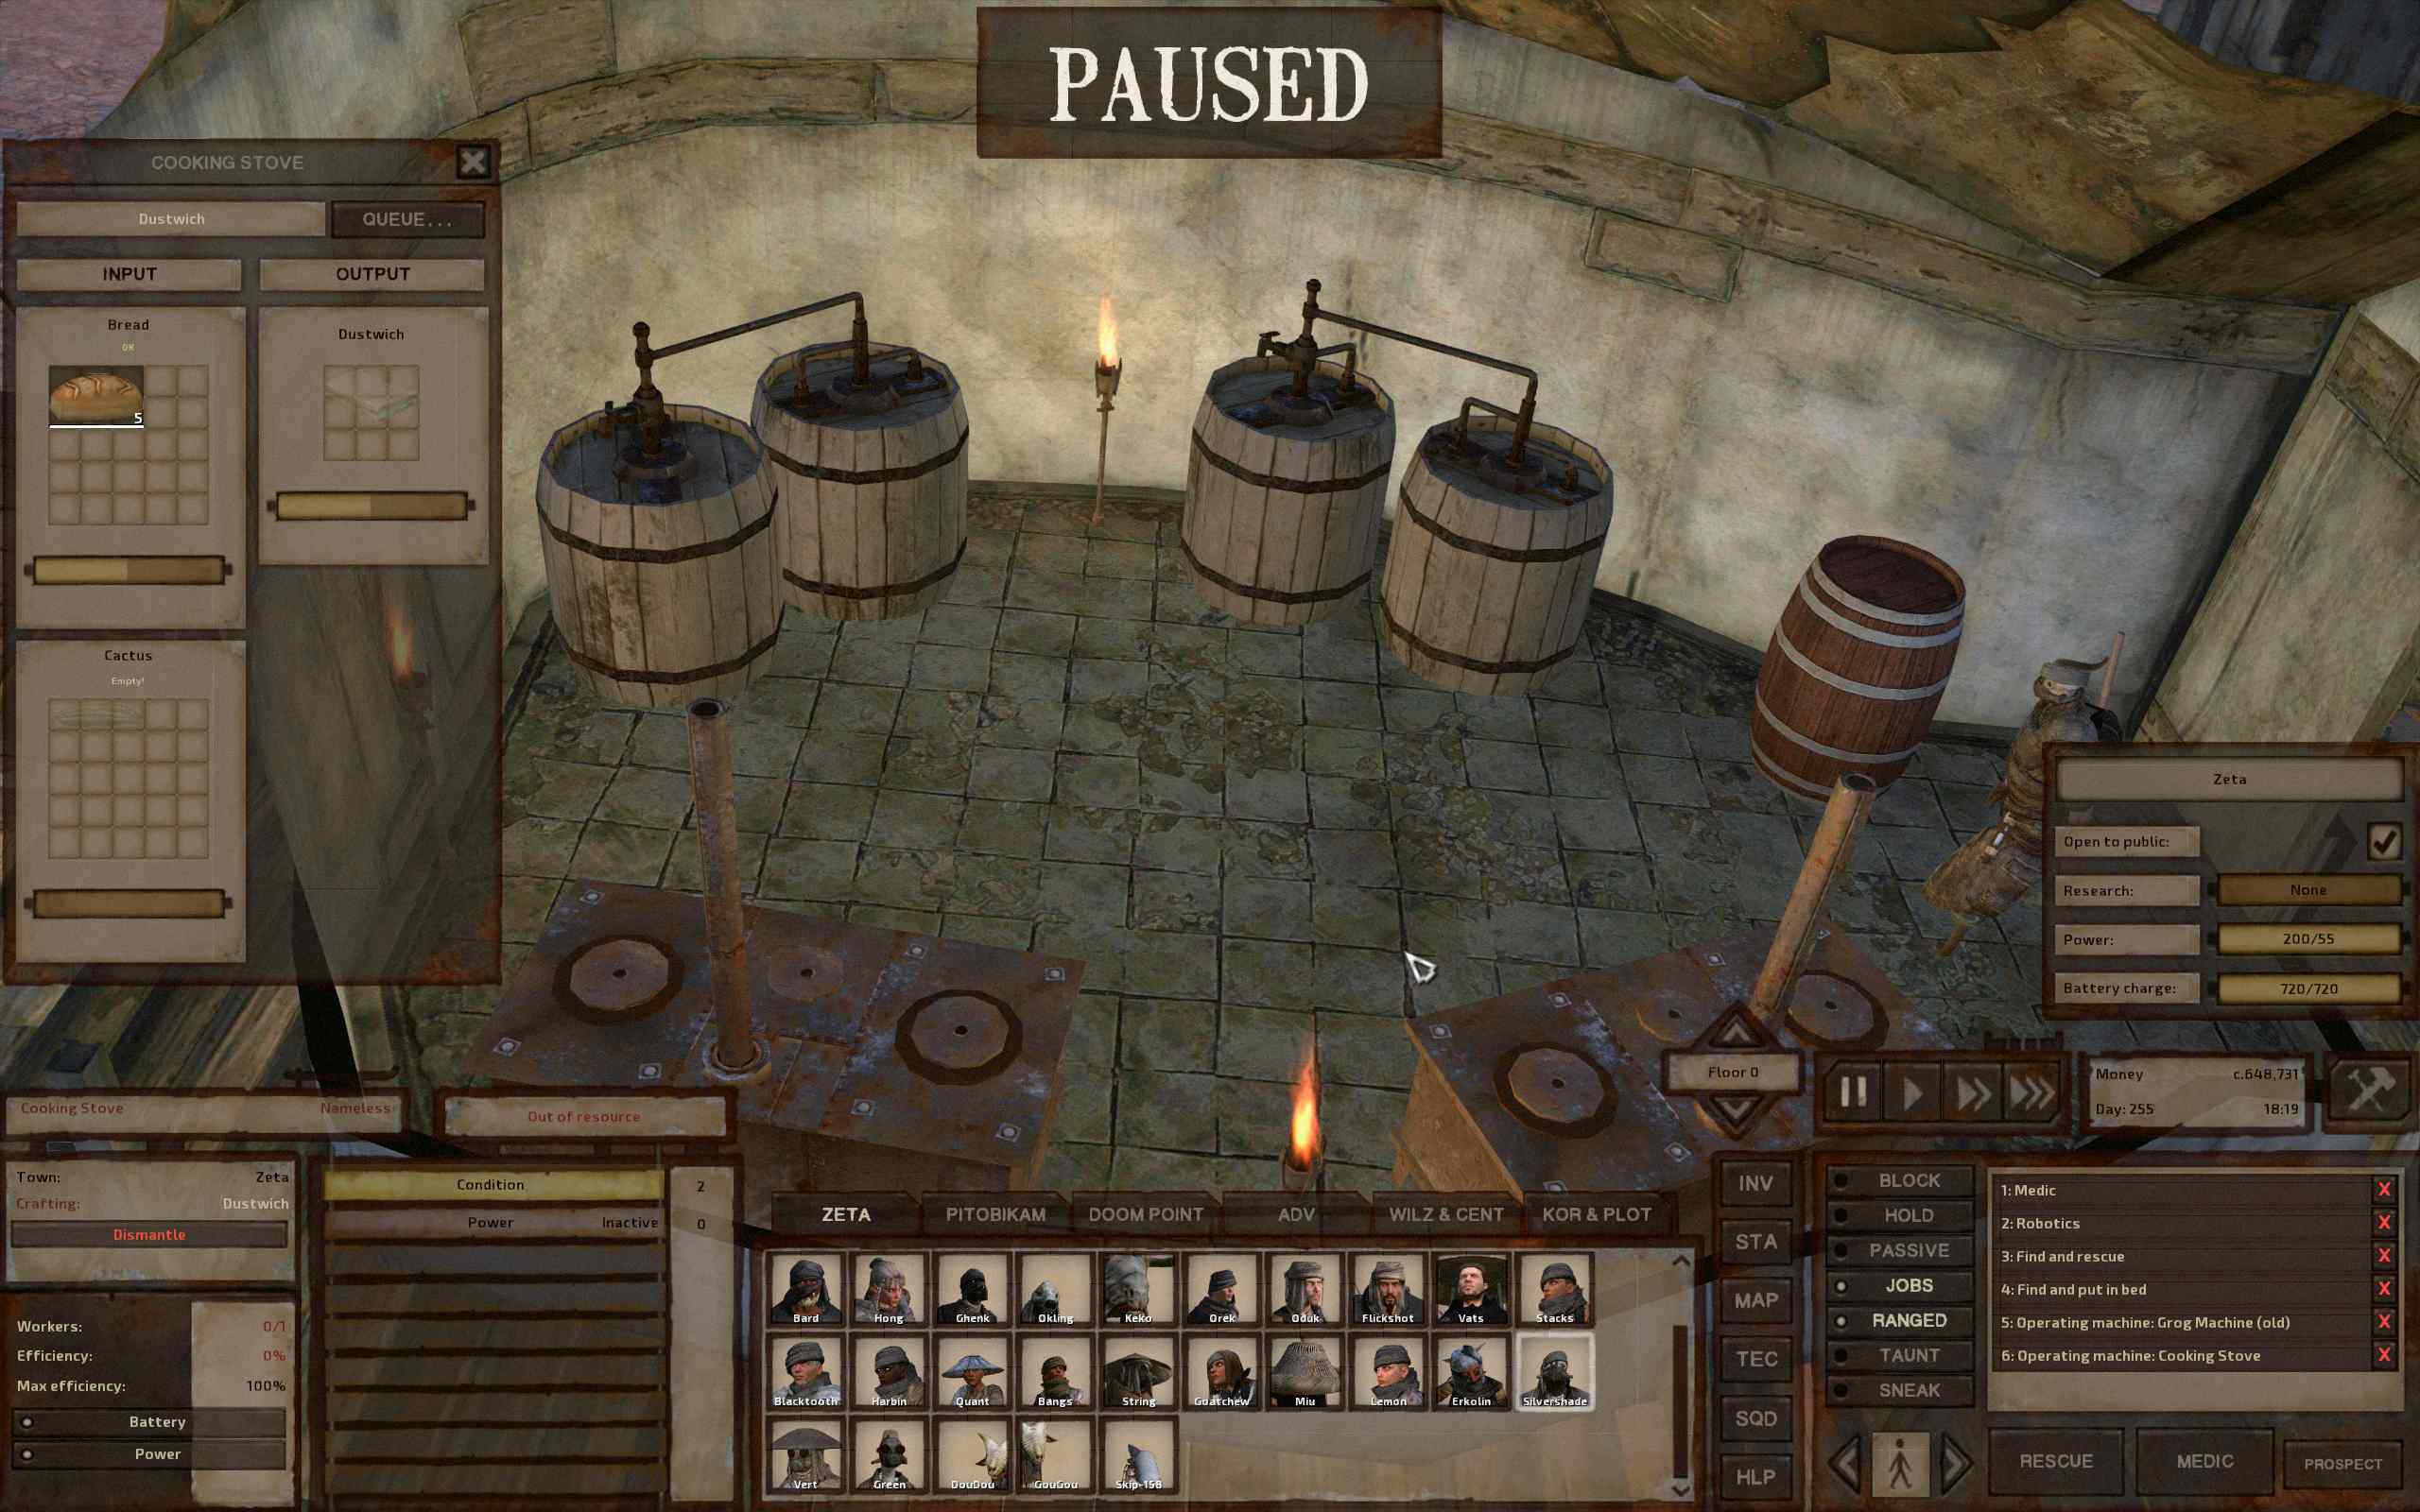
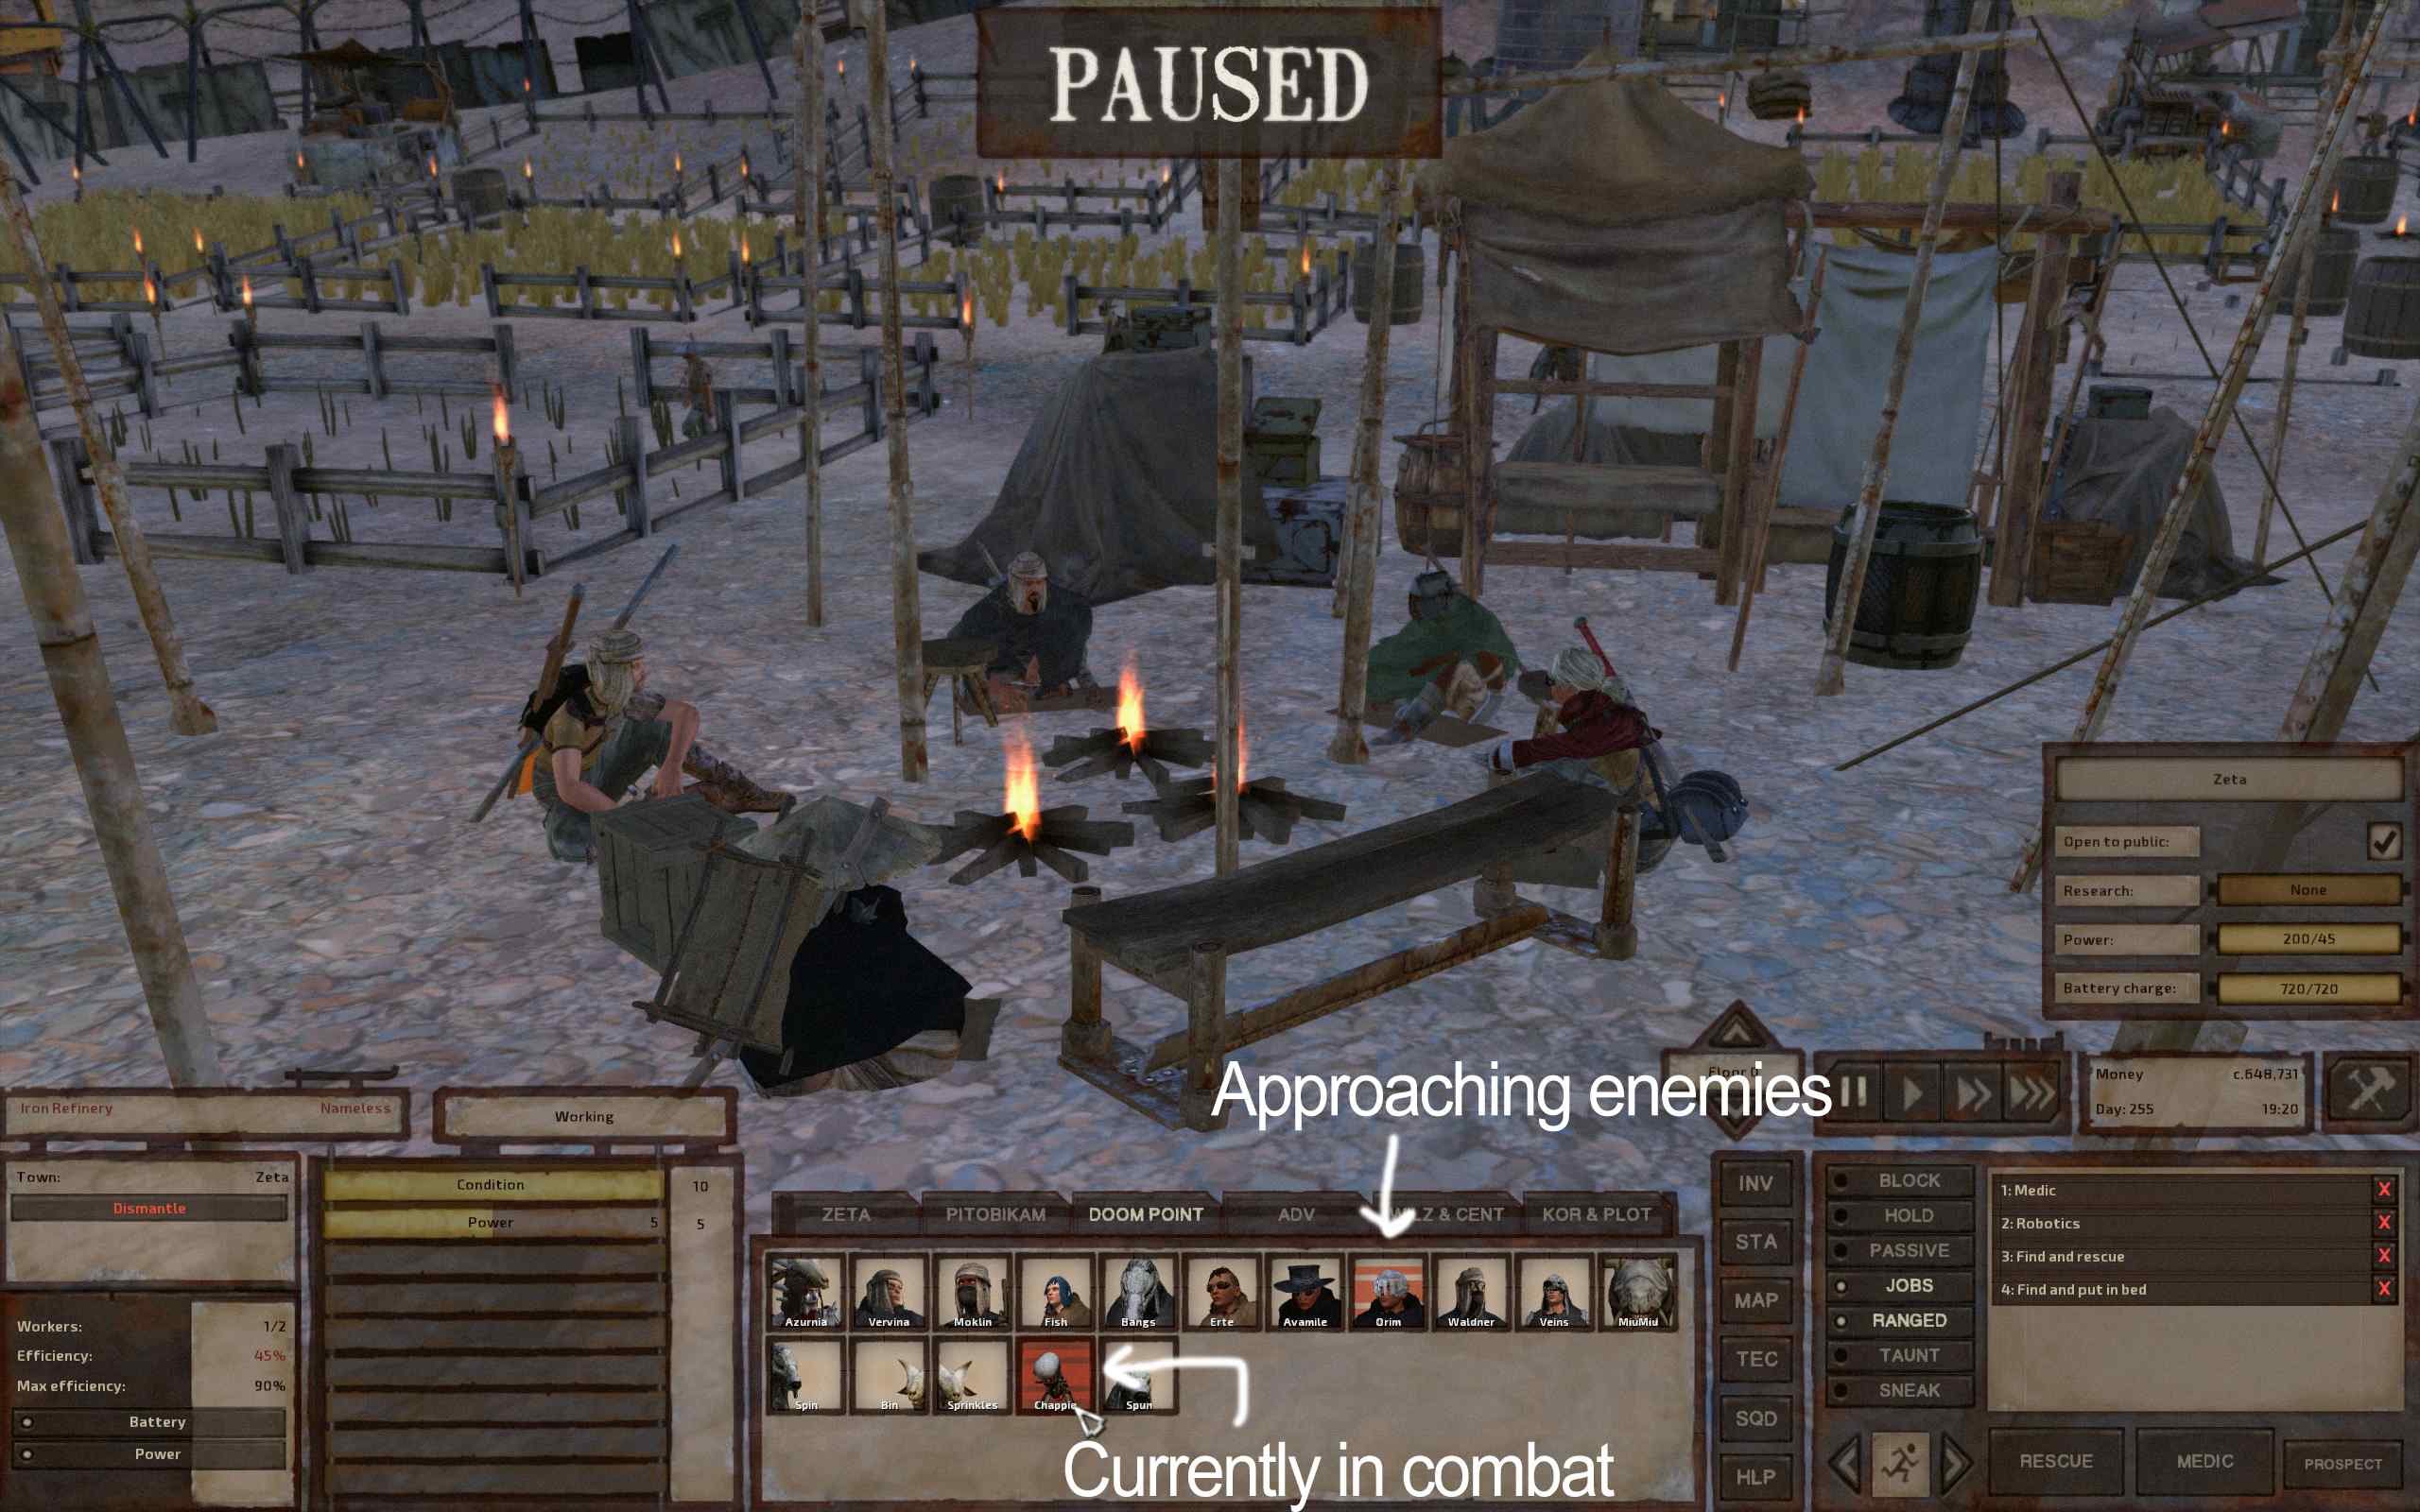
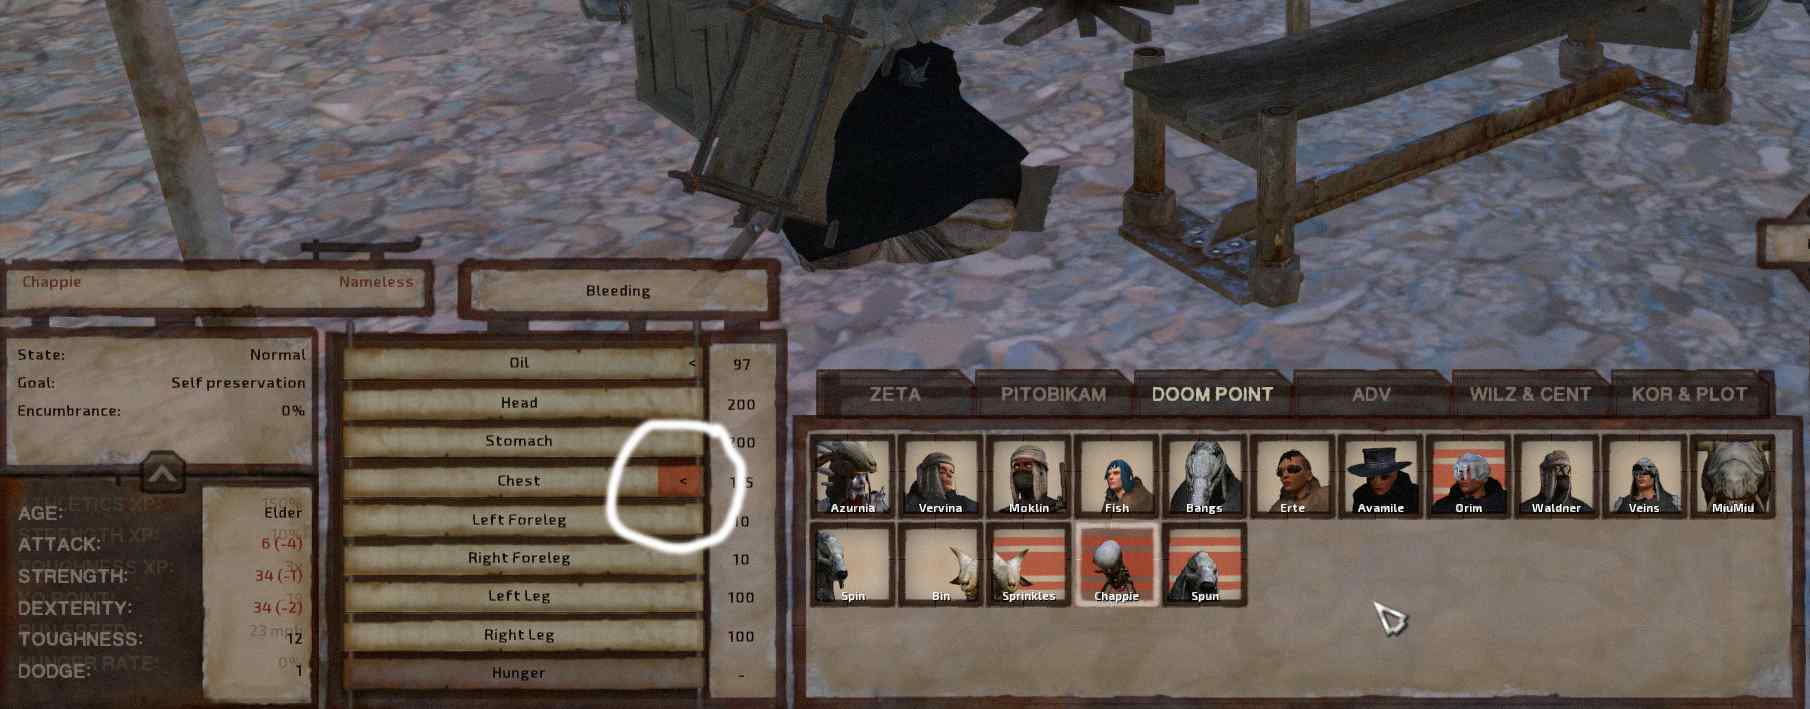
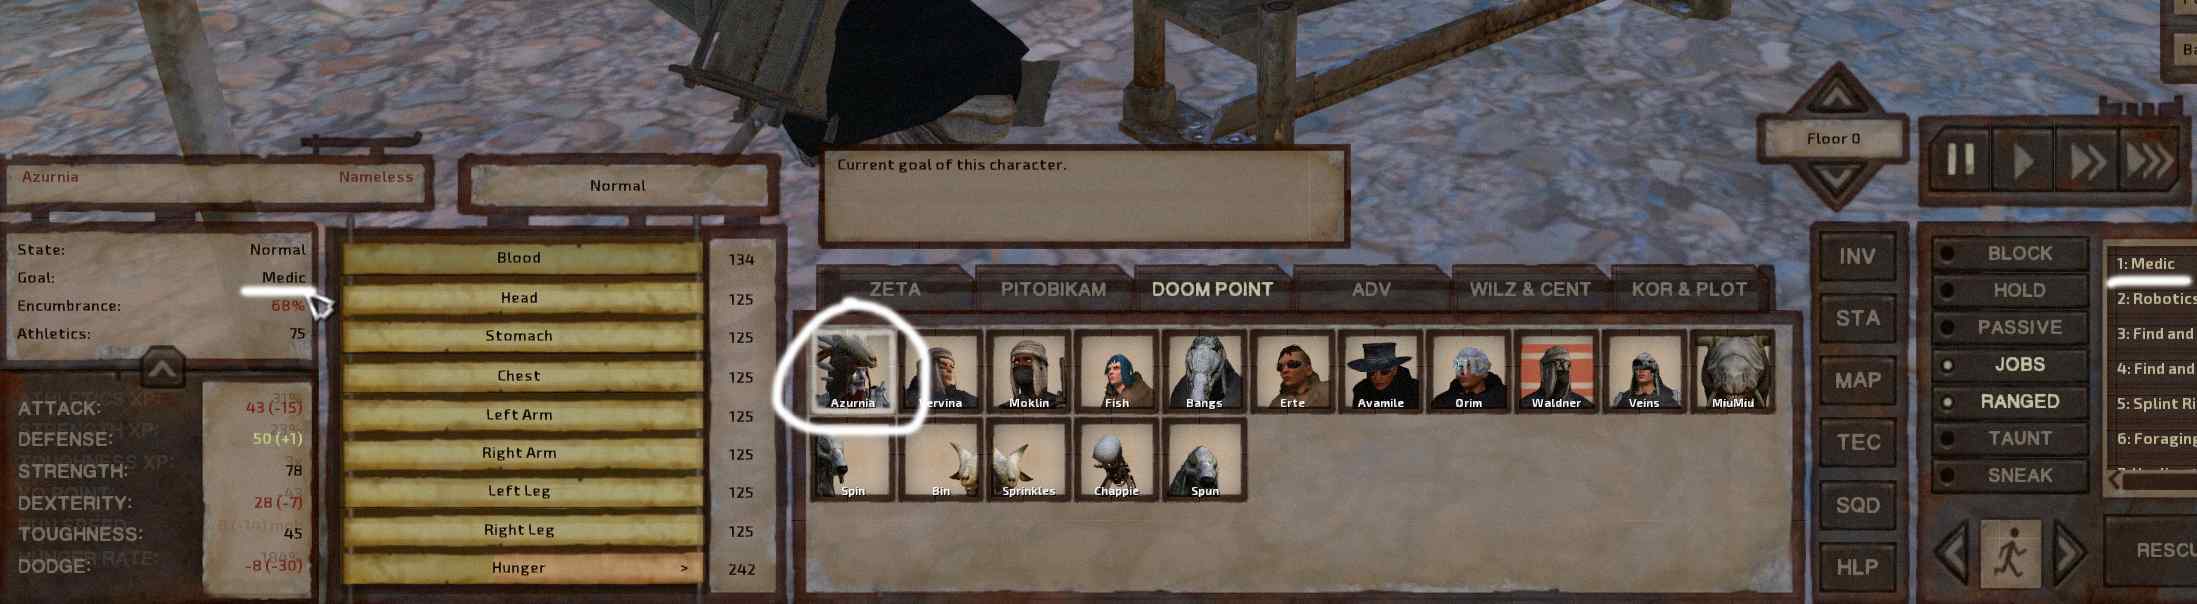
- any job at list would cancel restoration at bed. Even with -100hp leg they would go to mine ore.
Nixxen 24/fev./2024 às 3:51 
Great guide! I need some help with distant farm jobs combined with local other jobs.

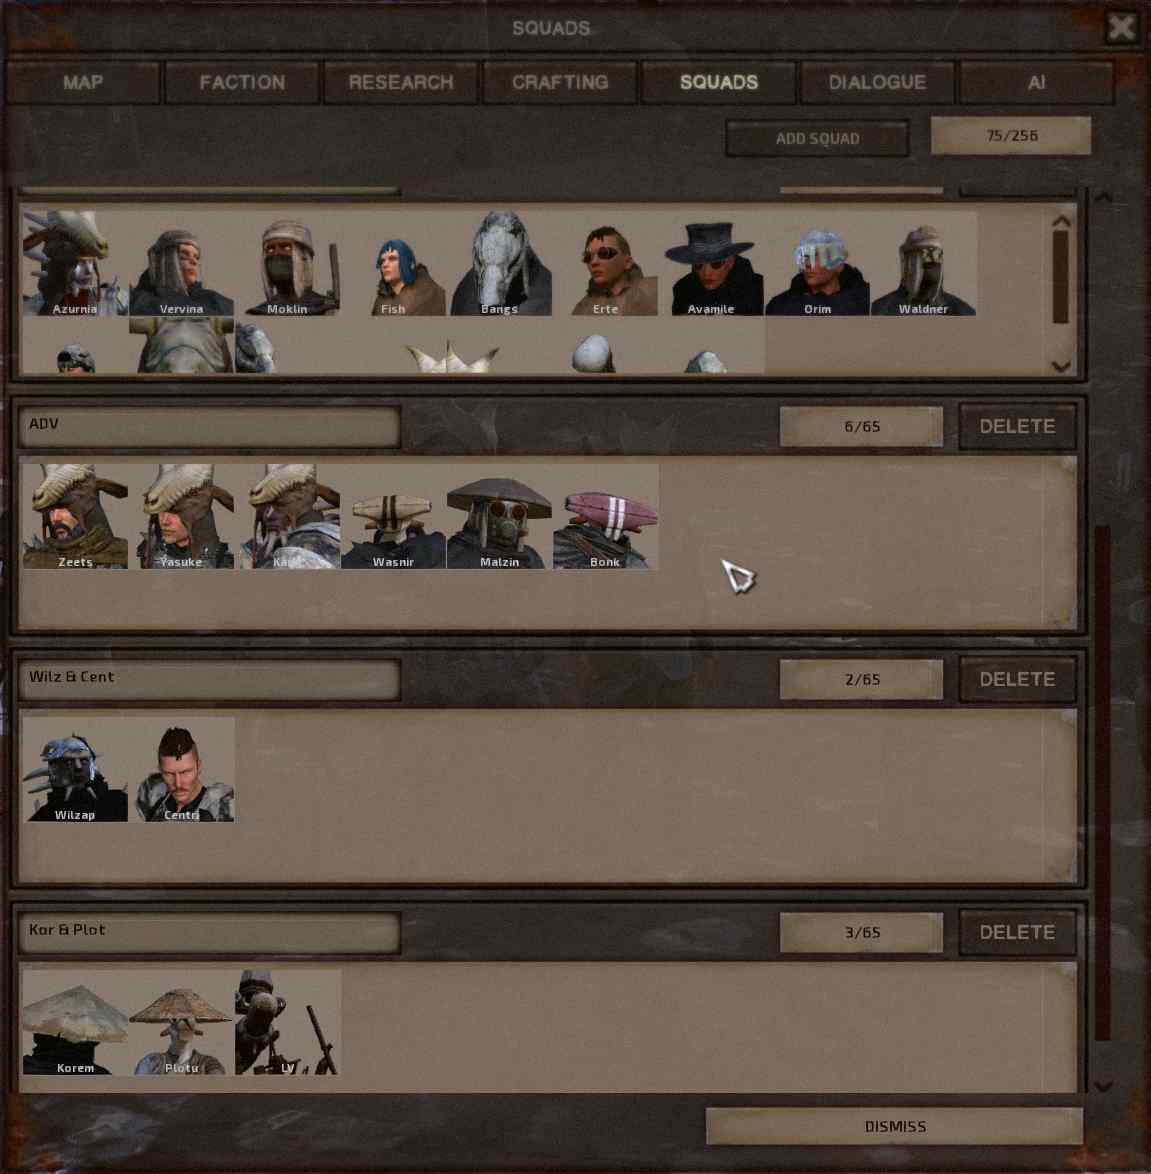
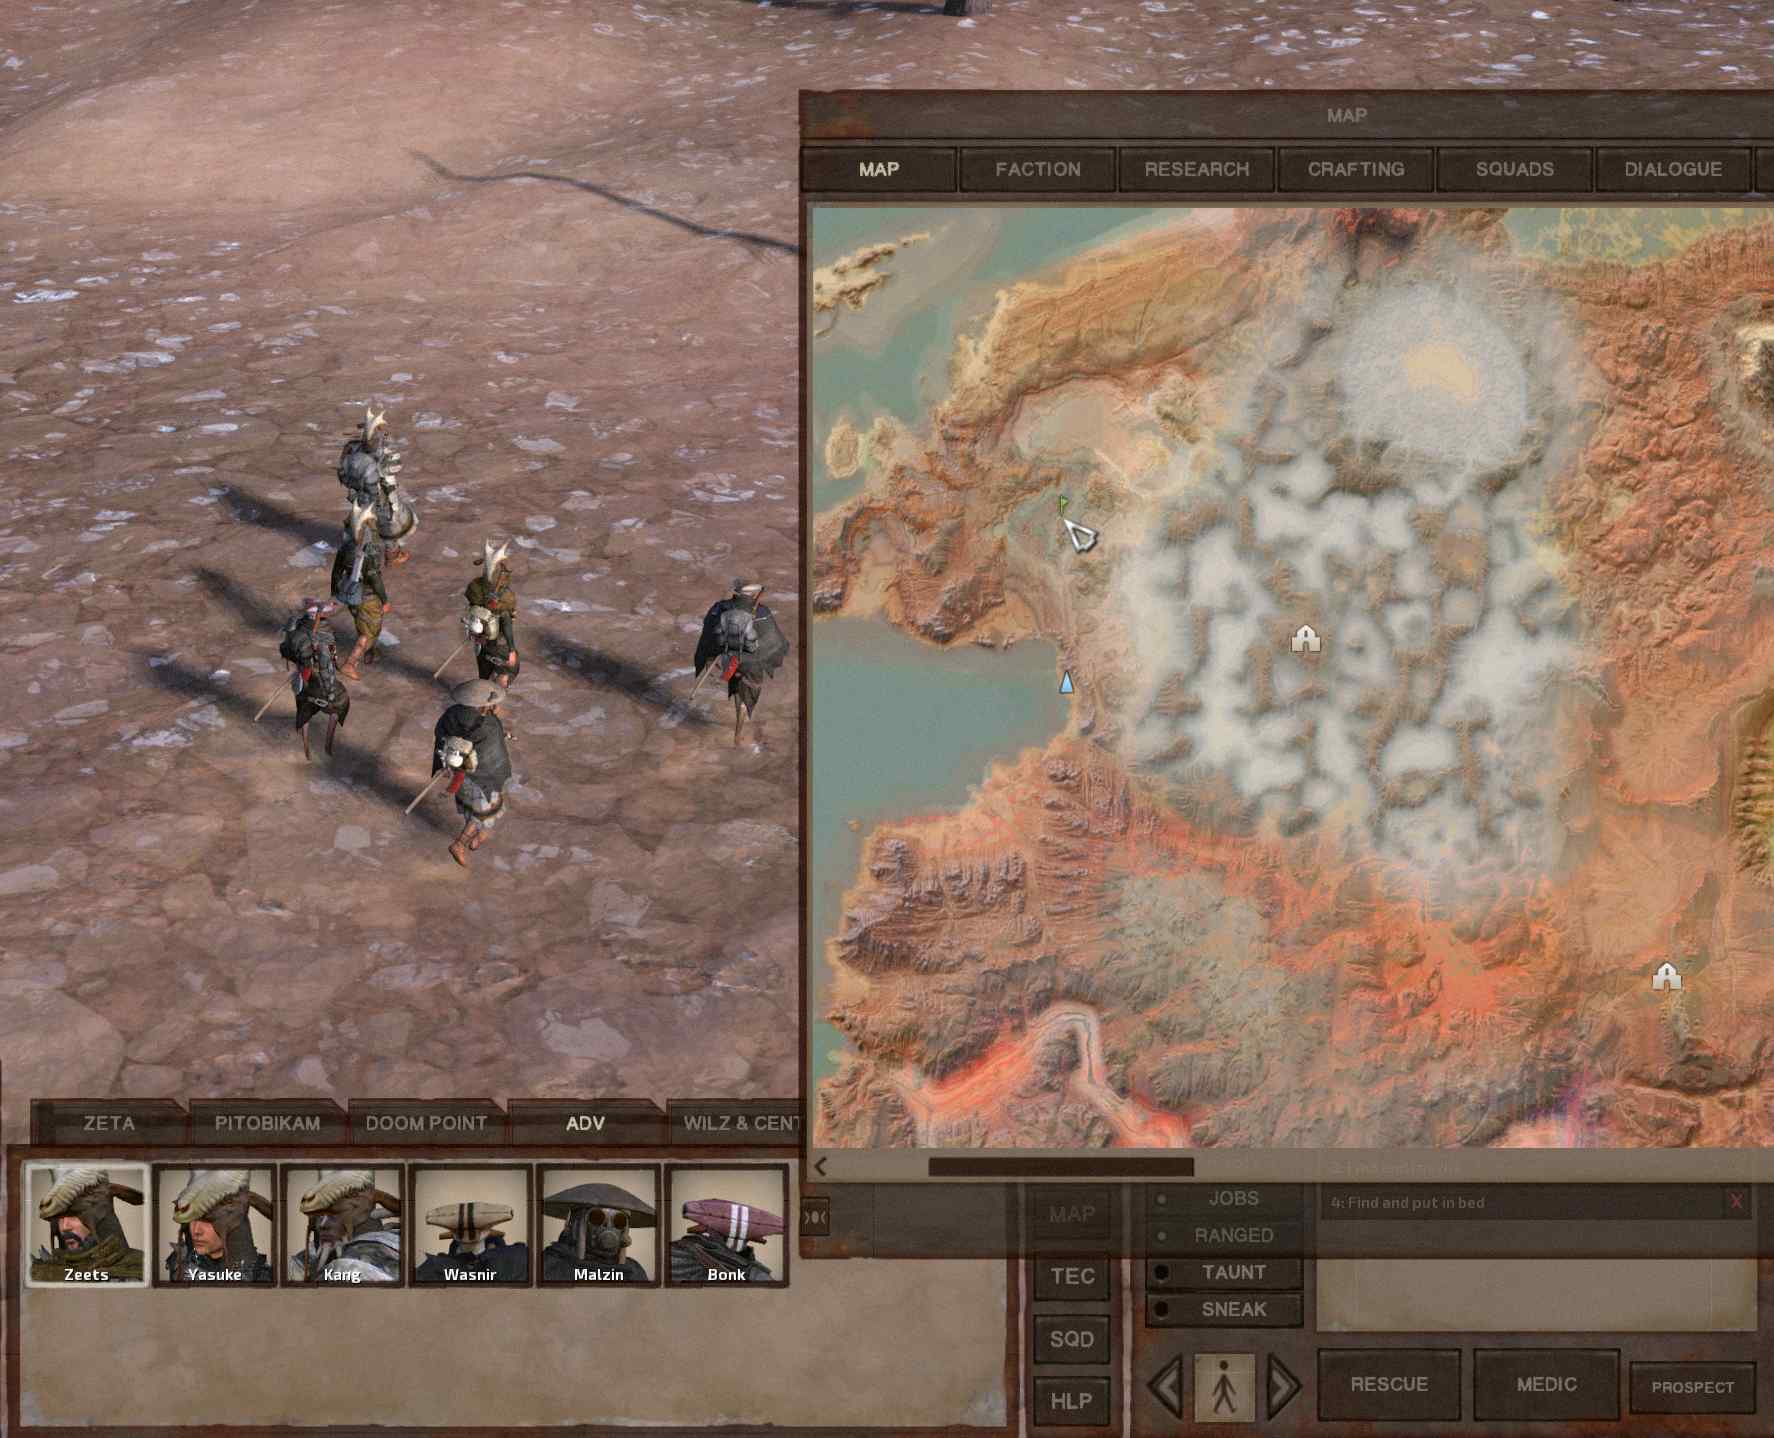
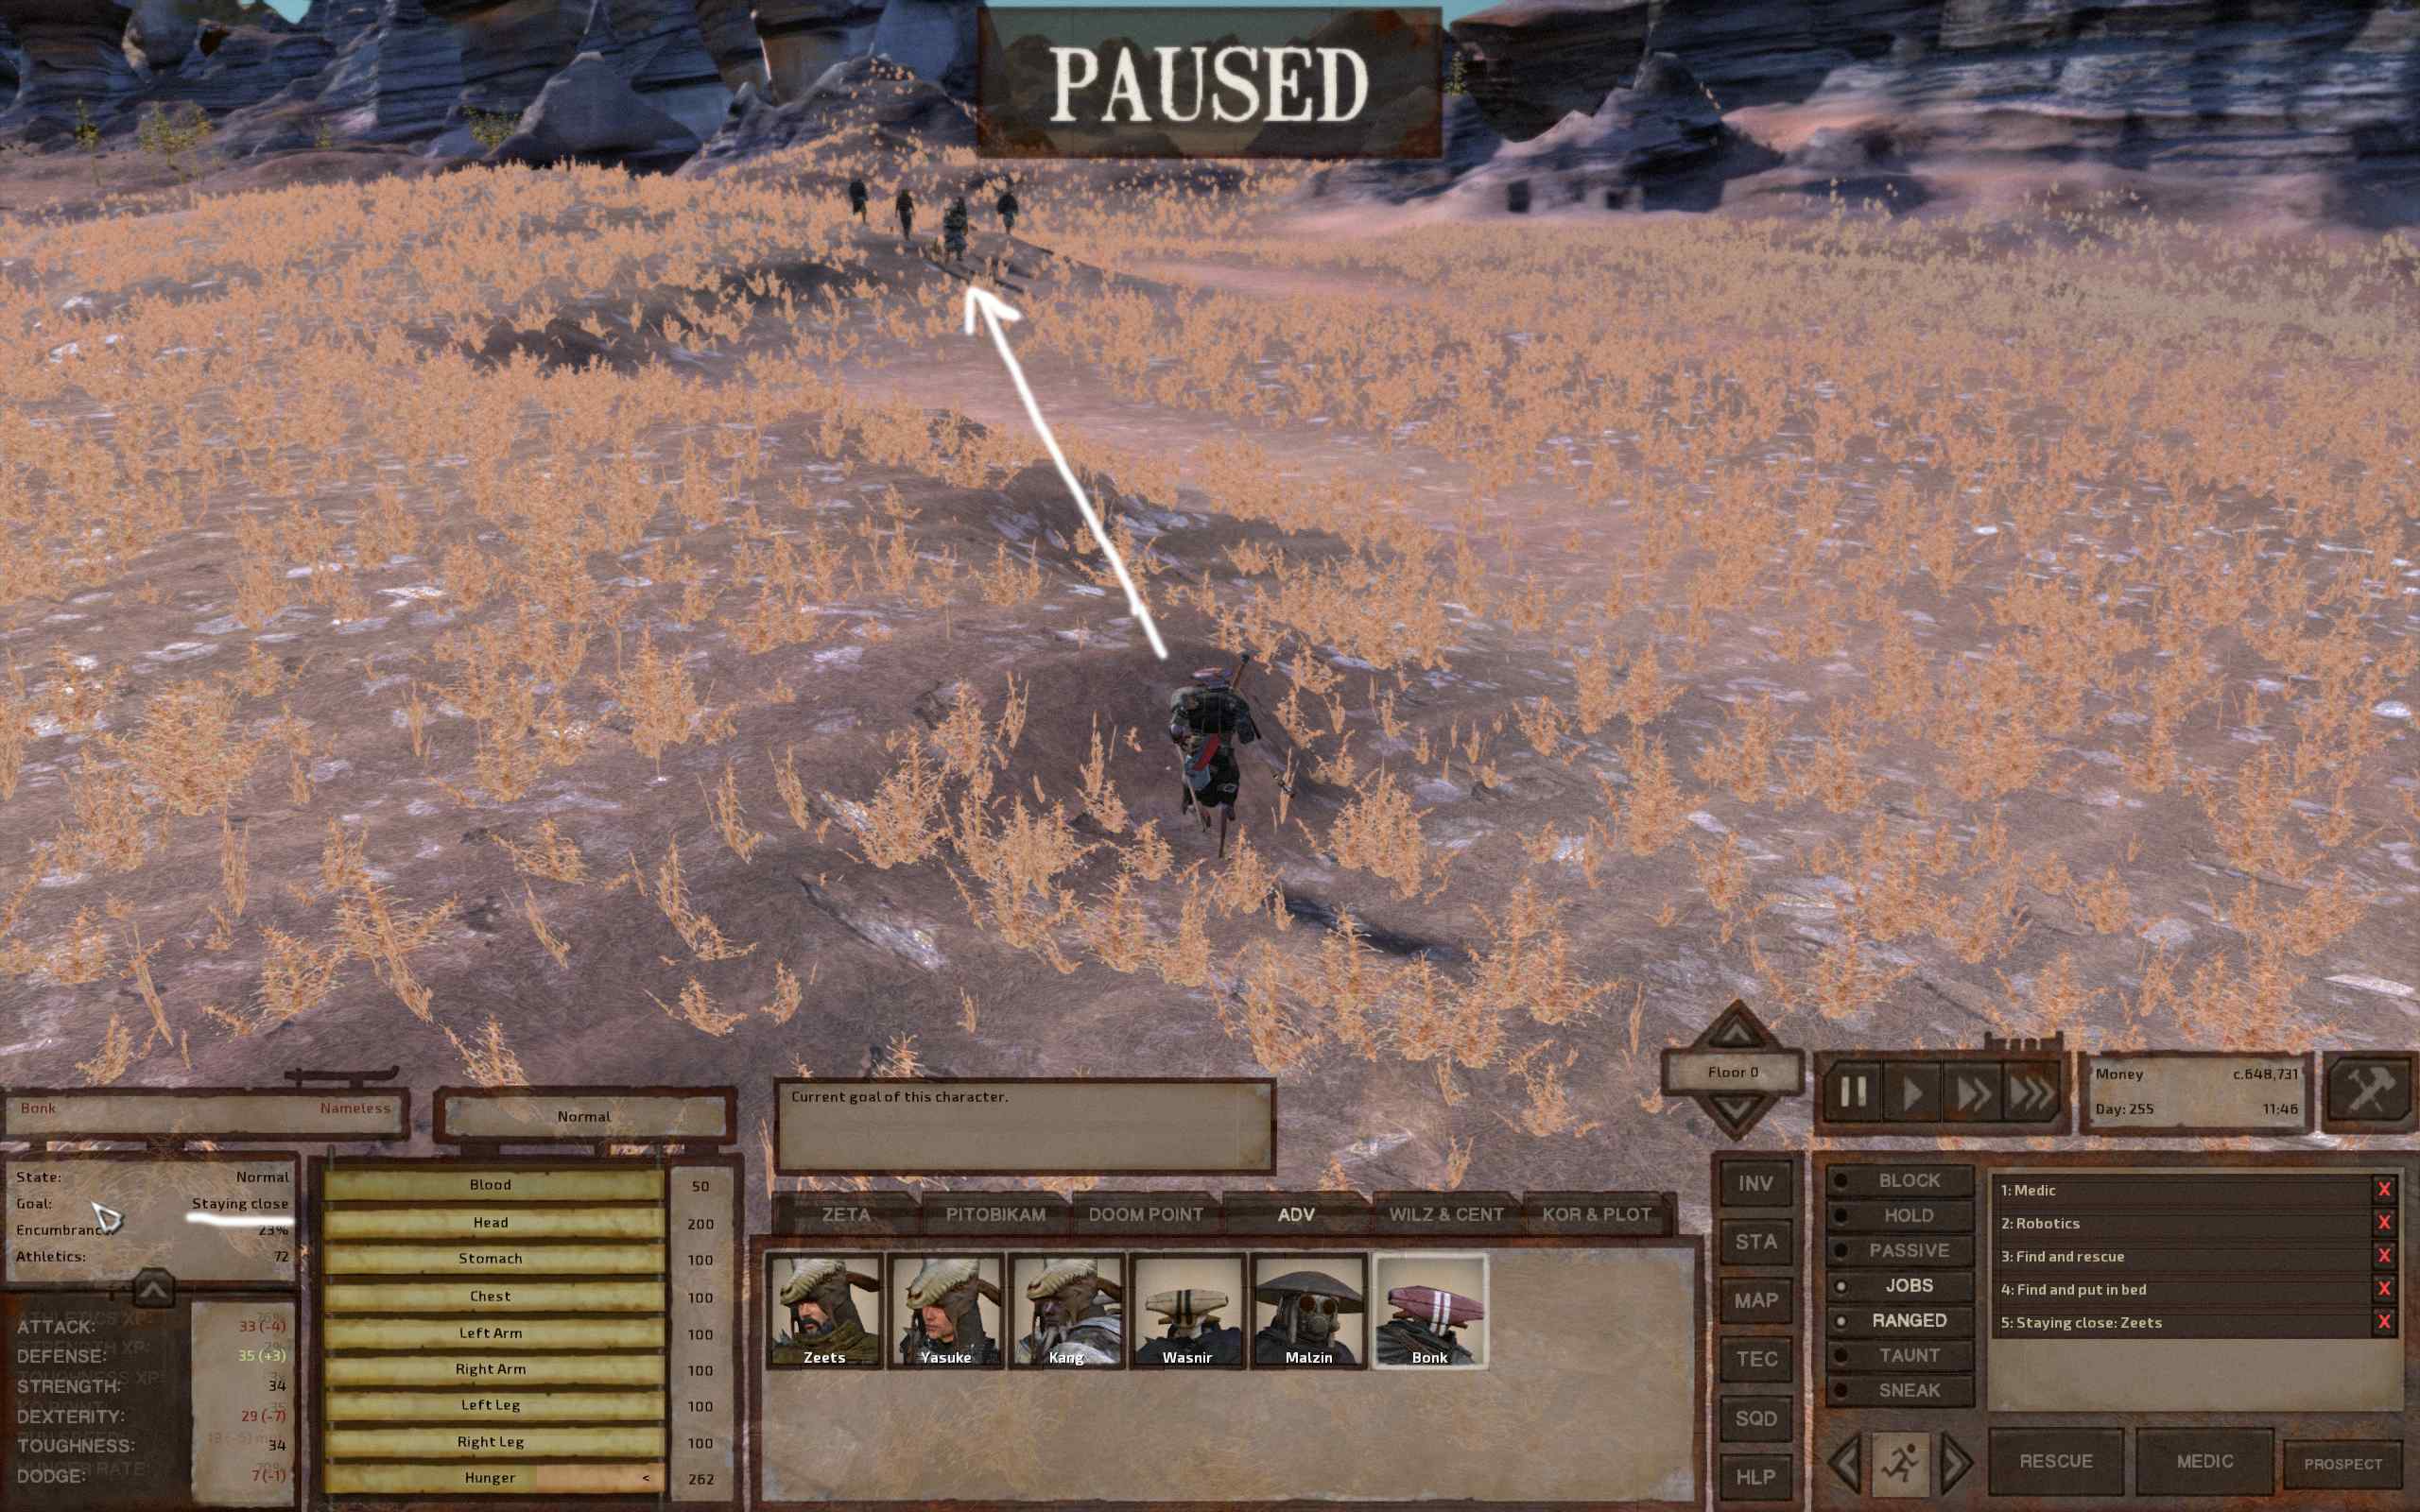
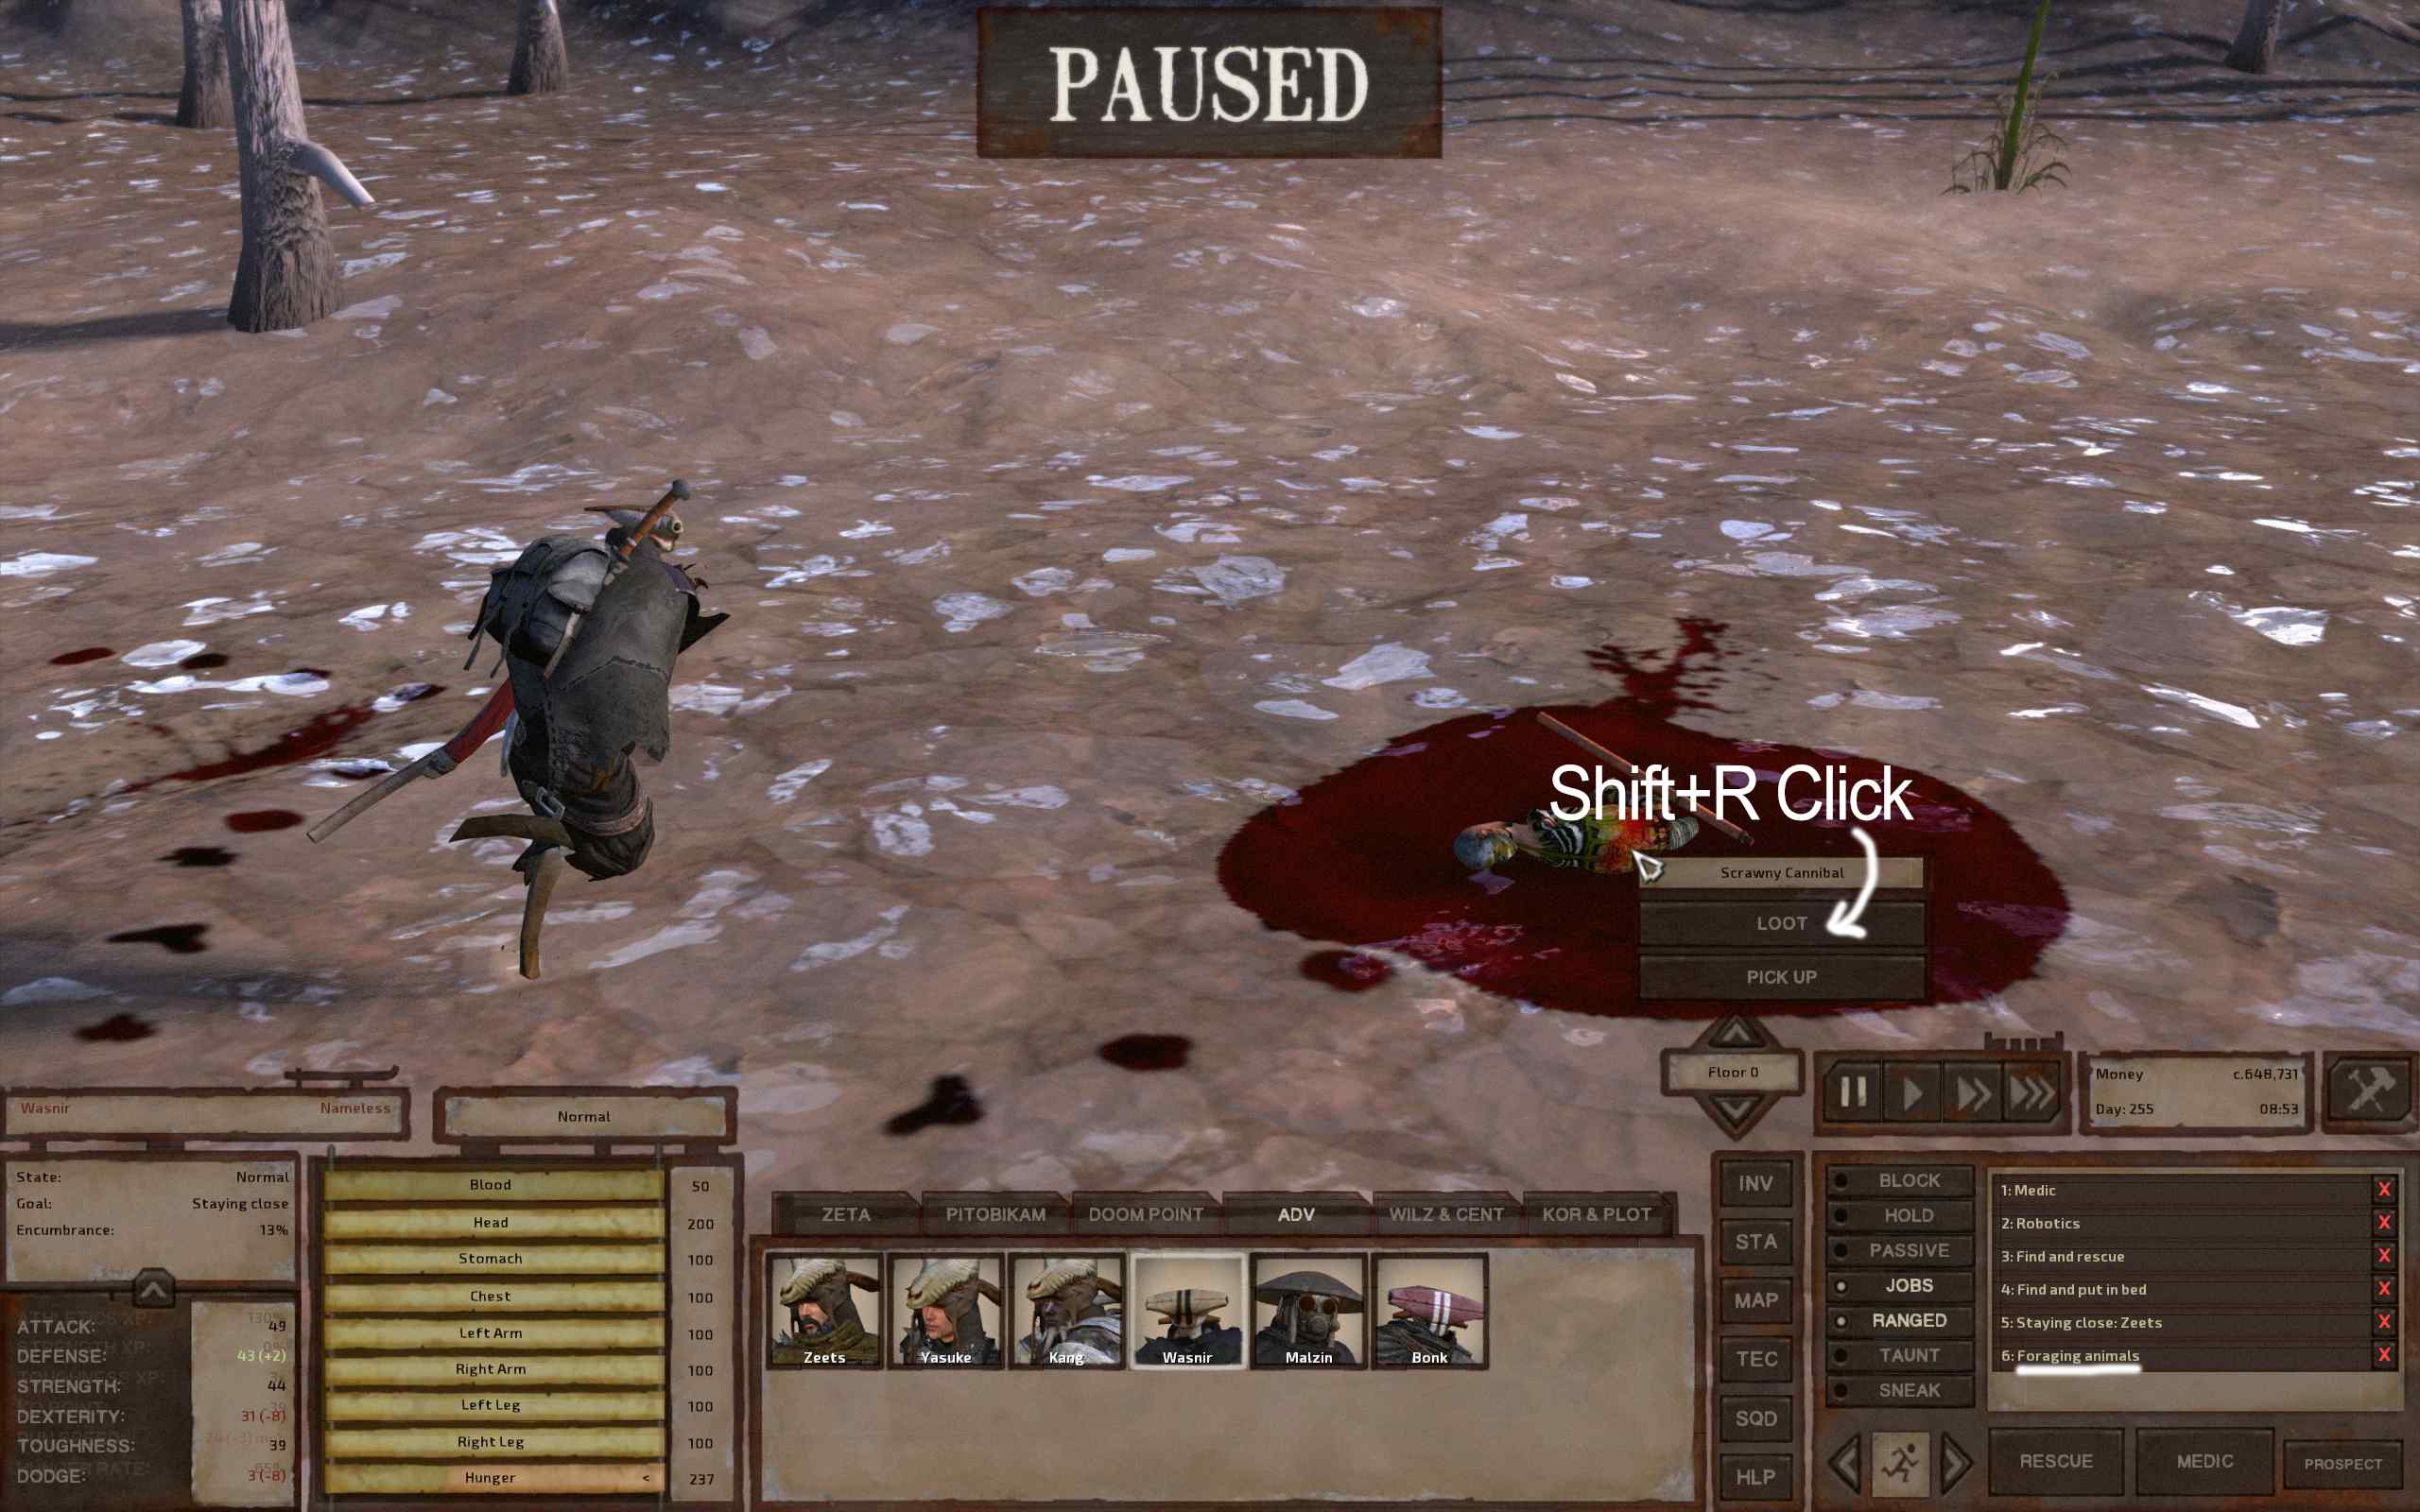
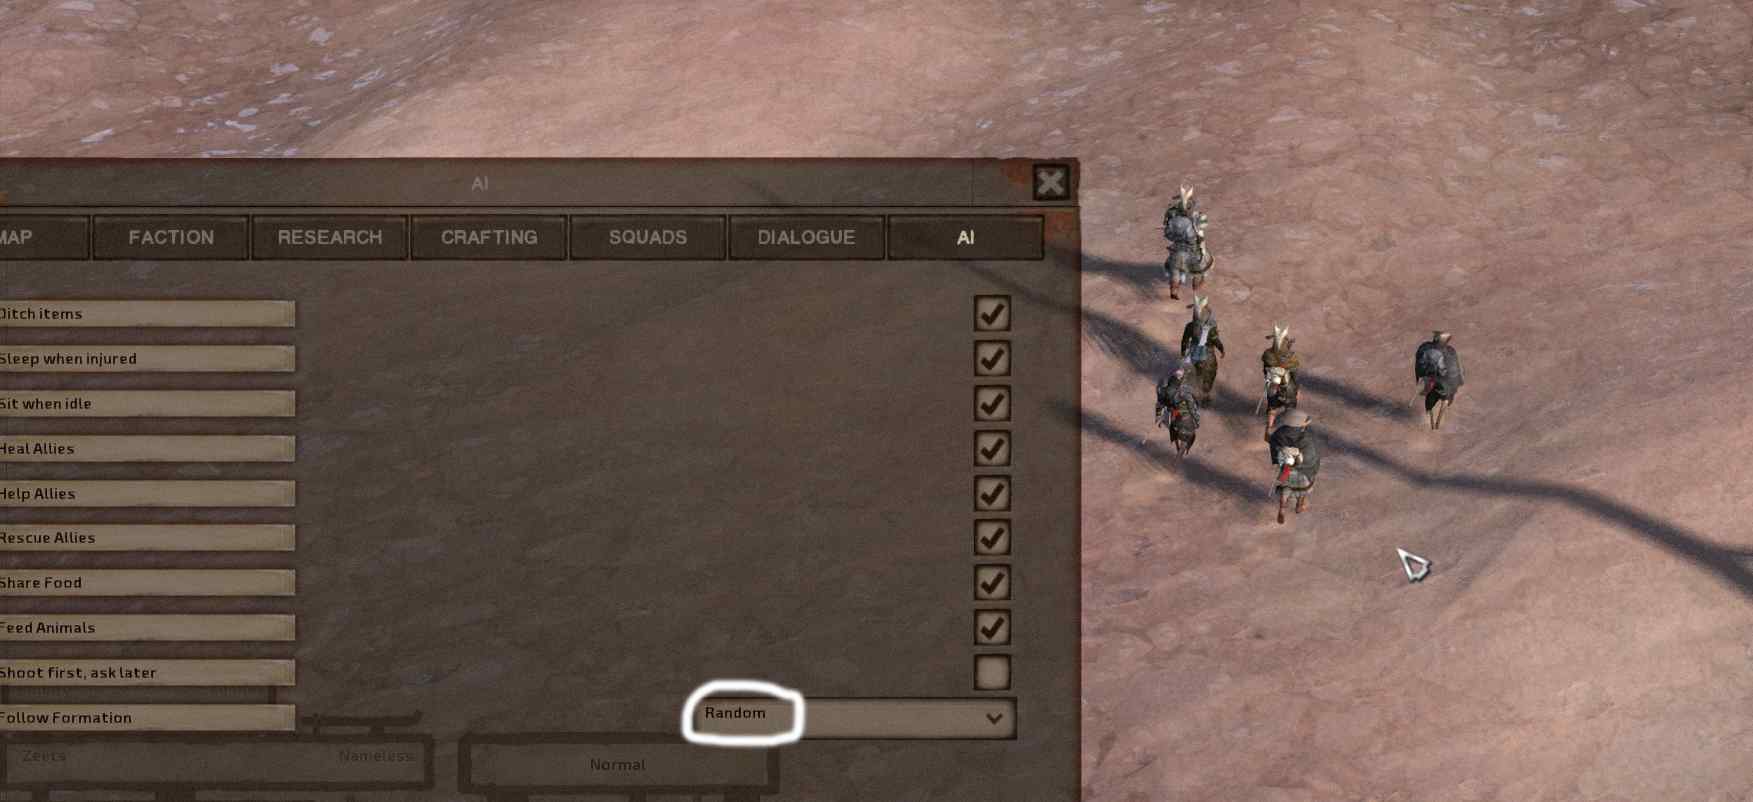
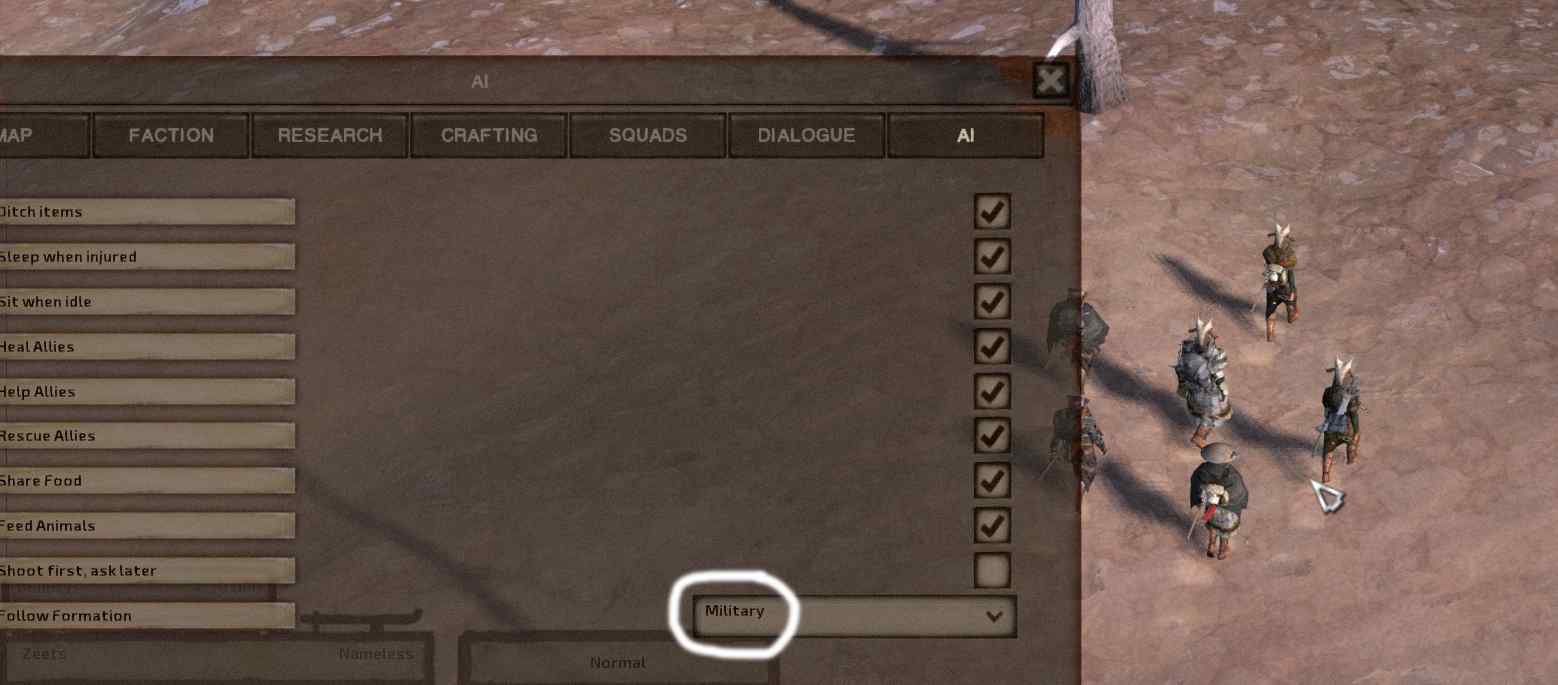
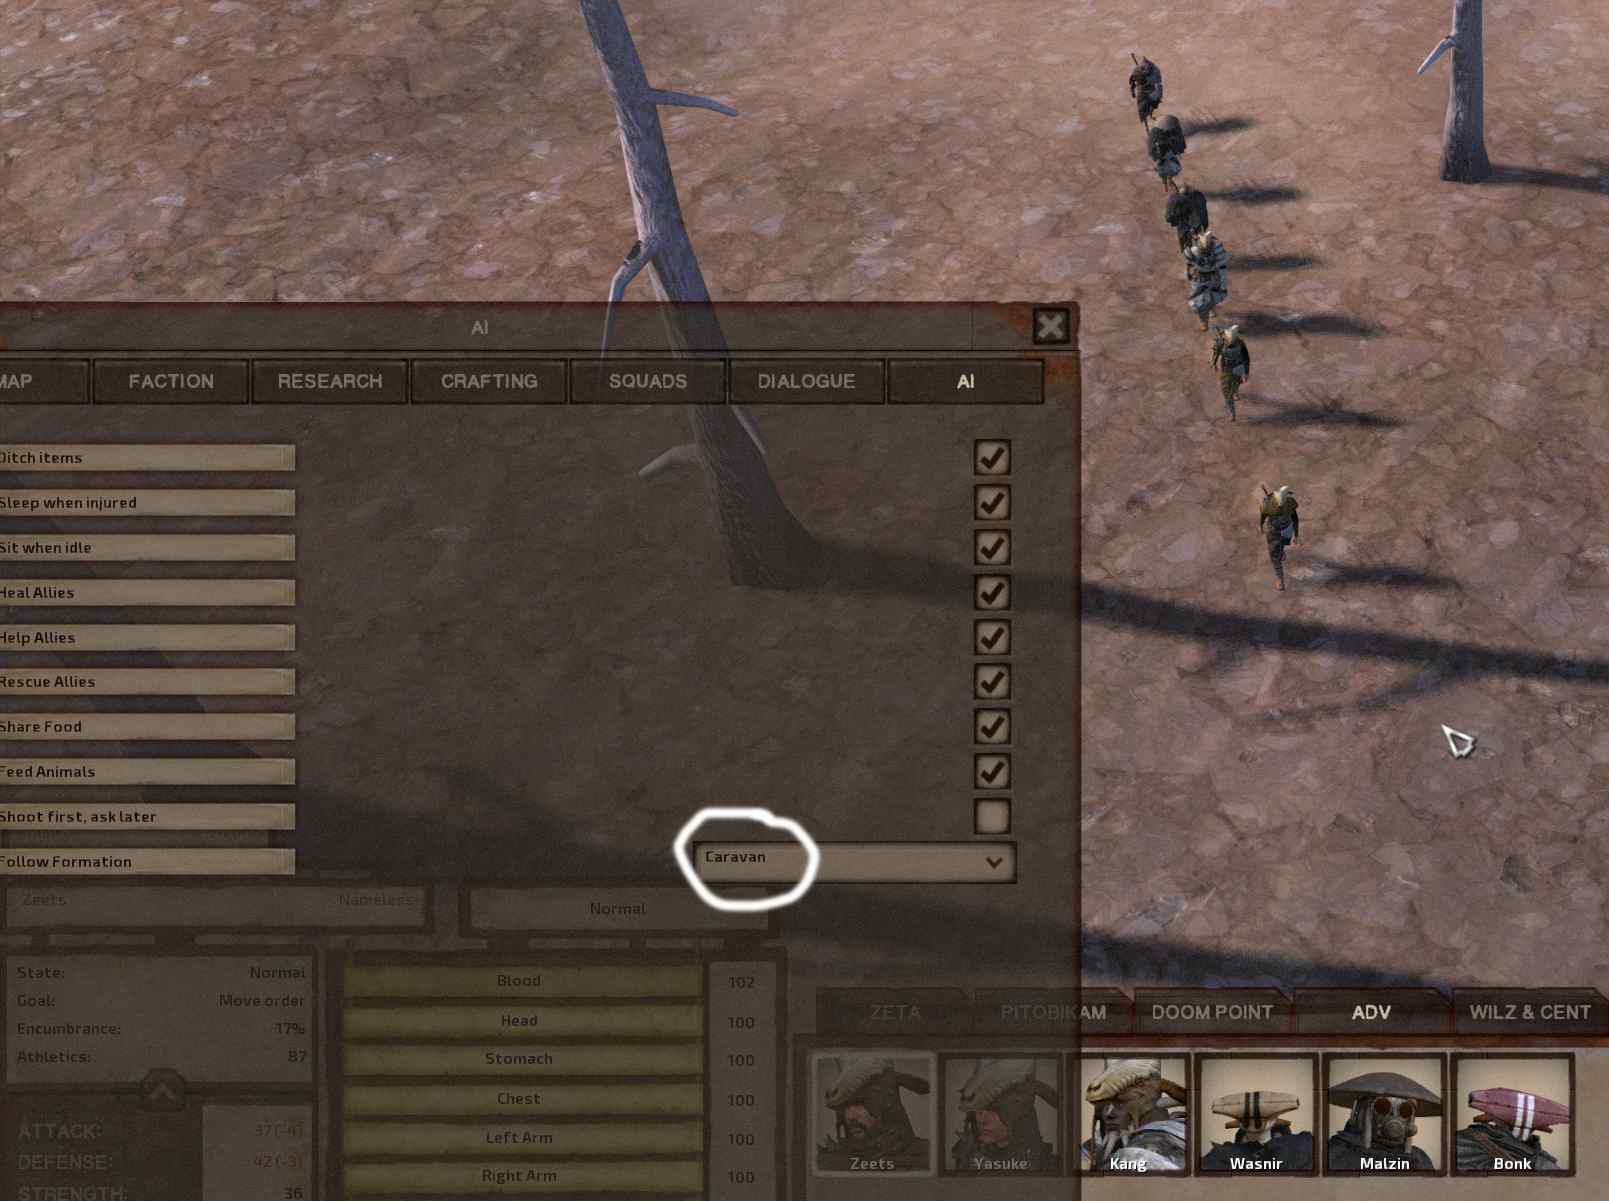
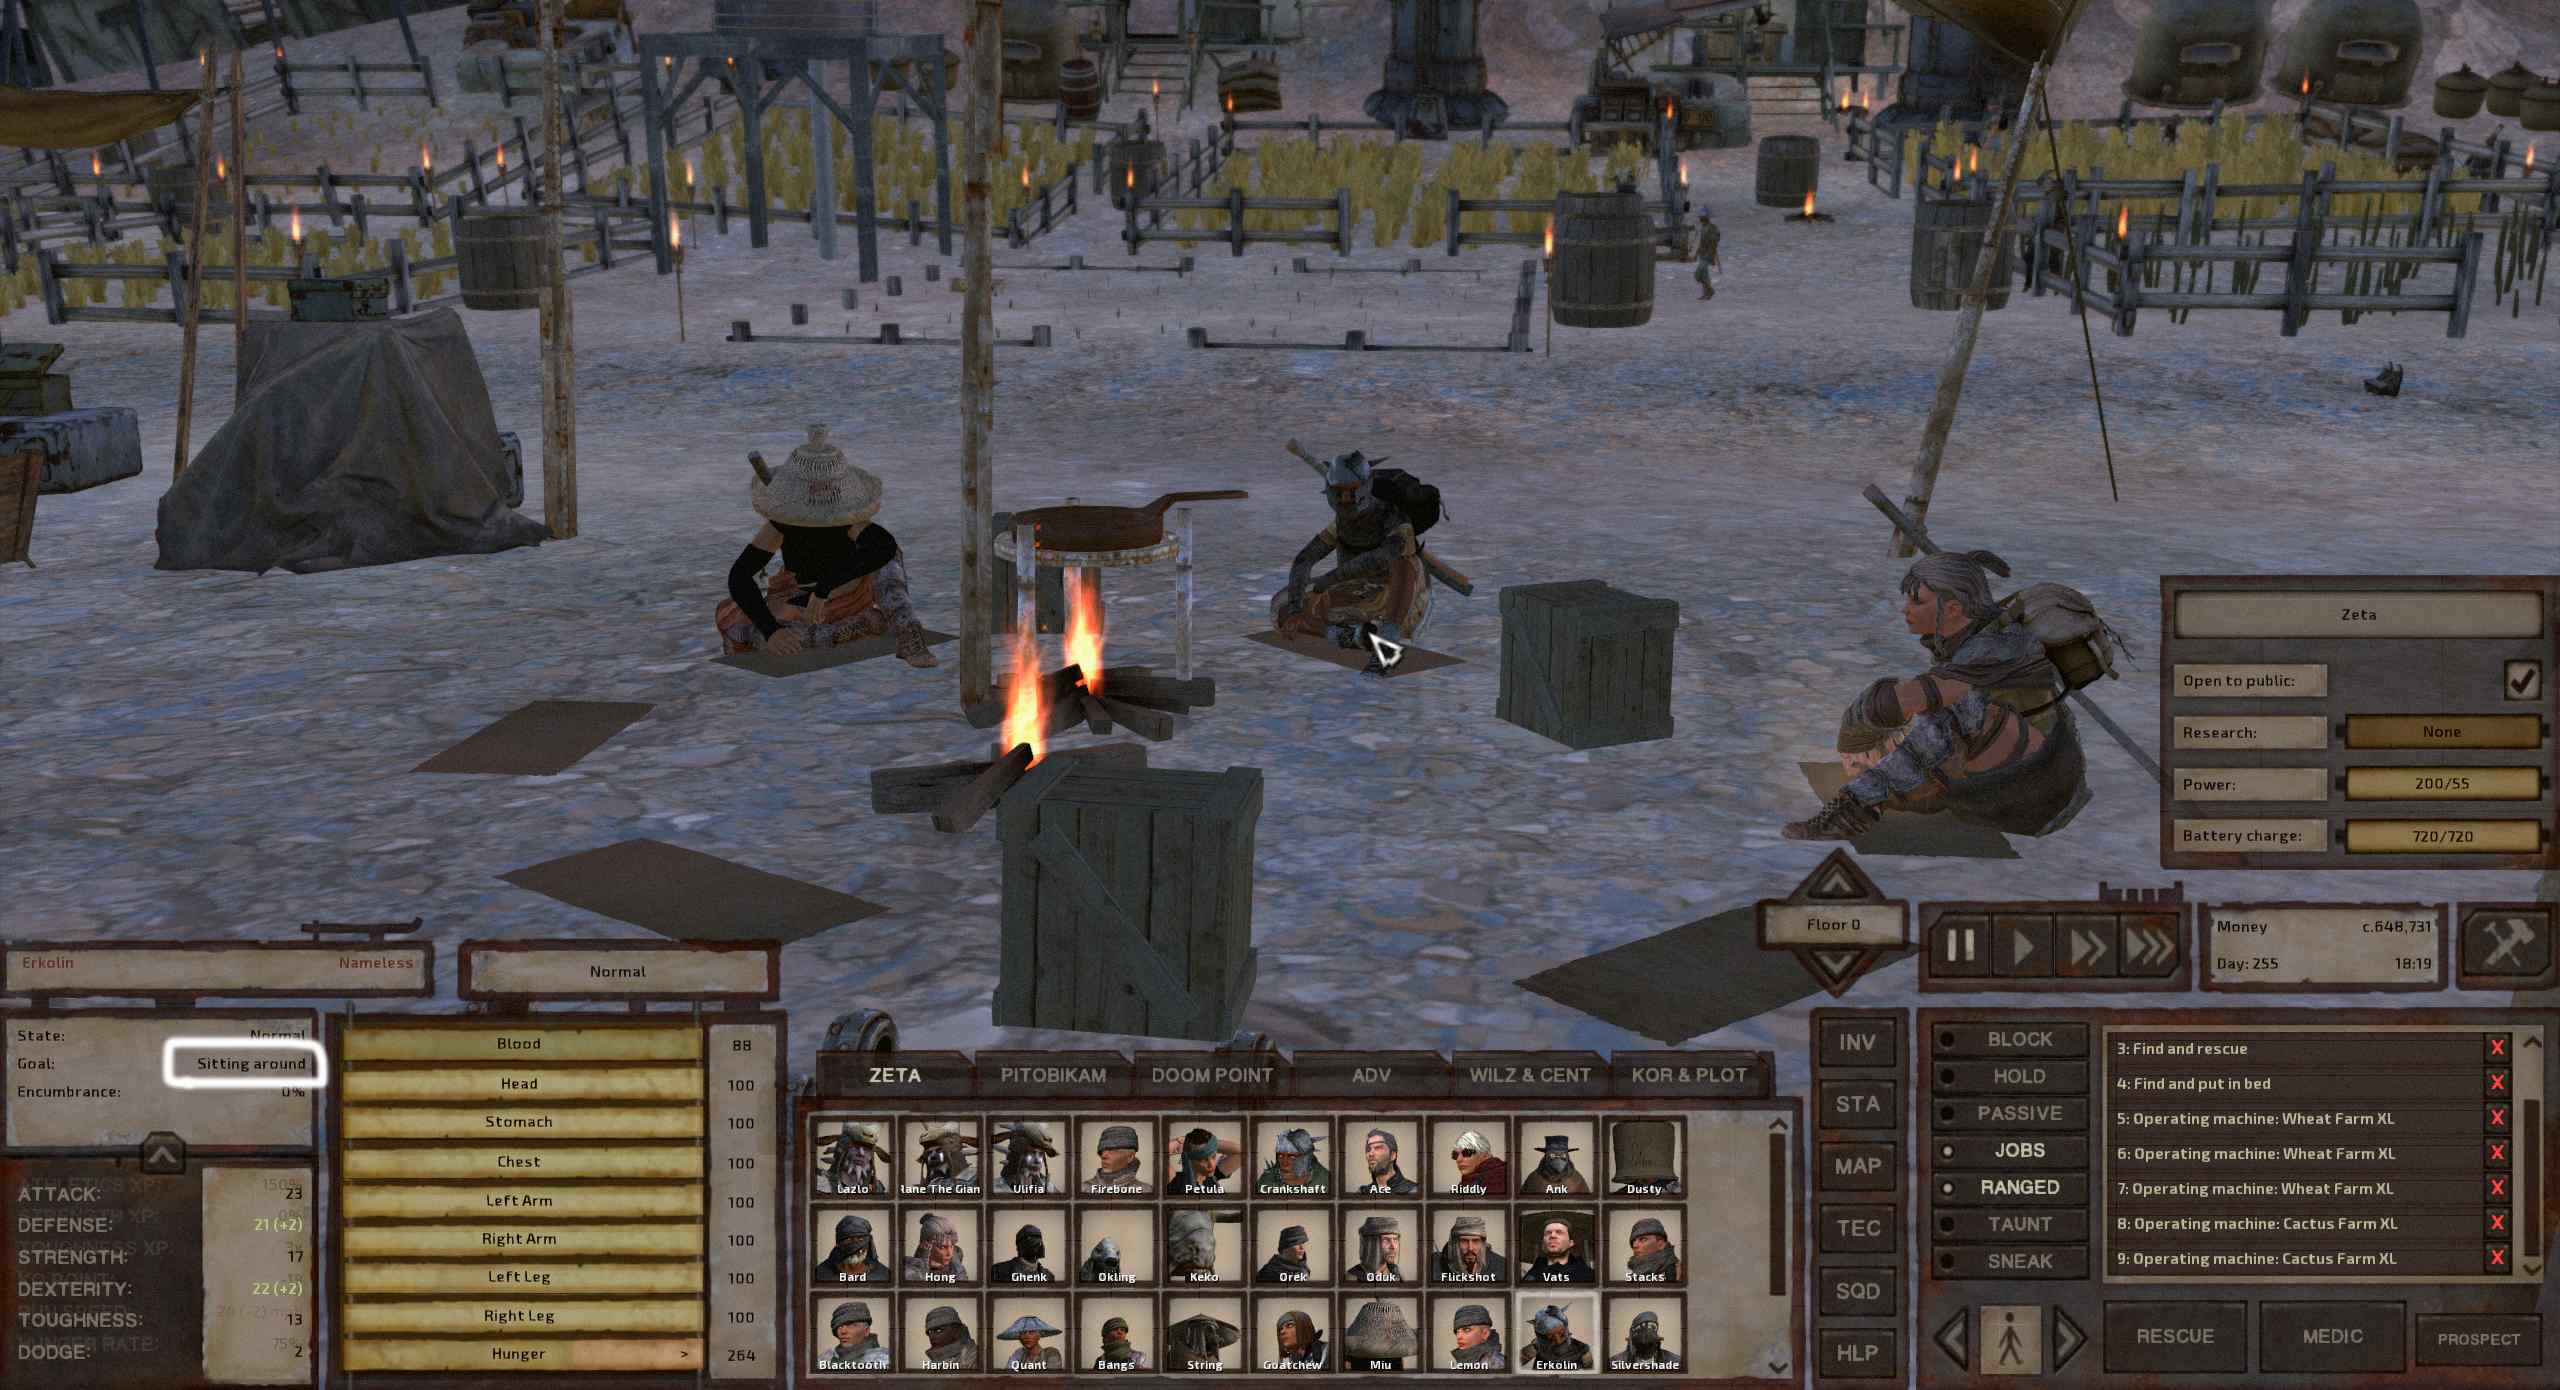
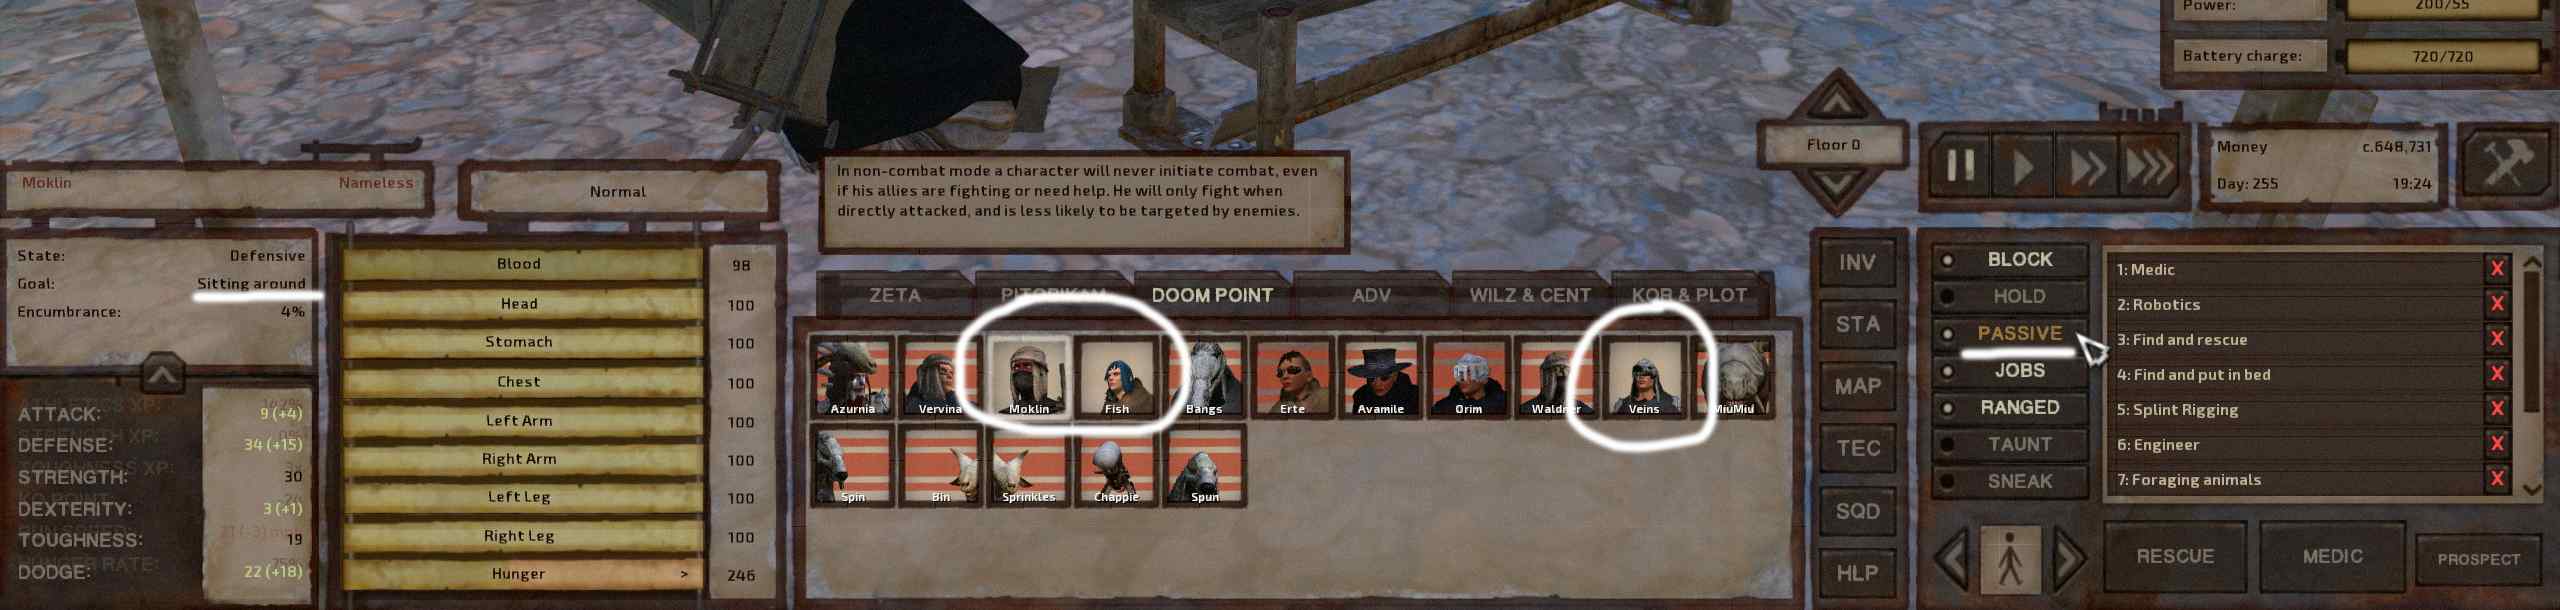
I set it up as you suggested, but with limited people; A wandering squad of 10 people and a homebodies squad of 3 people.

I am struggling with distant jobs for the homebodies squad.
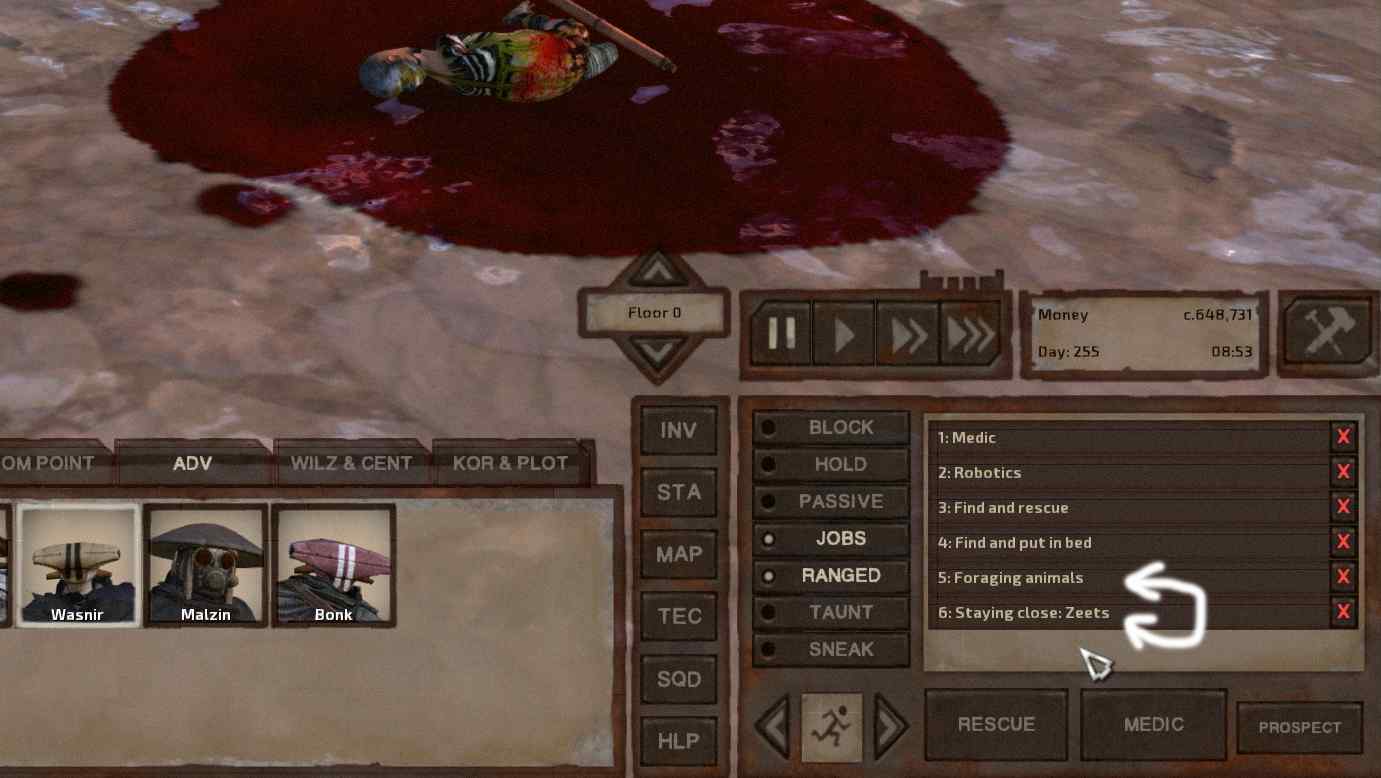
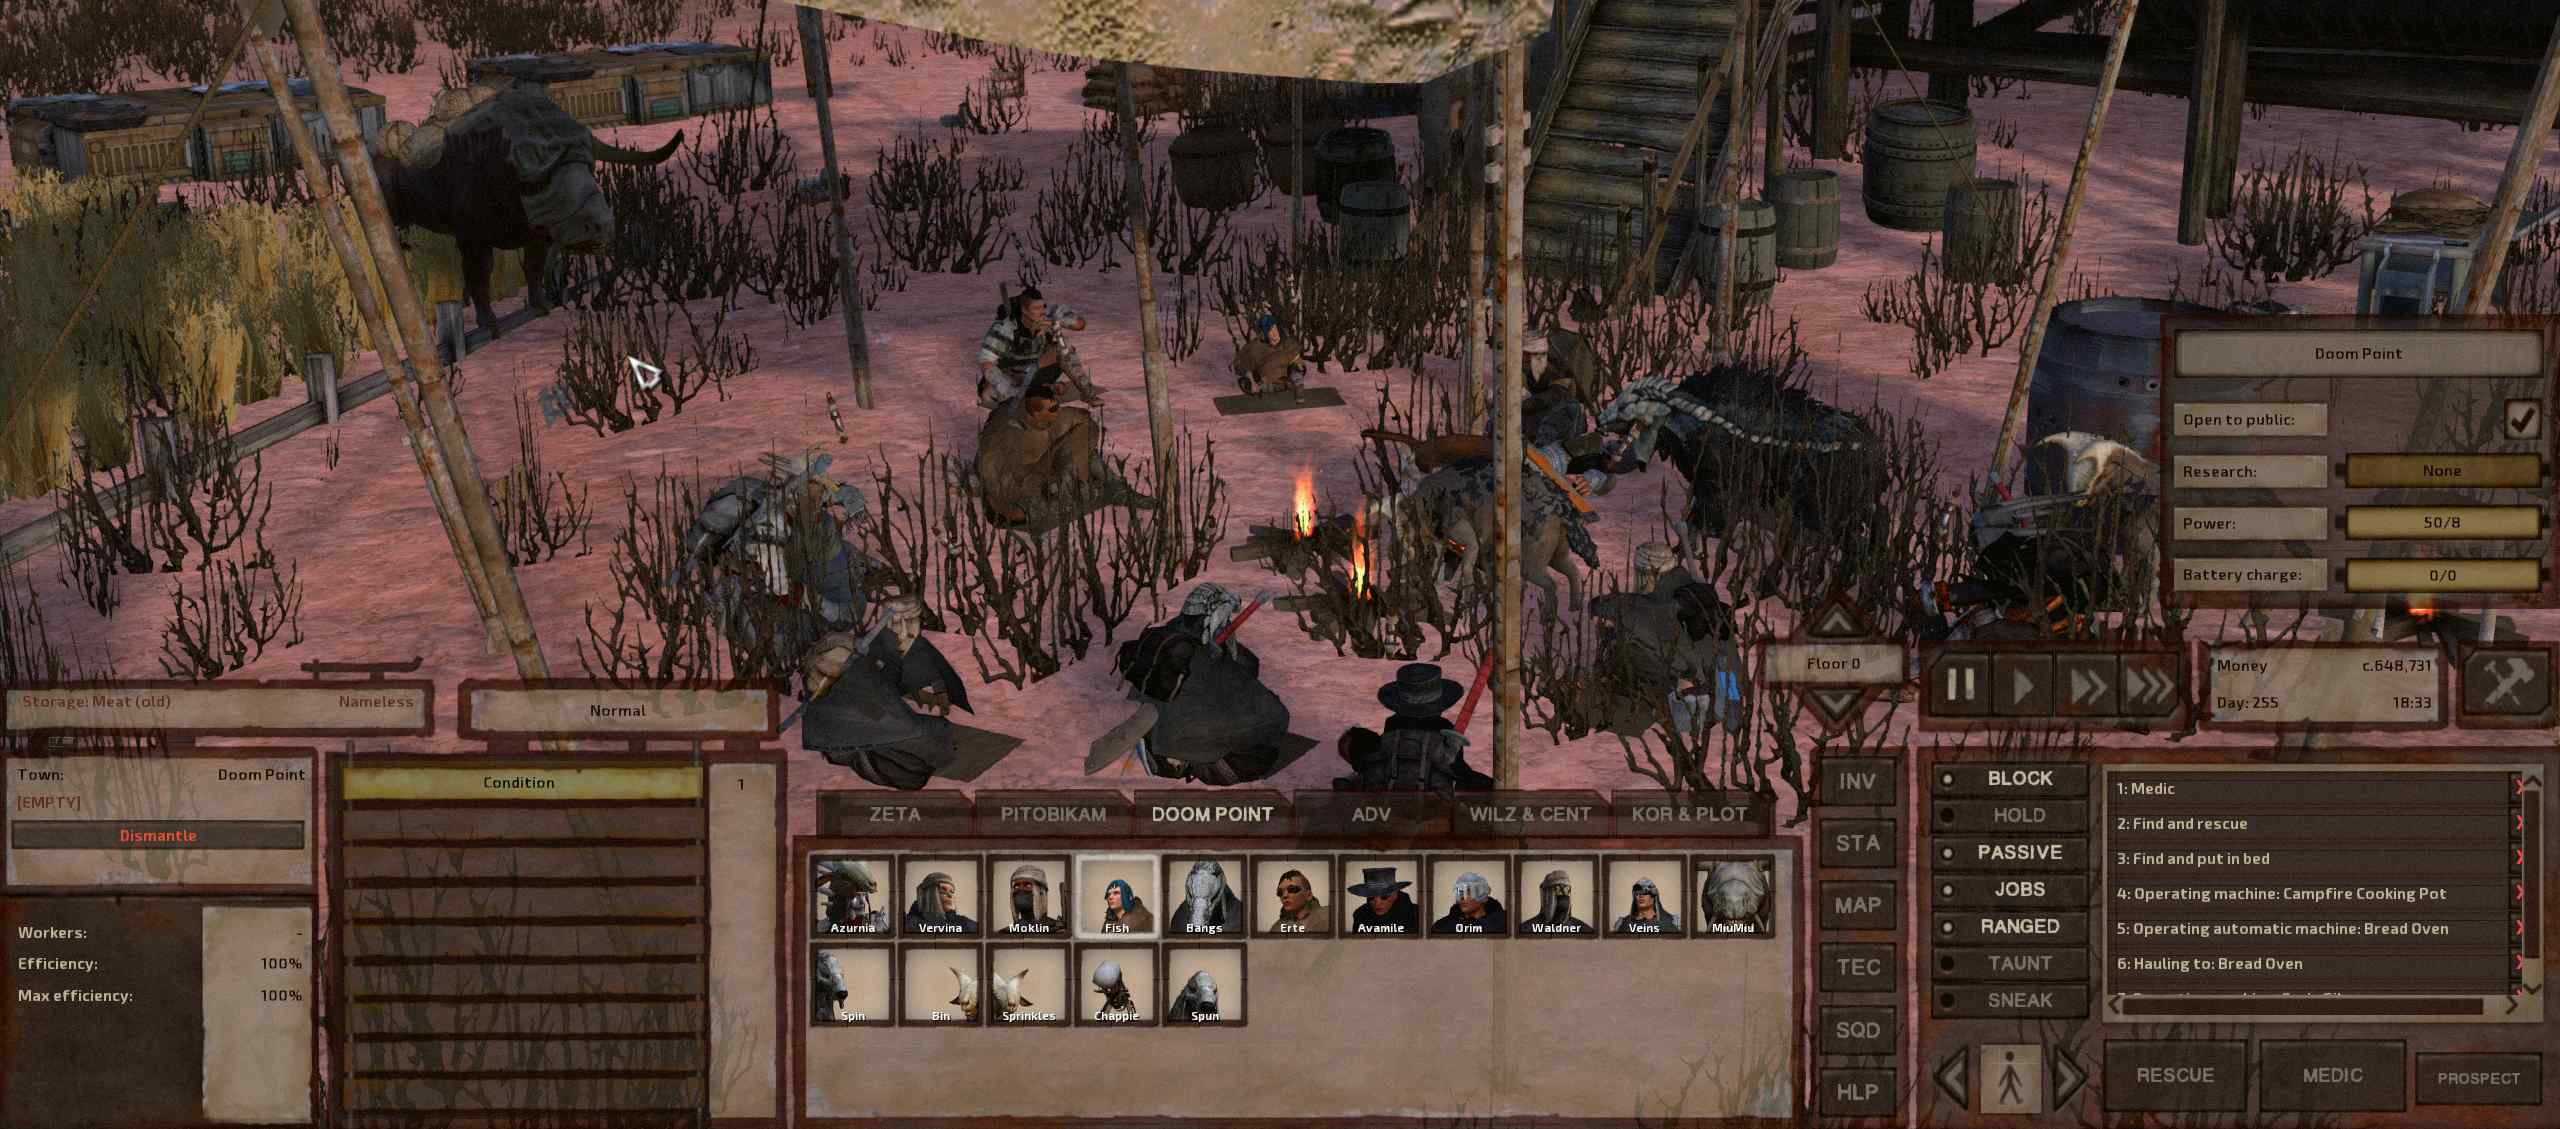
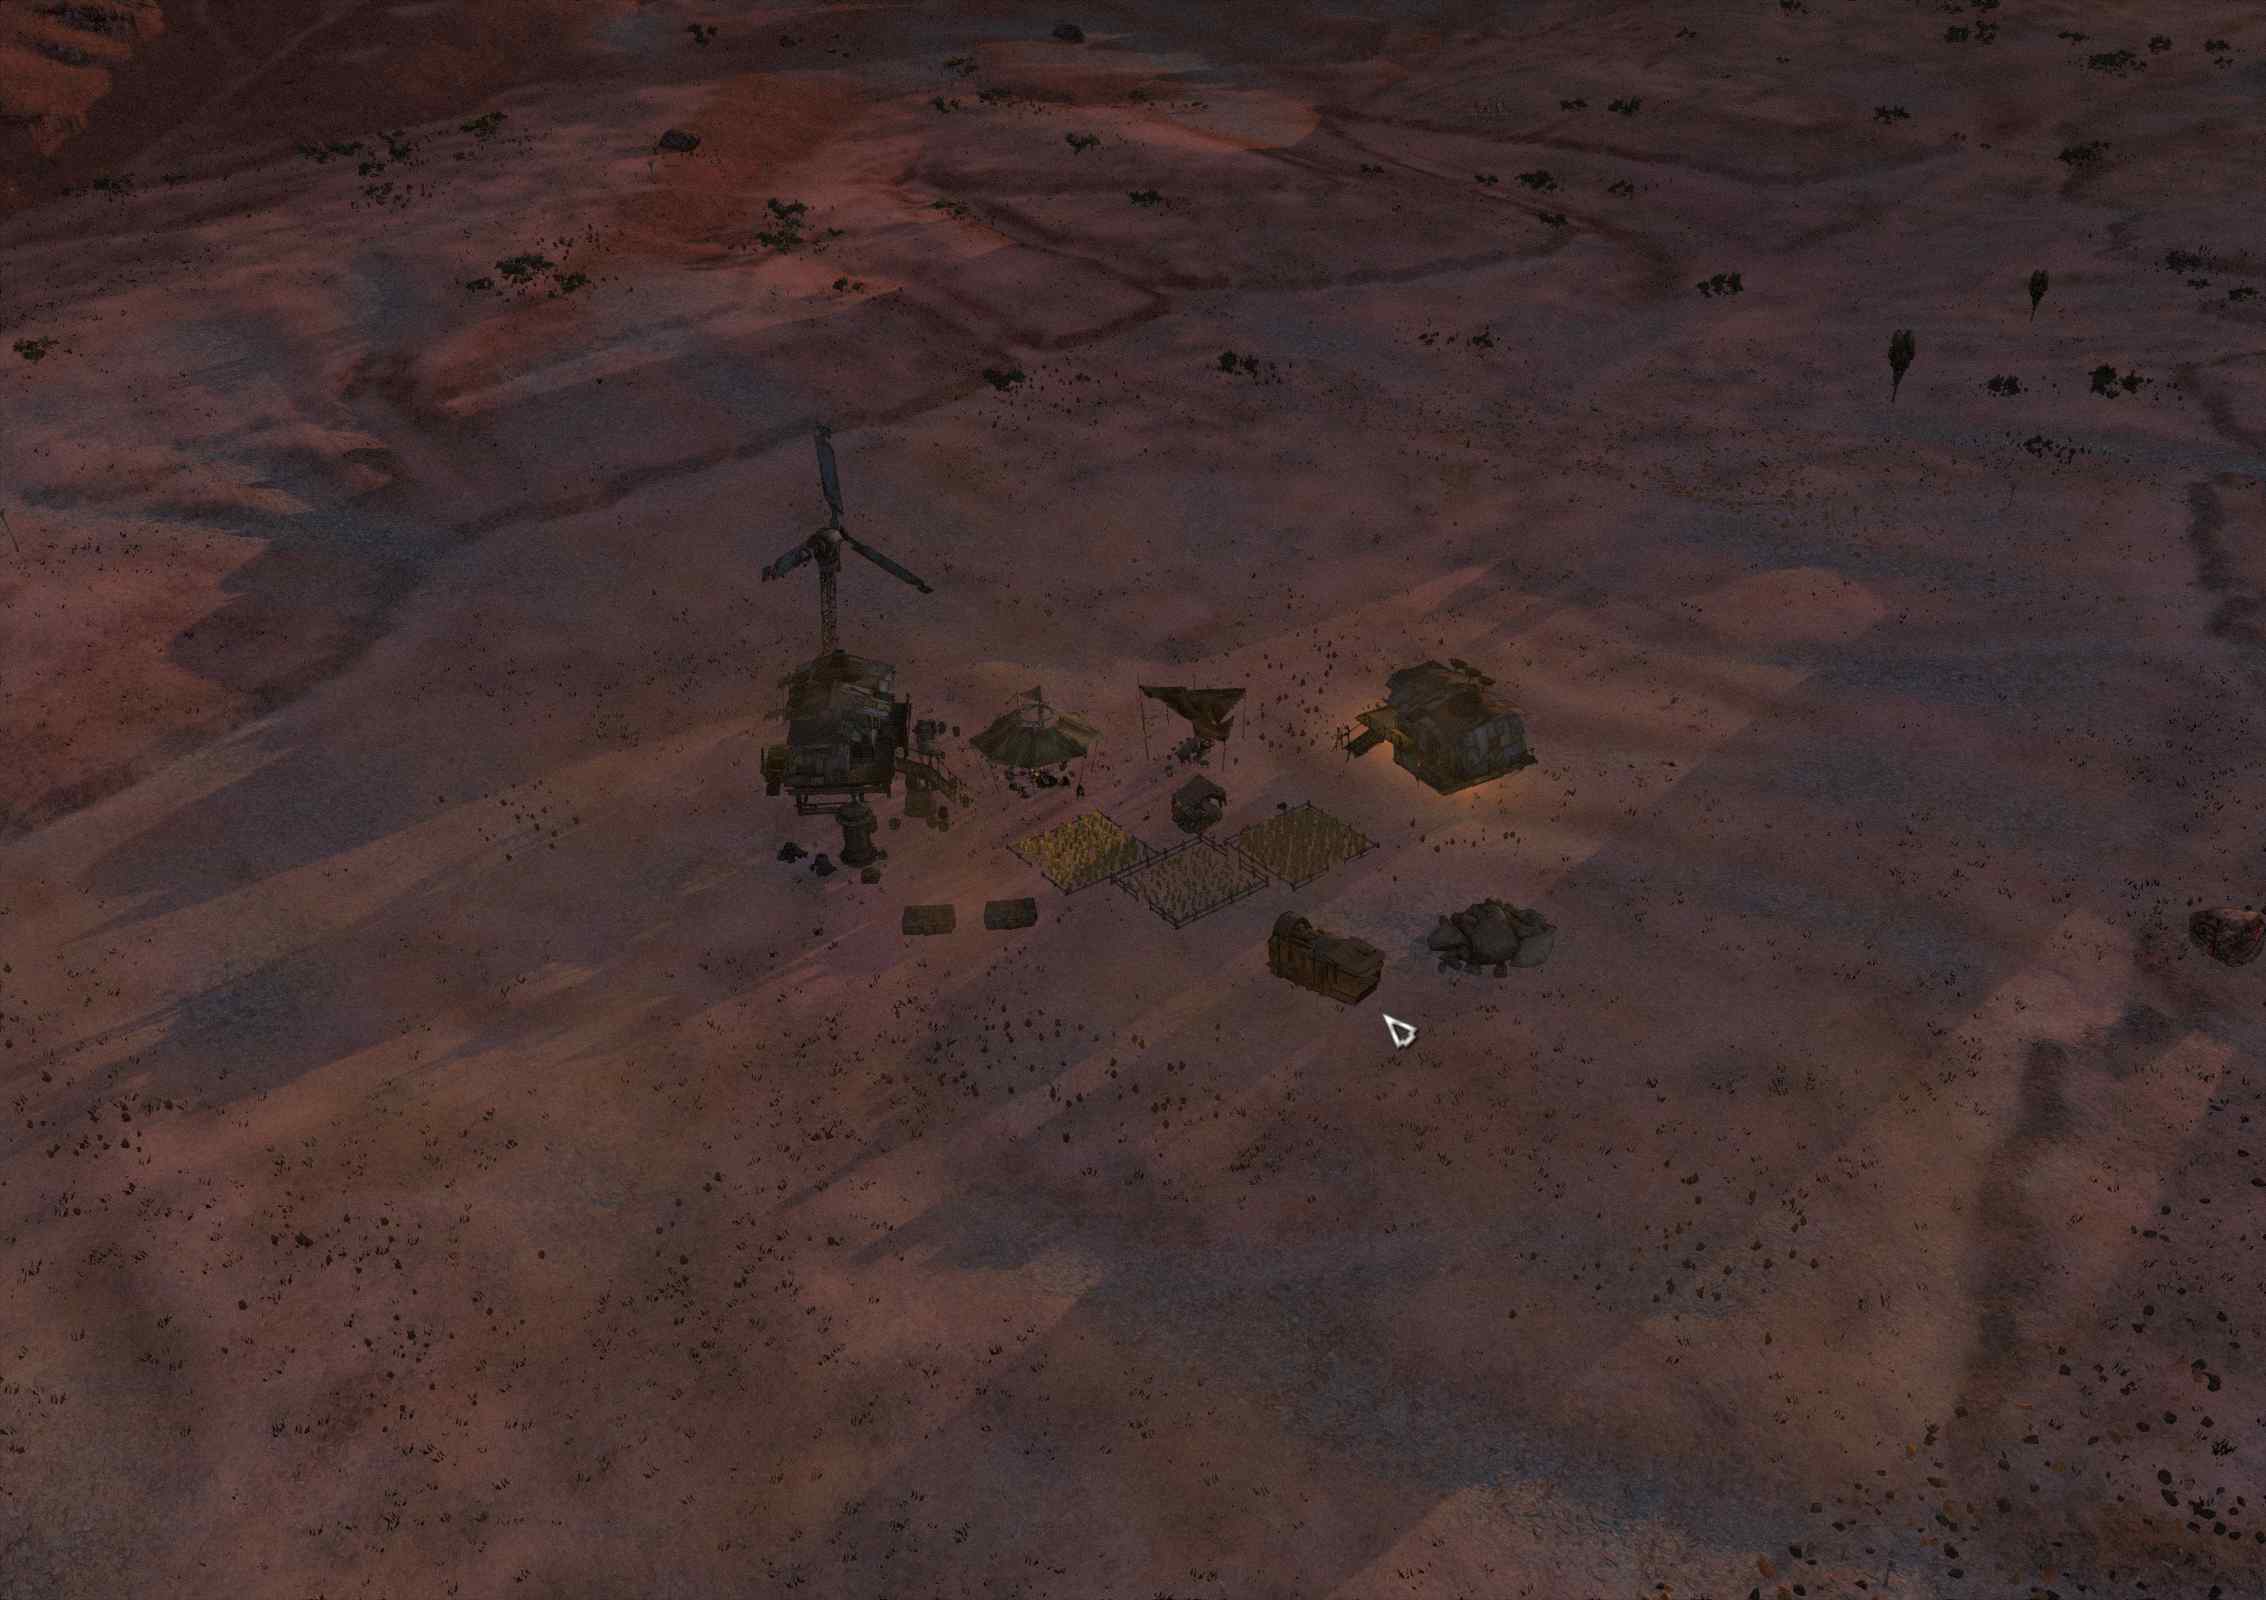
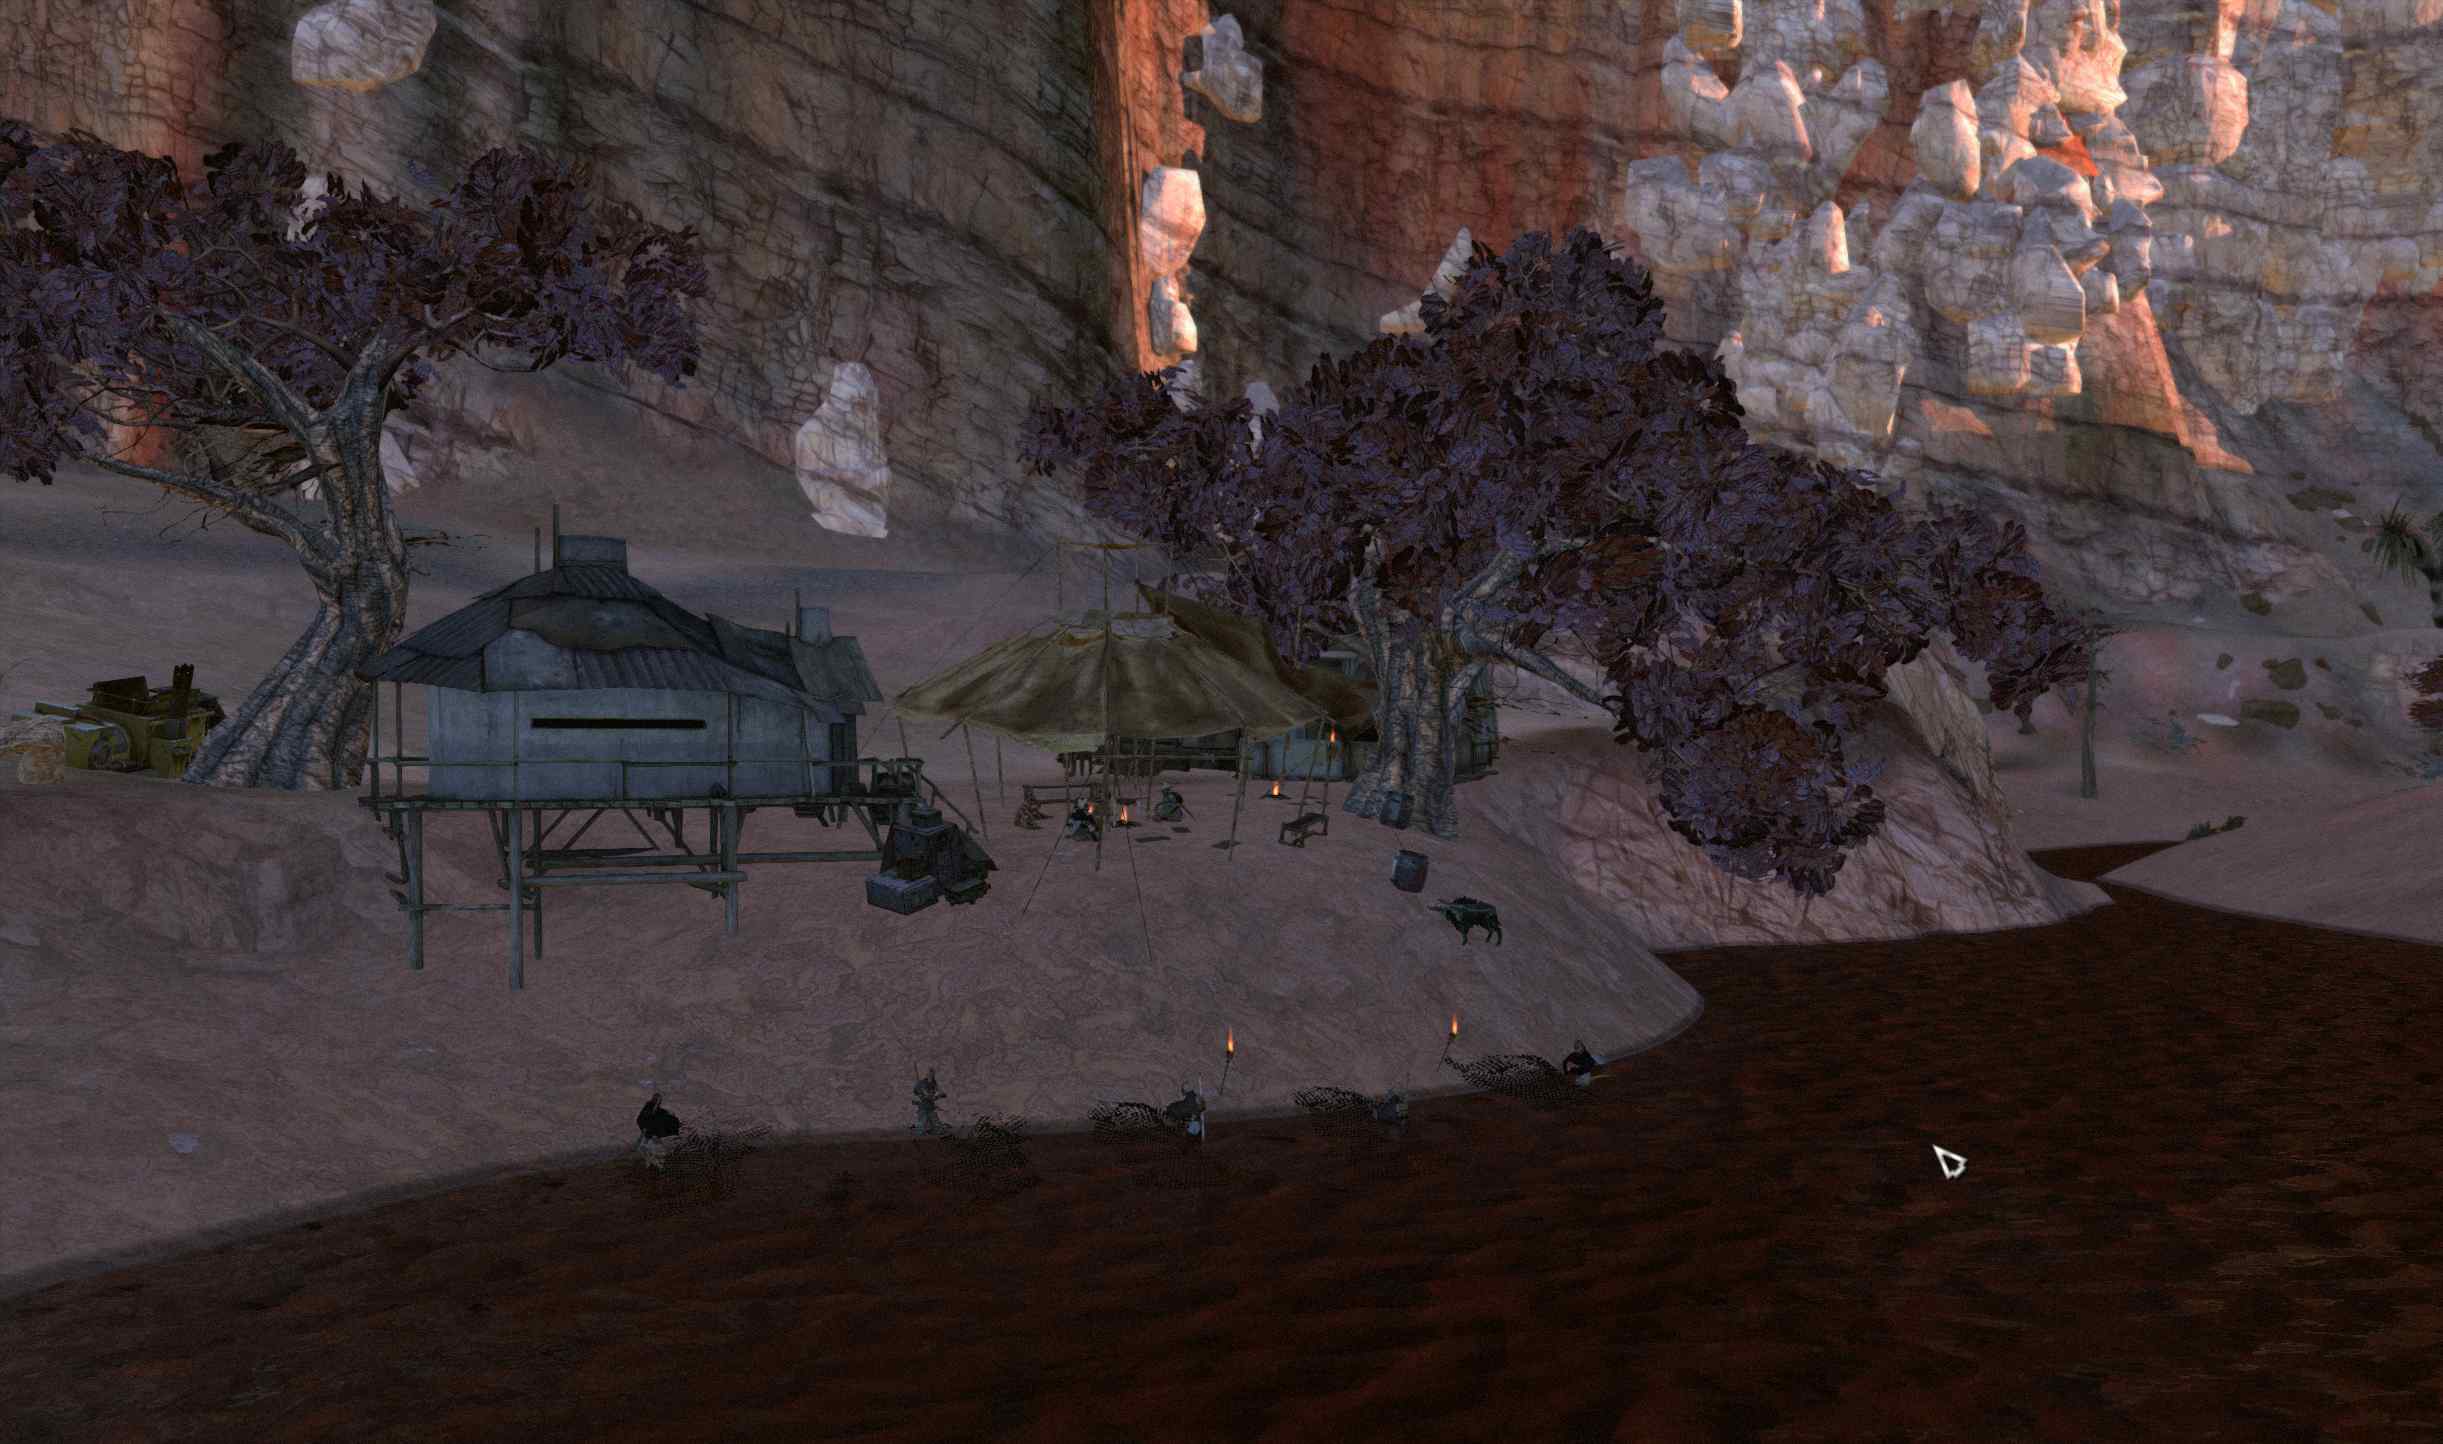
They run operations from a bought building in a faction-owned city with a farming outpost nearby.
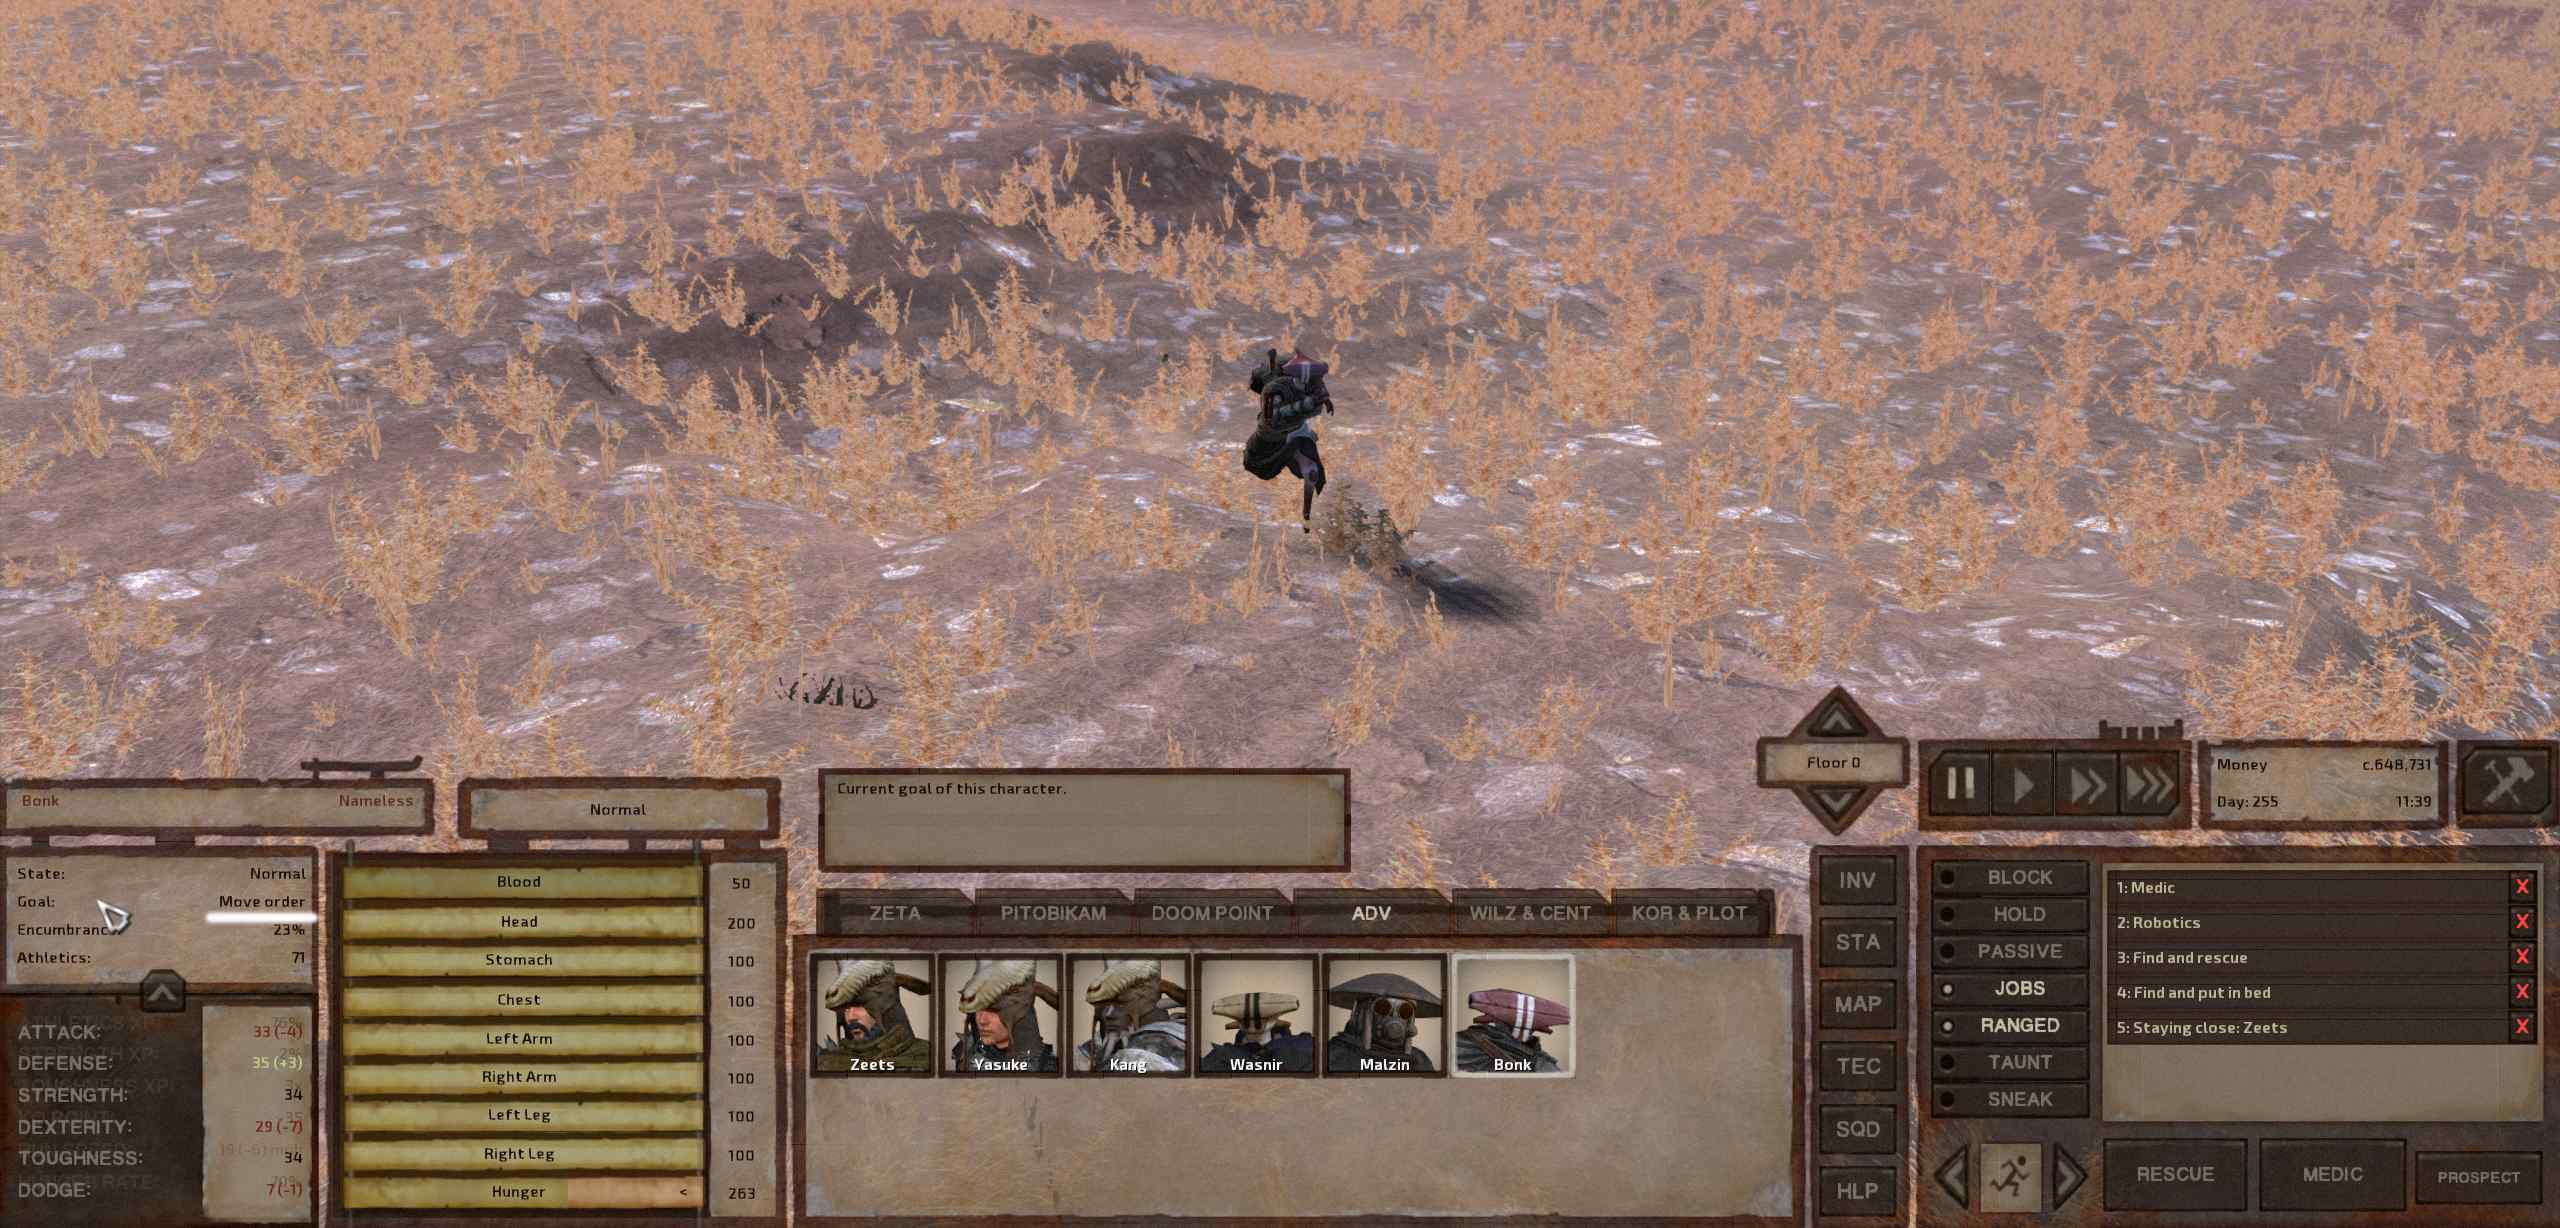
I can get them to work in town or on the farms, but they cannot pick up things from the farms and bring them to town. Instead, they hack away at the farm fields until full output and end up running towards town with an "operating machine" job; then, halfway there, they stop and run back to the farm with an "operating machine" job.
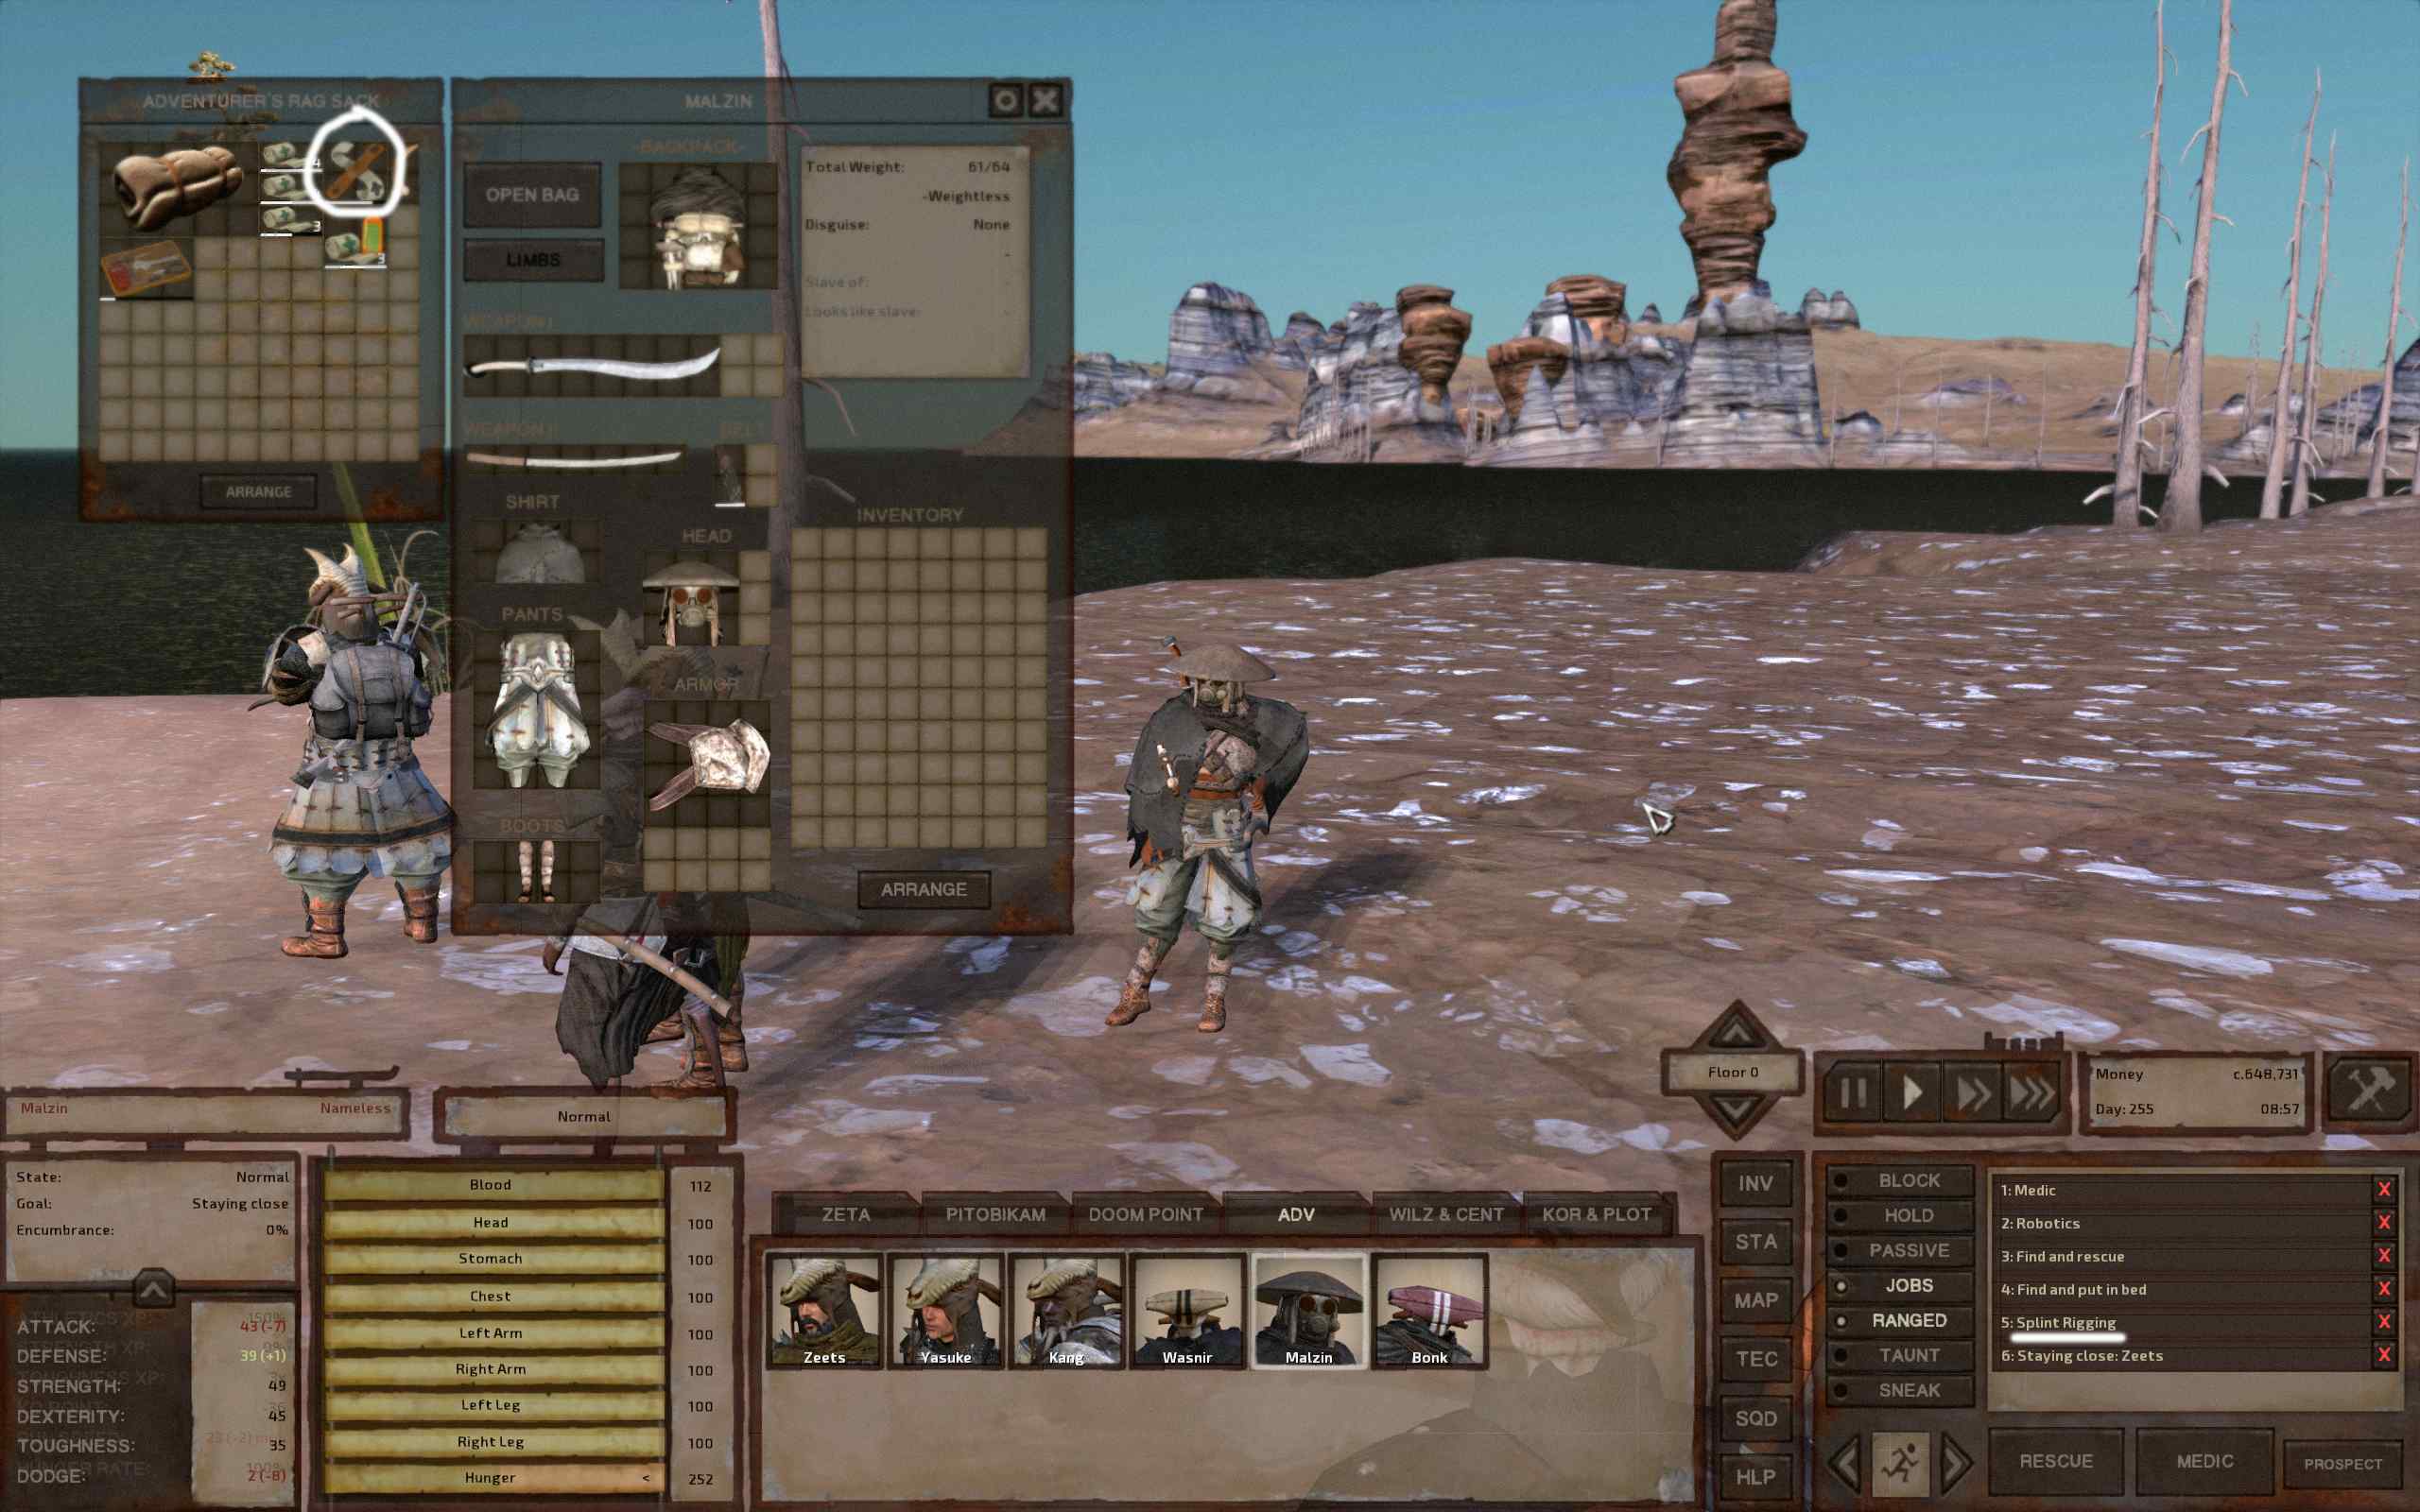
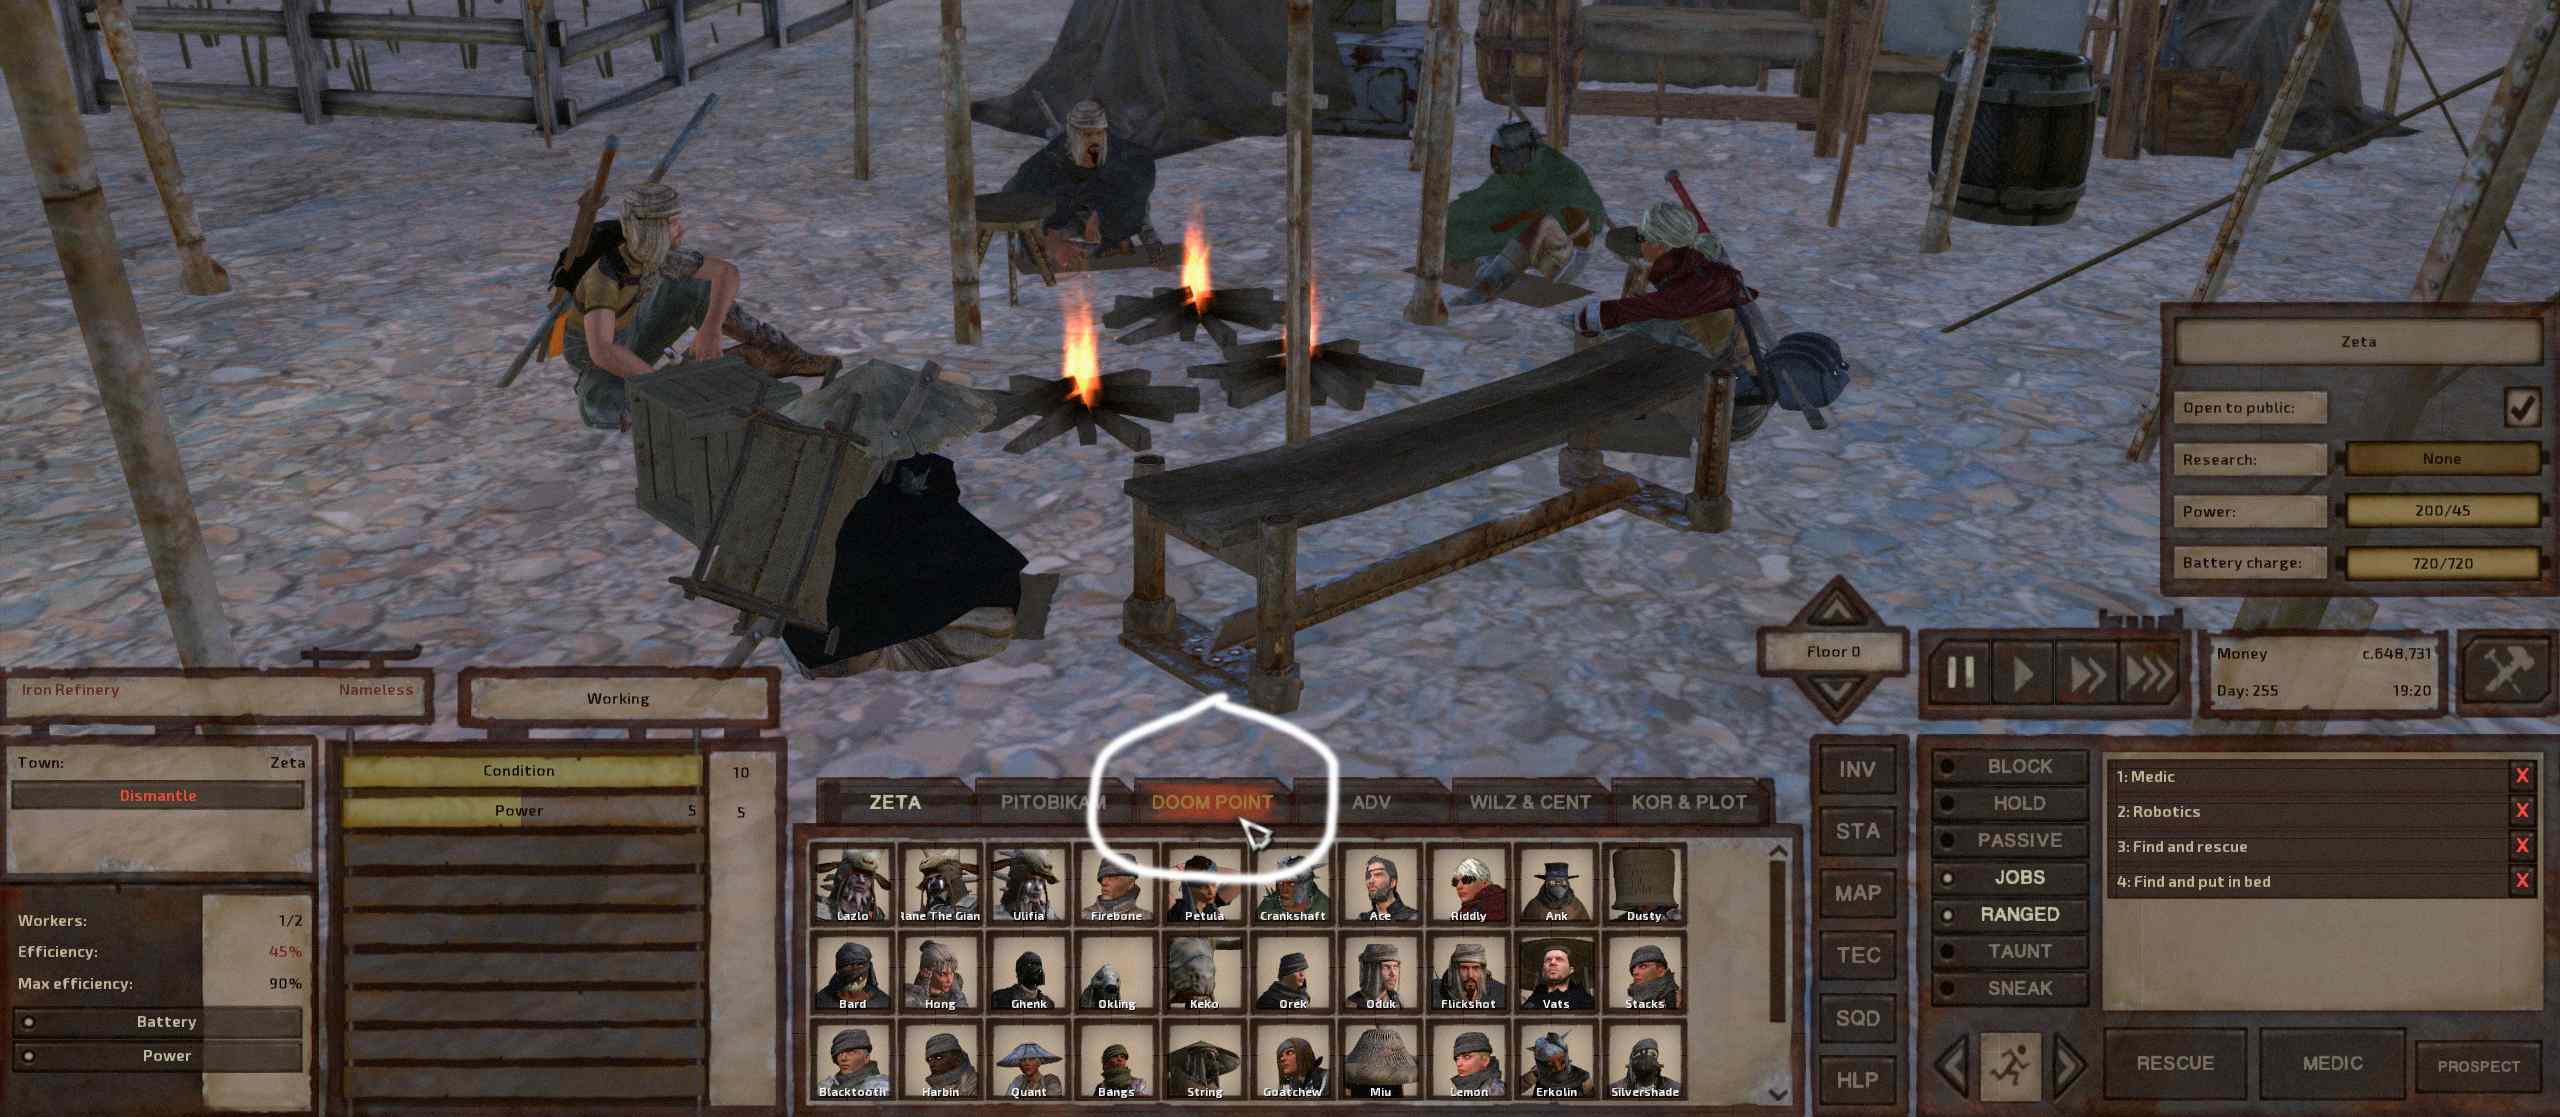
I can manually pick up the items in the fields; they will then bring them to town storage and work the field until the output is full again.

It might be related to the distance between the jobs. Does anyone have any tips?
Mì gói khô 6/jul./2023 às 21:25 
foraging animal doesn't work, they just stand around doing nothing
GrandTickler 7/fev./2023 às 9:44 
insanely helpful guide, thanks
jbra1  [autor(a)] 9/out./2022 às 2:26 
@Karlord, check his inventory. It's probably jammed up so he can't pick up a building material. This happens to producers when their storages get full, they keep producing and grabbing the last of it up to their inventory limit and then can't do anything else because they can't pick anything up. Failing that, there might be a pathing issue from where ever he is to the building material storage.
Karlord 8/out./2022 às 20:11 
thank you for the great guide but for some reason they stooped following the jobs i queue up like for example the engineer he used to go help build but now he is just sitting idle is there anyway to fix this?
®BBIE 21/jul./2022 às 21:06 
Amazing.
Dread 1/jul./2022 às 12:37 
As a long time Kenshi player i have to admit i love this guide. it will help alot of newbies for sure
Sorrowsnow 11/jun./2022 às 21:39 
thank you for this really good guide .
jbra1  [autor(a)] 22/abr./2022 às 2:28 
@what - I don't think so. I think the dev's might have thought that'd get unruly really fast with the bigger raids. But, actually, I've never tried it. Everything in this guide I've learnt by trying holding shift while doing things, and have been surprised a bunch of times. Try it out (shift right click 'put in' on a cage and see what happens).