Terraria

Terraria

383 betyg
FULL Melee Class Setup Guide For Terraria 1.4 (All Modes)
Av Equ4z
- Want to play Terraria melee class in 1.4, but not sure what to do?
- Well in this Guide I'm going to show you every Melee Setup at Each Section of the Game.
- The Guide contains Accessories and Weapons Setup, Boss Arenas and Boss Tips, Detailed Crafting with stats Information for each Weapons - Accessories, etc.
- The Guide Shows you What Gear and Weapons you should have before progressing at each point of the game.
- The Guide guides you through the whole game, from Start to Finish (Fresh World -> End-game).
- This Guide works for all modes.
- The Guide Does NOT show how to defeat Invasions / Events.
- Weapons and Armor, Accessories Information are from the Terraria Wiki..

(DISCLAIMER : I will not include small details like what Tools you'll need to break a certain ore, or how to explore your entire world because those are some of the basics, as most of the exploration that I will recommend you figuring them out on your own.)
13
5
18
2
4
3
3
2
2
   
Utmärkelse
Favorit
Favoritmarkerad
Avfavoritmarkerad
-Introduction-
- Howdy! and, welcome. In this guide I'll guide you through the game while playing as melee.
- I'll Show you everything including what is best to have, and how to progress smoothly through the entire game.

- This Guide Works Best for all modes,

- What is a Melee Class you ask?
The melee class is powerful, sporting high defence and damage as well as decent crowd control. It utilizes weapons such as swords, spears, and yoyos. Many melee weapons have a short attack range, and those that are viable at a distance tend to do lower damage than their close-range counterparts.


Anyways Lets Move On To The First Part.
[Pre-Bosses Weapons and Armor]
- Create your world and begin your adventure ( I recommend creating a Crimson World, because alot of Weapons and Accessories that I am going to mention is Crimson Exclusive ). Right as you spawn into your world, go chop downs some trees aswell as explore caves on the right or left side of your world go mining for ores and Heart Crystals and be careful for dart traps and boulders, for Pre Bosses armor we have 3 options :

Armor
Ancient Shadow Armor
- If you were lucky and patient enough to get a full set of Ancient Shadow armor then you currently have the second best armor possible you can have before bosses, as of 1.4.
+ How to Obtain : Each piece of the armor has a 0.19% to drop from Eater of souls.
-Eater of Souls Enemy-

+ 19 Defence in total for full set.
+ Eater of Souls only spawn in the Corruption Biome ,and the world that you created also has to be Corruption .
+ Which i wouldn't recommend you getting this armor early because of how hard it is, but we still have another option.


Full Gold / Platinum Armour
- Gold armor is the fourth armor set in the game.

+ It takes a total of 75 Gold Bars or 300 Gold ore for Desktop
+ A full set grants a basic 13 defense plus a set bonus of 3 defense which equals a total of 16 defense
- Platinum armor is a stronger alternative to Gold armor. It takes a total of 75 Platinum Bars on Desktop version And 300 Platinum ores for Desktop Version
+ It is also the strongest set that is made from ore which can be mined from the start (with a Copper Pickaxe)

[Having either Gold or Platinum Armour Depends on which ore your world spawns]

Weapons Choices
For weapons we have alot of choice including Yo-yos, Swords and Flails and Boomerangs and finally Spears
Here I will list them all for you :

Terragrim
- The Terragrim is a rare Pre-Hardmode melee weapon, the Terragrim's autoswings and appears as a series of blurred slashes aimed in the direction of the cursor. Anything within this area takes constant damage..

- It is obtainable from the unique background object found in an Enchanted Sword Shrine or very rarely in the Caverns layer. When the object is destroyed, it has a 1/50 (2%) chance to drop a Terragrim rather than an Enchanted Sword.
- It's best modifier is Godly or Demonic
- 19 Base DMG.
-The Background Object / Enchanted Sword in Stone-


Enchanted Sword.
- The Enchanted Sword is a pre-Hardmode, autoswinging projectile sword. When swung, it fires a sword-shaped projectile that costs no ammunition or mana
- he projectiles can be fired roughly every 1-2 seconds, and dissipates upon hitting an enemy or solid block.
- The Enchanted Sword can be obtained by destroying the background object of an enchanted sword in stone, with a 2% chance of dropping a Terragrim or Arkhalis.
- Base DMG of 23.
- On the Desktop version and Mobile version, they also have a 2% chance to be found in Golden Crates and Titanium Crates ( Replaces Gold Crate While in Hardmode ) Crates., which is obtained by fishing in any biome.
- It's best Modifier is Legendary.

-Enchanted Sword in Stone, Founds in Sword Shrines-


Starfury
- The Starfury is a sword that summons a star projectile from the sky when swung. The star falls to the location of the mouse cursor upon use
- Emitting light particles and piercing up to 2 enemies, but dealing no knockback.
- The Starfury can only be obtained from Skyware Chests which can be found on Sky Islands (33.33% chance), 25% chance from Azure Crates ( Which Replaces Sky Crate in Hardmode ), and also 25% chance from Sky crates , which can be obtained through fishing on Sky Lakes
- 22 Sword DMG, 44 Projectile DMG
- It's Best Modifer is Legendary.
Azure Crate Replaces Sky Crates During Hardmode ( Dark Blue One ).
Sky Crates can be fish up Pre-Hardmode On Sky Lakes, You can use a Gravitation Potion to find Sky Islands and Lakes in The Sky ( Light Blue One ).


Ice Blade
- The Ice Blade is a sword that is found in Frozen Chests (16.67%) in the Ice biome, also from Frozen crates and Boreal crate (16.67% for both crates), which can be obtained through fishing.
- It fires an "icy bolt" projectile when swung, at no mana or ammunition cost. The projectile does the same amount of damage as the sword itself but has a cooldown of 55 frames, or about 0.9 seconds
- The projectile also emits a small amount of light, which lingers briefly after it shatters.
- Best modifier is Legendary.
- 17 Base DMG.
Frozen Crates can be fish up in Ice Biomes During Pre-Hardmode.
Boreal Crates can be fish up in Ice Biomes During Hardmode. ( the bit darker one )


[More Pre-Bosses Weapons Choices]
Blade of Grass
- The Blade of Grass is a broadsword with an Average attack speed.
- It has a green particle effect resembling leaves when swung, and a 25% chance of inflicting the Poisoned debuff on enemies.
- Crafted from 12 Jungle Spores and 12 stingers on a Lead or Iron Anvil
- Jungle spores are found glowing in the underground jungle, while stingers has a chance to drop from Hornets or Spiked Jungle slimes. - It's best modifier is Legendary.
- 27 Base DMG
- Also one of the key components to craft the Night's Edges later on.


Rally
- The Rally is an early-game yoyo that is dropped by Giant Shellies, Crawdads, and Salamanders in the Cavern layer or lower, with a drop chance of about 3.9%
- It will remain deployed for about five seconds before returning automatically to the player.
- It has a spin duration of 5 seconds, and can reach up to 10 tiles.
- Its best modifier is Godly or Demonic.
- 14 Base DMG.


Amazon
- The Amazon is a yoyo that is crafted from materials found in the Underground Jungle biome.
- It has a spin duration of 8-9 seconds, can reach up to 13 tiles.
- and is currently the best yoyo Pre-Bosses.
- Its best modifier is Godly or Demonic
- 18 Base DMG.
- Crafting Station : Lead or Iron Anvil


Trident
- Another viable option for Pre-bosses.
- The Trident is a type of spear found in Water Chests in the ocean, Ocean crates (20.25%), and Seaside Crates (20.25%), On Mobile and Desktop Versions., Can be fish up From The Ocean
- If the Trident is held while submerged in water or lava the player moves faster through that liquid and has an increased jump height. This does not work in honey. (Fact)
- Its best modifier is Godly or Demonic.
- 14 Base DMG.
  Ocean Crates can be fish up from the Ocean During Pre-Hardmode. Seaside Crates (Purple one) Can be fish up from the Ocean during Hardmode, Basically Replaces Ocean Crates.


Storm Spear
- The Storm Spear is a desert-themed spear obtainable in pre-Hardmode and Bosses.
- When thrust, it fires a Storm Spear Shot, a small bolt of electricity that deals 125% of the spear's base damage and inflicts half its knockback.
- It can be found in Sandstone Chests (14.29%) in the Underground Desert, as well as in Oasis and Mirage Crates. (12.5% for both crates)
- Its best modifier is Godly or Demonic.
- 12 Base DMG, 15 DMG for projectiles.
Oasis Crate Can be Fished Up in the Mini Oasis Biome on the Surface of The Desert During Pre-Hardmode, Basically the pile of water you stumble while crossing it.
Mirrage Crates Can also be Fished Up From the Mini Oasis Biome Aswell but only During Hardmode.


Enchanted Boomerang
- The Enchanted Boomerang is a Boomerang that can be fired rapidly, has medium range, and releases light particles during use.
- Like all Boomerangs, it inflicts melee damage, so melee-boosting Accessories and Armor bonuses will benefit it.
- Crafted From 1 Fallen Star and a Wooden Boomerang which can be found on Surface Wooden Chests
.
- 13 Base DMG.


Ice Boomerang
-The Ice Boomerang is a melee weapon found in Frozen Chests (16.67%) in the Ice biome, as well as from Frozen, and Boreal Crates (16.67% for both crates), which can be obtained through fishing in the Tundra / Ice Biome.
- It behaves like a regular boomerang, but it is faster and emits light which can be used in dark areas. It is similar to the Enchanted Boomerang, dealing slightly more damage.
- 16 Base DMG.
Frozen Crates can be fished up in Ice Biomes During Pre-Hardmode.
Boreal Crates can be fished up in Ice Biomes During Hardmode.


Flaming Mace
- The Flaming Mace is a flail weapon craftable in early pre-Hardmode.
- It has a 1/6 (16.67%) chance to inflict the On Fire! debuff.
- Its best modifier is Godly or Demonic.
- Crafted By Combining a regular Mace With 99 Torches, the Regular Mace can Be Found in Surface Chests and Underground Gold Chests .
- 18 Base DMG.


Ball O' Hurt
- The Ball O' Hurt is a type of flail that is obtainable by destroying a Shadow Orb (20%), Your world must be Corruption in order to get this weapon.
- or by looting a Corrupt Crate (20%), Defiled Crate (Also 20%) that is obtained by fishing in the Corruption.
- It also emits small particles similar to those of other objects in the Corruption.
- 30 Base DMG.
The Corrupt Crate Can be Fished Up in The Corruption Biome During Pre-Hardmode.
The Defiled Crate Can Be Fish Up in the Corruption Biome Aswell During Hardmode, Replacing the Corrupt Crate.


And That it is For all the Weapon Options For Pre-Bosses.
[Pre-Bosses Accesories]
Feral Claws.
- Feral Claws are an accessory that increases melee attack speed by 12%, and stacks with all other attack speed boosts.
- Feral Claws can be found in Jungle Crates (19%), Bramble Crates (19%), and Ivy Chests (21.72%) located in Jungle Shrines and at the base of a Living Mahogany Tree in the Underground Jungle.
- In addition to increasing melee attack speed, Feral Claws give autoswing to all melee weapons.
Jungle Crates can be Fished Up in the Jungle During Pre-Hardmode.
Bramble Crates (Darker one) can be also Fished Up in the Jungle but only During Hardmode.

Magma Stone
- The Magma Stone is an accessory that drops from Lava Bats (2% chance) and Hellbats (0.67% chance) in The Underworld.
- Causes the wearer's melee attacks to inflict the On Fire! debuff one enemies.
- And also add orange flame particles effect on both the weapon sprite and their projectile that gives off light.
- The duration of the debuff is random.

Strings/ Any Colored strings ( For Yo-yos Users )
- A String is an offensive accessory that increases the range of any yoyo-type weapon when put into an accessory slot.
- The weapon gains about an additional 4 to 5 blocks of reach with this item equipped.
- White String is first crafted by the player with 30 Cobwebs at a Loom.
- And can be combined with certain Dyes to form colored variants.

Counterweights/ Any Color Counterweights ( For Yo-yos Users )
- Counterweights are accessories sold by the Traveling Merchant and the Skeleton Merchant. They fire a second yoyo-type projectile after hitting an enemy with a yoyo.
- dealing the same damage of the yoyo and traveling towards it, then arcing over the player
- There are 6 variants, all functioning identically.
-Traveling Merchant-

-Skeleton Merchant-


Hermes / Spectre / Frostsparks / Lightning Boots ( Optional )
- These Boots Provides speed and flight, it is better to have them but it is optional.
- Hermes Boots only Provide Speed
- Spectre Provide both speed and flight.
- Lightning Boots Provides faster Movement Speed and Mobility, also provides flight.
- Frostsparks boots is the same as Lightning Boots but gives you Extra Mobility on ice.

+ Hermes Boots can be Obtained in Chest on the Surface, or in the Gold Chest in Underground or the Caverns layer.

+ Rocket Boots can be bought from the Goblin tinkerer ( The Goblin Army Must have been defeated for the Goblin Tinkerer to show up, you can find him tied in the underground or cavern layers)

+ Spectre Boots can be crafted by combining the Hermes and Rocket Boots at the Tinkerer's Workshop , which can be Bought from the Goblin Tinkerer.

+ The Lightning Boots which can be crafted by combining the Spectre Boots with the Anklet of The Wind and The Anglet at the Tinkerer's Workshop.
The Anklet of The Wind can be found in the Ivy chest
And the Anglet which can be found in chests on the Surface.


+ Frostspark Boots can crafted by combining the Ice Skates with the Lightning Boots at the Tinkerer's Workshop.
the Ice skates which is found in Frozen Chests (16.67%) in the underground Ice Biome.

-Crafting tree-

You can also use the Frostsparks Boots to craft the Terrasparks Boots you can craft it in Hardmode later if you want to.


Fledging Wings ( Also Optional )
- This is the ONLY Pre-Hardmode/Bosses wings you can get.
- 33.33% to be in a Skyware Chest .
- It provides a few seconds of flight, but it is still very useful.

Accessories Setup
- You can use these Setups that i have for you.
1 - For Swords, Spear, Boomerang, Fails Maces Users :
Slot 1 + Magma Stone[/b]
Slot 2 + Feral Claws
Slot 3 + Fledging Wings
Slot 4 + Hermes or Spectre or Lightning or Frostsparks Boots.

Slot 5 + Any Accessories You Want.

2 - For Yo-yos Users
Slot 1 + Magma Stone
Slot 2 + Feral Claws
Slot 3 + Any CounterWeight, They all funtion the Same
Slot 4 + Hermes or Spectre or Lightning or Frostsparks Boots.
Slot 5 + Any String

Now Every Boss Fight In Pre-Hardmode Should Be Easy As Walking in The Park For You.

In the Next Section I'll Show You How to Build The Arenas For the all The Pre-Hardmode Boss Except The Wall of Flesh For now.
[Pre-Hardmode Bosses Arena]
Eye of Cthulhu Arena

- You should build your Arena something look something like this:

Just something this Simple,

General Tips:
+ Use the Platform Often, always move up and down from it

+ To deal with the Servants of Cthulhu that the Eye spawn, go at the direction they are coming from and swing your weapon, you will not take any damage since your Weapon has Knockback.

+ When The Eye Turns into his 2nd Phase, shoot the projectiles from far if you have a sword like the Enchanted Sword or Starfury, but if you do not, casually dodge his ram and go near him, make sure to back up in a few seconds.

+ For Expert and Master Mode 2nd Phase, just Run back and Foward, make sure to use your Potions if you get hit.

+ Expert and Master EoC could be very hard for sword which doesnt have Projectiles, so make sure you get one!


+ If you're feeling extra special, you can place some Heart Lanterns aswell to Boost your Health Regeneration, but i personally think Campfires are good enough for this fight.

Brain of Cthulhu Arena

- You should build your Arena something look something like this:

- You can Expand it more if you need more space, but i personally think this is enough.

General Tips:
+ You can not attack the brain before all his Minions / Creepers gets Killed, Therefore you need to Kill it's Minions First.

+ The Brain Will still do damage if it touchs you so pay attention to both of the Creepers and the Brain Itself.

+ You can dodge the Creepers charging at you just by Moving up and Down the platform.

+ When the brain enters 2nd, the fight is basically over

+ if the brain comes from under you, drop under and hit it, don't worry your sword knock back will keep it away, if it comes from above you, stay right where you are and swing your sword in his direction.

+ For Expert and Master the 2nd Phase is a little special, there will be 4 Brains surrounding you on the screen, this is the part where the projectiles shooting weapons gets really useful, use the minimap as your advantage, the real brain will appear on the minimap, 3 of the others are duplicates, don't worry your sword will have enough knock back to keep the brain away from touching you.

+ I almost forgot to mention, you need to block all the entrance or else the mobs in the Crimson can ruin your fight and kill you.


Eater of Worlds Arena

- You should build your Arena something look something like this:


General Tips:
+ Pay Attention to where to Eater of Worlds is heading, Use the minimap to locate where is he going to come from

+ If he comes from the side, DO NOT drop down, as in that case you can not hit him, and you will may to touch his segments which can easily kill you.

+ If he comes from the top, drop down and STAND NEXT to his segments and swing you sword only for a few second before he loops back.

+If he comes from under go up and wait for him to loop down, then STAND NEXT to him and swing your sword

+ Projectiles shooting sword are effective in this fight since they can pierce through his segments and do major damage.

+ In Expert Mode the Eater of Worlds Can shoot a green projectile called a Vile Split, you can easily dodge it by going up and down using your platforms.


Skeletron Arena

- You should build your Arena something look something like this:


General Tips:
+ Once you summon Skeletron, the giant skeleton will come out where the Old Man Was standing so be carful because you might take some damage.

+ Skeletron on Normal mode is pretty easy, if you want to you can take out both of his hand first, then there will be only his head so the fight is basically over, becareful for his spinning head attack though.

+ On Expert and Master Mode, If you do not take out his hands, your Weapon will only do 1-7 damage, because his defence is extremely high, after taking out his hands, his head wil shoot out Tracking skulls, you can avoid it by going up and down the platforms, wings and boots are extremely useful for this fight also weapons like the Enchanted sword is a Must, since it is very dangerous to go near him, once you learn how to dodge the skulls you can easily kill him.


Queen Bee Arena

- You should build your Arena something look something like this:


General Tips:
+ The Queen Bee will charge at you back and foward, make sure you pay attention to the map and time the jump correctly so you dont fall on her body.

+ The Queen Bee will also releases small bees, but its not really a problem if you keep swing your sword.

+ Queen Bee will also Shoot stingers at you and stand still, so use that time to do damage on her.

+ if your health ever get low, use the Honey in the Hive as your advantage, stand in the Honey reduce your walk speed but gives you a Regen Buff.

+ For Expert and Master, when the Queen Bee have about 1 or 2k health left, her defence will rise making you deal less damage, but its alright it will take some time though.


King Slime Arena

- You should build your Arena something look something like this:

- You can also use the rope trick ( 150 ropes )

General Tips:
+ The King Slime is Possibly the easiest out of all, it just jumps around and it is extremely slow

+ The King Slime can teleport to you anytime so make sure you never stop moving

+ In Normal the King Slime only spawns normal Blue Slimes which is not really a problem.

+ In Expert and Master, The King Slime Summons Spiked Slimes similar to the Spiked Jungle and Ice Slime dealing heavy damage, make sure you are always on the high grounds, only sometimes on the ground if King Slime teleports to you.


[The Wall of Flesh Arena Will be Mentioned in the ''Preparations and Potions Before The Wall of Flesh Section'']

- That's it For Pre-Bosses Armor, Weapons Choices, Accessorries and Boss Arenas that i have provided you, Your fight with the Bosses should be easy now!, Let's move on to prepare for the Wall of Flesh Fight, or you can call, Pre-Hardmode Gear.
[Pre-Wall of Flesh Weapons and Armor]

- So if you managed to kill all of the Pre-hardmode bosses, now it it time for you to prepare for the Wall of Flesh fight to Enter Hardmode By now you should ATLEAST HAVE 250 HEALTH, Here are the armor Choices For you :
Armor
Molten Armor
- A full set of Molten armor provides the following benefits:
+ 25 Defence
+ +17% increased melee damage
+ +7% melee speed
+ +7% melee critical strike chance
+ Immunity to the On Fire! debuff

- How to obtain : It takes a total of 45 Hellstone Bars to craft a full set of Molten armor, or 135 Hellstone and 45 Obsidian ., Make sure to use an Obsidan Skin Potion Before diving in the lava to mine Hellstone!!!
- How to get Obsidan -
- You must make Water and Lava Collide with eachother, when the collide, the can form into Obsidan.


Crimson/Shadow Armor
- Crimson and Shadow armor Depends on what kind of world you are in, it's either Corruption or Crimson, If it's Crimson, then you can craft the Crimson armour out of the Tissues Samples that you got from the Brain of Cthulhu, and the Crimtane ore from either the Eye of Cthulhu or Brain of Cthulhu, You can also go mining for it, but the process is slower. If your world is Corruption, then you can Obtain the Shadow armor, crafted by the Shadow scale that the Eater of Worlds drops, and the Demonite or which is dropped from either The Eye of Cthulhu and Eater of Worlds.
- Crafting the full set requires 60 Crimtane Bars / Demonite Bars and 45 Tissue Samples / Shadow Scale .

Weapons

Weapons Such as the Terragrim, Arkkhalis, Enchanted Sword and Starfury that i mentioned in Pre-Bosses can still be used for Pre-Hardmode and the Wall of Flesh Fight.


New Weapon Options
- The Muramasa is a blue broadsword that is found in the Dungeon's Locked Gold Chests or in Golden Lock Boxes .
- Both of which are opened using a Golden Key
- It is also worth mentioning that it is an autoswing sword, not many of which can be found at this point of the game
- It also emits a small amount of light when swung.
- it's best modifier is Legendary.
- It is one of the key ingredients in crafting the Night's Edge.
- 26 Base DMG.


Fiery Greatsword
- The Fiery Greatsword is a sword crafted from 20 Hellstone Bars
- It may have a slow swing speed, but it has the third-longest reach and second-highest damage of all swords before Hardmode.
- It has a 1/2 (50%) chance to inflict the On Fire! debuff on enemies for 3 seconds.
- Emits fiery light particles when swung.
- It is one of the key ingredients in crafting the Night's Edge.
- It's best modifier is Legendary.
- 40 Base DMG.


Night's Edge
- The Night's Edge is a Post-Skeletron broadsword, notable for having the highest base damage of all swords available before entering Hardmode.
- It has slightly shorter reach than the Muramasa, one of its crafting ingredients.
- When swung, the Night's Edge emits fire-like purple particles similar to the Fiery Greatsword another ingredient of it.
- It's best Modifier is Legendary
- 42 Base DMG.

-Crafting-

+ The Blood Butcher is Crafted out of 10 Crimtane bars ,
+ While the Light's Bane is crafted out of 10 Demonite Bar
.
+ Blade of Grass Crafting ( Already mentioned in the Pre-Bosses Section)
+ Muramasa ( Already mentioned)
+ Fiery Greatsword ( Already mentioned)
+ Crafted at a Crimson/Demon Altar in the Caves of the Crimson, or in the Holes in the Corruption.
+ Later in Hardmode, this sword can be turned into a True Night's Edge and further be crafted into the Terra Blade, one of the best melee weapons in the game.


Dark Lance
- The Dark Lance is a spear that can be found in Locked Shadow Chests (14.29%) in the Underworld. It can also be found in the Obsidian Lock Box (16.67%)
Locked Shadow chest can be unlocked in the underworld by using the Shadow key , which you can find in Golden Chests in the Dungeon.[/b]
- It is currently the strongest Pre-Hardmode spear. It can pierce through enemies, and even hit the same enemy multiple times.
- When used, it gives off light emitting particles that linger for a while, which is useful for fighting in the dark.
- Its best modifier is Godly or Demonic.
- 29 Base DMG


[More Pre-Wall of Flesh Weapons Choices]
Sunfury
- The Sunfury is a flail weapon that emits light when thrown, and has a chance to inflict the On Fire! debuff. It behaves like other thrown flails; holding the attack button will continuously swing the Sunfury around the player and deal half the item's listed damage. Letting go of the attack button will throw it in a direction .
- The Sunfury is obtained from Locked Shadow Chests (14.29%) in The Underworld, which can be unlocked by a Shadow Key . It can also be found in the Obsidian Lock Box (16.67%)
- It's Best Modifier is Godly or Demonic


Valor
- The Valor is a yoyo that can extend up to 14 blocks away from the player. Its flight time lasts 11 seconds before returning to the player.
- The Valor can be found in the Locked Gold Chests (14.29%) found in the Dungeon, or the Gold Lock Boxes (14.27%), which can be opened using a Golden Key , it is not guaranteed that every Dungeon will contain one.
- Its best modifier is Godly or Demonic.
- 22 Base DMG.


Cascade
- The Cascade is a pre-Hardmode yoyo. With a base reach of 15.5 tiles and a maximum spin duration of 16 seconds before returning, it is the most powerful yoyo available pre-Hardmode.
- Upon striking an enemy, it has a chance to inflict the On Fire! debuff on enemies.
- The Cascade has a 1/400 (0.25%) chance of being dropped by any enemy in or near The Underworld after Skeletron has been defeated. Once Hardmode begins, it will no longer drop, as the stronger Hel-Fire will drop instead.
- Its best modifier is Godly or Demonic
- 27 Base DMG

[That's it For Weapons Options]
[Pre-Wall of Flesh Accessories]
Accessories that i mentioned in the Pre-Bosses Section such as, Feral Claws, the Magma Stone, String (for Yo-yos Users), Counterweight (for Yo-yos Users), Hermes/Spectre/Frostsparks/Lightning Boots and the Fledging Wings can still be used in Pre-Hardmode and in the Wall of Flesh Fight.

More Useful Accessories for Pre-Hardmode and the Wall of Flesh Fight :

More Accessories

Cobalt / Obsidian Shield.
- The Cobalt Shield is a Shield accessory that grants the player immunity from knockback when equipped. It also provides 1 defense.
- The Cobalt Shield can be found in Locked Gold Chests (14.29%), or Locked Gold Boxes (14.29%), both can be unlocked using a Golden Key .
- The Obsidian Shield is the same as the Cobalt Shield but it grants you immunity on fire blocks, Crafted by combing the Obsidian Skull (Crafted using 20 Piece of Obsidian) with the Cobalt Shield , basically a better version of the Cobalt Shield..
- Very useful for the Wall of Flesh fight now matter how many time you get hit, you will not get stagger and knocked back, you can easily focus killing it.

Cloud in a Bottle
- The Cloud in a Bottle is an accessory that can be found in Gold Chests in the Underground and Cavern layers. When equipped, it allows the player to double jump, which is useful for mobility and dodging attacks.
- increasing the maximum height the player can reach without other accessories by 5 blocks, for a total of 11 blocks.

Wall of Flesh Fight Accessories Setup
- You can use these Setups that i have for you.
1 - For Swords, Spear, Boomerang, Fails Maces Users :
Slot 1 + Magma Stone[/b]
Slot 2 + Feral Claws
Slot 3 + Fledging Wings
Slot 4 + Hermes or Spectre or Lightning or Frostsparks Boots.
Slot 5 + Cobalt or Obsidian Shield.

Slot 6 ( Master Mode Slot ) + Any Other Acessories you want

2 - For Yo-yos Users
Slot 1 + Magma Stone
Slot 2 + Feral Claws
Slot 3 + Any CounterWeight, They all funtion the Same
Slot 4 + Hermes or Spectre or Lightning or Frostsparks Boots.
Slot 5 + Cobalt or Obsidian Shield.
Slot 6 ( Master Mode Slot ) + White String / Any colored strings.

(I also recommend getting ''Warding'' on every Accessories, it will greatly improve your lifespan)
[That's it for Accessories, Lets move on preparing an Arena and Preparation for the Wall of Flesh Fight.]
[Preparation and Potions Before the Wall of Flesh Fight]
Potions / Flasks
Iron Skin Potion
- The Ironskin Potion is a buff potion which grants the Ironskin buff when consumed. The buff increases the player's defense by 8, thus reducing damage by 4 on Classic 6 on Expert 8 on Master.
-Crafting-


Inferno Potion
- The Inferno Potion is a buff potion that grants the Inferno buff when consumed. It casts a ring of fire around the player that deals 10 damage per second and inflicts the On Fire! debuff for 2 seconds on enemies inside
- This lasts for 4 minutes
- This potion will surely keep the hungrys from the Wall of Flesh away from you
-Crafting-


Flask of Fire
- The Flask of Fire is a flask that will cause any melee weapons (and Whips) to inflict the On Fire! debuff.
- this effect will not be lost when the player dies.
- Crafted at an Imbuing Station.
- The Imbuing Station can be bought from the Witch Doctor NPC ( The Queen Bee must been defeated in order for him to move in )
-Witch Doctor NPC-

-Crafting-


Buffs
Sharpening Station.
- The Sharpening Station is a furniture item that, when placed and pressed on, Applies the Sharpened Buff, which increases armor penetration of all melee weapons by 12.
- It can be found in Underground Cabins in the Underground Jungle.
- Very useful later on for Hardmode Bosses.

Arena / Bridge
Your Area Should Look like this and expand all the way to the other side of the Underworld
Make sure you have a long bridge in the Underworld Ready to fight the Wall of Flesh, Once you're ready, Drop the Guide Voodoo doll into lava, Now the Wall of Flesh fight should be as easy as cutting a piece of cake for you.


General Tips:
+ The Wall of Flesh Shoots Laser and have Hungrys targeting you, Make sure you are keep moving, the Inferno Potion i mentioned earlier will keep the Hungrys from touching and damaging you.

+ For Expert and Master, when the Wall gets low, it will start moving insanely fast, at this point, use your highest dps Weapon that you have and just do every thing you can to finish him before he touches you.


How To Summon:
+ By Dropping the Guide Voodoo Doll into the lava, which cause the Wall of Flesh to spawn
+ The Guide Voodoo Doll is dropped from a rare enemy called the Voodoo Demon which spawns in the Underworld, the Voodoo Demon Always Has a 100% of Dropping the Doll.

[Thats it for Pre-Hardmode, Lets move on to Pre-Mech bosses in Hardmode]


[Pre-Mechanical Bosses Armor and Weapons]

- So you have managed to kill The Wall of Flesh, your world is now in Hardmode, the Ancient spirit of light and dark has been released, your world by now will have alot of new tough and powerful mobs, and a new Biome called the Hallow, But it's alright, I'll guide you through of it, including through mech bosses by now you should HAVE 400 MAX HEALTH, Here are the armor choices :
Armor
Titanium Armour / Adamantite Armor ( Mask / Helmet for melee )
- Having either Adamantite armour or Titanium armor depends on which ore your world spawns
- To be honest, if your world spawns Titanium, consider yourself lucky, because the Adamantite set bonus is ass compared to Titanium, while Titanium gives you a barrier of Titanium shards around you to protect you once you strike an enemy, the Adamantite set bonus gives you 25% more movement speed, which is almost completely useless. One set is 59 Titanium bars / Adamantite bars which is 236 Titanium ores / Adamantite ores
- To smelt the Titanium Ore / Adamantite Ore , you can smelt the ore by using a Titanium Forge / Adamantite Forge , which can be crafted by Combining a Hellforge with 30 Titanium Ores / Adamantite Ores at a Mythril Anvil or Orichalcum Anvil .
- For melee, craft the Titanium mask , and the Adamantite Helmet , because those benefits melee users.
- Adamantite gives you 50 defence, while Titanium gives you 49 defence, for Melee set.

Frost armour
- The Frost armor is a Hardmode armor set that grants the ability to inflict Frostbite debuff on enemies with melee or ranged attacks when the whole set is worn
- Frostbite is a variant of the Frostburn debuff that deals 25 DPS instead of 8.
- It takes 46 Adamantite Bars or Titanium Bars as well as 3 Frost Cores to craft a full set of Frost armor.
- The Frost Core is a Hardmode crafting material which is dropped by Ice Golems during Blizzards.
-Ice Golem Enemy-


[That's it for Armor, Moving on to Pre-Mech Bosses Weapons for Melee]

Weapons
Ice Sickle
- The Ice Sickle is a Hardmode melee weapon that fires a projectile with no ammunition or mana cost.
- Its wide projectile stops in midair a short distance from the player, spinning in mid-air for 5 seconds then disappearing. It can pierce enemies but disappears on the fifth hit.
- The Ice Sickle has a 0.56% (1/180) chance of being dropped by Armored Vikings, Ice Elementals, Ice Tortoises, and Icy Mermen in the Hardmode Snow and Ice biomes.
- Its best modifier is Legendary.
- 42 Base DMG.
- a Good weapon option for Mech Bosses.


Fetid Baghnakhs
- Fetid Baghnakhs are a Hardmode melee weapon with a short range but an exceptionally low use time. They have a 20% chance of being dropped by Crimson Mimics.
- You can either encounter a Crimson Mimic (20% Drop) in the Undeground Crimson, or by Crafting a Key of Night and placing it in a chest, the Key of Night is crafted by 15 Souls of Night , which is dropped from enemies in the Underground Crimson.
- Your world also must be Crimson to get this item, Corruption Worlds spawns Corruption Mimics.
- a Fast and a High Damage Output Melee Weapon, Also good for Mech Bosses Such as the Destroyer since he has a lot of segments.
- It's best Modifier is Legendary.
- 60 Base DMG
-Crimson Mimic Enemy-


-Key of Night Crafting-


Bladetongue
- The Bladetongue is a Hardmode autoswinging sword that is obtained by fishing in the Crimson biome.
- When it strikes an enemy, an Ichor stream is fired on an upwards arch, penetrating and damaging multiple enemies, bouncing against solid blocks, and applying the Ichor debuff lowering enemie's defence.
- Its best modifier is Legendary.
- 55 Base DMG.


Flying Knife
- Probably the most underrated Melee Weapon, but i can still take on the Mech bosses like a charm.
- The Flying Knife is a unique Hardmode melee weapon dropped by the Hallowed Mimic. It throws a reusable cursor-controllable projectile similar to the Magic Missile mechanic.
- You can either encounter a Hallowed Mimic in the Underground Hallow, Or craft a Key of Light crafted from 15 Souls of Light Dropped by enemies in the Underground Hallow Biome, once you got the key place it into a chest.
- Its best Modifier is Demonic.
- 40 Base DMG.
-Hallowed Mimic Enemy-


-Key of Light Crafting-

[a Tip for fighting Hallowed and Crimson / Corrupt Mimics, DO NOT STAND STILL, ALWAYS MOVE, DODGE HIS RUSH ATTACK BY JUMPING]

[More Pre-Mechanical Bosses Weapon Choices]
Hel-Fire
- The Hel-Fire is a Hardmode yoyo that has a 1/400 (0.25%) chance to be dropped from any enemy in the bottom half of the Caverns or Underworld.
- It has a chance to inflict the On Fire! debuff.
- Its best modifier is Godly or Demonic.
- 41 Base DMG
- Personally I think this is the best weapon for Mech Bosses, since you can attack from a safe distance.


Amarok
- The Amarok is a Hardmode yoyo which has a chance to inflict the Frostburn debuff whenever it hits an enemy.
- It has a reach of 18 tiles, and a spin duration of 15 seconds.
- The Amarok has a 1/300 (0.33%) chance to drop from any enemy defeated in a Snow biome.
- It can also drop in a Corrupted/Crimsoned or Hallowed Snow biome.
- Its best modifier is Godly or Demonic
- 43 Base DMG.
- Slightly better than the Hel-Fire I mentioned earlier.


Gradient
- The Gradient is a Hardmode yoyo that is purchased from the Skeleton Merchant for 20 Gold Coins.
- The Gradient is purchased from the Skeleton Merchant during moon phases 1 (full), 2, 3, and 4 only.
- It has a spin duration of 10 seconds, and can reach up to 16 tiles.
- Its best modifier is Godly or Demonic.
- 49 Base DMG
- Abit Better than the Amarok.

-Skeleton Merchant NPC:-


Bananarang
- The Bananarang is a Hardmode boomerang. Up to 10 Bananarangs can be stacked in one slot and thrown rapidly.
- They return to the owner once they hit an enemy, come in contact with a block, or reach the maximum range.
- Bananarangs are dropped by Clowns in the Hardcore Blood Moon in stacks of 1–4 with a chance of 1/30 (3.33%).
- The Bananarang cannot be reforged.
- 55 Base DMG.

-Clown Enemy, Only Spawn During Hardmode Blood Moon-


[That's it for Pre-Mechanical Bosses Weapons and Armor Options, Moving on to Accessories]
[Pre-Mechanical Bosses Accessories]
(If you are playing on Expert Mode, after you defeat the Wall of Flesh, it will drop an item called The Demon Heart which gives you another Accessory Slot, only works on Expert Worlds or Master, If your world is on Classic The Max Slot you can have is 5, For Expert is 6 Slots and Master 7 Slots.)
Accessories Such as the Lightning, Frostsparks Boots, Obsidian Shield that i mentioned in the Last Section can still be used at this point of the game, You can use the Frostsparks Boots you are not need to upgrade it to Terrasparks Boots, in order to progress.


The Terraspark Boots Only Gives you more abilities such as Water and Lava Walking, and Lava immunity for 7 Seconds which is not need for boss fights like these, while Lightning and Frostsparks Abilities and Mobility is enough in my opinion.

More Accesories
Warrior Emblem
- The Warrior Emblem is a Hardmode Accessory that increases melee damage by 15%. It has a 1/8 (12.5%) On Classic and 1/4 (25%) On Expert / Master to drop from the Wall of Flesh.


Beserker Glove
- The Berserker's Glove is a Hardmode accessory crafted from the Power Glove and Flesh Knuckles at a Tinkerer's Workshop, granting the abilities of both. It grants the following:
+ 12% increased melee speed.
+ 100% increased melee knockback.
+ 10% increased melee weapon size
Autoswing for melee weapons and whips
+ 8 Defence without modifiers.
+ Increased enemy aggro.


- Crafting:
+ The Power Glove is crafted by combining a Titan Glove which is dropped from Mimics (16.67%) and Feral Claws at a Tinkerer's Workshop.
+ The Flesh Knuckles are dropped from Crimson Mimics (20%), which can be found randomly in the Underground Crimson, or summon by placing a Key of Night into a chest, which is crafted from 15 Souls of Night dropped from enemies in the Underground Crimson.

-Mimics Not to be Confused with the Crimson / Corrupt and Hallowed Mimic-

-Crimson Mimic-


Yoyo Bag ( For Yo-yo Users )
- The Yoyo Bag is a Hardmode accessory which allows the holder to use two yoyos, similar to the Yoyo Glove along with two Counterweights and also increases the yoyo's range.

- Crafting:
+ Crafted by Combining any Counterweights with a String and a Yoyo Glove at a Tinkerer's Workshop.
+ Counterweights can be bought from either the Traveling Merchant or Skeleton Merchant.
+ The Yoyo Glove is purchased from the Skeleton Merchant for 50 Gold Coins during Hardmode.

- Traveling Merchant NPC and Skeleton Merchant NPC -


Hardmode Wings
- At this point of the game you can use any Hardmode Wings, they will provide you more Flight Time and make the Fights Easier for you.
- I recommend you getting the Fairy Wings which is the easiest wings you can get When Entering Hardmode in my opinion.
- Fairy Wings is Crafted out 100 Pixie Dust which can be Obtained by kill Pixies in the Hallow Biome and 20 Souls of Flight which is obtained by killing Wyverns
- Wyverns Spawns in the Space Biome and in the Sky.

- And trust me these Fairy Wings makes you look 100% more manly.
-Wyvern Enemy-


Mechanical Boss Fight Accessories Setup
- You can use these Setups that i have for you.
1 - For Swords, Spear, Boomerang, Fails Maces Users :
Slot 1 + Warrior Emblem.
Slot 2 + Beserker Glove
Slot 3 + Obsidian Shield.
Slot 4 + Lightning or Frostsparks Boots.
Slot 5 + Fairy Wings / Any other Hardmode Wings.

Slot 6 ( Demon Heart Slot ) + Any Other Accessories You Prefer.

Slot 7 ( Master Mode Slot ) + Any Other Accessories You Prefer

2 - For Yo-yos Users
Slot 1 + Berserker Glove
Slot 2 + Yoyo Bag
Slot 3 + Obsidan Shield
Slot 4 + Lighting or Frostsparks Boots
Slot 5 + Fairy Wings / Any other Hardmode Wings
Slot 6 ( Demon Heart Slot ) + Warrior Emblem.
Slot 7 ( Master Mode Slot ) + Any Other Acessories You Prefer.
(I recommend getting ''Warding'' Modifier on every accessories, this will greatly increase your lifespan)

[That's it for Pre-Mechanical Bosses Weapon, Armor Choices and Recommened Accessories for the Fight, Lets Move on setting up an Arena and make Potions and Buffs.]
[Preparation and Potions Before the Mech Bosses Fight]
The Destroyer Arena

- You should build your Arena something look something like this:


General Tips:
+ The Destroyer is just a harder Version of the Eater of Worlds.

+ It Spawns in Probes to shoot laser at you, the Probes should be taken out as soon as possible.

+ The head of The Destroyer has 0 defense, and it might be very difficult to damage only the head segment, focusing it can speed up the fight tremendously. Although it causes massive damage to the player, 70 on Normal, 200+ on Expert and even 400+ on Master, so i recommend going for the Head, you can also go for the Body segments which will take longer but it wont be as hard to Dodge his head.

+ Using the Minimap to see where the Destroyer will surface can greatly help with dodging.

+ Unlike most bosses, The Destroyer does not despawn if players get too far away; it will simply follow them to their position. This means that one can use any means of teleportation ( Magic Mirrors, Teleporters, etc.) to easily avoid it during the fight, as it does not teleport either, Make sure you have a good spawn point ready if you are low on health or in danger.


+ Weapons such as the Fetid Bagnahks and Ice Sickle is Very Effective since it can damage Multiple Segments at once if you know how to use it Correctly.

The Twins Arena

- You should build your Arena something look something like this:


General Tips:
+ Focus on defeating one eye completely first without inflicting too much damage on the other one. Battling The Twins while both are in their second form makes the battle much more difficult, especially in Expert Mode.

+ Spazmatism may be a better choice for defeating first, since its Cursed Flames are difficult to avoid without proper mobility equipment and buffs in its second phase, Retinazer is less deadly.

+ Mobility such as the Lightning Boots or better boots and Wings are useful for this fight.


+ A simple Flat arena is good for this fight.

Skeletron Prime Arena

- You should build your Arena something look something like this:

Same Arena as The Twins

General Tips:
+ Although it is a little more time-consuming, focusing on the arms first is very rewarding. Once Skeletron Prime's head is no longer shielded by anything, the fight becomes a lot easier.

+ A good idea is to focus on the Prime Laser first, as it is harder to dodge than the other limbs.

+ Due to Skeletron Prime's overall high defense, inflicting it with Ichor is effective, as it is not immune to it.

+ Accessories such as the Obsidian and Cobalt Shield is extremely useful for this fight as you can not be Stagger or Knocked Back.


Potions / Flasks
Iron Skin Potion
- The Ironskin Potion is a buff potion which grants the Ironskin buff when consumed. The buff increases the player's defense by 8, thus reducing damage by 4 on Classic 6 on Expert 8 on Master.
-Crafting-


Regeneration Potion
- The Regeneration Potion is a buff potion which grants the Regeneration buff when consumed. The buff provides health regeneration for a total of 960HP (2HP per second for 8 minutes)
- The buff's effect is stackable with the Band of Regeneration. The buff is hypothetically equivalent to equipping 2 Bands of Regeneration.

-Crafting-


Edunrance Potion
- The Endurance Potion is a buff potion which grants the Endurance buff when consumed. The buff reduces taken damage by 10%.
- This lasts for 4 minutes.

-Crafting-

(Armored Cavefish are a type of fish which are found uncommonly by fishing in the Underground, Cavern, and Underworld layers, in any biome except the Desert)

Flask Of Ichor (If your World is in Crimson)
- The Flask of Ichor is a Hardmode flask crafted at an Imbuing Station. While under the influence of a Flask of Ichor, melee (and whip) attacks will inflict the Ichor Debuff for 10 to 19 seconds, decreasing the defense of enemies by 15 on the Desktop Version, therefore increasing the damage of the player's weapon by 7 - 8 Damage.
- Ichor can be obtained from killing Ichor Stickers in the Underground Crimson
-Ichor Sticker Enemy-

-Crafting-


Flask Of Cursed Flames (If your World is in Corruption)
- The Flask of Cursed Flames is a Hardmode flask that, when applied, causes melee weapons (and Whips) to inflict the Cursed Inferno debuff for 3–6 seconds on a successful hit.
- Melee weapons that fire projectiles will also inflict the debuff on enemies hit by the projectiles.
- You can only use one kind of flask at a time.

- The Flask of Cursed Flames can be crafted by Mixing Cursed Flames with Bolted Water.
- Cursed Flames can be Dropped by Vile Ghouls, Word Feeders, Clinger is the Corruption and Underground Corruption.

-Vile Ghoul, World Feeder, Clinger Enemy-

-Crafting-


Buffs
Sharpening Station.
- The Sharpening Station is a furniture item that, when placed and pressed on, Applies the Sharpened Buff, which increases armor penetration of all melee weapons by 12.
- It can be found in Underground Cabins in the Underground Jungle.
- Very useful later on for High Defence Bosses such as Mechs.

[Now the fight against the Mechanical Bosses for you should be as easy as cutting a cake, Lets move on Gearing up and prepare to fight the Overgrown monster of the Jungle, Plantera!]
[Pre-Plantera Armor and Weapons]

- So you also managed to take down the 3 Mechanical Bosses, It's almost the end, but to get there you'll have to defeat Plantera the Overgrown monster of the Jungle first, now It's time for you to prepare, here are the Armor Choices :

Armor
Turtle Armor
- Turtle armor is a Hardmode armor set consisting of the Turtle Helmet, Turtle Scale Mail, and Turtle Leggings.
- A full set grants a vastly amplified Thorns effect, which reflects twice the full damage from melee attacks onto the attacking enemy.

- The full set of armor also provides the following:
+ 14% increased melee damage.
+ 12% increased melee critical strike chance.
+ 750 aggro.
+ 15% damage reduction.

- How to Obtain : Crafting this set requires a total of 54 Chlorophyte Bars or 270 Chlorophyte Ores and 3 Turtle Shells at a Mythril Anvil or
Orichalcum Anvil.
- Turtle Shells can be dropped from Giant Tortoise with a 5.88% a chance.
- Chlorophyte is a new ore that spawns in the Jungle when you enter Hardmode, you can't mine It unless you have a Drax or Pickaxe that is crafted from the Souls that the Mechanical Bosses drop and the Hallowed Bars.
-Drax and Pickaxe Crafting-

-Giant Tortoise Enemy-


Chlorophyte Armor (Mask for Melee)
- Chlorophyte armor is a Hardmode armor set available after defeating all three mechanical bosses. It can be considered a partial upgrade of Hallowed armor, granting more defense.
- Equipping the full set causes a Crystal Leaf to permanently appear over the player's head, automatically attacking enemies via a ranged projectile that costs no mana or ammunition. The projectile is capped at 100 damage.
- The Leaf Crystal is capable of firing two separate simultaneous volleys of projectiles. Each volley fires every 0.67 Seconds.
- Reduces damage taken by 5% (with Mask)
- FOR MELEE USERS CRAFT THE CHLOROPHYTE MASK.
- How to Obtain : A full set of Chlorophyte armor requires 54 Chlorophyte Bars, or 270 Chlorophyte Ores at a Mythril Anvil / Orchalcum Anvil.

[That's It for Armor, Let's move on to Weapon Choices]


Weapons
Weapons such as the Fetid Baghnakhs and Amarok that I mentioned earlier in the Pre-Mech Bosses section can still be used for the Plantera Boss Fight.


New Weapon Choices
True Night's Edge
- The True Night's Edge is a Hardmode sword. It has the highest base damage of any Pre-Plantera sword.
- It is also a stronger version of the Night's Edge, doing more damage and firing a glowing, spinning, green sword projectile called "Night Beam" in the direction of the cursor. Because this ability has a short cooldown.
- The True Night's Edge is one of the ingredients necessary to craft the Terra Blade, The Terra Blade can only be Obtained after Defeating Plantera on Desktop Version.
- The True Night's Edge can be crafted by Combining a Night Edge with 20 Souls of Might, Souls of Sight, Souls of Fright at a Mythril Anvil / Ordichalcum Anvil.
- If you don't know how to craft the Night's Edge again, go back Pre-Wall of Flesh Weapons and Armor Section to see how to craft it.
- It's Best Modifier is Legendary.
- 105 Base DMG
- Soul of Might is dropped from The Destroyer.
- Soul of Sight is dropped from The Twins.
- Souls of Fright is dropped from Skeletron Prime.


True Excalibur
- The True Excalibur is a Hardmode sword. It is a stronger version of the Excalibur, firing a glowing pink sword projectile called "Light Beam" in the direction of the cursor.
- This ability has a short cooldown, not every swing of the sword launches a Light Beam.
- The True Excalibur is one of the ingredients necessary to craft the Terra Blade.
- The projectile can pierce once, hitting up to two enemies.

- The True Excalibur is not capable of autoswing.
- Its best modifier is Legendary.
- 70 Base DMG.
- The True Excalibur can be crafted by Combining an Excalibur With 24 Chlorophyte Bars or 120 Chlorophyte Ores.
- The Excalibur is Crafted from 12 Hallowed Bars at a Mythril Anvil / Orichalcum Anvil, Hallowed Bars are dropped from every Mechanical Bosses.


Death Sickle
- The Death Sickle is a Hardmode post mech-boss auto-swinging melee weapon that fires a large, short-range, which travels through blocks.
- The projectile travels approximately 12 tiles, emits a small amount of light, and can pierce 4 enemies. It is dropped by Reapers during the Solar Eclipse event with a 1/40 (2.5%) Chance.
- Its best modifier is Legendary.
- 57 Base DMG
-Reaper Enemy (Spawns During the Solar Eclipse Event)-

[More Pre-Plantera Weapon Choices]
Light Disc
- The Light Disc is a Hardmode boomerang-type weapon that deals melee damage. Light Discs have the rare ability (along with the Bananarang, though it can have twice the amount) to be stacked up to 5 in a single slot, which allows them to be rapid-fired by holding the attack button.
- They are quicker than other boomerangs, and can ricochet any number of times.
- After approximately two seconds, the disc will return to the thrower.
- They also emit a small amount of light.
- Light Discs cannot have modifiers through any usual in-game means, due to their stackable nature.

- 57 Base DMG.


Yelets
- The Yelets is a powerful Hardmode yoyo, after defeating any mechanical boss, this yoyo has a 1/200 (0.5%) chance to drop from any enemy killed in the Jungle and Underground Jungle, including in the Jungle Temple.
- It has a spin duration of 14 seconds, and can reach up to 18 tiles.
- Its best modifier is Godly or Demonic.
- 60 Base DMG.


Shadowflame Knife
- The Shadowflame Knife is a Hardmode melee weapon that auto-fires small flaming knife projectiles that consume no mana or ammunition.
- The projectiles ricochet twice off enemies only (not blocks), dissipating upon their third impact.
- They also inflict the Shadowflame debuff for between 1 and 3 seconds, which deals an additional 15 damage per second.
- The Shadowflame Knife has a 1/6 (16.67%) / 1/3 (33.33%) chance to drop from a Goblin Summoner during a Hardmode Goblin Army.
- Its best modifier is Godly or Demonic.
- 38 Base DMG.
-Goblin Summoner Enemy-


(Note: The projectiles ricochet, they do not have homing properties.)

[That's it for Pre-Plantera Weapons and Armor Options, Moving on to Accessories]
[Pre-Plantera Accessories]
Accessories Such as the Warrior Emblem, Frostsparks Boots, Obsidian Shield, Yoyo Bag, Hardmode Wings that i mentioned in the Last Section can still be used at this point of the game.
More Accesories
Mechanical Glove
- The Mechanical Glove is a Hardmode accessory that doubles all melee weapons' knockback, and increases melee damage and speed by 12%.
- On the Desktop version, it enables autoswing for all melee weapons and whips and increases their size by 10%.


- Crafting: The Mechanical Glove is Crafted by Combining a Power Glove With a Avenger Emblem.


- The Power Glove is Crafted by Combining the Titan Glove Drops from Mimics With Feral Claws.

- The Avenger Emblem is Crafted by Combining either the Warrior Emblem / Ranger Emblem / Sorcerer Emblem or Summoner Emblem With 5 Souls of Might, 5 Souls of Sight and 5 Souls of Fright.

-Mimcs, Not to be confused with Crimson / Corrupt and Hallowed Mimics-


Fire Gauntlet
- The Fire Gauntlet is a Hardmode accessory that boosts melee weapons in the following ways:
+ 100% More knockback.
+ Plus 12% Damage.
+ They gain autoswing (also applies to whips)
+ +10% size on some melee weapons.


- Crafting:
- The Fire Gauntlet is crafted by Combing a Mechanical Glove With a Magma Stone at a Tinkerer's Workshop.


- The Mechanical Glove, Already Showed you how to craft right above.

- And the Magma Stone is The Magma Stone is an accessory that drops from Lava Bats (2% chance) and Hellbats (0.67% chance) in The Underworld.


Plantera Fight Accessories Setup
- You can use these Setups that i have for you.
1 - For Swords, Spear, Boomerang, Fails Maces Users :
Slot 1 + Mechanical Glove.
Slot 2 + Fire Gauntlet
Slot 3 + Frostsparks Boots
Slot 4 + Obsidan Shield.
Slot 5 + Fairy Wings / Any other Hardmode Wings.

Slot 6 ( Demon Heart Slot ) + Warrior Emblem.

Slot 7 ( Master Mode Slot ) + Any Other Accessories You Prefer


2 - For Yo-yos Users
Slot 1 + Yoyo Bag.
Slot 2 + Mechanical Glove.
Slot 3 + Fire Gauntlet.
Slot 4 + Frostsparks Boots.
Slot 5 + Fairy Wings / Any other Hardmode Wings.

Slot 6 ( Demon Heart Slot ) + Obsidan Shield.

Slot 7 ( Master Mode Slot ) + Warrior Emblem.

[That's it for Pre-Plantera Weapon, Armor Choices and Recommened Accessories for the Fight, Lets Move on setting up an Arena and make Potions and Buffs.]
[Preparation and Potions Before the Plantera Fight]
Plantera Arena

- You should build your Arena something look something like this:

(You can Add Heart Lanterns and Plant Sunflowers to boost your Health Regen)

General Tips:
+ Excavate a sizable area to allow easier dodging before summoning Plantera

+ Widening a Bee Hive in the Underground Jungle is a fast and effective way of making an arena for fighting Plantera

+ Narrow passages slow Plantera as it takes more time for her to grip the surrounding terrain.

+ In Plantera's second form, her only ranged attack consists of the Spores which are very easy to kill, this means that keeping distance is the key to avoid damage, she will also spawn in tentacles which will damage you up close.


How To Spawn Plantera:
- Breaking a Plantera Bulb which cause Plantera to spawn, so be careful to not break it on accident.
- The Plantera Bulb Spawns in the Jungle Terrain Underground on Jungles Grass, It's pretty hard to find one but you can also use the minimap to see where it is (Only apply to where you have explored)


Potions / Flasks
Iron Skin Potion
- The Ironskin Potion is a buff potion which grants the Ironskin buff when consumed. The buff increases the player's defense by 8, thus reducing damage by 4 on Classic 6 on Expert 8 on Master.
-Crafting-


Regeneration Potion
- The Regeneration Potion is a buff potion which grants the Regeneration buff when consumed. The buff provides health regeneration for a total of 960HP (2HP per second for 8 minutes)
- The buff's effect is stackable with the Band of Regeneration. The buff is hypothetically equivalent to equipping 2 Bands of Regeneration.

-Crafting-


Edunrance Potion
- The Endurance Potion is a buff potion which grants the Endurance buff when consumed. The buff reduces taken damage by 10%.
- This lasts for 4 minutes.

-Crafting-

(Armored Cavefish are a type of fish which are found uncommonly by fishing in the Underground, Cavern, and Underworld layers, in any biome except the Desert)

Flask Of Ichor (If your World is in Crimson)
- The Flask of Ichor is a Hardmode flask crafted at an Imbuing Station. While under the influence of a Flask of Ichor, melee (and whip) attacks will inflict the Ichor Debuff for 10 to 19 seconds, decreasing the defense of enemies by 15 on the Desktop Version, therefore increasing the damage of the player's weapon by 7 - 8 Damage.
- Ichor can be obtained from killing Ichor Stickers in the Underground Crimson
-Ichor Sticker Enemy-

-Crafting-


Flask Of Cursed Flames (If your World is in Corruption)
- The Flask of Cursed Flames is a Hardmode flask that, when applied, causes melee weapons (and Whips) to inflict the Cursed Inferno debuff for 3–6 seconds on a successful hit.
- Melee weapons that fire projectiles will also inflict the debuff on enemies hit by the projectiles.
- You can only use one kind of flask at a time.

- The Flask of Cursed Flames can be crafted by Mixing Cursed Flames with Bolted Water.
- Cursed Flames can be Dropped by Vile Ghouls, Word Feeders, Clinger is the Corruption and Underground Corruption.

-Vile Ghoul, World Feeder, Clinger Enemy-

-Crafting-


Buffs
Sharpening Station.
- The Sharpening Station is a furniture item that, when placed and pressed on, Applies the Sharpened Buff, which increases armor penetration of all melee weapons by 12.
- It can be found in Underground Cabins in the Underground Jungle.

[Now the fight against Plantera for you should be as easy as stomping on a dead plant, Lets move on Gearing up and prepare to fight the The Golem!]
[Pre-Golem Armor and Weapons]

- So you've killed Plantera, you're one step closer to the end of Terraria, but to continue, you'll have to slay the Golem first, here are the Armor choices :

Armor
There are actually no better new armor sets present after you killed Plantera, so the Armor Choice are still:
+ Turtle Armor

+ Chlorophyte Armor (Mask)
If you are wondering on how to craft these armor, I already mentioned them in the Pre-Plantera Armor and Weapon Choices


Weapons
Terra Blade
- The Terra Blade is a Hardmode projectile sword. When used, it fires a green sword-shaped projectile which costs neither mana nor ammunition, deals 50% of the Sword's Damage.
- The Projectiles can pierce through two enemies, dissipating after hitting a third enemy or a wall.
- The projectile can travel up to 5000 feet (2500 blocks) at a speed of 61 mph.


- How to Craft : Terra Blade Can be Crafted by combining the True Night's Edge with The True Excalibur with a Broken Hero Sword at a Mythril / Orichalcum Anvil.
+ The True Night's Edge Crafting is Mentioned in the Pre-Plantera Armor and Weapons Section.
+ The True Excalibur Crafting is Mentioned in the Pre-Plantera Armor and Weapons Section too.
+ The Broken Hero Sword is Dropped from Mothron (25%) during the Solar Eclipse Event.

- On the Desktop version, the Terra Blade becomes available after defeating Plantera, and after 1 Mechanical Bosses for other versions.
- This is Currently the BEST Weapon you can obtain after Plantera.
- Its best modifier is Legendary.
- 115 Base DMG.
-Mothron Enemy (Only Spawns In The Solar Eclipse Event)-


Seedler
- The Seedler is a Hardmode sword that has a 1/7 (14.29%) on Normal, and on Expert / Master, it has a 2/7 (28.57%) chance to be dropped by Plantera.
- It fires out grenade-like projectiles, which explode after a period of time or when hitting an enemy, sending out 4 to 7, smaller and faster shards.
- Its best modifier is Legendary.
- 50 Base DMG.


The Eye of Cthulhu
- The Eye of Cthulhu is a Hardmode, post-Plantera yoyo which has a 33.33% chance on Normal to drop from Mothrons during a Solar Eclipse and a 55.56% to drop on Expert and Master.
- It is one of the few yoyos that can stay in the air indefinitely, and it has a reach of 23 tiles.
- It is currently the second strongest yoyo in the game.
- Its best modifier is Godly or Demonic.
- 115 Base DMG.
-Mothron Enemy (Only Spawns In The Solar Eclipse Event)-


[More Pre-Golem Weapons Choices]
Vampire Knives (IF YOUR WORLD IS CRIMSON)
- The Vampire Knives are a Hardmode post-Plantera melee weapon that autofires a spread of projectiles, the player is healed by a small amount for each projectile that hits an enemy.
- The Vampire Knives are always found inside the Dungeon's Crimson Chest in Crimson worlds, a Crimson Key will be needed to open the Crimson Chest.
- The Crimson Key, including all the Biome keys has a 1/2500 (0.04%) chance of dropping from an enemy in the key's respective biome, For example the Crimson Key drops from the Crimson Biome which is it's respective biome, the fastest way to get biome keys is to build a monster farm.
- Its best modifier is Godly or Demonic.
- 29 Base DMG.


Scourge of the Corruptor (IF YOUR WORLD IS CORRUPTION)
- The Scourge of the Corruptor is a Hardmode post-Plantera weapon that fires projectiles. It is always found inside the Dungeon's Corruption Chest in Corruption worlds, a Corruption Key is needed to open the Corruption Chest.
- The Corruption Key, including all the Biome keys has a 1/2500 (0.04%) chance of dropping from an enemy in the key's respective biome.
- Its best modifier is Godly or Demonic.
- 70 Base DMG.


Paladin's Hammer
- Paladin's Hammer is a Hardmode, post-Plantera boomerang with high velocity and knockback but low range, it has a 1/15 (6.67%) to drop on Normal mode and a 22/225 (9.78%) chance on Expert Mode to be dropped from Paladins in post-Plantera Dungeon areas with Brick background walls.
- Its best modifier is Godly or Demonic.
- 90 Base DMG.
-Paladin Enemy (Only Spawns In Dungeons After Plantera Is Defeated)-


[That's it for Pre-Golem Weapons and Armor Options, Moving on to Accessories]
[Pre-Golem Accessories]
A lot of the Accessories from the Pre-Plantera Section that I mentioned earlier such as the Fire Gauntlet, Mechanical Glove, Frostspark Boots, Warrior Emblem can still be used for the Golem Fight.


More Accesories
Frozen Shield
- The Frozen Shield is a post-Plantera Hardmode shield accessory combining the functionalities of Paladin's Shield and the Frozen Turtle Shell, Grants immunity to knockback and puts a shell around the owner when below 50% life that reduces damage by 25% also absorbs 25% of damage done to players on your team when above 25% life (Only if you have friends).
- Grants an additional 6 Defence, it's basically a better version of the Obsidian Shield.

- How to Craft : Combine a Paladin Shield with a Frozen Turtle Shell at a Tinkerer's Workshop.

+ The Paladin's Shield is Dropped by Paladins which spawns in the Dungeon with a chance of 9.33% drop rate on Normal Mode and a 13.56% drop rate on Expert and Master mode.
+ The Frozen Turtle Shell is dropped from Ice Tortoise in the Ice Biome with a 1% chance of dropping it's shell.
-Paladin and Ice Tortoise Enemy-


Wings (Better Hardmode Wings)
- Previously on other fights that i have guided you so far, you are currently using the pair of Fairy Wings crafted at the beginning of Hardmode since we're almost at the Endgame it's time to upgrade it a bit.
- The wings that I'm going to show you how to craft now are ''Bat Wings'', they only provide about 0.6 more seconds of flight time but, it will come in handy for later fights that I'm going to guide you like Duke Fishron.

- Crafting : Combining a Broken Bat Wing with 20 Souls of Flight at a Tinkerer's Workshop.

+ The Broken Bat wing It has a 1/40 (2.5%) chance of being dropped by Vampires during a Solar Eclipse.
+ Soul of Flight is Dropped from Wyverns which can be encountered in the Space Biome or on a Sky Island.
-Vampire and Wyvern Enemy-


Avenger Emblem (Already Mentioned How To Craft In The Pre-Plantera Section, but I'll repeat it)

- The Avenger Emblem is Crafted by Combining either the
Warrior Emblem / Ranger Emblem / Sorcerer Emblem or Summoner Emblem With 5 Souls of Might, 5 Souls of Sight and 5 Souls of Fright.


The Golem Fight Accessories Setup
- You can use these Setups that i have for you.
1 - For Swords, Spear, Boomerang, Fails Maces Users :
Slot 1 + Fire Gauntlet.
Slot 2 + Mechanical Glove.
Slot 3 + Frostsparks Boots or Higher.
Slot 4 + Bat Wings / Any other better Hardmode Wings.
Slot 5 + Frozen Shield.

Slot 6 ( Demon Heart Slot ) + Warrior Emblem.

Slot 7 ( Master Mode Slot ) + The Avenger Emblem.


2 - For Yo-yos Users :
Slot 1 + Fire Gauntlet.
Slot 2 + Yoyo Bag.
Slot 3 + Frostsparks Boots or Higher.
Slot 4 + Bat Wings / Any other better Hardmode Wings.
Slot 5 + Frozen Shield.

Slot 6 ( Demon Heart Slot ) + Mechanical Glove.

Slot 7 ( Master Mode Slot ) + Warrior Emblem.

-I Highly Recommend Getting The ''Menacing'' Modifier On Most Of The Accessories (3 or 4), This Will Greatly Increase Your Damage Output By A lot.

[That's it for Pre-Golem Weapons, Armor Choices and Recommended Accessories for the Fight, Lets Move on setting up an Arena and make Potions and Buffs.]
[Preparation and Potions Before the Golem Fight]
The Golem Arena

- You should build your Arena something look something like this:
(Just hope that you don't get a small altar room lol, the smaller it is, the harder it is because you only have limited space, but don't worry too much because The Golem is one of the Easiest Bosses)

General Tips:
+ In some cases, the terrain surrounding the altar will cause Golem to get stuck when it spawns. It can attack with its fists and projectiles but will be unable to jump around. Players can also recreate this condition by placing blocks near the altar.

+ A quick pair of wings can be used to easily dodge the laser beams shot in Golem's second phase.


How To Spawn The Golem:
- Using The Lihzahrd Cell on the Lihzahrd Altar Will Summon The Golem.
- The Power Cells can be dropped by enemies in the Jungle Temple and can be found in Lihzahrd Chests too.


Potions / Flasks
Iron Skin Potion
- The Ironskin Potion is a buff potion which grants the Ironskin buff when consumed. The buff increases the player's defense by 8, thus reducing damage by 4 on Classic 6 on Expert 8 on Master.
-Crafting-


Regeneration Potion
- The Regeneration Potion is a buff potion which grants the Regeneration buff when consumed. The buff provides health regeneration for a total of 960HP (2HP per second for 8 minutes)
- The buff's effect is stackable with the Band of Regeneration. The buff is hypothetically equivalent to equipping 2 Bands of Regeneration.

-Crafting-


Edunrance Potion
- The Endurance Potion is a buff potion which grants the Endurance buff when consumed. The buff reduces taken damage by 10%.
- This lasts for 4 minutes.

-Crafting-

(Armored Cavefish are a type of fish which are found uncommonly by fishing in the Underground, Cavern, and Underworld layers, in any biome except the Desert)

Flask Of Ichor (If your World is in Crimson)
- The Flask of Ichor is a Hardmode flask crafted at an Imbuing Station. While under the influence of a Flask of Ichor, melee (and whip) attacks will inflict the Ichor Debuff for 10 to 19 seconds, decreasing the defense of enemies by 15 on the Desktop Version, therefore increasing the damage of the player's weapon by 7 - 8 Damage.
- Ichor can be obtained from killing Ichor Stickers in the Underground Crimson
-Ichor Sticker Enemy-

-Crafting-


Flask Of Cursed Flames (If your World is in Corruption)
- The Flask of Cursed Flames is a Hardmode flask that, when applied, causes melee weapons (and Whips) to inflict the Cursed Inferno debuff for 3–6 seconds on a successful hit.
- Melee weapons that fire projectiles will also inflict the debuff on enemies hit by the projectiles.
- You can only use one kind of flask at a time.

- The Flask of Cursed Flames can be crafted by Mixing Cursed Flames with Bolted Water.
- Cursed Flames can be Dropped by Vile Ghouls, Word Feeders, Clinger is the Corruption and Underground Corruption.

-Vile Ghoul, World Feeder, Clinger Enemy-

-Crafting-


Buffs
Sharpening Station.
- The Sharpening Station is a furniture item that, when placed and pressed on, Applies the Sharpened Buff, which increases armor penetration of all melee weapons by 12.
- It can be found in Underground Cabins in the Underground Jungle.

[Now With All These Weapons And Gear, The Fight Against The Golem Should Be Very Easy for you, After Defeating The Golem, You Have Access To Everything In The Game By This Point Now, And You Could Trigger The Lunar Event And Start The Endgame, But Before That, Let's Defeat Some Of The Rest Of The Hardmode Bosses To Obtain Better Weapons]
[Arenas and How To Defeat The Rest of the Hardmode Bosses]
Duke Fishron Arena
(Optional to fight or not)
(By This Point, You Should Have Max 500 Hp With Turtle or Beetle Armor, Bettle Armor is Crafted From Combining a Few Beetle Scales with the Turtle Armor, That's why i recommend you fighting these bosses after Golem)


- You should build your Arena something look something like this:

[You can add Heart Lanterns to increase your health regen and also expand your platforms too!]

General Tips:
+ The Inferno Potion can come in very handy during this fight to prevent taking any damage from Duke's homing bubble attacks, the Inferno Potion's ring of fire will block them off completely.

+ Duke Fishron's charges aim for where the player is, not where they will be. Because of this, moving perpendicularly with his charges will cause him to completely miss, Dodging his charges can be as simple as moving in a zig-zag pattern or a triangle.

+ As Sharknadoes might be hard to see during nighttime, it is recommended to fight Duke Fishron during the day.

+ When Duke Fishron falls below 50% health, he remains stationary for a second and transforms into his Second Phase, being a good time to deal damage and/or consume Potions. His skin becomes a darker green and his eyes will start glowing.

+ (Only On Expert Mode or Master) When Duke Fishron falls below 15% health, he will stop moving to transform again into his Final Phase, and the background will be covered in a dark, blue fog. Duke Fishron will become invisible, but his eyes still glow, he gains the ability to teleport behind you so make sure to pay close attention to where he is.

How To Spawn Duke Fishron:
+ Fishing in the Ocean while using the Truffle Worm as bait, will spawn Duke Fishron
+ Truffle Worms can be caught by a bug net, they can be found in the Underground Glowing Mushroom Biome.


Empress of Light Arena
(Optional to fight or not)

- You should build your Arena something look something like this:

Make sure to expand your arena enough for you to dodge her attacks, i would recommend 400 Platforms per floor, also get a few Heart Lanterns and Campfires, this fight is pretty tough for Melee Users.

General Tips:
+ She is not immune to any practical debuffs, this can be a good extra source of damage, especially with the use of Ichor.

+ It is best to stay at an average level or below the Empress of Light as she zips above the player's position after every attack.

+ Rod of Discord, dropped from Chaos Elementals in the Hallowed Biome, will help the you dodge some of her attacks, the Rod of Discord has a 1/400 (0,25%) of dropping from Chaos Elementals.

+ Use weapons that are capable of dealing damage reliably from long range like Yo-yos or Weapons that shoots out Projectiles.

How To Summon The Empress of Light:
+ The Empress of Light can be summoned by killing the Prismatic Lacewing which is a Rare Critter that spawns on the Surface of the Hallowed Biome at Night.


Queen Slime Arena
(Optional to fight or not)

- You should build your Arena something look something like this:

You don't even need an arena lol, this boss rewards you with 0 items that can benefit Melee Users, and it's also a Early-Hardmode Boss, and we're Post-Golem.

General Tips:
+ Queen Slime herself has a relatively simple attack pattern, half the threat comes from the minions she spawns, which can fill the screen with projectiles and quickly overwhelm the player. Killing or avoiding these should be top priority.

+ Stay in the air using wings or mounts during her first phase, as many of her attacks cannot reach the player there, during her second phase, the player should stay closer to the ground while occasionally luring her back up, as they can avoid many of her projectiles and minions due to their slow and predictable movement patterns.

How To Spawn Queen Slime:
+ The Queen Slime can be spawned by consuming a Gelatin Crystal.
+ The Gelatin Crystal can be found in the Underground Hallowed Biome.


(That's it for the rest of the Hardmode Bosses, let's move on preparing for the End-game Activity aka triggering the Lunar Event.)
[Pre-Lunar Event Armor and Weapons]

After all those Bosses From the Jungle, you have nearly made it to the End-game, but there's one more obstacle and that is to defeat the Lunatic Cultist In order to trigger the End-game Event aka the Lunar Event, So here are the Armor and Weapons Options I have for you :
YOU SHOULD HAVE 500 MAX HEALTH BY NOW

Armor
Beetle Armor
- Beetle Armor is a Hardmode, post-Golem armor set that provides melee and defensive bonuses. it is crafted from Turtle armor, it trades away the Thorns effect in exchange for stronger offensive or defensive bonuses (depending on which chest piece is worn).

- Beetle armor has two variants for its chest piece, Beetle Scale Mail and Beetle Shell, the Beetle Scale Mail enhances damage output and is slightly more agile, whereas the Beetle Shell provides more defense.

- It's Also The BEST Melee Armor Set before triggering the Lunar Event.

- Beetle armor provides the following bonuses when fully equipped:

-- With Beetle Scale Mail.
+ +8% melee critical hit chance.
+ 14% melee damage.
+ 12% melee speed.
+ 12% movement speed.
+ Significantly higher chance that enemies will target the wearer.
+ Grants you the ''Beetle Might'' offensive buff: increases melee speed and damage by increments of 10% when dealing melee damage to enemies, The boost can be raised up to 30%.

-- With Beetle Shell.
+ +5% melee critical hit chance.
+ 11% melee damage.
+ 6% melee speed.
+ 6% movement speed.
+ Significantly higher chance that enemies will target the wearer.
+ Grants you the ''Beetle Endurance'' defensive buff: When the player avoids taking damage, this buff reduces damage taken on the next hit by 15%, with further boosts to 30% and 45% if the player continues to avoid damage for a longer duration.

(If you prefer Defence, then you should craft the Shell, but if you prefer Damage Output rather than Defence, then you should craft the Scale Mail.)

- How To Craft : Crafting the full set with one chest piece requires 18 Beetle Husks and a full set of Turtle armor which I already showed you how to get the Turtle Armor previously,
+ Beetle Husks has a 100% to be dropped from ''Golem'' which is the Boss in the Jungle Temple.

-Crafting In Picture (If my words are too complicated for you)-


[That's It for Armor, Let's move on to Weapon Choices]


Weapons
Weapons Such as The Seedler, Terra Blade, Eye of Cthulhu and The Vampire Knives can still be used for the Pre-Lunar Event / Lunatic Cultist Fight.


New Weapon Choices
Influx Waver
- The Influx Waver is a Hardmode, post-Golem broadsword, it fires a sword projectile in a straight line towards the cursor as it is swung, After the projectile successfully makes contact with an enemy or another hostile projectile, it will disappear, but can return up to two more times to attack a nearby enemy, or the same enemy.

- The Influx Waver has a 1/6 (16.67%) chance of being dropped by a Martian Saucer during the Martian Madness Event.
- And to my surprise, it's actually better than the Terra Blade.
- Its best modifier is Legendary.
- 110 Base DMG.
-Martian Saucer Enemy (Only Spawns During Martian Invasions)-


Possessed Hatchet
- The Possessed Hatchet is a Hardmode, post-Golem boomerang-type melee weapon that flies very fast and homes in on enemies, then returns to the player.

- It has a 1/7 (14.29%) chance to be dropped from the Golem Boss.
- The weapon acts similarly to stacked Light Discs, capable of throwing out multiple hatchets even though the weapon cannot stack, with no limit to the number of hatchets that can be out at once.
- Its best modifier is Godly or Demonic.
- 80 Base DMG.


Starlight
- The Starlight is a Hardmode shortsword that has a 1/4 (25%) chance to be dropped by the Empress of Light boss.

- While the Attack button is held, short-range light beams fire rapidly, at no mana or ammo cost.
- Its best modifier is Legendary.
- 80 Base DMG.


Flairon
- The Flairon is a Hardmode melee weapon that auto-fires a ball-and-chain that is shaped like a Duke Fishron head about 25 tiles from the player, and releases homing bubble projectiles that damage enemies.

- The Flairon has a 1/5 (20%) chance of being dropped by Duke Fishron Boss.
- The Flairon is a launched flail, and while it has the appearance of a normal flail, it is not affected by gravity, does not remain deployed when holding the Attack button, and cannot be swung around. Rather, holding Attack button causes it to auto-fire repeatedly, returning and re-firing when it impacts or reaches its maximum range.
- Its best modifier is Godly or Demonic.
- 66 Base DMG.


North Pole
- The North Pole is a Hardmode, post-Plantera spear dropped by the Ice Queen (No accurate Drop Rate) during the Frost Moon event. It fires a deadly icy spear projectile with no mana or ammo cost.

- The projectile travels straight and is then affected by gravity. It leaves a trail of snowflakes that deal damage, effectively the area between the player and the landing point of the projectile.
- The projectile fired will break upon contact with any enemy or block, and the weapon does not have autoswing.
- Its best modifier is Godly or Demonic.
- 73 Base DMG.
-Ice Queen Enemy (Only Spawn During Frost Moons)-


[That's it for Pre-Lunar Event Weapons and Armor Options, Moving on to Accessories]
[Pre-Lunar Event Accessories]
Majority of the Accessories used for the Golem Fight can still be used for the Lunatic Cultist Fight.

New Accessories
Celestial Shell
- The Celestial Shell is a Hardmode, post-Golem accessory that combines the stat-boosting powers of the Celestial Stone with the transformation powers of the Moon Shell, allowing both of their effects to happen simultaneously while taking only one accessory slot.
- When entering the Water, the item turns the user into a Merfolk gives you infinite breath and move faster in water, and when it's Night Time it turns the user into a Werewolf which gives you Melee Buffs, Movement Speed and Health Regen Increase.

> Crafting <
- The Celestial Shell is crafted by combining the Celestial Stone with the Moon Shell at a Tinkerer's Workshop.

The Celestial Stone is Crafted from Combining the Moon Stone and the Sun Stone

+ The Moon Stone can be dropped from Vampires (2,88%), which spawn in a Solar Eclipse.
+ The Sun Stone is dropped from the Golem Boss (14,29%).
(Vampire Enemy)


The Moon Shell is Crafted from Combining the Moon Charm with a Neptune's Shell

+ The Moon Charm is Dropped from Werewolf (1,67%), they only spawn on Full Moon at night.
+ The Neptune Shell is Dropped from Creature From The Deep (2%), which spawn in a Solar Eclipse.
(Werewolf and Creature From The Deep Enemy)


- Wearing the Celestial Shell Accessory Grants you the following:


The Lunatic Cultist Fight Accessories Setup
- You can use these Setups that i have for you.
1 - For Swords, Spear, Boomerang, Fails Maces Users :
Slot 1 + Fire Gauntlet.
Slot 2 + Celestial Shell.
Slot 3 + Frostsparks Boots or Higher.
Slot 4 + Bat Wings / Any other better Hardmode Wings.
Slot 5 + Frozen Shield.

Slot 6 ( Demon Heart Slot ) + Mechanical Glove.

Slot 7 ( Master Mode Slot ) + Warrior Emblem.


2 - For Yo-yos Users
Slot 1 + Fire Gauntlet.
Slot 2 + Yoyo Bag.
Slot 3 + Frostsparks Boots or Higher.
Slot 4 + Bat Wings / Any other better Hardmode Wings.
Slot 5 + Frozen Shield.

Slot 6 ( Demon Heart Slot ) + Celestial Shell.

Slot 7 ( Master Mode Slot ) + Mechanical Glove.
(You can Swap the Demon Heart Slot with Slot 5 if you prefer DPS more than Defence.)

- I Highly Recommend Getting The ''Menacing'' Modifier On Most Of The Accessories (3 or 4), This Will Greatly Increase Your Damage Output By A lot.

[That's it for Pre-Lunar Event Weapons, Armor Choices and Recommended Accessories for the Fight, Lets Move on setting up an Arena for Lunatic Cultist Fight.]
[Preparation Before the Lunatic Cultist Fight]
The Lunatic Cultist Arena

- You should build your Arena something look something like this:

(You can just reuse the Skeletron Arena you that built infront of the Dungeon, It will save a lot of time and plus, the fight is easy.)
(You don't need potions for this fight, since it's a pretty easy fight)

General Tips:
+ Avoid defeating the Lunatic Cultist if you are not yet ready for the Lunar Events. Beating the Lunatic Cultist causes the Lunar Events to begin immediately, and there is no way to de-summon them.

+ Many of the Lunatic Cultist's attacks can be blocked by hiding behind solid blocks. A weapon that attacks through blocks or a yoyo can be used to continue dealing damage.

+ One of the Lunatic Cultist's attack is, he's going to make decoys of himself, therefore if you attack his decoy, it's will cause a Phantasm Dragon to spawn and Target you.

+ Attacking a decoy Cultist is not a bad idea if the player uses the Vampire Knives. The resulting Phantasm Dragon is very long and may be easily targeted to restore some life.


- The real Lunatic Cultist can be distinguished from its fakes in a number of ways:

+ The real Cultist is the only one with a health meter.
+ The real Cultist has narrow slit-like eyes, while the clones' eyes are holes.
+ The real Lunatic Cultist has a line on its hood while the fakes do not.


How To Spawn The Lunatic Cultist:
- The Lunatic Cultist can be spawned by killing the Cultists infront of the Dungeon, They are The ''Lunatic Devotee'' and The ''Cultist Archer''.

- After those Cultist are killed, the Lunatic Cultist will spawn.

- You need to kill the Golem first in order for the Cultists to spawn.

- If you fail to kill the Lunatic Cultist, then don't worry because the Cultist will respawn in the next Terraria Day for you to spawn him again!
-The Cultists-


(Now that we're done with the Lunatic Cultist, let's move on taking down the Celestial Pillars to summon Moon Lord.)
[How To Defeat The Celestial Pillars]
The Solar Pillar.

- The Solar Pillar is the Melee-themed pillar that drops ''Solar Fragments'' which can be crafted into powerful Melee Weapons at the Ancient Manipulator for the Moon Lord fight.

- There are multiple reason why i recommend you taking down this Pillar first, firstly the Solar Pillar is the hardest Pillar in my opinion, and getting it out of the way is a great idea, secondly it drops fragments when it dies, so when you have defeated the Pillar, you can go craft either the Solar Eruption or The Daybreak which will make the other Pillars way easier to defeat.

- Tips :
+ While fighting the Solar Pillar enemies, it is highly recommended to stay grounded, Airborne players are easy prey for the Crawltipede minions, which do an excessive amount of damage, but will only target airborne players.

+ Weapons such as the Possessed Hatchet will only target the tail of Crawltipedes, and this can kill them quickly and easily, making the fight much easier.

+ You can NOT attack the Pillar until you defeated a certain amount of enemies.

- Enemies -


The Vortex Pillar.

- The Vortex Pillar is the ranged-themed pillar, with fast, mobile minions capable of long-ranged projectile attacks, it drops ''Vortex Fragments''.

- Tips :
+ It will occasionally open a portal above the player that spawns two Alien Hornets or a lightning bolt, identical to the one produced by the Vortexian on death, so make sure you're always moving.

+ This is the only pillar where enemies or projectiles can't travel through blocks so taking cover is very effective.

+ Avoid getting swarmed by Alien Queens, as they easily grow from Alien Larvae and Alien Hornets and the Distorted debuff greatly decreases the player's fighting and agility.

+ Because most of the enemies try to stay at the same elevation as the player, staying on the ground removes much of the mobility.

- You can NOT attack the Pillar until you defeated a certain amount of enemies.

- Enemies -


The Nebula Pillar.

- The Nebula Pillar is the magic-themed pillar, with minions capable of flight, teleportation, and other unusual attacks and abilities, It drops ''Nebula Fragments'' when defeated.

- The Nebula Pillar is the only pillar that does not have any attack of its own. In addition, its enemies have a pulsing aura effect to make them easier to see.

- Tips :
+ When fighting, take caution to avoid getting hit by a Brain Suckler. They cause the Obstructed debuff, which is similar to Darkness but with a darker shade, It will persist until the player kills the Brain Suckler stuck to them.
+ Be very wary of Nebula Floaters. They do high damage with high accuracy, and their tendency to teleport, especially when harmed, can make them unpredictable, They can also teleport directly in front of the player and fire.
+ Kill Evolution Beasts quickly, because once they get in range they will fire a slow but highly damaging ball of energy that tracks the player, passes through walls, can deal continuous damage.
+ Keep an eye out for Predictors because they will stay at distance, not attempting to get close to the player, and shoot several Nebula Piercers.

- You can NOT attack the Pillar until you defeated a certain amount of enemies.

- Enemies -


The Stardust Pillar.

- The Stardust Pillar is the summoning-themed pillar, with large swarms of enemies that spawn smaller, weaker entities to attack, It drops ''Stardust Fragments'' when defeated.

- Tips :
+ A quick and easy way to break the shields is to lead a Star Cell away from the pillar, pop it into its smaller orbs, then let those orbs grow into full star cells, this creates an infinite loop.
+ On death, the Flow Invader will hurl up to three projectiles directly at the player. Be ready to dodge when the player kills this creature.
+ Stargazer lasers deal very high damage, but they have difficulty targeting the player without direct line of sight. Weapons that ignore terrain or can go around it will be very effective, such as Yoyos.
+ This is Most likely the easiest Pillar.

- You can NOT attack the Pillar until you defeated a certain amount of enemies.

- Enemies -


(That's it for the Info and Tips on how to defeat the Celestial Pillars, But don't take down the Last Pillar juts yet, because we still need to prepare for the Moon Lord Fight.)
[Preparation Before The Moon Lord Battle]
- By this point, you have almost reached the final battle of Terraria, but don't kill the last Pillar just yet, because we don't want to summon him without any preparations.


Gear
Armor and Accessories still Remains the same as PRE-LUNAR EVENT.


Weapons
By now, you should Have Upgrade your Weapon to either the Daybreak or the Solar Eruption, those are crafted from Solar Fragments dropped from the Pillar you just fought.
----------------------------------------------------------------------------------------------

Solar Eruption
- The Solar Eruption is a Hardmode autoswinging melee weapon which fires a long, spear-like projection from the player's position that quickly retracts.

- Solar Eruption can travel through blocks and inflicts the Daybroken debuff upon hitting an enemy, which deals ticks of 25 damage per quarter-second for 5 seconds.
- And honestly, this weapon is way better than it's alternative ''Daybreak''

- It's crafted from 18 Solar Fragments, dropped from the Solar Pillar.
- Its best modifier is Godly or Demonic.
- 105 Base DMG.


Daybreak
- The Daybreak is a Hardmode, endgame melee weapon crafted from Solar Fragments obtained from the Lunar Events.
- It auto-fires projectiles that cost no mana or ammunition.
- As its projectiles are affected by gravity and stick to enemies to inflict damage over time.
- Up to 8 projectiles can stick to an enemy at once inflicting the Daybroken debuff, with each dealing 25 damage per quarter-second.

- The Daybreak is crafted from 18 Solar Fragments dropped from the Solar Pillar.
- Its best modifier is Godly or Demonic.
- 150 Base DMG.


----------------------------------------------------------------------------------------------

The Moon Lord Arena

- You should build your Arena something look something like this:

(A flat and long sky platform is perfect for the fight, you can also add Heart Lanterns and Campfires to increase your Health Regeneration.)

General Tips:
+ Dodging the Moon Lord's attacks is crucial. In particular, the Phantasmal Deathray should be avoided at all costs, his attacks deals heavy damage especially the Phantasmal Deathray which could kill you in a hit on Master Mode.

+ The Moon Lord is vulnerable to almost all debuffs, most notably Ichor, which can dramatically speed up the fight. However, since the Moon Lord's eyes remove all debuffs when they close, the player will have to reapply them accordingly.

+ It is advisable to kill the eye on the head first. It is the only eye capable of firing the Phantasmal Deathray and remains closed for significantly longer than the eyes in the hands. If the player waits to kill the head last, they may have to deal with two True Eyes of Cthulhu for a longer amount of time.

+ In multiplayer, the Moon Lord will attack the nearest player. Players can take turns teleporting home to get healing from the Nurse.

How To Spawn Moon Lord:
- The Moon Lord will spawn after 1 Minute after defeating the Last Celestial Pillar, when the the status message "Impending doom approaches...", signifying that the Moon Lord, Terraria's final boss, is about to spawn, it spawns one minute after the message appears.

- It can also be summoned again with a Celestial Sigil, which is crafted from 20 of each Lunar Fragments. (seriously please don't craft this on your first fight, use the fragments to craft the weapon and armor instead then you can craft it.)
[Potions and Buffs For The Moon Lord Battle]
Iron Skin Potion
- The Ironskin Potion is a buff potion which grants the Ironskin buff when consumed. The buff increases the player's defense by 8, thus reducing damage by 4 on Classic 6 on Expert 8 on Master.
-Crafting-


Regeneration Potion
- The Regeneration Potion is a buff potion which grants the Regeneration buff when consumed. The buff provides health regeneration for a total of 960HP (2HP per second for 8 minutes)
- The buff's effect is stackable with the Band of Regeneration. The buff is hypothetically equivalent to equipping 2 Bands of Regeneration.

-Crafting-


Endurance Potion
- The Endurance Potion is a buff potion which grants the Endurance buff when consumed. The buff reduces taken damage by 10%.
- This lasts for 4 minutes.

-Crafting-

(Armored Cavefish are a type of fish which are found uncommonly by fishing in the Underground, Cavern, and Underworld layers, in any biome except the Desert)

Lifeforce Potion
- The Lifeforce Potion is a buff potion that grants the Lifeforce buff when consumed, which increases the player's health capacity by 20%. This lasts for 8 minutes.
- If you have 500 HP, then the potion will boost your HP up to 600 HP.
-Crafting-


Flask Of Ichor (If your World is in Crimson)
- The Flask of Ichor is a Hardmode flask crafted at an Imbuing Station. While under the influence of a Flask of Ichor, melee (and whip) attacks will inflict the Ichor Debuff for 10 to 19 seconds, decreasing the defense of enemies by 15 on the Desktop Version, therefore increasing the damage of the player's weapon by 7 - 8 Damage.
- Ichor can be obtained from killing Ichor Stickers in the Underground Crimson
-Ichor Sticker Enemy-

-Crafting-


Flask Of Cursed Flames (If your World is in Corruption)
- The Flask of Cursed Flames is a Hardmode flask that, when applied, causes melee weapons (and Whips) to inflict the Cursed Inferno debuff for 3–6 seconds on a successful hit.
- Melee weapons that fire projectiles will also inflict the debuff on enemies hit by the projectiles.
- You can only use one kind of flask at a time.

- The Flask of Cursed Flames can be crafted by Mixing Cursed Flames with Bolted Water.
- Cursed Flames can be Dropped by Vile Ghouls, Word Feeders, Clinger is the Corruption and Underground Corruption.

-Vile Ghoul, World Feeder, Clinger Enemy-

-Crafting-


Buffs
Sharpening Station.
- The Sharpening Station is a furniture item that, when placed and pressed on, Applies the Sharpened Buff, which increases armor penetration of all melee weapons by 12.
- It can be found in Underground Cabins in the Underground Jungle.

Ale
- Ale is a potion which gives the player the Tipsy debuff, increasing melee damage, but lowering the player's defense, for 2 minutes. It can be crafted at a Keg or purchased from the Tavernkeep.

- The Tipsy debuff has the following
+ -4 defense.
+ +2% critical hit on melee attacks.
+ +10% melee attack speed.
+ +10% melee damage.


(That's it for everything you need to do before the fight, with all this gear and preparation, the fight should be much easier for you. Once you're ready, go defeat the Last Celestial Pillar and prepare to fight Moon Lord!)
[End-game Armor and Weapons]
So you managed to defeat the Moon Lord himself and beaten Terraria, Congratulations, but before i end the guide, I'll show you what's best to have for the End-game after defeating Moon Lord.


Armor
Solar Flare Armor
- The Solar Flare armor is a post-Moon Lord set of armor which provides melee boosts. It is currently the final melee set available.

- Equipping the full set additionally provides a special set bonus that builds the longer the player avoids damage, up to 3 "charges". Each takes 3 seconds to build. The charges provide a fixed damage reduction of 20%, when damaged It discharges fire explosions around the player that can damage enemies.

- The set also gives you a dash ability, While dashing it ignores all incoming damage and damages your target.

- This armor set also provides the most base defense. Crafting it requires a total of 36 Luminite Bars / 144 Luminite and 45 Solar Fragments at a

- All together, Solar Flare armor pieces apply the following boosts:
+ +26% melee critical hit chance.
+ +29%melee damage.
+ +15% melee speed.
+ +15% movement speed.
+ Increased life regeneration (+3 HP/sec).
+ +900 aggro.

-The Dash Ability-


Weapons
Weapons such as the Solar Eruption and Daybreak mentioned in the last section can still be used for the End-game.

New Weapons
Zenith
- The Zenith is a Hardmode, post-Moon Lord melee weapon crafted using a variety of swords obtained throughout the game's progression.
- When swung, sword sprites of its component swords fly towards enemies within a 20-tile radius of the cursor, and circle back in quick.
- They pass through solid blocks, and three swords will appear per use, each sword sprite deals the weapon's full damage.

- The Zenith is capable of autoswing.
- Its best modifier is Legendary.
- 190 Base DMG.


-Crafting-
- In order to craft the Zenith, you'll need 10 different swords obtained through out playing the game, here I will list all the Needed and Required Swords you need to craft the Zenith.


Enchanted Sword (Material 1)
- The Enchanted Sword can be obtained by destroying the background object of an enchanted sword in stone.
- On the Desktop version and Mobile version, they also have a 2% chance to be found in Golden Crates and Titanium Crates ., which is obtained by fishing in any biome.


Starfury (Material 2)
- The Starfury can only be obtained from Skyware Chests which can be found on Sky Islands (33.33% chance), 25% chance from Azure Crates , and also 25% chance from Sky crates , which can be obtained through fishing on Sky Lakes
Azure Crate Replaces Sky Crates During Hardmode ( Dark Blue One ).
Sky Crates can be fish up Pre-Hardmode On Sky Lakes, You can use a Gravitation Potion to find Sky Islands and Lakes in The Sky ( Light Blue One ).


Bee Keeper (Material 3)
- The Bee Keeper has a 33% chance to drop from the Queen Bee.


Copper Shortsword (Material 4)
- The Copper Shortsword is literally the sword you start out with when you created a new character.
- If you threw away the sword already then you can craft it with 5 Copper Bars, if your world is Tin then sucks to be you.


Seedler (Material 5)
- The Seedler is a Hardmode sword that has a 14.29% chance on Classic to be dropped by Plantera and a 28,57% of dropping from her as well on Expert / Master.


Terra Blade (Material 6)
- How to Craft : Terra Blade Can be Crafted by combining the True Night's Edge with The True Excalibur with a Broken Hero Sword at a Mythril / Orichalcum Anvil.

+ The True Night's Edge Crafting is Mentioned in the Pre-Plantera Armor and Weapons Section.
+ The True Excalibur Crafting is Mentioned in the Pre-Plantera Armor and Weapons Section too.
+ The Broken Hero Sword is Dropped from Mothron (25%) during the Solar Eclipse Event.


Influx Waver (Material 7)
- The Influx Waver has a 1/6 (16.67%) chance of being dropped by a Martian Saucer during the Martian Madness Event.


The Horseman Blade (Material 8)
- The Horseman Blade has a 1.56-12.5% chance to drop from the Pumpking Post-Plantera Miniboss during the Pumpkin Moon.
- The Pumpkin Moon can be summoned using a Pumpkin Moon Medallion.


Star Wrath (Material 9)
- The Star Wrath has 1/9 (11.11%) chance to be dropped by the Moon Lord.


Meowmere (Material 10)
- The Meowmere has 1/9 (11.11%) chance to be dropped by the Moon Lord.

Once you have all the sword go Craft it at a Mythril / Orichalcum Anvil.
[More End-game Weapon Choices]
Star Wrath
- The Star Wrath is a Hardmode, post-Moon Lord sword which causes three pink projectiles to fall at the cursor whenever it is swung, each dealing double the sword's damage, it can be considered an huge upgrade of the Starfury.

- The Star Wrath has 1/9 (11.11%) chance to be dropped by the Moon Lord.
- Its best modifier is Legendary.
- 110 Base DMG, 220 Projectiles DMG.


Meowmere
- The Meowmere is a Hardmode, post-Moon Lord, autoswinging melee weapon, when swung, it fires a projectile trailed by a rainbow and shaped like a cat's head, and consumes no mana or ammunition.
- The projectile is affected by gravity, pierces multiple enemies, and ricochets off of blocks. Each ricochet emits an explosion that damages nearby enemies.
- The projectile disappears after piercing four enemies or after ricocheting four times.

- The Meowmere has a 1/9 (11.11%) chance to be dropped by the Moon Lord.
- Its best modifier is Legendary.
- 200 Base DMG.


Terrarian
- The Terrarian is a Hardmode, post-Moon Lord yoyo which has a reach of 25 tiles and can stay in the air indefinitely.
- Similar to the Flairon, it fires short-lived projectiles at a rapid rate which will hone in on nearby enemies and bounce off of walls.

- The Terrarian has a 1/9 (11.11%) chance to drop from the Moon Lord, it is currently the most powerful yoyo in the game.
- Its best modifier is Legendary, although yoyos cannot normally obtain the Legendary modifier, the Terrarian is an exception and receives a unique set of boosts from the Legendary modifier:
+ +17% damage
+ +8% critical strike chance
+ +17% knockback.

- 190 Base DMG.
[End-game Accessories]
After Defeating Moon Lord, there are no new Accessories anymore, but we can still Improve our Accessory Setup By crafting a New End-game Pair of Wings!

New Accessory
Solar Wings / Other End-game Wings or better
- The Solar Wings is a Pair of Wings crafted from Solar Fragments which is dropped from the Solar Pillar.
- It Grants 50% extra max ascent speed, faster acceleration, the Wings Glows in the dark and particle effect emits orange light.
- If you're playing on Master or Expert Mode, the Moon Lord will drop the Celestial Starboard, which is the best wings you can get.

- Crafting:
+ The Solar Wings is Crafted from 14 Solar Fragments and 10 Luminite Bars.


End-game Accessories Setup
- You can use these Setups that i have for you.
1 - For Swords, Spear, Boomerang, Fails Maces Users :
Slot 1 + Fire Gauntlet.
Slot 2 + Celestial Shell.
Slot 3 + Frostsparks Boots or Terrasparks Boots
Slot 4 + Solar Wings or any other better End-game Wings.
Slot 5 + Frozen Shield.

Slot 6 ( Demon Heart Slot ) + Mechanical Glove.

Slot 7 ( Master Mode Slot ) + Warrior Emblem.


2 - For Yo-yos Users
Slot 1 + Fire Gauntlet.
Slot 2 + Yoyo Bag.
Slot 3 + Frostsparks Boots or Terrasparks Boots
Slot 4 + Solar Wings or any other better End-game Wings.
Slot 5 + Frozen Shield.

Slot 6 ( Demon Heart Slot ) + Celestial Shell.

Slot 7 ( Master Mode Slot ) + Mechanical Glove.
(You can Swap the Demon Heart Slot with Slot 5 if you prefer DPS more than Defence.)

- I Highly Recommend Getting The ''Menacing'' Modifier On Most Of The Accessories (3 or 4), This Will Greatly Increase Your Damage Output By A lot.

[That's it for the End-game Section]
-The End-
- After a long journey, you have finally made it to the end of my guide, Congratulation you have successfully beaten the whole game while playing as Melee and became one of the most powerful Terrarians out there.

(Fun fact : This guide consist of 600+ Pictures)


- If my guide has helped you, please don't forget to Rate my Guide or Favorite it as well, if you have any opinions and tips for me to Improve or what Class Setup I should do next in my next guide then feel free to let me know in the Comments!, Anyways I'm Ain and I'll catch you all soon, peace!
24 kommentarer
GeeDino 1 apr @ 9:42 
finally some body noticed that you need vines to get blade of grass also can you add how to get vines please
Robb D. Black 18 feb @ 19:07 
dis made my brain go boom boom
Proton 5 aug, 2024 @ 16:53 
+1
Debby 18 maj, 2024 @ 10:45 
Very helpful
a cat 18 aug, 2023 @ 22:58 
░░░░░█▐▓▓░████▄▄▄█▀▄▓▓▓▌█Help
░░░░░▄█▌▀▄▓▓▄▄▄▄▀▀▀▄▓▓▓▓▓▌█ Doge
░░░▄█▀▀▄▓█▓▓▓▓▓▓▓▓▓▓▓▓▀░▓▌█ Take
░░█▀▄▓▓▓███▓▓▓███▓▓▓▄░░▄▓▐█▌ Over
░█▌▓▓▓▀▀▓▓▓▓███▓▓▓▓▓▓▓▄▀▓▓▐█ Steam
▐█▐██▐░▄▓▓▓▓▓▀▄░▀▓▓▓▓▓▓▓▓▓▌█▌ Copy
█▌███▓▓▓▓▓▓▓▓▐░░▄▓▓███▓▓▓▄▀▐█ And
█▐█▓▀░░▀▓▓▓▓▓▓▓▓▓██████▓▓▓▓▐█ Paste
▌▓▄▌▀░▀░▐▀█▄▓▓██████████▓▓▓▌█▌
▌▓▓▓▄▄▀▀▓▓▓▀▓▓▓▓▓▓▓▓█▓█▓█▓▓▌█▌ DO IT.
█▐▓▓▓▓▓▓▄▄▄▓▓▓▓▓▓█▓█▓█▓█▓▓▓▌
Mystical Engine Sorcerer 11 aug, 2023 @ 17:29 
grilled cheese obama sandwich
Equ4z  [skapare] 12 okt, 2022 @ 2:53 
I'm planning to fix some outdated information on guide sometime in the future to the latest version as of right now since this guide is made more than a year ago and I really didn't had the time to update the guide but soon enough I'll get on reading the change logs as well as sorting out what's been changed.

Still though, thanks for the feedback :terraria:
Bluedragon932 9 okt, 2022 @ 5:38 
is it just me or did everybody forget that 1.4.4 made you need vines for blade of grass
NauPhy 8 aug, 2022 @ 10:21 
Oh, I didn't realize they changed that in 1.4. Thanks for letting me know
Equ4z  [skapare] 7 aug, 2022 @ 9:06 
Yes, I agree with 2 of your suggestions, and I'll correct some of the info in my guide some time, but I'll have to correct you a little that as of the current 1.4 version of Terraria, Moon Lord's Phantasmal Death Ray can pierce through as I have experienced it multiple times by trying to cheese it during one of my walkthroughs. Although you can tank the laser head on in Classic and Expert but for Master Mode, It's generally a better idea to fight normally as It's a better experience instead of standing still and face tanking the boss even if you had the nurse NPC nearby the chances are the NPC will probably get slain midway.

And as for your second suggestion I completely agree, but both weapons can be specialize depending on the player's preference.

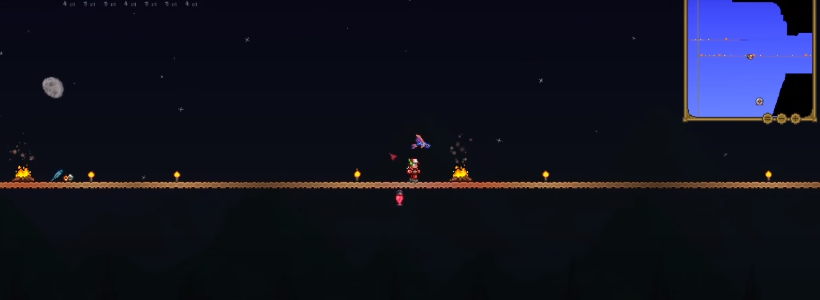
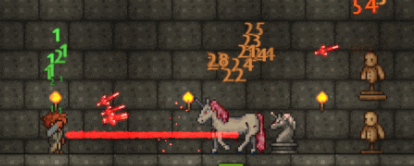
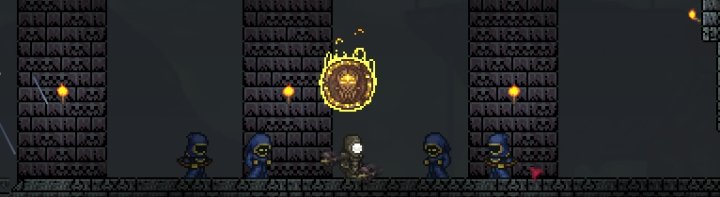
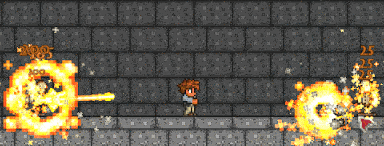
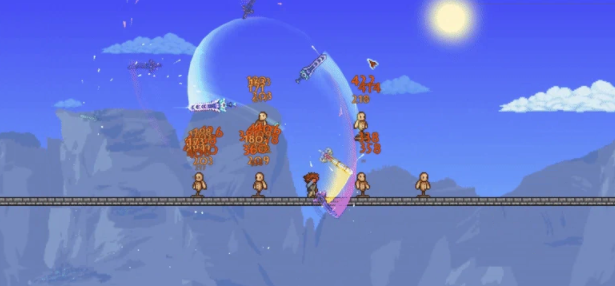
For more information regarding the Moonlord's Phantasmal Laser, here's a Link directly to the Wiki: https://terraria.fandom.com/wiki/Moon_Lord

And thanks for suggestion, I appreciate it! :greenslime: