BIOMUTANT

BIOMUTANT

269 beoordelingen
100% Achievement Guide
Door avesta4prez
This guide features all 46 of BIOMUTANT'S achievements and is presented in order of their appearance on the Steam page. It is one to be updated progressively with community findings and contributions and will help provide tips and tricks to achieving 100% completion.
3
2
7
2
2
   
Prijs
Toevoegen aan favorieten
Toegevoegd aan favorieten
Verwijderen uit favorieten
Guide Synopsis
Trophy Roadmap
Estimated Achievement Difficulty
3/10
Offline Achievements
46
Online Achievements
0
Missable Achievements
That’s Mine, Snack-Time, Mariner, Gumshow
Semi-missable Achievements
Max Gains, Pew Pew!, Hack n’ Slash, Electrified, Stick it to Them
Approx time to completion
20-30 hours

Tips to beginning your journey
BIOMUTANT doesn’t have any sort of traditional forced progression structure to it, as after you finish the tutorial and exit the bunker you are lead through a bit more tutorial on the tribes in the game, then can basically do whatever you feel like. You can progress the main quests whenever you feel like, or just choose to run around the map and search for loot and find other characters to interact with. All trophies can also be completed before the actual end of the story, as there are still some story events after defeating the 4 World Eaters, which is the main end goal of the game.

1. Save before each World Eater boss fight. Each fight has a missable trophy tied to it for doing something with the fight mechanics, and in the slim chance you don’t earn the achievement during the fight you would have to start a new playthrough to try again as you can’t replay the boss fights without reloading a save.

2. Save 16 upgrade points (for achievements Pew Pew! and Hack n’ Slash), 16 Psi-Points (for Electrified), and 12 Bio-Points (for Stick it to Them). This will take care of all achievement-related abilities/perks. If you do this you can make a save, then purchase the trophy-related abilities/perks to pop the trophies, then reload your save if you then want to redistribute your points to other more useful perks.

3. Pay attention to the achievement Toytinkerer, it requires you to encounter a randomly spawning bear with a lantern 4 times and complete his side quests. This is completely luck-based, so paying attention to it from the beginning will save you a lot of hassle later. It can spawn any place, any time, it’s just random luck.

4. Pay attention to the combat achievement Wung-fu Master from the beginning. It requires you to defeat 50 enemies using your Super Wung-Fu ability which needs to be charged up in combat first. If you ignore this, it could result in additional hours of grinding just to farm these kills. Always use your Super Wung-Fu during every combat encounter until the trophy unlocks.

5. Be on the watch for all different catchable animals: Sqvips (small orange squirrels & purple rodents for Zoo-do), Glittermoths (fireflies for Bugologist), and Pippis (dark birds for Flap-flap). Those animals can spawn anywhere. You can save yourself some grinding if you always grab the capturable animals when you see them! Also return to the two spots for Guppos (black fish for Angler) and Gumquacks (rubber ducks for Quack) from time to time because they always respawn in the same spot.

6. Making good or evil choices doesn’t matter overall for earning trophies or for story progression. It also doesn’t matter what Tribe you ally with. Certain abilities require a minimum aura score to unlock, but you can gain an unlimited number of aura points by capturing Sqvips, then either killing them (evil point) or keeping them (good point). 30 is the highest point total required to unlock abilities.
The Adventure Begins

Escape Bunker 101
This achievement is story related and can‘t be missed, you will get this during the (unskippable) tutorial within the first 30 minutes of your playthrough.
Twinkle Twinkle

Discover a Twinkle Crashsite
To get this achievement you must find the NPC Nova who can be found in their tower in Fnackyleaves Biome just east of the Nuclear Power Station.

Upon talking with Nova, you will get the side mission Twinkle Thwarting. Follow the waypoint to the crash site and solve the rotation puzzle to unlock the achievement.
Under the Table

Win a Drinking Competition against Gulp
Gulp is an NPC you will encounter at on a boat bar called Sinkidink just east of the Subnautica station. You will need the Googlide to reach him.

Complete his initial side missions until you unlock the drink-a-link side mission. Press Y to interact with him, then finish your drink.
Wung-fu Master

Defeat 50 Enemies using Super Wushu
Weapons have a "Super Wushu" ability in which the user becomes powered up and able to do attacks quickly. Some the abilities that may be tied to this combat style include:

Gun Super Wushu: Players leap in the air with weapons drawn. While time slows around them, they are able to unleash a barrage of shots against multiple targets. Once time reverts to normal, the results of the barrage occur.
Klonk Super Wushu: Used in conjunction with the Klonk Fist, this allows players to charge between enemies, repeatedly striking with a charged-up fist.
Super Melee Wushu: A melee ability that allows players to engage in a quick series of slashes with their blade.

As the description states, defeat 50 enemies using this ability to unlock the Wung-fu Master achievement.
Old World Gadgets

Discover all 15 Old World Gadgets
Old World Gadgets are a type of Collectible in Biomutant. For the achievement you are supposed to “find all 15” of them, but there are actually more than 15. Finding any 15 of these will do.

This step-by-step video by PowerPyx will guide you through the process.

Thugs

Defeat 25 Bandits
Scattered around Biomutant’s open world are 11 bandit camps filled with critters for you to fight and loot to acquire. Each camp has at least two normal-sized critters and two big critters (one of which is the bandit leader). These camps are relatively easy to spot on your map. You just need to look for a square-shaped box ringed by spikes.

Defeating 25 of these Bandits will award you with the Thugs achievement.
Tar-up

Drown 5 Enemies in Oil during Combat
It is recommended you use an oxygen suit for this area (obtained as a side quest automatically triggered when entering any anti-oxygen area).

To start off, you need to find a location that has both enemies and tar. Choicest options for these are the Deadzone (at the southwestern edge of the map) and the Kluppy Dunes (in the northernmost portion of the map).

Look for the bandit-type enemies (same as the size of your character) and bait them towards the tar; only to use the knockback on your melee to push them into it completely. Additionally, an easier method to getting this achievement is by acquiring the Mucus Bubble ability (listed under Biogenetics) which lets you roll over enemies.
Specialized

Reach Level 25 with any Character Class
Classes in Biomutant provide you with a starting archetype to model your character's abilities and combat affinities after. Each class specializes in a combat style, uses different starting equipment and are assigned special Class Abilities that make them more effective in combat. There are five classes to choose from with more available through DLC.

Attaining the Specialized achievement is purely progression based and dependent on the hours and grind you invest into the game.
Kneel

Discover all 30 Altars
While the achievement description states to find “all 30”, there are actually far more than 30 altars present in BIOMUTANT. You only need to find ANY 30. They are called Psyonic Shrines in-game.

Each enemy Outposts has an Altar in it, usually to the left or right after going through the main entrance. These are the first 18 locations easily visible on the world map and have fast travel points, so they are very fast to find. Then the remaining 12 are open world ones.

Follow through this video guide by PowerPyx to spot all of them.

Pew Pew!

Unlock all Gun Proficiency Skills
This achievement is awarded for unlocking all abilities under the Wung-Fu > Ranged Combat section of the ability menu. There are 5 different types of guns, where each has two unlockable special abilities that cost 1 and 2 upgrade points each. You need a total of 15 upgrade points to unlock all Gun Proficiency Skills.
Hack n' Slash

Unlock all Melee Weapon Proficiency Skills
This trophy is awarded for unlocking all abilities under the Wung-Fu > Close Combat section of the ability menu. There are 5 different types of close combat weapons (Unarmed counts as a weapon), where each has two unlockable special abilities that cost 1 and 2 upgrade points each, plus 1 extra for the “Twin Silver Grip” skill to allow you to use dual wield melee if you don’t start on the Saboteur class. You need a total of 15 (or 16) upgrade points to unlock all Melee Weapon Proficiency Skills.
DNA Overload

Re-code your DNA at a Cooling Tower Biopool
There are multiple places these achievement can be obtained, always in a nuclear power plant. It is not labelled as a Cooling Tower Biopool, it is called a mutation spot.

One of the mutation spots is found is in the west of the Fnackyleaves Biome, at the Bio Nucleus 10D power plant. You will need the biohazard suit to enter this area.

On the northeast side of the plant you can find a way underground, follow the path until you come across a green glowing waterfall. Interact with this and you will be able to adjust your character structure. After you exit you get the achievement.
Max Gains

Upgrade any 2 Attributes to 100
Your character has 6 different attributes with values that are set depending on what you do during character creation. When you level up, you gain points that you can use to add to any attribute +10 at a time. For this achievement, you just need to upgrade any 2 attributes so that they have a value of 100+. You will gain 250 attribute points at a minimum during the game because of the Specialized achievement, so just make sure to upgrade any 2 attributes to at least 100 while playing so that you don’t need to grind extra levels after other achievements.
Electrified

Defeat 20 Enemies using the Ki-Spark Ability
Ki-Spark is a Psi-Power mutation ability that you can unlock using 16 Psi-Points when you have at least 30 Light Aura. When used you shoot lighting in front of you while consuming your Ki gauge. You need to defeat a total of 20 enemies using this ability. It doesn’t deal a lot of damage quickly so can be a slight pain to use depending on when you unlock it, so for the easiest time, you should weaken enemies with melee or firearms first, then just finish them off with Ki-Spark. Only the killing hit needs to be from this ability, it’s perfectly fine to weaken the enemies first.
Stick it to Them

Stick 25 enemies to the Mucus Bubble
Mucus Bubble is a Biogenetics mutation you can purchase for 12 Bio-Points. When used it makes a bubble appear around you where you can then roll around and any enemies touched will stick to the bubble. Stick enemies to the bubble 25 times to earn this trophy.

You can do this on the same enemy / enemies over and over until the trophy pops, it doesn’t need to be different enemies.
Sproing!

Bounce 50 times on a Fungus
Fungi is a Biogenetic power that you can unlock for 4 Bio-Points. When used you spawn a mushroom on the ground which bounces enemies or you into the air. For this achievement, you need to bounce on your placed Fungi a cumulative total of 50 times.
Nautica

Ride the Googlide across all Water Resistance Levels
The Googlide is a jetski-like watercraft that you obtain during the main quest from Goop at Subnautica Station. Once you obtain it you can summon it in most water areas using the mount menu.

There are three different levels of water resistance that the Googlide can only go through if you have the appropriate level or higher motor equipped, with different motors being obtained by opening Googlide Wrekboxes. The water resistance levels are normal blue water at level 1, green water at level 2, and brown water at level 3.

Drive your Googlide in each of these water types with the correct level motor or higher equipped to earn this trophy. If you manage to obtain a level 3 motor early from one of the boxes then you can just use that all the time as it works for all water resistance levels.
Heavy Metal

Survive 5 minutes in the Mekton while in the Deadzone
The Mekton is a large mech suit that you unlock during the progression of the main story. You use it to enter the Deadzone, an area on the west part of the map that lacks oxygen, so the Mekton allows you to move around without running out of air. This trophy requires you to stay in the Mekton in the Deadzone for at least 5 minutes.

You can either do this while exploring the area, or just wait in one spot until the trophy pops.
Rodeo

Ride a Gnaut 500 meters
Gnoats are the animal mounts you can obtain during the game. You can first obtain them after the main quest where you take your first tribe outpost, where there will then be a new side quest nearby to acquire a mount, or a new main quest you come across on the way to the next outpost.

Finish either of these to acquire a mount, then ride it for a total of 500 meters.
Toytinkerer

Unlock all Automaton Upgrades
As you playthrough the game, you will encounter a character holding a lantern that will assign a side quest called Mirage. They spawn in random locations, but fairly frequently.

Chase down the character with the lantern before they disappear, you will then be required to perform a quick fight. Win or lose the fight you will receive an upgrade.

Repeat this 4 times to unlock the Toytinkerer achievement.
In the Green

Possess more than 1000 Greenleaf
Greenleaf is the currency used with vendors in Biomutant. It is obtained by defeating minibosses, selling items, or picked up from “Green ATM” plants that can be found in the environment. Have more than 1000 at the same time to earn this achievement.
Elementary

Obtain 10 of each Crafting Resource
There are 5 different crafting materials in Biomutant: Metal, Wood, Plastic, Rubber, and E-Waste. These are obtained either by destroying Resource Totems or disassembling gear items obtained while playing. Resources cap at 99 held at a time, and that’s a total you can easily reach while disassembling gear at the end of the game, so obtaining 10 of each should happen fairly quickly during gameplay.
Zoo-do

Capture 20 Sqvips
Sqvips are small orange squirrel-like animals & purple rodent-like animals that can be caught during the game. You will encounter them first during one of the main quests before facing the Jumbo Puff world eater. You will first obtain them in an area in the Deadzone for the main quest, but they can be found all over the game world with no specific set spawn location.

When you see one approach it and press Y (interact) to catch it, then you are given a choice of whether to kill the animal or capture it, which awards an Aura point depending on what you pick.

Catch 20 total of these (regardless of what Aura choice you pick) to earn this achievement.
Quack

Capture 20 Gumducks
Gumducks are a type of “animal” you are required to capture during the “Gumquack Hollow” main quest before facing the Porky Puff world eater. You are tasked with going into a location called “Gumquack Hollow” to capture these for Goop. It's location is one the border between Bricktown and Surfipelago.

At the end of this tunnel location, there is a large room with shallow water in it, where you find a number of rubber ducks floating around, which are the Gumquacks you need to capture.

This one specific area always respawns several Gumquacks, so to get 20 you can simply farm them by returning to this location a few times.
Bugologist

Capture 20 Glittermoths
Glittermoths are a moth/butterfly you are required to capture during one of the main quests before facing the Hoof Puff world eater. They look like a butterfly inside an area of other shiny butterflies.

You acquire 5 for the main quest from a specific location, then they become the most annoying of the animals to farm because they don’t respawn at that location again or seem to have any other sort of set spawn location like other animals. They can spawn basically anywhere in the game world, so the only way to catch them is to just randomly come across them. Make sure to always grab them if you see them while wandering around during normal gameplay, because they are frustrating to try and farm for later.
Flap-flap

Capture 20 Pippis
Pippis are a dark-colored bird that you can capture during the game. They aren’t required for one of the main quests, but you will probably run into them during gameplay as they can spawn basically anywhere in the world.

You can tell when near them because they make flapping and cawing noises like a bird would, and when found in the environment there will normally be a group of birds around them that will fly away when you approach, leaving just the capturable Pippi.
Angler

Capture 20 Guppos
Guppos are a black fish that you are required to capture during one of the main quests before facing the Murk Puff world eater. They are all black with white eyes, and like Gumquacks seem to only have one specific spawn point, located in Guppo Grotto.

At the end of the tunnel area you can find a group of them spawned in the shallow water in a circular room. You capture them by pressing Y when they jump out of the water.

Like Gumquacks this appears to be the only location that they spawn in, so you will need to return here after story to farm more of them, waiting around 30 minutes of game time before returning so that they respawn. They also appear in pairs of 6 at a time, so you will need to make at least 4 trips here total to obtain 20 of them.
Bagman

Buy an Item from Honki
Honki is a side character located directly southeast of the World Tree in an area called Sprill Slope. When you meet him, he’ll have you find two items for him that are nearby, then after returning with the second item he becomes available as a vendor.

Buy any item from him regardless of value to earn this achievement.
Adventurer

Discover all 7 Environment Biomes
There are 8 named regions of the map in Biomutant, with them largely mapping to the 7 different biomes the game has. Going clockwise around the map from the starting area they are as follows:

  • Whereabouts – South, general forest, similar to Fnackyleaves area
  • Deadzone – Southwest, barren area, lower elevation areas lack air and cause hypoxia
  • Fnackyleaves – Northwest, general forest, similar to Wherabouts area
  • Kluppy Dunes – North, desert
  • Mushumosh Mire – Northeast, swamp
  • Knupstonies – East, mountains
  • Surfipelago – Southeast, water/lake
  • Yerpfields – Central, plains

During main quests events, Kluppy Dunes is the only area you aren’t actually directed to go to for anything, but there are two side characters located there so you will need to go there eventually. After you have entered each biome (text notification will show on the bottom left when you enter new biomes) you will be awarded the achievement.
Eye on the Road

Discover and enter 3 Manholes
Manholes lead to locations called “Gutways”. You can find these normally in the middle of roads, and they can be seen on the map with the circular manhole with a light shining out of it.

For this achievement you need to enter 3 different Gutways. You don’t need to complete the area, only enter it so it shows you being inside and giving the location objectives.

Follow this guide by PowerPyx to scout through the locations.

Paragon

Defeat All four World Eaters
This is earned once you defeat all four of the World Eaters, which is the main objective for the story. Choices made during the story or what tribe you side with doesn’t affect this. You always defeat all world eaters no matter what. This also isn’t the actual end of the story, there are some more minor things that you do before the end after defeating all world eaters.
That's Mine!

Detonate 3 Bangballs on the Porky Puff
During the first phase of the boss fight against Porky Puff, the Eastern World Eater, you will be driving around on the Googlide. To damage the Porky Puff you can drag the Bangballs (the mines in the water) over to it using your Googlide tether.

Use your tether on the mines and release them near the boss. Then shoot the mine to blow it up. Do this three times during the first half of the boss fight to earn this achievement.

You can finish the rest of the fight by shooting the weakspots on the legs of Porky Puff from close range (the pink blobs at the bottom of his legs).
Snack-time

Feed the Jumbo Puff World Eater 6 Sqvips
During the boss fight against the Jumbo Puff, in between the fight phases, it will perform an attack that will have it inhale air. During this animation shoot the Sqvips while aiming into its mouth. Sqvips can be shot 3 at a time, so you should be able to get enough after two cycles of this attack.
Mariner

Feed the Murk Puff 10 Guppos
During the fight with the Murk Puff it will eventually move into its shell and launch a bunch of green orbs at you. It will then stick its head out and there will be a prompt to shoot Guppos at it to get it back out of its shell. During the fight, you need to have this happen at least 4 times so that you can shoot 3 groups of 3 plus 1 more Guppo at it. This is the only world eater that you might really potentially miss the achievement if you do the fight too quickly because you deal a lot of damage with the vehicle if you are constantly shooting.
Gumshow

Pull all Teeth from the Hoof Puff
During the fight with the Hoof Puff you can shoot at wounds that it has on the backs of its legs. Every time you shoot both the front ones, the Hoof Puff will be temporarily stunned with its mouth hanging open. When it is like this you can grab onto one of the teeth and mash the button to pull it out. Do this 4 times before the end of the fight to earn this achievement.
The Dragon

Defeat or Subdue all five Rival Tribe Leaders
One of the main story objectives of the game is dealing with all of the tribes in the game. When you choose one to ally with at the start of the story you then take over other tribe outposts, then their main fort. After you take over two of the Tribe Forts you are given the option to either end the conflict early or continue it as you were. If you choose to end it early you automatically take over the other tribe outposts and earn this trophy. This is fine to do if you don’t want to continue doing it manually and doesn’t lock you out of any other achievements.
Conquest

Take over 6 Tribe Outposts
During the story you deal with the other tribes to align them with your cause or subdue them so that they take your side. The way you do this is by taking over Tribe Outposts, then taking over their fort. Each Tribe has 3 Outposts, so you will earn this trophy after capturing all Outposts for the second tribe you go after.
Show-off

Defeat Enemies using 3 Different Tribe Weapons
Tribe weapons are special unique weapons you obtain after defeating a Tribe. The first one you are given by your chosen tribe that you take over outposts with after you complete two outposts, then the others are obtained when you take over the Fort of other rival tribes. You have to take over at least 2 Forts for story purposes (after this you can choose to automatically unite all tribes which is fine and doesn’t impact any trophies). So you’d always have at least the 1 you get from your Tribe + 2 from Tribes you defeat automatically from the story.
You can equip these in the Gear Menu > Main Hand > Melee / :r1: Ranged.

Note that there are some Melee and some Ranged Tribe Weapons. You can tell which ones are your Tribe Weapons because they say “Tribe” in their name and start with the Tribe’s Name. The ones you got are also listed in the Character Menu > Wung-Fu (they have their own menu points under Close Combat / Ranged Combat).

Also note that if one of your 3 Tribe Weapons is the Netra Tribe Grabbler (Ranged Weapon), it can’t kill enemies with its default attack but you can use its combos to deal the killing blow (combos found under Character > Wung Fu > Ranged Combat > Netra Tribe Grabbler).
Conscious

Complete all 20 Conscience Dialogues
Conscience Dialogues are the white/black aura choices you get throughout the story. This achievement says “all 20”, but there are far more than 20 opportunities to answer the conscience dialogues, and it seems to count them in an unknown way unrelated to what the game actually saves under the Journal > Dialogues > Conscience section of the Map menu. You will have many opportunities through the game during story and sidequests for these dialogues, so just keep playing and you will earn this eventually.
Trek

Discover all 6 Tribe Forts
Tribe Forts are the main base for the tribes in Biomutant. They are larger than outposts and located in unique locations within each tribe’s territory. For this trophy you need to find all 6 of them. Just going near enough to them for the icon to appear on the map is good enough for them to count as “discovered” for this trophy.

You can find screenshots of all 6 locations over at www.powerpyx.com by clicking here.[www.powerpyx.com]
Starstruck

Craft a 7 Star Weapon
Weapons have a star rating based on their overall quality and level of parts. When crafting weapons you can use high-quality parts along with upgrading the quality and material of a weapon at a bench to try and make a 7-star weapon, but that takes a lot of materials and requires finding high-quality parts first.

An easy way to do this is to first obtain the Pri Murgel Sword, which is one of the best melee weapons in the game. You can obtain it by first going to Lumentower on the southeast corner of the world map, climbing the tower, and activating the lighthouse light to point you towards a hidden cave with a new sidequest.

Follow the objective, and in the cave, you need to activate the 3 sections on the walls with writing on them to obtain the sword. The sword starts out at a 5 and a half stars rating with maxed-out quality and material. To get it to 7-star rating you just need to craft two add-ons into it. You can buy addons from the melee merchants at any outpost (the smith on the right side after entering a captured outpost). You can also find Addons in the world. When you buy them, make sure to buy those with a 1 star rating. Adding 2 x 1-star addons will bring the weapon to 7 stars total.
Hammertime

Find and Equip 5 Different Mekton Upgrades
Gizmo can be found at the Chugyard by Bricktown, and he starts a main quest where you obtain parts to then be granted use of the Mekton. Inside the Deadzone, you can find crates that contain upgrade parts for it, and after obtaining the first crate you are given a sidequest you can track that will point you to more upgrade crates one at a time. There are a total of 14 crates you can find, but you will only need to find 2 or 3 of them, as each crate contains 2 – 3 parts. Once you have found them you can press the prompt while operating it to access the customization menu, then equip any 5 parts other than the starting ones to earn this achievement.
Riding the wave

Find and Equip 5 Different Googlide Upgrades
Goop can be found at Subnautica Station, and he sends you on the main quest to find parts for the Googlide. After you find the first one during the main quest you obtain the side quest “The Googlide”, which points you to the other 8 locations of Googlide upgrades. Each Googlide Wrekbox includes 2 items in it, so you only need to find 3 then equip any 5 parts other than the starting ones to earn this achievement.
Knockout!

Deal more than 1000 Damage in a Single Hit
1000 damage may seem like quite a bit at the start of the game, but by the end it will be easy to do. Waiting until you have a 7-Star melee weapon like recommended in the trophy Starstruck, then using special attacks will almost guarantee you deal 1000+ damage once you are close to the end of the game.
Social

Discover all 16 Side Characters
Biomutant has 23 Character Locations. Finding all Side Characters unlocks the Social trophy or achievement. The trophy description says to find “all 16 side characters” but there are actually more than that.

A few are likely counted as Main Characters though. The 16 that the trophy wants are likely the ones that give a Side Quest in the Journal, but you should talk to all 23 to be safe. The best way to go about this is to play through the story until you defeated the 4th World Eater, then you can still go around the open world to reach all Characters.

During the story you are directed to many side characters automatically.

Locations of all these characters can be found in this video guide by PowerPyx.

End of the Rainbow

Find out what’s at the End of a Rainbow
After you find Jumble at Bullibull Glade, he asks you to find an item for him at the end of a rainbow. Follow the quest markers to where you eventually find a chest that contains “Rainbow Concentrate”. The achievement pops right when you pick up this item from the chest.
Credits

Content presented in this guide has been sourced from external websites
This guide was created with the purpose of making this information available and more accessible to the Steam community and has been majorly sourced from -


Additionally, image headers have been acquired through Wallpaper Cave[wallpapercave.com] and all individual videos credit the creator wherever linked.
26 opmerkingen
Doctor Long 92 18 jan om 6:28 
Ki Spark Is Cool Ability :steamthumbsdown:
Gamster 10 jul 2024 om 8:03 
Counters doesn´t work, but achievements does, that´s important. :outsnow:
Rinocrosser 13 mei 2023 om 10:19 
Is this only me or some counters are just not working? :winter2019sadyul:
Scrollzy 9 apr 2023 om 16:59 
thank you for this guide
Shofi 21 mrt 2023 om 11:24 
Angler achievement can be done in a 1min, i dont know if i ecountered a bug or not. Just return to the zone after the fish quest, save in the middle of the tank, catch 5 fishes, save again, reload, then fishes should respawn with a weird water physiscs, then catch 5 fishes again, repeat untill ypu get 20 of them. Easy. It didnt worked with plastic ducks tho :D
ELED3L 26 aug 2022 om 10:18 
(going to glittermoth cave is not farming, its just a good spwaning place for every creature, but you wont find 5 of them like for the others)
ELED3L 26 aug 2022 om 8:59 
bugologist is the worst and i would point it out in a separate section at the start, and not with the rest of the collectibles, because you can find a lot of the little animals and birds, you can farm ducks and fishes, but you cant farm this, i think most of the players will think that the firefly like bugs needed to be collected, but no, i would suggest to push the main story until the point you have to collect the bugs, and others suggested they are only spawn at daytime
Fortify45 28 jul 2022 om 2:56 
So I had some trouble with the 'Angler' achievement. To make a long story short, I had done most of the story and when I went back to the Guppo Grotto, I couldn't go back into the area. It seems the game locks it if you clear the area.

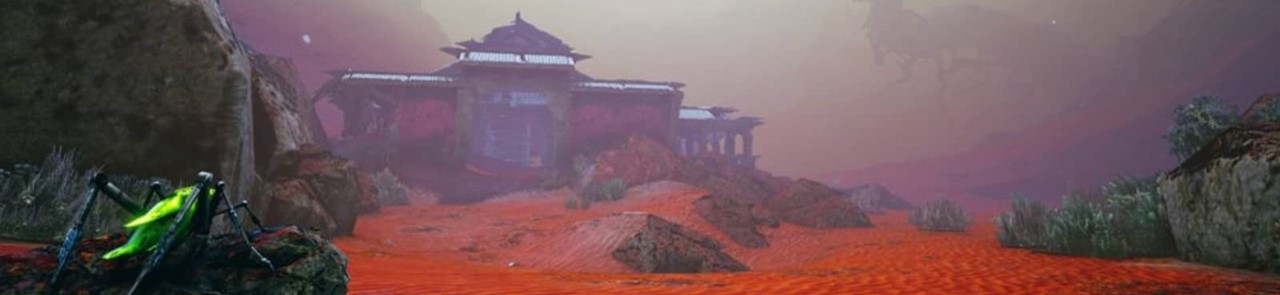
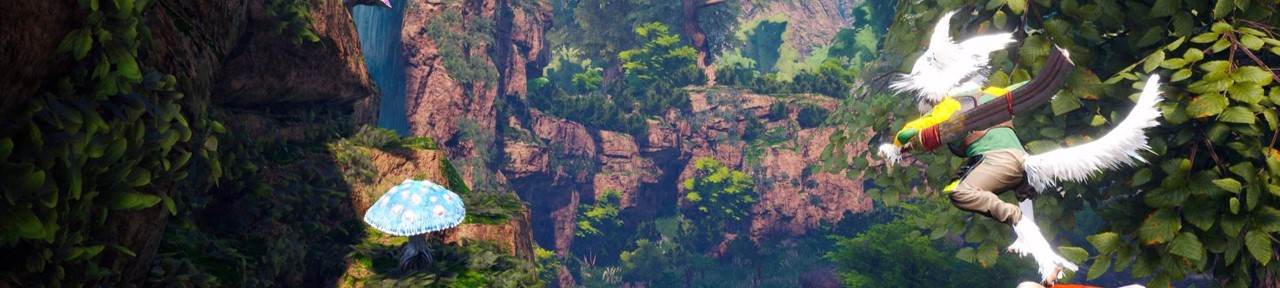
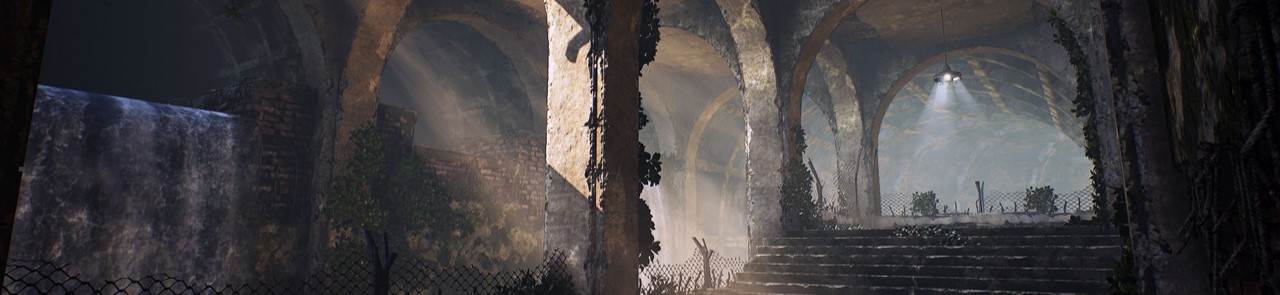
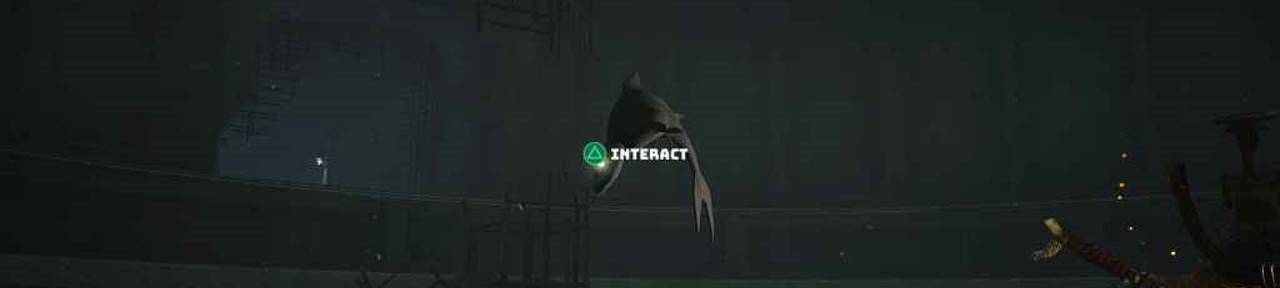
But to get this achievement, I was able to use Fungi to jump back through the pipe and then down against the winds to reach the area.

Just wanted to post this, just in case someone else comes across this problem in the future.
VI®US 6 mei 2022 om 1:27 
nice
feebzh 2 feb 2022 om 13:41 
nice guid