LEGO® The Lord of the Rings™

LEGO® The Lord of the Rings™

171 ratings
BLVGH - LEGO The Lord of the Rings
By legogamesguy
This is my new and improved guide for LEGO The Lord of the Rings! In an effort to make my guides more helpful and engaging, I have decided to rework them! I would appreciate any feedback you guys have about this new format, so be sure to leave a comment or shoot me a direct message!

In this guide you will find:
-A rundown of Gameplay Basics
-A tour of Middle-earth
-How to beat each level in Story Mode, as well as how to get to the next Story level in Middle-earth
-The locations of all 10 Treasure Chests, all 3 Treasure Items and the Blacksmith Design in each level in Free Play Mode
-How to complete the Bonus level, including how to unlock it
-A complete guide to exploring Middle-earth, including the locations of every Blacksmith Design, Character, Fetch Quest, Mithril Brick and Red Power Brick
-A complete list of all items in the Treasure Trove
-Full lists of Achievements, Characters, and Extras
-A full list of Cheat Codes

These guides have always been and will always be free. However, working on these guides takes considerable time and effort. If you like the guide, feel free to show your appreciation with a Steam Award! I appreciate all the points and support you guys have given me!
9
2
2
7
2
2
   
Award
Favorite
Favorited
Unfavorite
------------Gameplay Basics------------
Game Modes
This game has plenty of levels for you to play, with 18 story levels. There are several different game modes you can play, which I'll describe here. I also describe how I structure the walkthroughs for each game mode.

The first time you play a story level, you will be playing Story Mode. You will only have access to the characters that the game gives you. Generally, your exploration is limited due to the characters you have, meaning you'll have to come back in Free Play Mode to unlock the collectibles you couldn't collect in Story Mode. After completing a level in Story Mode, you can select the Replay Story option to replay the level in Story Mode.

At the top of my Story Mode walkthroughs, I list the enemies you'll encounter and any bosses you will fight. I also list both your starting characters and any characters that are added as you progress. Finally, I list the True Adventurer total for that level. Each level is split up into parts, which I sometimes call areas. Each part is a distinct area of the level, separated from other areas by a screen wipe (it will be very obvious when you enter a new area). Below each part, I explain what to do in that part to progress in the level. I do not include the locations of any collectibles, even if you can collect them in the story. At the end of the walkthrough, I list any characters you unlocked. If you need to purchase these characters, I have also included their cost in studs.

After completing a level in Story Mode, you will be able to play it in Free Play Mode. In Free Play Mode, you can select any character from all the ones you've unlocked to take into the level. The game will then give you a selection of other characters to cover all of the abilities you have unlocked. In Free Play Mode, your goal is to find all of the collectibles. At any point in Free Play Mode, you can save and exit to return to Middle-earth without having to complete the level.

My Free Play Mode walkthroughs are also divided into parts, as I believe this makes them easier to navigate. At the top of the walkthrough will be a list of the abilities you'll need to collect all of the collectibles in that level. Free Play Mode walkthroughs contain the locations of all 10 Treasure Chests, all 3 Treasure Items and the Blacksmith Design, even if they can be collected in Story Mode. Screenshots are also included to add clarity to the walkthrough.
Inventory and the Treasure Trove
While not a terribly complicated concept, I thought I would devote a section here to explaining the Inventory and Treasure Trove.

While playing as any character, hold down the "special" button to bring up their inventory. Here, you can see all of the items that they currently have, and if they have multiple, you can select which object you want the character to hold. In order to use some character's abilities, you'll have to first select the appropriate item from their inventory.


When picking up certain items (like firewood) you'll have to add them to your inventory. To do this, press the "special" button again after picking them up. You'll first have to select an open spot on their inventory, as characters can only hold up to 8 objects at once.


In addition to whatever items your character usually carries, you also have access to a whole host of other items via the Treasure Trove. You'll unlock the Treasure Trove during "Interlude - Strider" and it can be accessed from the bottom of the inventory wheel.


Pull up the Treasure Trove and you'll have access to all of the Treasure Items you have collected, as well as all of the Mithril objects you have forged.


Some items that you can pick up in Story levels will have purple lights coming off of them. This means that they can be combined with something else.


Pick the item up and you might find another item in your inventory outlined in purple (like Sam's Frying Pan in the screenshot). Press the "special" button with the purple object selected to combine the two items.
Collectibles
To get 100%, you gotta collect everything. There are lots of things to collect, so it's important to know what you are looking for! You can check your overall collectible progress from the pause menu.

Studs
These are the most important things you can collect. Studs act as the game's currency, so you'll want to be picking up as many as you can find. The silver studs are worth 10, the gold studs 100, the blue studs 1,000, and the purple studs 10,000. You'll use studs to purchase things in Middle-earth, so you'll want to be collecting as many as you can.


True Adventurer
Collecting studs is essential if you want to reach True Adventurer status. Collecting studs in a level will reveal a stud bar in the top center of the screen. As you collect studs, the stud bar will gradually turn yellow. Once you fill the stud bar, you will achieve True Adventurer status. Once you achieve True Adventurer in a level, you cannot lose it. Even if you lose all the studs in a level after achieving True Adventurer, you will not lose it. Achieving True Adventurer in a level will net you a Mithril Brick.

Treasure Chests
Looking exactly as you would expect them to, these collectibles can be found in Story levels. There are 10 in each Story level, and collecting all 10 of them will complete the Minikit Model for that level. Collect all 10 Treasure Chests in the Story level to receive a Mithril Brick.


Mithril Bricks
This is the bulk of your exploration, as there are 250 of these to collect in the game. Mithril Bricks appear as white bricks, and when you collect them, they'll go into a bag. You'll use the Mithril Bricks in your bag when forging items at the Blacksmith in Bree. Once you forge an item, the Mithril Bricks you used will be transferred to your total out of 250.


You can collect Mithril Bricks by:
  • Completing Story levels (18 total)
  • Achieving True Adventurer in a Story level (18 total)
  • Collecting all 10 Treasure Chests in a Story level (18 total)
  • Collecting all 3 Treasure Items in a Story level (18 total)
  • Collecting the Blacksmith Design in a Story level (18 total)
  • Completing Fetch Quests in Middle-earth (30 total)
  • Collecting them in Middle-earth (130 total)

Blacksmith Designs
Blacksmith Designs look like square envelopes, and collecting these allows you to forge new items at the blacksmith shop in Bree. Each Blacksmith Design will unlock a new item for you to forge. These can be collected in Story levels and in Middle-earth. Collect the Blacksmith Design in a Story level to receive a Mithril Brick.


Treasure Items
Some items that you can pick up in Story levels are surrounded by an orange light. These items are Treasure Items, and there are 3 in each Story level. Picking up these items will add them to your Treasure Trove, allowing you to use/wear them at any time. Some Treasure Items will also be used to complete Fetch Quests. Collect all 3 Treasure Items in a level to receive a Mithril Brick.


Fetch Quests
Some people in Middle-earth have a yellow circle in front of them. Walk up to them and press the "special" button to talk to them. They will then ask you to give them an object, either a Treasure Item or a forged Mithril item. If you have the object, talk to them again to give them the item and complete the quest.


Red Power Bricks
In some Fetch Quests, you'll be asked to give the person a forged Mithril item. Give that person the item and a Red Power Brick will appear for you to purchase. Red Power Bricks allow you to unlock Extras, which can be used to modify your gameplay in various ways. See the "Red Power Brick Extras" section below for info on each Extra.


Characters
After completing Story levels, certain characters will appear in Middle-earth for you to purchase. Simply walk up to the character and you'll be able to purchase them. If a character is an enemy, you might have to punch them a few times before you can purchase them.
Character Abilities
As you play through the levels, you will notice many things that you can do. However, not all characters will be able to do them! This is because each character has certain abilities, and in order to collect all the Treasure Chests, Treasure Item and Schematics, you'll need to make use of their abilities to unlock new areas of the levels to explore.

Here is a quick rundown of all the abilities characters can have. For detailed information on who has these abilities, see the "Characters" sections towards the bottom of this guide.

Arrow
Characters with this ability can shoot arrows into gold slots, allowing Elven characters to swing on them. Press and hold the "attack" button to target up to three slots, then release to fire arrows into them. Not all characters that have this ability can swing on the arrows after firing them.


Axe
Characters with this ability can destroy axe panels, which appear as cracked, white panels. Stand in front of an axe panel and press the "attack" button to smash it. This will usually destroy the object the panel is connected to, allowing you access to a new area.


If an axe panel is on the ground, it can be destroyed by performing a jump slam. Jump up, then press the "attack" button while you're in the air to slam into the ground, destroying the axe panel.


If an axe panel is on a wall, you'll need to toss Gimli at it to destroy it. Walk up to Gimli as a non-small character and press the "special" button to pick him up. Aim at the axe panel, then toss the "attack" button to toss him at the panel, destroying it.


Climbing
Characters with this ability can climb special white LEGO walls. Simply hop onto the wall to start climbing it, allowing you to reach new ledges.


Dig
Characters with this ability can dig up piles of dirt to reveal buried objects. Stand near the dirt and hold the "special" button to dig it up.


Elf
Elves possess greater agility than other characters, which allows them to jump higher. You can use this ability in places marked with green and yellow leaves to reach higher ledges.


Elvish characters can also swing on arrows that have been fired into gold slots. Hop onto an arrow to start swinging, then press the "jump" button to hop onto either the next arrow or the opposite ledge.


Explosive
Characters with this ability can destroy silver LEGO objects. Toss an explosive at them to destroy them.


Extinguish
Characters with this ability can use a bucket to put out fires. Stand in front of a pool of water and press the "special" button to fill up your bucket.


Head over to a small fire and press the "special" button to put it out. After putting out a fire, you will have to refill your bucket with water if you need to use it again.


Firestarter
Characters with this ability can light piles of wood to start a fire. When a fire can be lit, an orange/brown panel will appear in front of it. Stand on the panel and press the "special" button to light the fire.


Fisherman
Characters with this ability can fish at piers. Stand on the pier and press the "special" button to start fishing.


You will then face three button prompts. Hit the buttons when prompted and you'll retrieve an item from the water, as well as a small amount of studs. Wait until the button starts to glow (as in the screenshot) before hitting it and you'll receive a larger stud reward.


Gardner
Characters with this ability can grow plants. Stand in front of a seed and press the "special" button to grow the plant.


Illumination
Characters with this ability can light up dark alcoves, allowing them see what's inside. Simply walk up to the alcove and you should start to light it up. Characters without this ability will back away in fear if they approach a dark alcove.


Magic
Characters with this ability can use magic to manipulate purple objects. Hold the "special" button to lift the object up, then move it around using the d-pad.


Morgul
Characters with this ability can destroy Morgul LEGO objects, which appear as black-and-orange objects. Simply attack the Morgul LEGO object to damage or destroy it. Oftentimes, weapons that can destroy Morgul LEGO objects will glow bright white when near them. Characters without this ability can still attack Morgul LEGO objects, but they won't do any damage.
Character Abilities cont.
Rope
Characters with this ability can interact with rope points. Stand close to the rope point and press the "special" button to latch onto it. This will allow you to either climb onto a ledge or pull something down.


Sharp Shoot
Characters with this ability can hit small circular targets, usually with a bow and arrow. Press and hold the "attack" button to aim, then release to fire. Characters with this ability can target up to three targets at a time.


Small
Characters with this ability can use their small size to crawl through travel chutes. Stand in front of a travel chute and press the "special" button to crawl through. This will often give you access to new areas and ledges.


Super Strength
Characters with this ability can pull on super strength handles, which appear as orange handles on objects. Walk up to the super strength handle and spam the "special" button to tear it off. This will usually destroy the object.


Tracking
Certain items that you can pick up have what looks like green gas surrounding them. Characters with this ability can track these items, often to reveal a new item.


Press the "special" button to pick up the item. Green footprints will then appear. Follow the footprints around to find another item. When you get close, your character will get on all fours and move more slowly.
Tour of Middle-earth
Middle-earth is a vast world, and there is lots for you to do there. While there are lots of collectibles for you to find, there are also a few things you can do in Middle-earth that don't involve collecting. Let's take a tour!

You'll find Bag End in the Shire. When you first enter Middle-earth, you'll be unable to go inside. The door will open for you once you complete the Story.


Head inside and head through the opening on the right to reach the Character Customizer.


This is where you can create your Custom Characters (up to 10).


You can find the Blacksmith in Bree. The Blacksmith is the building with the hammer and anvil sign hanging above it, and is where you can forge Mithril Items.


Head inside and go to the left to see all of the Blacksmith Designs you have collected. Press the "special" button while standing in front of it and you'll be able to select an item to forge.


If you have enough Mithril Bricks, select an item and the Blacksmith will toss the Mithril Bricks into the fire. Hop on the bellows three times to melt the Mithril, allowing the Blacksmith to forge your item.


You can find the Minikit Room in Rivendell. It's the building with the Treasure Chest sign on it.


Head inside and you'll be able to view your progress on all of the Minikit Models.
---------------Story Levels---------------
Prologue - Story Mode

Enemies: Mordor Orc
Boss: Sauron
Starting Characters: Elrond (Second Age), Isildur, Elendil
True Adventurer: 30,000

Part 1 - Battle of Dagorlad

Time to take on the forces of Sauron! While you'll be attacked by plenty of Orcs, your target for now are the Orcs carrying banners on their backs. Defeat 5 of them and a second wave will appear. These Orcs are carrying shields, making them tougher enemies. When you battle them, spam the "attack" button to knock their shield away, allowing you to defeat them.

After those Orcs are defeated, Mount Doom will erupt, revealing Morgul LEGO pillars. Switch to Elendil and use his sword to destroy the pillars, allowing you to defeat the Orcs on top. Defeat the 3 Orcs on top of the Morgul pillars to trigger a cutscene.

Part 2 - Sauron

Looks like the Dark Lord himself has joined the fight. This fight is pretty simple. Avoid Sauron's attacks until his mace gets stuck in the ground. When his mace is stuck, switch to Elendil and use his sword to damage the mace. Do enough damage and you'll take out a heart. Repeat this process two more times to defeat Sauron.

Part 3 - Mount Doom

Time to destroy the Ring for good. Head to the right and hop onto the rock platform to cross the lava, then hop up the bars to reach the ledge. Continue to the right and destroy the Morgul pillars to clear the path, then hop onto the rock platform to cross the lava.

Continue to the right, timing your movements past the lava, and destroy the Morgul pillars to clear the bar above the lava river. Hop up the bars and shimmy to the right to pass over the lava, then destroy the Morgul pillar to knock down a beam. Walk up it, then use Elrond to high jump onto the ledge. Push the large rock to the edge of the tiles, allowing Isildur to join you.

Continue to the right and destroy the Morgul pillars to clear the path, then continue to the right. Hop up the bar to reach the ledge, then head to the right to reach the entrance to Mount Doom. Approach the gate and it will open, allowing you to head inside.

Part 4 - Destroy It!

Simply head all the way to the right to complete the level.

Unlocked Characters: Elendil, Isildur, Elrond (Second Age) (200,000), Gil-galad (125,000), Bilbo Baggins (125,000)
Prologue - Free Play Mode
Required Abilities: Axe, Climbing, Dig, Explosive, Illumination, Morgul, Rope, Sharp Shoot, Small, Super Strength

Part 1 - Battle of Dagorlad

Treasure Chest 1
Head to the top left corner of the battlefield and you'll find a dirt pile. Dig it up to reveal this Treasure Chest.


Treasure Chest 2
There are 3 Orc banners in the background that have targets on them. Shoot all 3 to receive this Treasure Chest.


Part 2 - Sauron

Treasure Item (Elven Sword)
Destroy the silver rocks in the back left corner to reveal this Treasure Item.


Part 3 – Mount Doom

Treasure Item (Magma Armor)
Destroy the rocks by your starting point to reveal some dirt.


Dig it up to reveal this Treasure Item.


Treasure Chest 3
Toss Gimli at the axe panel by your starting point to smash it, revealing an opening. Head inside.


Once inside, head to the back and latch onto the rope point to reach the ledge.


Toss Gimli at the axe panel across the gap to smash it, clearing the path.


Climb up the wall to reach the ledge.


Destroy the Morgul object to reveal this Treasure Chest in the center of the pool.


Blacksmith Design (Mithril Shockwave Axe)
After collecting Treasure Chest 3, head to the right side of the area and smash through the door to reveal an opening. Head inside to collect this.


Treasure Item (Shimmering Armor)
After collecting the Blacksmith Design, pull on the nearby super strength handle to open the box, revealing this Treasure Item.


Treasure Chest 4
There are 5 statues of Sauron atop Morgul pillars you need to destroy. The first statue can be found in the same area as Treasure Chest 3, by the center of the pool.


The second can be found on the left side of the lava river you cross by shimmying across the bar.


The third can be found after walking up the beam.


The fourth and fifth can be found by the gate leading into Mount Doom. Destroy all 5 to receive this Treasure Chest.


Treasure Chest 5
After crossing the second lava river, toss Gimli at the axe panel to reveal LEGO pieces.


Build them onto the wall, blocking part of the lava.


Shoot the target to knock down the rocks, blocking off the rest of the lava.


The pressure will then build up, clearing both blockages and revealing LEGO pieces. Build them into this Treasure Chest.


Treasure Chest 6
You'll find this Treasure Chest on a rock in the third lava river. Latch onto the rope point to pull it towards you, allowing you to collect it.


Treasure Chest 7
Before walking up the beam, head into the nearby dark alcove to reveal this Treasure Chest.


Treasure Chest 8
Destroy the Morgul blocks by the tiles to clear the opening, allowing you to collect this Treasure Chest.


Treasure Chest 9
Destroy the silver bars to the left of the entrance to Mount Doom to reveal a travel chute.


Crawl through it to reach the ledge with this Treasure Chest.


Part 4 - Destroy It!

Treasure Chest 10
Shoot the target above you to knock down this Treasure Chest.


Minikit Model: Sauron
Interlude - The Journey Begins
Characters: Frodo, Sam

Our journey begins in the Shire, right in front of Bag End. You can't go inside just yet though, so follow the guide studs into Farmer Maggot's field to start the next level.

Unlocked Characters: Frodo, Sam
The Black Rider - Story Mode

Boss: Saruman
Starting Characters: Frodo, Sam, Merry, Pippin
Added Characters: Gandalf the Grey
True Adventurer: 16,000

Part 1 - Get off the road!

We need to avoid the gaze of that rider. You're currently in stealth mode, so you can't jump or move very fast. Head to the right and you'll see the rider up ahead. If you step into the moonlight, the rider will see you and you'll back away. However, if you're Frodo, you'll have to spam the "special" button to get back out of sight.

To scare off the rider, smack the nearby rock to knock off a smaller chunk. Pick it up and toss it at the bird nearby to startle the rider. Continue to the right and you'll find that the rider has stopped again. Dig up the nearby dirt to reveal another rock, then pick it up and throw it at the boulder to knock it down. This will spook the rider, allowing you to continue to the right.

The rider will then start pacing back and forth. Time your movements to the right, avoiding its gaze. If you need to, you can attack the tree to open it up, giving you a spot to hide. The rider will then stop on the bridge, preventing you from crossing the water. Crawl through the travel chute to reach the branch above you, then walk across the beam to startle the bird. This will scare off the rider, allowing you to continue.

Crawl back through the travel chute to reach the ground, then continue to the right. Grow the plant to block the rider's gaze, allowing you to continue to the right.

Part 2 - Saruman's Counsel

Looks like Saruman isn't going to be giving us very good advice. Spam the "attack" button and you'll fall back to the ground. Saruman will then start casting spells at you. Avoid his attacks until he weakens, then hold the "special" button to lift him up. Toss him into one of the objects in the room to damage him. Repeat this process two more times.

Part 3 - Avoiding Detection

We are now continuing our quest of scaring off the Black Rider, and we need to find three pieces of tile to place on the track. The first can be found to the left of the rock. Pick it up, then press the "special" button to add it to your inventory. Destroy the glowing mushroom and tree stump to reveal the other two tile pieces. Once all three tile pieces have been placed, push the boulder to the right to spook the rider.

Continue to the right and pick up the apple, then toss it at the branch to startle the owl, moving the rider to the right. Continue to the right and pick up the apple again, then toss it at the owl to scare off the rider. Grow the plant to grow a flower, then walk up the ramp and continue to the right. The rider will then appear on the bridge, preventing you from continuing.

Head to the near left corner to find a pier. Merry can fish from here, so do so to reveal a crab. Pick it up and throw it at the torch to set the rider on fire, scaring him off. Continue to the right and dig up the dirt to reveal a rock. Pick it up and toss it at the beehive to anger the bees. The bees will fly through the cobweb in the tree, destroying it.

Head inside the tree and head to the right in the log. The rider will then move to the right. A bird will knock down an apple (this will only happen if you've completed Part 2), so pick it up and toss it at the bird to scare off the rider. Continue to the right.

Part 4 - Run, Frodo!

Run! Move around to collect studs and avoid the Black Riders. Reach the end to complete the level.

Unlocked Characters: Frodo (Shire), Merry, Pippin, Tom Bombadil (125,000), Rosie (25,000)
The Black Rider - Free Play Mode
Required Abilities: Axe, Climbing, Dig, Elf, Explosive, Firestarter, Illumination, Morgul, Rope, Sharp Shoot, Super Strength, Tracking

Part 1 – Get off the road!

Treasure Chest 1
Pull on the super strength handle to the left of your starting point to toss the rock aside, revealing a hole.


Drop down inside, then head to the left. Grab the rope to lower the log.


Head to the right, then high jump onto the ledge.


Head to the left on the ledge to reach this Treasure Chest.


Treasure Chest 2
After collecting Treasure Chest 1, smash the axe panel to knock the rock on top of one of the mole hills. We need to block the rest of the mole hills.


Head to the left, then light the fire to block off another mole hill.


Shoot the target on the right to knock the rocks onto another mole hill.


Head into the dark alcove on the right to scare the mole off.


The mole will then head into the mole hill in the center of the area, revealing this Treasure Chest.


Treasure Chest 3
This Treasure Chest is super easy to spot hiding behind a tree. Simply walk around to collect it.


Treasure Item (Ferryman's Cap)
Before heading into the river, head towards the screen and you'll find a path. Follow the path to reach a Morgul pillar. Destroy it to reveal LEGO pieces.


Build them into a model of a Ringwraith. This will scare the mole, who will leave this Treasure Item behind.


Treasure Chest 4
Destroy the silver rocks in the river to reveal this Treasure Chest.


Treasure Item (Soup Pot)
After crossing the river, destroy the plant to reveal a dark alcove. Head inside to reveal this Treasure Item.


Part 2 – Saruman’s Counsel

Treasure Chest 5
Throw Saruman into the window with the lock on it to open it. A bat will then fly in, dropping off this Treasure Chest.
The Black Rider - Free Play Mode cont.
Part 3 – Avoiding Detection

Treasure Chest 6
There are 5 nests you need to destroy. The first is to the right of your starting point.


The second is to the right of the purple flower you grow.


The third is on the left side of the bridge.


The fourth is right above the tree where you find Treasure Chest 8 (see below).


The fifth is above the tree by the exit. Destroy all 5 to receive this Treasure Chest.


Treasure Chest 7
After walking across the purple flower you grow, smash the axe panel on the log to reveal an opening. Head inside to collect this Treasure Chest.


Blacksmith Design (Mithril Music Horn)
After scaring the Ringwraith off the wooden bridge, head over to it and smash it to clear the path.


Head back towards the waterfall, then latch onto the rope point on the left to reveal this.


Treasure Item (Mushroom Crown)
After collecting the Blacksmith Design, latch onto the rope point on the waterfall to reveal a plunger.


Track it and you'll reveal a flower.


Track it to reveal this Treasure Item.


Treasure Chest 8
Climb up the wall inside a tree to reach this Treasure Chest.


Treasure Chest 9
After passing through the log, head back to the left and smash the brown leaves to reveal a dirt pile. Dig it up to reveal this Treasure Chest.


Part 4 – Run, Frodo!

Treasure Chest 10
This appears on the right side of the path.


Minikit Model: Bree
Interlude - Strider
Characters: Frodo, Sam, Merry, Pippin

Having successfully escaped the Black Riders (for now), we can now head to Bree to meet Gandalf. Follow the guide studs down the road and you'll reach the village of Bree. Head over to the Prancing Pony and you'll find a young hobbit at the door.

In order to get inside, we're going to have to complete his Fetch Quest. Talk to him and he'll ask you to forge him a Mithril Trowel. Follow the guide studs and you'll find the blacksmith shop.

Head inside and you'll find the Blacksmith Design for the Mithril Trowel lying in the middle of the room. Pick it up and you'll be able to forge the Mithril Trowel. Head over to the left side of the room and press the "special" button to view all of the available Blacksmith Designs. For now, you'll only have access to the Mithril Trowel.

It costs two Mithril Bricks to forge, which you'll have after completing the first two Story levels. Select the Mithril Trowel and the blacksmith will toss the Mithril Bricks in the fire. Head to the right side of the fire and hop on the bellows a few times to melt the Mithril, allowing the blacksmith to forge the trowel. This will add the item to your inventory, allowing you to use it whenever you wish.

Once the Mithril Trowel has been forged, hold the "special" button to pull up your inventory wheel. Select the Treasure Trove option at the bottom to pull up the Treasure Trove. Select the Mithril Trowel and the door to the blacksmith shop will open, allowing you to leave.

Head back over to the Prancing Pony and give the Mithril Trowel to the hobbit outside. He will thank you, opening the door inside. Head in to trigger a cutscene.


After the cutscene, Aragorn has been added to the party. Follow the guide studs out of Bree and over to Weathertop. Head up the steps to start the next level.
Weathertop - Story Mode

Enemies: Ringwraith
Starting Characters: Sam, Merry, Pippin
Added Characters: Frodo, Aragorn
True Adventurer: 46,000

Part 1 - Second Breakfast

The hobbits are hungry, so it's time to cook! First, we need to get a fire going, and we'll need to find three pieces of firewood to do so. The first can be found by smashing the glowing plant in the back right corner. Pick up the first piece of firewood and place it in your inventory.

Head onto the ledge in the back and destroy the rock to reveal LEGO pieces. Build them onto the tiles, then push the rock to the right, revealing a travel chute. Crawl through it to reach a ledge, then destroy the plant to reveal another piece of firewood.

Add it your inventory, then crawl back through the travel chute to reach the ground. Head to the near right corner and destroy the brown plant to reveal the final piece of firewood. Add it to your inventory, then place all three pieces of firewood into the fire pit. Sam can light the fire, so do so.

We now need to find three ingredients to place in Sam's frying pan. Have Merry fish from the pier to reel in a fish. Have Sam pick it up and add it to his frying pan. Head to the near right corner and grow the plant, then smack it to knock a tomato loose. Have Sam pick it up and add it to his frying pan.

Crawl back through the travel chute in the back, then hop onto the bar and shimmy to the right. Drop down onto the tree, then smack the nest to knock down an egg. Drop down and add it to Sam's frying pan. Once all three ingredients are in the pan, stand by the fire and press the "special" button.

Part 2 - Climbing Weathertop

Head to the left and destroy the plants to reveal LEGO pieces. Build them into a bridge, allowing you to continue to the left. Cross it, then grow the plant to reveal some rocks. Pick them up and toss them at the plants on the left, knocking down the rocks.

Continue to the left and grow the plant to reveal a flower. Bounce up the leaf to reach the ledge, then crawl through the travel chute as Sam. Build the LEGO pieces into firewood, then light it to clear the path above you. Crawl back through the travel chute, then continue to the left.

Head up the stairs and grab one of the vines, then switch to your partner. Grab the other vine to knock down some LEGO pieces. Build them into a beam, then walk across it. Continue up the path, then destroy the plant on the left to reveal LEGO pieces. Build them into firewood, then light it to reveal bars. Hop up them, then hop onto the ledge. Grow the plant to reveal a flower, then hop on it and continue to the right. Head up the path and through the opening.

Part 3 - The Nine

We're now in control of Frodo and Sam. Frodo is in the wraith world, and if a Ringwraith gets too close to him, you'll have to spam the "special" button to resist them. We need to build and light five fires. Since Frodo is in the wraith world, he can build the wraith LEGO pieces, which are the white glowing LEGO pieces.

Build the pile of wraith LEGO pieces into some firewood, then have Sam light it. Once you build a pile of firewood, the Ringwraiths will walk up to it and try to destroy it. Because of this, I recommend lighting each pile of wood as soon as you build it. There is another fire you can light in the center of the area.

To reveal the third, grow the plant on the left, then destroy it to reveal LEGO pieces. Build them into a fire, then light it. Destroy the cart in the back of the area to reveal more LEGO pieces, then build them into the fourth fire. Once you light it, head to the right and push the statue to the end of the tiles. This will reveal some wraith LEGO pieces. Switch to Frodo and build them into the final fire, then have Sam light it. Once all five fires are lit, a cutscene will play.

Aragorn has joined the party, and we need to get rid of the five Ringwraiths still bothering us. Smack any of the Ringwraiths with the lit torch Aragorn is carrying to scare them off. We need to do the same for the other four. To do this, we need to start another fire. Build the LEGO pieces in the back left corner into a fire, then light it.

Sam has a torch, so light it and use it to scare off another Ringwraith. We now need to find some more torches. You'll notice that there are several rocks lying on the ground. Pick one up and toss it at one of the three statues on the sides of the area to knock them down, revealing a torch. Pick it up and add it to your inventory, then light it in the fire and use it to scare off another Ringwraith. Scare off all five Ringwraiths to complete the level.

Unlocked Characters: Aragorn, Ringwraith (200,000), Ringwraith (Twilight) (200,000)
Weathertop - Free Play Mode
Required Abilities: Arrow, Axe, Elf, Explosive, Illumination, Morgul, Rope, Sharp Shoot, Super Strength, Tracking

Part 1 - Second Breakfast

Treasure Chest 1
Head into the dark alcove on the left to reach this.


Treasure Chest 2
Latch onto the rope point on the left to pull down the rocks, revealing this.


Treasure Item (Rubber Duck)
Shoot the target by the pond to reveal this Treasure Item.


Treasure Chest 3
Shoot an arrow into the slot on the wall.


Hop onto the arrow and swing over to this Treasure Chest.


Part 2 – Climbing Weathertop

Blacksmith Design (Mithril Music Boots)
Head into the dark alcove behind your starting point to reveal this.


Treasure Chest 4
Destroy 3 pink flowered plants. The first can be found right after crossing the rocks to the left.


The second can be found after hopping across the large flower.


The third can be found to the left of the exit. Destroy all 3 to receive this Treasure Chest.


Treasure Chest 5
After bouncing up the leaf of the pink flower, look to the right to see a bar.


High jump onto it, then shimmy to the right to reach this Treasure Chest.


Treasure Chest 6
Pull on the super strength handle to tear off the gate, revealing an opening. Head inside to grab this Treasure Chest.


Treasure Chest 7
Smash the axe panel to the right of the exit to create an opening, allowing you to collect this Treasure Chest.


Treasure Item (Quill)
After collecting Treasure Chest 7, destroy the nearby Morgul pillars to reveal a book.


Track it to reveal a bottle.


Track it to reveal this Treasure Item.


Part 3 - The Nine

Treasure Chest 8
Destroy the silver object in the near left corner to reveal wraith LEGO pieces.


Have Frodo build them into a pump.


Turn the crank to inflate a Ringwraith balloon, revealing this Treasure Chest.


Treasure Chest 9
There are 3 small targets on statues that you need to hit. The first is on the left side of the area.


The second is up high in the center of the area.


The third is on the right side of the area. Shoot all 3 to receive this Treasure Chest.


Treasure Chest 10
Pull on the super strength handle in the back left corner to open the tomb, revealing this Treasure Chest.


Treasure Item (Sun Hat)
Smash the axe panel on the right to reveal a statue.


Smash the axe panel on the statue to knock it down, revealing this Treasure Item.


Minikit Model: Ringwraith (Twilight)
Interlude - The Council of Elrond
Characters: Sam, Aragorn, Arwen Evenstar (Ranger), Merry, Pippin

We need to get Frodo to Rivendell! Follow the guide studs to the Ford of Bruinen to trigger a cutscene.

After the cutscene, follow the guide studs into Rivendell, triggering another cutscene.

After the cutscene, Frodo will be all rested up. Follow the guide studs through Rivendell to reach the secret meeting.


After the Council of Elrond, the Fellowship of the Ring will be formed. You have Frodo, Sam, Gimli, Aragorn, Merry, Pippin, Gandalf the Grey, Legolas and Boromir in your party. Frodo also has Mithril armor, meaning that he will now lose a heart after taking two hits (instead of one).

Follow the guide studs out of Rivendell and up the mountain. You'll reach a small river, preventing you from continuing. Hit the targets on the left to knock down the rocks, creating a bridge. Cross the bridge, then continue up the mountain to start the next level.

Unlocked Characters: Arwen Evenstar (Ranger)
The Pass of Caradhras - Story Mode

Starting Characters: Frodo, Sam, Gimli, Aragorn, Merry, Pippin, Gandalf the Grey, Legolas, Boromir
True Adventurer: 52,000

Part 1 - Mountain Pass

Head to the right and you'll encounter some deep snow. Characters who are short (Gimli and the Hobbits) cannot walk through this snow and will have to be carried by someone else. Walk up to a short character and press the "special" button to pick them up.

Pick up Gimli and carry him through the snow, then smash the axe panel to reveal a travel chute. Crawl through it, then smash the axe panel on the ground to clear the snow above you. This will also reveal an axe panel on the wall.

Crawl back through the travel chute, then toss Gimli at the axe panel to smash it, revealing a ledge. Hop up the bars to reach the ledge, then push the rock to the end of the tiles. This will allow you to reach the ledge on the right. Hop on top of the rock, then onto the ledge.

Continue to the right and carry Gimli through the snow, then smash the axe panel to reveal a travel chute. Crawl through it and smash the axe panel to clear the snow above you, as well as reveal another axe panel. Crawl back through the travel chute, then smash the axe panel to reveal LEGO pieces. Build them into steps, then hop up them to reach the ledge. Smash the axe panel to knock down some rocks, allowing you to continue to the right.

Continue to the right, then shoot the targets on the icicles to knock them down. Shimmy across the bar, then continue to the right to reach a campsite. We need to find three pieces of firewood. Destroy the boxes around the camp to reveal the firewood, then pick them up and place them in the fire.

Light the fire to melt the ice, revealing LEGO pieces. Build them into a crossbow, then hop inside and press the "attack" button to fire a rope across the gap. Have Legolas walk up the rope, then shoot arrows into the sockets on the wall. Hop on the arrows and swing to the left, then shoot the target to rotate the rope, allowing the rest of the Fellowship to join you.

Pick up Gimli and toss him at the axe panel to the left, knocking down some rocks. Hop up them and continue up the path. Pick up Gimli and carry him through the snow, then crawl through the travel chute to reach a ledge. Smash the axe panel to knock down some rocks, allowing the Fellowship to pass over the snow.

Some LEGO pieces will also be knocked down, so build them into a fire. Light it to melt the ice in your way, then continue up the mountain (watch out for the falling rocks!). Once you reach the end of the path, toss Gimli at the axe panel to clear the path, then continue to the right.

Pick up Sam and Gimli and carry them through the snow, then dig up the dirt to reveal LEGO pieces. Build them into a travel chute, then crawl through it. Smash the axe panel to reveal some dirt, then dig it up to reveal LEGO pieces. Build them into a beam, then walk across it, watching out for the gusts of air. Hop up the ledges and you'll find another fire.

We need to find three more pieces of firewood, so smash up the nearby wooden shed to reveal them. Pick them up and place them in the fire, then light it to melt the nearby ice, revealing a plant. Grow it to reveal some platforms, allowing the rest of the Fellowship to join you.

Continue to the right and shoot the targets to knock down the icicles, revealing LEGO pieces. Build them into an axe panel, then smash it to clear the path. Continue to the right.

Part 2 - The Doors of Durin

Time to find the entrance to Moria. Dig up the dirt nearby to reveal LEGO pieces, then build them into a fire pit. We need to find three pieces of firewood. To find the first, head to the far left side of the area to find a mine cart. Destroy it to reveal the first pieces of firewood. There is another mine cart to the left of the door, which you can destroy to reveal the second piece of firewood. The third piece of firewood can be found by destroying the wooden raft across from the door.

Once all three pieces of firewood are in the fire, light it to clear off the plants. We need to find some LEGO pieces to complete the door. Head to the far left side of the area, then use Legolas to hop onto the ledge by Gandalf. Shoot an arrow into the slot on the wall, then hop onto it and swing across the gap.

High jump onto the bar above you, then shimmy to the right. Drop down onto the ledge, then shoot an arrow into the socket on the wall. Hop on and swing across the gap, then continue to the right and cross the beam. Push the rock off the tiles to reveal LEGO pieces, then drop down and build them onto the door.

To get the rest of the pieces, head to the right side of the area and smash the axe panel to reveal a travel chute. Crawl through it, then destroy the objects on the ledge to knock down the boxes. Hop up the boxes, then climb up the rope to reach the ledge.

Destroy the box to reveal LEGO pieces, then build them into a rotary handle. Push it to rotate the tree, revealing a platform. Continue to the left and smash the axe panel to knock down some more LEGO pieces. Drop down and build them onto the door.

Part 3 - The Watcher

Shouldn't have disturbed the water! We need to rescue Frodo from the Watcher. Avoid its tentacles until one gets stuck on the ground. When that happens, attack the red flashing part to destroy the tentacle.

Once you destroy four tentacles, the Watcher will reveal itself. Pick up Gimli and toss him at the axe panel, then have Legolas shoot the Watcher's eye. Avoid the tentacle attacks, then repeat this process to take out the Watcher's other eye, completing the level.

Unlocked Characters: Gandalf the Grey, Gimli, Legolas, Boromir, Elrond (Third Age) (200,000), Gloin (25,000)
The Pass of Caradhras - Free Play Mode
Required Abilities: Axe, Climbing, Dig, Explosive, Firestarter, Fisherman, Illumination, Morgul, Rope, Sharp Shoot, Small, Super Strength, Tracking

Part 1 – Mountain Pass

Treasure Chest 1
There are 5 skeletons with helmets you need to destroy. The first can be found by heading left from your starting point.


The second can be found on the ledge by the rock you push down.


The third can be found on the left side of the tent in the camp.


The fourth can be found by heading to the right after walking up the rope.


The fifth can be found after crawling through the travel chute you build by digging up the LEGO pieces. Destroy all 5 to receive this Treasure Chest.


Treasure Chest 2
There are 4 flags you need to smack. The first can be found by heading towards the screen after passing through the second patch of snow.


The second can be found by heading to the left after climbing up the rope by the camp.


The third can be found halfway up the mountain path with the falling rocks.


The fourth can be found after crossing the beam. Destroy all 4 to reveal this Treasure Chest.


Treasure Chest 3
After walking across the gap on the tightrope, continue to the right to find an axe panel.


Smash it to reveal LEGO pieces.


Build them into a snowman, then shoot the target on it to reveal this Treasure Chest.


Treasure Chest 4
Destroy the silver rocks to reveal an opening. Head inside to reach this Treasure Chest.


Treasure Chest 5
Latch onto a rope point above you, then climb onto the ledge.


Pull on the super strength handle to open the box, revealing this Treasure Chest.


Treasure Chest 6
Destroy the silver boards by the wooden beam you build to reveal a dark alcove.


Head inside to reach this Treasure Chest.


Blacksmith Design (Mithril Cluster Bow)
After destroying the fourth flag (see Treasure Chest 2 above), head towards the screen on the ledge to find this lying in plain sight.
The Pass of Caradhras - Free Play Mode cont.
Part 2 – The Doors of Durin

Treasure Chest 7
Destroying certain dome-shaped rocks by the water will reveal smaller rocks.


Pick them up and toss them at 3 bottles in the water to destroy them. The first is on the right side of the area, by where Aragorn hangs out.


The second is in the center of the area, across from the door.


The third is on the left side of the area, by where Legolas hangs out. Destroy all 3 bottles to receive this Treasure Chest, as well as a warning from Aragorn not to disturb the water.


Treasure Item (Luminous Stone)
Destroy the silver rock to the left of your starting point to reveal a pickaxe.


Track it to reveal a jewel.


Track it to reveal a hammer.


Track it to reveal this Treasure Item.


Treasure Item (Bill's Riding Crop)
Destroy the Morgul pillars on the left side of the area to reveal Bill the pony.


Destroy the objects inside the alcove to reveal this Treasure Item.


Treasure Chest 8
After collecting the Bill's Riding Crop Treasure Item, hop on Bill.


Ride him to the right, following the stud trail, to reach this.


Treasure Chest 9
While on a ledge on the left, head into the dark alcove to reveal an opening. Head inside to enter a cave.


Once inside, head to the left and smash the bones on the water to reveal an axe panel.


Smash it to create a hole in the ice.


Fish from the pier to reel in a fish.


Pick it up, then climb the wall in the back to reach the ledge on the left.


Light the fire to melt the ice, revealing a troll.


Give the fish to the troll to reveal this Treasure Chest.


Treasure Item (Ice Lolly)
After collecting Treasure Chest 9, destroy the rocks in the near left corner to reveal a dig spot.


Dig it up to reveal this Treasure Item.


Part 3 - The Watcher

Treasure Chest 10
Latch onto the rope point to reach the ledge.


Destroy the plant to reveal this Treasure Chest.


Minikit Model: The Misty Mountains
Interlude - Into the Mines
Characters: Frodo, Sam, Gimli, Aragorn, Merry, Pippin, Gandalf the Grey, Legolas, Boromir

Simply head to the right and enter Moria to start the next level.
The Mines of Moria - Story Mode

Enemies: Moria Orc, Cave Troll
Starting Characters: Frodo, Sam, Gimli, Aragorn, Gandalf the Grey, Legolas, Boromir, Merry
Added Characters: Pippin
True Adventurer: 70,000

Part 1 - Fool of a Took

Pippin has manged to get himself stuck in the well, and we need to get him out. Destroy the white chests on either side of the well to reveal LEGO pieces, then build them onto the well. Shoot the target on the right to lower a chest. We need to find a key to open it.

Head to the right and light the wood on fire to reveal the key. Pick it up and use it to open the chest, revealing a wheel. Pick it up and place it in the slot on the well. Head to the left and smash the axe panel to reveal a crank, then pick it up and place it in the slot by the well. Turn the crank to raise Pippin back up.

Part 2 - Orc Attack

All that noise Pippin made has alerted the Moria Orcs to our presence. Head over to the door and build the LEGO pieces to brace it. Shoot the targets on either side of the door to lower bars. Grab onto one, then switch to your partner and grab the other bar. This will lower a beam onto the door, bracing it. Unfortunately, this will not be enough, and Orcs will break through. Battle the Orcs as they appear, and eventually a cutscene will play.

After the cutscene, a Cave Troll will be wandering around. We need to defeat it. Head to the center of the area and you'll notice some LEGO pieces. Build them into a brown panel, then stand on it. The troll will roar at you, then smack the panel with its flail. Avoid the attack and the troll's flail will get stuck in the panel, damaging it.

Head to the left side of the room and high jump onto the ledge. Destroy the large rock to reveal another brown panel. Stand on it, then avoid the troll's attack. The flail will get stuck on the brown panel. Hop onto the chain, then shoot an arrow at the troll's face. This will destroy the brown panel, revealing LEGO pieces on the ground. Ignore them for now, then head over to the right side of the room. Do the same thing here as you did before to trigger a cutscene.

After the cutscene, Pippin will be on top of the troll. Spam the "attack" button to smack the troll's head. Eventually, the troll will stop moving and you'll be able to target its face. Switch to Legolas and shoot an arrow at it. The troll will then toss Pippin off.

Head to the left side of the area and build the LEGO pieces into a travel chute, then crawl through it to reach the ledge. Stand in the yellow circle and press the "special" button to hop back onto the troll. Spam the "attack" button to smack the troll, then switch to Legolas and shoot an arrow at it when you can. When the troll tosses you off, repeat this process on the right side of the room to finally defeat it.

Part 3 - Great Hall

We are now making our way to the Bridge of Khazad-dum, and a whole onslaught of Orcs are attacking us. Gandalf's barrier will take out most of the Orcs, but a few will slip through. Defeat the Orcs that slip through and you'll progress down the hall. The first wave consists of three Orcs, the second wave consists of five, and the third wave consists of seven. Once you've defeated the third wave, the Balrog will scare off the Orcs.

Head to the left down the path and towards the door. As you approach, a fire will start on a gear. Thankfully, Pippin can put it out. Fill his bucket in the pool of water on the left, then use it to put out the fire. Use Gandalf's magic to place the purple gear on the purple slot on the right, then smash the axe panel on the right to reveal LEGO pieces.

Build them onto the tiles, then push the cart into the wall. Destroy the barrel to the left of the door to reveal a crank, then pick it up and place it in the slot. Turn it to open the door, then head inside.

Part 4 - Collapsing Stairs

Head down the stairs to trigger a cutscene. After the cutscene, part of the stairs will be destroyed, and we need to get the Fellowship over to the far left. Toss Gimli across the gap to destroy the axe panel, revealing a travel chute. Crawl through it as Sam, then shimmy across the chain to the right.

Light the fire to knock over the stairs on the right, allowing Aragorn and Legolas to join the rest of the Fellowship. Climb the rope to rejoin the Fellowship, then shoot the two targets on the left to lower the platform. Continue to the left down the stairs.

Part 5 - Shadow and Flame

Gandalf is falling towards the Balrog, and we need to catch up to his sword. Hold the "jump" button to speed up your descent towards the sword. Once you grab your sword, continue your descent towards the Balrog.

Once you land on the Balrog, follow the button prompts to attack it. Once you damage it, you'll be thrown off. Repeat this process two more times.

The second and third times, you'll have to avoid the Balrog's fire breath. The Balrog will show when it is about to breath fire by inhaling. Move out of the way of the air and you'll avoid the fire. Once you damage the Balrog three times, you'll be sent back to the rest of the Fellowship.

Part 6 - Fly, you fools!

With Gandalf gone, it seems like a good idea to follow his advice. Head up the stairs to the right, then shoot the target to reveal a slot on the wall. Shoot an arrow into it, then hop on and swing across the gap. Head to the left and destroy the rock to knock down a ladder, allowing the rest of the Fellowship to join you.

Head over to the door in the back and smash the axe panel (this will only appear if you've completed Part 5) to open it. Head through to complete this long level.

Unlocked Characters: Moria Orc (25,000)
The Mines of Moria - Free Play Mode
Required Abilities: Climbing, Elf, Explosive, Illumination, Morgul, Rope, Sharp Shoot, Small, Super Strength

Part 1 - Fool of a Took

Treasure Chest 1
You need to reveal 3 Dwarf statues by pulling on super strength handles. The first can be found on the left side of the area.


Treasure Chest 2
Pull on the super strength handle on the right to open the tomb, revealing this Treasure Chest.


Part 2 – Orc Attack

Blacksmith Design (Mithril Headdress)
Head to the back right corner and you’ll find this Blacksmith Design hidden in an opening in the wall.


Treasure Chest 1 cont.
The second statue is on the ledge on the left.


The third statue is on the ledge on the right. Reveal all 3 statues to receive this Treasure Chest.


Part 3 - Great Hall

Treasure Chest 3
There are 3 Morgul pillars you need to destroy. The first is on the right side of the area.


The second can be found by the House Key Treasure Item (see below).


The third can be found on the left side of the area. Destroy all 3 to receive this Treasure Chest.


Treasure Chest 4
Destroy the silver block to reveal an opening, then head into the alcove.


Destroy the carts on the left to reveal LEGO pieces.


Build them into a wall, then climb up to reach this Treasure Chest.


Treasure Chest 5
After collecting Treasure Chest 4, latch onto the rope point to reveal this Treasure Chest.


Treasure Item (House Key)
After collecting Treasure Chest 5, pull on the super strength handle to pull the mine cart off the tracks.


This Treasure Item will get tossed out.


Part 4 – Collapsing Stairs

Treasure Item (Moria Orc’s Helmet)
As soon as you start heading down the stairs, shoot the target above you to drop down the skeleton.


Pick up the helmet the skeleton is wearing to grab this Treasure Item.


Treasure Chest 6
Destroy the silver rocks to reveal an opening, then head inside.


You'll find two targets, one on either side of the organ. Shoot each target twice to drop a cage to the ground, revealing this Treasure Chest.


Treasure Chest 7
After collecting Treasure Chest 6, step on the button in the center to start moving the colors on the organ.


When the correct color (red) moves into the green rectangle, step on the button to lock it in. Repeat this process for the other colors (blue and green) to partially lower the bridge on the right.


Repeat this process for six more colors to fully lower the bridge on the right, revealing this Treasure Chest.


Treasure Chest 8
After crawling through the travel chute, head around the back of the pillar to grab this hidden Treasure Chest.


Part 6 – Fly, you fools!

Treasure Item (Artist’s Hat)
High jump onto the bar on the crane to raise up a basket of gems.


You’ll find this in the basket. Switch to your partner and grab it.


Treasure Chest 9
Head into the dark alcove to the right of the bridge to reveal this Treasure Chest.


Treasure Chest 10
Shoot the two targets on the wall on the right to drop LEGO pieces, then build them into this Treasure Chest.


Minikit Model: Balrog
Interlude - Lothlorien
Characters: Frodo, Sam, Gimli, Aragorn, Legolas, Boromir, Merry, Pippin

Fresh out of the Mines of Moria, follow the guide studs down the path and into Lothlorien.


After our visit with Galadriel, you'll find yourself in boats heading up the river. Spam the "attack" button to row down the river. Once you reach the statues, you'll start the next level.
Amon Hen - Story Mode

Enemies: Uruk-hai
Boss: Lurtz
Starting Characters: Frodo; Aragorn, Legolas, Gimli
Added Characters: Boromir, Merry, Pippin; Aragorn
True Adventurer: 45,000

Part 1 - Boromir's Temptation

You'll be in the wraith world for the majority of this section, and we need to scare Boromir off so we can make it up the path. If you get too close to Boromir, he will grab you, and you'll have to spam the "special" button to break free.

Grab the small rock on the right, then head up the path. Toss the rock at the bush behind Boromir to scare him off, then continue up the path. Crawl through the travel chute to reach the ledge above Boromir, then push the pillar to the edge of the tiles to scare Boromir off. Drop down and build the wraith LEGO pieces into stairs, then walk up them.

Smack the rock to knock off a piece, then pick it up and toss it at the hand statue in the back left. This will reveal some wraith LEGO pieces. Build them into a ramp, then walk up to reach the ledge. Attack the vines to knock over the statues, scaring Boromir off.

Continue to the right down the path, then destroy the rocks and trees to reveal wraith LEGO pieces. Build them into a catapult, then destroy the beam on the left to fire it. This will knock down the head of a statue behind Boromir, scaring him off. Continue up the path and pick up the rock, then toss it at the bush behind Boromir to startle him again.

Continue up the path, then destroy the rock to the left of Boromir to knock off a smaller piece. Throw it at the nest to the left to knock it down, revealing wraith LEGO pieces. Build them into a ramp, then walk up it to reach the ledge. Push the statue to the end of the tiles to scare Boromir off, then continue to the right.

Crawl through the travel chute, then smack the rock to knock off a smaller piece. Pick it up and toss it at the eagle statue above Boromir to knock it onto his head. This will snap him out of his trance, causing him to run off. Drop back down and head up the path, then run up the steps of the building. Spam the "special" button to resist the Eye of Sauron.

Part 2 - Searching for Frodo

We now have Aragorn, Legolas and Gimli in our party, and we're looking for Frodo. We need to find a torch to light a fire so we can clear the path ahead. Head to the right and destroy the oars on the ground to reveal a torch, then pick it up and head to the left. Light the torch at the fire, then use it to light the fire in the center of the area. This will destroy the rubble in your way, allowing you to continue up the path.

Head up the path, then high jump onto the ledge. Walk up the vine on the right, then shoot the target above you to drop the nest to the ground, revealing LEGO pieces. Drop down and build them into a trampoline, allowing your partners to reach the ledge. Continue up the path and smash the axe panel to destroy the debris, allowing you to continue.

Continue up the path, then throw Gimli at the axe panel on the statue to knock off its head. High jump on top of the statue, then shoot an arrow into the slot on the statue. Hop onto it and swing onto the opposite ledge, then push the pillar off the tiles. Drop down and smash the axe panel by the tiles to reveal LEGO pieces, then build them into another pillar. Push the pillars to the back left corner of the tiles, then hop up them and continue up the path.

Smash the axe panel to knock down the tree, then continue up the path. Pick up Gimli and toss him at the axe panel to destroy the statues, revealing LEGO pieces. Build them into a slot, then shoot an arrow into it. Hop onto the tree, then high jump onto the arrow and swing onto the ledge. Build the LEGO pieces up here into a pillar, then push it off the tiles, allowing your partners to join you. Have Aragorn track Sting (this will only appear if you've completed Part 1) to trigger a cutscene.

Part 3 - Uruk-hai Attack

Several Uruk-hai will attack us on the ground, but our real target are the Uruk archers. Some are on top of stone platforms, and you can destroy the pillars to knock them down. To defeat others, you'll have to have Legolas hit them with an arrow. This first clearing has three archers (two on stone platforms, one by himself on the right). Defeat the three archers and the path will clear, allowing you to continue into the next clearing.

This next clearing has four Uruk-hai you need to defeat. One is on the left (you'll need Legolas to hit him with an arrow) and the other three are on top of stone platforms on the right. Once you defeat those four, the rocks on the right will be destroyed, allowing you to continue into the final clearing.

In this next clearing, have Legolas take out the two archers on the left. Toss Gimli at the axe panel to create a ramp. This will cause two Uruk-hai to hop down, so defeat them. Once they're defeated, head up the ramp and defeat the final Uruk-hai.

Part 4 - Boromir's Last Stand

We now have Boromir, Merry and Pippin facing off against the leader of the Uruk-hai, Lurtz. The Uruk-hai will be trying to pick up Merry and Pippin. If you get picked up, switch to someone else and defeat the Uruk holding them to release them. Head to the left and crawl through the travel chute to reach the ledge Lurtz is on, then smack him to take out a heart. He will then toss you off the ledge, triggering a cutscene.

After the cutscene, Boromir will have an arrow sticking out of his chest. However, he's still fighting (he only has 3 hearts though)! The travel chute on the left will also be blocked off. However, accessing it is as simple as destroying the rocks in front of it, so do so. Crawl through the travel chute and smack Lurtz again to take off another heart.

After the cutscene, Boromir will have a broom sticking out of his chest. Despite this, he's still doing alright (he's now down to 2 hearts). The travel chutes will also be destroyed, so we'll need to find a new way up to Lurtz. Thankfully, an Uruk-hai will knock down the tree on the right, revealing LEGO pieces. Build them into a diving board, then bounce up onto the ledge with Lurtz. Smack him again to take out his last heart.

After the cutscene, Merry and Pippin have been taken away by the Uruk-hai. Aragorn has appeared to help Boromir defeat Lurtz. Boromir now has a banana in his chest, and can't move very fast. He also only has one heart, so be careful if you're playing as him.

This fight is very simple. Lurtz will throw his shield. He will then drop down to get it, but have difficulty pulling it out of the ground. Smack him when he's pulling at his shield to damage him, taking off one heart. Repeat this process one more time and Lurtz will hop down to fight you for real.

Follow the button prompts to battle him. He will then pick you up. Switch to your partner and smack Lurtz to take out another heart. Repeat this process two more times to defeat him and complete the level.

Unlocked Characters: Uruk-hai (25,000), Lurtz (200,000), Galadriel (200,000), Celeborn (200,000)
Amon Hen - Free Play Mode
Required Abilities: Arrow, Axe, Dig, Elf, Explosive, Firestarter, Gardener, Illumination, Magic, Morgul, Rope, Sharp Shoot, Small, Super Strength

Part 1 – Boromir’s Temptation

***NOTE*** Since you cannot switch characters in this section, you will need to use items from your Treasure Trove to cover abilities that Frodo normally doesn't have. If you don't want to replay this section multiple times, make sure you have some form of a bow, axe, and rope in your Treasure Trove before starting.

Treasure Chest 1
There are 6 statues of a king you need to destroy. The first can be found by the first set of stairs you walk up. Grab a bow from your Treasure Trove and shoot the target on it.


The second can be found by the catapult you build. Grab a bow from your Treasure Trove and shoot the target on it.


The third can be found after crawling through the final travel chute.


Treasure Chest 2
After throwing the rock at the hand statue, destroy the remaining pieces to reveal this Treasure Chest.


Treasure Chest 3
After knocking off the head of a large statue, grab a bow from your Treasure Trove and shoot the target above Boromir to knock down a rock.


It will roll back down to the catapult. Build the LEGO pieces onto the catapult, then smack the support to fire it.


The catapult will launch the rock at the statue, revealing this Treasure Chest.


Treasure Item (Stop Wand)
After scaring Boromir off for the last time, grab a rope from your Treasure Trove and latch onto the rope point on the arch.


Climb up, then grab an axe from your Treasure Trove. Smash the axe panel to knock down this Treasure Item.


Part 2 – Looking for Frodo

Treasure Chest 1 cont.
The fourth king statue can be found on the left side of the beach.


The fifth can be found on the left side of the path, after smashing the axe panel.


The sixth can be found by Sting. Destroy all 6 statues to receive this Treasure Chest.


Treasure Item (Arrow Helmet)
Head to the left and pull on the super strength handle to tear off the gate.


Head inside the alcove and a ghost will sit on the chest. To get him to move, you need to cook him some food. Dig up the nearby dirt pile to find the fish.


To find the tomato, latch onto the rope point by the debris, then climb up to the ledge. Smack the plant to knock the tomato loose.


To find the egg, dig up the dirt pile on the right side of the beach.


Once your frying pan is full, head over to the fire and press the "special" button to place the frying pan on the embers.


This will move the ghost off the chest, revealing this Treasure Item.


Treasure Chest 4
There are 4 Morgul bird statues that you need to destroy. The first is in the same area as the Arrow Helmet Treasure Item (see above).


The second is on the right side of the beach.


The third is on the ledge with the pillar you push down.


The fourth is on the right side of the final ledge. Destroy all 4 to receive this Treasure Chest.


Treasure Chest 5
Latch onto the rope point on the pillar on the right side of the beach to knock it down.


Use magic to reassemble it on the purple panel. Place the pieces in the correct order (matching the pillar on the right) to reveal this Treasure Chest.


Treasure Chest 6
After hopping up the pillars, high jump onto the bar on the right, allowing you to hop into the alcove with this Treasure Chest.


Treasure Chest 7
Walk into the dark alcove underneath the final ledge to reveal an Orc. Destroy the rock next to him to reveal this Treasure Chest.
Amon Hen - Free Play Mode cont.
Part 3 - Uruk-hai Attack

Treasure Item (Uruk Sword)
Destroy the silver pillars on the left side of the second clearing, allowing you to grab this Treasure Item.


Treasure Chest 8
Grow the plant in the top left corner of the third clearing to grow a flower. Bounce up the leaf to reach the ledge with this Treasure Chest.


Treasure Chest 9
Head to the near right corner of the third clearing and you'll find a path leading to a silver gate. Destroy the gate to reveal an opening, then head inside.


Once inside, latch onto the rope point above you to create platforms.


Hop up them, then shoot the target on the right to reveal LEGO pieces.


Build them into a platform, then high jump onto it to reach the ledge.


Hop up the ledges, then light the fire to clear the travel chute on the ledge to the left.


Crawl through the travel chute to reach another ledge.


High jump onto the ledge above you, then bounce on the mushroom to reach this Treasure Chest.


Part 4 – Boromir’s Last Stand

Treasure Chest 10
Latch onto the rope point on the right to reveal 6 targets.


Two are on the right side of the area.


Two are in the center of the area.


The last two are on the left side of the area. Shoot all 6 to receive this Treasure Chest.


Blacksmith Design (Mithril Rope)
Smack the statue on the ledge that Lurtz is on to reveal this.


Minikit Model: Amon Hen
Interlude - The Breaking of the Fellowship
Characters: Frodo, Sam

The Fellowship of the Ring has been disbanded, and for now you only have control of Frodo and Sam. Follow the guide studs through Emyn Muil to start the next level.
Taming Gollum - Story Mode

Boss: Balrog, Gollum
Starting Characters: Gandalf the Grey; Frodo, Sam
True Adventurer: 90,000

Part 1 - Battle of the Peak

Before we bother with Gollum, we need to take care of the Balrog! Head to the left up the mountain and you'll find some colored blocks. Destroy the ice and rocks holding them in place, then use magic to move them onto the purple panel, creating steps. You don't need to create perfect stairs, you just need to arrange them so you can reach the ledge.

Hop up the blocks to reach the ledge, then continue up the path. Once you reach the tower, some steps will collapse, revealing LEGO pieces. Build them into stairs, then climb up. Destroy the wooden beam holding up the next set of stairs to lower it, then continue to the top of the tower.

The Balrog will then appear to fight you. The Balrog has several different attacks that it can use. Aside from the usual ground smacks, it will also crack its whip across the area. Jump over the whip to avoid it.

Avoid the Balrog's attacks and eventually lightning will strike. Head over to the light blue circle and press the "special" button to channel the lightning through Glamdring (Gandalf's sword). Aim the lightning at one of the red panels on the Balrog's wings to damage it. Repeat this process two more times to defeat the Balrog (the final time, you'll have to direct the lightning at the Balrog's chest).

Part 2 - Raw and Wriggling

Approach Gollum and he will run off. Before he'll talk to us, we need to give him six fish. Pick them up and add them to your inventory, then toss them into the basket to lower the rock wall. The first fish can be found right in front of you. Another fish can be found just to your right (you need to complete Part 1 for this fish to appear). Pick up both fish and toss them in the basket. We can find the other four by doing a lap of this area.

Head to the right and you'll find a rope point. Have Sam latch onto it, then climb up onto the ledge. Destroy the plants to reveal LEGO pieces, then build them into a ladder. Climb up onto the ledge, then grab the fish and add it to your inventory. Continue to the right and you'll find a dark alcove. Frodo can now light up dark areas with the Phial of Galadriel, so head inside to scare Gollum off. Have Sam follow him inside, then dig up the dirt to reveal the fourth fish.

Pick it up and add it to your inventory, then continue to the right. Grow the plant to knock a pillar onto the tiles, then push it to the right. Hop up the leaves on the plant, then hop onto the pillar. Hop onto the ledge on the right, then continue. Dig up the dirt to reveal a fire pit. We need to find three pieces of firewood.

Destroy the brown plants on the right to reveal one set of firewood, then destroy the brown plants on the left to reveal another. Smash through the rock wall on the left to reveal an alcove, then destroy the rock on the ledge to reveal the last piece of firewood. Once all three pieces of firewood are in the fire, light it to clear the plants off the bars. Hop up the bars to reach the ledge, then grab the fifth fish.

Continue to the right, then destroy the pile of plants and bones to reveal a dirt pile. Dig it up to reveal LEGO pieces, then build them into a rope point. Latch onto it as Sam to reach the ledge, then grow the plant to create some platforms for Frodo. Crawl through the travel chute, then grab onto the bar and shimmy to the right. Drop down onto the ledge, then light up the dark alcove to reveal the final fish.

Pick it up and add it to your inventory, then drop down and continue to the right. Push the rock to the end of the tiles and you'll be back at your starting point. Toss the four fish you have in your inventory into the basket. Once all six fish are in the basket, the wall will be fully lowered, allowing you to head into the clearing.

Part 3 - It Burns Us!

Looks like Gollum still wants fish. Pick up the gold fish on the ground and toss it to Gollum. He will then drop down and start eating it. Have Sam stand in the lit-up circle on the ground and press the "special" button to latch onto Gollum. After a brief struggle, Gollum will break free and attack Sam. Switch to Frodo and smack Gollum to take off one heart. We need to find a way to get more fish.

Head into the dark alcove in the back of the area and destroy the plant inside to reveal a rope. Have Sam pick it up, then dig up the nearby dirt pile to reveal LEGO pieces. Build them into a rope point, then latch onto it to pull down the nest, revealing a hook.

Pick it up and combine it with the rope, then hop up the ledges on the left. Latch onto the rope point and climb onto the ledge, then head to the right and destroy the plant to reveal a stick. Combine it with the rope and hook to create a fishing rod.

Drop down off the ledge and fish at the pier on the right to reveal another fish. Toss it at Gollum, then quickly repeat the process from earlier to take out another heart. Do this one more time to take out his last heart, completing the level.
Taming Gollum - Free Play Mode
Required Abilities: Arrow, Axe, Climbing, Dig, Elf, Explosive, Gardener, Illumination, Magic, Morgul, Rope, Sharp Shoot, Small, Super Strength

Part 1 – Battle of the Peak

Treasure Chest 1
Use magic to arrange the colored blocks like the image on the wall on the right, revealing a nice bunch of studs, as well as this Treasure Chest. I recommend placing the yellow block first, then green, blue and red.


Treasure Chest 2
After climbing up the colored blocks, destroy the silver rocks to reveal a travel chute.


Crawl through it to reach the ledge with this Treasure Chest.


Blacksmith Design (Mithril Carrot Bow)
Shoot arrows into the sockets on the side of the tower, then swing up them to reach a ledge.


Head into the dark alcove to reveal this Blacksmith Design.


Treasure Item (Snowman Hood)
Before climbing up the steps inside the tower, grab onto the bar on the left, then drop down to reach a ledge.


Pull on the super strength handle to open the gate, revealing a snowman.


Destroy it to reveal this Treasure Item.


Treasure Chest 3
Destroy the Morgul wall in the tower to reveal an opening, allowing you to head out onto the ledge.


Grow the plant to reveal a flower.


Bounce up the leaves to reach a platform, where you'll find this Treasure Chest.


Part 2 – Raw and Wriggling

Treasure Chest 4
There are 4 large skeletons you need to destroy. The first can be found to the left of your starting point.


The second can be found to the right of the first rope point you run into.


The third can be found to the right of the first set of tiles.


The fourth can be found right by the rock you push down to reach the starting point of the area. Destroy all 4 skeletons to reveal this Treasure Chest.


Treasure Chest 5
Latch onto the rope point just to the right of a dark alcove to pull the rocks away, revealing this Treasure Chest.


Treasure Chest 6
There are 2 targets that appear on flowers that you grow. The first can be found to the left of the tiles.


The second can be found by the ledges that lead to the last fish. Shoot both targets to receive this Treasure Chest.


Treasure Chest 7
Destroy the Morgul wall by the tiles to reveal a dark alcove.


Head inside to reach this Treasure Chest.


Treasure Item (Rock Hat)
After hopping on the pillar to reach the ledge, look in the near left corner to find an axe panel.


Smash it, then destroy the rocks left behind to reveal this Treasure Item.


Treasure Chest 8
You'll find an axe panel to the left of the second flower you grow. Smash it to reveal this Treasure Chest.
Taming Gollum - Free Play Mode cont.
Part 3 – It Burns Us!

Treasure Chest 9
Destroy the three rocks covered in fish bones to reveal LEGO pieces. Build them into this Treasure Chest.


Treasure Item (Fishing Rod)
You’ll assemble this item during the Story. See the Story Mode walkthrough for more info.


Treasure Chest 10
Destroy the silver rocks in the dark alcove to reveal an opening, then head inside.


You'll find this Treasure Chest trapped behind some vines. We need to grab the crank on the left and place it in a mechanism.


Head to the part of the wall on the right where the path meets itself, then switch to your partner. Turn the rotary handle on the right to rotate the path, allowing you to reach the ledge on the right.


Destroy the boxes on the ledge to reveal LEGO pieces. Drop down and build them into a mechanism for the crank.


Climb back up the wall, then stop once you get to the section where the path meets itself. Switch to your partner and turn the rotary handle on the left to rotate the path.


This will allow you to reach the crank. Pick it up, then drop back down.


Place the crank in the slot, then turn it to raise the vines, allowing you to collect this Treasure Chest.


Minikit Model: Silvertine Peak
Interlude - Follow Smeagol
Characters: Frodo, Sam; Aragorn, Legolas, Gimli

At this point in the Story, you can decide where you want to go next. You can either continue the journey of Frodo and Sam, or you can switch over to Aragorn and company and continue their journey. For the purposes of this guide, let's stick with Frodo and Sam for now. Simply follow Gollum down the path and into the marshes to start the next level.
The Dead Marshes - Story Mode

Enemies: Haradrim
Starting Characters: Frodo, Sam
Added Characters: Faramir, Madril
True Adventurer: 66,000

Part 1 - Come Hobbits, Come!

Walk up to Gollum and he will walk through the water, leaving behind a greenish trail. This is the safe path through the water, allowing you to walk through the marsh. Follow Gollum to the next island and he'll run off again.

The path through the marsh will then be blocked by a fire. We need to find a bucket to put it out. Dig up the dirt nearby to find it, then pick it up and add it to your inventory. Fill it up in the nearby pool of water, then put out the fire to clear the path.

Follow Gollum to the next island and he will hop across some plants. A fire will spring up behind him, so we'll need to find a pool of water to fill the bucket with. Grow the plant on the left, then bounce on the leaf to reach the ledge. Light the fire by the tree to knock it down, revealing a pool of water. Walk down the tree and fill up your bucket, then walk back up. Drop down and put out the fire, then hop across the plants to reach Gollum.

He will then walk to the next island, leaving another fire behind him. Head to the right and you'll see a skeleton submerged in the water. Walk across the beams to raise up the skull, revealing another beam. Walk across it to reach a pool of water, then fill up your bucket. Return to the left and put out the fire, then follow the safe path through the water to reach another island.

Gollum will then set off again, revealing another fire in the water. You'll find a pool on the right, but it doesn't have any water in it. Send the character without the bucket across the plant to the right, then step on the button to fill the pool with water. Switch to the character with the bucket, then fill it up and put out the fire. If you step off the bucket, the water in the pool will disappear.

Continue through the marsh and Gollum will run off again, leaving another fire behind. Head over to the tree in the back and latch onto the rope point to knock down some leaves, creating a bridge. Walk across it, then head right to find another skeleton. Head inside and latch onto the rope point to raise up the skull, revealing a beam. Cross the beam and fill up your bucket, then put out the fire and continue through the marsh.

Gollum will then run off again, revealing one last fire. Hop onto the plant to reach the island, then head into the dark alcove at the base of the tree to reveal LEGO pieces. Build them into a rope point, then latch onto it to fill up the pool with water. Fill up your bucket, then head to the right and put out the fire. Continue to the right to finally catch up to Gollum.

Part 2 - Wraiths on Wings

We now need to keep hidden from the Nazgul. He will fly around for a bit before flying directly overhead. When he flies overhead, the Fellbeast he is riding on will roar. If you are not hiding, you will be killed by the roar. If all of your party successfully hides, you'll be able to move on to the next island.

Frodo has an Elven Cloak, which he can use to hide himself. Simply equip it from your inventory and you'll disguise yourself as a bush. Sam should hop into the tree stump to hide, while Gollum will take care of himself. You'll move through four islands this way.

On the fifth island, Frodo will have to light up the dark alcove so him and Sam can hide inside. After successfully hiding on the fifth island, follow Gollum to the right to reach another island. Head to the right and latch onto the rope point to swing across the gap. Stand on the platform to raise up another platform, allowing your partner to continue to the right. Destroy the base of the tree to knock it down, allowing everyone to continue to the right.

Continue following Gollum and you'll reach an island blocked by a tree. Light a fire to destroy the tree, then hide from the Nazgul. After successfully hiding, follow Gollum through the water to the right to reach another island.

Continue to the right on the island to reach a tree. Latch onto the rope point to reveal LEGO pieces, then build them into a bridge. Cross the bridge and continue to the right, then grow the plant. Bounce up the leaf to reach the ledge with Gollum. Continue to the right.

Part 3 - Rangers of Ithilien

Time to take out some Oliphants. There are two of them walking around. Grab the ropes hanging off one Oliphant, then climb up. If you're having trouble grabbing the ropes, you can destroy the trees in the center of the area to reveal LEGO pieces that you can build into trampolines.

Once you reach the top, defeat the enemies and climb the rope to reach the top ledge. If there is no rope leading to the top ledge, destroy the barrel on the left to reveal one. Pick it up and add it to your inventory, then latch onto the rope point to reach the top ledge. Spam the "attack" button to defeat the captain, neutralizing the Oliphant. Repeat this process to take out the other Oliphant, completing the level.

Unlocked Characters: Faramir, Madril, Gondor Ranger (25,000), Easterling (25,000)
The Dead Marshes - Free Play Mode
Required Abilities: Axe, Dig, Explosive, Fisherman, Morgul, Rope, Sharp Shoot, Super Strength

Part 1 – Come Hobbits, Come!

Treasure Chest 1
Head to the near left corner of the starting island and you'll find an axe panel. Smash it to reveal LEGO pieces.


Build them into a pier, then fish off of it to reel in a fish.


Pick it up, then toss it into the target on the left.


This will reveal a path through the water, allowing you to collect this Treasure Chest.


Treasure Chest 2
There are 5 axe panels you need to smash to disturb skeletons in the water. The first is in the near right corner of your starting island.


The second is on the top left corner of the second island.


The third is on the right side of a small island you reach by walking across a beam.


The fourth is on the left side of a small cluster of islands.


The fifth is to the left of the large rib cage you walk through. Smash all 5 axe panels to receive this Treasure Chest.


Treasure Item (Wooden Bucket)
You will collect this as part of the Story. See the Story Mode walkthrough for more info.


Treasure Chest 3
Look in the water south of the first large skeleton and you’ll find a small plant. Hop on it to reveal another plant, then continue walking along them.


You’ll find a rope point at the end. Latch onto it to launch this Treasure Chest onto the island.


Treasure Chest 4
Pull the super strength handle on the left side of an island to open the cave, revealing a croc.


The croc will swim over to her nest, causing an egg to hatch this Treasure Chest. Hop across the plant in the water to reach it.


Treasure Chest 5
Destroy the Morgul pillar to the left of the large tree to reveal a ghost. We need to assemble a steering wheel for him by backtracking through the area.


The first bone can be found on the small island to the right of the second large skeleton.


The second bone can be found on the left side of the small cluster of islands.


Once you collect both bones, combine them to create a skeleton steering wheel. Give it to the ghost and he will knock this Treasure Chest loose, allowing you to collect it.
The Dead Marshes - Free Play Mode cont.
Part 2 - Wraiths on Wings

Treasure Item (Fancy Umbrella)
On the fourth island you hide on, you'll find a target on the tree on the left.


Shoot it to open the suitcase, revealing this Treasure Item.


Treasure Chest 6
On the sixth island (the one where you sneak around), shoot the target on the tree in the back left corner to knock it down.


Walk across it to reach this Treasure Chest.


Treasure Chest 7
On the sixth island (the one where you sneak around), shoot the target on the tree in the back right corner to reveal 3 ghosts in the water.


Each ghost is holding a target above its head. Shoot all 3 targets and another ghost will toss out this Treasure Chest.


Treasure Item (Toy Snake)
On the left side of the final island, destroy the silver barrels to reveal this Treasure Item.


Blacksmith Design (Mithril Stud Mallet)
You'll find a chest on the left side of the final ledge. We'll need to find a key to open it.


Head to the right and fish at the pier to reel in a key.


Pick it up and add it to your inventory, then place it in the chest to open it, revealing this Blacksmith Design.


Treasure Chest 8
Destroy the bushes by the final ledge to reveal a super strength handle.


Pull on it to tear away the rock wall, revealing an opening.


Head inside and destroy the bushes, allowing you to move to the right and reach this Treasure Chest.


Part 3 – Rangers of Ithilien

Treasure Chest 9
There are 5 targets around the area that you need to shoot. The first is in the near left corner.


The second is in the back left corner.


The third is in the back right part of the background.


The fourth is on the right side of the area.


The fifth is in the near right corner. Shoot all 5 to reveal this.


Treasure Chest 10
Dig up the dirt pile in the near left corner to reveal this Treasure Chest.


Minikit Model: Fellbeast
Interlude - Orc Hunting
Characters: Frodo, Sam, Faramir, Madril; Gimli, Legolas, Aragorn

If you follow the guide studs as Frodo and company, you'll reach Osgiliath. However, the Eye of Sauron is currently watching the place, meaning we can't enter it yet. We'll need to progress the story of Aragorn and the others first.

Switch over to Aragorn, Legolas or Gimli to join them near Fangorn Forest, as they search for the pack of Uruk-hai that took Merry and Pippin. Follow the guide studs to the clearing to start the next level.
Track Hobbits - Story Mode

Enemies: Moria Orc
Starting Characters: Aragorn, Legolas, Gimli
Added Characters: Merry, Pippin
True Adventurer: 50,000

Part 1 - Uruk Pyre

Time to figure out what happened to Merry and Pippin. Shoot the three targets on top of the pyre to knock the boxes down, revealing LEGO pieces. Build the shields onto the pyre, then walk up to the top. Smash the axe panel to reveal one of their wee belts.

Have Aragorn track it to reveal a horseshoe. Track it to reveal some LEGO pieces, then build them into a rope point. We need to find a rope. Head to the near left corner, then shoot the target on the tree to reveal a rope.

Pick it up and add it to your inventory, then latch onto the rope point to reveal an axe. Track it to reveal a rope, then track it to reveal an axe panel. Smash it to reveal a belt, then track it to reveal the entrance to Fangorn Forest.

Part 2 - Fangorn Forest

We're now in control of Merry and Pippin, who are being chased by Grishnakh. Head to the right and smash through the rocks to clear the path, then slide down the slope. Continue to the right and you'll find a log on the ledge. Grab onto one of the bars, then switch to your partner and grab the other to knock down the log, revealing LEGO pieces.

Build them into a ladder, then climb up. Continue to the right on the ledge, then defeat the Orcs that attack you. An Orc with a shield will then show up, smashing through the debris on the right. Defeat the Orc, then crawl through the travel chute to reach the ledge. Head to the right and destroy the plants to reveal LEGO pieces. Build them into bars, then hop up.

Part 3 - Little Orcs

Pippin is now riding on Treebeard, while Merry is on the ground. Treebeard can pick Merry up by pressing the "special" button while facing him. Head to the right and up the slope, then continue up the path. You'll eventually reach some Orcs up on a ledge. Pick up one of the large boulders as Treebeard, then toss it at the smaller rocks to create a ramp.

Walk up onto the ledge, then continue to the right. Smash through the debris in the path, then continue. Eventually, you'll reach a river. Merry can't cross, so pick him up with Treebeard and continue to the right.

An Orc will then knock down a tree, setting it on fire. Have Merry crawl through the travel chute to reach the ledge on the tree, then grab the vine to put out the fire. Continue down the path to reach the White Wizard.

Unlocked Characters: Grishnakh (125,000), Radagast the Brown (500,000)
Track Hobbits - Free Play Mode
Required Abilities: Arrow, Axe, Dig, Elf, Explosive, Gardener, Illumination, Magic, Sharp Shoot, Super Strength

Part 1 – Uruk Pyre

Treasure Item (Uruk Shield)
Dig up the dirt pile in front of the pyre to reveal this Treasure Item.


Treasure Chest 1
There are three nets hanging in the air to the left of the entrance to Fangorn Forest. Shoot the targets on them to drop them to the ground, revealing LEGO pieces. Build them into this Treasure Chest.


Treasure Chest 2
Destroy the plants to the right of the entrance to Fangorn Forest to reveal a purple panel.


Dig up the dig spots to reveal colored blocks.


Use Magic to place them on the purple panel, creating steps. I recommend matching the image that can be found on the tree in the back.


Hop up the steps and grab the vine, then climb up to reach this Treasure Chest.


Treasure Chest 3
Destroy the silver rock holding up the banner to the right of the entrance to Fangorn Forest, revealing this Treasure Chest.


Part 2 – Fangorn Forest

Treasure Chest 4
Toss Gimli at the axe panel above your starting point to knock this Treasure Chest loose.


Blacksmith Design (Mithril Fishing Rod)
After heading down the slope, pull on the super strength handle to reveal an opening, then head inside.


Once inside, destroy the chest in the near right corner to reveal this Blacksmith Design.


Treasure Chest 5
After collecting the Blacksmith Design, head over to the target range and hop into the ballista.


Use the ballista to shoot the targets that appear.


After shooting most of the targets, the cage holding this Treasure Chest will fall from the ceiling, allowing you to collect it.


Treasure Chest 6
Head into the dark alcove to the left of the travel chute to reveal this Treasure Chest.


Treasure Chest 7
After crawling through the travel chute, shoot arrows into the slots on the left.


Hop on and swing to the left to reach a rope, allowing you to climb to this Treasure Chest.


Treasure Item (Wooden Armor)
Destroy the small tree to the right of Treebeard to knock it down, revealing this Treasure Item.


Part 3 – Little Orcs

Treasure Chest 8
Dig up the dirt pile to the left of your starting point to reveal a picnic basket.


Smack it to open it, revealing this Treasure Chest.


Treasure Chest 9
Pick up a large boulder as Treebeard and throw it at the owl on the left.


The owl will then fly to a branch on the right. Pick up another boulder and throw it at the owl.


The owl will then fly off to the right again, landing on a branch with this Treasure Chest on it. Throw one more boulder at it to knock down this Treasure Chest.


Treasure Item (Ent Draught)
Grow the plant to the left of the river to knock down this Treasure Item.


Treasure Chest 10
Continue to the right past the burning log and three targets will pop up. Shoot all three to reveal this Treasure Chest.


Minikit Model: Treebeard
Interlude - The Turn of the Tide
Characters: Frodo, Sam, Faramir, Madril; Gimli, Aragorn, Legolas, Gandalf the White

The Eye of Sauron is still on Osgiliath, so we'll need to stick with Aragorn and company for now. Follow the guide studs to reach Edoras, where you'll start the next level.
Warg Attack - Story Mode

Enemies: Rohan Guard, Mordor Orc
Boss: Theoden (Cursed)
Starting Characters: Gimli, Aragorn, Legolas, Gandalf the White
True Adventurer: 35,000

Part 1 - Freeing Theoden

We need to free Theoden from Saruman's control. Defeat the guards that attack you, then smack Grima to send him running around the room. This will allow you to approach Theoden, so walk up to him and use magic to turn one of his hearts red. Grima will then walk up to you and smack you, stopping your magic.

More guards will appear from the door on the right, revealing LEGO pieces. Build them into a cage, then walk up to Grima and smack him again. He will run around the room and get trapped in the cage, allowing you to use magic to turn another of Theoden's hearts red. Grima will then break out and punch you again. Repeat this process one more time (using the LEGO pieces that appear on the left) to free Theoden.

Part 2 - Ambush

This part is rather simple. You'll be attacked by several waves of Warg riders. The easiest way to defeat them is by staying on your horses, but you can also run up to the Wargs on foot and spam the "attack" button to hop on them. After defeating the third wave, your horses will be scared off, and you'll have to take out the last wave on foot. Defeat all four waves to complete the level.

Unlocked Characters: Gandalf the White, King Theoden (Cursed) (200,000), Eowyn (125,000), Hama (125,000), Gamling (125,000), Grima Wormtongue (200,000)
Warg Attack - Free Play Mode
Required Abilities: Axe, Climbing, Dig, Explosive, Firestarter, Gardener, Illumination, Magic, Morgul, Rope, Sharp Shoot, Super Strength, Tracking

Part 1 - Freeing Theoden

Treasure Item (Giant Ancient Crown)
Destroy the silver statue to the left of Theoden to open a secret compartment in the wall, revealing this Treasure Item.


Treasure Chest 1
Shoot the targets on two banners hanging above the throne to drop LEGO pieces. Build them into this Treasure Chest.


Treasure Chest 2
There are two axe panels in the center of the floor.


Smash them to reveal LEGO pieces, then build them into an image of a horse. Smash both images to receive this Treasure Chest.


Treasure Chest 3
Latch onto the rope point in the near left corner to pull back the drapes, revealing this Treasure Chest.


Treasure Chest 4
Light a fire underneath the pot in the near center part of the area to reveal LEGO pieces. Build them into this Treasure Chest.


Part 2 – Ambush

Treasure Chest 5
There are 5 flowers with targets on them that you need to shoot. The first three are on the left side of the area.


The fourth is towards the center.


The fifth is on the far right. Destroy all 5 to reveal this.


Treasure Item (Decorative Horseshoes)
Destroy the Morgul object on the left side of the area to reveal a brush.


Track it to reveal a carrot.


Track it to reveal an apple.


Track it to reveal a bucket.


Track it to reveal this Treasure Item.


Treasure Chest 6
Pull on the super strength handle on the left side of the area to tear the rock away, revealing this Treasure Chest.


Treasure Chest 7
Walk towards the wooden beams in the back and a rock slide will occur. Destroy the silver rocks to reveal this Treasure Chest.


Treasure Item (Warg Tooth)
Head towards the screen and you'll find some steps. Walk down them to reach a dark alcove.


Head inside and you'll find a rope.


Grab onto it and you'll open the plant above you. Switch to your partner and grab this Treasure Item out of its mouth.


Treasure Chest 8
Pick up Gimli and toss him at the three axe panels on the right to reveal a wall.


Climb up to reach this Treasure Chest.


Treasure Chest 9
Dig up the dig spot to reveal a scarecrow.


Hop on a horse, then smack it. Another scarecrow will appear ahead of you. Run up to it and smack it within 5 seconds to reveal another scarecrow. Smack all 5 scarecrows to receive this Treasure Chest.


Blacksmith Design (Mithril Gloves)
Destroy the silver rocks in the near right corner to reveal a plant.


Grow it to reveal a vine.


Grab on, then shoot the targets to clear the bar.


Hop on and shimmy to the right to reach this Blacksmith Design.


Treasure Chest 10
Dig up the dig spots on the right side of the area to reveal colored blocks.


Use Magic to stack them on the purple panel, allowing you to climb up to this Treasure Chest.


Minikit Model: Horse
Interlude - Fleeing to the Mountains
Characters: Frodo, Sam, Faramir, Madril; Gimli, Legolas

With the Eye of Sauron still on Osgiliath, we need to stay with Gimli and Legolas. Follow the guide studs over to Helm's Deep to start the next level.
Helm's Deep - Story Mode

Enemies: Uruk-hai
Starting Characters: Aragorn, Legolas, Gimli
Added Characters: King Theoden (Armor)
True Adventurer: 44,000

Part 1 - The Deeping Wall

We need to get up on the wall. Shoot the target on the left to knock down some LEGO pieces, then build them into gears. Smash the axe panel on the ground to your right to reveal a crank, then pick it up and add it to your inventory.

Place the crank in the slot, then turn it to reveal some LEGO pieces. Build them into platforms, then hop up them to reach the ledge. Hop up the ledges, then smash the axe panel to clear the remaining boxes. Hop up to the top of the deeping wall to trigger a cutscene.

After the cutscene, we need to take care of the ladders. There are three types of ladders. Some ladders will have two hooks holding them onto the wall. Destroy the hooks to knock over the ladder. Other ladders have an axe panel in front of them. Smash the axe panel to knock down the ladder. The last type of ladder has an Uruk-hai standing on top. Have Legolas shoot an arrow at the Uruk to knock down the ladder.

After knocking down the first wave of ladders, four more ladders will appear. Three of the ladders can be knocked down normally. To knock down the ladder on the right, crawl through the travel chute to reach the ledge. Push the box off the tiles to reveal LEGO pieces, then drop down and build them into an axe panel. Smash it to knock down the ladder.

After knocking down the second wave, five more ladders will be raised up. To knock down the ladder in the center, throw Gimli at the axe panel to smash it. The other four ladders can be knocked down normally. Take out the three waves of ladders to trigger another cutscene.

After the cutscene, the Uruk-hai have breached the wall. We need to retreat to the keep. Smash the axe panel on the left to reveal LEGO pieces, then build them into stone steps. Hop up them to reach the ledge above you, then destroy the rack of spears to reveal LEGO pieces. Build them into a slot, then shoot an arrow into it.

Hop onto it and swing onto the ledge on the left, then push the rock off the tiles, allowing Aragorn and Gimli to join you. Hop up the ledges, then smash the axe panel to clear the rubble. Continue to the left and head inside.

Part 2 - Defend the Keep

Pick Gimli up and toss him at the axe panel on the Uruk's shield to break their ranks, then defeat the remaining Uruk-hai. Destroy the battering ram to reveal LEGO pieces, then build them onto the door to brace it.

You'll then switch over to Legolas, who is on top of the keep. Shoot arrows at the Uruks who appear on top of the ladders to knock them down. After knocking down three ladders, another ladder will appear, being held to the wall by grappling hooks. Destroy the hooks to reveal a rope, as well as some LEGO pieces. Build them onto the tiles, then push the box off the edge, revealing LEGO pieces by the door.

Switch to Aragorn and Gimli and build the LEGO pieces into a platform. Hop on, then climb the rope and hop onto the ledge.

Part 3 - Forth, Eorlingas!

Oh yeah! Enjoy the ride and cause as much chaos as possible. Once you reach the end of the path, the level will end.

Unlocked Characters: King Theoden (Armor), Haldir (200,000), Lothlorien Elf (25,000), Berserker (200,000), Eomer (200,000)
Helm's Deep - Free Play Mode
Required Abilities: Axe, Climbing, Dig, Elf, Explosive, Gardener, Morgul, Rope, Sharp Shoot, Super Strength, Tracking

Part 1 – The Deeping Wall

Treasure Chest 1
Pull on the super strength handle on the right to destroy the cart, revealing this Treasure Chest.


Treasure Chest 2
Head to the far right side of the area and you’ll find a stone wall.


Destroy it to reveal an axe panel, then smash it to reveal this Treasure Chest.


Treasure Chest 3
Destroy the silver gate in the center to reveal an opening, then head inside.


Once inside, you'll find this Treasure Chest inside a cage in the ground. You need to complete 4 carnival games to open it.


The first can be found on the left. Smash the axe panel to complete it.


The second carnival game can be found to the right. Shoot all the targets that appear to complete it.


The third can be found to the right of the small river. Grow the plant to reveal a tree.


Smack it to drop some coconuts on the ground.


Pick them up and toss them at both stacks of cans to knock them down.


The fourth carnival game can be found on the far right. Shoot the target to dunk the Uruk-hai. Once you complete all 4 carnival games, you will receive this Treasure Chest.


Treasure Item (Ladle)
After collecting Treasure Chest 3, destroy the black pot on the left to reveal this.


Treasure Chest 4
After collecting the Ladle Treasure Item, destroy the cart to the left of the small river to reveal a brown pot.


Track it to reveal LEGO pieces.


Build them into a siege tower, then high jump on top of it to reach this Treasure Chest.


Treasure Item (Feathered Cap)
After collecting Treasure Chest 4, latch onto the rope point on the right to raise up a chest.


Destroy it to reveal this Treasure Item.


Treasure Chest 5
After collecting the Feathered Cap Treasure Item, destroy the Morgul object to reveal a dig site.


Dig it up to reveal LEGO pieces.


Build them into a ballista, then hop on.


Shoot the 5 targets that appear to knock down LEGO pieces. Build them into this Treasure Chest.


Treasure Item (Bandages)
After the deeping wall has been breached, dig up the dig spot to the right of the opening to reveal this Treasure Item.


Blacksmith Design (Mithril Fire Bow)
Destroy the silver box on your way up the deeping wall to reveal this.


Treasure Chest 6
On your way up the deeping wall, grow the plant to reveal a flower.


Smack the flower to close it, then smack it again to receive this Treasure Chest.
Helm's Deep - Free Play Mode cont.
Part 2 – Defend the Keep

Treasure Chest 7
Head to the right from your starting point and you'll find a wall. Climb up to reach this Treasure Chest.


Treasure Chest 8
After collecting Treasure Chest 7, drop back down and continue to the right to reach this Treasure Chest lying in plain sight.


Part 3 – Forth, Eorlingas!

Treasure Chest 9
You’ll find this floating above you as you turn onto the bridge out of the fortress. Jump up to collect it.


Treasure Chest 10
There are 5 Uruk-hai banners you need to destroy. The first is on the left side of the bridge.


The second is on the left side of the path, right at the base of the bridge.


The third is on the right side of the path shortly after the bridge.


The fourth is on the left side of the path, pretty much right after the third.


The fifth is also on the left side of the path, pretty much right after the fourth. Destroy all 5 to receive this Treasure Chest.


Minikit Model: Ballista
Interlude - City Under Siege
Characters: Frodo, Sam, Faramir, Madril; Aragorn, Legolas, Gimli, Gandalf the White

After the defeat of the Uruk-hai at the Battle of Helm's Deep, the Eye of Sauron has turned to Isengard. Switch over to Frodo, Sam, Faramir or Madril and follow the guide studs into Osgiliath.
Osgiliath - Story Mode

Enemies: Mordor Orc, Uruk-hai
Starting Characters: Gollum, Frodo, Sam, Faramir
Added Characters: Merry, Pippin
True Adventurer: 85,000

Part 1 - Ruined City

Your party is split up into two groups. Faramir is by himself in the foreground, while Frodo, Sam and Gollum are in the background. You are technically in the same area, but your paths will never cross. For this reason, I've kept this area as one part, but I've separated it out so you can more easily see when you switch locations.

We'll start with Frodo's group. Crawl through the travel chute on the left to reach the ledge, then switch to Faramir.

Head to the right and you'll find a gap in the wall, through which you'll see a target on the right. Shoot it to knock down a pillar, allowing Frodo and company to cross. Switch back to them.

Hop across the pillar to the right, then continue to the right. Latch onto the rope point to clear the path. You'll also reveal a target above you. Switch back to Faramir.

Head to the right and a large rock will crash into the wall, revealing LEGO pieces. Build them onto the tiles, then arrange the pillars so you can hop up them. Hop up the pillars, then shoot the target across the gap to raise up the gate by Frodo. Switch over to them.

Head into the passage, then switch back to Faramir.

Shoot the target that appears on the right to raise up the other gate, allowing Frodo and company to exit the passage. Switch over to them.

Exit the passage, then continue to the right. You'll see an Orc in the tower with a sword. We need that sword to cut the ropes on Gollum's hands. Light up the dark alcove, then destroy the boarded up door to reveal LEGO pieces. Build them into a travel chute, then crawl through it to reach the ledge. Head to the left and a rock will hit the tower, defeating the Orc. Latch onto the rope point in the tower to reveal some LEGO pieces. Build them into a board, then bounce on it to reach the next ledge. Switch over to Faramir.

The rocks to your right will be destroyed, allowing you to continue. Build the LEGO pieces into a ladder, then shoot the Orc standing on the ledge (he will drop barrels on you and knock you down if you don't defeat him). Climb the ladder, then shoot the target on the tower to knock down some LEGO pieces for Frodo. Switch back to them.

Build the LEGO pieces into a ladder, then climb up to reach the ledge with the sword. Pick it up and add it to your inventory, then head over to Gollum. Press the "special" button near him to cut the ropes binding his hands. This will allow him to climb up special walls. Climb up the wall on the right, then turn the crank to open the gates, allowing Frodo and Sam to join you. Continue to the right and you'll find another wall for Gollum to climb. However, there are two Orcs on top throwing barrels down at you. Time to switch back to Faramir.

Head to the right and some Orcs will bust through the rocks, allowing you to continue. Continue to the right and head up the stairs to reach the ledge. Shoot the targets on the right to reveal LEGO pieces, then build them onto the tiles. Push the pillar to the left to reveal an opening, from which you can take out the two Orcs across the gap. Once the Orcs are toast, switch back to Gollum.

Now that the Orcs are gone, climb up the wall, then push the pillar off the tiles to smash the rock, revealing a plant. Grow it, then bounce on the leaf to reach the ledge. Light a fire to clear the path, then continue to the right. A Nazgul will then appear, riding a Fellbeast. If Frodo gets too close, you'll have to spam the "special" button to resist the Ring. Switch back to Faramir.

The gate to your right will be broken down by Orcs, so defeat them and continue to the right. Destroy the wooden beams to knock down a section of the wall, giving you a clear shot at the Fellbeast. Shoot the target on its chest to scare it off. Switch back to Frodo.

Continue to the right and dig up the dirt to reveal LEGO pieces, then build them onto the structure on the right. Smash the rocks on the pier, then have Gollum fish to reveal the crank. Place it in the slot, then turn it to open the gate. Continue to the right and the Nazgul will appear again. Switch back to Faramir.

Continue to the right and part of the wall will be knocked away, giving you a clear shot at the Fellbeast. Shoot the target on its chest to scare it off. Switch back to Frodo.

Destroy the bases of the three pillars to knock them down, revealing LEGO pieces. Build them into stairs, then walk up. Continue to the right and the Nazgul will reappear. Switch back to Faramir.

The Fellbeast revealed some LEGO pieces to your right the last time you shot it, so build them into a ladder. Climb up, then hop up the bars to reach the ledge. Shoot the target on the Fellbeast's chest.

Part 2 - March of the Ents

You are now in control of two Ents, and we need to wreck our way through Isengard so we can break the dam and release the river. Head to the right and you'll find a large gap. Attack the large tower to knock it down, creating a bridge. Walk across it, then continue to the right.

Eventually, an Uruk-hai will light a barrier on fire, preventing you from continuing. Pick up the water tower on the right side of the barrier and toss it at the fire to put it out, allowing you to continue.

Head to the back of the area to find the dam, then pick up boulders and toss them at the towers to knock them down, creating ramps. Walk up to the dam and stand in the light next to each support. Spam the "special" button to tear it off. Tear off both supports to end the level.

Unlocked Characters: Gollum, Gondor Soldier (25,000), Saruman the White (500,000)
Osgiliath - Free Play Mode
Required Abilities: Axe, Elf, Explosive, Illumination, Magic, Morgul

Part 1 – Ruined City

Treasure Item (Goggles)
While on the top of the first ledge on the near path, destroy the silver rocks on the left to reveal LEGO pieces.


Build them into platforms, allowing you to hop up to this Treasure Item.


Treasure Chest 1
After hopping across the pillar in the back path, high jump onto the bar above you.


Hop onto the ledge and pick up the Flagpole, adding it to your inventory. We need to find a flag to combine it with.


After climbing up the second wall, high jump onto the ledge where the Orcs were throwing the barrels. You'll find the flag on the right. Pick it up and combine it with the flagpole to create a flag.


Give it to the Gondor Soldier on the left to reveal this Treasure Chest.


Treasure Chest 2
While climbing the tower in the back path, hop onto the ledge on the left. Carefully walk around the tower to reach this Treasure Chest, visible through the hole in the wall.


Treasure Item (Bubble Pipe)
Destroy the Morgul gate in the near path to reveal an opening.


Drop down inside to find this Treasure Item. To get back up, build the LEGO pieces into a ladder.


Treasure Chest 3
While on the top of the tower in the back path, high jump onto the rope to ring the bell, revealing this Treasure Chest.


Blacksmith Design (Mithril Boxing Gloves)
After climbing the first wall in the back path, head down the stairs to the right. You’ll find a small dark alcove to the left. Light it up, then head inside to collect this.


Treasure Item (Statue Hat)
Smash the axe panel in front of where the Fellbeast appears for the first time to drop down into the room below you.


Destroy the boxes and barrels to reveal three purple panels. Each purple panel has an image of a fruit above it.


There are three boxes of fruit in the room. Use magic to place each box on the purple panel underneath the matching fruit symbol. Once all three boxes are on the correct panel, the man on the left will give you his hat.


Treasure Chest 4
After shooting the Fellbeast for the second time, hop over the wall and head to the right to find this Treasure Chest hiding in plain sight.


Treasure Chest 5
After shooting the Fellbeast for the second time and climbing up the ladder, look to the left to find a silver rock. Destroy it, then dive onto the ledge to reach this Treasure Chest.
Osgiliath - Free Play Mode cont.
Part 2 – March of the Ents

Treasure Chest 6
There are 5 water wheels you need to destroy. The first is to the right of your starting point, behind some pipes.


The second is also to the right of your starting point, to the north of Treasure Chest 7 (see below).


The third is to the left of the large gap you cross.


The fourth is in front of the burning barrier.


The fifth is to the left of the dam. Destroy all 5 to receive this Treasure Chest.


Treasure Chest 7
This Treasure Chest is surrounded by fire to the right of your starting point.


Pick up the water tower on the right and toss it at the fire to put it out, allowing you to collect this Treasure Chest.


Treasure Chest 8
There are 3 balconies on Orthanc that you need to destroy. Pick up a rock and toss it at the balcony to destroy it. The first is on the left side of the tower.


The second is on the middle part of the tower.


The third is on the right side of the tower. Destroy all 3 to receive this Treasure Chest.


Treasure Chest 9
This Treasure Chest is surrounded by fire to the right of Orthanc.


Pick up the water tower on the right and toss it at the fire to put it out, allowing you to collect this Treasure Chest.


Treasure Chest 10
There is a minecart on the tracks to the right of the dam. Pick up a boulder and toss it at the first rock on the tracks to destroy it, allowing the minecart to move down the tracks.


Pick up another boulder and toss it at the next rock on the tracks to send the minecart crashing into the ground, revealing this Treasure Chest.


Minikit Model: Orthanc
Interlude - Secret Paths
Characters: Gollum, Frodo, Sam; Gimli, Aragorn, Legolas, Gandalf the White

Once again, we have a choice in where we want to go. For now, let's stick with Frodo and company. Have Gollum climb up the nearby wall to start the next level.
The Secret Stairs - Story Mode

Starting Characters: Frodo, Sam, Gollum
True Adventurer: 88,000

Part 1 - Minas Morgul

We need to keep a careful eye on Frodo. When you're not controlling him, he will be slowly walking towards Minas Morgul. If he gets too close, you'll have to spam the "special" button to resist the Ring. We need to get up to the steps on the left.

Head into the dark alcove to the left of the statues by Minas Morgul to reveal a patch of dirt. Dig it up to reveal LEGO pieces, then build them into a rotary handle. Push it to rotate the statue, revealing a rope point. Latch onto it to knock down the statue, revealing LEGO pieces. Build them onto the statue on the right, then light the fire to knock the statue down. Build the LEGO pieces that appear onto the stairs.

To build the other half, head to the far left and have Gollum climb the wall. Destroy the glowing boards to knock down the pillar, allowing Sam to reach the ledge. Hop up and dig up the dirt to reveal a skull, then pick it up. Toss it at the rocks across the gap to knock them down, revealing a rope point. Latch onto it to pull the plant down, creating a platform.

Hop onto it to reach the ledge on the right, then head inside the dark alcove. Destroy the basket inside to reveal LEGO pieces, then build them onto the tiles. Push the rock off the ledge to reveal LEGO pieces, then build them onto the stairs. With both parts of the stairs built, hop up and start climbing.

Part 2 - Very Far to Fall

Time to make our way up the stairs. Head to the right and hop across the ledge, then shimmy to the right on the bar. Drop down onto the stairs, then continue climbing up. At the top, head into the dark alcove in front of you to light it up, then climb up the wall to reach the ledge above you. Push the rock off the ledge, then drop back down.

Head to the right and destroy the tan pillar buried in the ground to reveal a dirt pile. Dig it up to reveal LEGO pieces, then build them onto the tiles. Push the rock to the right, allowing you to reach the next set of stairs. Hop up, then continue to climb.

At the top, head to the right and light up the dark alcove, then destroy the fanged chest to reveal a rock. Pick it up and toss it at the web on the left to reveal a rope point, then latch onto it to knock down the rocks. Hop up the bars and shimmy to the left, then drop down onto the ledge and continue up the stairs.

Attack the wall to knock down the webs, then climb up to reach the ledge. Destroy the large cobweb to reveal LEGO pieces, then build them into a lever. Hop onto it to knock down the rock, clearing the path ahead.

Drop down and continue to the right, then crawl through the travel chute to reach the ledge above you. Grow the plant to knock down the pillar on the right, revealing LEGO pieces. Build them into stairs, then continue to climb up.

Part 3 - The Tunnel

Head to the right to find the entrance to the tunnel, then head inside. Continue through the tunnel and eventually some eggs will hatch, leaving a bunch of spiders in your way. Gollum is afraid of these guys, and will back away if he gets too close. The Phial of Galadriel will repel the spiders, so have Frodo lead the way to scare the spiders off and clear the path.

The path will then be blocked by some debris. Smash through it, then continue into the next room. Scare away the spiders on the wall on the right, then climb up and push the rock to the edge of the tiles. This will clear off the travel chute below you, allowing Frodo to join you.

Continue down the path, clearing the webs and spiders along the way. You'll eventually reach a large skeleton. Destroy it to reveal LEGO pieces, then build them into bars. Hop up them to reach the ledge, then destroy the skeletons to reveal LEGO pieces.

Build them into a scale, then destroy the large rock on the right to reveal three smaller rocks. Pick up the rocks and toss them on the scale to lower the cobweb in your path, revealing an opening. Head inside.

Part 4 - Shelob

Move around and collect as many studs as you can. Reach the end to complete the level.

Unlocked Characters: Mordor Orc (25,000)
The Secret Stairs - Free Play Mode
Required Abilities: Arrow, Axe, Dig, Elf, Explosive, Gardener, Illumination, Magic, Morgul, Sharp Shoot, Small, Super Strength, Tracking

Part 1 – Minas Morgul

Treasure Chest 1
Smash the axe panel on the left side of the area to receive this Treasure Chest.


Treasure Item (Surefooted Greaves)
Shoot the target up on the rocks to the left of the statues to drop a quiver.


Track it to reveal a feather.


Track it to reveal a knife.


Track it to reveal this Treasure Item.


Treasure Chest 2
Before climbing up the stairs, destroy the rock on the right side to reveal a plant.


Grow it to grow a large flower, revealing this Treasure Chest.


Part 2 – Very Far to Fall

Treasure Chest 3
There are 5 piles of fish bones that you need to destroy. The first is to the right of your starting point.


The second can be found inside the first dark alcove you light up.


The third can be found in front of the dark alcove with the fanged chest inside.


The fourth can be found to the right of the travel chute.


The fifth can be found after crawling through the travel chute. Destroy all 5 to receive this Treasure Chest.


Treasure Chest 4
Shoot an arrow into the slot to the left of your starting point, then hop on.


Swing to the left to reach a bar, where you'll find this Treasure Chest.


Treasure Chest 5
Destroy the silver chest to reveal LEGO pieces.


Build them into a chair lift, then hop on.


Ride it up the stairs to reach this Treasure Chest.


Treasure Item (Muddy Armor)
Smash the axe panel to reveal LEGO pieces.


Build them into a crank, then turn it to lower a fishing rod, which will reel in this Treasure Item.
The Secret Stairs - Free Play Mode cont.
Part 3 – The Tunnel

Treasure Chest 6
Grow the plant on the left side of the first clearing to knock down this Treasure Chest.


Blacksmith Design (Mithril Squeak Sword)
As you head through the tunnel, you’ll notice a path that splits off to the left.


Head inside and destroy the web in your path, then destroy the rocks at the end to reveal this.


Treasure Item (Spider Fang)
Pull on the super strength handle on a chest on the left side of the path to open it, revealing this Treasure Item.


Treasure Chest 7
Destroy the silver web on the right side of the second large clearing, allowing you to collect this Treasure Chest.


Treasure Chest 8
You’ll find this Treasure Chest stuck in a web on the right side of the path. Simply smack the web to knock it down.


Treasure Chest 9
Destroy the Morgul pillar on the right side of the tunnel to reveal a dig spot.


Dig it up to reveal LEGO pieces.


Build them into a fly, then use magic to attach it to the purple panel on the web on the left, revealing this Treasure Chest.


Part 4 – Shelob

Treasure Chest 10
There are 3 piles of spider eggs that you have to run through. The first is on the right side of the path.


The second is on the left side of the path.


The third is on the right side of the path. Run through all 3 to receive this Treasure Chest.


Minikit Model: Minas Morgul
Interlude - Walk into Mordor
Characters: Frodo, Sam; Gimli, Aragorn, Legolas, Gandalf the White

If you want, you can switch over to Aragorn and company and head over to Edoras. For now though, let's stick with Frodo and Sam. Follow the guide studs through Mordor to start the next level.
Cirith Ungol - Story Mode

Enemies: Mordor Orc, Uruk-hai
Boss: Shelob
Starting Characters: Sam, Shagrat
Added Characters: Frodo (Weary), Sam (Weary)
True Adventurer: 54,000

Part 1 - Let him go!

Looks like we're teaming up with an Orc! In order to attack Shelob, we need both Sting and the Phial of Galadriel. Walk up to them and pick them up, then walk up to Shelob. A gold circle will appear in front of her. Stand in it and press the "special" button, then follow the button prompts to stab Shelob.

She will then retreat onto the wall. Toss the Phial of Galadriel at her to knock her down, then pick the Phial back up. Walk up to Shelob and press the "special" button, then follow the button prompts to stab her again. Repeat this process one more time (you'll have to toss the Phial at Shelob twice to knock her down) to force her to retreat.

Part 2 - The Tower

We need to get out of here. Latch onto the rope point on the light fixture hanging from the ceiling to reveal a rock. Pick it up and toss it at the light to knock it down, revealing a hole in the floor. Grab onto the rope and slide down, then head into the dark alcove on the left to find a gear. Pick it up and add it to your inventory, then place it in the slot on the wall.

This will reveal two ropes. Grab onto one, then switch to your partner and grab the other one to open the gate. Continue down the stairs and you'll reach a massive brawl between Orcs and Uruk-hai. Defeat all the enemies, as well as the Orcs that show up later. Eventually, more enemies will smash through the door on the right, allowing you to head inside.

Part 3 - Disguises

We need to find four pieces of armor so we can make disguises for Frodo and Sam. Head to the right and you'll find a rock on the ground. Pick it up and toss it at the pipe on the wall to destroy it. This will soak the Orc in green liquid, causing him to hop in the shower and toss out his armor. Have either Frodo or Sam pick it up and put it on, then continue to the right.

You'll find two Orcs standing by the gate. When we've gotten our disguises, we'll have to talk to these Orcs in order to open the gate. To the right of the Orcs, you'll find a place to light a fire. Start a fire, then grab the rope on the right to extend a curtain. This will allow the fire to spread, destroying the structure and revealing LEGO pieces.

Build them onto the catapult, then hop inside as Sam to reach the ledge on the right. Latch onto the rope point to reach the ledge, then head to the right. Smash the axe holding up the barrels to send them crashing down the stairs, defeating the Orc at the bottom. This will reveal some LEGO pieces, as well as knock off his helmet.

Have either Frodo or Sam put on the helmet, then build the LEGO pieces into a ladder. Climb up to reach the ledge, then head to the left. An Orc is standing guard here, and will raise the gate if he spots you. Thankfully, Frodo can use his Elven Cloak to sneak past. Equip the Elven Cloak to disguise yourself as a box, then head to the left to sneak past the Orc.

Climb the ladder to reach a ledge, then destroy the basket on the left to reveal a rock. Pick it up and add it to your inventory, then destroy the barrel on the right to reveal a stick. Combine the stick and the rock to create a rock hammer, which acts as an axe.

Smash the axe panel on the ground to create a hole in the floor, then drop down inside to reach the Orc guarding the gate. Defeat him, then turn the crank to open the gate, allowing you to leave the room. Have the character without a helmet grab the helmet laying in the room and put it on.

We just need to find one more piece of armor. Exit the room and continue to the left, then light the wood on fire to clear the path. This will also lower a chain, allowing you to quickly climb back up if you fall.

Continue to the left and you'll find two small boxes. Push them to the edge of the tiles to knock them down, revealing LEGO pieces. Build them onto the tiles, as well as a bar on the pillar. Push the pillar to the far right side of the tiles, then smash the barrier to reveal an alcove. Grab the final piece of armor inside.

Once both Frodo and Sam have disguises, head over to the Orcs guarding the gate. Stand in front of one and press the "special" button to talk to them. Switch to your partner and do the same with the other Orc to complete the level.

Unlocked Characters: Frodo (Orc Disguise), Sam (Orc Disguise), Shagrat
Cirith Ungol - Free Play Mode
Required Abilities: Axe, Climbing, Elf, Explosive, Firestarter, Fisherman, Gardener, Morgul, Rope, Sharp Shoot, Super Strength

Part 1 - Let him go!

Treasure Chest 1
Toss Gimli at the axe panel in the near left corner to reveal LEGO pieces. Build them into a trampoline, allowing you to bounce up to this Treasure Chest.


Treasure Chest 2
Destroy the silver web in the near right corner to reveal this Treasure Chest.


Treasure Chest 3
There are 5 egg sacs hanging from webs that you need to shoot. The first 2 are in the near left corner.


The third is in the back left corner.


The fourth and fifth are in the near right corner. Destroy all 5 to receive this Treasure Chest.


Part 2 - The Tower

Treasure Chest 4
Smash the axe panel on the top floor of the tower to create an opening, allowing you to head outside and grab this Treasure Chest visible through the window.


Treasure Chest 5
While heading down the stairs, hop on the railing and high jump onto the bar above you.


Hop onto the next bar to reach this Treasure Chest.


Treasure Item (Chef's Hat)
Smash the axe panel on the ground floor of the tower to reveal LEGO pieces.


Build them into a fire pit, which we need to find some wood for.


Shoot the three hanging lights in the area to reveal the firewood, then pick them up and place them in the fire.


Once the fire is ready, light it. We now need to find three ingredients so we can cook a meal.


Destroying the tables in the room will reveal silver boxes. Destroy them to reveal the ingredients.


Pick them up and place them in your frying pan, then place it on the fire.


An Uruk-hai with a chef's hat will then appear. Defeat him and he'll drop his hat, allowing you to collect it.
Cirith Ungol - Free Play Mode cont.
Part 3 – Disguises

Treasure Chest 6
There are 5 objects you need to destroy to reveal cobwebs. After revealing the cobweb, destroy it. The first can be found by destroying the basket underneath the climbing wall to the left of your starting point.


The second can be found by destroying the stool to the right of the save statue.


The third can be found by destroying the small wooden structure to the left of the tiles. This cobweb can be tricky to destroy, and you might need to shoot it with an arrow.


The fourth can be found by destroying a rock on the far right side of the upper ledge.


The fifth can be found by destroying the rock above the pillar you push on the tiles. Reveal and destroy all 5 cobwebs to receive this Treasure Chest.


Treasure Chest 7
Hop up the bars to the left of your starting point to reach a wall.


Climb up to reach the ledge with this Treasure Chest.


Treasure Item (Rotten Drumstick)
Destroy the two silver locks to the left of your starting point to reveal LEGO pieces.


Build them into a pier, then fish off it to reel in this Treasure Item. You might have to drop it, then pick it up again for it to register.


Treasure Item (Beard Comb)
Pull on the super strength handle on the shower on the left to tear off the door, revealing this Treasure Item.


Treasure Chest 8
Destroy the silver lock to the left of the exit to reveal an opening, then head inside.


You'll need to sneak through the maze to collect this Treasure Chest. Have Frodo put on his Elven Cloak to sneak past the towers. If you get spotted by a tower, the gate that the tower is guarding will close and you'll be attacked by Orcs. You'll have to defeat the Orcs to open the gate back up.


Head through the maze until you reach a room with a tower. You can latch onto the rope point on a tower to reveal LEGO pieces.


Build them into a fire, then light it to destroy the tower. You don't need to destroy the towers (except one), but it does make going through the maze easier.


Continue down the path and you'll reach a room with a key. Pick it up and add it to your inventory.


Continue along the maze and you'll reach a split in the path. Head down the bottom path and you'll reach a tower. Destroying it will give you access to the chest in the top right corner.


Once the tower is destroyed, sneak past the tower on the left and hop up to the chest. Place the key in the lock to open it, revealing this.


Treasure Chest 9
Smash the axe panel on the far right side of the area to reveal a plant.


Grow it to reveal a tree.


High jump onto it, then bounce onto the platform on the right. Grab the rope to activate a barrel launcher.


The launcher will start firing blue barrels into the center of the area. Run over there and destroy 20 barrels within 60 seconds. The launcher will then fire this Treasure Chest over to you.


Treasure Chest 10
Destroy the Morgul pillars on top of the building on the right to reveal LEGO pieces.


Build them into a ballista, then hop in.


Fire it to launch a tightrope all the way across the area. Walk across it to reach the platform with this Treasure Chest.


Blacksmith Design (Mithril Ice Bow)
Push the pillar in front of the barrier on the left, then destroy it to reveal this.


Minikit Model: Shelob
Interlude - Gondor Calls for Aid!
Characters: Frodo (Orc Disguise), Sam (Orc Disguise); Gimli, Aragorn, Legolas, Gandalf the White

The Eye of Sauron is fixed on Mount Doom, so we'll need to switch over to Aragorn and company for now. Follow the guide studs to Edoras to trigger a cutscene.

After the cutscene, follow the guide studs to Dunharrow. Climb up the steps and reach the top to start the next level.
The Paths of the Dead - Story Mode

Enemies: Soldier of the Dead
Boss: King of the Dead
Starting Characters: Aragorn, Legolas, Gimli
True Adventurer: 90,000

Part 1 - The Way is Shut

Aragorn has received Anduril from Elrond, and this allows him to destroy Morgul LEGO objects. As you walk through the area, you'll notice certain spots in the mist where the mist forms a circle. If you step in the circle, you'll have to spam the "attack" button to ward off the ghostly hands that are trying to grab you.

There are other places in the mist where it looks like the mist is sprouting from the ground. If you walk through these areas, soldiers of the dead will attack you. Only Aragorn can damage them, so be careful.

Head down the path and you'll eventually reach a clearing with some Morgul pillars. Destroy them to reveal LEGO pieces, then build them into stairs. Climb up them and continue down the path to reach another clearing.

Smash the axe panel on the left to reveal LEGO pieces, then build them into a travel chute. Crawl through it to reach the ledge. Switch to Legolas and high jump onto the ledge, then shoot an arrow into the socket on the left. Hop onto it and swing up onto the higher ledge, then push the box off the ledge to reveal LEGO pieces.

Drop down and build them into a ladder, allowing Gimli to reach the ledge. Head to the back of the ledge, then grab onto the bar and shimmy over the mist. Continue down the ledge and smash the axe panel to destroy the barrier, allowing you to continue.

Continue down the path and you'll reach a gap. Shoot the targets on either side of the path to reveal LEGO pieces. Build them into a bridge, then continue along the path to reach another clearing.

Smash the axe panel on the left to reveal LEGO pieces. Build them into a bar, then high jump onto it to reach the ledge above you. Shoot an arrow into the slot on the wall, then hop onto it and swing over the mist. Push the box off the ledge, allowing you to continue along the path.

Hop onto the box and onto the ledge, then destroy the Morgul pillars to clear the path. Continue along the path, then smash the axe panel to clear the rock wall. Continue down the path to reach another large clearing.

Destroy the Morgul pillar on the right to knock down the statue, then push it to the left on the tiles to reveal a ladder. Climb up to reach the ledge, then have Legolas walk across the tightrope. Switch to Aragorn and pick up Gimli, then toss him over to Legolas so he can reach the opposite ledge. Smash the axe panel to reveal LEGO pieces, then build them into a travel chute. Crawl through it to reach the opposite ledge, then turn the rotary handle to open the gate. Head inside.

Part 2 - Fulfill Your Oath

Time to face the King of the Dead. Smash the four axe panels on the ground to reveal LEGO pieces. Build them into a platform, then hop on. The King of the Dead will then come down towards you. Smack him and he will move to another side of the platform. Repeat this process and he will retreat, sending skulls to destroy the platform.

Build the LEGO pieces left behind into another platform, then hop on. Attack the King of the Dead as before until he retreats, sending more skulls to destroy the platform.

Build the LEGO pieces left behind into four small platforms. Follow the King of the Dead around and smack him. Smack him on each of the platforms to defeat him, ending the level.

Unlocked Characters: King of the Dead (500,000), Soldier of the Dead (25,000), Rohirrim Soldier (25,000)
The Paths of the Dead - Free Play Mode
Required Abilities: Climbing, Dig, Elf, Explosive, Firestarter, Gardener, Illumination, Magic, Morgul, Rope, Sharp Shoot, Super Strength

Part 1 – The Way is Shut

Treasure Chest 1
There are 5 plants that you need to grow. The first is on the left side of the path.


The second is to the right of the ramp you build by destroying the Morgul pillars.


The third is on the right side of the first large clearing.


The fourth can be found underneath the ledge in the second large clearing.


The fifth is to the left of the stairs leading to the exit. Grow all 5 to receive this Treasure Chest.


Treasure Chest 2
Shortly after passing through the first clearing, you’ll see some wooden boards on either side of the path. Destroy them to reveal LEGO pieces, then build them into this Treasure Chest.


Treasure Item (Skeleton Key)
There is a dig spot hidden under the mist in the near left corner of the first large clearing. Dig it up to reveal this.


Treasure Chest 3
Before smashing the axe panel and heading out of the first large clearing, head into the dark alcove on the left to find this Treasure Chest.


Treasure Item (Calcium Armor)
Destroy the silver boards on the right side of the first large clearing to knock down this Treasure Item.


Treasure Chest 4
After passing through the first large clearing, you'll find an urn on the left side of the path.


Smack it to knock it over, revealing a rope point.


Latch onto it to reveal a vase. Pick it up and add it to your inventory. We need to find some flowers to combine with it.


You'll find another urn on the left side of the second large clearing.


Smack it to knock it over, revealing a rope point.


Latch onto it to reveal some flowers. Pick them up and combine them with the vase to create an offering.


While on the back ledge, pull on the super strength handle to reveal a small shrine.


Place the offering on the shrine to reveal this Treasure Chest.


Treasure Item (Golden Axe)
After passing through the first large clearing, pull on the super strength handle on the right side of the path to open the coffin, revealing this.


Treasure Chest 5
Destroy the Morgul pillar on the right side of the second large clearing to drop the cage with this Treasure Chest inside, allowing you to collect it.


Treasure Chest 6
Shoot the target in the upper right corner of the second large clearing to drop a chain.


Climb up it to reach this Treasure Chest.


Blacksmith Design (Mithril Shield)
This Blacksmith Design can be found high up on a ledge on the left side of the third large clearing. Hop up the rocks, then high jump up to reach it.


Treasure Chest 7
Destroy the silver rock on the left side of the third large clearing to launch the catapult, destroying the cage around this Treasure Chest.


Climb up the wall on the ledge on the right to reach it.


Treasure Chest 8
Walk behind the rock wall by the statue in the third large clearing to reach this hidden Treasure Chest.


Treasure Chest 9
Light the fire on the ledge on the right side of the third large clearing to knock down the colored blocks.


Use magic to stack them on the purple panel, allowing you to reach this Treasure Chest.
The Paths of the Dead - Free Play Mode cont.
Part 2 – Fulfill Your Oath

Treasure Chest 10
There are 3 banners with targets on them that you need to shoot. The first is on the far left side of the area.


The second is high up on the left side of the area.


The third is on the right side of the area. Shoot all 3 banners to receive this Treasure Chest.


Minikit Model: King of the Dead
Interlude - Muster the Rohirrim
Characters: Frodo (Orc Disguise), Sam (Orc Disguise); King Theoden (Armor), Eowyn (Dernhelm), Merry (Rohirrim Squire)

The Eye of Sauron is still fixed on Mount Doom, so let's head over to Minas Tirith to defend the city! Follow the guide studs over to Minas Tirith and join the Rohirrim to start the next level.
The Battle of Pelennor Fields - Story Mode

Enemies: Mordor Orc, Haradrim, Easterling
Boss: Witch-king
Starting Characters: Eowyn (Dernhelm), King Theoden (Armor)
Added Characters: Merry (Rohirrim Squire); Aragorn, Legolas, Gimli
True Adventurer: 95,000

Part 1 - March of the Rohirrim

Charge! Move around and cause as much chaos as possible. Reach the end of the path to trigger a cutscene.

Part 2 - The Witch-king

We need to take out the Witch-king, but first, we need to defeat his Fellbeast. Thankfully, it's rather simple to defeat. Avoid its attacks and it will eventually slam its head into the ground. When it does this, it will get dizzy. Walk up to it and attack its head a few times to damage it. Repeat this process two more times to decapitate it.

After the cutscene, we now need to battle the Witch-king. You'll notice a brown panel in the center of the area. Stand on the panel and the Witch-king will attack you with his mace. Dodge the attack and the mace will get stuck in the ground, leaving the Witch-king vulnerable. Smack him to damage him.

Build the LEGO pieces on the right side of the area into a brown panel, then repeat this process to damage the Witch-king again. Destroy the bushes on the left to reveal the last brown panel, then repeat the process to damage the Witch-king a third time.

After damaging him three times, he will grab Eowyn. Switch to Merry and stand in the gold circle behind him, then press the "special" button to stab him. Switch to Eowyn, then press the "special" button in front of the Witch-king to defeat him.

Part 3 - Oliphant Attack

There are now Oliphants storming the battlefield, and we need to take care of them. There are currently two running around, and one has Morgul bracelets on its legs. Destroy the bracelets to knock down the Oliphant, then spam the attack button to climb up and take it down. That takes care of one.

The other Oliphant has slots on its legs. Shoot arrows into them, then hop on. Swing onto the next arrow, then flip around and swing onto the rope. Climb up and take out the Haradrim, then hop onto the platform with the chieftain. Spam the "attack" button to defeat him, revealing a gold circle on the lower platform. Stand in it and press the "special" button to defeat the Oliphant.

Once the first wave is down, three more Oliphants will appear (two with Morgul bracelets, one with arrow slots). Defeat them to complete the level.

Unlocked Characters: King Theoden, Eowyn (Dernhelm), Merry (Rohirrim Squire), Witch-king (500,000), Denethor (125,000), Gothmog (125,000), Citadel Guard (25,000), Corsair (25,000), Haradrim (25,000)
The Battle of Pelennor Fields - Free Play Mode
Required Abilities: Axe, Dig, Explosive, Extinguisher, Firestarter, Gardener, Sharp Shoot, Super Strength

Part 1 – March of the Rohirrim

Treasure Chest 1
You need to run into 3 boxes as you run around the battlefield. The first can be found on the right side of the path as soon as the level starts.


The second is on the right side of the path as you turn to the left.


The third is also on the right side of the path, shortly after Treasure Chest 2. Destroy all 3 to receive this Treasure Chest.


Treasure Chest 2
After passing by two Oliphants, you’ll see a ramp on the right side of the path. Run up it to crash through the box at the top, revealing this Treasure Chest.


Treasure Chest 3
You will receive this Treasure Chest as you approach the end of the path.


Part 2 - The Witch-king

Treasure Chest 4
Grow the plant on the left to reveal a green herb.


Pick it up and add it to your inventory. We need to find a red herb to combine with it.


Grow the plant on the right side of the area to reveal the red herb.


Combine the green and red herbs to create a first-aid kit. We need to find someone to give it to.


Dig up the dirt on the right to reveal LEGO pieces.


Build them into a super strength handle, then pull on it to free the soldier trapped underneath the cart.


Give him the first-aid kit to reveal this Treasure Chest.


Treasure Item (Glowing Shield)
Shoot the targets on the structure on the left to knock down the Orc.


Defeat him and he will drop his shield, allowing you to collect it.


Treasure Chest 5
After collecting the Glowing Shield Treasure Item, destroy the nearby objects to reveal LEGO pieces (shooting the targets also revealed some LEGO pieces).


Build them into a lever, then stand on it to push the horse upright, revealing this.


Treasure Chest 6
Smash the axe panel in the near left corner to reveal this Treasure Chest.
The Battle of Pelennor Fields - Free Play Mode cont.
Part 3 – Oliphant Attack

Treasure Item (Flower Hat)
This is partially hidden in the grass on the left side of the area.


Treasure Chest 7
You'll find some fires on the left side of the area. We need to find some water to put them out.


Head to the right and you'll find some silver shields. Destroy them to reveal a pool of water.


Fill up your bucket, then return to the left and put out the fires to reveal this Treasure Chest.


Treasure Chest 8
After collecting Treasure Chest 7, head back to the pool of water and fill up your bucket again.


Head to the right and put out each of the fires. Once the fires have been put out, destroy the boxes to reveal this Treasure Chest.


Treasure Chest 9
Smash the axe panel in the center of the area to free the trapped Rohirrim soldier, revealing this Treasure Chest.


Treasure Item (Golden Carrot)
Grow the plant in the center of the area to reveal this.


Blacksmith Design (Mithril Top Hat)
Destroy the silver shield in the center of the area to reveal this.


Treasure Chest 10
Light a fire on the right side of the area to free a trapped soldier.


He wants some crutches.


Dig up the dirt on the left to reveal material. Pick it up and add it to your inventory.


Head towards the screen and you'll see a spear on the ground. Pick it up and combine it with the material to create crutches.


Give them to the soldier to reveal this Treasure Chest.


Minikit Model: Grond
Interlude - Aragorn's Diversion
Characters: Frodo (Orc Disguise), Sam (Orc Disguise); Gimli, Aragorn, Legolas, Gandalf the White

We need to move the Eye of Sauron away from Mount Doom, so let's head over to Mordor. Follow the guide studs to reach a boat docked next to Osgiliath. Shoot the target on the right to lower the plank, allowing you to cross.

Follow the guide studs all the way through the Dead Marshes. Eventually, you will need to shoot some targets in the water to reveal lily pads, allowing you to continue. Continue to follow the guide studs to reach the Black Gate and start the next level.
The Black Gate - Story Mode

Enemies: Mordor Orc, Troll
Starting Characters: Gimli, Merry (Rohirrim Squire), Pippin (Gondor Armor), Legolas, Gandalf the White, Aragorn (Gondor Armor)
True Adventurer: 12,000

Part 1 - For Frodo

We need to draw Sauron's attention away from Mount Doom, and we can do that by fighting lots of trolls. A troll will toss an axe panel into the area, then come charging in after it. Smash the axe panel to reveal LEGO pieces, then build them into a brown panel. Stand on it to draw the troll's attention. The troll will roar, then attack you with its flail. Avoid its attack and the flail will get stuck on the panel, damaging the troll.

Some catapults will then fire rocks at the left side of the area. Destroy them to reveal LEGO pieces, then build them into another brown panel. Stand on it and dodge the troll's attack to damage it. Catapults will then launch Morgul pillars at the right side of the area. Destroy them to reveal LEGO pieces, then build them into a brown panel. Stand on it and avoid the troll's attack to defeat it.

One of the Nazgul will then fly down on a Fellbeast. Avoid the Fellbeast's attacks until it exposes its chest. Shoot the target on it to scare it off. Another troll will then appear on the left.

Head to the left to reach the troll, then shoot the targets on its armor to knock it off. Once both of its shoulder plates have been shot off, the troll will smash the rocks on the left, revealing LEGO pieces. Build them into a platform, then crawl through the travel chute.

Hop onto the ledge on the right, then stand in the gold circle and press the "special" button to hop onto the troll. Spam the "attack" button to smack the troll, then switch to Legolas and shoot the troll in the face to defeat it.

The Nazgul will then fly back to the center. Avoid the Fellbeast's attacks, then shoot it in the chest when the target appears. The Nazgul will then fly off again, revealing another troll.

This troll has Morgul armor. Avoid its attacks until it gets dizzy, then stand in the gold circle as Aragorn and press the "special" button to remove the troll's chestplate. Repeat this process to remove the troll's helmet. It will then flee to the left, so follow it.

The troll will smash a rock on the left, revealing LEGO pieces. Build them into a slot on the wall, then shoot an arrow into it. Shoot another arrow into the slot higher up on the wall, then swing up the arrows to reach the ledge.

Destroy the rock to reveal LEGO pieces, then build them into a brown panel. Stand on it, then avoid the troll's flail when it attacks. Walk on the chain and shoot the troll in the face to complete the level.

Unlocked Characters: Aragorn (Gondor Armor), Pippin (Gondor Armor)
The Black Gate - Free Play Mode
Required Abilities: Axe, Climbing, Dig, Explosive, Firestarter, Gardener, Morgul, Rope, Sharp Shoot, Super Strength

Part 1 – For Frodo

Treasure Chest 1
While fighting the first troll, there are 5 Orc archers standing on towers in the background. Hit all 5 with arrows to receive this Treasure Chest.


Treasure Chest 2
While on your way to fight the second troll, climb up the wall to reach the ledge with this Treasure Chest.


Treasure Chest 3
While fighting the second troll, pull on the super strength handle on the right to open the cage, allowing you to collect this.


Treasure Item (Handprint Breastplate)
While fighting the second troll, latch onto the rope point in the back right corner to tear the rocks away.


Light the fire to lower the chest to the ground. We need to find a key to open it.


Dig up the dirt on the left to reveal the key. Pick it up and add it to your inventory.


Place the key in the lock on the chest to open it, revealing this.


Blacksmith Design (Mithril Tinderbox)
After collecting the Handprint Breastplate Treasure Item, head behind the rocks to the left to reach this.


Treasure Chest 4
After chasing the third troll to the left, latch onto the rope point on the left to climb up to the platform, allowing you to collect this Treasure Chest.


Treasure Item (Flaming Hat)
While fighting the third troll on the left, dig up the dirt on the left side of the area to reveal this.


Treasure Chest 5
While fighting the third troll on the left, destroy the silver rocks to reveal an opening. Head inside.


Once inside, destroy the objects by your starting point to reveal a crank.


Turn it to dump this Treasure Chest into the nearby trough.


Treasure Chest 6
After collecting Treasure Chest 5, continue to the right and you'll find a pig.


Hop on, then ride through the 6 gates that appear to reveal this Treasure Chest.


Treasure Chest 7
After collecting Treasure Chest 6, continue to the right and destroy the Morgul pillars to reveal this Treasure Chest.


Treasure Chest 8
After collecting Treasure Chest 7, continue to the right and shoot the target to drop this Treasure Chest to the ground.


Treasure Chest 9
After collecting Treasure Chest 8, grow the plant on the right to reveal some carrots. A rabbit will then dig up this Treasure Chest.


Treasure Item (Elven Lute)
After collecting Treasure Chest 9, pull on the super strength handle on the right to open the cabinet, revealing this.


Treasure Chest 10
While fighting the third troll on the left, smash the axe panel on the ledge on the right to reveal this.


Minikit Model: The Black Gate
Interlude - Journey's End
Characters: Frodo (Orc Disguise), Sam (Orc Disguise); Aragorn (Gondor Armor), Legolas, Gimli, Gandalf the White

With the Eye of Sauron on the Black Gate, we can now head up to Mount Doom to destroy the One Ring. Follow the guide studs to Mount Doom to start the final level.
Mount Doom - Story Mode

Boss: Gollum
Starting Characters: Frodo (Weary), Sam (Weary)
True Adventurer: 85,000

Part 1 - Slopes of Doom

Head to the right and you'll find a small ledge. Frodo is exhausted and cannot jump, so we'll need to make a way for him to join us. Destroy the boxes to reveal LEGO pieces, then build them into a ramp, allowing Frodo to reach the ledge. Continue to the right and hop onto the rock in the lava, then latch onto the rope point to knock down the rocks, allowing you to continue.

Hop up the bars as Sam, then latch onto the rope point to reach the ledge. Head to the left and step on the rock to lower it into the geyser. This will raise up the rock on the left, allowing Frodo to join you. Head into the dark alcove on the right, then push the rocks to the right to cut off the lava, revealing a pile of dirt. Dig it up to reveal a small rock. Pick it up and toss it at the rock on the right to knock down a larger rock, cutting off the rest of the lava.

Continue to the right, timing your movements past the hot air. Grab onto the bar and shimmy to the right. The rocks will then fall into the lava, allowing you to cross. Cross the lava on the rocks, then continue to the right. Destroy the wooden planks on the right to reveal a dark alcove. Walk into it, then continue along the path.

Latch onto the rope point to lower the beam, then cross to the right. You'll find more geysers. Frodo will walk onto the rock on the right, so have Sam hop up to the rock on the left. This will raise Frodo up onto the ledge. Have Frodo head to the left and destroy the large rocks to reveal a beam. Walk off the beam to land back on the rock on the left, raising Sam up to the ledge.

Have Sam head to the right and hop across the gap, then dig up the dirt to reveal LEGO pieces. Build them into a beam, allowing Frodo to join you. Continue to the right and latch onto the rope point to lower the rock, blocking the lava.

Continue to the right, then destroy the objects by the tiles to reveal LEGO pieces. Build them into a pillar, then latch onto the rope point on the left. Hop onto the rock on the left to raise Frodo up on the right. Switch to Frodo and walk onto the pillar, then have Sam push the pillar to the right.

Switch back to Frodo and enter the dark alcove, then head to the right to reach the ledge. Attack the rocks to knock them into the lava, revealing a travel chute. Crawl through it to reach the ledge above you. Head to the left to trigger a cutscene.

After the cutscene, Gollum will be attacking Frodo. Pick up a rock and toss it at Gollum to damage him. He will then hop onto the ledge on the right. Switch to Frodo and throw another rock at him, causing him to attack Frodo again. Repeat this process to take out his hearts.

Part 2 - Cracks of Doom

Spam the "attack" button to throw Gollum off, then switch to Sam. Smack Gollum to take out two of his hearts. He will then jump on top of you. Spam the "attack" button to fight him off. Unfortunately, you will fall off the ledge onto a platform. Build the LEGO pieces into another platform, then hop back up to the main ledge.

Switch to Frodo and throw Gollum off, then switch back to Sam. Attack Gollum to take off another heart. He will then jump on your back, so spam the "attack" button to fight him off and land on another platform. Build the LEGO pieces into a rope point, then latch onto it to knock over the rocks. Hop across them to the right, then build the LEGO pieces into another platform.

Hop up the platforms to reach the main ledge, then switch back to Frodo and throw Gollum off again. Switch back to Sam and smack Gollum to take off another heart. He will then jump on your back, so fight him off to fall onto another platform.

Switch to Frodo and knock Gollum off again. Build the wraith LEGO pieces into a platform, then switch back to Sam and hop back up to the main ledge. Smack Gollum and he will hop back on Frodo. Switch to Frodo and toss Gollum off, then switch to Sam and hit him one more time.

Part 3 - The End of all Things

Spam the "special" button to pull Frodo onto the ledge, then run! Avoid the obstacles and reach the end to complete the level and the story.

Unlocked Characters: Frodo (Weary), Sam (Weary), Aragorn (Royal Armor), Boromir (Captain) (200,000), Bilbo Baggins (Old) (125,000)
Mount Doom - Free Play Mode
Required Abilities: Arrow, Axe, Climbing, Dig, Elf, Explosive, Extinguisher, Fisherman, Magic, Morgul, Sharp Shoot, Small, Super Strength

Part 1 – Slopes of Doom

Treasure Chest 1
After walking up the ramp, you'll find a large rockslide.


Destroy the rock in front to reveal a silver rock. Destroy it to clear the rockslide, revealing this Treasure Chest.


Treasure Item (Trophy Shield)
Destroy the rocks to the left of the first lava river to reveal LEGO pieces.


Build them into a pier, then fish off of it to reel in this Treasure Item.


Treasure Chest 2
Climb up the wall on the ledge to the right of the first lava river to reach a bar.


Shimmy to the left to reach some moving platforms.


Hop up them to reach this Treasure Chest.


Treasure Chest 3
After cutting off the second section of lava, dig up the dirt to reveal a rock.


Pick it up and toss it at the pillar on the right to knock it down, revealing a beam. Walk across it to reach this Treasure Chest.


Treasure Chest 4
Hop up the bars above a lava river to reach an axe panel.


Smash it to drop this Treasure Chest onto a platform in the lava.


Treasure Chest 5
Shoot the target by the dark alcove to drop the colored blocks to the ground.


Use magic to stack them on the purple panel, allowing you to climb up to this Treasure Chest.


Treasure Chest 6
After collecting Treasure Chest 5, fill up your bucket at the pool of water.


Hop onto the ledge in the back and put out the fire to reveal a travel chute.


Crawl through it to reach the ledge above you. Destroy the box on the right to reveal this Treasure Chest.


Treasure Item (Palantir Hat)
After collecting Treasure Chest 6, continue to the right and hop across the gaps to reach a large rock.


Pull on the super strength handle on it to reveal a dig spot.


Dig it up to reveal this.


Blacksmith Design (Mithril Climbing Boots)
After collecting the Palantir Hat Treasure Item, continue to the right and high jump up the ledges to reach the entrance to Mount Doom.


Shoot an arrow into the socket, then hop on and swing up to this Blacksmith Design.


Treasure Chest 7
After collecting the Blacksmith Design, head to the right and destroy the Morgul block to reveal a moving platform.


Ride it up to the ledge with this Treasure Chest.


Treasure Chest 8
After cutting off the lava and revealing a travel chute, head towards the screen to find this Treasure Chest on a ledge. Drop down to collect it.


Part 2 – Cracks of Doom

Treasure Chest 9
Hop onto the bar on the left side of the area to reach this Treasure Chest.


Treasure Item (Magma Rock)
The second time you fall off the ledge, you'll find a super strength handle as you hop back up. Grab an item from your Treasure Trove that gives you super strength, then pull on the handle to reveal this Treasure Item.


Part 3 – The End of all Things

Treasure Chest 10
This appears in the air above you shortly after you begin running. Jump up to collect it.


Minikit Model: Mount Doom
Bonus Level - Middle-earth
After completing the Story, follow the guide studs to reach Rivendell. You'll pass underneath a waterfall, where you'll find a banner. Press the "special" button in front of it to pull up the map, then select the Bonus level to start it.


Starting Characters: Sauron, Mouth of Sauron

You'll find yourself in a miniature version of Middle-earth. Your goal, like in most bonus levels, is to collect one million studs. Most of that will be done by destroying things, but I'll highlight a few extra things you can do.

You'll start in control of Sauron and the Mouth of Sauron, but you can also hold the "tag" button to bring up the character wheel, from which you can access your full character roster.

Build Barad-dur
Build the LEGO pieces to the left of your starting point onto the tower, then smack Mount Doom to reveal more. Keep building onto the tower this way until Mount Doom is destroyed.


Start a dance party
Once Mount Doom is destroyed and Barad-dur has been built, you'll find a crank where Mount Doom used to be. Turn it to move the light around, causing the Orcs to dance!


Once you're done in Mordor, turn the crank on the left to open the Black Gate, allowing you to exit.


Break into Minas Tirith
Pull on the super strength handle on the battering ram to send it crashing into the gate, allowing you to destroy Minas Tirith.


Destroy silver objects
You'll find bombs scattered throughout the area at various points. You can pick them up and use them to destroy silver objects.


Enter the Mines of Moria
You can head inside the Mines of Moria by heading into either of the cave openings in the Pass of Caradhras.


Knock off a statue's head
Destroy the tombs inside the Mines of Moria to reveal a crank. Pick it up and add it to your inventory.


Head over to the statues by Amon Hen, then place the crank in the slot. Turn it to knock the head off the nearby statue.


Once you collect one million studs, the level will end, and you'll get to keep the studs that you collect.

Unlocked Characters: Mouth of Sauron, Sauron
---------Exploring Middle-earth---------
After completing the final Story level, you'll have access to Middle-earth Free Play. This means that you'll be able to explore the entirety of Middle-earth with whatever characters you currently have unlocked. Hold the "tag" button and you'll pull up the character menu, allowing you to select whichever characters you want. With your entire character roster now open to you, you'll be able to unlock a lot more of the collectibles hidden throughout Middle-earth.

Scattered throughout Middle-earth are Map Stones, one for each area of Middle-earth. I have divided up the exploration sections to correspond to the various Map Stones. At the beginning of each section of the walkthrough, I have included a map of that area. This map shows the locations of all collectibles that can be found in that area. I decided to put them all on the same map because the items do not disappear after they have been found, so I don't have a blank slate that I can add images to. I have tried to label the maps as clearly as possible. If something isn't clear, let me know in the comments.

Once you activate a Map Stone, you'll be able to fast travel to it at any time by selecting it from the map. When you fast travel, you can also select the time that you want to travel to (either Day or Night). Some items can only be collected at certain times of day. While hovering over an image on the map, you might notice either a sun or moon logo appear. Items with a sun can only be collected in the Day, while items with a moon can only be collected at Night.

There are many Mithril Bricks in the game, and they're listed as Mithril Brick 1, Mithril Brick 2, etc. in the walkthrough (this also applies to other collectibles). As such, having a map showing nothing but images of Mithril Bricks really doesn't tell you much. If you know which Mithril Brick you are having trouble with, how are you supposed to know which one in my walkthrough it is? To help solve this problem, I have labelled the images on the map with the same numbers that correspond to the collectibles in the sections below. For example, the Mithril Brick labelled #1 corresponds to Mithril Brick 1 in the walkthrough.

Keep in mind that I will not be super specific about precise locations. For example, I won't say "starting at Mount Doom, take a right until you reach the...". The maps are there for a reason, and the labels should be enough to tell you where you need to go. If you are having trouble finding something specific, feel free to let me know and I'll clarify in the guide.

Because I am not super specific with the locations of each item, I highly recommend using the map to lead you to each item. Hover over an item on the map and select it, then select it again to "set destination". This will create a trail of guide studs that will lead you to the item. If you don't know where to begin, I highly suggest using this feature. It will make a lot of my explanations easier to follow.
---------------Amon Hen---------------
Blacksmith Designs
Mithril Camouflage Tome
This Blacksmith Design can only be collected at Night. Head to the shores of the Emyn Muil and you'll see a beam.


Walk across it to reach an Orc camp. Defeat the Orc holding this Blacksmith Design to reveal it.
Characters
Required Abilities: Rope

Lurtz
Latch onto the rope point by the Map Stone, then climb up. Hop up the ledges to reach the top of the hill (you can also reach this area by heading to the other side, shooting arrows into the sockets, and swinging up them).


You'll find Lurtz roaming around this area.
Fetch Quests
Required Abilities: Rope

Fetch Quest 1
"My family and I were walking near the Dead Marshes when a herd of Oliphants appeared. We avoided being trampled, but in the commotion my son dropped his Toy Snake. Would you mind searching for it?"

Latch onto the rope point by the Map Stone, then climb up. Hop up the ledges to reach the top of the hill (you can also reach this area by heading to the other side, shooting arrows into the sockets, and swinging up them).


Ring the bell to open the gate, allowing you to talk to the Elf.


He will ask you to find his son's Toy Snake. Give it to him to complete this quest.


Fetch Quest 2
"I love feeling tall, and used to have this terrific box to stand on - but the blasted thing finally caved under my weight. I reckon a Feathered Cap from Helm's Deep would raise my spirits again!"

You'll find some plants and stone platforms in the water.


Quickly hop across them, then hop up the stone platforms to reach a Dwarf. Talk to him and he will ask you to give him a Feathered Cap. Give him one to complete this quest.
Mithril Bricks
Required Abilities: Axe, Climbing, Explosive, Fisherman, Rope, Sharp Shoot, Small

Mithril Brick 1
Climb up the wall by the river to reach a ledge.


Crawl through the travel chute to reach some stone platforms.


Hop up them to reach another wall.


Climb up to reach another wall.


Climb up to reach a crossbow.


Attack it to shoot a rope across the gap. Walk across it to reach this Mithril Brick.


Mithril Brick 2
This Mithril Brick can only be collected at Night. Head to the shores of Emyn Muil and you'll see a beam.


Walk across it to reach an Orc camp. Destroy the small chest in the back to reveal this Mithril Brick.


Mithril Brick 3
Shoot the targets on the lily pads in the water, allowing you to bounce across to this Mithril Brick.


Mithril Brick 4
Shoot the target above a cave to open the gate, allowing you to head inside.


Attack the chest to open it, revealing this Mithril Brick.


Mithril Brick 5
Latch onto the rope point by the Map Stone, then climb up. Hop up the ledges to reach the top of the hill (you can also reach this area by heading to the other side, shooting arrows into the sockets, and swinging up them).


You'll find a bunch of mole hills. Smack a mole to start a timer. Smack 10 moles in 30 seconds to reveal this Mithril Brick.


Mithril Brick 6
You'll find a gate by the water. In order to open it, you'll need a crank.


Head to the nearby pier and fish to reel in the crank. Pick it up and add it to your inventory.


Place the crank in the slot, then turn it to open the gate. Head inside and follow the path.


You'll find a bunch of small stone pillars. We need to move one of them into each of the three green panels. Shoot the target in front of you to clear the debris in front of one pillar.


Smash the axe panel in the center to knock down part of the tiles.


Destroy the silver rocks to clear them from the tiles. Once the tiles are clear, push a stone pillar into each of the green panels to reveal this Mithril Brick.


Mithril Brick 7
After collecting Mithril Brick 5, head to the top of the building to find seven statues. After you destroy one, you'll have 5 seconds to destroy another. Quickly destroy all 7 statues to reveal this Mithril Brick.


Mithril Brick 8
After collecting Mithril Brick 7, destroy the silver rocks to reveal an axe panel.


Smash it to reveal this Mithril Brick.
Red Power Bricks
Studs x4
"I'm meant to catch enough fish to feed the army, but I'm terrible at it. Craft me a Mithril Rod and I might stand a chance... I'll make it worth your while by helping you get four times richer."

Talk to an Uruk-hai in front of a cave and he will ask you to forge him a Mithril Fishing Rod. It requires 3 Mithril Bricks to forge.


Forge one, then give it to him to reveal this Power Brick.
-------------------Bree-------------------

***NOTE*** The Map Stone for Bree lists 5 Fetch Quests (3 of them also being Red Bricks). However, the fifth Fetch Quest (and third Red Brick) is way out by Weathertop, so for the purposes of this guide, I have included it in the Weathertop section.
Blacksmith Designs
Required Abilities: Morgul

Mithril Trowel
This can be found in plain sight inside of the Blacksmith Shop. You'll have to collect this as part of the Story. See "Interlude - Strider" for more info.


Mithril Whistle Sword
Destroy the Morgul lock on the door on the side of The Prancing Pony to open it, revealing this.


Mithril Hairbrush
Destroy the Morgul lock on the door on the south side of Bree to open it, revealing this.
Characters
Radagast the Brown
Radagast can be found in the outskirts of Bree.
Fetch Quests
Required Abilities: Rope

Fetch Quest 1
"Me little'ens want feeding, but I lost my Soup Pot somewhere on that road where that Black Rider was lurkin' about. Please find it for me."

Talk to a Hobbit in the village and he will ask you to find his Soup Pot. Give it to him to complete this quest.


Fetch Quest 2
"I thought Dead Marshes was just a name. I didn't think there would actually be those... things floating in there! I ran away so fast I dropped my Fancy Umbrella!"

Latch onto the rope point on a door in the center of the village to open it, revealing a Hobbit.


Talk to him and he will ask you to find his Fancy Umbrella. Give it to him to complete this quest.
Mithril Bricks
Required Abilities: Arrow, Axe, Dig, Elf, Fisherman, Morgul, Sharp Shoot, Small

Mithril Brick 1
There is a large rocky outcropping by Bucklebury Ferry. Head up the steps to reach the top.


Push the pillar into the green slot on the tiles to raise up some platforms.


Hop up them to reach a chest, then destroy it to open it, revealing this Mithril Brick.


Mithril Brick 2
Smash the axe panel by a small pond outside Bree to reveal a pier.


Fish from it to reel in a key. Pick it up and add it to your inventory, then head to the other side of the pond.


You'll find some wooden beams in the water. Hop across them to reach a door, then use the key to open it.


Head inside the alcove, then destroy the Morgul chest to reveal this Mithril Brick.


Mithril Brick 3
You'll find three dirt piles in a small graveyard north of Bree.


Dig them up to reveal LEGO pieces, then build them into skeletons. Build all 3 skeletons to reveal this Mithril Brick.


Mithril Brick 4
Stand on the wooden platform by the north gate, then shoot the five targets to reveal this Mithril Brick.


Mithril Brick 5
High jump onto the bars on the house near the north gate, then keep hopping up to reach a beam.


Walk across the rooftops on the beams and tightropes to make your way to this Mithril Brick.


Mithril Brick 6
Crawl through the travel chute on the side of The Prancing Pony to reach the ledge with this Mithril Brick.


Mithril Brick 7
Shoot arrows into the slots on the side of The Prancing Pony, then hop on and swing up to this Mithril Brick.


Mithril Brick 8
Turn the crank on the small furnace outside the Blacksmith to reveal this Mithril Brick.
Red Power Bricks
Required Abilities: Explosive

Quest Finder
"You look like a helpful sort. Fancy making me a Mithril Trowel to replace me tatty old one? For your trouble, I'll let you in on a secret to help you seek out other quests."

Talk to the hobbit outside the Prancing Pony and he will ask you to forge him a Mithril Trowel. It costs 2 Mithril Bricks to forge.


Forge it and give it to him to reveal this Red Brick. You'll have to complete this quest as part of the Story. See "Interlude - Strider" for more info.


Mithril Brick Finder
"I have an argument to settle with a Dwarf in an unarmed fight. Mithril Boxing Gloves don't count as weapons right? Either way, I'll help you find Mithril easily if you forge me a pair."

Destroy the silver lock on a door by the Map Stone to open it, revealing a man.


Talk to him and he will ask you to forge him some Mithril Boxing Gloves. They cost 4 Mithril Bricks to forge.


Forge them and give them to him to reveal this Red Brick.
---------------Cirith Ungol---------------
Characters
Required Abilities: Explosive, Fisherman, Gardener

Gil-galad
Gil-galad can be found behind a gate. In order to open it, we need to find a crank.


To find it, head to the northeast corner of Mordor. You'll find a rock pillar with some silver rocks on top. Grow the plant next to it to reveal a leaf, then bounce up onto the ledge.


Destroy the silver rock to reveal a pool of water.


Fish off the pier to reel in the crank. Pick it up and add it to your inventory.


Head back to the gate, then place the crank in the slot.


Turn it to open the gate, then head inside to find Gil-galad.
Fetch Quests
Required Abilities: Arrow, Elf

Fetch Quest 1
"During the battle with Sauron 3,000 years ago, the Prologue to recent events, I lost the Shimmering Armor I wore for good luck. Foolish as it may be, I haven't lost hope that it will return to me someday..."

Shoot arrows into the sockets on the wall by Cirith Ungol, then high jump onto them.


Swing on the arrows to reach a bar, then hop onto the ledge.


Talk to the Elf and he will ask you to give him some Shimmering Armor. Give it to him to complete this quest.


Fetch Quest 2
"Whew... It's a bit hot up here, isn't it? What I wouldn't give for a nice, cool, refreshing... cool... hydrating... cool... Ice Lolly... from The Pass of Caradhras... right now..."

Head inside Mount Doom and talk to the man. He will ask you to give him an Ice Lolly. Give him one to complete this quest.
Mithril Bricks
Required Abilities: Arrow, Axe, Climbing, Dig, Elf, Explosive, Morgul, Rope, Super Strength

Mithril Brick 1
Climb up a wall to reach this Mithril Brick floating underneath a bridge.


Mithril Brick 2
You'll find a sheep by Mount Doom. Hop on and ride through the nearby markers to start a race. Complete the race to reveal this Mithril Brick.


Mithril Brick 3
You'll find this Mithril Brick on top of some stone pillars. Hop up the stone pillars (watch out for the fire!) to reach this Mithril Brick.


Mithril Brick 4
You'll find a locked chest. We need to find a key to open it.


To find the key, head up the steps by Cirith Ungol, then head down the path to reach Shelob's Lair. Destroy the silver rock to reveal some dirt.


Dig it up to reveal the key. Pick it up and add it to your inventory.


Return to the chest, then place the key in the lock to open it, revealing this Mithril Brick.


Mithril Brick 5
Head up the slope on Mount Doom and you'll find some stone pillars.


Hop up them (watch out for the fire), then latch onto the rope point above you.


Climb up onto the next platform, then shoot an arrow into the slot.


Hop on and swing onto the next platform, then climb up the wall (watch out for the fire).


Walk across the beams, then hop up the wooden platforms.


Continue up the rock pillar, then hop onto the arrow. Swing across the gap to reach the ledge with this Mithril Brick.


Mithril Brick 6
Smash the axe panel on the ground to reveal moles.


Smack 6 moles within 20 seconds to reveal this Mithril Brick.


Mithril Brick 7
You'll find a Morgul chest on the east side of Mordor.


Destroy it to reveal a silver chest.


Destroy it to reveal another chest. Pull on the super strength handle to open it, revealing this Mithril Brick.


Mithril Brick 8
This Mithril Brick can only be collected at Night. You'll be attacked by several Orcs. Defeat 35 Orcs within 60 seconds to reveal this Mithril Brick.
Red Power Bricks
Invincibility
"I've heard of a wonderful object called the Mithril Tinderbox, which lights fires with a charming fireworks display! If you forge me one, I'll reveal to you the secret of invincibility!"

Talk to a Dwarf and he will ask you to forge him a Mithril Tinderbox. It requires 8 Mithril Bricks to forge.


Forge one, then give it to him to reveal this Power Brick.


Action Assist
"Someone took my shiny shirt! But they won't be so smug when I get me an even shinier Mithril Whistle Sword! Forge me one and I'll show you how to make action events easier!"

Talk to an Uruk-hai by Shelob's Lair and he will ask you to forge him a Mithril Whistle Sword. It requires 4 Mithril Bricks to forge.


Forge one, then give it to him to reveal this Power Brick.


Studs x10
"Hello, my friend! Would you like to know the secret of absurd wealth? Having amassed a great fortune, I want for nothing now but a Mithril Squeak Sword! Forge me one, and the secret is yours!"

Talk to man in Mordor and he will ask you to forge him a Mithril Squeak Sword. It requires 4 Mithril Bricks to forge.


Forge one, then give it to him to reveal this Power Brick.
-----------------Edoras-----------------
Blacksmith Designs
Required Abilities: Explosive

Mithril Bottomless Bucket
Destroy the silver rocks in front of a house to clear the opening, allowing you to collect this Blacksmith Design.
Characters
Grishnakh
This Orc can only be purchased at Night. He can be found standing behind a large tree in Fangorn Forest.


Gamling
Gamling can be found in Fangorn Forest.


Eowyn
Eowyn can be found wandering around Edoras.


King Theoden (Cursed)
Theoden can be found standing in front of the royal hall.


Hama
Hama can be found on top of a small tower on the west side of Edoras.


Corsair
The Corsair can be found by the small river near Minas Tirith.
Fetch Quests
Required Abilities: Gardener, Rope

Fetch Quest 1
"I left Sauron's army to open a Middle-earth-class restaurant, but I left my Chef's Hat back in Cirith Ungol! Bring it to me, so I can finally put meat back on the menu!"

Talk to the Uruk-hai in Fangorn Forest and he will ask you to find his Chef's Hat. Give it to him to complete this Quest.


Fetch Quest 2
"I used to be a citadel guard, until I took an arrow to the knee in the battle at Helm's Deep. If only I hadn't lost my Bandages there, I could surely fix myself up again. Could you kindly find them for me?"

Hop on the ledge by the entrance to Edoras, then latch onto the rope point to pull down the wooden barrier.


Hop onto the ledge and talk to the man. He will ask you to bring him his Bandages. Give them to him to complete this quest.


Fetch Quest 3
"Apparently there's this strange drink called Ent Draught that can make Hobbits stand as tall as men! Think you could bring me some? It should be hidden in that place where you went to track the Hobbits..."

You'll find three plants in front of a house.


Grow all three of them and a Hobbit will walk out of the house. Talk to him and he'll ask you to give him an Ent Draught. Give him one to complete this quest.
Mithril Bricks
Required Abilities: Arrow, Axe, Dig, Elf, Firestarter, Illumination

Mithril Brick 1
There are 5 piles of Uruk-hai heads on a hill that you need to destroy. Once you destroy one, you have 7 seconds to destroy another one. The first is on a ledge across from Fangorn Forest.


The second is also on a ledge across from Fangorn Forest.


The third is by a tree across from Edoras.


The fourth is between two trees, across from Isengard.


The fifth is on top of the hill. Quickly destroy all 5 to reveal this Mithril Brick.


Mithril Brick 2
Destroy the wooden barrier on the side of a hill to reveal a chest. We need to find a key to open the chest.


The key can be found behind a gate on a small hill across from the entrance to Edoras.


Destroy the rocks on top of the structure and you'll reveal a mechanism. Now we need to find a crank.


You'll find a small garden outside Edoras. Dig up the dirt piles to find the crank, then pick it up and add it to your inventory.


Head back to the gate, then place the crank in the slot. Turn it to open the gate, allowing you to grab the key.


Pick it up and add it to your inventory, then head back to the chest. Place the key in the lock to open the chest, revealing this Mithril Brick.


Mithril Brick 3
You'll find a bunch of mole hills by Amon Hen. Smack 7 moles within 25 seconds to reveal this Mithril Brick.


Mithril Brick 4
Smash the axe panel on the side of a hill, allowing you to head inside and collect this Mithril Brick.


Mithril Brick 5
You'll find a doorway on the side of the hill in Edoras blocked by firewood. Light the wood on fire to clear the opening, allowing you to collect this Mithril Brick.


Mithril Brick 6
Shoot an arrow into the slot on the royal hall, then hop up and swing onto the bar, allowing you to collect this Mithril Brick.


Mithril Brick 7
Head into the dark alcove south of Edoras to reveal this Mithril Brick.


Mithril Brick 8
This Mithril Brick can only be collected at Night. You'll be attacked by Soldiers of the Dead. Defeat 15 of them within 50 seconds to reveal this Mithril Brick.
Red Power Bricks
Required Abilities: Extinguisher, Gardener

Disguises
"They say two arrows are better than one, and I'm told the Mithril Cluster Bow fires even more! Would you kindly forge me one? I'll pay you with a trick to get an interesting new look."

You'll find a house near the royal hall with a fire in front of the door.


To put it out, head to the left side of the house to find a plant.


Grow it to reveal a leaf, then bounce onto the roof. Walk across the wooden beam to reach a pool of water, allowing you to fill up your bucket.


Put out the fire, then talk to the man that appears. He will ask you to forge him a Mithril Cluster Bow. It requires 4 Mithril Bricks to forge.


Forge one, then give it to him to reveal this Power Brick.


Studs x6
"My husband's Mithril Top Hat shrunk in the wash. I'll never hear the end of it if he finds out! Could you forge me a replacement? I'll give you something that'll earn you six times as many studs..."

Talk to a woman by the royal hall and she'll ask you to forge her a Mithril Top Hat. It requires 3 Mithril Bricks to forge.


Forge one, then give it to her to complete this quest.
---------------Emyn Muil---------------
Mithril Bricks
Required Abilities: Illumination, Rope

Mithril Brick 1
Walk into the dark alcove to reach this Mithril Brick.


Mithril Brick 2
Latch onto the rope point to tear away the rocks, revealing this Mithril Brick.
---------------Helm's Deep---------------
Characters
Required Abilities: Rope

Eomer
Eomer can be found roaming around in the area between Helm's Deep and Isengard.


Rohirrim Soldier
This guy can only be purchased at Night. He can be found in the area between Helm's Deep and Isengard.


Uruk-hai
This guy can only be purchased at Night. He can be found walking around by the bridge leading into the fortress.


Berserker
Latch onto the rope point on the deeping wall, allowing yourself to climb over it.


Run up the steps on the fortress to reach the top, where you'll find the Berserker waiting.
Fetch Quests
Fetch Quest 1
"One of my kinsmen borrowed my special Uruk Sword when they went to attack Amon Hen, but he never brought it back! Then again, he didn't come back either! Hmmm. Anyway, find it for me?"

Talk to the Uruk-hai outside the fortress and he will ask you to find his Uruk Sword. Give it to him to complete this quest.


Fetch Quest 2
"We suffered a vicious Warg attack not long ago, and one of the beasts knocked me clean off my horse! While we were relatively unscathed, I was unable to find his Decorative Horseshoes anywhere."

Talk to the man inside the fortress and he will ask you to find his horse's Decorative Horseshoes. Give them to him to complete this quest.
Mithril Bricks
Required Abilities: Arrow, Climbing, Elf, Explosive, Firestarter, Morgul, Rope, Sharp Shoot, Small, Super Strength

Mithril Brick 1
Destroy the Morgul chest to the right of the entrance to the fortress to reveal this Mithril Brick.


Mithril Brick 2
There are a total of 7 statues on pedestals around the top level of the fortress. Once you destroy one, you'll have 8 seconds to destroy another one. Quickly destroy all 7 to reveal this Mithril Brick.


Mithril Brick 3
Destroy the silver gate on the side of the deeping wall, allowing you to collect this.


Mithril Brick 4
Pull on the super strength handle at the top level of the fortress to tear off the gate, allowing you to head inside the alcove.


Push the pillar to the left, allowing you to reach the travel chute. Crawl through the travel chute to reach this Mithril Brick.


Mithril Brick 5
Climb up the stairs behind the deeping wall to reach the top of the ledge, then latch onto the rope point to reach the next platform.


Grab onto the bar to reach the next platform.


Climb up the wall to reach another platform, then climb up the rope.


Hop onto the next platform, then shoot an arrow into the socket.


Swing up it to reach a bar, then hop onto the wooden beam.


Hop across the wooden beams, then hop inside the alcove at the top. Light the fire to reveal this Mithril Brick.


Mithril Brick 6
High jump onto the tall wooden platform behind the deeping wall, then shoot the target in the background to reveal more Orc targets.


Shoot all six targets to reveal this Mithril Brick behind you. Hop across the platforms and cross the beam to reach it.
Red Power Bricks
Studs x8
"Life is too short to be scraping and saving studs all the time. I know of a trinket that will earn you eight times as many! Forge me a Mithril Shield that I need and it's all yours."

Talk to a Dwarf high up in the mountains and he will ask you to forge him a Mithril Shield. It requires 3 Mithril Bricks to forge.


Forge it and give it to him to reveal this Red Brick.
----------------Hobbiton----------------
Blacksmith Designs
Required Abilities: Fisherman

Mithril Paintbrush
This Blacksmith Design can be found by fishing from the pier in the river.
Characters
Rosie
Rosie can be found wandering around the Shire, usually around Bag End.


Bilbo Baggins (Old)
Bilbo can be found inside Bag End.


Tom Bombadil
Tom Bombadil appears in a small village in the outskirts of Bree, and can only be purchased during the Day.
Fetch Quests
Required Abilities: Explosive, Rope, Sharp Shoot

Fetch Quest 1
"Me precious pet bunny Jack just ain't been the same since he lost his Golden Carrot out in the fields of Pelennor. If you find it, could you please bring it back to me?"

Destroy the silver lock on a house to open the door, revealing a woman.


Talk to her and she will ask you to find her Golden Carrot. Give it to her to complete this quest.


Fetch Quest 2
"I was keeping an eye on Gandalf's Stop Wand, but I turned my back for one second and some goat made off with it! I gave chase, but I lost him halfway up Amon Hen."

Latch onto the rope handle on a door to pull it open, revealing a hobbit.


Talk to him and he will ask you to find Gandalf's Stop Wand. Give it to him to complete this quest.


Fetch Quest 3
"That husband of mine has lost our House Key again! I swear this happens every time he goes gallivanting off with that friend of his near the Mines of Moria."

Shoot the target outside of a house to open the door, revealing a woman.


Talk to her and she will ask you to give her the House Key. Give it to her to complete this Quest.
Mithril Bricks
Required Abilities: Arrow, Axe, Elf, Firestarter, Gardener, Morgul, Sharp Shoot

Mithril Brick 1
Smash the axe panel on top of a small hill to reveal this Mithril Brick.


Mithril Brick 2
Grow the plant on the hill across from Bag End to reveal this Mithril Brick.


Mithril Brick 3
You'll find a cluster of mole hills on a small hill. Smack 10 moles within 25 seconds to reveal this Mithril Brick.


Mithril Brick 4
Stand on the wooden platform and targets will appear. Shoot all five to reveal this Mithril Brick.


Mithril Brick 5
This Mithril Brick can only be collected at Night. Light the box of fireworks in the pavilion to reveal this Mithril Brick


Mithril Brick 6
You'll find some platforms by a house near Farmer Maggot's field.


Hop up them, then shoot an arrow into the socket.


Hop onto the arrow, then swing up to the platforms.


High jump up them, then walk across the tightropes to reach this Mithril Brick.


Mithril Brick 7
This Mithril Brick can only be collected at Night. You'll find several Hobbits with sparklers around a pile of wood. Light the pile of wood on fire to destroy it, allowing you to collect this Mithril Brick.


Mithril Brick 8
You'll find a large chest at the end of the path. Destroy the Morgul lock to open the chest, allowing you to collect this.


Mithril Brick 9
You'll find a pig hanging out in a grassy field. Hop on and ride him through the posts on the right to start a race. Complete the race to receive this Mithril Brick.
Red Power Bricks
Required Abilities: Morgul

Poo Studs
"That blasted goat of mine keeps breaking loose, no matter what I use to tie it up! If you forge me some unbreakable Mithril Rope, I'll give you the secret to a smelly source of studs."

In order to reveal this Quest, destroy the Morgul lock on the door of a house. Talk to the Hobbit that comes outside and he will ask you to forge him some Mithril Rope. It costs 3 Mithril Bricks to forge.


Forge it and give it to him to reveal this Red Brick.
-----------------Isengard-----------------
Blacksmith Designs
Mithril Ice Sword
Hop up the rocks north of Isengard and you'll find a small tomb. Attack it to open it, revealing this Blacksmith Design.
Characters
Required Abilities: Arrow, Climbing, Elf, Small, Super Strength

Saruman the White
Pull on the super strength handle to tear off the gate, allowing you to head into Isengard.


Head around the tower, then hop on top of the wooden platform. Shoot an arrow into the slot, then hop on and swing up to the bar.


Shimmy to the right, then hop up the bars to reach a rope.


Climb up to reach a wooden beam, then walk across it.


You'll reach a travel chute. Crawl through it to reach another ledge.


Hop onto the bar on the right, then climb the wall to reach a rope.


Climb up the rope, then hop onto the next platform.


Hop up the bars, then swing on the arrows to reach another ledge.


Crawl through the travel chute to reach another ledge.


Hop up the bars and you'll find Saruman at the very top of the tower.


Grima Wormtongue
Grima can only be purchased at Night. He can be found next to Orthanc.
Fetch Quests
Fetch Quest 1
"I'm told that anyone can pass for an Uruk-hai, so long as they're wearing a Handprint Breastplate. I think I saw a spare near The Black Gate... If I had one, maybe they'd let me join their ranks!"

Talk to the Orc in a small cave north of Isengard and he will ask you for a Handprint Breastplate. Give him one to complete this quest.
Mithril Bricks
Required Abilities: Arrow, Climbing, Dig, Elf, Extinguisher, Fisherman, Illumination, Morgul, Rope, Small, Super Strength

Mithril Brick 1
You'll find a bunch of rocks on top of a hill north of Isengard.


Smash them to reveal a dark alcove, then head inside to find this Mithril Brick.


Mithril Brick 2
Pull on the super strength handle to tear off the gate, allowing you to head into Isengard.


Head to the right and cross the beam to find a bunch of troughs.


Hop up onto the ledge nearby, then turn the crank to move one of the troughs into position.


The next crank is on fire, so we'll need to find a pool of water to put it out. Continue around the tower to the left, then walk across the beam to cross the gap.


Destroy the large rock to reveal a pool of water, allowing you to fill up your bucket.


Head back across the beam and put out the fire, then turn the crank to move another trough into position.


Destroy the nearby Morgul lock, then turn that crank to move another trough into position.


Head back across the small wooden beam, then hop on the wooden platform near the tower. Latch onto the rope point, then swing across to the next wooden platform.


Walk across the beam, then turn the crank to move another trough into position.


There is one more crank we need to turn, and it can be found on the ledge to the right. Unfortunately, the crank is missing.


To find it, head to the left side of the troughs to find a dirt pile. Dig it up to reveal the crank, then pick it up and add it to your inventory.


Place it in the slot, then turn it to move the final trough into position. Once all five troughs are in position, water will flow down them, revealing this Mithril Brick.


Mithril Brick 3
After collecting Mithril Brick 2, continue around the tower to the left, then hop on top of the wooden platform. Shoot an arrow into the slot, then hop on and swing up to the bar.


Shimmy to the right, then hop up the bars to reach a rope.


Climb up to reach a wooden beam, then walk across it.


You'll reach a travel chute. Crawl through it to reach another ledge.


Hop onto the bar on the right, then climb the wall to reach a rope.


Climb up the rope, then hop onto the next platform.


Hop up the bars, then swing on the arrows to reach another ledge.


You'll notice some studs on the right. Jump down and collect them to fall right into this Mithril Brick.
Mithril Bricks cont.
Mithril Brick 4
After collecting Mithril Brick 3, return to the ledge you jumped off of. Instead of hopping off, crawl through the travel chute to reach another ledge.


You'll find this Mithril Brick above you. Hop up the bars to reach it.


Mithril Brick 5
This Mithril Brick can only be collected at Night. Approach the tower and you'll be attacked by Uruk-hai. Defeat 10 Uruk-hai within 30 seconds to reveal this Mithril Brick.


Mithril Brick 6
This actually starts over by Helm's Deep. Hop on the horse in front of the fortress and ride through the nearby markers to start a race. Complete the race to reveal this Mithril Brick.


Mithril Brick 7
You'll find this Mithril Brick behind a gate. You need to find a crank in order to open the gate.


Head over to the small waterfall south of Isengard to find a pier. Fish from it to reel in a crank, then pick it up and add it to your inventory.


Place it in the slot, then turn it to open the gate, allowing you to collect this Mithril Brick.
Red Power Bricks
Fast Build
"Ding! Dong! Ding! Dong! Craft me boots that make walking a song! Tock! Tick! Tock! Tick! Mithril Music Boots would do the trick! In return I'll help you build really quick!"

Talk to an Uruk-hai and he will ask you to forge him Mithril Music Boots. They require 3 Mithril Bricks to forge.


Forge him some, then give them to him to reveal this Power Brick.
----------------Lothlorien----------------
Blacksmith Designs
Required Abilities: Super Strength

Mithril Skeleton Bow
Pull on the super strength handle to tear off the gate, allowing you to head inside the alcove.


Destroy the small chest behind the Elf to reveal this.
Characters
Lothlorien Elf
Approach this guy and he will hop out of a tree, allowing you to purchase him.


Galadriel
Galadriel can be found on the top floor of the main building.


Celeborn
Celeborn is right next to Galadriel.


Haldir
You'll find Haldir on a ledge overlooking the Mines of Moria.
Fetch Quests
Required Abilities: Super Strength

Fetch Quest 1
"I'm a weapons collector, and I've heard of a sinister item hidden in The Paths of the Dead, known as the Golden Axe, which would be perfect for my collection. I'd be very grateful if someone could find it for me..."

Pull on the super strength handle to tear off the gate, allowing you to head inside the alcove.


Talk to the Elf inside and he will ask you to bring him the Golden Axe. Give it to him to complete this quest.
Mithril Bricks
Required Abilities: Arrow, Axe, Climbing, Elf, Explosive, Gardener, Illumination, Small

Mithril Brick 1
Destroy the silver lock on a chest, then attack it to open it, revealing this Mithril Brick.


Mithril Brick 2
Grow the plant next to some wooden platforms to reveal a flower.


Bounce up the leaves to reach the flower, then hop onto the tightrope.


Walk across to the left, then drop down onto the wooden platform. Hop across to the next platform to reach this Mithril Brick.


Mithril Brick 3
Hop up some rocks to reach a wall, then climb up.


Crawl through the travel chute on the ledge to reach another ledge.


Smash the axe panel to create an opening, then drop down inside to reach this Mithril Brick.


Mithril Brick 4
You'll find a cluster of 5 plants in a circle. Once you destroy one, you'll have 5 seconds to destroy another one. Quickly destroy all 5 to reveal this Mithril Brick.


Mithril Brick 5
Head into the dark alcove by the river to reveal this Mithril Brick.


Mithril Brick 6
While standing in the main building, look out the opening behind where Galadriel and Celeborn appear to see some platforms.


Hop across them, then walk across the tightrope.


At the end, shoot an arrow into the slot, then hop on and swing over to this Mithril Brick.


Mithril Brick 7
You'll find an axe panel behind a waterfall. The water is too deep for Gimli to smash it, to pick him up and toss him at the axe panel instead, revealing this Mithril Brick.


Mithril Brick 8
Quickly hop across the platforms in the water to reach the wooden platform in the center.


Shoot an arrow into the slot, then high jump onto it and swing to the right.


Hop up the wooden platforms, then cross the beam.


High jump onto the rock platform, then walk across the tightrope.


Shoot arrows into the slots on the rocks, then hop up the platforms.


Hop onto the arrows, then swing across to reach a ledge. Destroy the tomb to reveal this Mithril Brick.
Red Power Bricks
Required Abilities: Rope

Attract Studs
"Psst. Between you and me, I've always wanted to try my hand at archery. And what better way to start with than a Mithril Carrot Bow? Forge me one, and I'll show you how to attract riches from afar."

Latch onto the rope point on some rocks to tear them down, revealing an alcove.


Talk to the Dwarf inside and he will ask you to forge him a Mithril Carrot Bow. It requires 3 Mithril Bricks to forge.


Forge one, then give it to the Dwarf to reveal this Power Brick.


Fall Rescue
"I'd thank you to keep this between us, but I'm keen to explore combat with a Dwarven axe. I'll divulge the secrets of surviving the most perilous drop if you forge a Mithril Shockwave Axe for me."

Walk up the stairs on the main building and you'll find an Elf. Talk to him and he will ask you to forge him a Mithril Shockwave Axe. It requires 4 Mithril Bricks to forge.


Forge one, then give it to the Elf to reveal this Power Brick.
--------------Minas Morgul--------------
Characters
Required Abilities: Elf, Rope

Gondor Soldier
This guy can be found on the west side of Osgiliath.


Gondor Ranger
He can be found on the east side of Osgiliath.


The Witch-king
High jump onto the beam on the side of Minas Morgul, then walk across.


Hop across the beams to reach the stone platform, then latch onto the rope point to swing onto the bar.


Hop across the bars to the left, then drop down onto the stone pillars.


Head to the left and you'll find a lily pad in the water.


Bounce on it to reach the opposite shore, where you'll find the Witch-king.
Fetch Quests
Required Abilities: Rope, Sharp Shoot

Fetch Quest 1
"My Elven Lute was stolen by a group of Orcs who have recently taken to pillaging our homes. I trailed them to The Black Gate, but I don't feel up to the task of recovering my belongings... Would you go on my behalf?"

Talk to an Elf in Osgiliath and he will ask you to bring him his Elven Lute. Give it to him to complete this quest.


Fetch Quest 2
"I have a favor to ask of you. A friend of mine was lost in the Battle of Pelennor... I'd like to return his Glowing Shield to his family, but an injury prevents me from searching for it. Would you go in my place?"

Talk to a man in Osgiliath and he will ask you to bring him his friend's Glowing Shield. Give it to him to complete this quest.


Fetch Quest 3
"You know what? I hate fighting. I just want to paint! But my fellow Orcs buried me Artist's Hat somewhere in The Mines of Moria... So I suppose there's nothing to do now except fight."

Latch onto the rope point near Minas Morgul to reveal a lily pad.


Shoot the target to reveal another.


Bounce across the lily pads to reach an Orc. Talk to him and he will ask you to give him an Artist's Hat. Give it to him to complete this quest.
Mithril Bricks
Required Abilities: Arrow, Axe, Elf, Extinguisher, Fisherman, Gardener, Magic, Rope

Mithril Brick 1
You'll find a leaf on the side of the path leading to The Dead Marshes. Bounce on the leaf to reach the ledge, then attack the tomb to open it, revealing this Mithril Brick.


Mithril Brick 2
You'll find a plant in Osgiliath surrounded by fire. We need to put it out.


Head across the river, then smash the axe panel to reveal a pool of water.


Fill up your bucket, then put out the fire to reveal the plant.


Grow it to reveal a flower, then bounce up the leaves. Shoot arrows into the slots, then swing across them to reach a bar.


Hop up onto the beam, then cross it to reach a chest. We need to find a key to open it.


Head back across the river, then fish at the pier to reel in the key.


Pick it up and add it to your inventory, then return to the chest. Place the key in the lock to open it, revealing this Mithril Brick.


Mithril Brick 3
There are 5 statues on pedestals on the east side of Osgiliath that you need to destroy. Once you destroy one, you have 9 seconds to destroy another one. The first is near the river.


The other four can be found by climbing up the nearby bars. Quickly destroy all 5 to reveal this Mithril Brick.


Mithril Brick 4
After collecting Mithril Brick 2, bonce back up the leaves to reach the flower, then hop onto the wooden beam in front of you.


Look to the left to find this Mithril Brick.


Mithril Brick 5
Use magic to stack the stone pillars on the purple panel, then hop up them.


Hop onto the bar, then continue to hop up to reach a wooden beam.


Walk across it to reach this Mithril Brick.


Mithril Brick 6
High jump onto the beam on the side of Minas Morgul, then walk across.


Hop across the beams to reach the stone platform, then latch onto the rope point to swing onto the bar.


Hop across the bars to the left, then drop down onto the stone pillars.


Hop onto the arrows, then swing on them to reach this Mithril Brick.


Mithril Brick 7
Smash the axe panel up on a mountain to reveal this Mithril Brick.


Mithril Brick 8
This Mithril Brick can only be collected at Night. You'll find a camp, where you'll be attacked by Orcs. Defeat 10 Orcs within 35 seconds to reveal this Mithril Brick.
Red Power Bricks
Character Studs
"Craft me a Mithril Fire Bow, so I may smite my enemies with the scorching flames of justice! Ahem. Sorry, I got carried away there. If you help me out, though, I'll tell you how to get studs from fallen foes."

Talk to an Elf and he will ask you to forge him a Mithril Fire Bow. It requires 8 Mithril Bricks to forge.


Forge one, then give it to him to reveal this Power Brick.
---------------Minas Tirith---------------
Blacksmith Designs
Required Abilities: Sharp Shoot

Mithril Disco Phial
There are 7 targets that you need to shoot on the top ledge of Minas Tirith. The first is on the left side of the ledge overlooking Mordor.


The second and third are on the right side of Minas Tirith.


The fourth and fifth are on the left side of Minas Tirith.


The sixth and seventh are near the center of the top ledge.


Once you shoot all 7 targets, this Blacksmith Design will appear. Hop up the bars to reach it.
Characters
Required Abilities: Gardener

Soldier of the Dead
This ghost can only be purchased at Night. He can be found in the fields between Edoras and Minas Tirith.


King of the Dead
The King of the Dead can only be purchased at Night. Climb up the steps at Dunharrow to reach him.


Denethor
Denethor can be found walking around on the top ledge of Minas Tirith.


Citadel Guard
Grow the plant on the top ledge of Minas Tirith to grow a flower.


Bounce up the leaves to reach a bar.


Shimmy around to the right, then hop up the bars.


Keep hopping up and moving along the bars to reach the Citadel Guard.


Boromir (Captain)
Boromir can be found roaming around near Osgiliath.
Fetch Quests
Fetch Quest 1
"I've not visited Osgiliath in so long; I've all but forgotten the place. My duties prevent me from leaving my post, but perhaps you would be kind enough to bring me a Statue Hat as a reminder of my travels?"

Talk to the man on the top ledge of Minas Tirith and he will ask you to give him a Statue Hat. Give him one to complete this quest.


Fetch Quest 2
"I hear that the Secret Stairs are home to an Elven treasure known as the Surefooted Greaves, which allow their wearer to walk on deep snow without sinking, whatever their weight. How dry my beard would keep if I had them..."

You'll find a Dwarf behind a gate outside of Minas Tirith. Ring the bell to open the gate, allowing you to talk to him.


He will ask you bring him some Surefooted Greaves. Give him some to complete this quest.
Mithril Bricks
Required Abilities: Arrow, Elf, Firestarter, Gardener, Illumination, Rope, Sharp Shoot

Mithril Brick 1
You'll find a horse outside of Minas Tirith. Hop on and ride through the nearby beacons to start a race. Complete the race to reveal this Mithril Brick.


Mithril Brick 2
Stand on a wooden platform and some Orc targets will appear. Shoot all of them to reveal this Mithril Brick.


Mithril Brick 3
This Mithril Brick can only be collected at Night. You'll find 3 Orcs at a camp. Defeat all 3 to reveal this Mithril Brick.


Mithril Brick 4
Hop up the stone pillars on the top ledge of Dunharrow.


Shoot arrows into the slots, then hop on. Swing over to the right, then high jump up to this Mithril Brick.


Mithril Brick 5
Grow the plant on the top ledge of Minas Tirith to grow a flower.


Bounce up the leaves to reach a bar.


Shimmy around to the right, then hop up the bars.


Continue hopping up and moving along the bars to reach the very top of the tower. Light the fire to receive this Mithril Brick.


Mithril Brick 6
Attack the white tree to reveal this Mithril Brick above it.


Mithril Brick 7
You'll find some mole hills outside of Minas Tirith. Smack 10 moles within 30 seconds to reveal this Mithril Brick.


Mithril Brick 8
Latch onto the rope point to open the gate, allowing you to grab the crank inside.


Pick up the crank and add it to your inventory, then place it in the slot. Turn it to open the gate, revealing a dark alcove.


Head inside and you'll find a key. Pick it up and add it to your inventory.


Place the key in the lock to reveal a target.


Shoot it to lower a stone pillar, revealing bars.


Hop up the bars, then destroy the tomb at the top to reveal this Mithril Brick.
----------------Rivendell----------------
Blacksmith Designs
Required Abilities: Magic

Mithril Spring Boots
Use Magic to move the pillars onto the purple panel, creating steps.


Hop up them to reach the ledge, then head to the left. You'll find an opening just before a small staircase. Drop down inside to reach this Blacksmith Design.
Characters
Required Abilities: Arrow, Elf, Explosive, Magic, Small

Elrond (Third Age)
Elrond can be found on a building surrounded by water. To reach him, head to the shoreline and destroy the rock hanging from the wall to reveal a slot.


Shoot arrows into the slots, then hop on and swing up to a tightrope.


Walk across the tightrope, then cross the beams to reach a stone platform. Destroy the rock on the wall to reveal a slot, then shoot arrows into both slots.


Walk back across the tightrope, then swing up the arrows to reach some bars. Hop onto the ledge.


Destroy the large rock on the right to reveal a travel chute, then crawl through it to reach the building.


Head down to the balcony overlooking the water to reach Elrond.


Bilbo Baggins
Bilbo can be found standing in front of a small study.


Elrond (Second Age)
Elrond can only be purchased at Night. To find him, use Magic to move the pillars onto the purple panel, creating steps.


Hop onto the ledge, where you'll find Elrond.


Gloin
Destroy the silver rocks to reveal a cave opening.


Gloin will then come out of the cave, allowing you to purchase him.
Fetch Quests
Required Abilities: Magic, Small

Fetch Quest 1
"The amazing view from Weathertop inspired me to write a poem! Trouble is, I left my only Quill up there... Perhaps you'd be kind enough to fetch it for me?"

In order to reach this quest, destroy the objects on the tiles to clear the path, then push the rock platform to the end.


Hop on and crawl through the travel chute to reach the ledge above you.


Talk to the Elf and he will ask you to find his Quill. Give it to him to complete this quest.


Fetch Quest 2
"A Hobbit passed through a while ago, speaking of a Luminous Stone he'd seen on The Pass of Caradhras. I'm skeptical, but I'll admit to being curious... If you come across such a thing, could you show it to me?"

Use Magic to move the pillars onto the purple panel, creating steps.


Hop up them to reach the ledge, then head to the left to find an Elf. Talk to him and he will ask you to give him a Luminous Stone. Give him one to complete this quest.
Mithril Bricks
Required Abilities: Arrow, Axe, Climbing, Elf, Extinguisher, Gardener, Morgul, Rope, Sharp Shoot, Small, Super Strength

Mithril Brick 1
This Mithril Brick can be found on a building surrounded by water. To reach it, head to the shoreline and destroy the rock hanging from the wall to reveal a slot.


Shoot arrows into the slots, then hop on and swing up to a tightrope.


Walk across the tightrope, then cross the beams to reach a stone platform. Destroy the rock on the wall to reveal a slot, then shoot arrows into both slots.


Walk back across the tightrope, then swing up the arrows to reach some bars. Hop onto the ledge.


Destroy the large rock on the right to reveal a travel chute, then crawl through it to reach the building.


You'll find 6 statues of Elves holding lutes (not all statues are holding lutes). Once you destroy one statue, you'll have 6 seconds to destroy another one. Quickly destroy all 6 statues to reveal this Mithril Brick.


Mithril Brick 2
Head to the right of the building surrounded by water and you'll find a gate. Pull on the super strength handle to tear off the gate, allowing you to head inside.


Inside, you'll find three large stone heads. We need to find a crank for the machine.


Head to the left to find a pool of water. Fill up your bucket, then hop up the platforms to reach a leaf.


Bounce on the leaf to reach the vines, then swing onto the top of the stone head. Put out the fire and the head will raise up.


Drop back down, then destroy the chest to reveal the crank. Pick it up and add it to your inventory.


Place the crank in the slot, then turn it to raise up the head on the right, revealing a travel chute.


Crawl through it to reach the stone platforms in the background.


Latch onto the rope point to raise up the head in the center.


Smash the tomb underneath it to reveal this Mithril Brick.


Mithril Brick 3
Stand on the wooden platform by Bilbo's study, then toss Gimli at the axe panel to destroy it, revealing a target.


Shoot it to extend some platforms on the side of the tower.


Hop up them to reach this Mithril Brick.


Mithril Brick 4
Smash the axe panel on the ground across from the building surrounded by water to raise up some pillars.


Hop up them, then continue along the ledge.


Shoot the target across the gap to extend a bridge, allowing you to continue.


At the end of the path, you'll reach a balcony. Destroy the tomb to reveal this Mithril Brick.


Mithril Brick 5
Destroy the Morgul lock on a tomb, then destroy the tomb to reveal this Mithril Brick.
Mithril Bricks cont.
Mithril Brick 6
Latch onto the rope point by the courtyard where the Council of Elrond took place, then climb up.


Hop up the bars to reach the top of the tower.


High jump onto the wooden platform, then hop onto the next platform.


Hop onto the wooden beam, then walk across.


Hop onto an arrow, then swing up them to reach this Mithril Brick.


Mithril Brick 7
Walk up the path across from the Bonus level to reach a wall.


Climb up, then continue up the path to reach a plant.


Grow it to reveal a leaf, then bounce on it to reach the top of the statue. Smash the axe panel to reveal this Mithril Brick


Mithril Brick 8
After collecting Mithril Brick 7, head back inside and head to the right on the ledge to find a vine.


Hop onto it, then shoot an arrow into the slot. Walk over to the arrows, then swing up them to reach the vine, allowing you to reach this Mithril Brick.
Red Power Bricks
Required Abilities: Sharp Shoot

Studs x2
"We Elves may be an agile sort, but all that swinging from poles takes its toll on the hands. Could you kindly fashion some Mithril Gloves for me? In return, I could help to double your income..."

Head over to the right side of the building surrounded by water, then shoot the target on the lily pad.


Hop across the plants, then bounce on the lily pad to reach the bar.


Shimmy to the left, then drop down onto the lily pad and bounce onto the land to find an Elf. Talk to her and she will ask you to forge her some Mithril Gloves. They require 4 Mithril Bricks to forge.


Forge her some and give them to her to reveal this Power Brick.
--------------The Black Gate--------------
Blacksmith Designs
Mithril Fireworks
You'll find some bars on the side of Barad-dur.


Hop up them (you'll have to use a non-Hobbit character to reach the last bar), then walk across the beam to reach this Blacksmith Design.
Characters
Easterling
He can be found roaming between The Black Gate and The Dead Marshes.


Mordor Orc
You'll be attacked by this guy shortly after passing through The Black Gate. He'll hop down from a ledge once you get close.


Gothmog
Gothmog can be found hanging out by the entrance to Barad-dur.
Fetch Quests
Required Abilities: Axe

Fetch Quest 1
"I don't suppose you've seen a Bubble Pipe on your travels, have you? My cousin's been in a foul mood ever since he lost his on a trip to Osgiliath..."

Smash an axe panel (you'll have to jump and attack to destroy it) to reveal a cave.


Head inside and talk to the Dwarf. He will ask you to give him a Bubble Pipe. Give him one to complete this quest.
Mithril Bricks
Required Abilities: Axe, Climbing, Elf, Explosive, Extinguisher, Morgul, Rope, Small, Super Strength

Mithril Brick 1
You'll find a bunch of silver rocks on some tiles.


Destroy the silver rocks to clear the tiles, then push the two rock pillars into the green slots.


This will lower some rocks, creating platforms.


High jump up them to reach a Morgul chest, then destroy it to reveal this Mithril Brick.


Mithril Brick 2
Latch onto the rope points to climb up the rock platforms, allowing you to reach this Mithril Brick.


Mithril Brick 3
Climb up a wall to reach the top of the rocks.


Smash the axe panel to reveal this Mithril Brick.


Mithril Brick 4
Pull on the super strength handle to tear off the gate, revealing a cave entrance.


Head inside, then latch onto the rope point to reveal this Mithril Brick.


Mithril Brick 5
After collecting Mithril Brick 4, walk up the wooden beams to reach the ledge.


Latch onto the rope point to extend a bridge, allowing you to reach this Mithril Brick.


Mithril Brick 6
Destroy the silver rocks by a camp to reveal this Mithril Brick.


Mithril Brick 7
Shortly after entering Mordor, you'll be attacked by Orcs. Defeat 20 Orcs within 60 seconds to reveal this Mithril Brick.


Mithril Brick 8
Destroy the black rocks on the tiles, allowing you to push the rock platform into the green slot.


This will allow you to reach the travel chute. Crawl through it to reach the ledge with this Mithril Brick.


Mithril Brick 9
Destroy the silver gate to reveal a cave.


Head inside, then climb up the wall to reach the ledge with this Mithril Brick.


Mithril Brick 10
Destroy a Morgul chest on the ground to reveal this Mithril Brick.


Mithril Brick 11
Destroy the Morgul lock to lower a wooden platform, then hop up them.


Hop across the wooden platforms to reach a Morgul chest. Hopping across these platforms can be frustrating. I suggest using Legolas or another Elf, as their high jump makes it easier to hop between platforms. I also recommend jumping diagonally across platforms when possible.


Destroy the Morgul chest to reveal this Mithril Brick.


Mithril Brick 12
Destroy the silver gate to reveal a cave.


Before heading inside, fill up your bucket at the nearby pool of water.


Head inside the cave and put out the fires to reveal a ladder.


Climb up, then walk across the beam to reach this Mithril Brick.


Mithril Brick 13
Hop up the moving stone pillars by Barad-dur to reach this Mithril Brick.


Mithril Brick 14
We need to find a crank to lower a wooden platform. Fortunately, we can find one by destroying a nearby black rock.


Pick it up and add it to your inventory, then place it in the slot. Turn the crank to lower a wooden platform.


High jump onto it, then hop up the wooden platforms.


High jump onto the stone platform, then walk across the tightrope to reach this Mithril Brick.
Red Power Bricks
Required Abilities: Arrow, Elf

8-Bit Music
"I was chasing a tasty-looking pig for days, but the crafty beggar scrambled up a cliff out of my reach. Forge me some Mithril Climbing Boots so I can go after him, and I'll reveal a secret that will be music to your ears!"

Shoot an arrow into the slot on a tower, then hop on.


Swing up the arrows to reach a stone platform.


Climb up the ladder and you'll find an Orc at the top of the tower. Talk to him and he will ask you to forge him some Mithril Climbing Boots. They require 8 Mithril Bricks to forge.


Forge them, then give them to the Orc to reveal this Power Brick.
------------The Dead Marshes------------
Characters
Haradrim
This guy can be found roaming along the path to Minas Morgul
Fetch Quests
Fetch Quest 1
"Those Uruk-hai think they're so big, but I hear it was just some fancy mud that made them that way! If you got me some of that Muddy Armor from the Secret Stairs, maybe I could be that beefy!"

Talk to the Orc and he will ask you to find him some Muddy Armor. Give it to him to complete this quest.


Fetch Quest 2
"I've built a house from the bones of my enemies! Impressive - huh? But, er... I ran out of bones before I could make a Skeleton Key to get in. I bet they have one spare in The Paths of the Dead..."

Talk to the Uruk-hai and he will ask you to find him a Skeleton Key. Give him one to complete this quest.
Mithril Bricks
Required Abilities: Firestarter, Gardener, Illumination, Morgul, Sharp Shoot

Mithril Brick 1
You'll find a bunch of moving wooden platforms in the water.


Hop across them to reach the moving wooden pillars in the back.


Hop across them to reach the final pillar, then hop up the bars to reach this Mithril Brick.


Mithril Brick 2
You'll find this Mithril Brick surrounded by wood. Light the wood on fire, allowing you to collect this Mithril Brick.


Mithril Brick 3
Destroy the Morgul lock on a chest, then attack the chest to open it, revealing this Mithril Brick.


Mithril Brick 4
This Mithril Brick can only be collected at Night. Bounce across the leaves to cross the water, allowing you to reach a new island.


You'll find 3 ghosts dancing on a ledge. Defeat all 3 to reveal this Mithril Brick.


Mithril Brick 5
Hop across the small wooden platforms to reach this Mithril Brick.


Mithril Brick 6
Shoot the target to reveal a lily pad, then hop across it and the wooden beams to reach the island.


Grow the plant to reveal this Mithril Brick.


Mithril Brick 7
Head into the dark alcove to reach this Mithril Brick.


Mithril Brick 8
Hop across the stone platforms in the water to reach another island.


You'll find seven brown bushes. Once you destroy one, you'll have 5 seconds to destroy another. Quickly destroy all 7 to reveal this Mithril Brick.
Red Power Bricks
Required Abilities: Climbing

Mithril Hearts
"I'm often told that my ears are uncommonly dull for an Elf. A big, shiny Mithril Headdress ought to disguise that problem! I'll reveal a way for you to boost your vitality if you forge me one."

Head to the north part of the marshes and you'll find a climbing wall.


Climb up to reach a ledge, then talk to the Elf. He will ask you to forge him a Mithril Headdress. It requires 3 Mithril Bricks to forge.


Forge one, then give it to him to reveal this Power Brick.
---------The Pass of Caradhras---------
Characters
Moria Orc
This guy appears in front of the Mines of Moria.
Fetch Quests
Required Abilities: Fisherman, Super Strength

Fetch Quest 1
"Some mischievous Orcs made off with my Beard Comb! They probably took it back to that accursed tower, Cirith Ungol. Could you get it back for me? I'd go, but... I can't be seen out with such an unruly beard!"

There are some ruins on the path between Rivendell and The Pass of Caradhras. Pull on the super strength handle to tear down the gate, allowing you to enter.


You'll find a Dwarf in the ruins. Talk to him and he will ask you to find his Beard Comb. Give it to him to complete this quest.


Fetch Quest 2
"Brr! I-i-it's a bit c-c-cold up here, isn't it? I-i-if you're going towards M-m-mount Doom, I'd v-very much ap-p-preciate it if you could bring me a-a-a nice w-w-warm Magma Rock..."

You'll find a gate on the mountain along The Pass of Caradhras. Pull on the super strength handle to tear it off, revealing a man.


Talk to him and he will ask you to bring him a Magma Rock. Give him one to complete this quest.


Fetch Quest 3
"I'm sick of being mistaken for a man! If only I hadn't lost my nice feminine Sun Hat up on Weathertop... You couldn't be a dear and have a look for it, could you?"

We need to talk to the Dwarf behind the gate. In order to open the gate, we need a crank.


Head down to the water and fish at the pier by the small waterfall to reel in the crank. Pick it up and add it to your inventory.


Place the crank in the slot, then turn it to open the gate.


Talk to the Dwarf and she will ask you to find her Sun Hat. Give it to her to complete this quest.
Mithril Bricks
Required Abilities: Arrow, Axe, Elf, Explosive, Illumination, Morgul, Rope, Sharp Shoot, Super Strength

Mithril Brick 1
There are some ruins on the path between Rivendell and The Pass of Caradhras. Pull on the super strength handle to tear down the gate, allowing you to enter.


Head to the back part of the ruins, then shoot arrows into the slots on the wall. High jump onto one, then swing up to reach this Mithril Brick.


Mithril Brick 2
After collecting Mithril Brick 1, head back into the ruins and latch onto the rope point.


Climb up, then hop up the bars to reach a tightrope. Walk across it to reach this Mithril Brick.


Mithril Brick 3
Latch onto the rope point on a lily pad, then shoot the target on the next lily pad.


Bounce across the lily pads to reach the island on the right. Smash the axe panel to reveal this Mithril Brick.


Mithril Brick 4
Destroy the Morgul lock to open the gate, allowing you to collect this Mithril Brick.


Mithril Brick 5
Latch onto the rope point on a lily pad, then shoot the target on the next lily pad.


Bounce across the lily pads to reach the island on the left, then head to the right.


Destroy the Morgul pillars to reveal a dark alcove.


Head inside to reveal this.


Mithril Brick 6
Destroy the silver gate near the Mines of Moria, allowing you to collect this Mithril Brick.


Mithril Brick 7
You'll find some wheels by the water. Press the "special" button in front of one to take control of a boat.


Defeat the three waves of red ships that attack you to reveal this Mithril Brick.


Mithril Brick 8
High jump onto the rock platform by the entrance to the Mines of Moria, then hop onto the tightrope.


Walk across it to reach the top of the large archway.


Destroy the Morgul chest at the end to reveal this Mithril Brick.
Red Power Bricks
Required Abilities: Explosive, Rope, Sharp Shoot

Boss Disguises
"I've found a trick which can reduce the mightiest foe to a laughing stock! Interested? Craft me a Mithril Music Horn and I'll reveal all..."

Latch onto the rope point on a lily pad, then shoot the target on the next lily pad.


Bounce across the lily pads to reach the island on the left, then continue along to the opposite shore.


You'll find a gate with a silver lock. Destroy the lock to open the gate, then talk to the Dwarf. He will ask you to forge him a Mithril Music Horn. It requires 3 Mithril Bricks to forge.


Forge one, then give it to the Dwarf to reveal this Power Brick.
---------------Weathertop---------------
Blacksmith Designs
Mithril Skeleton Sword
Smash the rocks on the side of Weathertop to reveal an opening. Head inside to find this Blacksmith Design.
Characters
Required Abilities: Arrow, Elf, Super Strength

Ringwraith (Twilight)
Hop across the platforms in the water north of Weathertop, then shoot an arrow into the slot.


Grab onto it and swing across the gap, then continue to the right.


Pull on the super strength handle to tear off the gate, then head inside.


Head all the way to the room at the end of the path to find him.


Ringwraith
This character can only be purchased at Night. Head to the top of Weathertop to find him.
Fetch Quests
Fetch Quest 1
"Oh! Some brigand has stolen my priceless family heirloom, the Mushroom Crown! I went to retrieve it from the Orthanc tower, but I was chased off by a Black Rider. Please, get it back for me."

Talk to a Dwarf in a cave outside Bree and he will ask you to give him the Mushroom Crown. Give it to him to complete this quest.
Mithril Bricks
Required Abilities: Arrow, Axe, Dig, Elf, Explosive, Extinguisher, Fisherman, Gardener, Illumination, Rope, Sharp Shoot, Super Strength

Mithril Brick 1
Hop across the platforms in the water north of Weathertop, then shoot an arrow into the slot.


Grab onto it and swing across the gap, then continue to the right.


Pull on the super strength handle to tear off the gate, then head inside.


You'll reach a small room. Hop onto the bar on the wall, then continue hopping up to reach a vine.


Swing on the vine to reach this Mithril Brick.


Mithril Brick 2
After collecting Mithril Brick 1, continue down the path to reach a larger room. Grow the plant to create a leaf.


Bounce on it to reach the vine above you, then swing onto the beam on the right.


Walk across it, then walk across the chain to reach this Mithril Brick.


Mithril Brick 3
This Mithril Brick can only be collected at Night. Return to the same area as Mithril Brick 2 and you will be attacked by scorpions. Defeat 10 within 35 seconds to reveal this Mithril Brick.


Mithril Brick 4
After collecting Mithril Brick 2, destroy the Mithril lock on a chest in one of the alcoves in the room to open it, revealing this Mithril Brick.


Mithril Brick 5
One of the trees on the outskirts of Bree has bars on the side of it. Hop up them to reach a vine. Hop onto the next vine to reach this Mithril Brick.


Mithril Brick 6
Smash some rocks by the marsh to reveal a chest. We need to find a key.


There are several dirt piles in the marsh. Dig up one close to Bree to reveal the key.


Pick it up and place it in your inventory, then use it to open the chest, revealing this.


Mithril Brick 7
After crossing the water north of Weathertop (see Mithril Brick 1), continue to the right past the gate to find a plant.


Grow it to create a leaf, then bounce up onto the ledge. Smash the axe panel to reveal this Mithril Brick.


Mithril Brick 8
Head over to the Trollshaws and you'll find a cave.


Head inside, then follow the path until there is a small drop off. Dig up the dirt pile near the ledge to reveal this.


Mithril Brick 9
Smash the rocks on the side of Weathertop to reveal an opening. You'll find a goat inside.


Hop on, then ride through the nearby markers to start a race. Complete the race to receive this Mithril Brick.


Mithril Brick 10
This Mithril Brick can be found behind a gate. In order to open the gate, we'll need a crank.


Head by the water northeast of Weathertop and you'll find a pier. Fish at it to reel in a crank.


Pick it up and add it to your inventory, then place it in the slot. Turn it to open the gate, allowing you to collect this Mithril Brick.
Mithril Bricks cont.
Mithril Brick 11
You'll find a dark alcove in the Trollshaws. Unfortunately, it is blocked by a fire.


Cross the river heading towards Rivendell and you'll find a pool of water, allowing you to fill up your bucket.


Put out the fire, then enter the dark alcove to reach this Mithril Brick.


Mithril Brick 12
Destroy the silver rock south of Weathertop to reveal a cave, then head inside.


Follow the path to reach a clearing. Shoot the target on the lily pad on the left, then latch onto the rope point on the right.


Bounce across the lily pads to reach the stone pillar in the center, then smash the axe panel to reveal two more lily pads.


Hop across them to reach the other side of the pond, then shoot arrows into the three slots on the trees.


Hop on the arrows and swing up to reach a vine. Walk across it to reach this Mithril Brick.
Red Power Bricks
Required Abilities: Arrow, Elf, Explosive, Super Strength

Minikit Chest Finder
"Ever heard of the Mithril Stud Mallet? Rumor has it, it's a weapon you can build that smashes enemies into money! I'll show you something to help you sniff out Minikits if you forge one for me."

Hop across the platforms in the water north of Weathertop, then shoot an arrow into the slot.


Grab onto it and swing across the gap, then continue to the right.


Pull on the super strength handle to tear off the gate, then head inside.


Head all the way to the end of the path to reach a large room. You'll find a Hobbit standing in one of the alcoves on the side. Talk to him and he will ask you to forge him a Mithril Stud Mallet. It requires 8 Mithril Bricks to forge.


Forge him one, then give it to him to reveal this Power Brick.


Regenerate Hearts
"I've been wondering... what kind of sorcery allows a Mithril Ice Bow to freeze its target? If you would craft one for me, perhaps I could study it... In return, I'll share with you the knowledge of continuous recovery."

Destroy the silver rock south of Weathertop to reveal a cave, then head inside.


Head down the path to reach a clearing, then head to the left to find a man. Talk to him and he will ask you to forge him a Mithril Ice Bow. It requires 8 Mithril Bricks to forge.


Forge him one, then give it to him to reveal this Power Brick.
--------------Miscellaneous--------------
100% Completion Bonus
Once you reach 100%, you will receive the Lurtz (Newborn) character. You will also notice that a trail of guide studs has appeared.

Follow the guide studs to reach Bag End, then stand in the circle and press the "special" button to play the game's final cutscene.
Characters
There are a grand total of 74 characters (not including the 10 custom characters) that you can play as in this game. I have listed them all below in the order that they appear on the character selection screen. Next to each character I list their inventory and abilities. I also list how to unlock them and any other interesting things about them.

Many characters will gain new items in their inventory as you progress through the Story. For the purposes of this list, their Inventory will consist only of the items that they possess at the end of the Story.


Elendil

Inventory: Narsil
Abilities: Morgul
How To Unlock: Complete Prologue


Isildur

Inventory: Narsil (Broken)
Abilities: Morgul
How To Unlock: Complete Prologue


Frodo

Inventory: Sting, Phial of Galadriel, Elven Cloak
Abilities: Illumination, Small
How To Unlock: Start Interlude – The Journey Begins


Sam

Inventory: Frying Pan, Spade, Tinderbox, Elven Rope
Abilities: Dig, Firestarter, Gardener, Rope, Small
How To Unlock: Start Interlude – The Journey Begins


Frodo (Shire)

Inventory: None
Abilities: Small
How To Unlock: Complete The Black Rider


Merry

Inventory: Barrow-blade, Fishing Rod
Abilities: Fisherman, Small
How To Unlock: Complete The Black Rider


Pippin

Inventory: Barrow-blade, Bucket
Abilities: Extinguisher, Small
How To Unlock: Complete The Black Rider


Aragorn

Inventory: Sword
Abilities: Tracking
How To Unlock: Complete Weathertop


Arwen Evenstar (Ranger)

Inventory: Hadhafang
Abilities: Elf
How To Unlock: Complete Interlude – The Council of Elrond


Gandalf the Grey

Inventory: Gandalf’s Staff, Glamdring
Abilities: Illumination, Magic
How To Unlock: Complete The Pass of Caradhras


Gimli

Inventory: Walking Axe
Abilities: Axe, Small
How To Unlock: Complete The Pass of Caradhras


Legolas

Inventory: Bow of the Galadhrim, Daggers
Abilities: Arrow, Elf, Sharp Shoot
How To Unlock: Complete The Pass of Caradhras


Boromir

Inventory: Broadsword, Shield of Gondor, Horn of Gondor
Abilities: None
How To Unlock: Complete The Pass of Caradhras


Faramir

Inventory: Bow, Broadsword
Abilities: Arrow, Sharp Shoot
How To Unlock: Complete The Dead Marshes


Madril

Inventory: Short Sword
Abilities: None
How To Unlock: Complete The Dead Marshes


Gandalf the White

Inventory: Gandalf’s Staff, Glamdring
Abilities: Illumination, Magic
How To Unlock: Complete Warg Attack


King Theoden (Armor)

Inventory: Herugrim
Abilities: None
How To Unlock: Complete Helm’s Deep


Gollum

Inventory: None
Abilities: Climbing, Fisherman, Small
How To Unlock: Complete Osgiliath

Frodo (Orc Disguise)

Inventory: Sting, Phial of Galadriel, Elven Cloak
Abilities: Illumination, Small
How To Unlock: Complete Cirith Ungol


Sam (Orc Disguise)

Inventory: Frying Pan, Spade, Tinderbox, Elven Rope
Abilities: Dig, Firestarter, Gardener, Rope, Small
How To Unlock: Complete Cirith Ungol


Shagrat

Inventory: Scimitar
Abilities: Super Strength
How To Unlock: Complete Cirith Ungol


King Theoden

Inventory: Herugrim
Abilities: None
How To Unlock: Complete The Battle of Pelennor Fields
Characters cont.
Eowyn (Dernhelm)

Inventory: Rohan Sword, Rohan Shield
Abilities: None
How To Unlock: Complete The Battle of Pelennor Fields


Merry (Rohirrim Squire)

Inventory: Barrow-blade, Fishing Rod
Abilities: Fisherman, Small
How To Unlock: Complete The Battle of Pelennor Fields


Aragorn (Gondor Armor)

Inventory: Anduril
Abilities: Morgul, Tracking
How To Unlock: Complete The Black Gate


Pippin (Gondor Armor)

Inventory: Barrow-blade, Bucket
Abilities: Extinguisher, Small
How To Unlock: Complete The Black Gate


Frodo (Weary)

Inventory: Sting, Phial of Galadriel, Elven Cloak
Abilities: Illumination, Small
How To Unlock: Complete Mount Doom


Sam (Weary)

Inventory: Frying Pad, Spade, Tinderbox, Elven Rope
Abilities: Dig, Firestarter, Gardener, Rope, Small
How To Unlock: Complete Mount Doom


Aragorn (Royal Armor)

Inventory: Anduril, Gondorian Shield
Abilities: Morgul, Tracking
How To Unlock: Complete Mount Doom


Mouth of Sauron

Inventory: Sword
Abilities: None
How To Unlock: Complete Middle-earth


Sauron

Inventory: Sauron’s Mace
Abilities: Morgul, Super Strength
How To Unlock: Complete Middle-earth


Elrond (Second Age)

Inventory: Hadhafang
Abilities: Elf
How To Unlock: Complete Prologue, then purchase in Middle-earth


Gil-galad

Inventory: Elven Sword, Elven Shield
Abilities: Elf
How To Unlock: Complete Prologue, then purchase in Middle-earth


Bilbo Baggins

Inventory: Sting
Abilities: Small
How To Unlock: Complete Prologue, then purchase in Middle-earth


Tom Bombadil

Inventory: Spade
Abilities: Dig, Gardener, Super Strength
How To Unlock: Complete The Black Rider, then purchase in Middle-earth


Rosie

Inventory: Frying Pan
Abilities: None
How To Unlock: Complete The Black Rider, then purchase in Middle-earth


Ringwraith

Inventory: Ringwraith Sword
Abilities: None
How To Unlock: Complete Weathertop, then purchase in Middle-earth


Ringwraith (Twilight)

Inventory: Ringwraith Sword
Abilities: None
How To Unlock: Complete Weathertop, then purchase in Middle-earth


Elrond (Third Age)

Inventory: Hadhafang
Abilities: Elf
How To Unlock: Complete The Pass of Caradhras, then purchase in Middle-earth


Gloin

Inventory: Axe
Abilities: Axe, Small
How To Unlock: Complete The Pass of Caradhras, then purchase in Middle-earth


Moria Orc

Inventory: Moria Orc Sword, Orc Shield
Abilities: None
How To Unlock: Complete The Mines of Moria, then purchase in Middle-earth


Uruk-hai

Inventory: Scimitar, Uruk Shield
Abilities: Super Strength
How To Unlock: Complete Amon Hen, then purchase in Middle-earth


Lurtz

Inventory: Scimitar, Lurtz’s Shield, Lurtz’s Bow
Abilities: Arrow, Sharp Shoot, Super Strength
How To Unlock: Complete Amon Hen, then purchase in Middle-earth


Galadriel

Inventory: None
Abilities: Elf
How To Unlock: Complete Amon Hen, then purchase in Middle-earth


Celeborn

Inventory: None
Abilities: Elf
How To Unlock: Complete Amon Hen, then purchase in Middle-earth


Gondor Ranger

Inventory: Bow
Abilities: Arrow, Sharp Shoot
How To Unlock: Complete The Dead Marshes, then purchase in Middle-earth


Easterling

Inventory: Easterling Sword, Easterling’s Shield
Abilities: None
How To Unlock: Complete The Dead Marshes, then purchase in Middle-earth
Characters cont.
Grishnakh

Inventory: Orc Sword
Abilities: None
How To Unlock: Complete Track Hobbits, then purchase in Middle-earth


Radagast the Brown

Inventory: Radagast’s Staff
Abilities: Illumination, Magic
How To Unlock: Complete Track Hobbits, then purchase in Middle-earth


King Theoden (Cursed)

Inventory: None
Abilities: None
How To Unlock: Complete Warg Attack, then purchase in Middle-earth


Eowyn

Inventory: Rohan Sword
Abilities: None
How To Unlock: Complete Warg Attack, then purchase in Middle-earth


Hama

Inventory: Rohan Sword
Abilities: None
How To Unlock: Complete Warg Attack, then purchase in Middle-earth


Gamling

Inventory: Rohan Sword
Abilities: None
How To Unlock: Complete Warg Attack, then purchase in Middle-earth


Grima Wormtongue

Inventory: Grima’s Dagger
Abilities: None
How To Unlock: Complete Warg Attack, then purchase in Middle-earth


Haldir

Inventory: Bow of the Galadhrim, Elven Great Sword
Abilities: Arrow, Elf, Sharp Shoot
How To Unlock: Complete Helm’s Deep, then purchase in Middle-earth


Lothlorien Elf

Inventory: Bow, Elven Great Sword
Abilities: Arrow, Elf, Sharp Shoot
How To Unlock: Complete Helm’s Deep, then purchase in Middle-earth


Berserker

Inventory: Scimitar, Bomb
Abilities: Explosive, Super Strength
How To Unlock: Complete Helm’s Deep, then purchase in Middle-earth


Eomer

Inventory: Rohan Sword
Abilities: None
How To Unlock: Complete Helm’s Deep, then purchase in Middle-earth


Gondor Soldier

Inventory: Sword
Abilities: None
How To Unlock: Complete Osgiliath, then purchase in Middle-earth


Saruman the White

Inventory: Saruman’s Staff
Abilities: Illumination, Magic
How To Unlock: Complete Osgiliath, then purchase in Middle-earth


Mordor Orc

Inventory: Orc Sword, Orc Shield
Abilities: None
How To Unlock: Complete The Secret Stairs, then purchase in Middle-earth


King of the Dead

Inventory: King of the Dead’s Sword
Abilities: None
How To Unlock: Complete The Paths of the Dead, then purchase in Middle-earth


Soldier of the Dead

Inventory: Ghost Sword
Abilities: None
How To Unlock: Complete The Paths of the Dead, then purchase in Middle-earth


Rohirrim Soldier

Inventory: Rohan Sword, Rohan Shield
Abilities: None
How To Unlock: Complete The Paths of the Dead, then purchase in Middle-earth


The Witch-king

Inventory: Sword, Ringwraith Dagger
Abilities: None
How To Unlock: Complete The Battle of Pelennor Fields, then purchase in Middle-earth


Denethor

Inventory: Short Sword
Abilities: None
How To Unlock: Complete The Battle of Pelennor Fields, then purchase in Middle-earth


Gothmog

Inventory: Orc Sword
Abilities: None
How To Unlock: Complete The Battle of Pelennor Fields, then purchase in Middle-earth


Citadel Guard

Inventory: Sword, Gondorian Shield
Abilities: None
How To Unlock: Complete The Battle of Pelennor Fields, then purchase in Middle-earth


Corsair

Inventory: Axe
Abilities: Axe
How To Unlock: Complete The Battle of Pelennor Fields, then purchase in Middle-earth


Haradrim

Inventory: Bow
Abilities: Arrow, Sharp Shoot
How To Unlock: Complete The Battle of Pelennor Fields, then purchase in Middle-earth
Characters cont.
Boromir (Captain)

Inventory: Broadsword, Shield of Gondor, Horn of Gondor
Abilities: None
How To Unlock: Complete Mount Doom, then purchase in Middle-earth


Bilbo Baggins (Old)

Inventory: Sting
Abilities: Small
How To Unlock: Complete Mount Doom, then purchase in Middle-earth


Blacksmith

Inventory: Blacksmith’s Hammer
Abilities: Axe, Small
How To Unlock: Forge all Mithril items


Lurtz (Newborn)

Inventory: Scimitar, Lurtz’s Shield, Lurtz’s Bow
Abilities: Arrow, Sharp Shoot, Super Strength
How To Unlock: Achieve 100% completion
Treasure Trove
When you collect Treasure Items from Story levels or forge Mithril Items at the Blacksmith in Bree, they will be added to your Treasure Trove. This allows you to access and use these items at any time, as any character. Below, I've listed every item in the Treasure Trove, as well as what it does and how it can be collected.


Mithril Trowel
What It Does: This gives any character the Dig and Gardener abilities
How To Unlock: Collect its Blacksmith Design in Bree, then forge it in Bree. You will do this during "Interlude - Strider"


Soup Pot
What It Does: This is a hat
How To Unlock: Collect it in The Black Rider


Golden Carrot
What It Does: This is a weapon
How To Unlock: Collect it in The Battle of Pelennor Fields


Stop Wand
What It Does: This is a weapon
How To Unlock: Collect it in Amon Hen (Story level)


House Key
What It Does: This is a weapon
How To Unlock: Collect it in The Mines of Moria


Ent Draught
What It Does: This is a weapon. Hitting someone with it will cause their head to swell up
How To Unlock: Collect it in Track Hobbits


Fancy Umbrella
What It Does: This is a weapon
How To Unlock: Collect it in The Dead Marshes (Story level)


Chef's Hat
What It Does: This is a hat
How To Unlock: Collect it in Cirith Ungol (Story level)


Muddy Armor
What It Does: This is a piece of clothing
How To Unlock: Collect it in The Secret Stairs


Uruk Sword
What It Does: This is a weapon
How To Unlock: Collect it in Amon Hen (Story level)


Artist's Hat
What It Does: This is a hat
How To Unlock: Collect it in The Mines of Moria


Handprint Breastplate
What It Does: This is a piece of clothing
How To Unlock: Collect it in The Black Gate (Story level)


Skeleton Key
What It Does: This is a weapon
How To Unlock: Collect it in The Paths of the Dead


Beard Comb
What It Does: This is a weapon
How To Unlock: Collect it in Cirith Ungol (Story level)


Feathered Cap
What It Does: This is a hat
How To Unlock: Collect it in Helm's Deep (Story level)


Sun Hat
What It Does: This is a hat
How To Unlock: Collect it in Weathertop (Story level)


Surefooted Greaves
What It Does: These are shoes. They will also allow any character to walk on top of tightropes, as well as the snow in The Pass of Caradhras (Story level)
How To Unlock: Collect it in The Secret Stairs


Mushroom Crown
What It Does: This is a hat
How To Unlock: Collect it in The Black Rider


Bubble Pipe
What It Does: This is a hat
How To Unlock: Collect it in Osgiliath


Golden Axe
What It Does: This gives any character the Axe ability
How To Unlock: Collect it in The Paths of the Dead


Toy Snake
What It Does: This gives any character the Rope ability
How To Unlock: Collect it in The Dead Marshes (Story level)


Luminous Stone
What It Does: This gives any character the Illumination ability
How To Unlock: Collect it in The Pass of Caradhras (Story level)


Quill
What It Does: This is a weapon
How To Unlock: Collect it in Weathertop (Story level)


Elven Lute
What It Does: This is a weapon
How To Unlock: Collect it in The Black Gate (Story level)


Shimmering Armor
What It Does: This is a piece of clothing
How To Unlock: Collect it in Prologue


Bandages
What It Does: This is a hat
How To Unlock: Collect it in Helm's Deep (Story level)


Magma Rock
What It Does: This gives any character the Firestarter ability
How To Unlock: Collect it in Mount Doom


Ice Lolly
What It Does: This is a weapon
How To Unlock: Collect it in The Pass of Caradhras (Story level)


Glowing Shield
What It Does: This is a shield, and gives your character the "Illumination" ability
How To Unlock: Collect it in The Battle of Pelennor Fields


Decorative Horseshoes
What It Does: These are shoes
How To Unlock: Collect it in Warg Attack
Treasure Trove cont.
Statue Hat
What It Does: This is a hat
How To Unlock: Collect it in Osgiliath


Mithril Rope
What It Does: This gives any character the Rope ability
How To Unlock: Collect its Blacksmith Design in Amon Hen (Story level), then forge it in Bree


Mithril Top Hat
What It Does: This is a hat
How To Unlock: Collect its Blacksmith Design in The Battle of Pelennor Fields, then forge it in Bree


Mithril Stud Mallet
What It Does: Defeating characters with this weapon will cause them to drop studs, similar to the Character Studs Extra
How To Unlock: Collect its Blacksmith Design in The Dead Marshes (Story level), then forge it in Bree


Mithril Fishing Rod
What It Does: This gives any character the Fisherman ability
How To Unlock: Collect its Blacksmith Design in Track Hobbits, then forge it in Bree


Mithril Whistle Sword
What It Does: This is a weapon that makes whistling sounds when you swing it
How To Unlock: Collect its Blacksmith Design in Bree, then forge it in Bree


Mithril Music Boots
What It Does: These are shoes that make music when you move around. The tempo of the music changes depending on whether you are tip-toeing or running
How To Unlock: Collect its Blacksmith Design in Weathertop (Story level), then forge it in Bree


Mithril Climbing Boots
What It Does: These shoes give any character the Climbing ability
How To Unlock: Collect its Blacksmith Design in Mount Doom, then forge it in Bree


Mithril Carrot Bow
What It Does: This bow shoots carrots, and gives any character the Arrow and Sharp Shoot abilities
How To Unlock: Collect its Blacksmith Design in Taming Gollum, then forge it in Bree


Mithril Music Horn
What It Does: While you can use this as a weapon, press the "special" button to play music, causing nearby characters to dance!
How To Unlock: Collect its Blacksmith Design in The Black Rider, then forge it in Bree


Mithril Shield
What It Does: This is a shield
How To Unlock: Collect its Blacksmith Design in The Paths of the Dead, then forge it in Bree


Mithril Tinderbox
What It Does: This gives any character the Firestarter ability
How To Unlock: Collect its Blacksmith Design in The Black Gate (Story level), then forge it in Bree


Mithril Headdress
What It Does: This is a hat
How To Unlock: Collect its Blacksmith Design in The Mines of Moria, then forge it in Bree


Mithril Gloves
What It Does: These gloves allow any character to swing on arrows
How To Unlock: Collect its Blacksmith Design in Warg Attack, then forge it in Bree


Mithril Shockwave Axe
What It Does: This gives any character the Axe ability
How To Unlock: Collect its Blacksmith Design in Prologue, then forge it in Bree


Mithril Fire Bow
What It Does: This bow will cause anyone hit by it to burst into flames
How To Unlock: Collect its Blacksmith Design in Helm's Deep (Story level), then forge it in Bree


Mithril Boxing Gloves
What It Does: These gloves give any character the Super Strength ability
How To Unlock: Collect its Blacksmith Design in Osgiliath, then forge it in Bree


Mithril Squeak Sword
What It Does: This sword will squeak when it hits objects or enemies
How To Unlock: Collect its Blacksmith Design in The Secret Stairs, then forge it in Bree


Mithril Ice Bow
What It Does: This bow will freeze anyone it hits in a block of ice
How To Unlock: Collect its Blacksmith Design in Cirith Ungol (Story level), then forge it in Bree


Mithril Cluster Bow
What It Does: This bow shoots three arrows at the same time
How To Unlock: Collect its Blacksmith Design in The Pass of Caradhras (Story level), then forge it in Bree


Rotten Drumstick
What It Does: This is a weapon
How To Unlock: Collect it in Cirith Ungol (Story level)


Wooden Bucket
What It Does: This gives any character the Extinguisher ability
How To Unlock: Collect it in The Dead Marshes (Story level)


Fishing Rod
What It Does: This gives any character the Fisherman ability
How To Unlock: Collect it in Taming Gollum


Trophy Shield
What It Does: This is a shield
How To Unlock: Collect it in Mount Doom


Warg Tooth
What It Does: This is a weapon
How To Unlock: Collect it in Warg Attack


Bill's Riding Crop
What It Does: This is a weapon
How To Unlock: Collect it in The Pass of Caradhras (Story level)


Mithril Skeleton Bow
What It Does: Hitting a character with this weapon will turn them into a skeleton
How To Unlock: Collect its Blacksmith Design in Lothlorien, then forge it in Bree


Mithril Bottomless Bucket
What It Does: This gives any character the Extinguisher ability. It also does not need to be filled up with water beforehand, making it very useful
How To Unlock: Collect its Blacksmith Design in Edoras, then forge it in Bree


Mithril Spring Boots
What It Does: These shoes allow any character to jump as high as an Elf
How To Unlock: Collect its Blacksmith Design in Rivendell, then forge it in Bree


Mithril Hairbrush
What It Does: This weapon will give people it hits funky haircuts
How To Unlock: Collect its Blacksmith Design in Bree, then forge it in Bree
Treasure Trove cont.
Mithril Ice Sword
What It Does: This sword freezes anyone it hits
How To Unlock: Collect its Blacksmith Design in Isengard, then forge it in Bree


Elven Sword
What It Does: This is a weapon
How To Unlock: Collect it in Prologue


Mithril Skeleton Sword
What It Does: This sword turns anyone it hits into a skeleton
How To Unlock: Collect its Blacksmith Design in Weathertop (Middle-earth), then forge it in Bree


Flower Hat
What It Does: This is a hat
How To Unlock: Collect it in The Battle of Pelennor Fields


Ferryman's Cap
What It Does: This is a hat
How To Unlock: Collect it in The Black Rider


Arrow Helmet
What It Does: This is a hat
How To Unlock: Collect it in Amon Hen (Story level)


Goggles
What It Does: These are goggles you wear on your face
How To Unlock: Collect it in Osgiliath


Ladle
What It Does: This is a weapon
How To Unlock: Collect it in Helm's Deep (Story level)


Spider Fang
What It Does: This is a weapon
How To Unlock: Collect it in The Secret Stairs


Mithril Paintbrush
What It Does: This weapon turns characters it hits different colors
How To Unlock: Collect its Blacksmith Design in Hobbiton, then forge it in Bree


Mithril Disco Phial
What It Does: This gives any character the Illumination ability. It also plays a fantastic EDM song!
How To Unlock: Collect its Blacksmith Design in Minas Tirith, then forge it in Bree


Mithril Fireworks
What It Does: This gives any character the Explosive ability
How To Unlock: Collect its Blacksmith Design in The Black Gate (Middle-earth), then forge it in Bree


Moria Orc's Helmet
What It Does: This is a hat
How To Unlock: Collect it in The Mines of Moria


Uruk Shield
What It Does: This is a shield
How To Unlock: Collect it in Track Hobbits


Magma Armor
What It Does: This is a piece of clothing
How To Unlock: Collect it in Prologue


Calcium Armor
What It Does: This is a piece of clothing. It also gives any character the Super Strength ability
How To Unlock: Collect it in The Paths of the Dead


Rubber Duck
What It Does: This is a hat
How To Unlock: Collect it in Weathertop (Story level)


Mithril Camouflage Tome
What It Does: This allows any character to hide, similar to Frodo's Elven Cloak
How To Unlock: Collect its Blacksmith Design in Amon Hen (Middle-earth), then forge it in Bree


Snowman Hood
What It Does: This is a hat
How To Unlock: Collect it in Taming Gollum


Rock Hat
What It Does: This is a hat
How To Unlock: Collect it in Taming Gollum


Giant Ancient Crown
What It Does: This is a hat
How To Unlock: Collect it in Warg Attack


Wooden Armor
What It Does: This is a piece of clothing
How To Unlock: Collect it in Track Hobbits


Flaming Hat
What It Does: This is a hat
How To Unlock: Collect it in The Black Gate (Story level)


Palantir Hat
What It Does: This is a hat
How To Unlock: Collect it in Mount Doom
Minikit Models
After collecting all 10 Treasure Chests in a level, you will complete that level's Minikit Model. You can view your progress on each level's Minikit Model in the Minikit Room in Rivendell. You can't do anything with your Minikit Models besides look at them, but I figured I'd list them here anyway.


Red Power Brick Extras
There are 20 Red Power Bricks that you can collect in this game, and each gives you access to an Extra. These Red Power Bricks can be collected by forging Mithril Items and giving them to certain people in Middle-earth. Below I have listed all 20 Red Power Bricks, including where to get them and what they do. I have also included the Mithril Item that you need to have forged, in order to help you see what Red Power Bricks you currently have access to. For more information on how to collect each Red Power Brick, see the sections under "Exploring Middle-earth".

Poo Studs
Location: Hobbiton
Mithril Item: Mithril Rope
What It Does: While riding an animal, press the "special" button and the animal will poop out a stud

Disguises
Location: Edoras
Mithril Item: Mithril Cluster Bow
What It Does: This will give all characters glasses, as well as a fake nose and moustache

Boss Disguises
Location: The Pass of Caradhras
Mithril Item: Mithril Music Horn
What It Does: This gives boss characters disguises. Sauron will have a red cape and gold helmet. Trolls will have mohawks and spiked cuffs. The Balrog will be covered with flowers and other plants. Oliphants will be wearing baseball hats and sneakers. Fellbeasts will be wearing aviator hats and goggles. Shelob will be wearing colorful roller skates. The King of the Dead will have a fancy new haircut.

8-Bit Music
Location: The Black Gate
Mithril Item: Mithril Climbing Boots
What It Does: This changes the style of the music that plays in the game, which will now resemble something you might hear in a classic 8-bit game

Studs x2
Location: Rivendell
Mithril Item: Mithril Gloves
What It Does: Multiplies the value of all collected studs by 2. This stacks with other stud multiplier Extras

Studs x4
Location: Amon Hen
Mithril Item: Mithril Fishing Rod
What It Does: Multiplies the value of all collected studs by 4. This stacks with other stud multiplier Extras

Studs x6
Location: Edoras
Mithril Item: Mithril Top Hat
What It Does: Multiplies the value of all collected studs by 6. This stacks with other stud multiplier Extras

Studs x8
Location: Helm's Deep
Mithril Item: Mithril Shield
What It Does: Multiplies the value of all collected studs by 8. This stacks with other stud multiplier Extras

Studs x10
Location: Cirith Ungol
Mithril Item: Mithril Squeak Sword
What It Does: Multiplies the value of all collected suds by 10. This stacks with other stud multiplier Extras

Quest Finder
Location: Bree
Mithril Item: Mithril Trowel
What It Does: With this turned on, arrows will point to the locations of Fetch Quests in Middle-earth. This will not tell you HOW to access the quests, just WHERE they appear

Minikit Chest Finder
Location: weathertop
Mithril Item: Mithril Stud Mallet
What It Does: With this turned on, arrows will point to the locations of Treasure Chests in Story levels. This will not tell you HOW to collect them, just WHERE they appear

Mithril Brick Finder
Location: Bree
Mithril Item: Mithril Boxing Gloves
What It Does: With this turned on, arrows will point to the locations of Mithril Bricks in Middle-earth. This will not tell you HOW to collect them, just WHERE they appear

Character Studs
Location: Minas Morgul
Mithril Item: Mithril Fire Bow
What It Does: Defeated enemies will drop a small amount of studs

Attract Studs
Location: Lothlorien
Mithril Item: Mithril Carrot Bow
What It Does: This allows you to collect studs from much farther away, making them easier to collect

Action Assist
Location: Cirith Ungol
Mithril Item: Mithril Whistle Sword
What It Does: This makes it easier to perform actions that require spamming buttons. When turning a crank or pulling a super strength handle, press the "special" button once and the bar will automatically fill up

Fast Build
Location: Isengard
Mithril Item: Mithril Music Boots
What It Does: This dramatically increases your building speed

Fall Rescue
Location: Lothlorien
Mithril Item: Mithril Shockwave Axe
What It Does: If you fall off a ledge to what would be your death, you will be tossed back onto the ledge

Mithril Hearts
Location: The Dead Marshes
Mithril Item: Mithril Headdress
What It Does: This protects your hearts with Mithril, and you will now lose a heart after taking two hits instead of one

Regenerate Hearts
Location: Weathertop
Mithril Item: Mithril Ice Bow
What It Does: If you are missing any hearts, you will regenerate them after a few seconds

Invincibility
Location: Cirith Ungol
Mithril Item: Mithril Tinderbox
What It Does: This makes you immune to all damage from enemies and environmental hazards
Achievements
There are 48 Steam Achievements that you can complete in this game. These do not affect your overall game percentage, and you don't have to unlock all of these if you don't want to. However, I know lots of you like achievements, so I've decided to list them all here. Next to each image, I will list how to collect the achievement (taken right from the achievement list on Steam). I will then give more specifics (if necessary) and direct you to any sections of this guide that may help you out (if applicable).

The strength of Men failed.
How to Unlock: Complete Prologue

See "Prologue - Story Mode" for info on how to complete the level

It's a dangerous business...
How To Unlock: Complete The Black Rider

See "The Black Rider - Story Mode" for info on how to complete the level

That is no trinket you carry.
How To Unlock: Complete Weathertop

See "Weathertop - Story Mode" for info on how to complete the level

The long way around.
How To Unlock: Complete The Pass of Caradhras

See "The Pass of Caradhras - Story Mode" for info on how to complete the level

This is no mine... it's a tomb.
How To Unlock: Complete The Mines of Moria

See "The Mines of Moria - Story Mode" for info on how to complete the level

Let's hunt some Orc!
How To Unlock: Complete Amon Hen

See "Amon Hen - Story Mode" for info on how to complete the level

On the Precious...
How To Unlock: Complete Taming Gollum

See "Taming Gollum - Story Mode" for info on how to complete the level

Soft and quick as shadows...
How To Unlock: Complete The Dead Marshes

See "The Dead Marshes - Story Mode" for info on how to complete the level

Safe is where I'll keep you.
How To Unlock: Complete Track Hobbits

See "Track Hobbits - Story Mode" for info on how to complete the level

Stinking creatures...
How To Unlock: Complete Warg Attack

See "Warg Attack - Story Mode" for info on how to complete the level

The battle is about to begin...
How To Unlock: Complete Helm's Deep

See "Helm's Deep - Story Mode" for info on how to complete the level

A Wizard should know better!
How To Unlock: Complete Osgiliath

See "Osgiliath - Story Mode" for info on how to complete the level

Naughty little fly...
How To Unlock: Complete The Secret Stairs

See "The Secret Stairs - Story Mode" for info on how to complete the level

We did it, Mr. Frodo.
How To Unlock: Complete Cirith Ungol

See "Cirith Ungol - Story Mode" for info on how to complete the level

They have been summoned.
How To Unlock: Complete The Paths of the Dead

See "The Paths of the Dead - Story Mode" for into on how to complete the level

You and whose army?
How To Unlock: Complete The Battle of Pelennor Fields

See "The Battle of Pelennor Fields - Story Mode" for info on how to complete the level

This day we fight!
How To Unlock: Complete The Black Gate

See "The Black Gate - Story Mode" for info on how to complete the level

It's gone.
How To Unlock: Complete Mount Doom

See "Mount Doom - Story Mode" for info on how to complete the level

My Precious...
How To Unlock: Collect all the Mithril Bricks

Mithril Bricks can be collected in several different ways (see "Gameplay Basics - Collectibles" for a complete list). Once you collect all 250, you'll earn this Achievement

There's some good in this world.
How To Unlock: Complete all the Fetch Quests in Middle-earth

See the "Fetch Quests" and "Red Power Bricks" sections under Exploring Middle-earth for more info on these. There are 50 Fetch Quests in total to complete.

There and Back Again.
How To Unlock: Get 100%

This is fairly straightforward. Once you complete the game, you'll earn this Achievement

I told you he was tricksy.
How To Unlock: Collect all the Red Bricks

See the "Red Power Bricks" sections under Exploring Middle-earth for info on how to collect these. There are 20 in total

Of all the inquisitive Hobbits.
How To Unlock: Unlock all of the Map Stones in Middle-earth

There are 16 Map Stones in Middle-earth, and they are all marked on the map. Stand in front of each one and press the "special" button to activate it

Here's a pretty thing!
How To Unlock: Craft every Mithril item

Forge all Mithril items in Bree to complete this Achievement

Not with 10,000 men...
How To Unlock: Unlock all characters

While there are 84 characters in the game you can unlock, you do not need to unlock Lurtz (Newborn) to earn this Achievement. Unlock and purchase the other 83 and this achievement is yours. See the "Characters" sections for a full list of characters

Ready for another adventure.
How To Unlock: Achieve True Adventurer in every level

True Adventurer is earned by collecting a certain number of studs in each Story level. See each level's Story Mode walkthrough for the number of studs you have to collect

The Lord of the Ring.
How To Unlock: Complete the Bonus Level

See the "Middle-earth" section for details on the Bonus level

Delved too greedily...
How To Unlock: Collect more than 10,000,000,000 studs

To complete this Achievement, you need to have more than 10 billion studs in your total. This is most easily done by replaying Story levels with the full stud multiplier (x3840)
Achievements cont.
I'm glad to be with you.
How To Unlock: Complete a level in co-op

Complete a Story level with another player to earn this Achievement. You don't need to complete the whole level in co-op, you just need to finish the level with two players active

Don't tell the Elf...
How To Unlock: Throw Gimli 30 times

You'll have to throw Gimli at certain axe panels that are off the ground in order for him to reach them. You'll do this a bunch during Story levels and in Free Play, so you shouldn't have to farm this too much, if at all

Our only wish to catch a fish!
How To Unlock: Fish perfectly 20 times by pressing the icon as it flashes

While fishing off a pier, you'll have to press certain buttons. Wait until the rope circle disappears behind the button prompt and you'll notice it flash. Press the button when it flashes to fish "perfectly".

That is a rare gift.
How To Unlock: Reach the top of Amon Hen without being caught once by Boromir

To earn this Achievement, you'll have to play the first part of the Amon Hen Story level. Simply stay away from Boromir and complete the section to earn this Achievement. If Boromir grabs you, you'll have to restart

... And away he goes, Precious!
How To Unlock: Defeat Gollum as Gollum

Simply set both characters in Free Play as Gollum, then defeat your partner

What about second breakfast?
How To Unlock: Complete 2 cooking puzzles

Cooking puzzles are when you combine an egg, tomato and fish in your frying pan. You'll first do this during the Weathertop Story level, so you'll need to do it one more time to complete the Achievement. You can do this by collecting either the Arrow Helmet Treasure Item in Amon Hen or the Chef's Hat Treasure Item in Cirith Ungol (or just replay Weathertop - thanks to ascheplar for the info)

That one counts as mine!
How To Unlock: Finish one of Gimli's opponents as Legolas in Helm's Deep

During the Helm's Deep Story level, you'll be attacked by several Uruk-hai on the deeping wall. Some will come from ladders with an axe panel in front of it. Defeat one of those Uruk-hai as Legolas to complete the Achievement

I've always been taller!
How To Unlock: Use the Ent Draught on Pippin

The Ent Draught Treasure Item can be collected in the level Track Hobbits. To use it, hit Pippin with it

We cannot linger.
How To Unlock: Complete The Mines of Moria in under 15 minutes

Speed through the level to complete this Achievement. The longest part of the level is the Balrog fight, which you really can't speed up. Avoid distractions and focus on getting to the next area and you should have no problems

Dance of the dead.
How To Unlock: Turn an enemy into a skeleton and make them dance

You can turn a character into a skeleton by using either the Mithril Skeleton Sword or the Mithril Skeleton Bow. Once they're a skeleton, make them dance with either the Mithril Music Horn or the Mithril Disco Phial

Pointy-eared Elvish princeling.
How To Unlock: Defeat 42 Uruk-hai as Legolas

You'll fight Uruk-hai during the Amon Hen and Helm's Deep Story levels. Defeat them as Legolas to quickly earn this Achievement

One does not simply...
How To Unlock: Walk into Mordor

Simply walk into Mordor to earn this Achievement

Great! ...Where are we going?
How To Unlock: Form The Fellowship of the Ring

You'll earn this Achievement during "Interlude - The Council of Elrond"

Taking the Hobbits to Isengard.
How To Unlock: Travel to Isengard as every playable Hobbit

There are 6 playable Hobbits (Frodo, Sam, Merry, Pippin, Rosie and Bilbo). Simply travel to the Isengard Map Stone as each of them. You do not need to travel as all of their variants, just one version of each will do. Thanks to ascheplar for confirming this!

That still only counts as one!
How To Unlock: Defeat an Oliphant as Legolas

You'll do this during The Battle of Pelennor Fields Story level

An expected journey.
How To Unlock: Travel to the Trollshaws as Bilbo

The Trollshaws is the area between Weathertop and Rivendell. Travel to it as Bilbo to earn this Achievement

Return of the Mushroom King.
How To Unlock: Equip Aragorn with the Mushroom Crown

The Mushroom Crown Treasure Item can be found in The Black Rider Story level. Put it on Aragorn to complete this Achievement

Worth greater than the Shire.
How To Unlock: Dress a character completely in treasure items

You'll need to give a character a hat, piece of clothing, shoes, a weapon, and a shield, all from the Treasure Trove

It won't be that easy!
How To Unlock: During Prologue, jump into the fires of Mount Doom as Isildur

While in Part 4, jump off the side of the ledge to complete this Achievement. If you're struggling with this, try lowering your framerate in the game's settings (thanks to ascheplar for the info)

A link to the elements.
How To Unlock: Craft the Fire and Ice Bows

The Blacksmith Design for the Fire Bow can be found in Helm's Deep (Story level) and the Blacksmith Design for the Ice Bow can be found in Cirith Ungol (Story level). Forge both items to complete this Achievement
Cheat Codes
This is a list of the cheat codes available to use in the game. I have personally checked all of these codes and can vouch for their authenticity. If you have any other cheat codes that you wish to share, please message me and I will check them. If they work, I will add them to this list and give credit to you.

Characters
UE5Z7H - Berserker
J4337V - Bilbo Baggins
HTYADU - Boromir (Captain)
RJV4KB - Denethor
R7XKDH - Easterling
A9FB4Q - Elrond (Second Age)
U47AOG - Éomer
7B4VWH - Galadriel
AVJII1 - Gamling
LG5GI7 - Gondor Ranger
BU95CB - Grima Wormtongue
73HJP6 - Háma
IH7E58 - King of the Dead
C2A58D - Lothlórien Elf
QL28WB - Lurtz (Newborn)
C19F3A - Madril
F4M7FC - Mouth of Sauron
5LV6EB - Radagast the Brown
LYQU1F - Ringwraith (Twilight)
PJB6MV - Shagrat

Extras
GD35HC - 8-Bit Music
T1JM4R - Action Assist
C7FJ7B - Attract Studs
F3H14H - Boss Disguises
PR3V4K - Character Studs
MX26RJ - Disguises
WS68P2 - Fall Rescue
A2LU58 - Fast Build
A24TVJ - Minikit Chest Finder
B72D7E - Mithril Brick Finder
2MCRDN - Mithril Hearts
D49TXY - Poo Studs
EY4K32 - Quest Finder
H5L6N6 - Regenerate Hearts
1F5YH2 - Studs x2
20 Comments
legogamesguy  [author] Mar 30 @ 10:13pm 
Yes, I seem to remember having issues with that as well. I am not sure of the fix off the top of my head, but try lowering your graphics settings and enabling/disabling VSync and that may help.
Baraka Oct 25, 2024 @ 6:56am 
thx
legogamesguy  [author] Oct 24, 2024 @ 12:58pm 
There are several different options, but I find the easiest to be purchasing the Berserker character in Helm's Deep.
Baraka Oct 24, 2024 @ 8:55am 
where i can earn character or item to destroy silver bricks?
Lucrative Business Opportunity Jan 6, 2024 @ 4:29am 
Mount Doom specific things:
1. Collect treasure chest 8 during Story mode, then in Freeplay you can just completely skip the corner in which first fight with Gollum happens, saving a bunch of time. Moving through the top also skips a bunch of movement puzzles, again saving time.
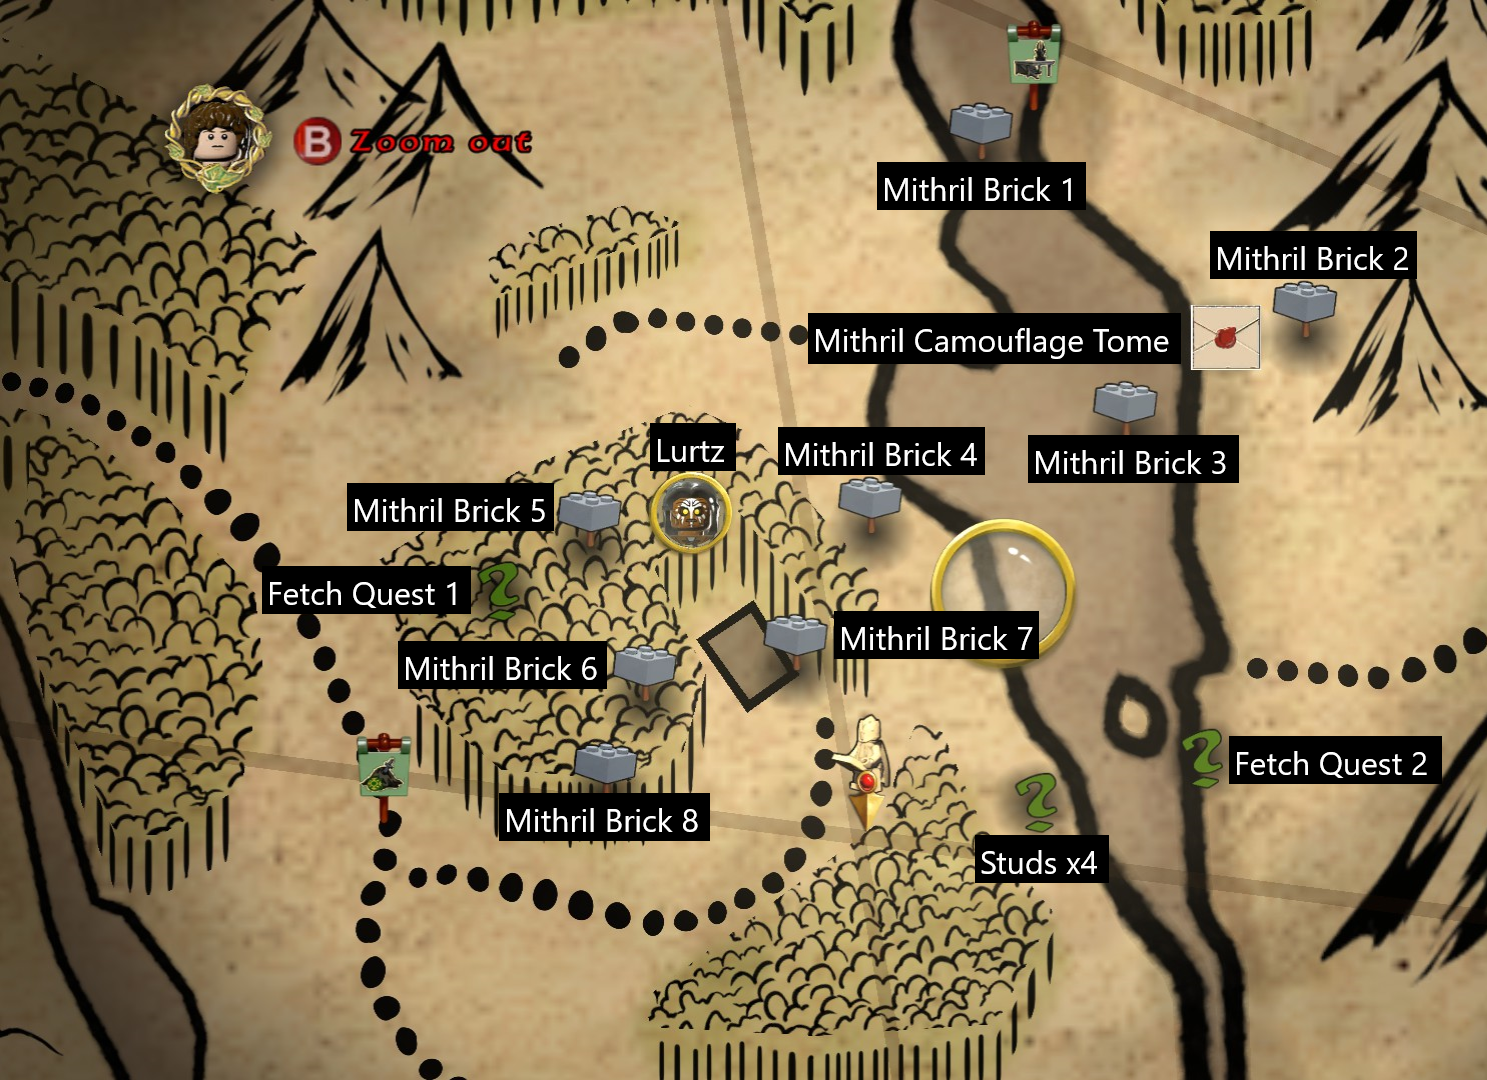
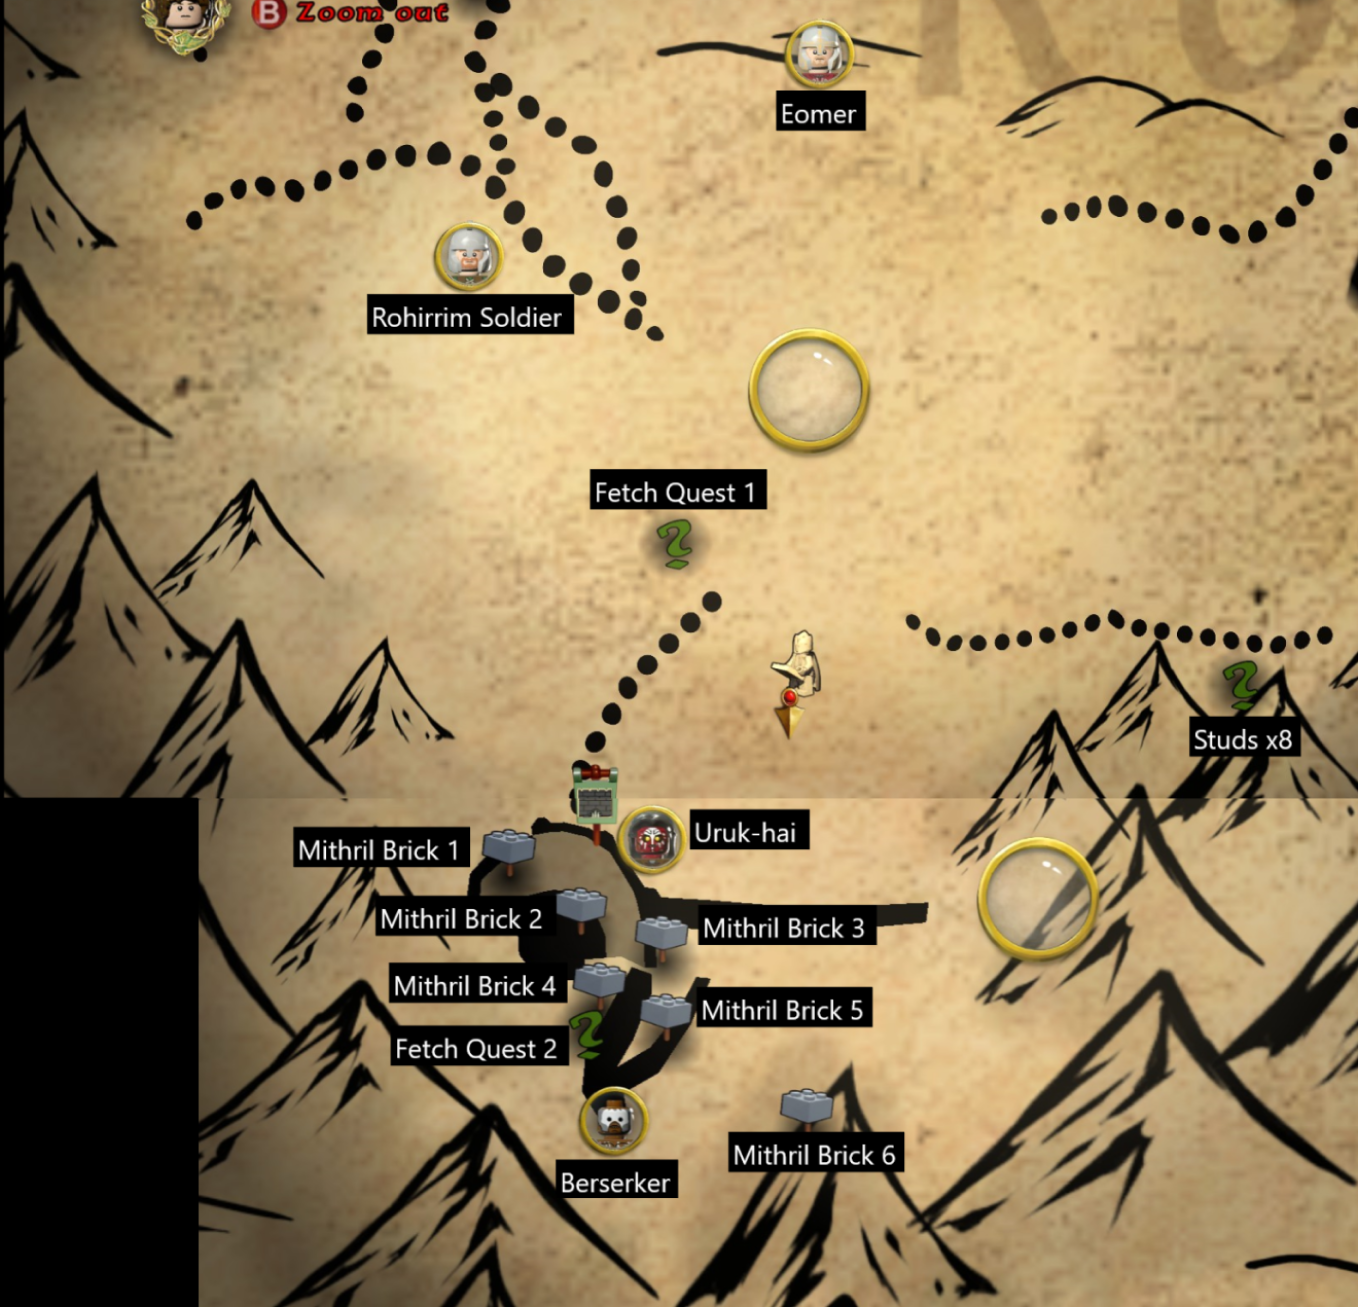
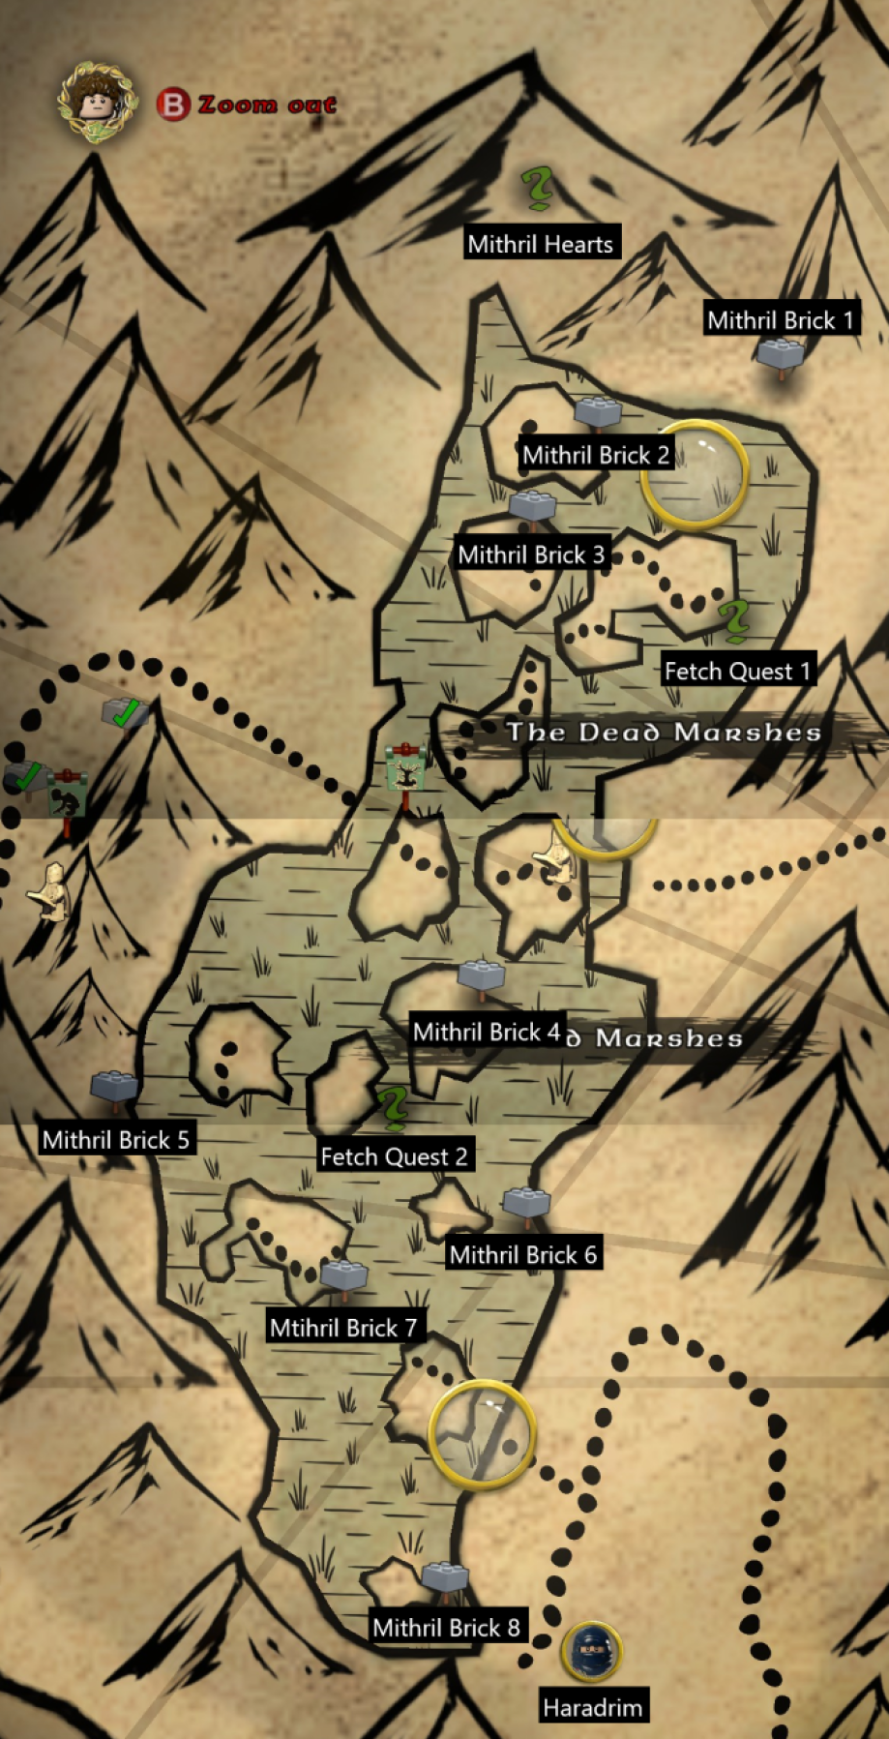
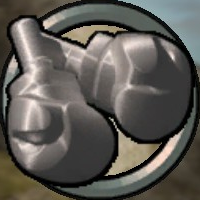
2. Use Mithril Boxing Gloves with Sam to get Magma Rock. You can't change characters in this section. I actually thought that the game glitched and put me in Story mode, and restarted the level :steamfacepalm:
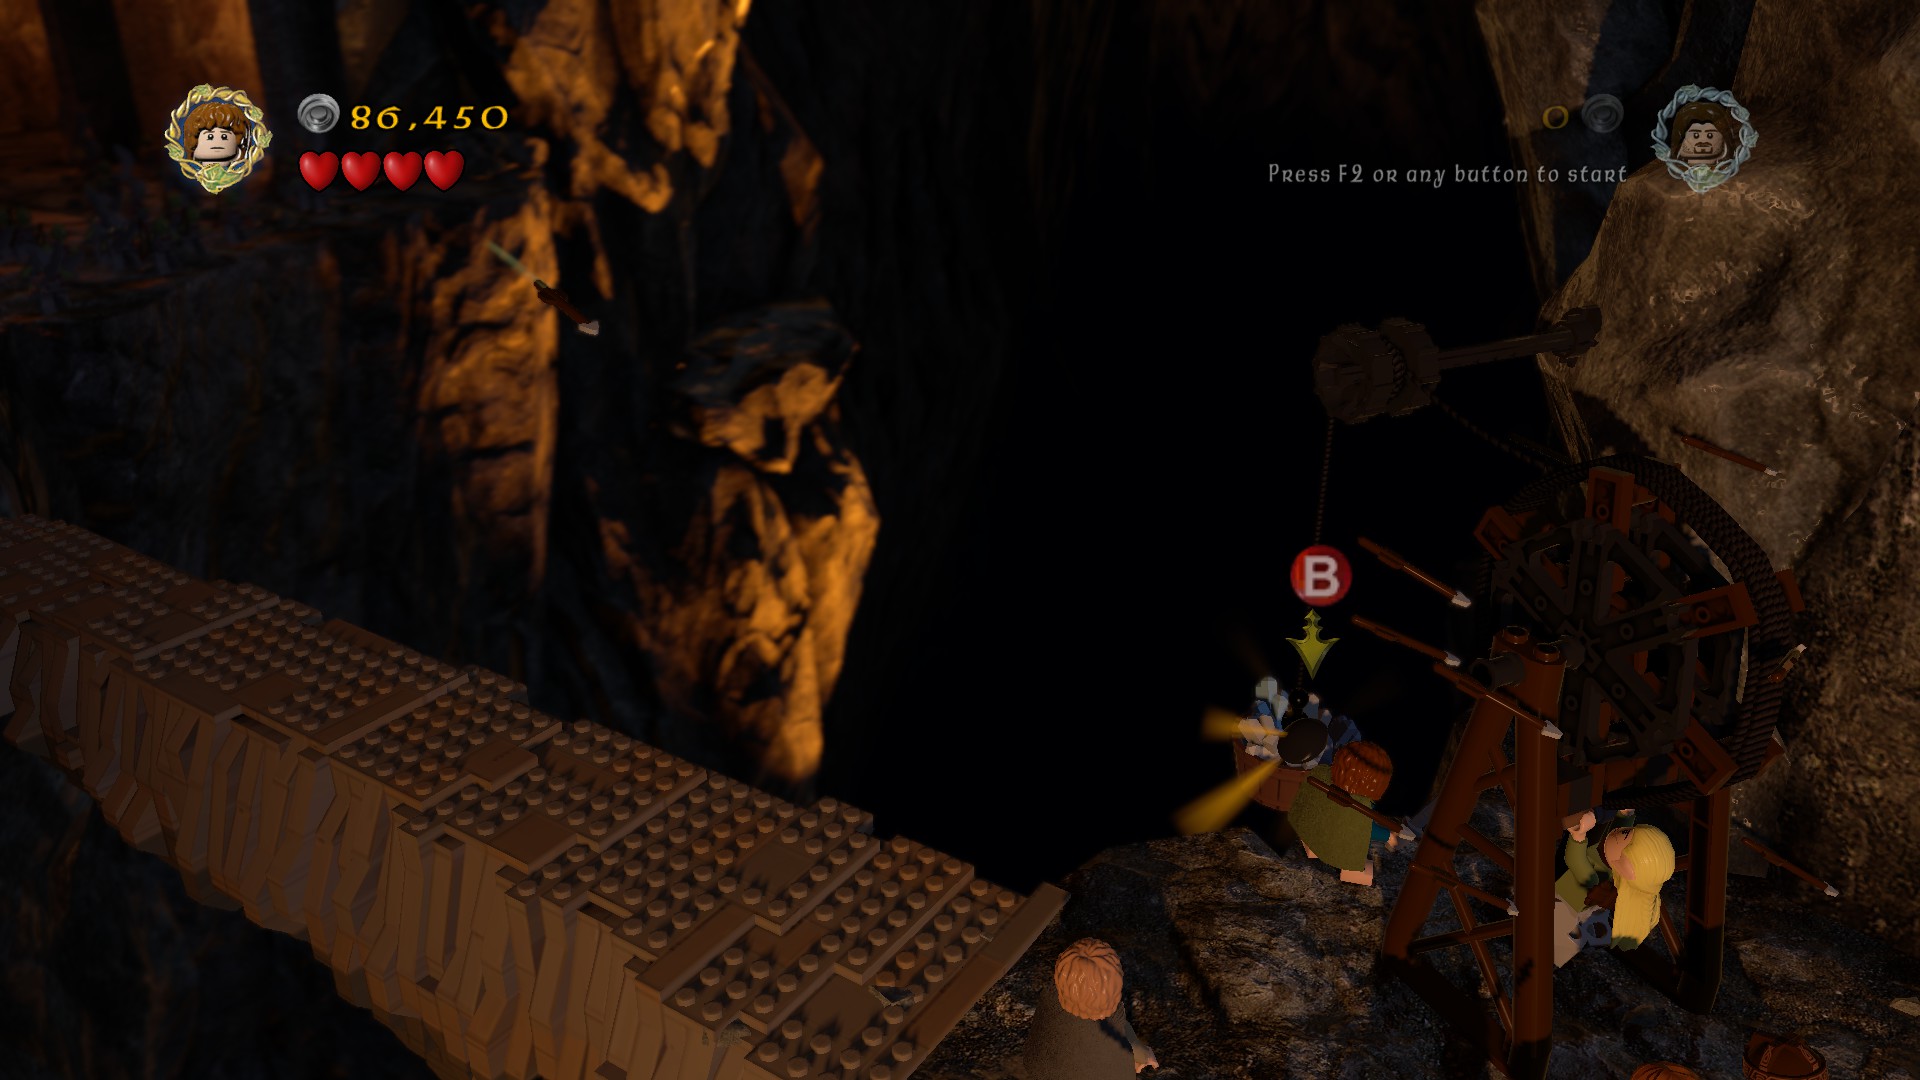
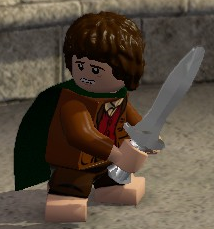
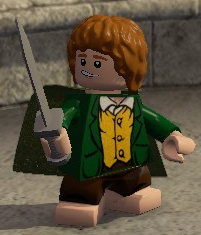
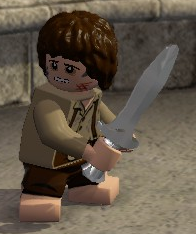
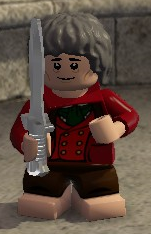
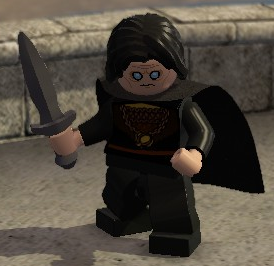
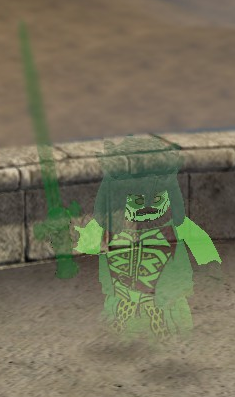
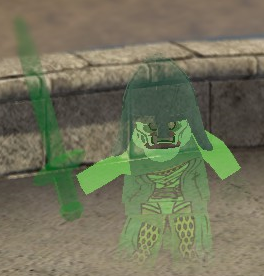
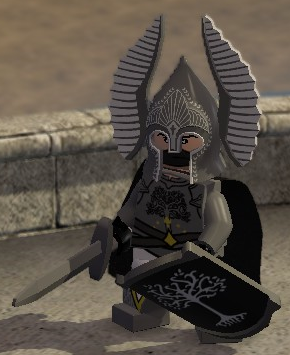
3. Gollum can be very hard to throw off during the last fight. It seems it can only be done in certain trigger zones, so try to not move Frodo around. Do not engage Gollum in an actual fight as Frodo. During the last part of the fight, moving Frodo towards building blocks seems to work best.
Lucrative Business Opportunity Jan 6, 2024 @ 4:10am 
Some general tips (1/2):
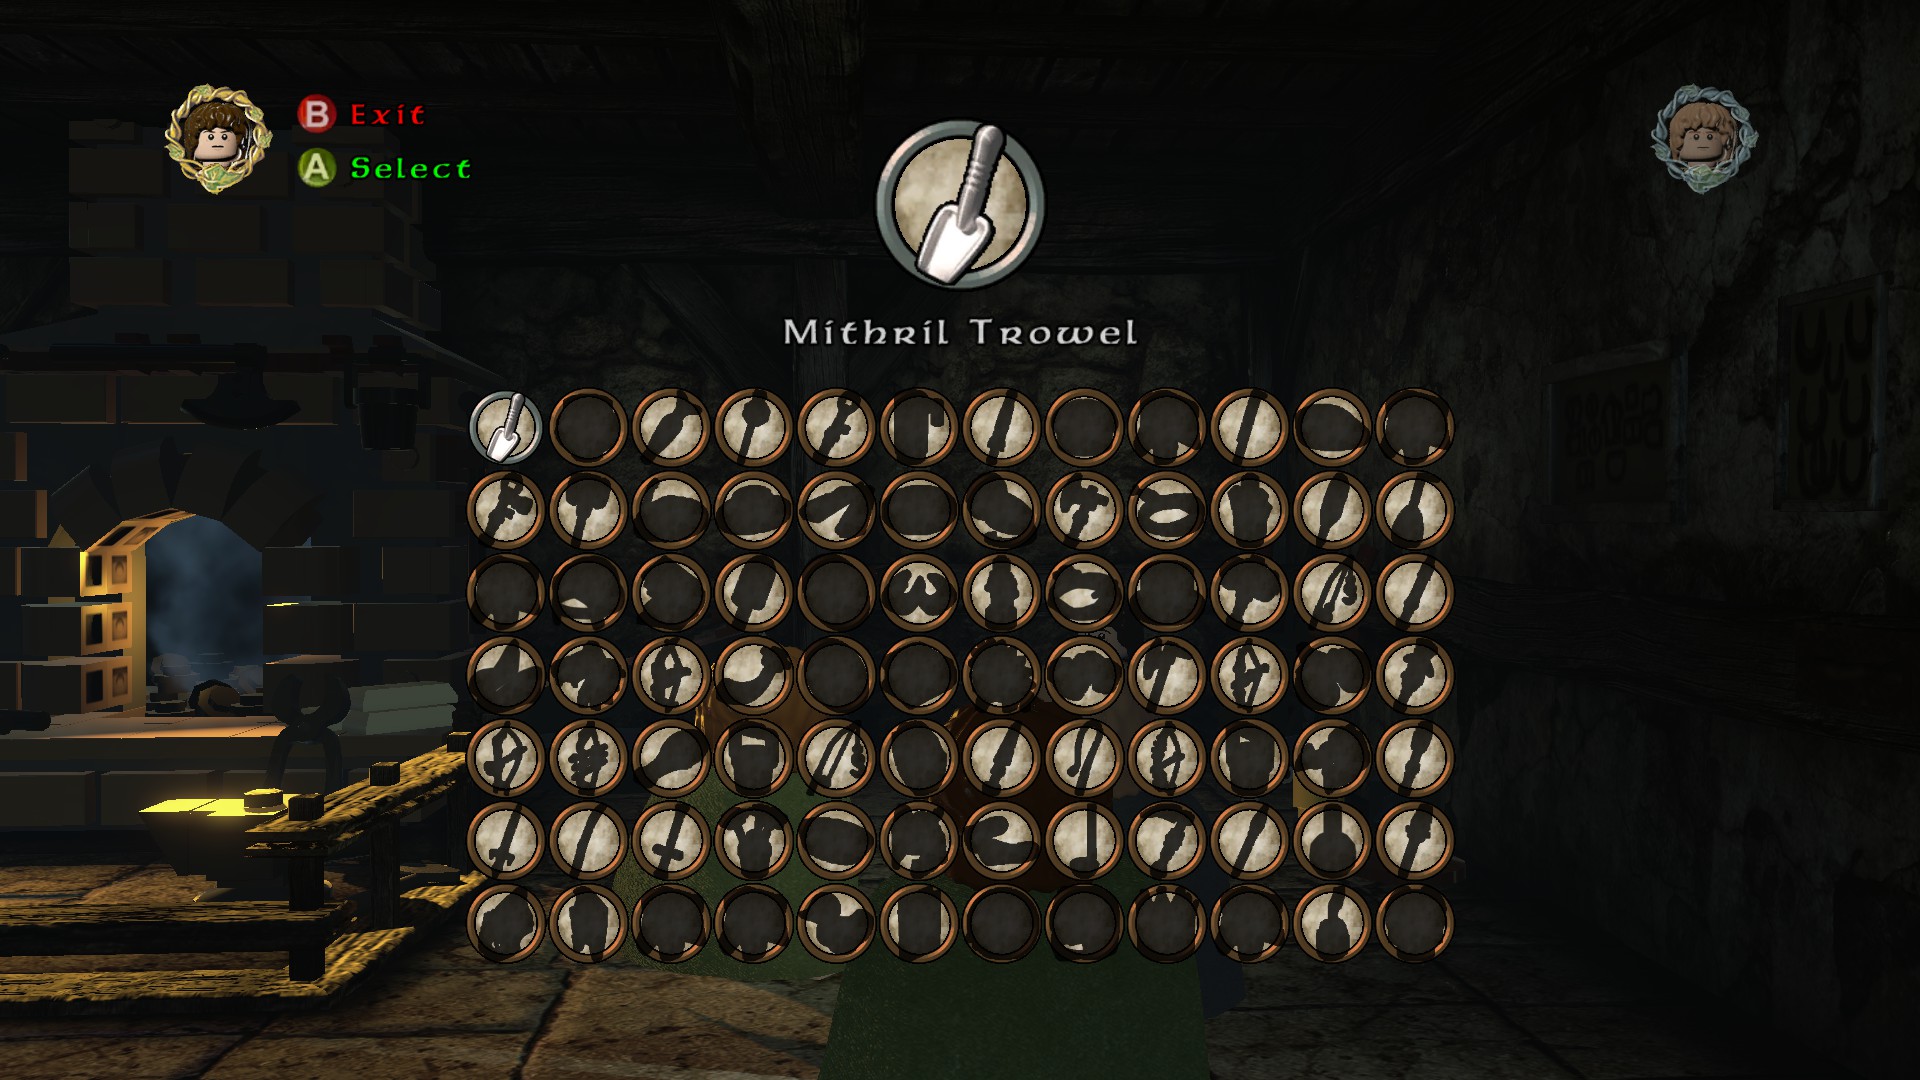
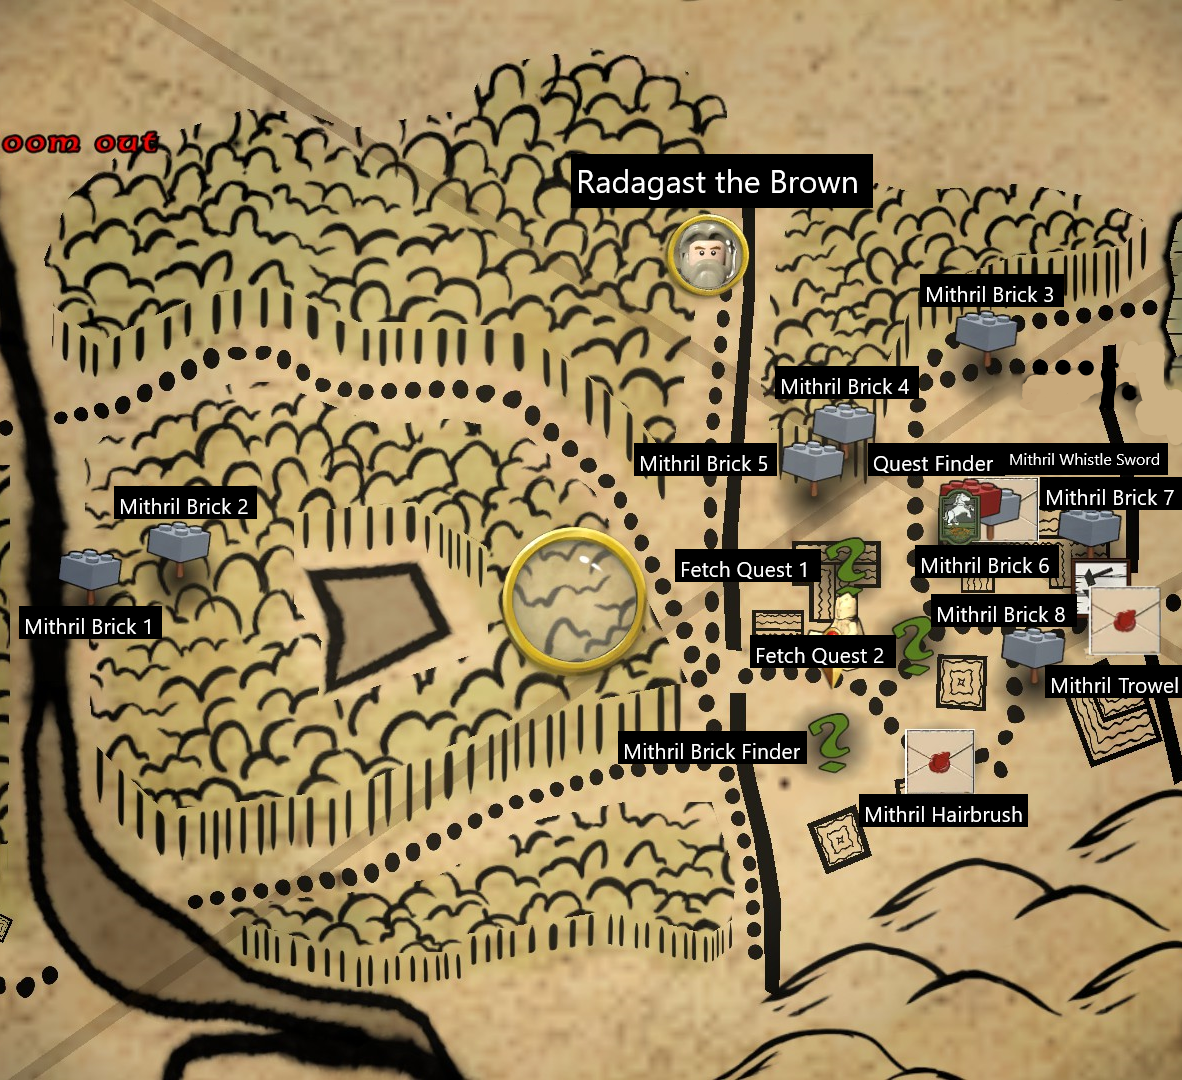
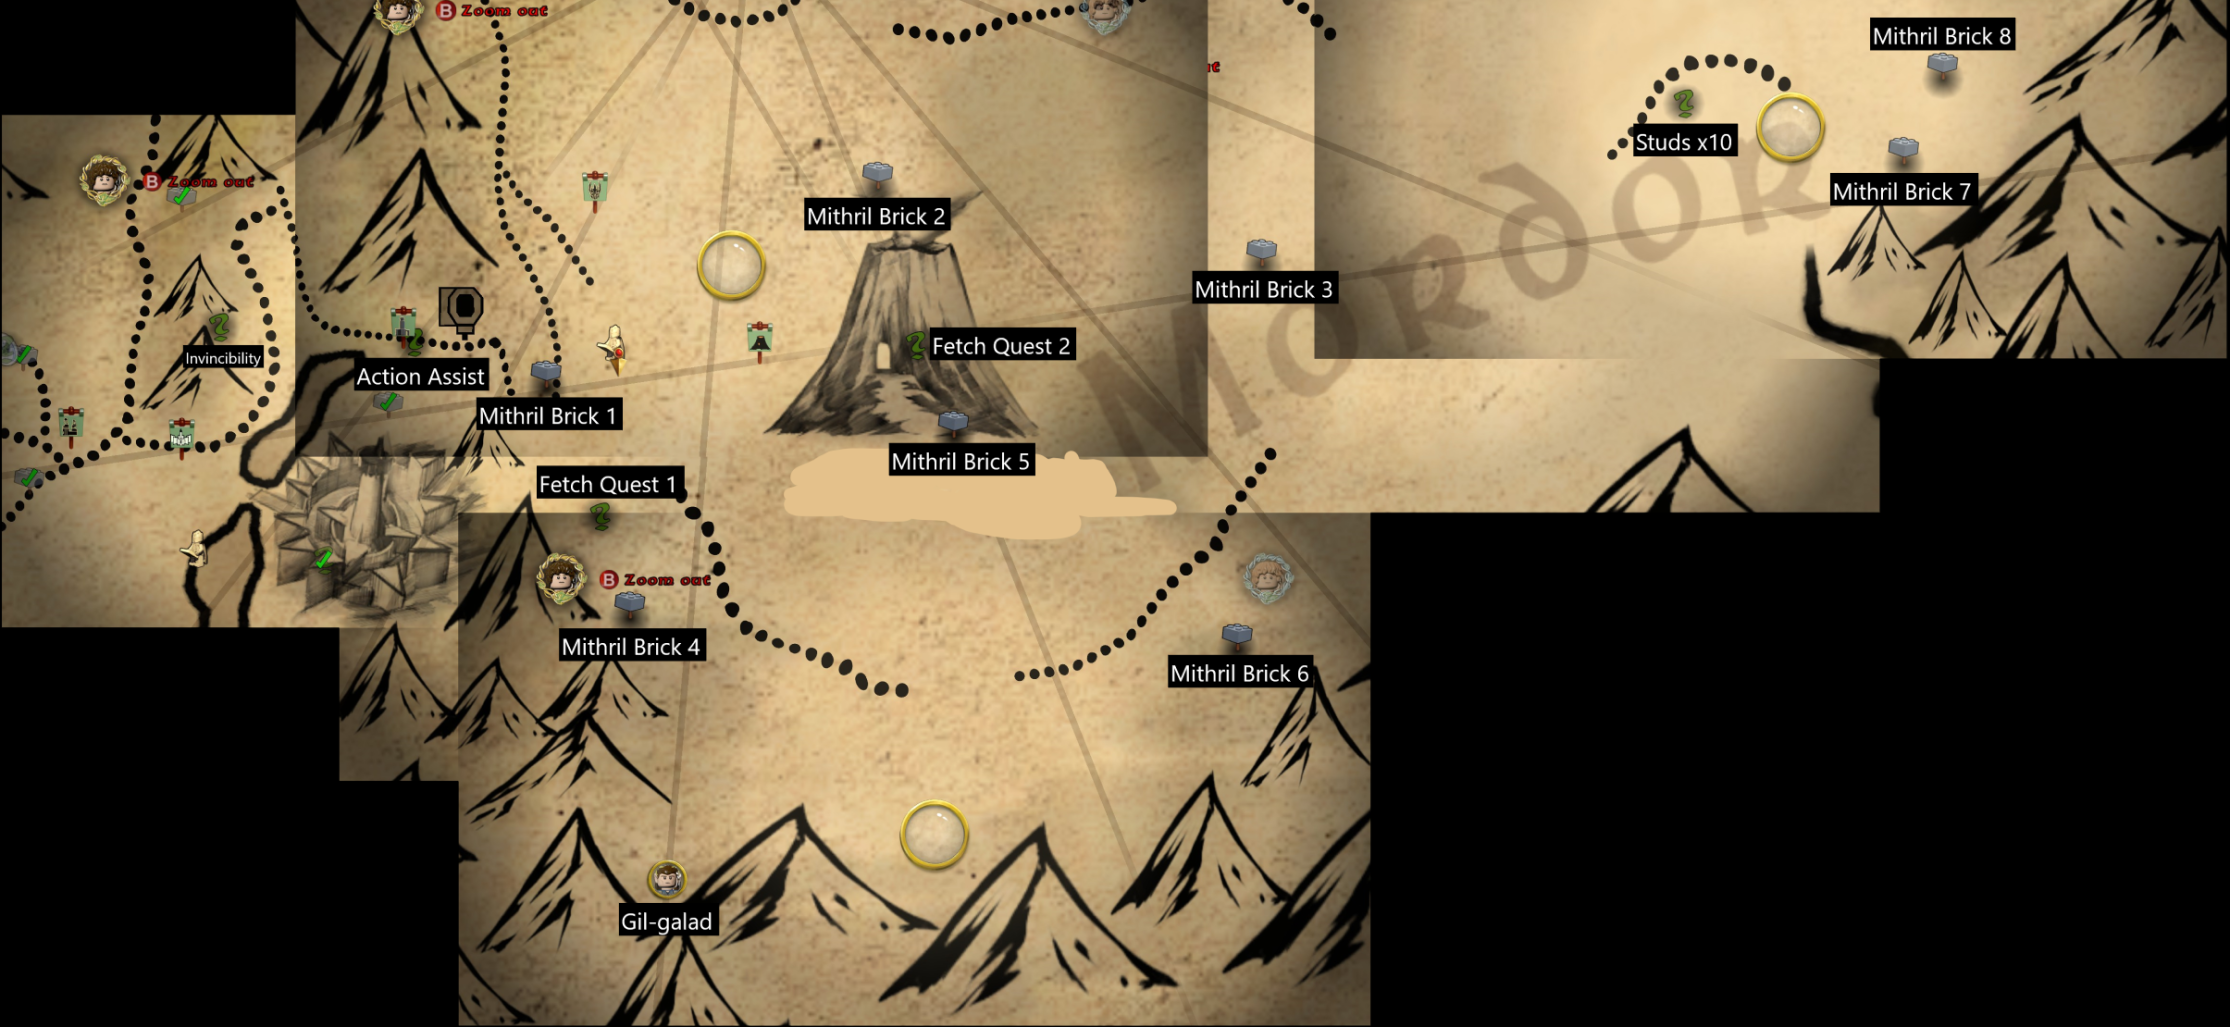
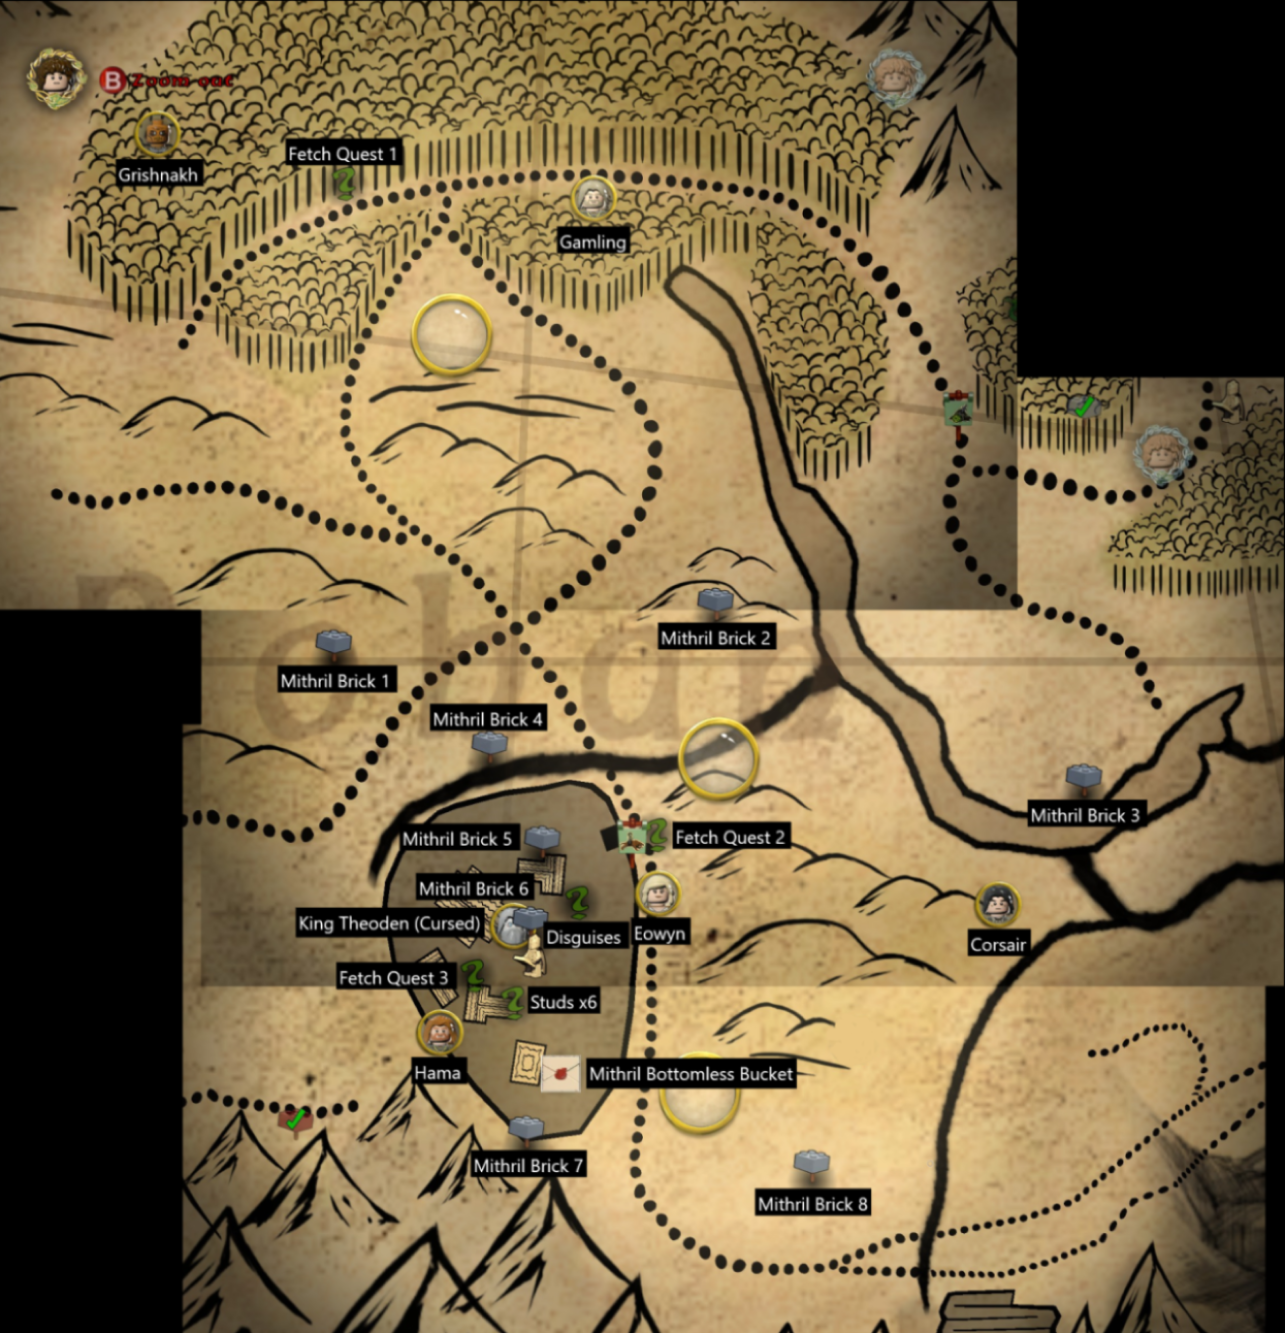
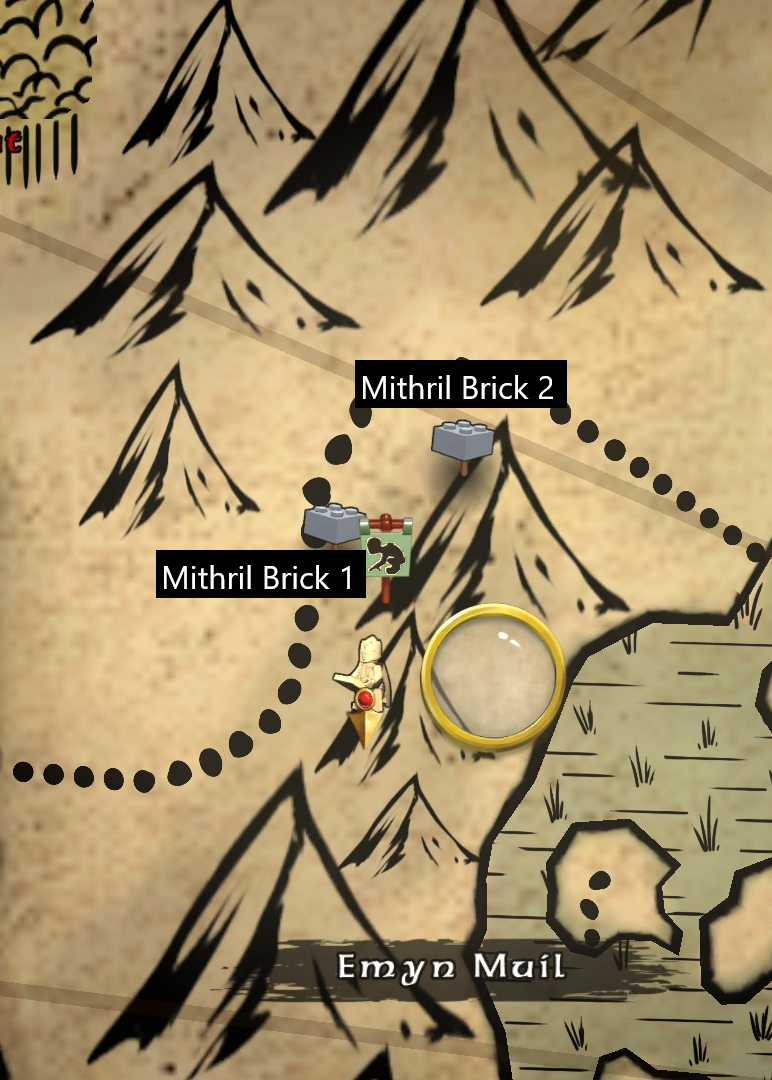
1. Game shows the number of used, not collected, mithril blocks in the right corner. So 234/250 means that you did not craft the last item (or maybe multiple). To get "total collected" number you need to add the ones in the "bag" on the left.
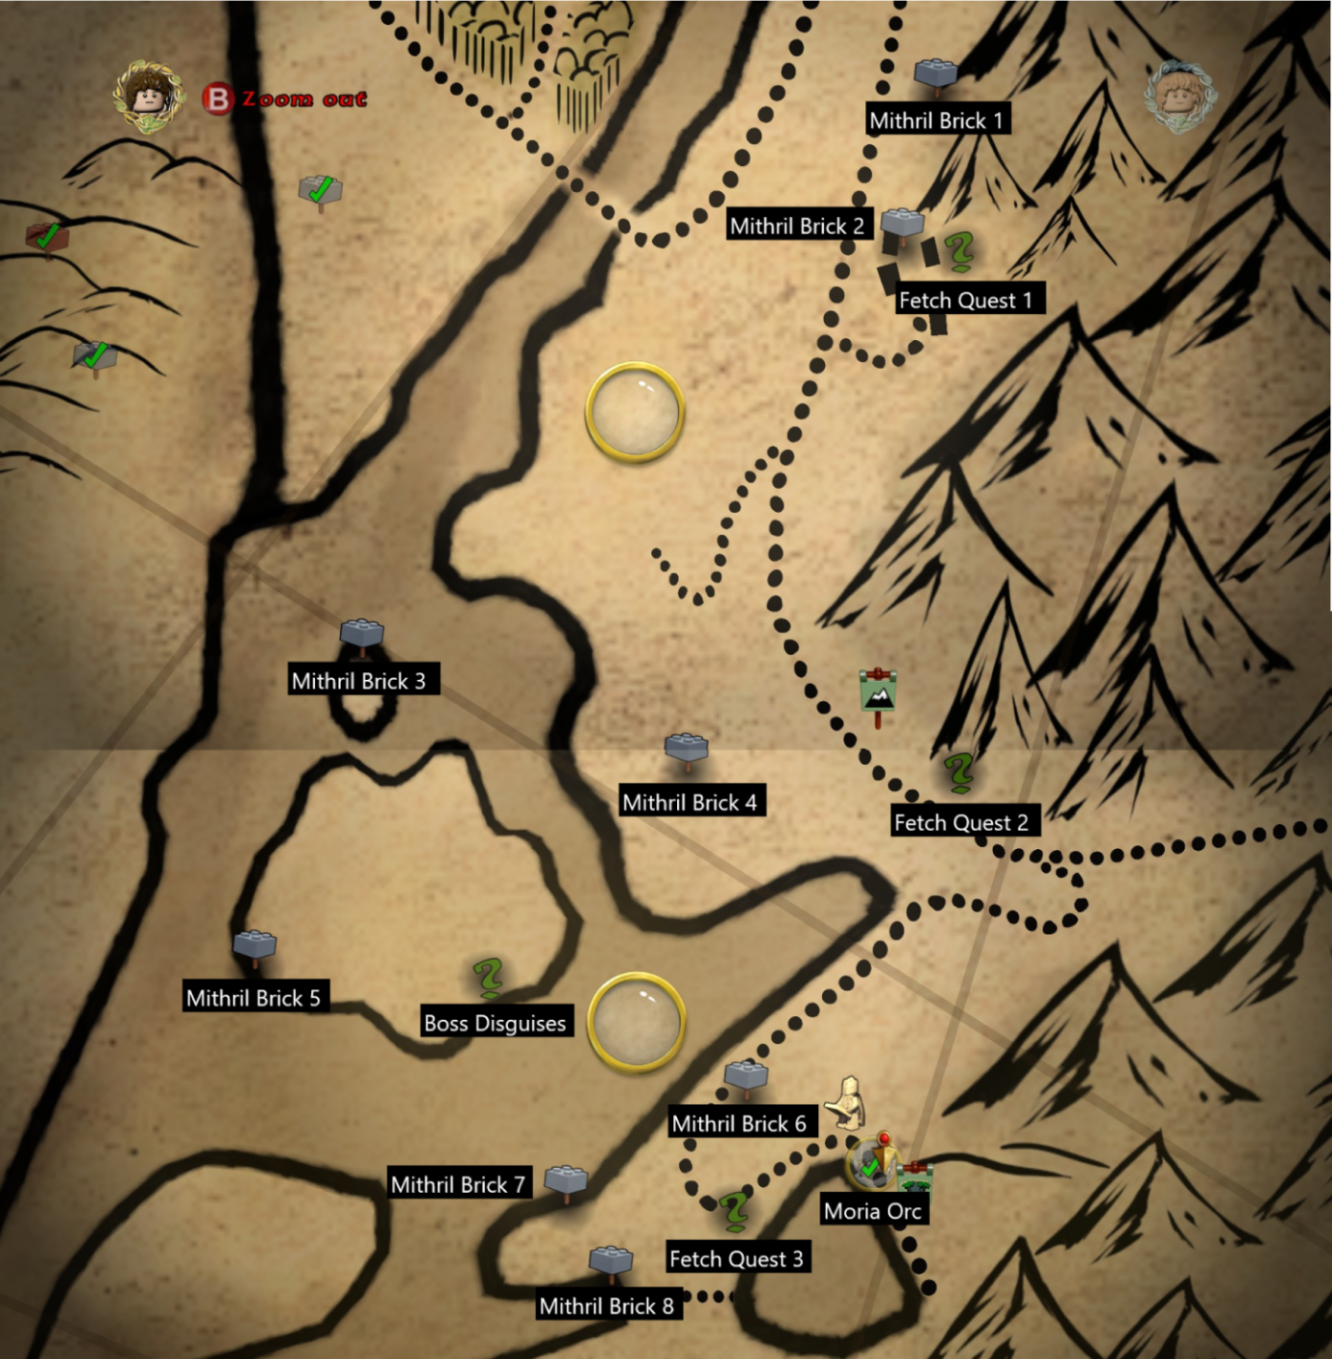
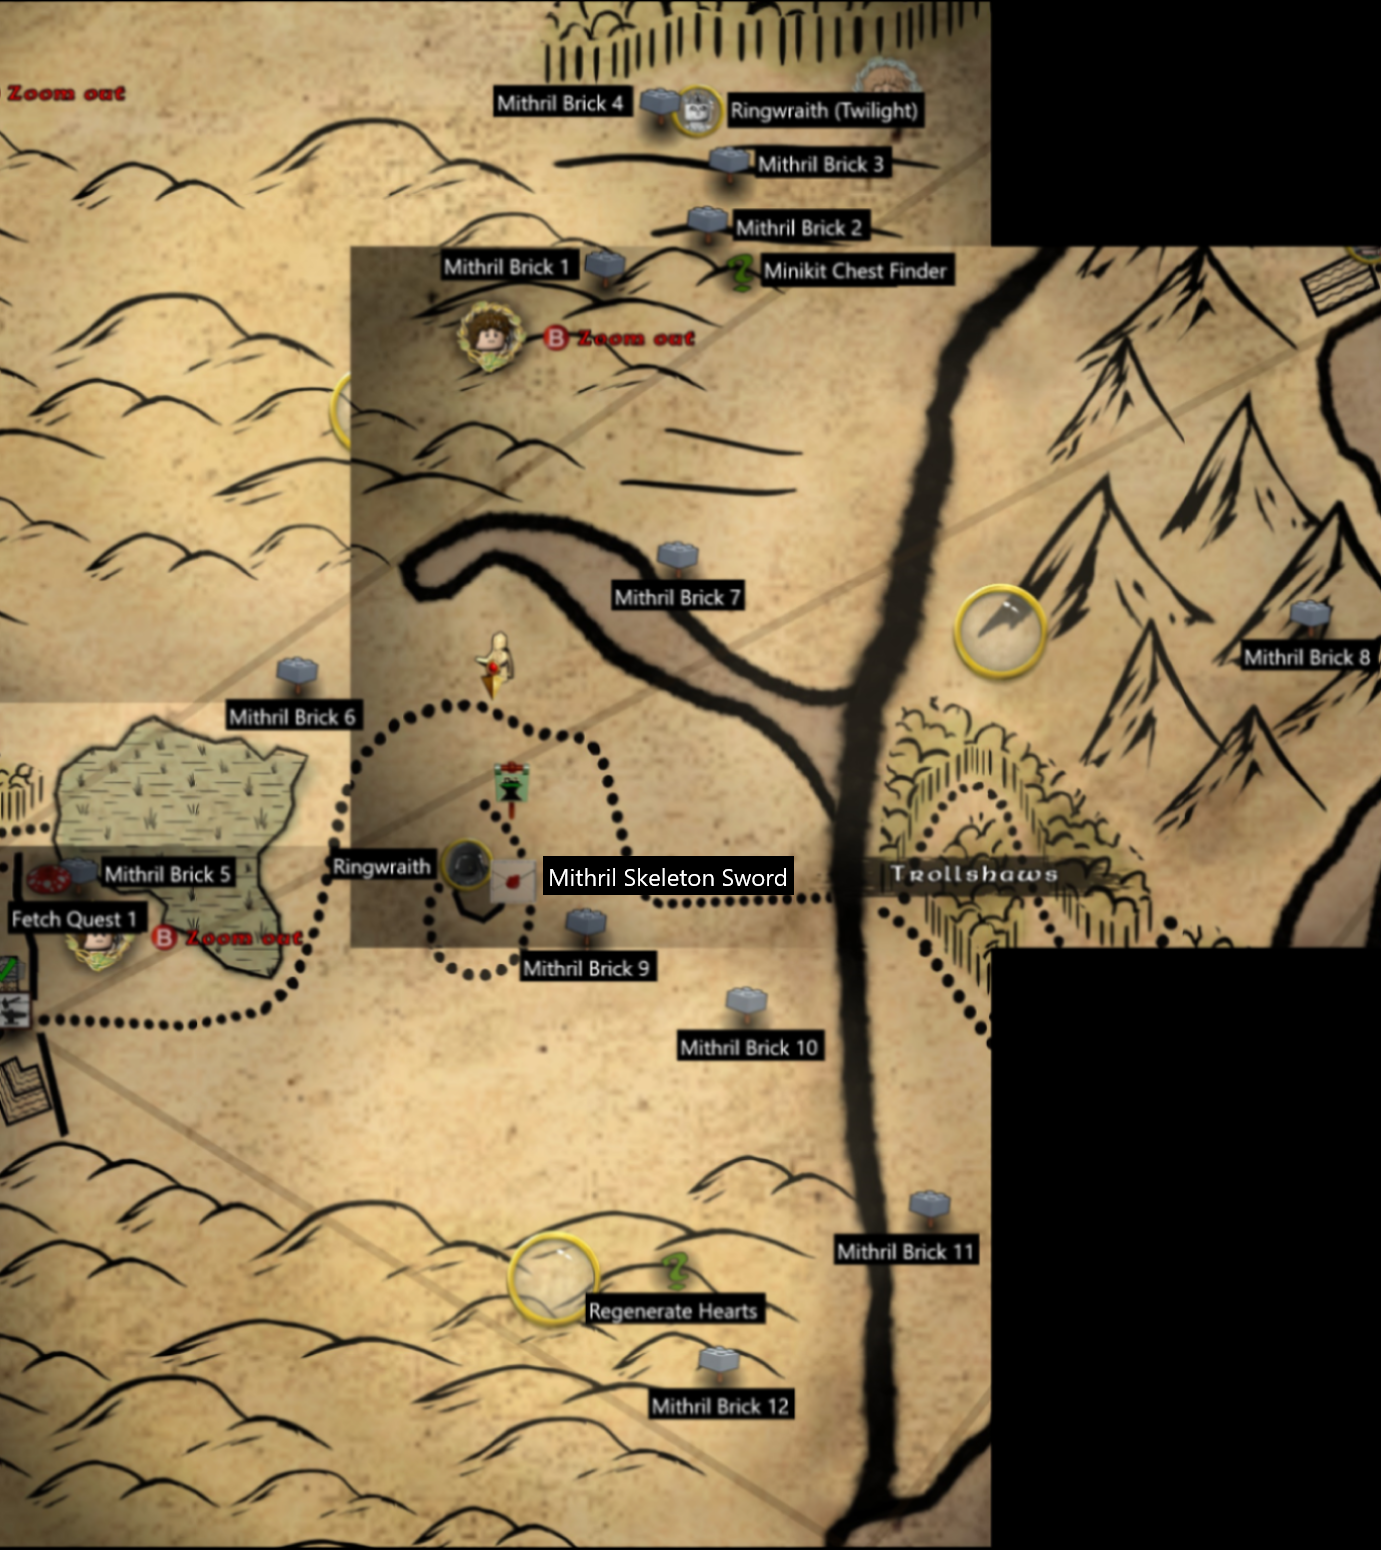
2. Some collectables do not get replaced with studs. For example, mithril block in Amon Hen or blacksmith design in Minas Tirith. It is also possible to collect 11/10 minikit parts in Mount Doom :lunar2020ratinablanket:
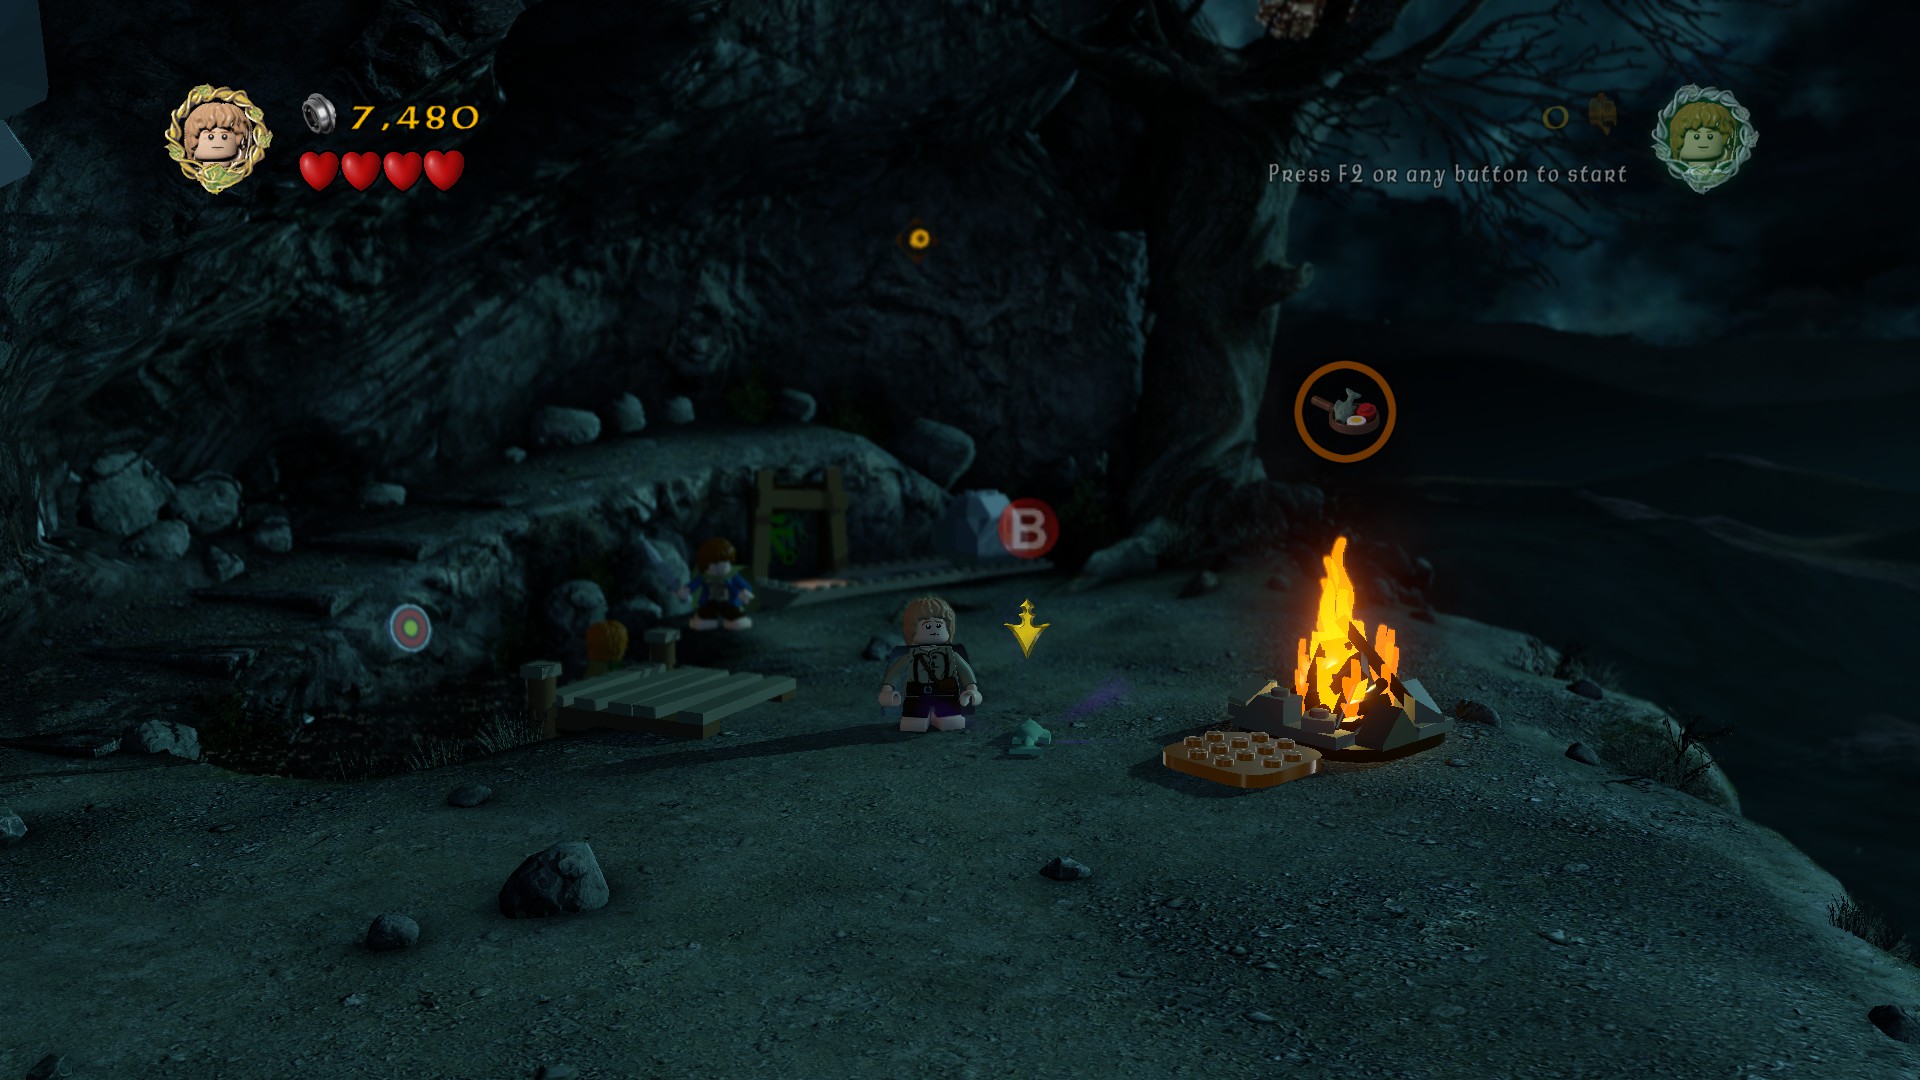
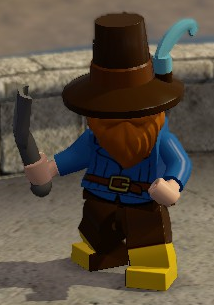
3. Some places expect you to ride something (Bill the pony, chairlift) to get a collectable. You only need to mount to spawn it, so riding the very slow pony is not required.
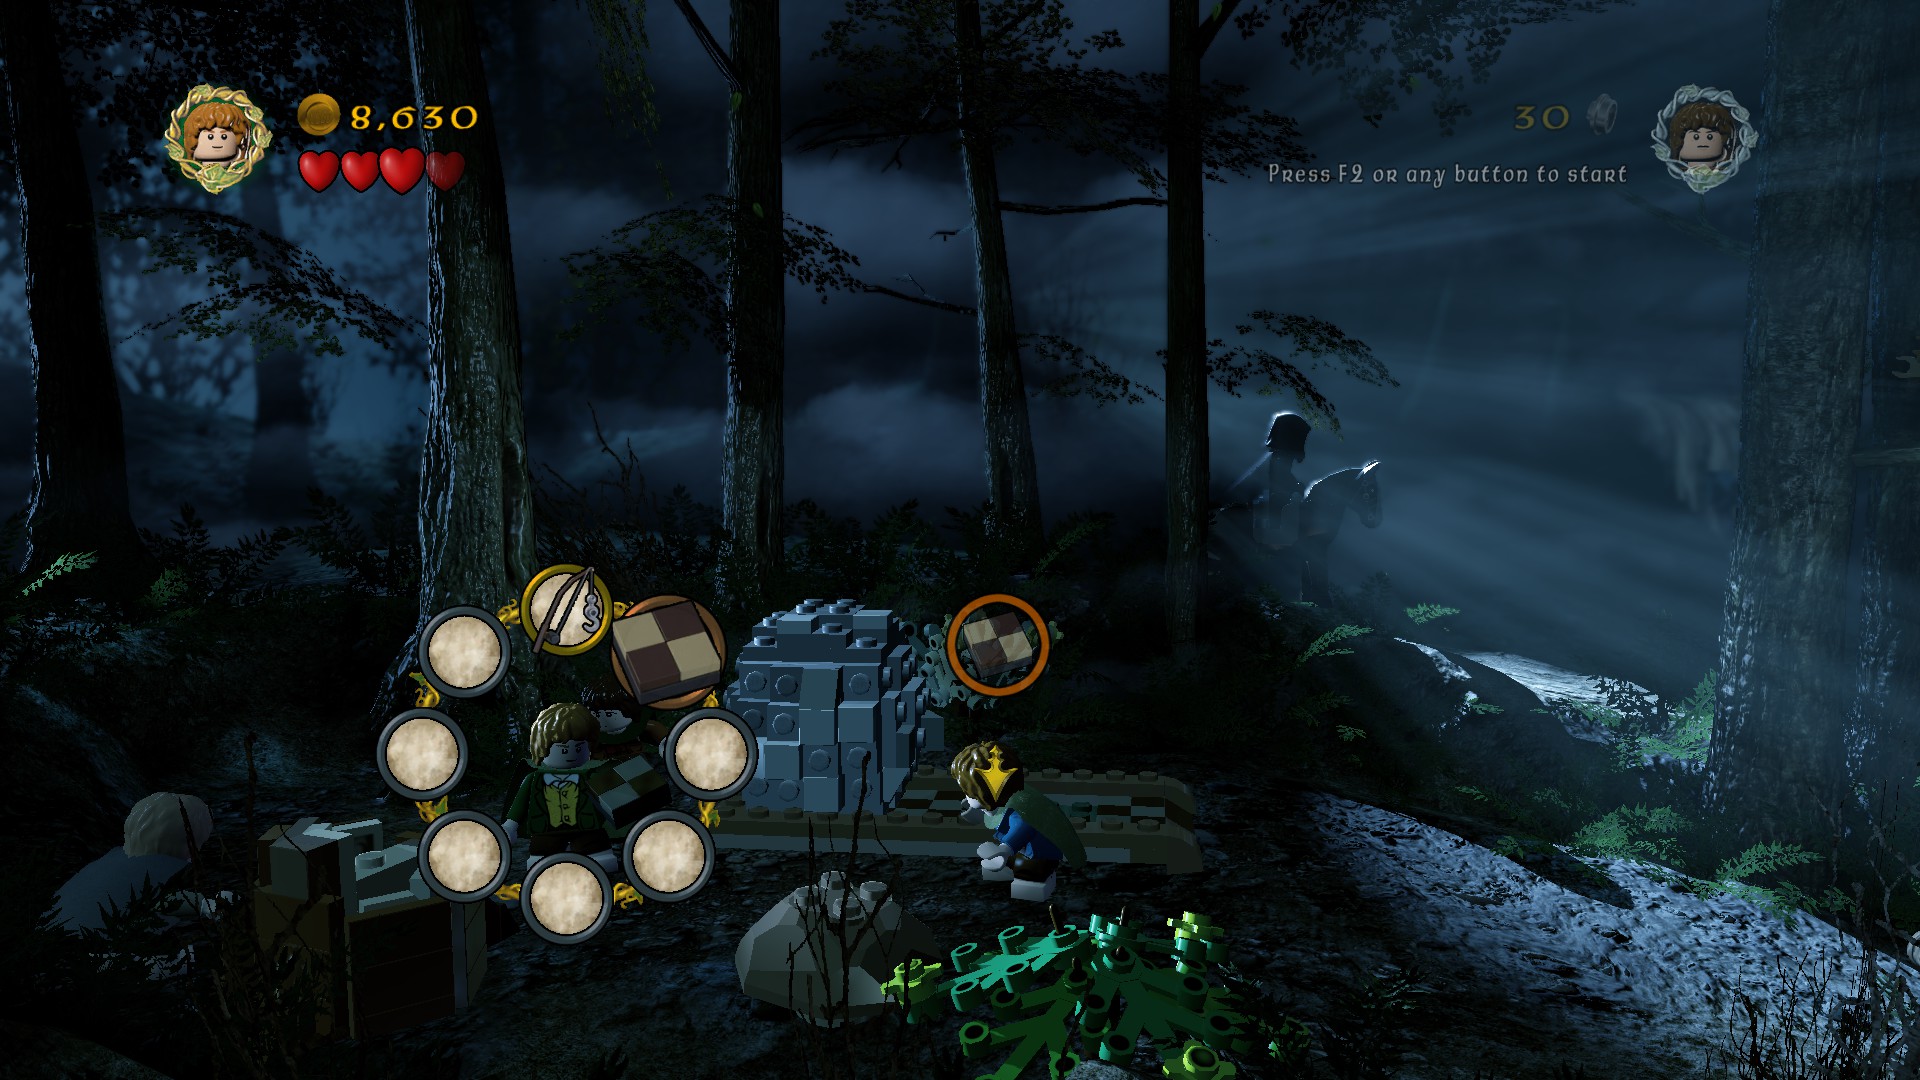
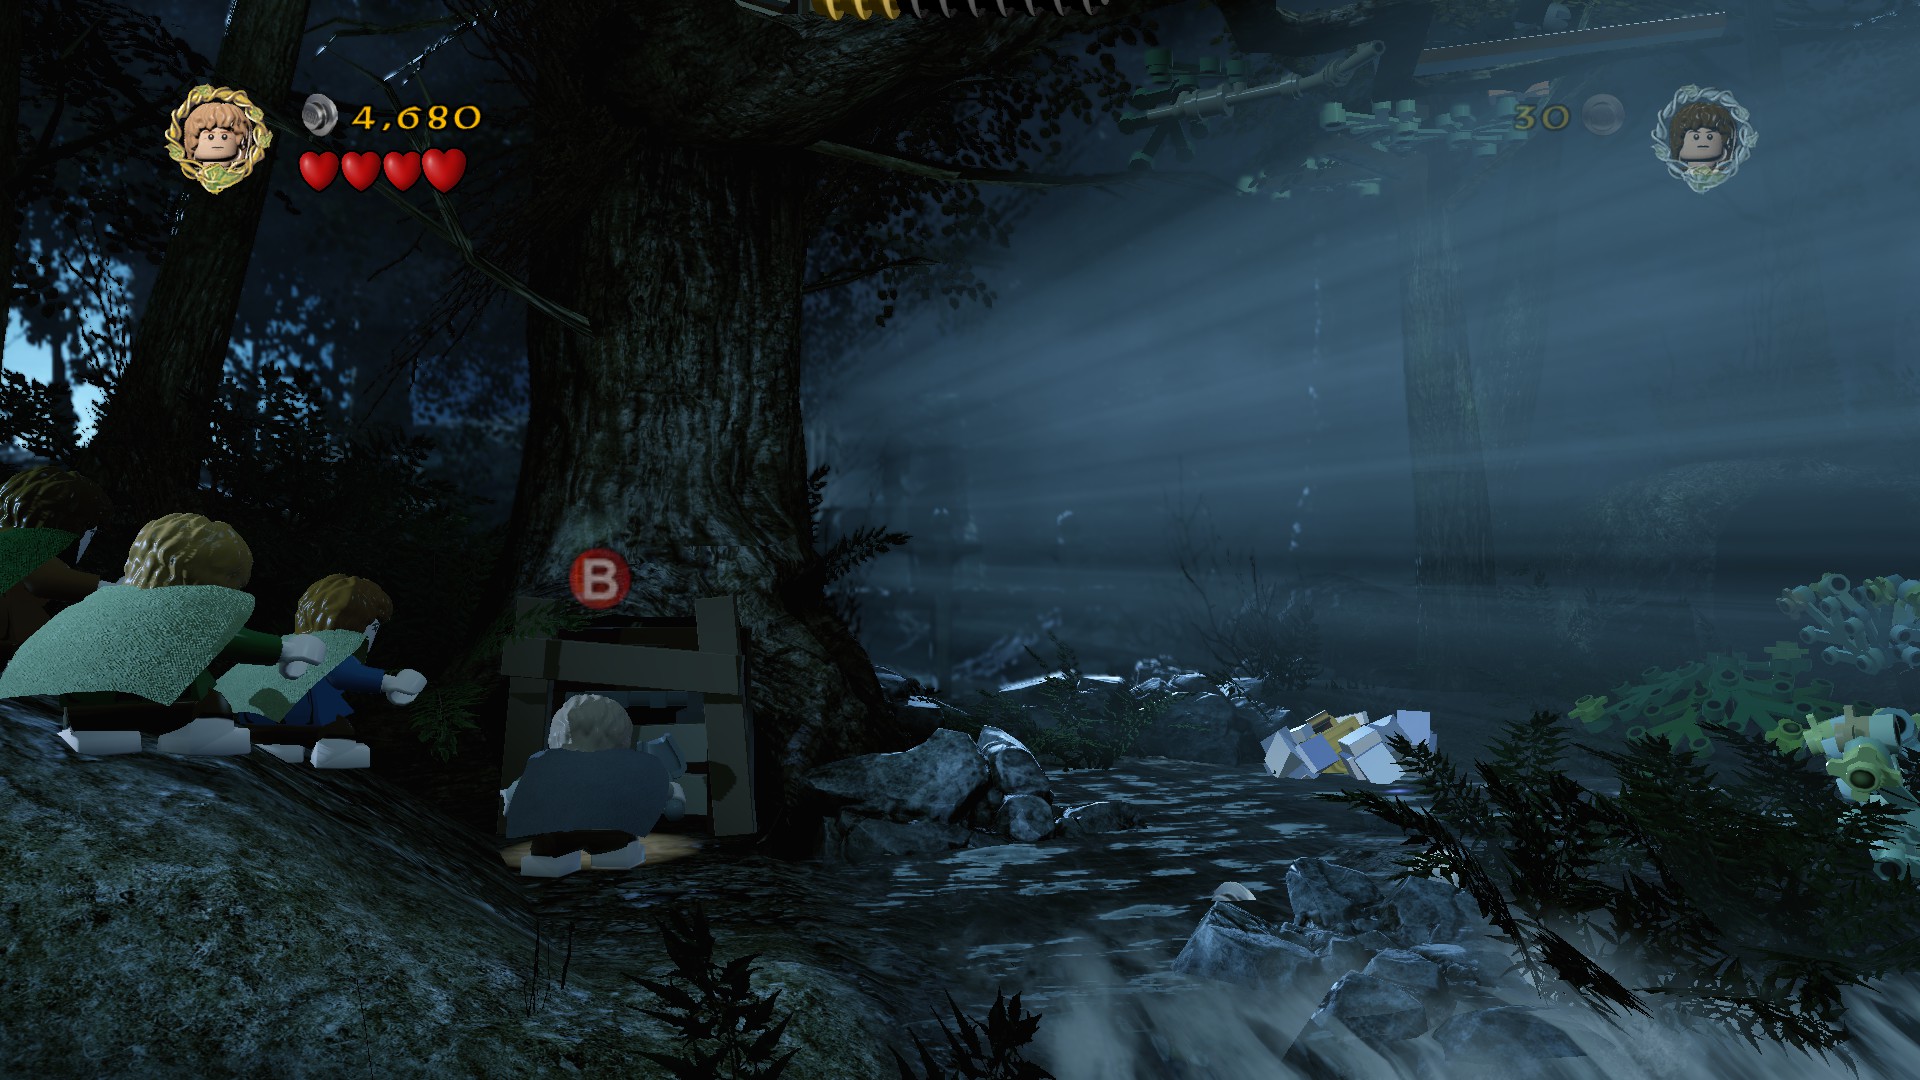
4. 30 FPS fixes a lot of problems with movement (looking at you, Gollum), but sometimes even that is not enough. Make sure to walk to the very edge of the platform when doing jumping "puzzles".
5. I had to get a Map Stone a second time to get the achievement for getting all. Game is glitchy, expect it :steamfacepalm:
Lucrative Business Opportunity Jan 6, 2024 @ 4:10am 
Some general tips (2/2):
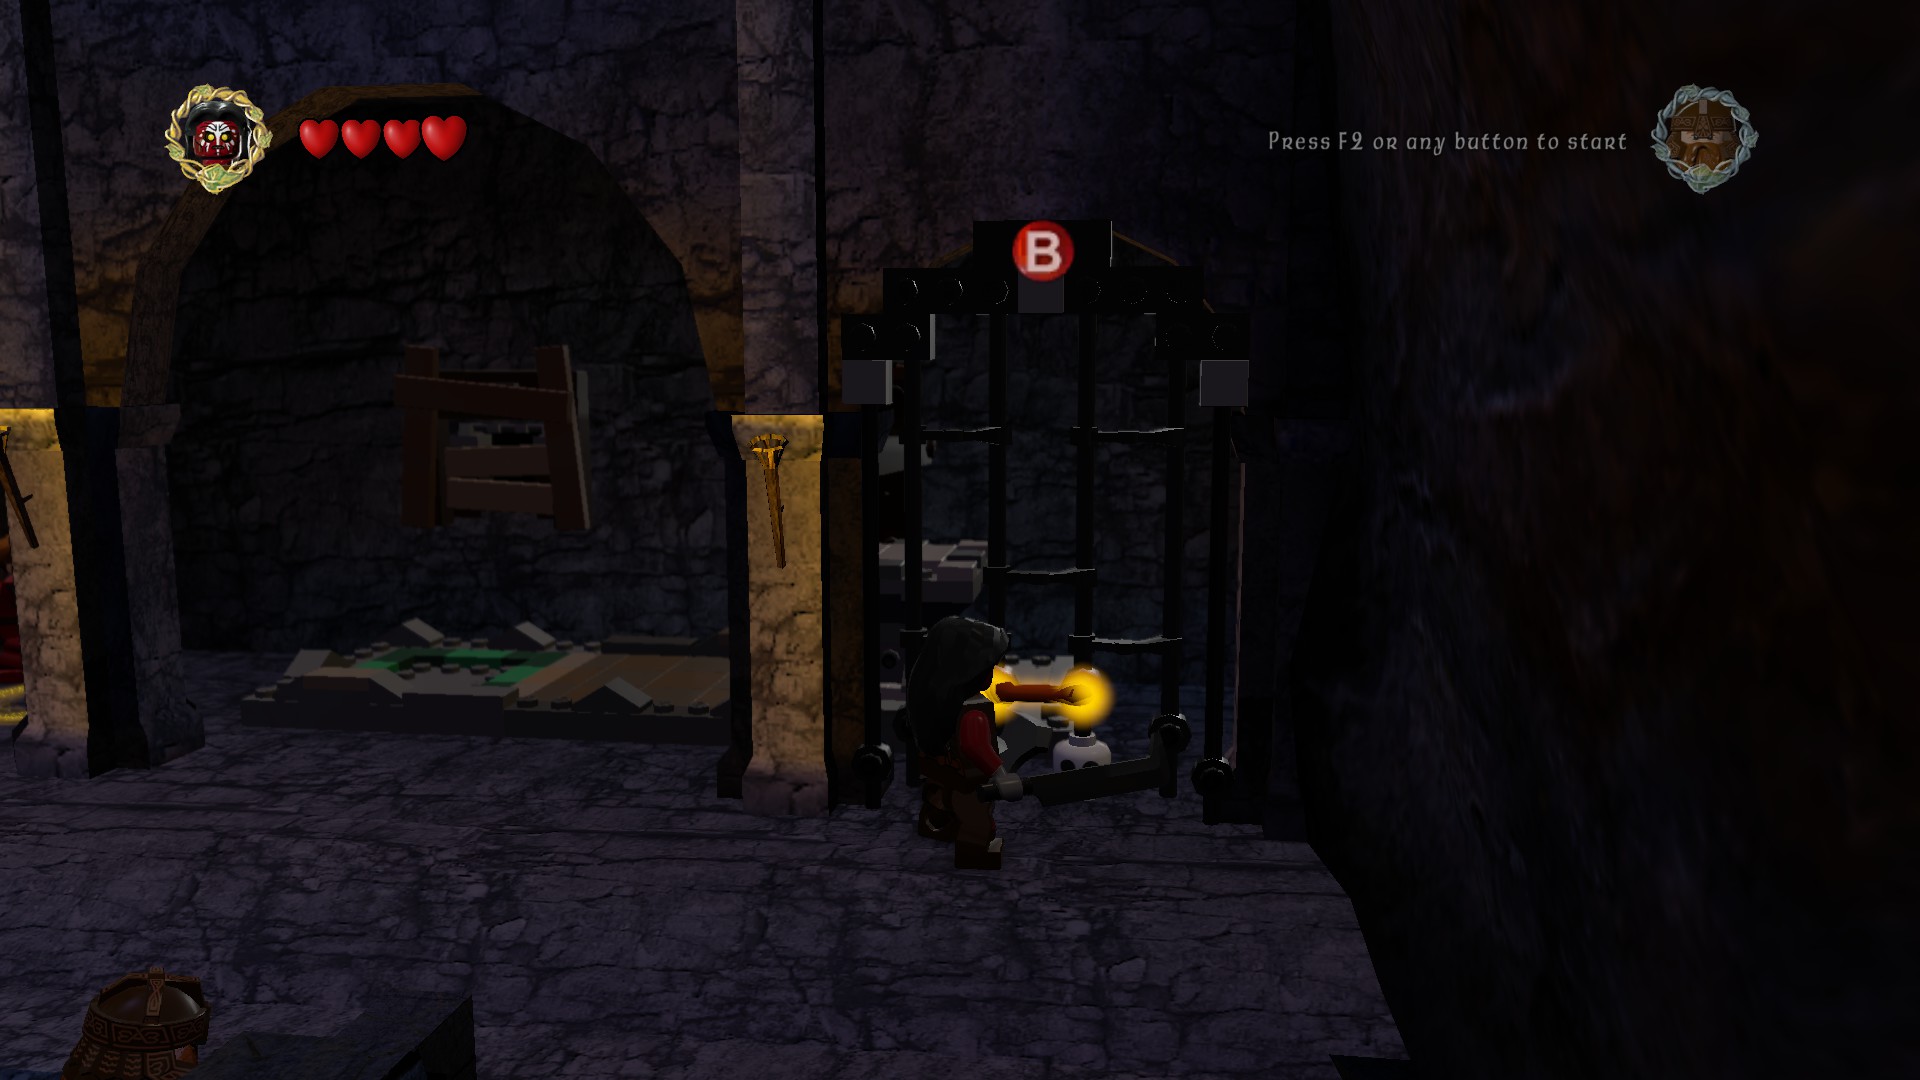
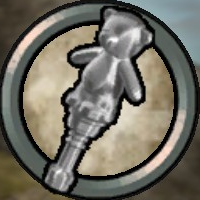
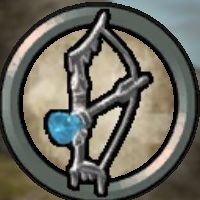
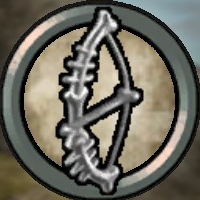
6. Most environment objects have 3 health, so Mithril Cluster Bow will give you the full money for them in one hit (though sometimes objects will remain at 2/3 with all money dropped already). Jumping attacks also work well and have the bonus of sometimes hitting multiple objects. Do note that some objects work on hits, not health, so damage won't matter to them.
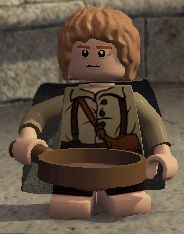
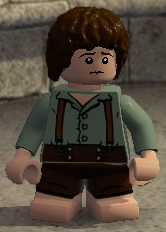
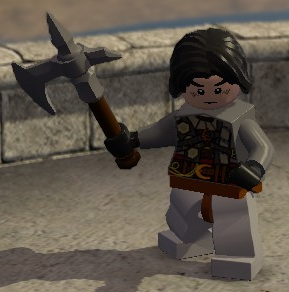
7. During Freeplay always having Sam on second player is incredibly useful, as Sam has the most interactions with puzzles in one small and hardy package.
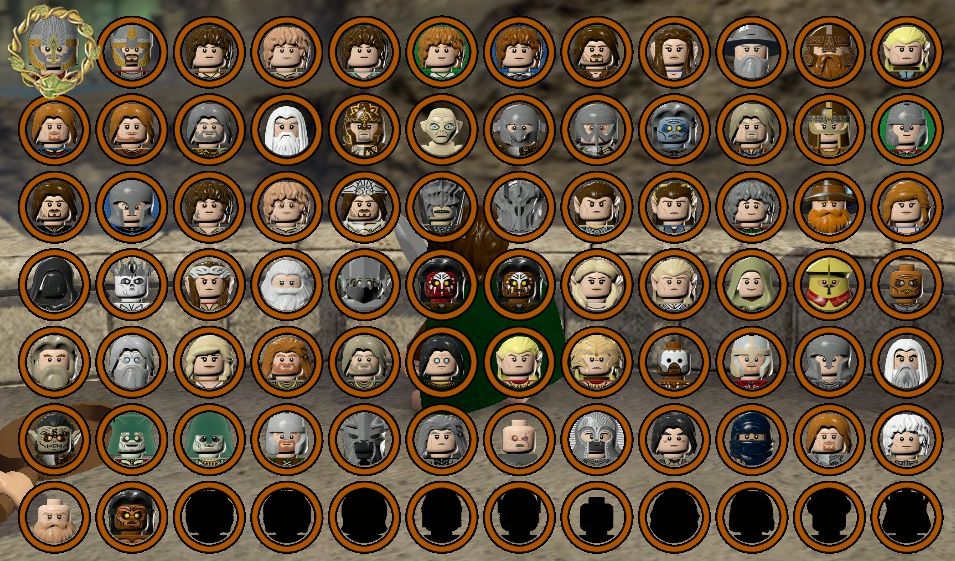
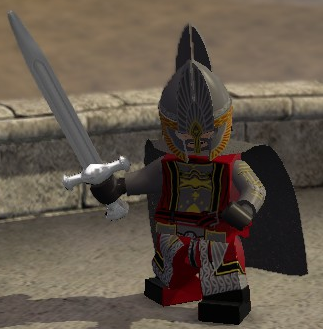
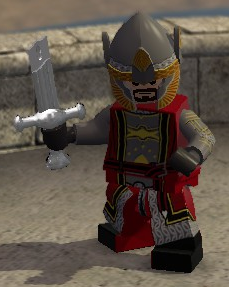
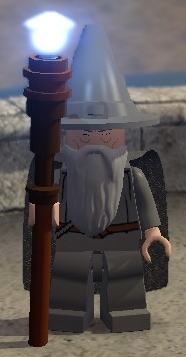
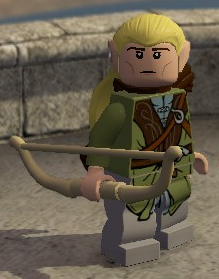
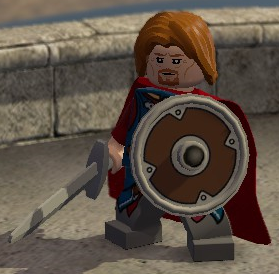
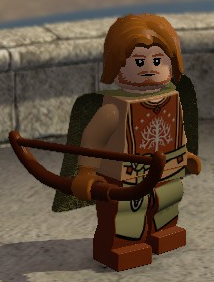
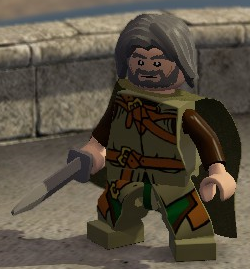
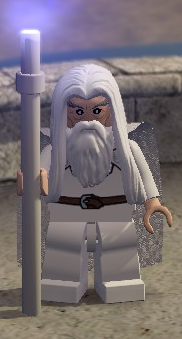
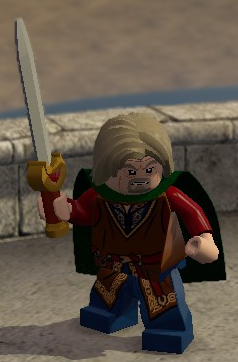
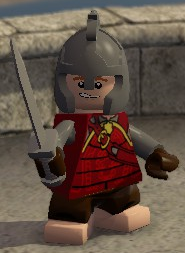
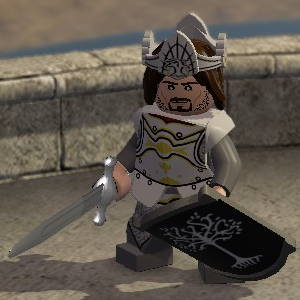
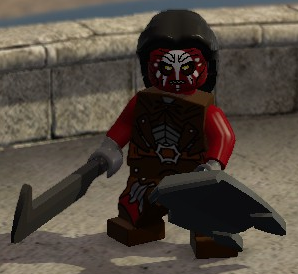
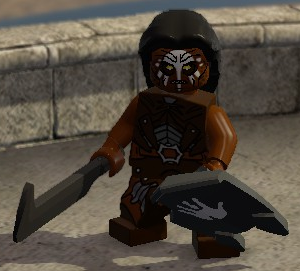
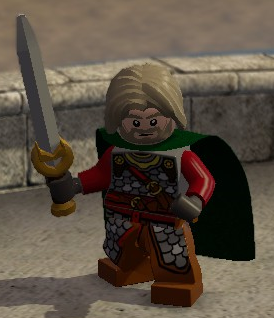
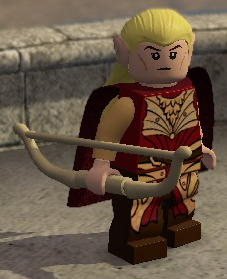
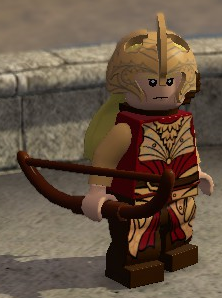
8. When Freeplaying levels, game seems to put most often selected characters on the wheel. Try to have Berserker , Sam, Gandalf (or any wizard), Legolas (or any elf with bow), Gimli (or Gloin), Aragorn with Gondor armor, and Gollum. Merry and Pippin may get some action, but they are rarely needed and are easily replaced with items.
9. Do not get the last minikit part without all stud multipliers, or you will miss out on several billion studs.
legogamesguy  [author] Nov 21, 2022 @ 2:32pm 
Huh. Interesting.
Dragis Nov 19, 2022 @ 9:36pm 
Yes, it appears as completed in the map but I can pick it again, despite not actualy increasing my mithril block number after the animation. It is the one that is gathered after completing the wack a mole in Amon Hen
legogamesguy  [author] Nov 16, 2022 @ 8:07pm 
Have you checked the maps and identified which Mithril brick it is?