Dyson Sphere Program

Dyson Sphere Program

44 értékelés
Using Energy Exchangers for local network balancing
Készítő: qcs2017
This guide will show you how to use Energy Exchangers for balancing your local power network, despite not being optimally designed for that.
And, following that guide, you will understand exactly how it works and why it works, and you learn something about the game.
3
2
   
Díjazás
Kedvenc
Kedvenc
Törlés
Introduction
This guide contains lots of information which are aiming at beginner players.

Please use the Table of Contents to find the information which is important to you if you only want to see the What and not the How.

Motivation:

Why use Energy Exchangers for local network balancing, and not Accumulators as buildings?
Accumulators need lots of space, and have slow energy output. You really need *lots* of them placed to be useful in a mid sized network.
There must be a way to use the much faster Energy Exchangers for local network balancing which needs less space and is more elegant.
The problem
Accumulators
The game has buildings called Accumulators.
When fully charged, they contain 90MJ energy. When you build it as a regular building, it can release those 90MJ in 54 seconds with a rate of 600kW. When there is surplus energy, an empty accumulator can charge within 54 seconds with 600kW until full.

The developer's idea is that you build a huge farm of accumulator buildings if you want to use them for stabilizing your power network, for example, if you have a strong difference between day and night.

Energy Exchangers
And then there are the Energy Exchangers. They are a separate building, which can use Accumulators in their item state (when not built). It is a bit unintuitive, but great.
But Energy Exchangers are different. If you put an Energy Exchanger into Charge mode, and insert empty Accumulators, they charge up to 45MW, depending on the available energy in your network, thus, ideally only taking 2 seconds, but possibly more. But they discharge differently: if you put the Energy Exchanger into Discharge mode, and insert full Accumulators, they do not discharge only in the rate of necessary energy - they discharge completely, and at the full rate of your energy demand, up to 45MW. If your energy demand surpasses 45MW, they are guaranteed to discharge in 2 seconds.

Short
Accumulators as buildings are used for network balancing. They charge only with surplus energy, and discharge only as much as necessary to fit the demand.
Energy Exchangers are meant to be facilities to charge shipable batteries for transport to other planets or stars. They charge only with surplus energy, but discharge fully, behaving like a regular power generation source.
The question
Because Energy exchangers always discharge at full power, they become the primary energy source of that network, making regular fueled power generators provide less energy, thus burning less fuel. This means, they are per se not usable for local network balancing, like regular Accumulators as buildings are.

The big question is now: Is there a way to use Energy Exchangers for network balancing anyway?

The answer is of course:
YES!
It is just not immediately visible how, as the developers didn't want you to use them this way.
(If the answer were no, there'd be no reason for this guide anyway!)
How it works (Preliminary Basics)
This is lots of basic information, pro DSP gamers can skip this section.

Basics 1: Charge/discharge behaviour combined
The naive attempt would be hooking two Energy Exchangers together, one in Charge mode, one in Discharge mode, like this:


If your available power levels are lower than the demand, you'll see that your charge rate is lower than your discharge rate, which is in fact a low cost network balancing. The difference between discharge and charge rate is about the same as the difference between power generation capacity and demand.

The problem is, that this way, while in bad times, your network is being helped by discharging accumulators, in good times, the charge and discharge ratio is equal. This means, you will run out of full accumulators over time. And that's not what we want from network balancing.

The second naive attempt would be: ok, well, then let's hook up *two* chargers for one discharger. This way, in good times, more accumulators get charged than discharged.
But this is also problematic: over time we will end up with all accumulators charged, and running out of empty accumulators, which isn't bad in itself, but that means accumulators are discharging uselessly while no empty accumulator is charging.

That's why we need to find a more sophisticated way than just hooking Energy Exchangers together.

Basics 2: What happens on Energy shortage
The whole energy network is homogenious. When there is energy shortage (meaning demand surpasses generation capacity plus eventual accumulators discharge capacity), all buildings demanding energy get the same percentage of energy. If your network needs 50MW energy, but your generation capacity is only 40MW, you are 10MW short, which is 20% of your demand, and you are only meeting 80% of your demand. That means, all buildings work at 80% energy/capacity. For most (if not all?) buildings this simply means, they are working at reduced speed, and the less demand is met, the slower the building works.
Energy shortage also means, wireless towers are charging the Mecha at a slower speed.

However, there are also a few things which are not affected by energy shortage.
Your Mecha is not affected by Energy shortage in your network, as it has it's own power system. Most importantly, belts are not affected. The transmission range of towers is not affected. The working speed of splitters is also not affected. Generation capacity of electrical plants is not affected, but Mining equipment works slower, and the loading capacity for fuel into the electrical plant is affected, as sorters work slower. That means, having not enough energy to mine fuel might starve your electrical generation further, creating a cascade effect.

Basics 3: Splitters
Splitters are nice buildings, and absolutely important for efficient layout of distribution networks. The basic property of Splitters is having 4 ports, which you can hook up incoming and outgoing ports to as you like (of course you'll need at least one incoming and one outgoing), and the Splitter will distribute incoming items evenly to outgoing ports. Additionally to that, Splitters can have maximum one priority output port, and one priority input port. Priority input means, as long as that port has items incoming, they are taken from this port, otherwise from other input ports, and if no input port has any items, the splitter runs idle. Priority output means, as long as that port is free, items are sent out this port, otherwise through other output ports, and if no output ports are free, the belts are stuck. Priority output can have another property: a filter for one item type. If the filter is set, the Splitter behaviour changes: only this item type is put into this output port, and this item type will never come out of the other output ports. This leads to stuck belt if for example the next item in the Splitter is the filtered item, but the filter port is blocked, regardless of the state of the other output ports.

Basics 4: Belt merging
Conveyor belts follow a simple pattern. It is important to understand the rules.
A belt can only have 1 output, but multiple inputs.
A belt with one input is easy.
A belt with two inputs will behave differently depending on the input location of the inputs. If one input of the belt goes straight to the output, the other input becomes lower priority - items from the non-straight belt input are only put into the output when there is no item from the straight belt input. If both inputs are not straight, the items are merged from both inputs.
A belt with three inputs will have priority on the straight belt, while using alternating inputs when the straight belt is empty.

The most important belt merge to remember is the two inputs belt with one straight input, giving priority to one of them.

Basics 5: Belt speeds and Sorter speeds
Two very important things to learn are Belt speeds and sorter speeds.

Belts come in three variants with different speeds - 6 items/s, 12 items/s and 30 items/s. Belts hold one item per grid.
Sorters also come in three variants - 1.5 items/s/grid, 3 items/s/grid and 6 items/s/grid - which basically means, the further away they have to go, the longer it takes.

The math is very easy. To saturate a belt, you need to add sorters adding up to at least the same number. For example, to saturate a 6 items/s belt, you need to use 1 Mk3 sorter on range 1, or 4 Mk1 sorters on range 1, or 4 Mk2 sorters on range 2.
The solution
Now, how to all those things come together?

Basically, what we need, is a control loop. We need to create a self-regulating system.
Simple self-regulating systems use the resource they produce for regulation. We are doing the same, we regulate using energy.

Remember what is affected from energy shortage, and what is not. Belt speeds are not affected by energy shortage, Sorter speeds are affected. The less energy demand is met, the more regulation is necessary, and the more energy becomes available due to regulation, the system gets inhibited again. Once there is enough energy available from outside, the system stabilizes itself.

We have:
  • A Conveyor belt Mk1 system (speed 6) for the control loop, saturated with water by two Sorters Mk2 on range 1 (speed 6), oversaturated by another Sorter Mk1 (speed 1.5). The oversaturation makes the system less sensitive to fluctuations, but you can also work with just speed 6. The closer you get your sorter speed to the speed of the belt, the more sensitive the control loop will become. Important is: the sorters putting the water back into the storage should be a bit faster than those putting it on the belt, to make sure there is no belt stutter.
  • A Charger/Discharger line of two Energy Exchangers, and a storage for charged accumulators. You can also add a storage for discharged accumulators between the Energy Exchangers. The splitter has a filter for only allowing charged accumulators into the Energy Exchanger.

How it works:
 As long as the network has enough energy, the Sorters will keep the pace of the belts, and keep the water flowing, closing the control loop by keeping the belt saturated. As long as the belt is saturated, the lower priority merging rule for the charged accumulators from the storage will not enter the belt.
As soon as the energy level drops enough to slow the Sorters down, there will be holes on the belt. Those will be filled by charged accumulators.
In the splitter, the charged accumulators get filtered out and enter the Discharger, aiding the network.
The discharged accumulator then enters the Charger and waits to be charged.
When it's charged, it gets charged slower than the next accumulator gets discharged, due to the shortage. While discharging, there is enough energy for the Sorters to close the gaps again, so no more accumulators enter the belt.

When there is enough energy from power generators again to satisfy the needs, there will be no discharging anymore, and the spent empty accumulators are charged as the energy network allows.
At the end, all your accumulators end up charged in your storage again.
Let's build it: two easy steps
So, how do you build it?

It is in fact very easy, only two small steps.
Step 1: Accumulator loop
Create the Accumulator loop.


It consists of:
  • Two Energy Exchangers, one set to Charge, one set to Discharge. Conveyor Belt from the Discharger to Charger.
  • A Splitter close to the Discharger, feeding into the Discharger. The Splitter's output filters full Accumulators only.
  • A Storage with a Sorter into, and a Sorter out of it. Closing the circuit.

At the end you should have a closed loop of belts.
Step 2: Control loop
Create the Control loop.


It consists of:
  • A storage for the control loop items. I'm using water, it's well visible, but you can also use oil, or any other item except accumulators.
  • The storage should have enough Sorters to keep the Conveyor belt saturated. For example, for a 6* Belt use two 3* Sorters at distance 1. Then optionally add a bit more Sorter capacity to adjust the sensitivity of the control loop to fluctuations. Remember: The closer you come to the Belt number, the more sensitive it is. In my example, I used a 6* belt and 7.5* Sorters.
  • Add Sorters to put the control loop items back into the storage. Use a little more capacity than for putting it on the belt. In my example, I used 9* Sorters.
  • Connect the belt from the control loop item storage to the belt leading from the accumulator storage in a way that the belt from the control loop item storage is straight. This is important to give this belt priority.
  • Connect one free port from the splitter back to the belt to put the items back into control loop item storage.

You now have a second belt loop leading from the control item storage, past the side belt from the accumulator storage through the splitter back to the control loop item storage.
Result
Now it is time to switch it on.

First, put enough control loop items into the control loop storage. I used water.
Wait and see how the control loop fills.


Then, put full accumulators into the accumulator storage. See how the first accumulators end at the water belt.


The system is armed and ready.
Variations
There are a few ways to create variants on this setup.

  • You could only use one storage, and sorters with filters. I didn't do that in this example, for clarity's sake. Using only one storage makes for an even more compact layout.
  • You could use faster belts (and faster sorters, of course), to have a chance for finetuning the speed ratio for the control loop, for example use 12* belts and 13.5* sorters. You could also use sorters with longer distances for this reason.
  • You can integrate this setup into your accumulator logistics.
  • If you don't like to use the elevation in the control loop belt, you can alternatively place a second splitter.
  • You can use a Sorter to pick the full accumulators from the control loop belt instead of using the Splitter, so you can build even more compact. The only thing you need to take care of is the Sorter speed. If this Sorter is too slow, accumulators will end up at the control loop belt and the control loop item storage. Of course this is no problem, if you only use one storage for accumulators and control loop items.
  • You can use the same mechanism with the sorter and belt speeds to provide emergency fuel for distinct auxiliary generators which are otherwise not active. Leave out the Energy Exchangers in that case, and put the power generators instead. For full accumulators, swap them with the fuel. You don't need a way back for empty canisters from the generator (as long as the devs don't implement it, which would be a great thing). But using it this way makes you responsible for adding more fuel as needed to the storage if it gets used.

For example, a more compact layout with very high sensitivity for energy fluctuations would possibly be:

This means: Sorter speed = Belt speed (no oversaturation), and a very short way for the gaps and the accumulators to enter the Discharger.
Thanks
Thanks for reading!

If you have any suggestions how to improve the guide, please let me know.

The images with the description of the Accumulator and the Energy Exchanger are screenshots from the awesome DSP Wiki [dsp-wiki.com]
17 megjegyzés
Gnarler 2023. jan. 22., 18:47 
You have actually found a productive use for barrel/unbarrel !
Firepower 2021. okt. 13., 11:08 
Thank you. It was fun to tinker with.
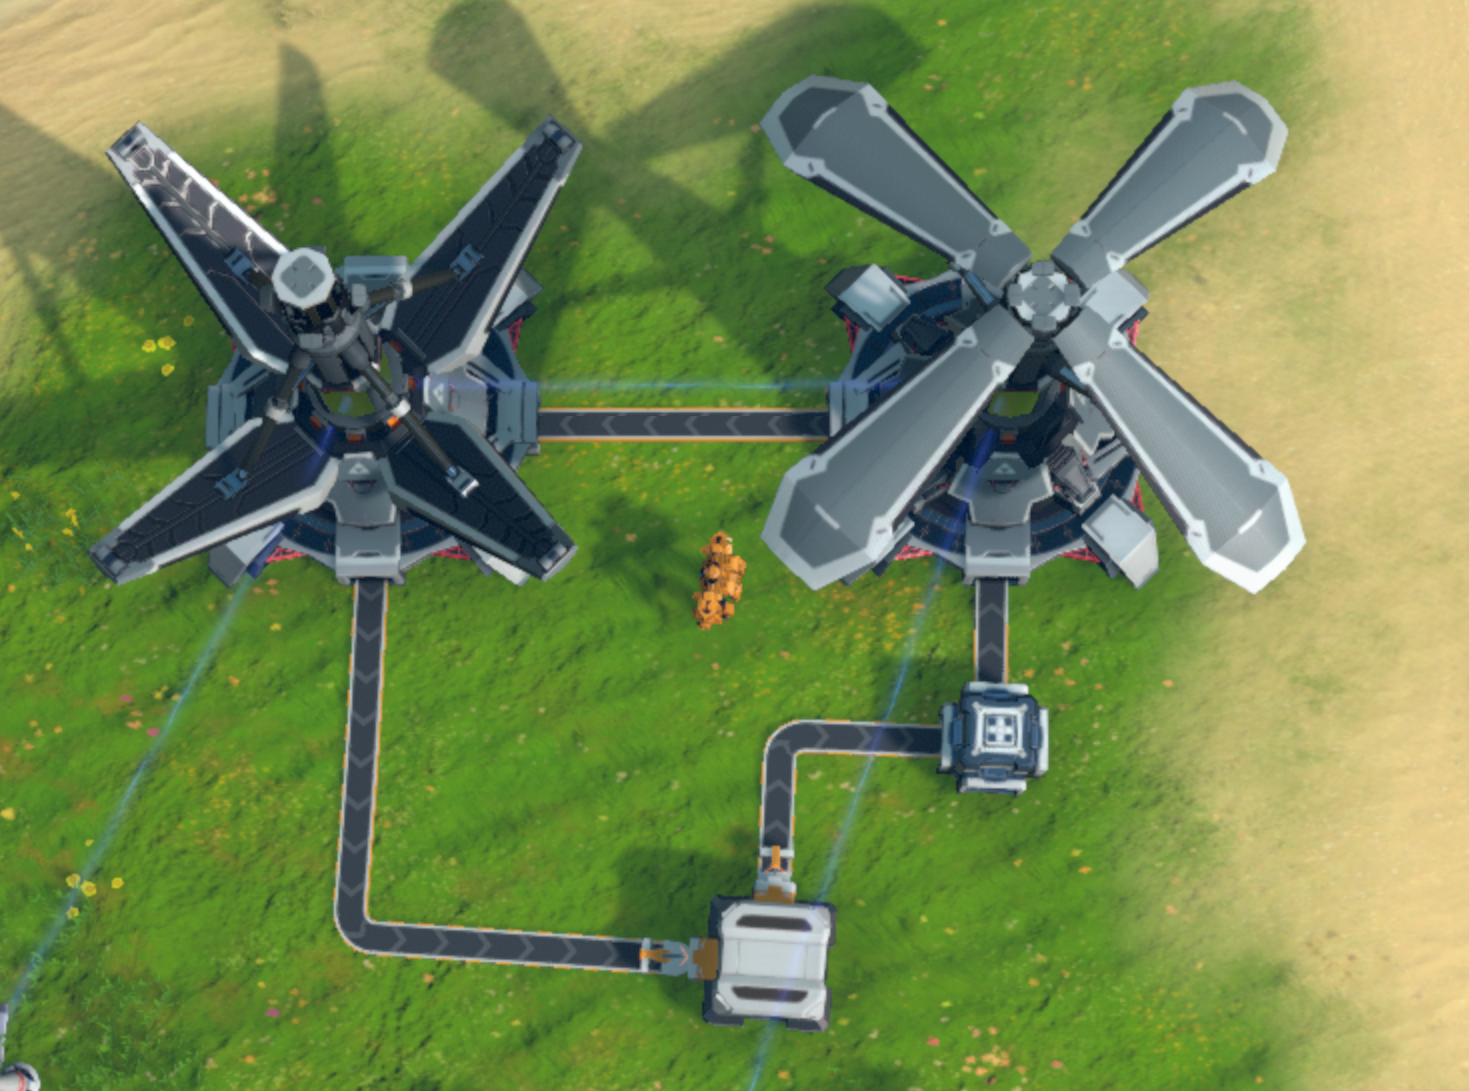
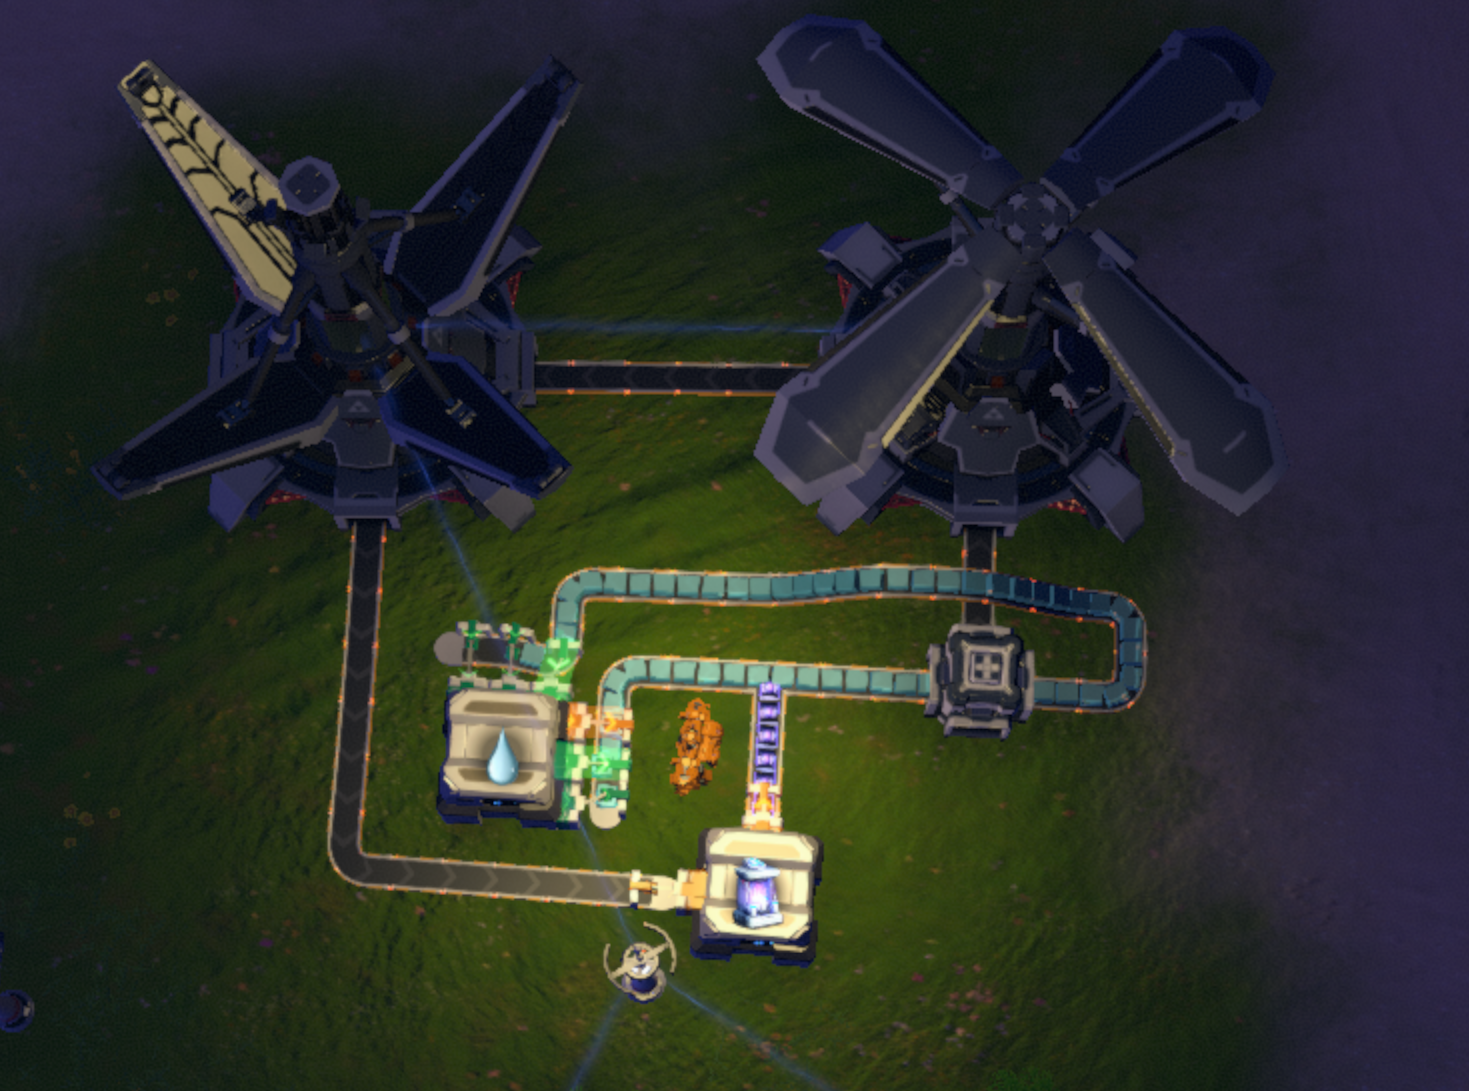
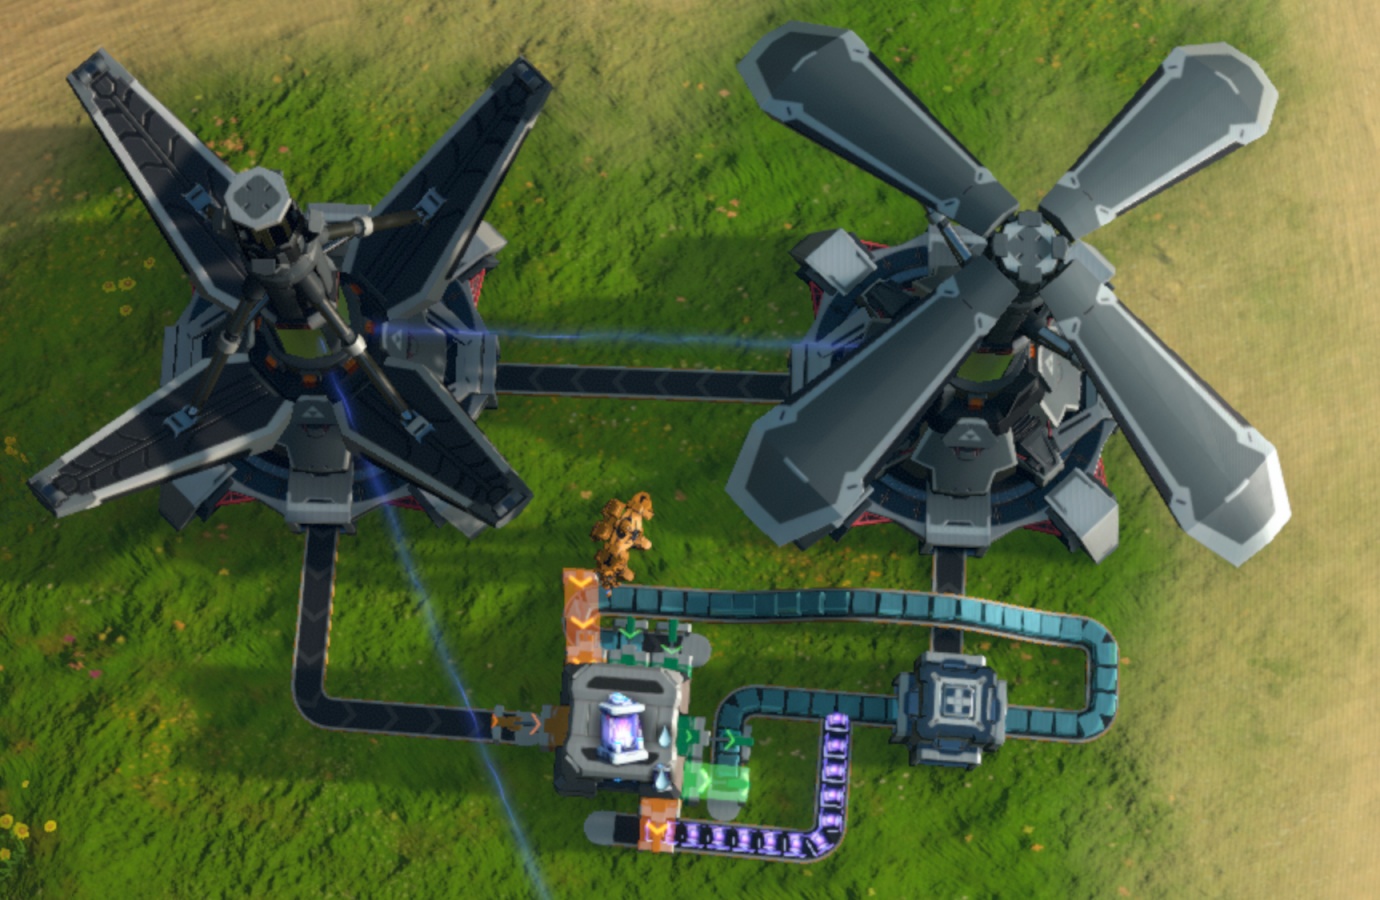
I've tried to plug my 0.2GW power swings with it instead of adding more Suns (just for fun).
Unfortunately, this approach is not suitable for supporting a network during short bursts in power demand(1-3 sec). The response time of, "failing to fill belt=>belt get filled by AC=>>..." way too long for this purpose.
But I think it'll work wonders for people who refuse to make belts of solar panels early game.:)
Upscaled and neatified. https://steamcommunity.com/sharedfiles/filedetails/?id=2627128784
NimbleJack21 2021. aug. 27., 21:23 
I like the idea, I made the formation a bit tighter, and set up belts/splitters to refeed and redirect batteries from EEs

https://imgur.com/a/UYmI3J5
Really 2021. jún. 23., 18:06 
or just cover the entire moon with solar panels and one giant tesla tower
Philos 2021. máj. 30., 8:41 
Nice guide and clever idea.
hugo_k 2021. máj. 22., 1:57 
Excellent!
Stopwatch 2021. márc. 31., 1:13 
Cool setup! I got as far as the second Naive solution before moving on to other problems in my own game. I hadn't thought of filling up the belts on purpose, but that's a resourceful and elegant solution.
jeremyaroundtheworld 2021. márc. 27., 4:19 
You've mentioned emergency fuel as your final variant, but it might be worth pointing out that you can use a similar variant to avoid wasting fuel if you have spare capacity in your power network and you're using a combination of renewable and non-renewable power (e.g. solar panels and thermal power generators). For example, if you're generating 50% of your power from solar and 50% from coal, and your overall power usage is 50%, the game runs solar panels and thermal generators at 50%, using coal and wasting 50% of your solar generation (you would probably prefer that it just ran off solar). Your idea here can be used to avoid this, and make the network use only solar and only switch on thermal power when needed. Just thought it might be worth a mention at the end of the guide.
qcs2017  [készítő] 2021. márc. 22., 8:41 
Yes, if you leave out the two energy exchangers, and instead of full accumulators you use antimatter rods, you can provide fuel to auxiliary energy generators which only turn on if the main energy generation does not suffice. I will add that as a variant.
Ruruwawa 2021. márc. 22., 6:46 
Very clever solution, thanks. I guess it could be used to provide fuel as needed to generators too, like antimatter rods to artificial suns. This one is definitely going into my toolbox.