Metal Unit
188 valoraciones
Metal Unit Achievement Guide
Por Masquerine
Achievement Guide for Metal Unit. Contains additional information about the game as well.
3
2
9
3
   
Premiar
Favoritos
Favorito
Quitar
Introduction
This is an achievement guide for Metal Unit. Most achievements will unlock naturally as you play. Information will be provided to explain how to get everything. You'll need 4 playthroughs to get all achievements: New Game, (New Game +1 and +2), 1 Challenge (Any work, Hardcore isn't required for the "About Time" achievement. I got it while having challenges 1, 2, 3 active). The initial playthrough unlocks the NG+/Challenge options. Hardcore uses a separate save slot, so your original save data is not lost on death.

There may be spoilers depending on where you look. Images used are from in game screenshots.

Here's some basic information about how the game plays. Metal Unit is an action, sidescrolling, 2D, platforming, roguelite game.

Progression:

Complete the tutorial level/Episode 1's boss of Stone King to save your initial progress.

Saving. The game saves when you arrive back at Sun Tail Base or the rest stop areas in missions. You're free to return to the main menu at either point.

Armory is where any item you've found in the game is stored as a reference. You're able to take 1 item from each category with you. These items can be mastered, but they cannot be used for synthesis or crafting. An item is mastered when it reaches 100 EXP. Items gain EXP from being equipped while defeating enemies. As you master more items, you unlock more tiers of items to use from the armory. Rare unlocks at 30, Epic at 80 and Legendary at 150.

CC (Crystal Cores) are mainly used for permanent character upgrade progression. You'll earn CC from killing bosses, opening random chests and dying during a run. They can also be used as currency in Sun Tail Base to buy items.

Coins are used to buy items/trade during a dungeon. Shopkeepers carry 4 items. Coins are earned from defeating enemies or selling items.

Synthesis combines two items to make a new random item. The quality of the input ingredients affects the outcome. Two common tier items have a high chance of producing a common item, with a low chance of producing a rare item instead. Potions are an exception. Combine two potions to get a higher quality potion!

Crafting uses various specific items to produce specific items. Recipes are unlocked as you progress through the story. Sometimes it may be quicker to craft a new item instead of waiting around for it to randomly drop/synthesis. A few recipes convert 2x common items into 1x rare (for example: two pebbles into one better pebble).

Dungeons consists of 15 map areas and 1 boss. There can be rest areas as well to buy/sell/synthesis/craft. You can choose to rest for full HP, or take on a bonus room for a treasure chest. Dungeon maps can be random. Some maps may contain chests or secret areas. The minimap can reveal hidden areas. Sometimes you may need to explore higher up in a map to find hidden exits or chests. Hidden exits often contain bonus loot/enemies/puzzles.

Dashing is your tool for survival. If you can't avoid an attack, you can dash right into it to negate it completely with good timing. Most attacks can be nullified this way. The telltale !!! warning attacks should be avoided completely. If an enemy connects a red chain to you, your dash will be disabled.

Assist Mode makes the game easier with different options. You can have infinite potions, unlocked armory, free upgrades, infinite ammo, double damage, infinite jump, invincibility. You can still earn achievements with assist mode on.

EX Mode is a rogue-like experience with random enemies/item rewards/stage modifiers. You pick which path you want to take each time. It is meant to be a quick paced challenge mode.

Editor's Notes
To do:
Collection page info?
If there's anything you'd like me to add, let me know and I'll see about working on it.
Achievement List
There are no miss-able achievements. Most will be unlocked naturally as you play. Some are optional areas/secrets or farming for items. You can earn achievements while having Assist Mode on.

Story related:

Red Flavor
Potion Used!


Hard to Swallow
Complete chapter 1.


Dragged Along
Complete chapter 2.


Crossing-Over
Complete chapter 3.


Hot Lead
Complete chapter 4.


Negateve
Complete chapter 5.

End of story related achievements. These next ones should come from normal play without much effort.


Risk and Reward
Complete a dungeon.


Ironwork
Craft an item.


J0 Ann-A
Mix two potions.


Atelier Joanna
Upgrade an item by synthesis.


Am I a munchkin now?
Obtained a legendary item!


Ready? Get sets!
Activate a new item set.


A good day to die
Experience your first death.


Deal with it
Trade with a travelling merchant.


Ask and you shall receive
Obtain a cosmetic skin.


Practice makes perfect
Attack the training dummy.

The tougher achievements. Two require multiple playthroughs. One requires a no-death playthrough using the Hardcore Challenge (requires you to beat the game to unlock).


Perfect Cherry Blossom
Obtain and repair the Legendary weapon of Forestia.


Inside the Ancient Pyramid
Complete the pyramid level.


Showing off
Obtain enough items to get a sweet trophy in your room.


A new Master
Obtain enough Mastery Points to unlock Legendary items in the armory.


Fully loaded
Obtain all upgrades.


Replay maps without dying enough and you'll stockpile enough gold. You can also sell items at rest areas to earn more gold.
Gold Hoarder
Hold 5654+ gold. Not a world record.


Push It To the Limit
Complete a run in New Game +2

Possibly bugged? Hardcore isn't required. Just complete any Challenge Mode and it unlocks. I got the achievement from having Challenges 1, 2, 3 active. Challenge 4 is Hardcore Mode.

About time
Complete a hardcore run of the game.

The Ruins dungeon can be found in Deeplava. The entrance has a flaming cyan gem above it.
The King in Ruins
Complete the ruins dungeon.


Miner Problem
Complete the mines dungeon.


EX Mode
Giant Modification
Clear a EX Mode level with the Gigantic Mod.

Flying Modification
Clear a EX Mode level with the Flying Mod.

Speedy Modification
Clear a EX Mode level with the Speedy Mod.

Teleporting Modification
Clear a EX Mode level with the Teleporting Mod.

Explosive Modification
Clear a EX Mode level with the Explosive Mod.

Flaming Modification
Clear a EX Mode level with the Flaming Mod.

Freezing Modification
Clear a EX Mode level with the Freezing Mod.

First Layer of Extreme
Clear the first layer of EX Mode.

Second Layer of Extreme
Clear the second layer of EX Mode.

Third Layer of Extreme
Clear the third layer of Ex Mode.

Extreme Mastered
Complete a full run of EX Mode.

Rescue Mission M
Rescue the Mixologist in EX Mode.

Rescue Mission T
Rescue the Tailor in EX Mode.

Rescue Mission B
Rescue the Blacksmith in Ex Mode.
Walkthrough/Boss Summary
==Tutorial/Episode 1==
From game start to first boss is fairly easy and straightforward. There are a lot of HP potions to find, including some in hidden areas on the map. Look at the minimap to easily reveal these areas for bonus items.

==Stone King==

Stomps to make rocks jut up from the ground in a line.
Tosses blue orbs around him.
Sprays a line of orbs that spins slightly at a medium distance.
Can teleport (does not deal damage). Can combo with ground stomp.
Drops: CC, Versatile Axe, Pebble.

After defeating Stone King you'll be in the Sun Tail Base map. You begin in Joanna's room. The first room has the VR Console to practice using items on enemies. Enter it, pick up any weapon and equip it. Head to the lower right and attack the training dummy for an achievement. Exit with any green door. The next room has the armory, set bonuses, skin changer and storage. The armory lets you take 1 of each item. The armory consists of pretty much every item/weapon you'll find in your dungeon runs. As long as you've found something once, it'll appear here for future use. You can master these items, they just can't be sold for coins, used for synthesis or used for crafting.

The set bonus machine gives you a passive depending on which set you pick. Initially you only have Cadet unlocked, so you'll start with bonus HP potions in your inventory if you die. The skin machine lets you change your player skin model which is cosmetic only. The storage area is found below. You can store items here that will be saved even if you die. These items can also be used for crafting during a run, saving you inventory space. You unlock more storage as you progress in the story.

In Sun Tail Base there are shops that require CC as currency. These shops are meant for late game when you no longer need CC to upgrade your character. Head to the right to find the mission portal. If you ignore it and go further right you'll find the museum. There's a chest inside for 2 CC. Double jump and dash to get up the cliff. Falcon's Health Scan and Assault Mode upgrades are good early grabs. Health Scan shows enemy HP. Assault Mode gives you another item slot to equip things. Metal Unit's Power of a Giant gives you access to many secret areas in Forestia. Pick that up when you can to get more treasures per run. Head to the portal to begin Forestia.


==Forestia: Episode 2==
==Blue Dragon==


Summons 1 black egg enemy. If ignored the egg will hatch into a black grub that attacks.
Stomps with it's front leg. Several swords pop up from the ground after from blue marked locations.
Opens mouth and releases two circles with many red projectiles.
Opens mouth and charges two lasers, top and bottom. The lasers swap places as they move.
At 50% HP or less:
Mouth lasers increases to 3.
Red projectile circle increased to 5.
Summons 3 black egg enemies.
Drops: CC, Bakuta, Dragon's Scale Fragment, Heart of the Lightning Dragon, Blue Synthesis Gem.


After defeating the story mode boss, a replacement boss will appear for future runs of Forestia.
There is also a miniboss that can appear (and you may have fought it on your first time through.) Proceed to Snowland when you feel comfortable. You should grab the Joanna upgrade Cat Walk, as some secret areas require it to access them.


==Forestia: Miniboss==
==Stone Golem==


Swipes with left arm.
Swipes with right arm.
Slams left arm down, getting it stuck in the ground.
Slams right arm down, getting it stuck in the ground.
Slams both arms down.
Pulls both legs together and charges a ball of energy. Two vertical lines are marked in red. Lasers appear here after a short delay.
Drops: CC, Black Crystal Core, HP Potion, Opal Core, Pebble, Metal Chunk.

==Forestia: Replacement Boss==
==Lightning Prince==


Can throw a fan of horn projectiles.
Can throw 5-6 horn projectiles in a line.
Can shoot out a ground lightning spike that travels towards the player.
Can charge forward if the player is too far away.
At 50% HP or less:
Ground lightning spikes increased to 2 in a row. They travel faster.
Marks massive red circle area that explodes. Two energy ball pillars appear after and move towards Lightning Prince. If the player is too far away, he will charge forward with the lightning ball pillars following him.
The horn line projectiles are stronger and purple.
Drops: CC, Dragon's Scale Fragment, Lightning Dragon Heart


Double boss battle for Episode 3. Shion tends to be the more immediate threat with her quick giant laser attack. Be ready to evade Adam if he starts using teleport strikes. Keep distance from Adam when he has the swords out.


==Snowland: Episode 3==
==Adam==

Makes 4 large swords appear around him. These slowly rotate and Adam slowly approaches
Teleports and attacks with a quick blade strike. He'll do this multiple times in a row.
Throws out a stream of small lightning balls towards the player. They explode into lightning bolts if they contact the ground.
==Shion==

Stabs forward once.
Marks a big horizontal line and unleashes a laser.
Stabs the ground and summons slow moving meteors.
Drops: CC, Black Core Fragment, Alien Material Fragment, Purple Synthesis Gem, Nightblade.


After defeating the story mode boss, a replacement boss will appear for future runs of Snowland. Seek out the optional Snowland secret area Hidden Temple if the map appears for another boss and new items. The map has a small pyramid poking out of the snow with a hidden entrance below it.
Proceed to Deeplava when you feel comfortable. Metal Unit's Burn Resistance upgrade will help to negate residual damage, as lots of enemies here use fire attacks.


==Snowland: Replacement Boss==

==Immovable Gary==

Can periodically chain the player, prevent use of dash.
Can summon 2 flying robot enemies.
Can fire a swarm of seeking missiles.
Lifts top turbine: fires a multitude of orbs.
Bottom turbine moves forward: ! warning indicator before it fires a red laser, knocking the player back into the ice spikes. The top turbine shoots out a ring of projectiles at the same time.
At 50% HP or less:
Red laser ! warning attack now alternates three times. Usually bottom, top, bottom.
Gary can pause to heal a moderate amount of HP.
Drops CC, Alien Material Fragment, Alien Part, Mysterious Item, Purple Synthesis Gem.

==Snowland: Hidden Temple Boss==
==Eye of the Ancient==


Summons 4 large diagonal red lasers that spin. These knock the player back on contact. The direction they spin can alternate between uses.
Summons 4 large diagonal red lasers for a second, then quickly swaps to 2 horizontal and 2 vertical lasers instead for a second.
Summons several red circles that explode.
Throws out a multitude of projectiles.
At 25% HP or less:
Only uses the red exploding circle attack. The speed and amount are greatly increased.
Drops: CC, Guardian Carapace, Guardian Cube, Guardian Plan, Guardian Armor, Guardian Shield, Guardian Greatsword.


Large enemy boss for Episode 4. You have to target Lava Ruler's 3 eyes when they open. Having weapons that can shoot up/auto target will help here, as Lava Ruler's eyes are above you constantly. Clear out the falling boulders and enemy spawns to limit enemy projectile count.
Walkthrough/Boss Summary Pt.2
==Deeplava: Episode 4==
==Lava Ruler==


Summons skull enemy.
Drops giant rocks from above. These release a circle of projectiles on landing.
Smashes both arms together and releases two blade waves that travel along the ground in opposite directions.
Marks many yellow lines in many directions that unleash lasers after a short delay.
Drops: CC, Ancient Magic Stone Fragment, Fiery Egg, Heart of Flame.

After defeating the story mode boss, a replacement boss will appear for future runs of Deeplava. Episode 5 is different from the others. There's no maps to explore, just boss fights. Bring lots of potions. You'll enter a boss fight immediately on entry. You get a safe zone hub to craft/synthesis/buy before the other bosses. These shops use CC as currency. Shops restock after every boss. If you defeat a boss and die, progress is saved. You won't be able to return to Sun Tail Base unless you die or defeat every boss.


==Deeplava: Replacement Boss==
==Twilight Guide Caladbolg==


Burrows and fires a multitude of orbs around.
Burrows and throws out large boulders.
Burrows and makes multiple red marks appear on the ground, then swords thrust up from them.
Unburrows and jumps, changing into a saw blade before burrowing somewhere else. It causes a sword shockwave on landing.
At 25% HP or less:
Movement is increased.
Marks massive red pillars that summon massive lasers.
Drops: CC, Gold Synthesis Gem, Ancient Magic Stone Fragment, Fire Storm.


==???: Episode 5==
==Hana==


Makes two rings of red orb projectiles that fan out.
Throws a fan of flame projectiles out.
Makes a giant sword appear that swings around her multiple times as she moves.
Points her arm and marks two red areas beside her. These engulf in flame tornadoes.
Jumps and kicks into the ground, making 3 flames appear.
At 50% HP: The battle ends.
Drops: None.

==Green Portal: Slithering Emperor==

Slithering Emperor is vulnerable on it's face and a green gem that moves around on it's body. When it shoots projectiles, there's a blind spot behind it.
Blows the player far away.
Shoots out 5 large red projectiles from it's mouth. It can chain this attack many times in a row.
If the player is in melee range, the tail sword spins and explodes.
Flies around the arena.
Drops: CC, Heart of the Glacier, Ice Armor.

==Red Portal: Slime Emperor==

Shoots out large flaming balls. These explode with a flame shockwave. Dash into them to destroy them before they can explode.
Fires a large laser horizontally.
Can bite if the player is too close.
Summons green healing slimes and black bomb slimes. If the healing slimes are left alive, Slime Emperor will vacuum them in and heal itself. The bomb ones explode after a short delay if attacked. If the bomb slimes are left alone, Slime Emperor will suck them in and deal massive damage to itself. You will take damage every time the Slime Emperor uses its vacuum attack.
Drops: CC, Gold Synthesis Gem.

==Blue Portal: Black Dragon==

The orb pillar will periodically disable your dash. There's lava hazards on either side of the field.
Flies into the background. Fireballs bounce in from one side. Flies back into play.
Moves to one side, then opens its mouth and fires a laser while strafing to the other side. Jump over this attack or stand near the very edge of the far platform.
Releases several large red/black orbs.
Little lights appear on it's shoulders. These release a multitude of tiny red orbs.
Drops: CC, Amethyst Core, Heart of Flame.

==Giant Door: Eve==

Marks a massive red beam. Small lasers appear from the middle to the outside of the red area.
Marks a red horizontal beam. Eve's giant hand sweeps by after a short delay.
Marks numerous vertical red beams. Lasers appear in all red marked areas after a short delay.
At 50% HP or less:
Eve's attack speed is increased. Attacks can overlap.
Drops: None.

Cutscene and another battle.

==Eve-Yuna==

Marks a red massive area. A massive laser appears after a short delay.
Marks two red horizontal areas. Lasers appear after a short delay.
Fires a multitude of small blue orbs.
Can teleport and go invisible, but can still be attacked.
At 50% HP or less:
Eve-Yuna is marked with a skull and can only take damage when visible. Her attacks can now overlap.
Marks multiple red diagonal areas. Lasers appear after a short delay.
Marks multiple red vertical areas. Lasers appear after a short delay.
The orb attack is now red with larger orbs.
Drops: None.

Defeating Eve-Yuna gives the Negateve achievement. You also unlock New Game+ for your save slot. Yuna's Room in Sun Tail Base has a new Challenge Mode unlocked.
New Game+/Challenges
New Game+ and Challenges are unlocked when you finish the game. Challenges are found in Yuna's Room. Any number can be activated at once.

These challenges use a separate save slot but upgrade your original save slot with the rewards. So you can freely attempt Hardcore Mode without losing your original save data. There's 5 challenges and you can activate as many at once as you want. You'll begin the game starting at Episode 2. You can abandon your challenge progress to return to your normal playthrough by revisiting Yuna's Room.

==Challenges==
Unstable Armament: Your items randomize every map transition. Tier will stay the same. Type will stay the same (example: blue guns only randomize into blue guns). Reward: Mystery Gun.
Super Enemy: Enemies attack faster and can't be interrupted. Reward: Heat Generator.
No Potion: Potions are unavailable. Potions obtained will become Pebbles. Reward: Life Elixir.
Hardcore: One life. Death resets the challenge run. Reward: Sentinel Mode.
The Hunt: Joanna is being hunted by a relentless enemy. Finish levels quickly to escape. Reward: Metal Bike.

==Rewards==
Mystery Gun: Every time the gun reloads it switches into a new gun. This gun cannot be mastered.
Heat Generator: After a successful dodge, increases damage dealt and received by the player.
Life Elixir: Potion that keeps working for awhile after being used.
Sentinel Mode: The Metal Unit splits off from Joanna, following as an AI companion.
Metal Bike: Joanna rides on a metal bike, increasing movement speed. Crouch is disabled while on the bike.

The relentless enemy is Hana from Episode 5. She will swing her sword for 10 damage, shoot a sniper rifle for 15 damage and use a firestorm attack for 5 and inflicts burning for additional damage. She will teleport with the firestorm attack. She will not appear during boss battles, rest stops or the rest stop bonus dungeon area. She will not appear in the Ancient Temple.
Completing any challenge gives you the "About Time" achievement. Hardcore specifically is not required. Possibly a bug?
Completing all the challenges unlocks a new skin.


==New Game+==
Activate New Game+ from your save slot menu after beating the game. New Game+ will restart the story while keeping your current items and upgrades, but with increased difficulty. Warning: This choice is permanent and will overwrite your save file. There is no limit to how many times you can NG+. You only need NG+2 complete for the achievement.
Deeplava: King's Tomb
King's Tomb is a dungeon area that appears in Deeplava. The entrance is an ominous cave with a flaming cyan gem above it. There's a separate set of rules for this zone, and when you complete it you'll return back to Deeplava. Your current progress through Deeplava is saved.


You begin with a safe zone and a choice of 3 buffs. You can only pick one. These buffs remain with you until King's Tomb is complete. Two are revealed and one is a random, mystery one. Possible buffs include: Damage increase, damage taken reduction, cooldown reduction, extra jump, extra movement speed, max HP increase.
There is a shop and a free chest that gives CC and 1-2 items. The shop always seems to sell the same 4 items: M.Skull, Improved Sniper Rifle, Broadsword, Ice Pendant. These items can help you do single target attacks to deal with the block enemies in case you didn't bring the right gear.

The chest possible items include: King's Tomb Blade, Blue Synthesis Gem, Purple Synthesis Gem, Gold Synthesis Gem, King's Tomb Flame, King's Tomb Light, Ruby Core, Quadnade, King's Tomb Jewels, Dimensional Blade, Plasma Coating, Odachi, Sky Spear

You'll have a combat zone and then a safe zone for another choice of buff. This cycle repeats until you reach the boss. There's two new enemy types with variations of each.
The first new enemy is a combination of blocks. You need to turn all of the connected cyan blocks into pink ones by hitting them. You may need to use a precise weapon to match the blocks on the larger enemies, as AoE or piercing weapons may make things difficult. These enemies come in 1, 2, 4 and 15 block combinations.
The second new enemy is a humanoid sized with cyan armor. The first variation can teleport and activate a reflective shield, turning your projectiles/damage against you. The second variation can teleport with a few dangerous attacks. This enemy only attacks after teleporting.


==Ruin King==

Starts off with a green eye that periodically shoots out a cyan orb at you. In order to damage Ruin King, the block enemies need to be all pink. Ruin King's Eye will fall to the ground, becoming vulnerable.

Phase 1: 13 Block
Any block that is currently cyan can have a small blade stick out during any of the attack patterns. Pink blocks are harmless.
Attack 1: Approaches from the right, then charges at Joanna.
Attack 2: Hovers above Joanna, then slams down.
Attack 3: Hides from the right. A reloading sound can be heard before it fires a big laser horizontally.
Attack 4: Hovers above Joanna in a sword shape. Rotates counter clockwise quickly once.
Attack 5: Appears as a big circle with one block in the center. Spins counter clockwise twice. This is your chance to pick off any remaining cyan blocks easily.

At around 35%? HP Phase 2 begins.

Phase 2: 9 Block and 5 Block
Pink blocks do not disable 5 Block's lasers.
Attack 1: 9 Block chains Joanna so she can't dodge. 5 block rotates and shoots lasers multiple times.
Attack 2: 9 Block chains Joanna so she can't dodge. 5 Block appears on the left or right side and fires multiple horizontal lasers.
Attack 3: 9 Block is horizontal. Any cyan blocks have a blade on them. 5 Block hovers above from side to side, shooting out 4 lasers 3 times.
Attack 4: 9 Block and 5 Block hover and spin. This is your chance to pick off any remaining cyan blocks easily.

Drops: CC, Execution
First time reward: Player skin: Ruin Unit
Crafting Recipes
Here's a list of the crafting recipes and the materials they require. You can safely store items for crafting purposes in your storage area in Joanna's Room. Armory items cannot be used for crafting. You'll need to find materials as you play and store them for later. For most recipe items it is possible to randomly synthesize them, but depending on your luck you may just want to craft a missing item instead.


Melee Weapon
Barben Sword: #1004 Broadsword, #2038 Metal Chunk.
Biohazard: #1002 Execution Axe, #2038 Metal Chunk, #2038 Metal Chunk, #2038 Metal Chunk.
Blazing Starlight: #1022 Centipede, #6027 Heart of Flame.
Butcher: #1005 Barben Sword, #6030 Alien Part.
*Dragon Katana: #1029 Broken Dragon Katana, #6029 Lightning Core Device, #6025 Alien Material Fragment.
*See Perfect Cherry Blossom section of the guide to find out how to get this recipe/item.
Dragon Spear: #1036 Sky Spear, #6026 Dragon's Scale Fragment, #6030 Alien Part, #2038 Metal Chunk.
Eros: #1011 Gamora, #6024 Ancient Magic Stone Fragment.
Executioner: #1012, #6030 Alien Part, #6019 Dusk Beads, #6029 Lightning Core Device.
Frozen Starlight: #1022 Centipede, #6028 Heart of the Glacier.
Light Saber: #1007 Orochimaru, #6030 Alien Part, #6019 Dusk Beads, #6029 Lightning Core Device.
Light Sword: #2038 Metal Chunk, #6030 Alien Part, #6025 Alien Material Fragment, #6029 Lightning Core Device.
Master Sword: #1007 Orochimaru, #1003 Biohazard, #1012 Eros, #1016 Wildcat.
Orochimaru: #1005 Barben Sword, #6027 Heart of Flame.
Wildcat: #1015 Brenada, #4011 Crimson Wind.

Ranged Weapon
Astra: #2036 Bloody Combat Crossbow, #2301 Hunter's Walter 3000, #2016 Mika's Arrow, #6027 Heart of Flame.
Bloody Combat Crossbow: #2052 YZI II, #2301 Hunter's Walter 3000, #2016 Mika's Arrow, #6024 Ancient Magic Stone Fragment.
Cannonball: #2038 Metal Chunk, #2038 Metal Chunk.
Coldsnap Revolver: #2002 D-Type Magnum, #3013 Ice Pendant.
Dragon Rake: #3000 Lotus, #6026 Dragon's Scale Fragment, #3034 Heart of the Lightning Dragon.
Lightning Storm: #2042 Fire Blossom, #3026 Sweeping Lightning.
Master Gun: #2050 Breath, #2015 Crystal AXIs, #6029 Lightning Core Device, #6019 Dusk Beads.
M.A.C: #2002 D-Type Magnum, #2031 Pebble.
M. Dragon: #2008 M. Wolf, #6030 Alien Part, #6024 Ancient Magic Stone Fragment.
M. Wolf: #2007 M. Blood, #6030 Alien Part.
Otherworldly Magnum: #2019 Brass Handgun, #2006 M. Skull, #6030 Alien Part.
Otherworldly SMG: #2019 Brass Handgun, #2012 AXIs Type G, #6030 Alien Part.
YZI X: #2052 YZI II, #2021 Lucky L-77, #6025 Alien Material Fragment, #6029 Lightning Core Device.

Sub Weapon
Aurora: #3007 Grenade, #3032 White Phosphorus Grenade, #3015 Ice Grenade, #3034 Heart of the Lightning Dragon.
Dragon Figurine: #6026 Dragon's Scale Fragment, #3033 Fiery Egg, #6024 Ancient Magic Stone Fragment.
Holonade: #3007 Grenade, #5025 Opal Core, #6025 Alien Material Fragment.
Ice Grenade: #3007 Grenade, #6031 Damaged Alien Part.
Ice Hook: #3009 Hook, #3013 Ice Pendant.
Lotus: #3018 Moonchild, #6031 Damaged Alien Part.
Mysterious Ice: #3001 Fiyo Drone, #6030 Alien Part.
Quadenade: #3007 Grenade, #3007 Grenade, #3007 Grenade, #3007 Grenade.
Tactical Rocket: #3020 Silence Missile, #3019 SCUD Missile.
White Phosphorus Grenade: #3007 Grenade, #3007 Grenade.

Ultimate Skill
Blizzard: #3013 Ice Pendant, #3014 Ice Shards.
Crimson Wind: #4009 Storm, #4010 Tempest.
Dragon Helmet: #4003 Giant Particle Cannon, #6029 Lightning Core Device.
Giant Blade: #1004 Broadsword, #1013 Greatsword.
Giant Particle Cannon: #4008 Super Particle Cannon, #6025 Alien Material Fragment, #6036 Suspicious Fragment.
Tempest: #4009 Storm, #6031 Damaged Alien Part.

Addon
Dragon Heart: #6026 Dragon's Scale Fragment, #3034 Heart of the Lightning Dragon.
Dragon Pauldron: #6026 Dragon's Scale Fragment, #3025 Lightning Blades, #6011 Banshee Laser.
Emerald Core: #5025 Opal Core, #5026 Amethyst Core, #5027 Black Crystal Core, #6029 Lightning Core Device.
Monocle: #5025 Opal Core, #6036 Suspicious Fragment.
Opal Core: #2038 Metal Chunk, #6030 Alien Part.
Panel Missile: #5008 Panel Launcher, #6031 Damaged Alien Part.
Ruby Core: #5025 Opal Core, #5026 Amethyst Core, #5027 Black Crystal Core, #6029 Lightning Core Device.
Topaz Core: #5025 Opal Core, #5026 Amethyst Core, #5027 Black Crystal Core, #6027 Heart of Flame.

Accessory
Dimensional Blade: #1031 Light Katana, #6011 Banshee Laser.
Dragon Claw: #6013 Lightning Shoes, #6026 Dragon's Scale Fragment.
Dusk Beads: #6027 Heart of Flame, #6028 Heart of the Glacier, #6029 Lightning Core Device.
Gold Armor: #6005 Titanium Armor, #6035 Gold Bar, #6035 Gold Bar, #6035 Gold Bar.
Jard's Lightning Armor: #6001 Light Armor, #6031 Damaged Alien Part.
Phase Boots: #6013 Lightning Shoes, #6030, #6030 Alien Part.
Titanium Armor: #2038 Metal Chunk, #2038 Metal Chunk.

Miscellaneous
Alien Part: #6031 Damaged Alien Part, #6031 Damaged Alien Part.
Gold Bar: #6037 Gold Nugget, #6037 Gold Nugget, #6037 Gold Nugget.
Heart of Flame: #6024 Ancient Magic Stone Fragment, #2038 Metal Chunk, #6030 Alien Part.
Heart of the Glacier: #6025 Alien Material Fragment, #2038 Metal Chunk, #6030 Alien Part.
Lightning Core Device: #6026 Dragon's Scale Fragment, #2038 Metal Chunk, #6030 Alien Part.
Metal Chunk: #2031 Pebble, #2031 Pebble.
Material Farm/Traders/Skins
Looking for something in particular? Story bosses not included as their drops are one time only. Replacement boss drops are listed here.

==Forestia==
Chests mostly drop common items.
Pebbles (common, rare) can drop from rock type enemies. There's also destructible boulders that can appear on maps that drop Pebbles.
Miniboss golem: Black Crystal Core, Opal Core, Pebble, Metal Chunk.
Boss: Only drops 1 item: Banshee Laser, Dragon's Scale Fragment, Heart of the Lightning Dragon.
Cherry blossom secret map: Light Katana, Broken Dragon Katana. Ninja trader has Shuriken - 10 gold, Fabro's Shuriken - 25 gold, Kunai - 10 gold, Ground Breaker - 200 gold.

==Snowland==
Chests mostly drop rare items.
Damaged Alien Parts can drop from enemies.
Alien Parts can drop from enemies. The ones in rest area secret labs tend to have a better chance.
Boss: Alien Material Fragment, Alien Part, Mysterious Item, Purple Synthesis Gem.
Secret map: Ice block jumping. Follow the blocks high into the sky to find 3 legendary chests containing Heart of Flame, Heart of the Glacier, Lightning Core Device.

==Snowland: Ancient Temple==
Pot mimic enemies can drop Gold Nuggets, Gold Bars and Suspicious Fragment. These enemies respawn on map switch.
Other enemies can drop Damaged Alien Parts, Alien Parts. These enemies respawn on map switch.
Boss: Guardian Carapace, Guardian Cube, Guardian Plan, Guardian Armor, Guardian Shield, Guardian Greatsword.

==Deeplava==
Chests mostly drop epic items.
Boss: Gold Synthesis Gem, Ancient Magic Stone Fragment, Fire Storm.


==Random Map Traders==
Traders can randomly appear in most maps. Their location can be random. They appear as the same dark green as the minimap so they can be tough to find that way. If you see an NPC, go and talk to them. They might trade you or give you free items.


Cupa, Moonlight Pilot
100 gold for 1 CC.


White armor, CC in backpack
200 gold for 2 CC.


Flaming head, red wings
100 gold for Path of Flames ranged weapon. (Seems consistent on giving this item at this price.)
1000 gold for legendary weapon.


Black figure
200 gold for a Pebble.


Potion Man
1 free Potion.


Machi, Synthesis Girl
Free synthesis gems or items.


Backpack Metal Unit
30 gold for 1 blue item.
100 gold for 1 purple item.
300 gold for 1 legendary item.

==Skins==
Brave Unit [11] - Default skin.
Nomad Unit [10] - Touch the statue in the ancient pyramid.
Solar Unit [01] - Complete the story.
Naked Unit [00] - Complete all time machine challenges. Requires beating the game once to unlock challenges.
Hollow Unit [HW] - Kill a Halloween themed enemy. Can be obtained in Forestia. The yellow enemy looks like this:

Ace Unit [S9] - Complete the museum's hidden parkour challenge course. Check below the floor in the museum to find the hidden course.
Conqueror Unit [C0] - Find all the museum scrolls in various maps. The appear as a poster on walls. Interact to grab them. A complete guide to the poster locations is just below here.
Ruin Unit [RN] - Defeat Ruin King for the first time. The King's Tomb dungeon can be accessed in Deeplava through a cave door with a flaming cyan gem above it.
??? Unit [PS] - This legendary unit is shrouded in mystery and can't be unlocked yet.
Museum Scrolls/Conqueror Unit Skin
To unlock the Conqueror Unit skin, you need to find all of the posters hidden throughout the game. There's 27 in total, with 26 to find. Each poster also reveals some history about the events of the game in the museum. You start with one museum information piece/poster unlocked by default. The posters have set spawn locations, though finding the right map tile might take a few runs through the level to get it to show up. Interact with the poster to claim it. Posters look like this:


#1: This poster is unlocked automatically.

Forestia:

#2, #3: Abandoned Temple: First poster on right side of map. Second poster behind stone block, requires Metal Unit upgrade "The Power of a Giant" to break the block.


#4: Treasure Forest: Either go through the maze of giant saws or jump up at the start and hit the blue switch through the wall to open a secret passage. The poster is to the right of the golden chest.


#5: Cavernous Passage: Directly above you at the start.


#6: Steep Cliff: Bottom left of the map behind a waterfall/hidden electric barrier. Dash through it to find the poster and a chest.


#7: Canyon Cave Passage: Right side of the map.


#8: Aerial Bridge: Midway up, left side above the stone block.


#9: Hollow Hill: Behind the stone block. Requires Metal Unit upgrade "Power of a Giant" to break.


#10: Quiet Forest: Right at the start of the map. This is the Golem miniboss fight.


#11: Destroyed Road: Upper middle of the map, on the platform above the spikes.


#12: Strange Forest: Bottom left of the map.


#13: Firmament Hill: Requires Blue Dragon to be defeated first. This map will spawn as the boss stage for Lightning Prince to replace Blue Dragon. Poster is at the base of the tower.


Snowland:

#14: Collapsed Stone Bridge: The right wall of the spike pit is fake and hides the poster and a chest.


#15: Ruined Military Base: Top right of the map across an ice bridge. Requires Joanna upgrade "Cat Walk" to cross the ice without breaking it.


#16: Snow-Covered Eastern Area: Middle of map over the hill. To the left of the snow covered grey object is a fake floor. Drop down to find the poster and a chest.


#17: Snow Covered Mountaintop: At the top of the mountain is the poster.


#18: Western Hill Cave: Right at the start of the map.


#19: Ruins at the Foot of a Cliff: To the right at the start of the map.


#20: Unending Snow: Requires Adam/Shion to be defeated first. This map will spawn as the boss stage for Unmovable Gary to replace Adam/Shion. Poster is at the start of the map.


Deeplava:

#21: Blazing Lava Entrance: Right at the start of the map.


#22: Blazing Cave Interior: Bottom middle of the map.


#23: Blazing Audience Chamber: In the very middle of the map.


#24: Deepest Place of Deeplava: There's 3 long platforms stacked at the start. Head up top and go right to find the poster. There's multiple stages that share this map name.


#25: Blazing Rocky Zone: On the far right side on a platform.


#26: Fiery Cave: Requires Lava Ruler to be defeated first. This map will spawn as the boss stage for Twilight Guide Caladbolg to replace Lava Ruler. Poster is at the start of the map.

Sun Tail Base: Yuna's Room

#27: Requires final boss to be defeated first. In Yuna's Room, take the elevator down to find the poster on the left wall. Yuna's room is the blue door when you enter Sun Tail Base.
Inside the Ancient Pyramid
The Temple entrance looks like this:


I made a rough map to visualize the layout of the Ancient Pyramid. Start at the green box on the left side. Explore all the rooms to find chests. Mimic enemies can drop Gold Nuggets, Gold Bars, Suspicious Fragment. Other enemies can drop Damaged Alien Part, Alien Part. These enemies don't give Mastery Experience but they do respawn. There's a player skin to be found going from door A>D>E>F. You'll need Metal Unit: Power of a Giant. You can get away with not having the Cat Walk upgrade if you're quick with dashing and make use of your double jump to hit the ice midway through the bridge.

The chests here are one time obtains only. (Thanks to Recupel for confirming).

Kill the Eye of the Ancient at the end of the temple area to get CC, pieces of the Guardian Set and an achievement.

Perfect Cherry Blossom
This achievement requires you to find the secret area Forestria map that contains cherry blossoms, a merchant, Light Katana and an interaction object with a message. The message reads: "Don't say anything. Forget about all sounds. Maybe then you will find the real treasure if you're not looking for it."


You need to hit the three statues in the map in order: Top right, bottom left, middle. After hitting them, a treasure will be revealed in the top left section of the map.


This contains the Broken Dragon Katana. Master the weapon. You'll then need to craft the Dragon Katana. It requires #1029 Broken Dragon Katana, #6029 Lightning Core Device, #6025 Alien Material Fragment. The achievement is unlocked when you craft the Dragon Katana.
Practice Makes Perfect
In Joanna's first room there is a VR console. Activate it to open the testing area for gear. Pick up any offensive item and equip it. Head to the lower right to find the training dummy. Simply attack it once for the achievement.
Puzzle Solutions
Puzzles all seem to start the same way between runs.

This is the large Red and Blue puzzle. Hit the numbers as shown and you'll complete it.


This is the large Red, Blue and Green puzzle. Hit the numbers as shown and you'll complete it.


This is the small Red, Blue, Green puzzle.


User Recupel says: For the 3x3 2 colors puzzle you can also hit each switch once, meaning that one big single hit attack or ultimate will solve the puzzle.
For the 3x3 3 colors puzzle, two hits on each switch will work, so you can apply the same trick as the previous one.


For candle rooms, you need to hit or touch all candles within a few seconds to get a reward. There's a small, medium and large sized room for candles. The first two are easy enough to get with most weapons, between attacking and jumping. The large room is going to require something that can hit a long distance. The Sub Weapon Dragon Figurine is good for this.
47 comentarios
szklanka 25 ABR a las 1:41 
Thank you kind person for this guide!
Octo Chara 10 DIC 2024 a las 9:21 
Risk and Reward isn't unlocking for me and i have completed multiple dungeons.
MaXiMuS_Xl 9 JUL 2024 a las 15:54 
How do you unlock Achievement Ready? Get sets! ?? :lunar2020thinkingtiger:
Coldheart 2 JUL 2024 a las 15:20 
I honestly didn't enjoy the game, but I wanted to get the achievements. Thanks for the guide. :steamthumbsup:
bobrocks95 24 SEP 2023 a las 10:49 
Any idea what all these EX mode achievements are that nobody's unlocked? Are they for an upcoming update to the game maybe?
Dexxter4 8 FEB 2023 a las 17:01 
Anyone happen to have any tips on finding the King's Tomb entrance? I've finished the game about 7 or 8 times now, and still can't find the entrance in Deeplava. I've been looking all over the place and still nothing.
stygmotion 28 OCT 2022 a las 15:53 
The Miner Problem achievement is no longer bugged. It can be done by completing the dungeon in Forestia after second camp with a 100% saved file. As soon as the "dwelling emperor" is defeated at the end of the dungeon the achievement will pop out. Thank you for such a helpful guide! :steamthumbsup:
Masquerine  [autor] 30 JUN 2022 a las 13:39 
As far as I know the red and green doors currently have no use.

The only info on Miner Problem I can find is Recupel saying it'll be in a new update very soon, so just have to wait on that. He mentioned it 2 days ago in Metal Unit's discord.

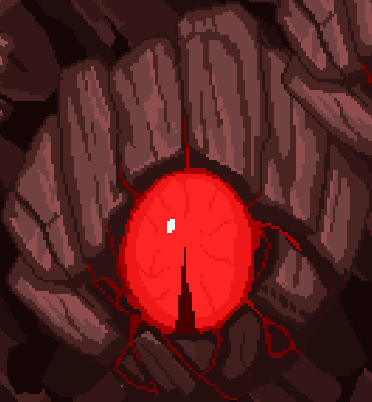
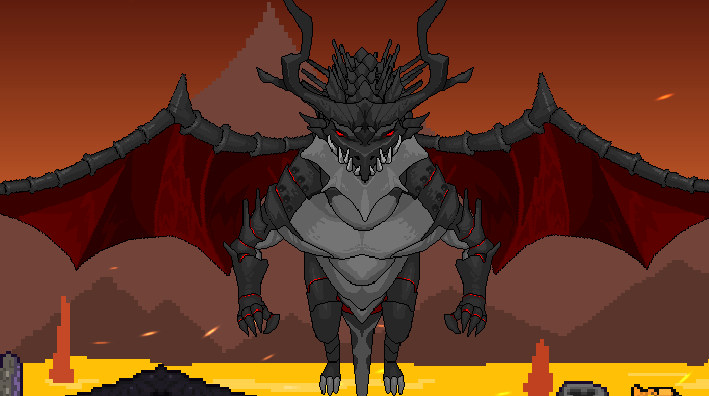
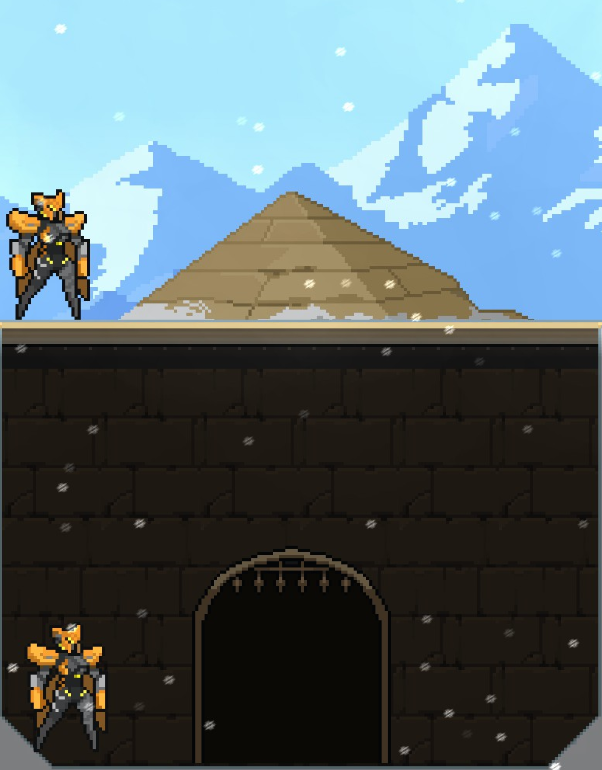
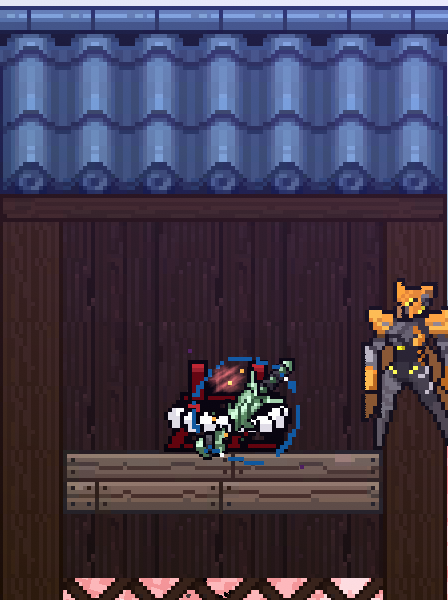
King's Tomb Entrance I found in Blazing Lava Entrance. The door was pretty much immediately there and there were no enemies in the map.
Cirno Hunnie 30 JUN 2022 a las 10:04 
achievenment Miner Problem when :v
Butts Johnson 24 JUN 2022 a las 23:00 
I can't seem to find the King's Tomb in Deeplava. What area is it in? And, possibly, what is the map icon like for that area? So that I know whether or not to bail on the run as soon as I enter the region.

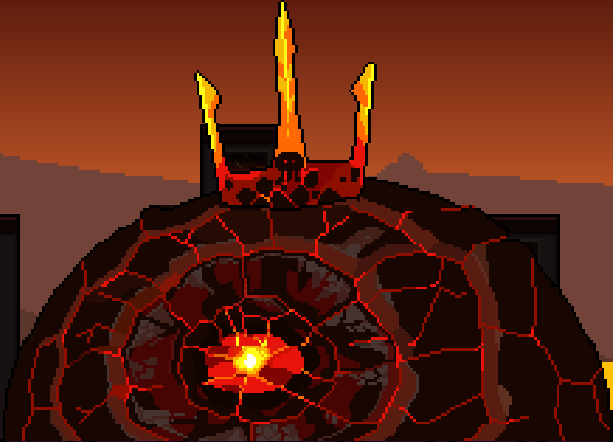
Worst part is, I've been in the Tomb before, and I recall it being easy to find, but I beat that hardcore run and now I can't find the place at all! Is it, perhaps, only accessible as a "postgame" thing prior to NG+ reset?