Gordian Rooms 1: A curious heritage

Gordian Rooms 1: A curious heritage

44 ratings
100% Walkthrough and Achievement guide ★ Gordian Rooms: A curious heritage
By marklar
2
   
Award
Favorite
Favorited
Unfavorite
Info


Gordian Rooms: A Curious Heritage is an escape game with 4 levels. In this guide we will fully walk you through every level, gaining every achievement.


The game saves automatically when you quit, so no progress is ever lost for quitting.
If you miss any horseshoes or hidden messages you can replay a level and quit after collecting it.
Credits for the walkthrough go to this guide, we just decided to turn it into a text walkthrough.

Estimated 100% time: 1h~
The Basement
  • Turn around and flip the switch near the door.
  • Head downstairs, and pick up the key near the pots.
  • Zoom into the panel on the wall and open it with the key, remember to turn the key to open.
  • Zoom into the numbers, and input 725.
  • Zoom into the door above the numbers, and open it.
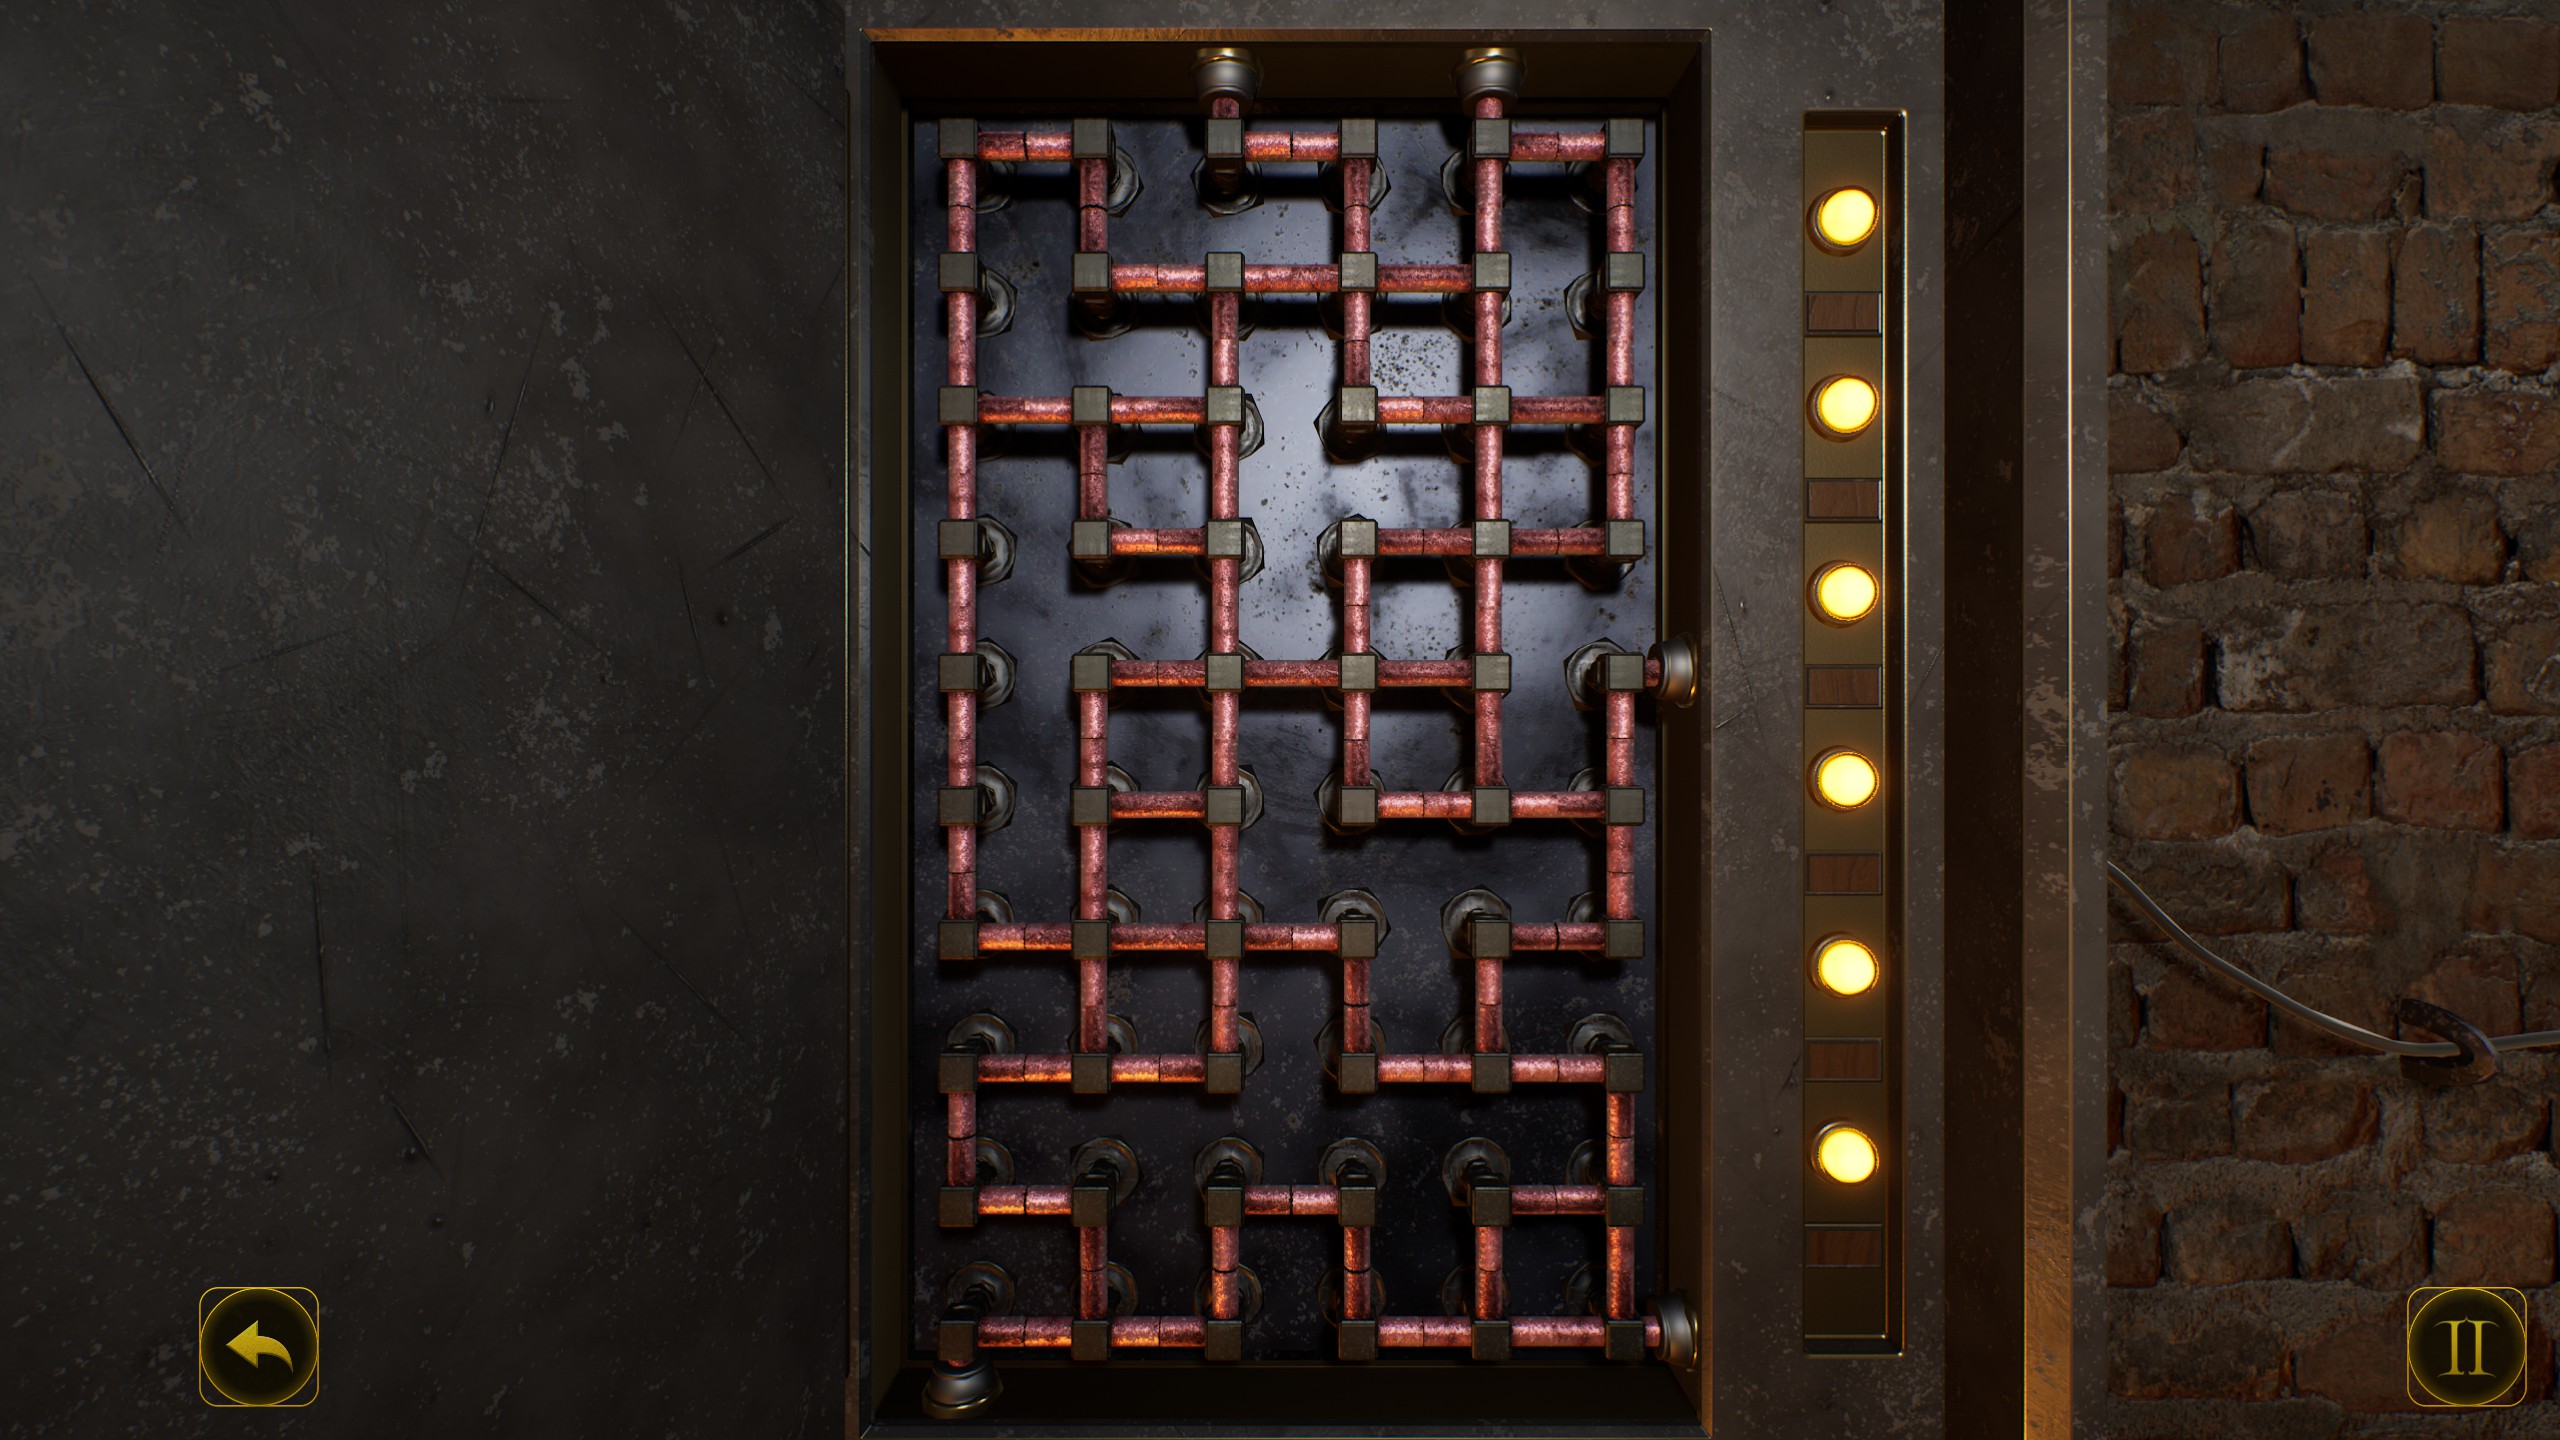
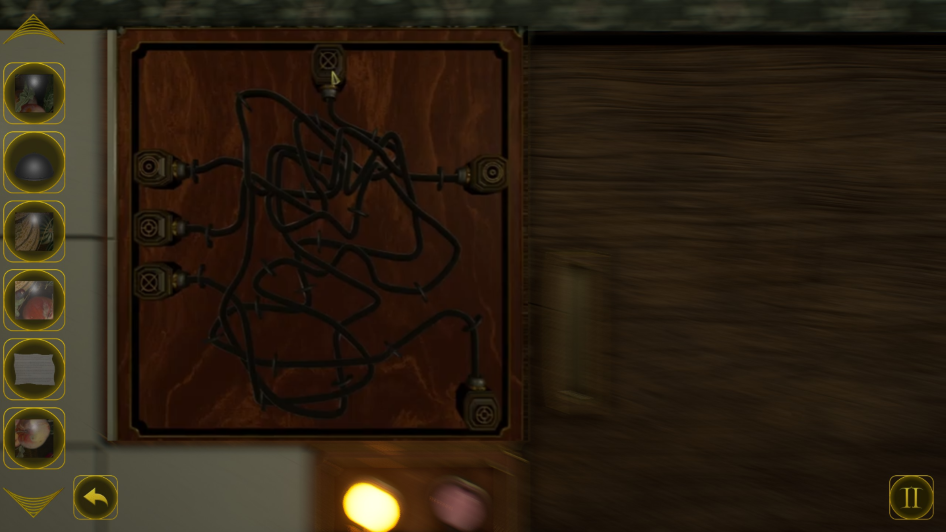
  • Solve the simple puzzle to turn back the power.


  • Back out, and interact with the small box connected to the electricity puzzle we just solved.
  • Open it and take the key from inside.
  • Interact with the puzzle next to the small box, and pick up the red sack of lentils.
  • Place it on the first position.
  • Back out, and turn right pick up the wine bottle to the right of the cupboard with jars.
  • Go forward once.
  • Zoom into the green cloth on the right and pick the shears.

  • Back out and go towards the work table.
  • Pick up a blue sack of corn from the shelf on the right.
  • Zoom into the worktable and pick up the wooden rod
  • Use the grindstone to sharpen the shears.
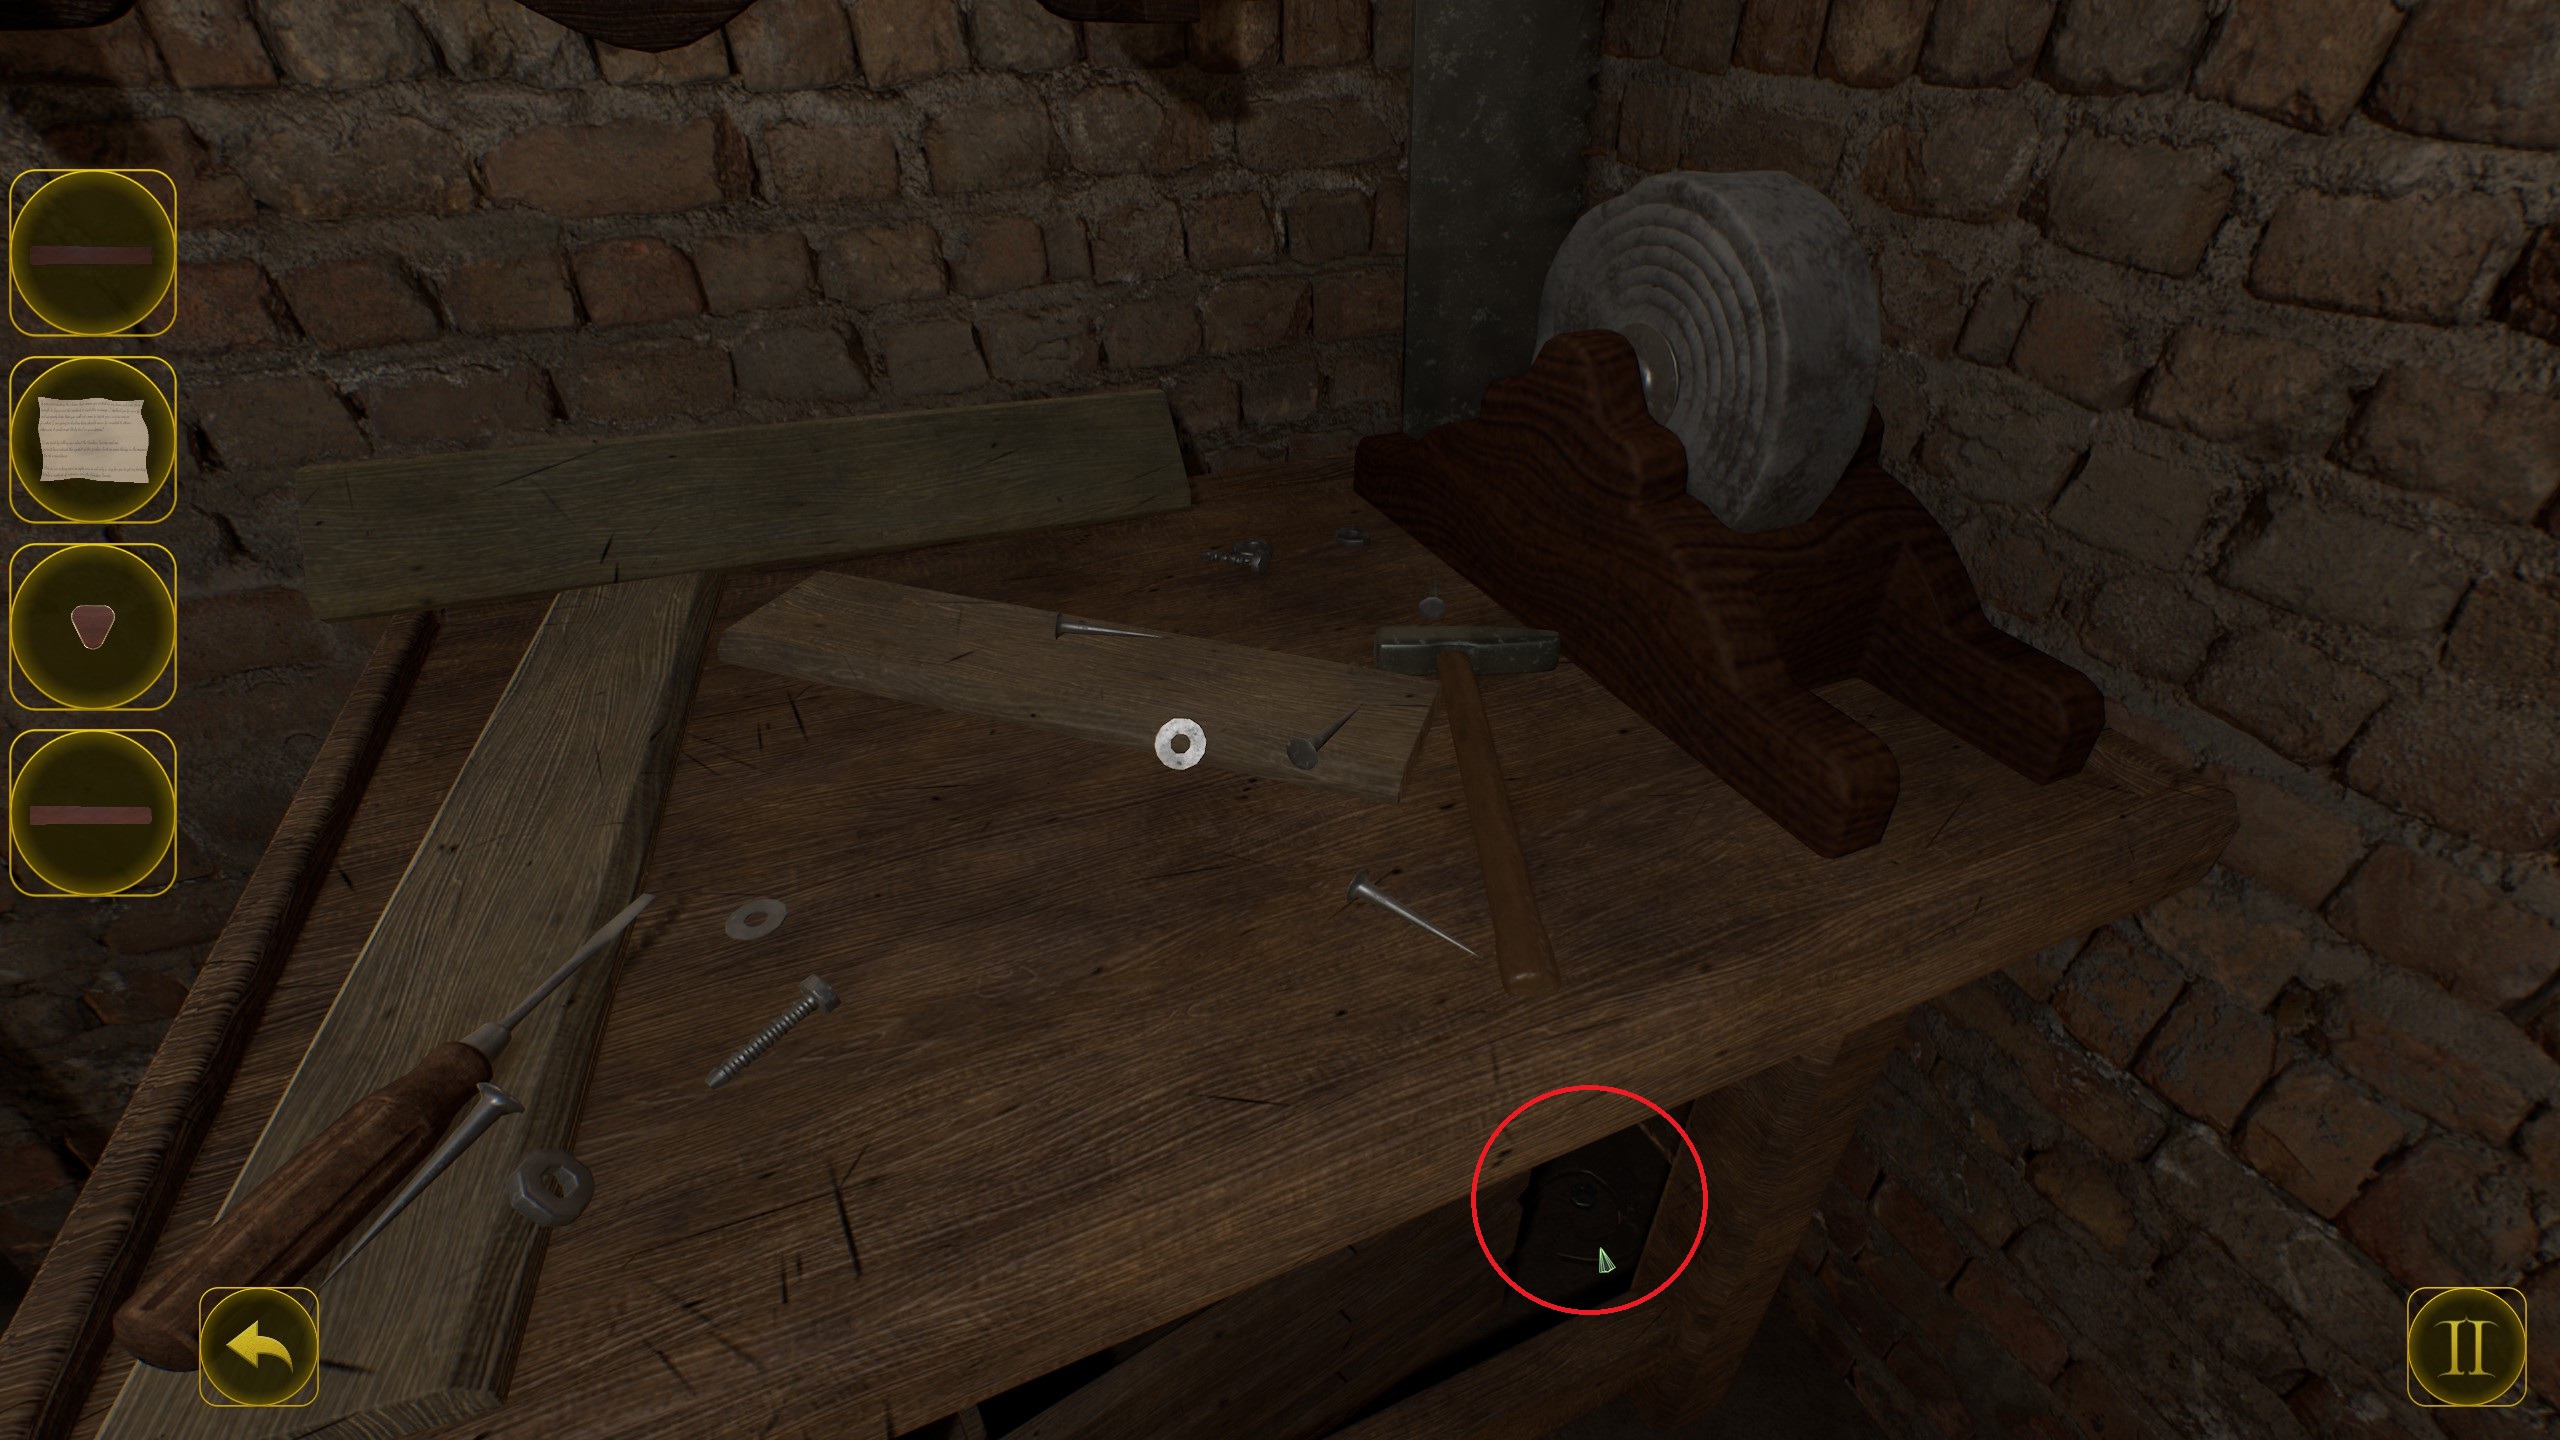
  • Look down and you will see a horseshoe under the table.
  • Back out from the table, go forward once and pick up another wooden rod from the crate near the big sacks.
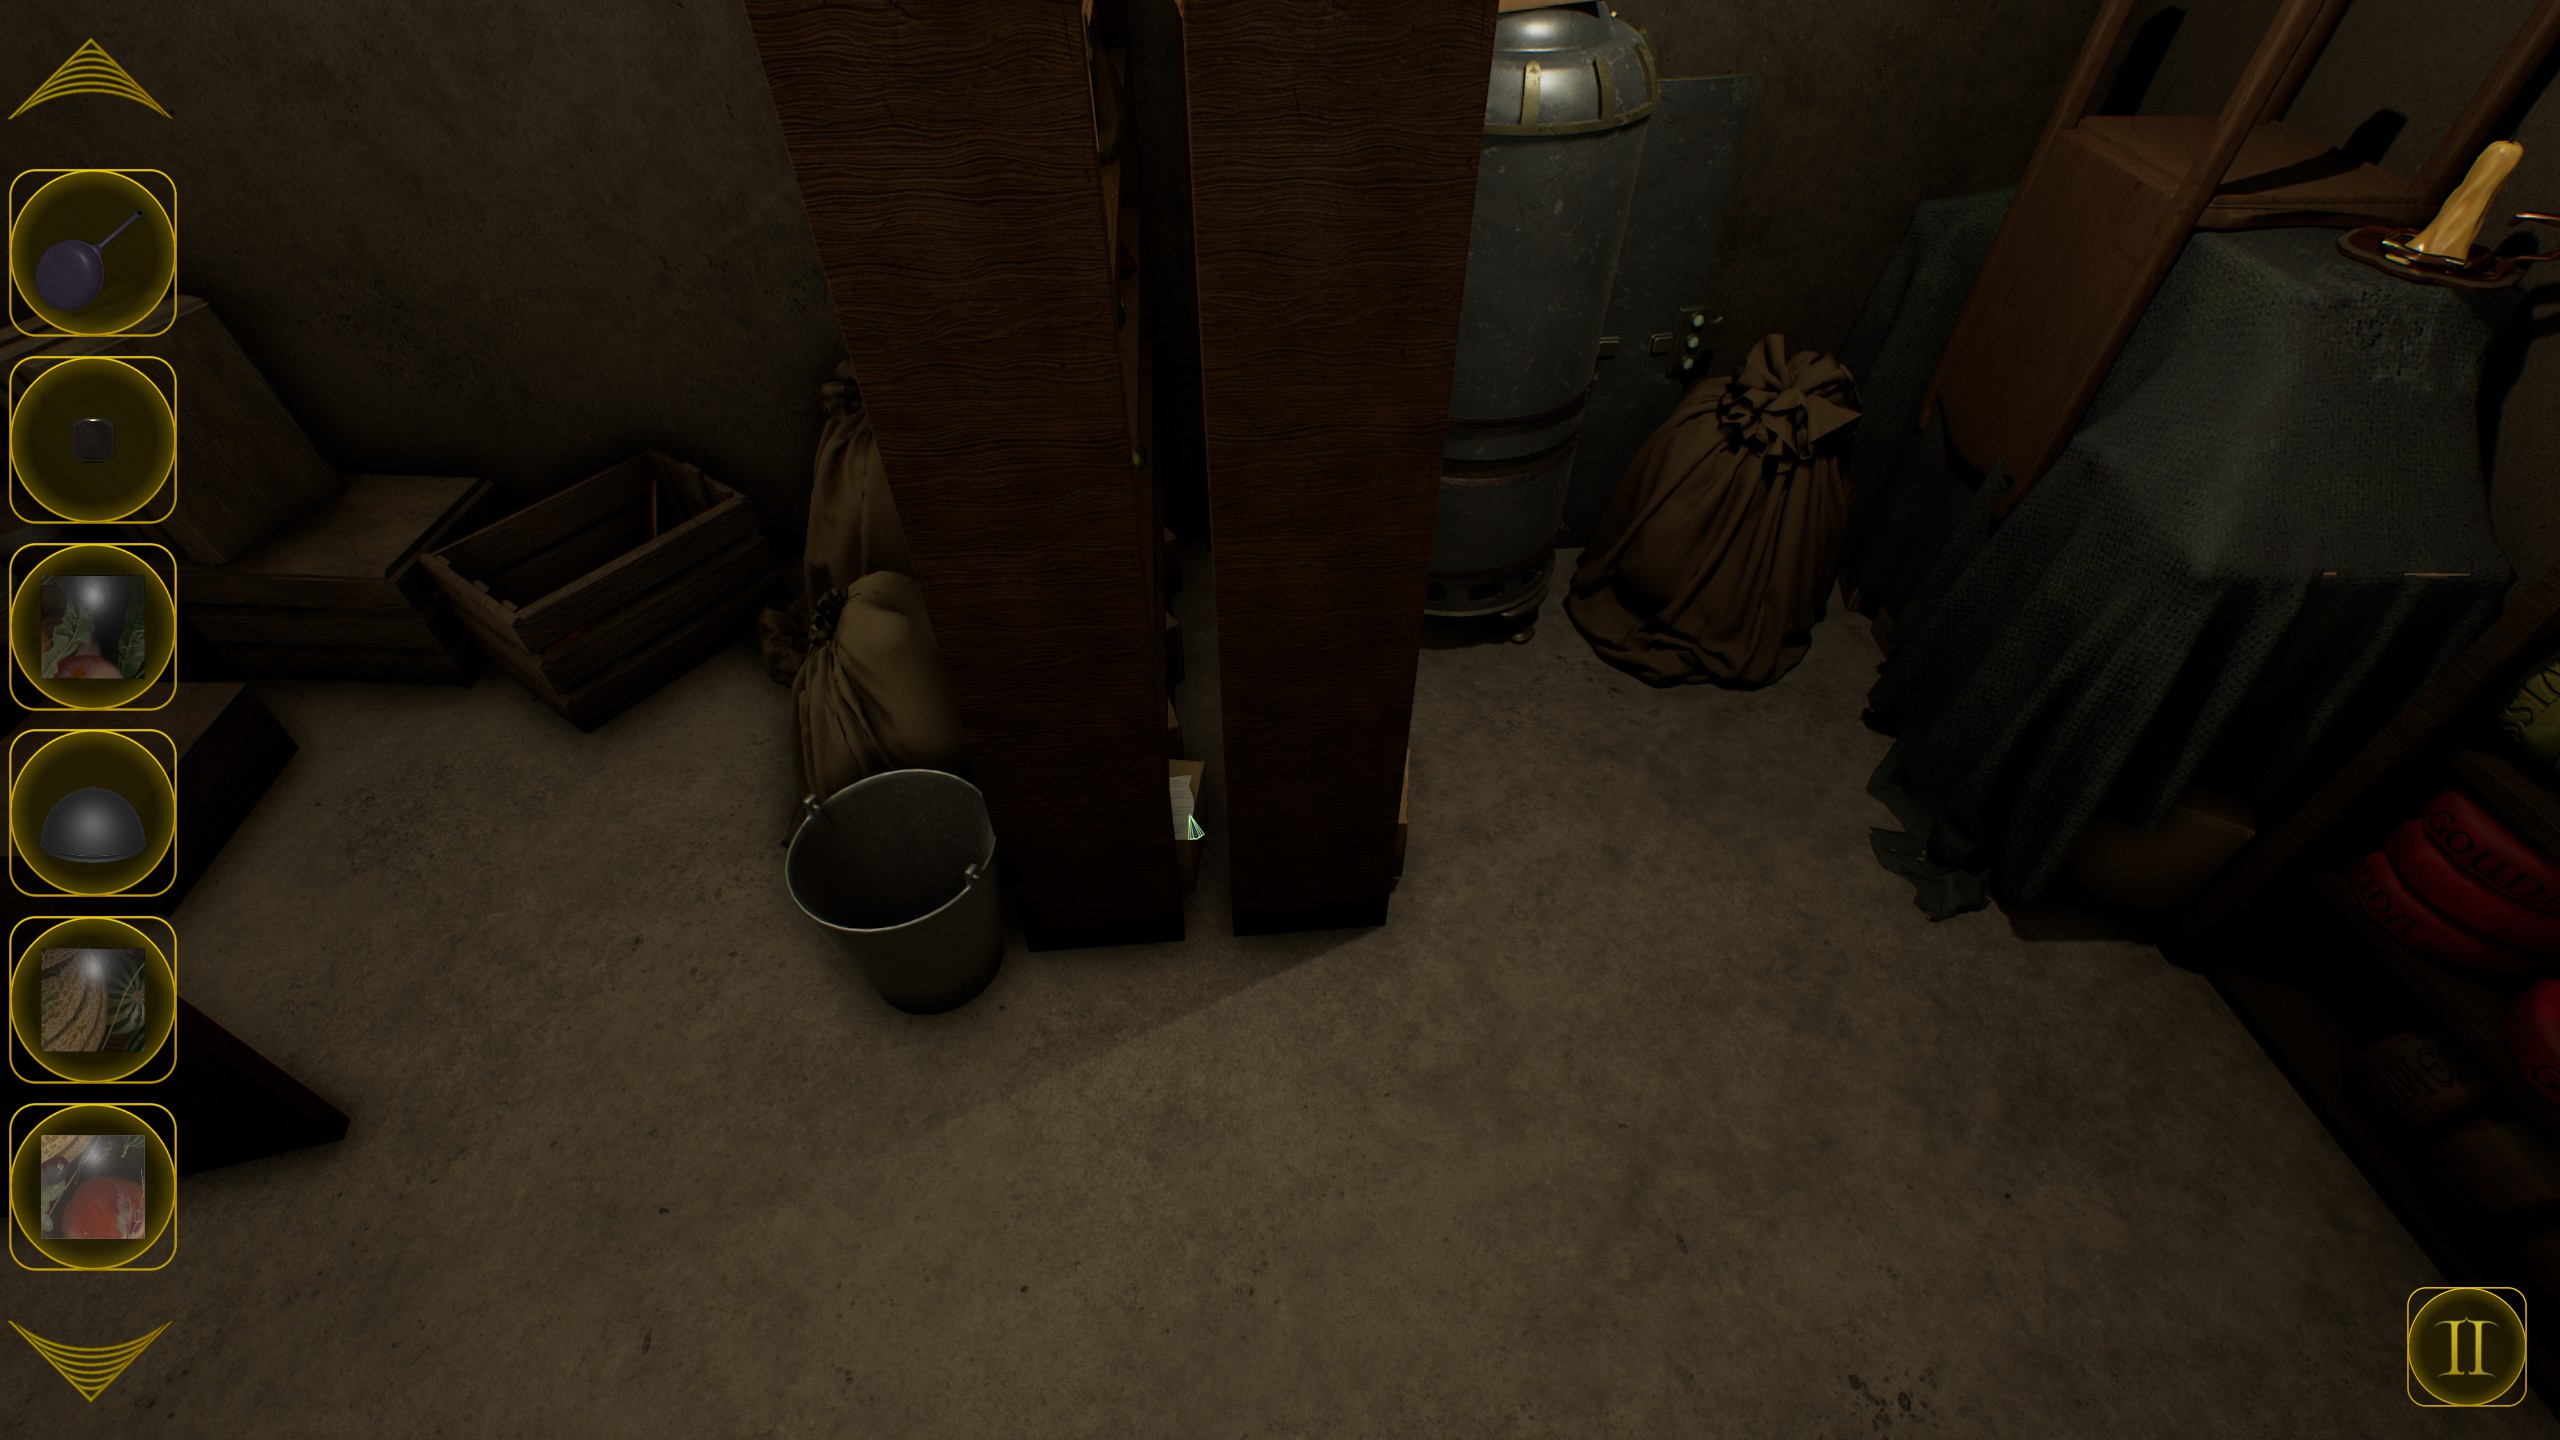
  • Move the rightmost sack to the right, and pick up a small sack of peas from the hole.

  • Interact with the red cupboard, open it using the small key.
  • Pick up the yellow sack from inside and back out.
  • Interact with the drawer below the cupboard and pick up another wooden rod .
  • Back out and go forward once.
  • Cut the rope on the left using the shears.
  • Look below and pickup the green sack of sawdust.
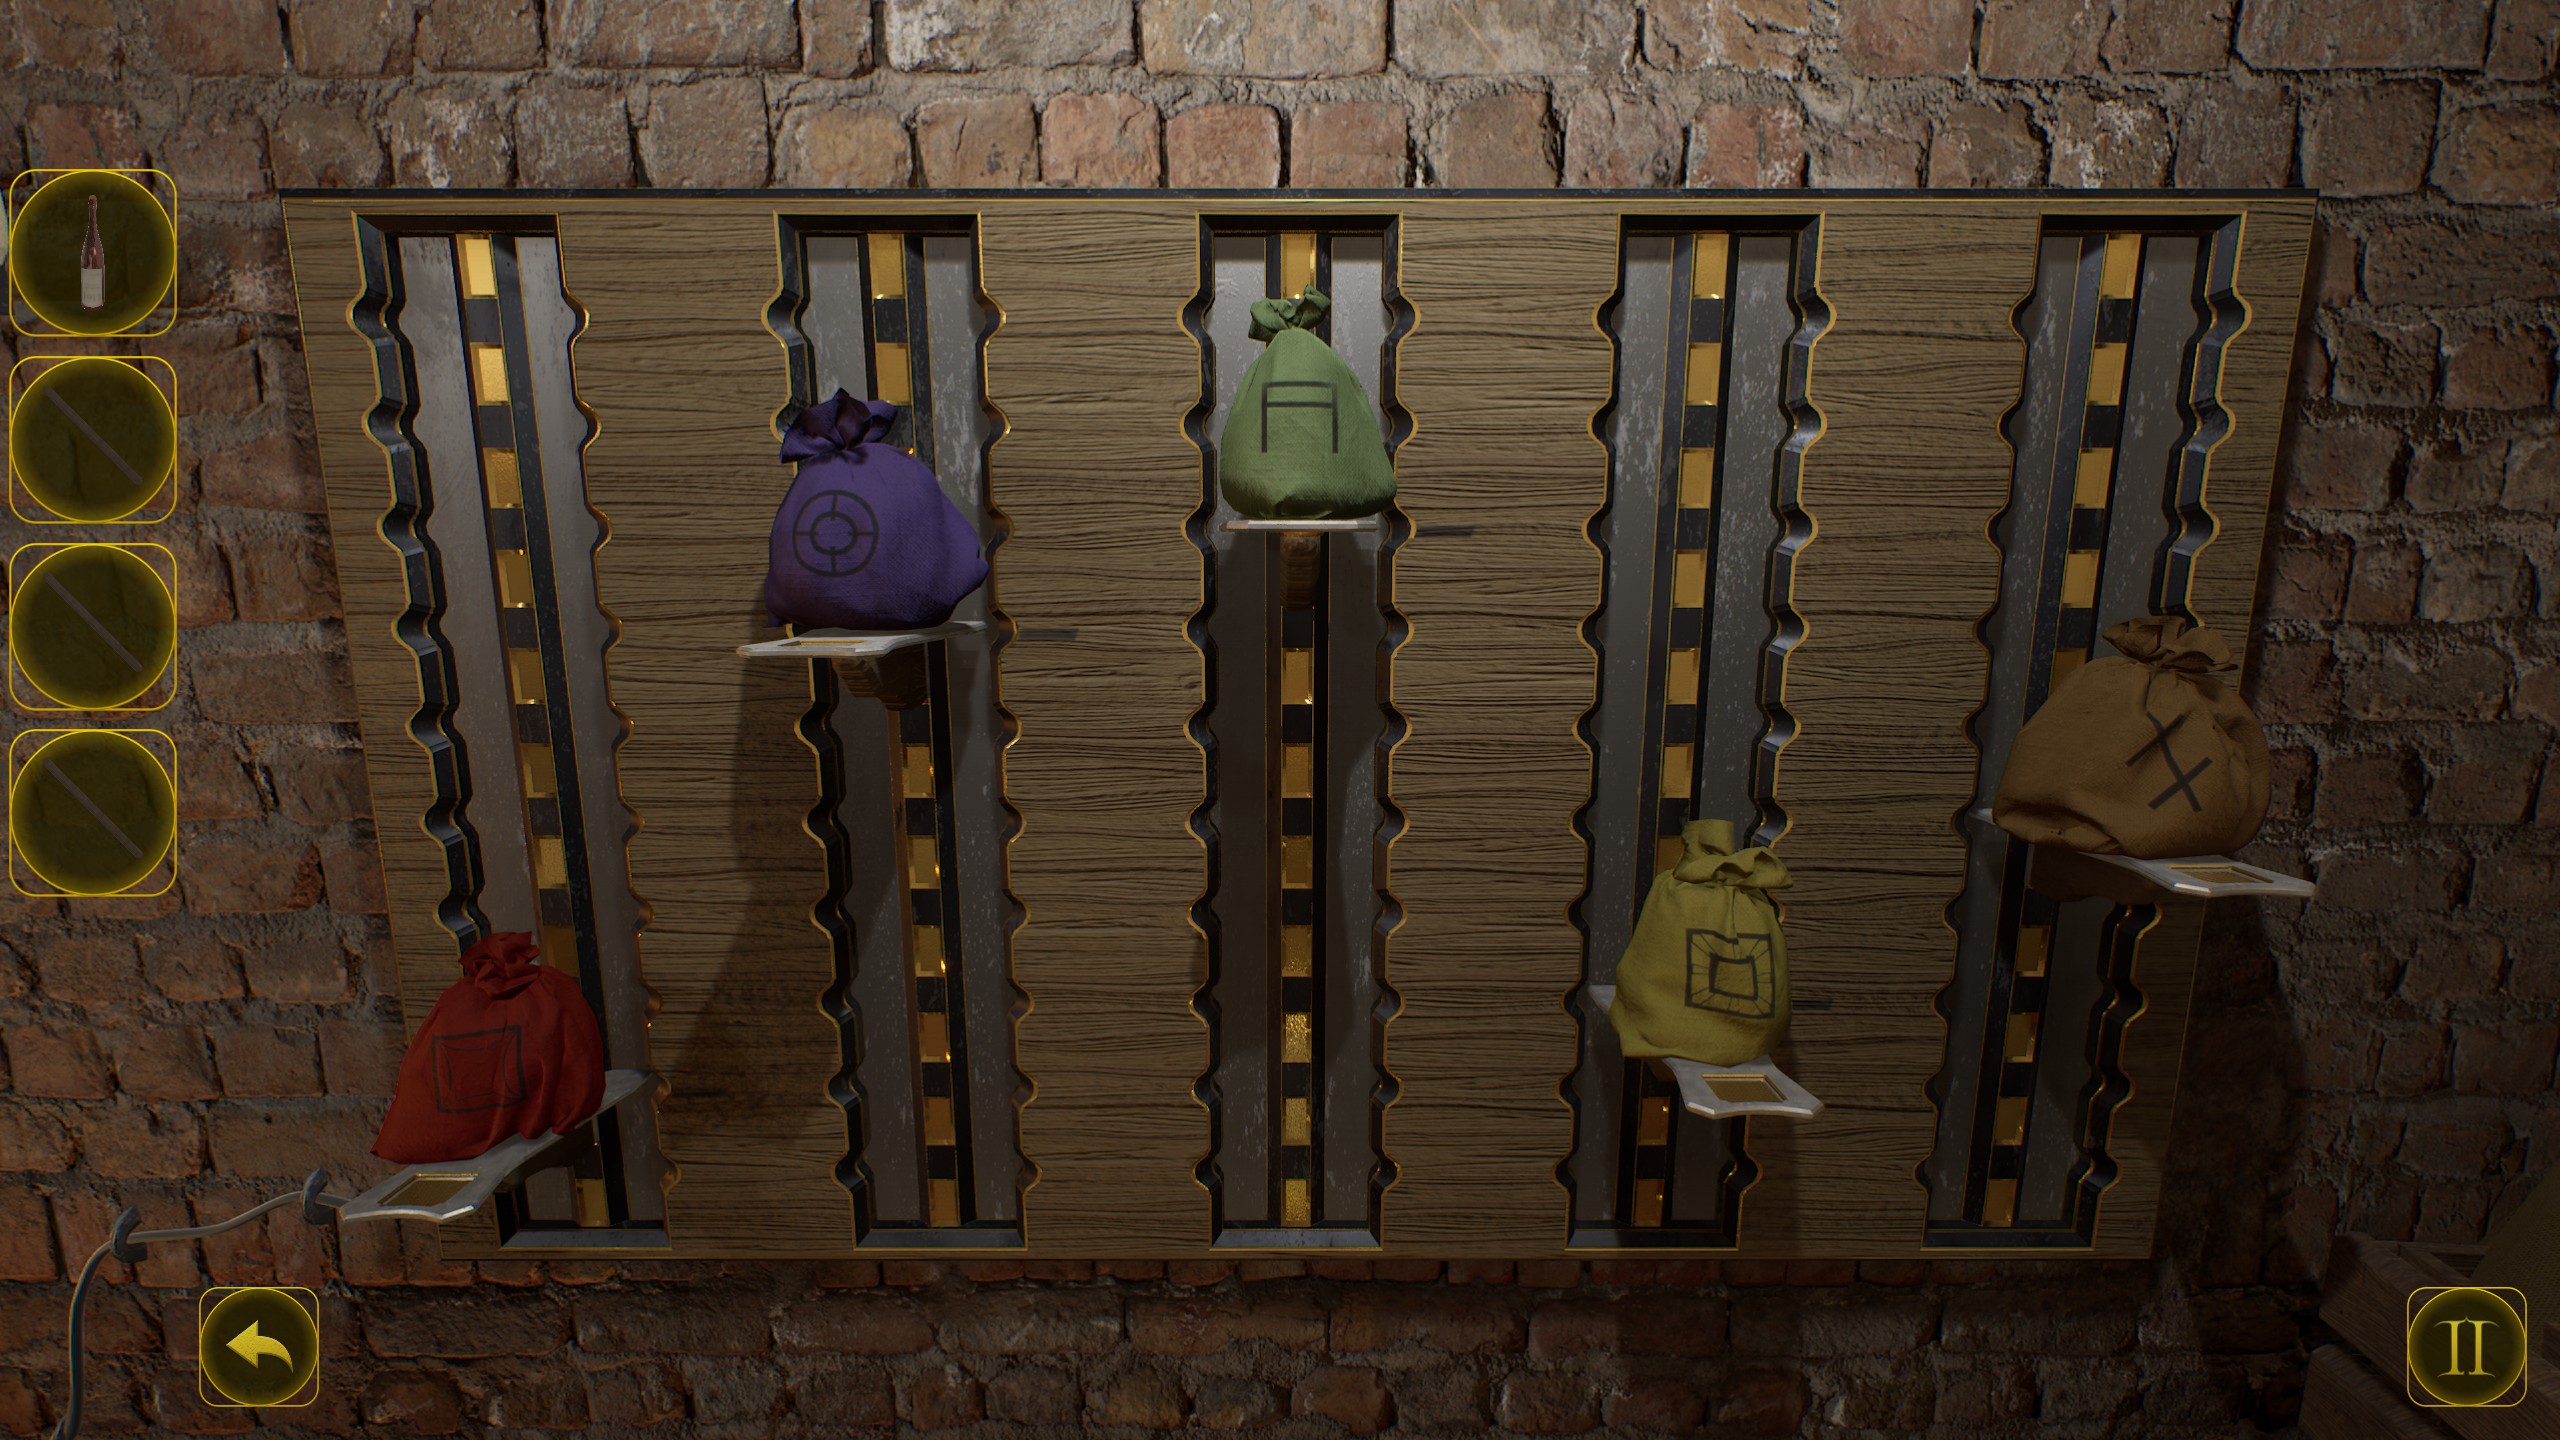
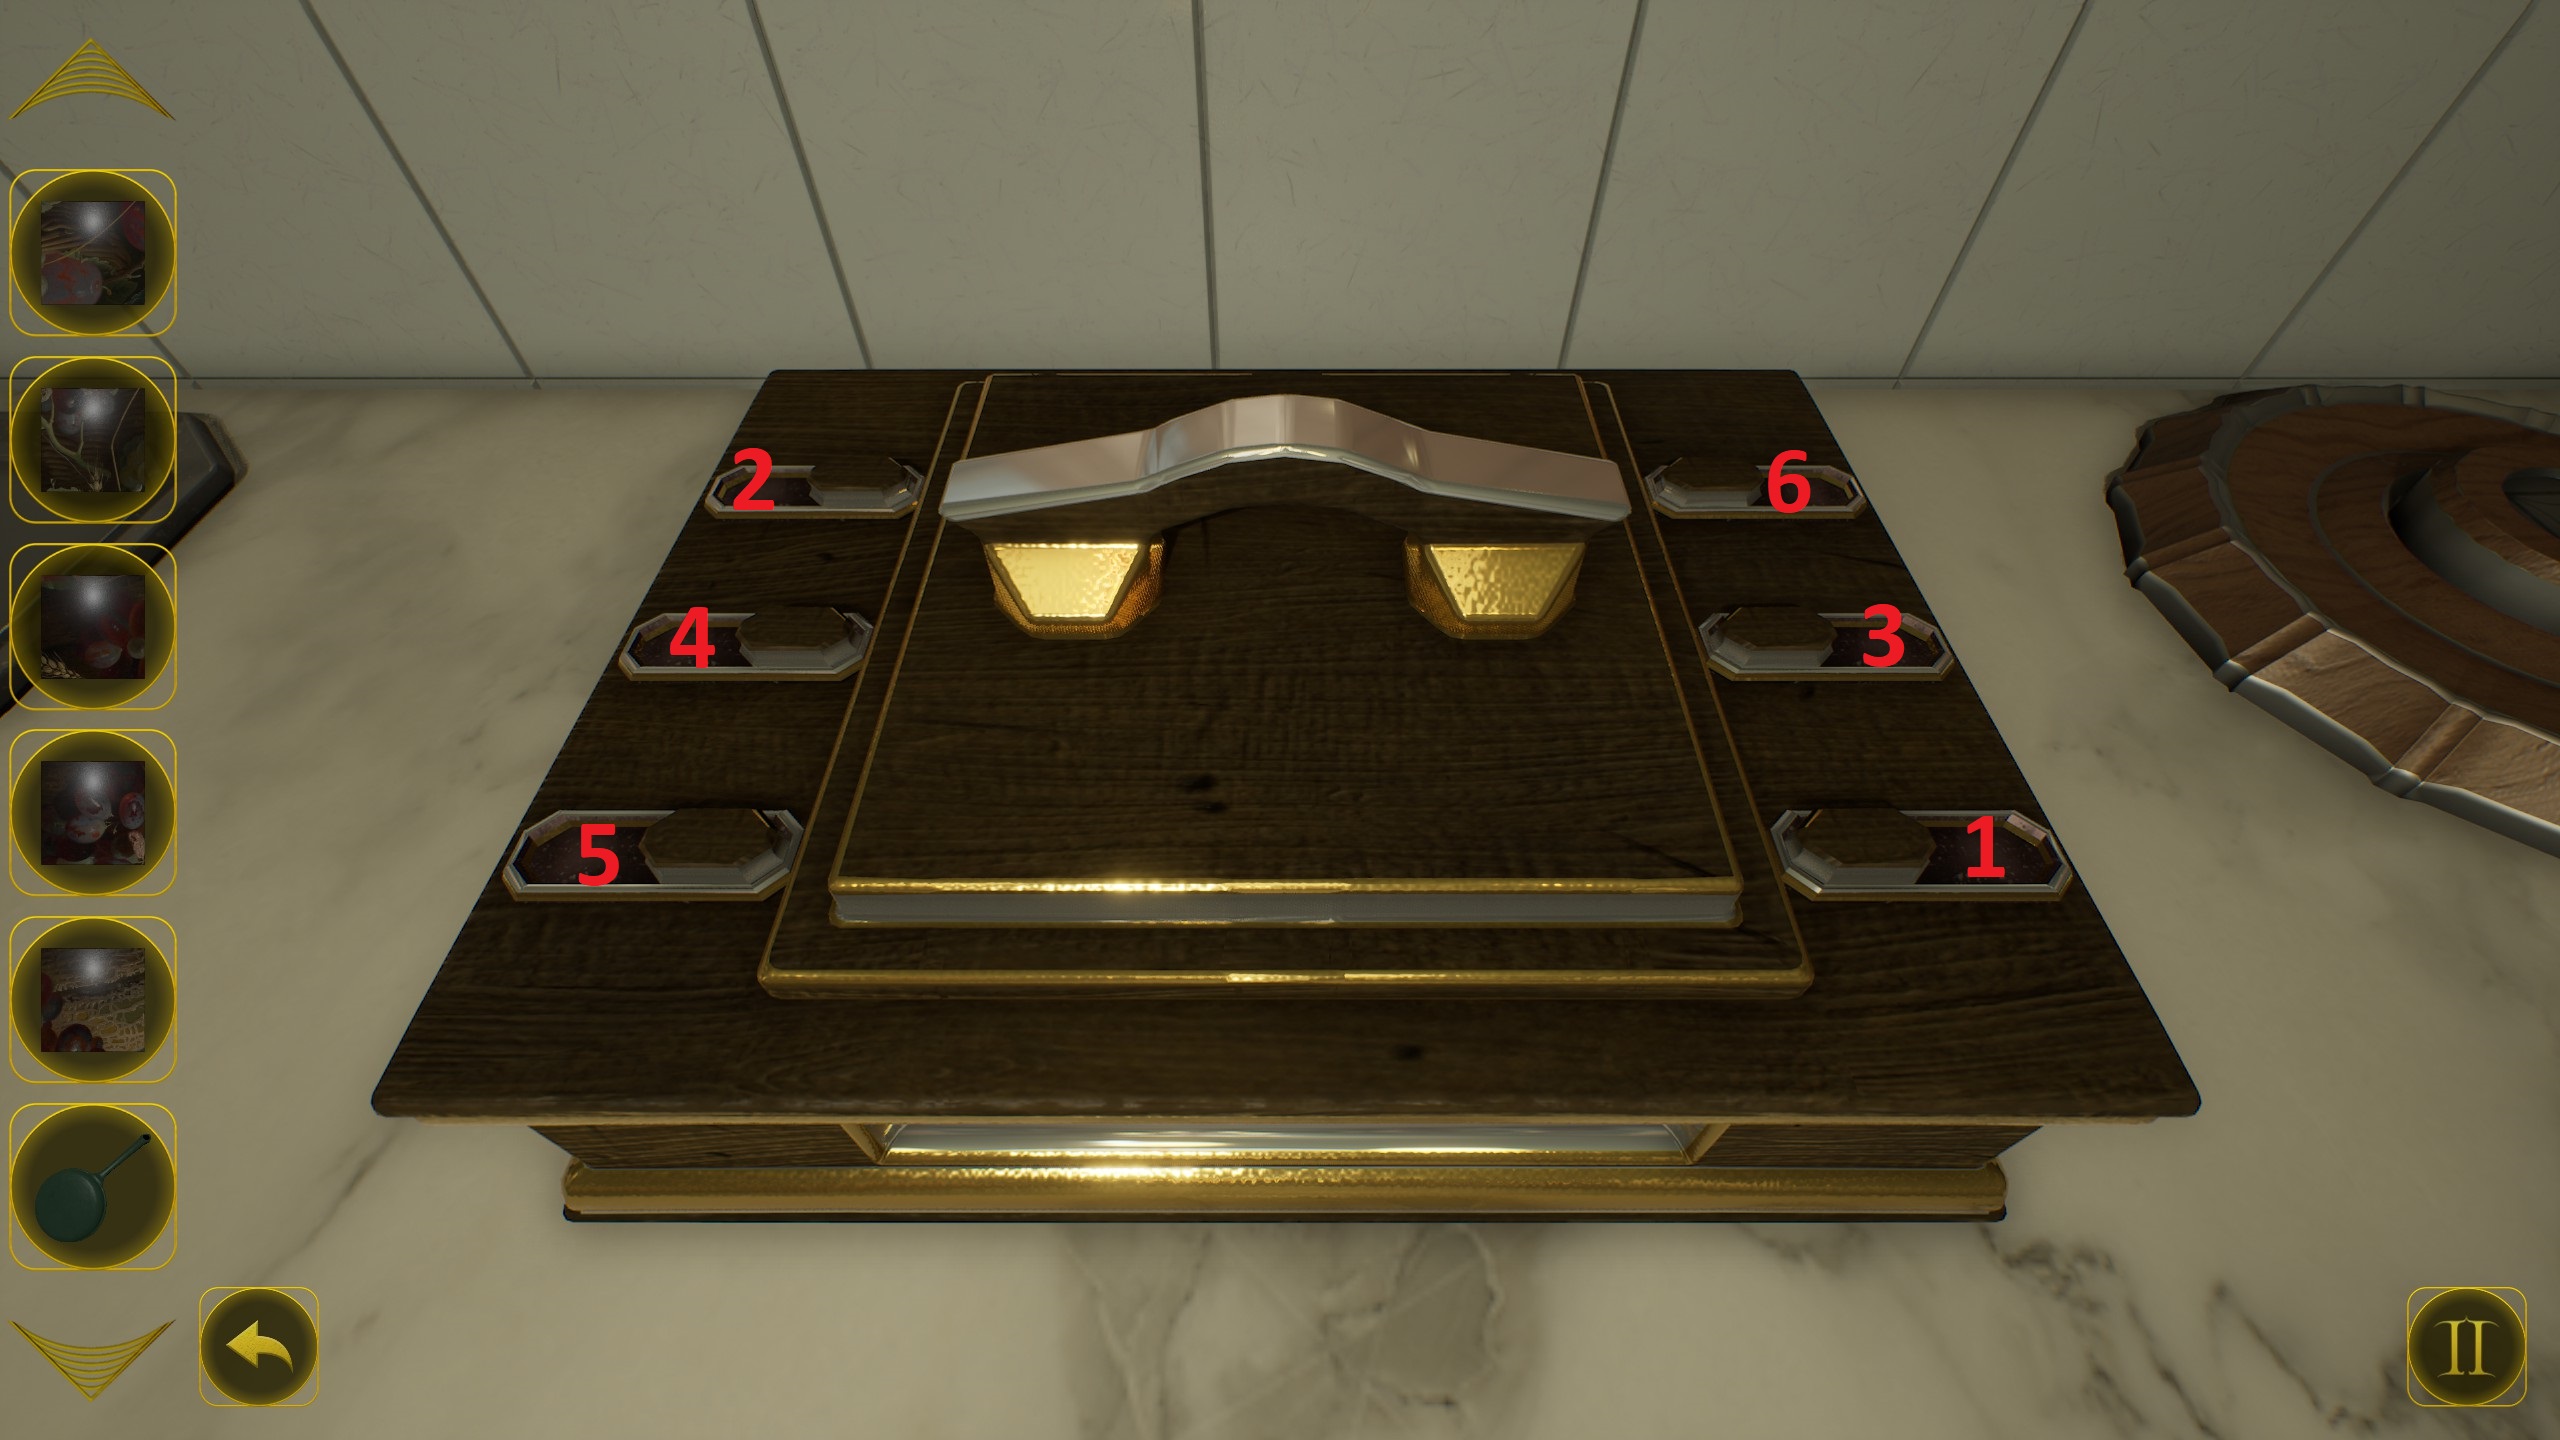
  • Go back to the wall with the red sack, and place all other sacks as in the screenshot.


  • Interact with the chest to the left of the weights puzzle.
  • Pick up another wooden rod, and a piece of wood from inside.
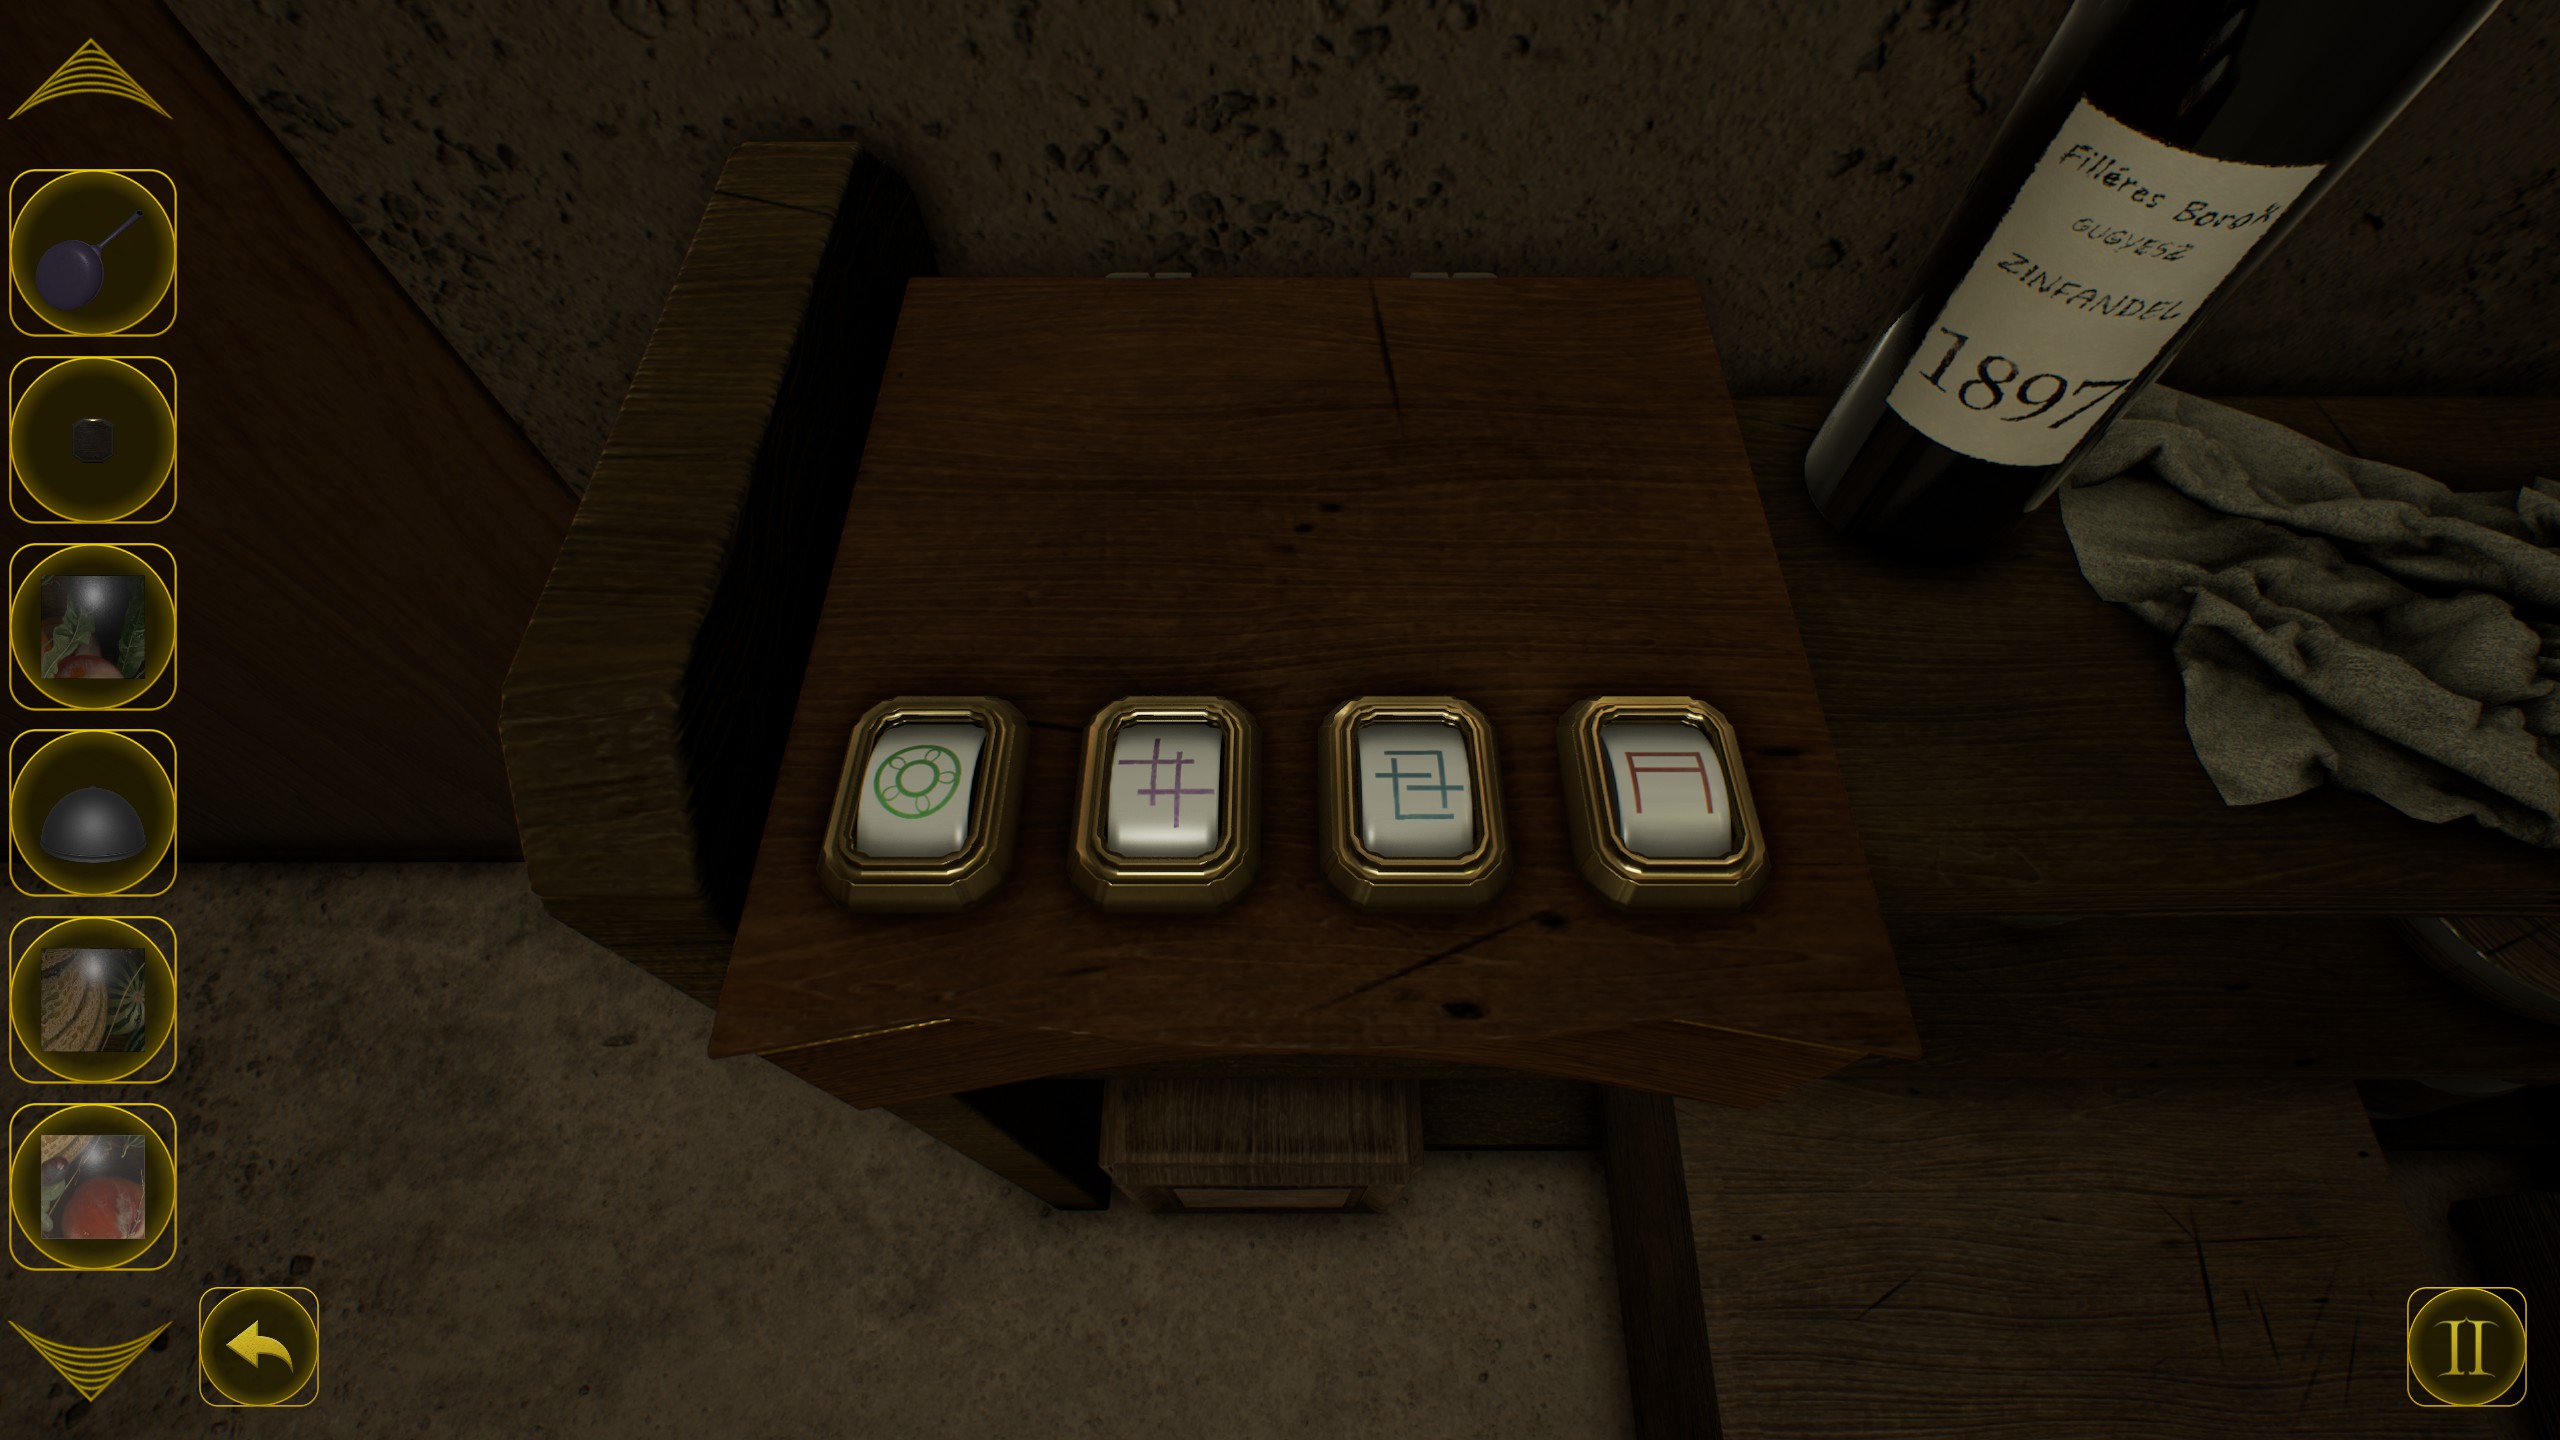
  • Back out and go to the red cupboard again, zoom into the bottom drawer and enter the code to open it. (The code is same order as symbols on the sacks, see screenshot above)
  • Take another wooden rod from inside, and a bottle of wine.
  • Go towards the boiler in the corner of the room, and simply turn the valves so all 3 lights turn green and grab another wooden rod from inside.
  • To the right of the boiler you will find a chest.
  • Enter the code 5,2,8,5 to open it and take another bottle of wine from inside.
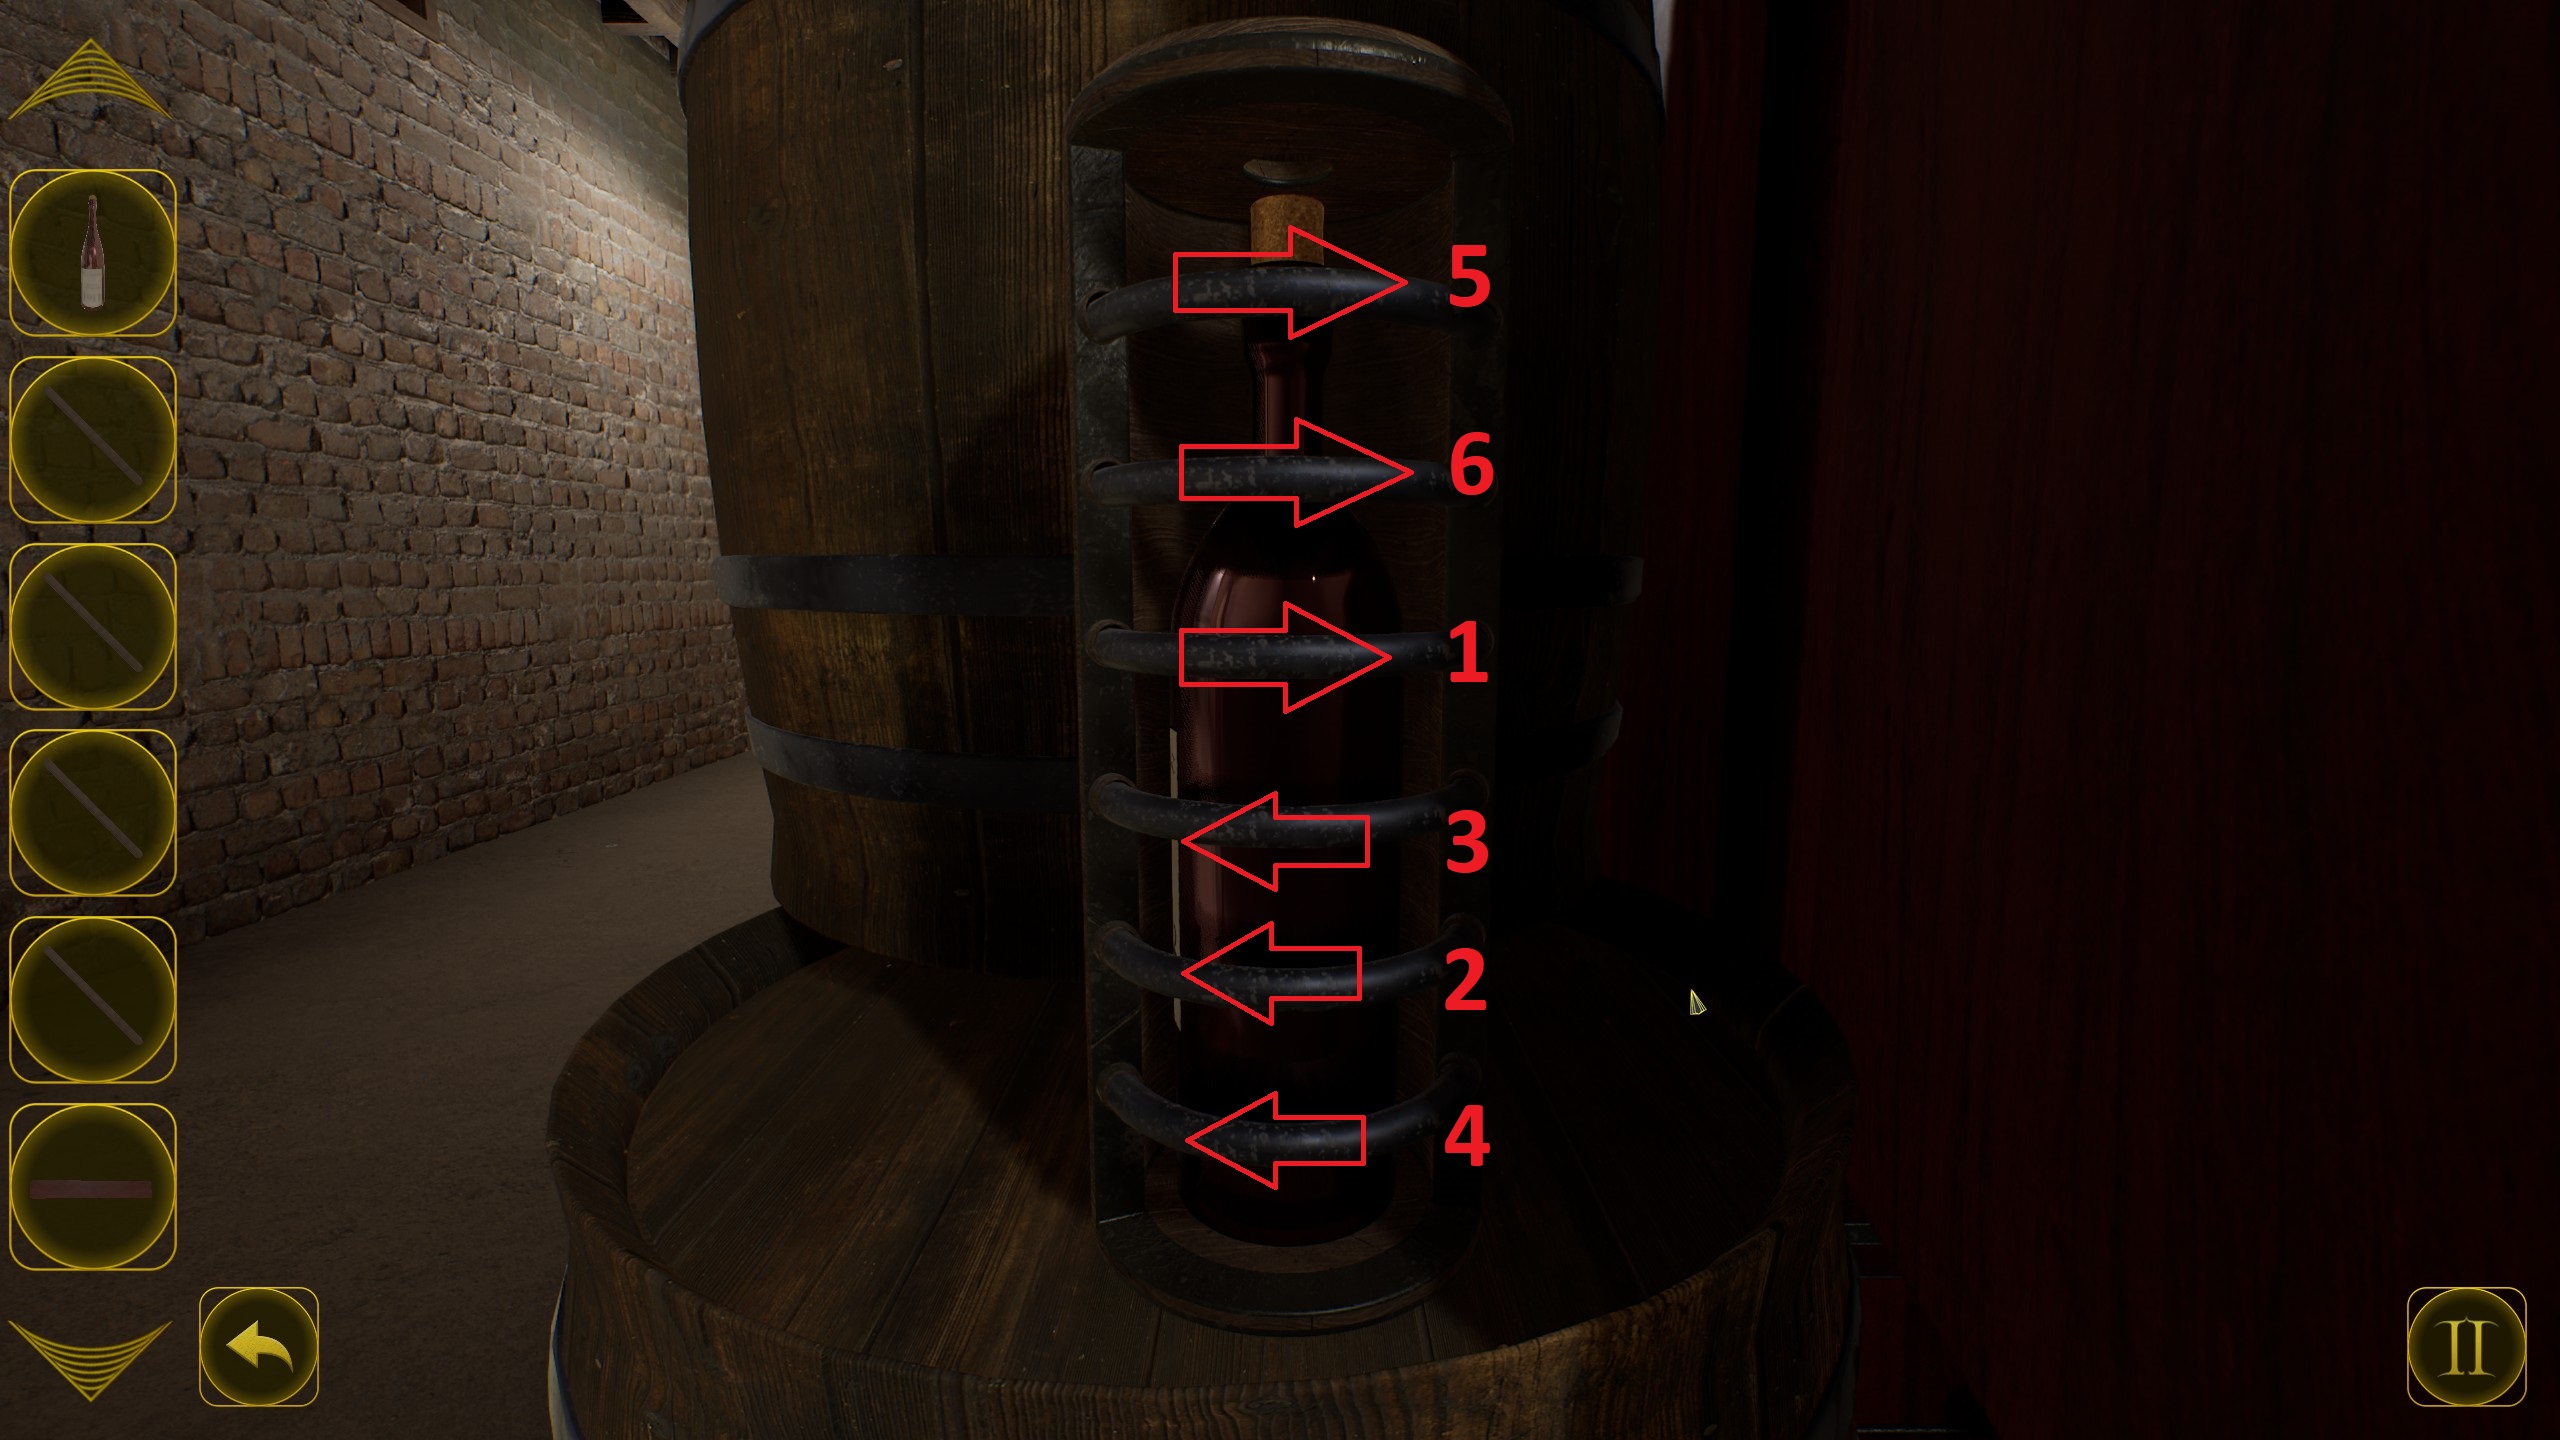
  • Back out and zoom into wine bottle on the left of the red cupboard.
  • Move the metal bars to the sides and pick up the wine bottle.

  • Back out and zoom into the wine wall.
  • Zoom into year 1889 all the way down to find a note. (1/4)
    • Place red wine from 1891 on the top shelf.
    • Place red wine from 1911 on 2nd shelf.
    • Place red wine from 1918 on 4th shelf.
    • Place white wine from 1902 on the 5th shelf.

  • Interact with the barrel on the left of the wine wall and solve a simple puzzle.
  • You need to move the cubes to allow the 4 rods to go through.
  • Pick up another wooden rod, wooden piece, and a triangular shape.
  • Go towards the ladder near the worktable, and insert all wooden rods inside.
  • Interact with the puzzle above the ladder, and solve the puzzle:

The Kitchen
  • Turn around and pick up a tile from the middle of the colorful plates.
  • Open the right cupboard and zoom in the spiral object to the left of the plates.
  • Solve the puzzle by sliding the round parts open and take the tile from the inside.
  • Open the cupboard on the left and rotate the plates on the top right shelf to find another tile.
  • Zoom into the radiator to the left of the cupboards, set it up so the valve of the brown radiator will be pointing down (↓). and the dark green radiator pointing north west (↖).
  • Open the small cupboard above the radiators on the left and grab the screwdriver from inside.

  • Zoom into the radiators again, and this time turn the valve of the brown radiator so it will be pointing right (→) and the dark green radiator pointing south east (↘).
  • Open the small cupboard above the radiators on the right and grab the tile from inside.
  • Turn left from the radiators and head up.
  • Look down and you will spot one tile loose, use the screwdriver on it and pick up another tile.
  • Pick up the frying pan from above the stove, and notes to the left of it.
  • Open the cupboard to the left of the curtain, and grab the pot from the inside.
  • Interact with the device to the right of the sink, and move all notches in the order shown in the screenshot:


  • Open it and grab another tile.
  • Open the left most cabinet to the right of the fridge, and take another frying pan from inside.
  • On the right of the cabinet, open the first drawer on the right to find a a small panel.
  • And the 4th drawer on the right to find another tile.
  • Open the cabinet above the drawers to find a grater.
  • Interact with the fridge on the left and enter the code EAT to open it.
  • Pick up the tile from under the wine bottles, and the food plate.
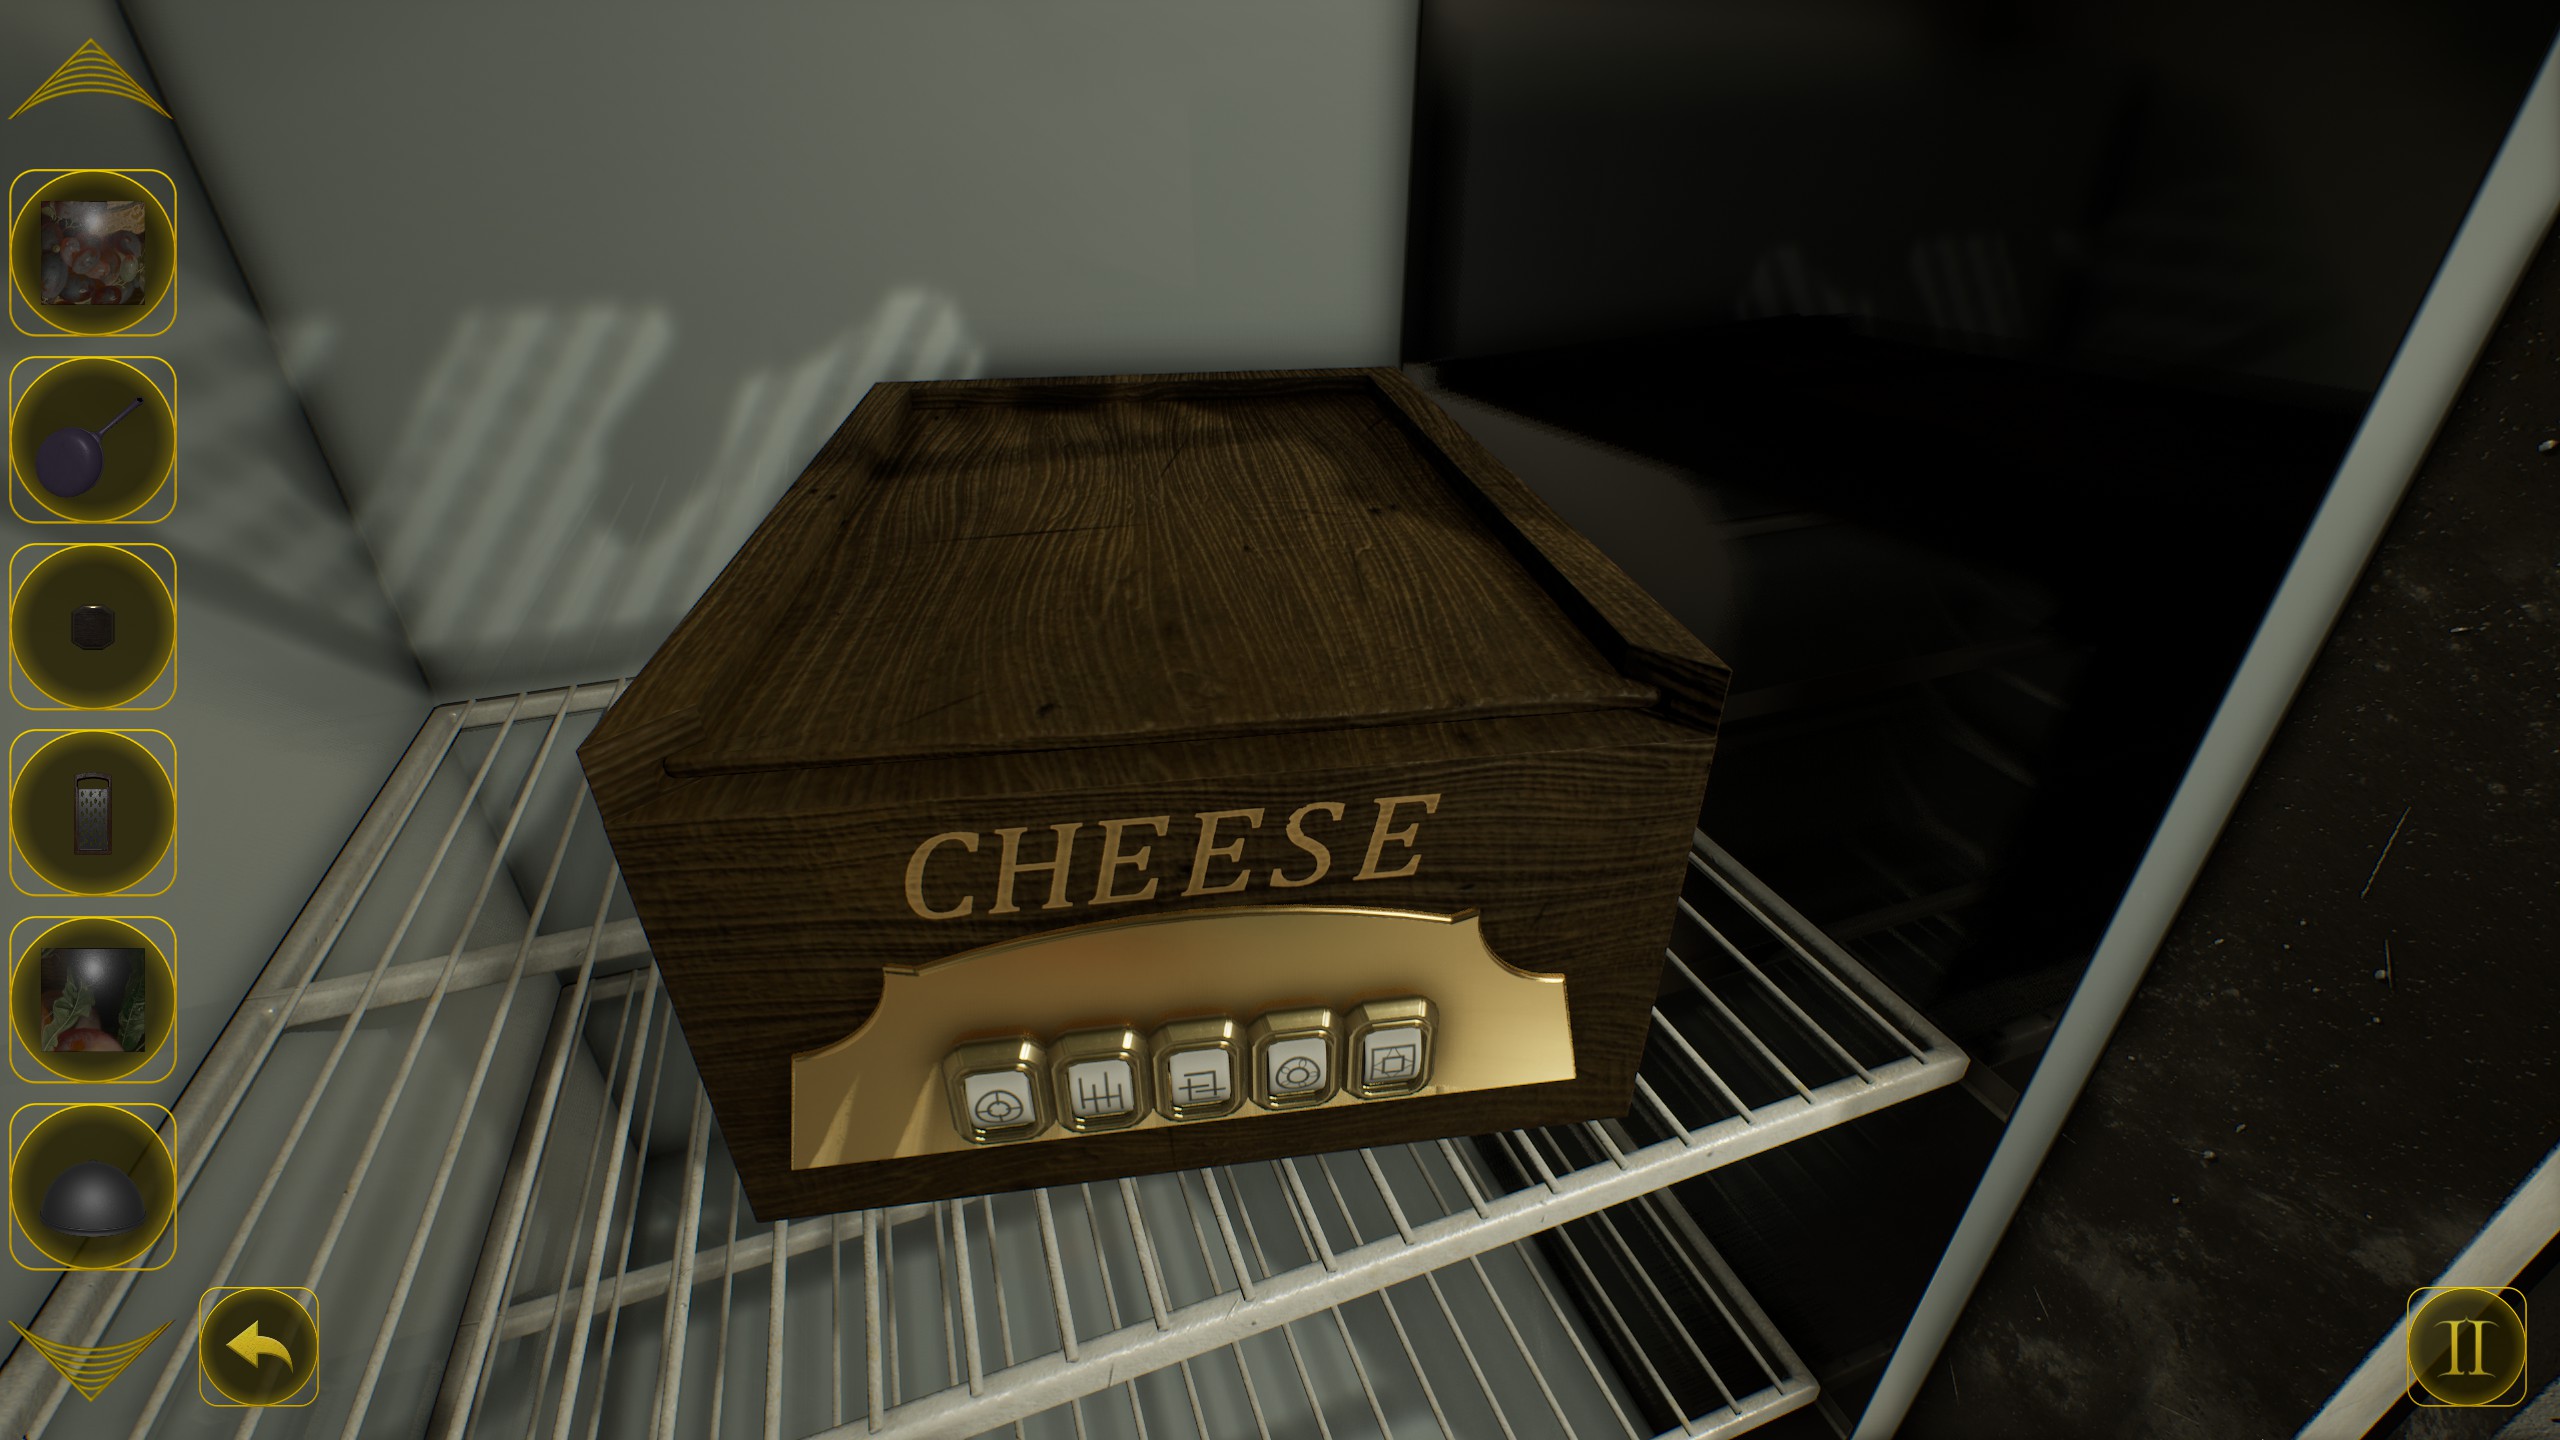
  • Zoom into the Cheese box, and enter the code:


  • Slide it open and pick up the cheese from inside.
  • Use the grater on the cheese in your inventory to find a key.
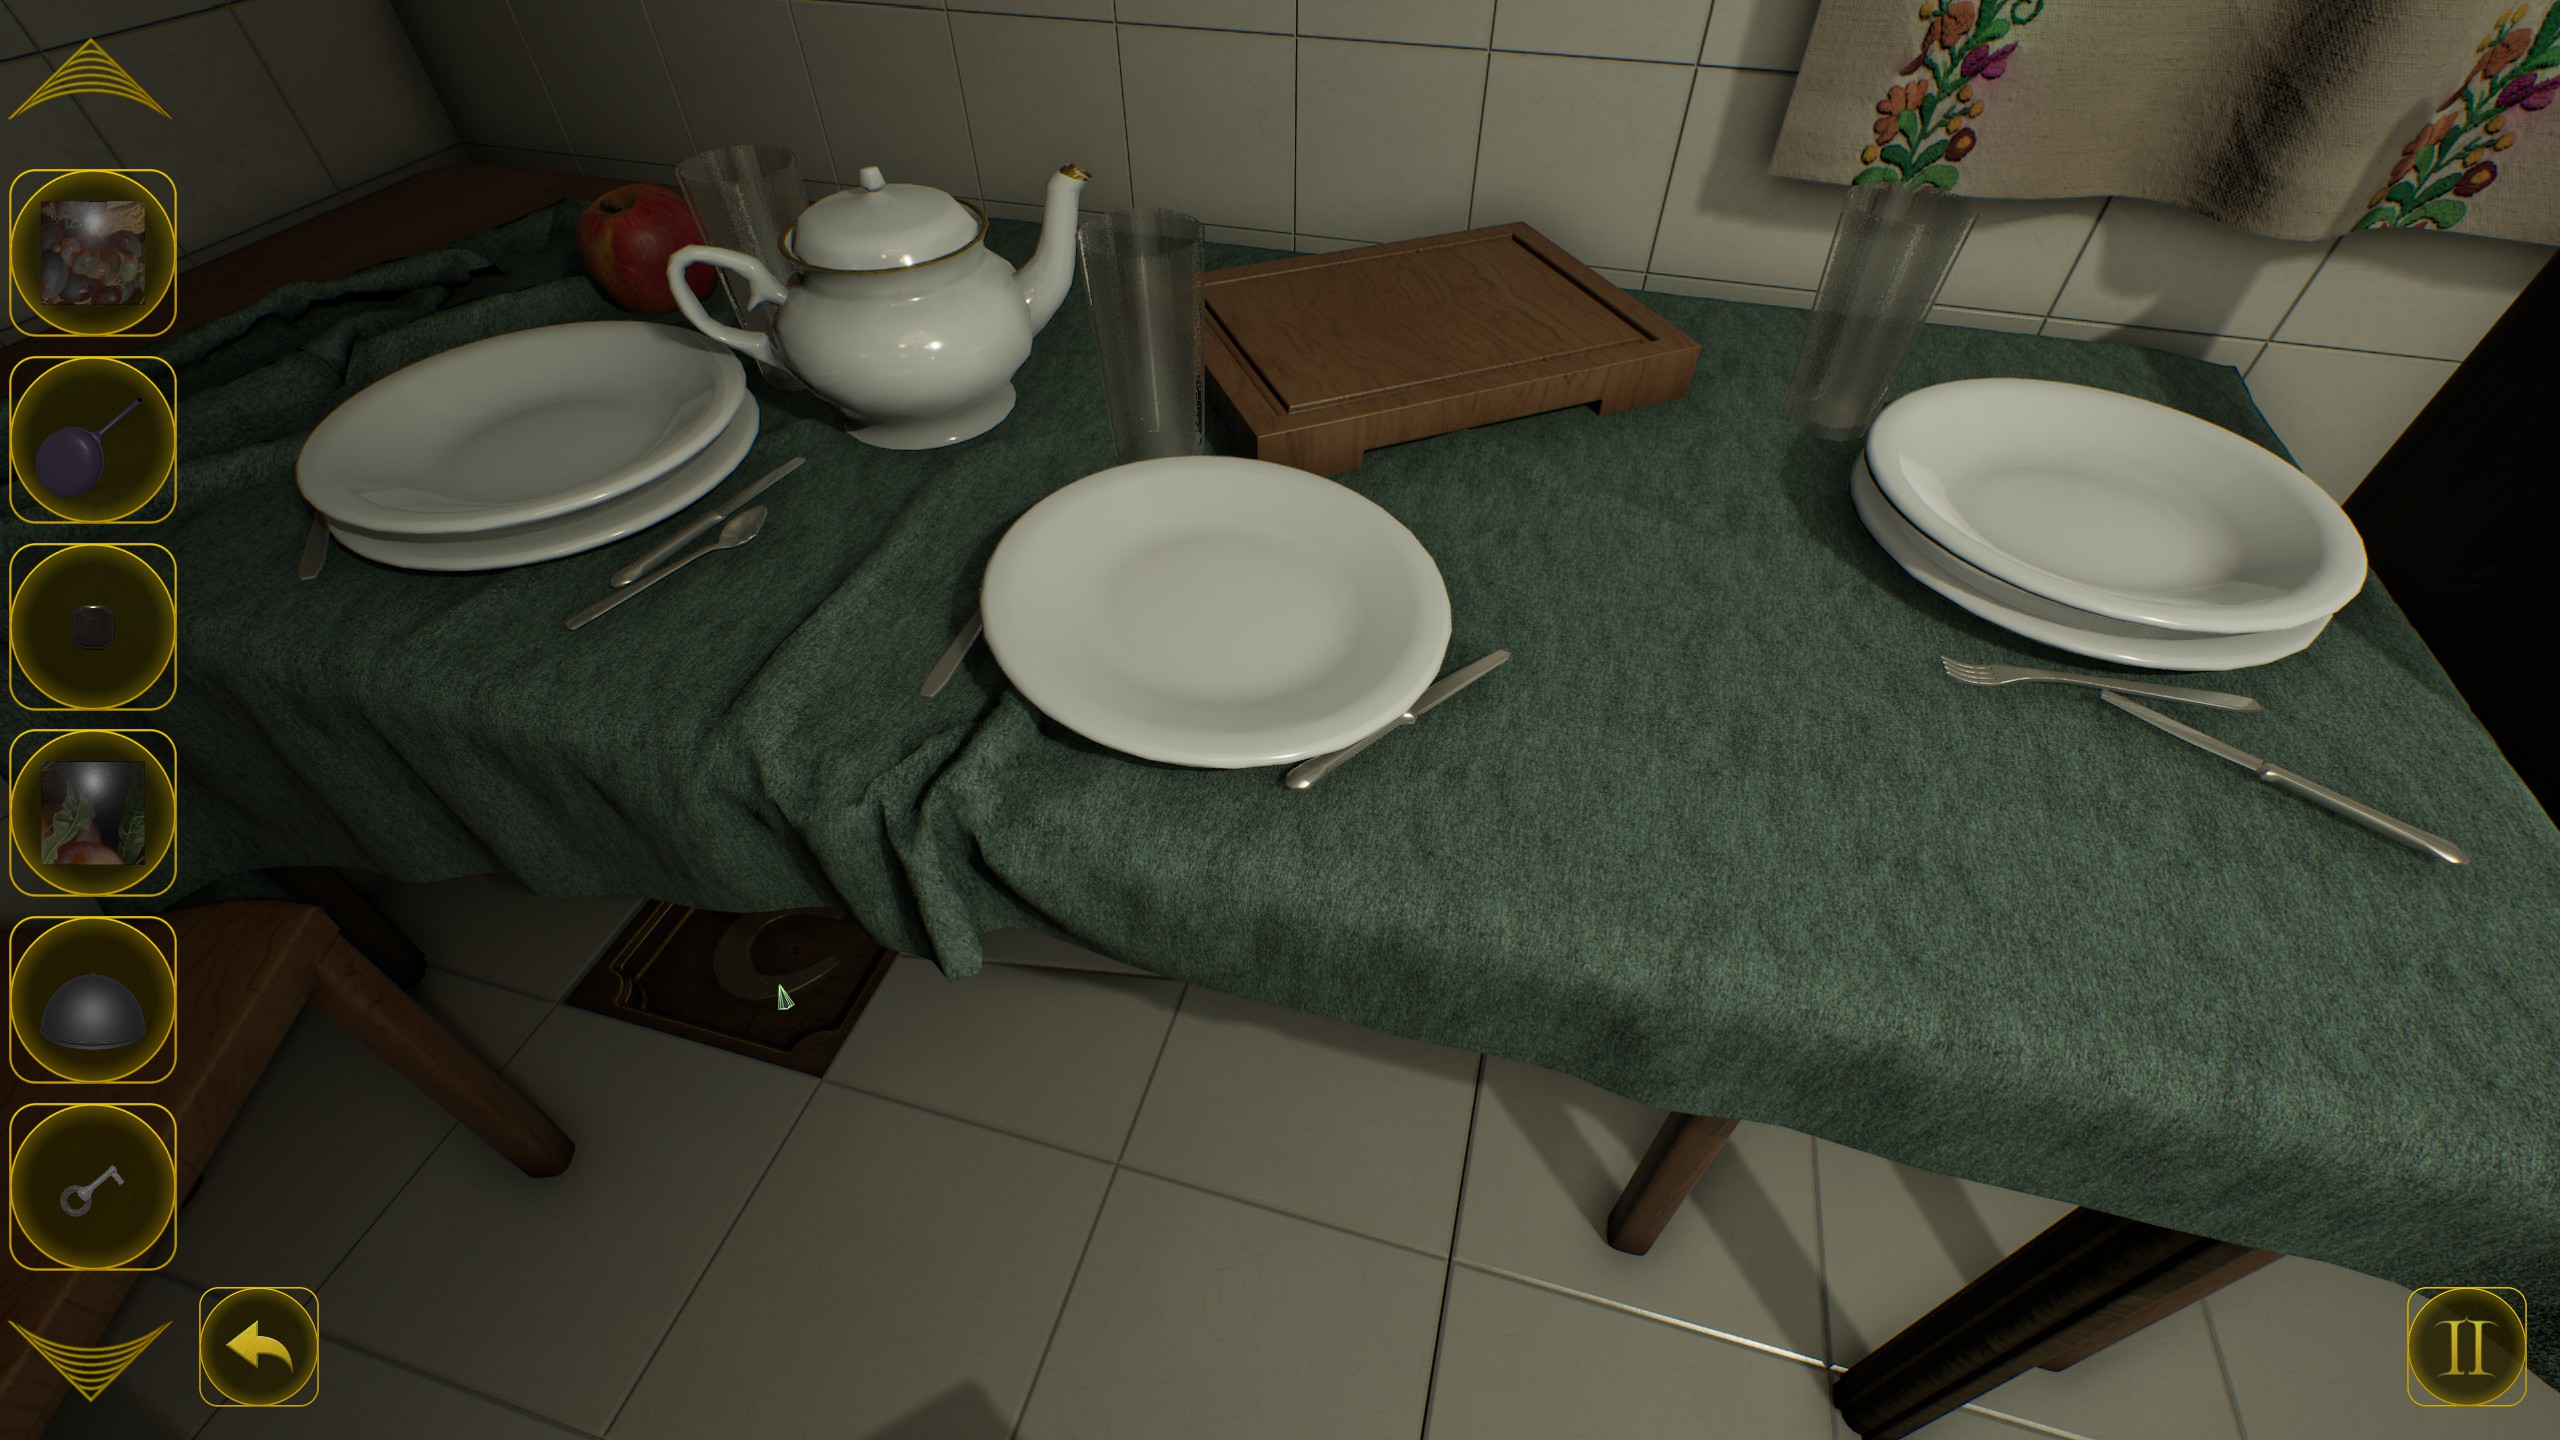
  • Turn around and zoom into the table, pick up the piece from under the chairs leg.
  • And move the lose tile piece on the left to find another horseshoe (2/4)


  • Grab the cutting board from the table, inspect it in your inventory and rotate it to find another tile.
  • Go back to the starting area of the room to find a door.
  • Use the key on the door to open it and go through.
  • Look to your right and down to find a hammer on the small stool.
  • Zoom into the spices cupboard in the corner of the room, and pick up cumin (orange spice, 4th row)
  • Zoom into the jars on the left of the spices, and take the leftmost one on the top.
  • Turn to your left, and you will see a hidden message in between the two cupboards on a box (3/4).


  • Zoom into the box in the left corner of the room to find another frying pan.
  • Close the door, and interact with the puzzle
.

  • Open it and pick the tile from inside.
  • Leave the room and go towards the stove.
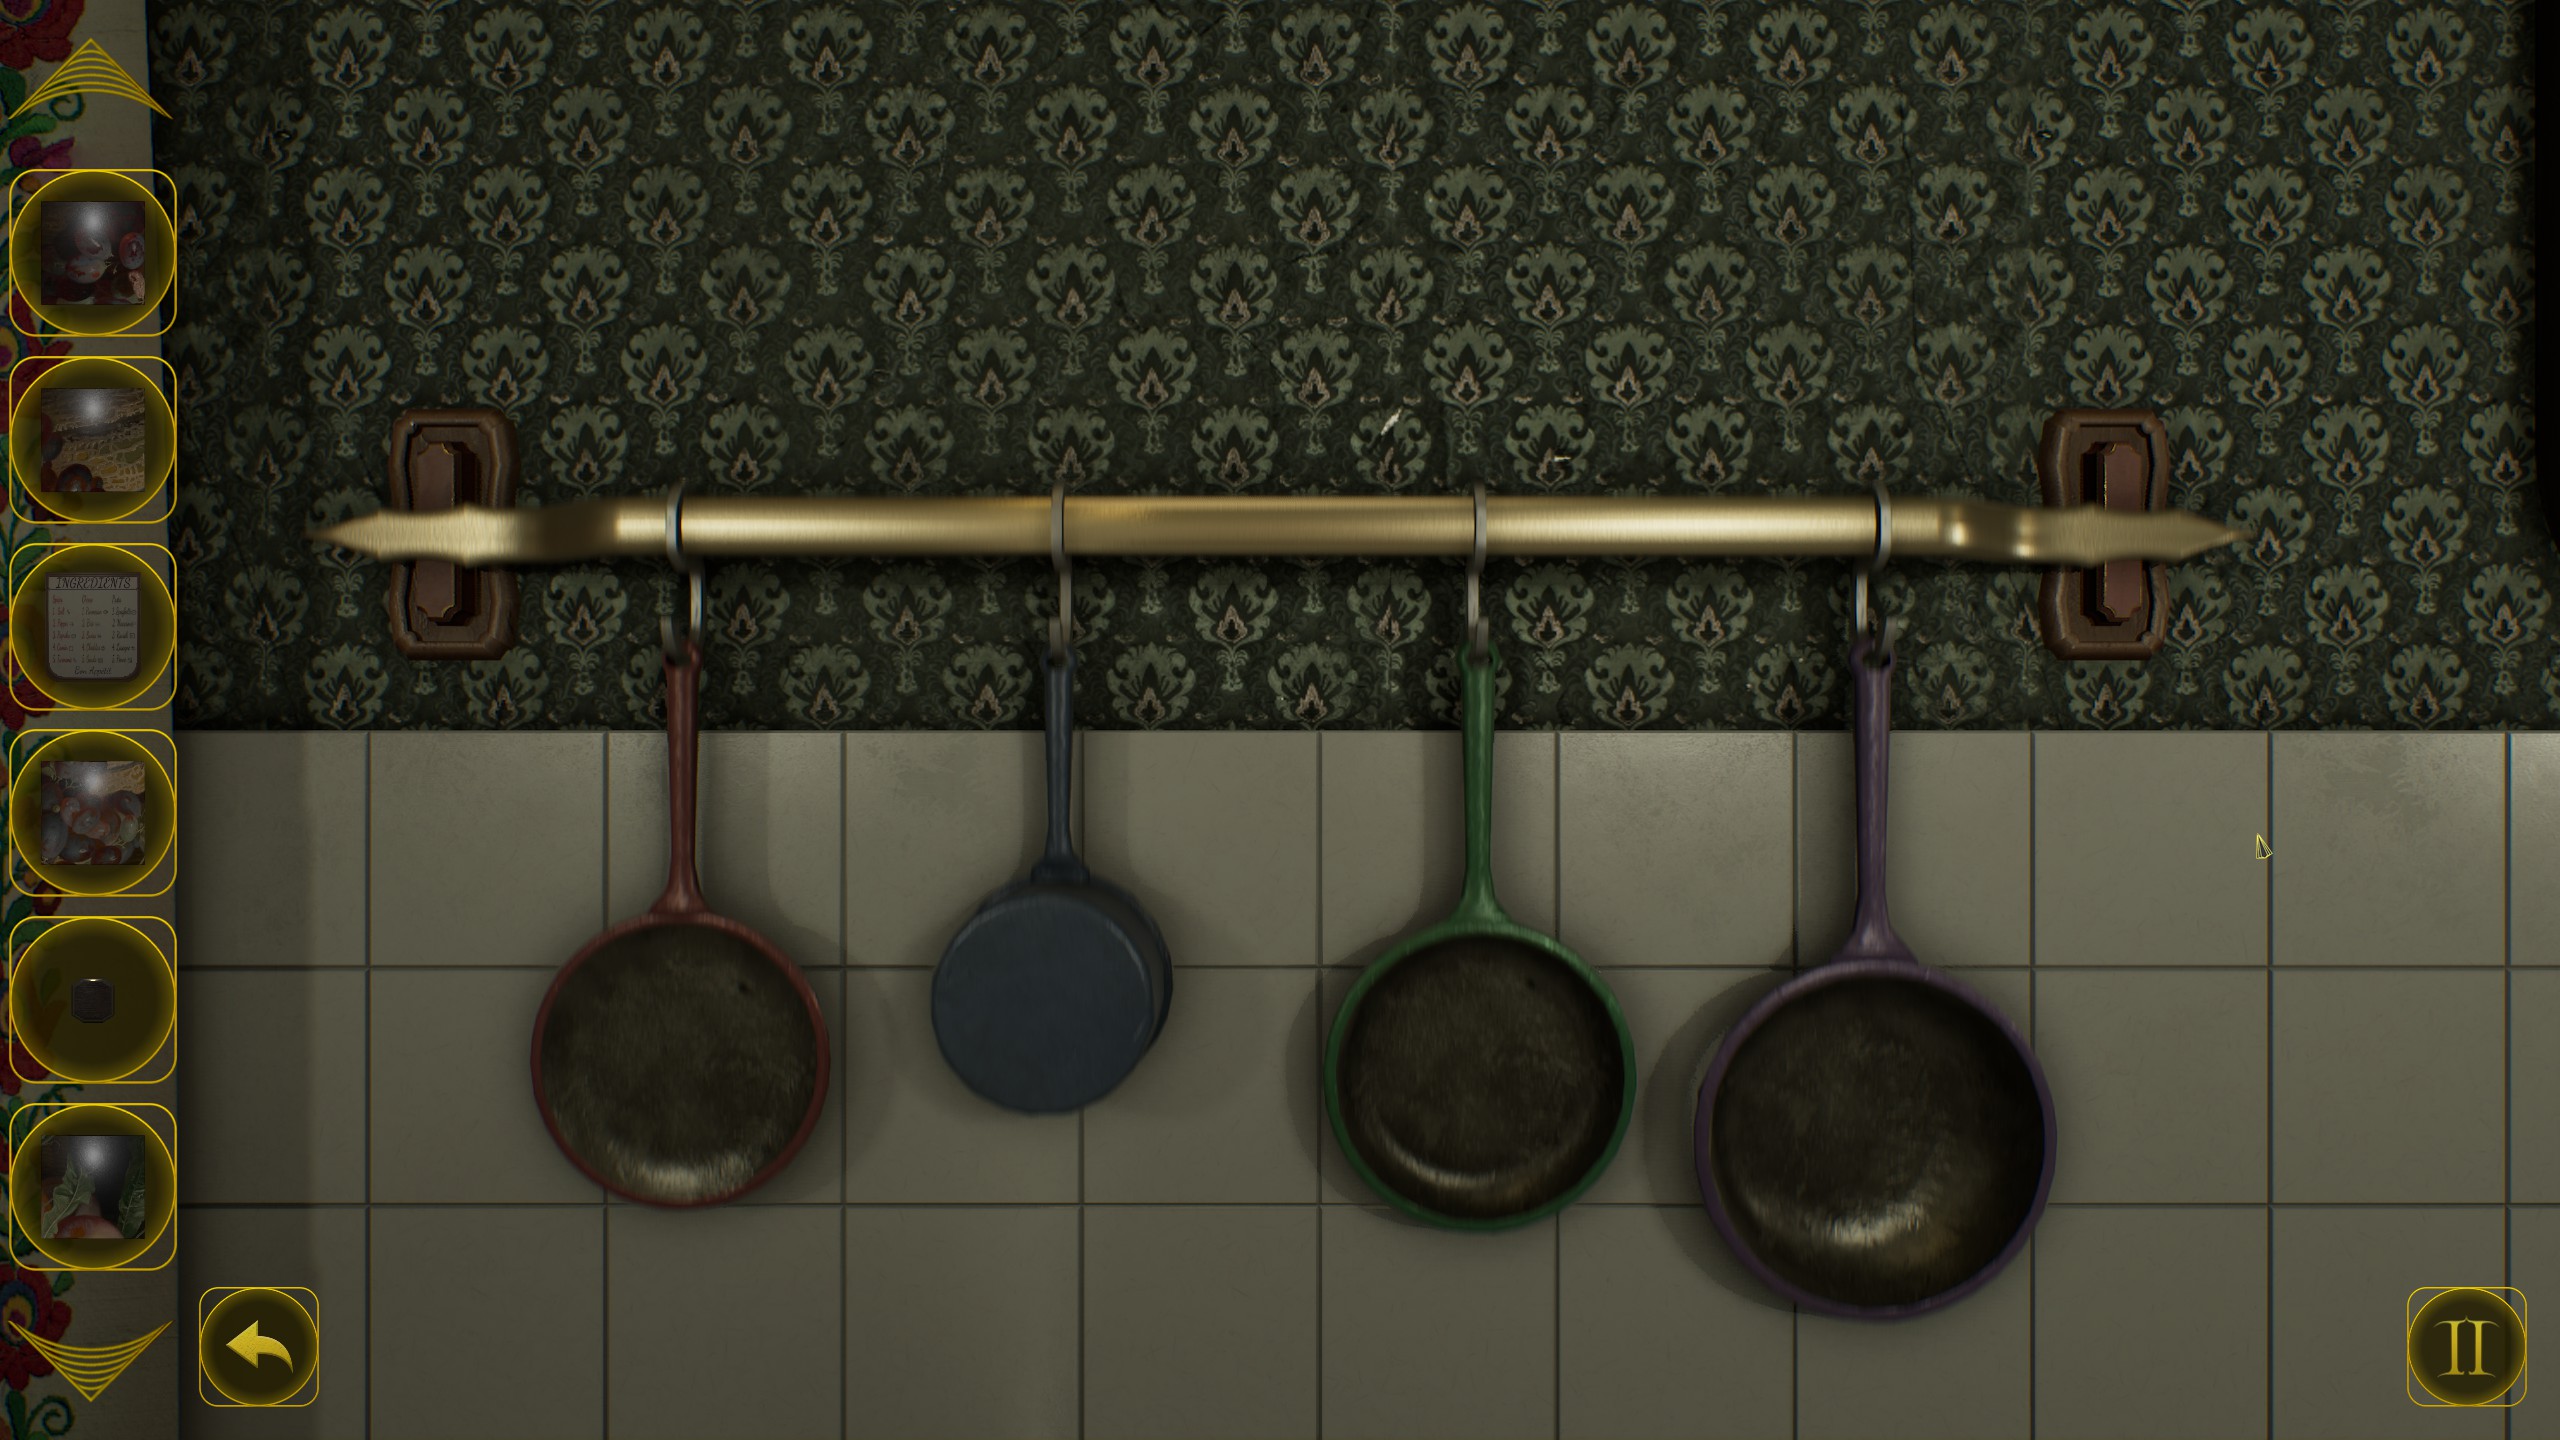
  • Hang all the pans in this order:


  • Zoom in to the stove and open the upper left door (open it upwards)
  • Take the tile from inside.
  • Zoom into the pot on the stove, and put the blue pebble that smells like soap.
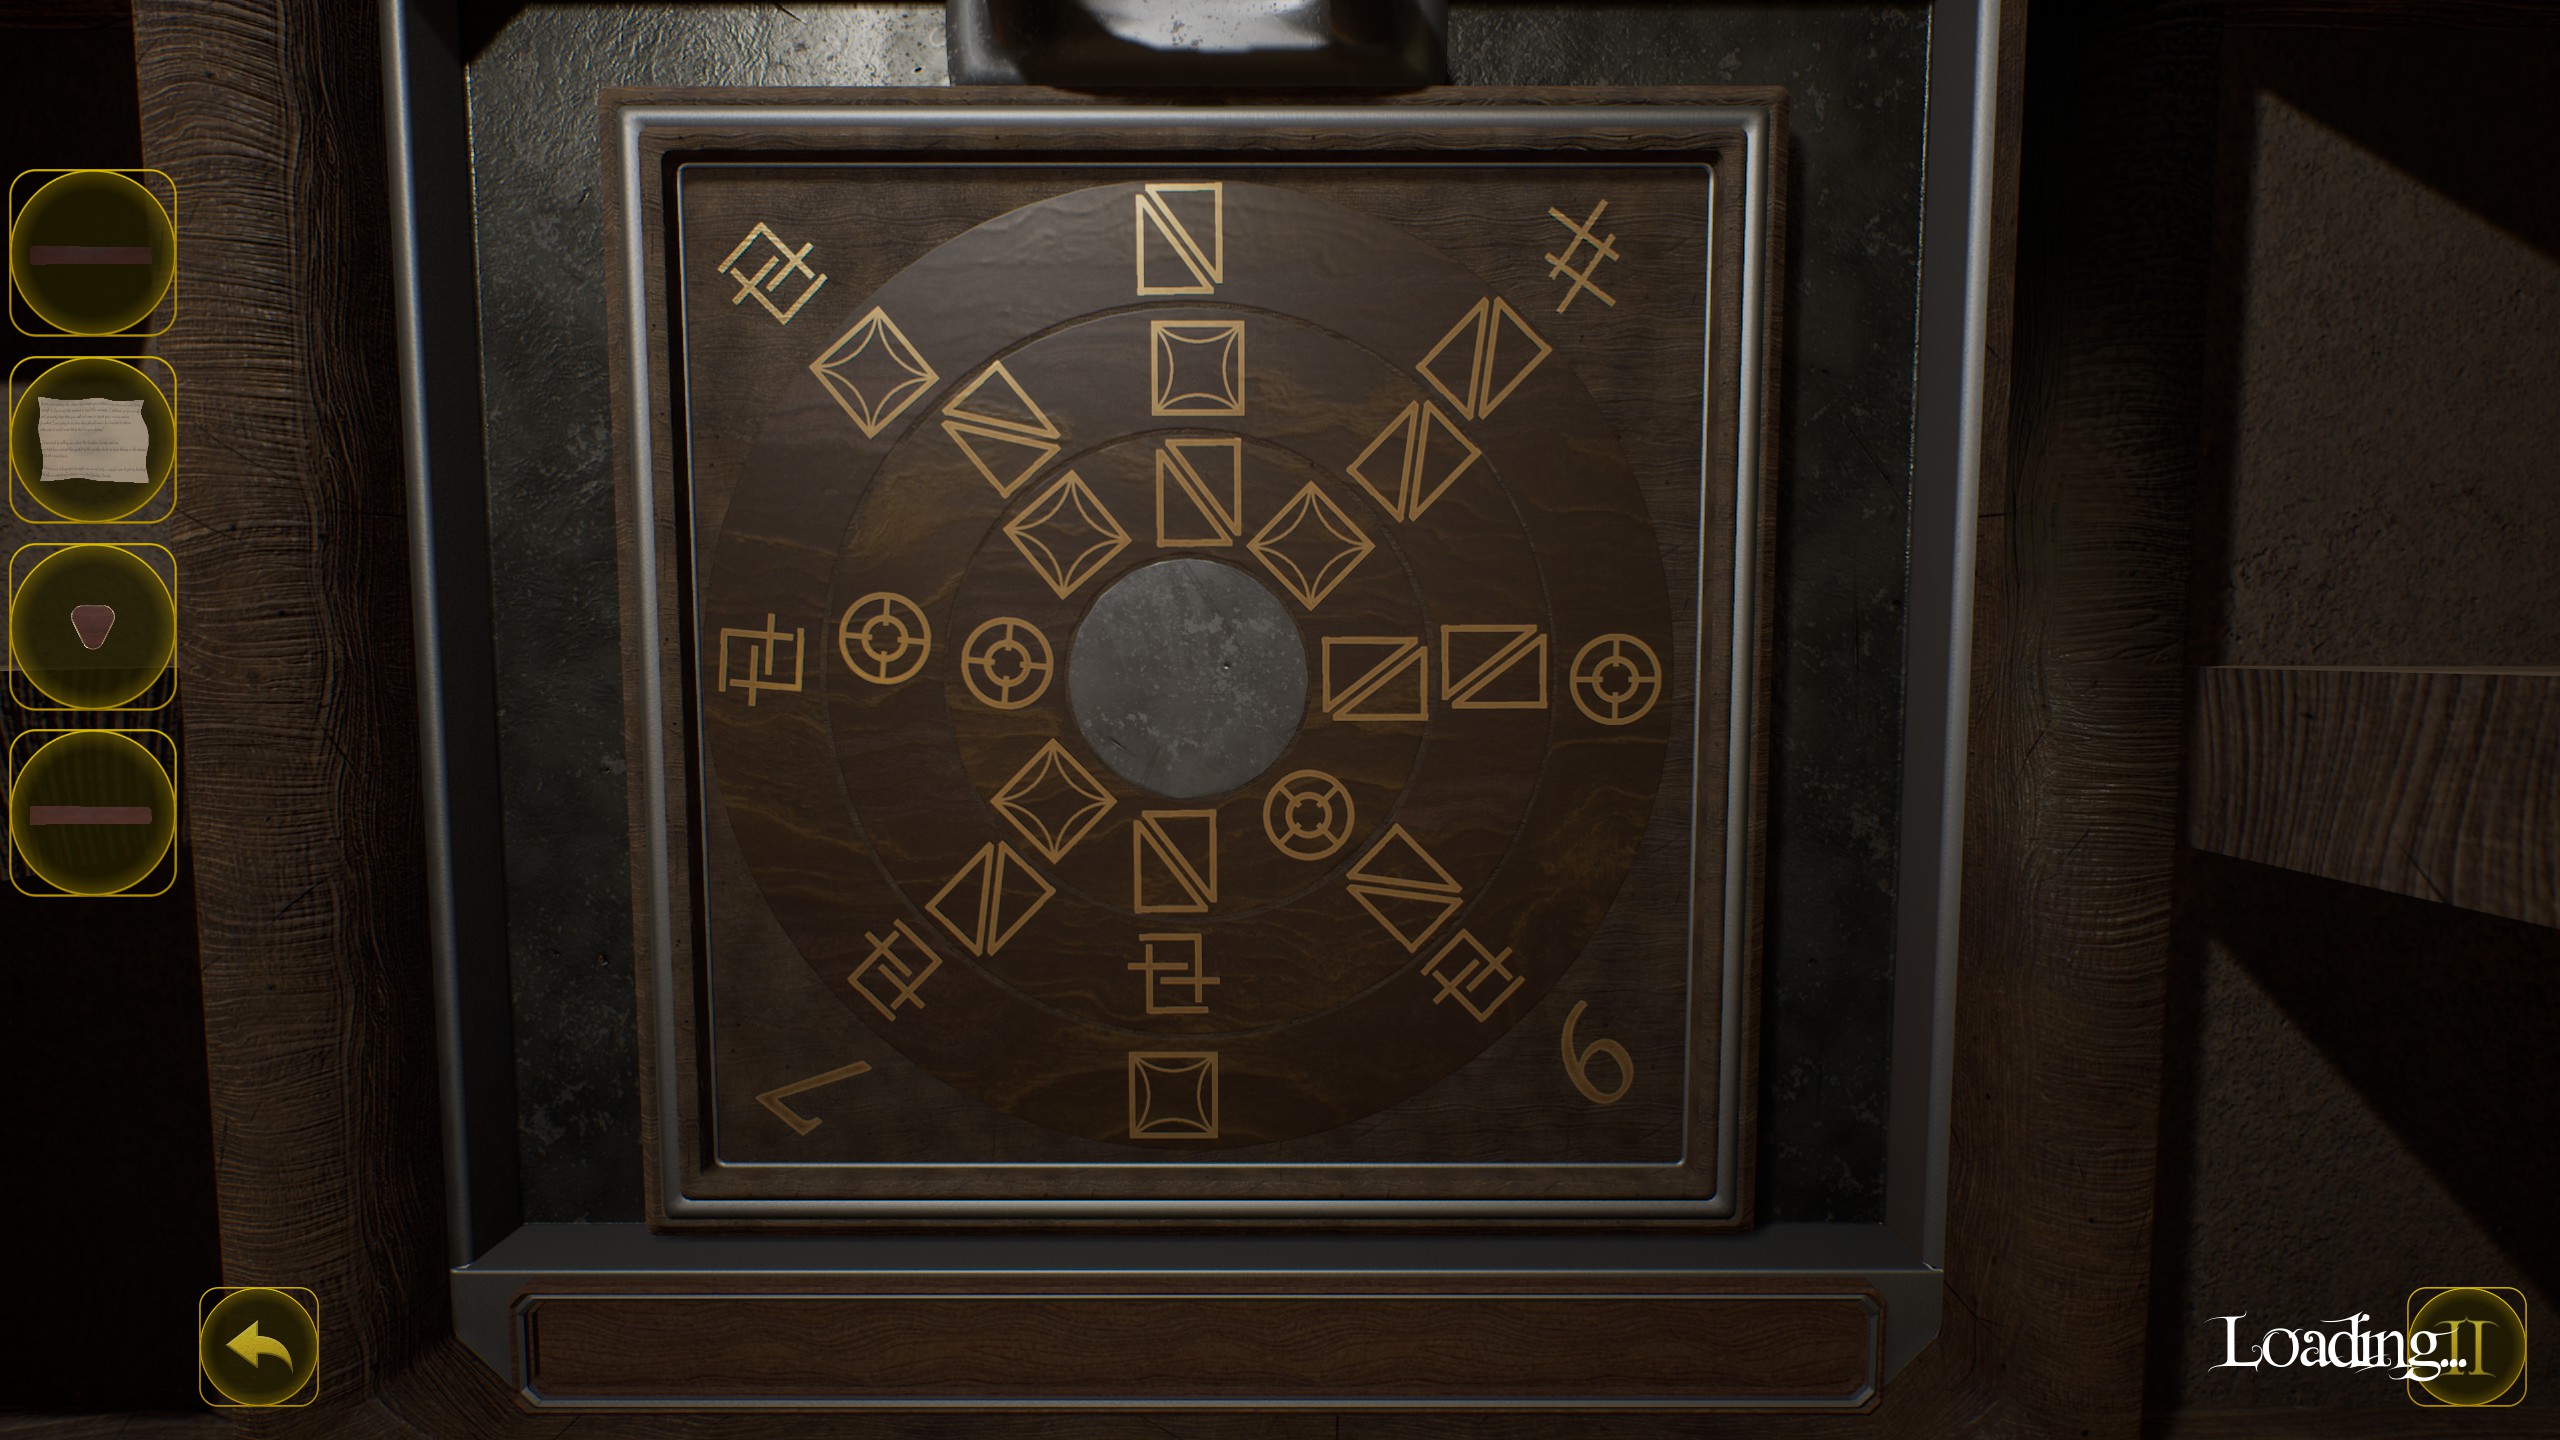
  • Zoom into the big stove door, and enter the code that can be visible inside the pot on the stove.

  • Take the small panel, and the tile from inside.
  • On the left of the stove you will see a round object, zoom into it and place the spice bottle on top.
  • Open the drawer just below the device and take a tile from inside.
  • On the left above all the small drawers you will see a plate covered with glass.
  • Use the hammer on it and grab the tile from inside.
  • Go near the door we opened before and look above the table with chairs on top.
  • Zoom into the panel and solve the puzzle by connecting same symbols.


  • Open the elevator door, and place your food plate inside.
  • Send it up to the lounge.
  • Zoom in under the place where the elevator was and pick up the tile.
  • Turn around and look on the wall near the plates.
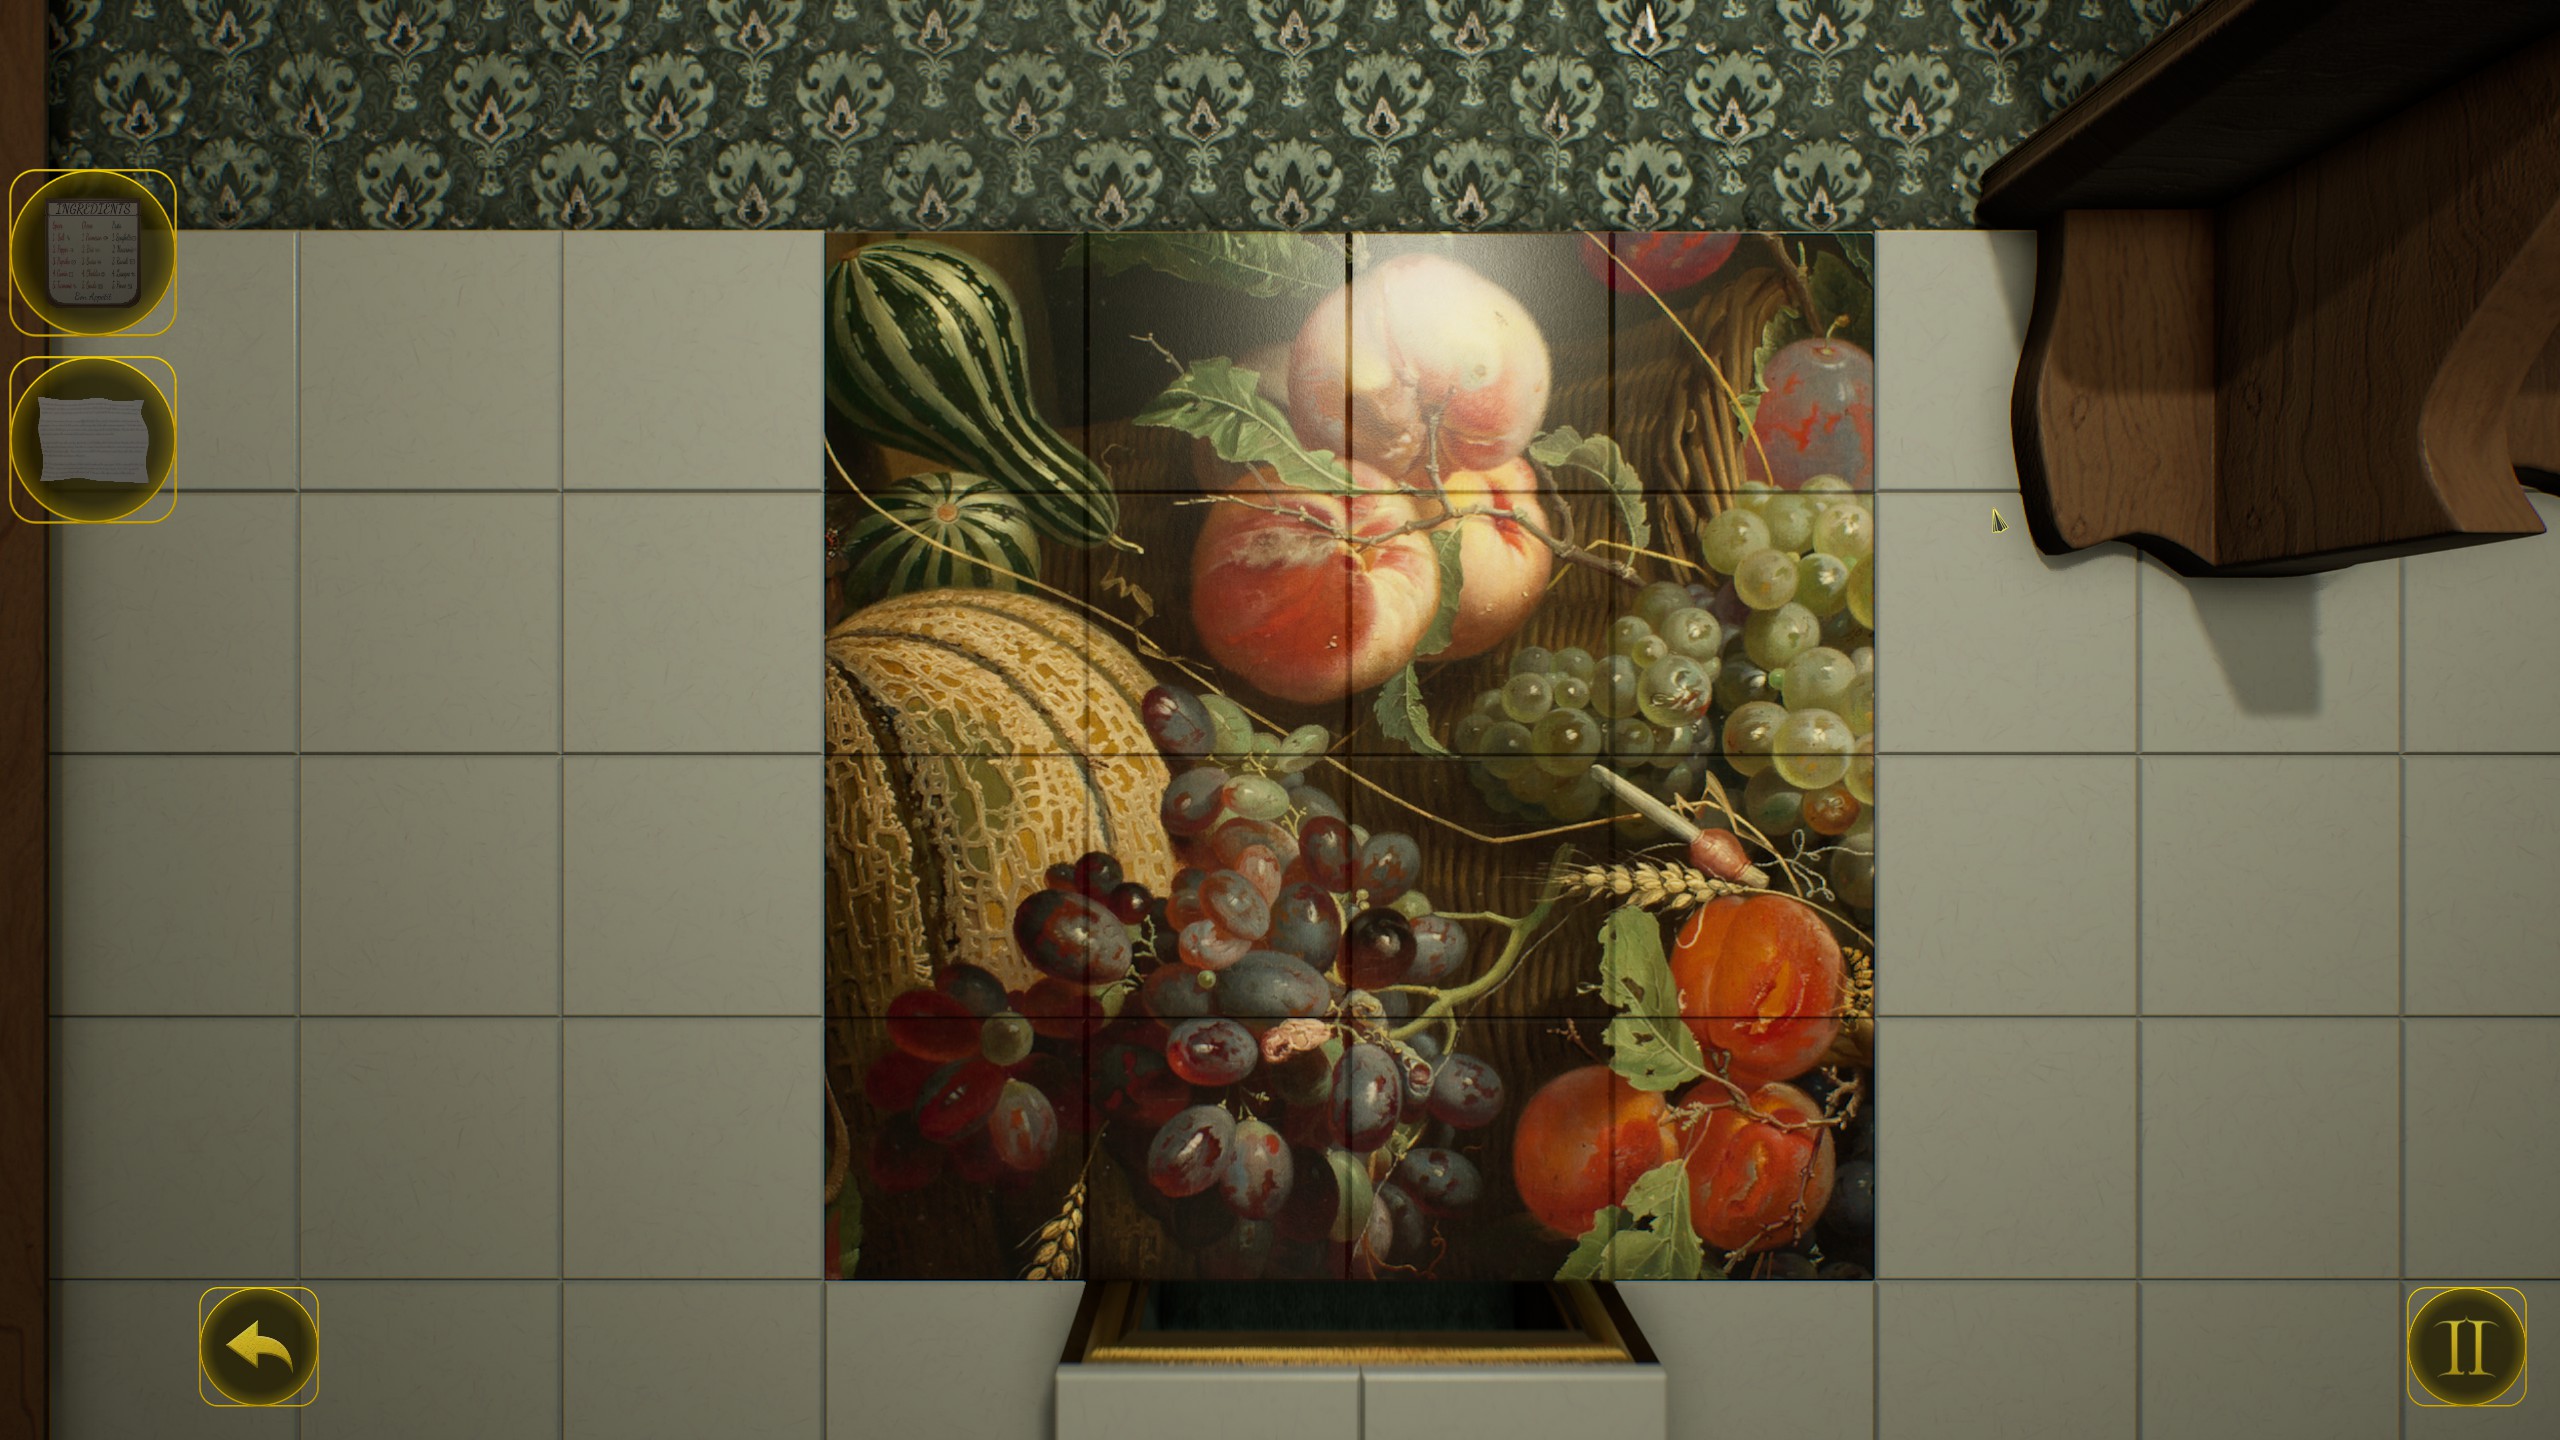
  • Zoom in and place on the tiles on the wall.
  • Now simply rotate the tiles to make a picture.


  • Zoom into the drawer that opened and pick the items from inside.
  • Zoom into the puzzle on the door to the left of the radiators.
  • Insert the button we found earlier, and use the o triangular object on the switch.
  • Now solve the puzzle:
O,↓,←,O,↓,↓,O,←,↑,←,↑,←,←,↓,↓,↓,→,→,↓,→,→,→,↓,↓,↓,↓,←,←,←,←,←,←,↑,O,↓,→,→,→,→,→,→,↑,↑,↑,↑,←,←,←,←,↑,←,←,↑,↑,↑,↑,↑,←,O,→,↓,↓,↓,↓,←,↓,↓,→,→,O,←,←,↑,↑,→,↑,↑,↑,↑,←,O,→,↓,↓,↓,↓,←,←,←,↑,↑,↑,↑,O,↓,↓,↓,↓,→,→,↓,↓,←,↓,↓,↓,←,↓

The Lounge
  • Turn around and look down below the switch and pick up the ball.
  • Go towards the table with tea.
  • Pick up the dart, and another ball.
  • Go forward and interact with the panel near the barred door.
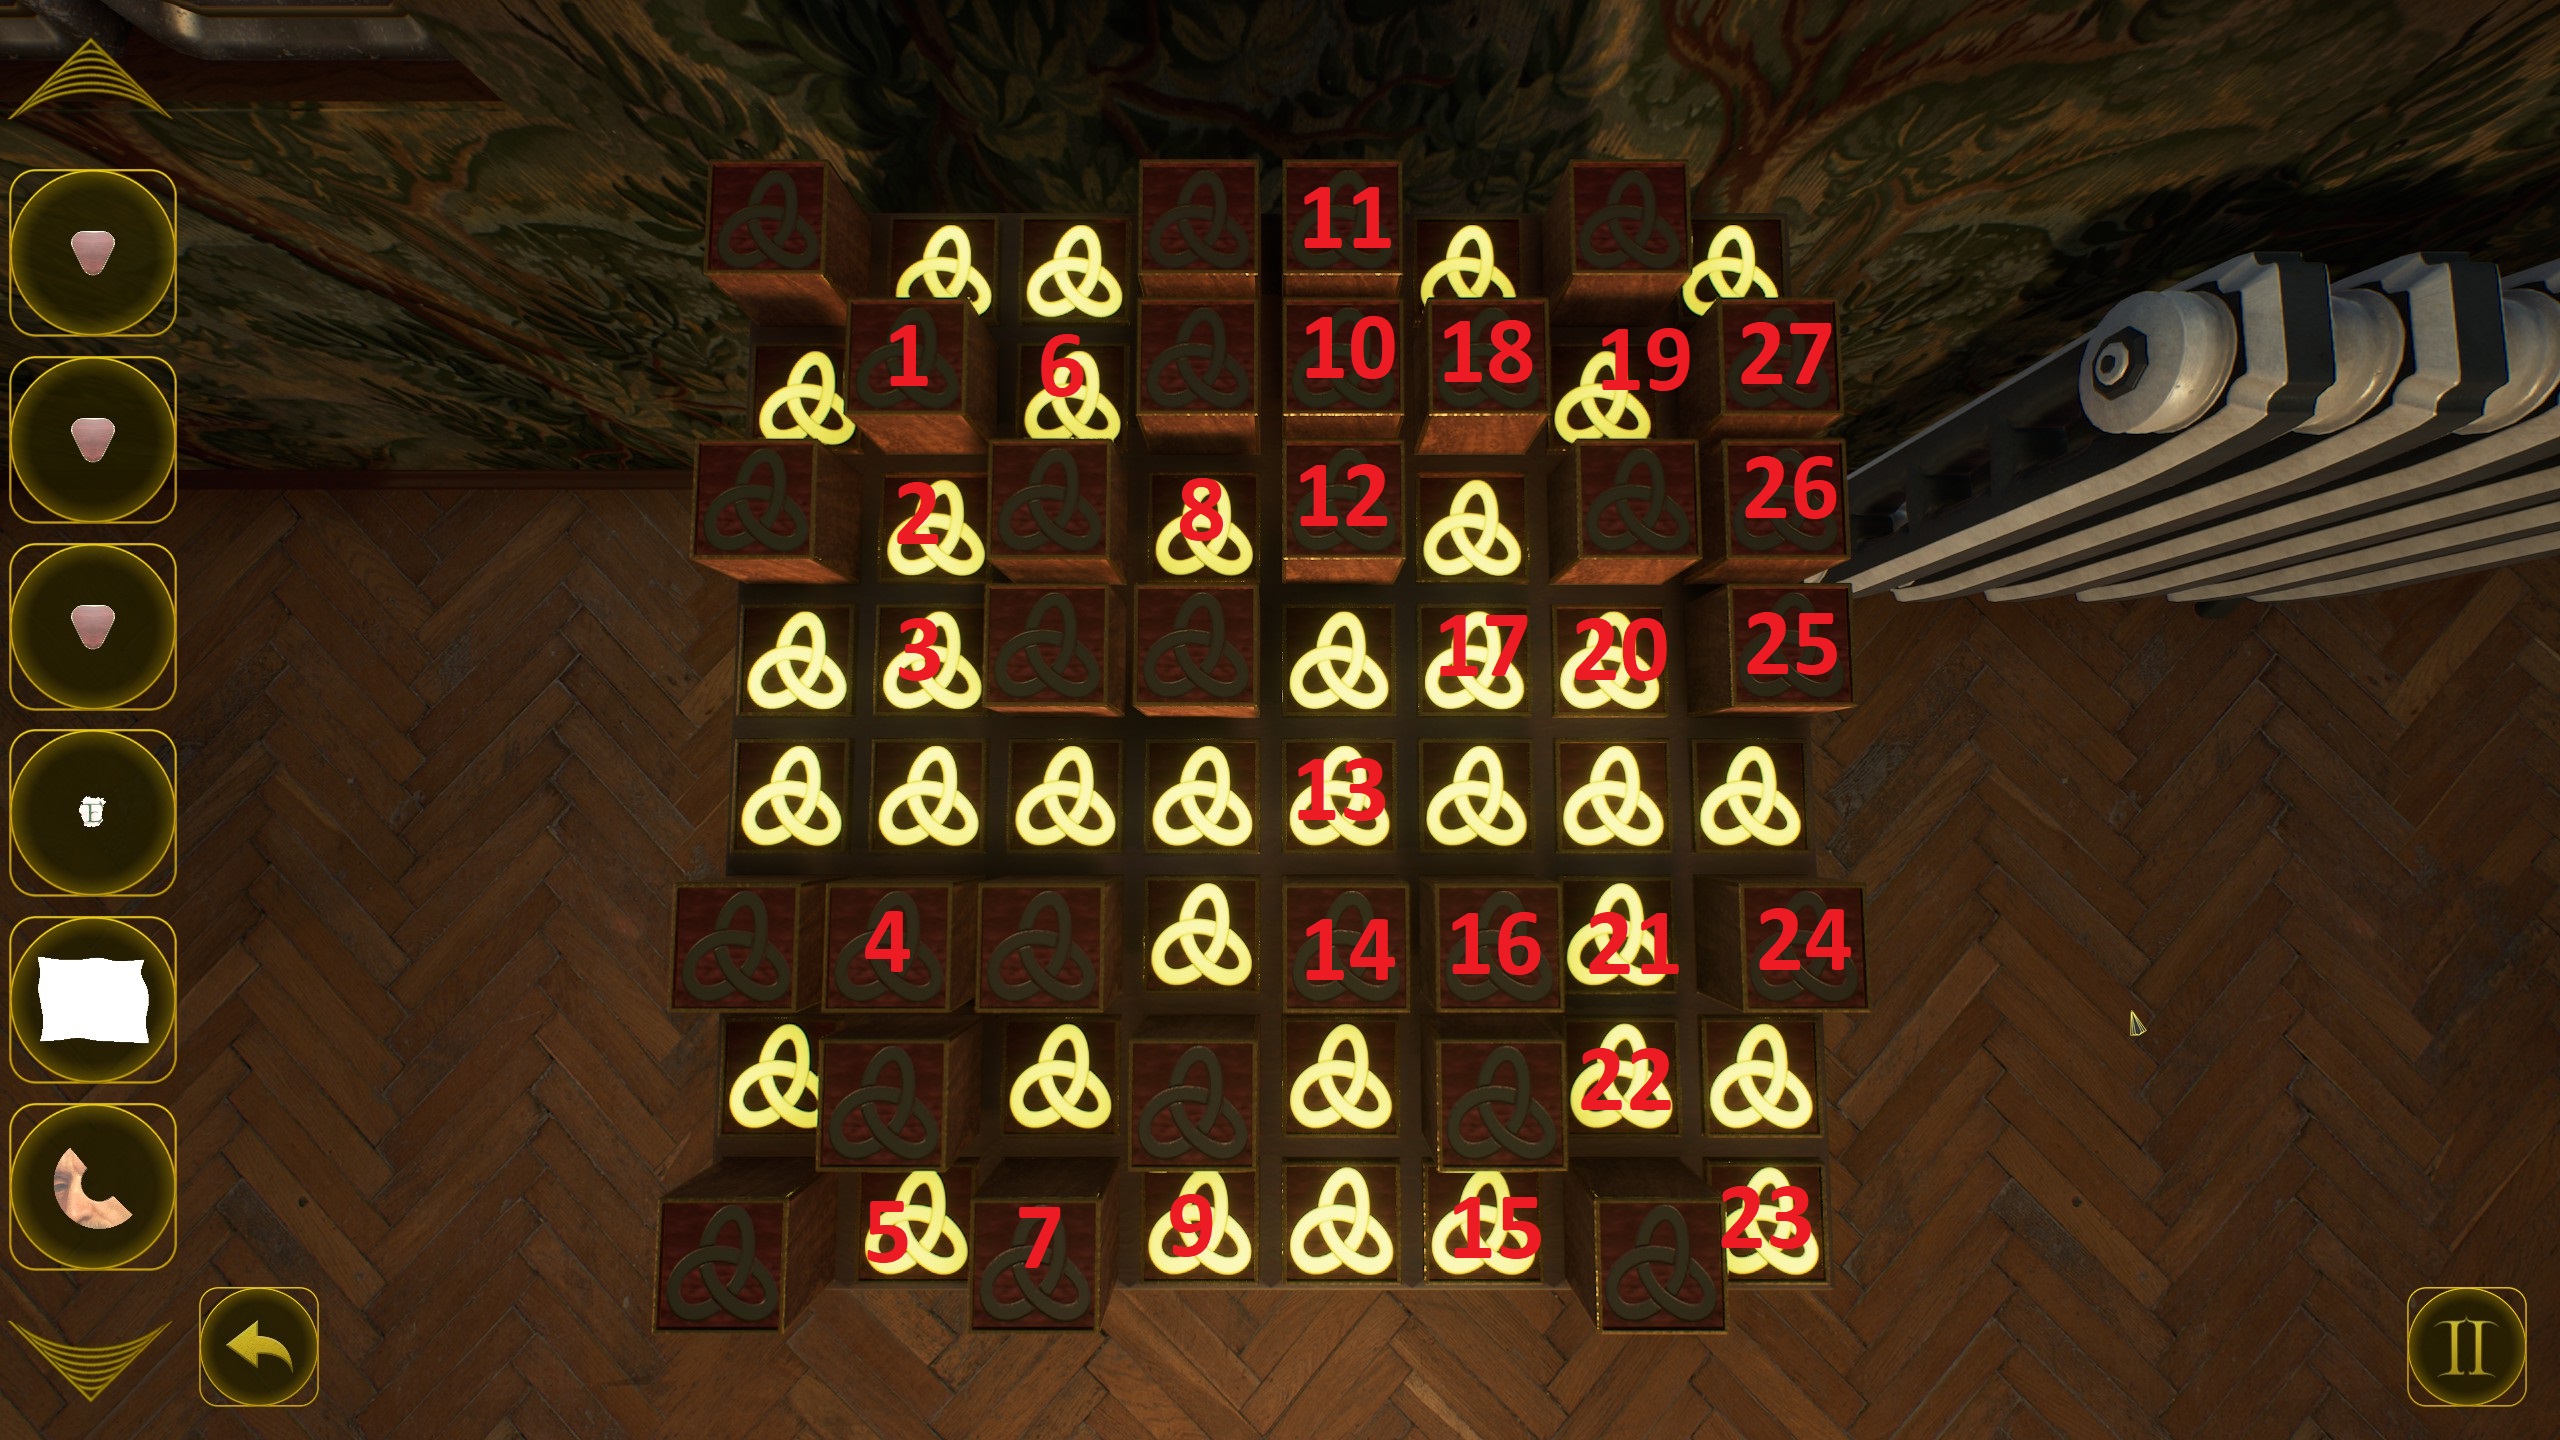
  • Solve the puzzle by making all lights white.
  • From left to right click on: 1,3,8,6,9,10.
  • Zoom into the cup to the left of the door on the lower shelf, and pick up the green ball from inside.
  • Move the cup on the right to find another ball under it.
  • Go through the door, and turn around.
  • Look at the stand with the pot and take the key and ball.

  • Zoom into the machine just right of the door, and pick up the ball from above it.
  • Leave the room, and zoom into the dartboard and pick up a dart from it.
  • Pick up the dart from the picture on the left of the dartboard.
  • Zoom into the dartboard again and place the yellow dart on 5, blue dart on 13, and red dart on 2.
  • Open the cupboard left of the picture and pickup the two balls from inside and the piano key.
  • zoom into the bookcase, and pick up the yellow ball from inside.
  • Look down and pick up the figurine.
  • Go left towards the piano, look to your left and pick up the bottle.
  • Zoom into the chair of the piano, and take another ball.

  • Take the bottle from above the piano.
  • Zoom into the piano, and use the small key to open it.
  • Insert the piano key on the missing slot on the right and play it.
  • Go forward through the secret door, and pick up the note near the safe.
  • Leave and go towards the snooker table, pickup the statue on top of the table.
  • On the left of the red curtain you will see a table.
  • Zoom into the table below the switch and click on the buttons in the following order:
  • 2,7,1,3,8,5,9,4,6.
  • Open the case and pickup the yellow ball.
  • Zoom into the red couch on the left.
  • Pick up the rod on the couch, and the bottle from the small table.
  • Pick up another figurine to the right of the couch.
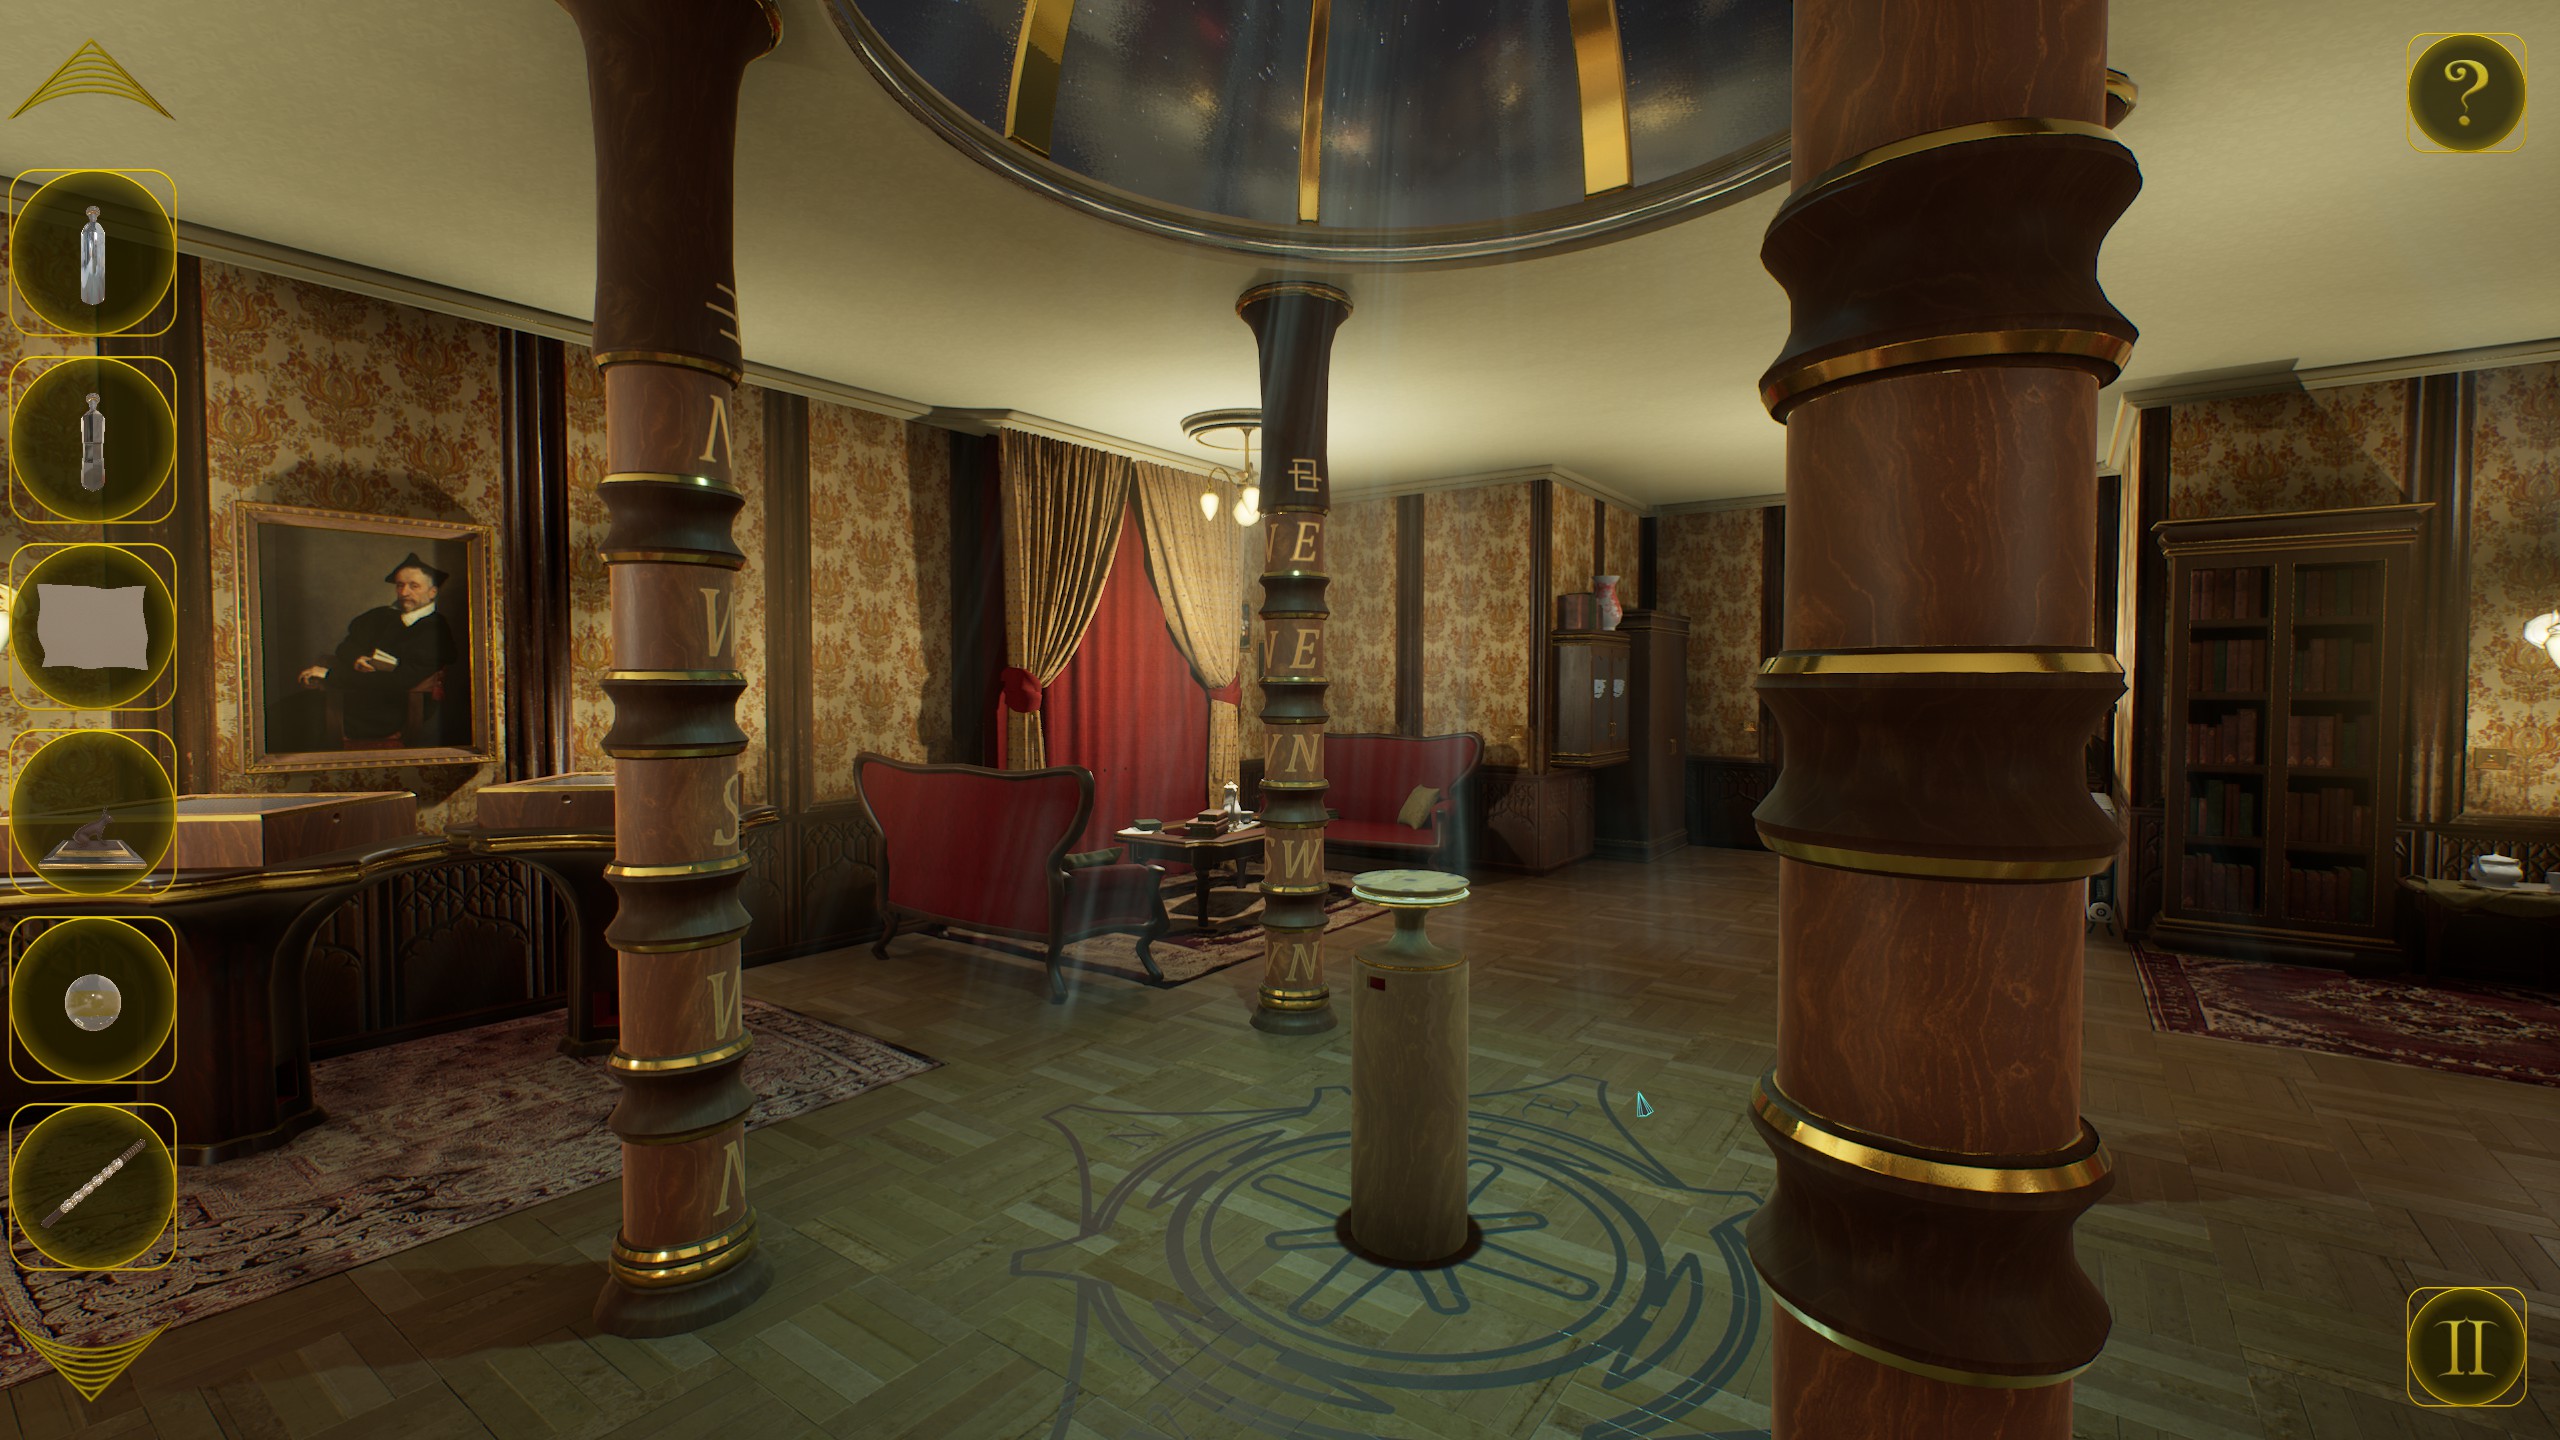
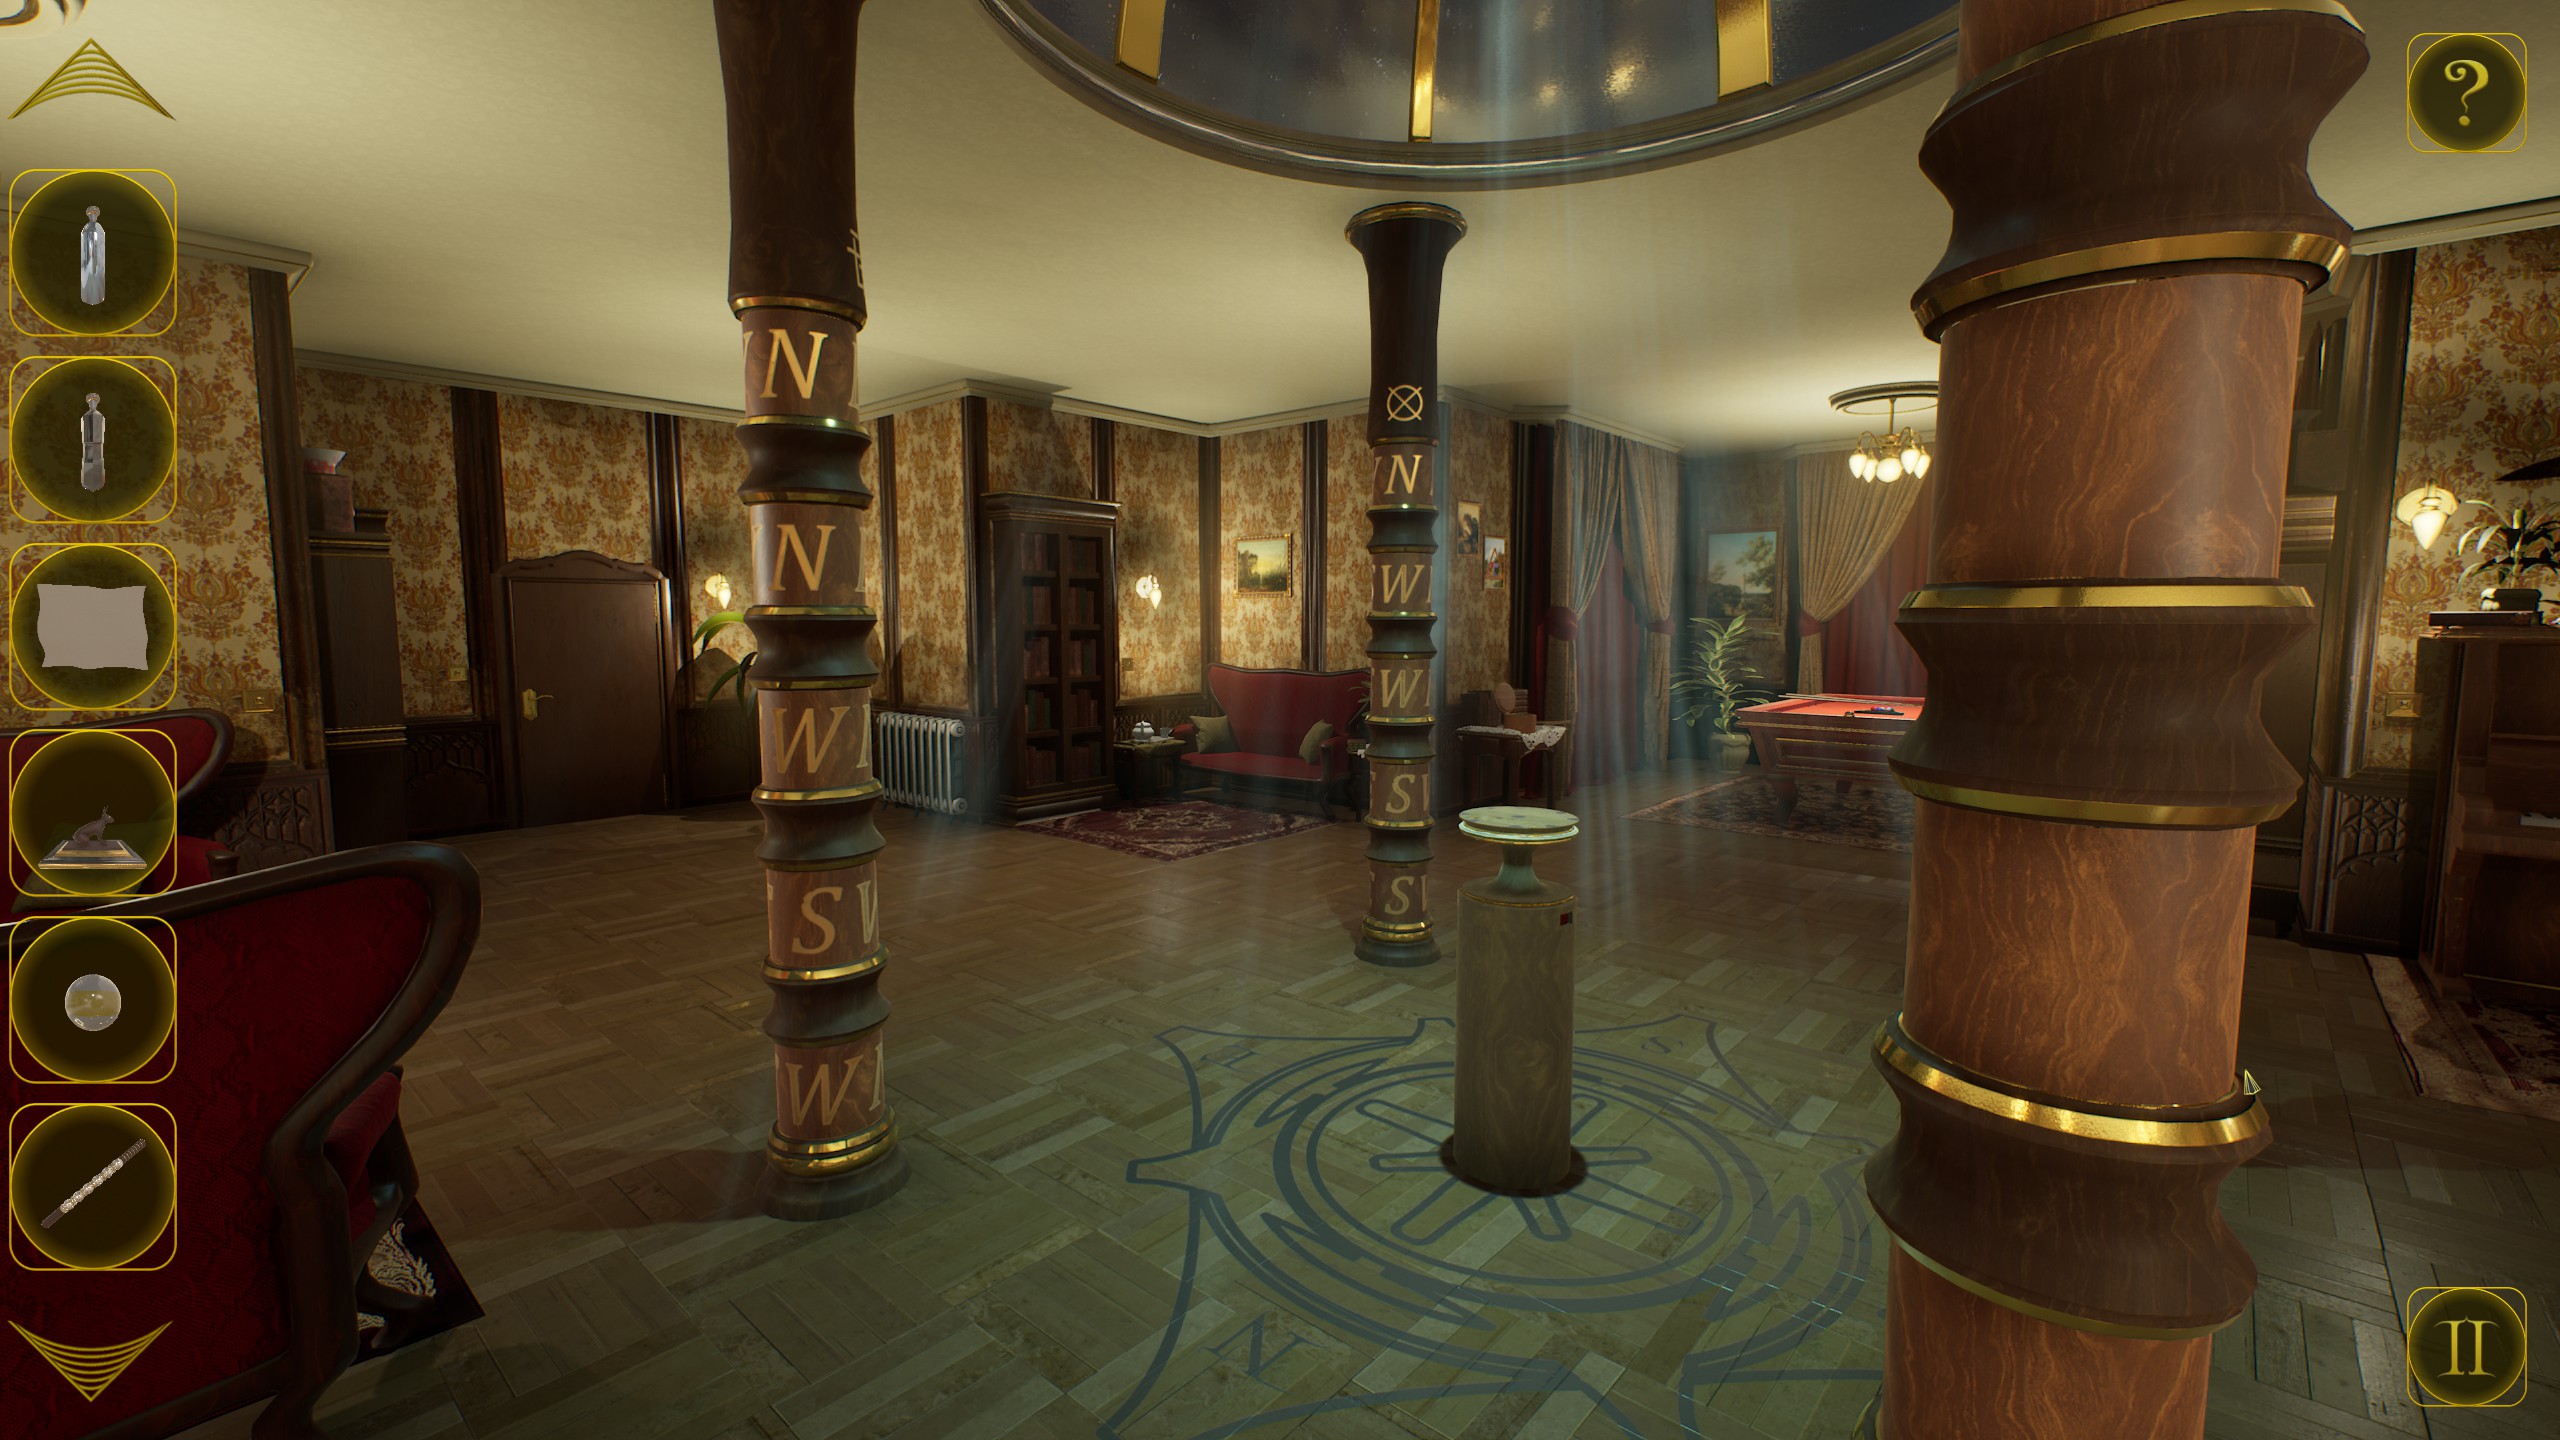
  • Go to the middle of the room with the columns and solve the puzzle.
  • The hints are in your note.
  • Column with O - NWWSS
  • Column with Square and lines - EENWN


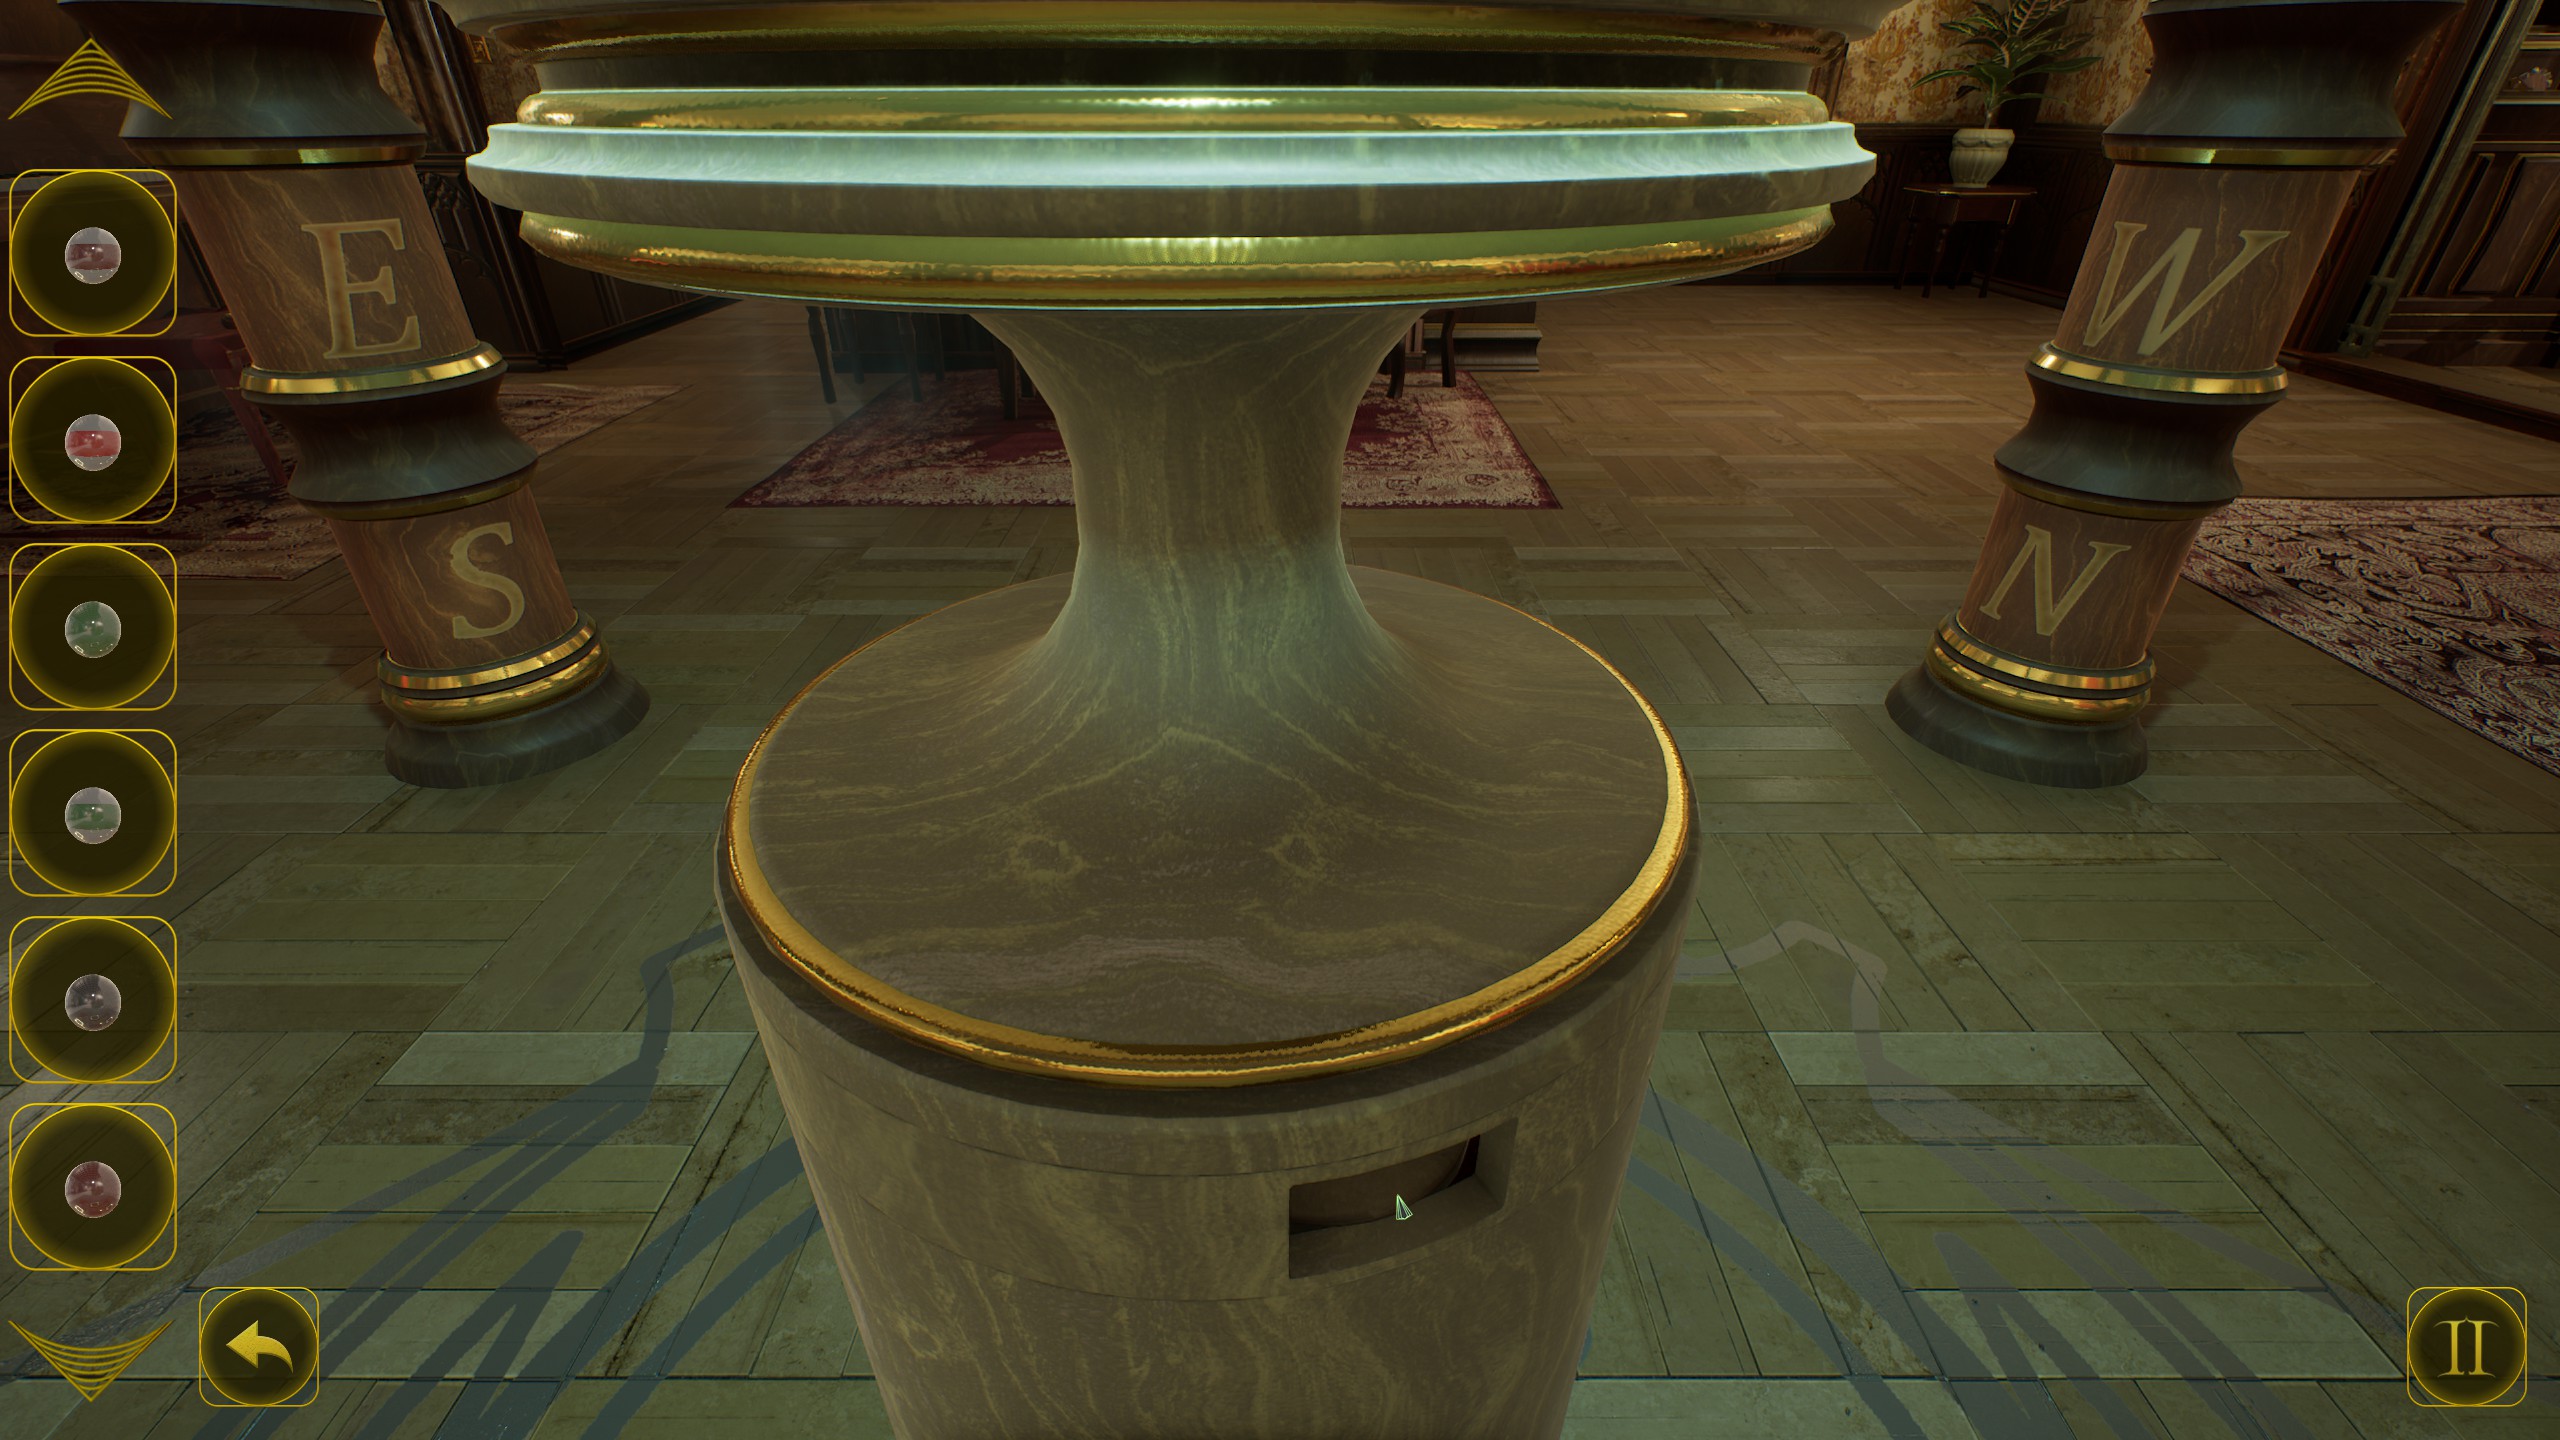
  • Pickup the figurine from the middle of the columns.
  • Rotate the column and you should see a horseshoe inside (3/4).


  • Go to the room with the bar, and interact with the phone.
  • Dial the number 11861.
  • Open the small elevator door on the left of the phone, and pick up a bottle from inside.
  • Zoom into the right of the machine near the door, and insert the rod we found on the couch in its side.
  • Now zoom into the machine itself and place the bottles in the following order:

    • Rectangular bottle of whiskey - 1st slot.
    • Move the dial below it to 4.
    • Triangular bottle of champagne - 2nd slot.
    • Move the dial below it to 3.
    • Round bottle of wine - 3rd slot.
    • Move the dial below it to 6.
    • Octagonal bottle of gin - 4th slot.
    • Move the dial below it to 2.

  • Now turn the lever on the right. If done correctly the light should turn green.
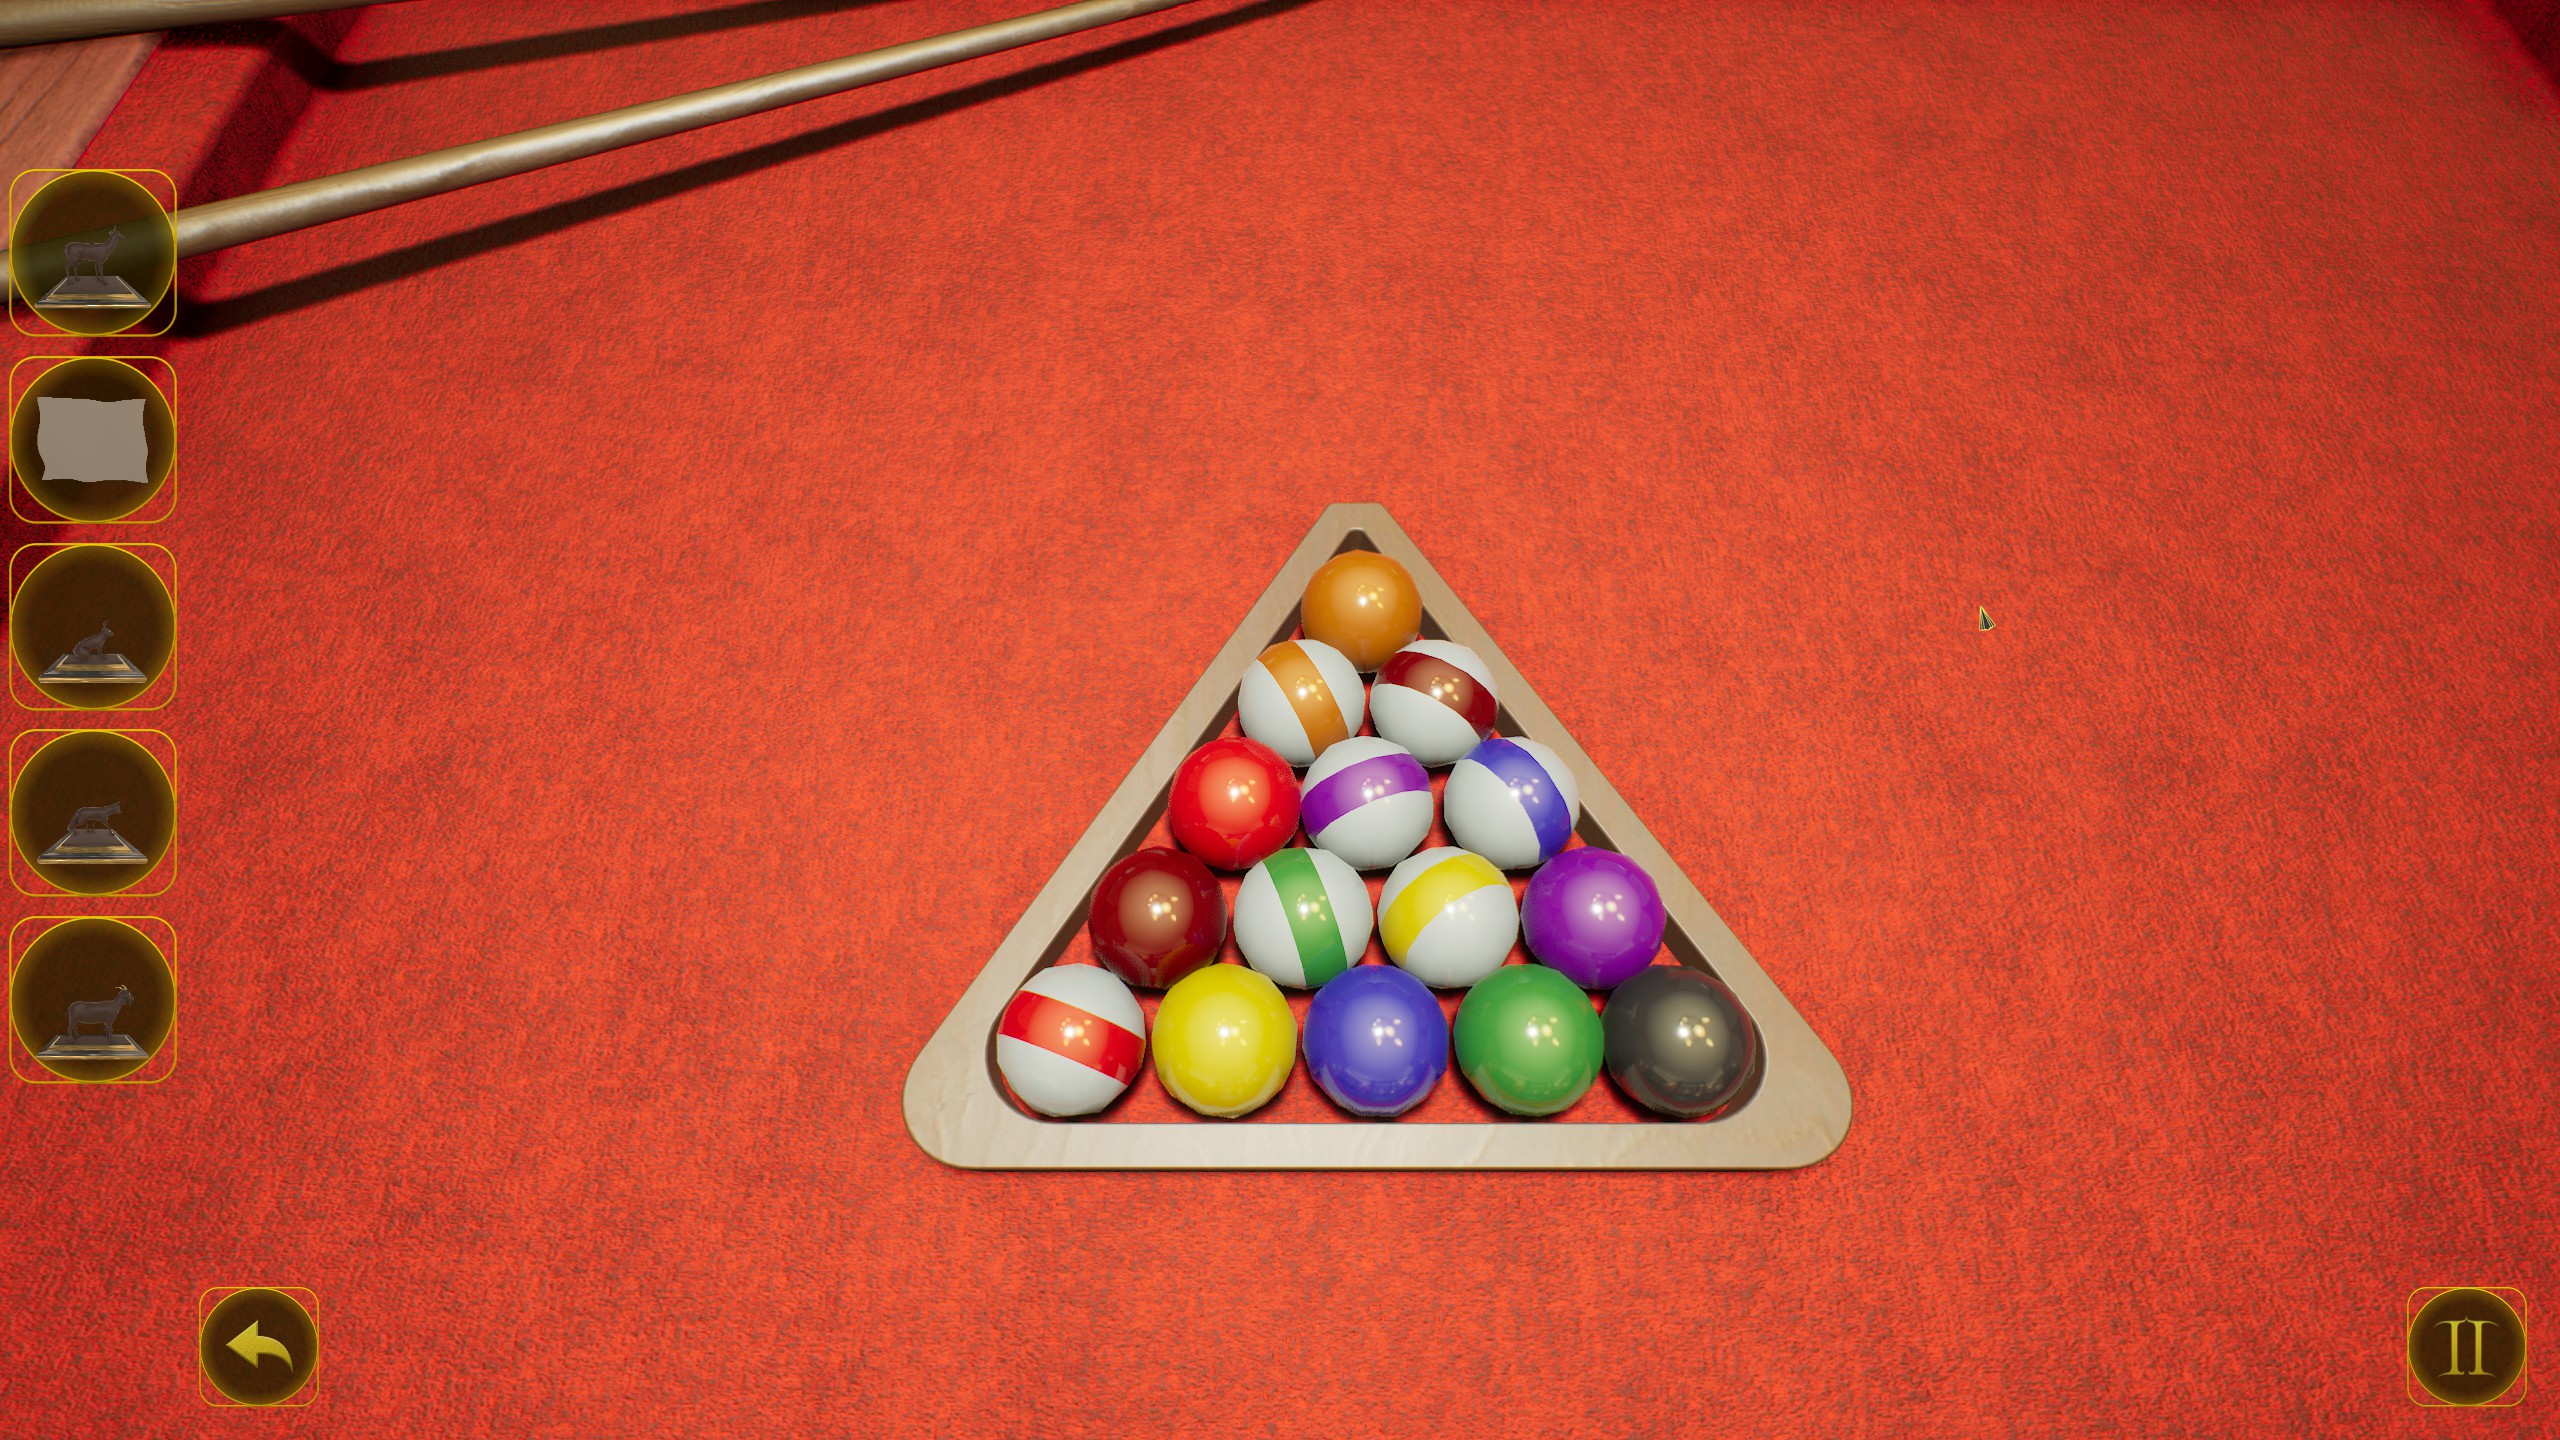
  • Go to the snooker table and place all the balls as in the screenshot:


  • Go to the secret room we opened earlier with the piano, and open the safe.
  • Take the figurine from inside and the button.

  • Go to the room with the phone, and interact with the chess board.
  • Now place the figurines as follows:
  • Stag on the top left corner.
  • Goat on the top right corner.
  • Fox in the middle of the board.
  • Doe in the bottom left corner.
  • Rabbit in the bottom right corner.

  • Go to the secret room, and interact with the door.
  • Open the hatch below the buttons to find a secret message. (3/4)
  • Now click on the following buttons from left to right:
    • 2,3,1,3,3,1,1,2
Uncle's study
  • Open the cupboard to the left of the chest, and pick up the letter inside it.
  • Move the box under the cupboard, and open the door that was blocked by it.
  • Zoom in and pick up the secret note from behind the boxes (4/4)

Nothing is simple...
Read every hidden message


  • Go towards the bookcase and zoom into it.
  • Flip the switch.
  • And pick up the piece under it.
  • Turn around and pick up another piece from the table.
  • Go towards the picture in the middle of the room and pick up another piece.
  • And a crank from the stool.

  • Go to the corner of the room on the right.
  • Pick up the crowbar from behind the statue of the dog.
  • Interact with the worktable, open the drawer in the middle and take the item from inside.
  • Below the table on the right interact with the secret switch.
  • Open the 2nd drawer in the third column and pickup the metal piece.
  • Open the 1st drawer in the first column and pickup the box.
  • Open the 2nd drawer in the first column and pick up the letters.
  • In your inventory inspect the box we found, and enter the code SUN to open it and find a letter and key.

  • Zoom into the cupboard to the left of the birdcage and use the key to open it.
  • Pick up the projector and a note.
  • Combine the note with the letters to see a hint for the next puzzle.
  • Go back to the work table, and place the projector on top of it.
  • Use the button on the projector, and the handle.
  • Turn the handle to start the projector.
  • Interact with the box to the right of the projector and enter the code VENUS.
  • Open it and take the key.
  • Go to the cupboard where we found the secret note and, and interact with the box there.
  • Enter the code: 1610 and take the small weight from inside.
  • Interact with the panel with numbers left of the door to start a puzzle.
    • Move purple to 2.
    • Move yellow to 5
    • Move red to 3
    • Move purple to 2
  • Zoom into the box on the left of the previous puzzle.
  • Use the crowbar on it and take the ornate box from inside.
  • Look at the box in your inventory and rotate it until you find a corner that looks a bit odd.
  • Click on it and keep rotating it until you find a heavy weight inside.
  • Interact with the cabinet above the box we opened, and use a key to open it.
  • Now flip the switches in the following way: ↖, ↙,→,↘
  • Now open the door near the switches, and take the letter from inside.
  • Rotate the vase and take another weight.
  • Go back towards the big dog statue, and interact with the table nearby.
  • Place all the wooden pieces on the round puzzle.

  • Now simply rotate the pieces to make the portrait.
  • Pan your mouse down and you will see a note below the puzzle piece.
  • Interact with the letters below the lamp close by.
  • Enter the word: Gregor.
  • Pick up the item that the dog statue dropped.
  • Turn around, and interact with the panel left of the bird cage.
  • Hang all 3 weights on the hooks, and place the cogwheel in the slot on the left corner.
  • Pull the red lever and the birdcage nearby should open.
  • Take the final horseshoe from the cage (4/4).
  • Go to the chest on the left and insert all 4 horseshoes on top of it.
  • Open the chest to get the achievement.

True heritage
Find every horseshoe and unlock the treasure chest


  • Now interact with the puzzle inside the birdcage.
  • Make all tiles light up.


  • Zoom to the side of the puzzle we just solved, and take another triangular shape.
  • Now interact with the worktable, and insert all the triangular shapes inside the box on the right, don't forget to rotate the box to insert the others.

Study
Finish the study
10 Comments
dsrogers999 Aug 12, 2024 @ 10:32am 
Can't get horseshoe in basement. It says I got it but it is not in inventory.
Smith Nov 20, 2021 @ 3:03am 
That's the one figurine I didn't inspect closely :steamfacepalm:
marklar  [author] Nov 19, 2021 @ 2:30pm 
@Smith you figure out the solution by looking under the stag figurine.
Smith Nov 19, 2021 @ 1:13pm 
Can you explain why the chess board needed to be done the way you did it? I couldn't find any hints for that.
les.baer Aug 9, 2021 @ 11:44am 
@egburr For column 1, it is clearer to me as:
8-5=3, 5-3=2, 3-2=1, 2-1=1
Arcadian Feb 23, 2021 @ 10:51pm 
@egburr the column 1 pattern is the Fibonacci sequence in reverse, so you had it right.
Mic Feb 6, 2021 @ 10:22pm 
Extremely hard to follow with no logic to how you get to the answers.
egburr Jan 18, 2021 @ 9:17pm 
@RhysCake:
The phone number is actually only 1861. It's from patterns on the menu. What's the next digit in each pattern?
Column 1: 8-3=5-2=3-1=2-1=1-0=1 (kind of broken, really, but whatever) (unless there's a better pattern I'm missing)
Column 2: 1+3=4-1=3+3=6-1=5+3=8 (alternate +3 or -1)
Column 3: simple pattern: 1,2,3,4,5,6
Column 4: every 2nd number is a "1", so the 6th number in the pattern is a "1".
RhysCake Dec 24, 2020 @ 5:57am 
What's the logic behind the phone number being 11861 ?
Amayeha Nov 10, 2020 @ 7:23am 
Great Guide!! Thanks for your effort :daf_phoenix: