
Інсталювати Steam
увійти
|
мова
简体中文 (спрощена китайська)
繁體中文 (традиційна китайська)
日本語 (японська)
한국어 (корейська)
ไทย (тайська)
Български (болгарська)
Čeština (чеська)
Dansk (данська)
Deutsch (німецька)
English (англійська)
Español - España (іспанська — Іспанія)
Español - Latinoamérica (іспанська — Латинська Америка)
Ελληνικά (грецька)
Français (французька)
Italiano (італійська)
Bahasa Indonesia (індонезійська)
Magyar (угорська)
Nederlands (нідерландська)
Norsk (норвезька)
Polski (польська)
Português (португальська — Португалія)
Português - Brasil (португальська — Бразилія)
Română (румунська)
Русский (російська)
Suomi (фінська)
Svenska (шведська)
Türkçe (турецька)
Tiếng Việt (в’єтнамська)
Повідомити про проблему з перекладом


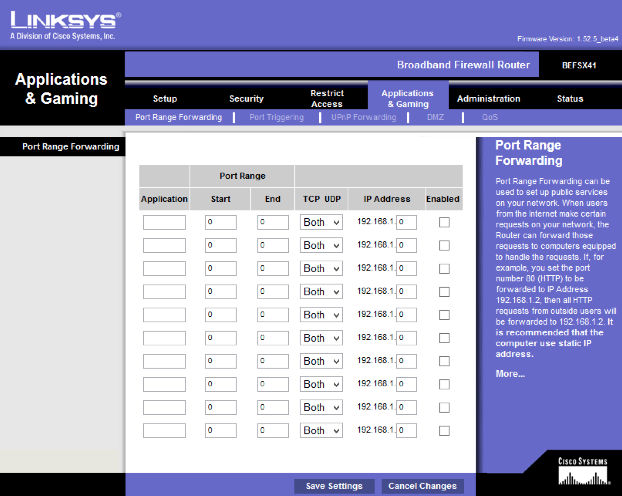


sm_cvar survivor_friendly_fire_factor_easy 0
sm_cvar survivor_friendly_fire_factor_normal 0.1
sm_cvar survivor_friendly_fire_factor_hard 0.3
sm_cvar survivor_friendly_fire_factor_expert 0.5
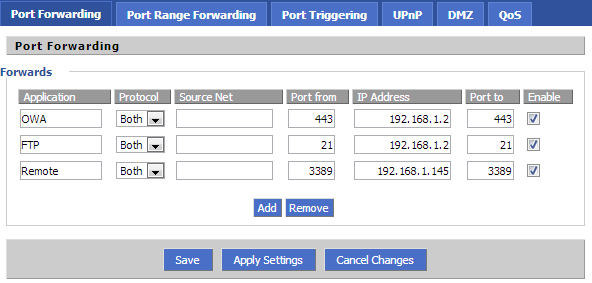
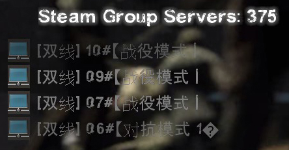
The easiest way to join your server from anywhere would be from the in-game developer console. It is also possible to join it from the Steam group server list in-game, but that is less reliable.
Though, now that you mention it, I am tempted to try that method out and experiment around with it. I suggest you do it too just for the sake of it.
You're most likely correct. It perhaps would be faster and more stable in terms of the connection. However, I am not familiar with that route, so I would simply recommend the usual wireless method.
Thanks for the reply! Out of curiosity do you know how to set it up with Ethernet? I’m thinking it’ll be faster/more stable. Is that route just not recommended?
Not a problem. Though, perhaps it is about time you consider an upgrade in your setup (computer mostly).
ah i see that's how it works now i know thanks for making it clear to me. I have no choice but to play sourcemod on the local server so they can join when they press play online. but that's why I'm looking for an alternative way because my laptop is burdened by the amount of horde infected and when 8 player survivors join in the game my laptop drops fps and maybe also because of the sourcemod I use to make it more challenging like more CI and SI respawn time 1 second. but thank you anyway
Of course. This guide assumes you use only a wireless connection, i.e., no ethernet connections. Thank you for pointing that out.