LEGO® Harry Potter: Years 1-4

LEGO® Harry Potter: Years 1-4

Ocen: 87
BLVGH - LEGO Harry Potter: Years 1-4
Autorstwa: legogamesguy
This is my new and improved guide for LEGO Harry Potter: Years 1-4! In an effort to make my guides more helpful and engaging, I have decided to rework them! I would appreciate any feedback you guys have about this new format, so be sure to leave a comment or shoot me a direct message!

In this guide you will find:
-A rundown of Gameplay Basics
-A tour of Diagon Alley
-How to beat each level in Story Mode
-The locations of all 4 Hogwarts Crest Pieces, all 3 Character Tokens, and each Student in Peril in each level in Free Play Mode
-Complete exploration guides for Diagon Alley and Hogwarts, plus maps of my own design
-Walkthroughs for all 10 Gringotts Bonus levels, as well as the 200 Gold Brick Bonus level
-Full lists of Joke Spells, Characters, Minikit Models and Extras
-A full list of Cheat Codes

These guides have always been and will always be free. However, working on these guides takes considerable time and effort. If you like the guide, feel free to show your appreciation with a Steam Award! I appreciate all the points and support you guys have given me!
6
   
Przyznaj nagrodę
Ulubione
Ulubione
Usuń z ulubionych
------------Gameplay Basics------------
Game Modes
This game has plenty of levels for you to play, with 24 story levels and 10 bonus levels. There are several different game modes you can play, which I'll describe here. I also describe how I structure the walkthroughs for each game mode.

The first time you play a story level, you will be playing Story Mode. As you might expect, you will be playing through the story of whatever movie you are in. You will only have access to the characters that the game gives you. Generally, your exploration is limited due to the characters you have, meaning you'll have to come back in Free Play Mode to unlock the collectibles you couldn't collect in Story Mode. After completing a level in Story Mode, you can select the Replay Story option to replay the level in Story Mode.

At the top of my Story Mode walkthroughs, I list the enemies you'll encounter and any bosses you will fight. I also list both your starting characters and any characters that are added as you progress. Finally, I list the True Wizard total for that level. Each level is split up into parts, which I sometimes call areas. Each part is a distinct area of the level, separated from other areas by a screen wipe (it will be very obvious when you enter a new area). Some levels have lots of parts, while some only have one. Below each part, I explain what to do in that part to progress in the level. I do not include the locations of any collectibles, even if you can collect them in the story.

After completing a level in Story Mode, you will be able to play it in Free Play Mode. In Free Play Mode, you can select a character from all the ones you've unlocked to take into the level. The game will then give you a selection of other characters to cover all of the abilities you have unlocked. In Free Play Mode, your goal is to find all of the collectibles. At any point in Free Play Mode, you can save and exit to return to the Leaky Cauldron without having to complete the level.

My Free Play Mode walkthroughs are also divided into parts, as I believe this makes them easier to navigate. At the top of the walkthrough will be a list of the spells and other non-magical abilities you'll need to collect all of the collectibles in that level. Free Play Mode walkthroughs contain the locations of all 4 Hogwarts Crest Pieces, all 3 Character Tokens, and the Student in Peril, even if they can be collected in Story Mode. Screenshots are also included to add clarity to the walkthrough.
Collectibles
To get 100%, you gotta collect everything. There are lots of things to collect, so it's important to know what you are looking for! You can check your overall collectible progress from the pause menu or from the door on the right side of the Leaky Cauldron.

Studs
These are the most important things you can collect. Studs act as the game's currency, so you'll want to be picking up as many as you can find. The silver studs are worth 10, the gold studs 100, the blue studs 1,000, and the purple studs 10,000. You'll use studs to purchase things in the hubs, so you'll want to be collecting as many as you can.


True Wizard
Collecting studs is essential if you want to reach True Wizard status. Collecting studs in a level will reveal a stud bar in the top center of the screen. As you collect studs, the stud bar will gradually turn yellow. Once you fill the stud bar, you will achieve True Wizard status. Once you achieve True Wizard in a level, you cannot lose it. Even if you lose all the studs in a level after achieving True Wizard, you will not lose it. Achieving True Wizard in a level will net you a Gold Brick.

Gold Bricks
Gold Bricks are exactly what they sound like, and they can be found in many different ways. They can be earned by completing certain tasks, and they can also be found as collectibles in Diagon Alley and Hogwarts. There are 200 Gold Bricks in total, and the amount of Gold Bricks you have is a good way to estimate your overall percentage in the game.


You can earn Gold Bricks by
  • Completing Story levels (24 total)
  • Earning True Wizard in a Story level (24 total)
  • Collecting all Hogwarts Crest Pieces in a Story level (24 total)
  • Rescuing a Student in Peril (50 total)
  • Completing a Gringotts Bonus Level (10 total)
  • Purchasing at Eeylops Owl Emporium (12 total)
  • Completing Minikit Models (4 total)
  • Completing Lessons in Hogwarts during Interludes(15 total)
  • Collecting them in Diagon Alley (2 total) and Hogwarts (35 total)
Hogwarts Crest Pieces
Each Story level has 4 Hogwarts Crest Pieces in it, one pertaining to each house. Collect all 4 Hogwarts Crest Pieces to complete the Hogwarts Crest for that level, earning you a Gold Brick.


Character Tokens
Unlike other LEGO games, all characters in this game are unlocked by collecting Character Tokens, which are small white tokens with character portraits on them. Each Story level has 3 Character Tokens in them. The rest are scattered throughout Diagon Alley and Hogwarts. Once you collect a Character Token, you can purchase that character by heading to Madam Malkin's.


Students in Peril
Throughout Hogwarts and in Story levels, you will find various students who have gotten themselves into trouble. Help them escape their predicament and you will have rescued them.


Red Parcels
Found throughout Hogwarts, these are your key to unlocking the Red Parcel Extras. Parcels appear as red boxes, and once you find one, you'll have to bring it to an owl. Give the Parcel to an owl and it will appear in the top floor of Eeylops Owl Emporium, allowing you to purchase the corresponding Extra.
Spells and Magical Abilities
As you might expect, there are lots of spells that you can learn in this game. Once learned, spells that you can use will appear on the spell wheel, and you can cycle through them at any time. Spells can be used to interact with the environment, and many of them are used to unlock collectibles and reach new areas. A vast majority of the spells are learned by attending lessons at Hogwarts.

There are also several magic-based abilities that are not technically spells, but still appear on the spell wheel. For this reason, I have included them in this list. I have not included the joke spells that can be purchased at Wiseacre's Wizarding Equipment. For info on them, see the "Joke Spells" section at the end of this guide.

Below, I have listed each spell/magical ability in the order they appear on the spell wheel. Not every character can use all of these spells. For more information on which characters can use specific spells, see the "Characters" sections towards the end of this guide.

Expelliarmus
This spell can be found in the red slot on the spell wheel (the same slot occupied by the joke spells) and is used in combat. Hitting a character with this spell will cause them to jump in shock. This spell will interrupt enemy characters as they're casting spells at you. Students learn this spell during "Interlude - In Search of Answers". See that section for more info.


Transfiguration
This spell can be found in the red slot on the spell wheel (the same slot occupied by the joke spells) and can be learned by heading into the Transfiguration Classroom (see "Exploring Hogwarts - Transfiguration Classroom" for more info). Transfiguration allows you to turn people into animals (either a toad or a rat). While not used for exploration, this spell can be quite fun.


Animagus
Some characters have the ability to turn themselves into an animal. This ability can be found in the green slot on the spell wheel. Press the "special" button to turn into an animal, sometimes gaining new abilities.


Avada Kedavra
The killing curse can be found in the green spell slot while playing as a dark wizard. Cast this spell at someone to instantly defeat them. Sadly, this does not work on bosses.


Invisibility Cloak
The Invisibility Cloak allows you to walk around undetected, and appears in the green slot on your spell wheel. Press the "special" button to put it on. While wearing the cloak, you will not be able to use any spells (except zapping objects) and your movement will be greatly reduced. Harry will receive the Invisibility Cloak at the start of the Story level "The Restricted Section".


Pet
Certain characters come with pets, which can be found in the green slot on your spell wheel. Press the "special" button to release your pet and take control of them. All pets are able to crawl through pipes, allowing them to hit buttons. Some pets can also dig, allowing you to reveal buried objects. Some characters will gain/lose their pets as you progress through Story levels.


Wingardium Leviosa
The most basic spell in the game, Wingardium Leviosa appears in the purple slot on your spell wheel. This spell is used to interact with objects in the environment, mostly moving them around. You can also use this spell on people to lift them up and move them around. This spell is also used for building LEGO pieces. Students will learn this spell during "Interlude - Welcome to Hogwarts!". See that section for more info.

Dark Magic
Certain wizards practice the Dark Arts, and they can use this knowledge to interact with and destroy black objects with red sparkles around them. Use Wingardium Leviosa on a black object with a dark wizard to destroy it.


Crucio
The Cruciatus Curse can be used by anyone who can use Dark Magic. Simply use Dark Magic on a person to torture them.


Lumos
This spell appears in the grey slot on your spell wheel, and is used for lighting up dark areas. However, you'll mostly be using it to scare away vines. Walk up to vines and press the "special" button to use Lumos. The vines will then retreat, allowing you to get to a new area or pick up whatever object they were holding. Students will learn this spell during "Interlude - The Lessons Continue". See that section for more info.

Lumos Solem
This serves as an upgrade to Lumos, and allows you to defeat Devil's Snare, which appear as bundles of small vines in green circles. Press the "special" button to fire a ball of light at the Devil's Snare, destroying it. Students will learn this spell during "Interlude - The Lessons Continue". See that section for more info.


Immobilus
This spell appears in the blue slot in your spell wheel, and is used for defeating Cornish Pixies. Hit a Pixie with Immobilus to freeze it in a blue bubble (as shown in the screenshot), then hit it again to defeat them. You can also hit other people with Immobilus to freeze them. Students will learn this spell during "Interlude - Welcome Home". See that section for more info.


Riddikulus
This spell appears in the yellow slot on your spell wheel, and is used for defeating Boggarts. Boggarts are creatures that take the shape of a person's worst fears, and can be found in brown chests. Once the Boggart appears, hit it with Riddikulus to make it take the form of something silly. This will defeat the Boggart, often revealing an item or collectible. Students (except Harry) will learn this spell during "Interlude - Divination and Dementors". See that section for more info.
Spells and Magical Abilities cont.
Expecto Patronum
This spell appears in the white slot on your spell wheel, and is used for defeating Dementors. Cast this spell at a Dementor to defeat it. Harry will learn this spell during "Interlude - Expecto Patronum!". See that section for more info. Other students will not learn this spell.


Reducto
This is the final spell you can learn in the game, and appears in the orange slot on the spell wheel. This spell is used to destroy silver objects. Students will learn this spell during "Interlude - Mad-Eye Moody". See that section for more info.
Non-Magical Abilities
While there are lots of spells in this game, there are also several non-magical abilities that characters can have. These abilities do not appear on the spell wheel, but are still useful in unlocking collectibles and opening new areas to explore. For more information on who has these abilities, see the "Characters" sections below.

Broomstick Flying
While most characters with magical abilities can fly on broomsticks, not all of them are great at it. Characters with this ability can fly up and down on broomsticks. While this ability doesn't come up often, sometimes you'll need to hop on a broomstick and fly through some hoops in the air, and you can only do this if you can gain some height.


Dig
Characters with this ability can dig up patches of dirt that have little blue paw prints floating around them. Stand near the dirt and hold the "attack" button to dig it up, often revealing an object or collectible.


Goblin Key
Certain characters possess a key that they can place in special locks. Hold the "special" button to turn the key. This is often used to open vaults with a collectible inside, but can also open doors to new areas.


House Access
Certain paintings contain characters who belong to one of Hogwarts' four houses (Gryffindor, Hufflepuff, Ravenclaw, Slytherin). Stand in front of the painting with a character of the appropriate house, then press the "special" button to talk with them. This will often open a door or reveal a collectible.


Mandrake Handling
Characters with this ability can repot Mandrakes. First, you'll need to get earmuffs from cupboards.


Once you have your earmuffs, you'll be able to pick up Mandrakes. Mandrakes can be used to break glass objects, often revealing collectibles. Students will learn this ability during "Interlude - Welcome Home". See that section for more info.


Old Age
At certain points in the game, you will encounter age lines, which appear as hazy blue lines on the ground. These lines can only be crossed by characters that have seen their fair share of winters. Drinking an Aging Potion will give any character this ability.


Parseltongue
Characters with this ability can speak to snakes. Snakes can be found at Parseltongue panels, which appear as an archway with a large snake's head at the center. Stand in front of the snake and press the "special" button to talk to the snake. If your character has this ability, the snake will nod, often opening a door or revealing an object. If your character doesn't have this ability, the snake will eat them!

Scholar
Certain characters carry around a blue book, which allows them to solve the puzzles found on Rune Cabinets. Stand in front of a Rune Cabinet and press the "special" button. Each of the four panels will then light up. Copy the pattern to "solve" the Rune Cabinet, often revealing LEGO pieces or a collectible.


Super Strength
Some characters are super strong, and they can demonstrate their strength by pulling on chains. Stand in front of the chain and press the "special" button to pull it. If a character does not have this ability, they will try to pull the chain, but fail. You can brew a super strength potion to give any character this ability.


Time Turner
Characters with this ability can use their Time Turner at special grandfather clocks to turn back time. This will bring you into the past, allowing you to find new collectibles and interact with the environment in new and exciting ways. To return to the present, simply leave the area.
Tour of Diagon Alley
Diagon Alley acts as the smaller hub in the game, and is where you can purchase many different things. As such, I have decided to use this section to describe what you can do in each of the shops. For a rundown of how to collect each of the collectibles in Diagon Alley, see the sections under "Exploring Diagon Alley".

When you exit Hogwarts, you'll appear in the Leaky Cauldron. There are many things you can do in the Leaky Cauldron, so let's take a tour!

Head through the door on the right to return to Hogwarts. You can also approach this door to view your overall collectible progress. While in Hogwarts, you can return to the Leaky Cauldron at any time from the pause menu. You will also appear in the Leaky Cauldron after completing the final level in a movie.


You'll find a notice board on the right side of the Leaky Cauldron. This is where you'll be able to replay levels you've already completed. You can either replay the level in Story More or play it in Free Play Mode to explore and look for collectibles.


Destroy the silver lock on the floor to reveal an opening.


Drop down inside and you'll find the Minikit Room. Once you collect all 24 Gold Bricks in a particular movie, you'll be able to build a Minikit Model, earning you another Gold Brick.


Head up the stairs and you'll find a door.


Head through and you'll find yourself in the hallway. Head all the way to the end and through the door on the left to find the movie room. This is where you'll be able to replay any cutscenes you've already seen. To unlock more cutscenes to view, play more Story levels.


Head through the door in the back to enter Diagon Alley.


The first store you can enter is Madam Malkin's.


In Madam Malkin's, you can purchase characters. Walk up to Madam Malkin and you'll be able to scroll through all of the characters. Collect Character Tokens in levels and in the hubs to unlock more characters for purchase.


You can also create custom characters in Madam Malkin's. Walk up the stairs on the left and head into the changing booth on the left to create your own custom characters.


The second store you can enter is Eeylops Owl Emporium.


Inside, you can buy Gold Bricks. There are a total of 12 Gold Bricks you can buy here. The first one is free, and each subsequent Gold Brick increases in price by 100,000.


Head up the stairs on the left to reach the Owlery. This is where you can purchase Parcel Extras once you unlock them. There are 4 available to purchase right away. The other 20 you'll have to find and mail from Hogwarts.


The third store you can enter is Wiseacre's Wizarding Equipment.


On the ground floor, you can purchase joke spells. These spells will gradually become available as you complete Story levels.


On the top floor, you can enter Cheat Codes to unlock new things for purchase. See the "Cheat Codes" section at the bottom of this guide for a full list of cheat codes.


Once you have at least 5 Gold Bricks, head to the far right side of Diagon Alley to find Gringotts. Build the LEGO pieces onto the door, allowing you to head inside. Inside Gringotts, you can play the 10 Gringotts Bonus Levels.


There is a silver gate in Diagon Alley. Destroy it and you'll be able to access Knockturn Alley.


Head all the way down the path and you'll find Borgin and Burkes on the left. Head inside.


Once you've collected all 200 Gold Bricks, you'll be able to build the entrance to the final bonus level.
---------------Story Levels---------------
------Year 1 - The Sorcerer's Stone------
The Magic Begins - Story Mode

Starting Characters: Harry (Blue Shirt), Hagrid
Added Characters: Griphook
True Wizard: 69,000

Part 1 - The Leaky Cauldron

Harry doesn't have a wand yet, so all he can do is roll into objects to break them. Hagrid is also very limited in his magical capabilities, only able to use Wingardium Leviosa.

We need to get to Diagon Alley, but the door handle is up on that back ledge. In the back right corner, you'll find part of the floor made of LEGO pieces. Stand on it as Harry, then switch to Hagrid. Use Wingardium Leviosa to raise up the platform, allowing Harry to reach the upper level. Switch to Harry and grab the door handle, then place it on the slot on the door. Use Wingardium Leviosa on it to open it, then head outside.

Part 2 - Diagon Alley

Build the LEGO pieces onto the wall, opening up Diagon Alley. Before we can buy anything however, we need money! Head down Diagon Alley to reach Gringotts. Unfortunately, the way to Gringotts is blocked. We are going to need to brew a potion to clear the path. The three ingredients you need can be seen floating above the cauldron.

Flower - You'll find the flower on a table on the right side of the alley.

Popsicle - Use Wingardium Leviosa on the ice cream stand next to the cauldron to reveal the popsicle.

Spider - The spider can be found on a cobweb on the left side of the alley.

Place all three ingredients into the cauldron to cause an explosion, clearing the way. Walk up to Gringotts, then pull the chain to open the door. Head inside.

Part 3 - Gringotts Lobby

Head to the right and stand in the lit-up circle in front of the head Goblin. Press the "special" button to talk with him.

After the cutscene, Griphook will be added to your party. Head to the left and use your key to open the gate. Head into the alcove, then pull the chain to raise the gate. Head into the room and use your key to open the vault, revealing LEGO pieces. Build them into a painting, then interact with it to reveal the cart. Head towards it.

Part 4 - Gringotts Vaults

Time to see if Harry's got some money! Head to the left and pull the chain to remove the dragon, then use your key to open the vault. Head inside.

Part 2 - Diagon Alley

Now that we have some money, we can start shopping. Head back down Diagon Alley and head into Ollivander's (the shop on the right with the arrow pointing at it) to complete the level.
The Magic Begins - Free Play Mode
Required Spells: Reducto, Wingardium Leviosa
Required Abilities: Super Strength

Part 1 - The Leaky Cauldron

Gryffindor Crest
There are two candles that you can use Wingardium Leviosa on. The first is in the back left corner by the fireplace.


The second is in the near left corner by the bar. Use Wingardium Leviosa on the candles to reveal LEGO pieces.


Build them into paintings, revealing this Crest Piece high in the air.


Use Wingardium Leviosa on the nearby chairs to create a ramp, allowing you to reach this Crest Piece.


Part 2 - Diagon Alley

Slytherin Crest
As soon as you enter Diagon Alley, talk to the woman in the shop on the left.


She will reveal this Crest Piece in front of the door.


Hufflepuff Crest
Use Wingardium Leviosa on the barrel on the right side of the alley to reveal LEGO pieces.


Build them into a sweeper, then hop on.


After using the explosive potion to clear the way to Gringotts, use the sweeper to clean up the green goo left behind, revealing this Crest Piece.


Student in Peril
This student can be found up on a ledge on the right side of Diagon Alley. Stand on the table and your partner will lift you up with Wingardium Leviosa. Hop on the ledge and the student will find the courage to hop down.


Part 3 - Gringotts Lobby

Ravenclaw Crest
Destroy the silver lock on the right side of the area to open the gate.


Pull the chain inside to remove the dragon, revealing this Crest Piece.


Character Token (Mr. Ollivander)
Destroy the silver lock on the chest on the left, then zap it to open it, revealing this.


Character Token (Tom the Innkeeper)
Destroy the silver lock on the chest on the right, then zap it to open it, revealing this.


Part 4 - Gringotts Vaults

Character Token (Griphook)
Destroy the silver lock on the chest on the right to open it, revealing this.
Interlude - Welcome to Hogwarts
Characters: Harry Potter, Ron Weasley; Hermione Granger

Gryffindor Dorm: Head to the right and you'll find the path blocked by some cobwebs. Zap the spiders to destroy the cobwebs, clearing the path to the common room.

Gryffindor Common Room: Hermione has joined your group. Time to head to your first class! Head to the right and a dresser will start eating clothes, blocking the way out. Zap the orange painting to the right of the dresser to turn it around, then zap it again to knock off the wizard's pants. The dresser will move to eat them, allowing you to exit.

House Hallway: Head down the hall and you'll find Nearly Headless Nick, who will guide you throughout Hogwarts. Follow him down the hall to the left.

Grand Staircase: Nick will head down the stairs, but then the stairs will move around. We need to get the stairs to move back to the left.

Head up the stairs to the right, then switch to Ron. Send Scabbers through the pipe, then press the button at the end to ring the bell. This will spook the wizard in the painting, sending him back to the left. Head back down the stairs and talk to the painting to move the stairs back to the left. From now on, you can talk to this painting to move the staircase back and forth. Continue to the left and through the opening at the end.

Main Hallway: Continue to the left and through the opening at the end.

Lesson Hallway: The path to the right is blocked by vines, so follow Nick through the door on the left.

Charms Hallway: Follow Nick to the left and head inside the classroom to start your first lesson!


Charms Class 1: Ron appears to have gotten us into a bit of a pickle. We need to rescue the three trapped students.

First Student - You can now use Wingardium Leviosa, so head to the right to find a large cylindrical weight. Use Wingardium Leviosa on it to raise it up, rescuing the first student.

Second Student - Head to the left side of the classroom and you'll find some large LEGO blocks. Use Wingardium Leviosa on them and you'll be able to move them around. Arrange them on the purple base so you can reach the upper ledge, then zap the orange painting to reveal LEGO pieces. Build them into a hand, then use Wingardium Leviosa on the weight to rescue the second student.

Third Student - Continue to the right and you'll find some purple pieces for the nearby suit of armor. Use Wingardium Leviosa on the pieces to repair the suit of armor, then use Wingardium Leviosa on the weight. The suit of armor will toss its spear, holding the weight up and rescuing the third student.

Once all three students have been rescued, you will officially learn Wingardium Leviosa. The lesson is now finished, so drop back down to the lower level and exit the classroom.

Charms Hallway: Follow Nick back to the right and through the doorway.

Lesson Hallway: Head to the right through the opening.

Main Hallway: Head to the right and you'll find your path blocked. We need to open that gate. There are three colored blocks scattered on the floor in front of the gate. Use Wingardium Leviosa to stack them in the correct order (look at the picture on the wall for the correct order). This will open the gate, allowing you to continue.

Entrance Hall: We need to get into the Great Hall. However, the doors won't open until we repair the Hogwarts logo on the floor. Use Wingardium Leviosa on the bookshelf on the left to reveal some LEGO pieces. Head to the right and use Wingardium Leviosa on the large stone brazier to reveal more LEGO pieces. Once you've revealed both sets of LEGO pieces, build them into the Hogwarts logo, opening the Great Hall. Head inside to start the next Story level.
Out of the Dungeon - Story Mode

Boss: Mountain Troll
Starting Characters: Harry Potter, Ron Weasley
Added Characters: Harry (Girl Disguise), Ron (Girl Disguise)
True Wizard: 48,000

Part 1 - Bathroom Corridor

Head to the right and you'll run into the troll. He'll smash the wall, revealing a pipe. If you try to continue to the right, you'll be blocked by toxic gas. Send Scabbers through the pipe, hitting both buttons. This will shut off the gas, allowing you to continue.

Continue to the right and the troll will smack a statue, blocking your path with a large stone globe. Zap the small shelf to reveal two LEGO blocks. Use Wingardium Leviosa to stack them on the purple base, then hop up them to reach the ledge. Hop to the right over the fountain, then use Wingardium Leviosa on the torch. This will burn the suit of armor, revealing LEGO pieces on the ground. Build them into a trident, then use Wingardium Leviosa on it to give it to the statue. The statue will then tee off, clearing the path.

Continue to the right and the troll will enter the bathroom. We need to get in there, but the painting won't let us. We need to disguise ourselves as girls to be let in. Build the LEGO pieces in front of the orange painting to build a light. This will let the wizard in the painting see what he's doing. Zap the painting and the wizard will give you a girl disguise. Quickly head to the right (your disguise will disappear if you take too long) and talk to the painting above the bathroom door to open it. Head inside.

Part 2 - Girl's Bathroom

Walk up to the troll and he will smack the ground, knocking you away. He will then run up and down the bathroom, smashing the stalls. Avoid his club and eventually part of the ceiling will fall down. Use Wingardium Leviosa on it to damage him.

He will then begin tossing purple rubble at you. Use Wingardium Leviosa to send it back at the troll, damaging him again. This will stun him, so use Wingardium Leviosa on his club. Lift it up over his head, then bring it back down to complete the level.
Out of the Dungeon - Free Play Mode
Required Spells: Reducto, Wingardium Leviosa
Required Abilities: Scholar

Part 1 - Bathroom Corridor

Gryffindor Crest
There are 9 vases for you to zap, revealing flowers. The first two are right by your starting point.


The third is to the left of the fountain, while the fourth is on the upper ledge.


The fifth and sixth are to the right of the fountain.


The seventh and eighth are at the end of the hall, opposite the entrance to the bathroom.


The ninth is to the right of the entrance to the bathroom. Zap all 9 to reveal this Crest Piece.


Character Token (Ron (Girl Disguise))
Solve the puzzle on the Rune Cabinet by your starting point to reveal this Character Token.


Ravenclaw Crest
There are 7 lamps you need to light by using Wingardium Leviosa. 4 are in this area, and the other 3 are in Part 2. The first is above the suit of armor to the left of the large pipe.


The second is on the wall to the right of the large pipe.


The third is above the suit of armor to the right of the orange painting.


The fourth is to the left of the bathroom entrance.


Slytherin Crest
There are 3 fish in front of the fountain.


Use Wingardium Leviosa to place each of them in the fountain, revealing this Crest Piece.


Hufflepuff Crest
After using Wingardium Leviosa on the torch, the suit of armor will run to the left and place its burning backside over the fountain. Destroy the silver clasp to reveal a valve.


Use Wingardium Leviosa on it to turn on the fountain, revealing this Crest Piece. Ride the water spout to reach it.


Character Token (Harry (Hogwarts))
Destroy the silver lock on the desk to the right of the entrance to the girl's bathroom, then zap the desk to reveal this Character Token.


Part 2 - Girl's Bathroom

Ravenclaw Crest cont.
The fifth and sixth lamps are on the left side of the bathroom, above the sinks.


The seventh lamp is on the left side of the bathroom, by the door. Light all 7 lamps to reveal this Crest Piece.


Student in Peril
As the troll smashes stalls, he’ll reveal this poor girl. She will then find the courage to leave the bathroom.


Character Token (Madam Malkin)
Destroy the silver lock on the locker on the left, then zap it to open it, revealing this Character Token.


Bounce on the trampoline to reach it.
Interlude - The Lessons Continue
Characters: Harry Potter, Ron Weasley, Hermione Granger

Entrance Hall: Head back down the stairs and through the door.

Main Hallway: Follow Nick to the left through the door.

Lesson Hallway: Head through the door on the left.

Charms Hallway: Head into the classroom on the right to start your next lesson!


Charms Class 2: Professor Flitwick has scattered five yellow pieces around the room, and we need to gather them all up and place them on the green panels in the center. You now have Lumos added to your spell wheel. Press the "special" button to use it.

Head to the right and use Lumos to scare away the vines holding the yellow piece. Pick it up and place it on one of the green panels, then head to the left side of the room. You'll find another yellow piece just laying there, so pick it up and place it on another green panel. Head to the left side of the room and use Wingardium Leviosa to stack the LEGO blocks on the purple base.

Hop up them to reach the upper ledge, then use Lumos to scare away the three sets of vines, revealing the final three yellow pieces. Pick them up and place each of them on a green panel. Once all five yellow pieces have been returned, the lesson will be completed. You have now learned Lumos, so head back out of the classroom.

Charms Hallway: Head back to the right and through the door.

Lesson Hallway: Head to the right and you'll find some vines. Use Lumos to scare them away, then continue to the right. You'll find the entrance to the Potions Classroom covered by vines, so use Lumos to scare them away. Head inside to start your next lesson.


Potions Classroom: Find to brew our first potion. The Strength Potion gives any character who drinks it the Super Strength ability. The three ingredients are a flower, fang and bone.

Bone - Head to the near left corner and use Wingardium Leviosa on the yellow blocks to reveal a hanging skeleton. Use Wingardium Leviosa on it to reveal a bone.

Fang - Use Wingardium Leviosa on the large snake in the center of the room to reveal the fang in its mouth.

Flower - Build the LEGO pieces in the back left corner onto the pipe, then send Scabbers through it. Push the ball to knock down the flower.

Once all three ingredients are in the potion, it will be ready to drink. Take a drink, then pull the chain on the right to complete the lesson. The door in the near left corner will then open, allowing you to exit the classroom.

Lesson Hallway: Head to the left and through the door to the Main Hallway.

Main Hallway: Time to go outside! Head up the stairs and hop up the ledges in the back. Use Wingardium Leviosa on the box of drumsticks to feed the lion, revealing a staircase. Head down it.

Outer Corridor: Head to the left and through the opening.

Clock Tower Courtyard: Head to the left and you'll find the path blocked by vines. Use Lumos to clear them, then continue on.

Herbology Grounds: Follow Nick into the greenhouse with Professor Sprout to start yet another lesson!


Greenhouse 1: Ron has been captured by the Devil's Snare, so it's just Harry and Hermione for now. Your Lumos has now been upgraded to Lumos Solem, which allows you to defeat Devil's Snare.

Use it to defeat all of the Devils' Snare in the greenhouse, then head to the near left corner. Use Wingardium Leviosa on the cart to reveal LEGO pieces, then zap the pipes on the right to reveal more. Use Wingardium Leviosa on the shovel in the near left corner to reveal more LEGO pieces.

Zap all of the large flowers that grew while you defeated the Devil's Snare around the greenhouse to reveal the final set of LEGO pieces. Build them into a cart, then hop on to crash through the plants. Use Lumos Solem to defeat the Devil's Snare holding Ron, ending the lesson. Exit the greenhouse.

Herbology Grounds: Head to the right and back down the path. The gate to the Training Grounds is now open, so head inside to join Madam Hooch for your flying lesson.


Training Grounds: Poor Neville. While Madam Hooch is taking him to the hospital wing, we need to recover his Remembrall. Hop on a broom and fly to the left. Harry is the only one of our trio who is any good on a broom, so you'll want to play as him.

Head to the left and zap the gargoyle. He will then toss the Remembrall to the gargoyle on the right, who will begin flying around. Fly after him and zap him to take out his hearts. He will then toss the Remembrall to a plant. Zap the three large flowers to cause it to drop the Remembrall.

Herbology Grounds: After the cutscene, you will have unlocked Broomstick Flying as a non-magical ability. Most magic using characters can fly on brooms as well as Harry can, but some (like Hermione) will still be terrible at it. Head back to the right.

Clock Tower Courtyard: Follow Nick to the right and through the opening to the Outer Corridor.

Outer Corridor: Head to the right and you'll find your path blocked by vines. Use Lumos to clear them, then continue on.

Fountain Courtyard: We need to break through that wooden barrier on the right. Use Lumos Solem on the Devil's Snare to release the LEGO pieces it's holding, then build them into a ball. Use Wingardium Leviosa to place it on the purple slots. We now need to brew the Strength Potion.

Bone - Zap the bushes in the back left corner.

Fang - Zap the bushes in the back right corner.

Flower - Zap the bushes in the near right corner.

Once you brew the potion, drink it to temporarily gain super strength. Pull the chain on the ball to send it through the barrier on the right, clearing the path forward.

Covered Bridge: Head to the right and you'll find that the bridge is broken. Hop on the broom and fly across the gap, then use Wingardium Leviosa to repair it. Continue to the right.

Hogwarts Grounds: Follow Nick down the path on the left to reach the Quidditch Grounds.

Quidditch Grounds: Head to the right and into the tent to start the next Story level.
A Jinxed Broom - Story Mode

Starting Characters: Hermione Granger, Ron Weasley
True Wizard: 32,000

Part 1 - Quidditch Stands

Looks like Snape is jinxing Harry's broom! We have to stop him! Head down the stairs to the right, then use Wingardium Leviosa on the wall of boxes to the right of the picture of Harry. This will clear the path, so head into the alcove and head to the right. A Slytherin player will then crash through the stands, taking out the floor, Fortunately, he has left his broom behind. Hop on it and fly to the right across the gap, then climb down the ladder.

Continue to the right and you'll find a large pipe. Use Wingardium Leviosa on the purple pieces, placing them in the right spots on the pipe. Once the pipe is completed, send Scabbers through it and out the hole in the top. This will spook the students, knocking down the large LEGO blocks on the left. Head back to the left and use Wingardium Leviosa to stack the blocks on the purple base, allowing you to reach the upper ledge.

Once on the upper ledge, head to the right and use Wingardium Leviosa on the boxes to clear the path. Zap the boxes to destroy them, then destroy the rubble on the ledge to reveal LEGO pieces. Build them into a Rune Cabinet, then solve it to reveal an axe. It will smash through the barrier on the right, allowing you to continue.

Continue to the right and you'll find some more LEGO blocks. Use Wingardium Leviosa to stack them on the purple base. If you try to hop up them however, the Prefect will knock you back. We need to get rid of him. Zap the orange curtain to reveal a painting. Zap it and the man in the painting will pull the lever, opening the trapdoor underneath the Prefect. Hop up the blocks and climb the ladder.

Part 2 - Staff Seating

Build the LEGO pieces on the left to create steps to the upper ledge. Before climbing them, head to the right and solve the Rune Cabinet to reveal platforms. Use Wingardium Leviosa to place them in the purple slots on the wall, then climb up the stairs on the left. Hop up the platforms to reach the upper ledge.

You'll find the entrance to the staff seating area blocked by some wooden boards. To destroy them, zap the statue on the left. It will sneeze, lighting the nearby box of fireworks. The fireworks will crash through the wood, allowing you to head into the seating area. Head through the opening to end the level.
A Jinxed Broom - Free Play Mode
Required Spells: Dark Magic, Immobilus, Reducto, Wingardium Leviosa
Required Abilities: Pet

Part 1 – Quidditch Stands

Gryffindor Crest
There are 7 flags you need to use Wingardium Leviosa on. The first is to the left of your starting point.


The second is at the base of the stairs by your starting point.


The third is to the left of the LEGO blocks.


The fourth is to the left of the large pipe.


The fifth is to the right of the large pipe.


The sixth is to the left of the orange painting.


The seventh is to the right of the second set of LEGO blocks. Raise up all 7 flags to reveal this Crest Piece.


Ravenclaw Crest
While stacking the first set of LEGO blocks, stack them to the left, allowing you to hop up to this Crest Piece. The Crest is closer to the screen than the blocks are, so you’ll have to jump towards the screen to collect it.


Character Token (Fred (Quidditch))
Destroy the silver lock on the chest to the left of the pipe, then zap it to open it, revealing this Character Token.


Student in Peril
Destroy the silver barrier on the ledge with the Rune Cabinet to rescue this student.


Hufflepuff Crest
After rescuing the Student in Peril, defeat the Pixies holding up this chest. They will drop it, opening it and revealing this Crest Piece.


Character Token (Harry (Girl Disguise))
This Character Token is hiding under the small staircase to the right of the orange painting. Send a pet under the stairs so you can collect it.


Slytherin Crest
Instead of climbing the ladder to Part 2, look to the left and you'll see that the ledge continues.


Carefully hop to the left past the barrier, then continue to the left. You'll run into some boxes.


Zap them to destroy them, revealing a black barrel. Use Dark Magic on it to destroy it, revealing this Crest Piece.


Part 2 - Staff Seating

Character Token (Marcus Flint)
Use Dark Magic to destroy the cabinet on the left, revealing this Character Token.
Interlude - Happy Christmas, Harry!
Characters: Harry Potter, Ron Weasley, Hermione Granger

Quidditch Grounds: Having survived your first Quidditch match, head back to the left.

Hogwarts Grounds: Follow Nick up the path and to the left, then use Lumos to remove the vines. Head through the opening.

Covered Bridge: Head to the left.


House Hallway: After the cutscene, it's Christmas! Head to the right and speak to the portrait of the Fat Lady to open the way to the Gryffindor Common Room. Head inside to start the next Story level.
The Restricted Section - Story Mode

Enemies: Library Book
Starting Characters: Harry (Sweater), Ron (Pyjamas)
True Wizard: 60,000

Part 1 - Library

Harry now has the Invisibility Cloak, so put it on and head to the right. There are two red books in this area. If you get close to them while not invisible, they will attack you. To get rid of them, put on the Invisibility Cloak and walk up to them. Once you get close enough, press the "tag" button to hop on and defeat them. Once both books have been defeated, you don't need to keep the Invisibility Cloak on.

We need to get through the door that Dumbledore went through. Unfortunately, it's locked. Walk up to the ghost on the right side of the door and she'll reveal a cauldron. Use Wingardium Leviosa on it to place it in front of the door. We'll need to brew an exploding potion.

Flower - Head to the right of the cauldron and you'll find a large statue holding a book. Stand on the blue book and your partner will raise you up. Hop onto the ledge, then head to the right. The flower can be found in the nearby planters.

Popsicle - Zap the desk to the left of the cauldron to reveal LEGO pieces, then build them into a book. The statue will then bow to you, knocking down some more books. Stand on the yellow book and your partner will raise you up. Hop up the books onto the ledge, then head to the left. Use Wingardium Leviosa on the torch to melt the ice, revealing the popsicle.

Spider - Return to the ledge on the right and zap the large bookshelf. It will fall over, collapsing the wall and revealing the spider.

Once the potion is complete, the cauldron will explode, destroying the door and allowing you to continue.

Part 2 - The Restricted Section

Filch is patrolling this area, so watch out. If you get caught by Filch, switch to your partner and zap Mrs. Norris (the cat). Filch will drop you and go check on Mrs. Norris, allowing you to escape.

Head to the right and zap the books. This will cause them to move aside, revealing a green object. Pick it up and carry it to the right, then place it on the gate. Use Wingardium Leviosa to place the other two pieces on the gate, opening it. Head into the alcove and grab the key, then head to the right. Head up the stairs and place the key in the slot to open the gate.

Head inside the alcove, then zap the books in front of the pipe to move them out of the way. Send Scabbers through the pipe, knocking down the LEGO pieces at the end. Use Wingardium Leviosa to place it on the door, then head inside.

Part 3 - The Mirror of Erised

We need to raise the curtain in front of the mirror. Head down the stairs and to the left, then use Lumos to scare off the vines. This will release two bats, who will land on top of the mirror. Zap both of them to raise the curtain, then walk up to the mirror to complete the level.
The Restricted Section - Free Play Mode
Required Spells: Dark Magic, Reducto, Wingardium Leviosa
Required Abilities: Goblin Key, Scholar

Part 1 – Library

Hufflepuff Crest
There are 6 vases you need to zap to reveal flowers. 4 are in this area and the other 2 are in Part 2. The first vase is in the near left corner.


The second vase is in the near right corner.


The third and fourth vases are in front of the exit.


Character Token (Harry (Pyjamas))
Destroy the silver projector on the right side of the area to reveal this.


Gryffindor Crest
Solve the puzzle on the Rune Cabinet on the right to reveal this Crest Piece.


Ravenclaw Crest
After revealing the spider, use Dark Magic to destroy the cobweb, then destroy the plants to reveal this Crest Piece.


Part 2 – The Restricted Section

Hufflepuff Crest cont.
The final two vases are in front of the gate to the restricted section. Zap all 6 vases to reveal this Crest Piece.


Student in Peril
Destroy the silver cage in the first alcove to reveal a book.


Use Wingardium Leviosa and it will fly to the right, revealing LEGO pieces.


Build them into a cuckoo clock, then use Wingardium Leviosa on it to reveal this student.


Character Token (Filch)
Open the safe to the left of the stairs, revealing this Character Token.


Part 3 – The Mirror of Erised

Slytherin Crest
There are 3 large spiders in cobwebs that you need to zap. One is in the near left corner, one is in the back left corner, and the other is on the right side of the room. Zap all 3 to reveal this Crest Piece.


Character Token (Neville (Pyjamas))
Use Dark Magic to destroy the black cabinet on the right, revealing this Character Token.
Interlude - Off to Detention
Characters: Harry Potter, Ron Weasley, Hermione Granger

Main Hallway: Head to the left, then head up the stairs through the opening on the right.

Outer Corridor: Head to the right.

Fountain Courtyard: Follow Nick to the right.

Covered Bridge: Continue to the right.

Hogwarts Grounds: Follow Nick to the right to reach Hagrid's Hut. Head inside to start the next Story level.
The Forbidden Forest - Story Mode

Enemies: Wasps
Starting Characters: Fang, Hermione Granger, Hagrid, Ron Weasley
True Wizard: 70,000

Part 1 - The Forbidden Forest

Harry's in danger, and we need to rescue him! Head to the right and build the LEGO pieces into a cloud. This will water the tree, revealing a ladder. Climb the ladder, then dig up the patch of dirt to reveal pixies. They will run to the right, creating another ladder. Drop down and head right, then climb the ladder. Continue to the right, then dig in the dirt at the end to reveal an opening. Head inside.

Part 2 - Forest Tunnel

Head to the right, then use Lumos to scare the vines away. Zap the brown vines to release the rocks, clearing the path. Continue into the tunnel.

Part 3 - Lake

Head to the right and hop in the lake. Swim to the small island in the center, then dig it up to drain the lake. Use Lumos to scare off the vines in the back, revealing a chain. Pull it to raise up the rock platform.

Head back to the left and you'll find a LEGO block buried in the dirt. Dig it up, then zap the two cobwebs in the background to reveal more LEGO blocks. Use Wingardium Leviosa to stack them on the purple base, then hop up them to reach the upper ledge. Continue to the right across the ledges and roots.

At the end of the path, you'll find a tunnel with red light coming out of it. We need to get up there. To reach the ledge, zap the cobwebs hanging in the background to reveal LEGO pieces. Build them onto the tree, then use Wingardium Leviosa on it to create a ramp. Walk up it to reach the ledge, then head into the tunnel to complete the level.
The Forbidden Forest - Free Play Mode
Required Spells: Dark Magic, Lumos Solem, Reducto, Wingardium Leviosa
Required Abilities: Dig

Part 1 – The Forbidden Forest

Student in Peril
This poor student is trapped in some Devil’s Snare to the right of your starting point. Use Lumos Solem to free him.


Hufflepuff Crest
There are 3 yellow flowers you need to zap. The first is to the right of your starting point, by the large tree.


The second flower can be found right after climbing the ladder the pixies create.


The third flower can be found further along the path, underneath a wasp nest. Zap all 3 to reveal this Crest Piece.


Character Token (Fang)
From your starting point, head as far to the right as you can, then head towards the screen. You’ll find a patch of dirt. Dig it up to reveal this Character Token.


Slytherin Crest
There are 10 black rocks you need to use Dark Magic to destroy. The first is to the right of your starting point.


The second is on the ledge with the dig spot you dig up to create a ladder.


The third is on the ledge on the right.


Part 2 - Forest Tunnel

Slytherin Crest cont.
The fourth is in the back right corner.


Part 3 – Lake

Character Token (Hagrid)
Destroy the plant in front of the chest to the left of the LEGO blocks, then destroy the silver lock. Zap the chest to open it, revealing this Character Token.


Slytherin Crest cont.
The fifth is by the LEGO blocks.


The sixth is on the left side of the lake.


The seventh is on the left side of the large tree to the right of the lake.


The eighth can be found across from the large tree to the right of the lake.


The ninth can be found at the base of the large tree to the right of the lake.


The tenth is to the left of the exit. Destroy all 10 to reveal this Crest Piece.


Character Token (Draco (Hogwarts))
Use Dark Magic to destroy the black sphere on the upper ledge, revealing this Character Token.


Gryffindor Crest
After draining the lake, there are 6 fish you need to use Wingardium Leviosa on to place them back in the water. The first 3 are on the left side of the water.


The fourth is on the north side, near the vines.


The fifth and sixth are on the right side of the lake. Put all 6 fish back in the water to reveal this Crest Piece.


Ravenclaw Crest
After draining the lake, head to the right to find a chest. Destroy the silver lock to open the chest, revealing this Crest Piece.
Interlude - Through the Trapdoor
Characters: Harry Potter, Ron Weasley, Hermione Granger

Grand Staircase: Looks like Quirrell's up to something! Head to the right and speak to the painting to move the staircase to the right, then walk up. Head through the opening to start the final Story level.
Face of the Enemy - Story Mode

Boss: Professor Quirrell (Voldemort)
Starting Characters: Harry (Sweater), Hermione (Blue Top), Ron (Cardigan)
True Wizard: 33,000

Part 1 - Fluffy

Well, this isn't good. We need to get past Fluffy, and the only way to do that is to find a way to make some music. Zap the orange painting and the wizard inside will toss out his rubber duck. Zap it to make it bigger, then use Wingardium Leviosa on it to give it to Fluffy.

After the cutscene, Fluffy will have moved to the left, but the trapdoor is still covered. Build the LEGO pieces into a harp. This will put Fluffy to sleep, opening the trapdoor. Drop down inside.

Part 2 - Devil's Snare

Use Lumos Solem to take out the Devil's Snare, then use Lumos to scare off the vines on the right, revealing a hole. Drop down.

Part 3 - Flying Keys

Head to the right and use Lumos Solem to take out the Devil's Snare. Use Lumos to scare off the vines, then take out the final bunch of Devil's Snare. You'll find yourself in a room with some flying keys. Use Wingardium Leviosa on the barrel to the left of the large pillar to cause the statue to drop the broom.

Hop on as Harry, then zap the large key in front of you. It will then fly off. Follow it around and zap it a few times to drop it to the ground. Use Wingardium Leviosa on it to place it in the door, opening it. Head inside.

Part 4 - Wizard's Chess

In order to open the door on the right, we'll need to play a game of Wizard's Chess. Fortunately, it's as simple as zapping the pieces that are waving at you. Zap the three black pawns, then hop in the rook (the piece in the near left corner that looks like a siege tower). Zap the black bishop, then build the two sets of LEGO pieces into your queen. Zap her to trigger a cutscene.

Part 5 - The Man with Two Faces

Looks like Ron won't be joining us, having tripped in the last room. It's just Harry and Hermione now, fighting Quirrell. Fighting him is simple enough. Walk up to Quirrell and part of the floor will collapse. Avoid the fireballs he shoots at you. He will eventually launch a large green head at you. Use Wingardium Leviosa to send it back at him, stunning him. When he's stunned, run up to him as Harry and get close to touch him, taking out one heart.

Repeat this process two more times to defeat him. Each time you take out a heart, more parts of the floor will collapse, so you'll have to be more careful when you're trying to reach Quirrell. Once his hearts are gone, the level will end.
Face of the Enemy - Free Play Mode
Required Spells: Dark Magic, Lumos, Reducto
Required Abilities: Broomstick Flying

Part 2 - Devil's Snare

Gryffindor Crest
Use Lumos to scare away the vines on the left, then destroy the silver chest to reveal this Crest Piece.


Part 3 – Flying Keys

Student in Peril
While on the broom, fly up and to the right to find a small ledge. Hop onto it, then use Lumos to scare the vines away, revealing this poor student.


Character Token (Harry (Slytherin Disguise))
Destroy the silver lock on the cupboard on the right, then zap it to open it, revealing this.


Slytherin Crest
There are 10 silver keys for you to zap. The first is on the left side of the area, near the ground.


The second and third are on the right side of the area, near the ground.


The other 7 are all floating in the air. Hop onto the ledge on the right and you'll be able to destroy them. Destroy all 10 to reveal this Crest Piece.


Part 4 - Wizard's Chess

Character Token (Professor Quirrell (Voldemort))
Use Dark Magic to destroy the black bishop by your starting point, revealing this Character Token.


Ravenclaw Crest
Destroy the silver chest in the back left corner to reveal a black horse.


Hop on and you'll be bucked up to this Crest Piece.


Hufflepuff Crest
Use Dark Magic to destroy the black castle in the near right corner, revealing this Crest Piece.


Character Token (Ron (Cardigan))
Use Dark Magic to destroy the black pawn on the right, revealing this Character Token.
----Year 2 - The Chamber of Secrets----
Floo Powder! - Story Mode

Enemies: Spider
Starting Characters: Harry (Red Sweater), Ron (Sweater)
Added Characters: Ginny (Hooded Top); Hagrid
True Wizard: 50,000

Part 1 - The Burrow

While this is quite a large area, all you have to do is head to the right and follow Ginny inside.

Part 2 - Burrow Interior

Harry makes Ginny nervous, so she is hiding somewhere in the area. Use Wingardium Leviosa to place the purple water faucet on the sink. The soapy dishes will then head into the sink, clearing the path to the left.

Head to the left side of the room, then use Wingardium Leviosa on the small blue chair to reveal Ginny (who cannot use magic yet), adding her to your party. Speak to the painting of the Weasleys to reveal some floo powder. Use Wingardium Leviosa on it to place it in the fire.

Part 3 - Borgin and Burkes

It looks like we've stopped at the wrong grate. Fortunately, Hagrid is here to come to the rescue. We've got to get out of here, but the door on the right is locked. We'll need to find the key. Head back to the left to find a mirror. Use Wingardium Leviosa on the broom in front of it to dust it off, revealing a chain. Pull it to open the hand, revealing LEGO pieces.

Build them into a sword, then use Wingardium Leviosa on it to give it to the wizard in the painting. He will slay the dragon and give you the key as thanks for assisting him. Pick it up and place it in the lock on the right to open the door. Head outside.

Part 4 - Knockturn Alley

Zap the two red boxes on the right to reveal LEGO pieces. Build them into a chain, then pull it to collapse the stand. Continue down the path and the spider in the cage will escape. Defeat it, then head down to the end of the path. Pull the chain to open the gate, then head inside to complete the level.
Floo Powder! - Free Play Mode
Required Spells: Dark Magic, Reducto, Wingardium Leviosa
Required Abilities: Dig

Part 1 – The Burrow

Gryffindor Crest
There are 6 gnomes you need to launch. Use Wingardium Leviosa on them to lift them up, then use Wingardium Leviosa to spin them around. Release the “special” button when the gnome is spinning to launch it. The first 5 gnomes are found on the left side of the Burrow.


The sixth gnome is on the right side of the Burrow by the basketball hoop. Toss all 6 gnomes to reveal this Crest Piece.


Hufflepuff Crest
There are two piles of LEGO pieces in this area. Build either of them to create a vehicle (a tractor or a pumpkin car).


Hop in and drive over the 7 small green plants to reveal carrots. The first 3 are on the left side of the Burrow.


The other 4 are on the right side of the Burrow.


Once the carrots have been revealed, use Wingardium Leviosa on them to launch them into the sky. Launch all 7 carrots to reveal this Crest Piece.


Character Token (George Weasley)
Dig up the dig spot on the far right side of the area to reveal this Character Token.


Part 3 - Borgin and Burkes

Slytherin Crest
Zap the brown chest on the left to knock out its fangs, leaving it open.


Drop down inside, then use Dark Magic to destroy the black sphere, revealing this Crest Piece.


Student in Peril
Destroy the silver lock on the cabinet on the left to open it, revealing this student.


Character Token (Arthur Weasley)
Use Dark Magic to destroy the black cabinet on the right, revealing this.


Part 4 – Knockturn Alley

Ravenclaw Crest
Use Wingardium Leviosa on the wooden beams in the cart on the right, creating stairs.


Walk up them, then use Dark Magic to destroy the gate, allowing you to reach the ledge with this Crest Piece.


Character Token (Harry (Sweater))
There is a small chest at the end of the path. Zap it to open it, revealing this Character Token.
Interlude - Welcome Home
Characters: Harry Potter, Ron Weasley, Hermione Granger

Grassy Courtyard: We need to get through that gate on the right, and we'll need a strength potion to do that. The cauldron can be found in the near left corner of the area.

Bone - Zap the bushes in the near right corner to reveal some LEGO pieces. Build them into a skeleton, revealing the bone.

Fang - Zap the flowerbed in the back right corner to reveal a large plant. Zap it again to reveal the fang.

Flower - Zap the brown wheeled structure on the left. It will then drive around, sucking up some plants and eventually spitting out the flower.

Once the potion is brewed, drink it and pull the chain on the right to open the gate. Continue to the right.

Clock Tower Courtyard: Follow Nick to the left towards the greenhouses.

Herbology Grounds: Head into the greenhouse to start the first lesson of the new year!


Greenhouse 1: Time to learn how to pot Mandrakes. First, we'll need our earmuffs. Head over to the cupboard and press the "special" button to put on a pair. You can now approach the Mandrakes safely. Pick them up and put them into the pots to shut them up. Pot all three Mandrakes to complete the lesson. Once you've completed the lesson, exit the greenhouse.

Herbology Grounds: Head back to the right.

Clock Tower Courtyard: Head to the right and you'll find your path blocked by a Mandrake. Time to put our new knowledge to the test! Head back to the left and you'll find a cupboard. Put on earmuffs, then grab the Mandrake. Put it in the pot, which can be found right nearby. This will clear the path, allowing you to continue.

Outer Corridor: Head to the right and up the stairs.

Main Hallway: Head to the left and go down the stairs. Continue to the left.

Lesson Hallway: Head to the right and you'll find a Mandrake. Before we can pick it up, we'll need some earmuffs. Continue to the right and head up the stairs to find the cupboard, then grab earmuffs.

Head back to the left and pick up the Mandrake, then head up the stairs. Use it to shatter the glass, then continue up the stairs. Put the Mandrake in the nearby pot, then head inside the classroom to start your next lesson.


Defense Against the Dark Arts Classroom 1: Cornish Pixies are on the loose! Thankfully, we have a new spell to take care of them. Hit a Pixie once with Immobilus to freeze it, then hit it again to defeat it. Defeat the three Pixies flying around to trigger a cutscene.

Lockhart has accidentally released the rest of the Pixies, so use Immobilus to defeat all 5, completing the lesson. Exit the classroom.

Lesson Hallway: Head back down the stairs and to the left.


Covered Bridge: After the cutscene, you'll find yourself on the Covered Bridge. Head to the right.

Hogwarts Grounds: Head down the path towards the Quidditch Grounds.

Quidditch Grounds: Head into the tent to start the next Story level.
Dobby's Plan - Story Mode

Boss: Dobby
Starting Characters: Hermione Granger, Hagrid, Ron Weasley
Added Characters: Madam Pomfrey
True Wizard: 68,000

Part 1 - Quidditch Stands

Hermione seems to be really good at spotting trouble during Quidditch games! Use Wingardium Leviosa on the trapdoor to open it, then drop down inside. Zap the large chest to reveal a Bludger bat, then zap it again to knock the Bludger to the left. Build the LEGO pieces left behind into a trampoline, then use it to bounce up onto the ledge.

Continue to the right and you'll find Dobby. Zap him to damage him. He will then disappear. Pull the chain to lower the stands, allowing you to continue to the right. Zap Dobby again and he will disappear. Use Immobilus to defeat the Pixies, then use Lumos to free the snitch. This will reveal some LEGO pieces on the right. Build them into stairs, then walk up them.

Chase Dobby to the right, then climb the ladder. Use Wingardium Leviosa to place the large rock on the chain on the right, opening the gate. Head inside.

Part 2 - Locker Room

Climb the ladder on the left and zap Dobby. He will then disappear into one of the lockers on the right. To reach him, pull the chain to open the cage with the gargoyle, revealing LEGO blocks. Use Wingardium Leviosa to stack them on the purple base, then hop up onto the ledge. Zap the locker in the middle to reveal Dobby, then zap him again to damage him.

He will then move over to the ledge on the left. Drop down onto the ledge below you, then defeat the Pixies to lower the bridge. Cross it to the left, then zap the barrel. Use Wingardium Leviosa on it to reveal Dobby, then zap him again.

Part 3 - Hospital Wing

We need to brew some Skele-Grow to help Harry. You'll have Madam Pomfrey as a member of your party, and she has access to the full range of spells, including the ones Ron and Hermione haven't learned yet! She also does not need to wear earmuffs to pick up Mandrakes, since her bonnet serves that purpose.

Bone - Use Wingardium Leviosa on the skull on the table in the back right corner, placing it on the skeleton. The skeleton will dance on the bed for a bit before being zapped by the student, revealing the bone.

Flower - Pick up the Mandrake and carry it over to the glass display case in the back left corner. Shatter the glass to reveal the flower.

To find the spider, we'll need to get into the next room. Use Wingardium Leviosa on Malfoy's bed to reveal LEGO pieces. Build them into a suit of armor, which will throw an axe at the lock, opening the door. Head inside.

Part 4 - Hospital Wing Lobby

Spider - Use Wingardium Leviosa on the purple broom, then move it over to the purple cobweb to brush it away. The red spider will then appear, making a new cobweb. Zap it to knock it down, allowing you to pick it up.

With the final potion ingredient collected, head back left to return to the Hospital Wing.

Part 3 - Hospital Wing

Toss the spider into the cauldron to complete the potion, ending the level.
Dobby's Plan - Free Play Mode
Required Spells: Dark Magic, Lumos, Reducto, Wingardium Leviosa
Required Abilities: Goblin Key, House Access (Slytherin)

Part 1 – Quidditch Stands

Hufflepuff Crest
You need to raise up 4 Quidditch flags. The first is a Gryffindor flag, found to the left of your starting point. The second is a Ravenclaw flag, found to the right of your starting point.


The third is a Slytherin flag, found to the left of the exit. The fourth is a Hufflepuff flag and can be found right next to the exit. Raise up all 4 flags to reveal this Crest Piece.


Ravenclaw Crest
There are 4 small barrels with flags inside them that you need to zap. The first can be found inside the alcove after knocking the Bludger through the barrier on the left.


The second barrel can be found right behind Dobby when you first encounter him.


The third barrel can be found to the right of the Pixies.


The fourth barrel can be found to the right of the ladder you climb to reach the exit. Zap all 4 to reveal this Crest Piece.


Character Token (Draco (Quidditch))
Use Dark Magic to destroy the black cabinet to the right of the stairs you build, revealing this Character Token.


Part 2 - Locker Room

Slytherin Crest
There are 2 pictures of Slytherins you need to talk to. The first can be found on the right. Use Wingardium Leviosa on the scroll on the ledge to reveal it.


Use a Slytherin to talk to it.


The second can be found by Dobby's final hiding place. Use Wingardium Leviosa on the scroll to reveal it, then talk to it as a Slytherin. Talk to both pictures to reveal this Crest Piece.


Student in Peril
Use Lumos to scare away the vines around the chest on the right, then destroy the silver lock to open it, revealing this.


Part 3 – Hospital Wing

Character Token (Dobby)
This is floating above one of the beds on the left. Bounce up to it to reach it.


Part 4 - Hospital Wing Lobby

Character Token (Madam Pomfrey)
Use Dark Magic to destroy the red lock on the right.


Zap the object to reveal this Character Token.


Gryffindor Crest
Open the safe on the right to reveal this Crest Piece.
Interlude - In Search of Answers
Characters: Harry Potter, Ron Weasley, Hermione Granger

Clock Tower Courtyard: Harry is fresh out of the hospital wing, and now we need to learn how to duel. Head to the right.

Outer Corridor: Head to the right and go up the stairs.

Main Hallway: Head down the stairs and through the gate.

Entrance Hall: Head up the stairs and into the Great Hall.


Great Hall: Looks like Hermione is busy staring at Lockhart, so it's just Harry and Ron. Cast Expelliarmus at the dummies to disarm them. If you're standing in front of the red line, it won't count. Hit 5 dummies with both Harry and Ron.

After the cutscene, you'll be dueling Draco. Hit him with Expelliarmus to damage him. Take out his hearts to defeat him.

Entrance Hall: Harry has now gained the Parseltongue ability. Malfoy sure seems suspicious, so let's follow him. Head back down the stairs and through the opening at the end.

Main Hallway: Head to the right and go through the door.

Grand Staircase: Head to the right and through the door at the end.

House Hallway: Head to the left and you'll find a Parseltongue panel. Use it to reveal LEGO pieces. Use Wingardium Leviosa on them to build a snake statue, opening the gate. Head inside.


Slytherin Dungeon: Head down the stairs and interact with the door to trigger a cutscene.

After the cutscene, Hermione will have disappeared, so you're down to Harry and Ron. Head back up the stairs and out of the dungeon.

House Hallway: Head to the right and down the stairs.

Grand Staircase: Head to the left and through the opening.

Main Hallway: Head to the left through the door.

Lesson Hallway: Head to the right and into the Potions Classroom.


Potions Classroom: Time to brew a new potion! We'll need to find three ingredients: an apple, a cherry and some hair.

Apple - head to the near left corner. Use Wingardium Leviosa on the yellow panel to reveal a Pixie holding the apple. Defeat the Pixie and it will drop the apple.

Cherry - head to the table in the near right corner. You'll find a black pot and some colored bottles. Zap the blue, red and green bottles to grow a plant, revealing the cherry.

Hair - Use Wingardium Leviosa on the cauldron on the left, revealing a vine. It will snatch the poor student away, leaving his hair behind.

Once the potion has been brewed, you'll automatically unlock Justin Finch-Fletchley. Drink the potion, then switch to him by selecting him from the character menu. Speak to the portrait on the right to learn Polyjuice Potion. Exit the classroom to the left.

Lesson Hallway: Head to the left and go through the opening.

Main Hallway: Head to the right and into the opening leading to the Entrance Hall.

Entrance Hall: Head up the stairs and to the right. You'll find your path blocked by a large red curtain. Use Wingardium Leviosa on the broom to dust off the trophies, revealing their colors. Use Wingardium Leviosa on the broom again to dust off the picture, allowing you to speak to him. One of you should still be Justin Finch-Fletchley, so use him to speak to the painting. The student in the painting will open the curtain, allowing you to continue up the stairs to the right.


Bathroom Hallway: Head to the right and you'll find your path blocked by some toxic gas. Use Wingardium Leviosa on the pipes to shut it off, allowing you to continue to the right. After the cutscene, head into the bathroom to start the next Story level.
Crabbe and Goyle - Story Mode

Starting Characters: Harry Potter, Ron Weasley, Hermione Granger
Added Characters: Harry (Slytherin Disguise), Ron (Slytherin DIsguise)
True Wizard: 25,000

Part 1 - Girl's Bathroom

Time to brew some more Polyjuice Potion!

Apple - Stand on one of the toilet lids on the right and use Wingardium Leviosa on the large red valve. This will send water shooting out of the toilets, lifting the lids in the air. Hop to the left across the lids, lowering the final lid onto the toilet. This will destroy the toilet on the left, revealing a pipe. Use Wingardium Leviosa on it to place it above the flower, revealing LEGO pieces. Build them into a flower, clearing the toxic gas out of the center stall. The door will then open, revealing the apple.

Cherry - Head to the left side of the area and use Wingardium Leviosa on the broom in the back left corner to knock over a valve. Pick it up and place it on the slot on the left, then use Wingardium Leviosa on it to knock down the cherry.

Hair - Use Wingardium Leviosa on the sleeping Crabbe and Goyle.

Once the potion is ready, drink it to trigger a cutscene.

Part 2 - Slytherin Dungeon

Head down the stairs. We need to shut off the water jets so we can access the common room. Hop into the water on the right, then use Lumos to scare away the vines. Use Wingardium Leviosa on the chest to reveal LEGO pieces.

Build them into a flute, revealing a snake. Zap the snake as it appears out of each of the four manhole covers to reveal LEGO pieces. Build them into a suit of armor, which will shut off the water jets. Interact with the door to open it, then head inside.

Part 3 - Slytherin Common Room

Malfoy has taken the snake's eyes, and we need to give them back if we want to reach the dorms. Head to the far right side of the room and use Wingardium Leviosa on the ball to reveal a fish. It will hop back to the left. Use Wingardium Leviosa on it to place it in the fish tank, then use Wingardium Leviosa on the skull to lift it out of the water. Use Wingardium Leviosa to put the eyes back on the snake, completing the level.
Crabbe and Goyle - Free Play Mode
Required Spells: Dark Magic, Reducto, Wingardium Leviosa
Required Abilities: Super Strength

Part 1 - Girl's Bathroom

Character Token (Vincent Crabbe)
Destroy the silver barriers on the right, allowing you to reach this Character Token.


Gryffindor Crest
Pull the chain on the left to reveal LEGO pieces.


Build them into a plunger, then hop on.


Ride over the 6 green puddles on the floor to clean them up, revealing this Crest Piece.


Part 2 – Slytherin Dungeon

Hufflepuff Crest
There are 3 fish that need to be placed back in the water with Wingardium Leviosa. 2 are on the left side of the fountain, and 1 is on the right side.


Once all 3 fish are back in the water, this Crest Piece will appear to the left of the exit.


Part 3 – Slytherin Common Room

Ravenclaw Crest
There are 6 lamps for you to use Wingardium Leviosa on. The first two are to the left of the fireplace.


The third and fourth are to the right of the fireplace.


The fifth and sixth are to the right of the exit. Light all 6 to reveal this Crest Piece.


Student in Peril
Use Wingardium Leviosa on the broom by the fireplace to reveal LEGO pieces.


Build them into a painting, then speak to it to rescue this student.


Slytherin Crest
Use Dark Magic to destroy the black sphere by your starting point to reveal this Crest Piece.


Character Token (Gregory Goyle)
Use Dark Magic to destroy the black cabinet to the right of the fireplace, revealing this.


Character Token (Ron (Slytherin Disguise))
Destroy the silver lock on the desk on the right, then zap it to open it, revealing this Character Token.
Interlude - Hermione!
Characters: Harry Potter, Ron Weasley

Bathroom Hallway: Hermione has been petrified! Time to check the bathroom for some answers. Head to the right and enter the girl's bathroom to start the next Story level.
Tom Riddle's Diary - Story Mode

Boss: Moaning Myrtle
Starting Characters: Harry Potter, Ron Weasley
Added Characters: Tom Riddle
True Wizard: 70,000

Part 1 - Girl's Bathroom

Time for a fight with Myrtle. This is pretty simple. Myrtle will toss objects at you from the stalls. Use Wingardium Leviosa on them to knock the doors open. Open enough stall doors and Moaning Myrtle will appear in one of the toilets. Zap her to damage her.

Repeat this process to take off two more hearts. Once she's down to one heart, she'll start chasing you. Zap her to take out her final heart.

Part 2 - Tom Riddle's Memory

We're now in the past, hanging out with Tom Riddle. Tom has the full range of spells, including the ones that Harry doesn't know yet. There's a lot to do in this area, but we'll start by getting rid of that Mandrake.

Head to the right and use Lumos to scare away the vines in the center of the room. Use Wingardium Leviosa on the cupboard to repair it, allowing you to grab a pair of earmuffs. Grab the Mandrake, then use it to shatter the glass to the right of the pot, revealing a chain. We'll need to brew a strength potion in order to pull it, and you'll find the cauldron nearby on the ground.

Bone - Use Wingardium Leviosa on the bookshelf by your starting point to reveal the bone.

Fang - Step on the three valves on the left side of the area to extend some platforms, then hop up them onto the ledge on the right. Use Wingardium Leviosa to create a valve, then step on it to keep the platforms permanently extended. Head to the right and hop across the gap, then zap the moving chest to reveal the fang.

Flower - Hop back up the platforms, then hop over to the ledge on the left. Zap the pot to reveal the flower.

Drink the potion, then pull the chain to reveal some LEGO blocks. Use Wingardium Leviosa to stack them on the purple base, then continue to the right. Defeat the Pixies and they'll drop the LEGO blocks. Use Wingardium Leviosa to stack them on the purple base.

Once both sets of LEGO blocks have been stacked, drink the strength potion, then hop back up the platforms to reach the upper ledge. Head all the way to the right to find a chain. Pull it to scare away the boar statue on the right, revealing an opening. Head through it.

Part 3 - Secret Corridor

Head down the corridor, then continue to the right. You'll find that the stairs are facing the wrong way. Stand on the valve to raise them up, allowing you to continue. The next set of stairs is also facing the wrong way. Zap the orange painting and the wizard inside will toss you the valve. Use Wingardium Leviosa on it to place it on the slot, then step on it to raise the stairs.

Continue to the right and you'll find your path blocked by a large bookshelf. Your partner will stand right up next to it. Use Wingardium Leviosa on the desk to the left, rotating the bookshelf. Switch to your partner and do the same for the next desk, allowing your partner to join you. This will open the gate on the right, allowing you to continue.

Zap the black-and-white banner on the wall to reveal LEGO pieces, then build them into a trampoline. Bounce up it to reach the ledge, then use Lumos to scare the vines away. This will reveal some platforms. Drop down and use Wingardium Leviosa to place the platforms in the slots, then bounce up them to reach the ledge. Use Wingardium Leviosa on the arches to reveal a door, ending the level.
Tom Riddle's Diary - Free Play Mode
Required Spells: Dark Magic, Reducto
Required Abilities: Goblin Key, Scholar

Part 1 - Girl's Bathroom

Hufflepuff Crest
Destroy the silver chest on the right to reveal a plunger.


Hop on and ride it over the 5 water puddles on the floor to reveal this Crest Piece.


Character Token (Moaning Myrtle)
Use Dark Magic to destroy the black cabinet on the right side of the room, revealing this.


Part 2 – Tom Riddle’s Memory

Gryffindor Crest
There are 6 suits of armor for you to zap. The first is right by your starting point.


The second is on the far right side of the area, on the ground floor.


The third is across from the cupboard on the ground floor.


The fourth is on the ledge on the left.


The fifth is on the upper ledge in between the archways you construct.


The final suit of armor is on the ledge on the right. Zap all 6 to reveal this Crest Piece.


Student in Peril
Solve the puzzle on the Rune Cabinet on the right side of the area to reveal a key.


Pick it up and carry it back to the left, then place it in the slot to open the door, revealing this student.


Part 3 – Secret Corridor

Character Token (Vocalist)
Open the safe right by your starting point to reveal this.


Ravenclaw Crest
Destroy the silver lock on the chest, then zap it to open it, revealing this.


Slytherin Crest
There are 3 radios you need to zap. The first is to the right of the valve you stand on to raise the stairs.


The second is to the left of the rotating bookshelf.


The third is to the right of the exit. Zap all 3 to reveal this Crest Piece.


Character Token (Professor Vector)
Open the safe to the right of the exit to reveal this.
Interlude - Spiders Flee Before It
Characters: Harry Potter, Ron Weasley

Bathroom Hallway: These spiders sure are acting strangely. Time to find out why. Follow them to the left.

Entrance Hall: Head to the left, then follow the spiders down the stairs.

Main Hallway: Follow the spiders to the right and up the stairs.

Outer Corridor: Continue to the right.

Fountain Courtyard: Continue to the right.

Covered Bridge: The spiders are still moving, so follow them to the right.

Hogwarts Grounds: Follow the spiders to Hagrid's hut to start the next Story level.
Follow the Spiders - Story Mode

Enemies: Wasps, Spiders
Boss: Aragog
Starting Characters: Harry (Blue Jacket), Ron (Cardigan), Fang
True Wizard: 90,000

Part 1 - The Forbidden Forest

Head to the right and you'll find a tree stump buried in the ground. Use Wingardium Leviosa on it to raise it up, then hop on. Ride it to the right, then hop onto the ledge. We'll need to create a way for Fang to join us, so zap the bushes in the back left to reveal LEGO pieces. Use Wingardium Leviosa on them to build a cloud, then use Wingardium Leviosa on it to move it to the left. This will water the tree, revealing pixies. They will make a ladder for Fang, allowing him to join you.

Dig up the dirt on the right to knock over the tree, creating a bridge. Cross it, then continue to the right. Walk onto the dock, then use Lumos to scare away the vines. Use Wingardium Leviosa on the broomsticks to raise them up, then hop on them. Fly to the right over the lake, then hop onto the docks. Build the LEGO pieces into a ramp, allowing Fang to join you.

Continue to the right and you'll find a ladder on a tree. Pixies will then appear, stealing the rungs. A new ladder will then form on the left. Climb up it, then head to the right on the ledge. The Pixies will then reappear and harass a tree. Use Immobilus to defeat all of them, causing the tree to smack the ground. This will reveal a dig spot, so dig it up to reveal an opening. Head inside.

Part 2 - Aragog's Lair

This fight is interesting. Throughout the fight, Aragog will be shooting webs at you. If you happen to get caught in a web, spam the "jump" button to free yourself. There will be lots of brown spiders harassing you, so defeat them. You need to keep an eye out for a black spider.

Zap a black spider to flip it over, then use Wingardium Leviosa on it to raise it up in front of Aragog. Use Wingardium Leviosa again to start spinning the spider, then release to toss it at Aragog. This will take off one of his hearts. Repeat this process two more times to defeat him.

Part 3 - Ford Anglia Rescue

Simply drive forward to avoid Aragog. If he catches you, he'll do one heart of damage to you, so feel free to drive backwards if you want more studs.

Part 4 - Aragog Escape

More of the same. Keep driving.

Part 5 - Are We There Yet?

After the cutscene, you'll have just a bit more to drive before completing the level.
Follow the Spiders - Free Play Mode
Required Spells: Dark Magic, Reducto, Wingardium Leviosa

Part 1 – The Forbidden Forest

Slytherin Crest
There are 10 groups of mushrooms you need to use Wingardium Leviosa on. The first is to the left of your starting point.


The second is on the ledge you reach by hopping off the tree stump.


The third is by the tree you dig up.


The fourth can be found shortly after crossing the tree bridge.


The fifth can be found to the left of the dock with the broomsticks.


The sixth and seventh can be found just to the right of the lake.


The eighth can be found by the ladder on the tree root.


The ninth can be found by the tree that the Pixies harass.


The tenth can be found to the right of the exit. Use Wingardium Leviosa on all 10 to reveal this Crest Piece.


Ravenclaw Crest
Destroy the silver gate in the lake to reveal two frogs.


Hop on one and ride it through the reeds that appear to reveal this Crest Piece.


Character Token (Professor Sinistra)
Use Dark Magic on the black cabinet to the right of the lake to reveal this.


Character Token (Ron (Sweater))
After climbing the ladder to the right of the lake, head to the left on the ledge and you’ll find this. Bounce up on the cobwebs to reach it.


Part 2 – Aragog’s Lair

Student in Peril
This poor student is trapped in a web on the right side of the area. Zap her a few times to free her.


Character Token (Lucius Malfoy)
Destroy the silver lock on the chest, then zap it to open it, revealing this Character Token.


Hufflepuff Crest
Use Dark Magic to destroy the black sphere on the left, revealing this Crest Piece.


Part 3 – Ford Anglia Rescue

Gryffindor Crest
There are 5 cabinets for you to destroy. 2 are in this area and the other 3 are in Part 4. The first cabinet is on the left side of the path.


The second is also on the left side of the path.


Part 4 – Aragog Escape

Gryffindor Crest cont.
The third cabinet is on the right side of the path.


The fourth is also on the right side of the path.


The fifth is on the left side of the path, after dropping off a ledge. Destroy all 5 to receive this Crest Piece.
Interlude - You're a Fraud!
Characters: Harry Potter, Ron Weasley

Main Hallway: Looks like the Chamber of Secrets has been opened again. We need to tell Lockhart everything that we know! I'm sure he'll be a big help! Head to the left.

Lesson Hallway: Head up the stairs and into the classroom to start the final Story level.
The Basilisk - Story Mode

Boss: Basilisk
Starting Characters: Harry Potter, Ron Weasley, Gilderoy Lockhart
Added Characters: Ginny Weasley
True Wizard: 60,000

Part 1 - Girl's Bathroom

You have Lockhart in your party, and despite his ineptitude, he does have access to spells that Harry and Ron can't use yet. We need to construct the entrance to the Chamber of Secrets. Head to the left and zap the orange painting to reveal LEGO pieces. Build them into platforms, clearing the entrance to the pipe.

Head into the open stall and use Wingardium Leviosa on the pipe above the toilet to lower it. Send Scabbers through the pipe and step on the red button inside to reveal a button. Press it to reveal some LEGO pieces, as well as some vines. Use Lumos to scare them away, opening the door and revealing part of the pipe. Use Wingardium Leviosa to place it in the slot on the pipe, revealing more vines on the right.

Use Lumos to scare them away, opening the stall door. Head inside and use Wingardium Leviosa on the pipe to lower it into position. Switch back to Scabbers and head to the end of the pipe. Push the button to reveal a toad. He will run into the cabinet on the left. Use Wingardium Leviosa on it to reveal LEGO pieces. Build them into a plunger, then hop in.

Ride it to the right and hop onto the toilet in the stall on the far right. This will reveal more LEGO pieces. Build them into a Parseltongue panel, then use it to open the Chambers of Secrets. Drop down the opening.

Part 2 - The Chamber of Secrets

Head to the left and you'll reveal a squid. Hop up the rocks on the left and use Wingardium Leviosa on the plunger to plug it up, revealing LEGO pieces. Build them into a platform, then stand on it. Your partner will raise you up.

Continue to the right, then build the LEGO pieces into a skeleton. He will fish in the water, revealing the squid. Hop in the water jet to reach the opposite ledge, then build the LEGO pieces into a bridge. It will crawl over to the right, allowing you to cross the gap.

Continue to the right, then use Wingardium Leviosa on the giant snake head to lower it. Hop in its mouth, then ride it up to the ledge. Head through the opening on the right.

Part 3 - The Basilisk

Ron and Lockhart are trapped, but Ginny has decided to join us. It is now time to face the Basilisk. Watch out for its heat vision, as it will kill you. We need to get it to crash into some rocks. Head to the left and you'll find a whole bunch of rocks. Stand in front of them until the Basilisk's heat vision disappears. Move out of the way and the Basilisk will strike at the rocks, damaging itself. Do the same thing with the two sets of rocks on the right to take the Basilisk down to two hearts.

We now need to brew a strength potion.

Bone - Use Lumos to scare away the vines on the rock on the right, then use Wingardium Leviosa on it to reveal the bone.

Fang - Head back to the left and use Wingardium Leviosa on the rock to reveal a plant. Zap it to reveal the fang.

Flower - Use the Parseltongue panel on the right to reveal the flower.

Brew the potion, then drink it. Head to the left and pull the chain to trigger a cutscene.

After the cutscene, Fawkes will have blinded the basilisk. Zap the basilisk's face to cause it to disappear. Head back to the left and use Wingardium Leviosa to place the chains on the pipe. Use Wingardium Leviosa on one side and your partner will use Wingardium Leviosa on the other, revealing an opening. Drop down inside to reach the ledges in the center of the area.

Hop up to the right, then use Wingardium Leviosa on the Sorting Hat to reveal the Sword of Gryffindor. Use Wingardium Leviosa on it, then move it towards the shiny blue orb by the Basilisk's chin to complete the level.
The Basilisk - Free Play Mode
Required Spells: Dark Magic, Lumos, Reducto, Wingardium Leviosa
Required Abilities: Dig, Goblin Key

Part 1 – Girl’s Bathroom

Student in Peril
After using Lumos to scare away the vines, you’ll open the stall door, revealing this trapped student.


Part 2 – The Chamber of Secrets

Gryffindor Crest
There are 4 skeletons for you to build. The first is right by your starting point.


The second is on the right side of the area, by the bridge you build.


The third is on the left side of the area, by the snakeskin.


The fourth is on the upper ledge. You’ll build him to progress in the level. Build all 4 to reveal this Crest Piece.


Hufflepuff Crest
There are 4 dig spots for you to dig up. The first two are by the snake skin.


The third is on the left side of the upper ledge.


The fourth is on the right side of the area. Dig up all 4 to reveal this Crest Piece.


Character Token (Gilderoy Lockhart)
Use Lumos to scare away the vines around the black chest on the left, then use Dark Magic to destroy it, revealing this.


Character Token (Wizard (Green))
Use Lumos to scare away the vines around the black chest on the right, then use Dark Magic to destroy it, revealing this.


Part 3 – The Basilisk

Character Token (Tom Riddle)
Open the safe on the right to reveal this.


Ravenclaw Crest
Destroy the silver lock on the left to reveal LEGO pieces.


Build them into a birdhouse, revealing this Crest Piece.


Slytherin Crest
After the Basilisk disappears, there will be 3 instruments you need to play. The first is on the right. Build the LEGO pieces into a violin, then use Wingardium Leviosa on it to play it.


The second instrument is a trumpet, and can be found on the right. Use Wingardium Leviosa on it to play it.


The third instrument is an accordion, and can be found on the left. Build it, then use Wingardium Leviosa on it to play it. Play all 3 instruments to reveal this Crest Piece.
----Year 3 - The Prisoner of Azkaban----
News From Azkaban - Story Mode

Enemies: Dementor
Boss: The Monster Book of Monsters
Starting Characters: Harry (Grey Jacket), Arthur Weasley
Added Characters: Hermione (Red Hooded Top), Ron (Brown Jacket); Professor Lupin
True Wizard: 50,000

Part 1 - The Leaky Cauldron

Looks like Harry's Monster Book of Monsters is putting up a fight. You have Arthur Weasley with you, who can use the full range of spells. Use Wingardium Leviosa on the painting on the left to straighten it. The red wizard will then move into an orange painting on the right. Zap it and he'll toss out his hat. The book will chase it, eventually getting eaten and spat out by the dresser. Once the book is stunned, walk up to it and press the "special" button to damage it.

The painting on the left will once again be knocked to the side, so use Wingardium Leviosa on it to straighten it. The green wizard will then appear in the painting above the fireplace on the right. Zap it and the wizard will toss the firewood into the crate. Use Wingardium Leviosa on it to set the wood in the fires, then use Wingardium Leviosa on the bellows to launch a fireball at the book, stunning it. Walk up to it and press the "special" button to take another heart off.

Use Wingardium Leviosa on the painting on the left once more and the white witch will toss out a rubber duck. This will cause the chandelier to fall on the book, stunning it. Walk up to it and press the "special" button to take out its last heart.

Part 2 - King's Cross Station

We've got Hermione and Ron now, and we need to get on the train. Hermione now has her pet cat Crookshanks, who can crawl through pipes as well as dig up buried objects.

Head to the right and Malfoy will pull a chain, causing steam to block your path. Zap the bird cage and the owl will lift up the trunk, revealing a flower. Use Wingardium Leviosa to place it in the slot on the train, cutting off the steam.

Continue to the right, then zap the bush in the back right corner to reveal part of a speaker. Use Wingardium Leviosa to place it on the stand, waking up the students. Zap the trunk on the right to reveal LEGO pieces. Build the LEGO pieces into a bounce pad, then pick it up and carry it to the left. Place it on the green panel, then bounce on it to reach the top of the train.

Head to the left, then drop down on the other side of the rotating barrier. The barrier will then spin away, revealing LEGO pieces. Build them into a cauldron, in which you'll need to brew a strength potion.

Bone - Zap the cage in the near left corner.

Fang - Earlier, you built a speaker to wake up some sleeping students. Zap the trunk on the left to reveal the fang.

Flower - You'll find this on top of the train. You passed it on the way to the left side of the barrier.

Once the strength potion has been brewed, zap the black trunk on the left to reveal LEGO pieces. Build them into a chain, then drink the strength potion. Pull the chain to connect the train cars, then head inside.

Part 3 - Anything from the trolley, dears?

Head to the right and the trolley witch will head down the train car, stopping at the boy. Use Wingardium Leviosa on the lollipop to give it to him, then follow the trolley witch to the right. Use Wingardium Leviosa to give the girl the lollipop, then continue to the right. Use Wingardium Leviosa on the cart to reveal a key. Pick it up and place it in the lock to open the door. Head inside.

Part 4 - Dementors of Azkaban

Looks like the Dementors have kidnapped Harry. We need to get him back. Professor Lupin has joined your party, and he has access to the full range of spells. This is actually going to come in handy, as he knows the Patronus charm. It can be found in the white slot on the spell wheel. Cast the Patronus charm at Dementors to defeat them.

Head to the right and you'll find a patch of moonlight. Lupin doesn't seem to like this, so we'll need to find a way to block the window. Head back to the left and you'll see a room blocked by ice. Head into the room to the left of the ice, then zap the large trunk to open it. Use Wingardium Leviosa on the ice pick to break down the ice, opening the passenger compartment and revealing LEGO pieces. Build them into a cart, then use Wingardium Leviosa to place the trunks on it. Zap it to send it to the right, opening the door and blocking the moonlight. Head to the right and through the door.

Part 5 - Frozen Car

Head to the right and defeat the Dementors, then use Wingardium Leviosa to move the trunks away from the pipe. Send Scabbers or Crookshanks through, knocking down the trunk. This will wake up the student inside, opening the compartment. Zap the large trunk inside to reveal a key, then pick it up and carry it to the right. Place it in the slot, revealing an ice pick. Use Wingardium Leviosa on it to destroy the ice block on the right. Continue to the right.

Part 6 - Rescuing Harry

Head to the right and solve the puzzle on the rune cabinet to reveal LEGO pieces. Build them into a box, then use Wingardium Leviosa on it to place it on the purple panel, blocking the moonlight. Continue to the right and use Wingardium Leviosa on the ice pick to destroy the ice blocks, revealing a curtain. Use Wingardium Leviosa on it to place it on the purple slot, blocking the moonlight. Continue to the right and defeat the three Dementors to complete the level.
News From Azkaban - Free Play Mode
Required Spells: Dark Magic
Required Abilities: Dig

Part 2 – King’s Cross Station

Hufflepuff Crest
There are 5 red trunks for you to zap. The first is to the right of your starting point, by some sleeping wizards.


The next 3 can be found to the right of the train.


The last trunk is on the left side of the platform, hidden behind the large black trunk. Zap all 5 to reveal this Crest Piece.


Character Token (Stan Shunpike)
Use Dark Magic to destroy the red lock on the chest, then zap it to open it, revealing this.


Character Token (Ernie Prang)
Use Dark Magic to destroy the black cabinet on the right, revealing this.


Gryffindor Crest
While on top of the train, dig in the coal to reveal a trunk. Destroy it to reveal this Crest Piece.


Part 3 - Anything from the trolley, dears?

Student in Peril
Use Dark Magic to destroy the red lock on the left, opening the compartment and rescuing this student.


Character Token (Trolley Witch)
This can be found in the same room as the Student in Peril.


Part 5 – Frozen Car

Ravenclaw Crest
There are 5 large Slytherin trunks for you to zap. 3 are in this area and the other 2 are in Part 6. The first is right by your starting point.


The second is in front of the first group of passenger compartments.


The third is to the left of the frozen door.


Slytherin Crest
After using Wingardium Leviosa to clear the trunks from the pipe, stand on top of them and jump up to reach this hidden Crest Piece.


Part 6 – Rescuing Harry

Ravenclaw Crest cont.
The fourth chest is behind the large ice blocks.


The fifth chest is to the left of the Dementors. Zap all 5 chests to reveal this Crest Piece.
Interlude - Divination and Dementors
Characters: Harry Potter, Ron Weasley, Hermione Granger

Lesson Hallway: Head up the stairs to the left to reach the Defense Against the Dark Arts Classroom. Head inside.


Defense Against the Dark Arts Classroom 1: Harry has been locked out of the class by Malfoy, so it's just Ron and Hermione. Time to learn a new spell! Stand in front of the cabinets and you'll be confronted by a Boggart. Hit it with Riddikulus to defeat it. Defeat 3 Boggarts each with Ron and Hermione and you'll learn Riddikulus! Exit the classroom.

Lesson Hallway: Harry is back with us, so head down the stairs and head to the right. You'll find a Boggart nearby. Defeat it to reveal a key. Pick it up and place it in the lock on the right to open the door. Continue on.

Divination Courtyard: Head to the right and use Wingardium Leviosa to hang the planters. This will raise the vines, allowing you to head up the stairs to the Divination Classroom.


Divination Classroom: We need to place tea cups on each of the three trays. The first one can be found to the left of your starting point. Simply use Wingardium Leviosa to put it back on the tray.

Head to the near right corner of the area and you'll find a large stack of tea cups. Smash them to reveal a Rune Cabinet. Solve the puzzle to reveal LEGO pieces. Build them into the second tea cup, then head to the base of the stairs on the right.

You'll find a small brown cabinet. Zap it to reveal LEGO pieces, then build them into the third and final tea cup. Once all 3 tea cups are in their place, a cutscene will play.

Divination Courtyard: After the cutscene, you'll find yourself back in the Divination Courtyard. Head to the left and hop over the railing, then head through the opening.

Clock Tower Courtyard: Head down the path and through the door on the right.

Outer Corridor: Head to the right past the troll guarding the staircase, then continue into the courtyard.

Fountain Courtyard: Head to the right.

Covered Bridge: Head all the way to the right and head through the opening.

Hogwarts Grounds: Dementors are roaming around the grounds, and since you don't yet know how to defeat them, it's best to avoid them. Head down the path towards Hagrid's Garden.


Forbidden Forest: This is a unique section of Hogwarts, in that you can only access this area during this specific part of the story. Thankfully, there are no collectibles that you can collect here, so don't worry about missing anything.

We need to find three drumsticks for Buckbeak. Head to the back part of the area and you'll find a Pixie flying around. Use Wingardium Leviosa on the nearby tree, then place it on the purple slot. This will block any more Pixies from appearing. Defeat the Pixie, then zap the plants on the ground to make them fly away. This will reveal a dig spot, so dig it up to reveal some vines. Use Lumos to scare them away, revealing the first drumstick.

Pick it up and place it next to Buckbeak, then head into the dried-up lake on the right. You'll find the second drumstick hidden among the plants on the far right. Pick it up and place it next to Buckbeak, then head back into the lake.

Use Wingardium Leviosa on the large rock to reveal a dig spot. Dig up some pixies, who will then create a ladder. Climb up, then use Wingardium Leviosa on the lily pads to enlarge them. Hop onto the island, where you'll find the final drumstick. Pick it up and place it next to Buckbeak to complete the lesson.

Hogwarts Grounds: After the cutscene, head back to the left and onto the Covered Bridge.

Covered Bridge: Continue to the left.

Fountain Courtyard: Continue to the left.

Outer Corridor: Continue to the left. The troll is still standing guard, so continue to the left to reach the Clock Tower Courtyard.


Clock Tower Courtyard: After the cutscene, you'll be controlling Harry, Fred and George. Head back to the right.

Outer Corridor: The troll is gone, so head to the right and up the stairs.

Main Hallway: Head down the stairs and through the gate in the center.

Entrance Hall: Head up the stairs and to the left. You'll find your path blocked by a yellow curtain. Use Wingardium Leviosa to place the body parts on the suit of armor, raising up the curtain.

You'll need to send a pet through the pipe to knock down the helmet. If you haven't done this on your own before this point, you'll need to brew some Polyjuice Potion so you can switch to a character with a pet.

To find the ingredients, zap the two large banners by the stairs and use Wingardium Leviosa on the large blue object to the right of the Great Hall entrance. Once the suit of armor is repaired, the curtain will raise up, allowing you to continue. The statue will move aside, allowing you to head through the opening and start the next Story level.
Hogsmeade - Story Mode

Boss: Draco (Sweater)
Starting Characters: Harry (Grey Jacket), Fred (Sweater), George (Sweater)
Added Characters: Ron (Brown Jacket), Hermione (Red Hooded Top)
True Wizard: 50,000

Part 1 - Secret Passage

Drop down to the right, then use Lumos to scare away the vines. Continue to the right, then defeat the Pixie. This will lower the platform to the ground. Use Wingardium Leviosa on it to place it on the purple slot, then hop onto it. Use Wingardium Leviosa on the platform on the right, then place it on the other purple slot.

Hop across the platforms to reach the snowy platform in the center, then use Wingardium Leviosa to move the platforms over to the right, placing them on the purple slots. Hop across them to the right, then use Wingardium Leviosa on the weight. Place it on the purple slot to lower the bridge, allowing you to continue.

Continue to the right and you'll find some torches. Use Wingardium Leviosa on them to move them up and to the right, scaring away the vines. This will drop some platforms. Hop across them to the right, then defeat the Boggart. This will allow you to use Wingardium Leviosa on the drapes, raising them up.

This will reveal three objects, as well as three faces to the left. You need to use Wingardium Leviosa to place each object in front of the face with the corresponding sense (the face with the large nose = smell, etc.). Place the cake in the middle, the picture on the right, and the flowers on the left. This will raise up some stairs on the right. Continue to the right, then climb the ladder.

Part 2 - Honeydukes

Head to the left and you'll find the door blocked by a scale. Use Wingardium Leviosa on the purple jar on the right, then place it on the purple slot to raise the scale. Head outside.

Part 3 - Hogsmeade

Head up the street and Draco will enchant a snowman, causing him to throw a snowball at a wizard. The wizard will drop his torch in panic. Use Wingardium Leviosa on the torch, then move it around the snowbank to melt it. This will reveal some LEGO pieces. Build them into a fire, melting the snowman and allowing you to continue to the right.

Part 4 - Snowball Fight

Fred and George have been replaced by Ron and Hermione. Time to take on Draco in a snowball fight. Avoid the smaller snowballs he throws at you. Eventually, he will toss a large snowball at you. Use Wingardium Leviosa on it to send it back to him, damaging him. Repeat this process to take him down to one heart.

He will then build a snowball cannon. When he launches a snowball at you, use Wingardium Leviosa to stick it back in the cannon. Draco will then appear to growl at you. When he fires another snowball, use Wingardium Leviosa to send it back at him, damaging him. Repeat this process to take out the rest of his hearts.

Part 5 - The Three Broomsticks

There is a snowball blocking the way into the Three Broomsticks. To get rid of it, we need to find three brooms. The first one is right next to the snowball. Use Wingardium Leviosa on it to give it to one of the students trapped inside.

Head to the left and you'll find a dragon in a purple cage. Use Wingardium Leviosa to place it on the sled, melting the snowbank on the left and revealing a broom. Hop on, then ride it over to the snowball. You'll hop off once you get close, allowing you to use Wingardium Leviosa on the broom to give it to another student trapped inside.

The third broom is up in the air over the center courtyard, being ridden by a student. Zap the trees in the north part of the courtyard to fire them at the student, knocking him off. Use Wingardium Leviosa on the broom to give it to the final student trapped in the snowball. Once all of the students have brooms, the snowball will fly away. Head inside The Three Broomsticks to complete the level.
Hogsmeade - Free Play Mode
Required Spells: Dark Magic, Reducto, Wingardium Leviosa
Required Abilities: Dig, Super Strength

Part 1 – Secret Passage

Hufflepuff Crest
There are 10 cobwebs for you to zap. The first 2 are right above your starting point.


The third can be found on the wall after the vines.


The fourth can be found on the right side of the snowy platform. It’s easiest to hit this while standing on one of the platforms.


The fifth can be found on the right side of the bridge, down on the wall.


The sixth and seventh can be found after crossing the bridge.


The eighth can be found after crossing the wooden platforms.


The ninth and tenth are right by the exit. Zap all 10 to reveal this Crest Piece.


Character Token (Crabbe (Sweater))
Use Dark Magic to destroy the black sphere, revealing this.


Part 2 - Honeydukes

Character Token (Goyle (Sweater))
Use Reducto to destroy the silver lock on the right.


Use Wingardium Leviosa on the mannequin to reveal this.


Part 3 – Hogsmeade

Ravenclaw Crest
There are three owls for you to zap. The first is on the left side of the street, across from the snowbank.


The second is on the right side of the street, just before the snowbank.


The third is on the left side of the street, at the far end.


Zap all three owls to reveal some LEGO pieces on the right side of the street. Build them into a snowman, then zap it to reveal this Crest Piece.


Gryffindor Crest
Before heading to Part 4, head to the left and dig up the snow to reveal a snowball.


Hop on, then ride it to the bottom of the street.


Knock over the bowling pins to reveal this Crest Piece.


Part 5 – The Three Broomsticks

Student in Peril
Head down the path on the left side and you’ll find a snowman. Zap it to reveal this student, who was trapped inside.


Character Token (Draco (Sweater))
You'll find a wizard holding this Character Token in the bottom left corner.


Zap him and he'll disappear, reappearing in the bottom right corner.


Zap him again and he'll reappear to the right of The Three Broomsticks. Destroy the silver lock, then use Wingardium Leviosa on the basket to reveal a snake. This will scare off the wizard, who will leave this Character Token behind.


Slytherin Crest
After clearing the snowball from the entrance of The Three Broomsticks, it will roll down the street on the right. Pull the chain to blast it into the air, revealing this Crest Piece.
Interlude - I Solemnly Swear That I Am Up To No Good
Characters: Harry Potter, Ron Weasley, Hermione Granger

Main Hallway: Head through the door on the right.

Grand Staircase: Head up the stairs and to the right. Head through the door to the House Hallway.

House Hallway: Head to the right and talk to the portrait of the Fat Lady to open the way to the Gryffindor Common Room. Head inside to start the next Story level.
Mischief Managed - Story Mode

Starting Characters: Harry (Grey Jacket), Ron (Pyjamas)
True Wizard: 50,000

Part 1 - Castle Corridor

Peter Pettigrew has appeared on the Marauder's Map, and Harry and Ron are trying to find him. We need to open the door in front of us, for which we'll need two keys. The statue on the left is holding a torch. Use Wingardium Leviosa on it to scare away the vines on the ceiling, revealing one key. Use Wingardium Leviosa to place it in the red slot.

Zap the cabinet on the right to reveal LEGO pieces. Build them into a suit of armor holding a chest. Zap the suit of armor and it will drop the chest, revealing a key. Use Wingardium Leviosa to place it in the yellow slot. Once both keys are in the slots, use Wingardium Leviosa on one of them to turn it. Your partner will use Wingardium Leviosa on the other key, opening the door.

Head down the hallway and you'll eventually reach a large room. Defeat the Boggart on the right, then zap the cabinet to reveal LEGO pieces. Build them into a cauldron. We need to brew a strength potion.

Bone - Use Wingardium Leviosa to stack the small colored blocks in the center of the area in the correct order (green, red, blue). This will reveal a secret compartment in the floor, where you'll find a skeleton. Zap it to reveal the bone.

Fang - Zap the chest in the back right corner to reveal a plant monster. Defeat the Pixie holding the hammer, then use Wingardium Leviosa on it to raise it above the monster's head. This will defeat it, revealing the fang.

Flower - Zap the rolled-up banner in the back left corner.

Once you brew the strength potion, drink it, then pull the chain in the center of the room to reveal a rock. Use Wingardium Leviosa to place it on the pillar, opening the door in front of you. Continue down the path.

Part 2 - Outer Courtyard

Head to the right and use Lumos to scare away the vines, revealing a cauldron. Time to brew a new potion: the Invisibility Potion. This potion grants you invisibility, but without the movement restrictions of the invisibility cloak.

Cherry - Use Wingardium Leviosa on the shovel to the right of the cauldron to reveal a plant. Zap it to reveal the cherry.

Drumstick - Zap the statues around the fountain to reveal LEGO pieces. Build them into a valve, then use Wingardium Leviosa to turn it. This will turn on the fountain, revealing some leaves. Hop up the leaves to reach the ledge, then head to the right. Filch and Mrs. Norris are patrolling the area, so watch out for them. If Filch gets hold of you, switch to your partner and zap Mrs. Norris to scare Filch off. You'll find the drumstick in an open window to the right.

Spider - Defeat the Boggart on the left, then use the Parseltongue panel to reveal some LEGO pieces. Build them into a platform, allowing you to hop down to the spider. Zap the cobweb to knock it off.

Once the potion is complete, have both characters drink it, then hop back to the upper ledge. Head to the right and use Wingardium Leviosa on one of the statues. Your partner will use Wingardium Leviosa on the other statue, opening the gate. Head inside.

Part 3 - Close Call

Head down the hallway and you'll find the door at the end locked. The wizard in the nearby painting has the key we need, but he's too scared to give it to us. Zap the two chests in the hall to reveal LEGO pieces. Build them into a violin, then use Wingardium Leviosa on it to put the wizard to sleep. Grab the key and place it in the slot to open the door, then head down the hall to complete the level.
Mischief Managed - Free Play Mode
Required Spells: Dark Magic, Reducto, Wingardium Leviosa
Required Abilities: House Access (Slytherin), Scholar

Part 1 – Castle Corridor

Ravenclaw Crest
There are 5 suits of armor for you to zap. The first is right by your starting point.


The second is on the left side of the hallway.


The third is on the right side of the hallway, in a corner.


The fourth is in the back left corner of the large room.


The fifth is in the back right corner of the large room. Destroy all 5 to reveal this Crest Piece.


Character Token (George (Sweater))
Solve the puzzle on the Rune Cabinet on the left side of the large room to reveal LEGO pieces.


Build them into a table, then stand on it. Your partner will raise you up to this Character Token.


Hufflepuff Crest
After placing the brown rock on the left pillar, the black rock on the right pillar will fall off. Use Dark Magic to open it, revealing this Crest Piece.


Part 2 – Outer Courtyard

Student in Peril
Destroy the silver lock on the left side of the upper ledge, opening the shutters and rescuing this student.


Character Token (The Grey Lady)
This is on the left side of the room with the Student in Peril.


Gryffindor Crest
Use Dark Magic to destroy the black boards on the upper ledge, opening the shutters and revealing this Crest Piece.


Character Token (Fred (Sweater))
This is hiding behind the table with the drumstick.


Part 3 - Close Call

Slytherin Crest
Speak to the painting holding this Crest Piece as a Slytherin to receive it.
Interlude - Expecto Patronum!
Characters: Harry Potter, Ron Weasley, Hermione Granger

Gryffindor Common Room: We're back in the common room, so head to the right and out into the hallway.

House Hallway: Head to the left and down the stairs.

Grand Staircase: Head down the stairs and through the door on the left.

Main Hallway: Follow Nick to the left and through the door.

Lesson Hallway: Head to the right and up the stairs, then head all the way to the left to find Professor Lupin. Follow him inside.


Defense Against the Dark Arts Classroom 2: Time to learn a new spell! Harry can now use Expecto Patronum, and we need to use it to defeat five Dementors. You can also play as Professor Lupin if you want, but it needs to be Harry who defeats the Dementors.

The first two can be found in the chests on the ground. Zap them to open them, then use Expecto Patronum to defeat the Dementors. The third chest can be found on the left being held up by a Pixie. Defeat it, causing it to drop the chest. The fourth chest can be found on the right side of the room, being held by some vines. Use Lumos to scare them away.

To find the final chest, zap the brown cabinet on the right to reveal LEGO pieces. Build them into a projector, then zap it to reveal an orange projection. Zap it to reveal the chest. Once all five Dementors have been defeated, the lesson will be complete. Exit the classroom.

Lesson Hallway: You've got Ron and Hermione back now, so head back down the stairs and to the left.

Main Hallway: Head up the stairs and through the opening at the top.

Outer Corridor: Head to the right.

Fountain Courtyard: Head to the right.

Covered Bridge: Head all the way to the right.

Hogwarts Grounds: Follow Nick down to Hagrid's Hut. Head inside to start the next Story level.
The Shrieking Shack - Story Mode

Enemies: Spiders
Boss: The Whomping Willow
Starting Characters: Harry (Grey Jacket), Hermione (Red Hooded Top)
Added Characters: Professor Lupin, Sirius Black
True Wizard: 22,000

Part 1 - The Whomping Willow

The Whomping Willow may look intimidating, but it's actually a fairly simple fight. Avoid the branches until you see one that looks like a fist. Hop inside it and the Whomping Willow will pick you up. While in the air, furiously spam the "attack" button and you'll hit one of the yellow bulbs on top of it. This will cause one of the vines blocking the entrance to shrink away. Repeat this process two more times to remove all of the vines in front of the entrance, allowing you to head inside.

Part 2 - Secret Passageway

Head to the right and use Lumos to startle the vines, creating a bridge. Continue to the right, then drop down. You'll see a red flower on the left. Look to the right and you'll see a brown vine. Zap it to move it out of the way of a green seed. Zap the brown vine again and the seed will land next to the flower. Zap the flower to water the seed, revealing platforms.

Hop up them, then continue to the right. You'll see some moving cobwebs. Stand on the first one, then ride it up. Hop onto the ledge on the left, then use Wingardium Leviosa on the anvil to remove one of the vines from the entrance to the Shrieking Shack. Continue to the right across the cobwebs, then drop down to the bottom level. Head to the right and use Wingardium Leviosa on the anvil to remove another vine from the entrance to the Shrieking Shack.

Hop on the cobweb on the left, then ride it up. Hop onto the upper right ledge, then continue to the right. Zap the purple balls above you to knock them to the ground, then use Wingardium Leviosa to place them in the slots. This will raise up the wooden platform on the right. Ride it up, then hop to the left. Use Wingardium Leviosa on the anvil to remove the final vine from the entrance of the Shrieking Shack. Hop across the gap to the right, then head inside.

Part 3 - The Truth Revealed

You are now in control of Lupin and Sirius Black. We need to capture Scabbers. Follow him around the room and zap the objects that he hides in to gradually reveal LEGO pieces. When Scabbers is hiding in an object, it will be shaking quite noticeably. Once you've revealed all of the LEGO pieces, build them into a mousetrap.

Part 4 - Lupin's Secret

We need to get to Sirius and Lupin. Ron's out for the time being, so it's just Harry and Hermione. Head to the right and use Lumos to scare away the vines. Build the LEGO pieces into a boulder, then zap it to reveal some LEGO blocks. Use Wingardium Leviosa to stack them on the purple base, then hop up them and onto the ledge.

Continue to the right and you'll find Lupin and Sirius up on the ledge. We need to brew a strength potion. Dig up the dig spot to reveal the cauldron.

Bone - Zap the cobweb to the left of the cauldron to reveal LEGO pieces, then build them into a skeleton.

Fang - Zap the snake bones along the back wall.

Flower - Destroy the rock to the left of the cauldron, then use Wingardium Leviosa on the green seed.

Once the potion is complete, drink it and head to the left. Pull the chain to raise up the platforms, then hop up and dig up the dig spot to reveal pixies. They will create a ladder on the right. Head to the right and climb up the ladder, then continue along the path. Build the LEGO pieces into a mushroom, then use it to bounce onto the ledge, completing the level.
The Shrieking Shack - Free Play Mode
Required Spells: Dark Magic, Reducto
Required Abilities: Dig, Mandrake Handling

Part 1 - The Whomping Willow

Gryffindor Crest
Dig up the dig spot on the left to reveal a black chest.


Use Dark Magic on it to destroy it, revealing this Crest Piece.


Character Token (Witch (Grey))
Dig up the dig spot on the right to reveal a black chest.


Use Dark Magic on it to destroy it, revealing this.


Part 2 – Secret Passageway

Hufflepuff Crest
There are 5 yellow plants for you to destroy. The first is right by your starting point.


The second is to the right of the red flower.


The third is to the left of the cobweb platforms.


The fourth is by the light-green root.


The fifth is right by the entrance to the Shrieking Shack. Zap all 5 to reveal this Crest Piece.


Part 3 - The Truth Revealed

Character Token (Peter Pettigrew)
Use Dark Magic to destroy the black cabinet on the left, revealing this.


Part 4 – Lupin’s Secret

Ravenclaw Crest
Dig up the dig spot by your starting point to reveal a glass box.


After hopping up the platforms, destroy the silver lock on the cupboard, allowing you to grab earmuffs.


Head to the left to find a Mandrake.


Grab the Mandrake and carry it to the left, shattering the glass and revealing this Crest Piece.


Character Token (Hermione (Red Hooded Top))
Destroy the silver lock on the chest, then zap it to open it, revealing this.


Slytherin Crest
There are 5 rocks you need to destroy with Dark Magic. The first is by the Mandrake.


The second is by the chain.


The third is by the cauldron.


The fourth and fifth are right before the exit. Destroy all 5 to reveal this Crest Piece.


Student in Peril
You’ll find this poor student trapped in a cobweb to the right of the exit. Zap the web to rescue him.
Interlude - Hermione's Secret
Characters: Ron Weasley, Hermione Granger

Clock Tower Courtyard: Harry's recovering in the hospital wing, so let's stop by and say hello! Head to the left and enter the hospital wing to start the next Story level.
Dementor's Kiss - Story Mode

Enemies: Wasps
Starting Characters: Harry (Grey Jacket), Hermione (Red Hooded Top)
True Wizard: 60,000

Part 1 - Rescuing Buckbeak

Time to save Buckbeak! Head to the left and grab earmuffs from the cupboard, then head to the right. You'll notice a pot for the Mandrake. However, there is a plant inside. Zap the plant so it goes away, then grab the Mandrake and place it in the pot.

The plant has now moved into some leaves to the right of Buckbeak. Zap the plant and it will knock over the barrel on the left, revealing a fish. Use Wingardium Leviosa on it to raise it up, exciting Buckbeak.

This will reveal some LEGO pieces on the right. Build them into a fire, then use Wingardium Leviosa on the drumstick. This will excite Buckbeak some more, revealing an axe. Use Wingardium Leviosa on it to cut the chains.

Part 2 - Werewolves of London

We need to amplify Hermione's voice so that Lupin can hear her. Head to the right and you'll find a dried up lake. Defeat the Pixies holding up the discs, then build them into a cloud, filling the lake up with water.

Hop on the lily pad on the left to reach the upper ledge, then head to the left. Use Lumos to scare away the vines, knocking down the record player. Drop down and build the LEGO pieces to repair the record player, then return to the upper ledge.

Use Wingardium Leviosa to place the branch on the tree, then zap the hook to reveal a chest. Zap the chest to reveal a golden record. Pick it up and place it in the record player.

Part 3 - The Dementor's Kiss

We need to break that ice block in the center of the lake. To do so, head to the left and hop up the ledges. Head to the right and zap the red leaves in the tree to knock them down. Use Wingardium Leviosa on the fallen leaves to create a bridge.

Walk across it and continue to the right, then use Lumos to scare away the vines. This will send the boulder crashing through the ice block in the lake, revealing three Dementors. Defeat them to reveal three more. Defeat all six Dementors to end the level.
Dementor's Kiss - Free Play Mode
Required Spells: Dark Magic, Reducto, Wingardium Leviosa
Required Abilities: Dig, Parseltongue

Part 1 - Rescuing Buckbeak

Ravenclaw Crest
Destroy the silver birdcage on the left to release the bird, revealing this Crest Piece near Buckbeak.


Part 2 – Werewolves of London

Student in Peril
Head to the left from your starting point and you’ll find this student trapped by wasps. Defeat them to rescue her.


Gryffindor Crest
Once you repair the record player, you need to play 2 skeleton records on it. The first can be found lying out in the open to the left of the record player.


The second can be found after filling the lake up with water. There is a dig spot where the frogs used to be. Dig it up to reveal the second record.


Before picking it up, use Wingardium Leviosa on the plant to create platforms, allowing you to hop out of the hole. Place both records in the record player to receive this Crest Piece.


Slytherin Crest
After filling the lake with water, hop on the frog and ride it through each of the plants in the lake to reveal this Crest Piece.


Character Token (Professor Lupin)
Destroy the bushes on the right side of the upper ledge to reveal a chest.


Destroy the silver lock, then zap the chest to open it, revealing this.


Part 3 - The Dementor's Kiss

Character Token (Cornelius Fudge)
Destroy the silver rubble on the right side of the area to reveal a Parseltongue Panel.


Use it to reveal this Character Token.


Hufflepuff Crest
After destroying the ice block in the lake, head to the right to find some LEGO pieces.


Build them into platforms, then hop up them. Zap the leaves on the left to knock them down, creating a platform.


Stand on it and your partner will raise you up. Hop onto the ledge, then use Dark Magic to destroy the black rock in the middle, revealing this Crest Piece.


Character Token (Macnair)
After collecting the Hufflepuff Crest, use Dark Magic to destroy the black rock on the right, revealing this.
Interlude - To the Top of the Tower
Characters: Harry Potter, Hermione Granger

Grassy Courtyard: Simply walk up to Buckbeak and hop on to start the final Story level.
The Dark Tower - Story Mode

Enemies: Dementors
Boss: Head Dementor
Starting Characters: Harry (Grey Jacket), Hermione (Red Hooded Top)
True Wizard: 75,000

Part 1 - Castle Rooftops

Head to the right and you'll find a gold chest. Zap it to reveal an ice pick, then use Wingardium Leviosa on it to chip away the ice. Use Lumos to scare away the vines, allowing you to continue on. Continue down the path, then use Wingardium Leviosa on the barrel in the fountain. This will grow two large flowers. Zap them to start spinning them, then ride the air currents up onto the ledge.

Zap the statue holding the torch and it will sneeze, melting part of the ice over the door. Zap the large chest on the right to reveal LEGO pieces. Build them into a statue, then zap it to melt the rest of the ice, opening the door. Head inside.

Part 2 - Split Path

There are two paths across the gap, and you'll need one character to take each path. Head down the path on the right and use Wingardium Leviosa on the platform. Place it on the slot on the left, then switch to your partner. Hop across it, then use Wingardium Leviosa on the torch. Move it to the right to scare away the vines, then switch to your partner.

Hop across the platforms, then use Wingardium Leviosa to place the platform on the slot on the left. Switch to your partner and hop across, then use Wingardium Leviosa on the boards to create a bridge. Switch to your partner and walk across, then use Wingardium Leviosa on the boards in front of the door to create a bridge for your partner. Head back outside.

Part 3 - Tower Approach

Head to the right and you'll find a statue holding a cauldron. Use Wingardium Leviosa on it to lower it to the ground. We need to brew a strength potion.

Bone - Head to the near left corner and you'll find a ladder. Climb down it, then head to the right on the ledge. Use Wingardium Leviosa on the purple statue, them place it on the purple bar. This will break the glass. Hop inside the alcove, then solve the puzzle on the Rune Cabinet to reveal the bone.

Fang - Head over to the red flowerpot in the back of the area, then zap it to reveal a plant monster. Zap it to reveal the fang.

Flower - head to the tree in the back. Use Wingardium Leviosa on the barrel next to it to reveal an axe. Use Wingardium Leviosa on it, then move it to the purple spot on the tree branch to chop it down, revealing the flower.

Brew the potion, then drink it. Pull the chain to raise up a bridge. Cross it, then continue up the stairs.

Part 4 - Dementor Showdown

Before we can free Sirius, we have to defeat one last Dementor. Use Wingardium Leviosa on the barrels to reveal objects. Defeat the Dementors chasing after you and the Head Dementor will inhale. The objects will hit him, stunning him. Hit him with Expecto Patronum to damage him.

Repeat this process to take him down to one heart. He will then freeze the entire area, including you. Spam the "jump" button to free yourself, then zap the statues on each side of the area to melt the ice around the barrels. Use Wingardium Leviosa on them, then defeat the Dementors chasing you. The Head Dementor will then inhale. Hit him with Expecto Patronum when he's stunned to complete the level.
The Dark Tower - Free Play Mode
Required Spells: Dark Magic, Expecto Patronum, Reducto, Wingardium Leviosa
Required Abilities: Goblin Key

Part 1 – Castle Rooftops

Ravenclaw Crest
There are 5 lanterns for you to zap. The first is right by your starting point.


The second is by the ice wall. Use Wingardium Leviosa on it to melt the ice around it, allowing you to zap it.


The third is after the ice wall. Use Wingardium Leviosa on it to melt the ice around it, allowing you to zap it.


The fourth is to the left of the fountain. Use Wingardium Leviosa on it to melt the ice around it, allowing you to zap it.


The fifth is right by the exit. Use Wingardium Leviosa on it to melt the ice around it, allowing you to zap it. Zap all 5 to reveal this Crest Piece.


Character Token (James Potter (Ghost))
Destroy the silver lock to open the door, then head inside to collect this Character Token.


Student in Peril
After collecting the James Potter (Ghost) Character Token, defeat the Dementor to rescue this student.


Part 2 - Split Path

Character Token (Lily Potter (Ghost))
Destroy the silver lock on the chest, then zap it to open it, revealing this.


Slytherin Crest
Open the safe at the end to reveal this Crest Piece.


Part 3 – Tower Approach

Hufflepuff Crest
There are 6 silver bird statues for you to destroy. The first is above the entrance to this area.


The second and third are above the ledge with the room with Professor Trelawney inside.


The fourth can be found in the background while crossing the bridge.


The fifth can be found in the foreground while crossing the bridge.


The sixth can be found right before the stairs. Destroy all 6 to reveal this Crest Piece.


Gryffindor Crest
This is in the near right corner of the alcove with Professor Trelawney.


Character Token (Sirius Black)
Use Dark Magic to destroy the black cabinet in the room with Professor Trelawny, revealing this.
-------Year 4 - The Goblet of Fire-------
The Quidditch World Cup - Story Mode

Enemies: Death Eater, Book, Snake
Starting Characters: Hermione (Red Hooded Top), Ginny (Hooded Top)
Added Characters: Ron (Brown Jacket), George (Sweater), Arthur Weasley, Fred (Sweater)
True Wizard: 90,000

Part 1 - Death Eater Attack

Looks like it's up to Hermione and Ginny to rescue the guys. Before we can rescue Harry, we'll have to rescue the rest of the Weasleys. Death Eaters may appear occasionally to harass you. Just zap them and they'll disappear.

Ron - Head up the path from your starting point, then head right to find poor Ron trapped beneath a table. There is a Death Eater nearby levitating a large hammer. Zap him and he'll apparate somewhere nearby. Keep zapping him until he disappears, then use Wingardium Leviosa on the table to raise it up, freeing Ron and adding him to your party.

George - Head south after rescuing Ron and you'll run into George. A bunch of fireworks are flying around his head. Zap them and he'll be free, adding him to your party.

Mr. Weasley - After rescuing George, continue to the right and you'll find Mr. Weasley being stunned by a Death Eater. If you zap the Death Eater, he'll just reappear, so use Wingardium Leviosa on the large pan nearby to knock him out, adding Arthur Weasley to your party.

Fred - Now we need to get to Fred. If you try to head to the left, you'll be attacked by the book. To take it out, we'll need to brew the Invisibility Potion.

Cherry - Dig up the nearby dig spot to reveal a plant, then zap it to reveal the cherry.

Drumstick - The drumstick can be found roasting on the nearby grill.

Spider - Zap the cobwebs on the right to reveal the spider.

Once the potion has been brewed, drink it and approach the book. Press the "tag" button when prompted to hop on, defeating it. Use Wingardium Leviosa on the cart to move it aside, then continue to the left. Use Wingardium Leviosa on the tent to free Fred, adding him to your party.

Part 2 - Camp Ruins

Time to find Harry. You're in control of Ginny, Hermione and Ron. Head to the right and zap the black-and-white banner to reveal LEGO pieces. Build them into a bounce pad, then use it to bounce to the right over the fire. Zap the box underneath the barrel on the right to put out the fires, allowing your partners to join you.

Continue to the right and you'll find a broken cart. We need to find the missing wheel. Use Wingardium Leviosa on the large box on the left to open it. Your partner will also use Wingardium Leviosa, revealing a barrel. Use Wingardium Leviosa on it to put out the fires, revealing a dig spot. Dig up a wheel, then pick it up and place it on the cart on the right. Use Wingardium Leviosa on the cart to clear the path.

Continue to the right and you'll find an overturned cauldron. Use Wingardium Leviosa on it to put it right side up. We need to brew a strength potion to clear the way to Harry.

Bone - Head back to the left and you'll find an orange chest. Zap it to reveal an axe, then use Wingardium Leviosa on it to clear the path. Head down the path and zap the objects around the large barrel to reveal the bone.

Fang - Defeat the nearby Pixie to reveal a green valve. Pick it up and place it on the barrel on the right, filling the barrel with water. Use Wingardium Leviosa on it to put out the fires, revealing the fang.

Flower - Continue down the path past the fang, then destroy the debris on the left to reveal the flower.

Brew the potion, then drink it. Pull the chain to open the gate to Harry. Continue to the right.

Part 3 - Death Eater Showdown

Time to face off against some Death Eaters. Defeating them is as simple as zapping them. Defeat the three waves of Death Eaters and snakes to complete the level.
The Quidditch World Cup - Free Play Mode
Required Spells: Dark Magic, Reducto, Wingardium Leviosa
Required Abilities: Dig, House Access (Ravenclaw)

Part 1 – Death Eater Attack

Gryffindor Crest
There are 8 barrels that you need to use Wigardium Leviosa on to put out fires. The first is to the right of your starting point.


The second is on the left side of the path to the north of your starting point.


The third can be found to the right of George.


The fourth is on the far right side of the area, by the cauldron.


The fifth is to the right of Arthur Weasley.


The sixth is on the right side of the upper path.


The seventh is towards the center of the upper path, slightly to the left of the previous barrel.


The eighth is right by where Fred Weasley is being held. Extinguish all 8 fires to reveal this Crest Piece.


Student in Peril
There is an outhouse just to the right of your starting point. Use Reducto to destroy the silver lock on the door, allowing this student to escape.


Slytherin Crest
Use Dark Magic on a tent in the back right corner to open it, revealing this.


Character Token (Death Eater)
Use Dark Magic to destroy the black sphere on the right side of the lower path, revealing this.


Part 2 – Camp Ruins

Hufflepuff Crest
There are 5 wizards who need your help. The first can be found by the first fires you put out. Use Wingardium Leviosa on the barrel to put out the fires in front of him.


The second wizard can be found to the south of the cart you need to repair. Destroy the debris trapping him.


The third wizard can be found to the left of the location of the bone. Use Wingardium Leviosa on the barrel to put out the fires in front of him.


The fourth wizard can be found south of the previous wizard. Destroy the debris trapping him.


The fifth wizard is by the location of the flower. Use Wingardium Leviosa on the barrel to put out the fires in front of him. Rescue all 5 wizards to reveal this Crest Piece.


Character Token (Ginny (Hooded Top))
After putting out the fires with the barrel, head south and destroy the brown rubble to reveal this Character Token.


Ravenclaw Crest
After passing past the area with the cart, head towards the screen to find some silver boxes.


Destroy them to reveal a dig spot.


Dig up a painting, then speak to it as a Ravenclaw to receive this Crest Piece.


Character Token (Barty Crouch Junior)
Destroy the silver lock on the chest to the left of the flower, then zap it to open it, revealing this Character Token.
Interlude - Did You Put Your Name In The Goblet of Fire?!?!
Characters: Harry Potter, Ron Weasley, Hermione Granger

Entrance Hall: With the start of the Triwizard Tournament, Hogwarts is now full of students from Beauxbatons and Durmstrang. Head down the stairs and through the opening.

Main Hallway: Head to the left and through the door.

Lesson Hallway: Head to the right and into the Potions Classroom.


Potions Classroom: Time to help Fred and George make an aging potion!

Banana - The banana can be found in the fish tank on one of the desks. However, if you use Wingardium Leviosa on it, the fish will pull it back in the water. Use Wingardium Leviosa on the books in the nearby pipe to clear the way, then send Crookshanks inside. Head through the path on the right, then push the weight to open the birdcage. The bird will land near the fish tank. Zap the bird to turn it into drumsticks, then use Wingardium Leviosa to lift them over the fish tank. The fish will grab on to them, allowing you to use Wingardium Leviosa on the banana and grab it.

Leaf - Zap the lock on the chest in the near right corner to destroy it, then zap the chest to reveal a large button. Pick it up and place it in the slot on the left. Step on the buttons a few times when they're raised up to fill the central tank with water, revealing the leaf.

Snake - Head to the near left corner and use Wingardium Leviosa on the gargoyle to reveal a Rune Cabinet. Solve the puzzle on it to reveal LEGO pieces. Build them into a bunch of lab equipment. You need to make the three secondary colors in the order they appear in the book. Use Wingardium Leviosa on the appropriate primary colors to make the secondary colors. Make purple (red and blue), then zap the bubble that appears. Make green (yellow and blue) and orange (red and yellow) to reveal the snake.

Complete the potion to trigger a cutscene.


Lesson Hallway: After the cutscene, follow Nick back to the left and through the door.

Main Hallway: Head back to the right and through the door in the center.

Entrance Hall: Follow Nick up the stairs and into the Great Hall.


Entrance Hall: Looks like Harry has been entered into the Triwizard Tournament! Head back down the stairs and through the opening.

Main Hallway: Head up the stairs and through the opening on the right.

Outer Corridor: Follow Nick to the right.

Fountain Courtyard: Head to the right.

Covered Bridge: Continue to the right.

Hogwarts Grounds: Follow Nick into Hagrid's Hut to start the next Story level.
Dragons - Story Mode

Starting Characters: Harry (Blue Jacket), Hagrid, Fang
True Wizard: 52,000

Part 1 - Dragon Paddocks

Head to the right and you'll find your first dragon. It won't let you pass to the right, so we need to distract it. Use Wingardium Leviosa on the purple egg on the left, then place it in the purple slot high up on the left. It will then fall through the pipe inside the room. Zap the lock to destroy it, allowing you to head inside the cage. Use Wingardium Leviosa to guide the egg through the pipe, placing it in the nest inside the dragon's cage. This will distract the dragon, allowing you to continue to the right.

Do so, then defeat the three Pixies to reveal LEGO pieces. Build them into a chain, then pull it to lower the platform. Continue down the path, watching out for the fire. Use Lumos to scare away the vines, then destroy the plant, revealing LEGO pieces. Build them into a mushroom, then bounce on it to reach the upper ledge. Build the LEGO pieces into a chain, then pull it to lower the platform.

Continue to the right, then use Wingardium Leviosa on the object in the dragon's paddock, creating a xylophone. Use Wingardium Leviosa on the mallet, copying the colored patterns that the dragon sings. Copy three patterns and the dragon will go to sleep.

Continue to the right and you'll find some platforms. Carefully hop across them, avoiding the dragon fire. Once you're across the platforms, head to the left. You'll find a large fish tank. Use Wingardium Leviosa on the basket, then dunk it in the water. Move it over the fires to put them out (you'll have to do this a few times to put out all of the fires). This will reveal LEGO pieces. Build them into a ramp, then walk up it onto the boardwalk.

Continue to the left to reach the third dragon. You'll notice that it constantly shoots fireballs at the purple ring. Use Wingardium Leviosa on the ring, then maneuver it so that it is behind each of the purple hooks. The dragon will hit them with fireballs, destroying them. Once all three hooks are destroyed, the door on the right will open and a bridge will appear.

Continue to the right and you'll find some LEGO blocks. Use Wingardium Leviosa on them to place them on the purple bases, creating a bridge so you can cross. Continue to the right, then head down the boardwalk. Continue to the right.

Part 2 - Dragon Tamer

Head to the right and use Wingardium Leviosa on one of the chains. Your partner will do so on the other one. The Dragon Tamer on the right will do so as well, opening the gate on the right. Continue to the right and up the stairs.

Part 3 - Hungarian Horntail

Head to the right and dig up the dig spot to reveal a hole in the ground. Hagrid and Fang will drop down inside. Have Harry sneak to the right using the Invisibility Cloak, then switch to Hagrid. Pull the chain to raise the cage by Harry, then switch to him and continue to the right. Use Lumos to scare away the vines, then zap the plant to clear the way for Hagrid on the bottom path.

Use Wingardium Leviosa on the pillar to raise it up, allowing Hagrid and Fang to continue to the right. Hagrid will then use Wingardium Leviosa on a mushroom, allowing you to head to the right through the tree. Once Harry is through, switch back to Hagrid and head to the right through the tree. Dig up the dig spot to reveal a chain, then use Wingardium Leviosa on it to raise it up. Switch to Harry and zap the circular clasp to complete the level.
Dragons - Free Play Mode
Required Spells: Dark Magic, Reducto, Wingardium Leviosa
Required Abilities: Goblin Key

Part 1 – Dragon Paddocks

Gryffindor Crest
There are 9 lanterns for you to zap. The first is right by your starting point.


The second is right after the first dragon.


The third can be found after passing through the fire.


The fourth is after the second dragon.


The fifth can be found on the right side of the path after crossing the platforms with dragon fire.


The sixth is to the right of the large fish tank.


The seventh is to the left of the third dragon.


The eighth is to the left of the LEGO blocks.


The ninth is at the end of the boardwalk. Zap all 9 lanterns to reveal this Crest Piece.


Hufflepuff Crest
After putting the second dragon to sleep, use Wingardium Leviosa on the xylophone mallet. Tap the yellow note five times to reveal this Crest Piece.


Character Token (Durmstrang Student)
After passing through the fire for the second time, use Dark Magic to destroy the black cabinet on the right, revealing this.


Ravenclaw Crest
After passing the third dragon, use Dark Magic on the chain to the right of the enclosure to reveal LEGO pieces.


Build them into a skeleton, who will fish up this Crest Piece.


Character Token (Cedric (Sweater))
After crossing the LEGO blocks, open the safe at the base of the ramp to receive this Character Token.


Slytherin Crest
Destroy the two silver locks on the box right before the exit.


Use Wingardium Leviosa on the box to reveal LEGO pieces.


Build them into a dragon, who will break down the barrier, allowing you to collect this Crest Piece.


Part 2 - Dragon Tamer

Character Token (Dragon Handler)
Destroy the silver lock on the chest by your starting point, then zap it to open it, revealing this.


Student in Peril
Open the safe on the right side of the area to rescue this student.
Interlude - Mad-Eye Moody
Characters: Harry Potter, Ron Weasley, Hermione Granger

Gryffindor Dorm: Exit the dorm to the right.

Gryffindor Common Room: Head to the right and exit the room.

House Hallway: Head to the left and down the stairs.

Grand Staircase: Head to the left and down the stairs.

Main Hallway: Continue following Nick to the left.

Lesson Hallway: Head to the right and up the stairs. Head to the left and into the classroom.


Defense Against the Dark Arts Classroom 2: You now have Reducto, the final spell you will learn in this game, and you need to use it to rescue some students that Ron trapped. All five of them are laying on the floor, so destroy the silver objects on top of them to rescue them. Once all of the students have been rescued, the lesson will end. Exit the classroom.

Lesson Hallway: Head back down the stairs and to the left. Head through the door.

Main Hallway: Head up the stairs and out the door on the right.

Outer Corridor: Continue to the right.

Fountain Courtyard: Continue to the right.

Covered Bridge: Continue following Nick to the right.

Hogwarts Grounds: Follow Nick down to the tent, then head inside to start the next Story level.
The First Task - Story Mode

Starting Characters: Harry (Dragon Task), Hermione (Blue Top)
True Wizard: 60,000

Part 1 - The Hungarian Horntail

Head to the right and the dragon will start shooting fireballs at you. Stand behind each of the large rocks and the dragon will destroy them, revealing LEGO pieces. Once all of the rocks have been destroyed, zap the small brown rocks on the right to reveal the last of the LEGO pieces. Build them into a dog, causing the dragon to destroy the large rocks.

Continue to the right, then use Wingardium Leviosa to place the large rock in the slot. This will reveal LEGO pieces. Build them into a cauldron. We need to brew a strength potion.

Bone - Build the LEGO pieces on the right into a skeleton.

Fang - Zap the snake bones on the left.

Flower - Use Lumos to scare away the vines to the left.

Brew the potion, then drink it. Stand on the rock platform, then ride it up. Hop onto the ledge, then pull the chain to reveal a platform above you. Hop up onto the ledge, then use Wingardium Leviosa to place the rock platform in the slot on the right. Hop across the platforms to the right. The dragon will then come back down, breathing fire onto the platforms. Time your jumps across the platforms (avoiding the fire of course), then use Wingardium Leviosa on the barrel to put out the fires, allowing you to continue.

Continue up the path, then destroy the green rock to reveal LEGO pieces. Build them into a green block, then dig up the dig spot to reveal a blue block. Defeat the Pixie on the left to reveal a red block. Stack the LEGO blocks on the purple bases, then hop up them to reach the egg.

Part 2 - RUN!

Gather your nerves, then head to the right. The dragon will start pursuing you, so keep running down the path. I suggest spamming the attack button to clear obstacles in your way. Reach the end to complete the level.
The First Task - Free Play Mode
Required Spells: Dark Magic, Wingardium Leviosa

Part 1 – The Hungarian Horntail

Character Token (Cedric (Dragon Task))
Use Wingardium Leviosa on the barrel to the right of your starting point to put out the fire, revealing this.


Slytherin Crest
At various points, black rocks will be tossed in front of you. You need to use Dark Magic to destroy them. The first can be found while standing around the large rocks.


The second appears in the area where you brew the strength potion.


The third appears while approaching the ledge with the egg. Destroy all 3 to reveal this Crest Piece.


Hufflepuff Crest
After the dragon destroys the large brown rocks, black rocks will be left behind. Use Dark Magic to destroy the 3 of them, revealing this Crest Piece.


Character Token (Harry (Dragon Task))
Use Dark Magic to destroy the black sphere, revealing this Character Token.


Gryffindor Crest
While stacking the LEGO blocks, you’ll notice skeletons on the wall with different colored helmets. Place the LEGO blocks in front of the skeleton with the same colored helmet to reveal this Crest Piece.


Part 2 – RUN!

Character Token (Fleur (Dragon Task))
As soon as you enter the building, look to the right to find this.


Ravenclaw Crest
After passing through a narrow doorway, look to the left to find this.


Student in Peril
While running through the building, you’ll notice a cabinet on the right side of the path with a silver chain surrounding it. Zap it (you don’t need to use Reducto) to open it, freeing the student trapped inside.
Interlude - Hints from a Hufflepuff
Characters: Harry Potter, Ron Weasley, Hermione Granger

Gryffindor Common Room: Head to the right and exit the common room.

House Hallway: Head to the left and down the stairs.

Grand Staircase: Head to the left and down the stairs.

Main Hallway: Head to the left and up the stairs, then through the opening at the top.

Outer Corridor: Continue to the right.

Fountain Courtyard: Continue to the right.


Covered Bridge: After that not-so-subtle hint from Cedric, head back to the left.

Fountain Courtyard: Head back to the left.

Outer Corridor: Head back to the left and up the stairs.

Main Hallway: Head down the stairs and through the opening in the gate.

Entrance Hall: Head up the stairs and to the right, then head up the spiral staircase and through the opening.

Bathroom Hallway: Head to the right down the hall, then head up the stairs. Continue to the left, then use Reducto to destroy the silver gate. Continue to the left and enter the bathroom with Myrtle to start the next Story level.
Secret of the Egg - Story Mode

Enemies: Scorpion
Starting Characters: Harry Potter, Moaning Myrtle
True Wizard: 12,000

Part 1 - Prefect's Bathroom

We need to find four green seashells and place them on the green panels on the right. The first seashell is right next to the green panels. To find the second, head to the left. Zap the lockers against the wall to reveal an umbrella, then zap it again. Use Wingardium Leviosa on it to give it to the wizard in the painting. He will give you the seashell as thanks.

The third seashell can be found by using Wingardium Leviosa on the brown barrel. This will reveal LEGO pieces. Build them into a hatch, then use Wingardium Leviosa on it. Your partner will do the same on the other hatch, launching this seashell out of the other toilet. For the final seashell, head to the left. Zap the overflowing sinks on the left to flood the container with water, knocking out the seashell. Place all four seashells on the green panels to reveal an opening. Head inside.

Part 2 - Prefect's Bath

Head into the bath, then use Wingardium Leviosa on the broom to clean off all the dirty parts of the stained glass window. The water will then disappear, angering the mermaid. She will throw a cage of scorpions at you. Defeat them and she will throw more cages at you, revealing LEGO pieces.

Build them into a train, which will create a cloud. Use Wingardium Leviosa on it to place it in the stained glass window, restoring the water. She will then toss you a valve. Use Wingardium Leviosa to place it on the purple slot on the right, then use Wingardium Leviosa on it again to turn on the faucets, completing the level.
Secret of the Egg - Free Play Mode
Required Spells: Dark Magic, Reducto, Riddikulus/Expecto Patronum, Wingardium Leviosa
Required Abilities: Scholar, Super Strength

Part 1 – Prefect’s Bathroom

Hufflepuff Crest
There are 3 torches that you need to light with Wingardium Leviosa. The first is on the right by the entrance to the bath.


The second is also on the right, by the entrance to the bath.


The third is on the left side of the room. Light all 3 torches to reveal this Crest Piece.


Slytherin Crest
There are 4 cabinets that you need to zap. The first is on the right by the entrance to the bath.


The other 3 are on the left side of the room. Zap all 4 to reveal this Crest Piece.


Character Token (Cedric Diggory)
Defeat the Boggart to reveal this Character Token.


Character Token (Moaning Myrtle (Swimsuit))
Use Dark Magic to destroy the black cabinet right by your starting point, revealing this.


Student in Peril
Use Dark Magic to destroy the black cabinet on the right side of the area, revealing this student.


Gryffindor Crest
After filling the container on the left with water, this Crest Piece will appear inside it. Pull the chain to collect it.


Part 2 – Prefect’s Bath

Character Token (Fleur (Lake Task))
Destroy the silver lock on the cabinet to the left of your starting point, then zap the cabinet to reveal this Character Token.


Ravenclaw Crest
Solve the puzzle on the Rune Cabinet on the right side of the area to receive this Crest Piece.
Interlude - The Second Task
Characters: Harry Potter, Ron Weasley, Hermione Granger

Main Hallway: Head to the left and up the stairs, then head through the opening at the top.

Outer Corridor: Continue to the right.

Fountain Courtyard: Continue to the right.

Covered Bridge: Continue to the right.

Hogwarts Grounds: Head to the right and you'll find a silver gate. Destroy it, then continue on.

Black Lake: Head all the way down the stairs, then continue onto the docks to start the next Story level.
The Black Lake - Story Mode

Enemies: Grindylow, Mermaid
Starting Characters: Harry (Lake Task), Cedric (Lake Task)
True Wizard: 65,000

Part 1 - The Black Lake

Swim to the right and you'll find a pipe. Swim inside it to appear closer to the screen. Continue to the right and you'll find a large drop-off. Continue to the right and eventually a squid will appear. To get rid of it, we're going to need to clear a way to the far path.

Head back to the left and zap the large cluster of rocks to reveal a pipe. Swim through it, then head to the right. Use Wingardium Leviosa on one of the squid's tentacles. Your partner will do the same on the other tentacle, clearing the path.

Continue to the right and swim through the pipe (if you were on the path in the background) then continue to the right. You'll find some LEGO blocks up on a ledge. Use Wingardium Leviosa to place them on the purple slot, creating a fish. The fish will knock over a pillar, clearing the path ahead. Continue to the right.

Part 2 - Depths

Swim to the right and you'll see that the path has split into two parts. Take the lower path and your partner will take the upper path. Use Wingardium Leviosa to move the vines out of your way, then quickly swim to the right before they return. Continue to the right and use Wingardium Leviosa on the crab to place it on the purple slot, clearing the way for your partner.

Switch to them and zap the squid's eye to move the tentacles out of your partner's way. The squid will then clear the rocks on the right, filling the caverns with ink. Use Lumos to proceed to the right, then head into the top right passage. Destroy the plant to reveal a pearl. Pick it up and carry it to the bottom right, then place it in the clam. The clam will then jet away, allowing you to continue to the right.

Part 3 - What They Took

Time to rescue our friends. Use Lumos to scare away the vines, then use Wingardium Leviosa on the anchor to reveal a silver clasp. Destroy it to free Ron, then head to the far right. Use Wingardium Leviosa on the anchor to reveal a silver clasp, then destroy it to free Gabrielle.

Head back to the left and destroy the rocks to reveal a pipe. Swim through it, then use Wingardium Leviosa on the purple ball. Place it on the scale to raise the cage over the anchor, then use Wingardium Leviosa on it to reveal a silver clasp. Destroy it to rescue Cho, ending the level.
The Black Lake - Free Play Mode
Required Spells: Dark Magic, Wingardium Leviosa

Part 1 - The Black Lake

Ravenclaw Crest
There are 9 seashells for you to zap. The first is right below your starting point.


The second is in the background to the right of your starting point.


The third can be found on a chain. After passing through the first pipe, head left and swim up to find this.


The fourth can be found in the background after swimming through the first pipe.


The fifth can be found towards the screen right before the big drop-off.


The sixth can be found towards the screen by the squid.


The seventh can be found after swimming through the second pipe.


The eighth can be found in the background by the third pipe.


The ninth is on the platform with the fish blocks. Zap all 9 to reveal this Crest Piece.


Gryffindor Crest
There are 6 fish you need to reveal and zap. To reveal the fish, use Wingardium Leviosa on worms. 4 are in this area and 2 are in Part 3. The first two can be found after swimming through the first pipe, to the left.


The third and fourth can be found after passing the squid.


Character Token (Harry (Lake Task))
After swimming through the first pipe, head all the way to the left to find a skeleton holding a treasure chest. Zap it to reveal this.


Student in Peril
After swimming through the second pipe, swim all the way back to the left. You’ll find a skeleton in a boat.


Use Wingardium Leviosa on the oars to give them to the skeleton, then use Wingardium Leviosa on him to reveal an opening, freeing the trapped student.


Part 2 – Depths

Character Token (Guitarist)
As soon as you enter this area, swim straight down and look to the left to find a brown chest. Zap it to reveal this.


Slytherin Crest
After collecting the Guitarist Character Token, use Dark Magic to destroy the nearby black chest.


This will reveal some bones. Use Wingardium Leviosa on them to construct a skeleton. The skeleton will pull the chain, clearing the rocks and revealing this Crest Piece.


Hufflepuff Crest
Quickly swim through all the passages with ink in them to clear it out. The squid will then swim away, leaving this behind.


Part 3 – What They Took

Character Token (Krum Shark)
Zap the brown chest on the left to receive this.


Gryffindor Crest cont.
The fifth can be found after using Wingardium Leviosa on the anchor on the left.


The sixth can be found after using Wingardium Leviosa on the anchor on the right. Zap all 6 fish to reveal this Crest Piece.
Interlude - Meeting with Dumbledore
Characters: Harry Potter, Ron Weasley, Hermione Granger

Grand Staircase: We need to get up to Dumbledore's Office. Talk to the painting to rotate the staircase, then continue up the stairs to the right. Another staircase will appear, so continue up the stairs. Destroy the silver chest to reveal a steering wheel, then use Wingardium Leviosa on it to give it to the wizard in the painting. Zap the painting and the staircase will rotate to the right, allowing you to continue up.

A staircase will then lower, allowing you to continue. Defeat the Pixies holding up the painting, then use Wingardium Leviosa to place it on the wall. Zap it and the stairs will raise up, allowing you to continue to the left. Head inside Dumbledore's Office to start the final Story level.
The Dark Lord Returns - Story Mode

Enemies: Death Eater
Boss: Lord Voldemort
Starting Characters: Harry (Maze Task), Cedric (Maze Task)
True Wizard: 42,000

Part 1 - First Chamber

Zap the bushes in the center to reveal LEGO pieces. Build them into a suit of armor, then zap it. It will point in two directions. Head through the fog in those directions to proceed to the next area.

Part 2 - Second Chamber

Defeat the Pixies holding the LEGO pieces, then build them into a suit of armor. Zap it, then follow the directions.

Part 3 - Third Chamber

Use Lumos to scare away the vines, revealing LEGO pieces. Build them into a suit of armor, then zap it. Follow the directions.

Part 4 - Hedges

Head down the path, avoiding the moving hedges. At the end, the path will turn to the right. Continue down it and past the moving hedges. You'll find a Pixie holding an arrow. Defeat the Pixie, then pick up the arrow. Continue down the path and place the arrow on the stand. Use Wingardium Leviosa on it to reveal a path. Head through the opening.

Part 5 - The Sphinx's Riddle

Head down the path and you'll find a sphinx. Head to the right and you'll find a box. Use Wingardium Leviosa on it to reveal LEGO pieces. Build them into a bounce pad, then use it to bounce over the hedge to the right. Use Lumos to scare away the vines, then use Wingardium Leviosa on the fly to place it on the web, revealing a spider.

Another fly will then appear to the left. Use Wingardium Leviosa on it to place it on the web, causing the spider to crash through the hedges. Build the LEGO pieces left behind into another fly, scaring away the sphinx and revealing the Triwizard Cup. Head down the path towards it.

Part 6 - The Graveyard

Uh oh. Time to face Voldemort. Zap the Death Eaters running around and Harry will automatically be moved in front of Voldemort. Spam the attack button to damage Voldemort. Repeat this process two more times to complete the level.
The Dark Lord Returns - Free Play Mode
Required Spells: Dark Magic, Lumos, Lumos Solem, Riddikulus/Expecto Patronum, Wingardium Leviosa
Required Abilities: Dig

Part 1 – First Chamber

Character Token (Cedric (Maze Task))
There are 8 large plants with yellow flowers for you to zap. The first is in the bottom right corner.


Part 2 – Second Chamber

Character Token (Cedric (Maze Task)) cont.
The second plant is in the top right corner.


Part 3 – Third Chamber

Character Token (Cedric (Maze Task)) cont.
The third plant is on the left side of the area.


The fourth plant is on the right side of the area.


Part 4 – Hedges

Character Token (Cedric (Maze Task)) cont.
The fifth plant can be found after passing the first set of moving hedges. Head to the left to find it.


The sixth can be found after passing through the final set of moving hedges.


Ravenclaw Crest
Use Dark Magic to destroy the black hedge on the left, then head down the path.


Dig up the dig spot at the end to reveal this Crest Piece.


Character Token (Fleur (Maze Task))
After passing the first set of moving hedges, head to the left to find a hidden path. You’ll find a Boggart at the end. Defeat it to reveal this Character Token.


Hufflepuff Crest
There are 5 plants for you to defeat with Lumos. The first can be found right when the path curves to the right.


The second can be found shortly after the first.


The third can be found after passing the final set of moving hedges.


Gryffindor Crest
Use Dark Magic to destroy the hedge at the end, revealing some fog.


Head through the fog to reach the alcove with this Crest Piece.


Character Token (Viktor (Lake Task))
After collecting the Gryffindor Crest, dig up the nearby dig spot to reveal this.


Part 5 – The Sphinx’s Riddle

Hufflepuff Crest cont.
The fourth can be found to the left of your starting point.


The fifth can be found to the right of the sphinx. Defeat all 5 to reveal this Crest Piece.


Character Token (Cedric (Maze Task)) cont.
The seventh can be found to the left of the sphinx.


The eighth can be found southeast of the sphinx, by the Student in Peril. Zap all 8 to reveal this Character Token.


Student in Peril
Head down the path to the right of the sphinx, then head straight down. You’ll find this student held in Devil’s Snare. Use Lumos Solem to free him.


Part 6 – The Graveyard

Slytherin Crest
There are 3 skeletons you need to use Wingardium Leviosa on. The first is on the left.


The second is in the back right corner.


The third is in the near right corner. Use Wingardium Leviosa on all 3 to reveal this Crest Piece.
---------Exploring Diagon Alley---------
Below is my map of Diagon Alley. It's a pretty small area, so you shouldn't need a map, but I thought I'd include it just in case.

Borgin and Burkes
Gold Brick
This is hiding in plain sight right behind the counter.
Eeylops Owl Emporium
Required Spells: Wingardium Leviosa

Gold Brick
Destroy the cage to reveal LEGO pieces, then build them into a sweeper.


Hop on and use it to clean up all of the owl droppings, revealing this Gold Brick by the door.
Knockturn Alley
Required Spells: Wingardium Leviosa

Character Token (Igor Karkaroff)
Use Wingardium Leviosa on the wooden boards to create stairs, allowing you to walk up to the ledge with this Character Token.


Character Token (The Bloody Baron)
After collecting the previous Character Token, stand on the cart and zap it. The cart will buck you up to this Character Token.


Character Token (Shifty Wizard)
Zap the chest on the table in front of Borgin and Burkes to move the table to the right.


Stand on the table for a few seconds and it will launch you up to this.
Madam Malkin's
Required Spells: Wingardium Leviosa

Character Token (Harry (Tuxedo))
Head towards the changing booth on the right. You’ll find a wizard inside, spooking him and revealing this Character Token.


Character Token (Hermione (Ballgown))
Build the LEGO pieces on the floor to place them back on the rack, revealing this Character Token.
-----------Exploring Hogwarts-----------
Below is my map of Hogwarts. The names on the map are the same names I use in the Interlude sections, as well as in the Exploring Hogwarts sections below. The directions of the lines and locations of the rooms on the map do not necessarily reflect the direction you need to travel to reach that room, so please keep that in mind.

Bathroom Hallway
Required Spells: Reducto, Wingardium Leviosa

Character Token (Hermione (Cat))
Solve the Rune Cabinet on the left side of the area to reveal LEGO pieces.


Build them into a drawer, then zap it to reveal this Character Token.


Gold Brick
On the upper floor, you'll find a maze. Use Wingardium Leviosa to guide the ball to the end (your partner will use Wingardium Leviosa to move the red blocks out of the way). The ball will then appear outside the maze.


Zap it and it will turn into a snail. It will then slither away, revealing this Gold Brick.
Black Lake
Required Spells: Wingardium Leviosa

Student in Peril
Zap the large boxes to reveal LEGO pieces, then build them into a dock, rescuing this student.


Character Token (Ron (Tuxedo))
After rescuing the Student in Peril, this Character Token will appear on the dock.


Character Token (Bassist)
There is a mole on the left side of the area.


Zap him and he'll appear on the right.


Zap him again and he'll appear even further to the right.


Zap him and he will appear next to the docks on the right. Zap him to reveal this Character Token.


Gold Brick
Use Wingardium Leviosa on the fishing pole to reveal LEGO pieces.


Build them into frogs, which will hop into the water. Head to the left and hop on a frog, then ride it through the reeds to reveal this Gold Brick.
Boy's Bathroom
Required Spells: Reducto, Wingardium Leviosa

This area can be accessed from the Bathroom Hallway. Destroy the silver lock to open the door, allowing you to enter.


Student in Peril
Zap the stall on the left to open it, rescuing the student trapped inside.


Red Parcel (Score x8)
Use Wingardium Leviosa to place the two showerheads on the pipes.


Zap all of the shower handles to open the clam in the center, revealing this Parcel.


The owl can be found by the entrance.


Character Token (Madam Hooch)
Zap the trashcan in the near right corner to reveal a bottle of spray paint.


Use Wingardium Leviosa to move it around the wall, creating a graffiti image of a witch. Complete the image to reveal this Character Token.
Charms Class 1
Required Spells: Wingardium Leviosa

Character Token (Boy)
There are several brown books on the bookshelf on the upper level of the classroom. Use Wingardium Leviosa on them to rearrange them, revealing this Character Token.
Charms Class 2
Character Token (Girl)
There are 4 candles for you to zap. The first 2 are by the exit.


The other 2 are on the upper ledge. Zap all 4 candles to reveal this Character Token.
Charms Dungeon
Required Spells: Dark Magic, Lumos
Required Abilities: Parseltongue

This area can be accessed from the Charms Basement. After passing the vines, continue to the right to find some chained monsters.


Time your movements past them to reach an opening. Head inside to enter this area.


Gold Brick
Use Lumos to scare away the vine on the right, breaking one of the chains holding up the cage.


The vine will reappear on the left. Use Lumos to scare it away, dropping the cage and revealing this Gold Brick.


Red Parcel (Character Token Detector)
Use the Parseltongue Panel to reveal a black sphere.


Use Dark Magic to destroy it, revealing this Parcel.


The owl can be found in the near center part of the area.
Charms Hallway
Required Spells: Wingardium Leviosa

Student in Peril
Use Wingardium Leviosa on the ball to give it back to the student. I wonder why he couldn’t do that himself!
Clock Tower
Required Spells: Immobilus, Lumos, Riddikulus, Reducto, Wingardium Leviosa
Required Abilities: Parseltongue, Scholar, Time Turner

This area can be accessed from the Clock Tower Courtyard. On the right side of the area is a Boggart chest. Defeat it to reveal a key, which you can place in the green lock behind you. Head up the stairs to reach this area.


Student in Peril
As soon as you enter this area, you’ll find this poor student stuck in some webs. Zap him to free him.


Red Parcel (Score x2)
There are two chests in the center of the area. Zap them to reveal four clocks.


Use Wingardium Leviosa to place them on the correct colored pedestals, revealing this Parcel.


To reach the owl, head to either side of the area to find some rotating stairs.


Defeat the Pixies and the stairs will stop rotating, allowing you to climb up and reach this owl on the right side of the upper ledge.


Character Token (Vernon Dursley)
Use the Parseltongue panel on the left side of the upper ledge to reveal an egg. The nearby snake will then eat it, getting stuck in the wall.


Zap its tail to reveal this Character Token.


Gold Brick
Zap the orange painting on the right side of the upper ledge to reveal a purple gear.


Use Wingardium Leviosa to place it in the slot on the wall, revealing this Gold Brick.


Character Token (Milkman)
There is a grandfather clock in the near right corner. Use the Time Turner to travel back in time.


You’ll find this Character Token sitting out in the open.


Character Token (Madam Rosmerta)
After using the Time Turner, walk towards the stairs on the left. Your partner will stand on the valve, allowing you to walk up.


Head to the right to find a Rune Cabinet. Destroy the silver lock on it, then solve the puzzle to reveal this Character Token.


Gold Brick
After collecting the Madam Rosmerta Character Token, build the LEGO pieces that came out of the Rune Cabinet onto the clock.


Zap the orange painting on the left to reveal a clock. It will explode, revealing LEGO pieces.


Build them onto the clock.


You need to get your partner up here. Use Lumos on the vines on the right to scare them away, revealing a gargoyle head.


Use Wingardium Leviosa to place it on the gargoyle, slowing down the stairs and allowing your partner to join you.


Use Wingardium Leviosa on one of the hands of the clock. Your partner will do the same for the other hand, revealing this Gold Brick.
Clock Tower Courtyard
Required Spells: Dark Magic, Reducto, Wingardium Leviosa
Required Abilities: Broomstick Flying, Mandrake Handling

Student in Peril
You’ll find this student being zapped by some bullies on the left side of the courtyard. Zap the bully with the wand and they’ll flee.


Red Parcel (Collect Ghost Studs)
In the center of the courtyard are four bird statues. Zap all 4 of them to reveal LEGO pieces.


Build them into a suit of armor, which will unplug the fountain, revealing this Parcel.


The owl can be found to the left of the large doors in the background.


Character Token (Hufflepuff Boy)
While holding the Mandrake, use it to break 5 glass objects. The first is on the right side of the area, by where the students gather.


The second is also on the right side of the area, hidden behind the stone pillars.


The third is in the back left corner of the area.


The fourth is on the left side of the area, hidden behind the stone pillars.


The fifth is on the left side of the area. Shatter all 5 glass objects to reveal this Character Token.


Character Token (Ravenclaw Prefect)
After collecting the Red Parcel, destroy the silver suit of armor to reveal five yellow puddles.


Hop on the plunger and ride it over each of the puddles to clean them up. Clean up all of the puddles to reveal this Character Token.


Gold Brick
Use Dark Magic on the suit of armor to destroy it, revealing a broomstick.


Hop on and fly through all of the small stud rings to reveal this.
Computer Room
Required Spells: Wingardium Leviosa

This room can be accessed from the Grand Staircase. Zap the doorbell to open the door, allowing you to head inside.


Gold Brick
You need to reveal three rabbits. The first can be found by using Wingardium Leviosa to stack the desks on the left.


Hop up them and zap the toaster to reveal the first rabbit.


Zap the painting on the left to reveal a letter.


Use Wingardium Leviosa on it to reveal the second rabbit.


The third rabbit can be found by zapping the buttons on the side of the TV. This will reveal a rabbit on the screen. Zap it again to reveal the third rabbit.


Once all three rabbits have been revealed, the car will fly away, allowing you to collect this Gold Brick.


Red Parcel (Score x6)
Zap the printer to reveal this Parcel.


The owl can be found on the left side of the room.


Character Token (Dudley Dursley)
Zap the computer to reveal a Character Token on the screen.


Zap it again to reveal this Character Token.


Character Token (Mr. Mason)
Zap the bobblehead on the table to reveal another bobblehead.


Zap the second bobblehead to reveal a third bobblehead, along with this Character Token.


Character Token (Mrs. Mason)
Zap the vacuum on the right side of the room and it will fly out of the window, leaving this Character Token behind.
Dark Basement
Required Spells: Lumos, Riddikulus/Expecto Patronum
Required Abilities: Goblin Key

This room can be accessed from Charms Class 2. Turn your key in the slot to reveal an opening in the floor. Drop down inside to enter this area.


Character Token (Professor Flitwick)
Head to the right on the ledge, watching out for the grates. If you stand on a grate, vines will appear and push you off.


Defeat the Boggart at the end to reveal this Character Token.


Student in Peril
This student can be found on the far right side of the area, on the bottom ledge. Use Lumos to scare away the vines holding him.
Defense Against the Dark Arts Classroom 1
Required Spells: Dark Magic, Wingardium Leviosa
Required Abilities: Scholar

Character Token (Station Guard)
There are 4 torches you need to light using Wingardium Leviosa. The first is in the near left corner.


The second is in the back left corner.


The third is in the back right corner.


The fourth is in the near right corner. Once you light all 4 torches, this Character Token will appear in the center of the room.


Character Token (Parvati Patil)
There are 4 blue books for you to zap. The first is in the near left corner.


The second is on the left side of the room.


The third is at the top of the stairs in the back of the room.


The fourth can be found by solving the Rune Cabinet. Zap all 4 books to reveal this Character Token in the center of the room.


Character Token (Ginny Weasley)
Use Dark Magic to destroy the gate under the stairs, allowing you to collect this.
Defense Against the Dark Arts Classroom 2
Required Spells: Dark Magic, Immobilus, Lumos, Reducto
Required Abilities: Scholar

Gold Brick
There are 7 silver objects you need to destroy, not counting the ones holding the students down in the lesson. The first is a silver pile of books in the center of the room.


The second is a silver skeleton. Use Lumos to scare away the vines on the left, then destroy the silver ribcage.


The third is being held by a Pixie on the right side of the room. Defeat the Pixie and it will drop the silver object, allowing you to destroy it.


The fourth is a very obvious wall in the back right corner of the room.


The fifth is a silver owl underneath a cage. Use Wingardium Leviosa to lift off the cage, allowing you to destroy the owl.


The sixth is also being held by a Pixie in the back left corner of the room. Defeat the Pixie and it will drop the silver object, allowing you to destroy it.


The seventh can be found by solving the puzzle on the Rune Cabinet on the right. Destroy all 7 objects to reveal this Gold Brick.


Character Token (Parvati (Ballgown))
There are 3 cobwebs for you to zap. The first is at the top of the stairs in the back of the room.


The second is high up on the wall on the left side of the room.


The third is above the horse skeleton on the right side of the room. Zap all 3 to reveal this Character Token.


Character Token (Ron (Pyjamas))
There are 4 torches for you to use Wingardium Leviosa on. The first two are on the left side of the room.


The third and fourth are on the right side of the room. Light all 4 torches to reveal this Character Token.


Red Parcel (Fast Magic)
Use Dark Magic to destroy the black sphere, revealing this Parcel.


The owl is in the near left corner.
Divination Classroom
Required Spells: Dark Magic
Required Abilities: Goblin Key

Character Token (Professor Trelawny)
Open the safe in the back part of the classroom to reveal this Character Token.


Character Token (Hermione (Blue Top))
Use Dark Magic to destroy the cabinet in the back part of the classroom, revealing this Character Token.
Divination Courtyard
Required Abilities: Broomstick Flying, Super Strength

Character Token (Oliver Wood)
Pull the chain on the right side of the area to release some rings. You can brew a Strength Potion if you don’t have a character with Super Strength. The ingredients can be found by zapping the clusters of bushes.


Hop on a broom and fly through all of the rings to reveal this Character Token.
Dragon Basement
Required Spells: Dark Magic, Reducto, Wingardium Leviosa

This area can be reached by destroying the silver lock in Charms Class 1, revealing an opening in the floor.


Student in Peril
This student is trapped in a cobweb high up on the right side of the area. Zap him to rescue him.


Red Parcel (Extra Hearts)
Use Dark Magic to destroy the black sphere on the right side of the area, revealing the Parcel.


The owl can be found on the left side of the area.


Character Token (Mad-Eye Moody)
Zap the eggs in front of the dragon to destroy them.


This will reveal parts for the dragon statue. Use Wingardium Leviosa to place them on the statue, revealing this Character Token.


Gold Brick
After collecting the previous Character Token, hop on the dragon’s head to be tossed back into Charms Class 1, collecting this Gold Brick in the air.
Dumbledore's Office
Required Spells: Dark Magic, Immobilus, Reducto, Wingardium Leviosa
Required Abilities: Super Strength

This area can be accessed by heading to the very top of the Grand Staircase and using Wingardium Leviosa on the statue, revealing stairs.


Red Parcel (Invincibility)
Simply approach Fawkes and he will burst into flame, revealing this Parcel.


The owl can be found by the door on the left.


Character Token (Professor Dumbledore)
Use Dark Magic to destroy the black chest behind Dumbledore's desk, revealing this Character Token.


Gold Brick
Destroy the silver lock on the chest in front of Dumbledore's desk to open it, revealing this.


Character Token (Professor Dumbledore (Grey))
We need to brew a strength potion. Defeat the Pixie on the right side of the room and it'll drop the flower.


Zap the suit of armor twice to reveal the bone.


Use Wingardium Leviosa to place each bean in the correct colored container, revealing the fang.


Once the potion is brewed, drink it and head up the stairs. Pull the chain to reveal a model of the solar system.


Destroy it to reveal the Sorting Hat.


Use Wingardium Leviosa on it to reveal this Character Token.


Character Token (Nearly Headless Nick)
Zap the vials on the right to knock them down, revealing this Character Token.
Entrance Hall
Required Spells: Dark Magic

Gold Brick
There are 4 banners in the area. The Ravenclaw and Hufflepuff banners are on either side of the stairs, and the Slytherin and Gryffindor banners are high up on the wall. Zap all 4 to reveal this Gold Brick.


Student in Peril
Zap the Slytherin banner high up on the wall to rescue this student, who was trapped inside.


Character Token (Harry (Blue Shirt))
This can be found underneath the spiral staircase to the right side of the area.


Character Token (Witch (White))
Use Dark Magic to destroy the cabinet on the far left, revealing this Character Token.
Garden Path
Required Spells: Reducto

This area can be reached by destroying the silver lock in Greenhouse 1, opening the door.


Character Token (Fleur Delacour)
Destroy the silver lock on the chest, then zap it to reveal this Character Token.
Garden Shed
Required Spells: Riddikulus/Expecto Patronum
Required Abilities: Mandrake Handling

This area can be accessed by heading through the door at the end of the Garden Path.


Character Token (Drummer)
Defeat the Boggart on the upper ledges to reveal this Character Token.


Character Token (Professor Sprout)
Stand on the bench on the right, then zap it to launch yourself up to the ledge.


Grab earmuffs from the cupboard, then drop back down.


You’ll find the Mandrake in the near right corner.


You need to use it to shatter 5 glass objects. The first is underneath the ledge on the right.


The second is right by the exit.


The third is underneath the ledge on the left.


The fourth is on the ledge on the left.


The fifth is on the top ledge, by where the Boggart was. Shatter all 5 objects to reveal this Character Token.
Gear Basement
Required Spells: Immobilus, Lumos, Reducto, Riddikulus/Expecto Patronum, Wingardium Leviosa
Required Abilities: Super Strength

This area can be accessed from the Defense Against the Dark Arts Classroom 1. Destroy the silver lock on the chest behind the chalkboard.


Use Wingardium Leviosa to open it, revealing LEGO pieces.


Build them into a door, then zap it to reveal the entrance to this area.


Red Parcel (Regenerate Hearts)
There are 5 Boggarts for you to defeat. The first is to the right of your starting point.


The second is on the ledge with the student in peril. Use Lumos to scare away the vines covering the chest.


To reach the third, head to the right across the gears, then wait for a notch to appear in the final gear.


Hop on and onto the ledge, then defeat the Pixie holding the chest to the left.


The fourth can be found just to the right. Zap the gear in the center to reveal LEGO pieces.


Build them into a gear, then use Wingardium Leviosa on the switch to lower the chest to the ground.


To reach the fifth, build the LEGO pieces on the left into a set of steps.


Walk up them, then pull the chain to drop the fifth chest. You can brew a strength potion here if you need to. You can find the ingredients on the ledges as you climb. Defeat all 5 Boggarts to reveal this Parcel by the entrance.


The owl can be found to the left.


Character Token (Viktor (Tuxedo))
There are 7 lanterns for you to zap. The first is right by your starting point.


The second and third are just to the right of your starting point.


The fourth is on the ledge to the right.


The fifth and sixth are on the upper ledge.


The seventh is by the cauldron. Zap all 7 to reveal this Character Token.


Student in Peril
Use Wingardium Leviosa on the LEGO pieces by your starting point to turn them into a gear.


This will start moving a platform. Ride it onto the ledge, then zap the cobweb to rescue this student.


Character Token (Harry (Maze Task))
Zap the 3 multi-colored banners along the back wall to reveal this Character Token.
Grand Staircase
Required Spells: Immobilus, Reducto, Wingardium Leviosa

Character Token (Percy (Sweater))
Zap the two vases on the platform underneath Dumbledore’s Office to reveal flowers. Zap them again to reveal this Character Token.


Gold Brick
At the base of the staircase, there is an orange painting. The man inside is holding a Quaffle. Zap him and he will toss the Quaffle to another painting on the right.


Zap her and she will toss the Quaffle to another painting to the left.


Zap the painting to reveal this Gold Brick to the left of the entrance to Dumbledore's Office, right next to the Student in Peril.


Student in Peril
While standing in front of Dumbledore's Office, head to the left and a staircase will appear. Head to the top and you'll find this student stuck in a web. Zap him to rescue him.


Character Token (Professor Binns)
Use Wingardium Leviosa on the candle to the left of the entrance to Dumbledore's Office to reveal this Character Token.
Grassy Courtyard
Required Spells: Dark Magic, Immobilus, Wingardium Leviosa

Character Token (Angelina Johnson)
There are 10 pillars with a flame at the top on the outside of the area. Zap all 10 of them to reveal this Character Token. 5 are on the left side of the area, 2 are on the north side of the area, and the last 3 are on the right side of the area. Zap all 10 to reveal this Character Token in the center of the area.


Character Token (Hufflepuff Prefect)
Use Immobilus to defeat the Pixies on the left, causing them to drop the chest.


Zap it to reveal LEGO blocks, then use Wingardium Leviosa to stack them on the purple base, allowing you to climb up to this Character Token.


Character Token (Slytherin Prefect)
Use Dark Magic on the chest on the right to reveal a watering can and a seed.


Use Wingardium Leviosa to plant the seed, then use Wingardium Leviosa on the watering can.


This will reveal a flower. Hop on it and your partner will use Wingardium Leviosa on it, sending you floating up to this Character Token.
Great Hall
Required Spells: Reducto

Student in Peril
This student is trapped in a cobweb on the left wall. Zap him to free him.


Character Token (Molly Weasley)
Destroy the silver platter on the left to reveal this Character Token.


Character Token (Colin Creevey)
Destroy the silver platter on the right to reveal this Character Token.


Red Parcel (Character Studs)
Zap the chicken on the left and it will turn into a live chicken.


It will run around for a bit, eventually exploding and revealing this Parcel.


The owl can be found on the right.


Gold Brick
There are 6 pitchers you need to zap. The first is on the staff table, directly behind Dumbledore’s podium.


The second is on the far left table.


The third is on the center left table.


The fourth is on the center right table.


The fifth and sixth are on the far right table.


Once you zap all 6, the Gold Brick will appear up in the air. To reach it, zap the three piles of plates on the tables to create platforms, allowing you to hop up to the Gold Brick.
Greenhouse 1
Gold Brick
Zap the plant to the left of the cupboard to grow it.


Hop onto it, then hop on top of the cupboard. You can now reach this Gold Brick floating in the air to the left.
Greenhouse 2
Required Spells: Wingardium Leviosa
Required Abilities: Mandrake Handling, Super Strength

This area can be reached by heading into the door on the right side of the Garden Path.


Student in Peril
We need to brew a strength potion. The bone can be found on the right, by a Mandrake.


The fang can be found on the upper ledge. Walk to the left and you’ll find a large plant. Use Wingardium Leviosa to lower the structure on the ceiling, then walk towards the plant. It will lunge out and attack you, hitting the structure and revealing the fang.


The flower can be found by zapping the plant on the left.


Once the potion is brewed, drink it and head to the left. Pull the chain to rescue the student.


Red Parcel (Singing Mandrake)
After rescuing the student in peril, you’ll find some LEGO pieces in the room with him. Zap the plant on the right to reveal more LEGO pieces.


Build them into a ramp to the upper level. There are three pots up here, and we need to find three Mandrakes to place in them.


Grab earmuffs from the cupboard on the right.


The first Mandrake can be found on the right.


The second Mandrake can be found inside the room the student was trapped in.


The third Mandrake can be found on a ledge on the left. To reach it, zap the boxes on the left.


This will reveal a ladder, allowing you to climb up and grab the Mandrake.


Once all the Mandrakes have been potted, this Parcel will appear.


The owl is in the near left corner of the room.
Gryffindor Common Room
Student in Peril
There is a student asleep on the couch on the left. Zap him and he will be eaten by the couch!


The couch will then spit him back out. He’ll be all crumpled up, so zap him to put him back together.


Character Token (Gryffindor Boy)
Hop behind the couch on the left to grab this hidden token.
Gryffindor Dorm
Required Spells: Reducto, Wingardium Leviosa
Required Abilities: Time Turner

Gold Brick
There are 4 beds in the dorm.


Zap the tops of each of them to reveal this Gold Brick.


Character Token (Ron (Hogwarts)
Zap the chest to the right of the exit to open it, revealing this.


Red Parcel (Fall Rescue)
Use Wingardium Leviosa on the plant on the left to move it off the suitcase.


Zap the suitcase to reveal this Parcel. Pick it up and give it to the owl just to the right to mail it off to Eeylops.


Gold Brick
Zap the large chest in the back to reveal LEGO pieces. Build them into a grandfather clock, then use the Time Turner to turn back time.


Once you’re in the past, zap the large chest on the left to open it, then hop inside to collect this Gold Brick.


Character Token (Dean Thomas)
After using the Time Turner, zap the suitcase on the left to reveal this Character Token.


Character Token (Seamus Finnigan)
After using the Time Turner, destroy the silver lock on the suitcase on the right to open it, revealing this.
Hagrid's Garden
Required Spells: Reducto, Wingardium Leviosa
Required Abilities: Dig, Super Strength, Time Turner

You can enter this area any time after completing “Floo Powder!”. Simply walk up to the gate and it will open.


Gold Brick
Looks like Ron’s curse has backfired. We need to cure him by making a giant saltshaker. You’ll have Harry, Hermione and Fang in your party. Zap the picnic blanket on the left side of the area, then use Wingardium Leviosa on the basket to reveal more LEGO pieces.


Dig in the back right corner to reveal more LEGO pieces. Once you’ve revealed all the LEGO pieces, build them into part of the saltshaker.


Destroy the pumpkins in the back to reveal a seed.


Use Wingardium Leviosa on it to plant it in the ground, then use Wingardium Leviosa on the watering can to grow it. This will reveal the final piece of the saltshaker. Use Wingardium Leviosa to put it together, earning this Gold Brick.


Character Token (Ron (Brown Jacket))
Use Wingardium Leviosa on 3 groups of mushrooms. The first is in the near right corner.


The second is in the back right corner.


The third is in the near left corner. Use Wingardium Leviosa on all 3 to reveal this Character Token in the center of the area.


Student in Peril
After using Wingardium Leviosa on the picnic basket to set the picnic, use Wingardium Leviosa on it again to reveal a seed. Zap it to grow a pumpkin, then use Wingardium Leviosa on it to carry this student away.


Character Token (Amos Diggory)
Destroy the silver lock on the chest on the right.


This will reveal a Boggart. Defeat it to reveal this Character Token.


Gold Brick
Dig up some LEGO pieces on the right, then build them into a grandfather clock. Use the Time Turner to head back in time.


We now have to help Hagrid hatch Norbert. Dig up the dig spot on the right to reveal a scarecrow’s head.


Use Wingardium Leviosa on it to place it on the scarecrow, revealing another dig spot in the center of the area.


Dig it up to reveal some pumpkins, then destroy them to reveal LEGO pieces.


Build them into a chain, then pull it to reveal some LEGO pieces.


Build them into an oven, then head to the left.


Use Wingardium Leviosa on the egg to place it in the oven, revealing this Gold Brick.


Student in Peril
After using the Time Turner, zap the pumpkin on the right to rescue this student.


Character Token (Petunia Dursley)
After using the Time Turner, dig up the dig spot in the back right corner to reveal this.


Character Token (Gilderoy Lockhart (Green Jacket))
After using the Time Turner, destroy the silver lock on the left to reveal this.
Hogwarts Grounds
Required Spells: Dark Magic, Immobilus, Lumos, Lumos Solem, Reducto, Wingardium Leviosa

Student in Peril
This poor student is trapped in some Devil’s Snare to the right of Hagrid’s Garden. Use Lumos Solem to free him.


Character Token (Percy Weasley)
There are 4 carrots you need to reveal by using Wingardium Leviosa. The first is by the fireworks and the large rocks.


The second is to the right of Hagrid’s Garden.


The third is across from Hagrid’s Hut.


The fourth is on the left side of the path leading to the Quidditch Grounds. Reveal all 4 carrots to reveal this Character Token.


Red Parcel (Fast Dig)
On the left side of the path leading to the Quidditch Grounds, you’ll find some LEGO pieces.


Build them into a cloud, then use Wingardium Leviosa to move it around, revealing 4 patches of flowers.


Use Wingardium Leviosa on all 4 of them to reveal this Parcel.


The owl can be found on the left side of the area by the entrance to the Covered Bridge.


Gold Brick
There are three rocks we need to build and clean. For the first rock, use Lumos to clear off the vines, then build the LEGO pieces.


For the second rock, zap the dirt around it, then use Wingardium Leviosa to raise it out of the ground.


Use Wingardium Leviosa on the third rock to stand it up.


Once all three rocks have been restored, use Wingardium Leviosa on the brooms in front of them to clean off the bird poop. Clean off all three rocks to reveal this Gold Brick.


Character Token (Ginny (Cardigan))
There is a Cornish Pixie holding a blue firework.


Use Immobilus to defeat it, then zap the fuse to light it, launching the firework into the air and revealing this Character Token in the air by Hagrid’s Hut.


To reach it, use Immobilus to defeat the two Pixies on the left. This will release the pumpkin.


Hop on and ride it up to this Character Token.


Character Token (Cedric (Lake Task))
Zap the silver chains holding the green firework down, then zap the fuse to light it.


This Character Token will then appear in the sky.


Character Token (Viktor Krum)
Use Dark Magic on the red firework, then zap the fuse to light it.


This Character Token will then appear in the air.
House Hallway
Gold Brick
There are 5 banners in the hallway that you need to zap. The first two are Gryffindor banners, and they can be found in front of the hallway leading to the Fat Lady’s portrait.


The third banner is a Hufflepuff banner, and it can be found in front of the entrance to the Hufflepuff Hallway.


The fourth banner is a Ravenclaw banner, and it can be found in front of the entrance to Ravenclaw Tower.


The fifth banner is a Slytherin banner, and it can be found in front of the entrance to the Slytherin Dungeon. Zap all 5 banners to reveal this Gold Brick.
Hufflepuff Common Room
Required Spells: Reducto, Wingardium Leviosa
Required Abilities: House Access (Hufflepuff)

This area can be accessed from the Hufflepuff Hallway. Talk to the painting as a Hufflepuff to reveal the entrance.


Gold Brick
Destroy the silver lock on the oven on the right to reveal a cake.


Use Wingardium Leviosa on it to give it to the ghost in the painting, revealing this Gold Brick.


Student in Peril
Zap the plant in the fireplace until it is destroyed, rescuing this student.


Character Token (The Fat Friar)
Zap the painting on the left to reveal a cake.


Zap it to light the candles, then zap it again to destroy it, revealing this Character Token.
Hufflepuff Dorm
Required Spells: Wingardium Leviosa
Required Abilities: Mandrake Handling

This room can be accessed from the Hufflepuff Common Room. Grab earmuffs from the cupboard on the left.


Head back to the right and use Wingardium Leviosa on the large light fixture.


This will reveal a secret compartment with a Mandrake underneath the stairs to the fireplace.


Pick up the Mandrake and place it in the pot on the left to open the door to the dorm.


Character Token (Hufflepuff Girl)
Zap the chest by the entrance to reveal LEGO pieces.


Build them into a radio, revealing this Character Token.


Red Parcel (Christmas)
Zap the plant in the center and it will grow a whole bunch of flowers.


Zap all of them to reveal this Parcel.


The owl can be found on the left.
Hufflepuff Hallway
Required Spells: Immobilus, Wingardium Leviosa
Required Abilities: Mandrake Handling

This area can be accessed from the House Hallway. Defeat the Pixie holding the handle, then pick it up and place it in the slot. Turn it to open the door.


Student in Peril
Grab earmuffs from the cupboard on the left.


Head to the right and you’ll find the Mandrake. Place it in the pot to rescue the student.


Character Token (Neville Longbottom)
Use the Mandrake to shatter 3 glass objects. The first is on the far left side of the area.


The second is to the left of the cupboard.


The third is right next to the pot. Shatter all 3 to reveal this Character Token.
Lesson Hallway
Required Spells: Dark Magic, Reducto, Wingardium Leviosa
Required Abilities: Mandrake Handling, Pet

Character Token (Gryffindor Girl)
There is a student holding this token in the near left corner of the main area.


Zap him and he’ll run to the right.


Zap him again and he’ll run to the left of the Potions Classroom. Use Wingardium Leviosa on the nearby basket to reveal a snake, startling him and revealing this Character Token.


Character Token (Hannah Abbot)
There are 8 torches you need to use Wingardium Leviosa on. The first is on the far right side of the area.


The second is on the right side of the area, by the chalkboard.


The third is by the right staircase.


The fourth is to the right of the entrance to the Potions Classroom.


The fifth is to the left of the entrance to the Potions Classroom.


The sixth is by the left staircase.


The seventh torch can be found at the top of the stairs to the right.


The eighth torch can be found at the top of the stairs on the left. Light all 8 to reveal this Character Token.


Character Token (Lee Jordan)
Head up the stairs on the right, then head to the right side of the ledge. Zap the pillars and they’ll start bouncing, eventually revealing this Character Token.


Character Token (Ernie Macmillan)
Use the Mandrake to shatter 6 glass objects. The first is to the right of where you find it.


The other 5 objects are on the sides of the entrance to the Defense Against the Dark Arts Classroom. Shatter all 6 glass objects to reveal this Character Token.


Gold Brick
Use Wingardium Leviosa on the LEGO blocks on the top left ledge to create an “H”.


This will reveal a silver Hogwarts crest.


Zap it to reveal a pipe. Use Wingardium Leviosa on it to repair it, then send a pet through it. Run into the chain on the left to reveal this Gold Brick.


Character Token (Millicent Bulstrode)
Use Dark Magic to destroy the large red cabinet, revealing this Character Token.
Library
Required Spells: Reducto, Riddikulus/Expecto Patronum, Wingardium Leviosa

This area can be accessed from the Main Hallway. Defeat the Boggart to reveal a key.


Pick it up and head up the stairs on the left. Place the key in the lock to open the gate.


Character Token (Ravenclaw Girl)
Destroy the silver lock on the right to reveal a board.


Use Wingardium Leviosa on it to reveal LEGO pieces.


Build them into a radio, then zap it to reveal this Character Token.


Character Token (Susan Bones)
Zap a curtain on the left to roll it up.


Use Wingardium Leviosa on the shutters to reveal a torch.


Use Wingardium Leviosa on it to light the torches on the statues.


Zap the statue by the painting in the back right corner, causing the wizard to flee to the painting on the left.


Stand on the yellow flower on the left. Your partner will use Wingardium Leviosa on it, causing you to float up to this Character Token.
Main Hallway
Required Spells: Wingardium Leviosa

Gold Brick
There are 6 candles floating in this area. You need to zap all 6 of them to reveal this Gold Brick. The first is floating above a suit of armor on the right.


The second is floating above the entrance to the Lesson Hallway.


The third is floating above a suit of armor on the left.


The fourth is floating among the ledges in the back part of the area.


The final two candles are floating on either side of the red gate that leads to the Entrance Hall. Zap all 6 to reveal this Gold Brick.


Student in Peril
You’ll find this student hanging from the bookshelf on the left.


Zap the bookshelf to knock off some books. Use Wingardium Leviosa on the books to construct platforms, then hop up them, allowing this student to hop down.


Character Token (Doris Crockford)
You need to use Wingardium Leviosa on 9 torches. 6 are in this area, and the other 3 are in the Outer Corridor. The first torch is on the far left side of the area.


The second and third torches are on the left staircase.


The fourth and fifth torches are on the right staircase.


The sixth torch is on the far right side of the area.
Outer Corridor
Required Spells: Reducto, Wingardium Leviosa

Character Token (Doris Crockford) cont.
There are 9 torches that you need to light using Wingardium Leviosa. The first 6 are in the Main Hallway. The seventh torch is on the left side of the corridor.


The eighth torch is on the right side of the stairs leading to the Main Hallway.


The ninth torch can be found by the entrance to the Fountain Courtyard. Destroy the silver lock on it and you’ll be able to use Wingardium Leviosa on it. Light all 9 torches to reveal this Character Token.


Character Token (Madam Pince)
There are 3 panels for you to zap. The first 2 are on the right side of the corridor.


Destroy the silver lock on the left to reveal the third stone panel. Zap all 3 to reveal this Character Token.
Owlery First Floor
Required Spells: Reducto, Riddikulus/Expecto Patronum, Wingardium Leviosa
Required Abilities: Time Turner

This area can be reached from the Grassy Courtyard. Defeat the Boggart in the near right corner to reveal a valve.


Pick it up, them place it on the green panel. Use Wingardium Leviosa to open the gate, allowing you to continue to the Owlery Path.


Head down the path and through the door at the end to enter.


Character Token (Hermione (Grey Hooded Top))
Use Wingardium Leviosa on the rolled-up object on the right.


It will fly around a bit, eventually making a ramp, allowing you to walk up to this.


Student in Peril
Walk up to the owls in the back holding the parchment. They will unroll it, revealing this student.


Student in Peril
There is a grandfather clock on the right side of the bottom level. Use the Time Turner to travel back in time.


Zap the student stuck in the feeding tray to rescue him.


Character Token (Barty Crouch Senior)
After using the Time Turner, destroy the silver lock on the cupboard, then use Wingardium Leviosa on it to reveal LEGO pieces.


Build them into a plunger, then hop on and ride it over the 5 white owl droppings to clean them up, revealing this Character Token.


Gold Brick
After using the Time Turner, use Wingardium Leviosa to place the packages on the right into the correct colored slots, revealing this Gold Brick.
Owlery Second Floor
Required Spells: Reducto, Wingardium Leviosa
Required Abilities: Time Turner

You'll need to do some work to reach the second floor of the Owlery. Zap the chest on the left, then use Wingardium Leviosa to fill the dish in the center of the room with seed. This will reveal some LEGO pieces.


Build them into a platform. Three owls will then appear. To reach the upper level, we’ll need to find a fourth owl.


Use Wingardium Leviosa on the egg to move it to the end of the maze.


Zap it to reveal the fourth owl.


Stand on the platform to reach the upper level.


Gold Brick
Use Wingardium Leviosa on the feather to cause the wizard in the painting to sneeze, revealing LEGO pieces.


Build them into a chest, which will open and reveal this Gold Brick.


Character Token (Cho Chang)
You need to reveal three records on the upper level. The first can be found right next to the record player. Use Wingardium Leviosa on it to place it on the record. Let it play for a bit, then zap it to take it off.


Destroy the silver chest to the right to reveal another record. Use Wingardium Leviosa on it to place it on the record. Let it play for a bit, then zap it to take it off.


Zap the dresser on the right, then use Wingardium Leviosa on the drawer to place the final record on the record player, revealing this Character Token.


Red Parcel (Gold Brick Detector)
After using the Time Turner (found in the Owlery First Floor), you need to head to the upper level. To do so, zap the painting on the left. This will cause owls to appear on the platform.


Hop on to reach the upper level.


Once on the upper level, use Wingardium Leviosa on the gear on the left to place it on the projector, revealing a projection of the Red Parcel.


Use Wingardium Leviosa on the projection to reveal the Parcel.


The owl can be found right next to the projector.


Character Token (Hermione (Hogwarts))
After using the Time Turner, head to the upper level of the Owlery. Zap the plant to cause the wizard in the painting to sneeze, revealing LEGO pieces.


Build them into a record player, revealing this Character Token.
Pendulum Basement Lower Level
Required Spells: Immobilus

This area can be accessed from the Pendulum Basement Upper Level. Head all the way to the left, then head down the stairs.


Character Token (Professor Quirrell)
Head to the right and defeat the Pixie moving the platform. Hop across the gap to the right. The Slytherin Prefect will occasionally push you back, but keep on trying and eventually you’ll make it across.


Continue across the moving platforms.


You’ll find two more platforms being swung around by Pixies. Defeat them and hop across to reach this Character Token sitting out in the open. Once again, there’s an annoying Slytherin Prefect pushing you back, but keep pushing to the right and he’ll give up.


Gold Brick
Defeat both Pixies holding up the pillars on the far right side of the room to knock down a large statue, revealing this Gold Brick.
Pendulum Basement Upper Level
Required Spells: Dark Magic, Immobilus

This area is accessible from Defense Against the Dark Arts Classroom 1. After collecting the Character Token for Ginny Weasley, continue into the opening to reach this room.


Character Token (Draco Malfoy)
There are 4 Pixies for you to defeat. As you proceed to the left, you’ll notice Pixies moving the large pendulums around. Head to the left, defeating the Pixies as you go. Defeat all 4 to reveal this Character Token.
Potions Classroom
Character Token (Justin Finch-Fletchley)
You will earn this Character Token during “Interlude – In Search of Answers”. See that section for more info.
Potions Dungeon
Required Spells: Wingardium Leviosa
Required Abilities: Goblin Key, House Access (Hufflepuff), Old Age, Scholar

This room can be reached by heading through the door on the right side of the Potions Classroom.


Red Parcel (Score x10)
You need to reveal three keys. Speak to the painting on the left as a Hufflepuff to receive the first.


Pick it up and place it in one of the locks on the right.


Use Wingardium Leviosa on the gargoyle on the left to reveal LEGO pieces.


Build them into a key slot, then use it to reveal the second key. Pick it up and place it in a lock on the right.


Solve the puzzle on the Rune Cabinet on the right to reveal the third key. Pick it up and place it in one of the locks.


Once all three keys have been placed in the locks, the gate will open, revealing LEGO blocks. Use Wingardium Leviosa on them to stack them so you can hop up to the ledge on the right, where this Parcel is.


The owl can be found to the left of the Rune Cabinet.


Gold Brick
After opening the gate on the right and revealing the LEGO blocks, use Wingardium Leviosa to stack the blocks so you can hop onto the ledge on the left. Head to the left and you’ll see this Gold Brick behind an Age Line. Cross it and you’ll be able to collect it.


Character Token (Professor Snape)
After collecting the Gold Brick, continue to the left to find a chest. Zap the lock to open it, revealing this Character Token.
Practice Room
Required Spells: Reducto, Transfiguration

This area can be reached by destroying the silver lock in the Transfiguration Classroom, opening the gate.


Character Token (Fred Weasley)
This is hidden behind the chalkboard in the back left corner. Zap the chalkboard and it will rotate, allowing you to see it.


Gold Brick
When you enter the room, Professor McGonagall will open some cages. Dummies will come out of them. When you transfigure a dummy, the animal will continue moving and go into one of the cages. Transfigure the dummies so that each cage has three animals in it to reveal this Gold Brick.


Character Token (Professor McGonagall)
After revealing the Gold Brick, this appears on the left by the cages.
Quidditch Grounds
Required Spells: Reducto, Wingardium Leviosa
Required Abilities: Dig, Time Turner

Student in Peril
Use Wingardium Leviosa on one of the banners on the left, creating a trampoline for this student to jump onto.


Character Token (Katie Bell)
Use Wingardium Leviosa to raise up 5 Gryffindor flags. The first is on the far left side of the area.


The other 4 are on the path leading to the tent.


Character Token (Padma Patil)
Use Wingardium Leviosa to raise up 4 Slytherin flags. All 4 are on the path leading to the tent.


Gold Brick
Stand on the bench to the right of the tent. Your partner will raise you up.


Head to the left and use Wingardium Leviosa on the hatch to return the Quaffle to the chest, revealing this Gold Brick.


Character Token (Ravenclaw Boy)
There is a popcorn stand on the right side of the area. Use Wingardium Leviosa to place the cornstalks into the top of the stand, revealing this Character Token.


Gold Brick
Dig up some LEGO pieces on the left, then build them into a grandfather clock. Use the Time Turner to travel back in time.


Head to the right and dig up some LEGO pieces by the gazebo.


Build them into a music stand, then use Wingardium Leviosa to place the sheet music on the stand.


Use Wingardium Leviosa on the music to conduct the instruments, revealing this Gold Brick.


Student in Peril
After using the Time Turner, head to the right and destroy the silver lock on a chest.


Use Wingardium Leviosa on it to rescue the student inside.


Red Parcel (Stud Magnet)
After using the Time Turner, head to the far right to find a large ice block.


Use Wingardium Leviosa on the hammer and chisel to chip away the ice, revealing this Parcel.


The owl can be found to the right of the gazebo.


Character Token (George (Quidditch))
After using the Time Turner, head to the far right to find a popcorn stand. Dig up some LEGO pieces, then build them into some clouds and a sun, melting the ice around the cornstalks.


Use Wingardium Leviosa on them to place them in the popcorn stand, revealing this Character Token.
Ravenclaw Common Room
Required Spells: Wingardium Leviosa
Required Abilities: House Access (Ravenclaw)

This area can be accessed by interacting with the door on the far right side of Ravenclaw Tower. You’ll need a Ravenclaw to get in.


Character Token (Gabrielle Delacour)
Zap the grey chest to reveal a Quaffle.


It will fly around for a bit, eventually revealing this Character Token on the left.


Gold Brick
There are 5 gold books for you to zap. 3 are in this area and the other 2 are in Ravenclaw Dorm. The first is on a bookshelf to the right of the entrance to the dorm.


The second is underneath a box. Zap the box to reveal the book.


Use Wingardium Leviosa to place it on the shelf, allowing you to zap it.


The third can be found bouncing on a trampoline on the left. Zap the trampoline to move it out of the way.


Use Wingardium Leviosa on the book to place it on the shelf, allowing you to zap it.


Red Parcel (Hogwarts Crest Detector)
We need to make a raven. Use Wingardium Leviosa on the large black table to make the wings.


Use Wingardium Leviosa on the black table and chair on the left to make the tail and part of the head.


Use Wingardium Leviosa on the small table in the center of the area to add to the wings.


Use Wingardium Leviosa on the chair on the right to complete the raven.


Once the raven is complete, fog will appear around it. Zap it to reveal the Parcel.


The owl can be found by the fireplace on the left.
Ravenclaw Dorm
This room can be entered by heading through the opening in the bookshelves in the Ravenclaw Common Room.


Student in Peril
You’ll find this student being bothered by a book in the center of the room. Zap the nearby chain to tie up the book, rescuing the student.


Character Token (Padma (Ballgown))
Zap the bed on the left to reveal this Character Token. Bounce on the bed to reach it.


Gold Brick cont.
There are 5 gold books for you to zap. 2 are in this area and the other 3 are in the Ravenclaw Common Room. The fourth is underneath the bed on the far right. Zap the bed to raise it up, allowing you to zap the book.


The fifth is underneath the second bed from the left. Zap the bed and it will fly away, allowing you to zap this book. Zap all 5 books to reveal this Gold Brick.
Ravenclaw Tower
Required Spells: Riddikulus/Expecto Patronum, Wingardium Leviosa

This area can be accessed from the House Hallway. Defeat the Boggart on the right to reveal shields.


Use Wingardium Leviosa to place them on the purple panels, opening the gate.


Character Token (Penelope Clearwater)
Zap the gate on the left to reveal LEGO pieces.


Build them into a telescope, revealing this Character Token.
Restricted Section
Required Spells: Dark Magic, Expecto Patronum, Immobilus, Lumos, Wingardium Leviosa
Required Abilities: Dig, Mandrake Handling, Old Age, Scholar

This area can be accessed from the Library. Use Lumos to scare away the vines on a chest on the right, then zap it to reveal some glasses.


Use Wingardium Leviosa on them to give them to the man in the painting.


He will give you a Hogwarts logo. Use Wingardium Leviosa to place it on the purple panel, opening the door. To get inside the Restricted Section, you’ll have to pass the age line. You can brew an Aging Potion in this area. The snake will appear after zapping the chest on the right, along with the glasses.


Zap one of the orange curtains on the left to roll it up.


Use Wingardium Leviosa on the shutters to reveal a bat, which will fly up and reveal the banana.


The leaf will appear while collecting the Character Token for Susan Bones.


Pass through the Age Line and you’ll be able to enter this area.


Red Parcel (Red Brick Detector)
Use Wingardium Leviosa to place the three books in the correct colored shelf, causing the Parcel to fall off the shelf.


The owl can be found in the near right corner.


Character Token (Wizard (Red))
Stand on the yellow book in the near left corner, then hop onto the stack of books and bounce onto the ledge.


A ghost will then appear. Zap him and he’ll disappear.


Use Dark Magic on the black panel to destroy it.


You’ll be attacked by a spider, Dementor, and wasp. Defeat them to receive this Character Token.


Student in Peril
While on the left ledge, grab earmuffs from the cupboard.


Head to the shelves underneath the right ledge. Zap the red book to knock it off the shelf.


Use Wingardium Leviosa on it to reveal a dig spot.


Dig it up to reveal a ladder.


Climb up and pot the Mandrake to rescue this student.


Gold Brick
There are 3 brown hats for you to zap. The first is on the ledge on the left.


The second can be found in the back left corner. Defeat the Pixies holding the book.


When the book hits the ground, it will turn into this hat.


The third hat is on the ledge on the right. Zap all 3 hats to reveal this Gold Brick.


Character Token (Alicia Spinnet)
Solve the puzzle on the Rune Cabinet in the back right corner to reveal LEGO pieces.


Build them into a cart, then hop on.


Five pink books will then be scattered around the library floor. Drive over all 5 of them to reveal this Character Token.
Slytherin Common Room
Required Spells: Wingardium Leviosa
Required Abilities: House Access (Slytherin)

This area can be accessed by speaking to the wall panel in the Slytherin Dungeon as a Slytherin.


Character Token (Slytherin Girl)
There are 5 lamps for you to light. The first is right by the entrance.


The second is on a table to the right of the fireplace.


The third is high up on a bookshelf to the right of the entrance to the dorm.


The fourth is on a desk to the right of the entrance to the dorm.


The fifth is on a desk to the right of the entrance to the dorm. Light all 5 to reveal this Character Token


Character Token (Slytherin Boy)
Zap the painting to the left of the fireplace to reveal a trunk to the right.


Zap it to destroy it, revealing this.
Slytherin Dorm
This area can be accessed by heading through the opening in the Slytherin Common Room.


Student in Peril
You’ll find this student trapped behind a bookshelf. Zap it to knock it over, freeing the student.


Red Parcel (Score x4)
This is laying out in the open next to a bed on the right.


The owl can be found by the entrance.


Gold Brick
Zap the black chest in front of one of the beds to turn the bath into a bubble bath, revealing this Gold Brick.
Slytherin Dungeon
Required Spells: Reducto, Wingardium Leviosa
Required Abilities: Super Strength

Character Token (Rita Skeeter)
Destroy the four silver locks to reveal LEGO pieces.


Build them into a chain, then pull it.


Pull the chain on the left as well to open the hatch. Ride the water current up to this Character Token.
Training Grounds
Required Spells: Reducto
Required Abilities: Broomstick Flying, Dig

Character Token (Harry (Quidditch))
There are 5 dig spots for you to dig up. The first is on the far right side of the area.


The second is in the bottom center part of the area.


The third is in the near left corner.


The fourth is in the back left corner.


The fifth is in the top center part of the area. Dig up all 5 to reveal this Character Token.


Gold Brick
Destroy the silver lock on the chest to reveal several rings.


Fly through all of them to reveal this Gold Brick.


Character Token (Viktor (Dragon Task))
This appears right next to the Gold Brick.
Transfiguration Classroom
Gold Brick
At any point after obtaining the Invisibility Cloak, you can enter this room to learn a new spell. In Year 1, head up the stairs on the right, using the Invisibility Cloak to sneak past the Prefect. Once you start Year 2, the Prefect will disappear, so you won’t need to use the Invisibility Cloak.


Once inside, simply step into the area surrounded by the white lines. Dummies will then attack you. Cast Transfiguration on them to turn them into animals. Do this two times each with Harry, Ron and Hermione to complete the lesson.
---------Gringotts Bonus Levels---------
Level 1
This Bonus level requires 5 Gold Bricks to play. Build the vault entrance, then turn the key to open the door. Grab the Portkey to start the level.


Starting Characters: Harry Potter, Ron Weasley

Your goal in this level is to collect 100,000 studs. There are way more than 100,000 studs scattered throughout the area, so just hop in a vehicle and plow through all of the plants. You should have this total in no time. You can also bring stud multipliers into this level to finish it even faster. Once you collect 100,000 studs, the gate in the back left corner will open, allowing you to head inside and claim the Gold Brick.
Level 2
This Bonus level requires 10 Gold Bricks to play. Build the vault entrance, then turn the key to open the door. Grab the Portkey to start the level.


Required Abilities: Pet

Starting Characters: Harry Potter, Ron Weasley

Ron is all the way across the quicksand, and we need to get him over to us. Stand on the button on the far right to start moving a platform. Ron will hop onto it and onto the land. Step on each button moving to the left to move the appropriate platforms, allowing Ron to join you.

Send Scabbers through the pipe and hit the button, opening the gate. Continue along the path and step on one of the buttons. Your partner will step on the other button, lowering the platform. Hop up to the ledge with this Gold Brick.
Level 3
This Bonus level requires 15 Gold Bricks to play. Build the vault entrance, then turn the key to open the door. Grab the Portkey to start the level.


Required Spells: Wingardium Leviosa
Required Abilities: Mandrake Handling, Super Strength

Starting Characters: Harry Potter, Ron Weasley

We need to brew a strength potion.

Bone - You'll find this on a small pedestal in the near left corner.

Fang - Stand on the bench in the near right corner and your partner will raise you up. You'll find the fang on a small pedestal.

Flower - You'll find this by some white flowers by the Mandrake.

Once the potion is complete, drink it and pull the chain on the left.

This will lower the platform on the left, allowing you to reach the ledge. Hop onto the ledge, then grab earmuffs from the cupboard. Head back to the right to find a Mandrake. Grab it and use it to shatter the glass on the left, then pot the Mandrake. Step on one of the buttons and your partner will step on the other, opening the gate and raising the lava. Continue down the path, then use Wingardium Leviosa to place the platforms on the purple panels. Hop up to reach the ledge with this Gold Brick.
Level 4
This Bonus level requires 20 Gold Bricks to play. Build the vault entrance, then turn the key to open the door. Grab the Portkey to start the level.


Required Spells: Lumos
Required Abilities: Mandrake Handling, Pet, Scholar, Super Strength

Starting Characters: Ron Weasley, Hermione Granger

Send a pet through the pipe and hit the button, lowering the platform to the right. Use Lumos to scare away the vines, then head into the water. Hop onto the ledge with the cupboard, then grab earmuffs. Head to the right and grab the Mandrake, then carry it to the right. Use it to shatter the glass, then place it in the pot.

Now we need to brew a strength potion.

Bone - Solve the puzzle on the Rune Cabinet on the right side of the area.

Fang - The fang can be found on a pedestal in the near right corner of the water.

Flower - The flower can be found on a pedestal in the back left corner of the water.

Once the potion is brewed, drink it and pull the chain on the right to lower the nearby platform.

Hop onto the ledge, then push the ball off the ledge and to the left. Push it into one of the sockets in the water. Hop onto the ledge on the left with the cupboard and turn the red valve to raise the water level. Hop in and swim back to the right.

Use Lumos to scare away the vines, revealing another ball. Push it into the water, then swim back to the left and turn the green valve to lower the water level. Push the ball into the other socket. This will open the gate in the center of the area, allowing you to reach this Gold Brick.
Level 5
This Bonus level requires 25 Gold Bricks to play. Build the vault entrance, then turn the key to open the door. Grab the Portkey to start the level.


Required Spells: Lumos
Required Abilities: House Access (Ravenclaw), Pet, Super Strength

Starting Characters: Ron Weasley, Hagrid

Use Lumos to scare away the vines on the right, then send Scabbers through the pipe. Step on the button and your partner will step on the other, lowering the bridge. Switch to Hagrid and pull the chain to raise up a barrier in the pipe on the right. Send Scabbers through it, then step on the button. Your partner will step on the other, lowering the bridge.

Cross the bridge and you'll find a cauldron. You'll need to brew a Polyjuice Potion.

Apple - The apple is on a pedestal in the center of the area. You'll find it after crossing the first bridge.

Cherry - The cherry is on a pedestal to the right of your starting point.

Hair - The hair can be found just south of the cauldron.

Brew the Polyjuice Potion, then use it to turn into a Ravenclaw. Head all the way back to the left, then interact with the door to open it. Hop across the platform and grab earmuffs from the cupboard, then head back to the right.

Grab the Mandrake, then carry it all the way to the far right side of the level. Use it to shatter the glass, then crawl through the pipe to reach this Gold Brick.
Level 6
This Bonus level requires 30 Gold Bricks to play. Build the vault entrance, then turn the key to open the door. Grab the Portkey to start the level.


Required Spells: Lumos
Required Abilities: House Access (Slytherin), Pet

Starting Characters: Ron Weasley, Filch

Turn the red valve on the left to lower the nearby platform. Hop across to the left, then use Lumos to scare away the vines. Continue to the left, then press the "special" button while standing in front of the fireplace to travel by Floo Powder. Turn the red valve so Filch can join you, then send a pet through the pipe.

Step on the button and your partner will step on the other, opening the nearby door. Continue to the right, then turn the red valve to open the gate. Hop up the ledges to find a cauldron, in which you'll need to brew a Polyjuice Potion.

Apple - There is a ledge running behind the pipe to the left of the cauldron. Carefully walk along the ledge to reach the apple on a small pedestal.

Cherry - The cherry can be found on a pedestal just to the left of the gate leading to the cauldron.

Hair - Turn the green valve next to the cauldron to partially flood the area. Drop down into the water, then swim to the right to find a fireplace. Use it to travel by Floo Powder, then drop down the ledge. Use Lumos to scare away the vines that appear, then continue to move towards the screen to find the hair on a pedestal. However, you are stuck on this side of the area. Turn the red valve to move some platforms, then switch to Filch. Hop across the moving platforms to reach another red valve. Turn it to open the gate, allowing Ron to return to the cauldron with the hair.

Once the potion is complete, drink it and turn into a Slytherin. Talk to the door by your starting point to open it, allowing you to collect this Gold Brick.
Level 7
This Bonus level requires 35 Gold Bricks to play. Build the vault entrance, then turn the key to open the door. Grab the Portkey to start the level.


Required Spells: Expecto Patronum, Lumos
Required Abilities: Mandrake Handling, Pet, Super Strength

Starting Characters: Harry Potter, Ron Weasley

Ron's trapped for the moment, so let's work on getting to him. Head to the right and use Lumos to scare away the vines, then hop up the ledges and turn the red valve to raise a barrier in a pipe in the background. Switch to Ron and head to the right, then send Scabbers through the pipe. Hit the button at the end to lower a platform to the left of Harry.

This will allow Harry to reach the fireplace and use Floo Powder to travel across the lava. Here, you'll find a cauldron, in which you'll need to brew a Strength Potion.

Bone - This can be found behind a tree to the right of the cauldron. Zap the tree to reveal the bone.

Fang - The fang can be found on a small pedestal by your starting point.

Flower - This can be found lying out in the open to the right of the cauldron.

Once the potion is brewed, drink it and pull the chain on the right to start moving the platform behind Ron. Switch back to him and hop on the platform to reach the cupboard. Grab earmuffs, then head to the right. Grab the Mandrake, then carry it to the left to shatter the glass.

Place the Mandrake in the pot, then turn the red valve to open the gate. Use the fireplace to travel by Floo Powder, then step on one of the buttons. Your partner will step on the other button, opening the gate. Turn the green valve to drain the lava, revealing this Gold Brick.
Level 8
This Bonus level requires 40 Gold Bricks to play. Build the vault entrance, then turn the key to open the door. Grab the Portkey to start the level.


Required Spells: Dark Magic, Expecto Patronum, Lumos, Wingardium Leviosa
Required Abilities: Pet

Starting Characters: Harry Potter, Ron Weasley

Hop up the ledges and you'll find a cauldron. Time to brew a Polyjuice Potion.

Apple - Defeat the Dementor to reveal the apple.

Cherry - Use the fireplace to travel by Floo Powder to the upper ledge, where you'll find the cherry on a small pedestal in front of the pipe.

Hair - The hair can be found on a small pedestal to the right of the cauldron.

Once you brew the Polyjuice Potion, use it to turn Harry into someone with Dark Magic. Use the fireplace to return to the ledge. Use Dark Magic to destroy the globe, then send Scabbers through the pipe. Hit both buttons to open the gate.

Continue down the path, then hop onto the platform on the right. Use Wingardium Leviosa on the LEGO blocks to create a bridge, then continue to the right. Use Wingardium Leviosa to place the platforms on the purple panels, then hop across them.

Hop onto the land on the right, then continue down the path, hopping across the gaps. You'll eventually reach some land. Head towards the screen and step on one of the buttons. Your partner will step on the other button, opening the gate.

Continue to the left, then use Lumos to scare away the vines. Turn the green valve to lower the quicksand, revealing platforms on the right. Hop across them, then bounce across the mushrooms on either side. Step on the button and your partner will step on the other one, opening the gate to this Gold Brick.
Level 9
This Bonus level requires 45 Gold Bricks to play. Build the vault entrance, then turn the key to open the door. Grab the Portkey to start the level.


Required Spells: Wingardium Leviosa
Required Abilities: Mandrake Handling, Old Age, Pet

Starting Characters: Harry Potter, Ron Weasley

Step on one of the buttons and your partner will step on the other one, opening the gate. Continue into the clearing to find a cauldron. We need to make an Aging Potion. Build both sets of LEGO pieces into buttons, then step on them to open the gates leading to the left and right.

Banana - Head to the right and grab a pair of earmuffs from the cupboard, then head up the stairs. You'll find a Mandrake trapped behind a gate. To open it, stack the LEGO blocks into the correct order (red on bottom, green in middle, blue on top) to make an "E". Grab the Mandrake, then carry it down the stairs. Shatter the glass along the back wall, allowing you to reach the banana.

Leaf - Head to the left and use the fireplace to travel by Floo Powder. Turn the green valve to lower the water, allowing you to grab the leaf.

Snake - Head to the left and send Scabber through the pipe. Carefully walk along the ledge, then head through the next pipe. Hit the button at the end to open the door to the lower courtyard. Head inside and turn the red valve to lower the platform, allowing you to reach the snake.

Once the potion is complete, drink it and head north. Cross the age line to reach this Gold Brick.
Level 10
This Bonus level requires 45 Gold Bricks to play. Build the vault entrance, then turn the key to open the door. Grab the Portkey to start the level.


Required Spells: Lumos, Wingardium Leviosa
Required Abilities: Broomstick Flying, Dig, House Access (Hufflepuff, Ravenclaw, Slytherin), Mandrake Handling, Old Age, Pet, Super Strength

Starting Characters: Harry Potter, Ron Weasley

This is a long one. Ready to use all that you've learned? First order of business is a Strength Potion.

Bone - Use Wingardium Leviosa to stack the blocks to the right of your starting point, allowing you to cross the gap. Use Wingardium Leviosa to place the platform on the purple slot, allowing you to hop to the back ledge, where you'll find the bone on a small pedestal.

Fang - Hop across the moving platforms to the left to reach the back left corner. Send Scabbers through the pipe, then press the button at the end to open the door to a Mandrake. Grab earmuffs from the cupboard, then use the Mandrake to shatter the glass, allowing you to grab the fang.

Flower - This can be found on a small pedestal right next to the cauldron.

Once the potion is complete, drink it and pull the chain on the right to open the gate. Continue down the path, then use Lumos to scare away the vines. Hop on one of the brooms and fly through the four hoops to open the door in the back.

Head up the path and through the door, then continue to the right. Use Wingardium Leviosa to stack the LEGO blocks on the purple panel, allowing you to reach the cauldron. Time to brew another potion, this time a Polyjuice Potion.

Apple - Zap the tree northwest of the hair to reveal the apple.

Cherry - Stand on the bench on the right and your partner will raise you up, allowing you to reach the cherry.

Hair - You'll find the hair on a small pedestal south of the steps leading to the cauldron.

Once you brew the potion, turn into someone with the Dig ability. Dig up the dig spots to reveal buttons. Step on one and your partner will step on the other, opening the door. Use the Polyjuice Potion to turn into someone with the Old Age ability. You can now head into the next room and access this Gold Brick behind the age line.

If you don't have a character who can cross the age line, you can also brew an Aging Potion using the cauldron in the center.

Banana - Speak to the door on the right as a Ravenclaw.

Leaf - Speak to the painting on the left as a Hufflepuff.

Snake - Speak to the door on the left as Slytherin.
--------------Miscellaneous--------------
200 Gold Brick Bonus - Harry's Destiny


After collecting all 200 Gold Bricks, head to Borgin and Burkes. You'll find a whole bunch of LEGO pieces on the floor.


Build them into a door, then interact with it to open it. Head inside to start this Bonus level.


Starting Characters: Lord Voldemort, Death Eater

As soon as you enter, you'll receive the Character Token for Lord Voldemort, allowing you to purchase him in Madam Malkin's. Your goal in this area is to collect 1 million studs, and there is way more than that in London. Run around zapping things with your wand. You can also hop in a vehicle and drive through things to destroy them. Once you collect 1 million studs, the level will end.
Joke Spells
There are a whole bunch of spells that you can purchase from Wiseacre's Wizarding Equipment. All of these spells will appear in the red slot on your spell wheel (with the exception of Accio, which appears in the purple slot). The red slot will cycle through all available spells, so when you cast at a person, whatever icon was visible will be the spell cast.

Below I'll list the name of the spell, along with what it does.

Slugulus Erecto
What It Does: This causes the victim to vomit up slugs. Ron tried to curse Malfoy with this during Year 2.


Multicorfors
What It Does: This simply changes the color of the victim's clothing


Rictusempra
What It Does: This causes the victim to break out into a laughing fit


Entomorphis
What It Does: This causes the victim to turn into a bug, sprouting mandibles and antenna on their head


Tarantallegra
What It Does: This causes the victim to start dancing uncontrollably


Locomotor Mortis
What It Does: This ties up the victim's legs, forcing them to hop around


Redactum Skullus
What It Does: This shrinks the victim's head


Colovaria
What It Does: This changes the color of the victim's hair


Calvorio
What It Does: This makes the victim bald


Anteoculatia
What It Does: This makes the victim sprout antlers on their head


Herbifors
What It Does: This makes the victim grow flowers on their head


Glacius
What It Does: This encases the victim in ice


Incarcerous
What It Does: This prevents the victim from moving by tying up their whole body


Flipendo
What It Does: This will flip the victim around in the air


Trip Jinx
What It Does: As you might guess, this causes the victim to trip over their own feet


Stupefy
What It Does: This stuns the victim, leaving them unable to act


Engorgio Skullus
What It Does: This causes the victim's head to expand


Accio
What It Does: This allows you to call potion ingredients to your hand from far away. If you cast this spell at someone, it will suspend them up in the air. Cast it at them again and they will start spinning around. Cast it at them again to launch them forward!
Characters
There are a grand total of 170 characters in this game, not including the custom characters. Below, I've listed them in the order they appear on the character selection screen. Below their name, I list what can be found on their spell wheel, as well as any abilities they have. I also list how to unlock them.

All of these character's abilities are listed as they are at the end of the story. For example, Scabbers is not listed under Ron's abilities, as he loses him toward the end of Year 3. I have also not included abilities such as Broomstick Flying and Mandrake Handling, as almost every magical character has them, so it felt redundant to include them.


Harry Potter
Spell Wheel: Transfiguration, Expelliarmus, Invisibility Cloak, Wingardium Leviosa, Lumos, Lumos Solem, Immobilus, Expecto Patronum, Reducto
Abilities: House Access (Gryffindor), Parseltongue
How To Unlock: Create a new game


Hermione Granger
Spell Wheel: Transfiguration, Expelliarmus, Pet (Crookshanks), Wingardium Leviosa, Lumos, Lumos Solem, Immobilus, Riddikulus, Reducto
Abilities: Dig (with pet), House Access (Gryffindor), Scholar, Time Turner
How To Unlock: Create a new game


Ron Weasley
Spell Wheel: Transfiguration, Expelliarmus, Wingardium Leviosa, Lumos, Lumos Solem, Immobilus, Riddikulus, Reducto
Abilities: House Access (Gryffindor)
How To Unlock: Create a new game


Harry (Blue Shirt)
Spell Wheel: None
Abilities: House Access (Gryffindor), Parseltongue
How To Unlock: Collect his Character Token in Entrance Hall, then purchase in Madam Malkin's


Harry (Sweater)
Spell Wheel: Transfiguration, Expelliarmus, Invisibility Cloak, Wingardium Leviosa, Lumos, Lumos Solem, Immobilus, Expecto Patronum, Reducto
Abilities: House Access (Gryffindor), Parseltongue
How To Unlock: Collect his Character Token in Floo Powder!, then purchase in Madam Malkin's


Harry (Hogwarts)
Spell Wheel: Transfiguration, Expelliarmus, Invisibility Cloak, Wingardium Leviosa, Lumos, Lumos Solem, Immobilus, Expecto Patronum, Reducto
Abilities: House Access (Gryffindor), Parseltongue
How To Unlock: Collect his Character Token in Out of the Dungeon, then purchase at Madam Malkin's


Harry (Dragon Task)
Spell Wheel: Transfiguration, Expelliarmus, Invisibility Cloak, Wingardium Leviosa, Lumos, Lumos Solem, Immobilus, Expecto Patronum, Reducto
Abilities: House Access (Gryffindor), Parseltongue
How To Unlock: Collect his Character Token in The First Task, then purchase in Madam Malkin's


Harry (Lake Task)
Spell Wheel: Transfiguration, Expelliarmus, Invisibility Cloak, Wingardium Leviosa, Lumos, Lumos Solem, Immobilus, Expecto Patronum, Reducto
Abilities: House Access (Gryffindor), Parseltongue
How To Unlock: Collect his Character Token in The Black Lake, then purchase in Madam Malkin's


Harry (Maze Task)
Spell Wheel: Transfiguration, Expelliarmus, Invisibility Cloak, Wingardium Leviosa, Lumos, Lumos Solem, Immobilus, Expecto Patronum, Reducto
Abilities: House Access (Gryffindor), Parseltongue
How To Unlock: Collect his Character Token in Gear Basement, then purchase in Madam Malkin's


Harry (Quidditch)
Spell Wheel: Transfiguration, Expelliarmus, Invisibility Cloak, Wingardium Leviosa, Lumos, Lumos Solem, Immobilus, Expecto Patronum, Reducto
Abilities: House Access (Gryffindor), Parseltongue
How To Unlock: Collect his Character Token in Training Grounds, then purchase in Madam Malkin's


Harry (Girl Disguise)
Spell Wheel: Transfiguration, Expelliarmus, Invisibility Cloak, Wingardium Leviosa, Lumos, Lumos Solem, Immobilus, Expecto Patronum, Reducto
Abilities: House Access (Gryffindor), Parseltongue
How To Unlock: Collect his Character Token in A Jinxed Broom, then purchase in Madam Malkin's


Harry (Slytherin Disguise)
Spell Wheel: Transfiguration, Expelliarmus, Invisibility Cloak, Wingardium Leviosa, Lumos, Lumos Solem, Immobilus, Expecto Patronum, Reducto
Abilities: House Access (Gryffindor, Slytherin), Parseltongue
How To Unlock: Collect his Character Token in Face of the Enemy, then purchase in Madam Malkin's


Harry (Pyjamas)
Spell Wheel: Transfiguration, Expelliarmus, Invisibility Cloak, Wingardium Leviosa, Lumos, Lumos Solem, Immobilus, Expecto Patronum, Reducto
Abilities: House Access (Gryffindor), Parseltongue
How To Unlock: Collect his Character Token in The Restricted Section, then purchase in Madam Malkin's


Harry (Tuxedo)
Spell Wheel: Transfiguration, Expelliarmus, Invisibility Cloak, Wingardium Leviosa, Lumos, Lumos Solem, Immobilus, Expecto Patronum, Reducto
Abilities: House Access (Gryffindor), Parseltongue
How To Unlock: Collect his Character Token in Madam Malkin's, then purchase in Madam Malkin's
Characters cont.
Hermione (Hogwarts)
Spell Wheel: Transfiguration, Expelliarmus, Pet (Crookshanks), Wingardium Leviosa, Lumos, Lumos Solem, Immobilus, Riddikulus, Reducto
Abilities: Dig (with pet), House Access (Gryffindor), Scholar, Time Turner
How To Unlock: Collect her Character Token in Owlery Second Floor, then purchase in Madam Malkin's


Hermione (Red Hooded Top)
Spell Wheel: Transfiguration, Expelliarmus, Pet (Crookshanks), Wingardium Leviosa, Lumos, Lumos Solem, Immobilus, Riddikulus, Reducto
Abilities: Dig (with pet), House Access (Gryffindor), Scholar, Time Turner
How To Unlock: Collect her Character Token in The Shrieking Shack, then purchase in Madam Malkin's


Hermione (Blue Top)
Spell Wheel: Transfiguration, Expelliarmus, Pet (Crookshanks), Wingardium Leviosa, Lumos, Lumos Solem, Immobilus, Riddikulus, Reducto
Abilities: Dig (with pet), House Access (Gryffindor), Scholar, Time Turner
How To Unlock: Collect her Character Token in Divination Classroom, then purchase in Madam Malkin's


Hermione (Grey Hooded Top)
Spell Wheel: Transfiguration, Expelliarmus, Pet (Crookshanks), Wingardium Leviosa, Lumos, Lumos Solem, Immobilus, Riddikulus, Reducto
Abilities: Dig (with pet), House Access (Gryffindor), Scholar, Time Turner
How To Unlock: Collect her Character Token in Owlery First Floor, then purchase in Madam Malkin's


Hermione (Cat)
Spell Wheel: Transfiguration, Expelliarmus, Pet (Crookshanks), Wingardium Leviosa, Lumos, Lumos Solem, Immobilus, Riddikulus, Reducto
Abilities: Dig, House Access (Gryffindor), Scholar, Time Turner
How To Unlock: Collect her Character Token in Bathroom Hallway, then purchase in Madam Malkin's


Hermione (Ballgown)
Spell Wheel: Transfiguration, Expelliarmus, Pet (Crookshanks), Wingardium Leviosa, Lumos, Lumos Solem, Immobilus, Riddikulus, Reducto
Abilities: Dig (with pet), House Access (Gryffindor), Scholar, Time Turner
How To Unlock: Collect her Character Token in Madam Malkin's, then purchase in Madam Malkin's


Ron (Hogwarts)
Spell Wheel: Transfiguration, Expelliarmus, Wingardium Leviosa, Lumos, Lumos Solem, Immobilus, Riddikulus, Reducto
Abilities: House Access (Gryffindor)
How To Unlock: Collect his Character Token in Gryffindor Dorm, then purchase in Madam Malkin's


Ron (Pyjamas)
Spell Wheel: Transfiguration, Expelliarmus, Wingardium Leviosa, Lumos, Lumos Solem, Immobilus, Riddikulus, Reducto
Abilities: House Access (Gryffindor)
How To Unlock: Collect his Character Token in Defense Against the Dark Arts Classroom 2, then purchase in Madam Malkin's


Ron (Sweater)
Spell Wheel: Transfiguration, Expelliarmus, Wingardium Leviosa, Lumos, Lumos Solem, Immobilus, Riddikulus, Reducto
Abilities: House Access (Gryffindor)
How To Unlock: Collect his Character Token in Follow the Spiders, then purchase in Madam Malkin's


Ron (Brown Jacket)
Spell Wheel: Transfiguration, Expelliarmus, Wingardium Leviosa, Lumos, Lumos Solem, Immobilus, Riddikulus, Reducto
Abilities: House Access (Gryffindor)
How To Unlock: Collect his Character Token in Hagrid's Garden, then purchase in Madam Malkin's


Ron (Slytherin Disguise)
Spell Wheel: Transfiguration, Expelliarmus, Wingardium Leviosa, Lumos, Lumos Solem, Immobilus, Riddikulus, Reducto
Abilities: House Access (Gryffindor, Slytherin)
How To Unlock: Collect his Character Token in Crabbe and Goyle, then purchase in Madam Malkin's


Ron (Girl Disguise)
Spell Wheel: Transfiguration, Expelliarmus, Wingardium Leviosa, Lumos, Lumos Solem, Immobilus, Riddikulus, Reducto
Abilities: House Access (Gryffindor)
How To Unlock: Collect his Character Token in Out of the Dungeon, then purchase in Madam Malkin's


Ron (Tuxedo)
Spell Wheel: Transfiguration, Expelliarmus, Wingardium Leviosa, Lumos, Lumos Solem, Immobilus, Riddikulus, Reducto
Abilities: House Access (Gryffindor)
How To Unlock: Collect his Character Token in Black Lake, then purchase in Madam Malkin's


Ron (Cardigan)
Spell Wheel: Transfiguration, Expelliarmus, Wingardium Leviosa, Lumos, Lumos Solem, Immobilus, Riddikulus, Reducto
Abilities: House Access (Gryffindor)
How To Unlock: Collect his Character Token in Face of the Enemy, then purchase in Madam Malkin's


Professor Dumbledore
Spell Wheel: Transfiguration, Expelliarmus, Wingardium Leviosa, Lumos, Lumos Solem, Immobilus, Riddikulus, Expecto Patronum, Reducto
Abilities: House Access (Gryffindor, Hufflepuff, Ravenclaw, Slytherin), Old Age, Scholar, Time Turner
How To Unlock: Collect his Character Token in Dumbledore's Office, then purchase in Madam Malkin's
Characters cont.
Professor Dumbledore (Grey)
Spell Wheel: Transfiguration, Expelliarmus, Wingardium Leviosa, Lumos, Lumos Solem, Immobilus, Riddikulus, Expecto Patronum, Reducto
Abilities: House Access (Gryffindor, Hufflepuff, Ravenclaw, Slytherin), Old Age, Scholar, Time Turner
How To Unlock: Collect his Character Token in Dumbledore's Office, then purchase in Madam Malkin's


Professor McGonagall
Spell Wheel: Transfiguration, Expelliarmus, Animagus (Cat), Wingardium Leviosa, Lumos, Lumos Solem, Immobilus, Riddikulus, Expecto Patronum, Reducto
Abilities: Dig (as cat), House Access (Gryffindor), Old Age, Pet (as cat), Scholar, Time Turner
How To Unlock: Collect her Character Token in Practice Room, then purchase in Madam Malkin's


Hagrid
Spell Wheel: Wingardium Leviosa
Abilities: Old Age, Super Strength
How To Unlock: Collect his Character Token in The Forbidden Forest, then purchase in Madam Malkin's


Professor Flitwick
Spell Wheel: Transfiguration, Expelliarmus, Wingardium Leviosa, Lumos, Lumos Solem, Immobilus, Riddikulus, Expecto Patronum, Reducto
Abilities: House Access (Ravenclaw)
How To Unlock: Collect his Character Token in Dark Basement, then purchase at Madam Malkin's


Professor Snape
Spell Wheel: Transfiguration, Expelliarmus, Wingardium Leviosa, Lumos, Lumos Solem, Immobilus, Riddikulus, Expecto Patronum, Reducto
Abilities: Dark Magic, House Access (Slytherin), Old Age
How To Unlock: Collect his Character Token in Potions Dungeon, then purchase at Madam Malkin's


Mad-Eye Moody
Spell Wheel: Transfiguration, Expelliarmus, Wingardium Leviosa, Lumos, Lumos Solem, Immobilus, Riddikulus, Expecto Patronum, Reducto
Abilities: Old Age
How To Unlock: Collect his Character Token in Dragon Basement, then purchase at Madam Malkin's


Professor Quirrell
Spell Wheel: Transfiguration, Expelliarmus, Wingardium Leviosa, Lumos, Lumos Solem, Immobilus, Riddikulus, Expecto Patronum, Reducto
Abilities: Dark Magic, Old Age
How To Unlock: Collect his Character Token in Pendulum Basement Lower Level, then purchase in Madam Malkin's


Professor Lupin
Spell Wheel: Transfiguration, Expelliarmus, Animagus (werewolf), Wingardium Leviosa, Lumos, Lumos Solem, Immobilus, Riddikulus, Expecto Patronum, Reducto
Abilities: Dig (as werewolf), Old Age, Super Strength (as werewolf)
How To Unlock: Collect his Character Token in Dementor's Kiss, then purchase in Madam Malkin's


Madam Hooch
Spell Wheel: Transfiguration, Expelliarmus, Wingardium Leviosa, Lumos, Lumos Solem, Immobilus, Riddikulus, Expecto Patronum, Reducto
Abilities: Old Age
How To Unlock: Collect her Character Token in Boy's Bathroom, then purchase in Madam Malkin's


Gilderoy Lockhart (Green Jacket)
Spell Wheel: Transfiguration, Expelliarmus, Wingardium Leviosa, Lumos, Lumos Solem, Immobilus, Riddikulus, Expecto Patronum, Reducto
Abilities: None
How To Unlock: Collect his Character Token in Hagrid's Garden, then purchase in Madam Malkin's


Gilderoy Lockhart
Spell Wheel: Transfiguration, Expelliarmus, Wingardium Leviosa, Lumos, Lumos Solem, Immobilus, Riddikulus, Expecto Patronum, Reducto
Abilities: None
How To Unlock: Collect his Character Token in The Basilisk, then purchase in Madam Malkin's


Madam Pomfrey
Spell Wheel: Transfiguration, Expelliarmus, Wingardium Leviosa, Lumos, Lumos Solem, Immobilus, Riddikulus, Expecto Patronum, Reducto
Abilities: Dig
How to Unlock: Collect her Character Token in Dobby's Plan, then purchase in Madam Malkin's

Madam Pomfrey does not need to grab earmuffs to pick up mandrakes


Madam Pince
Spell Wheel: Transfiguration, Expelliarmus, Wingardium Leviosa, Lumos, Lumos Solem, Immobilus, Riddikulus, Expecto Patronum, Reducto
Abilities: Old Age
How To Unlock: Collect her Character Token in Outer Corridor, then purchase in Madam Malkin's


Professor Sprout
Spell Wheel: Transfiguration, Expelliarmus, Wingardium Leviosa, Lumos, Lumos Solem, Immobilus, Riddikulus, Expecto Patronum, Reducto
Abilities: Dig, House Access (Hufflepuff), Old Age
How To Unlock: Collect her Character Token in Garden Shed, then purchase in Madam Malkin's

Professor Sprout is already wearing earmuffs, and therefore does not need to put some on before picking up Mandrakes


Professor Trelawney
Spell Wheel: Transfiguration, Expelliarmus, Wingardium Leviosa, Lumos, Lumos Solem, Immobilus, Riddikulus, Expecto Patronum, Reducto
Abilities: Old Age
How To Unlock: Collect her Character Token in Divination Classroom, then purchase in Madam Malkin's
Characters cont.
Professor Binns
Spell Wheel: None
Abilities: Old Age
How To Unlock: Collect his Character Token in Grand Staircase

As a ghost, Professor Binns can scare people. Press the "attack" button to scare nearby characters.


Professor Sinistra
Spell Wheel: Transfiguration, Expelliarmus, Wingardium Leviosa, Lumos, Lumos Solem, Immobilus, Riddikulus, Expecto Patronum, Reducto
Abilities: Old Age
How To Unlock: Collect her Character Token in Follow the Spiders, then purchase in Madam Malkin's


Professor Vector
Spell Wheel: Transfiguration, Expelliarmus, Wingardium Leviosa, Lumos, Lumos Solem, Immobilus, Riddikulus, Expecto Patronum, Reducto
Abilities: Old Age
How To Unlock: Collect her Character Token in Tom Riddle's Diary, then purchase in Madam Malkin's


Katie Bell
Spell Wheel: Transfiguration, Expelliarmus, Wingardium Leviosa, Lumos, Lumos Solem, Immobilus, Riddikulus, Reducto
Abilities: House Access (Gryffindor)
How To Unlock: Collect her Character Token in Quidditch Grounds, then purchase in Madam Malkin's


Seamus Finnigan
Spell Wheel: Transfiguration, Expelliarmus, Wingardium Leviosa, Lumos, Lumos Solem, Immobilus, Riddikulus, Reducto
Abilities: House Access (Gryffindor)
How To Unlock: Collect his Character Token in Gryffindor Dorm, then purchase in Madam Malkin's


Percy Weasley
Spell Wheel: Transfiguration, Expelliarmus, Wingardium Leviosa, Lumos, Lumos Solem, Immobilus, Riddikulus, Reducto
Abilities: House Access (Gryffindor)
How To Unlock: Collect his Character Token in Hogwarts Grounds, then purchase in Madam Malkin's


Percy (Sweater)
Spell Wheel: Transfiguration, Expelliarmus, Wingardium Leviosa, Lumos, Lumos Solem, Immobilus, Riddikulus, Reducto
Abilities: House Access (Gryffindor)
How To Unlock: Collect his Character Token in Grand Staircase, then purchase in Madam Malkin's


Fred Weasley
Spell Wheel: Transfiguration, Expelliarmus, Wingardium Leviosa, Lumos, Lumos Solem, Immobilus, Riddikulus, Reducto
Abilities: House Access (Gryffindor)
How To Unlock: Collect his Character Token in Practice Room, then purchase in Madam Malkin's


Fred (Quidditch)
Spell Wheel: Transfiguration, Expelliarmus, Wingardium Leviosa, Lumos, Lumos Solem, Immobilus, Riddikulus, Reducto
Abilities: House Access (Gryffindor)
How To Unlock: Collect his Character Token in A Jinxed Broom, then purchase in Madam Malkin's


Fred (Sweater)
Spell Wheel: Transfiguration, Expelliarmus, Wingardium Leviosa, Lumos, Lumos Solem, Immobilus, Riddikulus, Reducto
Abilities: House Access (Gryffindor)
How To Unlock: Collect his Character Token in Mischief Managed, then purchase in Madam Malkin's


Neville Longbottom
Spell Wheel: Transfiguration, Expelliarmus, Pet (Trevor), Wingardium Leviosa, Lumos, Lumos Solem, Immobilus, Riddikulus, Reducto
Abilities: Dig, House Access (Gryffindor), Pet
How To Unlock: Collect his Character Token in Hufflepuff Hallway, then purchase in Madam Malkin's


Neville (Pyjamas)
Spell Wheel: Transfiguration, Expelliarmus, Pet (Trevor), Wingardium Leviosa, Lumos, Lumos Solem, Immobilus, Riddikulus, Reducto
Abilities: Dig, House Access (Gryffindor), Pet
How To Unlock: Collect his Character Token in The Restricted Section, then purchase in Madam Malkin's


George Weasley
Spell Wheel: Transfiguration, Expelliarmus, Wingardium Leviosa, Lumos, Lumos Solem, Immobilus, Riddikulus, Reducto
Abilities: House Access (Gryffindor)
How To Unlock: Collect his Character Token in Floo Powder!, then purchase in Madam Malkin's


George (Quidditch)
Spell Wheel: Transfiguration, Expelliarmus, Wingardium Leviosa, Lumos, Lumos Solem, Immobilus, Riddikulus, Reducto
Abilities: House Access (Gryffindor)
How To Unlock: Collect his Character Token in Quidditch Grounds, then purchase in Madam Malkin's


George (Sweater)
Spell Wheel: Transfiguration, Expelliarmus, Wingardium Leviosa, Lumos, Lumos Solem, Immobilus, Riddikulus, Reducto
Abilities: House Access (Gryffindor)
How To Unlock: Collect his Character Token in Mischief Managed, then purchase in Madam Malkin's


Oliver Wood
Spell Wheel: Transfiguration, Expelliarmus, Wingardium Leviosa, Lumos, Lumos Solem, Immobilus, Riddikulus, Reducto
Abilities: House Access (Gryffindor)
How To Unlock: Collect his Character Token in Divination Courtyard, then purchase in Madam Malkin's
Characters cont.
Ginny Weasley
Spell Wheel: Transfiguration, Expelliarmus, Wingardium Leviosa, Lumos, Lumos Solem, Immobilus, Riddikulus, Reducto
Abilities: House Access (Gryffindor)
How To Unlock: Collect her Character Token in Defense Against the Dark Arts Classroom 1, then purchase in Madam Malkin's


Ginny (Hooded Top)
Spell Wheel: Transfiguration, Expelliarmus, Wingardium Leviosa, Lumos, Lumos Solem, Immobilus, Riddikulus, Reducto
Abilities: House Access (Gryffindor)
How To Unlock: Collect her Character Token in The Quidditch World Cup, then purchase in Madam Malkin's


Ginny (Cardigan)
Spell Wheel: Transfiguration, Expelliarmus, Wingardium Leviosa, Lumos, Lumos Solem, Immobilus, Riddikulus, Reducto
Abilities: House Access (Gryffindor)
How To Unlock: Collect her Character Token in Hogwarts Grounds, then purchase in Madam Malkin's


Colin Creevey
Spell Wheel: Transfiguration, Expelliarmus, Wingardium Leviosa, Lumos, Lumos Solem, Immobilus, Riddikulus, Reducto
Abilities: House Access (Gryffindor)
How To Unlock: Collect his Character Token in Great Hall, then purchase in Madam Malkin's


Parvati Patil
Spell Wheel: Transfiguration, Expelliarmus, Wingardium Leviosa, Lumos, Lumos Solem, Immobilus, Riddikulus, Reducto
Abilities: House Access (Gryffindor)
How To Unlock: Collect her Character Token in Defense Against the Dark Arts Classroom 1, then purchase in Madam Malkin's


Parvati (Ballgown)
Spell Wheel: Transfiguration, Expelliarmus, Wingardium Leviosa, Lumos, Lumos Solem, Immobilus, Riddikulus, Reducto
Abilities: House Access (Gryffindor)
How To Unlock: Collect her Character Token in Defense Against the Dark Arts Classroom 2, then purchase in Madam Malkin's


Dean Thomas
Spell Wheel: Transfiguration, Expelliarmus, Wingardium Leviosa, Lumos, Lumos Solem, Immobilus, Riddikulus, Reducto
Abilities: House Access (Gryffindor)
How To Unlock: Collect his Character Token in Gryffindor Dorm, then purchase in Madam Malkin's


Angelina Johnson
Spell Wheel: Transfiguration, Expelliarmus, Wingardium Leviosa, Lumos, Lumos Solem, Immobilus, Riddikulus, Reducto
Abilities: House Access (Gryffindor)
How To Unlock: Collect her Character Token in Grassy Courtyard, then purchase in Madam Malkin's


Lee Jordan
Spell Wheel: Transfiguration, Expelliarmus, Wingardium Leviosa, Lumos, Lumos Solem, Immobilus, Riddikulus, Reducto
Abilities: House Access (Gryffindor)
How To Unlock: Collect his Character Token in Lesson Hallway, then purchase in Madam Malkin's


Alicia Spinnet
Spell Wheel: Transfiguration, Expelliarmus, Wingardium Leviosa, Lumos, Lumos Solem, Immobilus, Riddikulus, Reducto
Abilities: House Access (Gryffindor)
How To Unlock: Collect her Character Token in Restricted Section, then purchase in Madam Malkin's


Gryffindor Boy
Spell Wheel: Transfiguration, Expelliarmus, Wingardium Leviosa, Lumos, Lumos Solem, Immobilus, Riddikulus, Reducto
Abilities: House Access (Gryffindor)
How To Unlock: Collect his Character Token in Gryffindor Common Room, then purchase in Madam Malkin's


Gryffindor Girl
Spell Wheel: Transfiguration, Expelliarmus, Wingardium Leviosa, Lumos, Lumos Solem, Immobilus, Riddikulus, Reducto
Abilities: House Access (Gryffindor)
How To Unlock: Collect her Character Token in Lesson Hallway, then purchase in Madam Malkin's


Draco Malfoy
Spell Wheel: Transfiguration, Expelliarmus, Wingardium Leviosa, Lumos, Lumos Solem, Immobilus, Riddikulus, Reducto
Abilities: House Access (Slytherin)
How To Unlock: Collect his Character Token in Pendulum Basement Upper Level, then purchase in Madam Malkin's


Draco (Quidditch)
Spell Wheel: Transfiguration, Expelliarmus, Wingardium Leviosa, Lumos, Lumos Solem, Immobilus, Riddikulus, Reducto
Abilities: House Access (Slytherin)
How To Unlock: Collect his Character Token in Dobby's Plan, then purchase in Madam Malkin's


Draco (Sweater)
Spell Wheel: Transfiguration, Expelliarmus, Wingardium Leviosa, Lumos, Lumos Solem, Immobilus, Riddikulus, Reducto
Abilities: House Access (Slytherin)
How To Unlock: Collect his Character Token in Hogsmeade, then purchase in Madam Malkin's


Draco (Hogwarts)
Spell Wheel: Transfiguration, Expelliarmus, Wingardium Leviosa, Lumos, Lumos Solem, Immobilus, Riddikulus, Reducto
Abilities: House Access (Slytherin)
How To Unlock: Collect his Character Token in The Forbidden Forest, then purchase in Madam Malkin's
Characters cont.
Vincent Crabbe
Spell Wheel: Transfiguration, Expelliarmus, Wingardium Leviosa, Lumos, Lumos Solem, Immobilus, Riddikulus, Reducto
Abilities: House Access (Slytherin)
How To Unlock: Collect his Character Token in Crabbe and Goyle, then purchase in Madam Malkin's


Crabbe (Sweater)
Spell Wheel: Transfiguration, Expelliarmus, Wingardium Leviosa, Lumos, Lumos Solem, Immobilus, Riddikulus, Reducto
Abilities: House Access (Slytherin)
How To Unlock: Collect his Character Token in Hogsmeade, then purchase in Madam Malkin's


Gregory Goyle
Spell Wheel: Transfiguration, Expelliarmus, Wingardium Leviosa, Lumos, Lumos Solem, Immobilus, Riddikulus, Reducto
Abilities: House Access (Slytherin)
How To Unlock: Collect his Character Token in Crabbe and Goyle, then purchase in Madam Malkin's


Goyle (Sweater)
Spell Wheel: Transfiguration, Expelliarmus, Wingardium Leviosa, Lumos, Lumos Solem, Immobilus, Riddikulus, Reducto
Abilities: House Access (Slytherin)
How To Unlock: Collect his Character Token in Hogsmeade, then purchase in Madam Malkin's


Marcus Flint
Spell Wheel: Transfiguration, Expelliarmus, Wingardium Leviosa, Lumos, Lumos Solem, Immobilus, Riddikulus, Reducto
Abilities: House Access (Slytherin)
How To Unlock: Collect his Character Token in A Jinxed Broom, then purchase in Madam Malkin's


Millicent Bulstrode
Spell Wheel: Transfiguration, Expelliarmus, Wingardium Leviosa, Lumos, Lumos Solem, Immobilus, Riddikulus, Reducto
Abilities: House Access (Slytherin)
How To Unlock: Collect her Character Token in Lesson Hallway, then purchase in Madam Malkin's


Slytherin Prefect
Spell Wheel: Transfiguration, Expelliarmus, Wingardium Leviosa, Lumos, Lumos Solem, Immobilus, Riddikulus, Reducto
Abilities: House Access (Slytherin)
How To Unlock: Collect his Character Token in Grassy Courtyard, then purchase in Madam Malkin's


Slytherin Boy
Spell Wheel: Transfiguration, Expelliarmus, Wingardium Leviosa, Lumos, Lumos Solem, Immobilus, Riddikulus, Reducto
Abilities: House Access (Slytherin)
How To Unlock: Collect his Character Token in Slytherin Common Room, then purchase in Madam Malkin's


Slytherin Girl
Spell Wheel: Transfiguration, Expelliarmus, Wingardium Leviosa, Lumos, Lumos Solem, Immobilus, Riddikulus, Reducto
Abilities: House Access (Slytherin)
How To Unlock: Collect her Character Token in Slytherin Common Room, then purchase in Madam Malkin's


Padma Patil
Spell Wheel: Transfiguration, Expelliarmus, Wingardium Leviosa, Lumos, Lumos Solem, Immobilus, Riddikulus, Reducto
Abilities: House Access (Ravenclaw)
How To Unlock: Collect her Character Token in Quidditch Grounds, then purchase in Madam Malkin's


Padma (Ballgown)
Spell Wheel: Transfiguration, Expelliarmus, Wingardium Leviosa, Lumos, Lumos Solem, Immobilus, Riddikulus, Reducto
Abilities: House Access (Ravenclaw)
How To Unlock: Collect her Character Token in Ravenclaw Dorm, then purchase at Madam Malkin's


Cho Chang
Spell Wheel: Transfiguration, Expelliarmus, Wingardium Leviosa, Lumos, Lumos Solem, Immobilus, Riddikulus, Reducto
Abilities: House Access (Ravenclaw)
How To Unlock: Collect her Character Token in Owlery Second Floor, then purchase in Madam Malkin's


Penelope Clearwater
Spell Wheel: Transfiguration, Expelliarmus, Wingardium Leviosa, Lumos, Lumos Solem, Immobilus, Riddikulus, Reducto
Abilities: House Access (Ravenclaw)
How To Unlock: Collect her Character Token in Ravenclaw Tower, then purchase in Madam Malkin's


Ravenclaw Prefect
Spell Wheel: Transfiguration, Expelliarmus, Wingardium Leviosa, Lumos, Lumos Solem, Immobilus, Riddikulus, Reducto
Abilities: House Access (Ravenclaw)
How To Unlock: Collect his Character Token in Clock Tower Courtyard, then purchase in Madam Malkin's


Ravenclaw Boy
Spell Wheel: Transfiguration, Expelliarmus, Wingardium Leviosa, Lumos, Lumos Solem, Immobilus, Riddikulus, Reducto
Abilities: House Access (Ravenclaw)
How To Unlock: Collect his Character Token in Quidditch Grounds, then purchase in Madam Malkin's


Ravenclaw Girl
Spell Wheel: Transfiguration, Expelliarmus, Wingardium Leviosa, Lumos, Lumos Solem, Immobilus, Riddikulus, Reducto
Abilities: House Access (Ravenclaw)
How To Unlock: Collect her Character Token in Library, then purchase in Madam Malkin's
Characters cont.
Justin Finch-Fletchley
Spell Wheel: Transfiguration, Expelliarmus, Wingardium Leviosa, Lumos, Lumos Solem, Immobilus, Riddikulus, Reducto
Abilities: House Access (Hufflepuff)
How To Unlock: Collect his Character Token in Potions Classroom, then purchase in Madam Malkin's


Cedric Diggory
Spell Wheel: Transfiguration, Expelliarmus, Wingardium Leviosa, Lumos, Lumos Solem, Immobilus, Riddikulus, Reducto
Abilities: House Access (Hufflepuff)
How To Unlock: Collect his Character Token in Secret of the Egg, then purchase in Madam Malkin's


Cedric (Dragon Task)
Spell Wheel: Transfiguration, Expelliarmus, Wingardium Leviosa, Lumos, Lumos Solem, Immobilus, Riddikulus, Reducto
Abilities: House Access (Hufflepuff)
How To Unlock: Collect his Character Token in The First Task, then purchase in Madam Malkin's


Cedric (Lake Task)
Spell Wheel: Transfiguration, Expelliarmus, Wingardium Leviosa, Lumos, Lumos Solem, Immobilus, Riddikulus, Reducto
Abilities: House Access (Hufflepuff)
How To Unlock: Collect his Character Token in Hogwarts Grounds, then purchase in Madam Malkin's


Cedric (Maze Task)
Spell Wheel: Transfiguration, Expelliarmus, Wingardium Leviosa, Lumos, Lumos Solem, Immobilus, Riddikulus, Reducto
Abilities: House Access (Hufflepuff)
How To Unlock: Collect his Character Token in The Dark Lord Returns, then purchase in Madam Malkin's


Cedric (Sweater)
Spell Wheel: Transfiguration, Expelliarmus, Wingardium Leviosa, Lumos, Lumos Solem, Immobilus, Riddikulus, Reducto
Abilities: House Access (Hufflepuff)
How To Unlock: Collect his Character Token in Dragons, then purchase in Madam Malkin's


Susan Bones
Spell Wheel: Transfiguration, Expelliarmus, Wingardium Leviosa, Lumos, Lumos Solem, Immobilus, Riddikulus, Reducto
Abilities: House Access (Hufflepuff)
How To Unlock: Collect her Character Token in Library, then purchase in Madam Malkin's


Ernie Macmillan
Spell Wheel: Transfiguration, Expelliarmus, Wingardium Leviosa, Lumos, Lumos Solem, Immobilus, Riddikulus, Reducto
Abilities: House Access (Hufflepuff)
How To Unlock: Collect his Character Token in Lesson Hallway, then purchase in Madam Malkin's


Hannah Abbott
Spell Wheel: Transfiguration, Expelliarmus, Wingardium Leviosa, Lumos, Lumos Solem, Immobilus, Riddikulus, Reducto
Abilities: House Access (Hufflepuff)
How To Unlock: Collect her Character Token in Lesson Hallway, then purchase in Madam Malkin's


Hufflepuff Prefect
Spell Wheel: Transfiguration, Expelliarmus, Wingardium Leviosa, Lumos, Lumos Solem, Immobilus, Riddikulus, Reducto
Abilities: House Access (Hufflepuff)
How To Unlock: Collect his Character Token in Grassy Courtyard, then purchase in Madam Malkin's


Hufflepuff Boy
Spell Wheel: Transfiguration, Expelliarmus, Wingardium Leviosa, Lumos, Lumos Solem, Immobilus, Riddikulus, Reducto
Abilities: House Access (Hufflepuff)
How To Unlock: Collect his Character Token in Clock Tower Courtyard, then purchase in Madam Malkin's


Hufflepuff Girl
Spell Wheel: Transfiguration, Expelliarmus, Wingardium Leviosa, Lumos, Lumos Solem, Immobilus, Riddikulus, Reducto
Abilities: House Access (Hufflepuff)
How To Unlock: Collect her Character Token in Hufflepuff Dorm, then purchase in Madam Malkin's


Arthur Weasley
Spell Wheel: Transfiguration, Expelliarmus, Wingardium Leviosa, Lumos, Lumos Solem, Immobilus, Riddikulus, Expecto Patronum, Reducto
Abilities: Old Age
How To Unlock: Collect his Character Token in Floo Powder!, then purchase in Madam Malkin's


Molly Weasley
Spell Wheel: Transfiguration, Expelliarmus, Wingardium Leviosa, Lumos, Lumos Solem, Immobilus, Riddikulus, Expecto Patronum, Reducto
Abilities: Old Age
How To Unlock: Collect her Character Token in Great Hall, then purchase in Madam Malkin's


Witch (Grey)
Spell Wheel: Transfiguration, Expelliarmus, Wingardium Leviosa, Lumos, Lumos Solem, Immobilus, Riddikulus, Reducto
Abilities: Old Age
How To Unlock: Collect her Character Token in The Shrieking Shack, then purchase in Madam Malkin's


Sirius Black
Spell Wheel: Transfiguration, Expelliarmus, Animagus (Padfoot), Wingardium Leviosa, Lumos, Lumos Solem, Immobilus, Riddikulus, Expecto Patronum, Reducto
Abilities: Dig (as Padfoot), Old Age, Super Strength (as Padfoot)
How To Unlock: Collect his Character Token in The Dark Tower, then purchase in Madam Malkin's
Characters cont.
Lily Potter (Ghost)
Spell Wheel: None
Abilities: None
How To Unlock: Collect her Character Token in The Dark Tower, then purchase in Madam Malkin's

As a ghost, Lily Potter can scare people. Press the "attack" button to scare nearby characters.


James Potter (Ghost)
Spell Wheel: None
Abilities: None
How To Unlock: Collect his Character Token in The Dark Tower, then purchase in Madam Malkin's

As a ghost, James Potter can scare people. Press the "attack" button to scare nearby characters.


Lord Voldemort
Spell Wheel: Transfiguration, Expelliarmus, Avada Kadavra, Crucio, Wingardium Leviosa, Lumos, Lumos Solem, Immobilus, Riddikulus, Expecto Patronum, Reducto
Abilities: Dark Magic, House Access (Slytherin), Old Age
How To Unlock: Collect his Character Token in Harry's Destiny, then purchase in Madam Malkin's


Professor Quirrell (Voldemort)
Spell Wheel: Transfiguration, Expelliarmus, Avada Kadavra, Crucio, Wingardium Leviosa, Lumos, Lumos Solem, Immobilus, Riddikulus, Expecto Patronum, Reducto
Abilities: Dark Magic, House Access (Slytherin), Old Age
How To Unlock: Collect his Character Token in Face of the Enemy, then purchase in Madam Malkin's


Lucius Malfoy
Spell Wheel: Transfiguration, Expelliarmus, Avada Kadavra, Crucio, Wingardium Leviosa, Lumos, Lumos Solem, Immobilus, Riddikulus, Expecto Patronum, Reducto
Abilities: Dark Magic, Old Age
How To Unlock: Collect his Character Token in Follow the Spiders, then purchase in Madam Malkin's


Tom Riddle
Spell Wheel: Transfiguration, Expelliarmus, Avada Kadavra, Crucio, Wingardium Leviosa, Lumos, Lumos Solem, Immobilus, Riddikulus, Expecto Patronum, Reducto
Abilities: Dark Magic, House Access (Slytherin)
How To Unlock: Collect his Character Token in The Basilisk, then purchase in Madam Malkin's


Peter Pettigrew
Spell Wheel: Transfiguration, Expelliarmus, Animagus (Scabbers), Crucio, Wingardium Leviosa, Lumos, Lumos Solem, Immobilus, Riddikulus, Expecto Patronum, Reducto
Abilities: Dark Magic, Pet (as Scabbers)
How To Unlock: Collect his Character Token in The Shrieking Shack, then purchase in Madam Malkin's


Igor Karkaroff
Spell Wheel: Transfiguration, Expelliarmus, Wingardium Leviosa, Lumos, Lumos Solem, Immobilus, Riddikulus, Expecto Patronum, Reducto
Abilities: Old Age
How To Unlock: Collect his Character Token in Knockturn Alley, then purchase in Madam Malkin's


Barty Crouch Junior
Spell Wheel: Transfiguration, Expelliarmus, Avada Kadavra, Crucio, Wingardium Leviosa, Lumos, Lumos Solem, Immobilus, Riddikulus, Expecto Patronum, Reducto
Abilities: Dark Magic
How To Unlock: Collect his Character Token in The Quidditch World Cup, then purchase in Madam Malkin's


Death Eater
Spell Wheel: Transfiguration, Expelliarmus, Avada Kadavra, Crucio, Wingardium Leviosa, Lumos, Lumos Solem, Immobilus, Riddikulus, Expecto Patronum, Reducto
Abilities: Dark Magic
How To Unlock: Collect his Character Token in The Quidditch World Cup, then purchase in Madam Malkin's


The Bloody Baron
Spell Wheel: None
Abilities: House Access (Slytherin)
How To Unlock: Collect his Character Token in Knockturn Alley, then purchase in Madam Malkin's

As a ghost, The Bloody Baron can scare people. Press the "attack" button to scare nearby characters.


The Fat Friar
Spell Wheel: None
Abilities: House Access (Hufflepuff), Old Age
How To Unlock: Collect his Character Token in Hufflepuff Common Room, then purchase in Madam Malkin's

As a ghost, The Fat Friar can scare people. Press the "attack" button to scare nearby characters.


The Grey Lady
Spell Wheel: None
Abilities: House Access (Ravenclaw), Old Age
How To Unlock: Collect her Character Token in Mischief Managed, then purchase in Madam Malkin's

As a ghost, The Grey Lady can scare people. Press the "attack" button to scare nearby characters.


Nearly Headless Nick
Spell Wheel: None
Abilities: House Access (Gryffindor), Old Age
How To Unlock: Collect his Character Token in Dumbledore's Office, then purchase in Madam Malkin's

As a ghost, Nearly Headless Nick can scare people. Press the "attack" button to scare nearby characters.


Moaning Myrtle
Spell Wheel: None
Abilities: House Access (Ravenclaw), Old Age
How To Unlock: Collect her Character Token in Tom Riddle's Diary, then purchase in Madam Malkin's

As a ghost, Moaning Myrtle can scare people. Press the "attack" button to scare nearby characters.
Characters cont.
Moaning Myrtle (Swimsuit)
Spell Wheel: None
Abilities: House Access (Ravenclaw), Old Age
How To Unlock: Collect her Character Token in Secret of the Egg, then purchase in Madam Malkin's

As a ghost, Moaning Myrtle can scare people. Press the "attack" button to scare nearby characters.


Fang
Spell Wheel: None
Abilities: Dig, Super Strength
How To Unlock: Collect his Character Token in The Forbidden Forest, then purchase in Madam Malkin's


Dobby
Spell Wheel: Wingardium Leviosa
Abilities: None
How To Unlock: Collect his Character Token in Dobby's Plan, then purchase in Madam Malkin's


Griphook
Spell Wheel: None
Abilities: Goblin Key
How To Unlock: Collect his Character Token in The Magic Begins, then purchase in Madam Malkin's


Amos Diggory
Spell Wheel: Transfiguration, Expelliarmus, Wingardium Leviosa, Lumos, Lumos Solem, Immobilus, Riddikulus, Expecto Patronum, Reducto
Abilities: None
How To Unlock: Collect his Character Token in Hagrid's Garden, then purchase in Madam Malkin's


Barty Crouch Senior
Spell Wheel: Transfiguration, Expelliarmus, Wingardium Leviosa, Lumos, Lumos Solem, Immobilus, Riddikulus, Expecto Patronum, Reducto
Abilities: Old Age
How To Unlock: Collect his Character Token in Owlery First Floor, then purchase in Madam Malkin's


Doris Crockford
Spell Wheel: Transfiguration, Expelliarmus, Wingardium Leviosa, Lumos, Lumos Solem, Immobilus, Riddikulus, Expecto Patronum, Reducto
Abilities: Old Age
How To Unlock: Collect her Character Token in Main Hallway, then purchase in Madam Malkin's


Wizard (Red)
Spell Wheel: Transfiguration, Expelliarmus, Wingardium Leviosa, Lumos, Lumos Solem, Immobilus, Riddikulus, Reducto
Abilities: Old Age
How To Unlock: Collect his Character Token in Restricted Section, then purchase in Madam Malkin's


Witch (White)
Spell Wheel: Transfiguration, Expelliarmus, Wingardium Leviosa, Lumos, Lumos Solem, Immobilus, Riddikulus, Reducto
Abilities: Old Age
How To Unlock: Collect her Character Token in Entrance Hall, then purchase in Madam Malkin's


Mr. Ollivander
Spell Wheel: Transfiguration, Expelliarmus, Wingardium Leviosa, Lumos, Lumos Solem, Immobilus, Riddikulus, Expecto Patronum, Reducto
Abilities: None
How To Unlock: Collect his Character Token in The Magic Begins, then purchase in Madam Malkin's


Tom the Innkeeper
Spell Wheel: Transfiguration, Expelliarmus, Wingardium Leviosa, Lumos, Lumos Solem, Immobilus, Riddikulus, Expecto Patronum, Reducto
Abilities: Old Age
How To Unlock: Collect his Character Token in The Magic Begins, then purchase in Madam Malkin's


Filch
Spell Wheel: None
Abilities: Dig (with Mrs. Norris), Pet (Mrs. Norris)
How To Unlock: Collect his Character Token in The Restricted Section, then purchase in Madam Malkin's


Madam Malkin
Spell Wheel: Transfiguration, Expelliarmus, Wingardium Leviosa, Lumos, Lumos Solem, Immobilus, Riddikulus, Expecto Patronum, Reducto
Abilities: Old Age
How To Unlock: Collect her Character Token in Out of the Dungeon, then purchase in Madam Malkin's


Madam Rosmerta
Spell Wheel: Transfiguration, Expelliarmus, Wingardium Leviosa, Lumos, Lumos Solem, Immobilus, Riddikulus, Expecto Patronum, Reducto
Abilities: Old Age
How To Unlock: Collect her Character Token in Clock Tower, then purchase in Madam Malkin's


Stan Shunpike
Spell Wheel: Transfiguration, Expelliarmus, Wingardium Leviosa, Lumos, Lumos Solem, Immobilus, Riddikulus, Expecto Patronum, Reducto
Abilities: Old Age
How To Unlock: Collect his Character Token in News From Azkaban, then purchase in Madam Malkin's


Rita Skeeter
Spell Wheel: Transfiguration, Expelliarmus, Animagus (Bug), Wingardium Leviosa, Lumos, Lumos Solem, Immobilus, Riddikulus, Expecto Patronum, Reducto
Abilities: Old Age, Pet (as Bug)
How To Unlock: Collect her Character Token in Slytherin Dungeon, then purchase in Madam Malkin's


Cornelius Fudge
Spell Wheel: Transfiguration, Expelliarmus, Wingardium Leviosa, Lumos, Lumos Solem, Immobilus, Riddikulus, Expecto Patronum, Reducto
Abilities: Old Age
How To Unlock: Collect his Character Token in Dementor's Kiss, then purchase in Madam Malkin's
Characters cont.
Ernie Prang
Spell Wheel: Transfiguration, Expelliarmus, Wingardium Leviosa, Lumos, Lumos Solem, Immobilus, Riddikulus, Reducto
Abilities: Old Age
How To Unlock: Collect his Character Token in News From Azkaban, then purchase in Madam Malkin's


Macnair
Spell Wheel: Transfiguration, Expelliarmus, Avada Kadavra, Crucio, Wingardium Leviosa, Lumos, Lumos Solem, Immobilus, Riddikulus, Expecto Patronum, Reducto
Abilities: Dark Magic, Old Age
How To Unlock: Collect his Character Token in Dementor's Kiss, then purchase in Madam Malkin's


Boy
Spell Wheel: Transfiguration, Expelliarmus, Wingardium Leviosa, Lumos, Lumos Solem, Immobilus, Riddikulus, Reducto
Abilities: None
How To Unlock: Collect his Character Token in Charms Class 1, then purchase in Madam Malkin's


Girl
Spell Wheel: Transfiguration, Expelliarmus, Wingardium Leviosa, Lumos, Lumos Solem, Immobilus, Riddikulus, Reducto
Abilities: None
How To Unlock: Collect her Character Token in Charms Class 2, then purchase in Madam Malkin's


Vocalist
Spell Wheel: Transfiguration, Expelliarmus, Wingardium Leviosa, Lumos, Lumos Solem, Immobilus, Riddikulus, Expecto Patronum, Reducto
Abilities: Old Age
How To Unlock: Collect his Character Token in Tom Riddle's Diary, then purchase in Madam Malkin's


Guitarist
Spell Wheel: Transfiguration, Expelliarmus, Wingardium Leviosa, Lumos, Lumos Solem, Immobilus, Riddikulus, Expecto Patronum, Reducto
Abilities: Old Age
How To Unlock: Collect his Character Token in The Black Lake, then purchase in Madam Malkin's


Bassist
Spell Wheel: Transfiguration, Expelliarmus, Wingardium Leviosa, Lumos, Lumos Solem, Immobilus, Riddikulus, Expecto Patronum, Reducto
Abilities: Old Age
How To Unlock: Collect his Character Token in Black Lake, then purchase in Madam Malkin's


Drummer
Spell Wheel: Transfiguration, Expelliarmus, Wingardium Leviosa, Lumos, Lumos Solem, Immobilus, Riddikulus, Expecto Patronum, Reducto
Abilities: Old Age
How To Unlock: Collect his Character Token in Garden Shed, then purchase in Madam Malkin's


Wizard (Green)
Spell Wheel: Transfiguration, Expelliarmus, Wingardium Leviosa, Lumos, Lumos Solem, Immobilus, Riddikulus, Reducto
Abilities: Old Age
How To Unlock: Collect his Character Token in The Basilisk, then purchase in Madam Malkin's


Dragon Handler
Spell Wheel: Transfiguration, Expelliarmus, Wingardium Leviosa, Lumos, Lumos Solem, Immobilus, Riddikulus, Expecto Patronum, Reducto
Abilities: Old Age
How To Unlock: Collect his Character Token in Dragons, then purchase in Madam Malkin's


Shifty Wizard
Spell Wheel: Transfiguration, Expelliarmus, Wingardium Leviosa, Lumos, Lumos Solem, Immobilus, Riddikulus, Expecto Patronum, Reducto
Abilities: Old Age
How To Unlock: Collect his Character Token in Knockturn Alley, then purchase in Madam Malkin's


Trolley Witch
Spell Wheel: Transfiguration, Expelliarmus, Wingardium Leviosa, Lumos, Lumos Solem, Immobilus, Riddikulus, Expecto Patronum, Reducto
Abilities: Old Age
How To Unlock: Collect her Character Token in News From Azkaban, then purchase in Madam Malkin's


Station Guard
Spell Wheel: None
Abilities: None
How To Unlock: Collect his Character Token in Defense Against the Dark Arts Classroom 1, then purchase in Madam Malkin's


Fleur Delacour
Spell Wheel: Transfiguration, Expelliarmus, Wingardium Leviosa, Lumos, Lumos Solem, Immobilus, Riddikulus, Reducto
Abilities: None
How To Unlock: Collect her Character Token in Garden Path, then purchase in Madam Malkin's


Fleur (Dragon Task)
Spell Wheel: Transfiguration, Expelliarmus, Wingardium Leviosa, Lumos, Lumos Solem, Immobilus, Riddikulus, Reducto
Abilities: None
How To Unlock: Collect her Character Token in The First Task, then purchase in Madam Malkin's


Fleur (Lake Task)
Spell Wheel: Transfiguration, Expelliarmus, Wingardium Leviosa, Lumos, Lumos Solem, Immobilus, Riddikulus, Reducto
Abilities: None
How To Unlock: Collect her Character Token in Secret of the Egg, then purchase in Madam Malkin's


Fleur (Maze Task)
Spell Wheel: Transfiguration, Expelliarmus, Wingardium Leviosa, Lumos, Lumos Solem, Immobilus, Riddikulus, Reducto
Abilities: None
How To Unlock: Collect her Character Token in The Dark Lord Returns, then purchase in Madam Malkin's
Characters cont.
Krum Shark
Spell Wheel: None
Abilities: Super Strength
How To Unlock: Collect his Character Token in The Black Lake, then purchase in Madam Malkin's


Viktor Krum
Spell Wheel: Transfiguration, Expelliarmus, Wingardium Leviosa, Lumos, Lumos Solem, Immobilus, Riddikulus, Reducto
Abilities: Super Strength
How To Unlock: Collect his Character Token in Hogwarts Grounds, then purchase in Madam Malkin's


Viktor (Dragon Task)
Spell Wheel: Transfiguration, Expelliarmus, Wingardium Leviosa, Lumos, Lumos Solem, Immobilus, Riddikulus, Reducto
Abilities: Super Strength
How To Unlock: Collect his Character Token in Training Grounds, then purchase in Madam Malkin's


Viktor (Lake Task)
Spell Wheel: Transfiguration, Expelliarmus, Wingardium Leviosa, Lumos, Lumos Solem, Immobilus, Riddikulus, Reducto
Abilities: Super Strength
How To Unlock: Collect his Character Token in The Dark Lord Returns, then purchase in Madam Malkin's


Viktor (Tuxedo)
Spell Wheel: Transfiguration, Expelliarmus, Wingardium Leviosa, Lumos, Lumos Solem, Immobilus, Riddikulus, Reducto
Abilities: Super Strength
How To Unlock: Collect his Character Token in Gear Basement, then purchase in Madam Malkin's


Gabrielle Delacour
Spell Wheel: Transfiguration, Expelliarmus, Wingardium Leviosa, Lumos, Lumos Solem, Immobilus, Riddikulus, Reducto
Abilities: None
How To Unlock: Collect her Character Token in Ravenclaw Common Room, then purchase in Madam Malkin's


Durmstrang Student
Spell Wheel: Transfiguration, Expelliarmus, Wingardium Leviosa, Lumos, Lumos Solem, Immobilus, Riddikulus, Reducto
Abilities: None
How To Unlock: Collect his Character Token in Dragons, then purchase in Madam Malkin's


Vernon Dursley
Spell Wheel: None
Abilities: Old Age
How To Unlock: Collect his Character Token in Clock Tower, then purchase in Madam Malkin's


Petunia Dursley
Spell Wheel: None
Abilities: Old Age
How To Unlock: Collect her Character Token in Hagrid's Garden, then purchase in Madam Malkin's


Dudley Dursley
Spell Wheel: None
Abilities: None
How To Unlock: Collect his Character Token in Computer Room, then purchase in Madam Malkin's


Milkman
Spell Wheel: None
Abilities: Old Age
How To Unlock: Collect his Character Token in Clock Tower, then purchase in Madam Malkin's


Mrs. Mason
Spell Wheel: None
Abilities: Old Age
How To Unlock: Collect her Character Token in Computer Room, then purchase in Madam Malkin's


Mr. Mason
Spell Wheel: None
Abilities: Old Age
How To Unlock: Collect his Character Token in Computer Room, then purchase in Madam Malkin's
Minikit Models
After collecting all 24 Gold Bricks in a particular movie, you can head to the basement of the Leaky Cauldron and build a Minikit Model. Completing the Minikit Model will give you another Gold Brick.

The Sorcerer's Stone


The Chamber of Secrets


The Prisoner of Azkaban


The Goblet of Fire
Red Parcel Extras
There are a total of 24 Extras available in this game. The first four can be purchased from Eeylops Owl Emporium. The other 20 you'll have to unlock by collecting the Red Parcels hidden around Hogwarts. Below I've listed each Extra in the order they appear in the menu. I have also listed what they do, and how to unlock them.

Silhouettes
How To Unlock: Create a new game, then purchase in Eeylops Owl Emporium
What It Does: This turns all characters into black silhouettes of themselves

Ice Rink
How To Unlock: Create a new game, then purchase in Eeylops Owl Emporium
What It Does: This makes the floor super slippery, and it will take longer for you to change direction. This also applies to enemy characters

Disguise
How To Unlock: Create a new game, then purchase in Eeylops Owl Emporium
What It Does: This gives all characters fake glasses, noses and a moustache

Carrot Wands
How To Unlock: Create a new game, then purchase in Eeylops Owl Emporium
What It Does: This turns all wants into carrots! They'll still function properly, but now they're edible!

Singing Mandrake
How To Unlock: Collect the Red Parcel in Greenhouse 2, then purchase in Eeylops Owl Emporium
What It Does: This turns the Mandrake's screeches into beautiful singing. You'll still need to wear earmuffs to pick them up though

Character Token Detector
How To Unlock: Collect the Red Parcel in Charms Dungeon, then purchase in Eeylops Owl Emporium
What It Does: Arrows will point to the final locations of Character Tokens. Keep in mind that this won't tell you how to actually get the Character Tokens, just where they'll appear

Fall Rescue
How To Unlock: Collect the Red Parcel in Gryffindor Dorm, then purchase in Eeylops Owl Emporium
What It Does: If you are going to fall off a ledge, you will be magically levitated back onto it

Character Studs
How To Unlock: Collect the Red Parcel in Great Hall, then purchase in Eeylops Owl Emporium
What It Does: Defeated characters (and other enemies) will drop a small amount of studs

Score x2
How To Unlock: Collect the Red Parcel in Clock Tower, then purchase in Eeylops Owl Emporium
What It Does: Multiplies the value of all collected studs by 2. This stacks with other stud multiplier Extras

Score x4
How To Unlock: Collect the Red Parcel in Slytherin Dorm, then purchase in Eeylops Owl Emporium
What It Does: Multiplies the value of all collected studs by 4. This stacks with other stud multipler Extras

Score x6
How To Unlock: Collect the Red Parcel in Computer Room, then purchase in Eeylops Owl Emporium
What It Does: Multiplies the value of all collected studs by 6. This stacks with other stud multiplier Extras

Score x8
How To Unlock: Collect the Red Parcel in Boy's Bathroom, then purchase in Eeylops Owl Emporium
What It Does: Multiplies the value of all collected studs by 8. This stacks with other stud multiplier Extras

Score x10
How To Unlock: Collect the Red Parcel in Potions Dungeon, then purchase in Eeylops Owl Emporium
What It Does: Multiplies the value of all collected studs by 10. This stacks with other stud multiplier Extras

Stud Magnet
How To Unlock: Collect the Red Parcel in Quidditch Grounds, then purchase in Eeylops Owl Emporium
What It Does: This increases the radius at which you can pick up studs, making collecting them easier

Regenerate Hearts
How To Unlock: Collect the Red Parcel in Gear Basement, then purchase in Eeylops Owl Emporium
What It Does: If you are missing any hearts, you will regenerate one heart every few seconds

Extra Hearts
How To Unlock: Collect the Red Parcel in Dragon Basement, then purchase in Eeylops Owl Emporium
What It Does: This gives you 6 hearts instead of 4

Invincibility
How To Unlock: Collect the Red Parcel in Dumbledore's Office, then purchase in Eeylops Owl Emporium
What It Does: This makes you immune to damage from enemy attacks and other environmental hazards

Red Brick Detector
How To Unlock: Collect the Red Parcel in Restricted Section, then purchase in Eeylops Owl Emporium
What It Does: Arrows will point to the final locations of Red Parcels. Keep in mind that this won't tell you how to actually get the Red Parcels, just where they'll appear

Hogwarts Crest Detector
How To Unlock: Collect the Red Parcel in Ravenclaw Common Room, then purchase in Eeylops Owl Emporium
What It Does: Arrows will point to the final locations of Hogwarts Crest Pieces. Keep in mind that this won't tell you how to actually get the Crest Pieces, just where they'll appear

Gold Brick Detector
How To Unlock: Collect the Red Parcel in Owlery, then purchase in Eeylops Owl Emporium
What It Does: Arrows will point to the final locations of Gold Bricks. Keep in mind that this won't tell you how to actually get the Gold Bricks, just where they'll appear

Christmas
How To Unlock: Collect the Red Parcel in Hufflepuff Dorm, then purchase in Eeylops Owl Emporium
What It Does: Everyone will be wearing Santa hats!

Collect Ghost Studs
How To Unlock: Collect the Red Parcel in Clock Tower Courtyard, then purchase in Eeylops Owl Emporium
What It Does: This allows you to collect the ghost studs that Nearly Headless Nick leaves behind. Each ghost stud is worth 1,000 studs

Fast Magic
How To Unlock: Collect the Red Parcel in Defense Against the Dark Arts Classroom 2, then purchase in Eeylops Owl Emporium
What It Does: This greatly increases the speed at which you perform spells. This doesn't effect how fast they travel, it only affect how long it takes to interact with objects when you hold the "special" button. This also speeds up your building time.

Fast Dig
How To Unlock: Collect the Red Parcel in Hogwarts Grounds, then purchase in Eeylops Owl Emporium
What It Does: This greatly increases the speed at which you dig up buried objects
Cheat Codes
This is a list of the Cheat Codes available to use in the game. As mentioned in the "Tour of Diagon Alley" section, these Cheat Codes can be entered in the top floor of Wiseacre's Wizarding Equipment.

I have personally checked all of these codes and I can vouch for their authenticity. If you have any other Cheat Codes that you wish to share, please message me and I will check them. If they work, I will add them to this list and give credit to you.

Gold Bricks
QE4VC7 - Gold Brick 1
FY8H97 - Gold Brick 2
3MQT4P - Gold Brick 3
PQPM7Z - Gold Brick 4
ZY2CPA - Gold Brick 5
3GMTP6 - Gold Brick 6
XY6VYZ - Gold Brick 7
TUNC4W - Gold Brick 8
EJ42Q6 - Gold Brick 9
GFJCV9 - Gold Brick 10
DZCY6G - Gold Brick 11

Extras
HZBVX7 - Silhouettes
F88VUW - Ice Rink
4DMK2R - Disguise
AUC8EH - Carrot Wands
BMEU6X - Singing Mandrake
HA79V8 - Character Token Detector
ZEX7MV - Fall Rescue
H27KGC - Character Studs
74YKR7 - Score x2
J3WHNK - Score x4
XK9ANE - Score x6
HUFV2H - Score x8
H8X69Y - Score x10
67FKWZ - Stud Magnet
89ML2W - Regenerate Hearts
J9U6Z9 - Extra Hearts
QQWC6B - Invincibility
7AD7HE - Red Brick Detector
TTMC6D - Hogwarts Crest Detector
84QNQN - Gold Brick Detector
T7PVVN - Christmas
FA3GQA - Fast Magic
Z9BFAD - Fast Dig

Joke Spells
U6EE8X - Slugulus Eructo
JK6QRM - Multicorfors
2UCA3M - Rictusempra
MYN3NB - Entomorphis
KWWQ44 - Tarantallegra
2M2XJ6 - Locomotor Mortis
UW8LRH - Redactum Skullus
9GJ442 - Colovaria
6DNR6L - Calvorio
QFB6NR - Anteoculatia
H8FTHL - Herbifors
ERA9DR - Glacius
YEB9Q9 - Incarcerous
ND2L7W - Flipendo
YZNRF6 - Trip Jinx
UWDJ4Y - Stupefy
CD4JLX - Engorgio Skullus
VE9VV7 - Accio
Komentarzy: 13
Solar Gremlin 7 stycznia o 23:18 
After a couple more minutes of trying to figure it out, I got the brick. They threw the Quaffle (I think that's how you spell it) to the fourth painting, which then went to the third then fifth. Still a weird bug.
Solar Gremlin 7 stycznia o 23:14 
Hey, this is a really great guide and I am excited to play the next game you make a guide for. But I am having trouble getting the gold brick in the Grand Staircase. Once I hit the first painting, they throw it. But the second painting isn't there. I would attach a screenshot but (by my limited research) there is no way to do so. If anyone could help, that would be great!
legogamesguy  [autor] 5 stycznia 2024 o 10:12 
Thanks so much! I love making these guides, so it's always good to hear that people find them helpful!
aldanaaldebaran 5 stycznia 2024 o 7:20 
YOOOOOOOOOOOOOO!
Thank you so much!
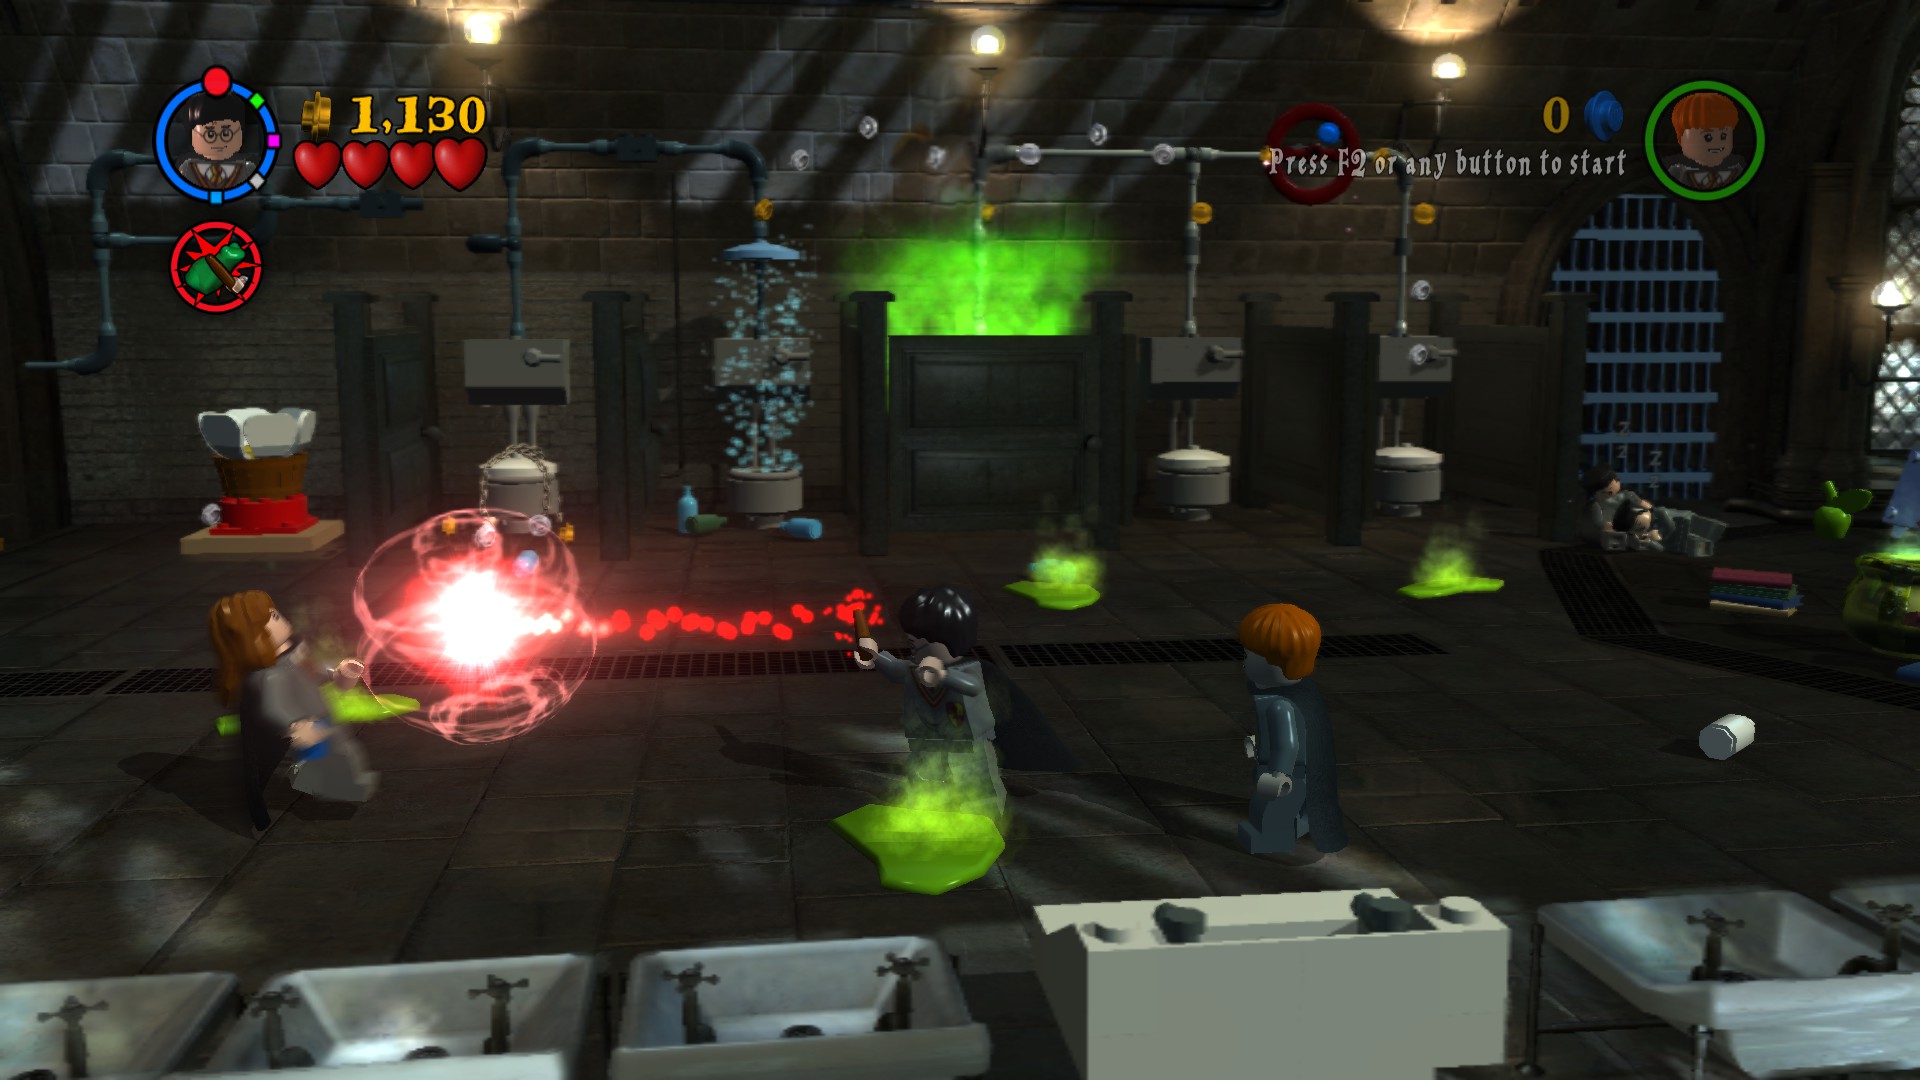
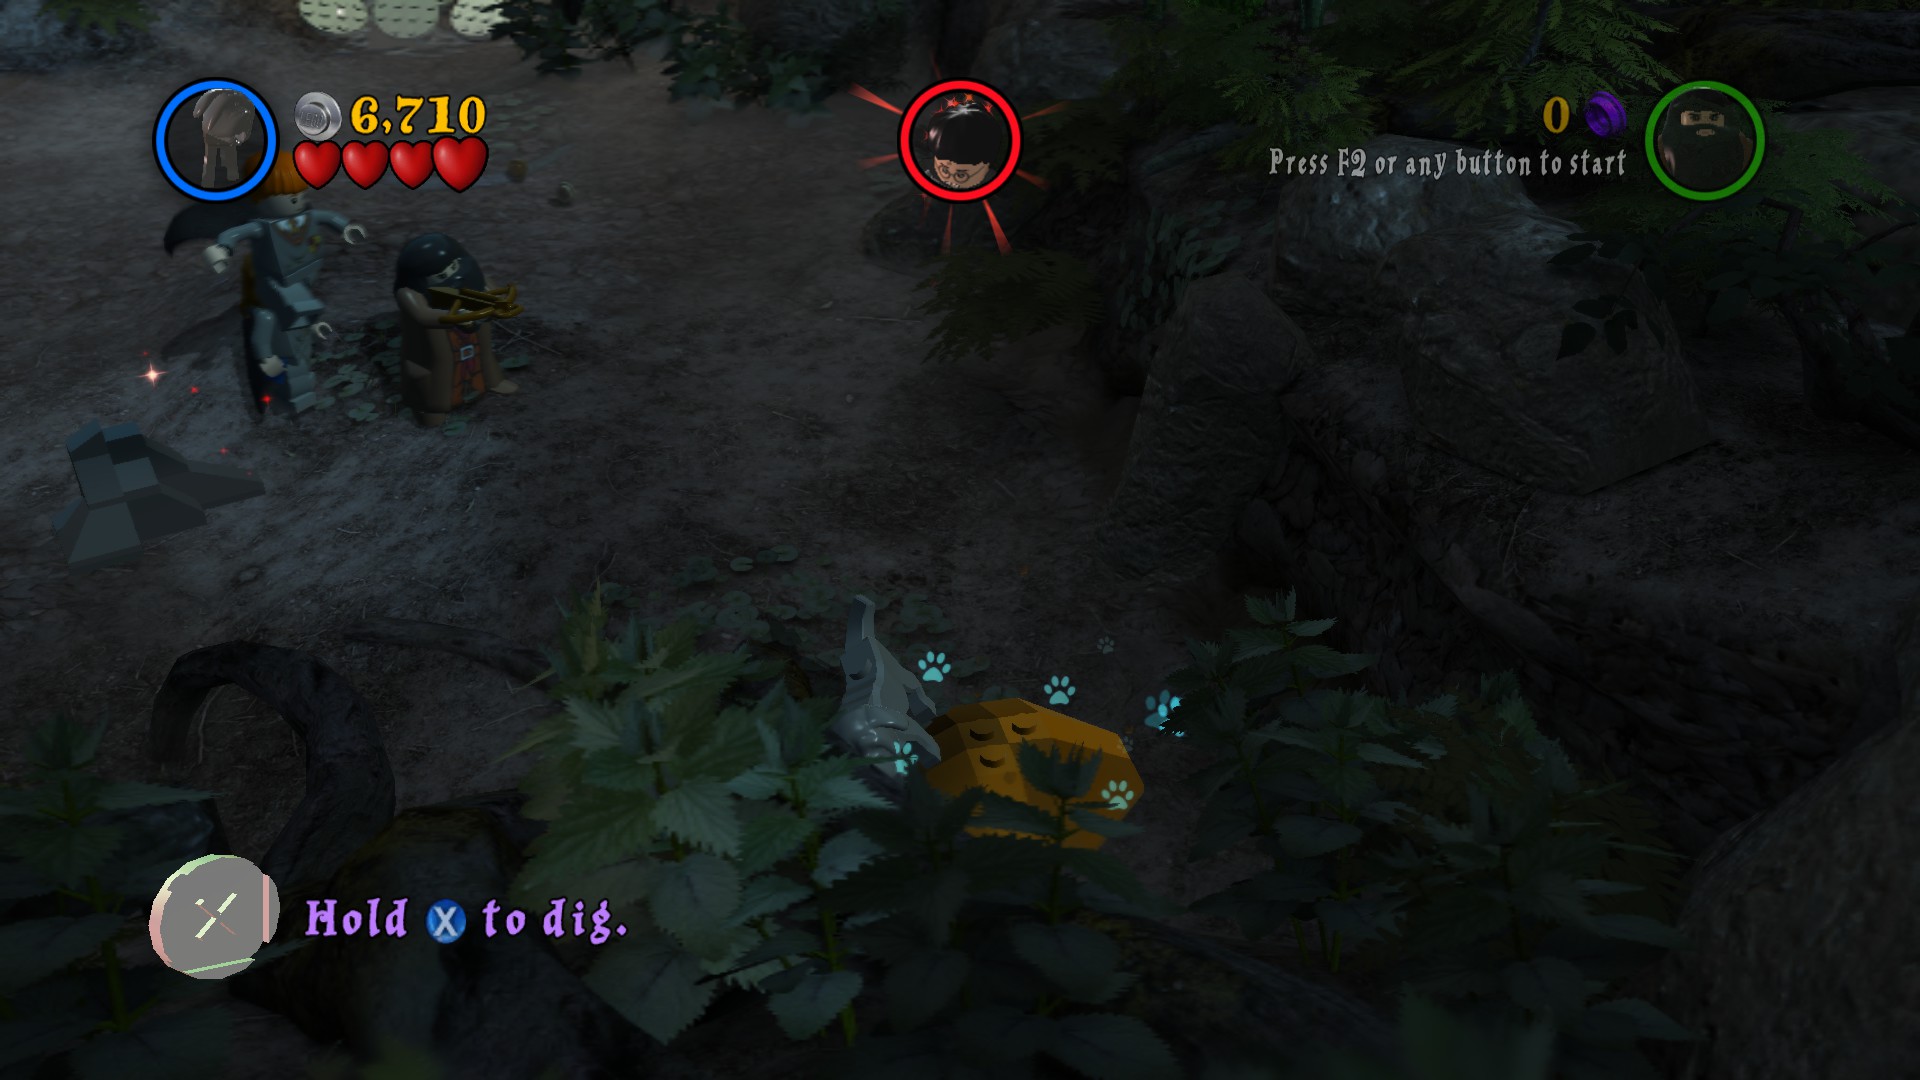
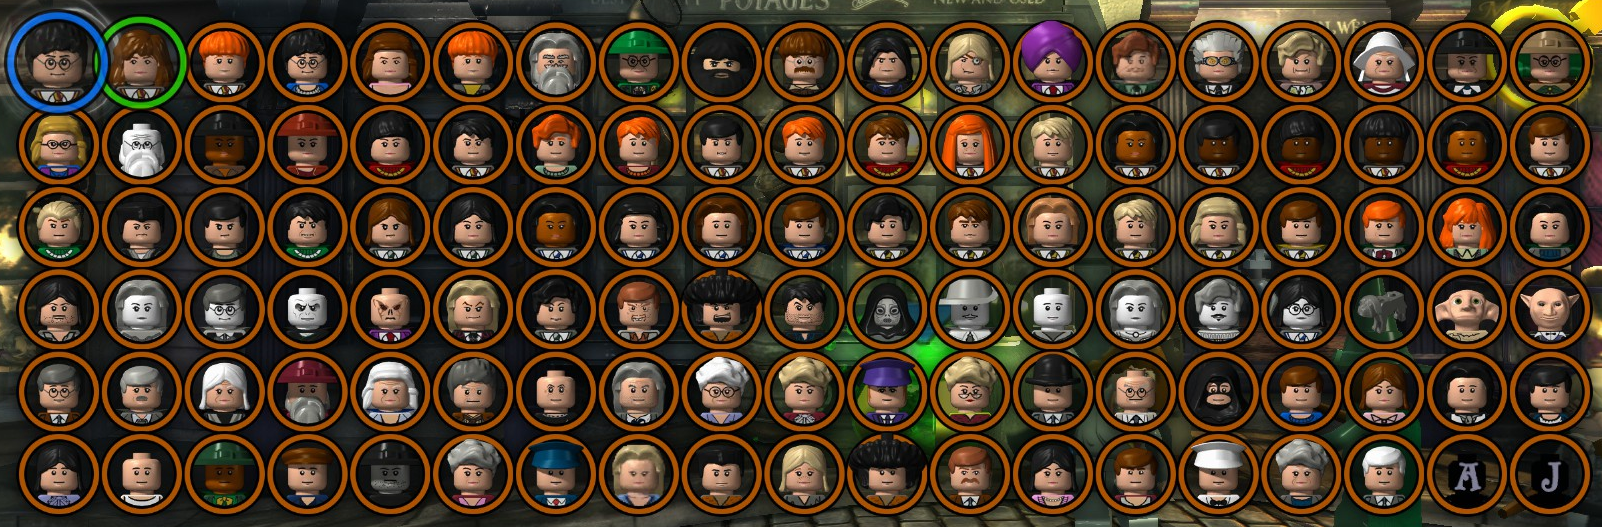
This game is my current obsession and i was looking for info like, the abbility list, what the red bricks do, and what abbilities each charachter had, just out of nerdiness XD
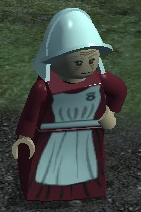
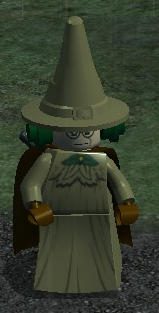
Like, now i know cat Hermaione can dig and Pompfrey is the only one able to take mandrakes without earmuffs lol
Anyway, any other guide i found online was incomplete or incorrect, it's amazing how you did this, i'ts very good and shows your effort uvu :steamthumbsup::steamthumbsup::steamthumbsup:
legogamesguy  [autor] 23 lipca 2022 o 3:06 
Just reuploaded both map images to their respective sections. The maps are just images that I added to the guide, so if they don't load right away just give them time.
Whatamadoo 23 lipca 2022 o 1:40 
The maps give me an invalid URL error.
legogamesguy  [autor] 18 marca 2022 o 17:38 
Give them time to load and they should appear
Xav1er 16 marca 2022 o 23:05 
Just letting you know, the maps aren't there. Otherwise an absolutely amazing guide
Rondrian82 7 czerwca 2021 o 1:13 
Amazing guide! Thank you very much :)
legogamesguy  [autor] 12 stycznia 2021 o 20:36 
Yes I have :) I finished it pretty recently