LEGO® Indiana Jones™ 2: The Adventure Continues

LEGO® Indiana Jones™ 2: The Adventure Continues

93 értékelés
BLVGH - LEGO Indiana Jones 2: The Adventure Continues
Készítő: legogamesguy
This is my new and improved guide for LEGO Indiana Jones 2: The Adventure Continues! In an effort to make my guides more helpful and engaging, I have decided to rework them! I would appreciate any feedback you guys have about this new format, so be sure to leave a comment or shoot me a direct message!

In this guide you will find:
-A rundown of Gameplay Basics
-How to complete all 5 Story levels in each playset
-How to unlock and complete all 5 Treasure and all 5 Bonus levels in each playset
-How to find and unlock all Characters and Vehicles in each of the hubs
-How to find all Colored Bricks in each of the hubs
-A full list of all Characters and Vehicles in each playset
-How to get 100% in the Creator playset
-A list of all Colored Brick Extras
-A list of Cheat Codes

These guides have always been and will always be free. However, working on these guides takes considerable time and effort. If you like the guide, feel free to show your appreciation with a Steam Award! I appreciate all the points and support you guys have given me!
5
3
5
2
   
Díjazás
Kedvenc
Kedvenc
Törlés
------------Gameplay Basics------------
The Warehouse
When you start a new game, and every time you load a saved game, you will begin in the warehouse. The warehouse is where you will access the hubs for each of the six "movies".

When you begin a new game, you'll only have access to one hub: Kingdom of the Crystal Skull - Part 1. Select it and Indy and Mac will open it up.


From here, you can see your overall progress in this particular hub. The 15 question marks correspond to the 15 levels in each hub (5 Story, 5 Treasure and 5 Bonus). Once you complete a mission for the first time, you'll be able to replay it whenever you want from this menu. You can also see all of the characters and vehicles that you have unlocked for that particular hub. On the left side, you will be able to see how many Treasures and Colored Bricks you have collected.

When you are ready to begin, select the "Start Story" option and you will be transported to the hub.

After completing the first Story level in Kingdom of the Crystal Skull - Part 1, you will unlock Raiders of the Lost Ark and the Creator. Other hubs are unlocked chronologically (Temple of Doom after Raiders of the Lost Ark, etc.).
Game Modes
This game operates differently then every other LEGO game, so I encourage you to read this section to better understand the different kinds of levels.

Story levels are the first kinds of levels you'll play, and are unlocked by progressing through the hub. The locations of Story levels are marked with green arrows. Story levels will give you a predetermined set of characters to help you complete the level. Once you complete a Story level, you will be placed in the hub, and will have to progress to the next Story level. This usually means walking to a new location, and is oftentimes very easy. I have included the interludes in between each of the Story levels.

Once you beat a Story level for the first time, you'll notice a gold arrow pointing at its entrance. Enter again and you'll find yourself in the Treasure level. Unlike Story levels, Treasure levels task you with solving a puzzle to reveal a Treasure. You will need certain abilities to complete certain Treasure levels, and the characters that you bring into the level need to have those abilities. Otherwise, you will not be able to complete the level. Before each Treasure level, I list the abilities that you'll need to complete each Treasure level.

Once you complete a Treasure level, you will be able to select if you want to play the Story or Treasure level when you walk into the level's location.

The third type of level are Bonus levels. Bonus levels need to be found by solving puzzles in the environment. Similar to Treasure levels, your task in Bonus levels is to find the Treasure. However, you will be given two characters to use to find the Treasure, so you don't have to worry about bringing the right characters.


Once you beat them for the first time, you can replay Story, Treasure or Bonus levels from the hub menu in the Warehouse.

Once you collect all 10 Treasures, you will be able to play the Super Bonus level. Head to a specific location in each hub and destroy the Treasures to reveal LEGO pieces. Build them, then head inside to start the Super Bonus level. You will be tasked with collecting 1 million studs, and you will get to keep them upon completion of the level.
The Whip
Indiana Jones is famous for his whip, and in this game he can use it to do a variety of things.

You can use the whip to grab onto whip points like this one. Hold the "attack" button to target the whip point, then release to grab onto it. You will then automatically interact with it, either pulling it or swinging from it.


You can also use the whip to grab objects in the environment. Target the object you want to grab, then release the "attack" button to send the object flying into your hands.


You can also use the whip to grab people. Target them, then release the "attack" button to tie them up.


You can then run around and drag them behind you.


Walk up to them and press the "special" button to pick them up.


You can also press the "special" button to release the whip. This will still leave them tied up, but you will no longer be able to drag them around.
Combat
Indy has many enemies, and you'll be fighting lots of them as you play through the levels. Combat in this game is relatively simple, but I figured I'd share some interesting things here. Your partner can actually be helpful in combat, as they can stun and defeat enemies for you.

Pretty much all characters in the game have melee attacks, requiring you to get up close and personal with your attackers. If you press the attack button at the same time that an enemy is going to attack you, some characters will perform a special move that either instantly defeats them or stuns them temporarily.

Some characters are equipped with ranged weapons such as guns and bazookas. These can be used to take out enemies from a distance. In many instances, you can find ranged weapons in the environment, either lying around or dropped by enemies. You can pick up these weapons and use them. However, they have a limited supply of ammo, so make your shots count.

Some characters are armed with spears. While spears can be used as melee weapons, they can also be thrown at enemies. Press and hold the "attack" button to bring up the targeting reticle, then release when your target enemy is selected to toss the spear at the enemy. This can also be done with swords.

Swords, wrenches and shovels are unique melee weapons in that they can deflect bullets. Swing your weapon before a bullet hits you to deflect it away from you. Unfortunately, you cannot send the bullets straight back to the attacker.

Lastly, pretty much any object in the environment that has a blue triangle over it can be picked up and thrown at enemies to damage them. This includes torches, bottles and chairs.
Phobias
Indy is famous for his fear of snakes, and like him, other characters have phobias. When a character approaches something that they are afraid of, they cower in fear. They will walk very slowly and be unable to jump or interact with anything in the environment. You can make a character stop cowering by either defeating the animals that they are afraid of, or by lighting a fire to scare the animals away. This doesn't come up very often, but it is important to know how to deal with it.
Collectibles
To get 100%, you gotta collect everything. There are lots of things to collect, so it's important to know what you are looking for! You can check your overall collectible progress from the Warehouse (when not in the hub) or from the pause menu (while in the hub).

Studs
collect. Studs act as the game's currency, so you'll want to be picking up as many as you can find. The silver studs are worth 10, the gold studs 100, the blue studs 1,000, and the purple studs 10,000. There are even purple studs worth 10,000! You'll use studs to purchase things in the hubs, so you'll want to be collecting as many as you can.


True Adventurer
Collecting studs is essential if you want to reach True Adventurer status. Collecting studs in a level will reveal a stud bar in the bottom center of the screen. As you collect studs, the stud bar will gradually turn yellow. Once you fill the stud bar, you will achieve True Adventurer status. Once you achieve True Adventurer in a level, you cannot lose it. Even if you lose all the studs in a level after achieving True Adventurer, you will not lose it.

Characters/Vehicles
A majority of the characters/vehicles in this game are purchased in the hub. Performing various tasks will cause certain characters/vehicles to appear, allowing you to purchase them. You can track which characters/vehicles you have unlocked from the pause menu.


Treasures
These can be collected in Treasure and Bonus levels. In each of these levels, your goal will be to find and collect the Treasure. As soon as you collect the Treasure, the level will end. After you collect all 10 Treasure in a particular hub, you will be able to unlock and play the Super Bonus Level. For more info on the different game modes, see the "Gameplay Basics - Game Modes" section.


Colored Bricks
Each hub contains Colored Bricks. Colored Bricks can be collected by destroying certain objects in the hub. Collecting all 10 Colored Bricks of the same color will cause an Extra to parachute out of the sky, landing somewhere in the hub. Walk up to it and you'll be able to purchase it.
Character Abilities
As you play through the levels and explore the hubs, you will notice many things that you can do. However, not all characters will be able to do them! This is because each character has certain abilities, and in order to collect all the Colored Bricks and unlock all the hidden levels, you'll need to make use of their abilities to unlock new areas of the hubs to explore.

Here is a quick rundown of all the abilities characters can have. For detailed information on who has these abilities, see the "Characters" sections of this guide.

Black Sleep
Characters with this ability carry bottles of the Blood of Kali, which allows them to put enemies into Black Sleep. Toss a bottle at a character and you will be able to take control of them. Switch back to your character by pressing the "special" button. This will not allow you to take control of characters you have yet to unlock, so don't think you can use this ability to save some studs.


Crystal Skull
This ability allows characters to walk through large groups of insects, usually ants, without being harmed. The insects will form a circle around the character. This effect will still be present even if the Crystal Skull is not being held in their hand (e.g. if a character is holding a shovel, but has the Crystal Skull on their belt, they can still walk through insects).


Dig
You will sometimes find objects buried in the ground that need to be dug up. Characters with shovels can dig these objects up to uncover whatever they are. Objects that are buried in the ground will have various sparkling lights around them. Pick up a shovel in the environment to give any character this ability.


Explosive
Characters with this ability can destroy silver objects, either with grenades or a bazooka. Be careful, as if you don't have Invincibility, you can take yourself out in the blast! Hold the "attack" button to target a silver object, then release to toss or shoot an explosive.


High Jump
In this game, female characters are more athletic than their male counterparts. As such, they are capable of jumping higher, enabling them to reach ledges and bars that other characters can't. Oftentimes, places where you need to high jump are marked with flower symbols. However, not every instance where you need to high jump is marked, so if you can't reach a ledge, try using a female character.

Mechanic
Characters with this ability can repair broken machinery. Broken machines will spark and have smoke coming out of them, and certain parts of them will be blue. Hold down the "special" button to repair them. Pick up a wrench in the environment to give any character this ability.


Perfume
Characters with this ability can hit enemy characters with their scented perfume bottles. This will cause the enemy to fall in love with you. While they are smitten, enemies will follow you around and defend you from other enemies. Be careful though, as the perfume's effect will wear off.


Scholar
Characters with this ability carry a book that allows them to solve hieroglyph puzzles. Stand in the lit-up circle and press the "special" button to activate the puzzle. You will see a pattern of four symbols light up. Correctly input the pattern to solve the puzzle.


Sharp Shoot
Characters with this ability can use guns or other projectile weapons to hit circular targets. Press and hold the "attack" button to aim, then release to shoot. Pick up a gun or other ranged weapon in the environment to give any character this ability.


Small
Characters with this ability can crawl through travel chutes to reach new areas. Travel chutes look like small brownish-red hatches. Press the "special" button while standing in front of one to crawl through.


Soldier
Characters with this ability can access Soldier panels, which look like a window with the image of an Officer. Stand in front of the window and press the "special" button. Your character will knock, and they will be inspected by an enemy soldier. If they have this ability, they will be approved, and a door or gate will open.


Spear
Characters with this ability can toss spears into special orange slots on walls. Hold the "attack" button to target the slot, then release to throw.


You can then hop up the spears to reach new areas. Pick up a spear in the environment to give any character this ability.


Staff of Ra
Characters with this ability can use the Staff of Ra to focus beams of light. While holding the staff, stand in a circle of light and press the "special" button. You can then move the beam of light around. This ability is often used to solve puzzles. Pick up a replica Staff of Ra in the environment to give any character this ability.
Character Abilities cont.
Sword
Characters with this ability can throw a sword at ropes to cut them. If you can throw a sword at something, it will be marked with a white triangle above it. If a character has a sword, they will not lose it by throwing it at an object (unless the sword was found in the environment). Pick up a sword in the environment to give any character this ability.


Thuggee
Characters with this ability can activate Kali statues. Kali statues have six arms, and activating them will either open a door or change something in the environment. Walk up to a Kali statue and press the "special" button to activate it. If your character has this ability, the Kali statue will nod. If your character does not have this ability, the Kali statue will shake its head. Grab a turban from a defeated Thuggee to give any character this ability.

Whip
Characters with this ability can use their whip to do all sorts of cool things. See the "Gameplay Basics - The Whip" section earlier in this guide for more info.
---------Raiders of the Lost Ark---------
This playset will become available after completing the first level (Hangar Havoc) in Kingdom of the Crystal Skull - Part 1.
---------------Story Levels---------------
Starting the Story
Characters: Indiana Jones, Jock

Despite all odds, we have landed in Nepal in search of Marion. Head into the nearby building to start the Story.
Raven Rescue


Enemies: Sherpa Brawler, Sherpa Gunner
Boss: Major Toht
Starting Characters: Indiana Jones, Marion
True Adventurer: 25,000

Part 1 - Gunfight at the Raven

It appears that Toht has discovered the power of the headpiece. Watch out for the laser. If you stand in it too long, it will kill you. Stay mobile and you should be fine. Head to the center of the area and you'll find a blue-and-white table. Smash it up to reveal a bunch of LEGO pieces. Build them into some tiles and a disc. Stand behind the disc so it reflects the laser, then push the disc to the lit-up portion of the tiles. This will reflect the beam back at Toht, damaging him.

He will then toss some dynamite around, revealing more LEGO pieces on the right. Build them into tiles and a disc, then use them to reflect the beam at Toht as before. This time though, you'll have to bounce the laser off the two discs you've built. Push each disc to the lit-up spot on the tiles, then stand behind the disc on the left. Toht will aim the laser at the disc, causing it to reflect back at him.

He will then toss more dynamite at you. Defeat the enemies that appear (use your whip to tie up the green-shirted Sherpas, allowing you to damage them), then push the discs to the lit-up spot on the tiles. Stand behind the disc on the right and Toht will aim his laser at it, reflecting it back at him and taking out his last heart.

Toht will then hop down to deal with you personally. Smack him around to take out his hearts, ending the level.

Unlocked Characters: Marion
Interlude - Journey to Cairo
Characters: Indiana Jones, Marion

Head to the right and walk down the stairs. Continue to the right and you'll enter Cairo. You'll find the door to the next mission, but it's locked. Head back to the left and you'll see a place where you can high jump. High jump up onto the bar to lower the key. Pick it up, then head back to the right. Place it in the slot, then turn it to open the door. Head inside to start the next Story level.
Market Mayhem


Enemies: Masked Bandit, Enemy Soldier (Desert), Bandit Swordsman
Starting Characters: Indiana Jones (Desert), Sallah
True Adventurer: 13,000

Part 1 - Cairo Street Fight

Marion has been captured, and we're now fighting bad guys. The first wave consists of masked bandits. Defeat them and a truck of soldiers will appear. Defeat them and you will be attacked by more soldiers, plus two guys on camels. Use your whip to pull the soldiers off the camels, allowing you to defeat them.

You'll then be faced by a whole bunch of bandits. There will also be two soldiers shooting at you. Use the whip points underneath them to destroy their perches, allowing you to defeat them.

You will then be faced by a bunch of elite swordsman. These guys can only be defeated if you also have a sword. Luckily, you can grab a sword from the bandits. Defeat one of them and they will drop a sword.

Once you defeat the three swordsmen on the ground, grab a banana and toss it to the monkey on the back ledge. He will toss you the key. Place it in the slot on the right, then turn it to create steps. Hop up them to reach the awnings, then hop across to the other two swordsmen. Defeat them both to end the level.

Unlocked Characters: Sallah
Interlude - They're Digging in the Wrong Place!
Characters: Indiana Jones (Desert), Sallah

Time to search for the Well of Souls. Head southeast from the market entrance and you'll find the entrance to the Map Room. Unfortunately, it's sealed shut. To open it, dig up the dirt near the sphinx head on the right. This will send it crashing onto the panel, breaking it. Drop down inside to start the next Story level.
Map Room Mystery


Starting Characters: Indiana Jones (Desert Disguise), Sallah (Desert)
Added Characters: Marion (Evening Dress)
True Adventurer: 23,000

Part 1 - The Map Room

Time to discover the location of the Well of Souls! We need to prep the room before we can use the Staff of Ra. Head to the right and dig up some LEGO pieces. Build them onto the tiles, then smash the rubble in the back right corner to reveal more LEGO pieces. Build them into a statue, then push it to the left.

This will turn the staff into a bar, so hop on and onto the ledge on the left. Grab the torch, then drop back down and head to the right. Carry the torch into the snake pit to scare them off, then place it in the socket on the wall. Pull the lever to extend a platform above you. Use the whip point on the pyramid to reveal a disc. Pick it up and carry it to the right.

Walk up the ramp and across the platform, then place the disc in the slot. With everything in place, return to the left and head into the light. Use the Staff of Ra to shine the laser onto the disc on the Anubis statue along the back wall. This will reveal LEGO pieces to your left.

Build them into a whip point, then use it to pull a stone out of the wall. Hop up and into the alcove, then grab the key. Place it in the slot, then turn it to lower the stone platform. Step into the light again and shine the laser to reveal an opening. Drop down inside.

Part 2 - The Well of Souls

Sallah has been replaced by Marion, and we now have to find our way out of here. Head to the back of the room and destroy the object to reveal LEGO pieces. Build them into bars, then hop up and grab the spear. Toss it into one of the slots on the right. Grab the torches and place them in the slots next to each lever. Pull the lever on the left to reveal another spear. Pick it up and throw it into the other slot on the wall.

Pull the lever on the right to extend a platform. Hop onto it, then hop across the spears. Hop onto the bar on the statue to lower it down, allowing your partner to join you. This will send the statue on the left crashing through the wall. Head through the opening to end the level.
Interlude - Pursuing the Ark
Characters: Indiana Jones (Desert Disguise), Marion (Evening Dress)

There are two soldiers on horses running around. Use your whip to tie up the soldiers, pulling them off the horses and allowing you to defeat them. Once they're defeated, hop on the horses and head to the right. You'll come across a lowered bridge. Hop across the gap on the horses, then park them on the orange panels to raise up the bridge and open the gate. This will start the next Story level.
After the Ark


Boss: Belloq's Car
Starting Characters: Indiana Jones, Sallah (Desert)
True Adventurer: 84,000

Part 1 - Cairo Dig Site

Your goal in this level is to wreck the enemy vehicles. You'll have a hard time doing this on a horse however, so hop into an enemy jeep as soon as you can. Destroy the four waves of enemy vehicles and the truck with the Ark will appear. Ram it until it stalls, then hop inside. Belloq's car will then appear. Ram it to take out its hearts, ending the level.
Interlude - Passage to England
Characters: Indiana Jones, Sallah (Desert)

Head to the right and destroy the two large brown boxes to reveal LEGO pieces and a blue object. Pick up the blue object and place it on the green panel, then build the LEGO pieces onto the structure to move the Bantu Wind towards the dock. Hop on board.

After the cutscene, head towards the Ark to start the final Story level.
Belloq Battle


Starting Characters: Indiana Jones (Army Disguise), Marion (Night Gown)
True Adventurer: 25,000

Part 1 - The Wrath of God

Belloq has god powers now, so watch out. If you touch the lightning, you'll die. Hop in a barrel (which will protect you from the lightning) and head left. High jump up the ledges, then push the box to the end of the tiles, revealing LEGO pieces. Drop down and build them into a rotary handle, then turn it to move the disc towards the center of the area, partially damaging Belloq.

Hop in another barrel and head to the far right. High jump onto the ledge, then grab the object and place it in the green slot on the left. Use the whip points to create platforms, then hop up them to reach the upper ledge. Climb the rope, then hop onto the ledge. Grab the object, then drop down and place it on the green panel.

Place both objects on the green panels to reveal LEGO pieces. Build them into a disc, reflecting the lasers back at Belloq. Once you have reflected both sets of lasers back at Belloq, hop in a barrel and head towards the center of the area. Step on one of the buttons and your partner will step on the other one, ending the level.
-------------Treasure Levels-------------
Toasty Tavern
This Treasure level can be played by heading inside Marion's bar.


Required Abilities: Explosive, Sword
True Adventurer: 34,000

Toss your sword at the rope on the right to knock down the chandelier, revealing LEGO pieces. Build them into tables, allowing you to cross over the fire. Head to the right, then destroy the two silver barrels on the tiles. This will allow you to push the other barrels to the end of the tiles.

Once both barrels are in position, destroy the silver barrel hanging from the ceiling on the left to reveal LEGO pieces. Build them into a button, then step on it to put out the fires on the right, allowing you to walk up the stairs to this Treasure.
Cairo Conundrum
This Treasure level can be played by heading into the Cairo marketplace.


Required Abilities: Spear, Staff of Ra
True Adventurer: 24,000

Head to the left side of the area and smash the large chest to reveal LEGO pieces. Build them into a battery, then push it to the end of the tiles. This will turn on the light. We need to align the discs so the laser shines into the disc on the display case with this Treasure.

Head to the center of the area and smash the large chest to reveal LEGO pieces. Build them into a disc and a rotary handle. Head towards the back wall and toss a spear into the orange socket. Hop up it to reach the ledge, then pick up the rotary handle. Place it in the green slot.

When all the discs have been built, stand in the circle of light and shine the laser at the nearby disc. Switch to your partner and turn each of the rotary handles, sending the laser into the disc on the large display case. This will destroy the display case, allowing you to collect this Treasure.
Cryptic Crypt
This Treasure level can be played by hopping into the Map Room.


Required Abilities: Sword, Whip
True Adventurer: 22,000

Head to the right and smash the pyramid to reveal a wrench. Pick it up and use it to fix the broken machine on the right. This will reveal a box. Pick it up and place it on the green panel to reveal LEGO pieces. Build them onto the statue, then head back left.

Toss your sword at the rope to cut it, revealing LEGO pieces. Build them into a rotary handle, then hop up the stairs and onto the sphinx. Use your whip to grab the black arm, then switch to your partner. Push the rotary handle to move the sphinx to the right. Switch back to your partner, then place the arm on the statue. Place both arms on the statue to reveal this Treasure.
Desert Dash
This Treasure level can be played by heading into this alcove on the path to the harbor.


True Adventurer: 90,000

Your goal in this level is to pop 10 balloons. Pop all 10 balloons to reveal the Treasure.

The first balloon is floating above the northernmost wooden bridge. Grab a Boost power-up and drive over the bridge going to the right. You'll fly right through this balloon.


The second balloon can be found by riding off a ramp on the far left side of the area.


The third balloon is above a small ramp on the left side of the marketplace.


The fourth balloon is floating in the air by the marketplace. Use a Jump power-up to grab it.


The fifth balloon can be found in the small side-street by the marketplace.


The sixth balloon is floating above the southernmost wooden bridge. Use a Jump power-up to reach it.


The seventh balloon can be found at the end of a small ramp on the right side of the town.


The eighth balloon is floating above some wooden scaffolding in the dig site. Use a Jump power-up to reach it.


The ninth balloon is on the right side of the dig site.


The tenth balloon can be found at the end of a ramp at the southern end of the dig site.


Pop all 10 balloons to reveal this Treasure on a ramp to the left of the dig site.
Buildozer
This Treasure level can be started by approaching the Ark.


Required Abilities: Dig, Spear
True Adventurer: 43,000

Drop down to the ground, then head to the right. Dig up the ground near the skull statue to knock it down, revealing LEGO pieces to the left. Build them into a bulldozer. We need to finish the ramp in the center of the area.

Toss spears into the orange sockets on the left, then hop up them to reach the ledge. Push the box off the ledge, revealing LEGO pieces. Build them onto the ramp, then hop back in the bulldozer. Drive up the ramp and park on the orange panel to reveal this Treasure.
--------------Bonus Levels--------------
Mountain Shack
After purchasing the Snowmobile, head up the icy slope on the left side of the area.


You'll reach a cozy little shack at the top of the mountain. Head inside to start this Bonus level.


Starting Characters: Indiana Jones, Satipo
True Adventurer: 50,000

Head to the right and hop up the stairs, then continue to the right. Turn the red valve to fill the area with water. Swim to the north, then hop onto the land. Pull the levers to start moving the platform underwater, then step on one of the buttons. Your partner will step on the other button, activating the fan. Ride the air current onto the ledge, then hop across the moving platforms to reach the ledge on the left.

Turn the red valve to raise up the water more. Swim to the north, then hop onto the land. Head to the right and step on one of the buttons. Your partner will step on the other button, raising the water up even more. Follow the studs to the southeast to find two levers. Pull each of them to open the gate in the back right corner. Swim over to it and hop on the land to find this Treasure.
Airstrip Hangar
This Bonus level can be played by entering a building in the military base. Pull the lever to open the gate, then head inside.


Starting Characters: Indiana Jones, Jock
True Adventurer: 6,000

Head to the left and push the box to the end of the tiles, then hop across the moving platforms to the left. Use your whip to grab the spear in the back left corner, then head back to the right. Toss the spear into the orange socket, then hop onto the box. Hop onto the spear, then onto the ledge.

Carefully head to the left past the saw blades, then grab the pistol. Head back to the right and shoot the target to open the gate. Head inside and pull the lever to start a platform moving. Head back to the center of the area, then head right.

Turn the red valve to reveal a platform, then continue to the right. Destroy the plants to reveal a spear, then pick it up and toss it into the orange socket on the back wall. Hop onto it, then hop up the bars to reach the lever. Pull it to turn on the fan.

Drop back down and ride the air current onto the ledge, then repair the machine to start moving the other platform in the middle. Return to the center of the area, then hop up the moving platforms to reach this Treasure.
Hovitos Temple
Destroy the silver skulls in front of the Hovitos temple to reveal an opening. Head inside to start this Bonus level.


Starting Characters: Indiana Jones, Sallah
True Adventurer: 50,000

Head to the right along the path, then use the whip point to swing across the gap. Grab spears and toss them into the orange sockets along the back wall. Swing back across the gap, then head over to the spears. Hop across them to the right, then hop onto the land.

Continue to the right and hop across the gap, then follow the path to find some tiles buried in the dirt. Dig them up, then push the box to the end of the tiles. Hop onto the box, then hop onto the ledge above you. Hop to the left over the lava, then turn the red valve to raise up some platforms. Hop across, then step on one of the buttons. Your partner will step on the other one, extending a bridge.

Cross the bridge, then carefully hop across the saw blades. Turn the green valve to lower the lava, then head to the right. Destroy the skeletons to reveal buttons. Step on one and your partner will step on the other, raising up platforms on the left.

Hop across them, then head to the left. Dig up the buried part of the tiles, then turn the red valve to turn on the lasers. Push the boxes out of the way, allowing the lasers to hit the three discs. This will open the gate ahead of you.

Head through the gate and continue down the path, then push the box to the end of the tiles. Hop onto it, then onto the ledge above you. Hop to the right and pull the lever. This will activate the laser above you, as well as raise some platforms. Hop across them, then head to the right.

Your path ahead is blocked by a box, so use the whip point to reach the ledge in the back. Hop onto the ledge on the left, then push the box to the right so Sallah can join you. Dig up a ladder, then climb up onto the ledge. Grab a stick of dynamite, then quickly throw it at the silver treasure chests on the left to clear the path.

Head left and pull the lever to activate the nearby laser. This will also raise some platforms near you. Hop back across them. Once both levers have been pulled, the gate around this Treasure will open. Hop onto the moving platform in front of it, then quickly hop into the alcove with the Treasure.
Bantu Wind
This Bonus level can be played by hopping into the lower deck of the Bantu Wind (the ship you ride to the island where you open the Ark).


Starting Characters: Indiana Jones, Sallah
True Adventurer: 22,000

Dig up the sparkling dirt on the left to reveal a ladder. Climb up, then hop onto the rope on the right. Hop onto the ledge to the right, then turn the red valve to open the gate below you. Drop down and hop in the bicycle, then drive it to the right through the gate. Park it on the orange panel to raise a bridge to the right.

Continue to the right, then dig up the sparkling dirt to reveal LEGO pieces. Build them into a ladder, then climb up. Use the whip point to raise the ramp. Hop back in the bicycle and drive it up the ramp. Park it on the orange panel to start a platform moving. Hop on it, then hop onto the ledge with this Treasure.
Submarine Base
This Bonus level can be played after purchasing U-Boat 26. Hop in and drive north to find a gate. Approach while in the U-Boat to open it, then hop out and head inside.


Starting Characters: Indiana Jones, Jock
True Adventurer: 15,000

Head to the right and destroy the two groups of plants to send the lasers to the discs, raising some ramps. Continue to the right and defeat the enemies, picking up one of the guns they leave behind (you'll need it later). Continue along the path and fix the generator to raise another ramp, then continue on.

Destroy the plants on the left to reveal a whip point, then use it to raise another two ramps. Continue up the path and shoot the target to raise the last two ramps. Once all of the ramps are raised, return to the starting point and hop in a bicycle. Drive it all the way to the end of the path and park it on the orange panel to lower the spears around this Treasure, allowing you to collect it.
Super Bonus Level - Lost World
Once you have completed all 5 Treasure levels and all 5 Bonus levels, head to the east side of Cairo.


Destroy the treasure chests to reveal LEGO pieces.


Build them into a drill, then pull the lever to detonate the nearby volcano.


Head over to the volcano and hop inside to be blasted into this Super Bonus Level.


Starting Characters: Indiana Jones (Crystal Skull), Mutt

Your goal in this level is to collect 1 million studs. A vast majority are just laying out in the open, but I'll highlight a few of the things you can do. Once you collect 1 million studs, the level will end.

One of the houses in the near left corner has a shovel next to it.


Pick it up and you'll be able to dig up some buried chests for studs.


Score 2 goals to lower the nearby platforms, allowing you to collect the studs.
------------Exploring the Hub------------
Hub exploration in this game is very linear. Unlocking certain characters will let you unlock other characters, which will unlock a Bonus level, etc. This flowchart illustrates how each aspect of hub exploration flows together. Consider using it as a checklist of sorts to guide your exploration.

Characters
Sherpa Brawler
After completing Raven Rescue, you will be harassed by these guys outside Marion's bar.


Defeat enough of them and you'll be able to purchase one.


Masked Bandit
After completing Market Mayhem, you will be attacked by these guys in Cairo.


Defeat enough of them and you'll be able to purchase one.


Bazooka Trooper (Raiders)
After purchasing the Army Jeep, hop in and drive in front of the camel enclosure to find a race.


Complete it and this guy will appear in the area where Nepal and Cairo meet.


Captain Katanga
Head over to the Hovitos island in the north and hop up the temple. Turn the valve twice to rotate the brown structure on the roof.


Grab the bar on it to lower it into the temple roof. This will create a race in the sky above the temple.


Once you unlock the Biplane, fly over to the temple and complete the race to reveal Captain Katanga on the Hovitos island.


Bandit Swordsman
Destroy the silver door to the camel enclosure, then hop on one.


Ride it to the left, where you'll find a race.


Complete the race and this guy will appear by the camel enclosure. You'll need a sword to subdue him, allowing you to purchase him.


Hovitos Tribesman
After completing Hovitos Temple, these guys will start bothering you.


Defeat enough of them and you'll be able to purchase one.


Satipo
After purchasing either the Green or Blue Speedboat, hop in and head north to find a race.


Complete it and Satipo will appear on the Hovitos island.


Enemy Soldier (Desert)
After completing Map Room Mystery, you'll be bothered by these guys around the Well of Souls.


Defeat enough of them and you'll be able to purchase one.


Major Toht
After completing Belloq Battle, a large snowman will appear to the left of the stairs.


Grab the snowman's arms and place them on the green panel to reveal LEGO pieces.


Build them into a woodpile, then head up the stairs and grab the torch.


Use it to light the fire, melting the snowman's head and allowing you to purchase him.


Belloq (Priest)
After completing Belloq Battle, return to the island and you'll find Belloq's pieces. Rebuild him and you'll be able to purchase him.


Colonel Dietrich
After completing Belloq Battle, return to the island and destroy the brown box to reveal LEGO pieces.


Build them into a pump, then step on the button a few times to inflate him, allowing you to purchase him.


Enemy Officer (Desert)
Once inside the airfield on the left side of Cairo, you will be harassed by these guys.


Defeat enough of them and you'll be able to purchase one.


Enemy Boxer
After purchasing the Flying Wing, hop in. You'll notice some hot air balloons in the sky.


Shoot them all down (there are 5) and this guy will appear in the military base.
Vehicles
Passenger Jet
This plane is buried in the snow at the landing strip by Marion's bar.


Dig it up and you'll be able to purchase it.


Army Jeep
This jeep is partially buried to the right of the marketplace entrance.


Dig it up and you'll be able to purchase it.


Snowmobile
There is a small building on the far left side of the snowy area.


Use the Soldier panel to open the gate, allowing you to purchase this.


Biplane
This vehicle is chained down on the Hovitos island by silver chains.


Destroy them and you'll be able to purchase this vehicle.


Green Speedboat, Blue Speedboat
There is a crane on Hovitos island with orange sockets on it.


Toss a spear into each, then grab onto them to cause the crane to drop the box, revealing LEGO pieces.


Build them onto the speedboats and you'll be able to purchase them.


U-Boat 26
On the left side of the island with the Ark is a silver box.


Destroy it to reveal a key.


Pick it up and place it in the nearby slot, then turn it to reveal this.


Flying Wing
There is a military base on the left side of Cairo. To get inside, we'll have to repair this light by placing four discs on it. The first two discs are right nearby.


The third disc can be found by destroying this trophy by the ice cream stand on the left side of Cairo.


The fourth disc can be found by destroying this trophy by some palm trees in the center of Cairo.


Once the light has been repaired, a circle of light will appear. Step in it and use the Staff of Ra to shine a laser into the disc, opening the gate.


Head inside and you'll be able to purchase this.
Red Bricks - Barrels
Score x3
The first three barrels can be found to the right of the bar. Use the whip point to destroy the stand, allowing you to smash them.


The fourth barrel can be found by grabbing this rope to the left of the bar entrance. Grabbing the rope will open a hatch up above the bar. This barrel will fall out and be destroyed.


The fifth barrel can be found in a small camp south of the Well of Souls. Use the whip point on it to destroy it.


The sixth barrel is also in the small camp south of the Well of Souls.


The seventh barrel is in that same camp, high up on a platform.


The eighth barrel is on the right side of the harbor. Use the whip point to open the hatch, causing the barrel to fall and break.


The ninth barrel is also in the harbor. Turn the key to move the magnet over the barrel, bringing it onto land and destroying it.


The tenth barrel is in the military base with the Flying Wing. Turn the key to destroy it.


Destroy all 10 barrels to reveal this Colored Brick in the military base.
Green Bricks - Christmas Trees
Poo Money
The first Christmas tree is on the far left side of the bar.


The second Christmas tree is directly left of the bar entrance.


The third Christmas tree is to the right of the bar entrance.


The fourth Christmas tree is on the far right side of the bar.


The fifth Christmas tree is to the left of the landing strip, on the ledge below it.


The sixth and seventh Christmas trees are directly to the left of the plane, on the ledge below it.


The eighth Christmas tree is on the right side of a small shed on the left side of the snowy area.


The ninth and tenth Christmas trees are to the right side of the stairs leading to Cairo.


Destroy all 10 Christmas trees to reveal this Green Brick in front of the bar.
Blue Bricks - Satellite Dishes
Fast Build
The first satellite dish is to the left of the bar entrance.


The second satellite dish is on a small shed on the left side of the snowy area.


The third satellite dish is just to the right of the entrance to the Cairo market.


The fourth satellite dish is on the side of a building on the east side of Cairo.


The fifth satellite dish is above a tent in a small camp south of the Well of Souls.


The sixth satellite dish is on top of a building on the far east side of Cairo. High jump onto the roof to reach it.


The seventh satellite dish is on the left side of the harbor.


The eighth satellite dish is up on the building to the right of the gate to the harbor.


The ninth satellite dish is on the left side of the island with the Ark, above the U-Boat hangar.


The tenth satellite dish is in the military base with the Flying Wing.


Destroy all 10 satellite dishes and this Colored Brick will appear in the military base.
-------------Temple of Doom-------------
This playset will become available after completing the Story in Raiders of the Lost Ark.
---------------Story Levels---------------
Starting the Story
Characters: Indiana Jones (Dinner Suit), Willie

We've escaped Lao Che, but we now need to find our way out of Shanghai. Head to the right of Club Obi-Wan and you'll find a ledge you can high jump onto. High jump onto it and step on the button to reveal a whip point. Pick it up and carry it to the near right corner, then place it on the slot on the building. Use it to start the first Story level.
Lao Chase


Boss: Lao Che's Car
Starting Characters: Indiana Jones (Dinner Suit), Short Round
True Adventurer: 26,000

Part 1 - Shanghai Streets

Your goal is simple: smash the cars! Drive around and ram into the cars to damage them. In the third wave, some cars will be partially silver. To destroy them, you will need to hijack the tan rickshaws. These will allow you to throw dynamite, so toss dynamite at the silver cars to damage them. The final vehicle you have to destroy is Lao Che's car. It is also silver, so toss dynamite at it to destroy it. Destroy all of the vehicles to complete the level.

Unlocked Characters: Short Round
Interlude - Rapids
Characters: Indiana Jones, Willie

Hop in the raft and head down the river. Climb up the ladder at the end to reach the village of Mayapore. Head to the left and you'll find the village elder. Head inside the building to start the next Story level.
Monkey Mischief


Starting Characters: Indiana Jones, Willie (Dinner Suit), Short Round
True Adventurer: 39,000

Part 1 - Mayapore Village

Looks like the monkeys have taken the Sankara Stones. We need to get them back! Fix the nearby machine to reveal a whip point, then use it to grow a tree in the center of the village. Grab the banana that fell off the tree, then head to the right. Toss the banana to the monkey on top of the palm tree to receive the first Sankara Stone.

Place it in the sacred place in the village, then head to the back left to find a torch. Pick it up and head left, then use it to boil the water in the pot. Ride the steam jet onto the rooftop, then use the whip point to swing across the gap. Push the box off the edge to reveal LEGO pieces. Build them into a platform, then return to the ledge.

Turn the key to raise up the platform, allowing Willie and Short Round to join you. High jump onto the bars, then hop to the right to reach another rooftop. Smack the ladder to lower it, then head back to the tree in the center of the village. Grab a banana, then climb back up the ladder. Toss the banana to the monkey to receive the second Sankara Stone, then place it in the sacred place.

Return to the rooftop and head right. Stand on the wooden panel to crash through the roof, then grab the key. Destroy the objects inside to reveal a sword, then pick it up and toss it at the rope to open the building. Head to the right and place the key in the slot, then smash the brick wall to reveal a travel chute.

Crawl through the travel chute to reach the upper ledge. Hop in the hanging basket, then switch to your partner. Turn the key to move Short Round to the right. Smack the ladder to lower it, allowing Indy to reach the rooftop. Use the whip point to open the door on the right, then head inside the alcove and grab the shovel.

Drop down and head to the right, then destroy the large rock pile to reveal an orange panel. Head back left and hop in the elephant enclosure, then dig up the LEGO pieces. Build them into a rotary handle, then push it to open the elephant enclosure. Hop on and ride the elephant to the right. Park on the orange panel to open the gate. Grab a banana, then toss it to the monkey to receive the final Sankara Stone. Place it in the sacred place to end the level.
Interlude - Elephant Ride
Characters: Indiana Jones, Willie (Dinner Suit)

There is an elephant running around the village. Hop on and ride it to the south, then take a left when the path splits. Continue to the left up the path to reach the entrance to Pankot Palace. Park the elephant on the orange panel to open the gate. Head inside to start the next Story level.
Malice at the Palace


Enemies: Thuggee, Pankot Assassin
Starting Characters: Indiana Jones, Willie (Evening Dress), Short Round
True Adventurer: 23,000

Part 1 - Dining Hall

This level simply has you beating up a bunch of Thuggees. The first two waves are pretty straightforward, but the third wave is more complicated. There are two Thuggees shooting at you from the balconies. Use the whip points under them to knock them down, allowing you to defeat them. There is also a Pankot Assassin with a black sword. You will need to use a sword to defeat him. Plenty of Thuggees will drop swords when they are defeated, so pick one up when you can. The fourth wave has even more Pankot Assassins. Defeat all four waves to complete the level.
Interlude - To the Temple
Characters: Indiana Jones, Willie (Evening Dress)

Head back to the right down the path, then head down and to the left to reach the entrance to the Temple of Doom. Head inside to start the next Story level.
Temple Tantrum


Enemies: Thuggee Slave Driver, Thuggee Acolyte
Boss: Maharajah (Thuggee)
Starting Characters: Indiana Jones, Willie (Ceremony), Short Round
True Adventurer: 45,000

Part 1 - Temple of Doom

We need to get the Maharajah. Head to the left and climb up the ladder, then high jump onto the bar. Shimmy across to the right, then push the box off the ledge to reveal LEGO pieces. Build them into a ladder, then climb back up. Crawl through the travel chute, then pull the lever to move the platform to the right.

This will lower a ladder on the right. Crawl back through the travel chute, then climb up the ladder on the right to reach the ledge. Use the whip points to reveal platforms, then hop across them to reach the Maharajah. He will then flee, knocking down a cage.

Pick up the key, then place it in the slot in the center. Turn it to reveal the sacrifice cage. Pick up the gear that appears, then place it in one of the slots on the right. Defeat one of the Thuggee Acolytes (the white ones) and pick up their turban. Use the Kali statue on the right to reveal a platform. Stand on it and you'll be raised up to the ledge, where you'll find another gear.

Pick it up and place it in another slot on the right. Climb the ladder on the far right side of the area, then use the whip point to swing across the gap. Grab the gear and place it in the final slot. Once all three gears are in the slots, repair them to damage the Maharajah, defeating him.

Unlocked Characters: Maharajah
Interlude - Pursuing Mola Ram
Characters: Indiana Jones, Short Round

The Maharajah is walking around here somewhere, so switch to him and head right. You'll find Mola Ram passed out by the bridge, but you can't get to him. Fortunately, the Maharajah has the Blood of Kali, which allows him to take control of enemies. Toss a bottle at the Thuggee in the guard tower to take control of him, then pull the lever to raise up a platform. Hop up it to reach Mola Ram.
Mola Rampage


Boss: Mola Ram
Starting Characters: Indiana Jones (Kali), Short Round
True Adventurer: 30,000

Part 1 - Kali Ma-nster

This Kali monster might look intimidating, but it's actually really easy to take down. Grab a water bottle from around the area and toss it at the statue's left foot to reveal a travel chute. Crawl through it, then smack Mola Ram. You'll then jump off the statue. Use the whip point that appears to tear off one of the statue's arms. Repeat this process three more times to tear off all of the statue's arms, then repeat the process one more time to destroy the statue, ending the level.
-------------Treasure Levels-------------
Shang-High
This Treasure Level can be played by heading into the garage on the right side of Shanghai.


True Adventurer: 28,000

Your goal in this level is to pop 10 balloons. Once you have popped all 10 balloons, the Treasure will appear.

The first balloon is on top of a ramp to the right of your starting point.


The second balloon is on top of a ramp in the alley on the right side of the area.


The third balloon is in the near right corner, to the left of the fountain.


The fourth balloon is on top of a ramp on the right side of the area, to the right of the central courtyard.


The fifth balloon is to the south of the central courtyard, on top of a small ramp over a car.


The sixth balloon is on top of a balcony north of the central courtyard.


The seventh balloon is on top of a ramp in the back left corner.


The eighth balloon is in the alley on the far left side of the area.


The ninth balloon is on top of a small ramp to the left of the central courtyard.


The tenth balloon is in a small street on the left side of the area.


Once you've popped all 10 balloons, this Treasure will appear on top of the ramp in the central courtyard.
Wrong Gong Rung
This Treasure Level can be played by walking into the building at the center of Mayapore.


Required Abilities: Explosive, Whip
True Adventurer: 25,000

Head to the left and destroy the silver rocks to reveal LEGO pieces. Build them into a whip point, then use it to ring the gong. This will reveal Thuggees. Defeat all of them to reveal this Treasure on top of a tree. To reach it, destroy the silver gate on the right to free the elephant. Hop on and ride it to the left, then hop from the elephant onto the tree to reach the Treasure.
Disarming Duel
This Treasure level can be played by heading into Pankot Palace.


Required Abilities: Sword, Whip
True Adventurer: 18,000

This can be frustrating, but it's doable. Use your sword to disarm at least three enemies. Don't defeat them, however, You'll need to use your whip to tie them up. Tie them up and carry them to the back, where you'll find five buttons. Place enemies on three of the buttons, then step on the other two with you and your partner. This will raise up the painting in the back, revealing this Treasure.
Lava Lake
This Treasure level can be played by heading into the Temple of Doom.


Required Abilities: Scholar, Spear
True Adventurer: 60,000

Grab the box nearby and place it on one of the green panels. We need to find four more boxes. Head to the left and climb up the ladder, then cross the bridge. Solve the hieroglyph puzzle to reveal a box. Pick it up and place it on a green panel, then head back left.

Toss spears into the sockets on the back wall, then hop up onto the ledge. Head to the right and hop across the platforms to reach the third box. Pick it up and place it on a green panel. Head to the far right and destroy the brick wall in the back right corner to reveal another box. Pick it up and place it on a green panel, then head back right.

Climb the ladder to reach the ledge, then hop onto the platform in the back. Switch to your partner and turn the key to move the platform to the right. Switch back to your partner and hop onto the ledge, then push the box off the edge to reveal LEGO pieces. Build them into a ladder, then climb back up.

Toss a spear into the socket on the wall, then hop onto it and onto the next ledge. Pick up the box and place it on the final green panel. Once all five boxes have been placed on the green panels, build the LEGO pieces into a raft. Hop in and steer it to the right to find this Treasure.
Cliff Clamber
This Treasure level can be played by heading towards the rope bridge from the left side.


Required Abilities: Spear, Sword
True Adventurer: 40,000

Toss spears into the sockets on the right, then hop across them. Hop onto the rope, then onto the next ledge. Toss a sword at the rope to cut it, opening the hatch above you. Climb the ladder, then hop across the gap to the left.

Continue to the left, then step on the plunger to destroy the silver rocks to the right. Head back to the right, then throw a sword at the rope to cut it, raising up the platform. Ride it up, then head to the left. Hop across the moving platform to find some dynamite, then grab it. Toss it at the silver rocks on the right to destroy them, clearing the path.

Hop across the ledges on the ropes, then toss spears into the sockets on the wall. Hop up the spears to reach the bars, then hop to the left to reach the ledge. Continue to the left and toss spears into the sockets on the wall, then hop up them. Continue to the left and toss another spear into the socket, then hop onto it. Hop onto the ledge on the left to find this Treasure.
--------------Bonus Levels--------------
Club ObiWan
This Bonus level can be played by destroying the silver "Club Obi-Wan" sign. It will crash down into the door, allowing you to head inside.


Starting Characters: Indiana Jones, Short Round
True Adventurer: 26,000

Head through the travel chute on the left, then repair the broken engine to start some platforms moving. Crawl back through the travel chute, then ride the platforms to the ledge. Head down the path (watch out for the saw blades!), then carefully hop across the platforms. Climb the ladder at the end, then push the box to the other end of the tiles.

Hop on top of it, then onto the ledge in the back. Hop onto the rope on the left, then onto the next ledge. Grab the spear, then head back to the right. Toss the spear into the socket on the back wall, then hop onto it and onto the ledge. Head to the right, then carefully walk past the saw blade.

Grab water bottles and use them to put out the fires on the right, revealing a red valve. Turn it to raise up some platforms. Hop across them, then drop down off the ledge. Head to the left and use the whip point to reveal a platform. Hop across it to the left to reach this Treasure.
Beachside Cave
This Bonus level can be played by solving the hieroglyph puzzle on the beach. This will open the gate, allowing you to head inside.


Starting Characters: Indiana Jones, Short Round
True Adventurer: 25,000

Drop down to the left, then grab the grenade. Push the box to the end of the tiles. Hop onto it, then onto the next ledge. Hop on top of the travel chute and grab onto the bar, then hop back onto the ledge. Toss the grenade at the silver rocks to destroy them, revealing a spear. Pick it up and toss it into one of the sockets to the right.

Drop back down, then crawl through the travel chute to reach an island in the water. Turn the red valve to raise the water level, then hop across the platforms that appeared on the right. Grab the spear, then head back to the left. Toss the spear into the other socket.

Head back to the island in the middle of the water, then turn the green valve to lower the water level. Head over to the spears, then hop up them to reach the ledge. Carefully head to the right (watch out for the saw blades) to reach this Treasure.
Slave Driver Cave
This Bonus level can be played by using the Kali statue in the north side of Mayapore. This will open the cave, allowing you to head inside and start this level.


Starting Characters: Indiana Jones, Maharajah
True Adventurer: 14,000

Pull the lever to start the boulder in the background moving. You need to hurry to the left and use the whip point before the boulder reaches the end. Watch out for the saw blades on the way. When you get to the end, use the whip point to open the next gate.

Pull the next lever to start moving another boulder. Quickly run to the end of the path and use the whip point before the boulder reaches the end. If you are successful, platforms will appear, leading you to this Treasure.
Mountain Cave
This Bonus level can be found by hopping in a plane and flying over Shanghai. You'll notice a ledge on the mountain with a cave. Hop out of the plane to land on the ledge, then head inside the cave to start this level.


Starting Characters: Indiana Jones, Maharajah
True Adventurer: 48,000

Head up the steps, then hop across the gap to the right. Turn the red valve to lower the platforms, then hop up them. Hop into the alcove, then pull the lever to open the gate. Grab the bazooka, then hop back to the ledge with the valve.

Continue down the path, then destroy the silver barrels to reveal a red valve. Turn it to raise up some platforms. Hop across them, then destroy the plants to reveal a travel chute. Crawl through it to reach the upper ledge, then cross the bridge. Pull the lever to raise the gate on the right.

Drop down and continue to the right, then grab a bazooka. Destroy the silver chest to reveal a shovel. Pick it up and dig up two silver rocks. Destroy them to reveal spears, then pick them up and toss them into the slots on the right. Destroy the plants on the left to reveal a lever, then pull it to reveal another spear. Pick it up and toss it in the final slot, then hop up the spears to reach the ledge.

Hop carefully over the fires, then collect the studs. This should put you at more than 30,000 studs. If not, do some more collecting. Once you hit 30,000, the gate on the left will open. Head up the ramp, then turn the red valve in the back to turn on the lasers. Push the boxes to the end of the tiles, allowing the lasers to hit the discs. This will raise up a ramp. Hop up it to reach the ledge with the Treasure.
Princess Rescue
There is a box hanging from a rope to the left of the entrance to Pankot Palace. Toss a sword at it to cut it, revealing LEGO pieces.


Build them into a ladder, then climb up to reach the ledge on the left, where you'll find the entrance to this Bonus level.


Starting Characters: Indiana Jones, British Commander
True Adventurer: 9,000

Grab the two spears from the center of the area and toss them into the slots on the right. Hop up them, then pull the lever to raise up a platform. Climb the ladder on the right, then use the whip point to raise the gate on the left.

Climb the ladder to reach the ledge, then grab the shovel. Drop back down and dig up three silver rocks, then destroy them to reveal a wrench. Pick it up and use it to repair the generator on the left. This will start moving the platforms on the left.

Head to the left, then hop across the platforms. Hop up the bars on the left, then grab water bottles. Use them to put out the fires below you, revealing a lever. Pull it to open the gate on the ledge on the right.

Return to the upper ledge, then hop across the gap using the bar. Step on the button and your partner will step on the other, raising some platforms in the center of the area. Return to the center of the area and swim over to the platforms, then hop up them onto the ledge with this Treasure.
Super Bonus Level - Treasure Trap
Once you have completed all 5 Treasure levels and all 5 Bonus levels, head to the west side of the beach.


Destroy the treasure chests to reveal LEGO pieces.


Build them into a boat, then hop on and head into the cabin to start this Super Bonus Level.


Starting Characters: Indiana Jones (Crystal Skull), Mac

Your goal in this level is to collect 1 million studs. A vast majority are just laying out in the open, but I'll highlight a few of the things you can do. Once you collect 1 million studs, the level will end.

There is a shed towards the center of the area. Destroy the door and you'll find a shovel.


Pick it up and you'll be able to dig up some chests for more studs.


Hop up the platforms on the right side of the house in the center of the area to find some more studs floating in the air. Use the ropes to reach them.


Drive a vehicle off the ramp to reach even more studs.


Dig up a ladder on the left side of your starting point, allowing you to reach the studs on the roof.
------------Exploring the Hub------------
Hub exploration in this game is very linear. Unlocking certain characters will let you unlock other characters, which will unlock a Bonus level, etc. This flowchart illustrates how each aspect of hub exploration flows together. Consider using it as a checklist of sorts to guide your exploration.

Characters
Dancing Girl
After purchasing the Junk Boat, hop in and drive it to the right to find a race.


Complete it and she'll appear on the dock where you found the Junk Boat.


Thuggee
After completing Monkey Mischief, you will be bothered by these guys in the village of Mayapore.


Defeat enough of them and you'll be able to purchase one.


Village Elder
After completing Monkey Mischief, there will be three villagers being harassed by snakes. The first one is on a roof top on the right side of the village.


The second villager is on the ledge by the river on the right side of the village.


The third villager is to the right of the entrance to Pankot Palace.


Rescue all three villagers and the Village Elder will appear in the center of Mayapore.


British Commander
After purchasing the Stunt Plane, hop in and fly over to Shanghai to find a race.


Complete it and this guy will appear on the right side of the rope bridge.


Shanghai Hoodlum
After completing Monkey Mischief, the gate to Shanghai will open back up, allowing you to return. You'll be harassed by these guys.


Defeat enough of them and you'll be able to purchase one.


Lao Che
After purchasing the Rickshaw, hop in and drive it to the left to find a race.


Complete it and Lao will appear in Shanghai.


Indian Farmer
After purchasing the Tractor, hop in and drive it to the right to find a race.


Complete the race and he'll show up by the carrot field.


Pankot Assassin
After completing Malice at the Palace, you will be harassed by these guys at the entrance to Pankot Palace.


Defeat enough of them and you'll be able to purchase one.


Thuggee Acolyte
After completing Temple Tantrum, you'll be harassed by these guys near the entrance to the Temple of Doom.


Defeat enough of them and you'll be able to purchase one.


Mola Ram
After completing Mola Rampage, head to the base of the waterfall to find his pieces. Rebuild him and you'll be able to purchase him.
Vehicles
Junk Boat
This can be found at a pier on the beach.


Stunt Plane
Grab an elephant or any vehicle and head to the left of Pankot Palace. You'll find this plane on the airstrip.


Park on the orange panel to lower the barrier, allowing you to purchase this.


Scooter
After purchasing the Stunt Plane, hop in and fly over to Shanghai to find a race.


Complete it and this vehicle will appear on the right side of the rope bridge.


Lao Che's Plane
This plane is locked down on the Shanghai airstrip by some silver chains.


Destroy them and you'll be able to purchase this.


Short Round's Car
This appears in Shanghai after completing Lao Chase. Once you complete Monkey Mischief, the gate back to Shanghai will open, allowing you to purchase this.


Rickshaw
This is broken down on the north side of Shanghai.


Repair it and you'll be able to purchase it.


Tractor
This vehicle can be found in an enclosure to the north of Mayapore.


Destroy the silver gate and you'll be able to purchase this.


Tuk Tuk
After purchasing the Tractor, hop in and drive it to the right to find a race.


Complete the race and this vehicle will show up by the carrot field.
Red Bricks - Scorpion Rocks
Score x6
The first rock can be found on the right side of Shanghai.


The second rock is on the right side of Mayapore, near where the path slopes downward.


The third rock is in the center of Mayapore.


The fourth rock is in the center of Mayapore.


The fifth rock is south of Mayapore and to the right of the entrance to Pankot Palace.


The sixth rock is to the right of the entrance to Pankot Palace.


The seventh rock is at the beginning of the path leading down to the beach.


The eighth rock is on the right side of the rope bridge.


The ninth rock is on the right side of the airstrip in Shanghai.


The tenth rock can be found on the mountainside north of Shanghai reached by plane.


Destroy all 10 rocks and this Red Brick will appear in Mayapore.
Green Bricks - Tan Posts
Ice Rink
The first three posts are on the path directly south of Mayapore.


The fourth post is to the south of the first three, right by the waterfall.


The fifth post is by the Thuggee in the guard tower.


The final five posts are all in front of the entrance to Pankot Palace.


Destroy all 10 posts and this Green Brick will appear in front of the entrance to the Temple of Doom.
Blue Bricks - Tan Pots
Stud Magnet
The first pot is on the right side of Mayapore. You'll run into it shortly after climbing the ladder out of the river.


The second pot is on the right side of Mayapore, next to the house near the river.


The third pot is very well hidden. Hop onto the ledge on the right side of Mayapore and you'll find this against the buildings.


The fourth pot is on the right side of Mayapore, near where the path slopes downward.


The fifth pot is on the left side of Mayapore.


The sixth pot is on the left side of Mayapore.


The seventh pot is in Mayapore, near the silver gate in the back.


The eighth pot is on the right side of Mayapore.


The ninth pot is in the center of the village.


The tenth pot is in the center of the village.


Destroy all 10 pots and this Blue Brick will appear by the airstrip in Shanghai.
------------The Last Crusade------------
This playset will become available after completing the story in Temple of Doom.
---------------Story Levels---------------
Starting the Story
Characters: Indiana Jones, Sallah (Fez)

We're after Panama Hat Man and the Cross of Coronado. Use the whip point to create an opening, then head inside. You'll pop out of the pipe at the top of the ship. Continue to the right, then head inside the ship to start the first Story level.
Coronado Caper


Enemies: Coronado Sailor
Boss: Panama Hat Man
Starting Characters: Indiana Jones, Sallah (Fez)
True Adventurer: 35,000

Part 1 - The Coronado

Destroy the objects on the right to reveal LEGO pieces. Use the whip point on the box hanging from the crane to reveal more LEGO pieces. Build them into a missile launcher and some buttons. Step on the buttons to fire the missile launcher, damaging Panama Hat Man.

He will then retreat to the left. Destroy the green barrels that appeared to reveal LEGO pieces. Build them into a green panel, then use the whip point on the box to the right. Destroy the object that appears, revealing a pipe. Pick it up and place it on the green panel, then turn the valve to damage Panama Hat Man.

After the cutscene, Panama Hat Man will be tossing dynamite at you, so watch out. Destroy the objects that have appeared on the deck to reveal LEGO pieces and a box. Build the first set of LEGO pieces into a green panel, then place the box on it to reveal more LEGO pieces. Build the rest of the LEGO pieces into a key, then turn it to rotate the crane arms around. Use the whip points to reach Panama Hat Man, ending the level.

Unlocked Characters: Elsa
Interlude - Ah, Venice!
Characters: Indiana Jones, Elsa

Hop in the water and swim to the northeast. You'll find a bar you can high jump to. High jump onto it to raise up a platform, allowing you to climb out of the water. Continue up the road to reach Castle Brunwald. High jump onto the bar on the left, revealing a whip point. Use it to open the gate, then head inside.

Continue to the right and you'll find two buttons. Step on one and your partner will step on the other, revealing a whip point. Use it to lower the drawbridge. Walk up the drawbridge and into the castle to start the next Story level.
Brunwald Blaze


Starting Characters: Indiana Jones, Henry Jones
True Adventurer: 27,000

Part 1 - Castle Dining Room

Move to the left and you'll be burned free of the chairs. Use the whip points on the chandeliers above you to swing left over the fire, then use the water bottles to put out the fires. Smash the suit of armor against the back wall to reveal LEGO pieces. Build them into a bar, then grab onto it to reveal a secret passage.

Switch to your partner and head through the passage, then continue to the right. Smash the weapons rack to knock loose the weapons. Pick up a sword, then head back left. Toss the sword at the rope to cut it, revealing a key. Turn it in the slot to keep the passage open, allowing your partner to join you.

Use the water bottles to put out the fires on the right, revealing a box. Pick it up and place it on the green panel to reveal LEGO pieces. Build them into a ladder, then climb up onto the ledge. Push the suit of armor off the edge to reveal LEGO pieces. Build them into a suit of armor, which will stand on one of the buttons. Step on the other two buttons to open the hatch in the fireplace. Head inside to end the level.

Unlocked Characters: Henry Jones
Interlude - Motorcycle Escape
Characters: Indiana Jones, Henry Jones

Head down the drawbridge and to the right. You'll find the Bike 'n' Side. Purchase it (you should have way more than 5,000 studs by now), then hop in and drive it to the right. Crash through the gate, then continue up the road to Berlin. Park the motorcycle on the orange panel to open the gate, then continue into Berlin. Head through the opening at the end of the path to start the next Story level.
Berlin Brawl


Enemies: Enemy Guard
Starting Characters: Indiana Jones (Officer), Henry Jones
True Adventurer: 50,000

Part 1 - Book Burning

Time to stick it to the Nazis! Defeat each wave of enemies as they appear. In the second wave, you will be faced with machine gun wielding enemies. Tie them up with your whip and you'll be able to damage them. The third wave has German soldiers firing at you from scaffolding. Use the whip points underneath them to knock them to the ground. You can also grab a gun from a defeated soldier and shoot the enemies on the scaffolding.

The fourth wave will see some soldiers on motorcycles. You'll need to grab the rocket launchers from the soldiers on the scaffolding in order to destroy the motorcycles. Defeat all four waves to complete this level.
Interlude - Rescuing Professor Jones
Characters: Indiana Jones, Sallah (Fez)

Head over to the tank and dig it out of the wall to start the next Story level.
Cannon Canyon


Boss: Tank
Starting Characters: Indiana Jones, Sallah (Fez)
True Adventurer: 100,000

Part 1 - Canyon of the Crescent Moon

Head down the ramp and hop in a jeep, as you won't be able to damage the enemy vehicles with a horse or camel. Once the first two jeeps are scrapped, the tank will blow up the rocks in the path, allowing you to head into the next part of the area. After you defeat each wave, the tank will destroy more rocks, allowing you to head into the part of the canyon with the next wave.

After the fourth wave has been defeated, the tank will appear for you to defeat. To damage the tank, hop in one of the mine-layers (the small open-topped treaded vehicles) and drive in front of the tank. Press the "attack" button to drop a mine. When the tank hits the mine, it will be damaged. Defeat the tank to complete the level.
Interlude - Desert Trek
Characters: Indiana Jones, Henry Jones

Switch to Sallah and head to the right. You'll notice some broken down pillars. Dig them up to clear a path, then head into the alcove. Head to the right to reach the grail temple. Solve the hieroglyph puzzle to reveal the entrance, then head inside to start the final Story level.
Trial & Terror


Boss: Walter Donovan
Starting Characters: Indiana Jones, Sallah (Fez)
True Adventurer: 38,000

Part 1 - The Trials

Head down the path, avoiding the saw blades. Use your whip to grab the key across the gap, then place it in the slot on the left. Turn it to extend a bridge, then cross it. Dig up the glowing patch in the dirt to knock over the statue, then walk across it.

Donovan will then appear. Use the whip point underneath him to damage him. He will then retreat to the ledge on the right. Use the whip point underneath him to damage him again. This will raise up the statues on the left and right. Use the whip point to the right of you to reveal LEGO pieces, then build them onto the tiles. Push both statues to the end of the tiles to reveal patterned blocks in the back part of the area.

Hop across the blocks in the correct order (butterfly, skull, eagle, grail) to open the door. Continue down the path, then grab onto one of the ropes. Your partner will grab the other, revealing a bridge. Walk across it to trigger a cutscene.

After the cutscene, Donovan will have gained tornado powers. Head to the pause menu, then select "Video Settings". Make sure that "Vertical Sync" is on, otherwise Donovan will constantly suck you up into his tornado (which is very, very annoying).

To damage him, use the whip points on each side of the room to knock down the silver shields. Donovan will suck them up. Grab one of the rocket launchers and fire at the silver shields to destroy them, damaging Donovan.

There are also three silver chests for you to dig up. Dig these up and lure Donovan into sucking them up, then destroy them with the rocket launcher to damage Donovan. Once all five silver objects have been destroyed, the level will end.
-------------Treasure Levels-------------
Crab Cake Confusion
This Treasure level can be played by heading into the Coronado, which can be found partially sunk in the water southeast of Venice.


Required Abilities: Sharp Shoot, Sword
True Adventurer: 29,000

In order to reach that Treasure, we'll need to get past the sea monsters. Shoot the target on the left to raise up some boxes, then carefully hop across them until your path is blocked by the crab. Toss your sword at the rope to cut it, causing the crab to disappear.

Continue to hop across the boxes, then shoot the target to reveal more boxes. Continue across the boxes, then toss your sword at the rope above the tentacle to cut it. This will clear the tentacle out of the way, allowing you to walk across the beam to this Treasure.
Castle Quench
This Treasure Level can be played by heading into Castle Brunwald.


Required Abilities: Explosive, High Jump
True Adventurer: 37,000

Destroy the silver gate so you can enter the dining hall, then head to the right. Build the books into a platform, allowing you to high jump onto the ledge. Pick up the box, then carry it to the left side of the room and place it on the green panel. Build the LEGO pieces onto the wall above you, then destroy the silver suit of armor to reveal more LEGO pieces. Build them onto the wall above you, then high jump onto the bar to reveal water bottles.

Use them to put out each of the fires in the dining hall. You'll have to destroy the silver gates on the right to reveal one of the fires. There are 9 fires in the dining hall. To reveal the tenth, destroy the pile of rubble to the left of the fireplace, revealing LEGO pieces. Build them into a key, then turn it to reveal the tenth fire. Put out all 10 fires to reveal this Treasure.
Perilous Parking
This Treasure level can be played by heading into the building in Berlin.


Required Abilities: Dig, Mechanic
True Adventurer: 18,000

This one's a real treat. There are four orange panels throughout the area, and you need to park a vehicle on each. Head to the far left side of the area and smash the dumpster to reveal a bazooka. Use it to destroy the two silver statues on the platforms. With the statues destroyed, head to the center of the area.

Repair the wheel on the truck, then hop inside and park it on the orange panel in the center of the area. Hop on the motorcycle and carefully drive it up the ramps to the left, parking it on the orange panel. Hop on the horse and carefully hop across the platforms to the right, stopping on top of the orange panel.

Head back to the center of the area and dig the jeep out of the book pile, then hop in. Drive it over the ramp to the right of the book pile, landing on top of the final orange panel. Once all vehicles are on the orange panels, this Treasure will appear.
Canyon Quest
This Treasure level can be played by heading into the archway in the desert to the left of the grail temple.


True Adventurer: 125,000

Your goal in this level is to pop 10 balloons. Once all 10 balloons have been popped, this Treasure will appear.

The first balloon is on top of a ramp in the first part of the area.


The second balloon is on top of a small ramp in the second part of the area.


The third balloon is at the end of a wooden ramp on the left side of the third part of the area.


The fourth balloon is at the end of a stone ramp in the third part of the area.


The fifth balloon is at the end of a stone ramp on the right side of the third part of the area.


The sixth balloon is at the end of a ramp in the third part of the area.


The seventh balloon is at the end of a ramp in the fourth part of the area.


The eighth balloon is at the end of a ramp in the fourth part of the area.


The ninth balloon is at the end of a ramp in the center of the fourth part of the area.


The tenth balloon is at the end of a ramp leading back to the third part of the area. While in the fourth part of the area, drive all the way to the right to find a path that leads north. Follow it and you'll find this balloon.


Once all 10 balloons have been popped, this Treasure will appear in a cave in the third part of the area.
Chalice Challenge
This Treasure level can be played by heading into the grail temple.


Required Abilities: Sword, Whip
True Adventurer: 25,000

Your goal in this level is to find 10 cups. Use the whip points on each side of the room to reveal cups, then destroy the two potted plants to reveal more cups. Toss your sword at the ropes on either side of the room, raising the cage in the center. Grab the two cups from the font of water, then use the whip point to reveal another cup. Grab the shovel and use it to dig up the three remaining cups. Place the cups on each of the green panels. Once all 10 cups are on the green panels, this Treasure will appear.
--------------Bonus Levels--------------
Venice Library
This Bonus level can be played by solving the hieroglyph puzzle in Venice. This will open the door, allowing you to head inside.


Starting Characters: Indiana Jones, Brody
True Adventurer: 24,000

Hop up the ledges and solve the hieroglyph puzzle to open the gate on the left. Head to the far right side of the area and build the LEGO pieces onto the tiles. Push the box to the end, then hop on top of it. Hop onto the ledge, then head towards the back wall. Hop onto the rope, then onto the next ledge on the left. Use the whip point to open the gate on the right. Once both gates are opened, step on one of the buttons. Your partner will step on the other, revealing this Treasure.
Beach Pit
This Bonus level can be played by heading to the beach on the right side of Venice.


Dig up the LEGO pieces, then build them into a lever. Pull it to start this Bonus level.


Starting Characters: Indiana Jones, Elsa
True Adventurer: 18,000

High jump onto the ledge above you and turn the red valve to raise up some platforms on the right. Hop across them, then use the whip point on the back wall to open the gate on the right. Continue to the right, then high jump onto the ledge. Pull the lever to lower a rock into the water, revealing a moving platform. Ride it up onto the back ledge, then grab a sword.

Head back to the left and toss the sword at the rope to cut it, lowering the platforms in the air. High jump up them to the left, then grab a spear from the ledge. Toss it into the socket on the left, allowing Indy to reach the far left ledge. Use the whip point to lower another platform to the right. Return to the right, then hop up the platforms to reach the ledge with this Treasure.
Berlin Airport
This Bonus level can be played by using the Soldier panel in the Berlin airstrip. This will open the hangar door, allowing you to head inside.


Starting Characters: Indiana Jones, Sallah (Fez)
True Adventurer: 15,000

Use the whip point to raise up the ramp, then dig up the tiles. Push the box to the end to send the laser into the disc, raising some platforms on the right. Hop across them, then dig up a ladder. Climb up onto the ledge with the enemy soldier, then defeat him to reveal a sword. Pick it up, then toss it at the rope on the right to cut it, opening the gate.

Pull the lever to the left of the gate to turn on one of the lasers, then grab the spear to the right. Toss it into one of the sockets on the right, then head back left to the ledge with the soldier. Grab the other spear, then toss it into the other socket. Hop up the spears, then pull the lever to turn on another laser. Use the whip point in the alcove behind the gate to lower the platform. Hop on top of it, then use the whip point on the left to lower the other platform. Hop up and pull the lever to turn on the final laser.

This will turn on the fan. Ride the air current onto the ledge, then use the whip point to reveal platforms in the lava. Hop across them, then pull the lever to start the platforms moving. Ride the air current back onto the ledge, then hop across the platforms to reach this Treasure.
Castle Cave
This Bonus level can be accessed after purchasing the Biplane. Hop inside and fly over Castle Brunwald. You'll notice a large horn on the roof.


Parachute onto the roof, then push the green panels. This will turn on the button on the horn. Step on it to play the horn, causing an avalanche to the right.


Drop down off the roof and head to the right to find a newly revealed cave. Head inside to start this Bonus level.


Starting Characters: Indiana Jones, Henry Jones
True Adventurer: 26,000

Solve the hieroglyph puzzle to open the gate, then continue to the right. Defeat the soldier, then pick up the gun he dropped. Shoot the two targets in the back of the area to lower the platform. Hop on the platform, then onto the ledge. Grab a sword, then toss it at the rope on the right to open the gate.

Continue to the right, then shoot the next three targets to raise up a platform. Hop across it and grab a key, then place it in the slot and turn it to open the gate. Continue to the right and shoot the next two targets to turn the quicksand into water. Hop onto the platform, then use the whip point to open the gate on the right. Continue to the right, then hop up the ledges. Hop on a horse, then hop left across the gaps and onto the ledge with this Treasure.
Venice Tunnel
This Bonus level can be played by shooting the targets on the road to Castle Brunwald.


This will open the gate in the water below you. Head inside to start this Bonus level.


Starting Characters: Indiana Jones, Sallah (Fez)
True Adventurer: 23,000

Head to the right and dig up the tiles, then push the box to the end. Continue to the right and use your whip to grab the spear, then head back left and toss it into the socket on the wall. Hop on top of the box, then onto the spear. Hop onto the ledge on the left, then turn the red valve to open the gate, releasing an enemy soldier.

Defeat him and pick up the gun he drops, then use it to shoot the target by the water. This will start moving the platforms out on the water. Hop across the platforms, then pull the lever to start the rest of the platforms moving. Hop across the platforms to reach the back ledge. Continue along the ledge to reach this Treasure.
Super Bonus Level - Lionheart
Once you have completed all 5 Treasure levels and all 5 Bonus levels, head to the grassy field east of Castle Brunwald.


Destroy the treasure chests to reveal LEGO pieces.


Build them into Mount Rushmore, then climb the rope in Lincoln's mouth to start this Super Bonus Level.


Starting Characters: Indiana Jones (Crystal Skull), Mutt

Your goal in this level is to collect 1 million studs. A vast majority are just laying out in the open, but I'll highlight a few of the things you can do. Once you collect 1 million studs, the level will end.

Along the road are various orange panels.


Drive over all of them to start moving a platform in front of the house in the center of the area. Ride it up to the green valve, then turn it to drain the water in the center of the area, revealing most of the studs.


There is a small soccer field in the back left corner of the area. Score 3 goals in the goal to start moving the platform by the house. Ride it up to reach some studs in the air.


One of the small sheds has a shovel in front of it.


Pick it up and you can dig up some chests for some extra studs.
------------Exploring the Hub------------
Hub exploration in this game is very linear. Unlocking certain characters will let you unlock other characters, which will unlock a Bonus level, etc. This flowchart illustrates how each aspect of hub exploration flows together. Consider using it as a checklist of sorts to guide your exploration.

Characters
Coronado Sailor
After completing Coronado Caper, head to the island southeast of Venice. You'll be harassed by these guys.


Defeat enough of them and you'll be able to purchase one.


Librarian
Destroy the tree to the left of the entrance to Castle Brunwald to reveal a key.


Pick it up and carry it to the left side of Castle Brunwald. Place it in the slot, then turn it to open the gate.


After purchasing the Green Speedboat, hop in and you'll find a race nearby.


Complete it and this guy will appear in front of the library.


Enemy Guard
After completing Brunwald Blaze, you'll be harassed by these guys outside Castle Brunwald.


Defeat enough of them and you'll be able to purchase one.


Bazooka Trooper (Crusade)
After completing Berlin Brawl, you'll be harassed by these guys in Berlin.


Defeat enough of them and you'll be able to purchase one.


Panama Hat Man
Destroy the silver tree on the island southeast of Venice, allowing you to purchase him.


Enemy Pilot
After purchasing the Biplane, hop in and fly it to the area south of Venice to find a race.


Complete it and this guy will appear in Berlin.


Enemy Soldier (Machine Gun)
After completing Cannon Canyon, you'll be harassed by these guys in the desert west of the grail temple.


Defeat enough of them and you'll be able to purchase one.


Colonel Vogel
After completing Cannon Canyon, you'll notice a silver cylinder to the right of the entrance to the grail temple alcove. Destroy it and more will appear. You need to quickly destroy all of them.


There are two more in the desert to the left of the grail temple.


Another is just to the left of the grail temple.


The last one is in the desert to the right of the grail temple. Head up the ramp to the right of the temple, then head northeast to reach this.


Destroy all of them within the time limit and Vogel will appear in the desert west of the grail temple.


Grail Knight
After completing Trial & Terror, he can be found wandering around the grail temple.


Donovan
After completing Trial & Terror, you'll find his pieces in front of the grail temple. Reassemble him and you'll be able to purchase him.


Hatay King
Toss a sword at the rope to the left of the grail temple to cut it, opening the camel enclosure.


Hop on a camel and ride it to the right, where you'll find a race.


Complete it and this guy will appear in front of the camel enclosure.


Brody
After completing Trial & Terror, you can find him wandering around Venice.
Vehicles
Gondola
This is right by your starting area in Venice.


Venice Speedboat
This can be found on the far right side of Venice.


Green Speedboat
This can be found in the water in Venice.


Bike 'n' Side
You are required to purchase this to progress in the story. See the section "Interlude - Motorcycle Escape" for more info.


Army Jeep
After purchasing the Bike 'n' Side, hop in and drive it to the right side of Castle Brunwald to find a race.


Complete it and this vehicle will appear in the grassy field south of Berlin.


Staff Car
Use the Soldier panel on the road leading to Castle Brunwald to raise the barrier around this, allowing you to purchase it.


Biplane
You'll find this plane parked along the beach west of the grail temple. Destroy the silver objects on the landing pad, then turn the valve a few times.


This will allow you to purchase this plane.


Tank
This appears in front of the grail temple after completing Cannon Canyon.


Zeppelin
Solve the hieroglyph puzzle in Berlin to open the gate, allowing you to head to the airfield.


You'll find this sitting on the airstrip.
Red Bricks - Red Flowers
Score x8
In order to reveal the flowers, you'll need to walk over brown studs on the ground. The first flower can be found on the road directly to the right of Venice.


The second flower can be found in front of a run-down shed to the right of the entrance to Berlin.


The third flower is in the grass to the left of Castle Brunwald.


The fourth flower is in the grass immediately to the left of Castle Brunwald.


The fifth flower is immediately to the right of the entrance to Castle Brunwald.


The sixth flower is outside the outer wall of Castle Brunwald.


The seventh flower is in the grass to the right of Castle Brunwald.


The eighth and ninth flowers are inside the wall, on the right side of Castle Brunwald.


The tenth flower is inside the wall, on the left side of Castle Brunwald.


Reveal all 10 flowers and this Red Brick will appear on the right side of Castle Brunwald.
Green Bricks - Venetian Pillars
Beep Beep
The first pillar is right by the location of the Gondola.


The second pillar is to the left of the first, next to a stone bridge.


The third, fourth and fifth pillars are across the water from the second.


The sixth and seventh pillars are on the far right side of Venice.


The eighth pillar is behind the library on the left side of Venice.


The ninth and tenth pillars are in front of the library on the left side of Venice.


Destroy all 10 pillars to reveal this Green Brick on the stone bridge in Venice.
Blue Bricks - Lawn Chairs
Invincibility
The first and second lawn chairs are on the beach to the right of Venice.


The third lawn chair is on the island southeast of Venice.


The fourth and fifth lawn chairs are on the beach on the left side of Venice.


The sixth and seventh lawn chairs are on the beach to the right of Castle Brunwald.


The eighth lawn chair is on the beach northwest of Castle Brunwald.


The ninth and tenth lawn chairs are on the beach north of the grail temple.


Destroy all 10 lawn chairs and this Blue Brick will appear on the beach west of the grail temple.
--Kingdom of the Crystal Skull - Part 1--
This is the only playset available when you start a new game.
---------------Story Levels---------------
Starting the Story
Characters: Indiana Jones (Crystal Skull), Mac

Looks like the museum needs some new pottery! You have a train to catch, so head to the right. Unfortunately, the gate will be down. A monkey in the nearby tree has the key, but he won't give it to us unless we give him a banana.

There are a few bananas in this area, but the easiest one to get is back by the school. Head down the road towards the school, then smack the blue mailbox to reveal a banana hidden inside. Pick up the banana and give it to the monkey to receive the key. Place it in the slot, then turn it to raise the gate. Head inside the train to start the first Story level.
Hangar Havoc


Boss: Dovchenko
Starting Characters: Indiana Jones (Crystal Skull), Mac
Added Characters: Janitor
True Adventurer: 59,000

Part 1 - Hangar 51

Well, we appear to be in a bit of a pickle. Pick up the small crate in the background and place it on the green panel. Hop up the crates, then use your whip to swing across the gap using the light. Push the green box to the edge of the tiles, revealing LEGO pieces on the floor. Drop down and build them into bars, allowing Mac to reach the upper ledge.

Hop back up and continue to the right. You'll find a large box surrounded by two green panels. Smash the large box to reveal a statue, then head to the near left corner. Smash the large box to reveal a smaller box, then pick it up and place it on one of the green panels to reveal LEGO pieces. Build them onto the statue. Head to the back right corner and smash the large box to reveal another small box. Pick it up and place it on the other green panel to reveal LEGO pieces, then build them onto the statue.

Have Mac shoot the target on the box on the right to open it, revealing some Staff of Ra replicas. Pick one up, then head to the statue. Stand in one of the circles of light and move the laser into one of the statue's eyes. Switch to your partner and do the same for the other eye. This will activate the statue, revealing LEGO pieces on the right.

Head to the right and build the LEGO pieces into a platform. We still need to take care of the fire, so grab water bottles throughout the area and toss them at the flames to put them out. Once the fires are out, hop up and over and continue to the right.

Shoot the target to reveal spears. Pick them up and toss them into the orange sockets against the back wall. Toss spears into each of the sockets, then hop up to reach the ledge. Push the box off the ledge, then head to the right. Hop up the crates in the back, then swing across the chains to the right. Push the other box to the end of the tiles. Push both boxes to the end of the tiles to reveal the alien remains.

After the cutscene, the friendly Janitor has decided to join you. Hop in the jeep and drive it to the right. Park it on one of the orange panels. There is a large box in between the two orange panels. Hop up the small crates nearby to reach the top, then step on one of the buttons. Your partner will step on the other button, opening the crate and revealing a tricycle. Hop in and park it on the other orange panel.

This will open the garage on the right. Pull the lever inside to lower a ladder. Head back to the left and hop up the crates to reach Dovchenko. Chase him to the right, swinging across the chains, then climb the ladder. Hop to the left across the platforms to reach him. He will then retreat to the ground. Walk up next to him on the glass.

Part 2 - Rocket Tram

This fight isn't over yet! Don't get too close to Dovchenko or he'll tie you up. If you get tied up, just spam the "jump" button to free yourself.

To damage him, head to the right. Step on one of the buttons and your partner will step on the other. This will turn on the rocket on the back of the tram. Use your whip to target Dovchenko, tying him up. Move him into position so he gets hit with the fire, damaging him. Repeat this process two more times to defeat him, ending this long level.

Unlocked Characters: Janitor
Interlude - New Town
Characters: Indiana Jones (Crystal Skull), Janitor

Unfortunately, we seem to be stuck in the desert. Fortunately, we found a nice small town! Head to the right and go inside the house. What could possibly go wrong?
Doom Town


Starting Characters: Indiana Jones (Crystal Skull), Janitor
True Adventurer: 37,000

Part 1 - Model House

Well, that's not good. We need to find safety. Try to ignore the fact that the mannequin's eyes follow you wherever you go! Head to the left and smash the table to reveal a box. Pick it up and place it on the green panel, then grab the other box off the desk in the back of the room. Place it on the green panel to reveal LEGO pieces. Build them into tiles, then push the box to the side, revealing a lever. Pull it to open the gate on the stairs.

Climb up, then head left into the bathroom. Smash the toilet and the tiles behind it to reveal a whip point. Latch onto it to reveal a key. Pick it up and place it in the slot in the hallway, then turn it to open the attic, revealing a whip point.

Latch onto it to lower the ladder, then climb up into the attic. Head to the left and build the LEGO pieces, then push the box all the way to the end of the tiles. Use the box as a boost to grab the rope. This will knock down some boxes, creating an opening into the bedroom. Drop down inside, then build the LEGO pieces into a rotary handle. Pick it up and place it on the green panel on the right, then push it to open the sliding glass door.

Head outside onto the deck, then grab the box. Drop down and place it on the green panel, revealing LEGO pieces. Build them into a lawnmower, which will crash through the door. Head inside to enter the kitchen, where you'll find that famous fridge. Unfortunately, it's padlocked. We'll need to find some explosives.

Head back outside onto the lawn, then latch onto the whip point on the shed to open it. Grab the shovel inside, then head to the near right corner of the lawn. Dig up the dynamite, then pick up a stick. Quickly run inside and toss it at the padlock to destroy it, opening the fridge. Walk towards it to complete the level.
Interlude - Hey, old man!
Characters: Indiana Jones (Crystal Skull), Janitor

Having conveniently landed back in town, it's time for a bite to eat. Head to the right and walk into the cafe with Mutt to start the next level.
Cafe Chaos


Enemies: Agent
Starting Characters: Indiana Jones (Crystal Skull), Mutt
True Adventurer: 8,000

Part 1 - Bar Fight!

This level is pretty simple. You just have to defeat each wave of enemies as they appear. Defeat the first two waves to trigger a cutscene.

After the cutscene, defeat the third wave to complete the level.

Unlocked Characters: Mutt
Interlude - Get on, Gramps!
Characters: Indiana Jones (Crystal Skull), Mutt

We gotta get outta here! Head to the left and you'll see a motorcycle. The stand is broken, so use Mutt to repair it. The motorcycle will be lowered to the ground, starting the next Story level.
Motorbike Mayhem


Starting Characters: Indiana Jones (Crystal Skull), Mutt
True Adventurer: 120,000

Part 1 - City Streets

This level is similar to the previous level, in that you'll be tasked with destroying waves of enemy vehicles. Simply ram into the vehicles to destroy them. Your motorcycles will be fine for destroying other motorcycles, but you'll want to hop in a car so you can destroy the enemy cars. Defeat all three waves to complete the level.
Interlude - In Search of Oxley
Characters: Mutt, Indiana Jones (Crystal Skull)

Having avoiding our Russian pursuers, we are now ready to head to Peru in search of Oxley. Head back to the right through the town and into the train to the right of the college.
Crane Train


Starting Characters: Indiana Jones (Crystal Skull), Mutt
True Adventurer: 24,000

Part 1 - Train

Huh. I don't remember this being in the movie. Anyway, use the whip point in front of you to swing over to the other train. Grab onto the chain on the left to send steam at the left crane. The crane arm will then knock you back. Attack the crane arm until one of the claws falls off. Repeat this process to knock off all the claws on each crane arm.

Once each crane arm has been disabled, repair the blue patch on the right crane arm. Pick up the whip point and place it on the green panel, then latch onto it. Drop down into the control room and defeat the Russian inside to complete the level.
-------------Treasure Levels-------------
Forklift Fun
This Treasure level can be played by entering the hangar in the southern military base.


Required Abilities: Mechanic, Soldier
True Adventurer: 50,000

Hop up the crates on the left, then push the box to the edge of the tiles to lower it to the ground, revealing LEGO pieces. Build them onto the forklift, then repair it. Hop in and park it on one of the orange panels, then head to the right.

Use the Soldier panel to open the gate, then pass through. Climb up the ladder on the left, then grab the small box. Place it on one of the green panels, then head to the right. Hop up the crates, then pick up the other small box. Place it on the green panel to reveal LEGO pieces. Build them onto the forklift, then hop in. Park it on the other orange panel to open the gate. Climb up the ladder to reach this Treasure.
Dummy Run
This Treasure level can be played by entering the house in the back right corner of Doom Town.


Required Abilities: Dig, Mechanic, Soldier
True Adventurer: 37,000

Use the Soldier panel nearby to open the shed on the left. Pick up the box and place it on the green panel in the near right corner of the yard. Dig up the nearby gears, then pick them up and place them on the green panel. Once both objects are on the green panel, build the LEGO pieces onto the machine. Repair it to bring all the mannequins to life!

Head to the left and build the LEGO pieces that appear onto the ladder. Climb up, then head to the left. Drop down through the big hole in the floor, then continue defeating the mannequins. More will bust through the door on the left, so continue out into the hallway.

Head left into the living room, then build the LEGO pieces onto the couches. Bounce on the couches to reach the bar, then hop into the bathroom. Climb up the rope, then hop onto the bar and onto the roof. Head right to reach this Treasure.
Diner Distraction
This Treasure level can be played by heading into the cafe.


Required Abilities: High Jump, Mechanic
True Adventurer: 20,000

Head behind the bar, then high jump onto the bar on the back wall. This will reveal a secret hatch in the wall. Smash it to release a rat, then defeat it. You will need to defeat 9 more rats.

Head to the left and repair the jukebox, then destroy the nearby bar stools to reveal a record. Pick it up and place it in the jukebox, then destroy the tables on the far right to reveal another record. Place both records in the jukebox to scare up another rat.

The other 8 rats can be scared up by destroying the tables and bar stools. Once all 10 rats are defeated, this Treasure will appear.
Bike Hike
This Treasure level can be started by heading into the gate at the end of the street to the left of the cafe.


True Adventurer: 132,000

Your goal in this Treasure level is to pop 10 balloons. Once all 10 balloons have been popped, this Treasure will appear.

The first balloon can be found on the southernmost street. Drive up a small ramp in front of a parked car to reach it.


The second balloon can be found in the center street that runs north-to-south. Drive up the ramp to reach it.


The third balloon can be found on the street that runs in front of the college. Ride up the ramp on the red-and-white car to reach it.


The fourth balloon can be found on the far right street that runs north-to-south. Drive up the ramp to reach it.


The fifth balloon can be found beneath the arches underneath the clock tower.


The sixth balloon can be found at the top of a ramp that launches you onto the campus.


The seventh balloon can be found by driving out of the stained glass window in the library (which can be found on the left side of the campus).


The eighth balloon can be found in the near left corner of the campus. Drive out of the library and head south to find the ramp with this balloon at the top.


The ninth balloon can be found to the right of the ramp that leads to the eighth balloon.


The tenth balloon can be found to the right of the ramp that leads to the ninth balloon.


Pop all 10 balloons to reveal this Treasure up on the clock tower.
Target Training
This Treasure level can be played by walking into the train parked just outside the town to the right of the college.


Required Abilities: High Jump, Sharp Shooter
True Adventurer: 41,000

You don't need someone with high jump to complete this level, but if you want the studs, you'll need a high jumper. This level is a piece of cake. Simply head to the left side of the train and shoot the target that is facing up. The other targets will then face up one at a time. Shoot each target when it faces up to reveal this Treasure. You'll have to be quick at this, otherwise you'll have to start over.
--------------Bonus Levels--------------
Marshall College
To unlock this Bonus level, solve the hieroglyph puzzle in front of Marshall College to open the large doors, allowing you to head inside.


Starting Characters: Indiana Jones (Crystal Skull), Stanforth
True Adventurer: 14,000

Defeat the enemy with the bazooka icon over him to reveal a bazooka, then pick it up. Ride the air current on the fan on the right to reach the ledge, then use the whip point to swing across the gap. Push the box to the end of the tiles so Stanforth can join you.

Step on one of the buttons and your partner will step on the other. This will start the platforms moving. Ride the platform in front of you onto the ledge, then defeat the enemy with the bottle icon over his head to reveal a bottle. Pick it up and head back to the ledge on the right. Toss the bottle at the fire to put it out, then pull the lever to start the platform moving.

Ride it up to the ledge, then defeat the enemy with the sword icon over his head to reveal a sword. Head back to the main area, then toss the sword at the rope on the right to cut it. This will open the gate. Head inside the alcove and destroy the silver chests to reveal a whip point. Use it to raise up a ramp, allowing you to hop over to this Treasure.
Gas Station
To unlock this Bonus level, drive a vehicle over to the gas station and park it on the orange panel.


This will open the door, allowing you to head inside.


Starting Characters: Indiana Jones (Crystal Skull), Mac
True Adventurer: 30,000

This Bonus level is pretty simple. You simply need to make it through all of the checkpoints. You can either do this by walking or by hopping in one of the hot rods. Once you drive through the final checkpoint, this Treasure will appear.

There are also 22 balloons for you to destroy (10 green and 12 blue). Destroy all of the balloons to raise some platforms by the end of the racetrack. Hop on the platforms to reach some high value studs. You don't have to destroy the balloons to reveal the Treasure, but it helps in getting True Adventurer.
Doom Town House 2
To play this bonus level, high jump over the fence on the right side of Doom Town, then head inside the opening.


Starting Characters: Indiana Jones (Crystal Skull), Brawler
True Adventurer: 50,000

Head to the left and destroy the plants behind the chains to reveal a key. Pick it up and place it in the slot on the left, then turn it to open the gate. Continue down the path, then defeat the enemy in the center of the room to reveal a sword. Pick it up and carry it to the left, then toss it at the rope to cut it. This will raise up a ramp to the right.

Hop onto it, then hop onto the upper ledge. Pull the lever to open the gate on the right. Continue to the right, then head down the path. Grab a shovel, then continue into the grassy area. There are several chests buried in the ground. Dig up the one in the center, then destroy it to reveal a bazooka. Pick it up, then head back into the living room.

Destroy the silver chest by the laser to raise up a ramp. Hop in a tricycle (either from the beginning of the area or from the grassy field) and park it on the orange panel to reveal this Treasure. Ride the moving platform up to reach it.

In terms of exploration for studs, there is a lot to do. Kick the ball into the goal in the grassy area to start a platform moving that you can ride to a bunch of studs. Destroy the silver lock on the fridge to receive a bunch of studs.
Interrogation Room
This Bonus level can be played by fixing the gears in the bottom right corner of the southern military base. This will open the nearby bunker, so head inside to play this Bonus level.


Starting Characters: Indiana Jones (Crystal Skull), General Ross
True Adventurer: 40,000

Head to the right and swing across the gap using the whip points. Turn the red valve to raise up a platform, allowing General Ross to join you. Destroy the silver chest on the far right to reveal a key. Pick it up and place it in the slot, then turn it to start moving some platforms on the left.

Hop across them to cross the lava, then use the whip points to swing across the gap. Pull the lever to start a platform moving, allowing General Ross to join you. Shoot the target to open a gate by your starting area.

Return to the starting area and hop in the car, then drive it to the right. Park it on the orange panel to open the gate behind you. Turn the green valve to drain the lava, revealing this Treasure.
Hangar 52
This Bonus level can be played by entering the bunker on the left side of the northern military base.


Starting Characters: Indiana Jones (Crystal Skull), Janitor
True Adventurer: 40,000

Head to the right and latch onto the whip point to open the gate. Before heading through, build the LEGO pieces on the left into tiles. Push the box to the end of the tiles, then hop up onto the ledge. Use the whip point in the air to swing onto the ledge on the right, then grab a torch.

Continue to the right, then use the torch to light the barrel of dynamite. The barrels will explode, revealing a button. Step on it to turn on the fan on the left. Ride the air current onto the ledge, then grab a water bottle. Toss it at the fire on the right to put it out, then pull the lever. This will open the gate in the back.

Head inside and turn the red valve to raise up a platform. Head back to the left and ride the air current onto the ledge, then head right. Use the whip point to swing onto the rope, then hop onto the platform. Hop onto the ledge on the right, then pull the lever to raise up a ramp.

Head back to the left and hop in the tricycle, then drive it up the ramps and to the right. Park it on the orange panel to turn on the fan underneath the Treasure. Build the ladder on the right, allowing you to reach the ledge. Climb up, then head over to the fan and ride the air current up to this Treasure.
Super Bonus Level - Space Rocket
Once you have completed all 5 Treasure levels and all 5 Bonus levels, head to Doom Town.


Destroy the treasure chests to reveal LEGO pieces.


Build them into a rocket, then head inside to start this Super Bonus Level.


Starting Characters: Indiana Jones (Crystal Skull), Mutt

Your goal in this level is to collect 1 million studs. A vast majority are just laying out in the open, but I'll highlight a few of the things you can do. Once you collect 1 million studs, the level will end.

Hop up these platforms behind the fire station to reach the top, where you'll find a whole bunch of studs.


One of the buildings towards the near right corner has a shovel next to it.


Pick it up and you can dig up some chests and smash them for studs.


There is a soccer field in the near left corner of the area.


Score two goals in a goal to lower the platforms near it, allowing you to reach the studs.
------------Exploring the Hub------------
Hub exploration in this game is very linear. Unlocking certain characters will let you unlock other characters, which will unlock a Bonus level, etc. This flowchart illustrates how each aspect of hub exploration flows together. Consider using it as a checklist of sorts to guide your exploration.


Characters
Mannequin (Man), Mannequin (Woman), Mannequin (Girl), Mannequin (Boy)
After completing Doom Town, you'll find that the green house is on fire. Grab nearby water bottles and toss them at the fires to put them out.


Once all of the fires have been put out, mannequins will appear and start to attack you.


Fight off the waves of mannequins and eventually you'll be able to purchase this mannequin family.


Russian (US Disguise)
You'll be swarmed by Russians when you enter the southern military base.


Defeat enough of them and you'll be able to purchase one of them.


Brawler
After completing Cafe Chaos, you'll be harassed by these guys while near the cafe.


Defeat enough of them and you'll be able to purchase one of them.


Greaser, Stanforth
After purchasing the Hot Rod, hop in and drive it to the train tracks. You'll find a race.


Complete the race and these two will appear in front of the college.


Agent
After completing Motorbike Mayhem, head to the left of the cafe to be bothered by these guys.


Defeat enough of them and you'll be able to purchase one.


General Ross, Taylor
After purchasing the Sabre Jet, hop in and you'll find a race above Doom Town.


Complete the race and these two guys will show up in the southern military base.


Russian Digger
After purchasing the Sabre Jet, hop in and fly to the north to find another military base. Hop out while over the base so you parachute in. Pull the lever by the gate to open it, allowing you to access this area all the time.


You'll be harassed by these guys.


Defeat enough and you'll be able to purchase one of them.


Hangar Guard
Head into the desert between the northern military base and the town. You'll find a spot where you can dig.


Dig up a gopher, then hit the gophers when they pop out of their holes.


Once they're all stunned, this guy will appear by the gas station.


College Female
After purchasing the Fridge Car, hop in and drive it to Doom Town to find a race.


Complete it and she'll appear in front of the cafe.
Vehicles
Tricycle
Smash the walls to the right of the cafe to reveal an opening.


Walk inside and you'll be able to purchase this.


Fire Truck
The garage behind the gas station has some broken gears next to it.


Repair them to open the garage, where you'll find this vehicle.


Hot Rod
This will appear to the left of the college after completing Cafe Chaos.


Sabre Jet
You'll find this vehicle grounded in the southern military base.


Repair the broken gear on the side of the landing strip to lower the barrier, allowing you to purchase the jet.


Motorbike
After completing Motorbike Mayhem, head to the left from the cafe and you'll find this.


Army Jeep
There is a silver barrier by the entrance to the southern military base.


Destroy it to reveal this.


Ice Cream Van
Head into the desert between the northern military base and the town. You'll find a spot where you can dig.


Dig up a gopher, then hit the gophers when they pop out of their holes.


Once they're all stunned, this vehicle will appear by the gas station.


Fridge Car
This is buried in the ground to the left of the cafe. Dig it up and you'll be able to purchase it.
Red Bricks - Fire Hydrants
Score x2
The first fire hydrant can be found to the left of the college at the end of the street.


The second fire hydrant can be found to the right of the college.


The third fire hydrant can be found across the street from the cafe.


The fourth fire hydrant can be found right next to the broken machine to the left of the cafe.


The fifth fire hydrant can be found in an alley to the left of the cafe. Head left and go all the way to the end of the street to find this on the right.


The sixth fire hydrant can be found in front of the entrance to Doom Town.


The seventh fire hydrant can be found in front of the gas station.


The eighth fire hydrant can be found in the southern military base, near the crane.


The ninth fire hydrant can be found in front of the entrance to the hangar in the southern military base.


The tenth fire hydrant can be found in the northern military base.


Destroy all 10 fire hydrants and this Red Brick will appear in the street by the gas station.
Green Bricks - Potted Flowers
Disguises
The first set of flowers can be found in the back left corner of the town. Head left from the cafe until you reach the end of the street, then look left to find this.


The second set of flowers is up on a ledge. After destroying the fire hydrant, ride the water spout up onto the awning. Bounce up to the rooftop to reach the flowers.


The third set of flowers is right in front of the cafe.


The fourth set of flowers can be found in front of the green house on the left side of Doom Town.


The fifth set of flowers can be found on top of a building in the town. To reach it, climb the ladder to the left of the cafe.


You'll find this set of flowers towards the center of the rooftops.


The sixth set of flowers can be found after leaving the town. Head to the right to find a small building. You'll find these flowers on the right.


The seventh set of flowers are well hidden. After leaving the town, head to the left down the road. Eventually, you'll see the train tracks turn to the north. Follow them and you'll find some trash cans.


Destroy them to reveal a whip point.


Latch onto it to open the garage, revealing this set of flowers.


The eighth set of flowers can be found in the desert between the town and the northern military base. Head towards the north to find them.


The ninth set of flowers can be found in the southern military base. On the right side of the base, you'll find a crane.


Turn the valve three times to raise up the metal panel, revealing the flowers.


The tenth set of flowers can be found in the northern military base.


Destroy all 10 potted flowers to reveal this Green Brick on the street by the gas station.
Blue Bricks - Light Green Cacti
Fast Fix
The first cactus can be found to the right of the entrance to Doom Town.


The second cactus can be found shortly after exiting the town.


The third cactus is in a patch of desert to the left of the town.


The fourth cactus is also in the desert to the left of the town, closer to the train tracks.


The fifth cactus is also in the desert to the left of the town, closer to the northern military base.


The sixth cactus is in front of the northern military base.


The seventh cactus is close to the gas station.


The eighth cactus is in the middle of the desert between Doom Town and the gas station. After exiting Doom Town, head north to find this.


The ninth cactus is in the desert just outside the southern military base. Exit the base towards Doom Town to find it.


The tenth cactus is in the bottom corner of the southern military base.


Destroy all 10 cacti to reveal this Colored Brick in the southern military base.
--Kingdom of the Crystal Skull - Part 2--
This playset will become available after completing the story in Kingdom of the Crystal Skull - Part 1.
---------------Story Levels---------------
Starting the Story
Characters: Indiana Jones (Crystal Skull), Mutt

Well, we've made it to Peru. Oxley has been imprisoned in the local "hospital" so we've got to get to him. Head to the left to enter a small market. Head south to find the entrance to the asylum. Head inside to start the first Story level.
Peru Cell Perusal


Starting Characters: Indiana Jones (Crystal Skull), Mutt
True Adventurer: 30,000

Part 1 - Nazca Asylum

Well, that didn't go as planned! Repair the broken machine to turn on the lights, then grab the chain to open the gate. Switch to your partner and head to the right, then push the boxes to the left to hold the gate up, allowing your partner to join you.

Continue to the right and you'll see a key on the ground. When you walk up to it, however, the patient will grab it before you can. Walk far enough away so he puts it outside his cell, then use your whip to grab it. Place it in the slot on the right, then turn it to open the gate.

Head into Oxley's cell, then hop on the bed to reach the upper ledge. Grab the whip point and place it in the green slot, then use it to reveal LEGO pieces. Build them into part of a map, then destroy the sink on the left to lower a pillar in the back left corner.

There will be a button where the sink used to be. Stand on top of the pillar, then switch to your partner and step on the button to raise up the pillar. Switch back to your partner and hop onto the ledge, then push the box off the ledge to reveal more LEGO pieces.

Build them into part of a map, then bounce on the bed some more to reveal more LEGO pieces. Build them into a bar, then bounce on the bed to reach it. Shimmy across to the right, then hop on the bar underneath the panel in the wall to reveal more LEGO pieces. Build them into the rest of the map. Complete the map to end the level.
Interlude - Good Thing We're Not Grave Robbers!
Characters: Indiana Jones (Crystal Skull), Mutt

Head to the right and push the block along the tiles, clearing the way to the cemetery. Pull the lever to open the gate, allowing you easier access to this area. Use the whip point on the outhouse to reveal a shovel, then pick it up. Head to the left and you'll find a place to dig. Dig up the ground in the marked spots to reveal the tomb entrance. Head inside to start the next Story level.
Tomb Doom


Enemies: Cemetery Warrior
Boss: Cemetery Warrior King
Starting Characters: Indiana Jones (Crystal Skull), Mutt
True Adventurer: 60,000

Part 1 - Orellana's Tomb

Head to the right and use the whip point on the gate to tear it away. Continue to the right, then destroy the skeleton to the right of the vine to reveal a shovel. Pick it up, then slide down the vine. Use the whip point on the gate to reveal broken gears, then repair them to reveal an opening on the right.

Continue to the right, then dig up a large skull. Pick it up and carry it to the right, then place it on one of the green panels. You'll find the other skull nearby, so pick that up and place it on the other green panel. This will reveal a vine to the right.

Head right and use the vine to cross the gap, then destroy the two tombs with the blue skeletons to reveal shields. Pick them up and place them on the green panels, then destroy the stone structure on the right to reveal a spear. Pick it up and toss it into the socket against the back wall, then hop up the spear and onto the bar.

Hop onto the ledge, then destroy the tomb to reveal the third shield. Pick it up and place it on the other green panel. Once all three shields are in place, build the LEGO pieces onto the tomb. This will reveal the Crystal Skull. Pick it up to trigger a cutscene.

After the cutscene, one of the cemetery warriors is making his escape with the skull! Chase him all the way to the left (be careful when passing through the traps) and up the ladder back to the cemetery entrance. You'll finally be able to damage him here, so smack him around to take out his hearts. Once he's defeated, pick up the skull and exit the cemetery to complete the level.
Interlude - Going Camping
Characters: Indiana Jones (Crystal Skull), Mutt

We've got the skull, so now it's time to get out of here. Head to the right side of the cemetery and you'll find a jungle path. Head down it and you'll find a bunch of ants. Fortunately, your crystal skull will scare off the ants, allowing you to head towards the rocks. Pick up the button and place it in the slot, then step on it to blow the rocks out of the path. Continue down the path to reach a Soviet Camp. Head inside the tent to start the next Story level.
Mac Attack


Enemies: Russian Soldier
Boss: Mac
Starting Characters: Indiana Jones (Crystal Skull), Mutt, Marion (Crystal Skull)
True Adventurer: 18,000

Part 1 - Quicksand Fields

The goal of this level is to beat up the attacking Russian soldiers. The first wave consists of nothing but foot soldiers. The second wave consists of machine gun toting soldiers. They will be standing on a platform above a snake pit. To damage them, use the whip points underneath them to send them tumbling into the snake pit (you can also just target them directly).

Once they're toast, defeat the third wave (which consists of more machine gun soldiers). After the third wave has been defeated, Mac will appear. Smack him to take out his hearts. Eventually, he will hop on the platform above the snake pit, so use the whip point underneath him to defeat him.

Unlocked Characters: Oxley, Marion (Crystal Skull), Mac
Interlude - Pursuing Spalko
Characters: Indiana Jones (Crystal Skull), Mutt

We've found Marion and Oxley, but now Spalko has the skull! We'll need to repair the nearby Jungle Cutter to go after her. Switch to Marion (who is walking around the camp somewhere) and head to the right side of the camp to find the Jungle Cutter. High jump onto the ledge on the right, then pick up the box.

Carry it back to the Jungle Cutter and place it on the green panel to reveal LEGO pieces. Build them onto the Jungle Cutter and you'll be able to purchase it for 5,000 studs. You should have way more than that by now, but if you don't, just replay a Story level and you'll get there no problem. Once you've purchased the Jungle Cutter, hop in and drive to the left through the trees, then head to the right to start the next level.
Rainforest Rumble


Boss: Jungle Cutter
Starting Characters: Indiana Jones (Crystal Skull), Oxley
True Adventurer: 150,000

Part 1 - Peruvian Jungle

You need to wreck the Soviet vehicles, and the Jungle Cutter is the best way to do so (obviously!). Destroy each wave of enemy vehicles to complete the level. To reach the third wave, you'll need to take the Jungle Cutter to the southernmost part of the area. Cut through the trees to reveal a ramp, then use a smaller vehicle to hop it. For the final wave, you'll need to use your own Jungle Cutter to damage the enemy Jungle Cutter. Destroy the Jungle Cutter to complete the level.
Interlude - Ant Attack
Characters: Indiana Jones (Crystal Skull), Oxley

Head to the left and you'll find a bunch of ants. Head to the left of them to find a banana crate. Smash it to reveal a banana, then pick it up. Head into the ants and follow the path to find a monkey. Toss it the banana to receive the key. Place it in the slot, then turn it to raise up some rocks, allowing you to continue. Continue to the left and go through the arch to start the final Story level.
Dovchenko Duel


Boss: Dovchenko
Starting Characters: Indiana Jones (Crystal Skull), Mutt, Oxley
True Adventurer: 50,000

Part 1 - Ant Hills

Smack Dovchenko to take out his hearts. He will then be carried away. The ants will then form a giant monster. Head to the right and use the whip point on the jeep to reveal a cone. Pick it up and place it on one of the ant hills that red ants are coming out of, then head to the right to find another jeep. Repair the broken lever to lower the tailgate, revealing another cone. Pick it up and place it on an ant hill.

Once two cones have been placed, the ant monster will disappear and Dovchenko will return. Smack him to take out his hearts. The ant monster will then return. Place cones on the three ant hills spewing red ants.

Dovchenko will then return. Smack him to take out his hearts, then place cones on each of the five ant hills to defeat the ant monster, ending the level.
-------------Treasure Levels-------------
Musical Mania
This Treasure level can be played by heading into the asylum.


Required Abilities: Explosive, Whip
True Adventurer: 20,000

Head to the right and destroy the silver containers to reveal LEGO pieces. Build them onto the circuit board to open all of the doors. Head all the way to the right to reach Oxley's cell, where you'll find five red buttons on the ground.

Use your whip to grab three patients running around, then drag them into Oxley's cell. Pick them up and set them on three of the buttons. Step on the remaining two buttons with you and your partner to reveal this Treasure.

If you're having trouble grabbing patients, you can make things easier by assembling a record player. The first piece can be found by the door to Oxley's cell. Place it on the green panel, then grab the record player piece on the right side of the bed. Place it on the green panel, then grab the shovel.

Dig up the ground near the pillar to lower it slightly, knocking off the record player piece. Pick it up and place it on the green panel. Once all three pieces are on the green panel, build the LEGO pieces into a record player. Punch it to start playing it, causing the patients to start dancing. This makes it easier to grab them with your whip.
Tomb Time
This Treasure level can be played by entering Orellana's tomb.


Required Abilities: Crystal Skull, Explosive
True Adventurer: 23,000

Destroy the silver box in front of you to reveal a button. There are four buttons in total, and you need to quickly step on each of them. Drop down on the left to find the first button, then climb the ladder and hop to the left. You'l find another button among the scorpions.

Head across the bridge to the right to find the third button, then head all the way to the right. You'll find the final button in the near right corner. Quickly step on all four buttons to lower a ladder, allowing you to climb up to this Treasure.
Mirror Mayhem
This Treasure level can be played by heading into the tent in the Soviet camp.


Required Abilities: Crystal Skull, Explosive
True Adventurer: 16,000

Destroy the silver chains on the bridge in the back, then walk across it. Walk through the ants and pull the lever to turn on a laser. We need to reflect it to the left. Destroy the silver box by your starting point to reveal a disc. Pick it up and place it in the slot, then continue to the left.

Destroy the silver box to reveal LEGO pieces, then build them onto the structure, rotating it to the right. Head to the back ledge, then walk through the ants. Grab the disc, then place it in the slot to send the laser into the structure. We just need to get the structure into position.

Destroy the silver box to the left to lower the key. Pick it up and place it in the slot, then turn it to rotate the structure. Once the laser hits the disc, the structure will raise up, revealing this Treasure. Destroy the silver bars around it, allowing you to collect it.
Forest Forage
This Treasure Level can be played by heading into the archway on the jungle path south of the Soviet camp.


True Adventurer: 170,000

You need to pop 10 balloons to reveal this Treasure.

The first balloon is on the northernmost path, to the left of your starting point.


The second balloon is at the end of a ramp on the left side of the area. Use a Jump power up to reach it.


The third balloon is in the far left of the area, in a little jungle path that leads to a bunch of studs.


The fourth balloon is on the far left side of the area.


The fifth balloon is floating above the ramp in the south part of the area.


The sixth balloon is at the end of a ramp that leads back to the northern area. After collecting the fifth balloon, take the path that leads to the north to reach this.


The seventh balloon is at the end of the path on the far right side of the area.


The eighth balloon is at the top of a ramp that can be accessed from the east side of the area. After taking the southernmost ramp, continue along the path. Follow it as it heads up the hill, then cuts to the left, to reach this.


The ninth balloon is also on the east side of the area. After taking the southernmost ramp, follow the path up the hill. Head to the left when the path splits to reach this balloon.


The tenth balloon is on a small jungle path. After popping the ninth balloon, continue to the left to reach this.


Once you pop all 10 balloons, this Treasure will appear on the ramp near the eighth balloon.
Jungle Jump
This Treasure level can be played by heading through the arch to the south of the Nazca lines.


Required Abilities: Crystal Skull, Explosive
True Adventurer: 36,000

Head to the far left and destroy the silver box on the trampoline to reveal the Treasure. Head back to the right and destroy the silver box to reveal LEGO pieces. Build them into a fan, then ride the air current onto the first trampoline. Bounce across the trampolines to reach this Treasure.
--------------Bonus Levels--------------
Peru Airport
This Bonus level can be played by using the Soldier panel on the left side of the airstrip.


This will open the nearby garage door. Head inside to start the level.


Starting Characters: Indiana Jones (Crystal Skull), Russian Officer
True Adventurer: 27,000

Head towards the screen and destroy the silver chest to reveal a shovel. Pick it up and use it to dig up the sparkling dirt on the left, revealing tiles. Push the box all the way to the left, then hop on top of it. Hop onto the ledge on the left and grab the key, then place it in the slot. Turn it to reveal another laser.

Push the box back to the right so it is in-between the two lasers. This will open the gate in the back. Use the whip point inside the room to reveal a platform on the right. Head to the right and hop onto the ledge, then continue to the right.

Dig up the ground near the tiles to reveal more tiles, then push the box to the end of the tiles. Destroy the silver chest to reveal a sword, then pick it up and toss it at the rope in the back. This will start a platform moving up on the ledge.

Hop up the box to reach the ledge, then ride the moving platform to the top. Turn the red valve to fill the room with water, then swim towards the screen to reach this Treasure.
Peruvian Market
This Bonus level can be played by high jumping up the ledges in the market. Grab the bar to open the gate.


Starting Characters: Indiana Jones (Crystal Skull), Mutt
True Adventurer: 20,000

Head to the right and use the two whip points to reveal targets. Destroy the boxes on the right to reveal a green valve, then turn it to lower the lava. Head to the left and bounce on the trampoline to reach the ledge, then grab water bottles. Toss them at the fires in the back to reveal another target.

Turn the green valve to reveal two more targets. Head back to the right and use your whip to grab the torch, then use it to light the dynamite on the left, revealing the final target. Grab a pistol from the chest in the center and shoot all of the targets to reveal this Treasure.
Graveyard Tomb
This Bonus level can be played by destroying the silver panel in the graveyard, revealing an opening. Head inside to start this level.


Starting Characters: Indiana Jones (Crystal Skull), Mutt
True Adventurer: 20,000

Turn the red valve to reveal a platform, then use the whip point on the left to reveal another platform. Hop across the platforms, then defeat the enemy with a sword icon above his head to reveal a sword. Pick it up and toss it at the rope on the right to cut it, revealing platforms on the right.

Use the rope and whip point to cross the gap, then hop up the ledges. Turn the red valve to raise up another platform, allowing Mutt to join you. Repair the broken engine to lower the platform, then hop up it and onto the ledge. Turn the red valve to reveal more platforms.

Hop across them, then turn the red valve to reveal more platforms. Hop across them, then onto the back ledge, where you'll find this Treasure.
Temple Tussle
This Bonus level can be played by driving the Jungle Cutter through the trees on the right side of the Soviet camp. After driving through the trees, follow the main path until it begins to turn to the left. Take the dirt path and head all the way to the end to find this door. Toss a spear into each of the orange sockets, then hang from them to open the door.


Starting Characters: Indiana Jones (Crystal Skull), Mutt
True Adventurer: 28,000

Turn the red valve to reveal two bridges. Head to the right and use the whip point to open the gate. Bounce up the trampolines to reach the ledge with the lever. Pull it to turn on a laser.

Head back to the center of the area and head towards the back. Turn the green valve to lower the lava. Hop across the platforms to the left and right of the gate, then repair the machines. Repair both machines to open the gate, then head inside and grab a key.

Head back towards the screen, then head to the left. Build the LEGO pieces onto the tiles. Push the box to the end, then hop onto the ledge and place the key in the slot. Turn it to turn on the final laser, which will start a platform moving. Head back to the center of the area and ride it up to this Treasure.
Gorge in the Jungle
This Bonus level can be played by heading on the jungle path south of the Soviet camp. Use your whip to grab the head, then place it on the statue to lower the spikes. Head inside to start this level.


Starting Characters: Indiana Jones (Crystal Skull), Mac
True Adventurer: 14,000

Head to the left and grab the shovel, then use it to dig up the tiles. Build the LEGO pieces to repair the tiles, then push the box to the end. Hop on the box, then hop over the fires and use the water bottles to put them out. Use the whip point to lower the platform above you, then head to the right.

Hop onto the rope, then onto the ledge. Grab a bazooka, then head back to the left. Hop up the ledges to reach the silver chest, then destroy it to reveal a sword. Pick it up, then toss it at the rope on the right to cut it.

This will start moving the saw blades, revealing a target. Shoot it to reveal a moving platform. Ride it up onto the ledge, then pull the lever to start moving a platform to the left. Ride it up to the ledge, allowing you to collect the Treasure.
Super Bonus Level - Bike Fright
Once you have completed all 5 Treasure levels and all 5 Bonus levels, head to the jungle path south of the Soviet camp.


Destroy the treasure chests to reveal LEGO pieces.


Build them into a test chamber, then pull the lever to open it up. Purchase the Bicycle, then hop on and ride it to the left to start this Super Bonus Level.


Starting Characters: Indiana Jones (Crystal Skull), Mutt

Your goal in this level is to collect 1 million studs. A vast majority are just laying out in the open, but I'll highlight a few of the things you can do. Once you collect 1 million studs, the level will end.

Once you collect 400,000 studs, the steps on the right will turn into a ramp, allowing you to collect the rest of the studs.
------------Exploring the Hub------------
Hub exploration in this game is very linear. Unlocking certain characters will let you unlock other characters, which will unlock a Bonus level, etc. This flowchart illustrates how each aspect of hub exploration flows together. Consider using it as a checklist of sorts to guide your exploration.

Characters
Patient
Head to the left side of the airstrip and build the LEGO pieces onto the orange panel. Drive a vehicle onto the orange panel to lower a ramp.


After purchasing the Motorbike, hop in and you'll find a race.


Complete it to reveal this guy near the airstrip.


Cemetery Warrior
After completing Tomb Doom, you'll be harassed by these guys in the cemetery.


Defeat enough of them and you'll be able to purchase one.


Soldier
After completing Mac Attack, you'll be harassed by these guys inside the Soviet camp.


Defeat enough of them and you'll be able to purchase one.


Market Trader
After purchasing the Jungle Cutter, drive it to the right of the Soviet Camp to find some trees. Clear them, then continue down the path. Destroy the tree on the path and several more will pop up.


Quickly drive through each of them to reveal this guy to the right of the Soviet camp.


Russian Officer
After completing Rainforest Rumble, you'll be bothered by these guys in the southern jungle.


Defeat enough of them and you'll be able to purchase one.


Peru Nurse
After unlocking the Biplane, hop inside and fly to the left to find a race.


Complete the race and she will appear near the airstrip.


Russian Grenadier
After purchasing either the Nazca Drifter or Nazca Racer, hop in and drive to the right to find a race.


Complete it and he will appear in the Soviet camp.


Cemetery Warrior King
After completing Dovchenko Duel, this guy will be available for purchase in the graveyard.


Dovchenko
After completing Dovchenko Duel, return to the entrance of that level to find Dovchenko buried in the dirt.


Dig him up and reassemble him, allowing you to purchase him.
Vehicles
Bus
This is right out in the open by the airstrip to the right of the hospital.


Motorbike
This is out in the open to the right of the airstrip.


Jungle Cutter
You will unlock this as part of the Story. See "Interlude - Pursuing Spalko" for more info.


Army Jeep
This can be found on the far right side of the jungle path south of the Soviet camp.


Biplane
This is chained to the airstrip by a silver chain.


Destroy the chain and you'll be able to purchase this.


Nazca Drifter, Nazca Racer
After cutting the trees to the right of the Soviet camp, head up the dirt path to find a silver rock.


Destroy it to clear the path, then continue up. Grab the shovel on the way.


You'll find a raft in the water. Hop in and paddle to the right (you'll need a shovel to paddle).


You'll find a race.


Complete it to reveal these two vehicles by the Nazca lines.


Bicycle
Once you assemble the entrance to the Super Bonus Level, you'll be able to purchase this.
Red Bricks - Spider Rocks
Score x4
The first rock is south of the airstrip, by the Motorbike race.


The second rock is on the right side of the airstrip.


The third rock is in the alley you end up in after exiting the asylum.


The fourth rock is in the cemetery.


The fifth rock is on the left side of the Nazca lines area.


The sixth rock is on the right side of the Nazca lines area.


The seventh rock is on the right side of the Soviet camp.


The eighth rock can be found by driving the Jungle Cutter through the trees on the right side of the Soviet camp. Once you're through the trees, follow the path all the way to the right until it curves back to the left. You'll find this rock right at the end.


The ninth rock can be found after cutting through the trees to the left of the Soviet camp.


The tenth rock can be found to the right of the jungle path south of the Soviet Camp.


Destroy all 10 rocks to reveal this Colored Brick in the Soviet camp.
Green Bricks - Green Plants
Silhouettes
The first plant is in the market to the left of the airstrip.


The second plant is on the right side of the cemetery.


The third plant can be found on the path leading to the Nazca lines. After exiting the cemetery, take a left when the path splits.


The fourth plant is on the far left side of the Nazca lines area.


The fifth plant is on the right side of the Nazca lines area.


The sixth plant is on the left side of the Soviet camp.


The seventh plant can be found by driving the Jungle Cutter through the trees to the right of the Soviet camp. Once through the trees, follow the path to the right until it begins to curve to the left. You'll find this plant on the left side of the path.


The eighth plant can also be found after driving through the trees to the right of the camp. Head up the dirt path that leads to the top of the waterfall to find this plant.


The ninth plant can also be found after driving through the trees to the right of the camp. Head down the path as it turns to the left, but take the dirt path instead to find this plant at the end.


The tenth plant can be found on the right side of the jungle path south of the Soviet Camp.


Destroy all 10 plants to reveal this Colored Brick south of the Soviet camp.
Blue Bricks - Black Chests
Fast Dig
The first chest is on the right side of the airstrip. Use the whip point to knock it down, allowing you to destroy it.


The second chest is right by the entrance to Orellana's tomb.


The third chest is on the right side of the Soviet camp, high up on a ledge. Use the whip point on the birdcage to release the bird, who will then carry this chest down to you.


The fourth chest can be found by driving the Jungle Cutter through the trees on the right side of the Soviet Camp. After you're through the trees, head down the path until it begins to turn to the left. Take the dirt path and you'll find a skull mechanism. Destroy the large plant next to it to reveal a key.


Pick it up and place it in the slot, then turn it to reveal this chest.


You'll run into the fifth chest while cutting through the trees to the left of the Soviet camp.


The sixth chest is buried on a beach to the left of the Soviet camp. Use the whip point on the outhouse to reveal a shovel.


Dig up the sparkling dirt immediately to the left to reveal this chest.


The seventh chest is on the jungle path south of the Soviet camp. Follow the path to the end and you'll find a broken propeller. Repair it, then ride the air current up to this chest.


The eighth chest can also be found on the jungle path south of the Soviet camp. Pull the lever to pull this chest out of the water.


The ninth chest can be found by the lines. Use explosives to destroy the large black rock by the left foot of the drawing, revealing this chest.


The tenth chest can be found up by the waterfall. At the top of the waterfall, you'll find some ledges on the right.


High jump up them to reach the chest.


Destroy all 10 chests to reveal this Colored Brick on the easternmost jungle path.
--Kingdom of the Crystal Skull - Part 3--
This playset will become available after completing the story in Kingdom of the Crystal Skull - Part 3.
---------------Story Levels---------------
Starting the Story
Characters: Indiana Jones (Crystal Skull), Mutt

Head to the right and you'll find the entrance to the first Story level. Head inside to get started.
Repair Scare


Starting Characters: Indiana Jones (Crystal Skull), Mutt, Oxley
True Adventurer: 33,000

Part 1 - Ant Hills

We need to find some boxes of pieces to repair the jeep. Smack the light-green chest to reveal bazookas. Pick one up, then use it to destroy the silver rocks on the left. The monkey will then hop away, revealing a whole bunch of ants. Use the crystal skull to walk through them, then smack the trees to reveal a banana. Pick it up and toss it to the monkey to receive the key. Head back to the right and place it in the slot, then turn it to raise up a bridge. Cross it, then grab the box. Carry it back to the jeep, then place it on one of the green panels.

Head back across the bridge and climb up the vine, then hop onto the ledge. Head to the right and use the whip point to lower a bridge. Cross it, then repair the winch to lower the cage to the ground. Drop down into the ants (with your crystal skull of course) and pick up the box. Carry it back to the jeep and place it on one of the green panels.

Head to the right and use the whip point to reveal some LEGO pieces. Some ants will appear as well, so use the crystal skull to keep them at bay while you build the LEGO pieces into a rock pile. Hop up onto the bar, then hop onto the ledge. Grab the box, then place it on the last green panel. Once all three boxes are on the green panels, build the LEGO pieces onto the jeep, ending the level.
Interlude - Trust Me!
Characters: Indiana Jones (Crystal Skull), Oxley

Head to the left and you'll find the Car Boat you repaired earlier. Purchase it (you should have way more than 5,000 studs by now), then hop inside. Drive it to the left through the archway to start the next Story level.
River Ruckus


Starting Characters: Indiana Jones (Crystal Skull), Mutt
True Adventurer: 250,000

Part 1 - Amazon River

Time to wreck the Russians who are chasing you. Drive around and ram the enemy vehicles to destroy them. Be careful with the water. Your car boat will do just fine in the water, but if you get too deep with a jeep, it'll explode. Destroy the three waves of enemy vehicles to complete the level.
Interlude - Three Times It Drops
Characters: Indiana Jones (Crystal Skull), Mutt

Swim down the river and you'll find the skull-shaped rock that marks the entrance to Akator. Hop onto the ledge underneath it, then use the whip point to lower a ladder. Climb up, then head inside the rock to start the next Story level.
Temple Tangle


Boss: Ugha King
Starting Characters: Indiana Jones (Crystal Skull), Marion (Crystal Skull)
True Adventurer: 25,000

Part 1 - Ugha Temple

Oxley is in trouble and we need to rescue him! Head to the left and high jump onto the ledge, then turn the valve to raise up a platform. Once Indy is on the platform, turn the valve again to rotate the platform to the left, allowing Indy to join you.

Continue to the left, then use the whip point to reveal a valve. Turn the valves to rotate the rocks so the pictures on the rocks match the images above them. Once the images are lined up, high jump onto the bar on the left to reveal a headdress.

Pick it up and carry it to the right, then stand on the platform. Switch to your partner and turn the valve to rotate the platform to the right, allowing you to continue to the right. Place the headdress in one of the slots, then head to the right.

Use the whip point to swing across the gap, then destroy the boxes to reveal LEGO pieces. Build them onto the tiles, then push the boxes to the end. Grab the key that appears, then place it in the slot. Turn it to extend some platforms, allowing Marion to join you.

Continue to the right and pick up the dish, then place it in the slot. Push the rotary handle on the back wall to rotate the disc to the right, then grab the chain on the right to raise up another disc. This will reflect the laser around, revealing the second headdress. Pick it up and head back left. Place the headdress in the other slot. Once both headdresses are in the slots, a cutscene will play.

After the cutscene, it's time to fight the Ugha King. To damage him, tie him up with your whip, then place him on one of the spear traps. Do this three times to defeat him, ending the level.
Interlude - After Oxley
Characters: Indiana Jones (Crystal Skull), Marion (Crystal Skull)

Head through the path in the mouth of the skull-shaped rock to reach Akator. Head up the stairs and into the temple on the left to start the next Story level.
Ugha Struggle


Enemies: Ugha Warrior, Ugha Assassin, Ugha King
Starting Characters: Indiana Jones (Crystal Skull), Mutt, Marion (Crystal Skull)
True Adventurer: 20,000

Part 1 - Temple Grounds

We can't leave Oxley behind, so we need to fight our way up to him. Defeat the first two waves of Ugha Warriors and some steps will appear on the temple. Hop up them and you'll be faced with more Ugha tribesman.

Some of them will stay on the upper ledge and toss spears at you. To defeat them, you'll need to toss spears at them. You can either pick up the spears they throw at you, or grab some from the ledges on either side of you. Also, watch out for the boulder that will occasionally fall through the center of the area.

Once the third wave is defeated, more stairs will appear. Hop up them, then use the whip point on the left to defeat one of the kings. High jump onto the vine on the right to defeat the other king. Use spears from the ledges to defeat the two white-haired Ugha tribesman. Once the fourth wave is defeated, more steps will appear. Climb up them to complete the level.
Interlude - Pursuit of Knowledge
Characters: Indiana Jones (Crystal Skull), Marion (Crystal Skull)

Now that we have rescued Oxley, he can be found wandering the area. Switch to him, then head up the stairs to the right. Head through the ants to the left and smack the red panel underneath the skull icon to knock down the key. Pick it up and head to the right through the ants.

Place the key in the slot, then turn it to raise the steps. Hop up them to reach the top of the temple. Grab the spears and use the whip points to drain the sand, then destroy the remaining rocks. This will reveal an opening. Drop down to start the final Story level.
Akator Ambush


Boss: Agent Spalko
Starting Characters: Indiana Jones (Crystal Skull), Marion (Crystal Skull)
True Adventurer: 28,000

Part 1 - Inner Sanctum

Looks like Spalko has some new powers. She will slam a rock onto the ground with buttons on it. Step on them to destroy the rock. Repeat this process to destroy the other three rocks, triggering a cutscene.

Part 2 - Gear Passageway

There are four more rocks for you to destroy. Each of the rocks has a whip point underneath it. Latch onto it, then drop down when you're above a rock to land on it. Step on one of the buttons, then switch to Marion. High jump onto it when it rotates around, then step on the other button to destroy it. Repeat this process to destroy three of the rocks. The last rock will pass by close to the ground, allowing Indy to hop on top of it. Destroy all four rocks to trigger another cutscene.

Part 3 - Chimney

Grab a rocket launcher, then wait for Spalko to pick up a silver rock. When she holds it close to her, destroy the rock to damage her. Repeat this process four more times to finally defeat her, ending the level.
-------------Treasure Levels-------------
Campfire Countdown
This Treasure level can be played by heading into the archway on the path by the ant hills.


Required Abilities: Sword, Whip
True Adventurer: 20,000

Grab the nearby torch and use it to light the fire. You need to light 9 more fires. Head to the bottom right corner of the area and you'll find two more torches. Destroy the nearby rocks to reveal LEGO pieces, then build them into a woodpile. Use a nearby torch to light it. Grab the other torch, then high jump onto the bar to reach the ledge, where you'll find the third fire.

Drop down and head to the far left side of the area, then use the whip point to reveal LEGO pieces. Build them into a platform, then grab a torch. Hop onto the platform, then high jump onto the bar. Hop onto the ledge, where you'll find the fourth fire. Drop back down and use the other torch to light the other nearby fire. Halfway there!

Head to the right and high jump across the bridge, then turn the key to raise it up. Use your whip to grab the shovel, then head back to the right. Dig up the woodpile, then use the nearby torch to light it. Head back across the bridge, then dig up the woodpile. Use the nearby torch to light it, then toss your sword at the rope on the right to cut it. This will lower a platform. Grab the nearby torch, then hop onto the ledge and light the eighth fire.

Grab the next torch, then head right. High jump to cross the gap, as the bridge will collapse, and light the ninth fire. Head back across the bridge and grab the box, then place it on the green panel in the center of the area. Build the LEGO pieces into a woodpile, then use the nearby torch to light it. Light all 10 fires to reveal this Treasure.
Riverside Rush
This Treasure level can be played by heading into the archway to the left of the ant hills.


True Adventurer: 250,000

Your goal in this level is to pop 10 balloons. Once all 10 balloons have been popped, this Treasure will appear.

The first balloon is right by your starting point, behind the waterfall.


The second balloon can be found behind another waterfall to the right of your starting point.


The third balloon can be found just off the path on the far right side of the area.


The fourth balloon can be found at the top of a waterfall at the very bottom of the area.


The fifth balloon is hiding in the plants on the far right side of the area.


The sixth balloon can be found in the river towards the center of the area.


The seventh balloon can be found in front of the waterfall in the back center part of the area.


The eighth balloon is on the log bridge in the center of the area.


The ninth balloon is in the lake on the left side of the area.


The tenth balloon is on the far left side of the area.


Once you pop all 10 balloons, this Treasure will appear by the waterfall in the back central part of the area.
Trick or Treasure
This Treasure level can be played by heading into the eye in the skull-shaped rock to the left of Akator.


Required Abilities: Sharp Shoot, Sword
True Adventurer: 50,000

Your goal in this area is to reveal 5 gemstones. They are found by opening the various boxes in the area. Shoot the targets, toss swords at ropes, or just simply destroy the boxes to open them. Once you reveal a gemstone, run into it to collect it. The gemstones will appear in different places each time you play this level. Collect all 5 gemstones to reveal this Treasure in the center of the area.
Tie Up High Up
This Treasure level can be played by heading inside the smaller temple in Akator.


Required Abilities: Explosive, Whip
True Adventurer: 30,000

Destroy the two silver cages to reveal buttons. We need to tie up some Ugha warriors so we can place them on the buttons. Head down to the ground level to find the Ugha running around. Tie two of them up and head all the way back to the top. Place them on two of the buttons, then have you and your partner step on the other two to reveal this Treasure.
Pit of Peril
This Treasure level can be played by dropping into the opening at the top of the main temple in Akator.


Required Abilities: Explosive, Spear
True Adventurer: 40,000

Toss spears into the sockets on the wall, then hop up onto the ledge. Destroy the silver tiles to reveal a button. Step on it to lower the water level. Hop in the water and swim to the right, then toss a spear into the socket on the wall. Hop across to the ledge, then destroy the silver tiles to reveal a button. Step on it to lower the water level.

Hop in the water and swim to the left, then toss a spear into the sockets on the wall. Hop up them to reach the ledge, then destroy the silver tiles to reveal a button. Step on it to lower the water level. Drop down to the bottom, where you'll find this Treasure.
--------------Bonus Levels--------------
Jungle Jinx
This Bonus level can be played by climbing the rope on the path north of Akator. Toss spears into the sockets by the door, then grab onto them to lower the spikes, allowing you to head inside.


Starting Characters: Indiana Jones (Crystal Skull), Agent Spalko
True Adventurer: 15,000

Build the LEGO pieces on the right into tiles, then toss your sword at the rope on the left to cut it. This will lower the nearby platform, so high jump onto it, then onto the ledge. Push the box off the edge, allowing Indy to reach the whip points. Use them to swing to the right, then hop up the steps. Turn the red valve to raise up a platform, allowing Spalko to join you.

Defeat the Ugha Warriors, then toss their spears into the slots on the right. High jump onto them, then hop across to the right. Turn the red valve to raise up a bridge, allowing Indy to join you. Continue to the right and use the whip points to swing across the gap, then pull the lever to start some platforms moving.

Hop to the right as Spalko, then high jump onto the moving platform in the back. Grab the shovel on the upper ledge, then drop down to the left. Dig up LEGO pieces, then build them into a ladder, allowing Indy to join you. Climb up and step on one of the buttons. Your partner will step on the other one, revealing this Treasure.
Lake Crypt
This Bonus level can be played by heading to the island in the river that runs on the right side of the area. High jump onto the roof of the building and grab the statue, then place it on the green panel to open the door.


Starting Characters: Indiana Jones (Crystal Skull), Mac
True Adventurer: 20,000

Shoot the target to start moving the platforms to the right. Hop across them, then hop onto the ledge in the back right corner. Pull the lever to raise up a platform to the left. Head to the near right corner, then hop to the left using the rope. Grab some spears, then toss them into the sockets along the back wall.

Once both sockets have spears in them, head over to them and hop up. Hop onto the ledge on the left, then use your whip to grab the shovel. Dig up some LEGO pieces, then build them onto the tiles. Push the box to the left, then hop on top of it. Hop over the gap to the left to reach this Treasure.
Digger's Delight
This Bonus level can be played by heading onto the path west of Akator. Cross the small rock bridge to reach this area, then dig up the marked locations to start this Bonus level.


Starting Characters: Indiana Jones (Crystal Skull), Mutt
True Adventurer: 25,000

Grab the shovel, then dig up the glowing dirt to reveal LEGO pieces. Build them into a ladder, then climb up. Dig up the chest, then smash it to reveal a key. Pick it up and place it in the slot, then turn it to kill the Soldier above you, revealing a water bottle. Use your whip to grab it, then toss it at the fires on the right to put them out (the bottle respawns). Grab the spear, then toss it into one of the sockets along the back wall in the center of the area.

Return to the right and use the whip point to start moving the platform above you. Hop onto the bar, then onto the platform. Hop onto the ledge, then repair the broken engine to start moving a platform on the left.

Head to the left and ride the platform onto the ledge, then drop down. Destroy the plants to reveal a spear, then pick it up. You'll need it later. Dig up the chest, then destroy it to reveal a torch. Pick it up and use it to light the barrels of dynamite in the back left corner, revealing a bicycle. Use the whip point on the wall on the left to raise up some ramps, then hop across the gaps to the right.

Turn the red valve to raise up a platform. Head back left and hop onto the bicycle, then drive it to the right. Park it on the orange panel to raise up a platform. Hop onto the platform, then drop down to the center of the area. Toss the spear into the other socket, then hop up them to reach this Treasure.
Treasure Room
This Bonus level can be played by heading to the east of the entrance to Akator. High jump up the rocks, then high jump onto the ledge above the door.


Pull the lever to open the door, then head inside to play this Bonus level.


Starting Characters: Indiana Jones (Crystal Skull), Ugha Assassin
True Adventurer: 20,000

Shoot the two targets in the background to open the gates on the left and right. Head to the right and grab the shovel, then head back left. Dig up the chest in the center of the area, then destroy it to reveal a water bottle. Toss it at the fires on the right to put them out (the water bottle will respawn), then shoot the target to lower the platform.

Hop to the back using the rope, then hop onto the ledge. Pull the lever to raise a platform in the center. Head back to the left, then dig up the rest of the tiles. Push the box to the end, then hop on top of it and onto the rope. Hop over to the back ledge, then turn the red valve to raise up some platforms. Return to the center of the area, then hop up the platforms to reach this Treasure.
Cave Capers
To access this Bonus level, hop in the water at the south part of the area and swim all the way to the left. Toss spears into the sockets, then high jump up them to reach the ledge. Head through the opening to start this Bonus level.


Starting Characters: Indiana Jones (Crystal Skull), Soldier
True Adventurer: 32,000

Use the whip points to swing to the left, then turn the red valve to raise up a bridge. Grab water bottles, then head to the right and use them to put out the fires. Put out the fires on the back ledge as well (this will save you time later). Once all the fires have been put out, continue to the right.

Use the whip points to swing across the gap, then turn the red valve to raise up a bridge, allowing the Soldier to join you. Shoot the target on the right to open the gate, then continue. Hop across the moving platform to reach the back ledge, then grab the torch. Head back to the left and up the stairs, then use the torch to light the fuse on the barrels of dynamite.

This will reveal two buttons. Step on one and your partner will step on the other, lowering some platforms on the left. Hop across the platforms, then continue hopping to the left to reach the ledge with this Treasure.
Super Bonus Level - Alien Ship
Once you have completed all 5 Treasure levels and all 5 Bonus levels, head to the east side of the area, on the path north of Akator.


Destroy the treasure chests to reveal LEGO pieces.


Build them onto the UFO, then hop inside to start this Super Bonus Level.


Starting Characters: Indiana Jones (Crystal Skull), Mutt

Your goal in this level is to collect 1 million studs. A vast majority are just laying out in the open, but I'll highlight a few of the things you can do. Once you collect 1 million studs, the level will end.

There is a platform in the back left corner that you can reach by using the whip point.
------------Exploring the Hub------------
Hub exploration in this game is very linear. Unlocking certain characters will let you unlock other characters, which will unlock a Bonus level, etc. This flowchart illustrates how each aspect of hub exploration flows together. Consider using it as a checklist of sorts to guide your exploration.

Characters
Soldier
After completing Repair Scare, you'll be harassed by these guys on the northernmost path.


Defeat enough of them and you'll be able to purchase one.


Russian Machine Gunner
After purchasing the Jungle Jeep, hop in and complete the nearby race.


This guy will appear on the path in the northeast part of the area, south of the ant hills.


Russian Officer
Hop in the car boat south of the entrance to Akator, then complete the nearby race.


This guy will appear in the southeast camp.


Ugha Warrior
After completing Temple Tangle, these guys will harass you by the small temple south of Akator.


Defeat enough of them and you'll be able to purchase one.


Ugha Digger
This one's rough. Smack this skull in Akator and you'll reveal several others down the path. You need to quickly hit each of these before time runs out to reveal him.


The first skull is outside the skull-shaped rock.


The second skull is on the path south of Akator.


Continue to the right and ride the air current from the flower onto the ledge, where you'll find the third skull.


Drop back down and continue to the right, then climb the ladder to find the next skull.


Hop across the ledges, then grab the rope. You'll find the final two skulls on either side of you.


Once you smack all of the skulls, this guy will appear in the small temple area directly south of Akator.


Ugha Assassin
After completing Ugha Struggle, you'll be harassed by these guys in Akator.


Defeat enough of them and you'll be able to purchase one.


Agent Spalko
After completing Akator Ambush, you'll find her pieces in front of the main temple in Akator. Reassemble her and you'll be able to purchase her.


Interdimensional Being
After unlocking the UFO Ride, hop in and fly it to the left to find a race.


Complete it and this guy will appear near where you purchased the UFO.


Ugha King
Toss a sword at this rope on the path north of Akator to drop a raft into the river.


Hop in and paddle it downriver (you'll need a shovel to paddle it) to find a race.


Complete it and this guy will appear in front of the smaller temple in Akator.
Vehicles
Car Boat
You'll be required to purchase this as part of the Story. See the section "Interlude - Trust Me!" for more information.


Blue Motorbike
This can be found on the westernmost path.


Green Motorbike
This can be found on the path south of Akator.


Jungle Jeep
This can be found on the path southeast of Akator.


Ice Cream Van
After purchasing the Jungle Jeep, hop in and complete the nearby race.


This vehicle will appear on the path in the northeast part of the area, south of the ant hills.


Civilian Jeep
This can be found in the camp to the north of Akator.


UFO Ride
After completing Akator Ambush, head to the right on the path south of Akator to find this vehicle floating in the small temple area.
Red Bricks - Whip Point Flowers
Score x10
The first flower is on the path to the first Story level.


The second flower can be found on the westernmost path.


The third flower can be found on the path south of Akator.


The fourth flower can be found on the path in the middle of the river to the west of Akator.


The fifth flower can be found on the path in the middle of the river to the west of Akator, shortly before the small waterfall.


To reach the sixth flower, hop in the water at the southern portion of the area, then swim to the left.


The seventh flower can be found in the southeast corner of the area, up on a ledge.


The eighth flower can be found on the northeast path, to the right of the ant hills.


The ninth flower is right by the mouth of the river that runs on the right side of the area.


The tenth flower can be found on some land to the north of the river that runs on the right side of the area.


Destroy all 10 flowers and this Red Brick will appear by the large UFO on the right side of the area.
Green Bricks - Face Statues
Snake Whip
The first statue can be found in a small temple area south of Akator.


The second statue can be found on the path in the middle of the river to the west of Akator.


The third statue can be found by hopping in the water at the southern portion of the area. Swim to the left, then hop on land. Touch the flower and it will send a burst of air upwards. Ride the air current onto the ledge with this.


The fourth statue can be found in the southeast part of the area. Smack the yellow flower and it will create an air current. Ride it up to the bar, then hop onto the ledge. Smack the LEGO pieces along the wall to knock them loose, then build them into the statue, allowing you to smash it.


The fifth statue can be found by destroying a silver skull on a structure along the western path.


The sixth statue can be found by destroying a silver skull on a structure in the camp north of Akator.


The seventh statue can be found in the middle of a small temple area in the camp north of Akator.


The eighth statue can be found just to the right of the camp north of Akator.


The ninth statue can be found on the island in the river that runs on the right side of the area.


The tenth statue can be found to the left of the main temple in Akator.


Destroy all 10 statues and this Green Brick will appear on the path south of Akator.
Blue Bricks - Beetle Jars
Fearless
The first jar can be found by destroying a rock pillar on the westernmost path. Use either a vehicle or explosives.


The second jar can be found in the southwest part of the area. Pick up the nearby whip point, then place it on the green panel. Use it to shut off the water, allowing you to destroy this jar.


The third jar can be found in the southeast corner of the area, on a ledge. To reach it, grab this box in the southeast camp, then place it on the green panel to the right, revealing LEGO pieces.


Build them into a ladder, then climb up. Hop across the ledges to reach this.


The fourth jar can be found on a ledge south of the ant hills. Climb up the rope, then hop to the right on the spears to reach this.


The fifth jar can be found at the mouth of the river that runs on the right side of the area. After passing the large UFO, head to the left to find a bird statue. Turn the key to knock the statue over, revealing this.


The sixth jar can be found on the island in the river that runs on the right side of the area. Smack the boards to reel in this jar, allowing you to destroy it.


The seventh jar can be found on some land on the right side of the river that runs on the right side of the area. Smack the skull to knock down this jar, allowing you to destroy it.


The eighth jar can be found on the right side of Akator. Carefully walk across the ledge to reach it.


The ninth jar can be found on the left side of the main temple in Akator. Grab this statue to the left of the smaller temple in Akator.


Carry it up the stairs to the right, then head to the left through the ants. Place the statue on the green panel to knock down this jar.


The tenth jar is on top of the main Akator temple. Toss spears into the sockets on the side, then hop up.


Hop up onto the ledge above you, allowing you to hit this jar from a distance.


Destroy all 10 jars to reveal this Blue Brick on the path south of Akator.
--------------Miscellaneous--------------
Creator
The Creator playset can be found in the far right of the warehouse, and just like any other playset, you need to get 100% on it to achieve 100% completion. Here, I'll explain how to get 100% in the Creator playset.

When you open the Creator playset, select the first option (Level Builder).


You'll see a series of blank spaces, since you haven't created any new levels yet.


Select an empty space, then select "Create". From here, you'll have the option to play Tutorial 1. Do so. There are 4 tutorials for you to complete, and you have to complete all of them.


Once you have completed all of the tutorials, you will have an incredible 4% completion rate for the Creator! The other 96% comes from purchasing objects in the menus.

To do this, head into the Level Builder. When you go to create a new level, you'll notice that there are 7 themes that you can select from.


To get 100%, you need to create a level from each theme. Once you're inside your level, press the "tag" button to pull up the menus. Select each option and you'll find tons of stuff to purchase. Only the Construction Worker and Enemy Boxer have items in their menus to purchase.


Once you've purchased everything in a menu, wait a few seconds to make sure that nothing else is available to purchase. Some of the slots have multiple things to purchase in them. For example, in the Props section in Raiders of the Lost Ark, you can purchase a Wooden Chest and a Metal Chest. While they both appear in the same slot, they have to be purchased separately. It can be easy to miss something to purchase by going through the menus too quickly, so take your time.

After purchasing everything you can, make sure to go to the Pause Menu and select "Save and Exit" to make sure your purchases are saved. Once you've completed all 4 tutorials and purchased everything from the menus, you will have 100% in the Creator!
Characters - Raiders of the Lost Ark
This will cover all of the characters that can be unlocked in Raiders of the Lost Ark. Most of these characters can only be played in the hub for Raiders of the Lost Ark and cannot be taken into any other hubs or levels.

Here I list each character's weapon and abilities, as well as how to unlock them. Most of these characters can be unlocked by finding and purchasing them in the hub. For more information on how to unlock them, see the "Exploring the Hub - Characters" section.


Indiana Jones

Weapon: Whip, Melee
Abilities: Whip
How To Unlock: Start the Story


Jock

Weapon: Wrench, Melee
Abilities: Mechanic
How To Unlock: Start the Story


Marion

Weapon: Melee
Abilities: High Jump
How To Unlock: Complete Raven Rescue


Sallah

Weapon: Shovel, Melee
Abilities: Dig
How To Unlock: Complete Market Mayhem


Sherpa Brawler

Weapon: Pistol, Melee
Abilities: Sharp Shoot
How To Unlock: Purchase in the hub


Masked Bandit

Weapon: Sword, Melee
Abilities: Sword
How To Unlock: Purchase in the hub

Enemy Soldier (Desert)

Weapon: Pistol, Melee
Abilities: Sharp Shoot, Soldier
How To Unlock: Purchase in the hub


Enemy Officer (Desert)

Weapon: Grenade, Melee
Abilities: Explosive, Soldier
How To Unlock: Purchase in the hub

Bazooka Trooper (Raiders)

Weapon: Bazooka, Melee
Abilities: Explosive, Sharp Shoot, Soldier
How To Unlock: Purchase in the hub


Bandit Swordsman

Weapon: Sword, Melee
Abilities: Sword
How To Unlock: Purchase in the hub

Hovitos Tribesman

Weapon: Spear, Melee
Abilities: Spear
How To Unlock: Purchase in the hub


Satipo

Weapon: Shovel, Melee
Abilities: Dig
How To Unlock: Purchase in the hub

Captain Katanga

Weapon: Wrench, Melee
Abilities: Mechanic
How To Unlock: Purchase in the hub


Enemy Boxer

Weapon: Melee
Abilities: None
How To Unlock: Purchase in the hub

Major Toht

Weapon: Machine Gun, Melee
Abilities: Sharp Shoot, Soldier
How To Unlock: Purchase in the hub


Colonel Dietrich

Weapon: Bazooka, Melee
Abilities: Explosive, Sharp Shoot, Soldier
How To Unlock: Purchase in the hub

Belloq (Priest)

Weapon: Staff of Ra, Melee
Abilities: Staff of Ra
How To Unlock: Purchase in the hub
Characters - Temple of Doom
This will cover all of the characters that can be unlocked in Temple of Doom. Most of these characters can only be played in the hub for Temple of Doom and cannot be taken into any other hubs or levels.

Here I list each character's weapon and abilities, as well as how to unlock them. Most of these characters can be unlocked by finding and purchasing them in the hub. For more information on how to unlock them, see the "Exploring the Hub - Characters" section.


Indiana Jones (Dinner Suit)

Weapon: Whip, Melee
Abilities: Whip
How To Unlock: Start the Story

Willie

Weapon: Perfume Bottle, Melee
Abilities: High Jump, Perfume
How To Unlock: Start the Story

Short Round

Weapon: Wrench, Melee
Abilities: Mechanic, Small
How To Unlock: Complete Lao Chase

Maharajah

Weapon: Blood of Kali, Melee
Abilities: Black Sleep, Small, Thuggee
How To Unlock: Complete Temple Tantrum


Shanghai Hoodlum

Weapon: Pistol, Melee
Abilities: Sharp Shoot
How To Unlock: Purchase in the hub


Thuggee

Weapon: Sword, Melee
Abilities: Sword, Thuggee
How To Unlock: Purchase in the hub


Pankot Assassin

Weapon: Sword, Melee
Abilities: Sword
How To Unlock: Purchase in the hub


Thuggee Acolyte

Weapon: Spear, Melee
Abilities: Spear, Thuggee
How To Unlock: Purchase in the hub


British Commander

Weapon: Bazooka, Melee
Abilities: Explosive, Sharp Shoot
How To Unlock: Purchase in the hub


Lao Che

Weapon: Machine Gun, Melee
Abilities: Sharp Shoot
How To Unlock: Purchase in the hub


Village Elder

Weapon: Melee
Abilities: Scholar
How To Unlock: Purchase in the hub


Dancing Girl

Weapon: Perfume Bottle, Melee
Abilities: High Jump, Perfume
How To Unlock: Purchase in the hub


Indian Farmer

Weapon: Melee
Abilities: None
How To Unlock: Purchase in the hub


Mola Ram

Weapon: Blood of Kali, Melee
Abilities: Black Sleep, Thuggee
How To Unlock: Purchase in the hub
Characters - The Last Crusade
This will cover all of the characters that can be unlocked in The Last Crusade. Most of these characters can only be played in the hub for The Last Crusade and cannot be taken into any other hubs or levels.

Here I list each character's weapon and abilities, as well as how to unlock them. Most of these characters can be unlocked by finding and purchasing them in the hub. For more information on how to unlock them, see the "Exploring the Hub - Characters" section.


Indiana Jones

Weapon: Whip, Melee
Abilities: Whip
How To Unlock: Start the Story


Sallah (Fez)

Weapon: Shovel, Melee
Abilities: Dig
How To Unlock: Start the Story


Elsa

Weapon: Melee
Abilities: High Jump
How To Unlock: Complete Coronado Caper


Henry Jones

Weapon: Melee
Abilities: Scholar
How To Unlock: Complete Brunwald Blaze


Coronado Sailor

Weapon: Wrench, Melee
Abilities: Mechanic
How To Unlock: Purchase in the hub


Enemy Guard

Weapon: Pistol, Melee
Abilities: Sharp Shoot, Soldier
How To Unlock: Purchase in the hub


Bazooka Trooper (Crusade)

Weapon: Bazooka, Melee
Abilities: Explosive, Soldier
How To Unlock: Purchase in the hub


Enemy Soldier (Machine Gun)

Weapon: Machine Gun, Melee
Abilities: Sharp Shoot, Soldier
How To Unlock: Purchase in the hub


Panama Hat Man

Weapon: Machine Gun, Melee
Abilities: Sharp Shoot
How To Unlock: Purchase in the hub


Librarian

Weapon: Melee
Abilities: None
How To Unlock: Purchase in the hub


Hatay King

Weapon: Sword, Melee
Abilities: Sword
How To Unlock: Purchase in the hub


Enemy Pilot

Weapon: Pistol, Melee
Abilities: Sharp Shoot
How To Unlock: Purchase in the hub


Colonel Vogel

Weapon: Pistol, Melee
Abilities: Sharp Shoot, Soldier
How To Unlock: Purchase in the hub


Brody

Weapon: Melee
Abilities: Scholar
How To Unlock: Purchase in the hub


Grail Knight

Weapon: Sword, Melee
Abilities: Sword
How To Unlock: Purchase in the hub


Donovan

Weapon: Machine Gun, Melee
Abilities: Sharp Shoot
How To Unlock: Purchase in the hub
Characters - Kingdom of the Crystal Skull - Part 1
This will cover all of the characters that can be unlocked in Kingdom of the Crystal Skull - Part 1. Most of these characters can only be played in the hub for Kingdom of the Crystal Skull - Part 1 and cannot be taken into any other hubs or levels.

Here I list each character's weapon and abilities, as well as how to unlock them. Most of these characters can be unlocked by finding and purchasing them in the hub. For more information on how to unlock them, see the "Exploring the Hub - Characters" section.


Indiana Jones (Crystal Skull)

Weapon: Melee, Whip
Abilities: Whip
How To Unlock: Start the Story


Mac

Weapon: Pistol, Melee
Abilities: Sharp Shoot
How To Unlock: Start the Story


Janitor

Weapon: Broom, Melee
Abilities: None
How To Unlock: Complete Hangar Havoc


Mutt

Weapon: Wrench, Melee
Abilities: Mechanic
How To Unlock: Complete Cafe Chaos


Russian (US Disguise)

Weapon: Pistol, Melee
Abilities: Sharp Shooter, Soldier
How To Unlock: Purchase in the hub


Russian Digger

Weapon: Shovel, Melee
Abilities: Dig, Soldier
How To Unlock: Purchase in the hub


Hangar Guard

Weapon: Pistol, Melee
Abilities: Sharp Shooter, Soldier
How To Unlock: Purchase in the hub


Agent

Weapon: Pistol, Melee
Abilities: Sharp Shoot
How To Unlock: Purchase in the hub


Brawler

Weapon: Melee
Abilities: None
How To Unlock: Purchase in the hub


College Female

Weapon: Melee
Abilities: High Jump
How To Unlock: Purchase in the hub


Greaser

Weapon: Melee
Abilities: None
How To Unlock: Purchase in the hub


Stanforth

Weapon: Melee
Abilities: Scholar
How To Unlock: Purchase in the hub


General Ross

Weapon: Bazooka, Melee
Abilities: Explosive, Sharp Shoot, Soldier
How To Unlock: Purchase in the hub


Taylor

Weapon: Pistol, Melee
Abilities: Sharp Shoot
How To Unlock: Purchase in the hub


Mannequin (Man)

Weapon: Melee
Abilities: None
How To Unlock: Purchase in the hub

Mannequin (Woman)

Weapon: Melee
Abilities: High Jump
How To Unlock: Purchase in the hub

Mannequin (Boy)

Weapon: Melee
Abilities: None
How To Unlock: Purchase in the hub

Mannequin (Girl)

Weapon: Melee
Abilities: High Jump
How To Unlock: Purchase in the hub
Characters - Kingdom of the Crystal Skull - Part 2
This will cover all of the characters that can be unlocked in Kingdom of the Crystal Skull - Part 2. Most of these characters can only be played in the hub for Kingdom of the Crystal Skull - Part 2 and cannot be taken into any other hubs or levels.

Here I list each character's weapon and abilities, as well as how to unlock them. Most of these characters can be unlocked by finding and purchasing them in the hub. For more information on how to unlock them, see the "Exploring the Hub - Characters" section.


Indiana Jones (Crystal Skull)

Weapon: Melee, Whip
Abilities: Whip
How To Unlock: Start the Story


Mutt

Weapon: Wrench, Melee
Abilities: Mechanic
How To Unlock: Start the Story


Oxley

Weapon: Melee
Abilities: Crystal Skull
How To Unlock: Complete Mac Attack


Marion (Crystal Skull)

Weapon: Melee
Abilities: High Jump
How To Unlock: Complete Mac Attack


Mac

Weapon: Pistol, Melee
Abilities: Sharp Shoot
How To Unlock: Complete Mac Attack


Soldier

Weapon: Pistol, Melee
Abilities: Sharp Shoot, Soldier
How To Unlock: Purchase in the hub


Russian Officer

Weapon: Bazooka, Melee
Abilities: Explosive, Sharp Shoot, Soldier
How To Unlock: Purchase in the hub


Russian Grenadier

Weapon: Grenade, Melee
Abilities: Explosive, Soldier
How To Unlock: Purchase in the hub


Cemetery Warrior

Weapon: Spear, Melee
Abilities: Spear
How To Unlock: Purchase in the hub


Cemetery Warrior King

Weapon: Melee
Abilities: None
How To Unlock: Purchase in the hub


Patient

Weapon: Melee
Abilities: None
How To Unlock: Purchase in the hub


Peru Nurse

Weapon: Cane
Abilities: High Jump
How To Unlock: Purchase in the hub


Market Trader

Weapon: Melee
Abilities: None
How To Unlock: Purchase in the hub


Dovchenko

Weapon: Chain Whip, Melee
Abilities: Soldier, Whip
How To Unlock: Purchase in the hub
Characters - Kingdom of the Crystal Skull - Part 3
This will cover all of the characters that can be unlocked in Kingdom of the Crystal Skull - Part 3. Most of these characters can only be played in the hub for Kingdom of the Crystal Skull - Part 3 and cannot be taken into any other hubs or levels.

Here I list each character's weapon and abilities, as well as how to unlock them. Most of these characters can be unlocked by finding and purchasing them in the hub. For more information on how to unlock them, see the "Exploring the Hub - Characters" section.


Indiana Jones (Crystal Skull)

Weapon: Melee, Whip
Abilities: Whip
How To Unlock: Start the Story


Marion (Crystal Skull)

Weapon: Melee
Abilities: High Jump
How To Unlock: Start the Story


Mutt

Weapon: Wrench, Melee
Abilities: Mechanic
How To Unlock: Complete Repair Scare


Oxley

Weapon: Melee
Abilities: Crystal Skull
How To Unlock: Complete Repair Scare


Mac

Weapon: Pistol, Melee
Abilities: Sharp Shoot
How To Unlock: Complete Repair Scare


Soldier

Weapon: Pistol, Melee
Abilities: Sharp Shoot, Soldier
How To Unlock: Purchase in the hub


Russian Officer

Weapon: Bazooka, Melee
Abilities: Explosive, Sharp Shoot, Soldier
How To Unlock: Purchase in the hub


Russian Machine Gunner

Weapon: Machine Gun, Melee
Abilities: Sharp Shoot, Soldier
How To Unlock: Purchase in the hub


Ugha Warrior

Weapon: Spear, Melee
Abilities: Spear
How To Unlock: Purchase in the hub

Ugha Assassin

Weapon: Blowpipe, Melee
Abilities: Sharp Shoot
How To Unlock: Purchase in the hub

Ugha Digger

Weapon: Shovel, Melee
Abilities: Dig
How To Unlock: Purchase in the hub

Ugha King

Weapon: Staff
Abilities: None
How To Unlock: Purchase in the hub

Agent Spalko

Weapon: Sword, Melee
Abilities: High Jump, Soldier, Sword
How To Unlock: Purchase in the hub

Interdimensional Being

Weapon: Melee
Abilities: Crystal Skull
How To Unlock: Purchase in the hub
Vehicles - Raiders of the Lost Ark
This will cover all of the vehicles that can be unlocked in Raiders of the Lost Ark. These vehicles can only be driven in the hub for Raiders of the Lost Ark and cannot be taken into any other hubs or levels.

Since all of the vehicles are unlocked by being purchased in the hub, this is simply a list of all of the vehicles that can be unlocked. For more information on how to unlock them, see the "Exploring the Hub - Vehicles" section.


Army Jeep


Passenger Jet


Flying Wing


Biplane


U-Boat 26


Green Speedboat


Blue Speedboat


Snowmobile
Vehicles - Temple of Doom
This will cover all of the vehicles that can be unlocked in Temple of Doom. These vehicles can only be driven in the hub for Temple of Doom and cannot be taken into any other hubs or levels.

Since all of the vehicles are unlocked by being purchased in the hub, this is simply a list of all of the vehicles that can be unlocked. For more information on how to unlock them, see the "Exploring the Hub - Vehicles" section.


Short Round's Car


Rickshaw


Junk Boat


Tuk Tuk


Tractor


Scooter


Stunt Plane


Lao Che's Plane
Vehicles - The Last Crusade
This will cover all of the vehicles that can be unlocked in The Last Crusade. These vehicles can only be driven in the hub for The Last Crusade and cannot be taken into any other hubs or levels.

Since all of the vehicles are unlocked by being purchased in the hub, this is simply a list of all of the vehicles that can be unlocked. For more information on how to unlock them, see the "Exploring the Hub - Vehicles" section.


Venice Speedboat


Green Speedboat


Gondola


Bike 'n' Side


Army Jeep


Staff Car


Biplane


Zeppelin


Tank
Vehicles - Kingdom of the Crystal Skull - Part 1
This will cover all of the vehicles that can be unlocked in Kingdom of the Crystal Skull - Part 1. These vehicles can only be driven in the hub for Kingdom of the Crystal Skull - Part 1 and cannot be taken into any other hubs or levels.

Since all of the vehicles are unlocked by being purchased in the hub, this is simply a list of all of the vehicles that can be unlocked. For more information on how to unlock them, see the "Exploring the Hub - Vehicles" section.


Army Jeep


Sabre Jet


Motorbike


Hotrod


Tricycle


Ice Cream Van


Fridge Car


Fire Truck
Vehicles - Kingdom of the Crystal Skull - Part 2
This will cover all of the vehicles that can be unlocked in Kingdom of the Crystal Skull - Part 2. These vehicles can only be driven in the hub for Kingdom of the Crystal Skull - Part 2 and cannot be taken into any other hubs or levels.

Since all of the vehicles are unlocked by being purchased in the hub, this is simply a list of all of the vehicles that can be unlocked. For more information on how to unlock them, see the "Exploring the Hub - Vehicles" section.


Bus


Biplane


Jungle Cutter


Army Jeep


Motorbike


Nazca Racer


Nazca Drifter


Bicycle
Vehicles - Kingdom of the Crystal Skull - Part 3
This will cover all of the vehicles that can be unlocked in Kingdom of the Crystal Skull - Part 3. These vehicles can only be driven in the hub for Kingdom of the Crystal Skull - Part 3 and cannot be taken into any other hubs or levels.

Since all of the vehicles are unlocked by being purchased in the hub, this is simply a list of all of the vehicles that can be unlocked. For more information on how to unlock them, see the "Exploring the Hub - Vehicles" section.


Car Boat


Jungle Jeep


Ice Cream Van


Green Motorbike


Blue Motorbike


Civilian Jeep


UFO Ride
Colored Brick Extras
There are a total of 19 Extras in this game, with one being available right away. The other 18 are unlocked by collecting Colored Bricks in each of the hubs. Below, I list each Extra, including what it does and how to unlock it. For the specific locations of the items you destroy to receive Colored Bricks, please see the "Exploring the Hub - Red/Green/Blue Bricks" sections.

Adaptive Difficulty
How To Unlock: Create a new game
What It Does: This Extra is always on by default. With Adaptive Difficulty on, you will lose different amounts of studs depending on how often you die. If you die a lot, you will only lose 1,000 studs. If you don't die very often, you'll lose 4,000 studs. With Adaptive Difficulty off, you'll lose 2,000 studs every time you die, regardless of how often it is.

Score x2
How To Unlock: Collect all 10 Red Bricks in Kingdom of the Crystal Skull - Part 1, then purchase in the hub
What It Does: This multiplies the value of all collected studs by 2. This stacks with other stud multipliers.

Score x3
How To Unlock: Collect all 10 Red Bricks in Raiders of the Lost Ark, then purchase in the hub
What It Does: This multiplies the value of all collected studs by 3. This stacks with other stud multipliers.

Score x4
How To Unlock: Collect all 10 Red Bricks in Kingdom of the Crystal Skull - Part 2, then purchase in the hub
What It Does: This multiplies the value of all collected studs by 4. This stacks with other stud multipliers.

Score x6
How To Unlock: Collect all 10 Red Bricks in Temple of Doom, then purchase in the hub
What It Does: This multiplies the value of all collected studs by 6. This stacks with other stud multipliers.

Score x8
How To Unlock: Collect all 10 Red Bricks in The Last Crusade, then purchase in the hub
What It Does: This multiplies the value of all collected studs by 8. This stacks with other stud multipliers.

Score x10
How To Unlock: Collect all 10 Red Bricks in Kingdom of the Crystal Skull - Part 3, then purchase in the hub
What It Does: This multiplies the value of all collected studs by 10. This stacks with other stud multipliers.

Silhouettes
How To Unlock: Collect all 10 Green Bricks in Kingdom of the Crystal Skull - Part 2, then purchase in the hub
What It Does: This turns all characters into pitch black silhouettes of themselves.

Beep Beep
How To Unlock: Collect all 10 Green Bricks in The Last Crusade, then purchase in the hub
What It Does: While in a vehicle without weapons, press the "attack" button to honk your horn.

Ice Rink
How To Unlock: Collect all 10 Green Bricks in Temple of Doom, then purchase in the hub
What It Does: This makes the ground super slippery, making it harder to move around. This applies for both you and enemies.

Disguise
How To Unlock: Collect all 10 Green Bricks in Kingdom of the Crystal Skull - Part 1, then purchase in the hub
What It Does: This gives all characters fake glasses, nose and mustache.

Poo Money
How To Unlock: Collect all 10 Green Bricks in Raiders of the Lost Ark, then purchase in the hub
What It Does: While riding an animal, press the "special" button to poop out some studs.

Snake Whip
How To Unlock: Collect all 10 Green Bricks in Kingdom of the Crystal Skull - Part 3, then purchase in the hub
What It Does: This turns Indy's whip into a snake

Fast Build
How To Unlock: Collect all 10 Blue Bricks in Raiders of the Lost Ark, then purchase in the hub
What It Does: This increases the speed at which you build LEGO pieces.

Stud Magnet
How To Unlock: Collect all 10 Blue Bricks in Temple of Doom, then purchase in the hub
What It Does: This greatly increases your stud collection radius, making it easier to collect studs.

Invincibility
How To Unlock: Collect all 10 Blue Bricks in The Last Crusade, then purchase in the hub
What It Does: This makes you completely immune to all damage from enemies. However, you'll still be hurt by environmental hazards.

Fast Fix
How To Unlock: Collect all 10 Blue Bricks in Kingdom of the Crystal Skull - Part 1, then purchase in the hub
What It Does: This greatly increases the speed at which you repair broken objects.

Fast Dig
How To Unlock: Collect all 10 Blue Bricks in Kingdom of the Crystal Skull - Part 2, then purchase in the hub
What It Does: This greatly increases the speed at which you dig up buried objects.

Fearless
How To Unlock: Collect all 10 Blue Bricks in Kingdom of the Crystal Skull - Part 3, then purchase in the hub
What It Does: This removes all character phobias, allowing Indy to fight snakes, Mutt to fight spiders, etc.
Cheat Codes
This is a list of the Cheat Codes available to use in the game. Simply head to the Extras menu to enter cheat codes.

I have personally checked all of these codes and I can vouch for their authenticity. If you have any other Cheat Codes that you wish to share, please message me and I will check them. If they work, I will add them to this list and give credit to you.

Special thanks to Tythesly, who contributed most of these codes

Raiders of the Lost Ark

Sherpa Brawler - SD2RGK
Masked Bandit - E4DBDY
Enemy Soldier (Desert) - TMVLWN
Enemy Officer (Desert) - AB466Z
Bazooka Trooper (Raiders) - QHCL9G
Bandit Swordsman - DJSR8Y
Hovitos Tribesman - MBHW3B
Satipo - XY89ZK
Captain Katanga - 8QPEYE
Enemy Boxer - 7EQF47
Major Toht - T6S3DQ
Colonel Dietrich - NXCGLF
Belloq (Priest) - FTL48S

Temple of Doom

Shanghai Hoodlum - TKC54L
Thuggee - 8AKD4F
Pankot Assassin - 78WW93
Thuggee Acolyte - UAKQNT
British Commander - C4MLPM
Lao Che - 7AWX3J
Village Elder - YC6SCT
Dancing Girl - Y4HRR9
Indian Farmer - Z82QHW
Mola Ram - 82RMC2

The Last Crusade

Coronado Sailor - 3V9YFL
Enemy Guard - TP7AYZ
Bazooka Trooper (Crusade) - NXAE4D
Enemy Soldier (Machine Gun) - 732QXK
Panama Hat Man - 2DYQCV
Librarian - 7Q2VBZ
Hatay King - PFLPSB
Enemy Pilot - JWX9L9
Colonel Vogel - 6Q7CHH
Brody - UPQDDF
Grail Knight - WC6GKB
Donovan - NCEMXR

Kingdom of the Crystal Skull - Part 1

Russian (US Disguise) - DQ9B8P
Russian Digger - EUHKY2
Hangar Guard - AUN9MA
Agent - L6F8M5
Brawler - B5RSF6
College Female - JPNXU6
Greaser - QCM6NN
Stanforth - QD5GYE
General Ross - 239YCR
Taylor - XGRB2G
Mannequin (Man) - QPWDMM
Mannequin (Woman) - U7SMVK
Mannequin (Boy) - 2UJQWC
Mannequin (Girl) - 3PG5EL

Kingdom of the Crystal Skull - Part 2

Soldier - LKUCK5
Russian Officer - L2U8TY
Russian Grenadier - BQB4KB
Cemetery Warrior - FX6Z27
Cemetery Warrior King - 3HA97Z
Patient - V2Z27R
Peru Nurse - 88JZWJ
Market Trader - RT9BQT
Dovchenko - WL4T6N

Kingdom of the Crystal Skull - Part 3

Soldier - BUL8JG
Russian Officer - EH58DG
Russian Machine Gunner - ARDXWM
Ugha Warrior - BFVR6V
Ugha Assassin - USTBY5
Ugha Digger - M6VCRR
Ugha King - 9ECFAR
Agent Spalko - PZ9C3U
Interdimensional Being - PXT4UP

Extras

Score x2 - U38VJP
Score x3 - PEHHPZ
Score x4 - UXGTB3
Score x6 - XWJ5EY
Score x8 - S5UZCP
Score x10 - V7JYBU

Silhouettes - FQGPYH
Beep Beep - UU3VSC
Ice Rink - TY9P4U
Disguise - Y9TE98
Poo Money - SZFAAE
Snake Whip - 2U7YCV

Fast Build - SNXC2F
Stud Magnet - EGSM5B
Invincibility - 6JBB65
Fast Fix - 3Z7PJX
Fast Dig - XYAN83
Fearless - TUXNZF
20 megjegyzés
legogamesguy  [készítő] febr. 7., 20:19 
I make guides because I enjoy it! And no idea how long this one took.
MermoTEC1133 febr. 6., 9:39 
What a crazy guide, may i ask how much time did it take you to make all of this and why did you do it if you dont earn from it?
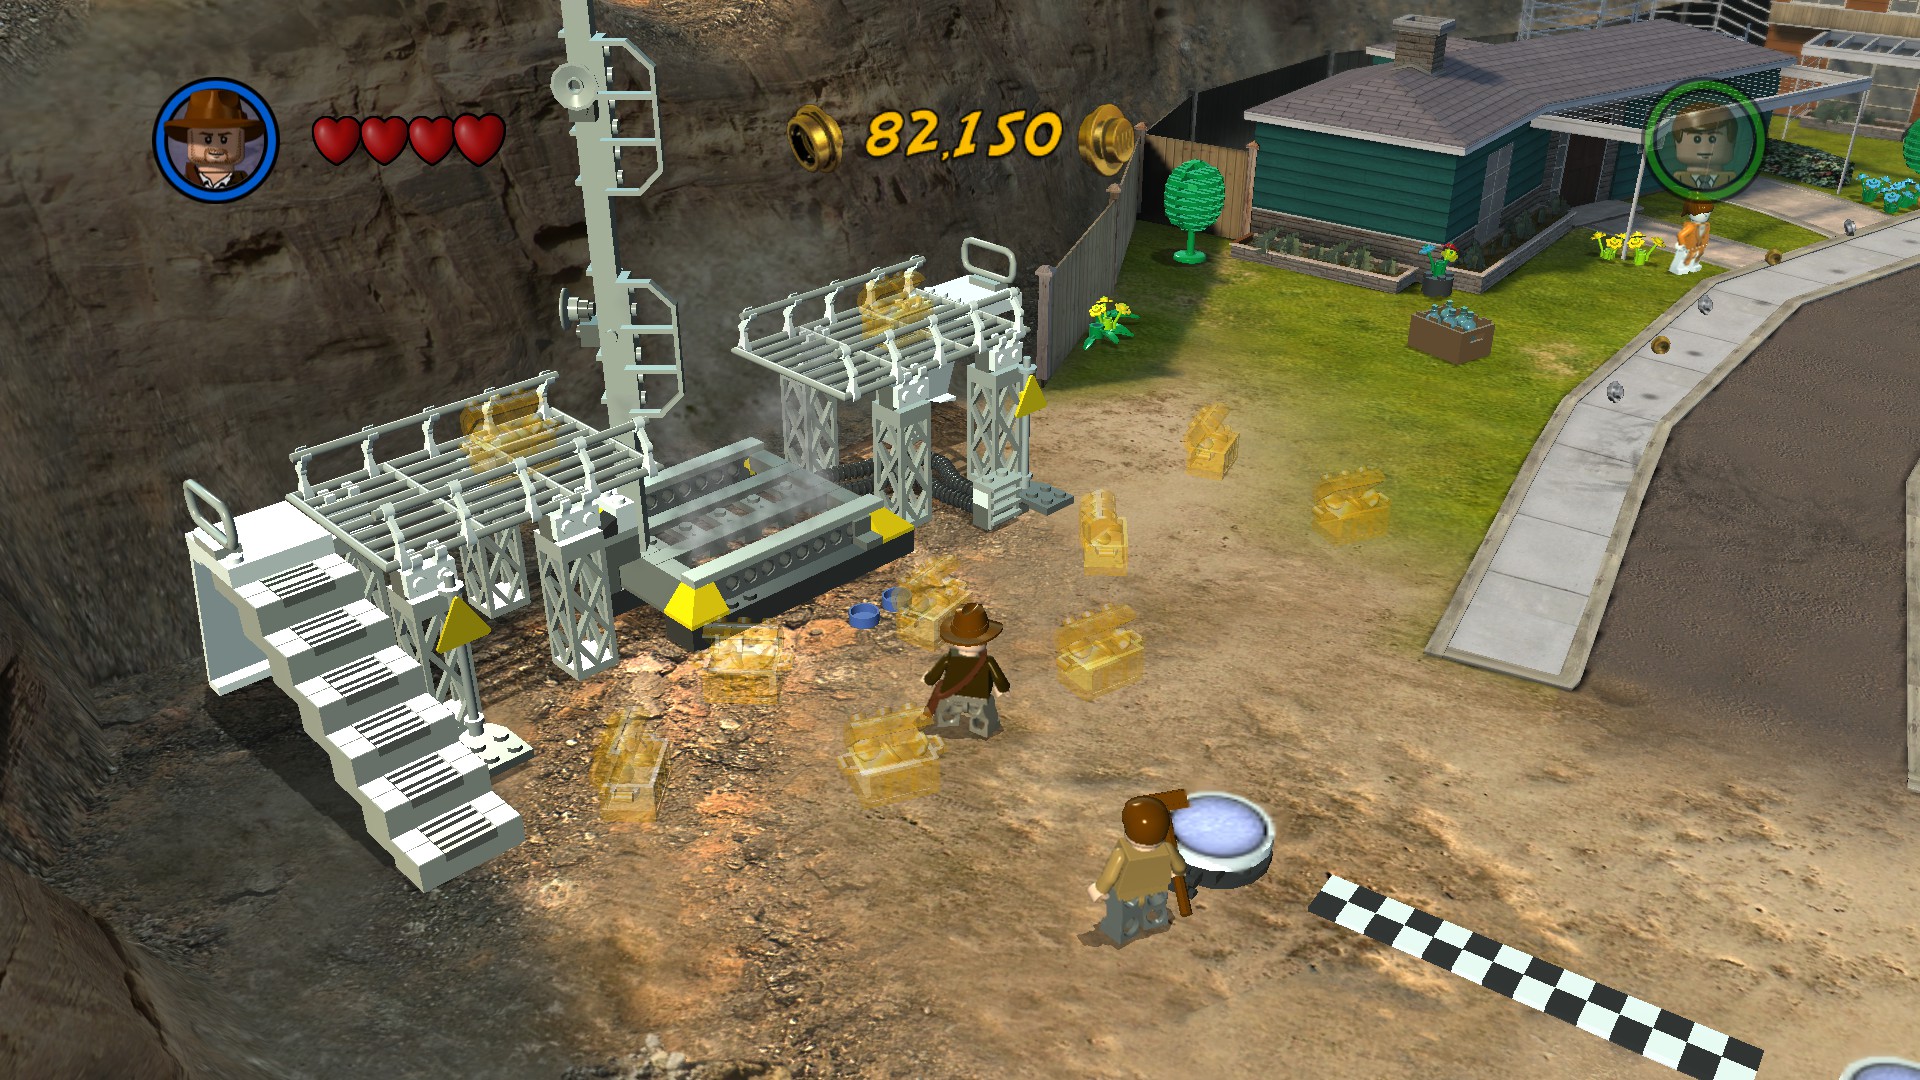
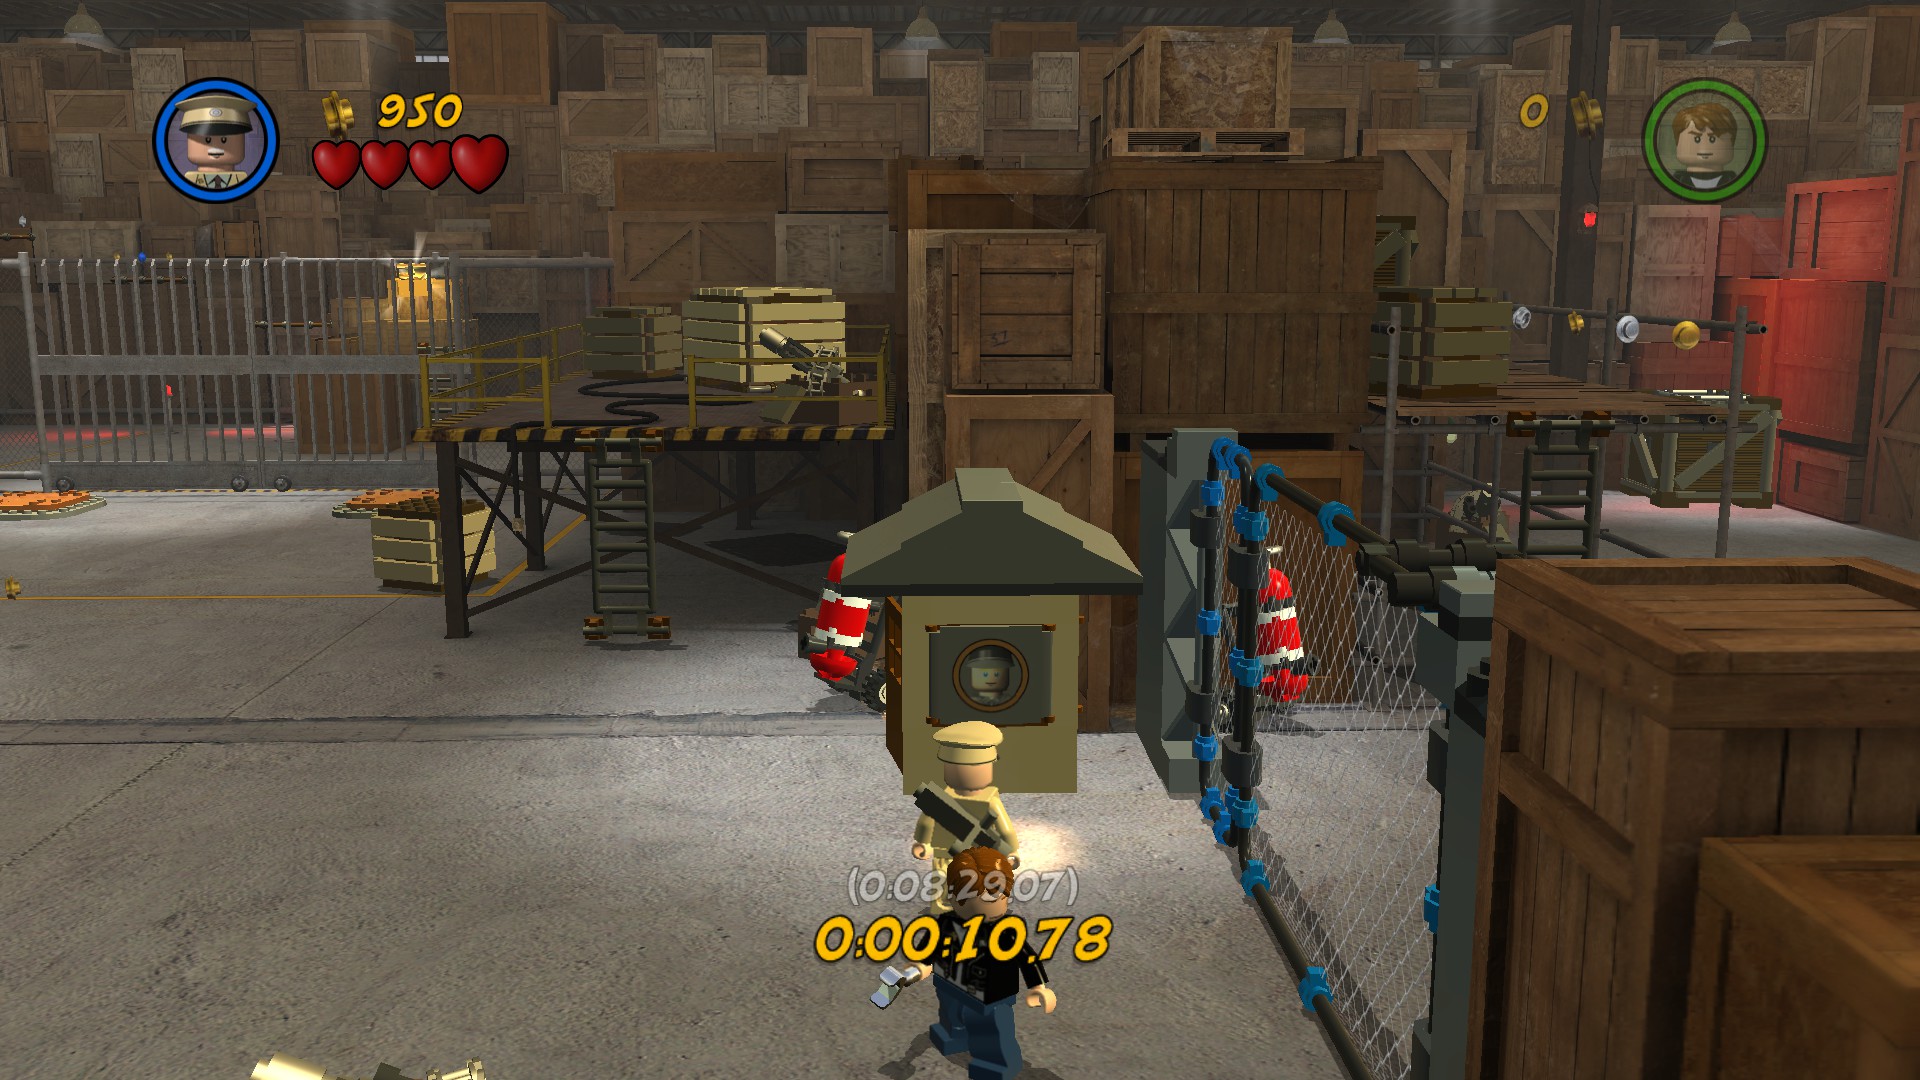
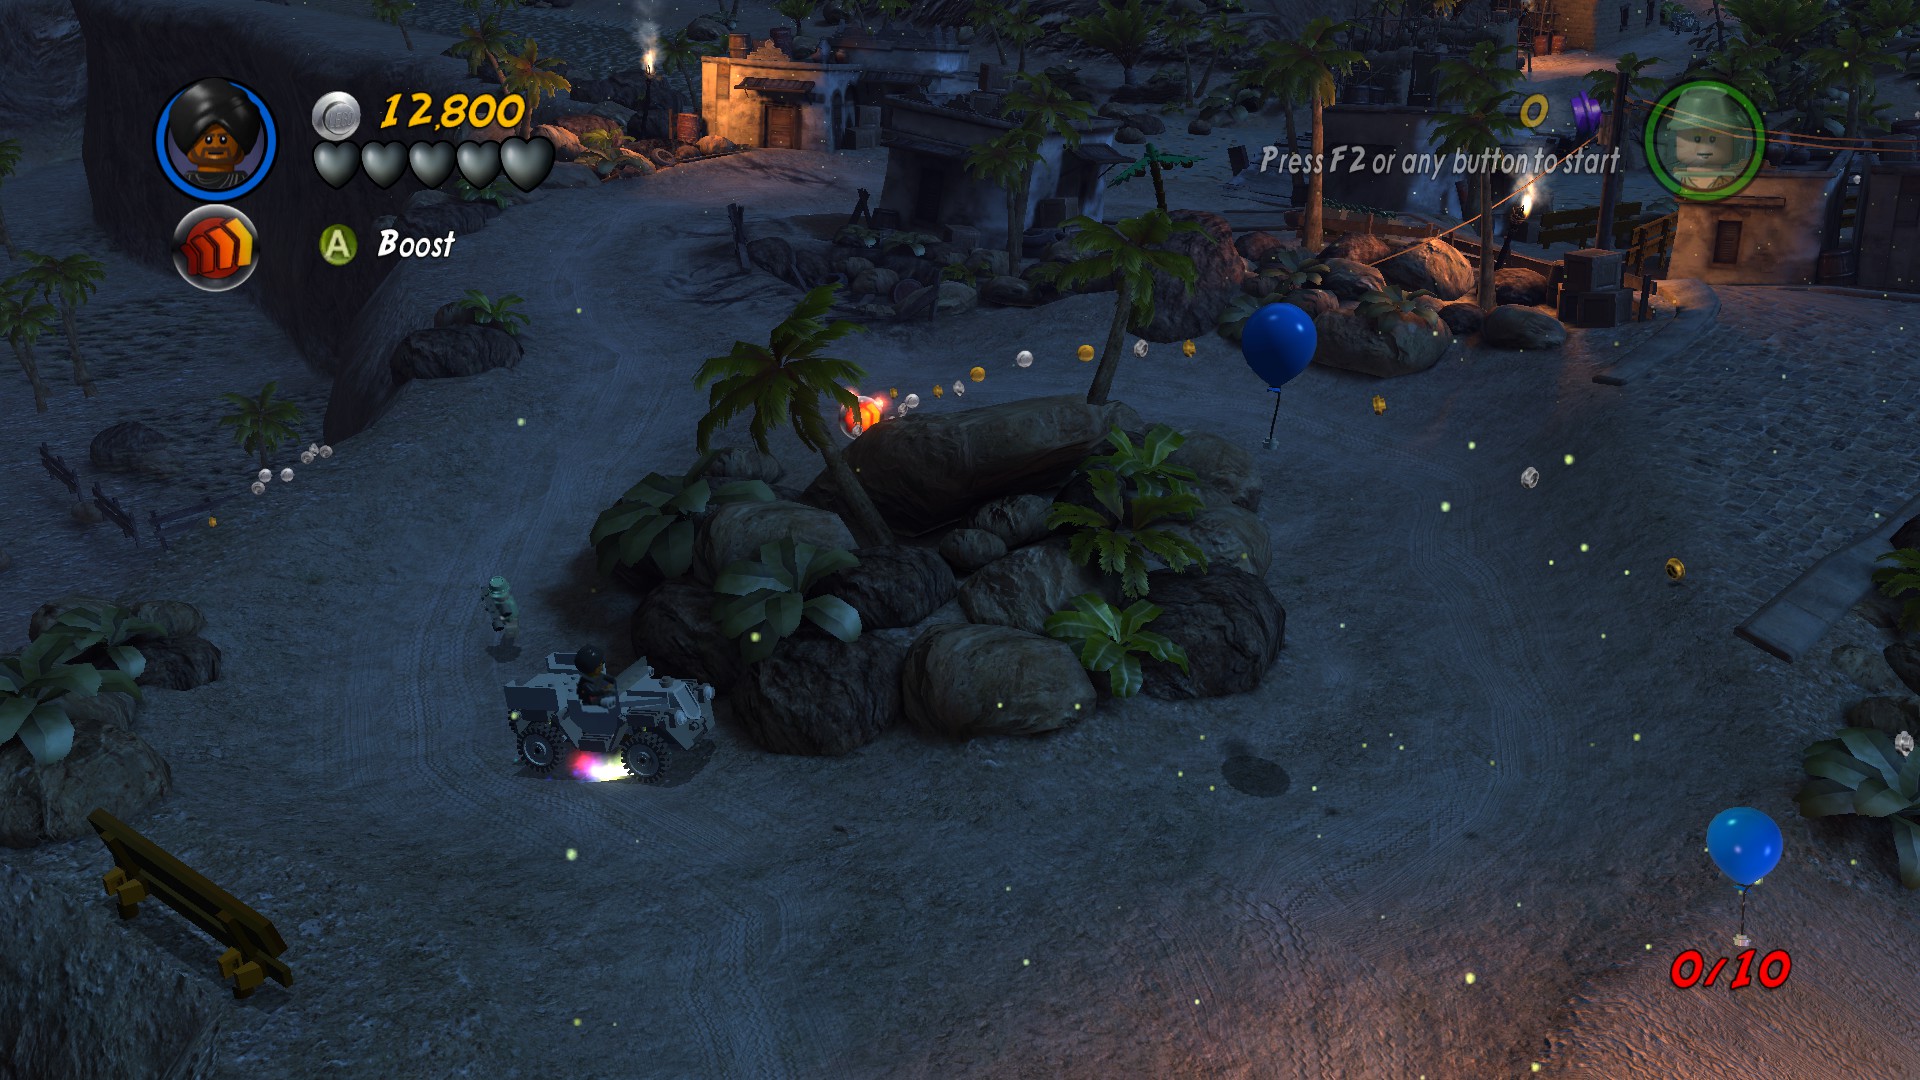
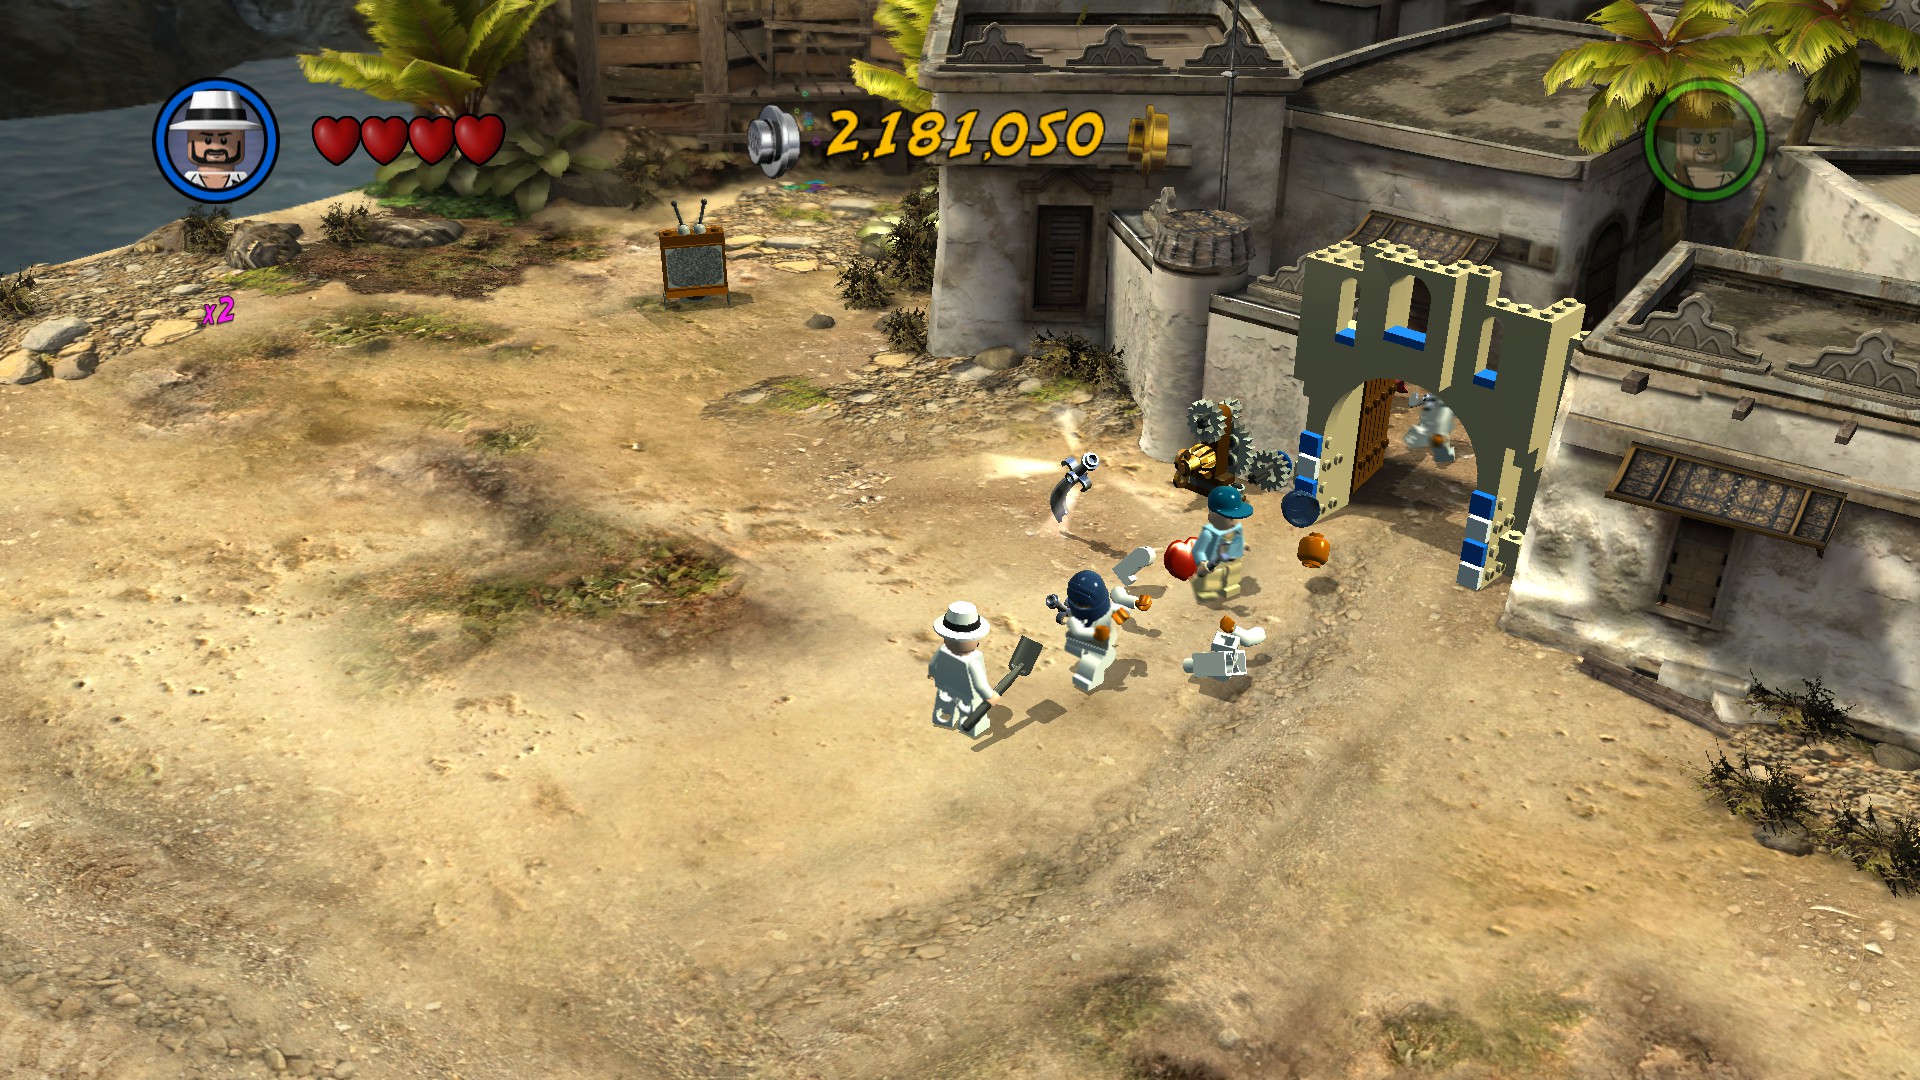
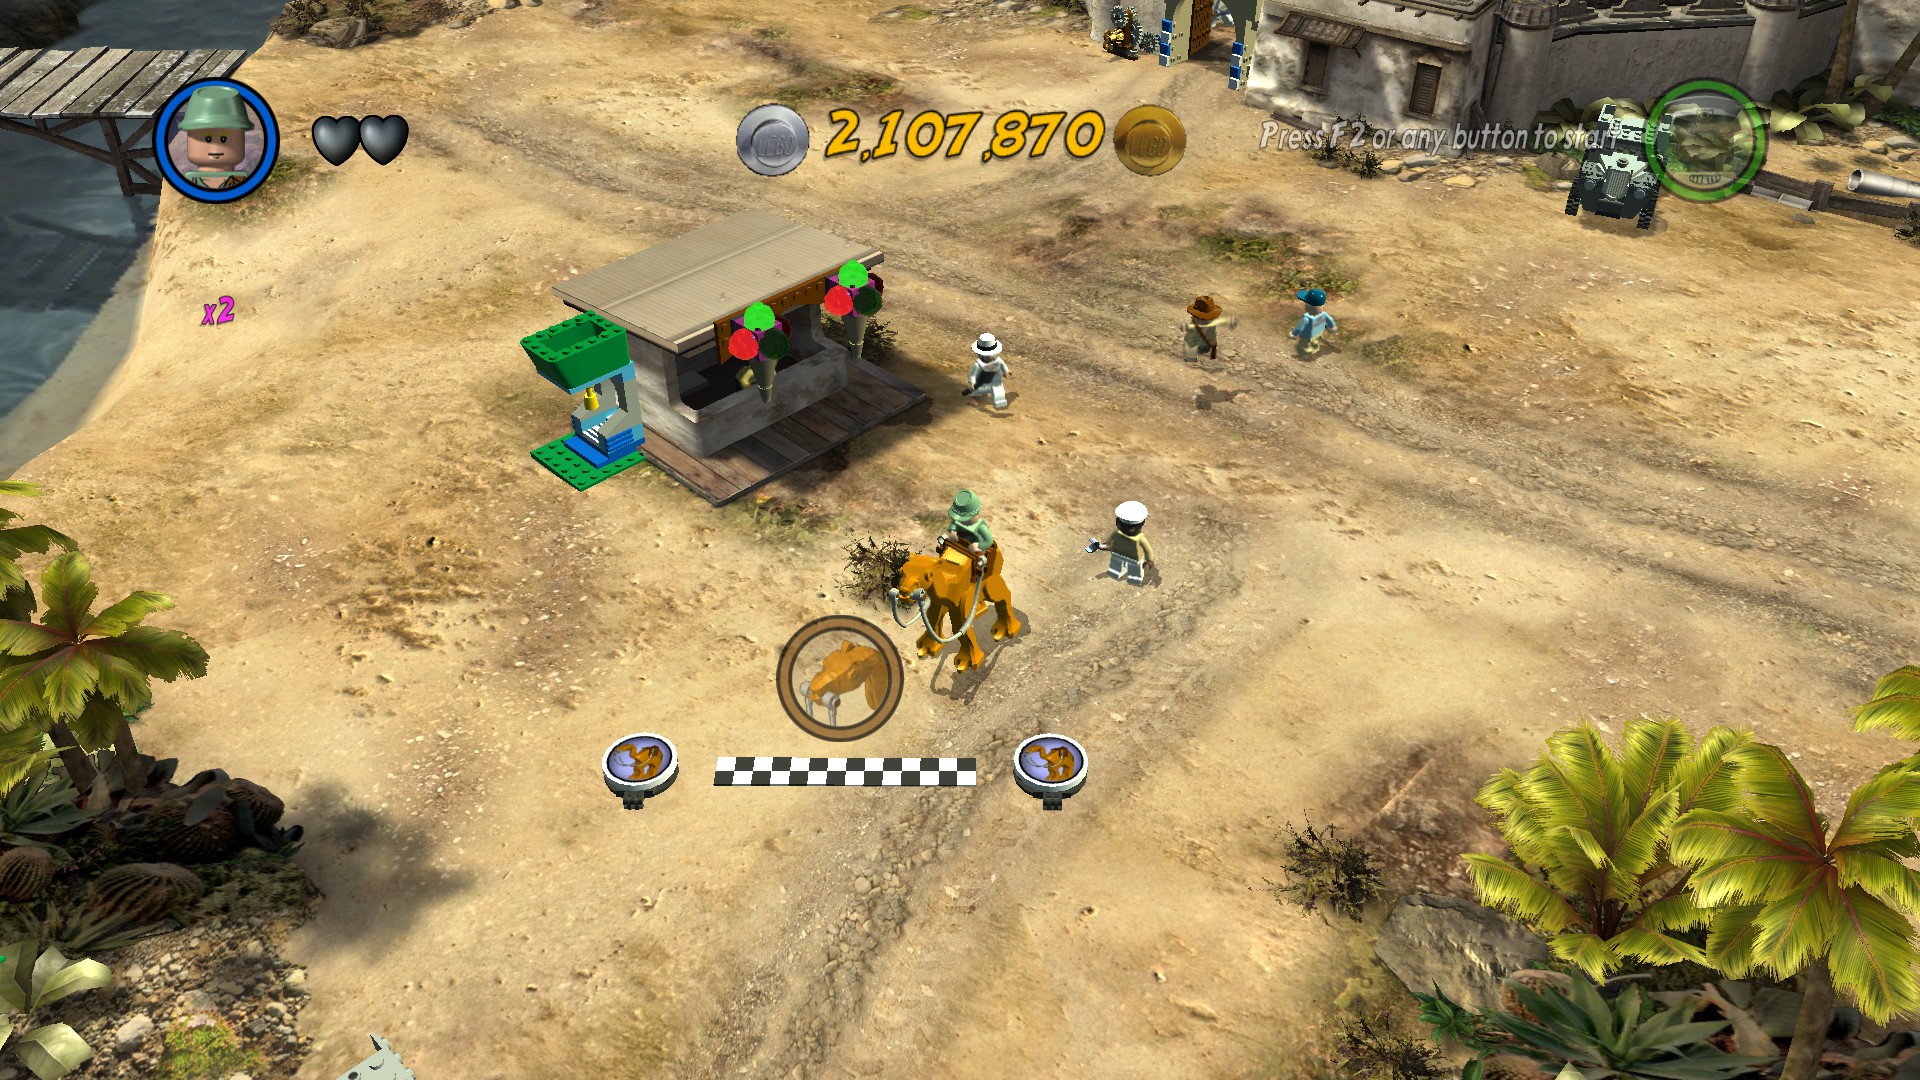
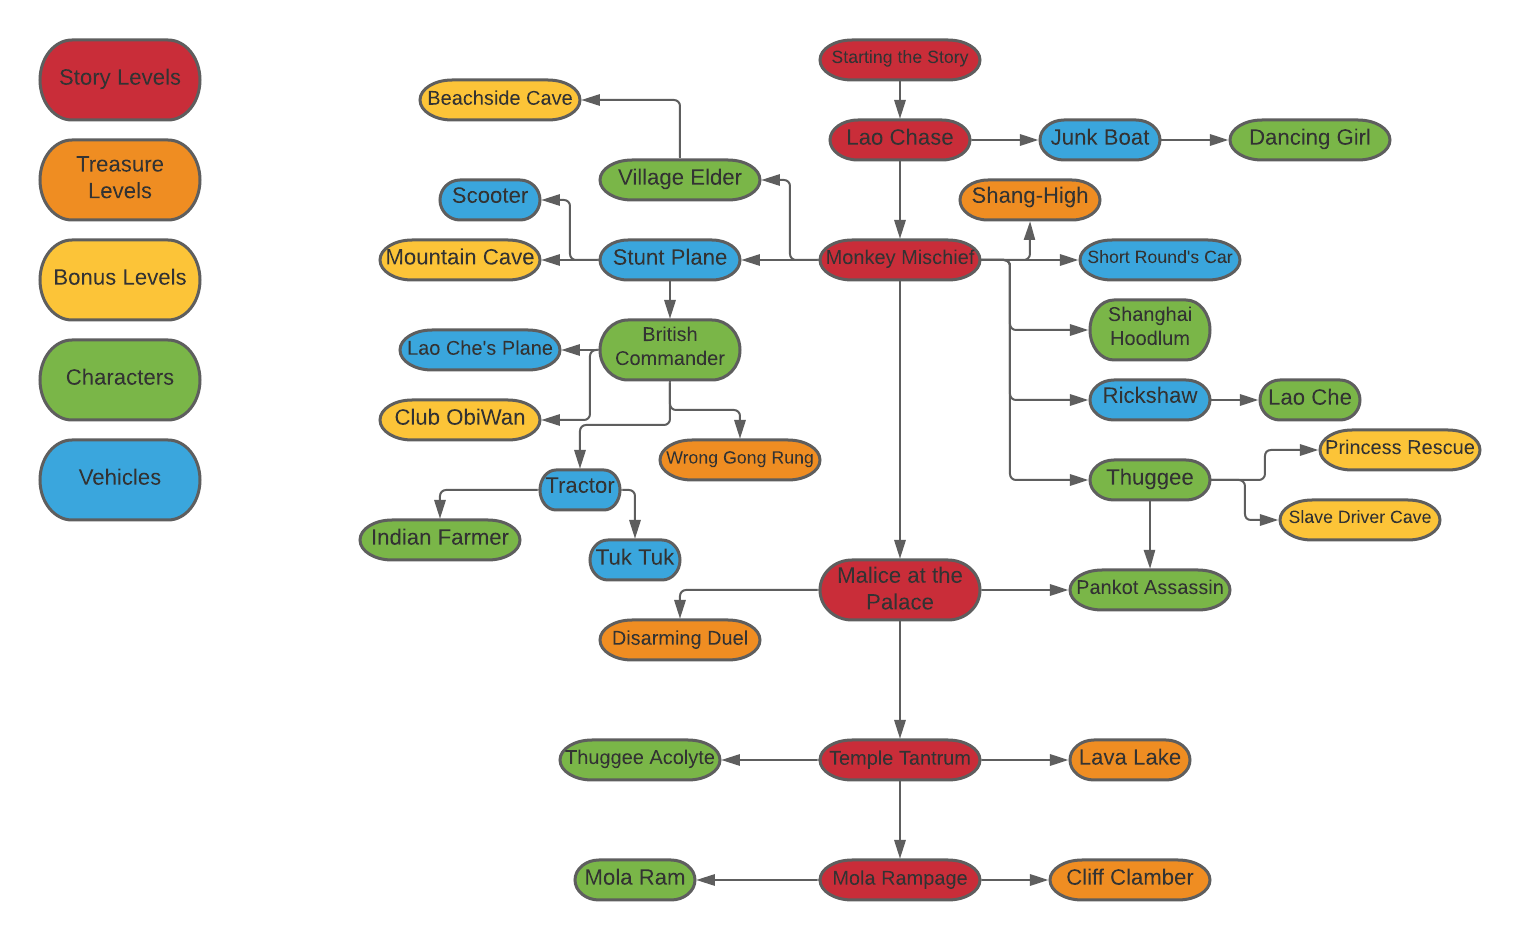
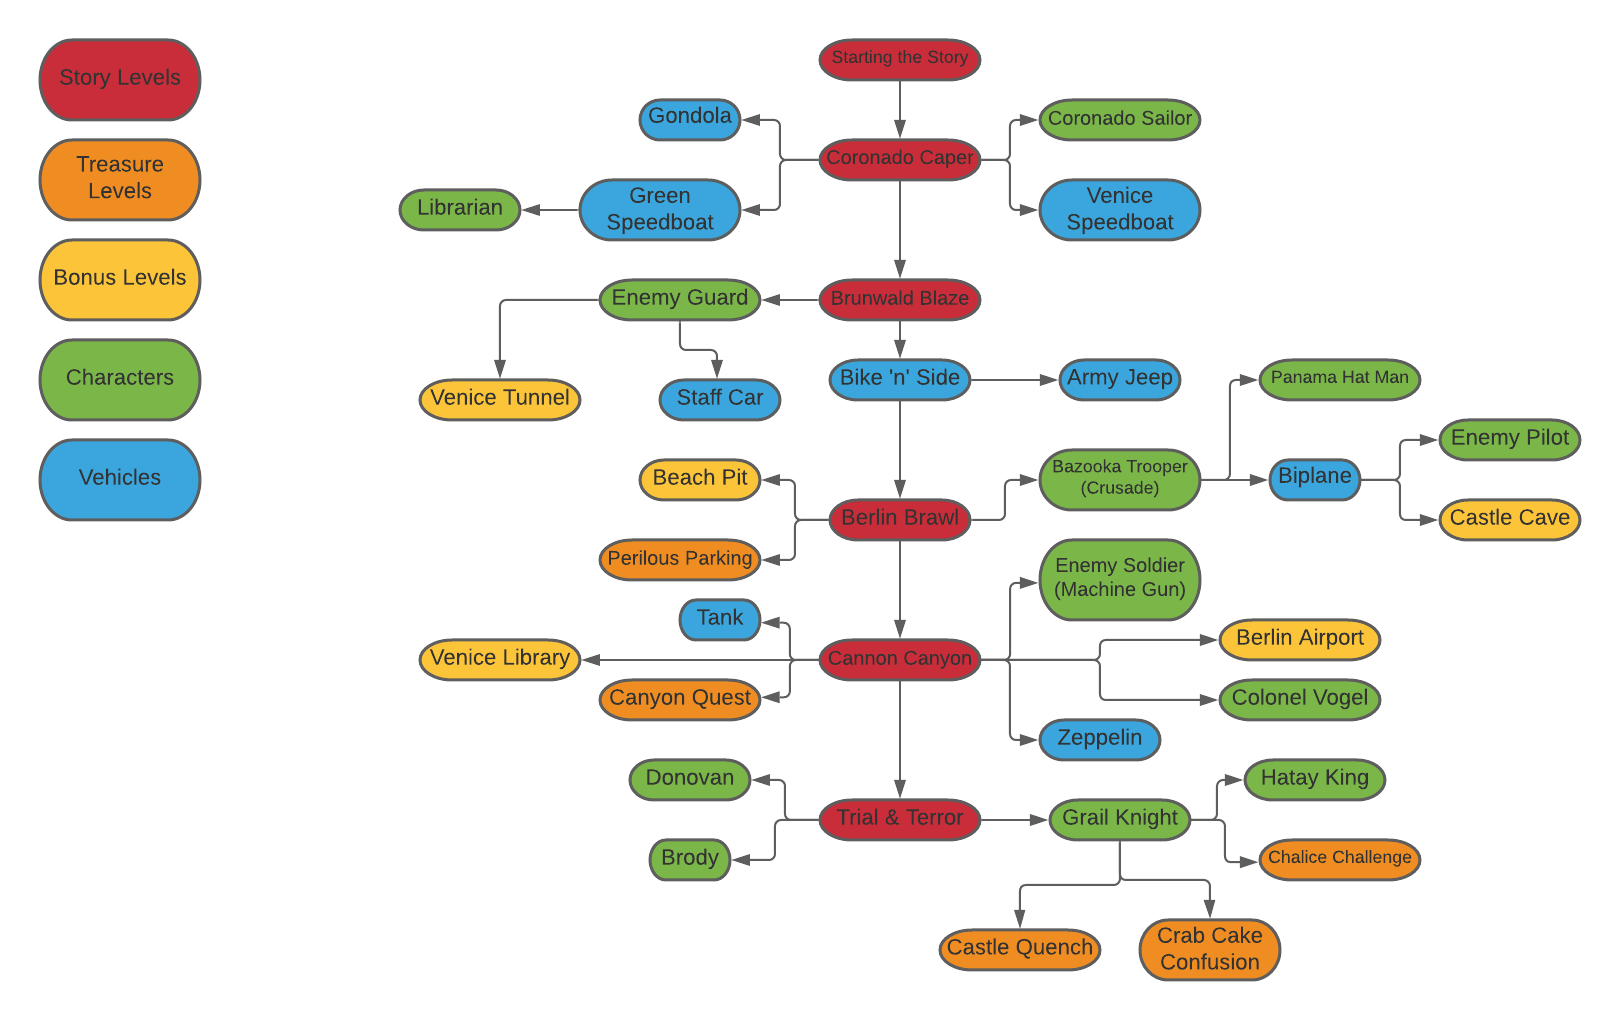
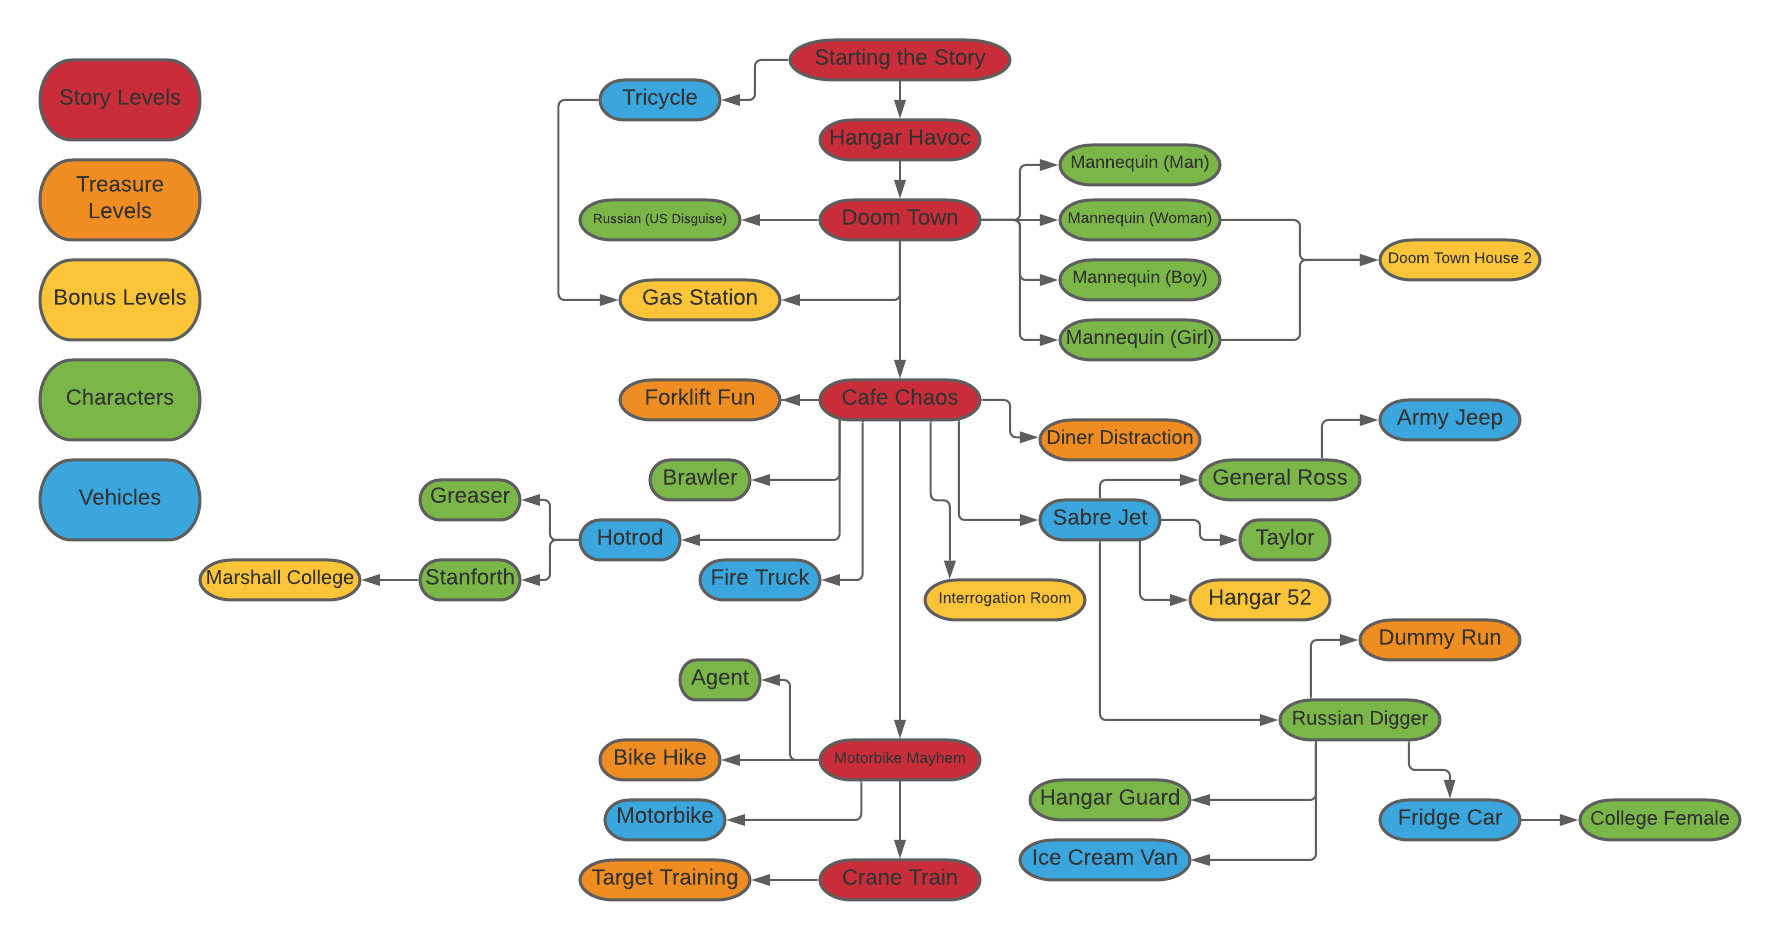
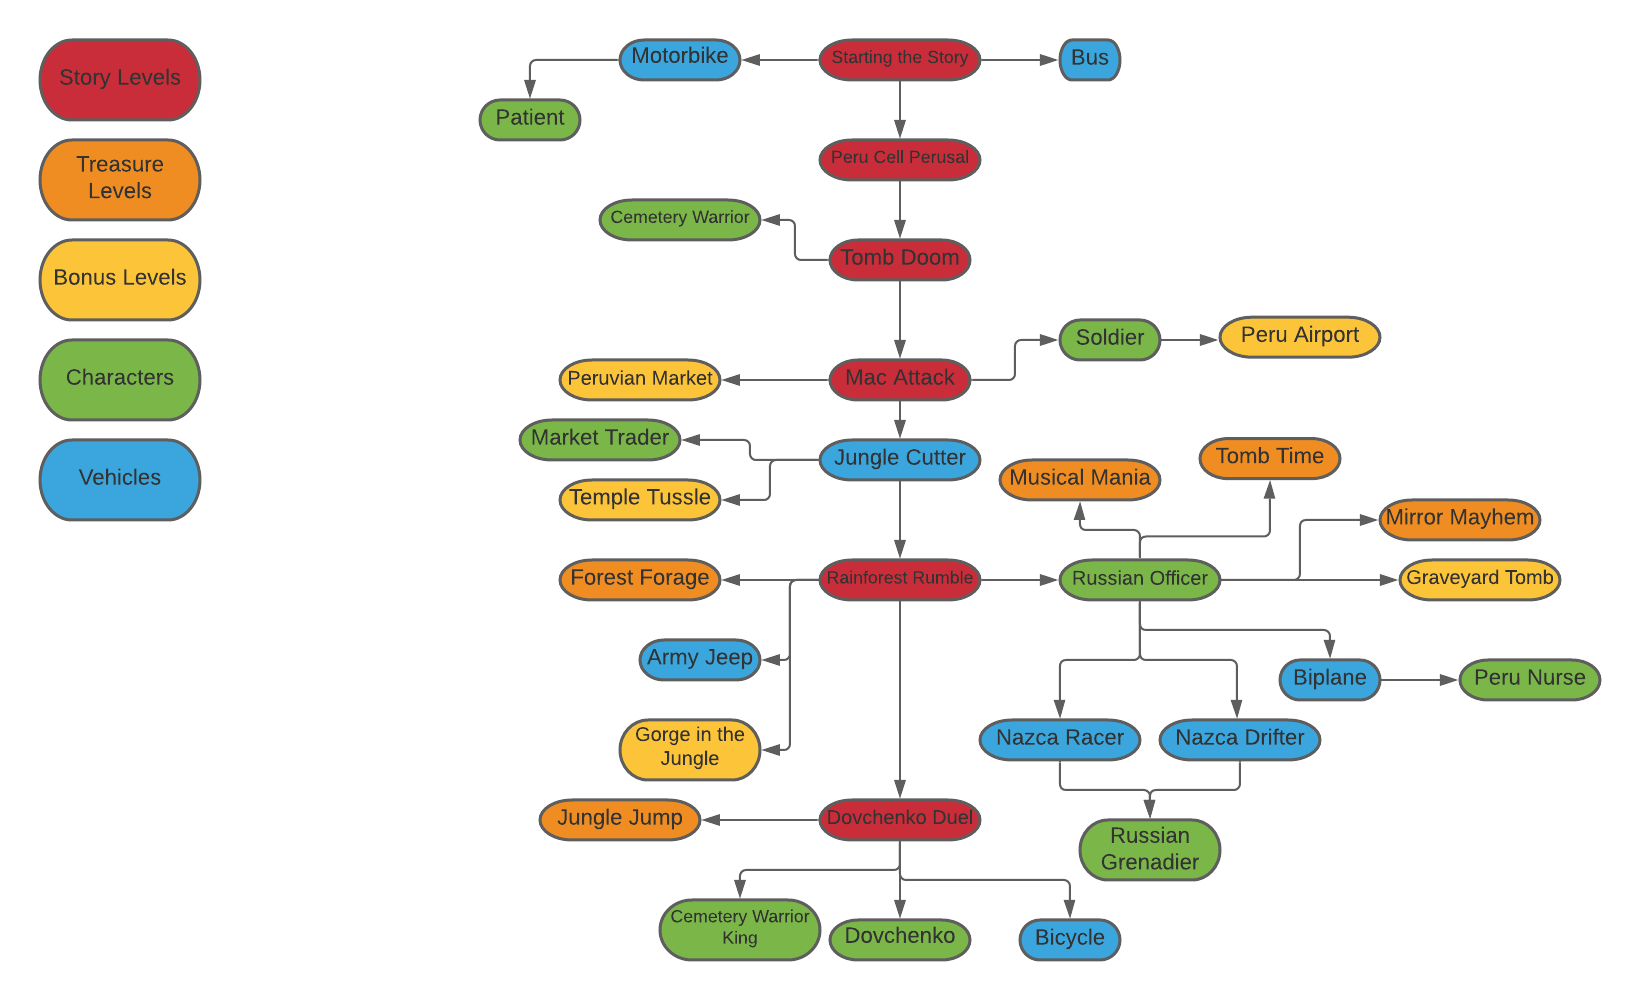
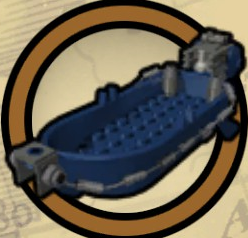
Im not complaning this is an art and its really beautiful but im just curious :steambored:
Evilyn Jordan 2024. okt. 20., 18:24 
took u long time type all that shoulda just used u mind i do neverneed walkthrough or hints n tip its in my mind
legogamesguy  [készítő] 2024. szept. 24., 13:23 
This game radically changed its format and style, very odd indeed. The other LEGO games shouldn't stump you as much :)
BlizzBlu 2024. szept. 21., 3:06 
All these guides are much appreciated - this game especially is leaving me stumped, after coming from the previous three...
Hammerlord 2023. ápr. 26., 19:47 
Just to help out others who really hate the level 'Perilous Parking' in Last Crusade, you can use the big flat truck (The one you fix with a wrench) as a lift for the horse since you can jump on it and get you up to the orange pad without having to jump across all of the platforms.
Tythesly 2021. dec. 13., 16:23 
Looks Awesome! :D
Tythesly 2021. dec. 8., 16:32 
You're Welcome! Glad to help :)
legogamesguy  [készítő] 2021. dec. 8., 16:03 
I'll make a fresh account and check all of these codes sometime soon. Thanks so much for this!
Tythesly 2021. dec. 8., 15:48 
https://pastebin.com/s4zpZPy8

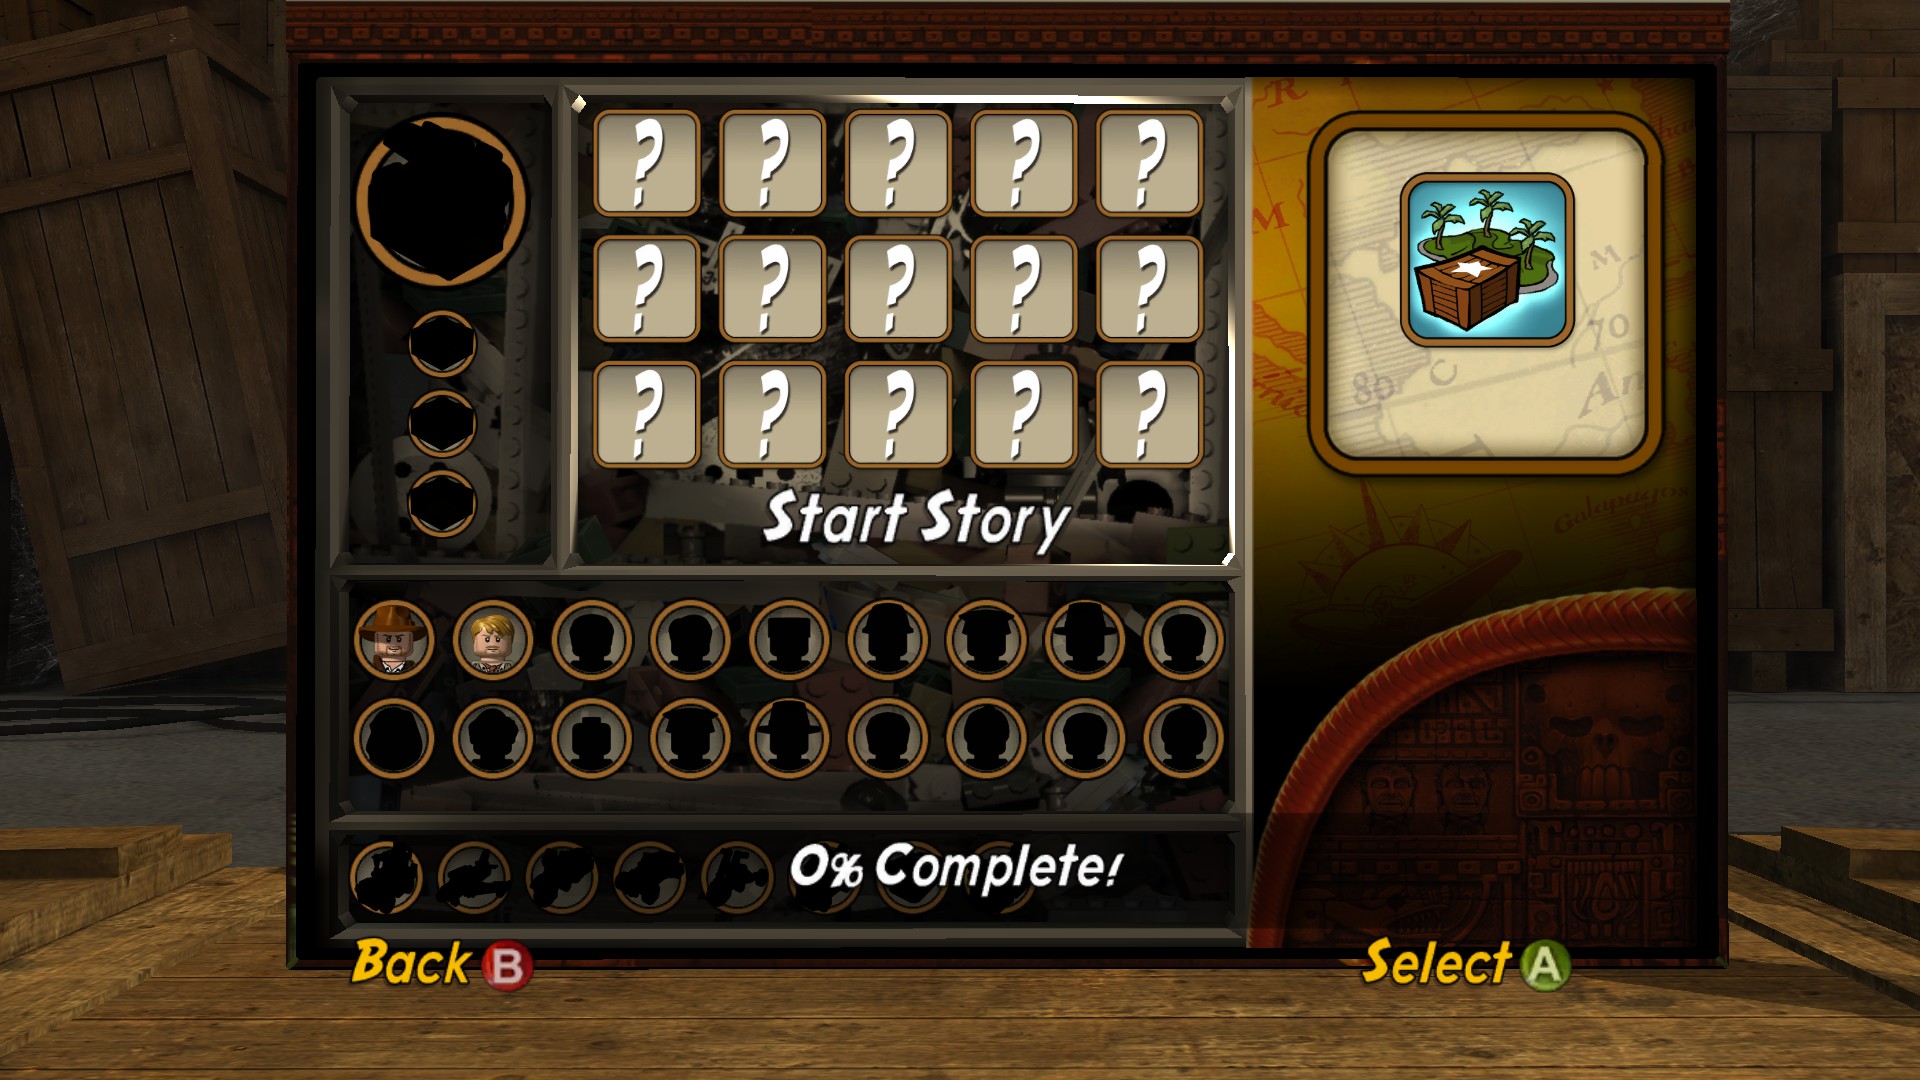
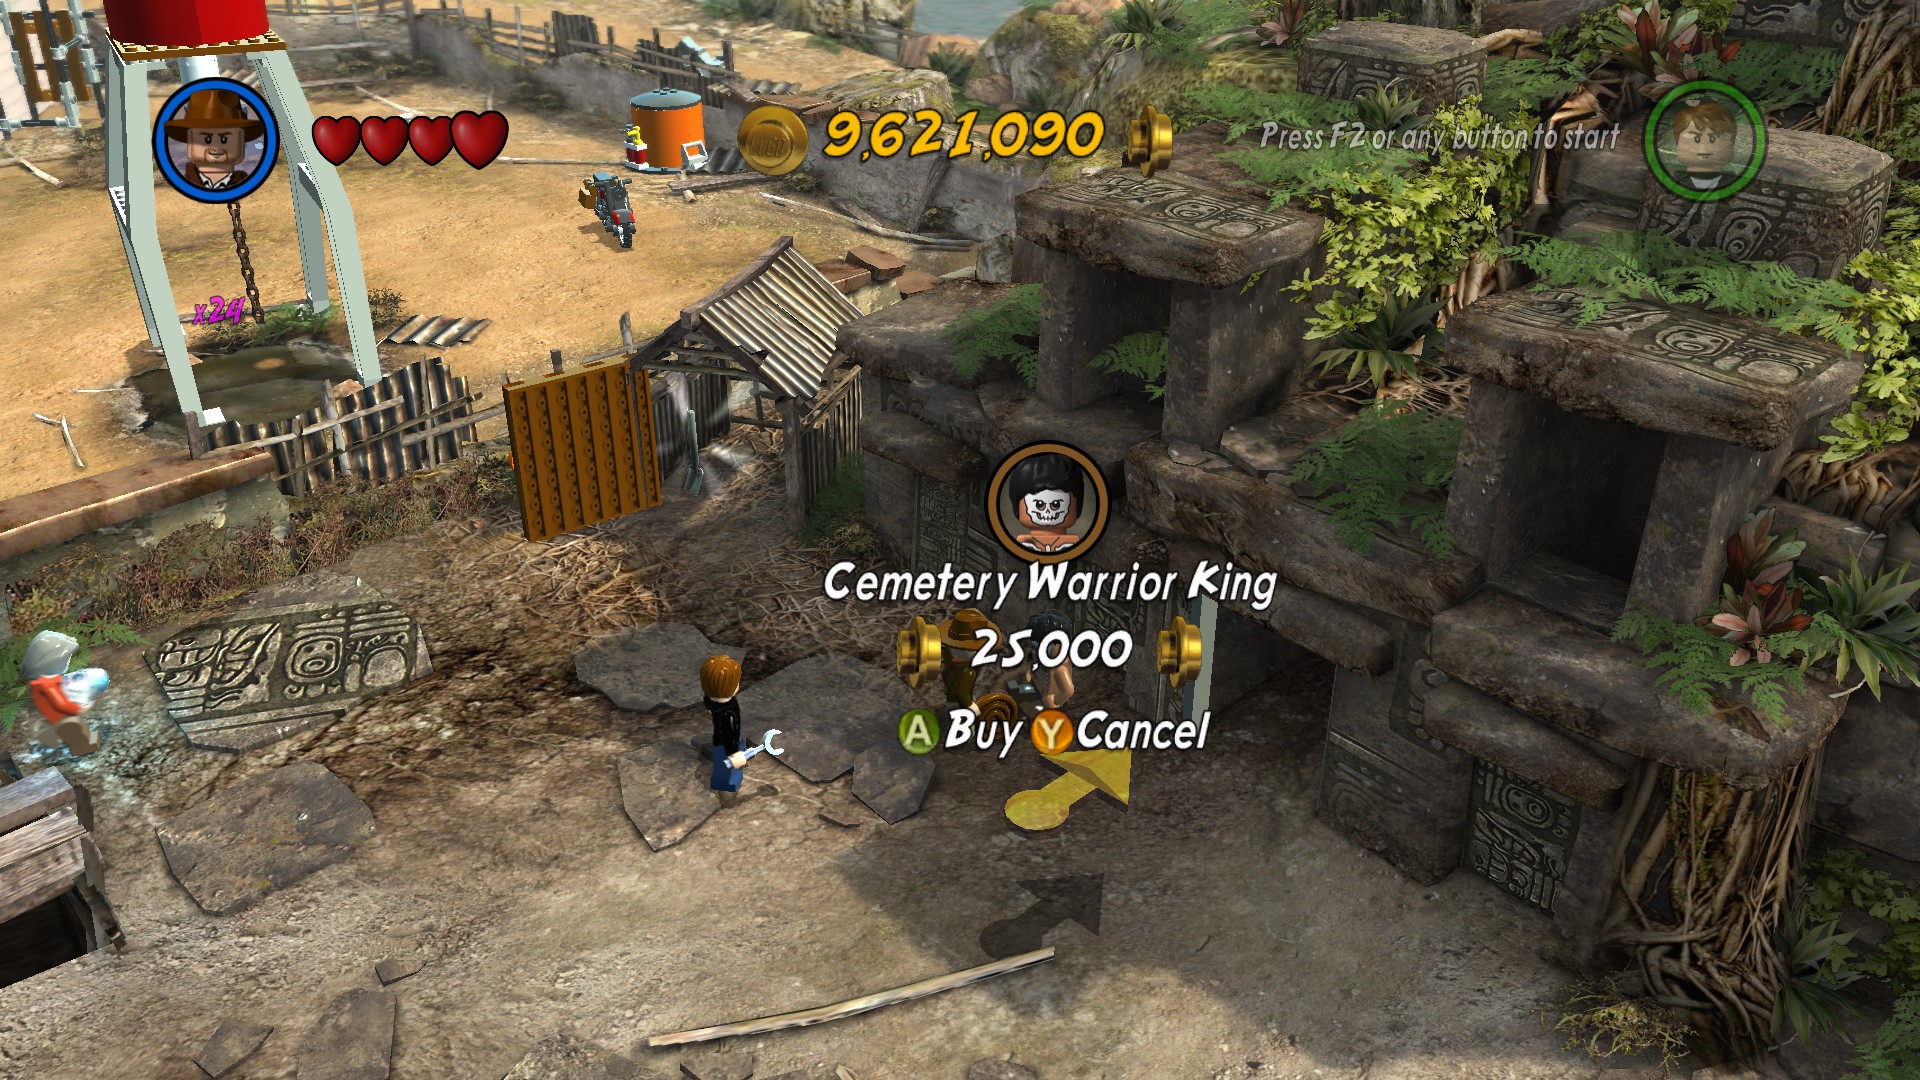
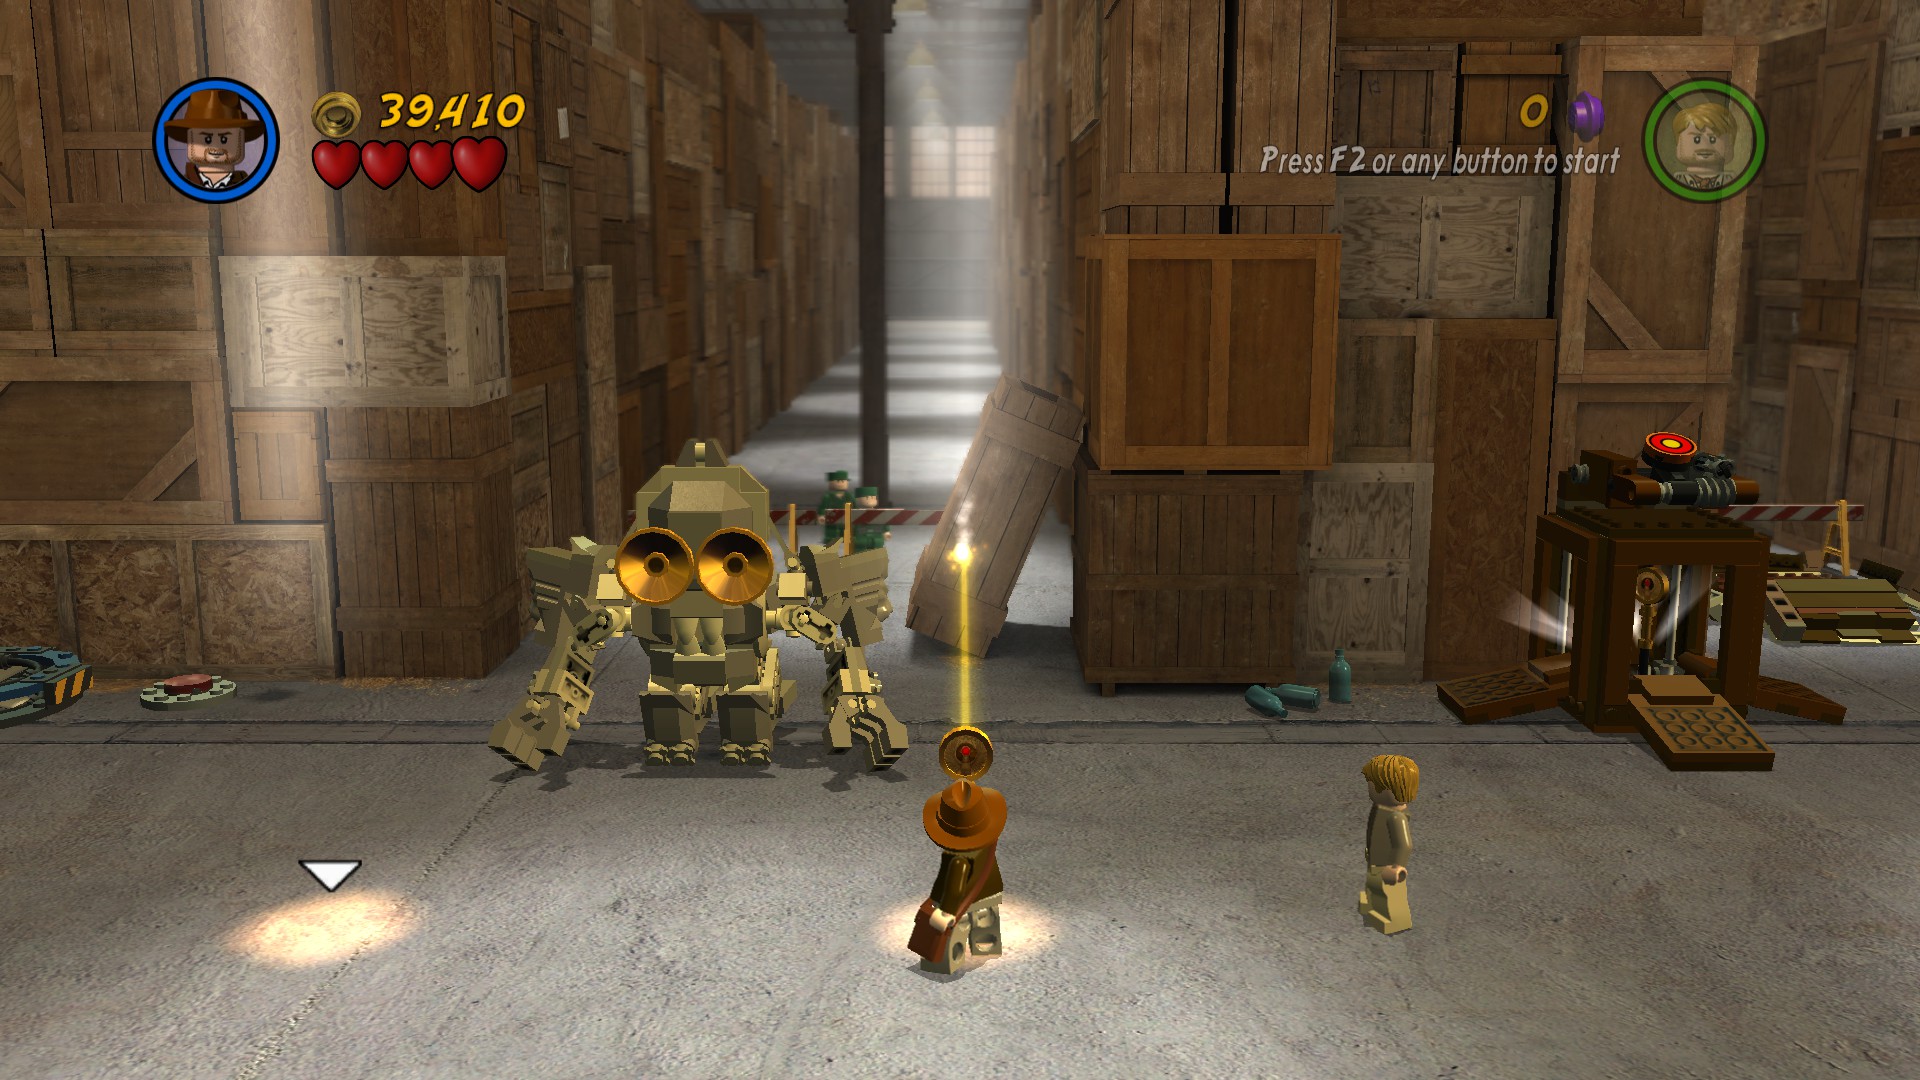
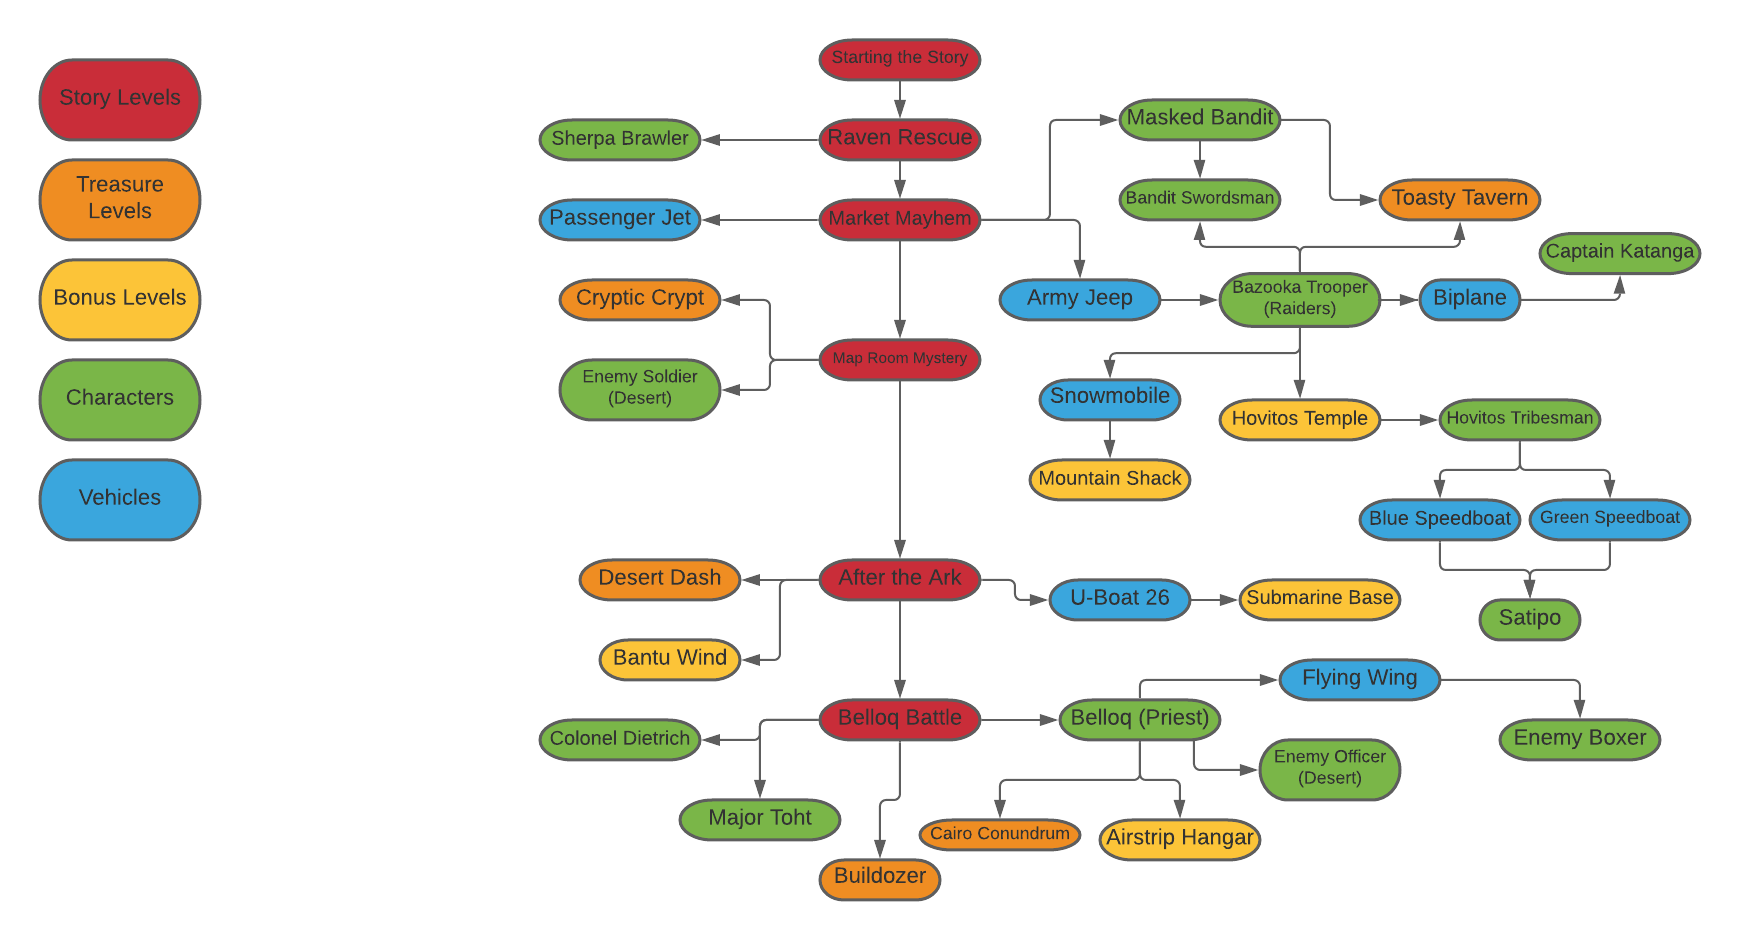
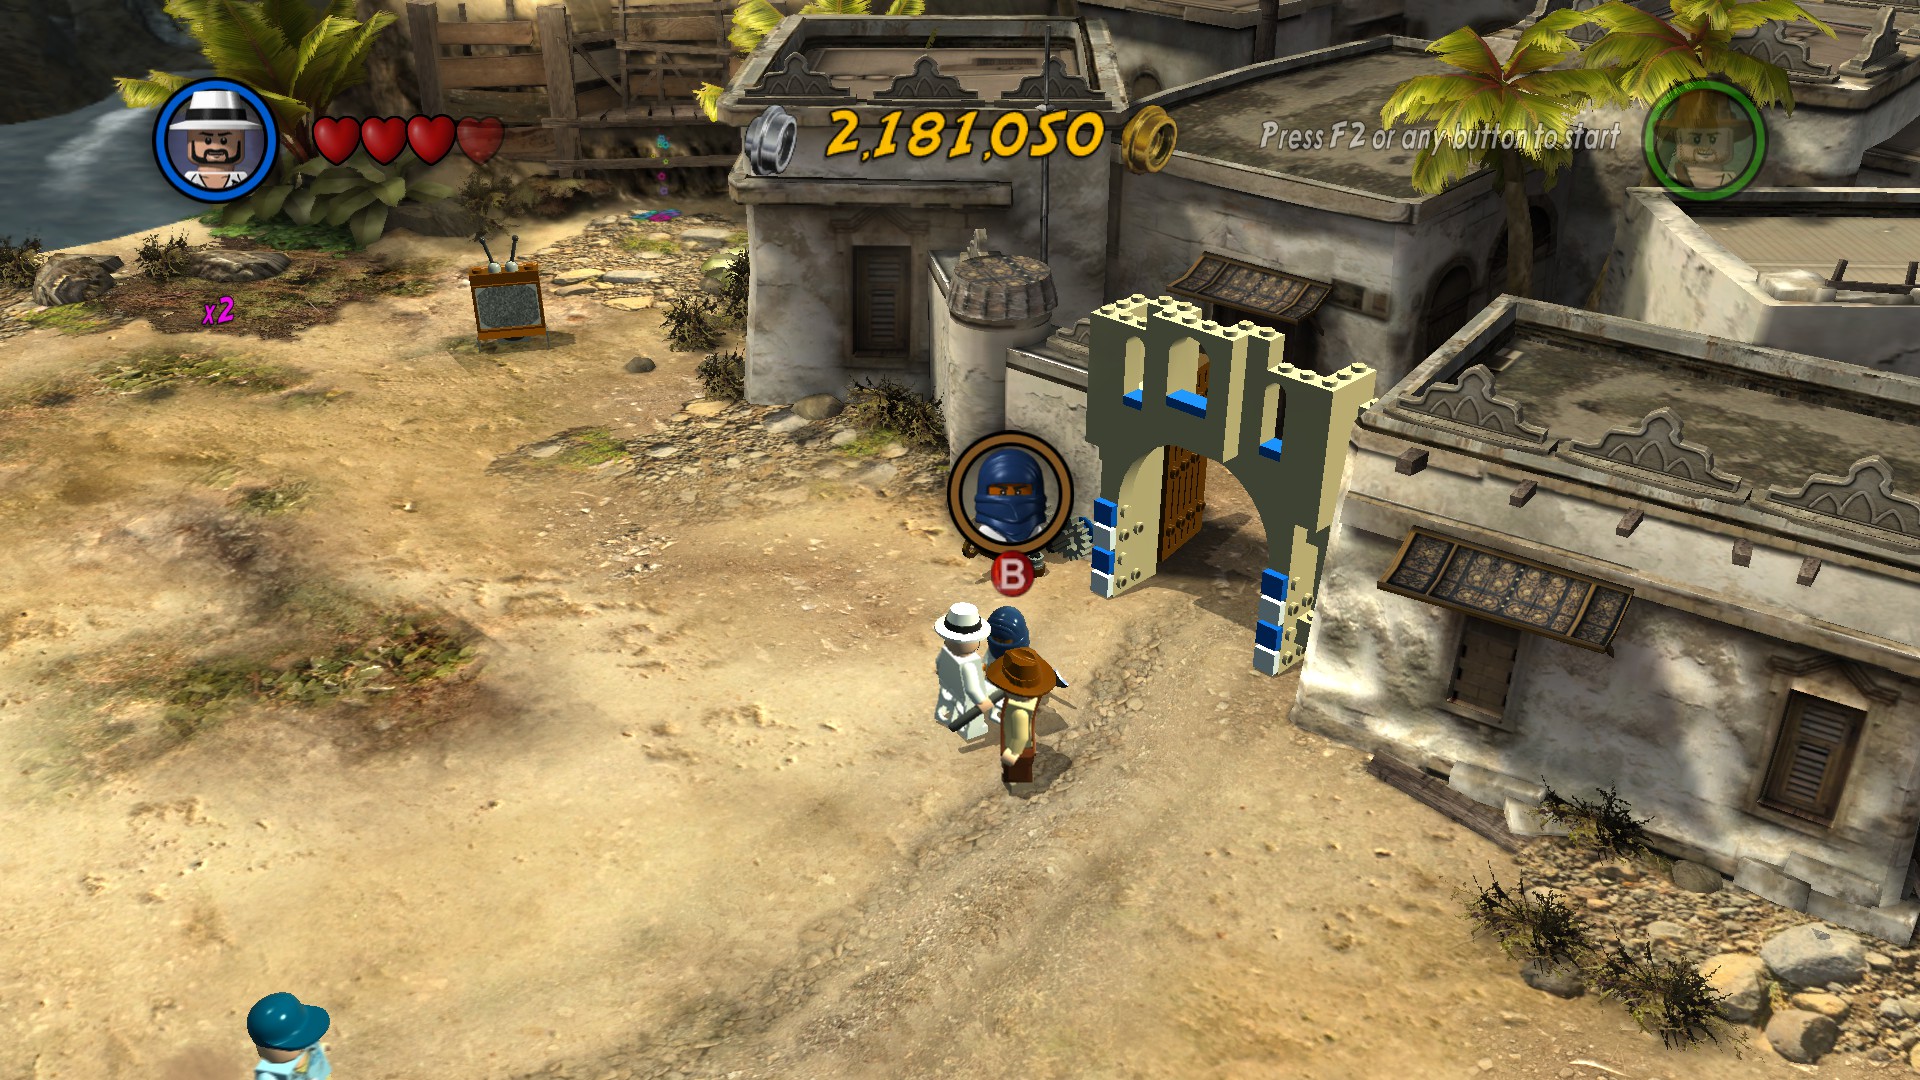
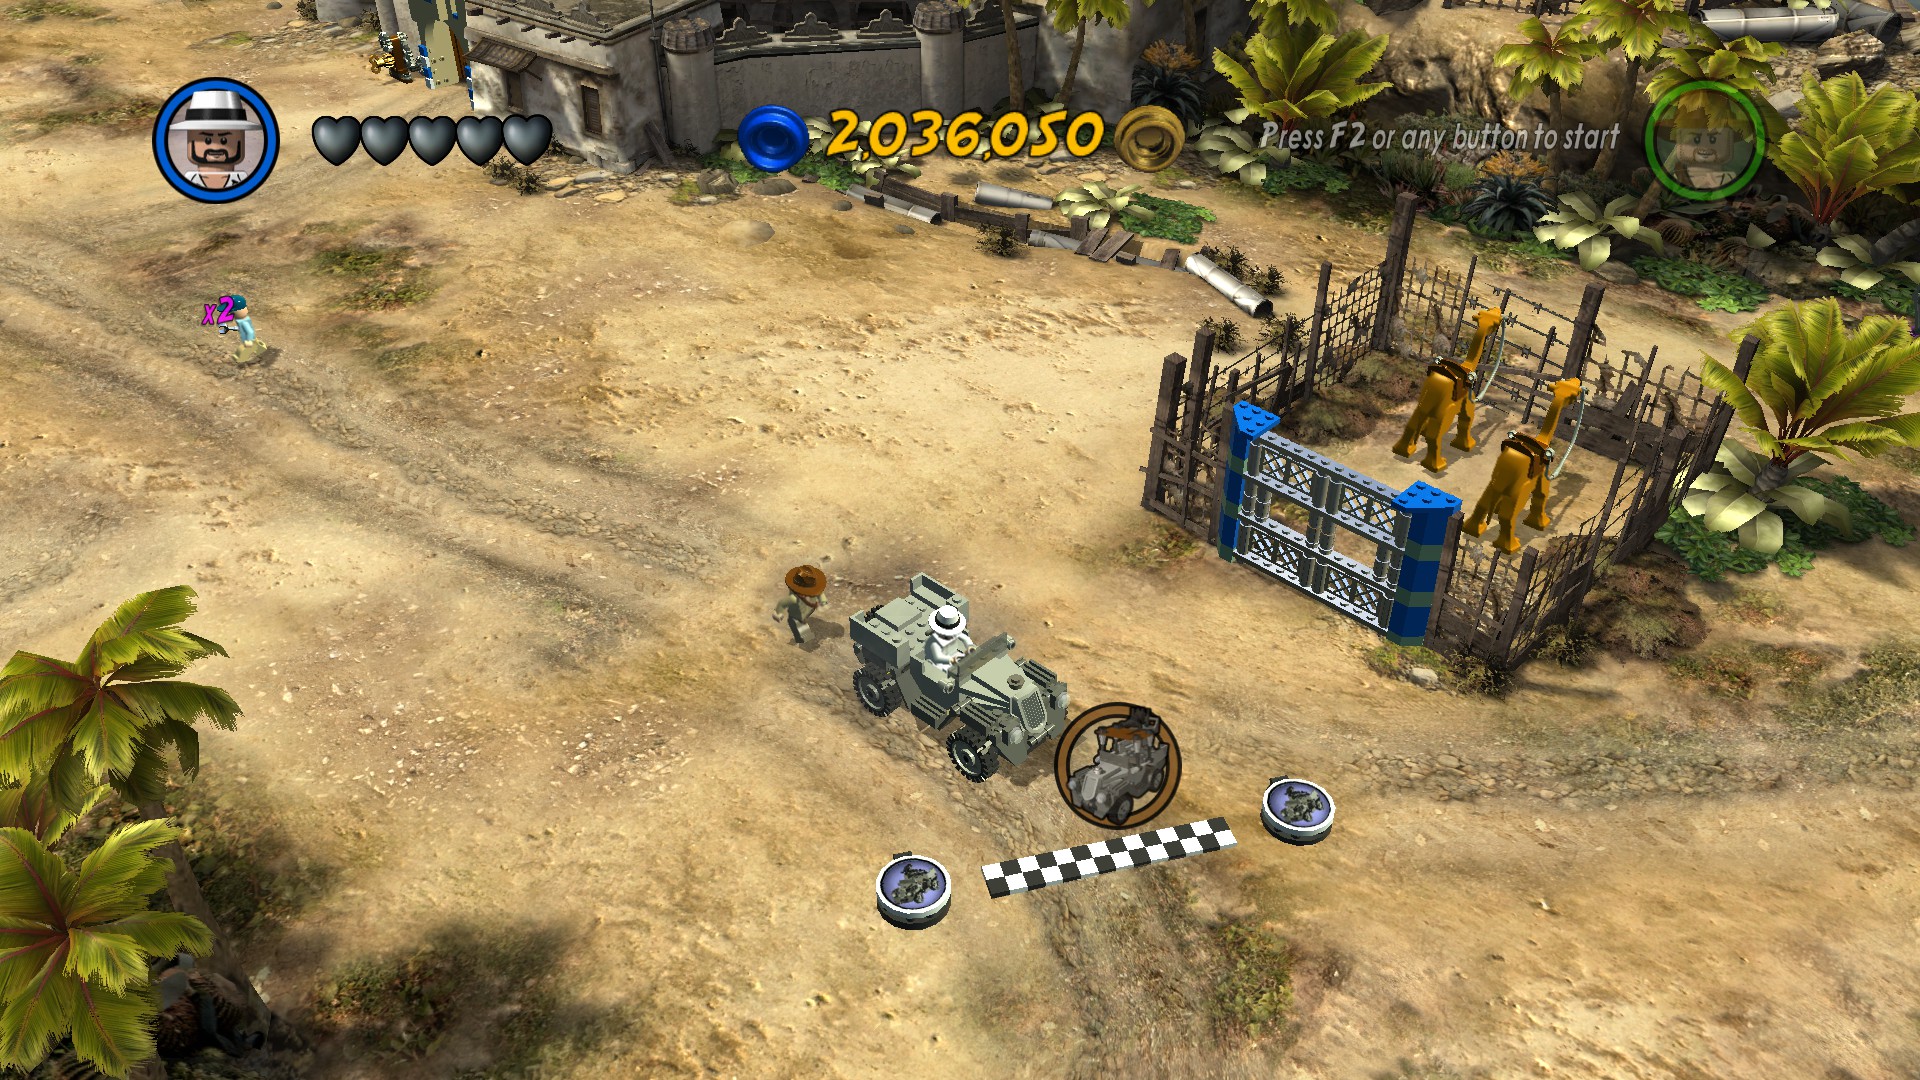
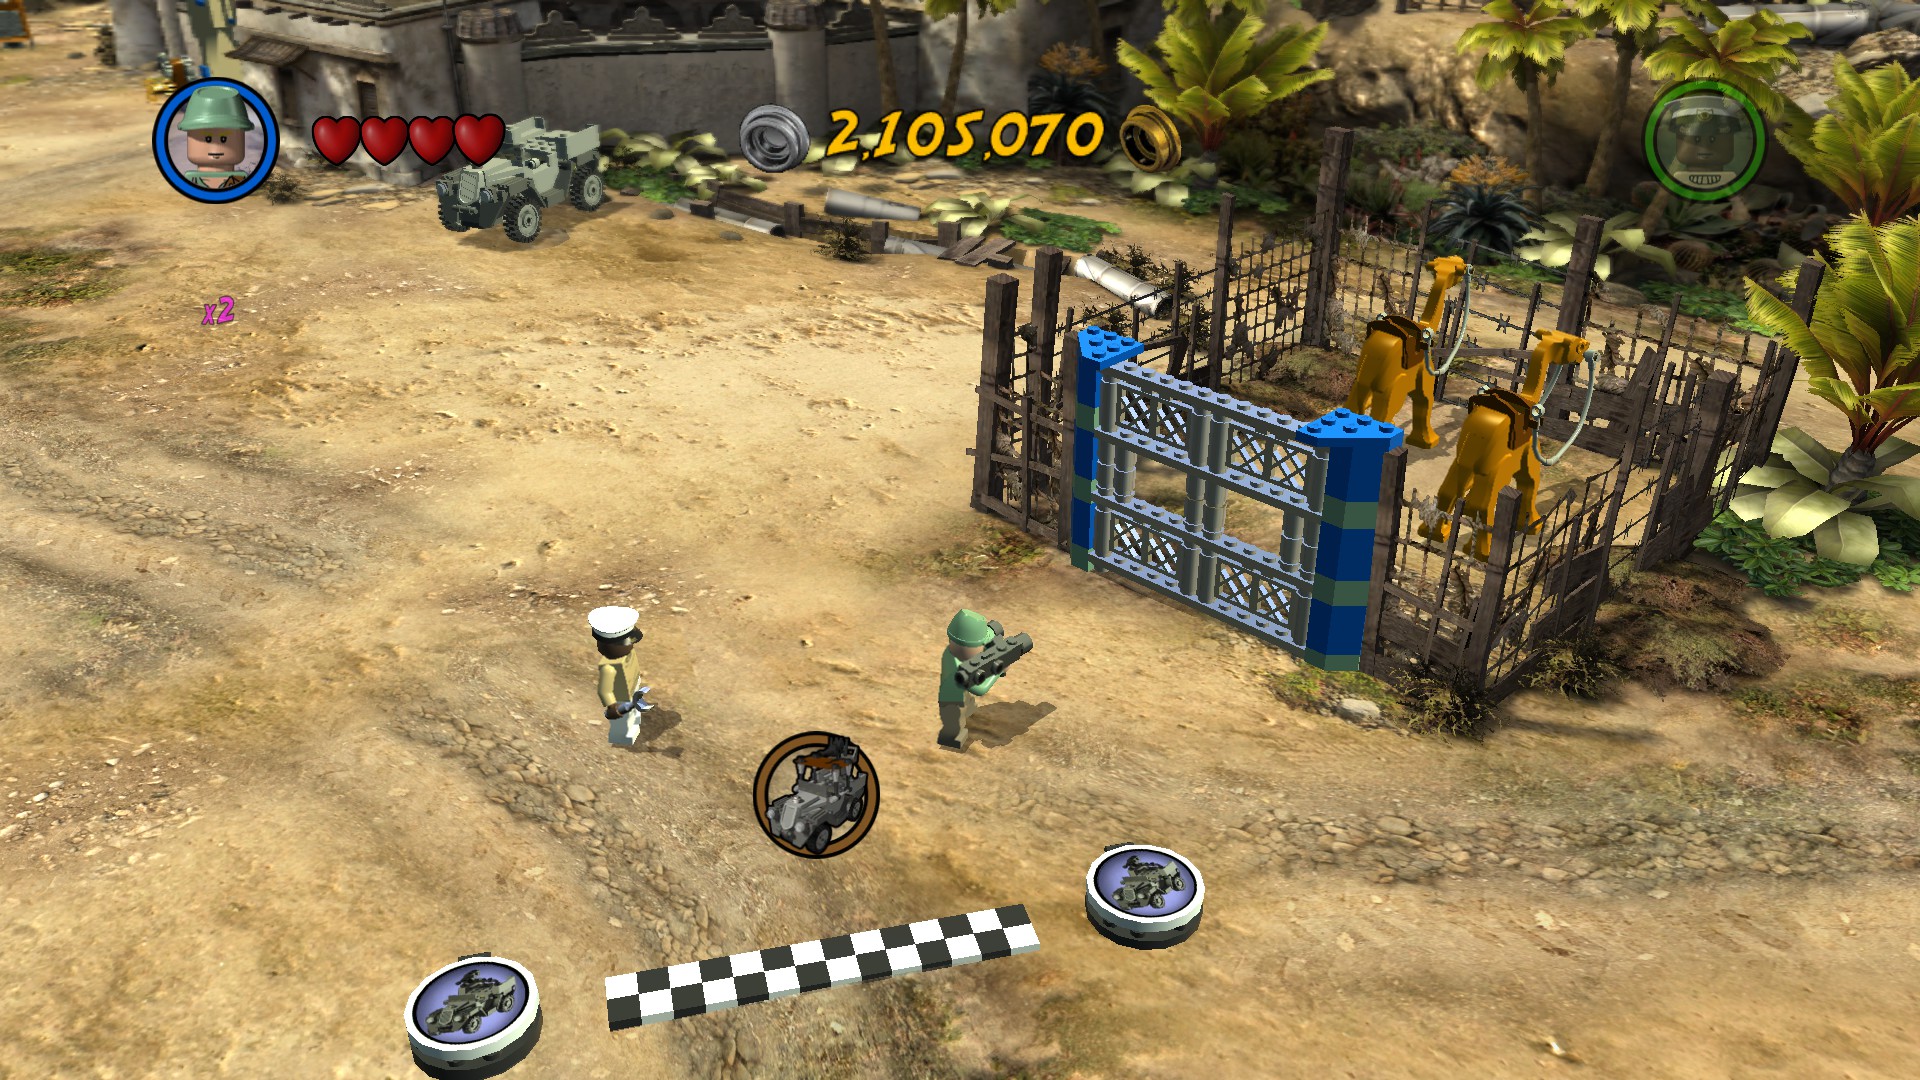
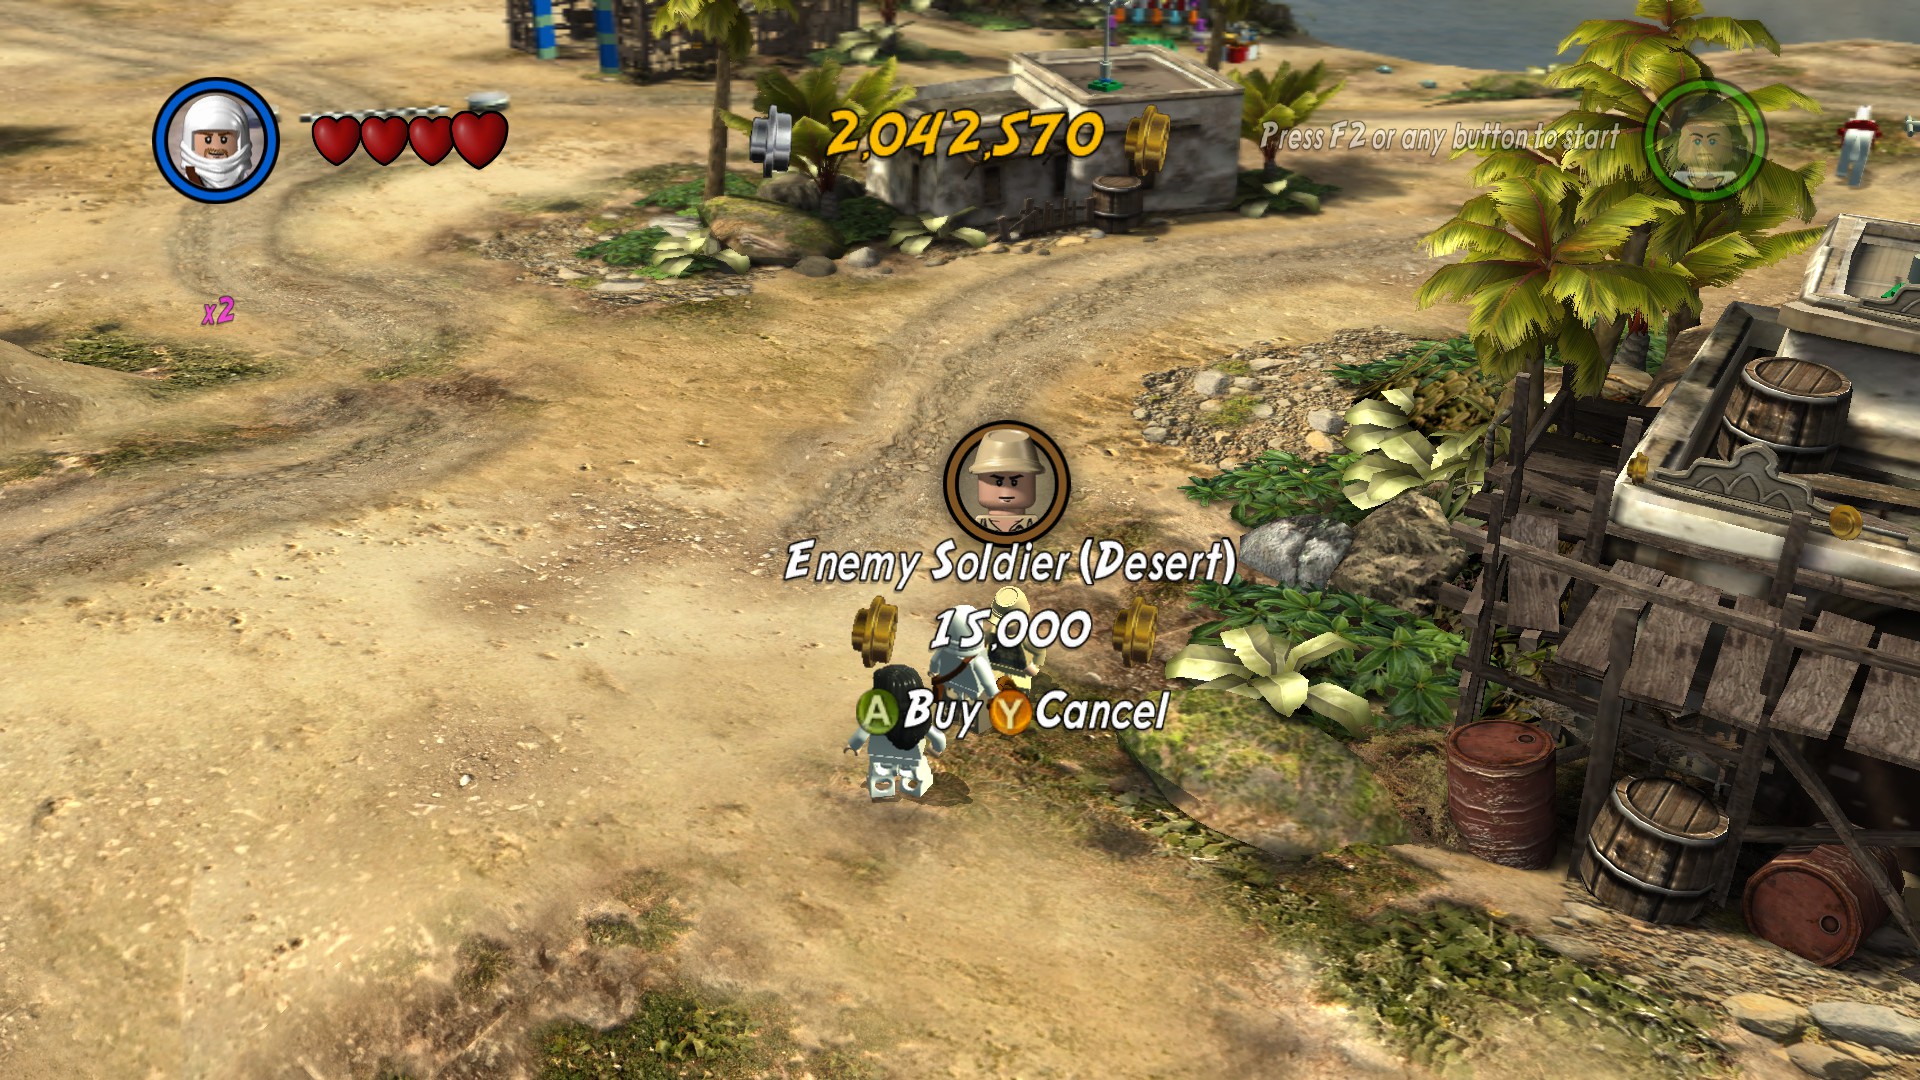
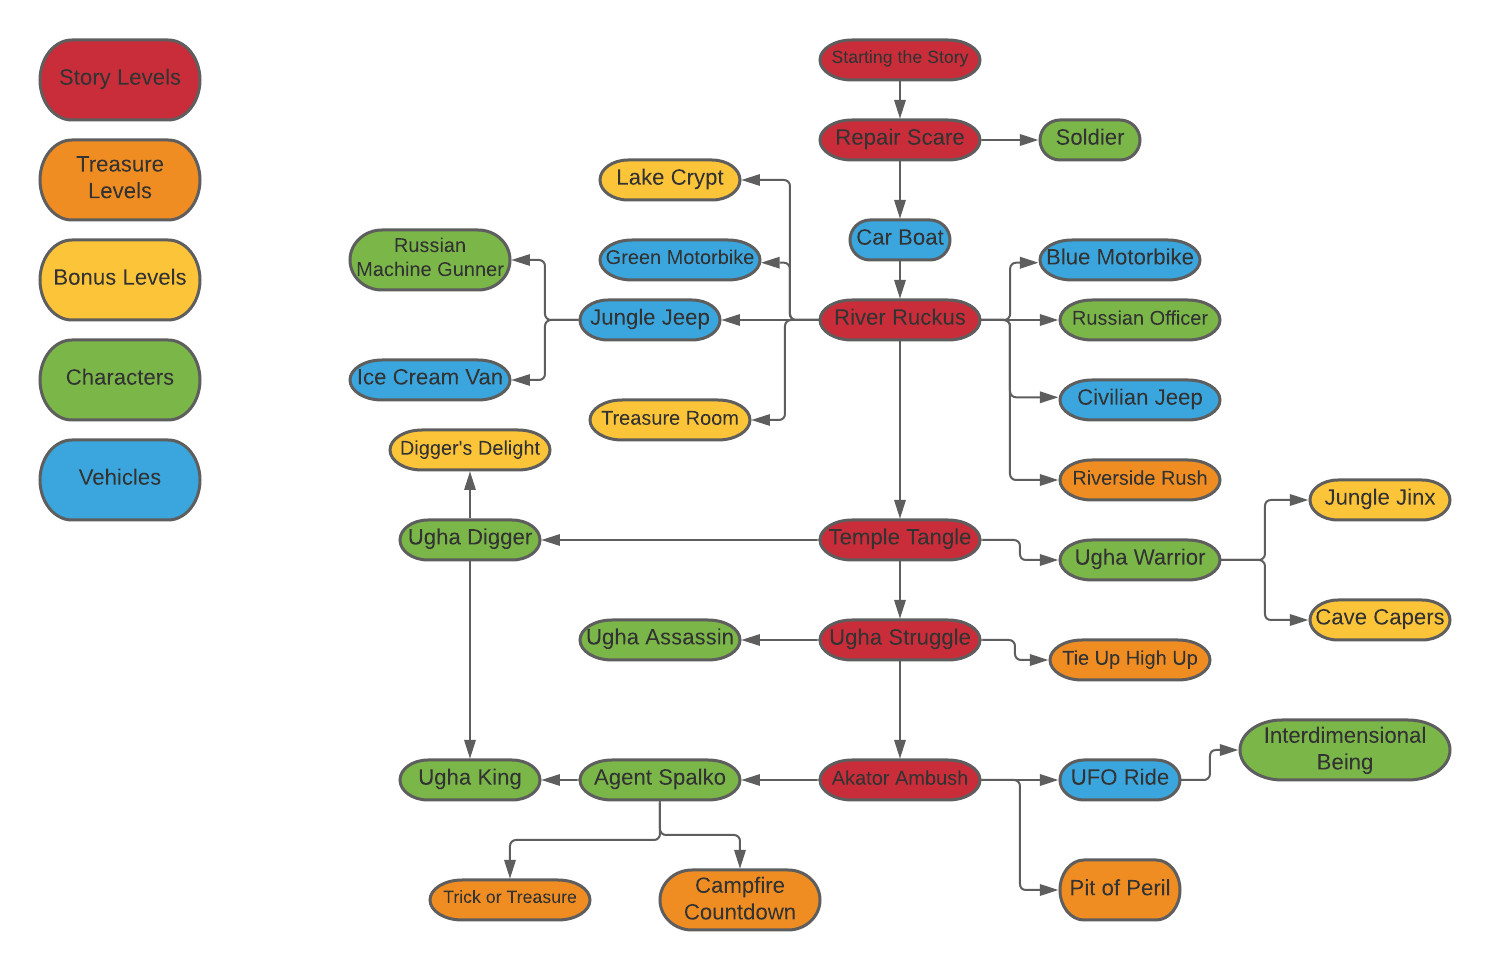
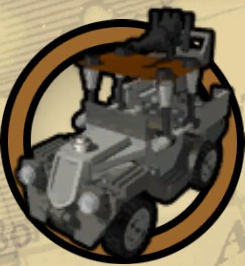
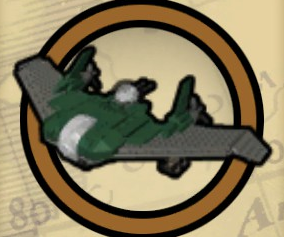
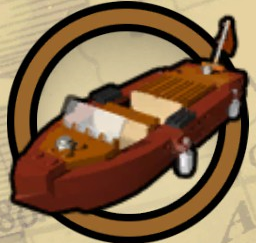
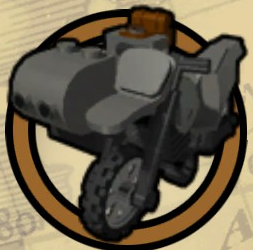
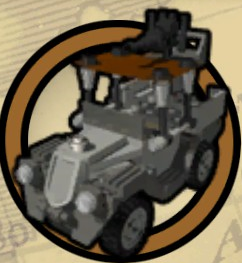
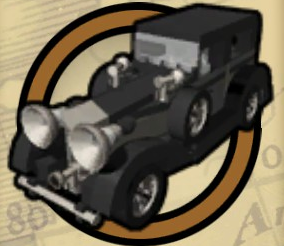
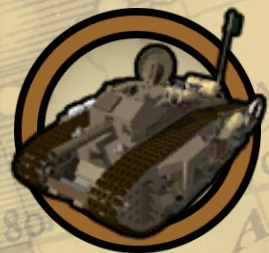
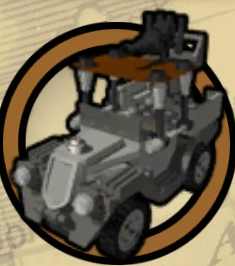
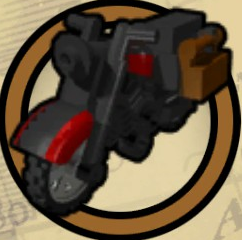
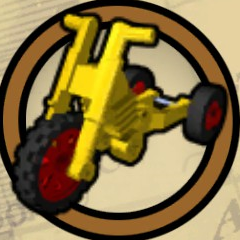
Here is a list that is in the games files. If it doesn't work then that means you already own that specific character. As you can see all the vehicle codes are disabled.... I do not know if the game enables them itself after you reach a certain point or not but *shrugs*.

All the codes for the extras are hidden in the games programming. When I explored that I laughed when I found codes for the first lego batman so I won't bother posting those xD.