Post Void

Post Void

363 ratings
POST VOID Full Guide
By Ewgene
Do you find yourself dying a lot and you can't quite figure out why? In this guide I will attempt to fill you in on some strategy, tips and tricks. This guide is written on the premise of you having already played a couple games and being somewhat familiar with most of its content.
3
24
2
4
2
3
2
2
   
Award
Favorite
Favorited
Unfavorite
General strategy
Let's get started right away. Here's a general strategy to playing Post Void:

Keep moving
Speed is essential in this game. You do not have time to stand still and mull over every decision or line up perfect shots. You continuously have to press onward at a great pace. It's important to find a healthy balance between slowing down to kill enemies while dodging their attacks and dashing through it all. This is a very high octane game and so you need to get used to making decisions fast because the game doesn't wait around.

Aim for the head
Most enemies die in a single hit in the right place, no matter the gun, so make an effort at aiming at said place (usually the head). Have your crosshair at the center so you can almost effortlessly pop heads as most enemies will be at the same height.

Expect enemies
There's enemies behind every corner. Literally. They will shoot or charge at you with no warning. Be prepared because they certainly are. There's no forms of stealth to it; they know you're there.

Reload/charge up in-between every single encounter
Every single time you have no enemies directly trying to kill you, reload your gun or charge up your Knife. There's enemies everywhere, so be ready for it and make sure your weapon is too. In the heat of combat it's easy to forget how many shots you have left in your clip and counting them is the last thing you want to put your attention span to.

Don't try and kill every enemy you see
You don't have time for it, simple as that. Most notably the Crying Mouths and Telehands are often not really in your path or can easily be dodged instead. Don't waste time trying to kill everything on sight unless you're starved for life essence.

Pick upgrades accordingly
Different upgrades work better for different guns. There's not a huge variation in upgrades and a lot of them are great all round, but your choice should depend on your abilities as well as the weapon you're using in your run.

Keep an eye on your health
Just don't look at it directly because you should be looking around for navigation and enemies. Other than the obvious, keep checking what your health is like and act accordingly. Got loads of essence? You can try and book some forward progress, possibly taking some more risks. Low essence? Then it's time to be more aggressive and bring some extra enemies down for more health. It's possible for no enemies to spawn in the next few corridors so if you already have a low amount of life essence, quickly turning around to kill a few more enemies might not be a bad idea.

Important: regeneration is not instantaneous: your idol can break after killing an enemy if something hits you for enough damage before the essence from the previously killed enemy can reach your idol.

Death is part of the loop
This is a lightning fast permadeath game and your demise can come in a split second anywhere during your run. Try and keep your head cool between runs and don't force it or get annoyed. You will succeed if you stay determined.
Enemies
Knowing your enemies and their abilities is vital for reaching The Void. There are only a few types to list, but their numbers are plenty.

Suits

There's a Black Suit and a White Suit enemy. The Black Suits apear as the first enemy you'll see in Act I. Soon as they see you they will fire their pistols at you. They can fire multiple shots as well as dodge your shots, seemingly at random.

The White Suits apear in Act III. They are basically more dangerous Black Suits. They fire faster and dodge more and often. Hitting them can become a chore and large numbers of them is dangerous.

As for both Suit type, a single headshot can drop them. When facing a group of Suits, try your best at dodging their gunfire and if you can't safely kill them, simply move on.

Apart from strafing, you can dodge both Suit types their bullets with your slide, but only if you initiate it early enough. The Slow Bullets upgrade makes this a lot more viable.


Flamingo

Definitely the most dangerous type of enemy in the game, appearing as early as the second level of Act I. They only have a melee attack which is a bite, but they can bite multiple times and a single one of them can drain a large portion of your health or all of it if you don't exercise proper caution to them.

They are not very tanky and will drop with a single headshot. Try to not let them come near at all as they are lethal in groups, be it mixed with other types of enemies or exclusively Flamingos. Listen for their fast-paced trotting sound.

This is the only type of enemy that poses a serious threat if you try to evade them and move on, as they are very fast and can easily catch up and keep up with you. Running into an enemy which slows you down while having a Flamingo on your tail is a common death scenario. If you notice a Flamingo has gotten behind you, find a safe moment to turn around and take care of it unless you've reached the end of a level.


Crying Mouth

Also appearing in Act I, the Crying Mouth is a stationary "turret" on the wall. It shoots multiple projectiles in quick succession. While they don't deal a lot of damage, collecting a salvo of their projectiles with your body is not a good idea. They die to a single hit but they don't have a very high priority because they can very easily be evaded and their projectiles are both less damaging than those of the Suits and fairly easily dodged.


Telehand

These flying drones appear in Act II and deal very little damage, but their real source of danger is their ability to slow you down, especially in swarms of them and even moreso when there's other enemies around. A single hit anywhere will drop them, but when they're not on the direct route, they are usually not worth gunning down.


Bulb Hand


These bouncing hands appear in Act III and try to explode themselves on you, doing marginal damage (if any at all), but will also emit a loud beep and flash the screen for half a second, making navigation tricky and can get you lost in the more vertical levels.

Don't try and kill them too much because they move quickly and erratically and are not exactly a great threat compared to all the other enemies, long as you keep focussing on where you are.


Fleshwall

The only neutral entity. It's a wall of flesh that sits in corridors, often blocking your path. Simply shoot the center to quickly take it out. Take caution if you still have the Pistol because missing the center means you have to spam your entire clip into it, which takes up a lot of time and allows enemies to catch up behind you.

Beware: a Fleshwall is not guaranteed to be in front of the way forward; it can also lead to a dead end.
Weapons
There are four weapons in the game. Three of these will randomly appear as an upgrade at the end of a level. The list is in order of viability, but it does boil down to preference and the set of upgrades you've already taken.

Uzi
Change your weapon to an uzi


The Uzi is my pick for the most viable weapon because of its synergies with upgrades as well as the effectiveness of the gun itself. It's accurate, has low recoil, reloads decently fast and houses twenty whole rounds in its unupgraded state. Since most enemies die with a single hit if your aim is on point, you have a lot of room-clearing potential in every single clip. You can easily compensate for the recoil by slowly pulling your crosshair down while holding down the fire key.

This gun is also the ultimate "spray and pray" weapon if things get tense. Especially with rubber bullets you can simply panic fire if there's too much going on for your brain to register.


Knife
Change your weapon to a knife. Hold to slash!


It is a misconception that the Knife is useless. In fact, the previous world record was done with the Knife, so that should say a lot. It's powerful and pairs very nicely with the slide, which you can focus on more now that you don't need to aim anymore. Every charged up slash is capable of instantly killing the enemy it hits. What makes it even better is that it can hit multiple enemies with a single slash, even if you're not facing them. It's great for close quarter combat and panic firing because of its huge area of effectiveness, most notably if you try to slide through enemies but get stopped.

The trick is to keep charging slashes because the stab attack is a lot less powerful and allows enemies to hit you inbetween stabs.

The two big downsides of the the Knife are that it obviously has no range, making Crying Mouths and White Suits quite annoying foes to deal with due their ranged attacks, as well as the fact that half of the upgrades do not work with it. Bigger Clips, Rubber Bullets and Reload Speed have no effect on the Knife and are rendered useless while wielding it.


Shotgun
Change your weapon to a shotgun


The Shotgun is capable of taking out several enemies in a single shot without the aid of upgrades. Basically anything it hits is a goner. That however is offset by its low clip capacity of only two rounds, as well as its slow firing speed and reload speed. Its range is also quite limited so save your shots until you're decently close to your enemy or the pellets will simply disappear.
This guns begins to shine quite brightly after a few upgrades to reload speed and upgrades like Explosive Ammo and Rubber Bullets, potentially outclassing all the other guns.

Due to its base efficiency however, I decided to put it below the Uzi and the Knife because of their higher overall viability than this gun. It's not bad but it definitely is a more risky choice that requires some neat upgrades to make it shine.


Pistol

The Pistol is the starting gun of every game. It holds six shots, is very accurate and reloads quickly. In Act I it's a very fine gun, capable of dealing with just about everything, especially if you aim for the head, but soon as you move up to Act II and III, it starts to fall flat compared to the other guns because of the overwhelming amount of enemies as well as stronger enemy types. It's still very possible to reach the Void with just the pistol, but any of the other three guns is a better choice overall.

If you want to keep the Pistol when presented with 3 weapon choices at once at the end of a level, just press space.


Upgrades
These are all of the available upgrades apart from the weapons. The list is in order of general priority, although it depends on what weapon you take for some of these, as not every upgrade functions the same with every weapon.

Explosive Ammo
Enemies explode upon death!


I personally think that this is the best upgrade overall. It works with all weapons and makes killing groups of enemies a lot easier because killing one explodes the rest. It even enables you to take out enemies you weren't aiming for with collateral damage, which in turn gives you an extra bit of health back. This upgrade is notably great against Telehands that quite often spawn in swarms.

You should pick this one over anything else, save for some personal preference in weapons.

Rubber Bullets
Bullets bounce off walls


It simply makes all bullets bounce off of walls in the hopes of hitting enemies via the ricochet. A close second after Explosive Ammo. It's a great upgrade for the Uzi and Shotgun because it allows you to make more mistakes with your aim or simply panic fire away and still get kills. Less effective on the Pistol, but not useless.

It's not a guaranteed win by just aimlessly firing with this however so do keep going for headshots. It's also important to note that it only works on walls; shooting the ground or ceiling does not work.

Ghost
Less slowdown when touching enemies


An absolute lifesaver. Getting slowed by a group of enemies is a very common source of dying in this game. It also allows you to slip by enemies faster, most notably groups of Telehands.

This upgrade is especially useful when paired with the Knife, since you will always be in melee range and therefore touching enemies.

Reload Speed
Reload faster!


Since you should be reloading inbetween every single encounter, making this frequent action faster is a big boon. This is especially useful on the Shotgun whose base reload speed is really slow. It also allows you to quickly get a new clip when you happen to run out during an encounter with enemies. This upgrade can appear multiple times, simply making it faster per stack.

Big Idol
More liquid in the idol!


It sounds like a valuable upgrade given how quickly you can die, but it only adds around one second worth of life essence to the maximum amount of the idol. Only take it if the other upgrades are the lesser choice. This upgrade can appear multiple times, adding the same amount of extra health to it.

Bigger Clips
More shooting less reloading


It adds more bullets to your gun's clip. For the pistol this means only two shots and for the Shotgun only one. You can get this upgrade multiple times, allowing for even bigger clips.

It's still the most useful on the Shotgun because of the gun's already low ammo capacity as well as its slow reload. You should still be taking reload speed over bigger clips with any gun regardless.

Slow Bullets
Slows down enemy bullets


It considerably slows down the travel speed of enemy projectiles. This allows the slide to be used more efficiently for dodging projectiles. Since only about half of the enemies fire projectiles, this is a bit of a limited upgrade, paired with the fact that you can never dodge everything and Crying Mouths that are positioned lower on the floor can still hit you with ease if you try and dodge it with sliding.

Serious Mode
Makes you run faster backwards


Does what it says on the tin, it makes you run faster backwards. This is almost only useful for quickly backing up if you end up in trouble and have to reload a gun or charge up the Knife.

While the running speed is quite significant, running ahead backwards is not a good idea in the slightest, as you're dashing into unknown terrain and unseen enemies. It also helps getting you disoriented.

Compass
Points towards the goal


Definitely the most useless upgrade you can select from. It puts a pointer at the top of the screen that points towards the end of the level. In and of itself it's not a terrible upgrade, but the premise certainly is: it makes you look at the top of the screen to see where to go, thereby distracting you from the rest of what's happening. In this game, you need to focus on what's happening around you.

Sure you can use it to reorient yourself if you accidentally go backwards, but this can also be achieved by just getting better at the game and not rely on the compass.

The only reason to take it is when you have a weapon you want to keep and the upgrade choices are two weapons and the compass, or when you're using the Knife and the other two choices are upgrades for guns... or just press space and leave it behind.
Achievements
There's only seven achievements and unlocking them is very simple.

Completion achievements

Act One Completed


Act Two Completed


Act Three Completed


Reach the Void


All that needs to be said is that you get the entirety of these if you beat the game once.


VOID

Die 20 times


Self-explanatory. No reason to grind for it because it will happen.


Weapon Master

Use all weapons


Simply get each unique weapon upgrade. Doesn't have to be all in one run.


Shut up! Give me more?

Spotify: Post Void Playlist


Go into audio options and rack the music volume slider back and forth until you unlock it.


Thank you for reading my guide
Now go and put your head to rest in the Void.
25 Comments
dog Feb 18, 2024 @ 10:38am 
Excellent guide. Kinda made it too easy
ELEMENTAL GERM Jan 26, 2024 @ 4:20pm 
kinda late to this but i couldn't find any support for this game. i love the gameplay and the art style but my game is very choppy at times for an unknown reason. sometimes i get to 2/3 fps and it becomes unplayable. anyone have/had a similar problem?
Average Genestealer Sep 14, 2023 @ 12:57pm 
Theory: The suits are versions of the player who died. When you die, you crush the head you carry in your hand. In the tutorial we can see the player's 'face' looks a lot like a Suit, just with an eye. Why do suits attack the player, then? Well, they probably went insane from losing their head, or something. What are flamingos, then? Idk, local wildlife?
GNOMES ARE REAL Aug 22, 2023 @ 8:10am 
tbh a good strat is just running past the enemies, then when you have a couple flamingo and telehands following you just turning around and spraying is a real like easy way to keep your health up ive found
CobaltNinja Aug 7, 2023 @ 7:58am 
After playing this game for a good bit, I have some suggestions for this guide:

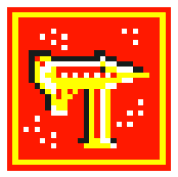
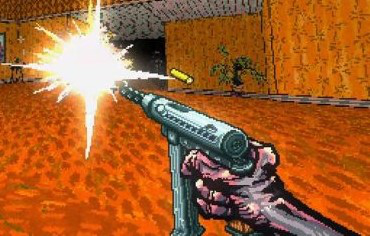
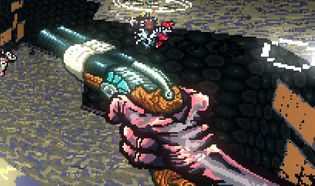
a) Shotgun is better than the uzi IMO. You can press reload immediately after firing to potentially shoot even faster (with even just one reload speed upgrade) and have infinite ammo.
b) Compass may be useless, but it is an easy HUD element to ignore and choosing it will thin the upgrade pool for other, potentially more useful upgrades to appear.
miller is real Jun 5, 2023 @ 2:41pm 
he has a point
T☢XIE Mar 13, 2023 @ 4:06am 
I'll be honest this game is easy homie you just suck
Aziz Sep 14, 2022 @ 6:01pm 
thanks very much ♥
Torres, The Devourer Sep 9, 2022 @ 2:04pm 
This is an excellent guide. Though I have some extra tips for the shotgun as it is my personal favorite weapon.
1. Rubber bullets synergies exceptionally well with shotgun. Exploding bullets is also another great pick.
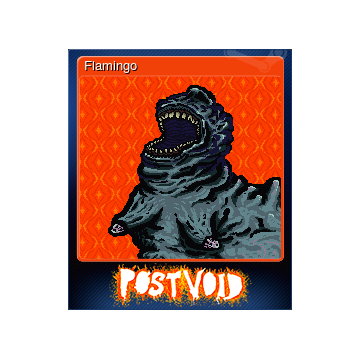
2. When I use the shotgun I feel safe as I can round a corner and kill anything that charges at me (like those damn flamingos). What I do is charge in, shoot my clip, and then take a moment to reload. Then rinse and repeat. I like this strategy as it makes me feel safe. Charge in and give them the ‘ol one-two; then take a moment to recuperate and reload then charge in again!
LiberatedGolem Sep 8, 2022 @ 10:08am 
This guide helped me reach the end. Thank you! :crtcool: