Halo: The Master Chief Collection

Halo: The Master Chief Collection

667 oy
Halo ODST: Collectibles
Psychedelic Adventurer tarafından
A simple guide to help you locate all the Audiologs in Halo 3:ODST. *Image & video heavy*
5
8
38
3
5
4
2
   
Ödül
Favorilere Ekle
Favorilere Eklendi
Favorilerden Çıkar
Intro


Hello all. Hope you brought you wellies, because we'll be dropping feet first into New Mombasa to collect some tasty collectibes. No, not Skulls this type Spartans, audio-logs. I know, it's not that much different, and honestly some of you would probably prefer the Skulls; but isn't, so let's get this over with.
There are 30 audio-logs scattered around Mombasa. Any of them can be picked up during the free-roaming sections where you play as the Rookie. As you go through the campaign, you will unlock more pieces of the city to explore, allowing you to get more of the logs.

Important: Read this.

After you beat the campaign, you will unlock a new, final, rally point in Mombasa Streets. This just makes collecting all the audio-logs so much easier, as all the gates will be unlocked. While it is certainly not necessary, I recommend waiting until you have completed the main campaign, and not collecting any of the logs until then. This makes it more expedient when you can go through in one run and collect all of them in one go. This guide will assume you are doing this, or at least have access to the entirety of the map.
Logs #1-10


Log #1
Follow the street Northeast from west side of the map. You'll find the find the station log right next to to the wall.

Log #2
Make your way east from the last Log, up a few slopes filled with crashed cars, through a giant door. You'll find it in the middle of the square.

Log #3
Right on top of Log#2, just one street up to the north-west. Go round the block, and move up into the building, up some stairs, and you'll find the phone booth on the ledge.

Log #4
Just off said ledge, and walk through a few blocks worth of streets due south until you reach another courtyard, with a coms terminal on the side of the square.

Log #5
Now move west, to the right of the last Log, around a building. You'll reach another courtyard, and a coms unit in the middle.

Log #6
Move south west a little, navigating the joining building, over the road, and you'll find it on the adjoining street.

Log #7
This Log is quite hard to find. The best way is, from Log #6, to move straight down, and then up again as you round a corner. You'll have to open a security door, and the audio Log will be right there, next to some trees.

Log #8
Make your way out of the little secret plaza that Log #7 is in, and continue moving due east until you reach a large courtyard with the cube monument with pillars. Continue past that, and on the side of the next building is the Log.

Log #9
Straight down from the last Log; move through the giant door, and you'll see it instantly directly to your left.

Log #10
From that, move due west, through a building, and just as you open into a courtyard, look to your right against the wall of the building you just came out of, and you'll see the booth with the Log in it.
Logs #11-20
Log #11
From the last log, exit out of the walled area through the door on the west side. After which, you can simply go round the side of the building, and find the phone booth on your right.
Log #12
Time for some backtracking. Go back to Log#11's space, in the walled area, leave through the north entrance, and continue down through the complex. Once you're outside, cross the street with some police cars left on the road, and back into another house. The Log is on the desk.
Log #13
Leave the building, and just go south, as the crow flies, Once you near the gated wall, you'll see the Log on the side of the ramp.
Log #14
Go through the gated wall that you were coming up to. As soon as you go through, direct yourself to the stairs on the left. Once you reach the top, you'll find the Log right in front of you.
Log #15
From there, just move due South until you reach a building. Go straight in and jump off the ledge to find the Log.
Log #16
Just head west out of the building, keep moving and you'll find the large doors which intersect the mpa. Go through this and you'll find some piled up traffic. Jump on the boxes to reach the ledge with the Log.
Log #17
Jump straight down and continue west. Go up the stairs to the plaza, then jump straight off and the Log will be on the wall.
Log #18
Go west from there. Hit the big door, go through it.. And it's in the middle of the plaza. Big brain time!

Log #19
Go due south from the plaza and hug the wall until you find the hidden door. Go straight in and the Log is under the gazebo.
Log #20
Leave the hidden room, turn back to the right and past Log #18. Keep going north, and it's under the overhang.
Logs #21-29
Log #21
Time to retrace your steps back down to the bottom again. Go south again, back through the plaza, back through the door, and continue south. Then go straight left from the stairs, and you'll find the Log in the small room.
Log #22
Head straight south again, and go through the door into a long haul way. Head right at the next turn, you'll find the Log at the end of the corridor.

Log #23
Make your way back, then go north-west. You'll bump in a large pair of doors, go through the door, and head straight. Once you hit the building, hug the left side until you hit the Log.
Log #24
Straight east and you'll see a big building with a ramp down into a building complex. Go down there and go round the circular road until you see the Log on the opposite wall.
Log #25
Go out of the building complex and hug a right up the road. Then take a right and wrap around the building, then go straight until you find the Log.
Log #26
Go straight east from Log #25, then continue on, wrapping around the building. Then take a shap left, go up the stairs and you'll find the Log there.
Log #27
Go through the intersection door, and jump down in the large sunken area to your right. Go straight on until you find you Log.
Log #28
The next log is essentially right behind the wall that Log #27 is on. You'll have to go all the way round the entire building to the opposite end. Go through two of the large door intersections. On the second set of doors, head straight forward to the stair case, and follow it to the Log.
Log #29
Head across the balcony to the end, jump off and keep heading south. Keep going until you see a set of stairs, with the log at the top of them.
Log #30
After you have ALL other logs, save and quit the current game, and load up 'Rally point 7' on 'Mombasa Streets'.
Keep moving through the level until you meet the Police officer, then continue with him through the level until you reach the ice-covered room with server stacks everywhere.


Note: The officer you follow through the data stacks cannot die. This means you don't have to babysit him, and can either use him as a live cover, or just leave him to fend for himself while you clean out the big-boys.

Once you have cleared out all the Covenant in the server room, the officer will tell you to stop, then promptly turn against you - It's your time to put him down. Once you do this, an telephone will start glowing on the South-west side of the room. Run over, this is your last log. Grab Log #30, and you've finished ODST's collectibes! Well done!
Change Log
Date/month/year notation are written in the UK standard.

--22/09/20 - Guide Published.
--25/09/20 - Fixed some minor errors, literary snags, and generally cleaned up the sections..

--To do:
+Add the mongoose locations for extra 'S P E E D'.
+Redo pictures and format the locations accordingly.


The Russian conversion of this guide can be found here:
https://steamcommunity.com/sharedfiles/filedetails/?id=2026748844
Conclusion
And there we are! All done! I remember getting all the Audio Logs on my first run of ODST back on launch day was a real paid. I didn't care a single bit about the sub plot, and honestly I still don't (it's not very interesting), but I was all about that Achievement life, so man's gotta do what man's gotta do.

If you have missed any of the Logs, just simply load up the open world level again and find the one you need, save and exist, then redo the last level. Simple! I hope you all enjoyed the latest Guide, this one was quite a challenge honestly.

Now, we can all begin the wait for the last instalment in the MCC: Halo 4!! (keep quiet Bungie fanboys, the game is actually good). Or you can replay the best Halo game ever made:
https://steamcommunity.com/sharedfiles/filedetails/?id=2098482099

[Optional] Donate!


https://steamcommunity.com/tradeoffer/new/?partner=38602821&token=A3SrzMse

Donations are not needed, and are certainly not expected. However, they are highly appreciated none the less, and give me extra motivation to carry on supporting my hobby. If you feel like throwing something my way, just use the trade link found above.


54 Yorum
Aaraknyx 13 Mar @ 1:52 
why are my logs out of order? log 17 was where log 6 is listed..
ogGrumble 9 Mar @ 4:33 
All work on easy, with acrophobia and bandana. Hope this helps
Shuii 10 Şub @ 17:37 
I'm trying to run this in reverse order from the free roam rally point, but it seems like 21 and 22 are blocked off by force fields on the streets from both paths. Am I missing something obvious?
Wub 8 Eyl 2024 @ 14:01 
after replaying the series and watching videos on Marathon, I kinda appreciate the old games more 'cuz there's a juxtaposition between the FPS "walk forward shoot things" with the introspective "what's the grander meaning?" that's central to both John Chief/Cortana's character dynamic and the larger plot. ODST proved the series could've had a different focus than "more off-brand halo rings" without losing the magic, and probably would've been better for it.
RepstarVixen 16 Tem 2024 @ 3:09 
order of pick up does not matter btw, it will always just play the next log in the sequence no matter which one you pick up. so just pick them up in the most convenient order route wise
Glupp Shitto Esq. MD, ARMY Ret. 18 May 2024 @ 4:30 
your map is like reading hieroglyphics my man
-[Badger]- 28 Nis 2024 @ 8:10 
@Shotmayker Yes the game makes it very easy to find them. Really all you need is an overworld map with the logs to find them. Also this guide is end game content, but whats the point of the caches in the end game? Lets complete the campaign then find the logs?
Clone303 22 Tem 2022 @ 20:09 
i looks all the place you did show but i could only finde 22 of them, okey im sure i can finde 30 one easy
thumbthrower 15 Mar 2022 @ 11:10 
A word of warning for those doing it CO-OP. It won't work if you quit the mission Mumbasa Streets to start Data Hive, it will delete all the audio logs you have found & you will not be able to get the 30th one.

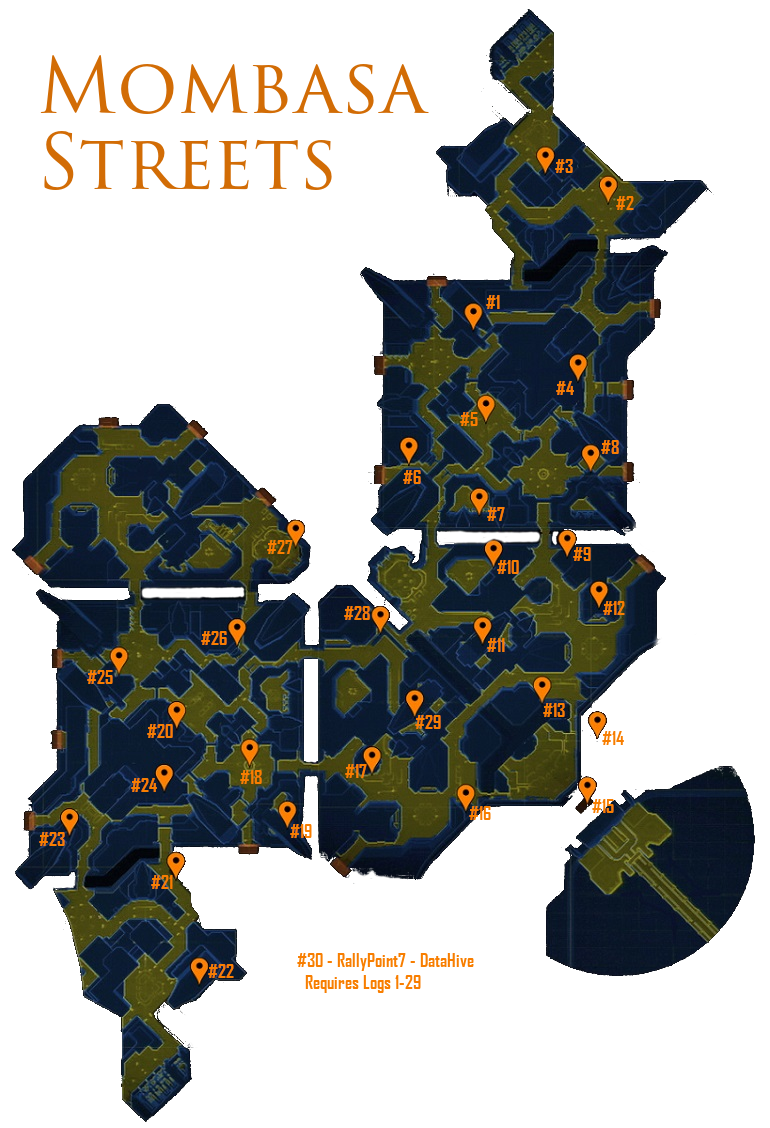
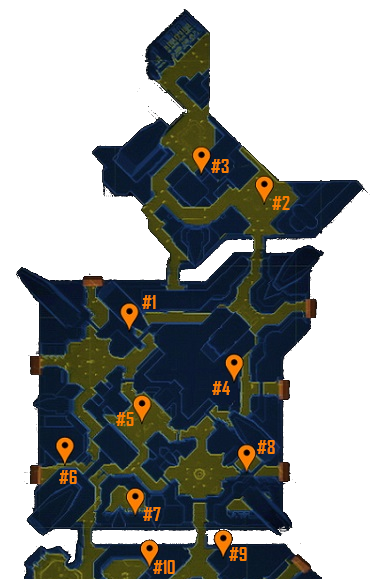
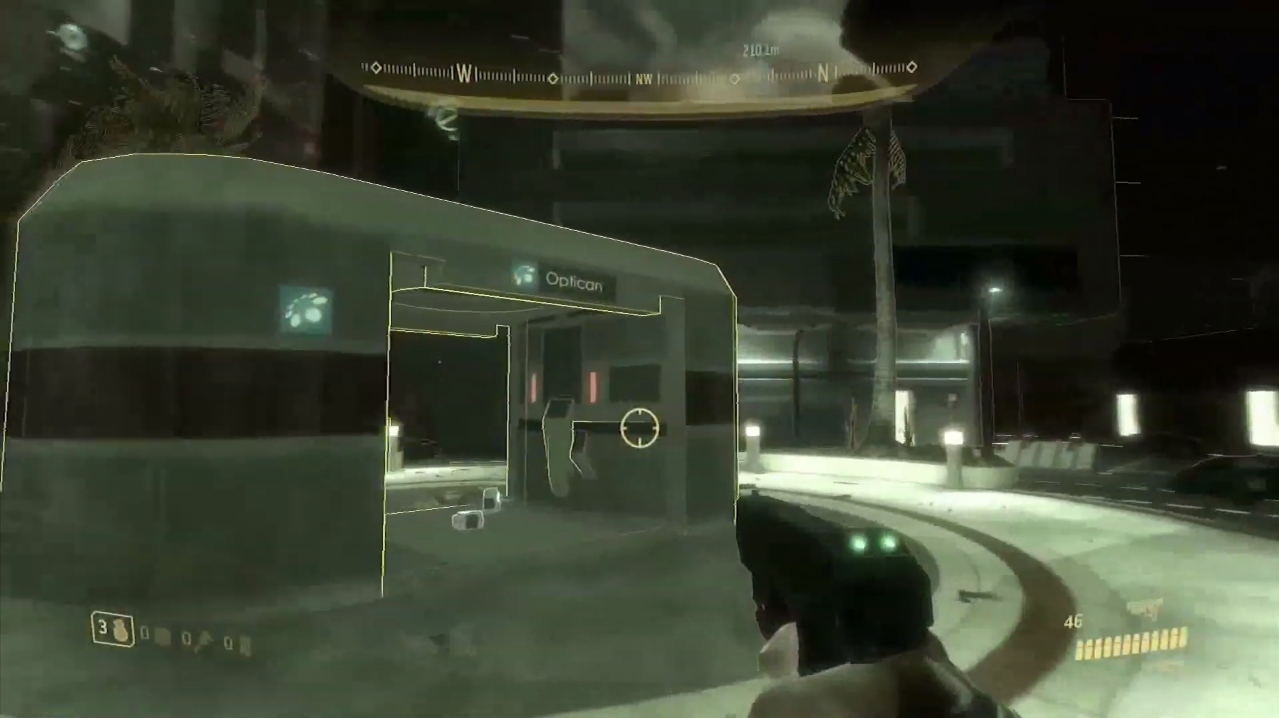
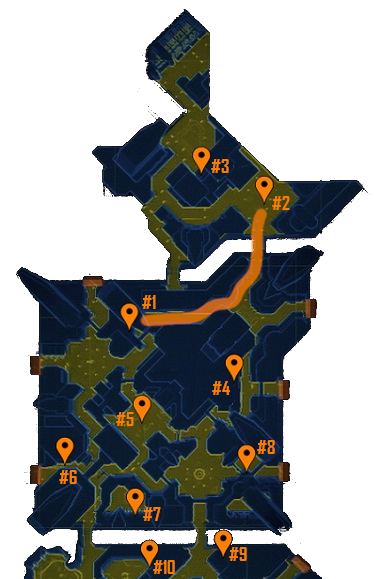
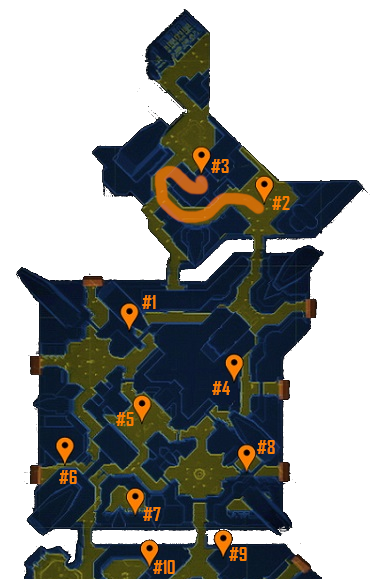
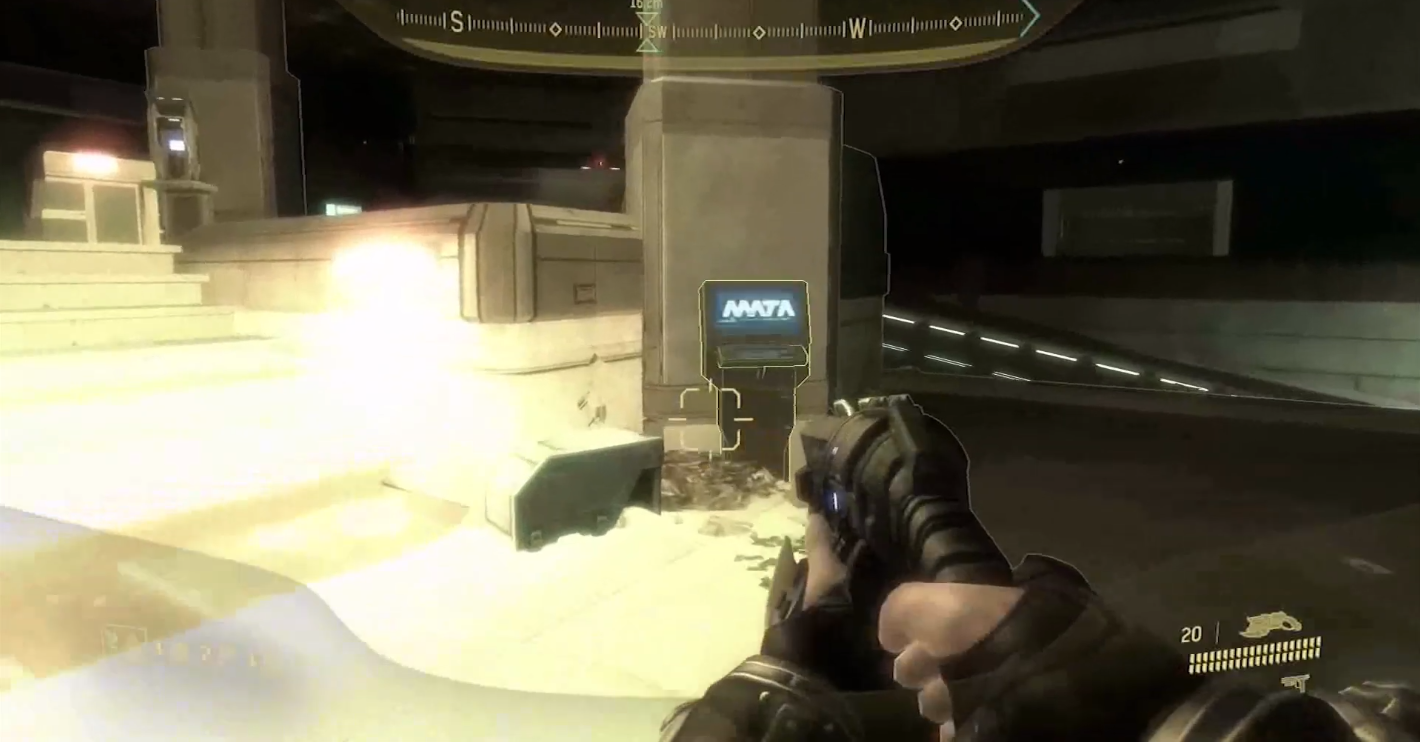
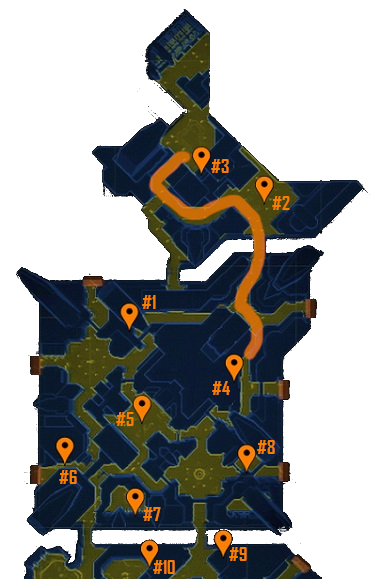
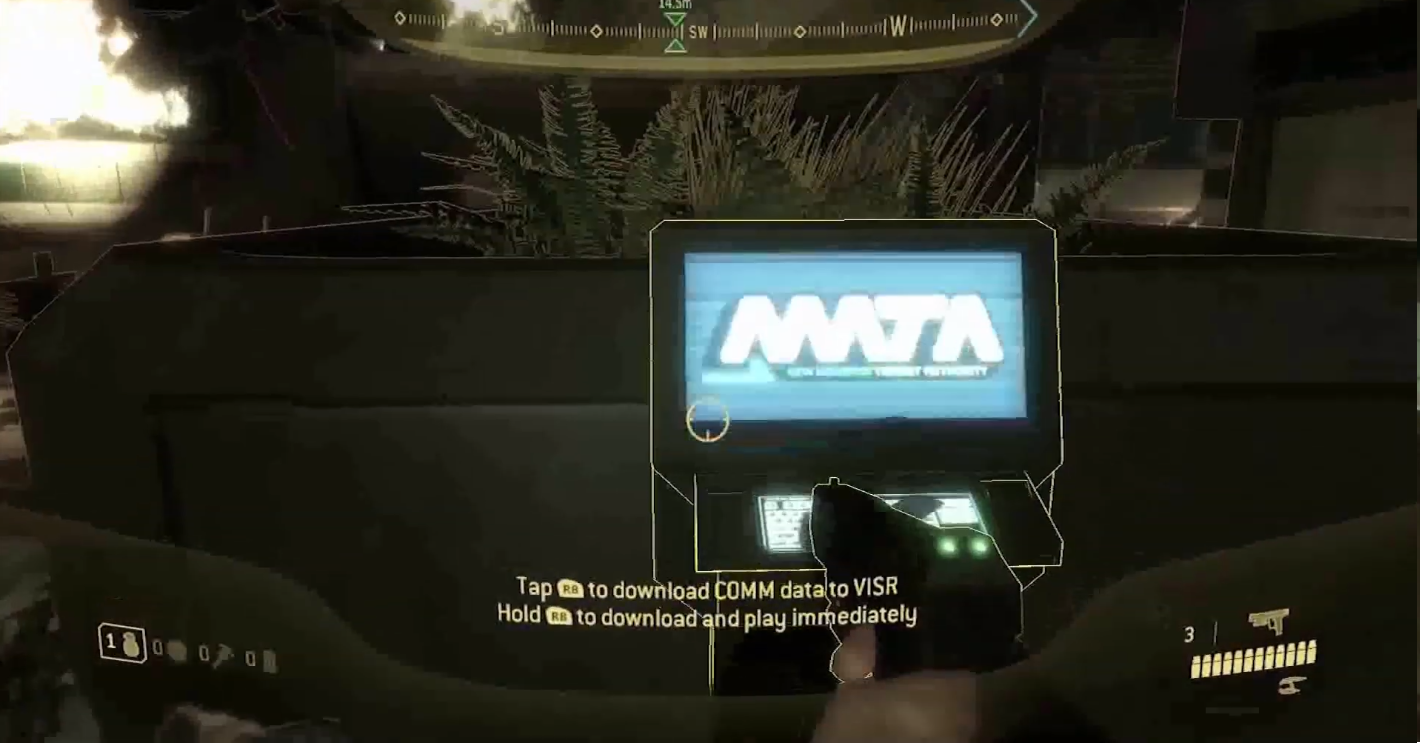
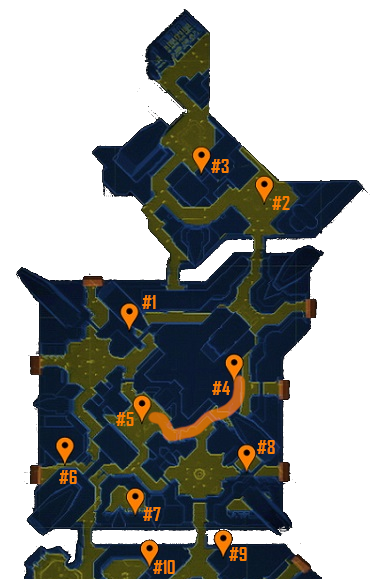
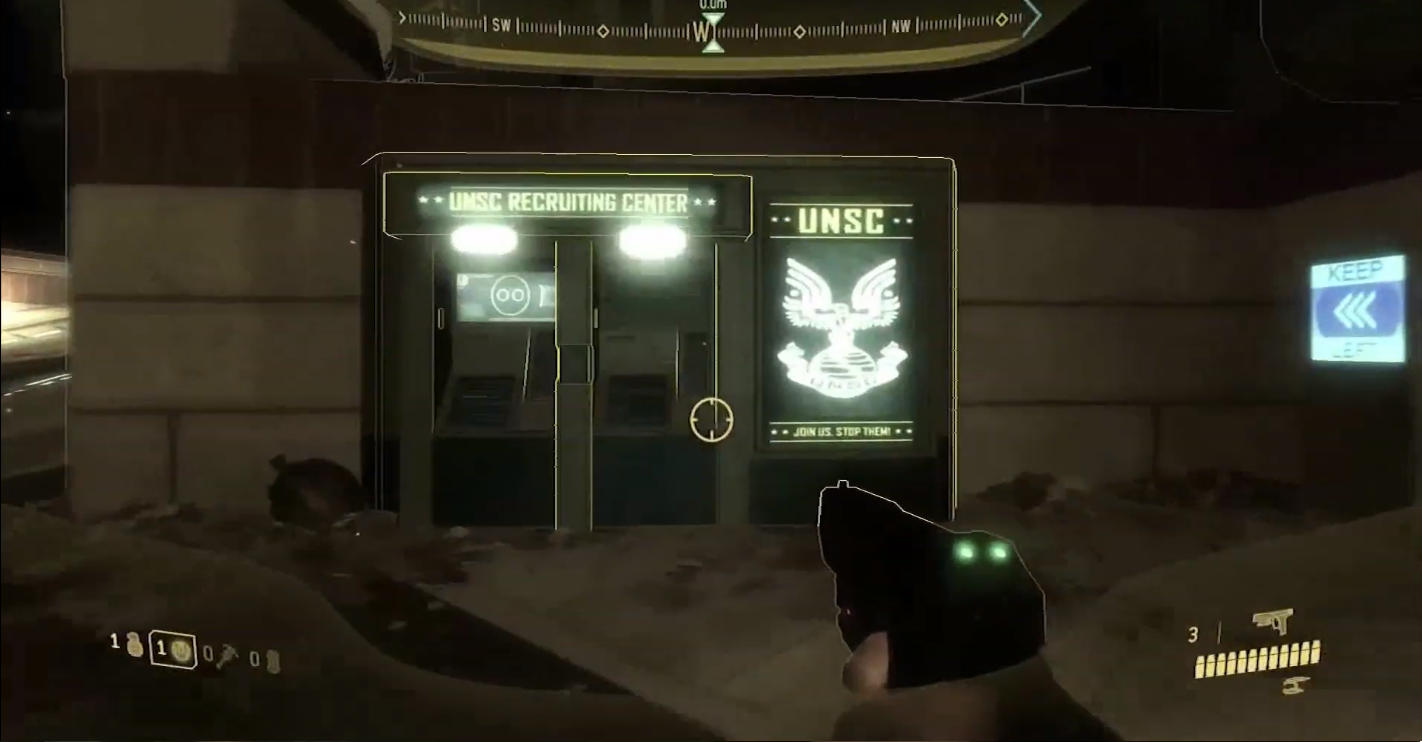
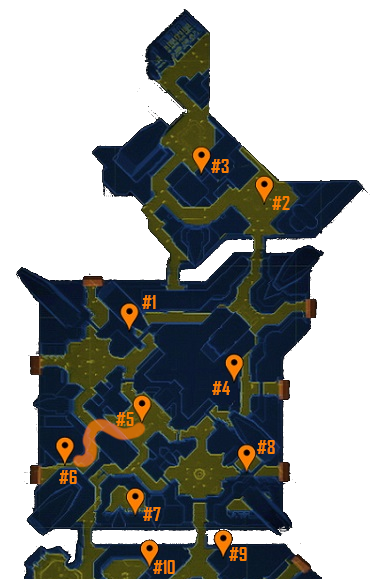
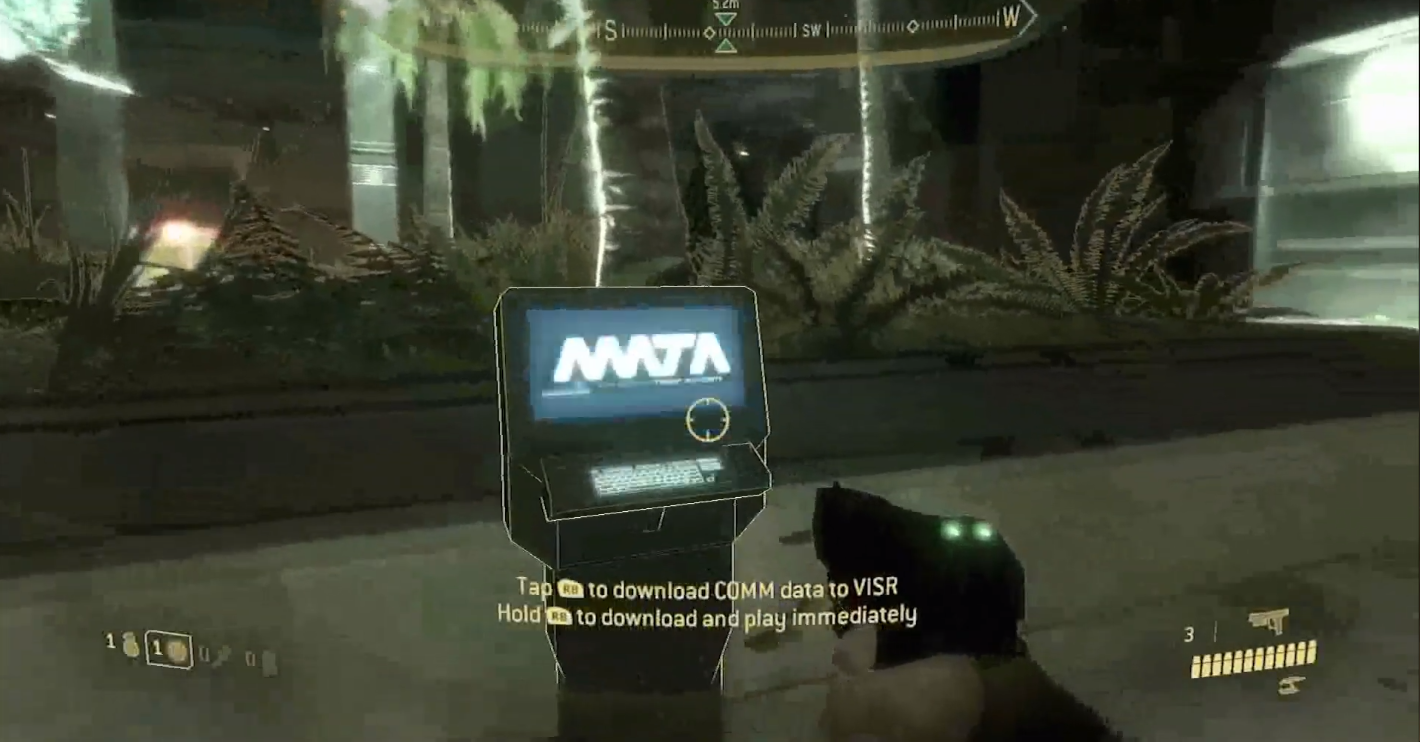
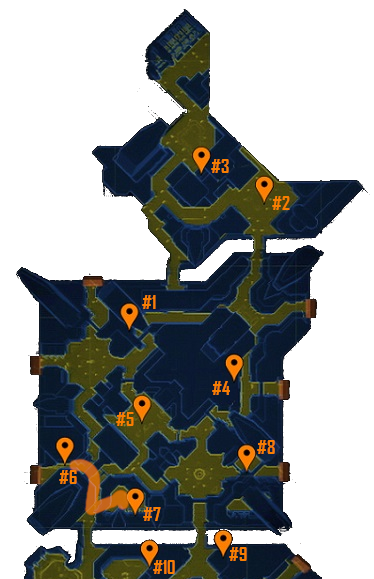
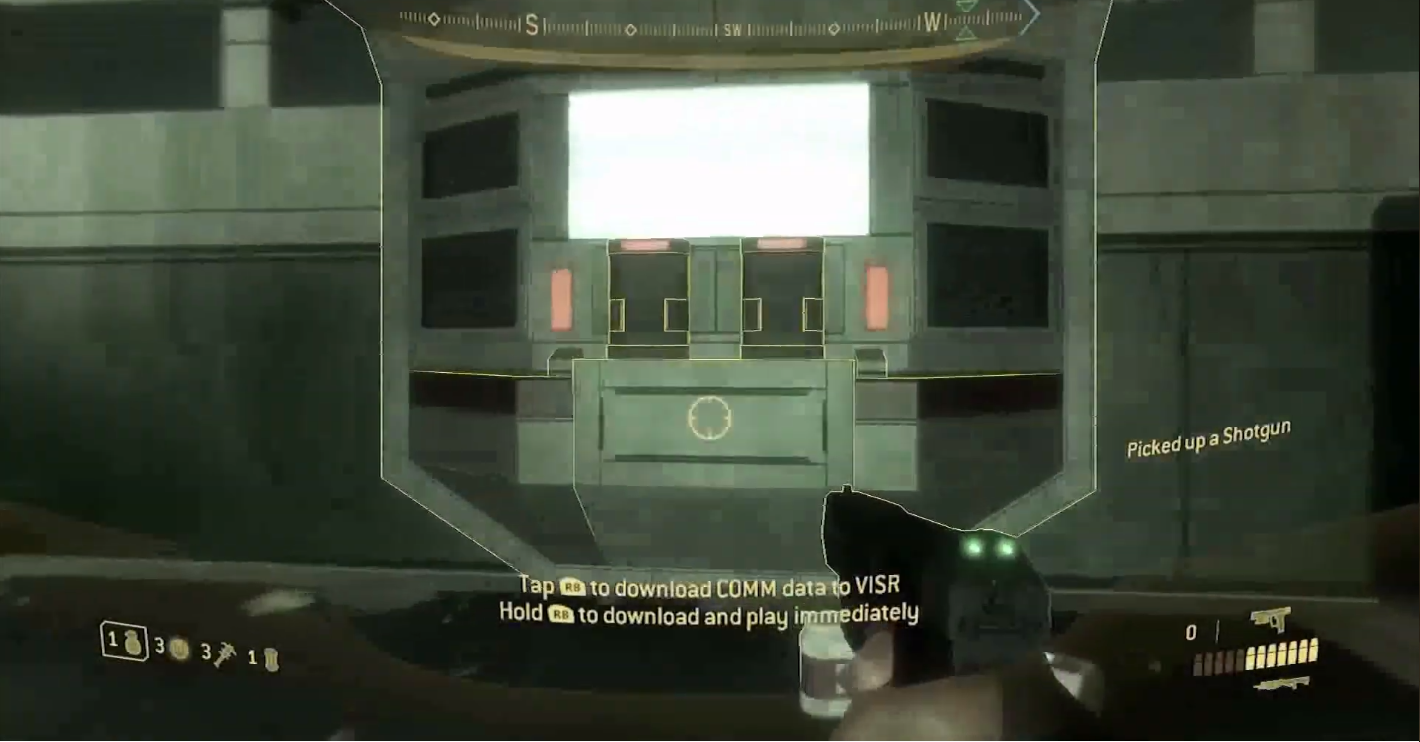
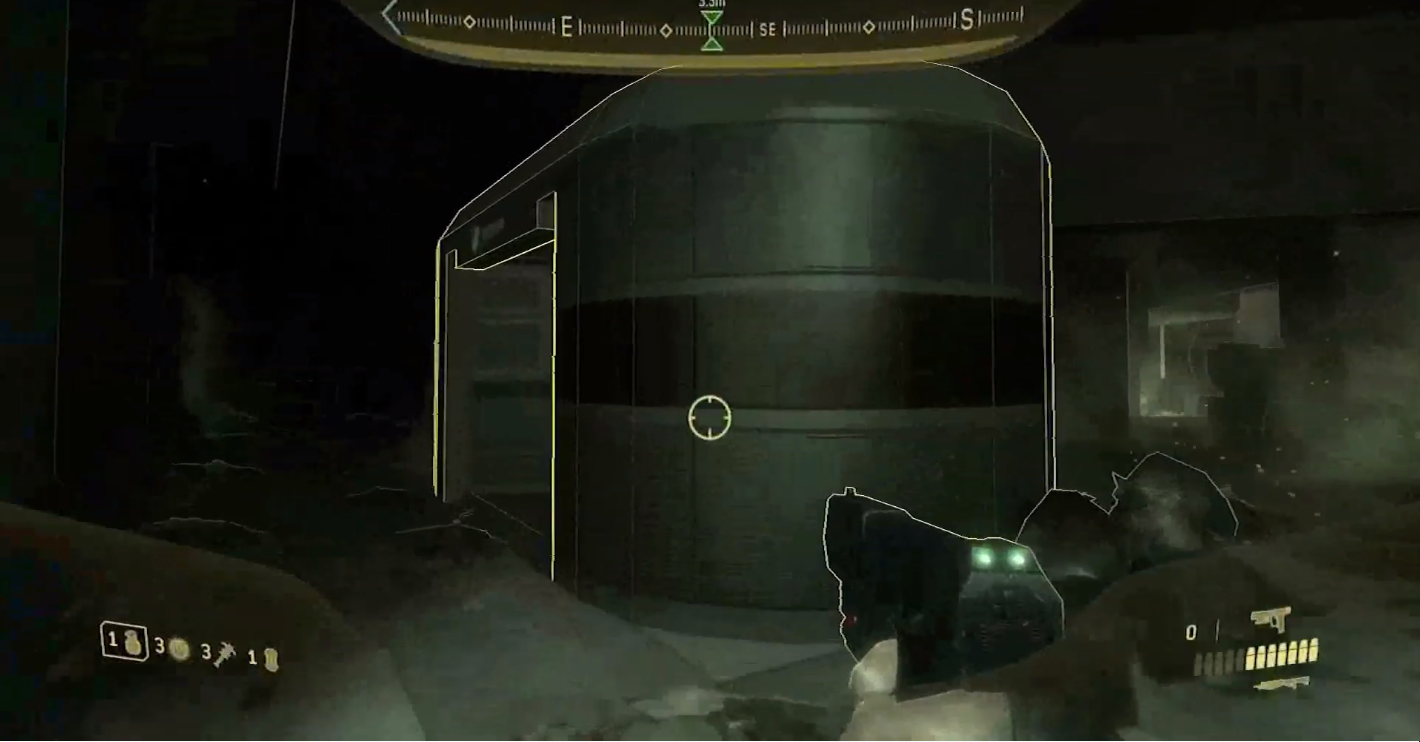
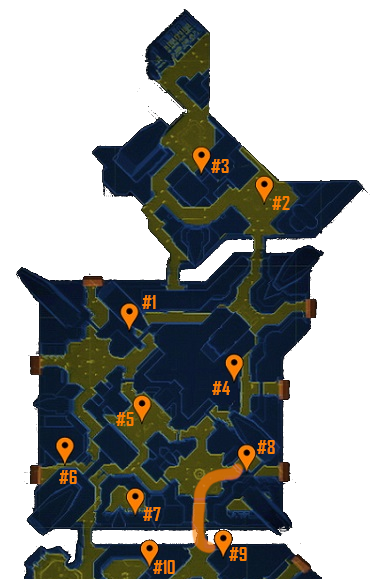
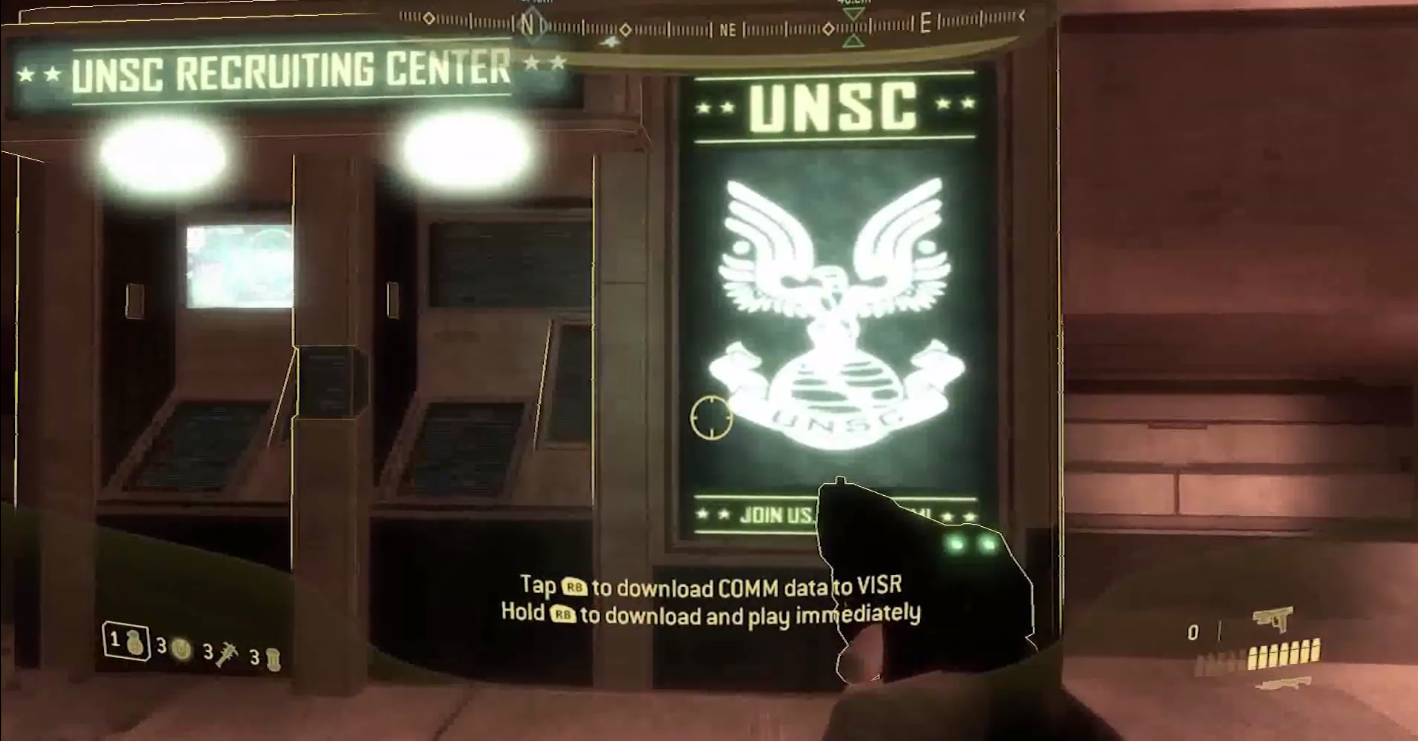
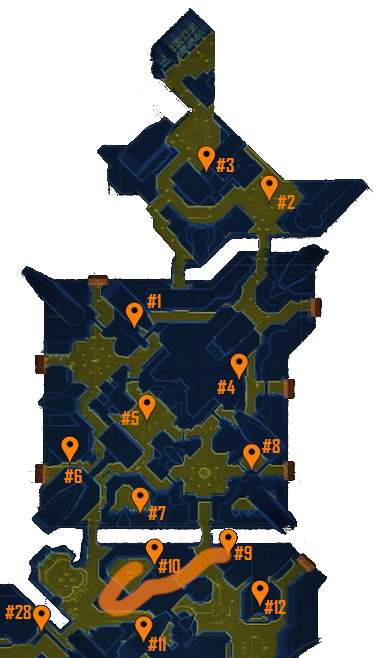
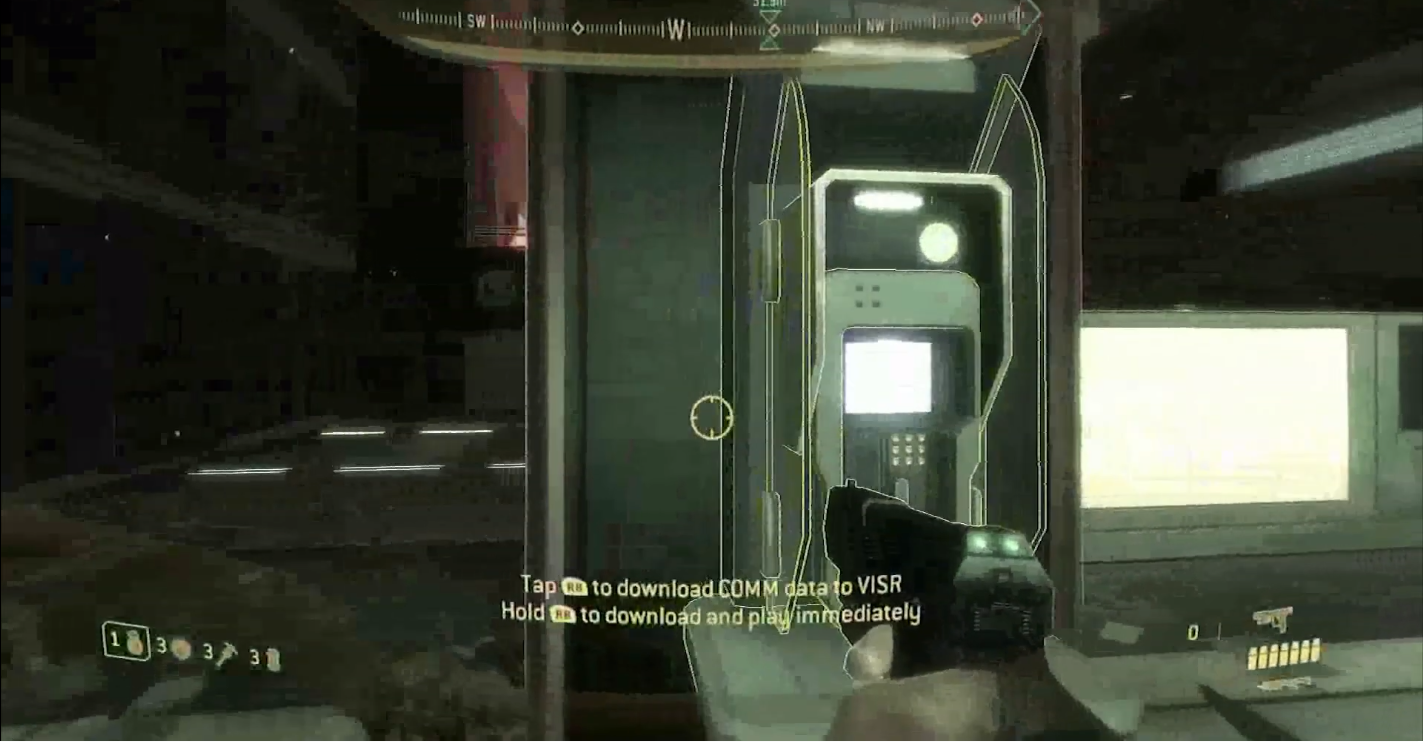
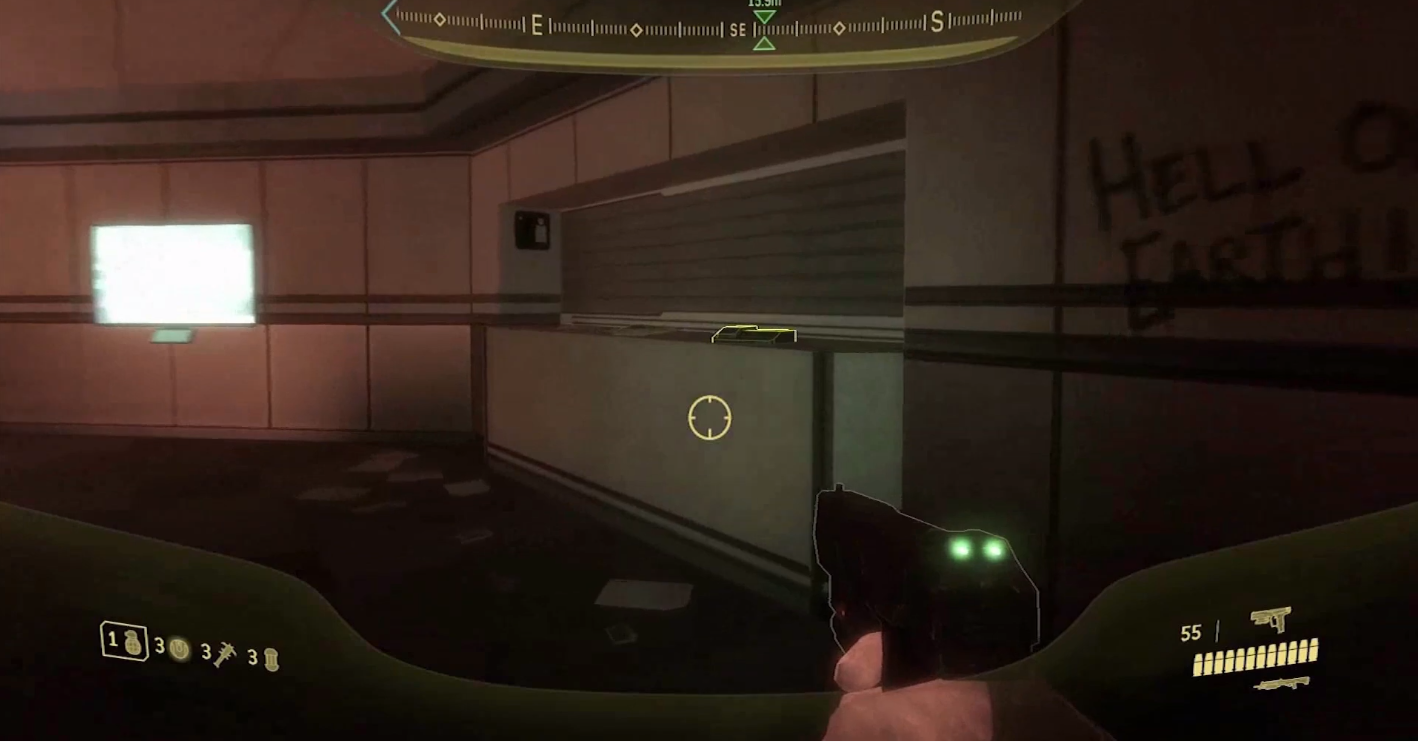
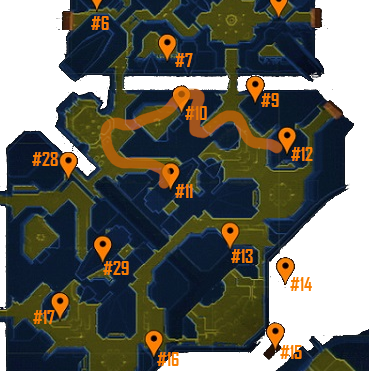
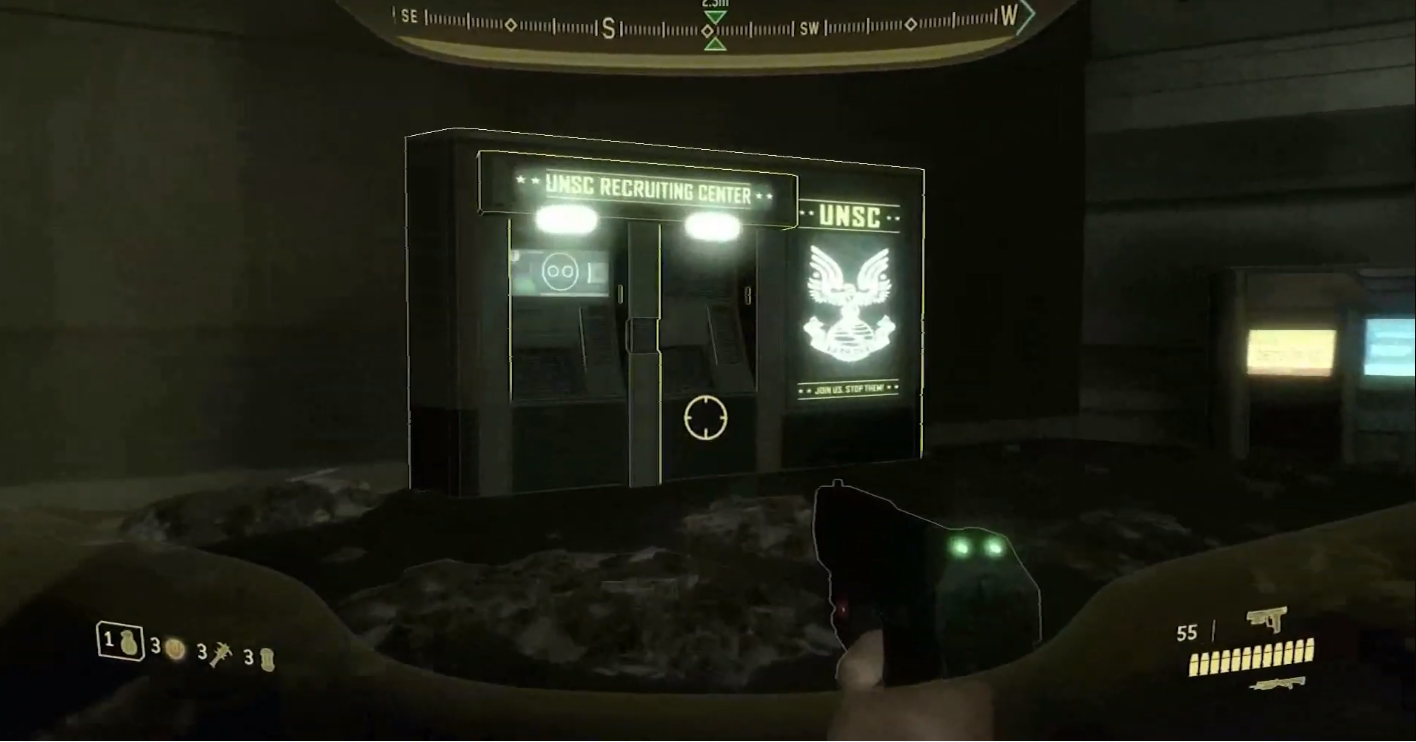
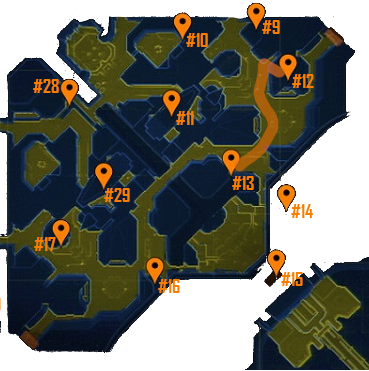
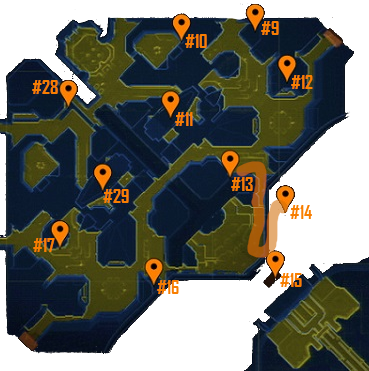
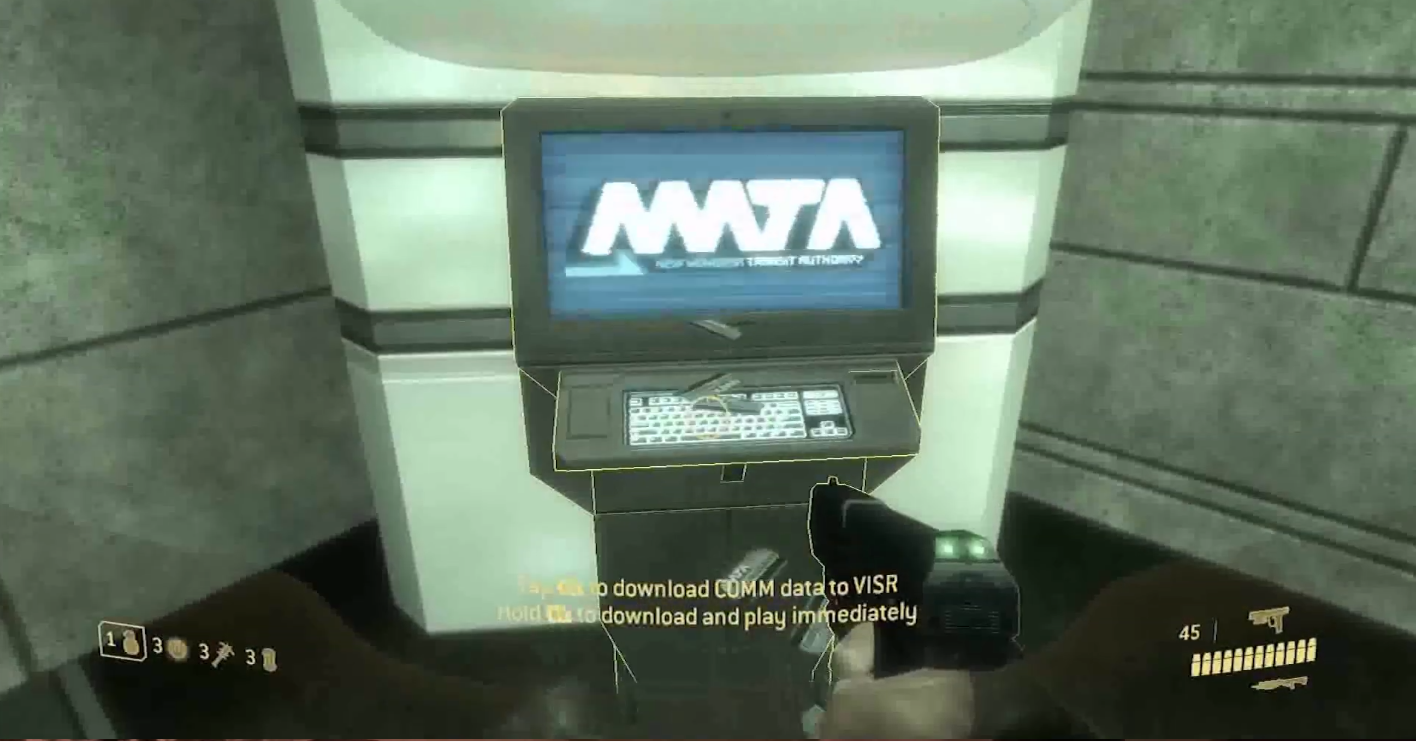
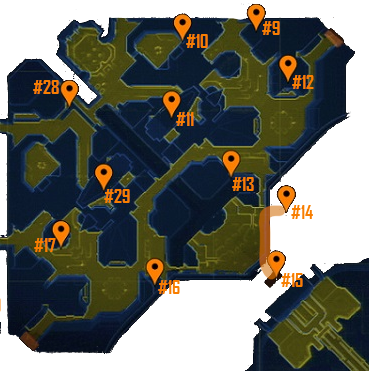
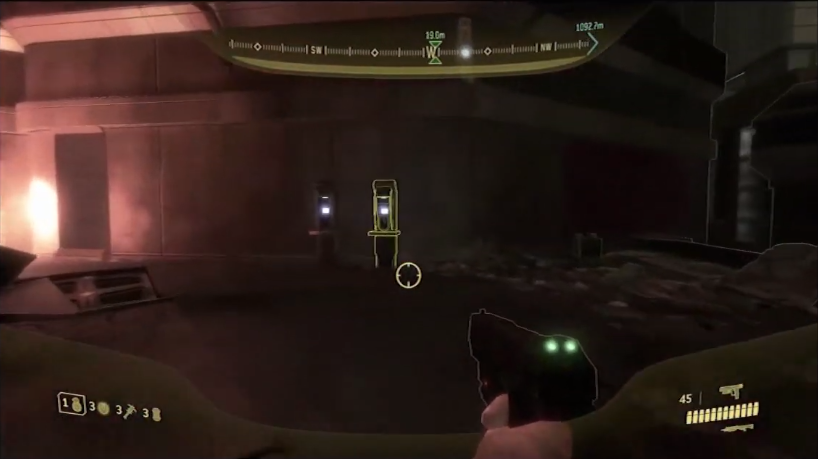
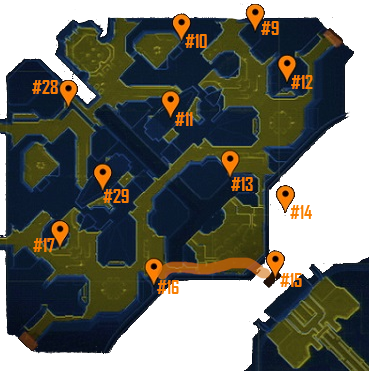
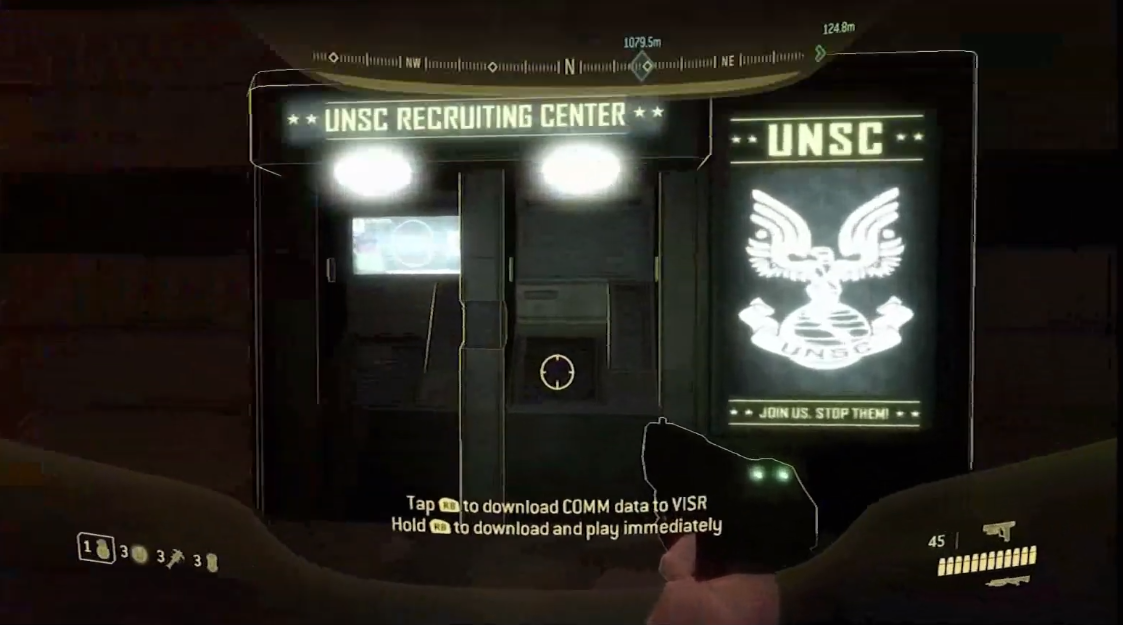
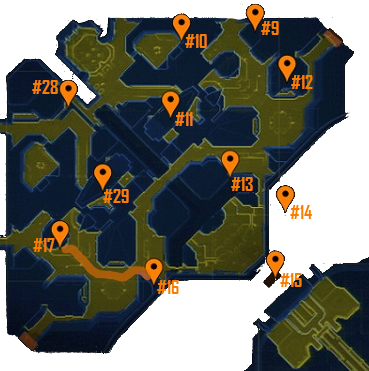
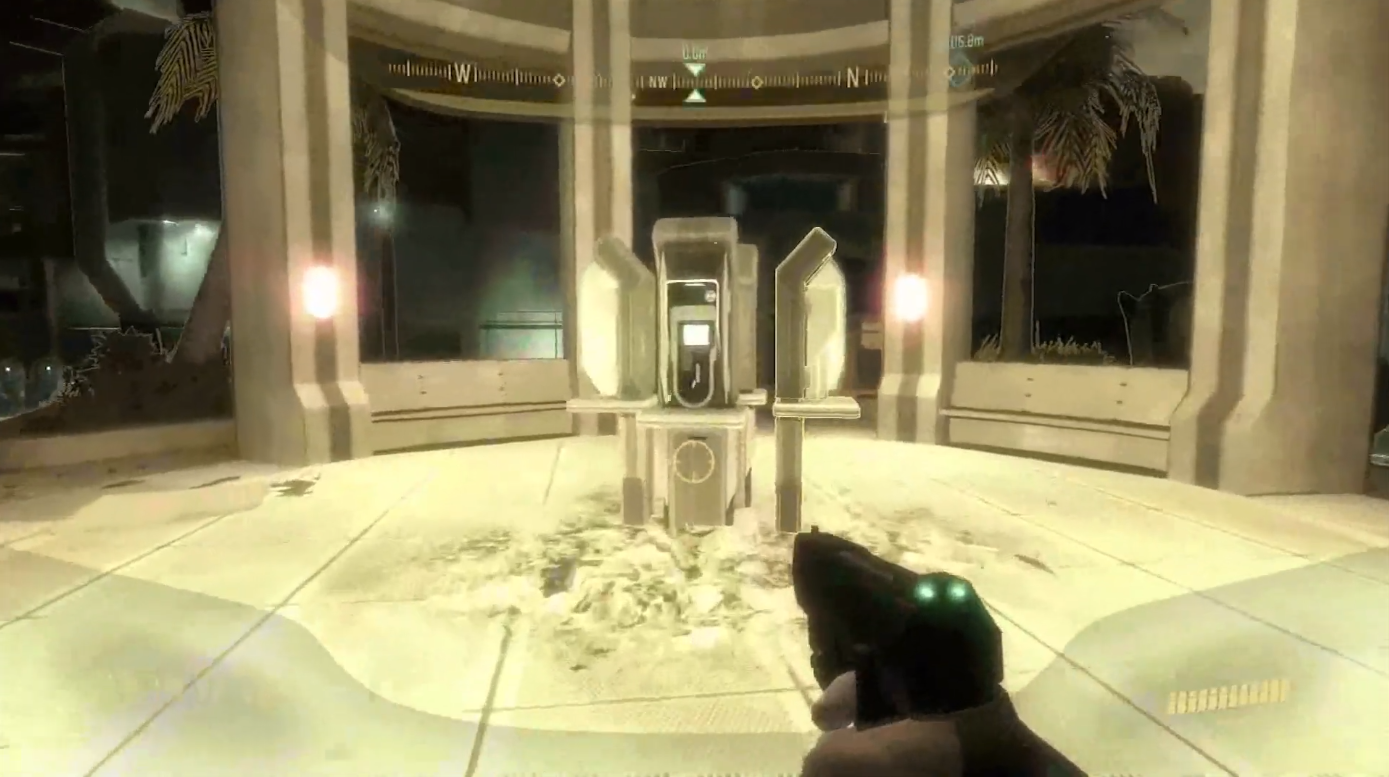
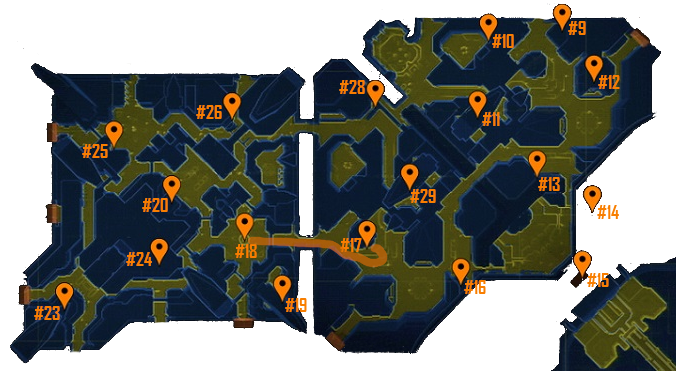
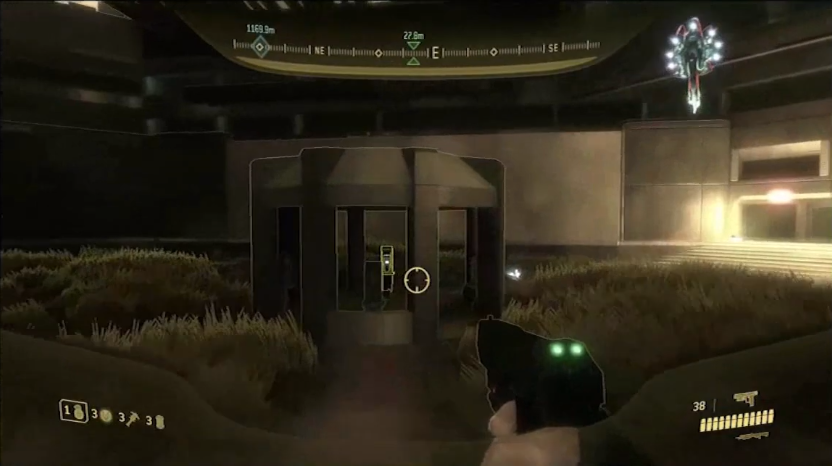
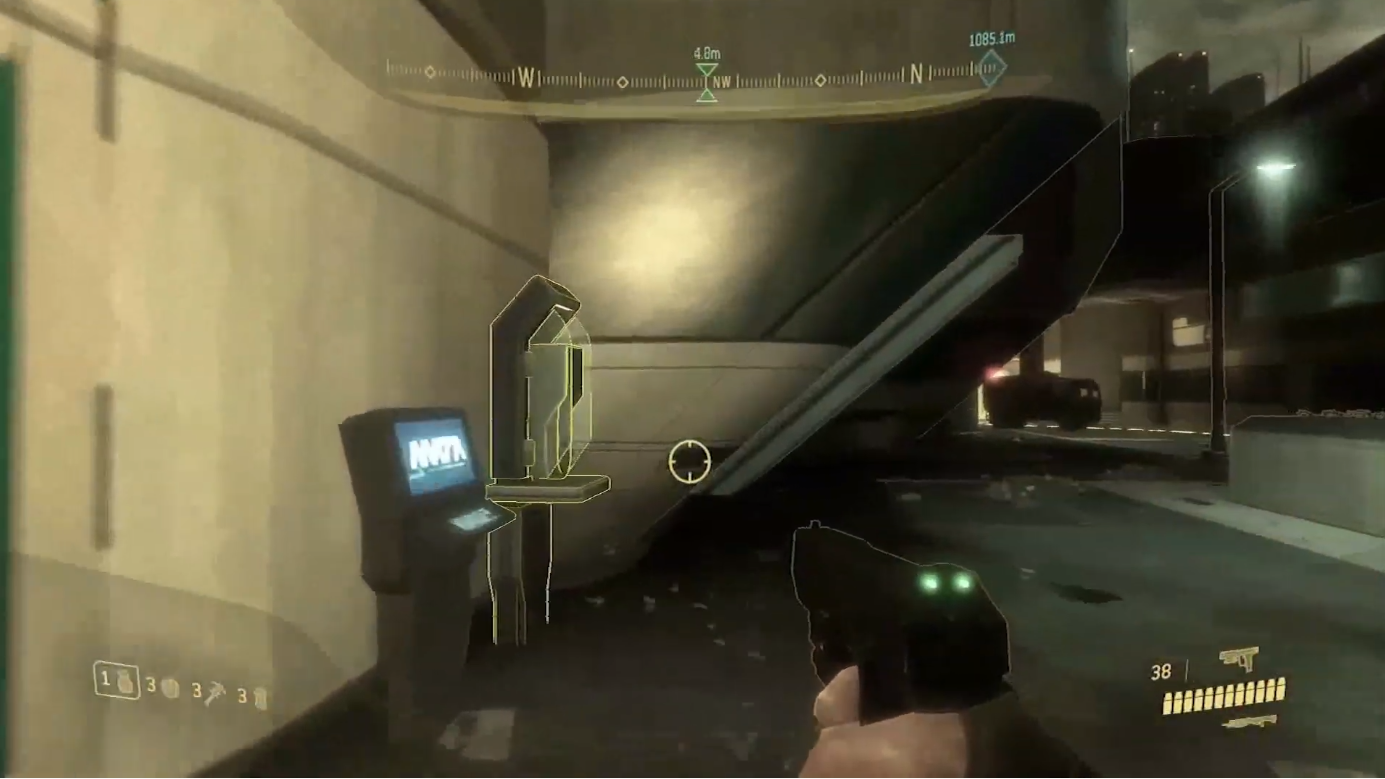
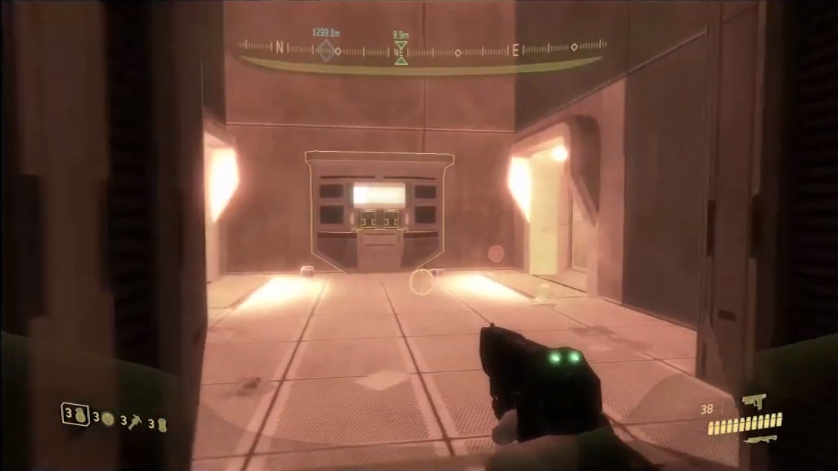
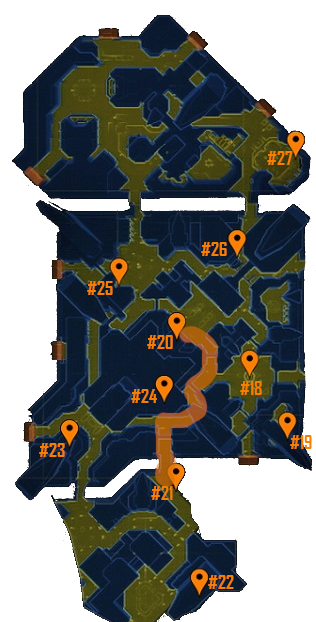
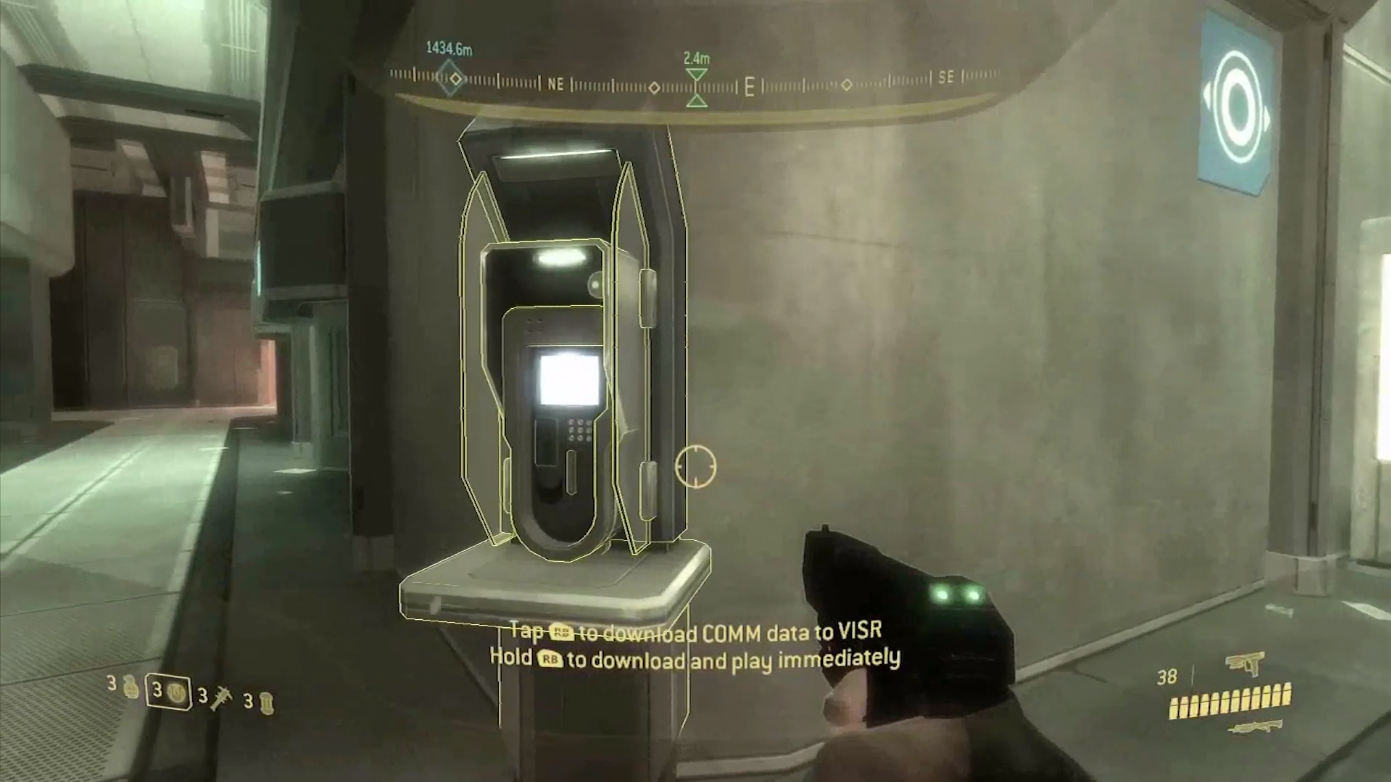
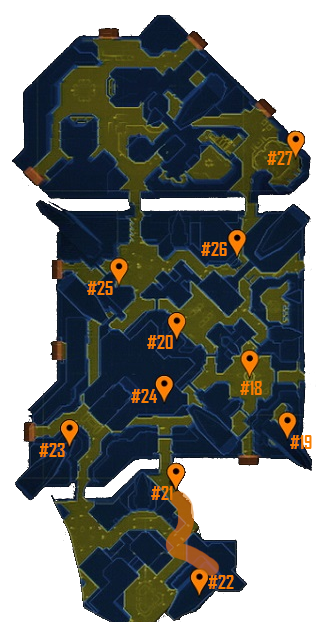
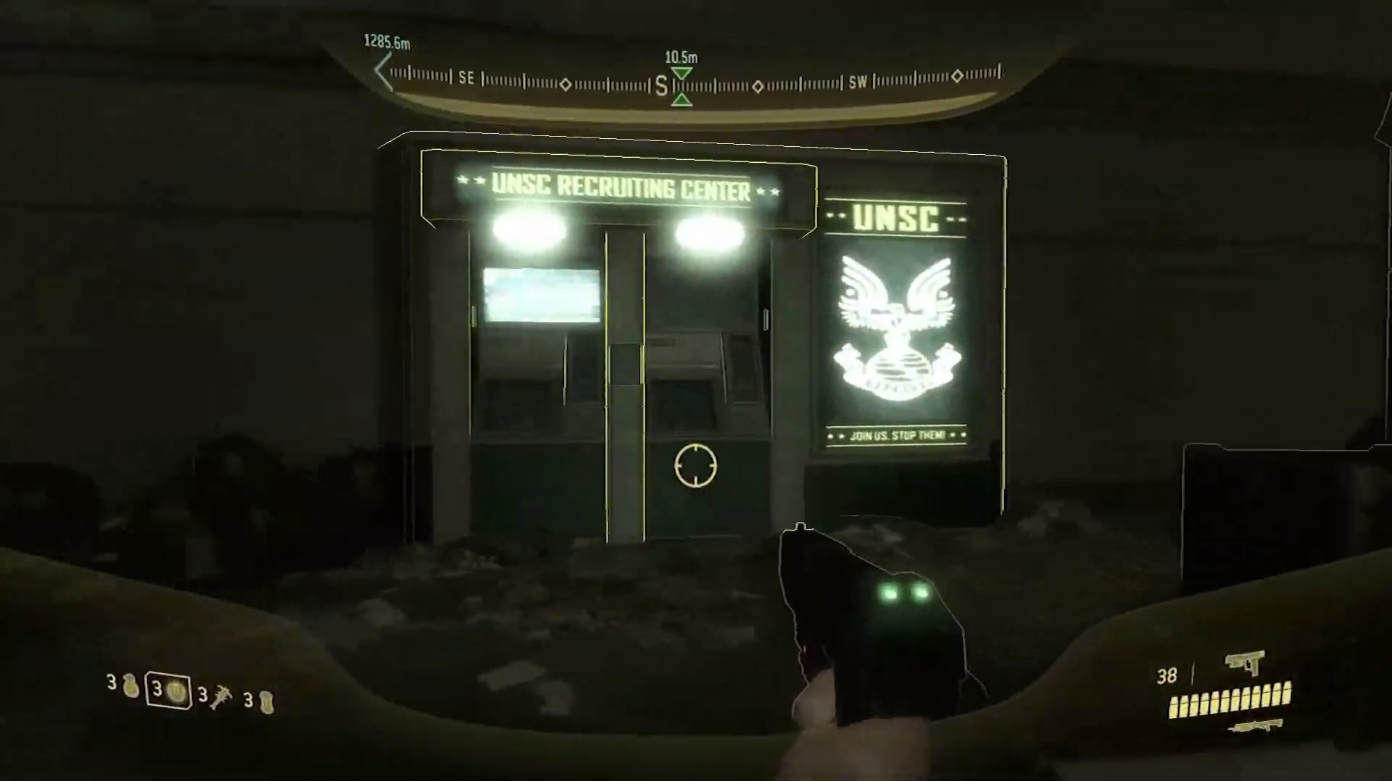
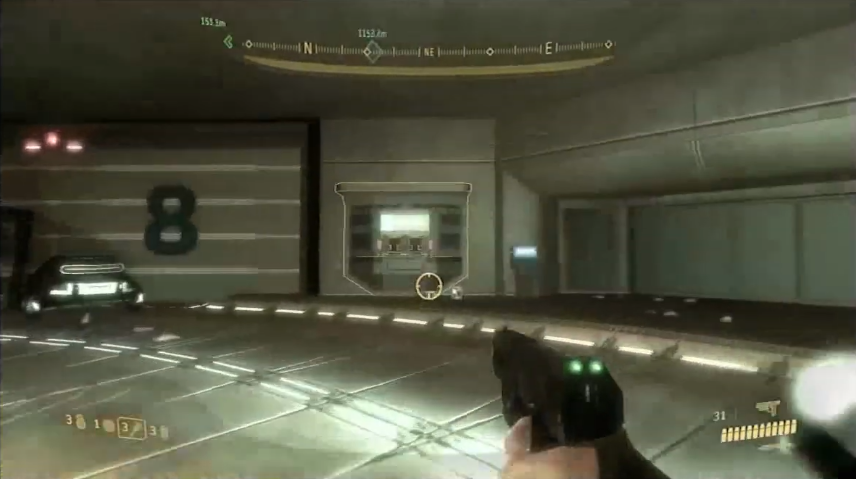
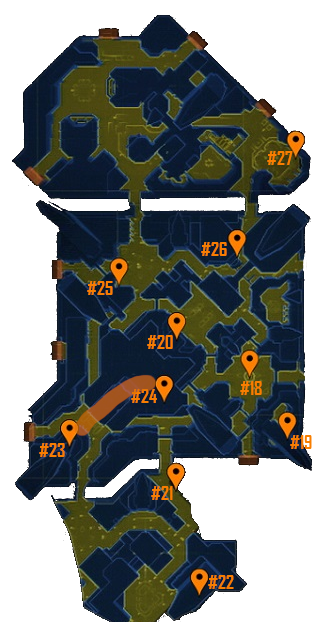
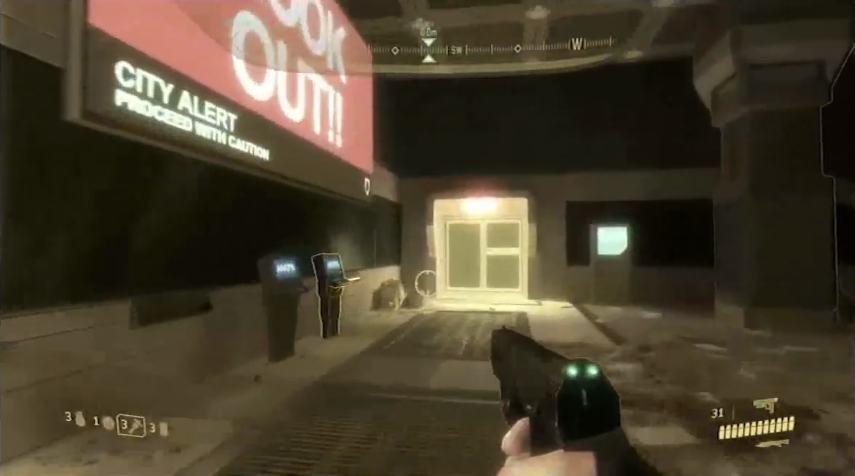
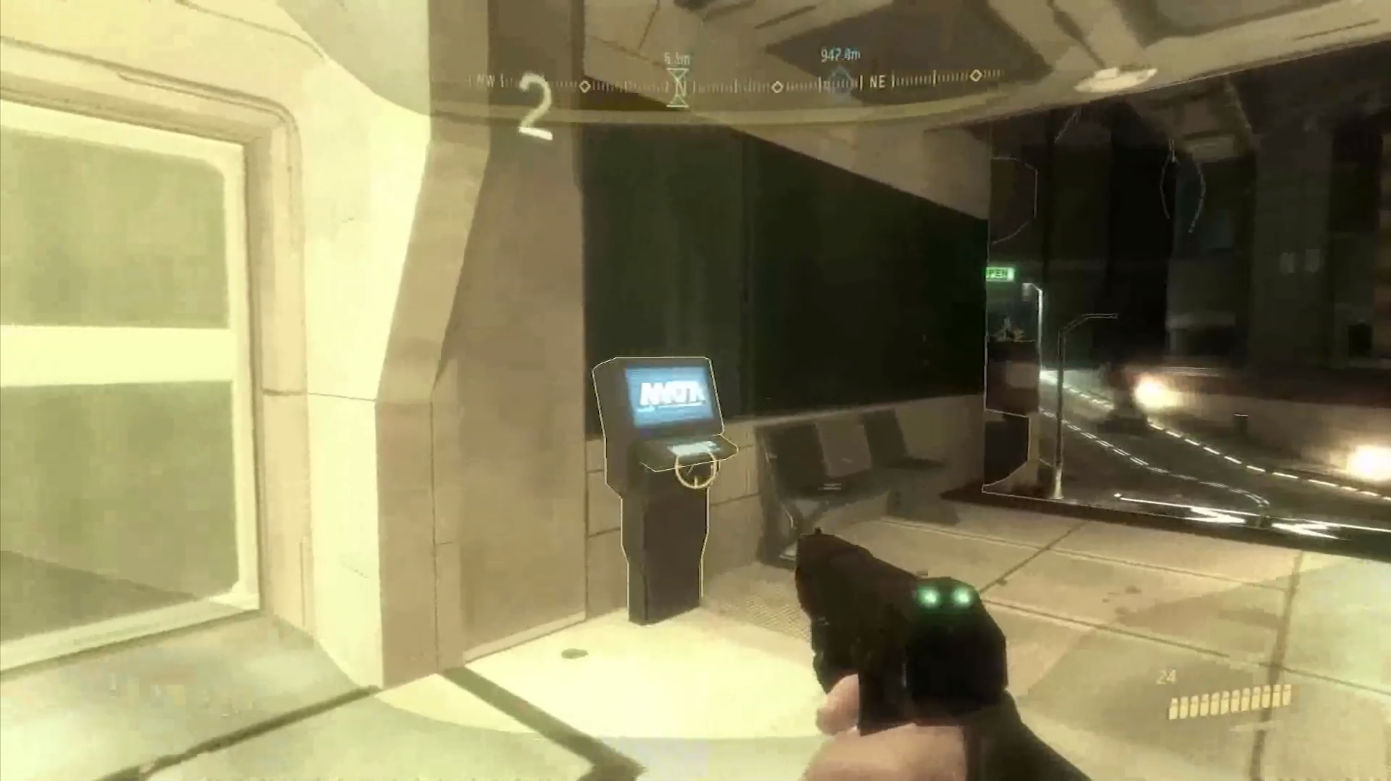
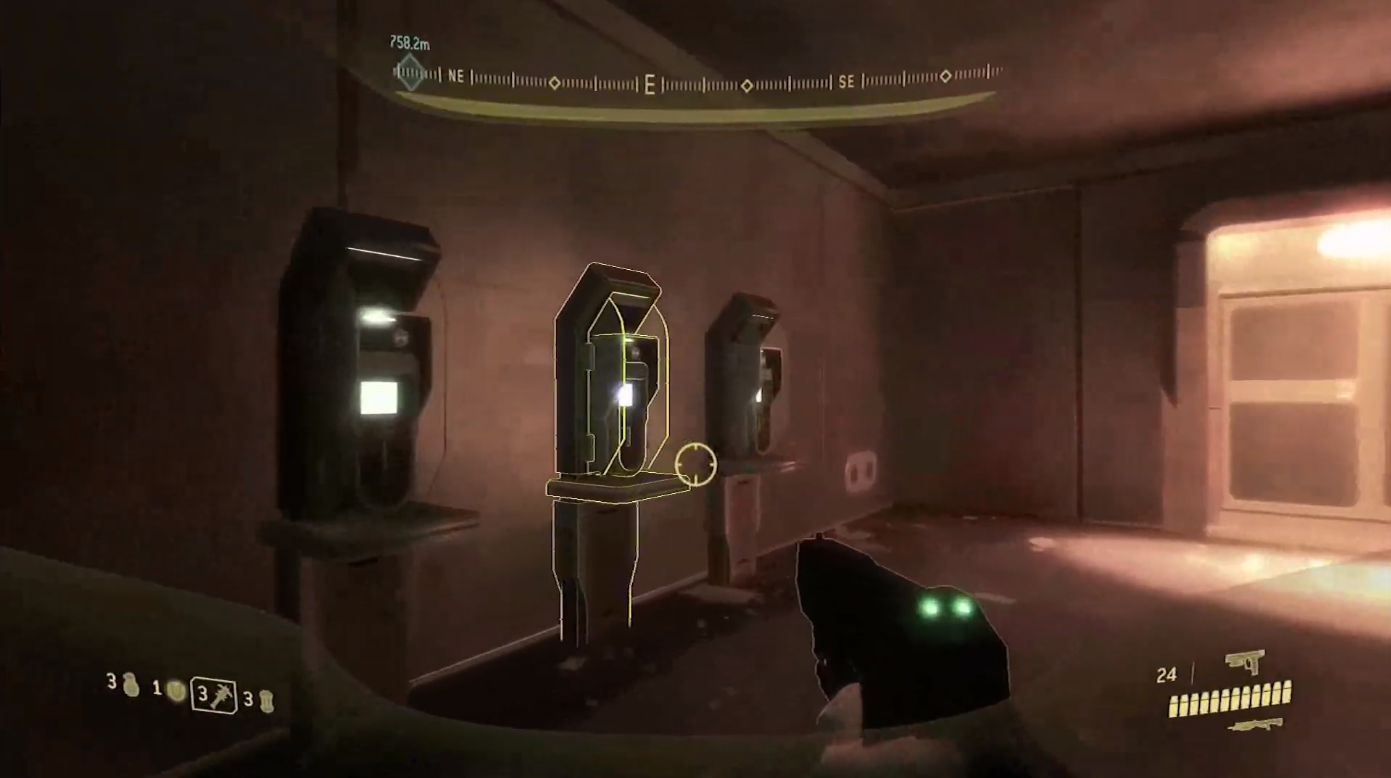
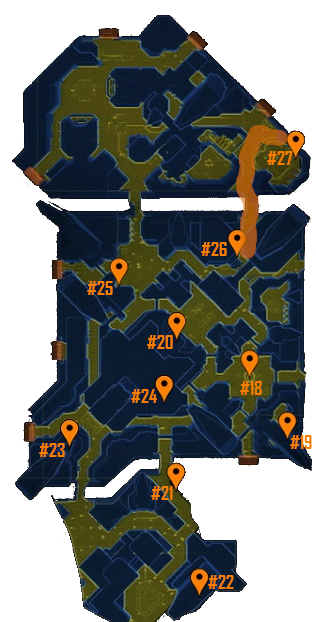
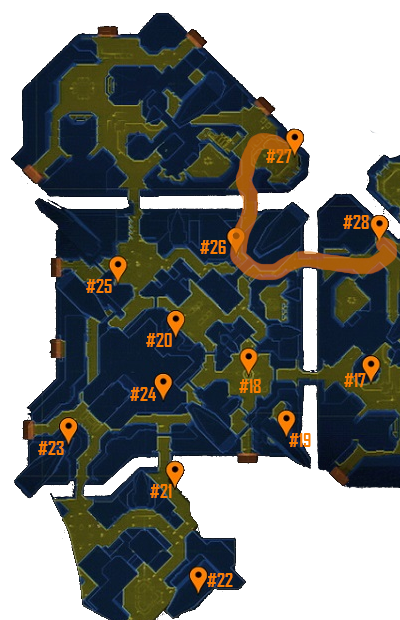
The best way we found in CO-OP is to start Rally Point 6 on Mombasa Streets, go around looking for the audio logs & keeping an eye out for opening Supply Caches after a certain amount of audiologs found, to get a mongouse to speed things up. (I don't know if it is a random spawn but I found one in the supply cache bottom of the map in the S-E)

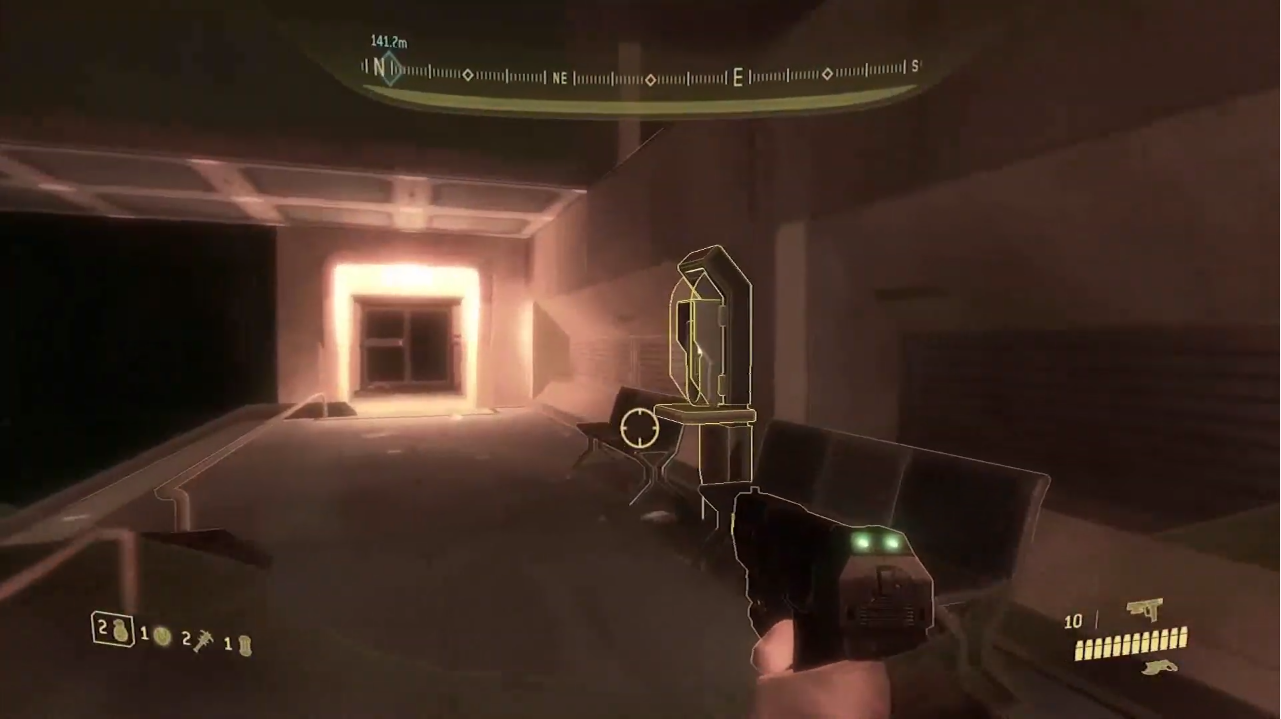
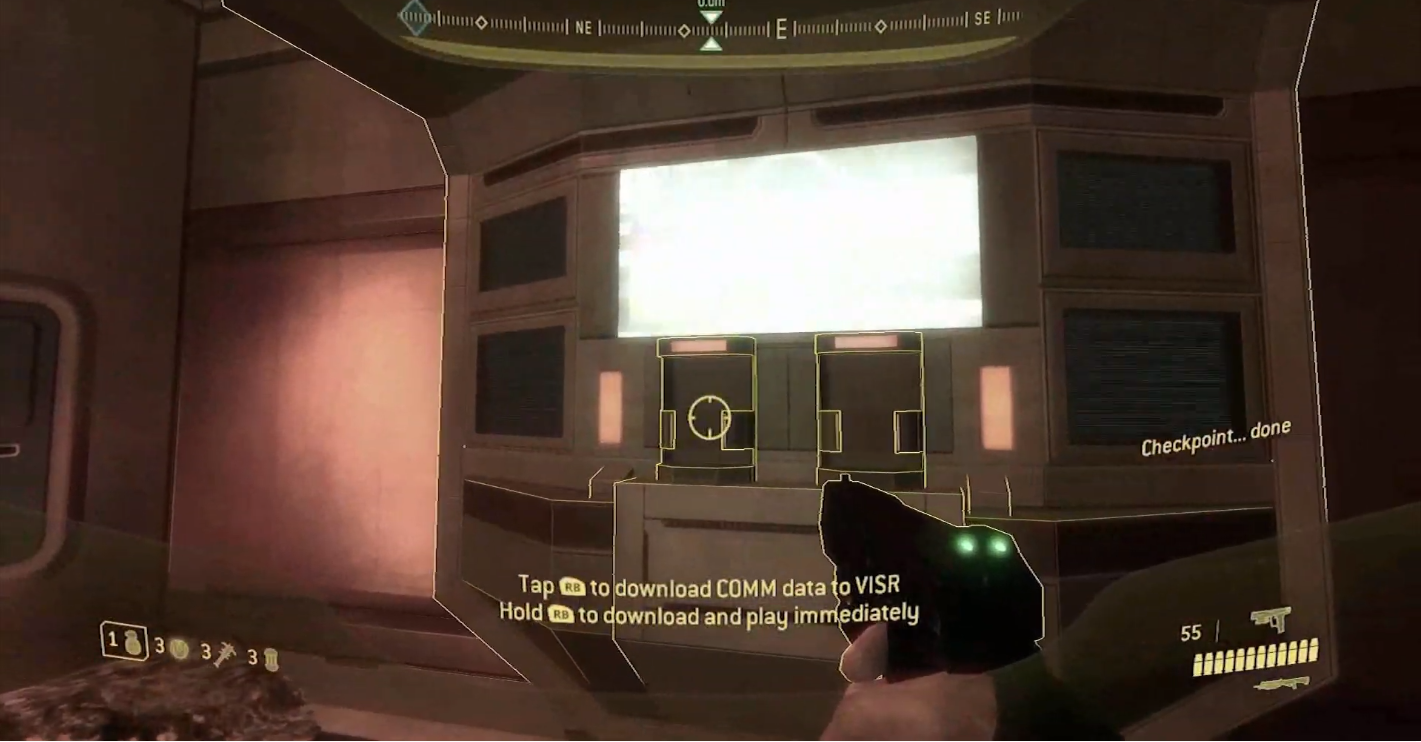
Find all 29 of the audio logs & then finish the mission by finding the rest of your squad at Kikowani Station, play through Kikowani Station, moving you on to the next level which is Data Hive to find the 30th Data Log. KEEP ON GOING UNTIL YOU ARRIVE AT DATA HIVE AND GET THE 30th LOG, DO NOT QUIT BEFOREHAND

DO NOT AT ANY POINT QUIT THE LEVEL VIA THE MENU OR ELSE ALL PROGRESS WILL BE LOST IN CO-OP! IT HAS TO BE DONE IN ONE SITTING.