Tainted Grail

Tainted Grail

87 ratings
A Beginners Guide to Avalon
By OlMaltelO
This is a Beginners guide to Tainted Grail: Conquest. This guide aims to present the basic game mechanics and give an introduction to how to approach the game, encounters and decks, as well as outline the basics of the classes. It will not teach how to build your character, as this is beyond the scope of this guide.
2
3
11
2
   
Award
Favorite
Favorited
Unfavorite
Introduction
Before reading on, I would like to mention that we have been buidling a great wiki, which contains most of the infomation you can find here + a lot more! :) if you are looking for anything thats missing here, head over there and you will likely find it!
Bring me to the wiki![taintedgrail-conquest.fandom.com]


Somewhat Up to date for V1.01a (apart from classes)

Tainted Grail: Conquest is a roguelike game, which means that with every run the character gets reset - this includes levels, items in inventory, runestones, passive abilities and cards. However, the game does save your progression, which will be explained further on in the guide. Only through experience and 'trial and error' it will be possible to master the game. Tainted Grail: Conquest offers different playstyles to approach, which the player needs to discover for himself to suit his preferences, hence this guide will only cover the basics of the classes.

First of all: You might die a lot, in the beginning - and later. It’s part of the roguelike experience so don’t feel bad if you die and have to restart. As with always in these kinds of games, don’t get attached to the current run. Just enjoy the stories and the fact you’ll be getting better at this game.
If you have difficulties, you can always resort to playing a few runs on "Easy Mode", found in the Main Menu. It offers the same experience with fewer enemies, a higher XP gain and -25% on all enemy stats. Additionally, all progression carries over between easy and regular mode.

Second: Experiment - for there are several ways on how to play Conquest. Try out new stuff! Yes, the chance of failure is there, but you might discover unexpected synergies between cards and passives, that you would have overlooked otherwise. And remember: It’s about the journey!
What’s it all about?
There are three factions in the game: The Children of Morrigan (Meele), The Moonring (Summoners) and Watchers of Tuathan(archers).
Each faction has a seperate pool of cards to choose from. Additionally, each faction has several classes, that have different starting decks, abilities (Ultimate as well as Passive bonus) and can acquire different passive skills.
The Ultimate is an ability that can be used once per round and as soon as enough charges are gained. Each class has its own way of gaining charges. Besides the active Ultimate ability, classes also have a Passive ability. More info on what each class does can be found in the section: Introduction to Classes.

The main goal in this game is to rebuild your village by gathering resources and rescueing people in the surrounding area that may settle in your village and aid you by offering their services. This is achieved by interacting with non-hostile NPC’s that you might come across or fighting back hostile encounters in order to gain experience and collect resources. Most collected items will disappear upon death of your character (or victory), including wealth, but a few things will always carry over into your next run (on the same saveslot):
  • Wyrdstones & other permanent currencies
  • Quest items

Furthermore, any upgrades or unlocks related to the village or quest states will remain.

By earning XP your character will level up to a maximum level of 20, which will award you variable rewards that may be skipped:
  • Every Level: Choose one out of three cards to add to your deck - this may be rerolled for 25 wealth (doubling cost every time you use it) to add 2 different cards.
  • Every 2nd Level: Choose one out of three passive skills.
  • Every 10th Level: Choose one out of three rune reforges (read: Ultimate ability upgrades)


At the start of the game there will be a single path available, commonly known as Tier 1, where several hostile and non-hostile encounters await. A red-dotted line on the map will lead to the boss, whose perish will unlock a new path in the village, leading to Tier 2. As the difficulty significantly increasesTier 2, fights should be taken with great precaution (See Choosing your fights). After killing the boss of Tier 2, a path to Tier 3 will be opened. After defeating the third boss, the final boss can be found on a new, short path, leading from the village. After this final fight the run ends and you will be rewarded with new faction cards, passive skills for your played Class/Rune and perhaps an additional class or cosmetic, either one for each 20K of score points collected accumulatively. Furthermore, you will unlock a the next [difficulty level, which may be set during Class selection.
Difficulty will initially control the composition of enemy groups and enemies attack patterns, later different variables of the game, such as buffing enemies health, armor and damage, adding new behaviour or enemies, while rewarding you with more currency gain and endgame score.
The Wyrdness
The woods surrounding the ruins of your village are infested by the Wyrdness, a mysterious fog of pure change that bends and deforms everything it touches. The Wyrdness is only repelled by the Menhir in the center of your village, ancient stones, scattered around the wilderness, known as milestones, and the ominous Wyrdcandles that may be found on Avalon.

During your game you will frequently come across Milestones. These stones give you 3 distinct options:
1) Activating them in order to permanently increase the repelling feature of the Milestone, clearing a much larger area from Wyrdness and potentially saving you from using a few candles.
2) Removing a Candle from the Milestone - this will add 1 candle to your inventory, but remove the Milestone.
3) Get a temporary bonus (e.g. +dmg, +armor) for the next fight, or a slight healing.

Wyrdcandles are items that burn for a limited amount of time, measured in turns [NB: not the same as combat turn!]. Outside of combat, turns are not tied to the time passed, but rather the distance travelled - this means that a candle won't run out while you’re standing still, so take your time to figure out where to go, what the shortest route is and most importantly: go slow! Moving too fast will trigger encounters, before you even will be able to see them. These artifacts are somewhat scarce, so do not waste them on travelling from one place to another, e.g. back to the village.
Another important note is that the Candles won't burn down, while you are in the range of an active Menhir or Milestone, so use that to your advantage!

The Wyrdness mechanic
The immediate main advantage of repelling the Wyrdness is that you will cartograph the paths of the surroundings, but there is more to it: Staying in wyrdness may trigger certain event dialogs, when Quests ask you to find certain people or creatures in the wyrdness, or certain encounters.
The Burnlevel of your Candle determines the radius of the Wyrdness repelling effect and is separated into 6 phases:
  • Burnlevel: Ultra - "Wyrdcandle's flame is a beacon repelling Wyrdness and granting you protection."
  • Burnlevel: Very High - "Wyrdcandle is blazing through the fog. The light shelters you from Wyrdness."
  • Burnlevel: High - "Wyrcandle is burning Bright. Wyrdness is repelled completely."
  • Burnlevel: Medium - "Wyrdcandle's flame is getting weaker. Wyrdness is trying to reach you."
  • Burnlevel: Low - "Wyrdcandle is fading. Wyrdness is slowly reaching you and twisting your mind."
  • Burnlevel: None - "Wyrdcandle is out. Wyrdness is everywhere and with it come unexpected dangers."
Furthermore, does the Burnlevel determine what bonus/penalty you might get during combat, in the form of an extra card (Tainted Force) that might be added to your hand, occasionally. These cards come with different energy costs, effects that trigger, if you play them and an effect that triggers if you choose not to play it (if it enters the discard pile). General rule is that the Tainted Force cards will cost less energy and have more benefitial effects on high burn levels, while they might have high costs, debuff or penalties on low burnlevels. Examples of these cards might be:
  • Burnlevel: Ultra - (0Energy) Deal 1 Hit for 100%dmg and reduce Armor by 25.
    If discarded: Draw 1 more cardnext turn, its cost is reduced to 0.
  • Burnlevel: Very High - (0Energy) Deal 1 Hit for 100%dmg.
    If discarded: Duplicated in discard pile.
  • Burnlevel: High - (1Energy) Deal 1 Hit for 100%dmg.
    If discarded: Duplicated in discard pile.
  • Burnlevel: Medium - (1Energy) Gain 10 Barrier.
    If discarded: 2 Random enemies will gain 10 Barrier.
  • Burnlevel: Low - (1Energy) Deal 1 Hit for 50%dmg.
    If discarded: Draw 1 card less next turn.
  • Burnlevel: None - (1Energy) Decrease your dmg by 20% UEOC (until end of combat).
    If discarded: Draw 3 cards less next turn.
Getting started
When starting the game for the first time, after the first few tries with the initial class, you should try out the different factions and classes, as you unlock them, to find out which one suits your playstyle the most. Once you get a good feeling for the different classes you might want to focus on a single class to get a better overview of the specific cards and passives this class offers. Some cards will work better with certain classes and builds, and worse with others - we will approach this in the introduction to Classes.

You should try choosing different passives and cards and explore how you can combine them in order to identify combinations that create synergy and may lead to a viable build. It might help not to force your character into “the one build” you just have in mind, but rather determine which builds are possible with the cards you are dealt - and not choosing any card is a viable option in order to prevent cluttering of your deck with useless cards.

Do not necessarily expect to survive too long during this phase, but use the time to get into another important aspect of the game: the enemies and how to choose your fights.
Choosing your fights
A key element of surviving in Avalon is knowing your enemies and assessing your odds. Is very important to take your time to get to know different types of creatures you can encounter, learn their behaviour and find out which combination of enemies cause trouble and which to prioritize. Make sure to always read tooltip descriptions of the enemies, as they may contain crucial information on what to expect and which approach to take.

Carefully choosing which encounter to take is key to success. Using the mouse-tooltip (or pressing the ALT-key) can help you identifying what creatures to expect in the different encounters.

Be weary of Treasure guardians, as these are some of the most difficult fights in the game - even surpassing bosses!
Better Equipment and where to find it
An important part of the game that shouldn't be underestimated is your equipment, your 4 combat items may be the difference between life and death. Try to identify what consumables you might need during an encounter, and which ones have effects that support your build. For example, if your build relies on not getting hit and killing enemies fast you might consider warding lores or health potions to survive an unexpected attack or items that temporarily increase your dmg. Do not hesitate on using them, they will perish on your death anyway!

What are Runestones?
Runestones are small stones, engraved with old norse symbols that seem to hold magic powers and enhance your character by offering various benefits. Every Runestone has a different benefit, depending on if it is equipped in a weapon- or an armor-slot. During a run, the player can unlock up to 3 of each Runestone slots, by interacting with a Treasure pile that can be found in every Tier and is guarded by a powerful enemy, or permanently unlock them from the Blacksmith in the Village.

Runestones come in various rarities (Common, Rare or Mythical) that represent the odds of finding that particular runestone, and Qualities (Tier 1-3), determining the strength of its magical effect. They can be found in various locations and are rewarded in almost every combat, so clearing out the Tiers can help you collect enough to merge 3 identical runestones to a higher quality.


Identifying Runestones that support your character build is cruicial. For example is there little point in choosing a runestone that reduces the cost of the 5th card you play in a turn (Ur), if your build heavily focuses on high energy cards or passives that favor playing few cards.

Furthermore it is important to keep the synergy between your runes in mind and prevent negative interferences: for example is there little sense in pairing a runestone that deals a low dmg hit at the start of every turn (Gar) with a runestone that applies lifesteal to the first hit of every turn (Lor), as the Lifesteal will have little to no effect.
NPC-Encounters
While exploring the map, several types of locations and persons can be found. Some will offer healing, others offer new cards, and others again may give a random effect or even end in combat encounters.

While monsters are proximity based, non-hostile encounters must be activated manually before they trigger, thus allowing you to avoid them for the moment, if needed. Inside each of these interactions, the game will usually tell you what costs, rewards or risks are associated with certain choices, however, learning the outcomes and advantages of these encounters is an important part of survival in Avalon. But be warned, the fights tied to the events tend to be a lot harder than regular encounters and are better avoided early.

Make sure to make good use of the “Rest” options, found in various places (such as Lost Soul - the merchant in the village), where you, a limited amount of times per run, will be offered to heal a part of your max HP (50 or 100% depending on unlocked upgrades at the Lost Soul).

For a full list of possible events visit the wiki[taintedgrail-conquest.fandom.com]!
Introduction to Classes: Children of Morrigan
General :
The Children of Morrigan represent a faction that takes the role of the melee fighter. The cards mainly focus around blocking attacks, taunting monsters, reflecting damage, and reducing the enemy’s armor. The faction consists of three unique classes:
  1. Wyrdhunter
  2. Pathfinder
  3. Berserker

The classes share a few passives, but each class also has unique passives related to the role the rune fulfills. The Wyrdhunter will have passives that focus on gaining armor and reducing enemy’s armor. Where the Pathfinder will have passives to allow more card draws and block, and the Berserker will have passives that will give effects when taking damage. Passives that accumulate effects Until the End Of Combat (UEOC) or Until the End Of Turn (UEOT) tend to be quite strong and will usually work quite well together with other passives.

Wyrdhunter :

Ability card: Broad Reach (1E) - Next Hit does +100% damage.

Ultimate ability: Deal damage to a single target.
  • 1-6 charges Each charge adds 10% base dmg.
  • 7-12 charges Each charge adds 15% base dmg.
  • 13-18 charges Each charge adds 20% base dmg.
Charge event: every time you hit an enemy.

Passive ability: Place 1 Combo Mark on an enemy per hit
(4 Marks = 1 debuff, +75% incoming dmg).


The focus of the Wyrdhunter lies on doing multi-hit and building up hit-streaks, which means passives related to accumulating effects per hit are quite effective with this class. Doing as many hits with a single card as possible is important, as every hit to an enemy will increase your Ultimate charge as well as stacking a debuff on the hit targets. The disadvantage of multi-hit cards is that they tend to target random enemies. A balance between single-target and multi-target is something that is the biggest challenge for this class.
A good build for this class might include several multi-hit cards, preferably with “on hit” effects, as this will build up the debuff and if combined with passives that offer “on hit” effects it will allow for a great synergy. (e.g. “Armor crusher”, reduces enemy armor by 2% on hit and “Attack is the best defense”, receive 1% armor with every hit).

Pathfinder :

Ability card: Find Footing (1E) - Duplicate the next stance card played.

Ultimate ability: Draw 1 card for every 3 charges consumed, gain 1 energy for every 6 charges consumed.
Charge event: Every stance card played (blue cards with keyword [stance]).

Passive ability: Gain another Focus (+50% dmg) for every consecutive turn without taking any damage. Any hit will reset this streak.


The Pathfinder focuses on [stance] cards in order to gain extra energy and draw more cards. This gives the Pathfinder the opportunity to build up long chains, making [chain] and 0 energy [stance] cards very strong. Pathfinder typically relies on blocking to prevent damage, while charging the Ultimate, which in return will allow generating a lot of energy for a future turn. Combat tends to build up slower and might generally be more forgiving. Passives typically revolve around stances, blocks and cards in hand.

Berserker :

Ability card: Fortify (1E) - Gain 25 Armor and retaliate 5 damage per Hit Until the End of Turn.

Ultimate ability: Gain lifesteal ability until end of Turn.
  • 4+ Charges gain 25% lifesteal.
  • 8+ Charges gain 60% lifesteal.
  • 12+ Charges gain 100% lifesteal.
Charge event: On any suffered hit.

Passive ability: When below 50%HP gain +1 Energy.


The main focus of the Berserker is to gain momentum upon incoming hits, low HP and killing enemies. Many passive abilities allow to either increase the Berserker’s armor, reflect damage back to the enemy or perform lifesteal. Playing this class, you might focus on getting high armor values in order to reduce incoming damage rather than using blocks, as they prevent those abilities, OR aim for to steamroll enemies quickly by choosing "onkill" passives or runestones. It is worth noting that a lot of berserker abilities are tied to low HP, allowing you to wrap up a lot of the encounters quickly, while staying on the verge of survival. Further reading on this rune can be found in the following (Outdated) guide.
https://steamcommunity.com/sharedfiles/filedetails/?id=2133836117

Introduction to Classes: Moonring
General :
The druids of the Moonring are some of the few human beings on Avalon that can use magic and bend the wyrdness to their benefit. The focus of this faction is on using summons to attack, block, buff, or debuff. The Moonring have several different summons at their disposal, each serving its own purpose. These Summons are:
  • Golem - Tanky summon that will take all hits. Activation is mainly focused on selfhealing.
  • Wyrm - This summon will do multiple hits on random targets and reduce enemies armor on hit.
  • Abomination - This creature is focused on doing AOE attacks, hitting all enemies.
  • Fae - Faes grant passive improvements to the player. activations generate rune charges.
All Summons but Faes can be chosen as the starter summon, that automatically will spawn at the start of every combat.

The Moonring consists three classes:
  • Blood Mage
  • Summoner
  • Necromancer

Where the Blood Mage will use it’s own HP to summon and power multiple weaker summons and focus on "overcharging" these for stronger attacks or temporal benefits (such as debuffing the enemies dmg or heal the player), the Summoner prefers focusing on investing energy into fewer summons, making them as strong as possible. The Necromancer stands out from these two, as it's the only class that actively can attack on its own (in the Lich form) and minions primarily are used to sacrifice them for their powers. One important aspect to keep in mind, might be the uncapped scaling of summoners, while Blood mages' and Necromancers' summons have a limited lifetime, they need to cycle through their summons.

Blood mage

Ability Card: Blood Preparation (0E) - Offer 5HP. Draw a random summon from your deck.

Ultimate ability: Immediately Overcharge a selected Creature. The effect potency depends on charge level:
  • 3+ Charges 100% effects magnitude
  • 6+ Charges 200% effects magnitude
  • 9+ Charges 400% effects magnitude
Charge event: On self sacrifice (sacrificing HP to play cards)

Passive ability: All Summoned Creatures auto-activate in their respective turns. At the start of every turn, every summon gets promoted. If they exceed level 4 they Overcharge, triggering a summon-specific special effect and perish. Summons may have different activation actions, depending on their level - the Golem, for instance, will attack a random enemy, possibly stunning the target on lvl 4.

The Summons:
Blood Golem:
  • Protects its allies by redirecting hits towards itself.
  • At level 4 it deals 1 hit to a random enemy with a chance to stun it.
  • On Activation: Heals itself for 10HP.
  • On Promotion: +50% of players Armor.
  • On Overcharge: Heals ALL allies for 10HP.
Blood Wyrm:
  • Attacks random enemy and reduces their Armor.
  • On Activation: Deals 1 Hit for 75% of the players damage and reduces enemies Armor by 2.
  • On Promotion: Adds 1 Hit and increases Armor reduction by 1.
  • On Overcharge: Deals 1 Hit to a random enemy for 200% of the players damage and reduces their Armor by 10.
Blood Abomination:
  • Attacks ALL enemies on the battlefield.
  • At level 4 it deals 1 additional hit.
  • On Activation: Deals 1 Hit for 50% of the players damage.
  • On Promotion: +25% of the players damage.
  • On Overcharge: 1 Hit for 200% of the players damage
Blood Fae:
  • Grants passive improvements to its master.
  • On Activation: Grants 1 Ultimate Charge.
  • On Promotion: Adds 1 additional Ultimate Charge.
  • On Overcharge: Increases the players damage by 100% and reduces ALL enemies damage by 30%for the next turn


Summoner

Ability Card: Activate (0E) - Activate a Minion.

Ultimate ability: Promote a selected summoned creature.
  • 4+ Charges: Promote a Summoned Creature by 1 level.
  • 7+ Charges: Promote a Summoned Creature by 2 levels.
  • 9+ Charges: Promote a Summoned Creature by 3 levels.
Charge event: Every time any Summoned Creature is Activated.

Passive ability: Summoned Creatures have no level limit. Summons need to be activated. Every hit to their minions deals damage equal to that minions level to the summoner.

Summons of this class are not limited by a level-cap and scale indefinitely, unlike the Blood Mage's spawns, however, they will always cause the same effect upon activation, regardless of their level (only the magnitude of this effect scales). Summoners ability to sustain single summons allows them to draw great benefit of sigils.

The Summons:
Summoned Golem:
  • Protects its allies by redirecting hits towards itself.
  • On Activation: Heals itself for 15HP.
  • On Promotion: +3 HP selfheal on activation.
  • On Summoning: Retaliates hits with 1 Hit for 50% of damage taken, but looses 10Armor for every hit.
Summoned Wyrm:
  • Attacks random enemy and reduces their Armor.
  • On Activation: Deals 2 Hits for 75% of the players damage and reduces enemies Armor by 5.
  • On Promotion: +15% of the players damage.
Summoned Abomination:
  • Attacks ALL enemies on the battlefield.
  • On Activation: Deals 1 Hit for 75% of the players damage.
  • On Promotion: +25% of the players damage.
  • On Summoning: Increases the damage of ALL Minions by 15%.
Summoned Fae:
  • Grants passive improvements to its master.
  • On Activation: Grants 1 Ultimate Charge.
  • On Promotion: Adds 1 additional Ultimate Charge.
  • On Summoning: Decreases damage of ALL enemies by 10%.


Necromancer

Ability Card: Last Activation (0E) - Activate a Minion and Sacrifice it.

Ultimate ability: Consume your minions to turn into a powerfull Lich for one turn. You will gain +3Energy, all cards will turn into Lich cards. Additionally you will gain +1Card, +25%dmg, +10 Barrier and (in the next turn) draw an additional summon-card per sacrificed Minion.
  • 6 Charges: Turn into a Lich.
Charge event: Every time something dies on the battlefield.

Passive ability: May sacrifice Minions to turn them into their Ethereal form with alternative activation effects. Summons Auto-activate, start at level 3 and loose 1 level each turn, until they perish. Each turn, summons will deal damage to the Necromancer equal to their level. Killed enemies will be added as Ghouls (0Energy) to your hand.

The Summons:
Resurrected Golem:
  • Gains 200% of the players Armor and protects its allies by redirecting hits towards itself.
  • On Activation: Heals itself for 5HP.
  • Ethereal form: Grants 15Barrier to ALL allies and passively adds +25 Armor to the player.
Resurrected Wyrm:
  • Attacks random enemy.
  • On Activation: Deals 2 Hits for 35% of the players damage.
  • Ethereal form: Deals 3 Hits for 100% of the players damage and reduces enemies' Armor by 15.
Resurrected Abomination:
  • Attacks ALL enemies on the battlefield.
  • On Activation: Deals 1 Hit for 35% of the players damage.
  • Ethereal form: Deals 1 Hit for 100% of the players damage and gains +50% damage.
Resurrected Fae:
  • Grants passive improvements to its master.
  • On Activation: Promotes a random minion and Heals the Necromancer.
  • On Promotion: Increases the amount of healed HP.
  • Ethereal form: Grants 1 Ultimate Charge and passively adds +1Energy to the player.
Introduction to Classes: Watchers of Tuathan
Not much is known of the mysterious men and women of this faction, but they are said to be the last stand between Tuathan and the rest of Avalon, guarding the unknowing people with their keen eyes.
Closing words
The intention behind this guide was to focus on giving a good starting reference for new players, and also give more experienced players a reference guide to look at. That said nothing in this guide is final and the authors highly suggests to try out new things and add your gained knowledge to the world of Tainted Grail Digital. Even between veteran players there are discussions on how to play a specific rune, since they discovered playstyles unique to that rune that others would have considered impossible. The community on the official Discord[discord.gg] is quite open and always interested in hearing stories on how you finished the game. Side note: The developers are also there and are always interested in your feedback too. So don’t feel bad for sharing a bug or giving constructive criticism. The community can handle it really well, unless you walk into the Wyrd without a candle. Then none of us can guarantee what the results will be.

This guide has been brought to you in cooperation with
disiesel & titan.bevel!

Good luck and save travel!

16 Comments
OlMaltelO  [author] Mar 23, 2024 @ 12:41pm 
@SmellofNapalm no particular reason apart from them not being released back when it was written.
And after writing this I had just spent most of my time filling the Wiki and didnt really think about updating that missing section here :)

But you can find the description on the Wiki [taintedgrail-conquest.fandom.com]
SmellofNapalm Mar 23, 2024 @ 12:25pm 
Btw, is there a reason why the Watchers are missing in the Introduction to Classes-section?
PHLOOP Jun 10, 2021 @ 4:44am 
Ah, that makes more sense, as I've been pretty much Wyrd-proof the entire game. I'll do a few runs without lighting a candle and I'll see what happens. Thanks!
OlMaltelO  [author] Jun 10, 2021 @ 4:41am 
@PHLOOP that certainly depends on where exactly in their questlines you are, but yes, both questlines involve encounters only found in the wyrdness.
PHLOOP Jun 10, 2021 @ 4:39am 
I've played through the game a few times and I'm being frustrated that I'm not able to solve a few of the NPC quests. Namely, the Seamstress and the Candlemaker's quests. They're in the village, but their quests aren't finished.

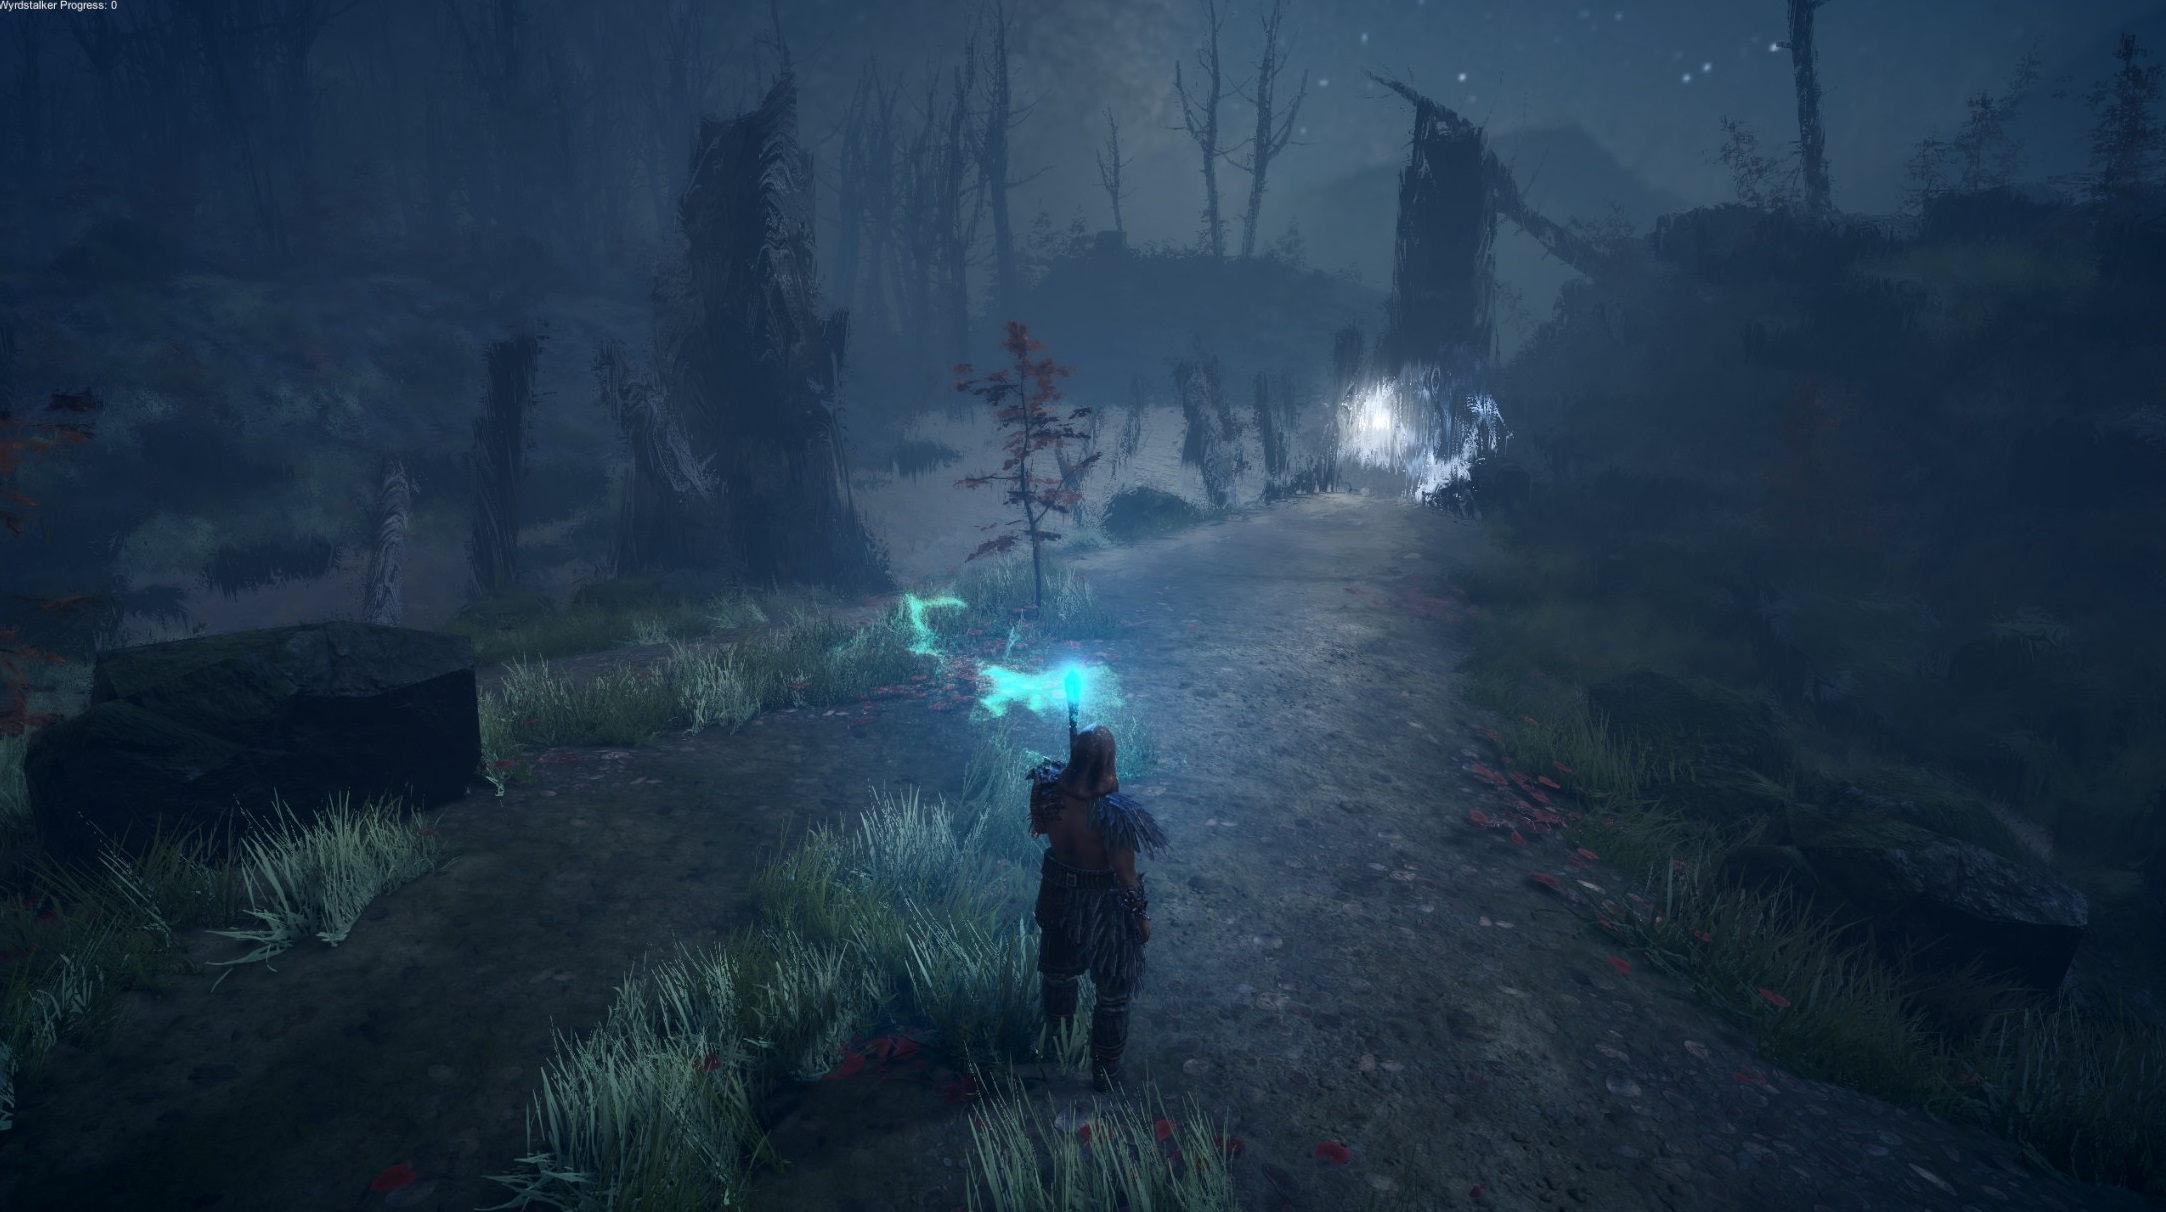
Do I need to run around with no candle to find their encounters?
OlMaltelO  [author] Jun 7, 2021 @ 5:31am 
Once I have some spare time, I will update the guide properly. Right now its still mostly up to date for the 0.99 so take all infos with a pinch of salt - but most general infos of it are still valid enough :)
AdApt* Jun 7, 2021 @ 5:15am 
Ok thanks ^^
OlMaltelO  [author] Jun 7, 2021 @ 4:50am 
@AdApt*
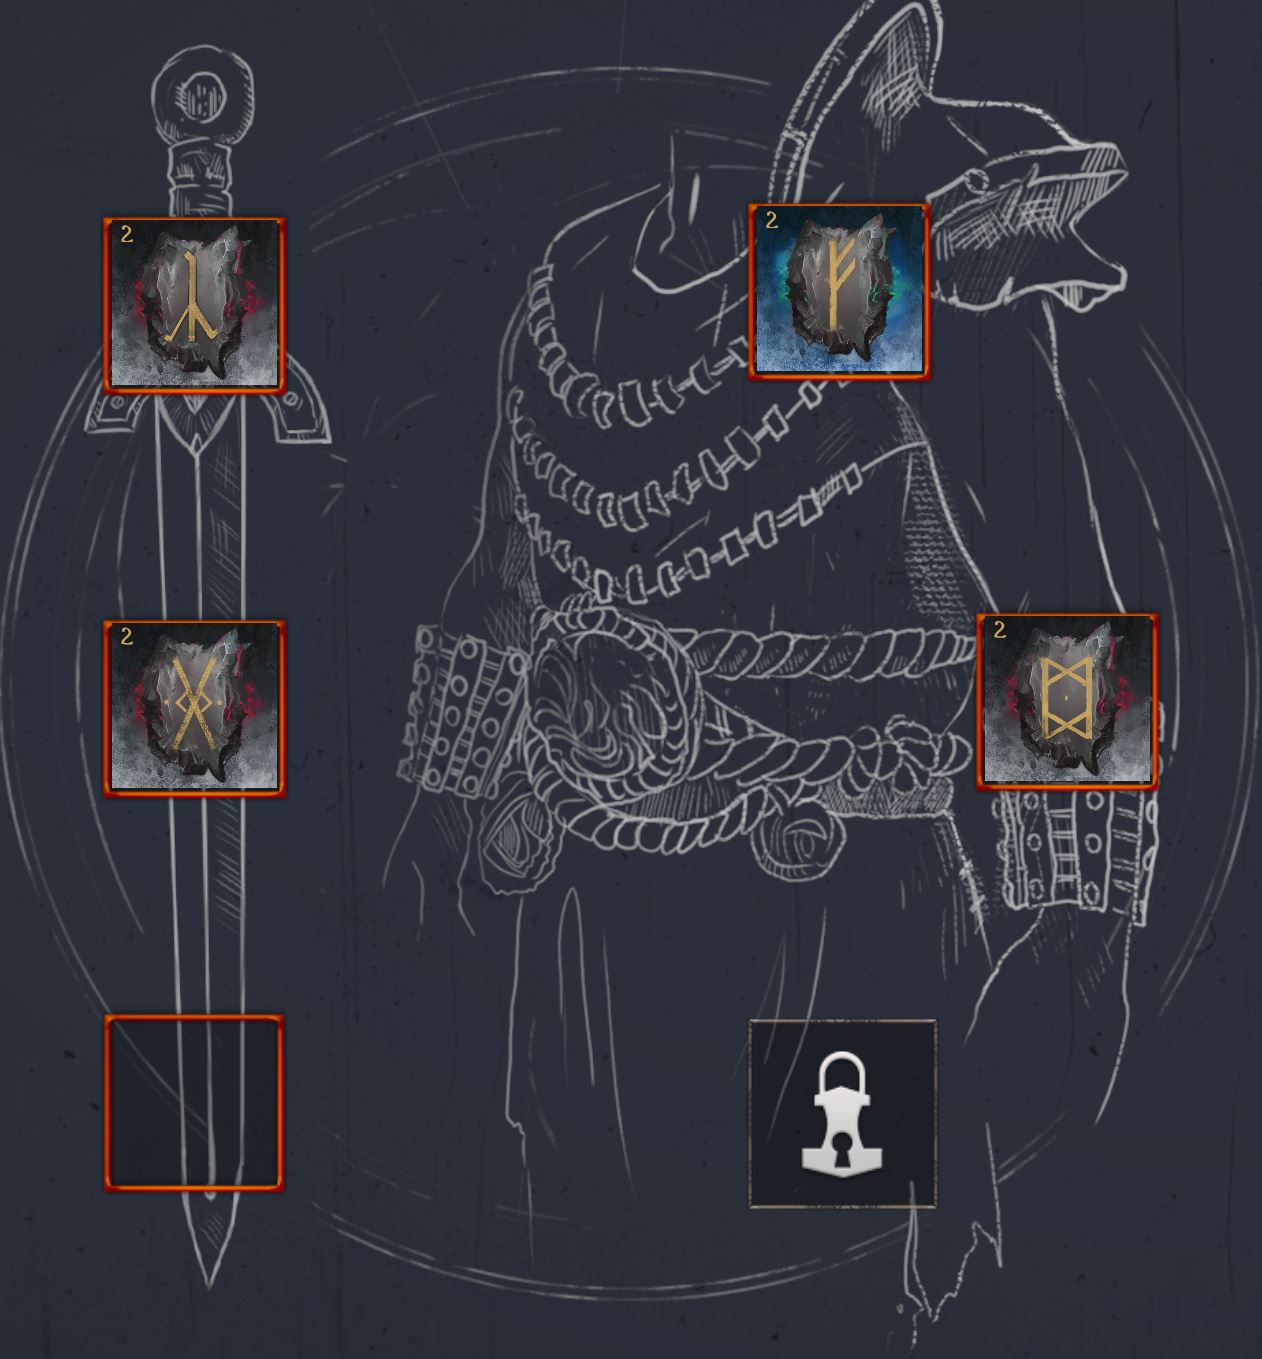
Was removed to encourage using things rather than selling them :D
AdApt* Jun 7, 2021 @ 4:28am 
Hi again.

In your 'Better Equipment..' section it says "Do not hesitate on using them, they will perish on your death anyway - so either use them for an advantage in combat or sell them to buy more consumables in the village or better Runestones."

This is about combat items (potions, scrolls, etc).

Where can I sell items? I can't remember seeing this option.
AdApt* Jun 2, 2021 @ 4:54am 
No probs :MrSThumbsUp: