Blender

Blender

113 hodnocení
TF2 Assets Porting Guide 2021
Vytvořil: recommn [3D Commissions]
(LAST UPDATE: 17.07.2021)

This guide will help you to port every single material and model there is in TF2 into Blender - now mostly without the excruciatingly long setups!

This guide was also provided to you by TF2 Blender Server[discord.gg] - the place for all people who want to do TF2, but in Blender! We are posting the content packs in .blend files to help you start, which include rigged characters and (soon) all kinds of models with the prepackaged materials and the materials themselves with the correct settings!

Also, credits to the guy who really knows what's up with TF2 Blender and who shared his wisdom with me - NameGoesHere.

Onto the guide now.
3
   
Ocenit
Přidat do oblíbených
Oblíbeno
Odebrat z oblíbených
Setup
(Things have changed a bit, so updating this. Also, DAMN I messed the import up by showing you the wrong addon)

First of all - install Blender itself, if you still don't have it. Make sure it's version is 2.82 or above.

Then? Install TF2 and very much so preferably SFM (if you do not have these), as you can get the fresher cosmetics from TF2 and the most of content from SFM.

Then, afterwards, come the two addons:

Blender Source Tools - the foundation for the importing process.
http://steamreview.org/BlenderSourceTools/

SourceIO - the real thing you'll import most of things with. With the update on Import VTF, it is now an optional choice.
https://github.com/REDxEYE/SourceIO

And most importantly, ImportVTF - this is what you will use. Download the latest release.
https://github.com/lasa01/io_import_vmf/releases

Word of warning: DO NOT UNPACK THEM. Have them as zips and move to your desired folder.
All of these addons need the next setup, with ImportVTF needing a few more:
Installing the addon:
And setting up ImportVTF, with the example being a CSGO setup:
(credits to the ImportVTF guys for the gifs on their website)

And that's it! You're set! There are more things that could require a setup, but for now? You are ready to import.
Importing Models
As for the import, things are MUCH simpler than the previous version. It might sound rather long, but it is indeed faster than before, and once you get the hang of it, it can go smooth and efficient.

The process of the import goes in the next way:

1: In the File>Import, you'll find a new section called "Source Engine Assets", which has a yellow crowbar icon on it. There, you'll find all sorts of the things to import, but for the majority, it is the MDL import that will be used the most. Click on it.


2: Then, go to the folder where the model's MDL file resides (in this case, I chose this Scout's cosmetic by the directory in the search bar) and then select it and either press the import button or doubleclick. MAKE SURE the "Materials" checkbox is on, unless you wish to import it blank and clean.

(and, unfortunately, there is no way to preview the model like in SFM, so you'll have to do a little searching and memorizing. Use "Recents" and "Favorites" to go quicker to the folders you use more often and you may also use the search bar, along with the certain "Recursions" option. You may get to it either by right-clicking anywhere in the window, or pressing a drop button to the right of the search bar.)

(also, I've put a link at the end of the guide to another guide, which has the in-folder names of the cosmetics all ordered, to ease the process.)


3: Hooray! The model is in Blender now! Resize it to 0.022 (for your own sanity, as it is the conversion rate from SFM to Blender). It now requires a few strongly suggested fine-tunings, however. Actually, no! It doesn't anymore! The vertices are already joined together and the materials are made decent and nice to look upon from the start!

Though, if there are still strange shadows or the edges look weird when you look at them from certain angles, you can go to Mesh>Normals>Average>Face Area and press that, with the whole model selected. Such a set of actions will rid of most strange shadows.


4: And there we go! The model has been set and now ready to use!

Importing Textures
Now, for this one? There are two ways - one requires little setup yet a LOT of searching later on, and the other will need a bit more setup but MUCH less searching. We shall begin with the one that involves only what is currently installed, as per the previously mentioned setup for import.

THE FIRST, CLUMSY YET RIGHT-AWAY WAY
1: Go to Import>Source Engine Assets>Source Texture, which is here.


2: Go to the folder with your desired texture. (This is where the "no preview" really begins to give trouble, because there are that many textures, making it basically a memory game.) Select the vtf file and then press "Import VTF" (the interface looks a little different, but the process is the exact same still.)


3: You're done!... Where is it, then?

It is located in the Blender file itself. To get it, you'll need to create a material, put and link an Image Texture node in it (or go to the existing one) and find and open the imported texture.


4: And you are now truly done! You can go ahead and do some stuff with it, like making wooden clothing. (Oh, the splinters... makes me shiver to think of it.)


This, right here, was one way to get the textures in. But there exists...

THE SECOND, AND ARGUABLY BETTER IN LONG-TERM WAY
For this one, before beginning anything, you'll need:

- TF2 or SFM
- VTFEdit, by this link:
https://gamebanana.com/tools/95

Install these as you would any other app.

- Some free space

Starting with the setup:
1: First of all, open VTFEdit and go to Tools>Convert Folder. Click it.


2: Next, in the next window, select the input folder (where all the VTFs are. It is usually a "materials" folder).


And then MAKE SURE that the "Recursive" option is on and the export format is set to PNG! After it all, press "Extract" and wait.


3: And... DONE! The setup is complete! Now you have all the textures in the PNG format - all that is left now is to pull them into your session.

The true benefit of the second method is that since these textures are all PNG now, you can SEE their previews! So the time you'd spent on the setup can pay off very quickly as you do not have to play the guessgame everytime you wish to get a texture of some kind! Now, you can put them in as any other image and set up as you wish.


Only word of advice? Some textures might be transparent in some places and/or paintable. In this case, you'll need to set it up in this manner:


The paintables use an alpha channel to highlight which parts are paintable, and which ones are not, and so such setup helps with both transparency and with paintability.

And that's it on the textures!

For Those Who Wish Accuracy
If you wish to truly try and replicate the classic Source look while still having all the benefits of Blender, you can combine the above-mentioned steps with the VertexLitGeneric - the set of node groups and world lights that imitates Valve's looks to its best ability. I will admit now that I haven't figured out how it works, but I do know that some people here strive for the more authentic look - so here it is:

https://github.com/syborg64/BlenderVertexLitGeneric

Follow the guide that is written in it and it should work proper.
Conclusion
For now, I know of the two reliable imports - models and textures. As for the maps, I will need to gather some more information and run some tests. As for the particles? There is no known way yet, unfortunately. And as for the more complex models, such as characters? Many intricacies are there, which too will require a bit of time for me to write. To save you trouble, however, our server has most of the TF2 characters already ported and setup, so do check it out!

Invite link:
https://discord.gg/zHC2gJW

And also, the guide on the cosmetics that I promised:
https://steamcommunity.com/sharedfiles/filedetails/?id=395367659

Alright, have a good day ahead - updates to the guide are to come later.
Počet komentářů: 24
Ace 1. led. v 14.16 
THANK YOU I'VE BEEN LOOKING FOR THIS METHOD FOR AGES THANK YOU SO MUCH!!!!! :steamhappy:
matveytheman 28. říj. 2023 v 17.01 
can this apply to Hl2?
t1ar 22. čvn. 2022 v 21.12 
Use Pragma Filmmaker (its a replica of sfm wit. they export as gltf file,also with shape keys animation, which is sfm cant do.

after that you want to use hisanimation shader setup on the character that was exported.
Tscendrik 11. čvn. 2022 v 14.04 
How do you export tf2 animations like Kazotsky Kick into blender?
Fluff Gaming 17. srp. 2021 v 12.49 
Would have been nice to know you needed Source Filmmaker first.
Syborg64 24. čvc. 2021 v 1.24 
glad to see the inclusion of BVLG :D
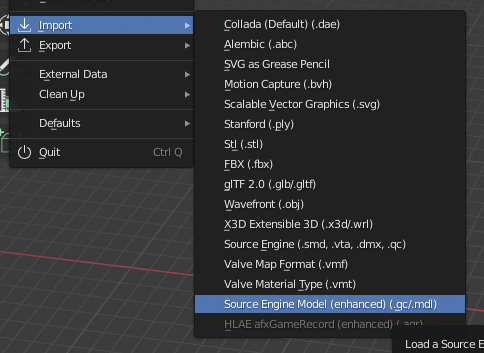
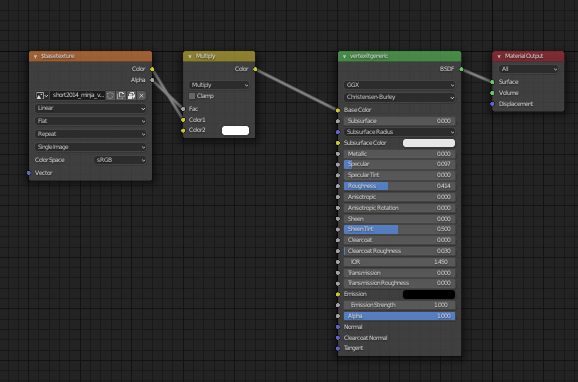
note that it's now included within SourceIO and is a checkbox in mdl importing.
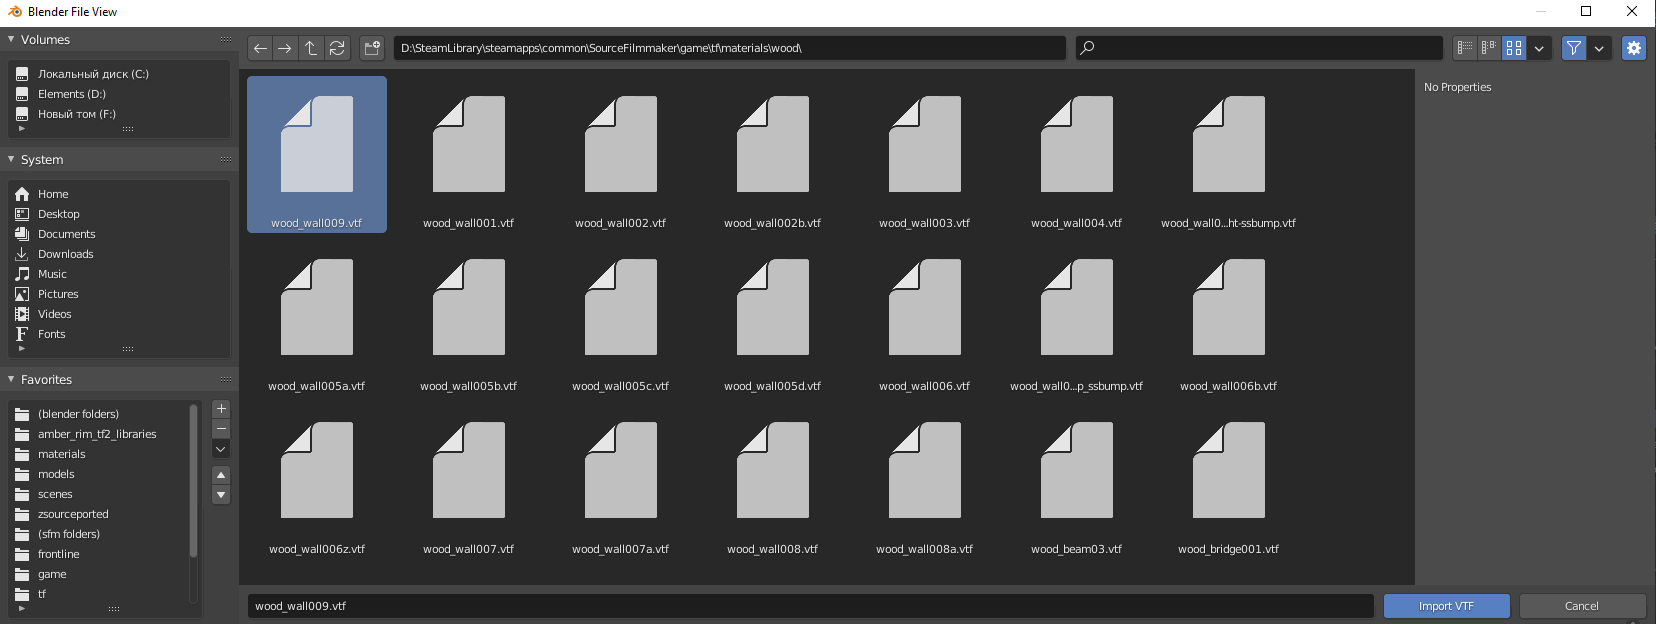
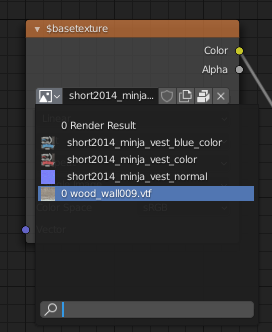
best way I can think to understand it is to look at examples of imported VMTs;
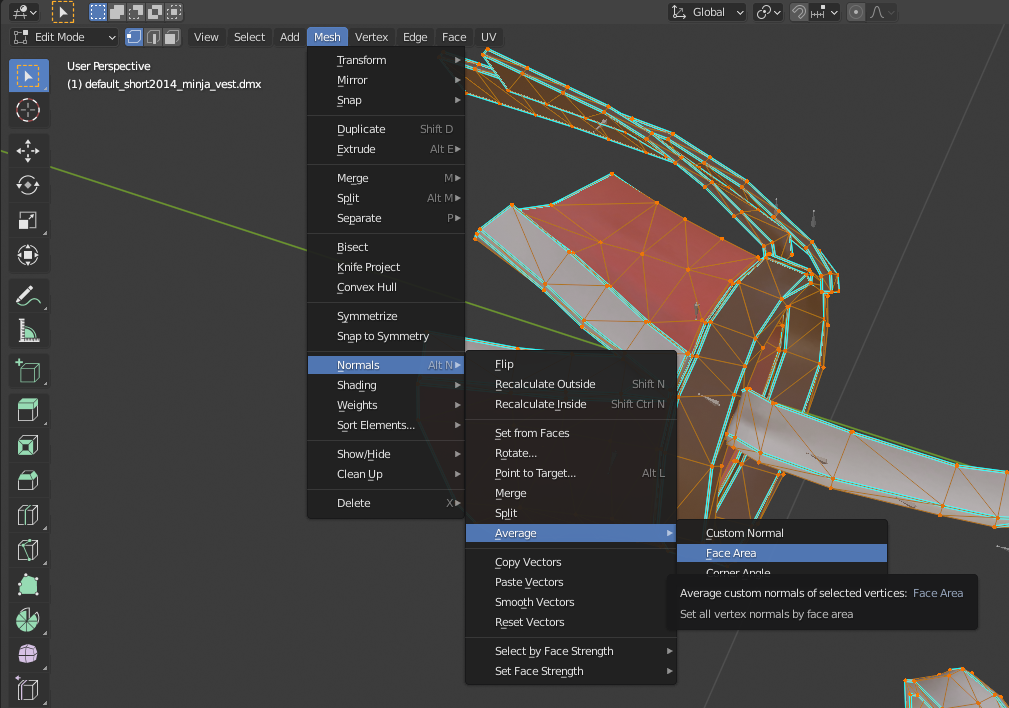
a cleaner way to deal with the alpha is to set the alpha mode to 'channel packed'
ShellShock 23. čvc. 2021 v 12.26 
how do you import Blender models, ( both my own and downloaded ones) to SFM?
Dr.ParadoX 1. kvě. 2021 v 14.14 
And to top it all off....I can even import SFM sessions....this tool will bring forth a new generation of porn I mean, animations.....
Dr.ParadoX 1. kvě. 2021 v 14.12 
My friend......This is a REVOLUTIONARY tool....It goes BEYOND importing models, I mean now I can import a MAP into blender??? Do you have any idea how useful it is?
Now I can make models INSIDE my own maps, INSIDE blender.....this is beyond cool. And import happens with textures??? And it's free???? Major props to whoever came up with this awesome tool....
AveryACP 16. led. 2021 v 15.24 
My tomislav is not working, please help. Also, my crowbar looks different from yours