FEZ
Оценок: 1,412
The Ultimate Guide to FEZ
От Smoke 'n Pew Pew
This guide is basically a very detailed walk through of the game, FEZ. Everything you will ever need to know about this game and its obstacles will be revealed here. If you're stuck and/or are afraid you've missed something, I can easily help you find out! Please leave comments/ratings so I know that I've helped! It always makes me feel warm inside... GAME ON, FEZIANS!
3
4
3
15
4
3
2
2
2
   
Наградить
В избранное
В избранном
Удалить
Introduction to Guide Writer
Hello, there! My name is Morrigen and I am going to be helping you through the fun and (unfortunately) sometimes confusing world of FEZ! This is my first time writing a guide, but I made so many notes and played for so many hours on FEZ that my friends were actually asking me for help on some of the puzzles! So I thought, "What the heck? Might as well make a guide to help... Well, everyone!" I hope you enjoy the guide and we can have as much fun as being in the wonderful world of FEZ.

Caution! This guide will have MANY spoilers! The purpose of this guide is to give you a complete walk through so that you can find everything in FEZ and accomplish all of the achievements. If you want to be surprised, this guide isn't for you. Sorry!

Note: This guide is currently under construction! Not finished! Not for the lack of information, but because I can only type so fast. The guide has all the information needed to complete the game; I'm just looking for grammar mistakes.

Also, if you ever see the icon, its because its the end of the chapter and I'm telling you everything you should have. Not everything you've gotten, but what you should have left!

Please drop a rate and/or comment! Feedback welcome!

Alright, guys. Ready? Game on!
PC-XBox Controls
There are always going to be people who don't know or forget the controls during the game and that's fine! I'm one of those people myself.

*PC Controls:
Jump - Space bar
Action (pick up/open) - Left control
Cancel/Talk - Left shift
Move - Arrows
Look - IJKL
World Map - Escape
Inventory - Tab
Pause - Enter
Rotate Left - A
Rotate Right - D
Reset Look - Right shift
Zoom In (Map) - W
Zoom Out (Map) - S
**First Person View - Right alt
**Fly Cheat - Up, up, up, up + space

*XBox Controls:
Jump - A
Action (pick up/open) - X
Cancel/Talk - B
Move - Left analog stick/Arrows
Look - Right analog stick
World Map - Select button
Inventory - Y
Pause - Start button
Rotate Left - Left trigger (LT)
Rotate Right - Right trigger (RT)
Reset Look - Right shift
Zoom In (Map) - W
Zoom Out (Map) - S
**First Person View - Left analog click
**Fly Cheat - Up, up, up, up + A

*Map Controls (XBox):
Pan - Left analog stick (LS)
Zoom - RB/LB
Cancel/Talk - LT/RT
Look - Right analog stick (RS)
Back - B

NOTE: I, personally, use a wired XBox controller to play this game instead of my keyboard. I find it easier to navigate. You can find a wired XBox controller at your local gaming store (ex. GameStop) and purchase one for about $30. Always get the Original Wired Microsoft XBox controller for guaranteed PC use.

* - These controls are the DEFAULT controls set by FEZ.
** - Only usable during "New Game +" game mode only.
Achievements
Many gamers are obsessed with obtaining all of the achievements... I'm one of them. Follow this guide and you'll get them all!


Sum Total
Find all collectibles.
This will be the last achievement you'll unlock. It requires you to find all the collectibles in the game. These are as follows:
- 24 Golden Cubes
- 64 Cube Bits*
- 32 Anti-Cubes
- 3 Red Cubes
- 4 Artifacts

* - Makes 8 Golden Cubes which makes 32 Golden Cubes total!


Get a Cube
Find your very first cube shard.
This will be the very first achievement you will unlock. When you've completed the intro and regain control of Gomez, simply grab the cube shard near the running children to your right to unlock this achievement.

Kill Screen
Get to the end.
This is story related. To get this, you have to collect 32 cubes and open the door that requires this number. When you do, you will get into the final world and once the credits start, you will get the achievement. When you are done, you can return to playing and access "New Game +" to complete any lasting achievements and puzzles.

Hexahedronaut
Collect all 32 Golden Cubes and 32 Anti-Cubes.
To get all 32 Golden Cubes and Anti-Cubes, you have to finish every puzzle, secret, and area. Following this guide will help you achieve that!

Haikus Not Epics
Find the Tome artifact.
There are four artifacts in the game, each with their own achievement. They are not very hard to come by; especially if you use the guide. To find the Tome Artifact you have to go to the museum (near the clock tower) and push the bookshelf in to reveal a secret room. Within this room, there is a chest. Open it and the artifact is yours!

Phrenologist
Find the Skull artifact.
You must have all of the maps (especially the ones that look like grids) to get the Skull Artifact. You get this artifact by going to to the old catacombs. You have to decode the Fezian number system to figure out which doorway to enter first! Doesn't matter where you exit, but where you enter! It goes as follows:
1. Shift until the entrance building is on the far right. Enter column 4, row 4.
2. Shift until the entrance building is on the far left (No Fezian script visible). Enter column 3, row 3.
3. Shift until you see the entrance doorway. Enter column 3, row 2.
4. Shift until the entrance building is on the far left. Fezian script is visible. Enter column 2, row 1.
You will come out of a tree. Jump into the "Red River" and swim for quite a ways to the right. There's a chest! And your achievement!


Mightier Than The Sword
Find the Writing Cube artifact.
This artifact is actually one of the easier ones to get to if you know where to look! You'll want to start from the warp gate and jump to the lone island to your left. Enter the door with wooden boards underneath it. It will send you to the Crying Waterfall area. From there, get to the top and enter the entrance in the tree. As you see, there is a chest! Getting to this chest, you will obtain a red cube and the achievement!

A Numbers Game
Find the Counting Cube artifact.
To get to this artifact, you must go to the Telescope Room area. Instead of climbing all the way to the top of the Observatory, go to the mid height lone island. Its a dark purple building. Enter the door that leads you to the Temple. Work your way up using the time crank. Better hurry! Once you're at the top, enter the Temple at the base to get to the Globe Room. Enter the other door and shift until you see the chest. Open it and grab that artifact and achievement! You've earned it!

Equal and Opposite
Find an Anti-Cube.
This can actually be one on the first level of FEZ. After you gain the ability to change perspective in the game (the second time you wake up) enter the code: "RT, RT, LT, RT, RT, LT, LT, LT". You will unlock both this achievement and the "Achievement Unlocked" achievement which you get just for inserting the code! Easy, huh?

Warp Zone
Reactivate all 5 warp gates.
This should unlock naturally as you progress through the world of FEZ. There are 5 main areas in the game with several worlds around them. Once you enter the 5th world, this achievement will unlock. The map will place an icon where these warp gates appear. If you know how to read Fezian, they will point them out to you in the levels!

Cryptographer
Break the code.
This can be done in the first level. Enter the house with a big picture of a guy wearing a monocle. Insert the following code: "RT, RT, LT, RT, LT, LT, RT" to unlock both an Anti-Cube and this achievement!

Achievement Unlocked
RTRTLTRTRTLTLTLT
This achievement can be acomplished anywhere in the game. Simply insert the code in the achievement description: "RT, RT, LT, RT, RT, LT, LT, LT" in the game to unlock an Anti-Cube. If this is your first Anti-Cube you will also get the achievement "Equal and Opposite" which requires you to find one.
Collectibles
The world of FEZ is ginormous. Like... I still get lost. But that only means one thing... There's a lot to collect! Which, ya know, is kind of the whole point of this game. So its pretty important to know what you're collecting, huh?


Cubes
These are the easiest to collect. They are all over! There are 32 cubes total. However, some of the cubes are split into what I call "bits".


Bits
Collecting 8 bits will form a full cube. To finish of the cubes, you must find all of the bits!


Anti-Cube
Anti-Cubes are much harder to collect. These will require you to solve challenging puzzles in order to obtain them.


Red Cubes
These adorable heart-shaped "cubes" are the rewards for the hardest puzzles! There are only 3 in the entire game. With me, we'll find them all!


Artifacts
Each artifact unlocks an achievement in the game. Handy, huh? There are 4 total.


Maps
Even though they are kind of a pain in the butt to read if you don't know what the heck they're for, you need the maps. Not only do they help you find treasure, but they help you unlock achievements to boot!


Treasure Chests
You will find quite a few of these in the game. They will contain either a Golden Cube, a Key, a Map, or even an Artifact! Trust me. You want to open these bad boys.
Language of the Fezians
Alright, for those of us who don't have photographic memory like me, here are some pictures explaining the symbols that the Hexahedron has next to him when he first speaks to you.

Learning the alphabet, numbers, and symbols will help you greatly during the game! But if you have a hard enough time with the language you speak already, don't worry about it. I am going to translate everything and make sure you get everything done!


Chapter 1: The Village
So we've gone over the basics, yes? Awesome! Let's get this show on the road!

The game opens to the view of our hero, Gomez!


An old man known as "Geezer" sends down a letter to you! Read it and start to climb to the top of the village. As you're climbing, test out the controls, talk to other Fezians, etc. It will help you get use to them. Again, keyboard might make the game a little more difficult. Anyway! As you reach Geezer, your "special something" happens.


Good golly gosh! Its the Hexahedron! It speaks to you, but if you don't know how to read Fezian, you're gonna have no idea as to what he's saying. Since this is a guide and it's kind of my job, I have translated it for you:

"Hi there! How are you? I will be your hexahedron today. So this is just routin procedure, but I do need someone here just in case something goes wrong. If something does go wrong, you are going to have to clean up the mess... Hey, wait a minute! Can you even understand what I am saying? And what is wrong with your head? Oh, well... You are here now. Might as well do this thing. Prepare to have your mind blown."

Are you prepared?


"All right. Welcome to the club! Enjoy your free hat. I kind of thought maybe this would not work because of your weird head, but everything seems a-OK from over here! Thanks for the hand! You can go home now. It was very nice to meet you! You can now shift dimensions! Try it out a couple of times! -- UH-OH!!!"


Prepare to have your game crash. Yes, this is suppose to happen. Don't rage quit like I almost did.

"Start" the game again and it will take you back to Gomez sleeping once more. But, wait! He still has the fez! Walk outside once more.

Here, we're going to meet Dot. Dot will explain what happened and what you need to do to save Hexahedron.


The Village
Before we continue any further, let me mention codes for a moment. In some of the puzzles in FEZ, you must imput a code through actions to reveal an anti-cube or red cube. When I list the code, I will list it such as the following:

Left, Right, Up, Down, RT, LT, etc.

These are XBox controls, not the keyboard ones! If you need to the ones for the keyboard, please refer back to the PC-XBox Controls tab we discussed earlier.

Now, let's continue on, shall we?

Stand anywhere and input this code! RT, RT, LT, RT, RT, LT, LT, LT

This will reveal an anti-cube! And by doing this, you've recieve TWO achievements already!

Equal and Opposite
Find an Anti-Cube.


Achievement Unlocked
RTRTLTRTRTLTLTLT


Moving on! There are 4 bits outside and 4 inside the houses. Don't forget, you can shift now! This will form your first Golden Cube. (Don't worry, I'm going to break this down so you don't miss something in any of the houses!)

Oh my! Another achievement!

Get a Cube
Find your very first cube shard.


The Village I - Outside
There is an island with a chest on it. Open the chest to find a key!
There are a total of 4 bits outside.

The Village II - Inside
Enter the house on the other island. This is Geezer's house. Talk to him and he will say his farewells... Kinda.

Now go to the house below the locked door (below the door that has a keyhole on the front of it).

Top Hat Room
You are going to shift so that the fireplace is facing forwards. Now shift twice and talk through the hole to appear in the other room with the chest. It contains a key!

Go back to the main room and shift so that you can see the painting with the row of Fezians. If you look closely, you'll notice that the painting reveals a code. If you can't see it, the code is:

RT, RT, LT, RT, LT, LT, LT, RT

Wah-la! It revealed an anti-cube! Grab it and head back outside. You can now go to the locked door from earlier and open it with one of your two keys. Enter it.

Boiler Room
Once you enter, you'll notice something floating. Grab it! What is it? Oh, nothing... Just another achievement!

Cryptographer
Break the code.


You now have your first map! And now for another code. This code is (unfortunately) impossible to solve without the sunglasses which you can only get on "New Game +". But thankfully, I have the code! It goes as follows:

Up, RT, Left, A, Right, LT, Down, RT

This reveals an anti-cube, and that concludes everything in the Village. Go back down to Gomez's house and shift until you see some vines that lead down to the purple door that Dot mentioned earlier. Dot will most likely mention opening the door once you have enough cubes to do so. Silly, Dot.


Totals:
1 Golden Cube/8 Bits
3 Anti-Cubes
1 Key
1 Map
-- is what you should have at the moment.
Chapter 2: The Gateways I
The Pillar
This is the first place you've gone to outside of the Village. Don't be nervous! If you die, you automatically respond at the last place you had solid footing.

Shifting is a must for the rest of the game! In this area you'll have to climb some vines and do some hopping. There are 8 bits in this room that you can easily grab as you make your way up! Go through the door at the top to enter the Gateways.

The Gateways
This is the Gateways. Like Dot said, "Woah." Don't think too much on how to get into the doors just yet! I promise, we'll enter them all in time. Again, like Dot said, there's a 4 bit, 8 bit, and 16 bit door. Since we got everything in the Village we have enough to enter the 4 bit door! Let's enter it now.


Ancient City
The first thing you notice about the Ancient City is that there are quite a few entrances. But despite that, there are only 4 bits in total in this area. 3 of them are in rooms.


While you are here, you will enter a room that introduces you to blackholes. Don't go near them. Don't touch them. Avoid them at all costs. No joke. We don't like them, okay? But if you go some where and you notice that it is blocking your way from somewhere you need to be, just go back the way you came and then enter the room once again. Keep doing this (shouldn't be more than 3 times) and they go away for the time being. If you DO decide to mess with a blackhole, you'll lose.

Oddly enough, there are no codes or secrets in this area. Once you are finished exploring, go back to the Gateway. Climb up the floating pillars and shift until you can jump to the over the doorway entrances. Shift until you see another doorway. Enter it now!
Chapter 3: Sky Hub I - Crying Waterfall I


First, let me tell you why I call this area the Sky Hub. If you look past the main islands you can see other areas in the background against the sky! Pretty neat, huh? It makes it really easy to remember where the doors to where you need to be are! Also, don't forget that this is your main warp gate.

The Sky Hub is the largest area in all of FEZ. Because of this, I am splitting everything into branches based on the map. The first place we're going to go through is the Crying Waterfall branch. You don't even have to shift. If you look past the island, you can see it. The door is on the far left on a lone island with a board platform underneath it.

Crying Waterfall
There are only 2 bits outside to get. They're easy to grab! It should be getting dark right about now... Head over to the purple statue and pink tree. Stand on the tree and wait. An owl will land next to you. Talk to him and you will get a vague clue like the turtle from Kung Fu Panda.

If you haven't noticed by now, owls are kind of a big deal here. There are a total of 4 owls that you can talk to in the game. Guess what? We're gonna talk to them. Because when we do, something useful is going to happen...

Notice the markings on the purple statue? Its a code! This is a Tetris code and the shapes it shows represent different buttons. If you still don't understand on how to decifer it, the code is as follows:

Left, LT, Right, RT, Up, A, Down, RT, RT

Unlike the other codes we've used before, this code reveals a hidden door!

Water Control
If you go through the door, it leads you to an area where you can change the water level. Grab the lever and shift to release the valves. The water lowers and reveals a door! Go on through.

Treasure Cove
Once you go through the door, you can see a chest. Open the chest and you get a... Map? Uh, yup! That's a map... Kinda. Oh, well. It counts. Now go back to the Water Control room.

Is it dark out yet? Well, when it is, you can see a Tetris code in the stars! Don't see it? Well, that's okay. Its as follows:

Left, LT, Left, Right, RT, Down, Up, LT

Boom-Ba-Da-Bing! A door opens. Go on through for a goovey time, yo!

Musical Blocks
Oh, yeah, this doesn't look hard at all... You'll soon notice that the bright pink blocks appear and disappear to the beat of the music. Don't be too afraid to take a guess as to where to jump. The bright pink dots in the dark are clues to where a platform resides! Climb to the next big platform and shift to find the door. Enter it for a little fun.

Tuning Fork
Well, this doesn't look weird. Jump up onto the tuning fork and feel the music! If you have a controller you can feel the vibrations on a different side. If you have a keyboard, listen for the vibrations. The music is telling you a code! It is as follows:

LT, RT, RT, RT, LT, RT, RT, LT

This reveals an anti-cube! Go back to the Musical Blocks room and climb all the way to the top. Once you've reached it, enter the door there.

Beat Climb
Climb to the top once again and there you will find an anti-cube! You'll also discover your first warp gate! Again, warp gates are one-way portals back to the current zone hub. Go ahead and use this one.

Once you're back at the Sky Hub its apparent that the Water Control room also affected the lowering of the water of the entire ocean! Go on back to the Crying Waterfall and jump down from the entrance. If you've noticed, there is a new platform and door that was once hidden by the ocean. Enter the door and get ready to get your first red cube.

Security Question
The pillar is asking you a question. A security question to be exact. Hence the title. The answer is METATRON. Basically, you have to rearrange the blocks so that they spell Metatron backwards. They also have to be evenly spaced on all planes. Rotate to check their spacing. Not only that, but once you've finished, rotate it just so the computer locks in the answer.

Most people complained because the symbols aren't even the right ones to make the name. All you have to do is stand on the block you want and then shift until it makes the symbol you want. Pick it up and then rotate back so that the entrance shows. Set it down where it needs to go.

To pick up a block, go up against it and hit Left Control (keyboard) or X (XBox). To throw, hit the same button. To set down gently, hit Down + Left Control (keyboard) or Down + X (XBox). I found a picture that might help you with the symbols so you don't have to keep looking for a certain letter.


Once you've finished, a red cube will appear! Go ahead and grab it and then head back outside to the Crying Waterfall. On the backside of the waterfall there's what looks like cracks in the wall... Climb up to the bomb and pick it up. Gotta be fast though! For a fast way to get down, press Down + Space (keyboard) or Down + A (XBox), Set it down the same way with the blocks.

Remember. Bombs are deadly, but they can help you too. We love you, bombs.

Doing this will reveal a door. Go on through to get to the Bomb Mine Entrance!
Chapter 4: Sky Hub I - Crying Waterfall II
Bomb Mine Entrance
Use bombs to blow up walls to reveal bits, walkways, and secret doors. But for now, blow up the big rock wall to continue into the mine. There is only one bit to collect here.

Bomb Mine Pillars
There are a few more bits here and a cube on top! This one is a little tricky. You're going to have to time your shifts so that they reveal the entire walkway. Once you do the first pillar another bomb will reveal itself so you can do the second pillar. So don't freak when the second pillar's walkways go back to being sealed after the first bomb.

HEY! LISTEN! After collecting the cube, do NOT use the small portal! Instead, make your way down and find the doorway near the entrance that can be blown up! Enter there.

Bomb Mine Treasure
Just like the title says, there's a treasure chest in here along with some bits! The puzzle is pretty simple to solve. Just blow up the wall and climb the ladder. Rotate to the side to continue climbing high enough to reach the chest. The chest contains a key!

Don't forget to look for walls that can be blown up and are hiding bits! *Reminder! To make sure you didn't leave anything behind, you can always check your map. If the level you're on is gold it means you've completed the level.

Now that you're done, let's go back to the Crying Waterfall.

Climbing back up to the bomb in the Crying Waterfall area, you should see another door nearby. Its blocked by a stone wall. Pick up the bomb and shift around to reach the door. Blow it up to reveal a door! Let's enter!

Infinity Waterfall
Odd room right? Well, as you're collecting the bits and Golden Cube look a little closer to the platforms you're standing on... Doesn't that look like... Tetris? The platforms themselves are making a Tetris code! It is as follows:

Right, LT, Right, A, RT, Down, A, Up

An anti-cube will appear where the Golden Cube was. Go back outside to the Crying Waterfall. Now, let's climb all the way to the top of the waterfall to find a secret entrance in a tree!

Alphabet Tree
Why am I calling this room the Alphabet Tree? Well, do you see the fox? And isn't he jumping over... A lazy dog? Sound familiar? "The quick brown fox jumped over the lazy dog." They are trying to tell us how to decifer the language of the Fezians! How clever!

Go ahead and grab the bit and then jump from there to reach a chest containing an artifact and an achievement!

Mightier Than The Sword
Find the Writing Cube artifact.


We are now finally done with the Crying Waterfall branch. HALLELUJAH! Go back to the Sky Hub to start the next branch: Cuberty Bell.


Totals:
5 Golden Cubes
6 Bits
6 Anti-Cubes
1 Red Cube
2 Keys
2 Maps
1 Artifact
-- is what you should have at the moment.
Chapter 5: Sky Hub II - Cuberty Bell I
Back at the Sky Hub! Assuming you're standing in the entrance way of the Crying Waterfall, you're going to shift until you see a bell tower (not a lighthouse) behind you. Its also the other wooden door on the other lone island. Enter the door to head to the Cuberty Bell!

Cuberty Bell

Before we look around and explore, there is an obvious door below you. Enter it.


Forshadow
Even though this room looks INSANE, its actually really clever. If you pay attention to each and every block you step on and remember them, you'll see them again later as you play. So this is why I call this room the Forshadow Room.

To actually get through this room though, you're going to have to shift. A lot. At some point a light tan block that looks like its made of gravel will start to crumble as soon as you land on it. Be quick! Shift and jump onto the next platform to keep from falling and having to start all over!

For the trouble, you are rewarded an anti-cube! For the love of FEZ, use the warp gate to get out of there.

You are going to warp back to the Sky Hub. Head on back to the Cuberty Bell. Once you come through, shift 180 degrees and you're going to find another door. Enter there now.


The Lonely Island
If you shift 180 degrees you will see another door. Notice anything? Yeah. 64 cube door. Obviously, we can't do anything with this room right now. Just be aware of its existance and maybe now you have a new motivation for beating this game: if only to see what's behind this door!

Let's go back to the Cuberty Bell. Time to climb up to the bell itself! Grab all the bits as you go and once you reach the bell, we're going to do a puzzle for an anti-cube.

Notice anything special about this bell? Each side has a different Fezian number symbol. Ring the bell with Left Ctrl (keyboard) or X (XBox):


One time.


Six times.


Three times.


Ten times.

Ahh... You hate to see it go, but love to watch it leave! Because you now have another anti-cube. Woot, woot!

Now you're going to use the floating blocks to climb above the bell to find another door. Enter said door.


Floating Walls
You're going to find a bit and another door on this first floating wall. Enter it.


Tetris
This is actually not really all that hard. Just have 3 of the blocks setting in the glowing pink areas and then its just a trial and error with the fourth block. You have to rearrange the blocks so that they match the tetris shape shown below the platform. You will need to shift to see how it looks.

Your reward? An anti-cube!


Now you're going to go back outside to the Floating Walls. Climb to the top, collecting bits along the way. Shifting is going to be your best friend for this area. At the top you're going to find a door. Go ahead and enter it.


Donut
There's a door at the bottom of this area, but let's go ahead and get everything while we're here. Once you get to the top you're going to find a chest. It contains a key. Don't forget the bits along the way! After you've finished raiding the area go back to that door at the bottom. Let's enter it.

Holes in the Wall
More jumping than climbing! Make your way to the top, collecting bits along the way like always. At the top you find a golden cube! DO NOT USE THE WARP GATE! Instead, we're going to go to the nearby tree. If you look, you'll find that it has a door!


The Shifty No-Shift Room
Like the title says, you can't shift here. Climb up to the lever. Grab a hold of it with Left Ctrl (keyboarding) or X (XBox) and then shift left once to collect the bits. Shift left again to discover another door. Let's go through it.

Puzzle Blocks
This one is extremely simple. All you have to do is put a certain block in the space where the lines will connect. All of the lines must align or the block will be rejected. The last block is on the ground floor. You might have to shift to see it, and you're definitly going to have to shift to get it on the higher platform. Simply use the pillars to carry the block up. Solving this puzzle will reveal a door. You didn't think something so simple would give ya something amazing, did ya?

Secret Puzzle Block Room
Well, how about that! Its an anti-cube! And with that, we're done with the Cuberty Bell branch. Check your map to make sure you didn't leave anything behind and that everything is completed 100%. If it is, use the warp gate in "Holes in the Wall" to get back to the Sky Hub.


Totals:
8 Golden Cubes
3 Bits
10 Anti-Cubes
1 Red Cube
3 Keys
2 Maps
1 Artifact
-- is what you should have at the moment.
Chapter 6: Sky Hub III - Pandora I
Precision Room
Okay, because it is so close to the Pandora branch, I am going to add this in here right quick. Remember when we lowered the water levels? Yeah, well, it made a door available in the Sky Hub area. Its the door right underneath the doorway for the Gateways. Unfortunately, there's nothing we can do in this room at the moment. We have to be in New Game + to complete it unfortunately. Just like the 64 bit door, just be aware of its existance!


We've now come to the part where we enter what I call "Pandora". Reason I call it that? Well, its an area of nothing but floating islands. So, yeah.
Alrighty, let's get to it! Shift around until you can see a bunch of floating islands in the distance. Still don't understand my method? That's alright. I have a picture you can use!


Pandora
For now, we're going to look past the door and collect everything we can in this area. And since we're floating the only way we can go is up, so keep on climbing! At the very top, you're going to open a chest that contains a key. Notice the other chest that just seems to be out of your reach? Yeah... You can't have it yet. Sucks, I know, but we have to have another map for that! Or you know, the flying cheat you can use during the New Game +.

So! Since you've gotten everything you can for the time being, why don't you climb back down and pick up that box? Set it on the purple pressure switch to reveal a door. Let's keep going!

Baby Blocks
This area is really easy. Obviously, grab the bits! Again, use the box to put it on the pressure switch. As the pillars and doorway rise from the ground, jump on a pillar to make your way to the bit by the tree. If you weren't able to do that and now can't reach it again, just use the box as a stepping stool! Once you've finished collecting bits, go on through the door.

Simple Switch
Again, all you have to do here is grab the box, jump onto the bottom pillar and shift and jump to the next highest pillar to make your way to the top. Put the box on the switch for it to open yet another door!

Cube Cavern
Once more, use the pillars to climb to the top and grab the cube! Use the warp gate. It takes you back to the Sky Hub. Go back to Pandora. Remember where the switch is? There's a normal wooden door near it. Go on through it.

Floating Blocks I
All you have to do is climb a tiny bit and you'll find a door. Don't worry about this room right now. We're going to come back in a second.

Treasure Cavern
Simply climb up the steps and open the chest. What's that? A map! Woot! Sadly, there's nothing else here. Let's go back to the Floating Blocks!


Floating Blocks II
Alrighty! Do your thing and climb around! Grab your bits and-- Oh! What's this? A cube! Suh-weet! Not only have you just gotten another cube, but getting everything from this room means we're done with the Pandora branch for now. Go ahead and use the warp gate to go back to the Sky Hub to get ready for our next branch: The Lighthouse.


Totals:
11 Golden Cubes
3 Bits
10 Anti-Cubes
1 Red Cube
4 Keys
3 Maps
1 Artifact
-- is what you should have at the moment.
Chapter 7: Sky Hub IV - The Lighthouse
Lighthouse


I made sure to get a snapshot of the door I used to get to the Lighthouse, just to make sure! Anyway, there is a door right below the Lighthouse. Don't worry about bits and what not right now. We'll get to those later. For right now, let's get this stuff knocked out, yeah?

Tuning Fork
There is another tuning fork! Remember how we delt with one of these earlier? All you have to do is listen/feel for the vibrations to give you the code. If its not working for you, its alright. I have the code right here! Make sure you stand on the tuning fork while using this code!!! It is as follows:

LT, RT, RT, LT, LT, LT, RT, RT, RT, RT

Way to go! You now have another anti-cube!

Lighthouse Island
Let's go back outside to the Lighthouse. Do you see the statue on the little floating island? Let's go check it out... Hmm... Odd right? Well, unfortunately, we can't see the code that's on the ground at the moment, but luckily I have the code anyway! It is as follows:

Up, LT, RT, Up, LT, Up, RT, Up

Wow-zah! Another anti-cube! We're on a roll! Okay, let's grab the bit by the trees right quick and then use a key to get into the actual Lighthouse.

Inside the Lighthouse
Oh! A chest and a bit! Grab the bit and open the chest. A map! Awesome! We now have the map to get the unreachable chest in the Pandora branch, remember? However, we aren't going to go back just yet. There's a much easier way later. If you shift twice, you'll notice another door. Let's go!

Lighthouse Climb
Woahmama! Hmm... Its best if you climb one set at a time. Wait for the pillar to shift itself before proceeding. If you try to rush it, you're gonna fall and have to start all over! Once you get to the top go through the door. Make sure you look for bits before proceeding though!

Exiting through the door in the Lighthouse Climb has sent you right back out to the Lighthouse... But on top! Go ahead and grab the lone bit on the top of the Lighthouse and then jump to the floating island next to it to find a door. Onward we go!

Sky Hub Exit
There is a door right below you near the water. Enter it now.

Owl Room
Okay, just by first glance it doesn't look like there's much to this room. And that's kind of true. Not many people know what to do in this room but luckily, I figured it out! When you're in New Game +, you have to look in first person view at the floor around the owl statue for the code! Said code is as follows:

RT, RT, RT, LT, RT, RT, RT, LT

Yay! Another anti-cube! Let's go back outside to the Sky Hub Exit. See the crank? Turn it once so you can start climbing. Collect bits as you go. Once you get to the door, prepare yourself... You're about to leave the Sky Hub all together! Hence the "exit" part of the title. Go through the door and let's get started on our next adventure: Industrial District.
Chapter 8: Industrial District I
Industrial Entrance
I bet most of you noticed the chest right off the bat. Well, unfortunately, we don't have the map to get it yet so we're just gonna have to wait for now. Go ahead and grab the bits while you make your way to the top. Once you're done with that, go on through the door.


Industrial District Hub
Go ahead and explore! The reason why I have titled this the "Industrial District" is because that is what the smiling face on the wall says: "Industrial District Welcome". Oh, and all of those blue and white signs you've been seeing? They say Zu. I'll explain that later. Anyway! Go find the 2 houses that are in this area. They're relatively easy to find as they are identifiable by their light tan and purple appearances with a wooden door. Each house contains a bit. After that, shift to that you're looking at the smiling face. Shift once to the right and enter the door that's on that side.

Windmill
Climb and jump around to collect the bits here! Is it getting dark out? Oh! Another owl! Let's talk to him and see what he has to say! ... Well, that wasn't weird at all. Oh, well. Let's just enter the Windmill.


Inside the Windmill
As soon as you enter, shift once to the left. Wait for the spinning pillar in the middle to finally shift. It reveals an entryway! Onward!


Windmill Bunker
Oh! A chest! Not a key or map, but a Golden Cube! There's nothing else to do in here, unfortunately, so head on back until you get back to the Windmill. Once you're outside, shift left and look below you; there should be a door there. Let's enter there now.


Shifty City
There are a few bits to collect here. In order to get them, turn the ladders on each side so that they face away from the central pillar. Now you can easily climb to the top and reach the bits! Hop on over to the furthest pillar from the center one and then shift around until you find a door. Enter it.

Labyrinth
Okay, so this room is like a cruel joke. The platforms are extremely difficult to climb. You have to wait until they turn horizontal and then time it just right so you can jump and land on the next one when it, too, turns horizontal. Not only that, but all you get for reaching the top is one lone bit... Hence why I call this room "Labyrinth" after the movie. Its so unfair! In the words of the Goblin King, "I wonder what your basis for comparison is?" But why do we bother? Because we're determined to beat this thing! Anyway! Go back to the Shifty City and jump back to the central pillar to find another door. Enter it.

Right Round
Basically what you have to do is turn the cranks. Notice the plural. The one below the giant block being help up by a tiny little pipe controls the turning wall inside. Climb the vines to get to the crank above it and it turns the outer block. What I did was turn the lower one until I had them both lined up and then turned them once the same way so that they stayed lined up. If you do this then a door will be revealed! Again, this puzzle is mostly trial and error, but its relatively simple. Just tedious. Enter the now revealed door.

Rocket Man
Prepare to be shot up into the sky! Literally. Make sure you're on the edge of the direction of where you need to go on the platforms that shoot you into the air; otherwise, you're not going to make it to the other platform. Enter the door at the top.

Wow-zah! You appear right back outside, but on top! And next to a cube to boot! Hawt-dawg! Grab your reward and use the warp gate to take you back to the Industrial District. Face the smiling face on the side of the building and shift left. You'll see another door! Enter it.

Block Rides
Does this remind you of Mario? Anyway, jump onto the platform. Yes, they move! All you have to do it shift so that they black lines connect with each other to keep you moving to your intended target. The top. Yes, there was a door on the top of the first structure, but don't worry about that one for now. We'll enter it in a few minutes.

Ladder Climbing
A simple puzzle actually. Just turn the ladders with the cranks so that they all line up. Start climbing the bottom one and then shift so you see all the ladders connected from the side. Climb all the way to the top and grab the bits! You will see a door up there. Go ahead and enter it once you have all your bits.

Rotating Platforms
The platforms you have to jump onto to climb to the top rotate, so be careful of when you jump! Make your way to the top, collecting bits along the way. At the top you get another Golden Cube! Seeing as how you're done here, go ahead and use the warp gate to take you back to the Industrial District. Face the smiling face and shift twice to find another door.

Twist & Shout
This puzzle is going to frustrate you... You have to time everything JUST right! Don't forget that shifting is your friend. It will make this go a lot more smoothly. Be patient and keep your cool, and you'll get through this level fine. Once you reach the cranks, get to the top of the first one and then shift until you're a comfortable distance from the chest platform. Jump on down and open it to receive a map! The crank automatically moves down to where you are so you can easily just jump right back and crank it up to the other one. Go all the way to the top to find a door. Enter it.

Shifty Ladder
Climb up the ladders and reach the top to get the Golden Cube! Go ahead and use the warp gate to get back to the Industrial District. Remember that door we skipped back in Block Rides? Well, its time to go back! Remember, face the smiling face and shift to the left. Enter the door there to get back to the Block Rides. On the top of the first structure, enter the door.

Sewer Pipe
I swear, this game was based off of a mix of Mario, Zelda, and something all it's own. Dot calls it a well, but really? Its a giant pipe... Anyway, jump on top of it and be like Mario and press down to enter the pipe. What lies below?
Chapter 9: Industrial District II - Sewers I
Okay, you guys... We're very close to obtaining 32 cubes and anti-cubes total! Because I ran out of room in the previous chapter, I will do an item update after the Sewers. And yes, this level is as appealing as the name. In the next chapter we're going to be going through our first play through of the game; which means you get to see the ending! Well, the first one at least.

Sewer Entrance
It is kind of hard to tell where the bits are in this level, but if you look for the random pulsing diamond shape every now and then, you'll be able to pick up on where its at quite easily. Jump over (don't fall into the acidic sewer water!) and use the crank to lower the water levels. Jump on down and enter the door there. Don't forget the bit!


Sewer Hub
Go ahead and collect all the bits here. You're going to have to raise the water levels in order to get them all. Once you're finished, go up to the warp gate at the very top. (Don't worry, we're going to finish the Sewer levels once we start New Game +.) Shift until you're standing in front of the blue side. The blue side is going to take you back to the Sky Hub. Handy, huh? Go ahead and enter it. You're now at the Sky Hub!


Gateways
Okay, let's go to the Gateways and enter the 8 cube door.


Totals:
18 Golden Cubes
3 Bits
13 Anti-Cubes
1 Red Cube
1 Key
5 Maps
1 Artifact
-- is what you should have at the moment.
Chapter 10: The Gateways II


Owl City
Oddly enough, this level isn't very huge and not very difficult at all. All you have to do is explore! Enter every door. Some will have bits and some won't. When you first enter Owl City, shift left and the door on the second platform will be a special room.

City Classroom
Did you notice the tetris code on the blackboard to your right? If you still don't know how to decipher it, or just don't want to bother with it because you have me, the code is as follows:

Up, Left, RT, A, LT, Right, A, Down

This reveals an anti-cube! After you have found everything, go back to the gateways and enter the 16 cube door (the last door to open).

Alright, this is the door that you're going to need to enter. Remember when I said I would explain that "Zu" thing earlier? Well, you're actually about to enter the city of Zu. Once you enter here, and you paid attention to the writings on some of the walls, that they actually have a hierarchy in Zu. One of which where you are just below the all powerful Cube! So... Huge honor. Anyway, let's get going!


***WARNING! Do NOT open the 32 cube door! DON'T DO IT!!!***

Why? Because once you go in, there's no going back, and we have a few more things to do before we do that! Alright... Now that that's settled, lets go explore. There's two bits to collect outside and a few more to collect in the rooms. Some will have them, and some won't. There is a room with a chest that contains a key! And then there's another special room...


Throne Room
Originally, we wouldn't be able to solve this room without being in New Game +, but because I'm awesome, I have the code for you guys! If you shift fast enough, you can actually catch a glimpse of the code on the wall. The code is as follows:

RT, RT, LT, RT, RT, RT, LT, LT, RT, LT, LT, LT, RT, LT, RT, LT

This reveals an anti-cube! Once you've found everything and explored to your satisfaction (remember to use your map to make sure that you've completed everything!) enter the 32 cube door.
Chapter 11: Star Gate I
The Star Gate
Surprise, surprise! This is the first ending to the game! All you have to do is approach the Star Gate and talk to Dot to activate it. Its going to spin around a lot and then show you a new zone to take you too. Enter it when you're ready.


The Heavens Temple


Notice how the focus is further away? Yeah... You're just going to have to work with it. Gravity is sharply reduced, by the way. Which makes things a lot easier, actually. Make your way to the top and you'll see an owl! But seriously, are those octopi? Anyway! Once you get to the top, climb onto the owl statue and jump into the white part of the cube. Don't freak when your game "crashes" again.

Once you have "reloaded" the game, you will appear back at Gomez's house, sleeping. Leave your house and start climbing to the top of the village once again. The graphics are going to so freaky weird on you as you go. Its totally normal. If you make it to the top, just wait.

I'll let you enjoy the incredibly long cut-scene, but after that, the credits will roll. But you know what this means? You beat the game! Not all the way yet, but technically, you have finished! Which means...? AN ACHIEVEMENT!

Kill Screen
Get to the end.


After the credits are gone, the main menu will appear once again. Hit Enter (keyboard) or A (XBox) and then choose your save file. Choose the new option available called, "Start New Game +".

Despite the name of the option, you still have all of your progress completed and have everything you've achieved so far. Again, climb to the top of the Village like when you first started the game and speak to Geezer. Everything is just like when you received the fez, but this time you get a pair of sunglasses! These bad boys allow you to see from a first person point of view!

Congradulations! We're half way done! Now all we have to do is backtrack for some missing stuff and complete the game for good. Get ready! Because here we go!


Totals:
19 Golden Cubes
2 Bits
15 Anti-Cubes
1 Red Cube
2 Keys
5 Maps
1 Artifact
-- is what you should have at the moment.
Chapter 12: Pandora II
Now that we have the sunglasses that give us a first person perspective let's do some backtracking. Remember Pandora and the floating islands? Time to head in that direction.

Of course, you start in the Village. Go below your house to get to the Pillar. Again, climb to the top to reach the door that leads to the Gateways. Enter it and then use the floating purple pillars to get to the doorway above the number cube doors. Enter it and it takes you to the Sky Hub.

Shift to see the doorway to Pandora. Remember, you'll see the floating islands in the background. Its the doorway on the far right when you shift.

Pandora II
Remember that chest that we couldn't reach before? Well, we can finally use the cheat to get it. Climb to the top so you can see it and then climb onto the tree. Again, press the following to fly:

Up, Up, Up, Up + Space/A

Use Space/A to adjust how high you go or when to start falling again. It takes some getting use to. Let go of Space/A while still holding Up to start falling. You can move left or right while you are falling. Hold Space again to start going upwards again or to stop falling.

Once you reach the chest, open it and receive your anti-cube!

Okay, remember the door in the Sky Hub that was revealed when we lowered the water levels, but we couldn't do anything? If you can't remember this specific room (The Precision Room), go back to Chapter 6: Pandora I. It will be labeled as the Precision Room. Go to that room now.

Precision Room
This one is complicated and somewhat frustrating. Use Right Alt (keyboard) or the Left Analog Click (XBox) to look in first person when you're standing on top. See the swirls? Well, you have to step on the center of the swirl with the empty square. You will have to shift and look to line it up correctly. Once you've got it, use this following code:

Up, RT, Up, A, Down, LT, Up, Down

What the--? Er... A black monolith appears... Hmm... Position yourself on the other swirl center and input this code:

Down, Down, LT, RT, RT, A, Up

Ah! There we go! A Red Cube appeared!!! Grab it and head back to the Sky Hub.
Chapter 13: Industrial District III - Sewers II
Now that you're back at the Sky Hub, let's go back to the Industrial District. Do you remember how to get back? If not, you have to go through the door that leads to the Lighthouse. Once you're there, go in to the Lighthouse entrance door. Shift inside the Lighthouse to find another door. Enter that one and it leads you to the Lighthouse Climb. Remember how we couldn't get the chest here before? Well, now we can!

I personally used the map to obtain the chest, but if you want, you can use the Flying Cheat. Again, just use the following:

Up, Up, Up, Up + Space/A

Once you reach the platform, open the chest. Oh! We get another anti-cube!


Go back to the main platform and make your way down to the door you came in through. Again, exit the Lighthouse. Go back to the Sky Hub. Once you're at the Sky Hub, climb up to the warp gate. Shift until you see the the Sewers background. Enter it.


Sewer Hub
Go over to the crank and lower the sludge level. Collect bits as you go along. There's one on every level. Enter the door at the very bottom.

Treasure Room
You're going to jump on a platform and simply ride it until you can jump up to the chest. Open it and receive a key! Go back through the door you came in from to the Sewer Hub once more.

Enter the second highest door (but not the door that leads to the Sewer Entrance). Its a level above you.

Ups and Downs
You come out onto a platform. Under the sludge is another crank. Go ahead and use the crank already visable and lower the sludge level so that you can climb down to the hidden crank. Turn the bottom crank any direction twice. Raise the water back up until the floating platform is just above the larger platform. Let go of the crank and shift right once. Now turn the crank left.

Wah-la! The floating platform is now resting on the larger platform. Again, lower the sludge level so that you can use the bottom crank again. Turn the bottom crank two times in any direction once more. Jump back up to the top crank and raise the sludge levels all the way. Now you can jump and latch onto some vines to open a chest with a Golden Cube inside!

Once done, go back to the Sewer Hub. This time, we're going to enter the door underneath the warp gate.
Sludgy Hallway
All you have to do is jump from platform to platform. At the very last one, shift and jump to another platform. If you shift again, you'll discover a bit and another door! Grab the bit and enter the door.

Sewer Sub-Hub?
This room is similar to the Sewer Hub in which it has doors on every level as well. Let's start at the top. Go ahead and collect all the bits so you don't have to worry about them later. On the floating pillar, just jump to the top of the pillar and then climb down to grab the bit and then just jump right back up. You don't have to dive-die to get this one if you don't want to.

Go to the highest crank and lower the sludge level to the very bottom. Climb all the way down and enter the door at the lowest level (make sure its not the one we came in from).

[/screenshot]Tuning Fork
Just like the last times, stand on top of the tuning fork and use the following code:

LT, LT, LT, RT, LT , RT, LT , RT

Woot, woot! You have an anti-cube! Go back through the door we entered and climb up to the next level and enter the door.

Sludge Geyser
Jump from geyser to geyser and shift to reach a chest. Open it and receive a key! Nothing else to do here so go back through the door we came in from and then go up another level in the Sub-Hub (the highest level) and then enter the door there.

Cube Room
Make your way to the top and grab the Golden Cube! Go ahead and use the warp gate to go back to the Sewer Hub. Once you're there, enter the door below the highest crank.

Tetris Door
Make sure to check for bits and then turn the crank to lower the sludge level to reveal a hidden door! Wait, this door looks weird... Is that a code on it? Well, let's use said code and see if it opens. The code is as follows:

Right, Up, Left, Down, A, LT, RT, A

Ta-da! The door is open! Enter it.

Lava Room I
Before you do anything, shift to the left to find another door. Go through it.


Tuning Fork
Another one? Oh, well. At least its easy! The code is as follows:

LT, LT, RT, LT, LT, RT, RT, RT

This reveals an anti-cube! Grab it and go back to the Lava Room.

Lava Room II
Okay, now you can go to the top and turn the crank. Turn it in any direction. But WAIT! You should probably know that this crank is going to lower the ladder and make the lava start to rise at an alarming rate. Climb as fast as you can before the lava hits you. If you die, you have to start all over.

To start, you have to climb the ladders and vines while jumping from platform to platform and shifting to make your way to the top. Avoid the glowing black and red pillar-blocks by shifting. After more ladders and vines, you're going to run into some rotating platforms. You have to time when to jump just right! Start when they're horizontal and then jump when they shift to become vertical. Finally, stand on the stripped platform and wait for the lava to rise. The platform will float the rest of the way up. Avoid the glowing black and red pillar-blocks during the ride. Once the lava stops rising there will be a floating island. Jump to it and enter the door there.

If you do not want to do this extremely difficult challenge you can use the flying cheat:

Up, Up, Up, Up + Space/A

Lava Skull
Climb to the top of the skull and grab the anti-cube! Use the small portal to go back to the Sewer Hub. You're going to enter the highest door (which is locked).

A Bit Sludgy
All that there is in this room is a lone bit... That's all. Go back out to the Sewer Hub and use the warp gate to go back to the Sky Hub (the blue side of the warp gate). Once you get to the Sky Hub look above and you can see a door in the tree resting on top of the warp gate! Enter it.
Chapter 14: Sky Hub V - Ruins of Zu I
Tree Climbing
Make your way to the top of the tree. Be sure to collect whatever bits there may be on the way up! Enter the door at the top.


Cabin in the Woods
Bypass the cabin for now. We'll come back to check it out later. So make sure you DO NOT ENTER IT. Climb onto the top of the cabin using the bouncy mushrooms and wait until nighttime. An owl will appear on the pink tree. Make sure you talk to it!

After that odd, cryptic clue go to the statue on the lone floating branch. Looking with first person view, you can see the code on the ground. The code is the following:

Right, RT, Left, LT, Left, Up, Down, A

Yay! We have another anti-cube! Now, enter the door below the statue.

Treasure Tree
Be careful! These platforms crumble and if you take too long, you'll fall! Use these crumbling platforms to make your way to the chest at the top. Open the chest and receive a map! Go back to the Cabin in the Woods. Use the bouncy mushrooms to bounce your way to the top! Be sure to collect the bits along the way. Enter the door at the very top.

Treasure Hunt
See the statue? The code is on the ground, just like the last one. Go towards it and use the following code:

LT, A, RT, Up, Down, LT, RT, A

It reveals an anti-cube! Now, the chest on the floating platform requires a map that we'll get later. If you want to wait to get the map and then go back and do it, that's fine. But for the sake of not having to run every where and possibly get lost, I would recommend using the flying cheat:

Up, Up, Up, Up + Space/A

*I strongly recommend using the cheat so that you will be able to use the map in the chest to get an anti-cube a little while later in this chapter! Otherwise, you'll have to go back!
Go on through to the other door.

Rock Climbing
Climb the rock temple/statue thing and get the bit at the very top. You will have to use the trees to get on top. Enter the door to the side before the main entrance.

Tetris Puzzle
The pillar is showing you different designs that can be folded into cubes. Basically, all you have to do it make one that is not listed. Once you have it, shift back and forth a couple of times for the game to register it. I have an image to help you.

It reveals an anti-cube! Grab it and then head back outside to the Rock Climbing room. Climb down and shift to see the door to the entrance of the Temple. Enter it.

Cave of Wonders
Collect the bits and then stand by the statue. There's a code on one of the other platforms in this room. The code is the following:

Left, Left, Down, Down, Right, Right, Up, Up

This reveals an anti-cube! Sheesh, we're on a roll! Go ahead and enter the door under the statue.

Ruins of Zu
Remember Chapter 10: The Gateways II (Lable: City of Zu)? Yeah... Same place! Go through all the rooms that are not on an island by itself. Almost all of them lead to bits. You can enter the 32 cube door for two bits; just look out for the black holes! The door above the doorway from where we came in is a special room.

QR Code
Is that... A QR code...? It is! I found this amusing and very clever. You can easily scan this QR code for the real code! For those of you who don't have a smartphone, or for some reason the code won't scan the answer is as follows:

RT, RT, LT, RT, LT, LT, LT, RT

*You won't be able to do this room until you have a specific map for it! Remember the Treasure Hunt area a little while back in this chapter? That's where you get the map!


Observatory I
Beside you is a time crank. Turn it four times to the right to activate it and then try to climb up the revealed vines as fast as you can! Collect the bits along the way. Halfway up is another door. Enter there before continuing to climb!


Octopus Temple
Use the time crank to climb to the top of the temple. Wait for nighttime and then jump on top of the tree. Another owl will appear and this will be the fourth and FINAL owl! After the weird, cryptic message enter the door that is embedded into the tree.

Teaching Tower
If you didn't notice, the tower lights up with the tetris symbol in the way you move! Basically, it's teaching you. Clever, huh?

Anyway, the code on the pillar is the following:

Up, A, RT, LT, A, Down, LT, RT

You get an anti-cube! Way to go! Now, go back outside to the Octopus Temple and enter the temple's door.

Corridor
There is literally nothing in here. Just go through the other door.

Treasure Room
Open the chest for an artifact! Oh, and an achievement!

A Numbers Game
Find the Counting Cube artifact.

Go back outside to the Corridor. Enter the door that leads you back to the Octopus Temple. Climb to the top of the temple and grab your Golden Cube! Use the blocks with eyes on them to make it to the top! When they line up with you on one of them, they will close together and squish you!

Make your way back to the Observatory.

Observatory II
Again, use the time crank to climb to the top and enter the building.

Star Gazer
This room has the hardest puzzles in the game. The first one reveals an anti-cube! Climb up to the telescope and stand on the seat. Shift until you are facing outside. Wait for nighttime and then hit Left Ctrl (keyboard) or X (XBox) to look through the telescope!

The stars write a code in the night sky and through the telescope. The code is the following:

Right, RT, Left, RT, RT, A, A, Right

Grab your anti-cube and then look at the stars once more. There are two stars that blink in a certain pattern which represents a binary code that translates into the code! The code is the following:

RT, LT, LT, RT, RT, LT

This reveals the FINAL Red Cube! Congrats! Go back outside to the Observatory.
Chapter 15: Sky Hub V - Ruins of Zu II
Observatory III
Climb up the building to reach a Golden Cube! Grab it and then use the warp gate to take you back to the Ruins of Zu. Once there, go through the highest island door.

Entryway
Nothing here. Just shift a couple of times and you'll find another door to enter. Do so.

Museum
There is one bit on the top of the museum to grab. Snatch it and then go inside the Museum.

Inside the Museum
Shift 180 degrees to find a bookcase. Stand in front of it and press Left Ctrl (keyboard) + Up or X (Xbox) + Up to push the bookcase in and reveal a secret doorway!

Globe Room
Use the crank to turn the globe. Turn it to the left once and then grab the bit inside! Go back and turn the crank twice more to find a hidden doorway.

The Study
Climb down to the chest and open it for an artifact! Hawt-dawg! And an achievement!


Haikus Not Epics
Find the Tome artifact.


Make your way back to the Ruins of Zu. Once you're there, enter the door to the second island.

The Clock Tower
Use the time cranks to make your way to the top. Use the crank at the top to make the floating pillars rise; enabling you to go up and grab the cube! Don't use the portal! Jump back down to the clock.

Each side of the clock runs on a different time frame. When the clock reaches the stroke of 12, an anti-cube appears on one of the floating pillars! It is strongly recommended to use your PC clock to speed things along... The time frames are as follows:

Red has a cycle of 1 minute.
Blue has a cycle of 1 hour.
Green has a cycle of 1 day.
Gray has a cycle of 2 days.

Just press Alt + Tab to minimize the game and change your PC clock, or pause the game and go to "Help & Settings", then "Visual Settings" and change the screen mode from "Full Screen" to "Windowed" to make switching back and forth easier. Once you're done with this you are now officially done with the Ruins of Zu!


Totals:
26 Golden Cubes
6 Bits
31 Anti-Cubes
3 Red Cubes
1 Key
8 Maps
3 Artifacts
-- is what you should have at the moment.
Chapter 16: Sky Hub VI - The Catacombs
Okay, guys! So close to being finished! Make your way back to the Sky Hub and once again enter the doorway made into the tree resting on top of the warp gate. You are sent back to the Tree Climbing area. Make your way to the top of the tree and enter the door at the top.


You're now back to the Cabin in the Woods. I finally give you permission to enter the cabin! Enter it now. Buwahahaha! Nothing in there... Welp, ya better leave then.

Oops. Did I forget to mention that its a freaky cabin that takes you to a whole other dimension? Well, it does.

Dead Zone
Grab the bits and enter the other door.

The Catacombs
Entering this area unlocks the last warp gate, and an achievement!

Warp Zone
Reactivate all 5 warp gates.


Go ahead and grab all of the bits in this area. The rain and lightening in this zone makes it easier to see the invisible blocks that help you climb from level to level. If you don't want to wait for the lightening to flash, look closer and you can see the splash that the rain makes on the blocks which gives you an outline and an estimate of where to jump. Make your way back down to the lowest door (not the one we came through) and enter it.

The Owl's Secret
Wondered why the owls were so important? Well, its because they open a secret door! (Also, don't you think its clever how the owl's head shifts all the way around like a real owl whenever you shift? I thought it was.) Grab the bit and enter the new door.

Hoot, Hoot
Grab the anti-cube on top of the owl statue! Thank you, feathered friends! Now, we need to start heading back to the Catacombs. Once you're back there, enter the door on the island that's beside the warp gate, not above it.

The Mausoleum
Grab what bits you can for now and then head over to one of the lower islands. One of them has a door. Enter it.

Spooky Islands
Be sure to grab all the bits as you climb to the second island. Enter the door there!

The Tower
As you climb, be sure you don't leave any bits behind. (Again, be sure you're checking your map to make sure you've gotten everything!) Grab the cube at the top! Instead of using the warp gate, climb back down to Spooky Islands.

Spooky Islands II
Use the bomb to make another entryway. Pick it up, shift right once, and jump from platform to platform. Go through the new entryway and enter the door.

A Bit Scary
Grab all the bits! And... That's it. Go back to the Mausoleum and unlock the last locked door. Its the door on the main platform.

Tomb Raider
This is the last hard puzzle for the entire game. All you have to do is open your items menu and look at the four maps that look like grids. If you look, you'll notice that some are missing dots. That's where the closed tombs are. There was a clue outside on the building, translating, "dots to dots". There are numbers on each map to tell you which doors to enter and in which order. When you exit, it is done randomly. If reading the maps are too difficult, just follow my instructions:

1. Shift until the entrance building is on the far right. Enter column 4, row 4.
2. Shift until the entrance building is on the far left (No Fezian script visible). Enter column 3, row 3.
3. Shift until you see the entrance doorway. Enter column 3, row 2.
4. Shift until the entrance building is on the far left. Fezian script is visible. Enter column 2, row 1.

After entering the last door you will be taken to a secret room!


Red Sea
Don't shift. Jump to the right and into the water. Swim for quite a while and you'll finally run into a lone little island with a chest. Open the chest and discover the ancient skull artifact and obtain an achievement as well!


Phrenologist
Find the Skull artifact.


Swim back and start to backtrack to the Catacombs. Once you're back, enter the door above the warp gate.

Spin Me Right Round
Grab the last bits of the game! You should now have all of the regular cubes.

There are 4 small skull statues here that you can rotate by grabbing them and shifting. Make them all face the same direction to reveal a door in the back of the giant skull. Enter the door.

Death is Only the Beginning
Grab the anti-cube on the top of the skull. You have now just completed game! You have gotten all 64 cubes! Dot will congratulate you and suggest to go to the 64 cube door. Not only can you go to that door now, but you have also just received your last two achievements!

Sum Total
Find all collectibles.


Hexahedronaut
Collect all 32 Golden Cubes and 32 Anti-Cubes.


Just like Dot suggested, let's go back to that 64 cube door. Backtrack to the Catacombs and use the warp gate to take you to the Sky Hub.


Totals:
32 Golden Cubes
0 Bits
32 Anti-Cubes
3 Red Cube
0 Keys
9 Maps
4 Artifact
-- is what you should have at the moment.
Chapter 17: Sky Hub II - Cuberty Bell II
Sky Hub
Shift until you see the Cuberty Bell in the background. Enter the door. (The door should be on a lone island to the right.) Once you come through, shift 180 degrees and you're going to find another door. Enter there now.

The Lonely Island
If you shift 180 degrees you will see another door. There she is! Isn't she gorgeous? Welp, time to open her! Enter the 64 cube door.


Heart Piece
Climb up the vines, stand under the heart, and hit F12 for a screenshot. This is your proof that you have beaten the game by collecting all Golden Cubes, Anti-Cubes, and Red Cubes!

Lastly, you now have an alternate ending since you collected all 64+ cubes. All you have to do to watch it is go back to the Gateways, enter the 16 cube door that leads to the City of Zu, and enter the 32 cube door. Enter the Star Gate and redo the ending.

After watching the alternate ending and the credits, you have the option to play New Game or New Game + once again.

Choose "New Game +". It will start out just like the first two times. Again, climb to the top of the Village and speak to Geezer. In the end, you'll get something special.


End Game
3D Glasses! You can toggle it in your Game Options menu.
Happy gaming!
The End - Words From the Writer
Thank you all for reading! I spent many hours into this and I hope you all enjoyed it as much as I have. Please feel free to leave a comment, add me, etc. Feedback is appreciated!

A Special Thanks To...
RandomSplode
Reedeeps
Professor Ganki
Dorian Williams
My Father
... for all the love, support, & encouragement. Thank you! <3

This guide began on December 30th, 2013, and was completed January 6th, 2014.
Комментариев: 216
corwinat 2 апр в 4:20 
Finally getting around to playing this one. and I'm loving it, however as I was playing I got to the windmill late in my play through and found I was out of keys for the door so after several hours of hunting around I finally found a key. but upon my return to the windmill I found my way blocked by black holes can anyone describe a way to get back here or am I screwed until I start NG+
universedonut 25 фев в 13:02 
Amazing guide, thank you so much for the help, I genuinely got stuck in a few spots and your guide really helped me get back on track, thanks!!! :stella_happy:
Cid 22 янв в 3:45 
I am going to be totally honest, I would never completed everything on the game without this guide, some of the puzzles just require too much work

So thank you for investing soo much time into this, you must be very patient, or a genius, the game is awesome, and our guide is the best
Stuart 7 сен. 2024 г. в 7:46 
@themonsterofthenet
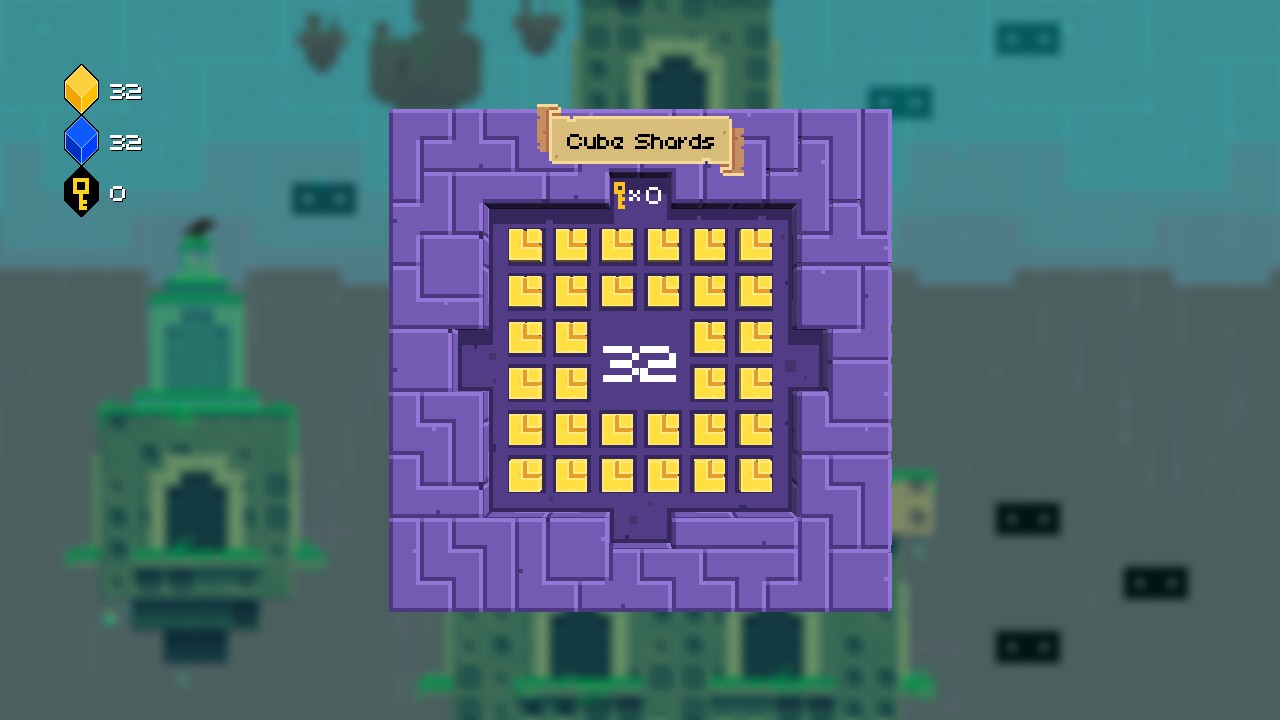
1. One of the owls says "Hexahedron. Octahedron. Dodecahedron. Her sacred geometry." Metatron's Cube is a sacred symbol in some mystic traditions.

2. Another owl says "The thirteen circles. The 64-bit name of God."
The thirteen circles refers to the first clue, as Metatron's Cube is comprised of 13 circles.
The 64-bit name of God implies that god's name can be encoded into 64 bits. 64 bits of binary is eight letters. Note that the developer of the game has an eight letter name, Polytron.

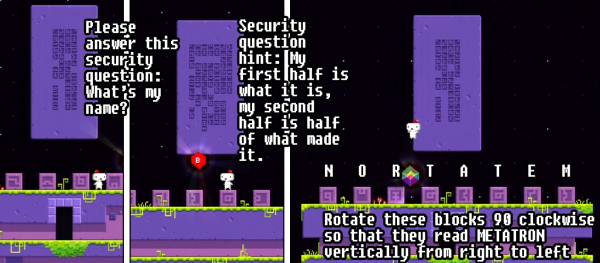
3. The hint in the room reads: "Security question hint: My first half is what it is; My second half is half of what made it."
"My first half is what it is" is a very "meta" description.

"My second half is half of what made it." Well, the makers of the game are Polytron. If we take the second half of that name, 'tron', that could be the second half of the answer.

Combining these two halves together gives us 'Metatron', neatly referring back to Metatron's cube.
themonsterofthenet 1 сен. 2024 г. в 12:16 
How the ^%$$& did you get the answer to the Security Question???
AssileM 16 авг. 2024 г. в 7:58 
Incredible guide, thank you so much !
skaarj217 7 мая. 2024 г. в 2:00 
In Pandora II, you don't have to fly to get to the chest. Flying code is nowhere seen in the game, it's a developing/testing artifact and is not needed to complete the game or even do anything.
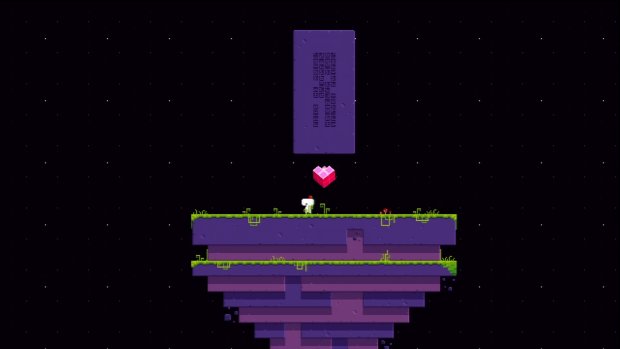
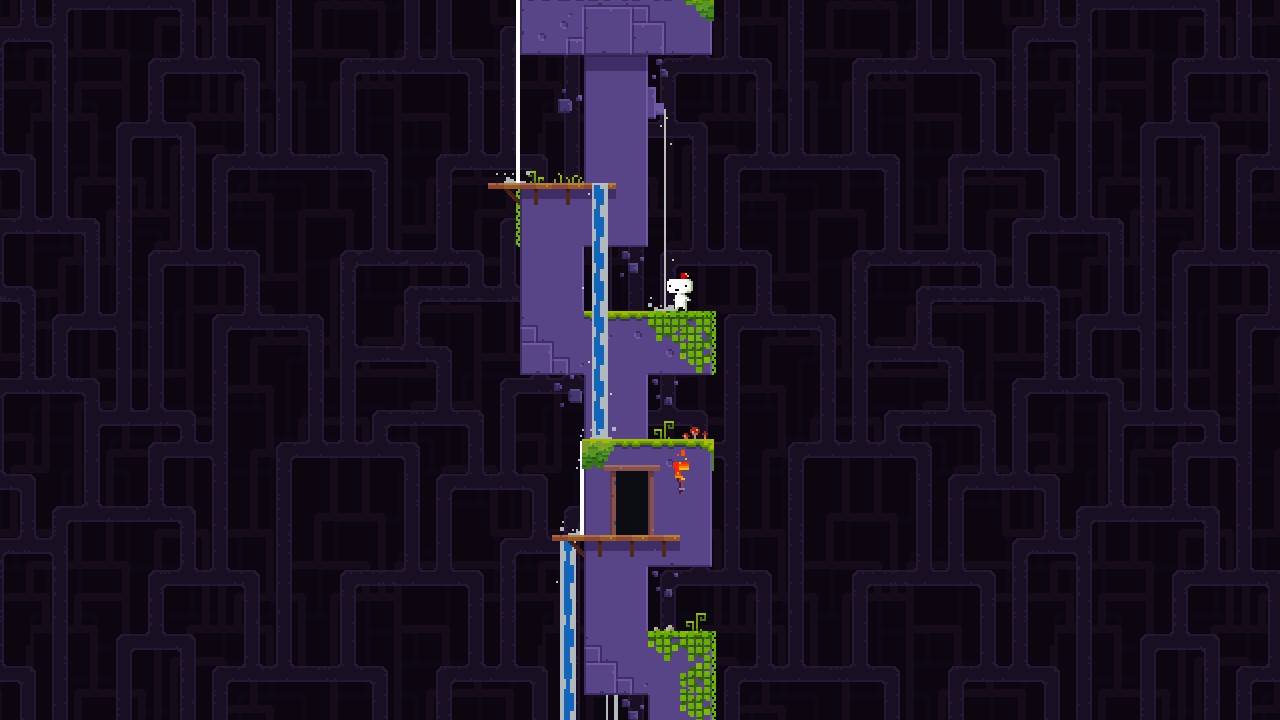
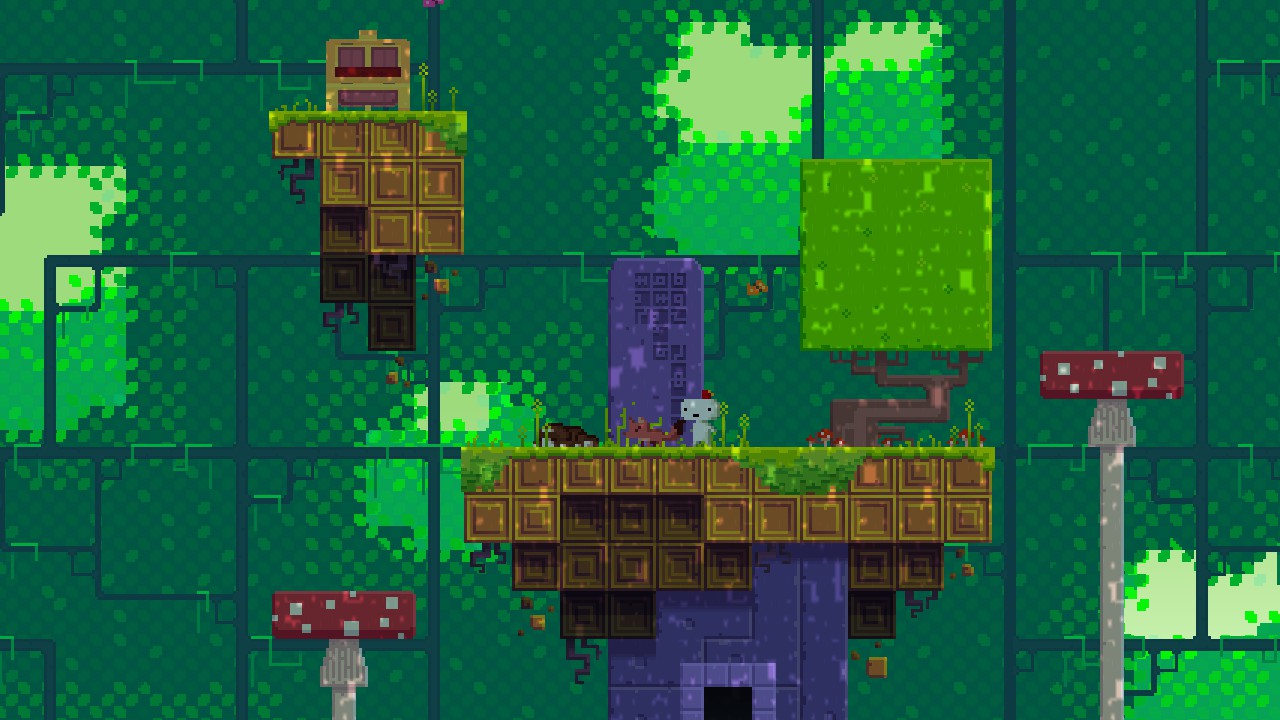
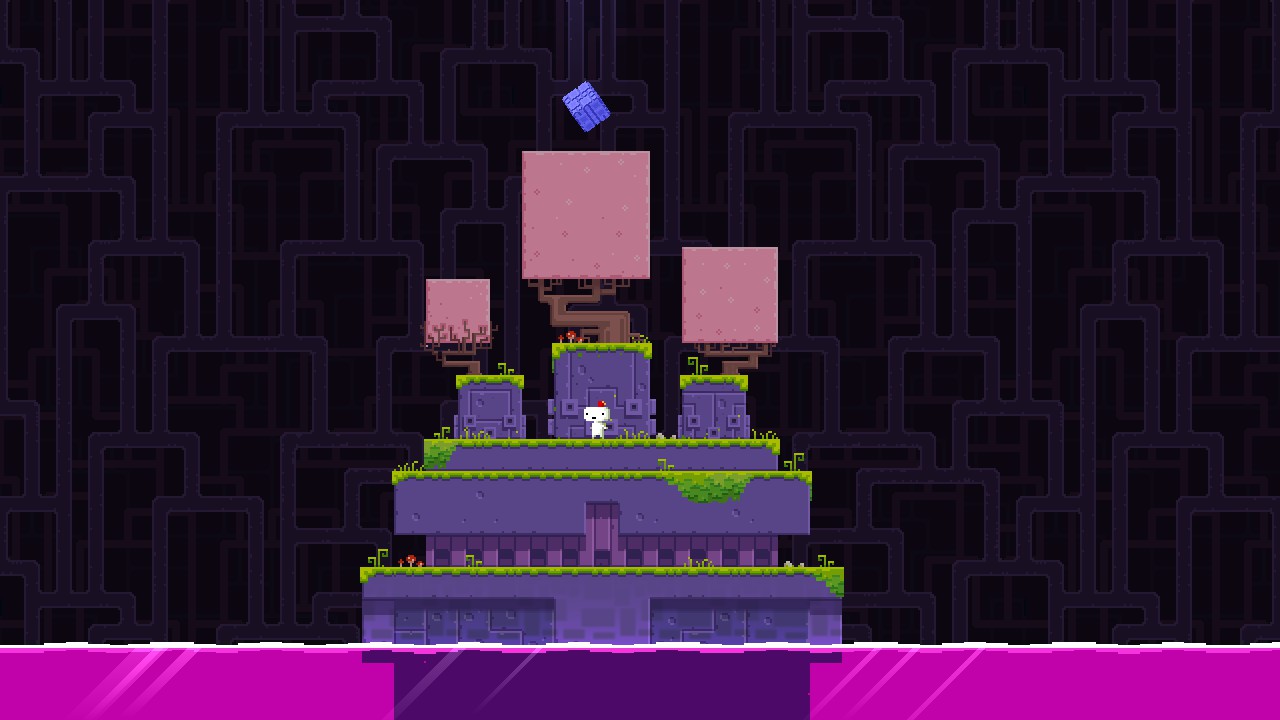
To get to that chest, look for a map and then just jump to the invisible brick, then jump and shift while in the air to land on that same brick but from another plane. Then jump to the floating island with the chest.
maerrey 22 мар. 2024 г. в 13:58 
Awesome guide 🩷 finally finished my childhood game :p2cube:
Rusty 29 дек. 2023 г. в 5:52 
thanks
HotKgon 4 мая. 2023 г. в 20:04 
Great guide. Very detailed and well written.