Steam Marines

Steam Marines

82 ratings
[English/JP] Basic guide for Steam Marines [日本語ガイド]
By MeaslyTripod
Detailing game systems, introduction for each playable class, and enemy data. I hope it'll be your help for survival.
日本語版はずーっと下の方にあります。
   
Award
Favorite
Favorited
Unfavorite
Introduction
日本語版はずーっと下の方にあります

I haven't seen the ending of this game yet!
My current best record was the 1st level of the Armory.


Good luck, Marines.
About the game
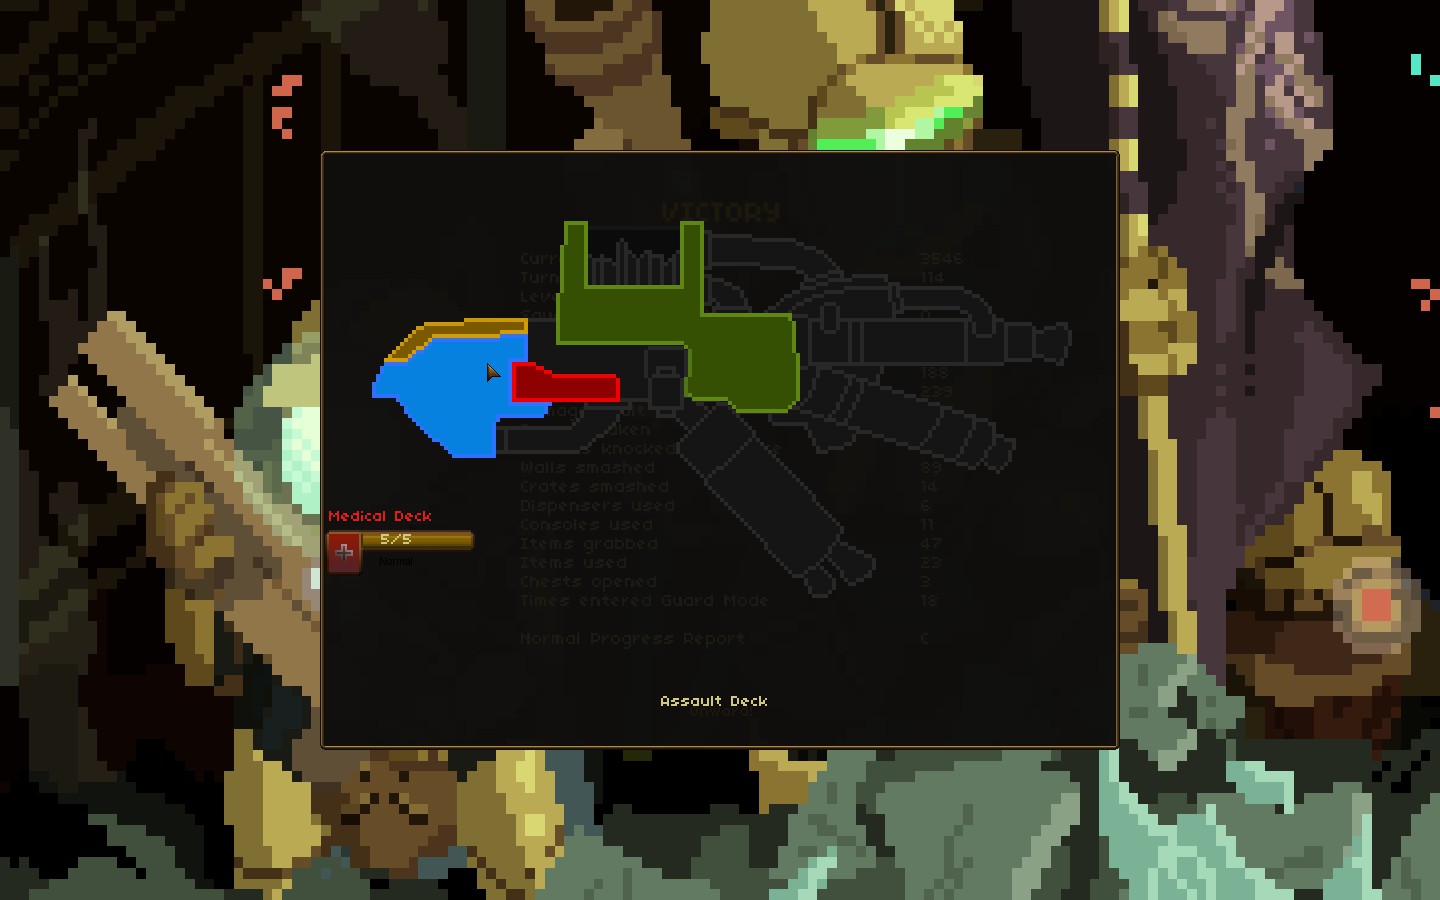
There're 5 decks to explore, each deck has 5 floors, which means 25 in total.
You need to complete all the decks to win.
Your game always starts from the Commande Deck.


Once you completed the Commande Deck, you can choose 1 of 4 other decks to explore, Engineering, Medical, Armory, Bridge.
You can't go back to the Command Deck anymore.
Useful info and tips
  • Don't get close to walls alone without enough APs left nor end your turn standing by walls.
    Some enemies might burst from walls by destroying it without any notice!


    Don't panic, just calculate how to kill it before you get killed.
    Remember to make your squad members cover each other.

  • Destroy walls at corner of a room before you actually enter it,.
    This gives you diagonal Line of Sight and you can see inside of the room without entering.


    You want to check this room, but there might be enemies or traps inside...
    Let's destoy the wall on your right so that you gain diagonal Line of Sight.


    You find the elevator and 2 enemies (one is this floor's boss!) without entering the room!
    Now you can plan what to do next.

  • Check your ammo and spend carefully and wisely.
    Melee attack doesn't consume ammo, use frequently as possible!
    While melee attack's initial damage output is less than guns', it can be increased by assigning "skill points" on "Smasher" skill.


    Brutons can't block melee attacks!

  • Hobering cursor on a character displays the character's stat and weapon range, including enemies'.


  • Shooting enemies at maximum range grants 100% accuracy.
    Check your squad members' weapon range.
    For example, a squad member with a range 4 weapon gains 100% accuracy when shooting an enemy who is 4 squares away from him.

  • Those who are pushed off the edge of floor die, regardless of remaining HPs.
    This rule also applies to all your enemies (including the boss!) so this could be handy.
    Shotgun is the only weapon with knockback effect you can have at the very beginning of play, and it consumes only 1 AP.
    This makes the Leader class indispensable!


    Fighting this gigantic robot (aka this floor's boss) will consume lots of ammo...
    Oh wait, he is on the edge of floor and you have a SHOTGUN!


    BANG!


    Just one shot made him HISTORY!
    (You also send a rare item the boss drops into oblivion, though.)
    Try not to make this happen against bosses who drop rare items upon death as I did becase you always want rare items, just keep this as your last resort.

  • Doors can be opened or closed by pressing interact key (default is E on keyboard), this consumes 1 AP.
    Use doors to slow enemy movement, enemies can't attack through closed ones.


    Sorry, wrong room!

  • Your goal is to reach the elevator, not to eliminate your enemies.
    Always check where the elevator is, include escape in one of your options.
    Death of Boss enemy isn't prerequisite for the next level.
    If all your attempt failed, just RUN before you waste more of your ammo and items!


    The elevator can be activated even when enemies are on its floor.
    All the enemies who are on the elevator disappear when you reach the next level.

  • The dead never returns.
    Don't let your precious squad members die in vain.


    When you enter a new deck with at least 1 dead squad member, you can find a recruit with no promotions.
Traps
Some doors have plastic bombs attached to it when you start the level.
You can also attach it manually from your inventory.


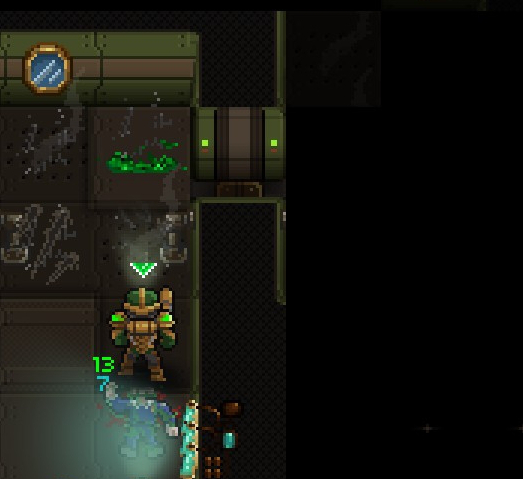
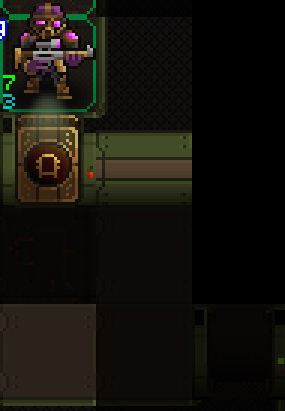
Left : normal door, Right : door with PLASTIC BOMB!

Plastic Bomb detonates when the door it's attached to is opened, 
and inflicts significant damage to all adjacent units to the door.
Though it can be disarmed by a squad member with "Bomb Tech" skill, I think there's no need to assign your skill points as you can circumvent the bomb attached doors by destroying walls.
Left : normal door, Right : door with PLASTIC BOMB!

Plastic Bomb detonates when the door it's attached to is opened,
and inflicts significant damage to all adjacent units to the door.
Though it can be disarmed by a squad member with "Bomb Tech" skill, I think there's no need to assign your skill points as you can circumvent the bomb attached doors by destroying walls.


Don't open this door by yourself, just stay away from it and let your enemy do!
Inventory and credit

Every surviving member of your squad can access to the inventory whereever he is, this is a shared one.
Your squad can carry up to 12 items.


Credits can be spent on purchasing items from the Alien Merchant.
Squad creation


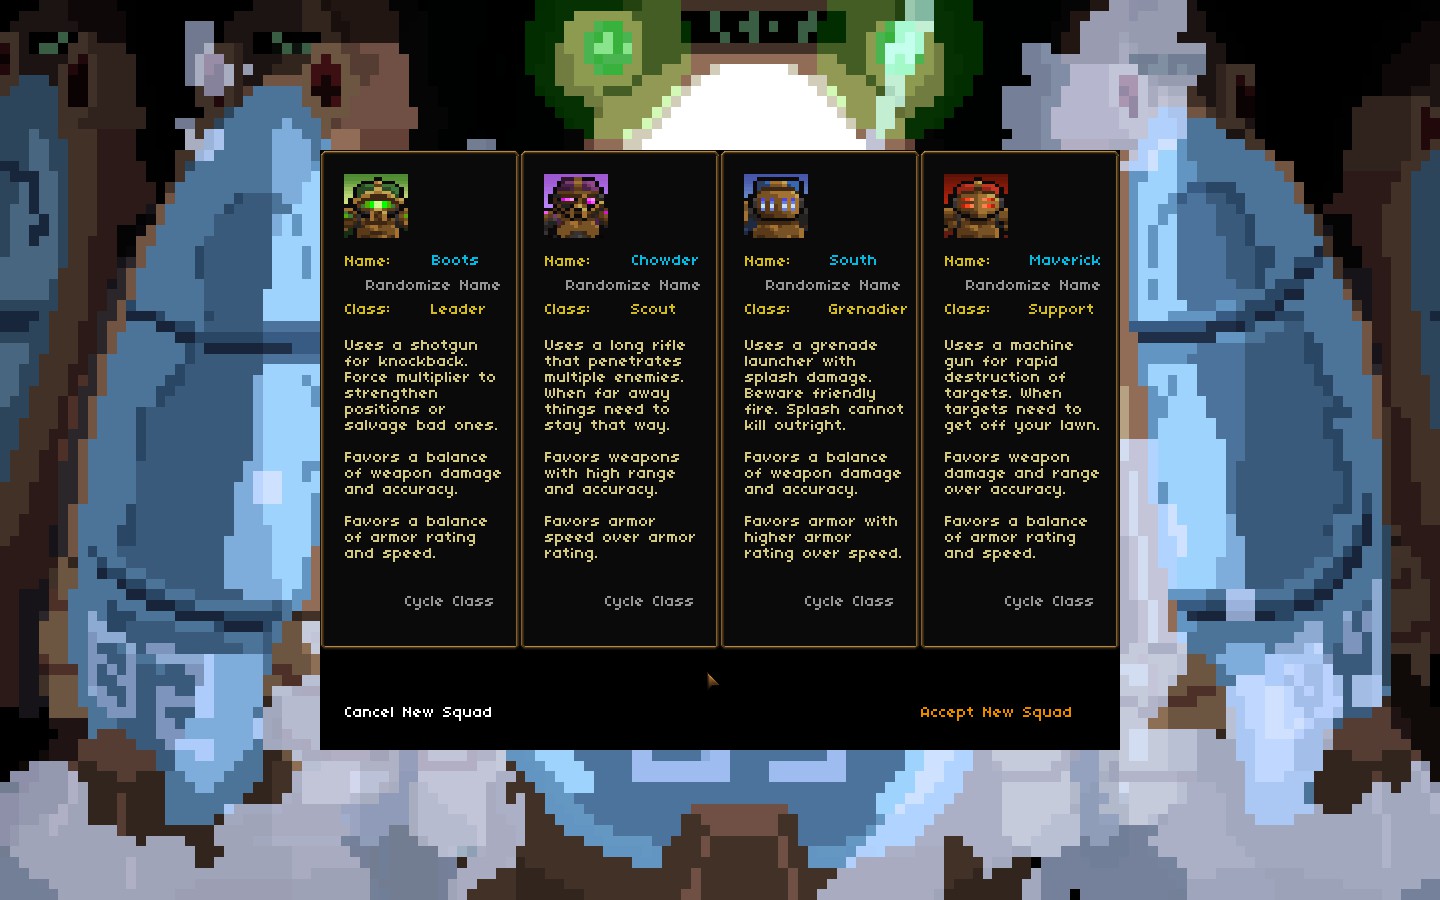
With the implemention of Engineer, 5 classes are available now, but your squad can only have up to 4 marines.
I'd recommend assigning each marine on different classes so you squad will be balanced, meaning 1 class has to be discarded.
Which class to discard depends on your choice, let me say Grenadier's grenade launcher causes friendly fire until he's promoted to Sergeant...
Class : Leader
His shotgun's knockback effect allow him to both protect your squad and push enemies into void!

Promotion
  • PFC : Private First Class
    Name
    Note
    Charge
    Pushing an enemy is good for both offense and defense!
    Iron Resolve
    It's always better to push enemies away than to take damage, pass.


  • LCPL : Lance Corporal
    Name
    Note
    Snap Shot
    It depends on your Leader's weapon range, I usually pass.
    Flak Rounds
    Quite useful against boss enemies, it also saves your entire squad's ammo greatly by increasing damage per shot.

  • CPL : Corporal
    Name
    Note
    Rader
    This will prevent enemies' surprise attacks! You might need this.
    Fire Fighter
    Taking no damage is better than taking some so I prefer Rader.

  • SGT : Sergeant
    Name
    Note
    Stim
    I want more accuracy bonus, only 5% for 3 APs!? Pass.
    Vigilance
    It's a passive perk, which means it's active permanently with no cost!
Class : Scout
His sniper rifle has long range and can penetrate multiple enemies.
Also his perks hinders enemy action.

Promotion
  • PFC : Private First Class
    Name
    Note
    Scoped
    I always pick this.
    Second Skin
    Offense is the best defense! Inflict damage and kill before you take some, pass.

  • LCPL : Lance Corporal

    Name
    Note
    Called Shot
    I rarely use this as his weapon is powerful but it's more useful than Stealthy.
    Stealthy
    This passive perk makes your other squad members targeted instead of your Scout, pass.

  • CPL : Corporal
    Name
    Note
    Garrote
    It's a rare sight to see a sniper standing next to his prey, pass.
    Autoloader
    This perk turns your Scout into a killing machine, simply take it!

  • SGT : Sergeant
    Name
    Note
    Stasis
    While AP cost of 4 is a little expensive, very handy for fighting boss enemies.
    Biohazard
    I prefer Stasis as Biohazard doesn't affect robotic enemies, pass.
Class : Grenadier
His grenade launcher inflicts explosive damage to initial target and splash damage to all those adjacent to its initial target including friendly units...remember, splash damage can't reduce HP to less than 1 without "Annihilation" perk.
So he can be used to lower multiple enemies' HP to near zero, then let other squad members finish them.
Once he got "Annihilation" perk, his splash damage can kill outright so be more careful for friendly fire!

Grenade launcher has low clip and accuracy, don't waste it.
Let him shoot at his max range and gain the 100% accuracy bonus!


Accuracy and ammo, that's what he really needs!

Promotion
  • PFC : Private First Class
    Name
    Note
    Napalm
    Not bad perk, but Annihilation is much better.
    Annihilation
    Now your splash damage can kill outright! Be ware for friendly fire!

  • LCPL : Lance Corporal
    Name
    Note
    Batter
    Your Grenadier can push an enemy for 2 APs.
    Mine Sweeper
    You can avoid traps by breaching walls, pass.

  • CPL : Corporal
    Name
    Note
    Pincer
    If this perk cost 2 APs, I would pick this.
    Ablaptive Armor
    I always pick this as it doesn't cost any AP.

  • SGT : Sergeant
    Name
    Note
    EMP
    This can affect only robotic enemies so I prefer Smart Bomb which doesn't require any AP.
    Smart Bomb
    Grenade's splash damage no longer causes friendly fire!
Class : Support
Yes, his machine gun is so weeeeeeak, but he isn't useless at all!
His true weapon is Melee attack, with Hulk perk he can push enemies without using ammo,


All he needs is 1 AP.


Even the gigantic boss can be kept at bay by keep pushing.

Promotion

If you're going to pick Sentry perk, you definitely need to spend your stat points on Power stat.
Place some skill points on Smasher skill, with Hulk Perk and this skill he is a melee expert.

  • PFC : Private First Class
    Name
    Note
    Point Blank
    Not bad perk, but Hulk is much better. His machine gun lacks accuracy.
    Hulk
    Now your Support can push an enemy for just 1 AP without using ammo!

  • LCPL : Lance Corporal
    Name
    Note
    Hail Mary
    Spending 4 APs for just 1 shot? Meh.
    Shark Rounds
    This costs no AP, it's a passive perk.
    [/table]
  • CPL : Corporal
    Name
    Note
    Bulwark
    Building walls can be used for blocking enemy's path or luring them to your deadly trap, but 3 APs are a little expensive.
    Sentry
    This perk needs your proper plan to fully compensate. Lure enemies to your Support's firing line...and don't forget to spend his stat points on Power!

  • SGT : Sergeant
    Name
    Note
    Turret
    I've never used this so far, I can't say anything.
    Flanker
    This perk needs your proper plan to fully compensate.
Class : Engineer
The 5th class implemented after its release, thank you Developer!

Promotion

  • PFC : Private First Class
    Name
    Note
    Target Scan
    For those who love challenge and hate spoilers.
    Stun Shot
    For those who play the game while reading this guide.

  • LCPL : Lance Corporal
    Name
    Note
    Mag Fist
    Spending 4 APs for just 1 shot? Meh.
    Hackery
    This costs no AP, it's a passive perk.

  • CPL : Corporal
    Name
    Note
    Weld
    2 health is useless when enemies deal massive damage (more than 2 points at least).
    Active Targeting
    Stop worrying about heal, just shoot before taking any damage.

  • SGT : Sergeant
    Name
    Note
    Ammo Smith
    The other one is better but it depends on your situation.
    Tech Upgrade
    More fire power helps you so much, yay.
Spoiler : Enemies
Spoiler Alert!
Spoiler Alert!
Spoiler Alert!
Spoiler Alert!
Spoiler Alert!
Spoiler Alert!
Spoiler Alert!
Spoiler Alert!
Spoiler Alert!
Spoiler Alert!
Spoiler Alert!
Spoiler Alert!
Spoiler Alert!
Spoiler Alert!
Spoiler Alert!
Spoiler Alert!


===================================================================

  • Command Deck

    This is your 1st area to explore, most enemies are melee unit so relatively easier.

    Image
    Name
    HP
    AP
    Range
    Type
    Note
    Bruto
    12
    3
    1
    Robot
    Slow melee unit...not a threat unless they swarm in large numbers.
    Bruton
    25
    2
    1
    Robot
    His front shield blocks most attacks but melee ones.
    Flamejack
    15
    3
    3
    Robot
    The 1st ranged enemy your squad shall encounter...shoot on sight!
    Bucket
    18
    3
    1
    Robot
    Just shoot, not much of a threat.

  • Engineering Deck

    Image
    Name
    HP
    AP
    Range
    Type
    Note
    Torgon
    20
    3
    4
    Organic
    Weapon range 4...quite dangerous.
    Tick
    2
    5
    1
    Robot
    Be ware for his high APs, that's all. His HP is just 2, just melee twice! He doesn't deserve your ammo.
    Thopter
    15
    4
    1
    Robot
    Not a hard foe but he has 4 APs.
    Flamejack
    15
    3
    3
    Robot
    Yes, him again!


  • Medical Deck

    Image
    Name
    HP
    AP
    Range
    Type
    Note
    Torsniper
    15
    5
    5
    Organic
    High APs, long range...don't let him shoot even once!
    Sapper
    26
    2
    4
    Organic
    He not only throws grenades but also explodes upon death, both inflict severe splash damage, splash damage can't kill outright but other enemies will take care of your dying squad members. Remember, he can pass through doors with plastic bomb without triggering it.
    Ripsaw
    25
    4
    1
    Organic
    Higher AP makes him deadly...kill quickly.
    Amputator
    35
    3
    1
    Robot
    High HP, concentrate your fire.

  • Armory Deck

  • Bridge Deck
ゲーム内容について
艦内は5つのデッキで区分けされ各デッキは5階層で構成されています。
つまり全25階層を攻略すればクリアというわけです。
最初に挑むデッキは常に司令デッキと決まっています。


司令デッキ攻略後は整備・医療・武器庫・艦橋の4デッキから次に探索する場所を選べます。
司令デッキにはもう戻れません。
役立つ知識やコツ
  • 敵が前触れもなく壁を破壊して出現する場合があるため、
    APが残り僅かな状態で1人で壁に近づいたり、壁の側に立ったままターン終了するのは控えましょう。


    慌てず冷静に対処しましょう。
    各隊員に互いをカバーさせるようにしましょう。

  • 部屋の中に入る前にその部屋の四隅の壁を壊しましょう。
    斜めの視線を確保することで、部屋に入らずに内部を覗き見ることができます。


    部屋を調べたいけど中に敵や罠があるかもしれない。
    右隣の壁を壊して斜めの視線を確保しましょう。


    部屋の中に入らずにエレベーターとボスを含む敵2体を発見できました。
    これからどうするかじっくり考えましょう。

  • 弾数管理は常にすること、賢く使い無駄撃ちしてはいけません。
    弾薬を消費しない近接攻撃を多用して弾を節約しましょう。
    近接攻撃は銃に比べ初期威力が低いものの、Smasherスキルにポイントを割り振ることでダメージ量を増加できます。


    Brutonは近接攻撃を防げません。

  • マウスカーソルをキャラの上に置くとそのステータスや武器の射程が表示されます。


  • 射程範囲の端にいる敵を撃つと、常に命中率が100%になります。
    各隊員の武器の射程を確認しましょう。
    例えば射程4の武器なら、4マス先の相手を狙えば必ず命中率が100%になります。

  • 床の外に押し出された場合は残りHPに関わらず死亡扱いとなります。
    このルールはボス敵も含めて全ての敵にも適応されるため、場合によっては役に立ちます。
    ゲーム開始時にノックバック効果がある武器はショットガンのみ、しかも1APで発動できます。
    唯一ショットガンを持つことのできる指揮官クラスはゲームクリアに必須と言っていいでしょう。


    相手はボス敵、まともに戦えば弾薬の無駄です。
    しかし相手はフロアの端にいて、こちらにはノックバック効果のあるショットガンがあります。


    BANG!


    たった1発で相手を宇宙に放り出すことが出来ました。
    (ただしレアアイテムも一緒に!)
    レアアイテムを落とすボスに対しては可能な限り避けるべき作戦ですが、最後の手段として覚えておくといいでしょう。

  • ドアはキーボードのEキーを押すことで自由に開閉可能、1回毎に1APを消費します。
    敵は扉越しに攻撃することは出来ません、ドアを使って敵の進行を遅らせましょう。


    Sorry, wrong room!

  • Your goal is to reach the elevator, not to eliminate your enemies.
    クリア条件はエレベーターへの到達であり敵の全滅ではありません。
    常にエレベーターの場所を確認し逃げることも視野に入れましょう。
    ボスを倒さなくても次の階層には行けます。
    万策尽きたら逃げましょう、弾薬やアイテムを無駄遣いするよりずっとマシです。


    敵がエレベーターの上にいる場合でもエレベーターを動かす事はできます。
    次の階層に移動すれば、エレベーター起動時に一緒に乗っていた敵は全て消えます。

  • The dead never returns.
    死者は決して蘇りません。
    貴重な隊員を死なせるくらいなら逃がしましょう。


    各デッキの開始時に分隊に空きがある場合には新兵を発見できますが、新兵なので育て直さないといけないのが難点です。
罠について
レベル開始時に、幾つかのドアにプラスチック爆弾が取り付けられている場合があります。
また自分のインベントリからプラスチック爆弾をドアに取り付けることも可能です。


左:普通のドア、右:プラスチック爆弾つきのドア

プラスチック爆弾は設置されたドアが開かれた際に起爆し、
ドアに隣接する全ての者に大ダメージを与えます。
爆弾技術スキルを持った隊員なら爆弾を解除できますが、壁を壊して迂回すれば解除の必要はありません。
わざわざ貴重なスキルポイントを費やす必要は無いと思います。
左:普通のドア、右:プラスチック爆弾つきのドア

プラスチック爆弾は設置されたドアが開かれた際に起爆し、
ドアに隣接する全ての者に大ダメージを与えます。
爆弾技術スキルを持った隊員なら爆弾を解除できますが、壁を壊して迂回すれば解除の必要はありません。
わざわざ貴重なスキルポイントを費やす必要は無いと思います。


自分からドアを開けずに距離を置き、敵が開けに来るのを待ちましょう。
インベントリとクレジットについて


生存している分隊メンバーは何処にいてもインベントリのアイテムを使用できます。
このインベントリは共用であるため誰でも自由にアクセス可能です。
最大12個までインベントリに収められます。


クレジットは現金であり、船内でたまに会える異星人の商人からアイテムを買う時に使います。
分隊編成


現在選択できるクラスは5種ですが、ゲーム内では最大4人までしか部隊に編入できません。
各クラスを1人ずつ選びバランスの取れた編成にするのがお勧めです。
どのクラスを捨てるかはプレイヤー次第ですが、誤爆の可能性が高いGrenadierは最高階級の軍曹になるまで足手まといになる可能性があります。
クラス解説:指揮官
ショットガンの吹き飛ばし効果は、敵の接近を阻止したり宇宙空間に放り出すのに便利です。

Promotion
  • PFC : Private First Class
    Name
    私見
    Charge
    敵を押して自分から遠ざけるのは、攻めにも守りにも役立ちます
    Iron Resolve
    ダメージを受けるくらいならChargeで敵を押して遠ざけましょう


  • LCPL : Lance Corporal
    Name
    私見
    Snap Shot
    習得するかどうかは武器の射程次第です
    Flak Rounds
    ボス退治に効果大、更に1発当たりのダメージ量を増やすことで分隊全体の消費弾数も減らしてくれます

  • CPL : Corporal
    Name
    私見
    Rader
    敵の不意打ちを防ぐのに役立ちます
    Fire Fighter
    ダメージの心配をするくらいなら受けない方がいいので私はRaderを選びます

  • SGT : Sergeant
    Name
    私見
    Stim
    消費3APで命中率補正が5%と小さすぎるのが難点です
    Vigilance
    AP消費ゼロで常時発動というのが嬉しいです
クラス解説:偵察兵
遠距離から複数の敵を貫通するスナイパーライフルは非常に有用です。
また昇進により修得する、敵の行動を妨害するパークは大いに役立ちます。

Promotion
  • PFC : Private First Class
    Name
    私見
    Scoped
    私はいつもこれを習得します
    Second Skin
    攻撃は最大の防御です、ダメージを受ける前に相手を倒せばこのスキルは不要です

  • LCPL : Lance Corporal

    Name
    私見
    Called Shot
    元の火力が高いので滅多に使わない能力ですが、ステルスよりは役に立ちます
    Stealthy
    偵察兵の代わりに他のメンバーが敵の標的になるだけで根本的な解決になりません、パスしましょう

  • CPL : Corporal
    Name
    私見
    Garrote
    スナイパーが敵に隣接するなんて滅多にありません、不要です
    Autoloader
    偵察兵を殺戮兵器に変貌させます、これを取らないでどうするんですか

  • SGT : Sergeant
    Name
    私見
    Stasis
    消費AP4は高いですがボス戦で重宝します
    Biohazard
    生物にしか効果が無く機械系の敵には無力です
クラス解説:擲弾兵
グレネードは標的にダメージを与え、更に隣接するもの全てに爆風によるダメージを与えます。
この爆風でHPがゼロになることは無いので、序盤は多数の敵のHPを削る役になるでしょう。
Annihilationを習得すると、爆風によるダメージでHPをゼロにできるようになり更に活躍できます。
ただし誤爆には十分気をつけましょう。

グレネードランチャーは弾数が少ない上に命中率が低いため無駄撃ちせず、
射程ギリギリで撃つと命中率が100%になるボーナスを狙うようにしましょう。


彼に何より必要なのは命中率と弾です。

Promotion
  • PFC : Private First Class
    Name
    私見
    Napalm
    悪くないですがAnnihilationのほうがずっと役に立ちます。
    Annihilation
    グレネードの爆風で相手のHPを0に出来るようになります、誤爆に注意!

  • LCPL : Lance Corporal
    Name
    私見
    Batter
    2 APの消費で敵を押せるようになります
    Mine Sweeper
    壁を突破して道を作れば罠を解除せずとも先に進めます

  • CPL : Corporal
    Name
    私見
    Pincer
    発動コストが2APなら習得したのに…。
    Ablaptive Armor
    AP消費ゼロなので、いつもこっちを取ります

  • SGT : Sergeant
    Name
    私見
    EMP
    発動コストの要らない上に、機械以外にも効果のあるSmartBombのほうを選びます
    Smart Bomb
    グレネードの爆風で味方がダメージを受けなくなります、必須!
クラス解説:支援兵
武器は貧弱なものの近接戦闘で大いに貢献してくれます。
Hulkを習得させれば弾を使わずに敵を押せるようになるのです。


たった1APで弾丸を使わずに相手を宇宙空間に押し出せるサポートは実に有用なのです。


強大なボスですら押し続けることで無力化できます。

Promotion

Sentryパークを選ぶならPowerにポイントを割り振りましょう。
SmasherスキルとHulkパークがあれば近接戦闘で右に出るものはいないでしょう。

  • PFC : Private First Class
    Name
    解説
    Point Blank
    悪くないスキルですがHulkのほうがずっと役に立ちます。また機関銃は命中率に欠けるのでこのスキルを活かしきれません
    Hulk
    弾を使わずにたったの1APで敵を押せるようになります

  • LCPL : Lance Corporal
    Name
    解説
    Hail Mary
    1回の攻撃に4APも使うのは割に合いません
    Shark Rounds
    Hail Maryと違ってAP消費無しで効果が常時発動されるので、いつもこっちを習得してます

  • CPL : Corporal
    Name
    解説
    Bulwark
    壁を設置することで敵の進路を遮ったり罠の方向に誘導できるようになりますが、消費3APは少し高いです。
    Sentry
    このスキルを活かすためには、敵をサポートの射線上に誘導する必要があります。腕の見せどころと言えるでしょう

  • SGT : Sergeant
    Name
    解説
    Turret
    1度も使ったことがないので何とも言えません
    Flanker
    有効利用できるかどうかはプレイヤー次第です
クラス解説:技術兵
開発者によって販売開始後に導入された第5のクラス。

Promotion

  • PFC : Private First Class
    Name
    解説
    Target Scan
    ネタバレ嫌いな方、より歯応えのあるプレイを求める方へ
    Stun Shot
    敵データが頭に入っている、あるいは当ガイドを見ながらプレイされる方はこちらをどうぞ

  • LCPL : Lance Corporal
    Name
    解説
    Mag Fist
    1回の攻撃に4APも使うのは割に合いません
    Hackery
    Hail Maryと違ってAP消費無しで効果が常時発動されるので、いつもこっちを習得してます

  • CPL : Corporal
    Name
    解説
    Weld
    敵の攻撃力が高い本作で2点のヘルスに価値はありません
    Active Targeting
    敵をさっさと片付ければダメージの心配は要りません

  • SGT : Sergeant
    Name
    解説
    Ammo Smith
    もう片方が有用ですが、弾薬不足の際には選ぶしかないかもしれません
    Tech Upgrade
    火力の強化はゲームクリアの大きな助けになります
ネタバレ注意:敵データ
ネタバレ注意!
ネタバレ注意!
ネタバレ注意!
ネタバレ注意!
ネタバレ注意!
ネタバレ注意!
ネタバレ注意!
ネタバレ注意!
ネタバレ注意!
ネタバレ注意!
ネタバレ注意!
ネタバレ注意!
ネタバレ注意!
ネタバレ注意!
ネタバレ注意!
ネタバレ注意!

===================================================================

  • 司令デッキ

    Image
    Name
    HP
    AP
    Range
    Type
    私見
    Bruto
    12
    3
    1
    Robot
    大群で現れない限り雑魚です
    Bruton
    25
    2
    1
    Robot
    正面からの攻撃をほぼ無効化する上に、大量に出現する強敵。近接攻撃を防げないのが救いです
    Flamejack
    15
    3
    3
    Robot
    飛び道具を使う最初の敵、最優先で倒しましょう。
    Bucket
    18
    3
    1
    Robot
    大した相手では無いのでさっさと片付けてしまいましょう

  • 整備デッキ

    Image
    Name
    HP
    AP
    Range
    Type
    私見
    Torgon
    20
    3
    4
    Organic
    射程4と面倒な相手です
    Tick
    2
    5
    1
    Robot
    AP5である点に注意、HP2なので近接攻撃で倒して弾を節約しましょう
    Thopter
    15
    4
    1
    Robot
    AP4である点を除けば雑魚です
    Flamejack
    15
    3
    3
    Robot
    司令デッキから引き続き登場


  • 医療デッキ

    Image
    Name
    HP
    AP
    Range
    Type
    私見
    Torsniper
    15
    5
    5
    Organic
    高APに長射程を兼ね備えた強敵、1発も撃たせずに始末しましょう
    Sapper
    26
    2
    4
    Organic
    手榴弾を投げる上に、死亡時に爆発し隣接する者全てに大ダメージを与えます。もちろん爆風によるダメージでは死亡しませんが、他の敵が一緒にいる場合には最優先で倒さないといけません。更にプラスチック爆弾つきの扉を起爆せずに通過できます。
    Ripsaw
    25
    4
    1
    Organic
    高いAPに物を言わせて、一気に間合いを詰めてくるので早めに倒しましょう
    Amputator
    35
    3
    1
    Robot
    HPが高いので火力を集中させましょう

  • 武器庫

  • 艦橋
20 Comments
DaemosZythaer Feb 28, 2016 @ 12:27am 
:yay:
Melvyn Tell Oct 26, 2015 @ 2:06am 
Thanks for the guide.

I concur to @Cpt. America about the usefulness of the perks (still newby right now) and also what those blue ^ icons mean..)
Kabal Aug 18, 2015 @ 8:18pm 
I would be interested to know more about the best perks for each class and also the terrain deformation effects.
Revy Foxxx⭐ Feb 27, 2015 @ 3:01pm 
coool thank you for this
Chaka (FR) Sep 28, 2014 @ 7:53am 
Very nice and usefull guide! :golem:
Chemo Sep 8, 2014 @ 2:45pm 
Very useful for newbies like me. A lot of thanks!
A.D.Mynx Aug 18, 2014 @ 1:58am 
very nice guide! well done!
KittyKat Feb 12, 2014 @ 8:05am 
Argh I should have read this guide before that sapper walked right through a c4'd door.
apsyse  [developer] Jan 26, 2014 @ 1:37am 
Holy crap! Nice guide ^_^
Морской Jan 16, 2014 @ 3:19am 
can't pass the 1-st deck
i reached elevator with whole squad , press E, then there is Victory window with stats and again my squad on this deck.