PAYDAY 2
104 ψήφοι
Holdout Made Easy - A Grinder Build
Από Green
The problem: With most turret builds is you need to take ammo bags to maintain 4 turrets, and since you are taking turrets and ammo bags, you can't take doctor bags, meaning you won't last long. Also, since ammo bags have limited usage, they will eventually run out.

The solution: This build allows you to maintain up to 6 turrets without the use of ammo bags, meaning you could last forever without running out of ammo. The build also maximises your health (+40%) and health regen (56.2hp/s).
   
Βραβείο
Αγαπημένο
Αγαπημένο
Μη αγαπημένο
Overview
This is a Grinder build which will make use of turrets and converts to maximise your health regen in order to survive all 9 waves of holdout.

The guide allows you to take up to 6 turrets and 2 converts, which all contribute towards your health regen, keeping you alive.

With 4 players using this build, you will have 24 turrets and 8 converts, all crammed around the hostage, meaning there is no way you can lose.
The Skills
Mastermind
This build is based around health regeneration, which means we will need converts. Converts allow for extra health in many different ways.
Confident and Joker - These skills allow you to have 2 converts, both dealing higher damage, this damage also contributes towards your grinder health regen!
Partners in Crime - This skill gives you 30% health throughout the entire heist, as long as you have a hostage. And since this skill also allows your hostages to take 99% less damage, they will not die throughout the entire heist.
Hostage Taker - Another source of health regen, you will gain a constant 4.5% every 5 seconds throughout the heist. Even though this is only 2.898hp/s, during a 30 minute holdout heist this adds up to a potential 5216.4 health throughout the entire heist!

Enforcer
One problem with turret builds is that ammo consumption is high, meaning people often feel as if they have to waste a deployable slot by bringing ammo bags. This is not needed though, instead of upgrading your ammo bags, you should be upgrading your ammo box skills.
Scavenger - With 6 turrets and 2 converts (per person) killing enemies, there will always be loads of ammo boxes, this skill will allow you to gain full ammo within a few seconds by running by dead enemies.
Bulletstorm and Portable Saw - Even though we will not be using these skills at all, we still require them in order to reach the highest tier.
Fully Loaded - The 25% ammo increase helps with setting up turrets at the beginning. Also the 75% increase in health per ammo box, you will easily have constant full ammo by grabbing just a few ammo boxes.
Underdog - There's 4 spare points when using this build, I went for underdog aced for the damage reduction whilst placing sentries, but it might be better to go for some speed boosts in the Fugitive tree.

Technician
Since this is a turret build, we will be maxing out the Engineer tree.
The Engineer Tree - This will maximise the sentry gun output, and will therefore increase our health regeneration
Jack of All Trades - The only non-turret skill in this tree. It will allow us to bring an extra deployable, in this case we will bring an additional 2 turrets. However if you are having trouble with downs you may want to bring a medic bag secondary, but it is not needed as the regen is good with 6 turrets.

Ghost
There are no skills in this skill tree that will help us in holdout. There is no need for speed increase or dodge skills as we will be staying in one location throughout the heist.

Fugitive
There are also not many skills that are helpful here either.
Nine Lives - This skill helps as the extra down will allow you to keep on playing without going into custody throughout the entire heist.
If you are finding nine lives redundent, and you can finish a holdout without going down once (which is fairly easy with this build), then refund it along with underdog and consider getting bullseye aced.
The Weapons
Primary

Surprisingly, you will not be using your weapon that much, as your turrets and converts will be dealing the majority of the damage. Still, it helps to have a good weapon for situations that the turrets can not deal with.

KSP Light Machine Gun
This gun combines high damage, ammo, rate of fire and magazine size.
Recommended modifications:
  • Barrel - Long Barrel
  • Barrel Ext - Competitor's Compensator
  • Bipod - Lion Bipod
  • Boost - Accuracy
  • Foregrip - Railed Foregrip
  • Gadget - LED Combo
  • Stock - Solid Stock


Secondary
Again, you will not be using this that much, it is better to take an explosive weapon for when it is needed, for example when you need to remove the visors off a dozer, or when there is a large group of newly spawned enemies.

There are two good weapons to take here, I use the China Puff 40mm Grenade Launcher, but the The Judge Shotgun is also effective.

China Puff 40mm Grenade Launcher
High explosive radius and high damage, this one helps when needing to kill multiple enemies at once.
No modifications requried.

The Judge Shotgun - HE Rounds
This one helps with removing visors and taking out shields, however your turrets also do this, which is why I take the China Puff instead. Another reason to not take this weapon is, it is so good in terms of fire rate and reload time, you will waste too much ammo and will not be able to place turrets.

Modifications are not important for this one, as long as you take the HE Round Ammunition type


Perk Deck and Armor
Perk Deck - Grinder
The perk deck in use will be Grinder, this gives you the following.
  • 40% extra health
  • 30% higher chance to pierce enemy armor
  • Damaging an enemy heals 4 hp every .3 seconds, for 4.2 seconds

Which means, with the turrets and converts dealing constant damage, you will have a hp gain of 56 every 4.2 seconds. However since the effect can be applied every 1.5 seconds, it can stack multiple times before the first effect expires.

This means it is actually possible to have 4 lots of this effect on at once with the turrets and converts, giving you a constant 53.3hp/s

Armor - Lightweight Ballistic Vest
With the grinder perk deck, you only get two options, the LBV or the suit. The only significant differences between the LBV and suit is the armor difference and dodge. The 5% dodge chance is not as helpful as the 30 extra armor, so I would recommend the LBV.
Deployables, Melee and Throwables
Deployables
With Jack of All Trades, you can take 2 deployables, obviously we will be bringing turrets as the primary deployable.

For the secondary, you can either take the silenced turrets for the extra damage output, or the doctor bags, to reset your downs.

Personally, I take the extra turrets, however it is up to you! If you are finding yourself dying more than 4 times during a heist, take doctor bags, however once you get more familiar with the maps, the enemies of each wave, it may be better to start bringing extra turrets.

With the silenced turrets, enemies do not focus them, meaning they are not gonna be distracted and will focus you over them, which means they are not as effective as regular turrets, but are really helpful still as secondaries.

Throwables
Molotov Cocktails - These are the most useful throwables for this game mode for a few reasons.
  • You can block off choke points to reduce the amount of enemies entering the area for a while.
  • The damage over time counts towards your grinder effects, meaning you will be gaining more health!
  • It is also worth noting that with Fully Loaded, you will be gaining more throwables, so make sure that you aren't afraid to use them.

Melee
Take the Electrical Brass Knuckles, it allows you to damage and then freeze an enemy in place, allowing you to take easy hostages at the start
How to play
Most of the time with this build you will just be sat in cover waiting for it to end. Yes, its boring, but its a really easy way of finishing all holdouts.

First thing you want to do when you spawn in is get your turrets up, you should be able to place 5/6 before you are out of ammo. However your first turret should have gotten a kill by now so you should be able to go pick an ammo box up and place your final turret.

Always toggle AP rounds ON, this makes your turrets pierce all armor and shields, increase the damage by 250%, and also decrease fire rate by 75% (so they last longer).

You can melee an enemy then spam F on them to get the to surrender, do this twice to get two converts. By now your turrets should have racked up a few kills, allowing you to gain full ammo again from the boxes. You are now set up and your objective now is to survive for 30 mins.

Your main job is to ensure that your turrets are always running, don't worry about wasting ammo by picking up non-empty turrets, you have so much ammo gain it doesn't matter. Just try to keep turrets above 50% ammo at all times.

All you really need to do throughout the heist is take out the odd dozer and anyone that manages to get close to the hostage. Sometimes dozers get close to turrets, and stare down at them. If this happens just take your primary and spam their faces.

The only weakness I have found with this build is that you may get one-shot by dozers, however this becomes less of an issue the more you play (i.e. you simply learn how far away to stand from a dozer etc.). Just take cover.

This build is viable in other heists too, for example cook off, border crystals, and heists where you spend a lot of time in one area (Mayhem and below though, this guide isn't for DSOD!)
You will get around 400-500 kills per heist with this build, which also helps towards Robbacop (Kill 650k enemies).
General Tips for Holdout
  • Each round lasts 3 mins, the overall time for the heist is 30 mins
  • Count your downs - I have never lost a game due to all dying, it has always been due to people not counting their downs
  • Don't bring ammo bags or FAKs - neither of these are helpful, there are skills that make these useless
  • Don't place turrets too close to each other - They will both try to shoot the same target, and one will shoot the other.
  • Keep your turrets out of line of the Swat van turret - It will tear through your turrets
  • Don't ask what wave the host plans to go to - It's 9, no one will want to go to wave 5 then give up
  • Use your skills - If you have shotgun skills, bring shotguns, if you have convert skills, have converts!
  • You lose if a team member goes into custody before wave 9 begins, once wave 9 does begin, all you have to do is have one person alive.
  • Learn the spawns of each map, with multiple players you can split up and cover 1 or 2 spawns each, making the game much easier.
FAQ - From comments and messages
Is this build viable for solo?
To an extent yes, I have managed to complete Holdout before solo using this build. However at the same time I have also failed a lot whilst soloing Holdout. But I have always found that this is the best build going for both solo and with players. In other words, this is as viable of a solo build you are going to get.

why the portable saw???
Acquiring that skill is only done so that we can reach the tier 4 skill "Fully Loaded". It is the cheapest way to get that skill.

By the way, don't bring a saw..

Should I swap x skill out with x
With the lower tier skills, it doesn't really matter, what matters is you get converts and sentries fully upgraded. From there you can change the build all you want without making too much of a difference.

Where does the 40% health increase come from?
Its a part of the grinder perk deck

This build takes no skills and is nooby
Okay? I literally say in the title it makes the mode easy

Id recommend Bullseye aced with converts
Thanks, I added it to the build
Final Words
That's it from me, I hope this guide helps you get the achievements for holdout.

If anyone has any questions or improvements, let me know in the comments!
26 σχόλια
MrTailson 25 Σεπ 2022, 9:14 
Yes I use the AI and boosts to movement, interaction, and reload speed. For the most part I place all the turrets down and sit by the first one I placed to refill when it's empty, but as I run around gathering ammo and getting to the other turrets, I get shot down by a dozer coming around a corner, or if I hadn't noticed it, I find that my turrets are dead.

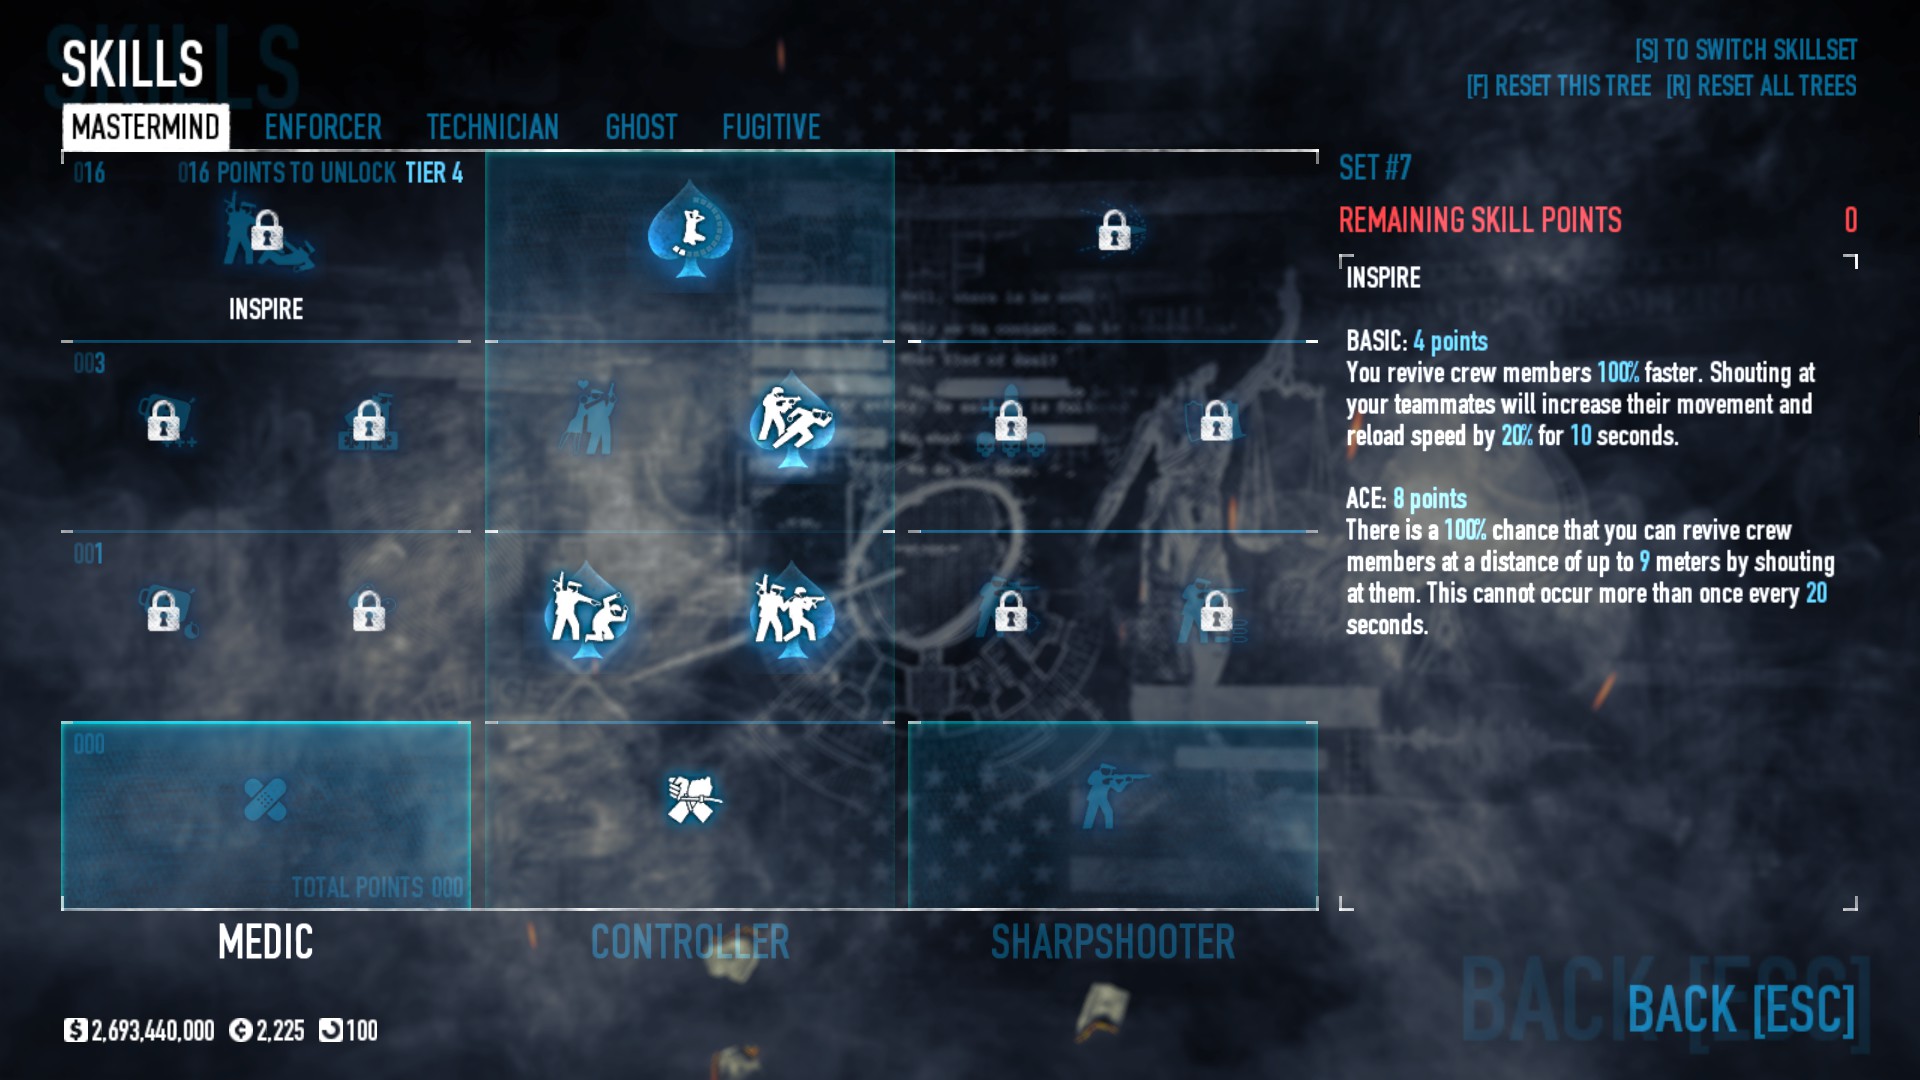
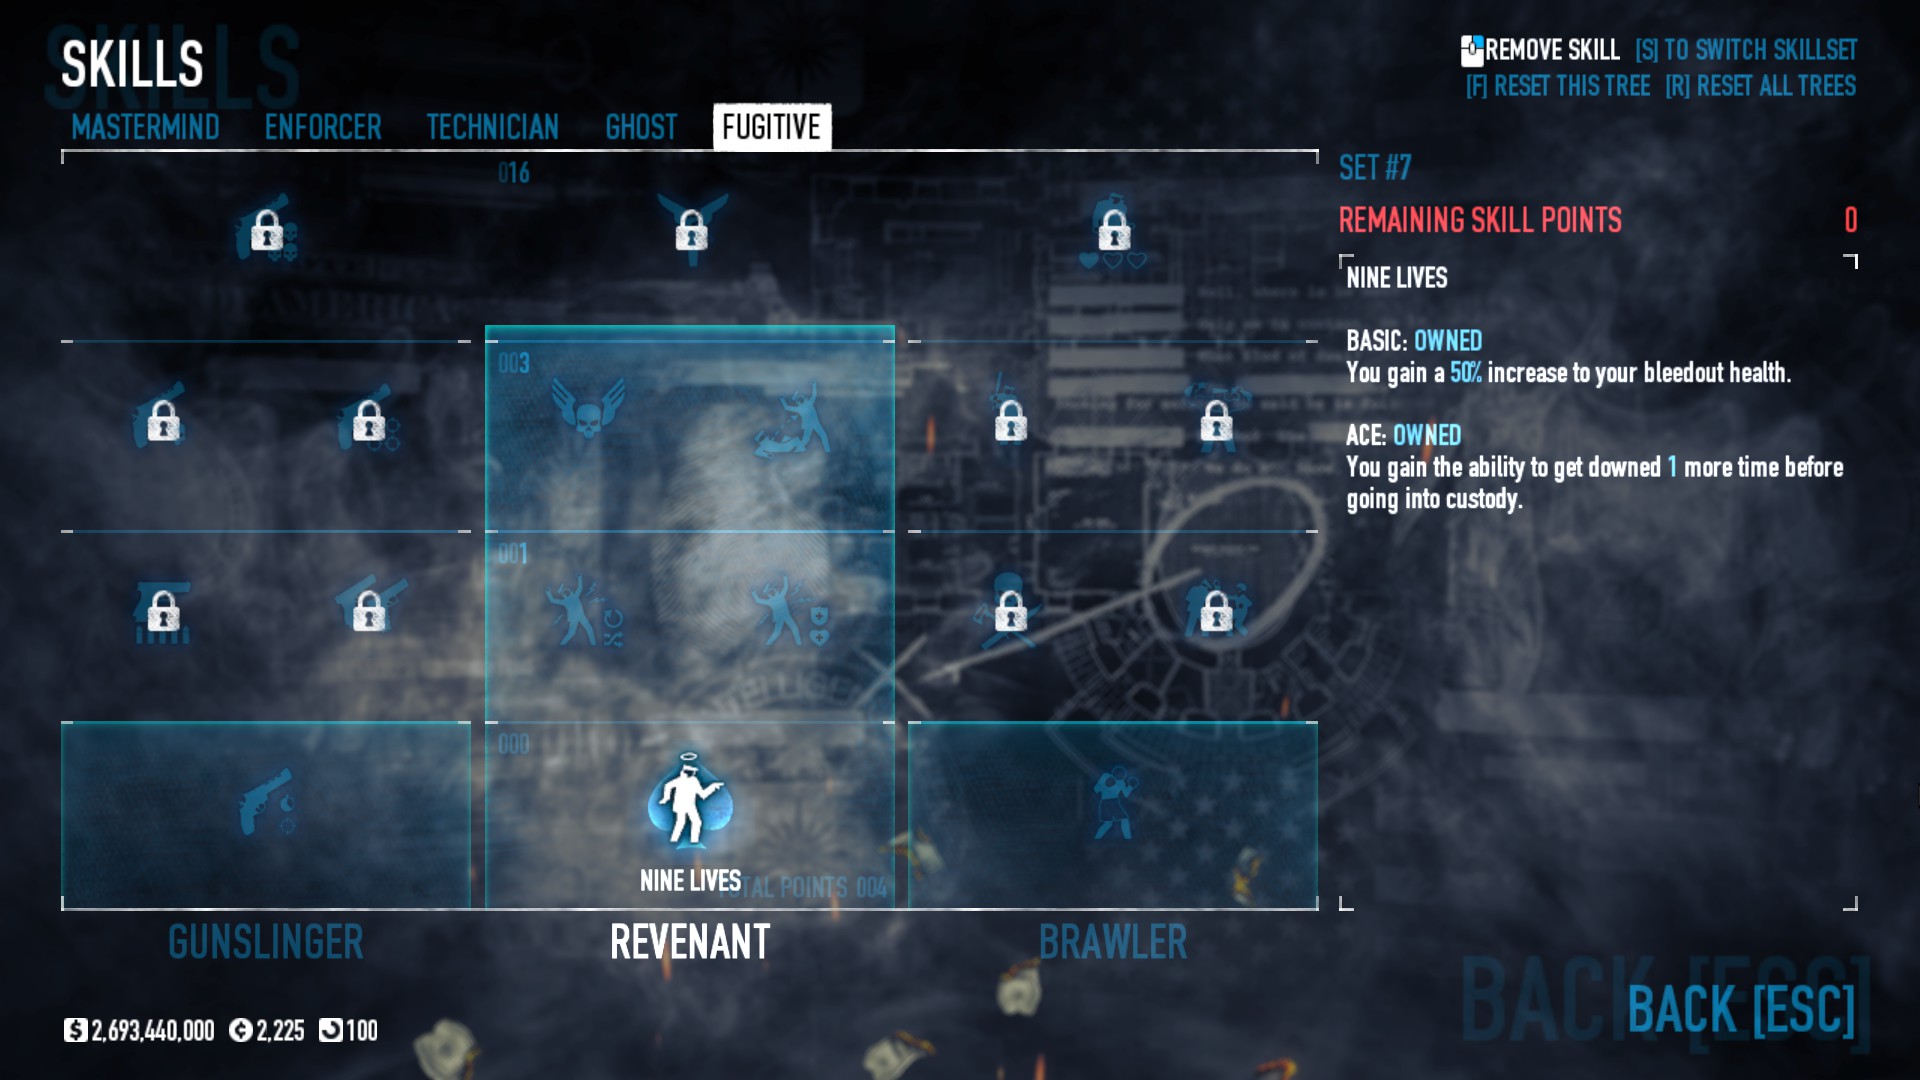
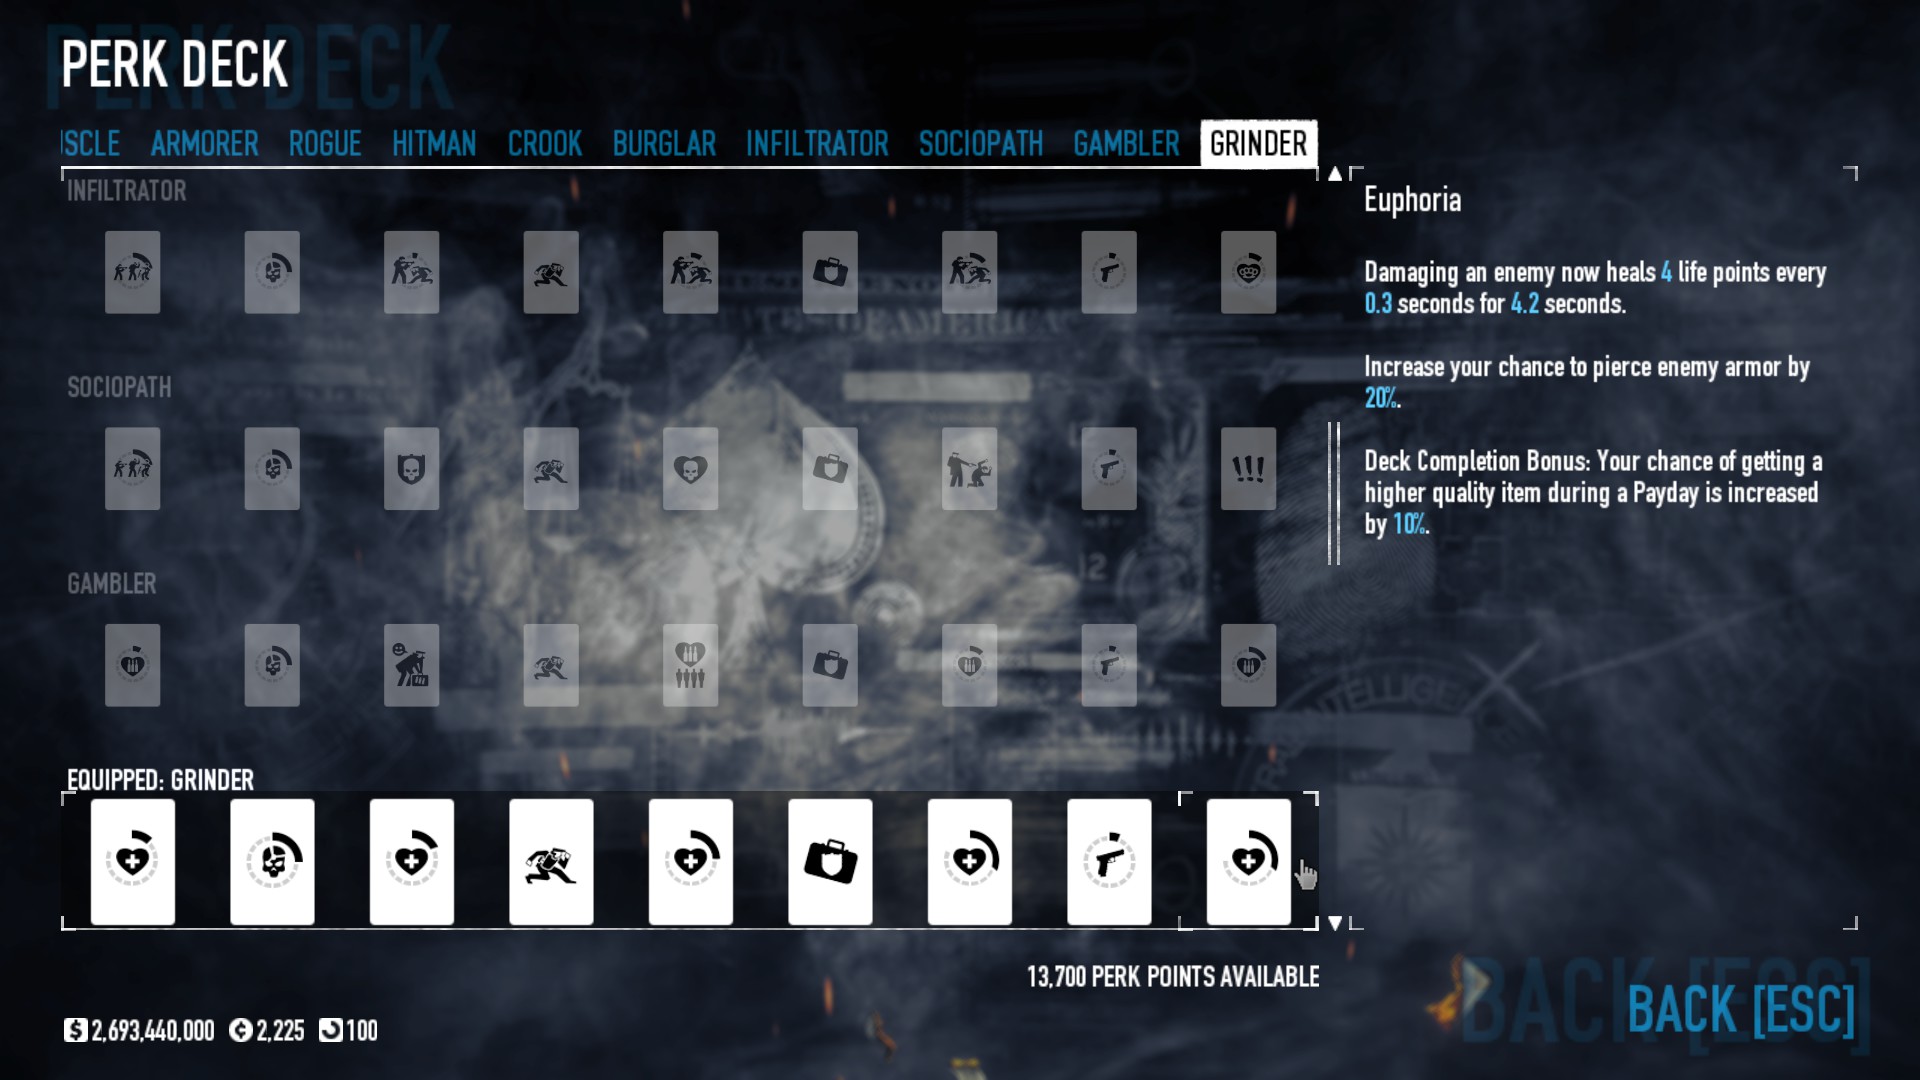
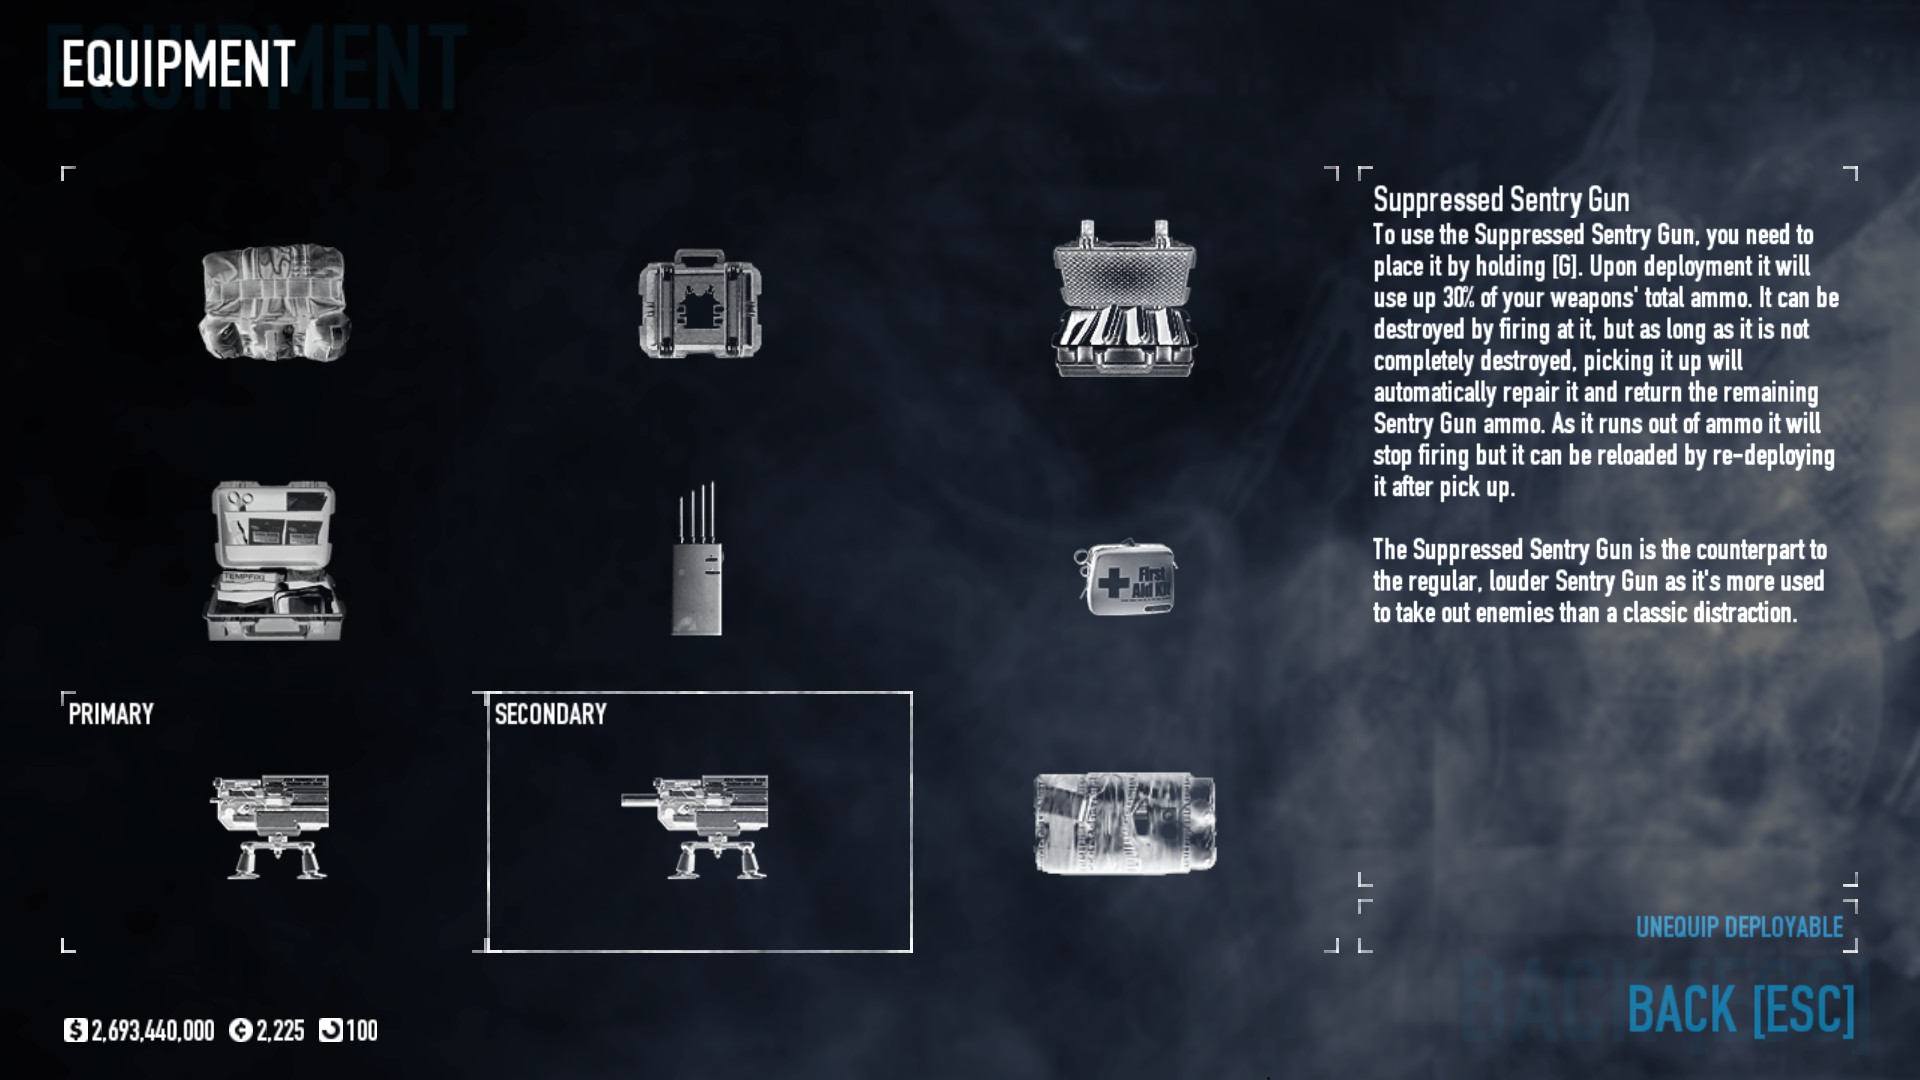
P.S. I lost my downs very quickly after getting down the first time since I get revived with so little health and have to try to run for cover when most of the turrets I placed are then running out of ammo.
Green  [Δημιουργός] 24 Σεπ 2022, 23:36 
Another trick to try instead of grinder then would be stoic. Use the flask to tank the damage taken during the ammo replenishment.
Are you making good use of the ai and their boosts too?
MrTailson 24 Σεπ 2022, 13:39 
I can survive quite well on most maps by sticking to cover and placing the turrets around corners, but for ones with the hostage out in the open make it very difficult as I get gunned down by everything. The regen works against a few enemies with stray bullets, but if I have to fight one-on-one with a dozer I usually end up dying. I blow off their visors with the China Puff but that's about all before I duck for cover.
Green  [Δημιουργός] 24 Σεπ 2022, 13:25 
It is a level 100 build, but sure you can try it at 60, with just the bare minimum (sentries and jokers maxed). I would recommend it for your grind from level 70-100.

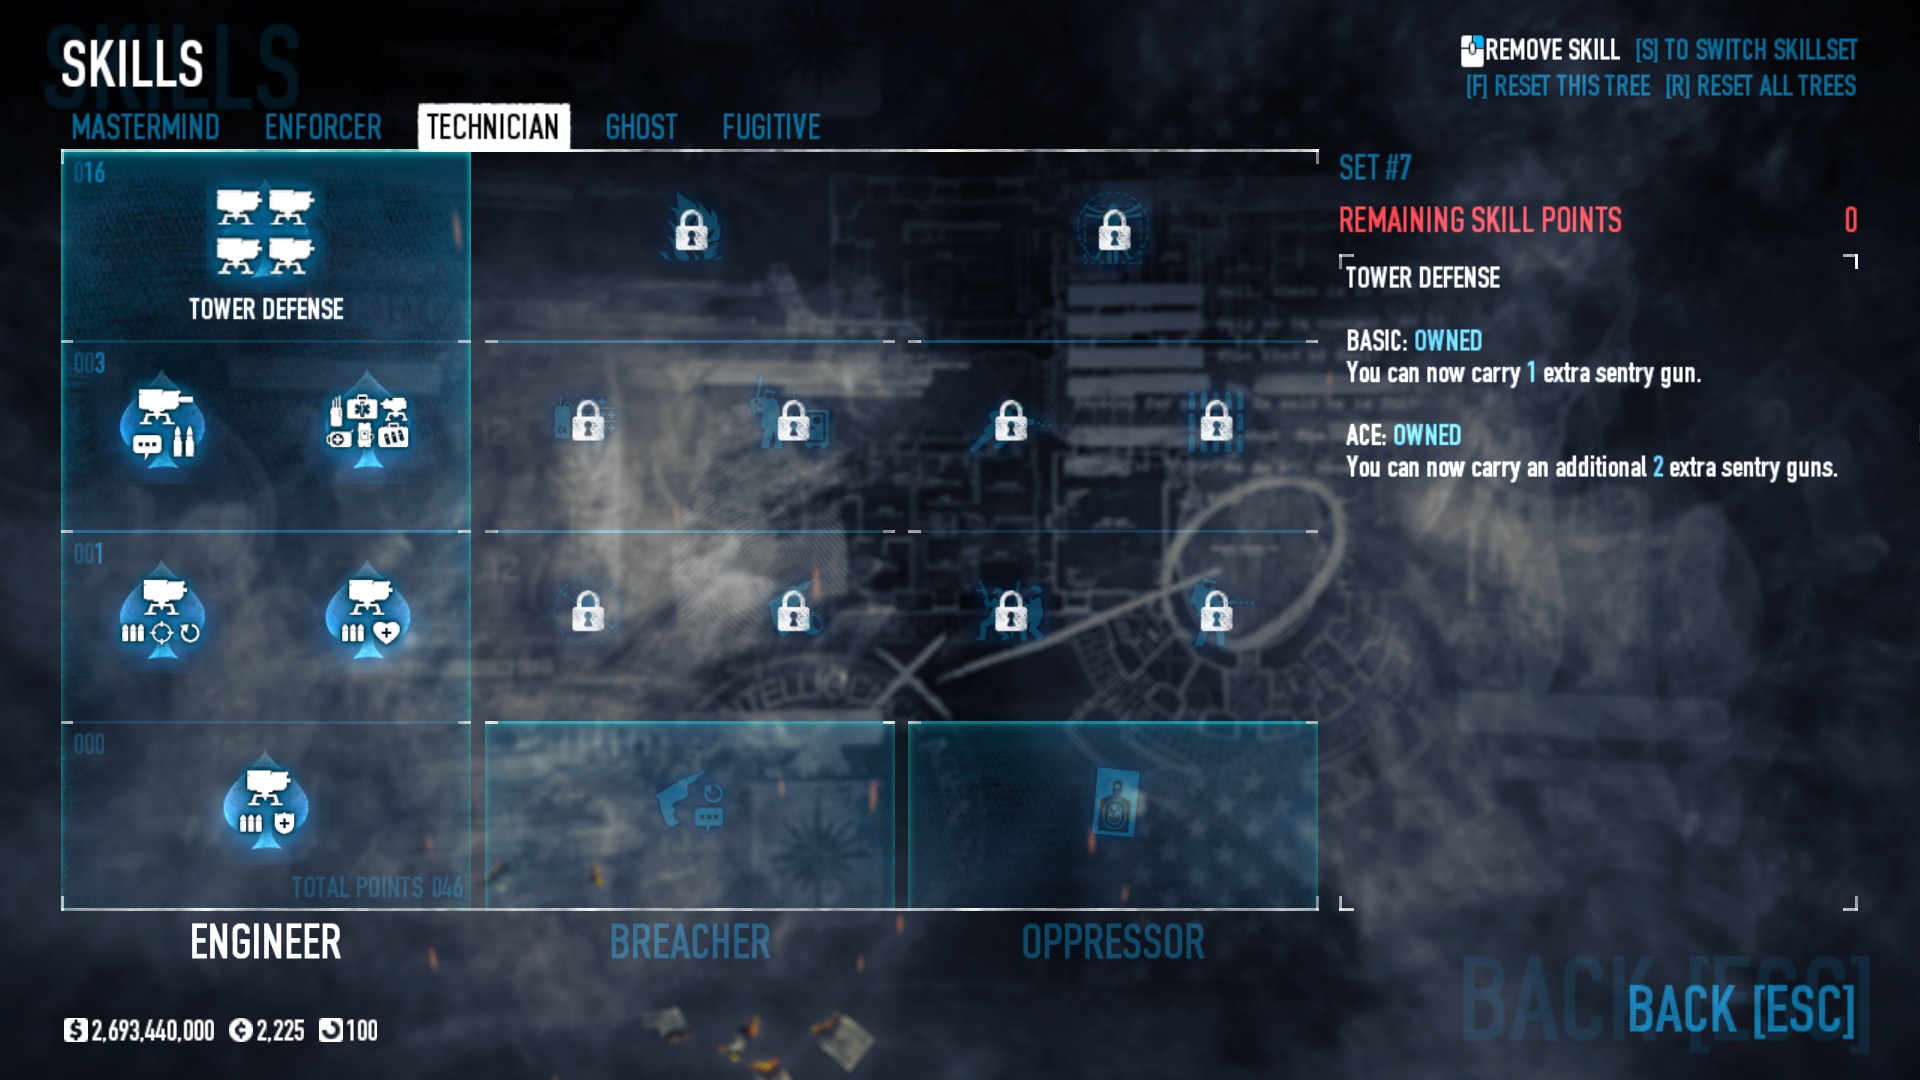
@MrTailson: As long as you have your regen, you should survive most enemies, you may have to take out the odd dozer. If you have the "quick" crew boost too, you should have no problem at all to replace sentries. It will be almost instant
PandorasMask 24 Σεπ 2022, 12:22 
Hey, for what level is this build? Level 100? or can I pull it of with just level 60 or so as well?
MrTailson 14 Ιουλ 2022, 16:28 
I seriously suck at Holdout. This build does not help me stay alive. I need tips on how to not get downed while running to refill the sentries. I've never gotten past wave 3 or 4, and my turrets keep getting destroyed by dozers.
Green  [Δημιουργός] 10 Νοε 2021, 13:26 
I doubt it makes much difference really, so yeah give it a try. Although you should rarely need to use it
هادئة, vuween 9 Νοε 2021, 15:48 
Can i use the Compact grenade launcher that comes with the base game instead of The Judge and the China Puff?
doctor sex 1 Φεβ 2021, 19:36 
Just tried this out. It works amazingly well, much better than I expected. Thank you so much.
Monolith Preacher 4 Ιαν 2021, 10:34 
alright cheers!