XCOM: Chimera Squad

XCOM: Chimera Squad

291 ratings
Chimera Squad : Agents, Loadouts, Abilities, Builds, Synergies.
By Bryock
This guide concentrate on how to build and optimize your Agents, as well as how to use them on the field to the best of their abilites. You will find informations about how to outfit your Agents' weapons, a detailed explanation on their abilities and what to choose when leveling, and some example of synergetic team to help you face the various enemies you will encounter in City 31.
2
11
6
2
2
   
Award
Favorite
Favorited
Unfavorite
INTRODUCTION
Hello everyone and thank you for reading this Guide on XCOM Chimera Squad.
In this Guide, we will overview each Agents available to the players and how to use them on the field. Each Agents of Chimera Squad has different strengths and weaknesses that need to be understood to use them at their full efficiency. We will also study how to optimize their loadouts according to their skills and need, what their abilities are and how to use them and how to build your agents to bring the best out of them.

Finally, I will also propose some builds and synergies to suit your agents and help you bring peace and order to City 31 and succeed in the investigation.

Each Agents will have their profile as detailed as possible. Please use the section on the right to skip to the Agent whom you wish to know more.
GODMOTHER


Godmother is a highly mobile, shotgun-wielding agent that use her speed to easily flank and score critical hits on enemies. Her kit can further be enhanced by focusing on her strength and building upon her flanking capability.

LOADOUT :
Godmother can make great use of the Lonely Herald legendary shotgun thanks to the Run and Gun skill attached to it. With it, she can more easily set up her scattershot skill to hit more enemies.
She can make great use of a Laser Sight and Expanded Magazine as modifications for her weapons. The laser sight will greatly help in scoring consistent critical hits. Most of her skills eat up her ammo reserve quickly, and her ultimate training option effectively replace the need of an auto-loader.
Early game, she will be one of your heaviest hitter. Giving her Tranq Round will help you in gaining additional intel. However, her aggressive kit makes her vulnerable to retaliation fire. Equip her with Plated Armor or a Mach Weave to boost either her armor or dodge to help her survivability.

ABILITIES AND BUILD :
  • Starting Skill : Scattershot
    Scattershot is a great active skill that lets Godmother cover a cone in front of her where she will fire upon all enemies present. The cone is 4 square long, so keep that in mind when trying to setup Godmother to fire upon more than two bunched up enemies. Use this skill often if you see enemies bunching up in conjunction with her high mobility.

  • Deputy Agent : Alpha Strike.
    Alpha Strike make Godmother fire her shotgun for regular damage during the breach, make her act more quickly during the following encounter, and give her an additional action point.
    Alpha Strike makes her one of the better second slot breacher in the team. As such, she can also make good use of breach gears such as flashbang bombs or target analyzers. By using Alpha Strike on the second slot, she effectively plays after the first character to breach. Use her additional action point to move around the field and secure objective in the first round, or to set up scattershot killzones.


  • Field Agent : Last stand or Flush
    Last stand is a passive ability that can save Godmother for going down in combat. It's not very flashy but it can help surviving a bad positioning that led to being outflanked. However, Last Stand is useless if Godmother is poisoned, burning and suffering from acid burn as she will be impaired on her following free turn.
    Flush is an active ability that makes Godmother shoot at an enemy and force them to move. The shot does no damage, and can be somewhat useful if you make an enemy run into another agent's overwatch zone or to force him to leave an objective zone.
    I recommend picking Last Stand over Flush as the passive ability can sometimes save Godmother from getting K.O on the field, and flush is too situational to be consistent and useful.

  • Special Agent : Ventilate
    Ventilate is an active ability that makes Godmother guarantee damage upon an enemy, in addition to destroying their cover and leaving them vulnerable to other Agents fire support. Ventilate is a great skill to finish off wounded enemies and make cars or explosive barrels explode if enemies are using them for cover. Use it often. Use it well, and give Godmother an expended magazine to alleviate the ammo cost.
    Her training option upon reaching Special Agent makes her gain mobility and dodge, which can be helpful in combination with a Mach Weave to boost her dodge, but is not an urgent training to undertake.

  • Senior Agent : Close Combat Specialist or Untouchable.
    Close Combat Specialist is a passive ability that makes Godmother shoot at an enemy that move on one of her 8 adjacent square. She will fire upon incoming chryssalids, mutons melees and Ronin consistently and can save herself from being damaged. You can even provoke Berserker and Chryssalids to attack Godmother and potentially be killed in retaliation fire by moving her as close as possible to them. However, remind yourself that Ronin always dodge reaction fire coming their way, making Close Combat Specialist useless against them.
    Untouchable is a passive ability that makes Godmother dodge incoming damage if she managed to down an enemy during her turn or during breach. Scattershot doesn't activate Untouchable, sadly. It can effectively make her dodge a Soulfire attack or a Berserker bash, which greatly help her survivability if you can consistently kill enemies with her.
    Both of the skills are great in their own way. Close Combat Specialist however ironically rewards aggressive play, and Untouchable is a defensive ability. In my own opinion, Close Combat Specialist is the better choice and works well with an expanded magazine.


  • Principal Agent : Overtime.
    Overtime is an one-use active ability that grants bonus crit and dodge to Godmother and, most importantly, makes her take an additional turn after 3 turn. It effectively lets her play two times in a single round, and combined with her Alpha Strike breach skill that lets her play earlier in the encounter, can make her cross the map and set up two effective scattershot. It is a great ability, that can potentially be combined with another agents "Team Spirit" ability to make her play 3 time during a single round. Use it on the last encounter of every mission, in combination with Alpha strike.
    By reaching this rank, Godmother can undergo training that makes gives her Step Up and let her reload each time she manage to down a enemy, which effectively can grant her infinite ammo as long as she is not getting disabled by a Hitman and consistently kill enemy criminals.

SYNERGIES AND FAVORED ENEMIES :
As an aggressive and mobile Agent, Godmother can works well with other tanky teammates. Axiom can synergize well with Godmother by being the designated first breacher, and Cherub can protect an aggressive Godmother from being outflanked thanks to his one-use shield. She can also synergize well with Terminal, as her heals and can greatly boost her survivability.

Godmother is efficient against all enemy factions. A Close Combat Specialist Godmother can be quite helpful against Sacred Coils many chryssalids, but be mindful of self-destructing androids that can catch her in their blast zone.

FINAL RANKING : A

Godmother is a good, aggressive unite that will often do the heavy lifting and secure kills. Use her Alpha strike on the second slot of the breach to make her play just after the first breacher's turn. Use her high mobility to set up scattershot killzones and use Vaporize to secure kills.
CHERUB


Cherub is a relatively slow tank-like character wielding shield and pistol. His main role is to mitigate damage around the team by making enemies waste their turn against his shields and to occasionally make a big damage spike when he has accumulated enough charges.


LOADOUT :
Cherub suffers from being a relatively low-damage character, and as such can have quite some trouble with enemies that have lots of armor, especially on higher difficulty where his single-use shield won't protect his teammates from getting damaged. However, he can make good use of the Endless Brevity pistol that grants him Fan Fire, a one-use skill that lets him unload his pistol on an enemy and can help him deal with a troublesome enemy.
You can equip him with a good Stock to deal consistent damage despite his low aim and damage and an Auto-loader to mitigate the ammo consumption from the Fan Fire and help him recover from having his weapon disabled by a hitman. You can also try to give him a good Scope to try to alleviate his low Aim due his pistol.
Equipping him with A.P Round let him bypass enemy armor, greatly enhancing his offensive range power. Consider also giving him a medikit as he will often be very close to his teammates and can help healing their or his own wounds.


ABILITIES AND BUILD :
  • Starting skill : Kinetic Shield
    Kinetic Shield is a good active skill that lets Cherub place a one-use shield around any of his teammates, including him, that will absorb all damage for a single time. It can protect from Soulfire, from Berserker punches, from android self-destructing, and even from a Sectopod wrath canon. However, it cannot protect agents from being damaged by hazards such as poison, acid or fire. Kinetic Shield does not end Cherub's turn, so it's usually efficient to start his turn by putting down a Kinetic Shield first and deciding upon moving, shooting or charging with his second action.
    Each time a shield is destroyed by damage Cherub gain one charge that will amp his shield charge to also damage enemies behind his target, which can be great to make multiple subdues against bunched up target. Cherub is often more useful towards the end of an encounter, but needs to be played early so that he can set up his shields around his comrades in arms.

  • Deputy Agent : Phalanx
    One of his most useful skill, Phalanx is used during Breach to absorb almost all incoming damage from aggressive enemies. During the breach, you can know which enemies will fire upon your team by looking at their icon : if they have a little target near them, it means that Cherub can absorb their fire using Phalanx. It is a single use skill, so use it wisely, as it can potentially save your entire team from getting shot at by 6 to 7 different enemies on high difficulty.
    Each shot blocked by Phalanx will give Cherub a charge, making him often begin a round fully charged and ready to charge. Please note that using Phalanx forgoes making Cherub actually shoot at anyone.

  • Field Agent :Generator or Guard
    Generator is a straightforward passive skill that lets Cherub gain 1 charge at the end of each encounter. It's usefulness is debatable, as Cherub often finish encounters at max charge if he's using his shield regularly. Furthermore, some missions are contained in a single encounter, which makes Generator a wasted opportunity in those cases.
    As such, Guard is no contest the more useful passive perk, as it grants Cherub a free 1 point of armor each time he finish his turn and makes him impossible to be flanked as he will always be considered at half-cover. He can also move himself on the side of a flanked Agent to provide half-cover and protect them from incoming fire. Note that if Cherub is damaged during the enemy turn he will always lose his free point of armor, but it will help to mitigate incoming damage.
    Pick Guard over Generator if you value consistent damage mitigation. Generator is rarely useful considering the multiple ways Cherub can gain charge over the course of a firefight.

  • Special Agent : Overload.
    A straight up upgrade to Cherub's playstyle. Overload is a passive skill that let him build 3 charges and grants him more mobility the higher his stored charges is. His added mobility can be quite useful during hostage extract missions and to cover greater distance to shield charge a bunched up group of enemies. Upon reaching this rank, Cherub can undergo training to boost his mobility which is useful, but not necessarily an important training to undergo and can be skipped.

  • Senior Agent :Recharge or Resonance Field.
    Recharge is a passive ability that lets Cherub get back 1 charge when he managed to subdue an enemy using his shield charge. It synergize well with his kit and is mostly a good way to keep Cherub charged and mobile through the firefight.
    Resonance Field gives +15 Aim to an ally (or Cherub) when a kinetic shield is over them. A +15 aim correspond to a Superior Scope, which is not a negligible boost. However, due to the nature of kinetic shield (it will attract enemy fire and will disappear any time an enemy attack the shielded individual) it is hard for the aim boost to pay off in the long run.
    I would recommend picking Recharge as it synergize well with Cherub base kit and is less situational than Resonance Field, but Resonance Field could help Cherub alleviate his low aim or help another character make the killshot where it counts the most. See what fits your long term aim better : a more mobile Cherub if he managed to subdue someone in melee, or a one-time aim boost that will disappear the next time an enemy shoots your way.

  • Principal Agent : Supercharge
    Supercharge is an active ability that lets Cherub consumes all his stored charge to increase the weapon damage of his allies, and mark enemies to be easier to hit. It's a great one-time buff for the entire team and can quickly turn a bad engage into a victory especially if you get the "Put all your units into overwatch" kind of breach. Use is at the last encounter of a mission when Cherub is fully charged, or in the opening turn following a Cherub-lead breach where he absorbs a lot of enemy fire with his Phalanx.
    By reaching this rank, Cherub unlock a training that lets him Return Fire on enemies that shoot him. Which can combo well with a kinetic shield that he puts on himself. As long as he has ammo and a good type of munition, he can retaliate and help the team. However, the enemy still needs to actually shoot Cherub for Return Fire to activate, so you still run the risk of having Cherub or allies get damaged for no payoff. Still, it's a worthy training to undergo.

SYNERGIES AND FAVORED ENEMIES :
Cherub works well with an aggressive team that needs his shield to mitigate heavy damage. As such, Zephyr can use both her parry and a kinetic shield to protect herself from two different source of damage, and Shelter can use his relocation without fear of being instantly obliterated by outflanking enemies.
Cherub works well against most enemy faction, and his kinetic shield is the only way to protect a teammate or himself from one of the Progenies many Soulfire and Null Lance.

FINAL RANKING : C
Cherub is a tank that is there to protect his team by making enemies waste their turn shooting at his shield. However, his low damage, low mobility and one-use nature of his shield makes him feel slightly underpowered. He is there to absorb damage first and foremost, but he has trouble catching up to other Agents in term of power and usefulness
TERMINAL [1]


Terminal is an invaluable asset for the team as she can provide 4 points worth of healing for every of her turn. She can effectively mitigate the damage taken by her comrades and provides useful and versatile assets to the team. She becomes even more invaluable on higher difficulty, where the long range of her GREMLIN heals and stabilization can save a bleeding out teammate on the other side of the map. If only she was a little less snarky about it...


LOADOUT :
Terminal can make great use of both of the legendary submachine gun, but my own preference goes to the Crucial Symmetry and its Chain Shot ability that lets Terminal puts down heavy firepower in addition to her multiple heals.
As most of her actions does not end her turn, she can effectively use both the Holo-targetor to mark enemies for her comrade from the backline and a good Scope to accurately shoot enemies down range. Give her some Tracer rounds if you want to boost her aim, or some Tranq rounds if you want additional intel. She also makes good use of the various grenades, both defensive and offensive, and can be equipped with the Infiltrator weave as armor to let her use vents and use them during breach to accurately stun enemies while breaching.
She makes a great 4th breacher, as even if she's late to come into play she can use her actions to heal her comrades, give a character an additional action or wait in Overwatch mode.

ABILITIES AND BUILD :
  • Starting Skill : Safeguard
    Safeguard is an invaluable active skill. For a single action that does not end her turn, Terminal send her GREMLIN to heal another character for 4HP while providing a little boost to their defense. It is Terminal's signature skill and one you will need to use very often, especially on higher difficulty.

  • Deputy Agent : Refresh
    A simple and straightforward breach ability. Refresh lets Terminal heal the Agents at her breach location for 2HP, which can be helpful to top off a lightly wounded agent. It is effectively the same as the breach utility item medipatch, and should be used sooner rather than later.

  • Field Agent : Sustain or Pin Down
    Sustain is very similar to Godmother's Last Stand ability. If Terminal receive fatal damage during a fight, she is instead put into a statis bubble for 1 turn and reduced to 1HP. It can only happen one time per mission, of course, and it won't stop Terminal from getting impaired on her following turn if she's suffering from acid, burning or poison. A good defensive passive ability for higher difficulty where Terminal can get focused down quickly, but it still a risky ability to see put in use.
    Pin down is an active ability that makes Terminal lay down suppressive fire upon a target to delay its turn. It has a short 2 turn cooldown, and can be used as Terminal's first action without ending her turn. Pin Down can be quite useful during a "Neutralize the Hostage Taker" optional objective if the hostage taker hasn't be neutralized yet and Terminal must choose between healing or shooting them down. However, be mindful that Pin Down can sometimes not prove enough to push a target's turn under an ally's turn in the timeline. Pin Down can also be quite effective at delaying a Ronin's Tempo Surge action spam during a round.
    The two skills are great in their own ways, but I always tend to choose Pin Down instead of Sustain. Terminal works better when she is far from the frontline, so she can concentrate on healing and be relatively safe from being focused down. As such, Pin Down synergizes well with her kit as it is a guaranteed success to delay a target's turn at the cost of one ammo. Use it as often as possible if it means that an ally can play before an enemy.

  • Special Agent : Cooperation
    Cooperation is a great skill that makes Terminal gift one immediate bonus action to another Agent, regardless of their position in the timeline. It doesn't end Terminal's turn if used as her first action and can be quite useful at helping another Agent deal important damage or prepare a defensive action while waiting for their turn. As such, cooperation works great on character such as Zephyr, who can use her momentum twice in a round. Use cooperation often, as a way to secure kills, help a character gets out of a complicated situation or to complete an objective.
    Remember that Cooperation can also be quite useful in making a character puts out a burning status by using "Preparation" on their bonus action. The bonus dodge and defense can also help if their normal turn comes later in the timeline.
    By reaching this level, Terminal unlock a training option that let her unlock a new utility item. While it is great to bring a special ammo type, a grenade and a utility item such as relocation disk, it's going to be a while until you amass enough gadgets and items to fully kit out your Agents. Make her undergo the training if you want her to use a medikit as free action instead of using a turn to safeguard Terminal.

  • Senior Agent : Armor System or Resilience
    Armor System makes Terminal's Safeguard provide 1 pip of armor to the protected Agent. It complements very well Safeguard base healing by providing a small mitigation in incoming damage. It is a straight up upgrade to Terminal's starting skill and even if it's not very showy, that small point of armor can make the difference in the long run.
    Resilience makes Terminal heal up to full at the end of every encounter. It is a good perk on the higher difficulty where the encounter-to-encounter healing ratio is either on half heal or no heal at all. As terminal can sometimes get focused down it can be very useful to cancel all her damage and use her heals on the others Agent. Remember, however, that some missions only features a single encounter, making Resilience not that useful.
    Both choices at this level are very good, and your choice will mostly be determined if you want to mitigate damage on the long run or let Terminal heal up between the encounters of the hard "take down the gang" missions. At the end of the day, I'd recommend Resilience if you play on the harder difficulty, as it let Terminal not worry about getting wounded during a firefight too much and let her focus on healing her teammates. Armor System is a very good alternative, so do not worry if you picked up the armor buff instead of the full heal.

  • Principal Agent :Second Wind
    A single-use active skill that lets Terminal send her GREMLIN to heal all her teammates for 4HP and stabilizing wounded allies about to bleed out. Be mindful that using this skill will end Terminal turn, so use it on your second action rather than your first. It is a good skill, a straight-up one-use mega heal for the entire team that could very well turn the tide of battle during a long 3-encounter mission where everyone is a bit damaged by the end of it. Try to keep it for when things get desperate and you have more than two agents under 50% HP, or if you need to stabilize and heal multiple agents quickly.
    Reaching this level let Terminal undergo a special training that let her unlock Guardian, a powerful passive ability that let her stay on Overwatch and shoot at any enemy crossing her line of sight for as long as she has ammo for her guns. It pairs exceptionally well with the special breach that makes all of your agent enter overwatch in the following round. Use her on the last slot and watch as she will shoot at anything that move. After undergoing this training, it would be a good idea to exchange her holo-targetor for an auto-loader for the free reload or an expanded magazine for more ammo.
TERMINAL [2]
SYNERGIES AND FAVORED ENEMIES :
Terminal can synergize well with any team composition. She usually is a good 3rd or 4th slot breacher considering she can heal the wounded and use her cooperation to help complete an objective. Many characters can make great use of her cooperation skill such as Zephyr, who can engage momentum and parry a second time in a round, Claymore, who can spam his shrapnel grenades like no tomorrow, Torque who can use her tongue pull to take an enemy out of the fight after binding them successfully and Cherub, who can protect another character with his Kinetic shield.
She is most valuable against the Progenies, as their Soulfire skill bypass cover and is always accurate, making her heal invaluable to mitigate incoming damage. Against the Grey Phoenix, she will help counteract poison and protect Agents being targeted by Praetorians. Finally, against the Sacred Coil, she will help put out fire on burning Agents and delay the spammy Ronin's turn.

FINAL RANKING : S
Terminal is always useful to the team, especially on higher difficulty where her heals let you go through difficult 3 encounters mission with more ease and less agent scars at the end. Use her cooperation skill often, to help other agent secure kills and objective, and make sure that she is healing someone every turn. She will tend to be immobile once she start the breach, so consider giving her a relocation disk to freely teleport her to a good cover.
VERGE / VIRGIL [1]


Verge is a psi-specialist alien that uses his powers to stun, disorient and turn enemies upon each other. He will need time to properly set up his neural network but once he has a few enemies linked to it he can quickly dish out good damage upon multiple foes.

LOADOUT :
Verge use an assault rifle, and can use both legendary weapon to their full potential depending on the situation. I'd recommend giving him the Impetuous Spire, as the Banish ability let him focus down a powerful enemy like a praetorian and completely shut down a Berserker at the cost of his ammo. However, shooting is not what you will do often with Verge as his role is more of a specialist than rifleman.
I'd recommend outfitting him with a Holo-targetor to mark enemies for his teammates, and either a good Scope, a Stock or even a Hair trigger if you're in a gambling mood as the bonus free action can sometimes be used to launch a devastating mindlash on a wounded enemy.
As for utility, Verge can make great use of Smoke Grenades to better protect his position, considering he will stay far away from the frontline and a Medikit to heal himself during emergencies. As he will rarely shoot his gun, the many different speciality ammunitions should go to other Agents that need them to boost their damage.


ABILITIES AND BUILD :
  • Starting Skill : Stupor and Battle Madness
    Stupor is Verge's bread and butter. For the cost of one action this friendly sectoid will launch a psi attack that is almost guaranteed to stun or disorient an enemy character. Use is as often as possible, as each time Verge launch a psi attack, the enemy will be added to his Neural Network but be mindful that once an enemy is in the network it cannot be the target of another psi attack from Verge. Use Stupor to stun Ronin before they launch their Tempo Surge, to stun a Codex and stop it from using the Psi bomb or their cloning ability and to shutdown a Dominator mind control or an Acolyte Psi Suplex. If you hesitate between shooting a far away enemy or using Stupor, choose the later, as a guaranteed stun/disorient is often more valuable than risking a miss.

    Battle Madness is Verge's second starting ability, and while it is a great skill, it is slightly less useful than Stupor because it renders the enemy berserk for a single turn. By turning an enemy berserk, you can force an enemy to shoot at the back of his comrade, which is very efficient if you turn a shotgun wielding Muton being protected by a shield-bearer Guardian. However, Battle Madness only last for a turn, and once added to the neural network the enemy cannot be the target of Stupor. Use this skill wisely and try to aim for the furthest enemy from your frontline, one that is on a flanking position to his comrades.

  • Deputy Agent : Levitation
    Levitation is a breach skill that can be used as often as you want. Verge lifts an enemy in the air and removes their cover bonus as well as canceling their Alert or Aggressive status. While you do not do any damage to them when you lift them it is often beneficial to stop a Sacred Coil shield-bearer Alert status to delay their shield buff, or to stop a powerful enemy from shooting your squad if you didn't manage to down them during the breach. At first underwhelming, Levitation can be great to protect the squad from incoming arm and stop some troublesome Sacred Coil enemies to proc their defensive skills.

  • Field Agent : Crowdsource or Collar
    Crowdsource is a passive ability that buff Verge aim and critical chance for each enemy that he connects to his Neural Network. For each criminal you use Stupor or Battle Madness on, Verge will become a better shot. Keep in mind that enemies that are rendered unconscious instead of killed will remain in the Neural Network and contribute to Verge's buff if he chose Crowdsource. With but a few enemies connected to his neural network, Verge can reliably nail a target on the other side of the map.
    Collar is an insurance that every enemy that Verge has connected to his neural network will be rendered unconscious instead of killed, so that you are almost guaranteed to gain some intel at the end of the mission. However, keep in mind that some enemies, even if you connect them to the Neural network, will always be killed instead of rendered unconscious, such as the Andromedon living form and the Codexes.
    I recommend picking Crowdsource over Collar, as even if Intel is hard to amass in the early game, you will be swimming in it toward the end of the second investigation while a reliable aim and crit boost will always be useful, from early game to end-game. Furthermore, there is nothing stopping you from using subduing action to quickly render an enemy unconscious instead of using Verge to set up a Stupor first.

  • Special Agent : Mindlash
    By reaching this rank, Verge start to ramp up in power. Unlocking Mindlash let Verge unleash a mental attack upon enemies he has connected to his Neural Network that will deal 3HP worth of damage, bypassing armor. It is a great skill to finish off wounded enemies, and is a reliable way to deal consistent damage across multiple target. Once you unlock mindflay, Verge will use his gun even less as most of his action economy will consist of doing Stupor then Mindlash across the enemy team.
    Mindlash can also synergize well with Terminal cooperation, so that Verge can use Stupor and Battle Madness and Mindlash his target during his bonus action.
    By reaching this rank, Verge unlock a training option that will give him a welcome bonus to his dodge. Considering his relative low HP pool, it is often a good consideration to pair this training with a brand new Mach Weave to boost his dodge and let him be grazed if an enemy shoot his way.

  • Senior Agent : Network Healing or Slam
    Network Healing is a passive ability that provides a 1HP heal for each enemy Verge managed to connect to the Neural Network. While the amount seems small, remember that Verge can reliably connect two people per turn to his neural network, and combined with a Regen Weave can get a 4HP heal per turn! A good defensive option to consider if you like Verge to hang back and slowly connect every enemy to his neural network.
    Slam synergize with his Levitation break skill to deal a slow amount of damage to his target but, most importantly, to instantly connect it to his Neural Network. Enemies that are left on 1HP during a breach can hence be rendered unconscious as Verge jam their mind and welcome them to the slam at the start of the round. Remind yourself that the target of a Slam attack will connect to his neural network and hence be impossible to Stupor or Battle Madness in the following encounter.
    Both of the skills choices are interesting in their own way, and your choice will essentially depend if you want to give Verge a more defensive mindset or to gain time to set up a good mindlash. I would personally recommend Slam as the small amount of damage can sometimes be enough to take out dangerous enemies left on a low amount of HP after a breach and... more importantly, can provide a very good setup for Verge ultimate ability which is...
VERGE / VIRGIL [2]
  • Principal Agent : Puppeteer
    Puppeteer is a one-time use active ability that make Verge try to take control of each enemies connected to his neural network for one round. It can synergize very well with an opening Slam, as you can use Verge to Battle Madness another enemy and use Puppeteer to try and take control of two enemies in the opening round. However, keep in mind that Puppeteer can fail, and it will be more difficult to take control of powerful enemies such as Sorcerer or Ronin, but managing to take control of a living Andromedon can quickly turn a difficult engagement into a cakewalk as you use their Acid bomb attack on their comrades.
    By reaching this rank, Verge can undergo training to boost the damage of his mindlash from 3 to 4. While a +1 damage might not seem impressive, Verge will use mindflay more often than his gun over the course of an encounter, and the armor bypassing damage can be very helpful in quickly taking armored Praetorians down.

SYNERGIES AND FAVORED ENEMIES :
Verge can work very well with Terminal to setup his neural network quickly thanks to her cooperation skill. His ability to stun multiple people can also help Zephyr charge into battle without worrying about too much incoming damage.
He will performs very well against the Sacred Coil, as Andromedon and Chryssalids make prime target for Battle Madness and Puppeteering, and will have slightly more trouble against the Progenies as their superior Psi training make them less vulnerable against his own psi attack. Against Grey Phoenix, Verge can have a field day making powerful Mutons shoot their allies in the back and making sure to shut down a Dominator attempt to mind control an ally.

FINAL RANKING : B
Verge is a great asset to the team but his rough action economy, his inability to target the same enemy twice with his Stupor and the long time he need to set up his neural network can hurt him on the long run. He will be most useful during the early game, whereas toward mid-game and late game he will turn into a somewhat superior rifleman that is there to finish off weakened enemies.
AXIOM [1]


Axiom is an aggressive, mobile and unpredictable Agent that can use his both shotgun and melee to lay waste upon his enemies. Using Axiom is not without risks, as his melee can miss and puts him on a vulnerable position or proc his berserker rage, making him decide upon himself to charge a random enemy without the player's input. However, a good Axiom can use his rage to come into play during the enemy's turn to deal heavy damage.


LOADOUT :
Thanks to a good action economy, Axiom can make good use of the Callow Ember legendary shotgun and its Rapid Fire ability. By first moving in to smash a target and then using Rapid Fire upon a dangerous, high-HP enemy, Axiom can reliably lay down heavy damage across the board.
Giving him a good Laser Sight to boost his critical ability will go well with his close-quarter combat playstyle. You can also consider giving him an Impact Frame to make his subduing action a more reliable source of damage. A good quality auto-loader can also help alleviate his somewhat intensive ammo consumption.
Axiom's role as first breacher imply that he will not use the tactical breach items to their full capability. Consider giving breach grenades to other characters.
A good armor can help Axiom tredemensly during firefight. A Plated Vest can boost his armor rating to a comfortable position, but I'd recommend outfitting him with a Hazmat Weave to protect him from Acid, Poison and most importantly the Burning status that stops him from using his many abilities.
As for utility item, giving Axiom Tranq Rounds in the early game can help accumulating Intel as he will be one of your heavy damage dealer. A more specialized ammo type such as Dragon Rounds or Talon Rounds will make his late-game damage skyrocket. Consider giving him either a Medikit to provide him with a quick healing possibility in case his rage leave him in a precarious spot, or a good Plasma Grenade to destroy the cover of his enemies and leave them vulnerable to his powerful shotgun.

ABILITIES AND BUILD :
  • Starting Skill : Smash and Psych Up
    Smash is a powerful melee attack that Axiom can damage enemies for around 4 to 7 HP and leave them disoriented, stunned or even unconscious. That mean that Axiom can potentially one-shot any organic enemy by doing his smash attack and rendering them unconscious, even Praetorians! The possibility of inflicting debilitating effects with Smash is increased the more Rage Axiom has stored, similar to Cherub's charge playstyle. Be mindful that contrary to Zephyr's attack and the subdue attack, Smash can and will miss enemies and can make Axiom enter his Muton rage. It is a gamble, but a gamble worth undertaking, especially when paired with his Adrenal Surge perk.
    Psych Up is a free action that increase Axiom's Rage. Consider that Axiom can never enter berserk from doing Psych Up alone, as his Berserker status can only proc from being damaged by enemies or by performing Smash, so there is no downside to using Psych Up every turn. Do not be afraid of Axiom's Berserker state, as he will never (at least, he never did during all my testing) target an ally when in a berserker state. If there is no enemies left on the field and he enter berserker rage, he will usually reload his weapon or skip his turn. Rage can be stored up to five time, and will completely disappear after Axiom perform any action during his Berserker status.

  • Deputy Agent : Battering Ram
    Battering Ram is a passive breach skill that Axiom automatically do if Axiom is in the first Breacher slot during a normal Door situation. He will perform a mighty roar that has a chance to leave enemies in a panicked state after the Breach shootout. Panicked is one of the most debilitating status that you can inflict upon enemies as it will often lead them to shoot their comrades in the back or spend the whole firefight cowering in a corner, unwilling to fight back your Agents. It will also let you see one of the Viper enemies most adorable animation where they curl up and rattle their tail when panicked.
    The more Rage Axiom has stored, the higher the possibility that he will leave enemies in a panicked state at the end of the breach standoff.
    As such, Battering Ram can combo very well with Godmother's Alpha Strike as it will let both Axiom and Godmother move and shoot before anyone else in the Timeline.

  • Field Agent : Aftershock or Shrug it off
    Aftershock upgrade Axiom's Smash ability to deal a small amount of damage to nearby enemies, as well as giving a chance to disorient, stun or render them unconscious. It is a straight upgrade to one of his mainstay abilities, but the actual area of effect range of it is rather short and can also miss. The damage done is rather low, but it is still hilarious to render a praetorian unconscious by doing 2 damage to him even as you aimed at the riot shield mercenary that was defending him.
    Shrug it Off is a passive ability that gives Axiom a chance to reduce all type of incoming damage to 1. It has a 50/50 chance to activate, and can potentially reduce a dangerous attack such as a Null Lance or a Soulfire to only 1 pip of damage.
    In my opinion, Shrug it off is the better option between the two. Aftershock actual area of effect is rather slow and it is very rare that enemies bunch up enough to make it worthwhile, especially considering the fact that Smash can still miss enemies. Shrug it off gives Axiom a good way to mitigate incoming damage, even if its activation is left to random chance. It can also give Axiom a chance to defend against heavy incoming fire if a bad Rage proc left him on a vulnerable position.

  • Special Agent : Adrenal Surge
    Adrenal Surge is a powerful active ability that greatly enhance Axiom action economy by making Smash only cost one action, even if Axiom need to dash to perform it. While under the effect of Adrenal Surge, Psych Up and Smash loose their cooldown, which mean you can spam Psych Up to make Axiom instantly reach 5 Rage on his opening turn! You can also use Adrenal Surge to let Axiom use his first action to Smash a far away enemy, then use the following free action to shoot or use Rapid Fire on a flanked enemy. Adrenal Surge gives Axiom a much needed flexibility when it comes to his action economy, but be mindful that using Smash with a high Rage count can lead to him going berserk and choosing his own target and action. Adrenal Surge can also be used toward the end of an encounter, to give Axiom his maximum Rage and upgrade his Battering Ram breach skill.
    By reaching this rank, Axiom unlock a special training that give him 1 point of armor. As Axiom is often in the thick of the fight getting shot and outflanked, it is a very important training to undergo and will help mitigate incoming damage in the long run.
AXIOM [2]
  • Senior Agent : Fear Factor or Regeneration
    Fear Factor upgrades Smash by adding the possibility to inflict Panic in a large radius around the target, even if Smash miss the original target. As mentioned before, Panic is one of the most debilitating status that you can inflict upon your enemies, and making multiple enemies shoot their friend in the back or skip their turn can quickly change the outcome of a difficult engagement. Fear Factor doesn't need Aftershock to proc on multiple enemies, and synergize well with an aggressive Axiom playstyle that use Adrenal Surge to boost his Rage count in the opening turn and proceed to smash everyone and everything in sight.
    Regeneration is a passive ability that heals Axiom at the end of his turn for 2 HP. Combined with a Regen Weave, it can combo to heal Axiom for 4 HP at the end of his turn. It is a good defensive ability, that will greatly enhance Axiom survivability on the longer missions that goes across several encounters. It also synergize pretty well with Shrug it off, as it let Axiom heal back the damage he managed to absorb almost completely.
    Between the two, I still think that Fear Factor is the better perk. Regeneration goes well with a defensive-focused Axiom, but Shrug it off, a regen weave or a Terminal Safeguard can take care of healing. Being able to inflict Panic on multiple enemies across the board is something that is not to be underestimated, especially as it can lead to threatening enemies to completely shutdown for the duration of the firefight.

  • Principal Agent : Quake
    Quake is a one-use active ability that makes Axiom damage enemies and destroy the environment in a large radius, about the same size as Claymore's shrapnel grenade. Quake is a high-risk manoeuvre as it will inevitably lead to Axiom standing out of cover, but it can also help finish off multiple bunched up enemies. You can set up a good quake by either charging a row of already stunned enemies (by means of Shock Grenade or Patchwork drone) or by protecting Axiom with one of Cherub's kinetic shield. Quake is still slightly too dangerous for Axiom to actually put in use, so keep this in mind.
    Upon reaching this rank, Axiom unlock a training that will let him use Counterattack, a passive skill that can lead to Axiom being able to totally absorb an enemy melee attack and counter with a powerful counter attack worth 4 to 6 damage. Being able to counter a Chryssalid rush, a Ronin melee spam or a Berserker punch is nothing short of hilarious, especially if you can kill them in the retaliation strike. Try to undergo this training as soon as possible, but keep in mind that like most of Axiom's skill, it is left to random Xcom chance to properly activate in your time of need.

SYNERGIES AND FAVORED ENEMIES :
Axiom can pair exceptionally well with Godmother to form a very powerful breacher team, where Axiom open with his Battering Ram and Godmother follow with her Alpha strike to let them act before anyone else in the timeline. As they both use shotgun, they gain a lot from an early Assembly research to enhance and perfect their weapon, and make them the heaviest hitters in your roster. Axiom can also works well with Terminal and the many possibilities of using her cooperation action and insured by her GREMLIN heals. Finally, Blueblood can form a perfect buddy-cop duo with Axiom and use his many offensive possibilities to finish off wounded enemies left in the big Muton's wake.
Axiom can perform well against all enemy factions. A high level Axiom with Counterattack will do wonders against the many melee-centric enemies of the Sacred Coil (Andromedon / Chryssalids / Ronin) and his high base damage and mobility can help against the many heavy-armored Grey Phenix mercenaries.

FINAL RANKING : A to B
At the end of the day, Axiom can either be a boon or a curse, depending if you prefer to control every aspect of the battle or leave something to chance. Most of Axiom's kit leads to a degree of unpredictability, from Smash chance to miss to Shrug it off and Counterattack random nature. His berserker status can lead him to charge blindly into the fray, leaving him exposed and vulnerable. Despite this, Axiom is one of the heaviest hitter in your team, and is the only character able to inflict Panic upon the enemy with the proper build. You need to understand his quirks and how to control his anger, but once you understand how Axiom works you will be able to enjoy Muton-grade devastation.
BLUEBLOOD


Blueblood is a mobile and versatile character than has one of the better action economy in the game. His pistol starts off weak but he can quickly ramp up in power with the proper equipment and training. He is a good offensive character that can complement rather well any kind of team setup.

LOADOUT :
Blueblood weapons of choice are pistols, which make him deal sub-par damage in the early game and render fights against armored opponents difficult. Nonetheless, he can work wonders with the Artful Fathom legendary pistol as the Lightning Hands perk can help him shoot three times in a round and has the same cooldown as his Lancer pistol. With this weapon, you are almost guaranteed to always be able to shoot at least twice every few rounds.
As such, Blueblood can make good use of a Expanded magazine or an Auto-loader until he unlock his last training option. A good Stock is a worthwhile option to consider, as even with missed shot his ability to shoot multiple time in a round will lead to consistent damage upon the enemy.
One of the most interesting utility item to give Blueblood is some A.P rounds. With them, Blueblood will be able to overcome the pistol greatest weakness and bypass enemy armor. Alternatively, once pistols are upgraded in the Assembly, giving him a specialized ammo type such as Venom Rounds will let him spread status effect on multiple enemies, and Talon Rounds can synergize very well with his high critical chance to boost his damage.

ABILITIES AND BUILD :
  • Starting Skill : Deadeye and Desperado
    Deadeye is a simple active skill that makes Blueblood take a shot with lower hit chance but greater damage. If your hit chance is superior to 90% when using Deadeye, it is often worth it to try to take the shot and inflict greater damage than with his normal attack.
    Desperado is Blueblood main trait, and lets him be able to shoot twice in a round, or use his first action to shoot at someone without ending his turn. As such, Desperado function like a free Reflex Grip for Blueblood and open up his action economy to versatility.

  • Deputy Agent : Lancer Shot
    A rather straightforward Breach skill. Lancer shot makes Blueblood pulls out his Lancer pistol and shoot at an enemy during a breach standoff, negating all cover bonus of his target. It is more useful during the early game, where the Lancer pistol has the same damage as his main weapon, and quickly loses its edge as Blueblood Aim improves and you upgrade his main gun damage. Nonetheless, it can be useful to finish off a troublesome aggressive enemy hiding out behind full cover.

  • Field Agent : Warm Welcome or Ever Vigilant
    Warm Welcome makes the first bullet of every clip able to disorient a target, which can shut off a Dominator mind control or a Necromancer Psi zombie revival. It can lead to a bit of micro intensive gameplay if you combine it with an auto-loader or Blueblood ultimate training option to reload and use the disorienting bullet across multiple enemies.
    Ever Vigilant makes Blueblood automatically enter total Overwatch if his last action is spent moving, including using Subdue or dashing to far away cover. This overwatch function the same as the one you can get from breaching, and cover the entire field. Ever Vigilant can make Blueblood particularly useful during hostage extraction missions or when you need to defend against multiple waves, as he will be able to shoot at enemies regardless of their point of entry.
    In my opinion, Ever Vigilant is the better perk of the two. If disorienting is a pretty useful status effect, being able to enter Overwatch at the end of a movement action makes Blueblood more efficient at covering his squad's advance. Be mindful that Ever Vigilant will not work against Ronin, as their Lightning Reflex will make any reaction shot against them automatically miss.

  • Special Agent : Phase Lance
    Phase Lance is one of Blueblood signature skill. This active skill makes the by-the-book cops pull out his Lancer Pistol and fire in a straight line, ignoring both line of sight and bypassing cover bonus to automatically hit everything in its path. Phase Lance can be used every 3 turn, but will end the turn if used as Blueblood's first action. It's a great finisher skill and by giving Blueblood a better angle, can lead to impressive damage number across multiple enemies.
    By reaching this rank, Blueblood can undergo training that will add +15 to his crit chance. This will make him a prime candidate to use Talon Rounds to give a comfortable boost to his overall damage.

  • Senior Agent : Fond Farewell or Cascade Lance
    Fond Farewell is a passive ability that makes every last shot of each clip deal double damage. While it seems nice on paper, keep in mind that most firefight will end before Blueblood runs out of ammo, and some enemies can disable Blueblood weapon to force him to reload to full. It is a very situational skill that is hard to put in practice and can lead to great disappointment and potential depression if the last shot of his clip is spent missing a 98% shot.
    Cascade Lance upgrade the Phase Lance skill to ramp up damage for each enemy hit in a single blast. By making sure Blueblood is well positioned, the Cascade Lance can lead to impressive damage number if he can manage to catch at least three people in the blast.
    There is no contest for this skill choice, Cascade Lance wins by far by making one of Blueblood signature skill even better. As Phase Lance is a guaranteed hit every three three turns, you can inflict good damage upon multiple enemies. If you are feeling mischievous, use an allied Agent like Axiom or Zephyr as the first "target" of the Phase lance, so that the enemy behind Blueblood's ally takes the full brunt of the upgraded damage.

  • Principal Agent : Faceoff
    Faceoff is a one-use active skill that makes Blueblood fire once at every enemy in his line of sight until he runs out of ammo. This is a great skill to use in the opening turn to quickly wound many enemies and inflict status effect upon them by using specialized ammo type, but be mindful that Faceoff tends to come with a hefty aim debuff which can lead to many misses in a row.
    By reaching this rank, Blueblood can undergo training to unlock Quick Reload which makes all of his reloads be free actions. This effectively gives him an natural auto-loader, and makes him scoff at a Codex psi bomb, a hitman weapon disabling or a Ronin disarming strike. It is not necessarily a vital training to undergo, but it is a very helpful one.

SYNERGIES AND FAVORED ENEMIES :
Blueblood can synergize pretty well with Axiom as both of their good action economy complements each other. Paired with Terminal, he can be able to shoot 4 time in a single round. All in all, Blueblood is a versatile character that will fit well in any team composition.
Be mindful that early game, the high armor of Grey Phoenix mercenaries will protect them against Blueblood damage. In the same vein, Sacred Coil tends to field many enemies in a single encounter, which can lead to appealing target for his Phase lancer skill.
Try to give Blueblood A.P Round as soon as possible, and you won't regret it.

FINAL RANKING : B
Blueblood is a straightforward offensive character that function pretty well in many team composition. His good action economy makes him be able to deal good damage across the board but he is still gimped by the fact that you need to dedicate precious time to upgrade pistols in the Assembly. He is somewhat a late bloomer character and needs some time to unlock his more powerful skill, but come late game Blueblood can get really powerful.
CLAYMORE [1]


This gentle giant of a man is Chimera Squad resident demolition expert. As such, he has access to many explosive options when it comes to deal with the enemy factions. Claymore needs proper care and some clairvoyance when it comes to using his skills, as improper use of them can lead to devastating collateral damage and can lead to civilian death.


LOADOUT :
Claymore is a shotgun wielding character that benefits well from his weapon high base damage. However, he will spend most of his time chucking explosives everywhere. Both legendary shotgun can suit his playstyle, but try to remember that he tends to stay in the backline compared to Axiom and Godmother.
As such, it might be a good idea to give Claymore a Reflex Grip to let him shoot as his first action and use his sticky bomb to finish off a wounded enemy. A good Scope can help Claymore shoot accurately at enemies from his position in the backline, and a Stock is a good option to consider if you want him to be able to deal consistent damage even if he miss his shot.
Claymore is a good candidate for a Plated Vest to stack up on Armor, and a Hazmat Vest can potentially be used to give the same effect of one of his skill.
Claymore's main power comes from the utility item you give him. He makes of course excellent use of the various grenades you come across, offensives and defensives ones.
I would personally recommend giving him Acid Grenades if you want to deal consistent damage, or outfitting him with Shock Grenades if you want to be able to inflict stun reliably across a large radius and deal with robotic enemies easily.
Consider giving him Tranq Rounds to render enemies unconscious in the early game, to boost your Intel income a little bit. A medikit can also be used to replace a specialized ammo type and give him a possibility to heal himself during emergencies.

ABILITIES AND BUILD :
  • Starting Skill : Shrapnel bomb
    Shrapnel bomb is a powerful active skill on a 1 round cooldown that let Claymore chuck a wide radius explosive charge that detonate after about 3 or 4 turn down the timeline. This is Claymore's bread and butter, and early game will help him deal consistent 4 pip of damage across the board if you shoot at the charge before the enemies have time to get away from it. However, be mindful about deploying a Shrapnel bomb is many civilians are present on the field, as an enemy can sometimes force the civilians to move into the blast radius of one of your bomb.

  • Deputy Agent : Concussive Charge
    Concussive Charge is a breach-skill and is effectively an upgraded Breaching Charge item you can use to open up walls and use alternative point of entry for encounters. It deal a small amount of damage if enemies are very close to the point of detonation and most importantly rupture them, leading to double damage against them during the ensuing shootout. Use it if the occasion present itself, as the rupture status can really help in dealing with enemies quickly and efficiently.

  • Field Agent : Fortitude or Improvised Explosives
    Fortitude is a passive ability that makes Claymore immune to all types of grenades (the one thrown by Shrike's Mutton Bombers and Sacred Coil Purifier Incendiary) as well as making him immune to environmental hazards, such as Acid, Poison or Fire. It doesn't make Claymore immune to car or barrel explosion, however, or at least during my testing he was still damaged by the explosions.
    Improvised Explosives let Claymore regenerate one charge for a carried grenade at the end of each encounter. This means that Claymore will always be able to chuck grenade at the beginning of each encounter, which is very useful on the long 3 encounters missions where you don't can use your gear with reckless abandon.
    There is no context in my opinion, Improvised Explosives is the better perk between the two. A Hazard Vest can be equipped on Claymore to grant him the immunity to status effect, and grenade wielding are too rare to warrant a perk dedicated to countering their attack. Being able to use grenades for each encounter will lead to consistent damage or utility, especially when using a powerful grenade type such as Shock Grenades to stun and destroy robots or Turncoat Grenades to make your foes fight between each others.

  • Special Agent : Sticky Grenade
    Claymore's second signature skill, Sticky grenade is an active skill that will makes Claymore throw a sticky grenade upon any enemy in his field of view, including enemies too far away to shoot with his shotgun or hidden behind full cover. It is also a guaranteed source of damage as the Sticky Grenade will always succeed in connecting with the enemy. Once stuck, the targeted foe will enter a "falling back" state where they will move to a new location. This new location can be "another enemy", an empty square, near an explosive barrel for maximum hilarity, an innocent civilian or even your own Agents. Therefore, be mindful when deploying Sticky Grenades and try to aim for the furthest enemy in the encounter, to reduce the risk of them doing a kamikaze run toward your line.
    Sticky grenade can also be combined with another Agent's Overwatch to force your target to trigger an allied agent Overwatch during their falling back phase, doubling the damage and often leading to a quick kill.
    Upon reaching this rank, a new training unlocks for Claymore that lets him gain 1 point of armor. This is a worthwhile training to undergo, as armor is one of the best and most consistent way to mitigate damage and will make Claymore slightly tankier than his other human teammates.

  • Senior Agent : Heavy Shrapnel or Impending Doom
    Heavy Shrapnel upgrade Claymore's signature Shrapnel bomb to be able to damage all enemies in its blast radius, regardless of their cover. By default, an enemy hiding behind a half cover would be protected for the blast, and you would need to "flank" them with the bomb to damage them. With this perk, you can do consistent and reliable damage across the board, regardless of your foes position. As long as they are in the blast radius of the shrapnel bomb, they will be damaged.
    Impending Doom upgrade Shrapnel bomb to inflict the Rupture status effect upon all enemies that are within the bomb's radius when it lands, which mean they are ruptured before the bomb even explode. This means that you can use Claymore to reliably inflict rupture upon a wide radius of enemies, doubling the damage upon the affected enemies. Shrapnel bomb then becomes less of an offensive skill and more of a debuffer, where you care less about the bomb explosion and more about making that tough Berserker really vulnerable to Claymore's shotgun.
    This is a tough call. Both of the perks are good in their own way. I would say that Impending Doom wins by a very short lead by helping Claymore inflict Rupture across a wide radius of enemy, which can be used by the other Agents to quickly take down bunched up groups of enemies. Heavy Shrapnel is a viable alternative, but Impending Doom status effect combo very well if you use one of Claymore's own utility grenade to detonate the Shrapnel bomb, and that's a lot of damage coming your foes' way.
CLAYMORE [2]
  • Principal Agent : Barrage upgrade both Shrapnel Bomb and Sticky Grenade to do +1 Damage and stop those skills from ending Claymore's turn. Additionally, Shrapnel Bomb can be used more than once, and this can help Claymore setup impressive explosive kill zone where one Shrapnel bomb will detonate another. A good strategy upon reaching this rank is throwing one Shrapnel Bomb on a group of enemies, detonating it with one of Claymore's grenade, then finishing off the wounded with a Sticky Grenade or laying down another Shrapnel Bomb to either force your enemies to move or kill them outright.
    The radius of the Shock Grenade is the same as the Shrapnel Bomb blast radius, meaning you can reliable stun and damage enemies by planting the bomb first and detonating it with the Shock grenade once you unlock this perk.
    By reaching this rank, Claymore unlocks a new training that grants him Heavy Ordnance which make him bring two grenades for each encounters. Note that it seems that the second grenade will not recharge even if you picked Improvised Explosives. This is a great perk to have, so send Claymore to training as soon as possible to benefit of the possibility of throwing two Shock grenades and potentially stunning the entire enemy roster for the encounter.

SYNERGIES AND FAVORED ENEMIES :

Claymore can work well with character that can entrench and form a good defensive line. Patchwork and Terminal can provide useful synergies to Claymore many area of effect skills, and Verge can provide a valuable help by stunning an enemy to make it a prime target to a safe and secure Sticky Bomb. All of them are units that don't need to move much to be efficient, which can help form a really solid line.
Claymore can works pretty well against all enemy factions, but his armor shredding capabilities can do wonders against the Grey Phenix mercenaries. If you kit him out with Shock Grenades, he becomes hilariously powerful against the Sacred Coil he can reliably down MEC in one turn and make Chryssalids group blow up.


FINAL RANKING : B
The only thing stopping Claymore from reaching the A rank is his very low mobility. During hostage extraction mission he will often lag behind and be unable to provide explosive covering fire with his Shrapnel grenade while he run to the extraction point. He is nonetheless a very strong addition to any team and his explosive can provide a reliable and consistent source of damage across the entire game. Just remember to be especially careful when there is a lot of civilians in play, as a panicked civilian can lead to devastating collateral damage.
PATCHWORK [1]


Patchwork is a mobile and versatile gadgeteer Agent with great utility. She can quickly become one of your most valuable character as she grows in power and can quickly become the queen of inflicting status effect upon a wide range of enemies. Properly kitted out, Patchwork can solo almost any encounter in the game.


LOADOUT :
Patchwork use an assault rifle, which make her deal slightly more damage than her fellow GREMLIN-wrangler Terminal. She can make great use of the Fortunate Blossom legendary rifle by using its Serial ability to quickly finish off wounded enemies and continue the fight, but you will first need to upgrade assaults rifle in the Armory to make her damage ramp up.
Patchwork is the prime candidate to use a Reflex Grip. Being able to use both of her action to first shoot at an enemy and follow up by one of her GREMLIN attack opens up her action economy and provide great versatility to her playstyle. If you ever have the possibility to gain a Reflex Grip in a mission or at the Scavenger Market, do not hesitate and give it to Patchwork, you won't regret it. Since she will mostly be a backline character, she can make great use of a good Scope or even a Holo-targetor to help mark the enemies for the squad.
Patchwork can work very well as a 2nd slot breacher, as she is better played early in the timeline. She can make great use of specialized breach item such as the Target Scanner to provide a valuable alternative to her Gremlin scan across multiple Encounters.
Consider outfitting her with a Plated Vest to increase her survivability. Equipping her with Tracer Rounds to increase her long-range aim is a good choice before access to specialized ammo type. I'd also recommend giving her either a grenade to soften up enemy resistance or a medikit to provide an emergency source of healing.

ABILITIES AND BUILD :
  • Starting Skill : Chaining Jolt and Reprogram
    Chaining Jolt is Patchwork signature skill. She sends her GREMLIN to any enemy in her field of view to deliver a powerful electric shock worth 4 damage. This attack bypasses both cover and enemy armor, it is a guaranteed way to damage enemies and should be used as often as possible. Keep in mind that the electric shock will always kill the enemy target, so let another character subdue the weakened criminal if you want bonus intel. By default, the "chaining" part of the jolt has a rather short range, roughly 3 square, and will only do 1 damage on each subsequent target. Chaining Jolt will end Patchwork turn if used as her first action.
    Reprogram makes Patchwork attempt to hack and take control of a robotic enemy (Andromedon "suit" form and Sacred Coil many turrets, android and MECs are prime target). A successful hack will turn the robotic enemy to your side for 1 to 3 turn, and can provide incredibly valuable help depending on the hacked enemy. A successful hack will lead to a lengthy cooldown, so be mindful if you use it toward the end of an encounter. Reprogram will end Patchwork turn if used as her first action.

  • Deputy Agent : Combat Scanners
    Combat Scanners is a one-use breach skill that can be used on the 2nd, 3rd or 4th slot of any door breach situation. Using it will mark all enemies in the room with a Holo Target for the entire duration of the encounter, making them much easier to hit with every member of your squad. Use it as often as possible, as it will greatly help your Agent to deal with well covered enemies. Pair Combat scanners with a Target Analyzer on her breach slot so that you can provide both a Aim bonus and a Crit bonus on long missions.

  • Field Agent : Voltaic Arc or Threat Recognition
    Voltaic Arc provides a point defense passive ability to Patchwork by making her GREMLIN shocks enemies that move adjacent to Patchwork, or Patchwork move adjacent to them. Note that Voltaic Arc can proc if Patchwork and an enemy are separated by only one squad of half-cover. From my personal testing, it seems that Voltaic Arc can sometimes proc multiple time and sometimes only once. The arc will also chains to nearby enemy, which can lead to a surprising amount of low damage across the board. Voltaic Arc will not protect against a Ronin's advance, as their lightning reflexes make them immune to the GREMLIN point defense.
    Also, be mindful that the Voltaic Arc will proc if a Patchwork tries to subdue an enemy, which can lead to interesting outcomes : if an enemy has only 4 HP left, Patchwork can reliably subdue them by using her Voltaic Arc bonus damage. If an enemy is actually killed by the Voltaic Arc before Patchwork proceed with the sudbue animation, her action is "canceled" as if nothing happened. This can lead to quite an interesting situation where Patchwork can kill an enemy by moving to subdue them, then subdue another target in the same turn.
    Threat Recognition is an upgrade to Patchwork breach skill. It grants one additional use of her Combat Scanners ability and grant an additional +25 Crit upon use, combining the effect of both the Target Analyzer and the Holo Scanner in a single skill, usable twice per mission on any breach slot.
    There is no contest in my mind. Voltaic Arc is the better skill to pick at this level as it will lead to even better synergy the more Patchwork gains in ranks. It can also leads to hilarious hijinks, such as killing a charging Chryssalid or frying a Viper that was moving to bind Patchwork. Voltaic Arc provide good defense, utility and offense, and you can use a Target Analyzer as a breach item to proc the same effect as Threat Recognition.

  • Special Agent : Stasis Field
    Stasis Field lets Patchwork put a target, friend or foe, in a statis bubble until her next turn. The unit cannot attack and is immune to all damage. Using Stasis field does not end the turn of Patchwork if used as her first action. This is a powerful tool to shutdown a powerful enemy or protect a wounded ally from status effect damage if you can finish the encounter quickly. It can also be used to protect a hostage or a civilian from an incoming explosion, or to delay the activation of some enemy units skills such as a codex Psi Bomb or an Archon skyward missile barrage. Use it often, but use it wisely.
    Upon reaching this rank, Patchwork can undergo training to unlock an additional utility item on her loadout. It is a worthwhile training to undergo, as it will let you equip Patchwork with an ammo type, a grenade and a utility item such as relocation disk (for quickly moving around the field) or a medikit (for emergency healing).
PATCHWORK [2]
  • Senior Agent : Shock Therapy or High Voltage
    Shock Therapy upgrades Chaining Jolt and Voltaic Arc to be able to inflict Disorient or even Stun upon the targeted enemies. This makes Patchwork able to inflict debilitating status effect consistently and efficiently with her base skill, almost every turn. Taking into account that you can chain target together, you can potentially stun multiple enemies if they are bunched up together. This will also provide a good protection against melee enemies as they can be stunned while approaching Patchwork. In my experience, it even managed to stun Zephyr as she was mind controlled, saving Patchwork for being heavily damaged by her ally.
    High Voltage upgrade the damage of the chaining part of the Chaining Jolt and Voltaic Arc damage by 1 to 3 extra damage. This means that Chaining Jolt will still deal 4 damage, but any enemy caught in the chain will get heavily damaged by the arc. Can be an interesting perk to pick if you value DPS over status effect.
    In my opinion, Shock Therapy is clearly the superior perk at this rank. Being able to consistently stun or disorient any target on the field is a great advantage as it can completely shut down Ronins, Berserkers and Archons from ruining your day. It can also lead to hilarious hijinks where you render an entire enemy formation stunned during a firefight if they are bunched up together. High Voltage would have been a worthwhile perk if it upgraded Chained Jolt and Voltaic Arc nase damage instead of the chain part.

  • Principal Agent : Capacitor Discharge
    Capacitor Discharge is a one-use active skill that lets Patchwork send her GREMLIN in a location to emits a powerful electric attack on a wide radius, damaging enemies for 4 HP and potentially stunning them. Capacitor Discharge can be great to catch enemies that Patchwork has no visual on, such as behind walls or on a different elevation. It is not more powerful that her base Chaining Jolt attack, so use this skill sparingly to finish off a few enemies that are out of Patchwork field of view.
    Upon reaching this rank, Patchwork unlocks a training option that can lead to her most valuable and powerful asset : Storm Generator. This perk greatly enhanced the range where the electric arc of Chaining Jolt and Voltaic Arc can reach between each enemies, and can lead to incredible moment where you can damage and potentially stun the entire enemy roster over a wide area. Be mindful when you select a target for a Chaining Jolt : if you see other enemies highlighted in the timeline and colored red on the field, it means that the chaining jolt can reach them. By unlocking this perk, Patchwork can reliably solo an entire encounter by shutting down every enemy and finishing them off with her rifle. Use both thunderbolt and lightning against your very very frightened enemies.

SYNERGIES AND FAVORED ENEMIES :
Patchwork can fit any combination of Agent and provide a valuable and consistent source of damage over the course of a mission. She can make Axiom and Zephyr aggressive playstyle more safe by stunning enemies around them with her upgraded Chaining Jolt, and will work wonders with Terminal as her cooperation action can help Patchwork spam Chaining Jolt two times in a single round, often leading to hilarity.
She is the Agent to send against any mission involving the Sacred Coil as she will do extra damage to any robotic enemy with her Gremlin. She can be an excellent counter to MECs, detonate self-destructing androids safely and turn a rampaging Andromedon Suit to her side.
Bringing her to the Sacred Coil stronghold mission will greatly enhance your chance of survival. During the "Take down the Sacred Coil" mission, her hacking ability can provide incredible value in turning the enemy MEC present to your side to activate the console on each side of the Psionic gate, stopping the ongoing reinforcement wave and turning the attention of Ronins and Andromedon away from your Agents.

FINAL RANKING : S
Patchwork is one of the strongest agents available in the Chimera Squad. She provides an easy and reliable source of damage in the early game that gets upgraded to a deadly chain-lightning once she reaches max rank and undergoes her ultimate training. She will make any missions involving the Sacred Coil much more manageable and is generally a delight to use on the field.
SHELTER [1]


Shelter is a Psi operative that use his power to provide mostly utility on the field and for his teammates. His low health makes him quite vulnerable if his Relocation leaves him in a vulnerable state, and he mostly suffers from being underpowered until he unlocks more of his power. Shelter needs a bit of work and focus to make him efficient on the field, but some efforts can make it worth your while.

LOADOUT :
Shelter use a submachine gun as his main weapon, but his below average aim makes him a worse sharpshooter compared to his fellow Psi operative Verge. He can somehow make good use of the Surly Constant legendary submachine gun, as its Hail of Bullet can guarantee some damage at the cost of heavy ammo consumption. Consider leaving him with his default weapon, however, as most of his damage and utility comes from his power.
As for weapon mods, a good Scope to counteract Shelter's low aim and either a Holo-Targetor to mark target for the team or a Stock to help him deal consistent damage even with missed shot are worthwhile options.
Try to buff his low health by giving him either some Padded Armor or a Plated Vest. A Hazmat Vest is also a viable option to protect Shelter from the Burning Status, which stops him from being able to use most of his power.
Giving him Tracer Rounds to further boost his aim and a Medikit for emergency healing is a good utility loadout, as being able to heal himself greatly increases Shelter chances of survival.

ABILITIES AND BUILD :
  • Starting Skill : Relocate
    Relocate is Shelter's signature skill. Using it will make Shelter and his target exchange position on the field. He can use this skill on both enemies and allies. Using this skill as Shelter's first action doesn't end his turn, and can be useful to help a ally reach an extraction zone faster or even during Shelter's turn. It can also be used to save an ally from an incoming car or grenade explosion, or to exchange Shelter's place with an enemy to surround him with your remaining agents.
    Be mindful, however, as Relocate can often lead to Shelter being completely surrounded and outflanked, or rushed by melee enemies. You need to use Relocate wisely, often paired with a long term plan using your other Agents to deal quickly with a surrounded enemy or to bring back Shelter to a safer place. It is a hard skill to put efficiently into practice, but can lead to spectacular results... sometimes.

  • Deputy Agent : Dazzle
    Dazzle is a one-use breach skill that makes Shelter throw a psionic ball at a target, rendering close enemies disoriented for the breach shootout and his target disoriented for the opening turn. It can be useful to debuff the enemy aim during the breach, especially in conjunction with a smoke bomb to protect your Agents, but Dazzle has basically the same effect as a long-range flash bomb and can be used on any breach slot. Disoriented enemies are unable to use some of their more troublesome skills, such as the Sacred Coil shield-bearer party-wide shield buff. Dazzle doesn't do any damage, and is mostly an utilitarian breach skill to mitigate some incoming damage by virtue of debuffing the opposition aim. It is somewhat a little underwhelming when a flash bomb can do the same effect and still let the breacher shoot at the opposite side.

  • Field Agent : Temporal Shift or Distortion Field
    Temporal Shift upgrade Shelter's Relocate skill to delay the next turn of relocated enemies. It can be used in conjunction with Terminal pin down to truly shut down an enemy from coming into play, and to cancel out a Ronin's Tempo Surge. Be mindful that relocating enemies can leave Shelter in a dire position, and try to aim at enemies that are located on higher elevations to provide good cover to your other agents. Using Temporal Shift can also help in delaying an Archon's skyward barrage, or to make sure an Hostage Taker doesn't harm his captive for a little while longer.
    Distortion Field upgrades Relocate so that when Shelter use his skill on another Agent, both him and his friendly target get a hefty +50 Defense until their following turn. This perks lets Shelter take a more defensive role, and he will be able to stay with the squad and provide a useful defensive buff across the board.
    It is a tough call to choose between the two perks, and both choices offer a different playstyle to Shelter's relocate ability. Do you want to shut down an enemy and delay their turn in the timeline or do you want to provide your squad with a higher defense (at the cost of maybe a slight disorientation) ? I personally think that Temporal Shift provides the better value, as being able to delay an enemy can make a fight more manageable compared to buffing the defense of an ally that might not be the next target of the enemy. What's more, the slight delay in turn order can be used to force some enemies to blow up on their own comrade's grenade!

  • Special Agent : Soulfire
    Soulfire is Shelter's other signature skill, and once he unlocks this skill his offensive power skyrocket, as well as his versatility on the field. Soulfire is a skill that throws a Psi attack that does about 4 damage to enemies and, more importantly, is guaranteed to hit. It bypass both cover and armor, and is set on a two turn cooldown, but can only do damage to organic enemies. It is often worth it to use Shelter's opening turn to use Soulfire to accurately down a heavily wounded enemy that survived the breach shootout. As an added bonus, if the enemy survive the Soulfire, they will be delayed in the timeline. Throwing a Soulfire then using a Temporal Shift Relocation can really shut down an enemy, but you risk leaving Shelter in a compromised location.
    By reaching this rank, Shelter unlock a training opportunity to boost his mobility. It might be worthwhile to undertake this training as Shelter base mobility is quite low, and can help him relocate to a secure location after using his own... relocation.

  • Senior Agent : Solace or Soul Storm.
    Solace make Shelter exude an aura that protects from mental status effects for both himself and nearby Agents. This also means that if Shelter move to a stunned or disoriented Agent's side, he will be able to remove the status effect. Solace basically replace the Mindshield armor item, but also make Shelter project a small defensive aura around him to protect his allies. Note that Solace will not protect from Soulfire, Null Lance and Psi Bomb.
    Soul Storm upgrade Shelter's Soulfire ability to heal himself for half of the damage dealt, meaning 2 HP. This is mostly a way to provide Shelter with a 2 turn cooldown small heal, that could combine nicely with a Regen Weave to greatly improve Shelter's survivability. However, be mindful that Shelter cannot use soulfire on mechanical enemies such as Sacred Coil android, and such will not have access to his Soulfire heal if he must face an entire army of robots.
    For the previous reason, I think that Solace is the better skill between the two. Solace will effectively replace mindshield and make Shelter able to stop a Mind Control attempt or help an agent that has been Psi Disabled and Stunned for 2 turn. The Soul Storm skill would have been invaluable if it could heal Shelter for the same amount of damage dealt, but a medikit in his loadout will provide him with a better and more reliable way of healing himself in emergencies.
SHELTER [2]
  • Principal Agent : Fracture
    Shelter's ultimate ability let Shelter create a Psionic clone of himself that appear with Shelter's current health pool and can use both Relocate, Soulfire (on a 1 turn cooldown) and can both stabilize bleeding out agents and activate objectives. This is Shelter's biggest strength, even if it's a one-use per mission, as it will make your 4 Agent squad gain a new body that will be able to attract incoming fire and actively participate in the fight. The clone can use Soulfire every turn, which mean a reliable and consistent 4 point of damage against organic units every turn, and use relocate to take the place of a outflanked Agent. Use this ability wisely, as it can turn a difficult engagement into something way more manageable and can provide incredible value in difficult missions such as the "Take down the Sacred Coil" mission where you need to deactivate the Psionic Gate.
    By reaching this rank, Shelter can unlock a training option that will let him unlock Writhe, a melee ability that will damage his target and heal him for about the same amount of damage dealt. However, he cannot target mechanical units and cannot use the skill if he's at full health. Which means that Writhe is an extremely situational skill and difficult to put into actual use.

SYNERGIES AND FAVORED ENEMIES :
By building Shelter as a more defensive character, capable of protecting his fellow Agents from mental assault and providing defensive buff with his relocation, Shelter can fit into teams that tends to stay in the backline to be efficient such as a Patchwork and Claymore. As it stands, his offensive abilities are somewhat subpar and his low Aim makes him a worse sharpshooter compared to Verge.
As a Psi Operator, he can be very efficient at fighting the Progenies and Grey Phenix and protect his squad from the various mental disable that can come their way. However, he will have much trouble against the Sacred Coil where most of his skill cannot be used against robotic enemies.

FINAL RANKING : C
Shelter main's strength is his ability to create a psionic clone of himself that will wreak havoc upon the enemy, but as Fracture is a one-time use skill Shelter will feel somewhat underpowered during long missions with multiple encounters. His Relocate ability is hard to put into efficient practice without leaving Shelter and his low health pool in a precarious position, and his Soulfire ability, if it can deal consistent damage, is less efficient than Patchwork Chaining Jolt. As it stands, Shelter is one of the hardest Agent to put into efficient use, especially compared to some of his comrade in arms.
TORQUE [1]

Everyone's favorite alien girl, Torque is a versatile and surprisingly tanky and mobile character that can deal consistent poison damage and whose main strength is to completely take out a single enemy character out of the fight, at the cost of her own participation to the firefight. Torque is a self-sufficient character that can fit a multiple of role and provide great value to any squad combinaison.

LOADOUT :
As a submachine gun user and by virtue of having good Aim, Torque can use both legendary submachine gun to great efficiency. I personally give him the Surly Constant prototype, as its Hail of Bullet closely mirrors Godmother's Ventilate ability in being able to guarantee damage at the cost of heavy ammo consumption. A good Hail of Bullet can be used to finish off a wounded enemy that threatens the squad.
As for weapon mods, Torque can make good use of a Reflex Grip to grant her a better action economy and open up her ability to deal damage at range. Alternatively, a good Scope will often be enough to make her a very accurate sharpshooter at range. I personally recommend to give her an Impact Frame, as her superior mobility will let her subdue enemies all over the map and can be used in tandem with her Tongue Pull and Bind ability. A good combo would be to use Tongue Pull and Bind to wound an enemy, release the bind when Torque comes into play, shoot someone with the Reflex Grip as her Torque first action and finish off the previously binded enemy with the Impact Frame. Finally, a Laser Sight can also be considered a good item to give to Torque considering the fact that her superior mobility will let her flank enemies with ease.
I highly recommend giving Torque a Mach Weave as her armor item. The dodge bonus will make her own natural dodge skyrocket until she will be able to dodge most incoming damage, and only receive scratch damage during firefights. Alternatively, a Hell weave can sometimes provide good value as Torque will often attract the ire of melee attackers. She can use the Vent option during breach, effectively mimicking the effect of the Infiltrator weave.
As for utility items, I recommend giving Torque a good specialized ammo such as Talon Rounds or even Venom Rounds if you want to play into the poisonous motif. Note that using Dragon or Caustic rounds on a poisoned enemy can sometimes cancel the poison, or at least it did in a few of my runs. Torque can also make good use of both offensive and defensive grenade, and giving her a medikit for emergencies is also a viable option to consider, especially on higher difficulty, but remember that Torque is by default immune to poison.


ABILITIES AND BUILD :
  • Starting Skill : Bind and Tongue Pull
    Bind is an active skill that makes Torque coil around an adjacent enemy, stopping them from taking any actions as long as they are bound and slowly choking them for about 2 damage. Note that Torque cannot Bind an enemy positioned diagonally to her. Bind will also inflict more damage the longer Torque do not release her Bind. On the first following turn, it will inflict 2 damage, then on the following turn, 4 damage! Also note that Bind will always kill the bound unit, and that if the only enemy unit remaining in the field is currently Bound by Torque, she will automatically snap their spine and kill them. It is a great skill that can completely take out a threatening enemy from the fight, and can be used against almost all enemies except Berserker, MECs, Archons, Andromedons and such. It can be used against Praetorians, Sorcerers and Ronins to shut them off and protect the squad from their powerful ability. Torque will often spend most firefight Binding an enemy, so choose your target well.
    Tongue Pull makes Torque throw out her tongue to grab her target and bring them to her location. This skill can be used both on allies, hostages and enemies. It cannot be used against all enemies, notably the Grey Phenix elite Viper and the various giant type of enemies such as Andromedon, MECs and Archon. It seems that all enemies that you can target with Tongue Pull can be subsequently be the target of Bind. You can also use Bind to save an agent or hostage from an incoming car or grenade explosion, or to make a slow Agent such as Claymore catch up with the group during extraction situation. Note that Tongue pull, if used as Torque's second action and if successful in capturing an enemy target, will not end her turn and will let you use bind to take your target out of the fight.

  • Deputy Agent : Toxic Greeting
    Torque breach skill lets her unleash a poisonous spit at a target, dealing 3 damage to them and poisoning them for 2 turns. Poison is a consistent and reliable way to deal exactly 2 damage at the beginning of the poisoned individual turn. Toxic Greeting is also always accurate, so it can be used to quickly take out a wounded enemy during the breach shootout. If an enemy has exactly 5 HP, you can also use Toxic Greeting during the breach to effectively remove them from the fight, as they will die upon starting their turn. While it is most useful in the Early Game, when most enemies still have a relatively low HP pool, it tends to falter during the late game as your main gun out-damage the skill. Please note that you cannot target all enemies with Toxic Greetings. Enemies immune to poison such as robots, enemy Vipers and Codexes will not be targetable by Toxic Greeting.

  • Field Agent : Tight Squeeze or Hard Target
    Tight Squeeze upgrades Bind to deal 5 damage instead 2. This makes Torque Bind ability able to one shot wounded or weak enemies in the same turn she binds them. It can also combo very well with an Impact Frame as the high damage can leave the enemy vulnerable to a Subdue in the following round. There is only a few enemies, even at higher difficulty, that can resist 10 damage dealt over the course of 2 turn by Torque.
    Hard Target is a passive buff that gives Torque a hefty permanent +30 bonus to Dodge and a bonus 1 point in mobility on the first turn of every encounter. This, combined with a Mach Weave and her Special Agent training, can effectively skyrocket Torque's dodge to reach 100 and virtually make any damage receive a grazing wound. The bonus point in mobility can be useful in the higher difficulty to secure a contraband cache or Bind a hostage taker.
    In my opinion, Tight Squeeze is the better skill between the two as the bonus damage means that Torque will spend less time Binding enemies and more time securing kills and moving on the field. While the bonus mobility and dodge of Hard Target looks appealing, it might seems a bit overkill if you give Torque a Mach Weave and let her undergo her Special Agent training. Tight Squeeze would combo well with both a Reflex Grip and an Impact Frame to open up Torque's ability to deal heavy damage during any encounter.
TORQUE [2]
  • Special Agent : Poison Spit
    Poison Spit is an active ability that basically grant a Torque a permanent access to a Gas Grenade. It is an always accurate attack that share the same blast radius as Claymore's Shrapnel Bomb. When "detonating" her poison spit, enemies will be hit for 3 damage and be Poisoned, which mean they will take 2 damage on the following turn. This can be enough to take down weak enemies in the early game, and as Poison Spit doesn't end Torque turn when used as her first action, can be used to soften a target before shooting them down. Be mindful about using this ability if there are civilians on the field as they can, albeit rarely, run into the poisonous cloud and die. Poison Spit can also be used to detonate Claymore's Shrapnel Bomb. Keep in mind that Poison Spit suffers from a hefty 3 turn cooldown, so use it wisely.
    Upon reaching this rank, Torque can undergo training that will grant her a permanent bonus of 1 in Mobility and 20 in Dodge. This is a very important training for Torque as it will greatly help in mitigating incoming damage and makes her one of the most mobile Agent you can field. Combine this training with a Mach Weave and watch as Torque can consistently dodge incoming fire and only take grazing wounds.

  • Senior Agent : Reinforced Scales or Synthetic Venom
    Reinforced Scales is a passive buff that grants +1 Armor to Torque if she is currently binding an enemy and also prevent her from canceling her Bind if she take damage during it. This a good skill if you want to be absolutely sure to secure a kill using Bind, and the bonus armor, while situational, can sometimes be used with Terminal's Safeguard and Torque's natural dodge to reduce incoming damage to ridiculously low number. If you plan on using Torque as an aggressive Agent, moving from target to target on the frontline to bind them, or if you want to use Torque to take out of action a Praetorian or Sorcerer, then Reinforced Scales will help you reinforce that playstyle.
    Synthetic Venom is a passive ability that gives Torque a bonus +50% Crit chance against enemies suffering from Poison. It will also let her heal 2 HP if she is ending her turn while standing in a poison cloud, such as the one she produce using Poison Spit, the one made by a Gas Grenade or one from the exploding barrel. Synthetic Venom is a bit situational, but can be used in conjunction with her Poison Spit to deal heavy damage to a unique target. The bonus heal can sometime be useful in a pinch, but is rather small. However, when you take into account Torque ability to dodge incoming damage, it can be helpful to make her heal the grazing wound she endured.
    This is a rather tough call when it comes to choosing which skill is better. Your choice should depend on what Torque to specialize in. If you need her to Bind threatening targets and make sure to take them out of the fight, or to serve as a somewhat tanky off-tank that will attract incoming fire when using Bind, then choose Reinforced Scales. If you want Torque to be an aggressive frontliner, who use her superior mobility to flank enemies and deal heavy damage with her submachine gun, then consider picking Synthetic Venom and equipping her and or a few of her comrades with Gas Grenades or Venom Rounds so that her bonus crit chance can be use as often as possible. Both of those skills are situational, but I'd personally go for Synthetic Venom in the long run.

  • Principal Agent : Vicious Bite
    Vicious Bite is an active ability on a 3 turn cooldown that makes Torque attack an enemy in melee and to deal 5 damage and inflicting Poison on her target. Note that this attack can miss and has a base 70% accuracy. Vicious Bite tends to feel a bit underwhelming, especially if Torque is equipped with an upgraded submachine gun and using venom rounds, as she can effectively deal the same amount of damage and apply poison at range and with better accuracy. Note that Vicious Bite will end Torque's turn if used as her first action as well. All in all, Vicious Bite is an interesting skill on paper but see little actual use in gameplay, as it is often more safe and reliable to just use Poison Spit first and then shoot your enemies, but you are still free to use it as you see fit.
    Upon reaching this rank, Torque unlocks a training opportunity that will grant her Tag Team, which upgrades her Tongue Pull skill to immediately grand a free action if she use it on an allied Agent. This can be particularly useful to make sure all Agents extract as quickly as possible during Hostage rescue missions, and can lead to a particularly funny bug if you use it on a Stunned Agent as it will still let them be able to move around, seemingly teleporting elsewhere on their knees. Alternatively, try to use a Tag Team on a Blueblood equipped with his legendary pistol, as it can lead to him being able to use Lightning Hand and move around to proc his Ever Vigilant Overwatch on his single bonus action.

SYNERGIES AND FAVORED ENEMIES :
Torque can properly work in many team composition as one of the more mobile frontliner and damage dealer. Her mobility can help her secure flanking positions and her skills will let her inflict poison upon her enemies, slowly softening them up for the rest of the team. She can pair nicely with Godmother to soften groups of enemies before a mighty scattershot. Also, she can be a useful squadmate to Claymore as her poison spit can detonate his Shrapnel Bomb and deal additional poison damage. Furthermore, her Tongue Pull will let a low mobility unit such as Claymore or Cherub move around quickly during extraction missions.
Torque will be most useful against the Progenies, where she can shut down Sorcerers and almost all of the Progenies roster are somewhat vulnerable to poison. She can have a little more trouble against the Sacred Coil, however, as many of them are immune to the Poison status. However, Torque can be used to tongue pull an android and bind them quickly in her opening move to prevent them to activate self-destruct.

FINAL RANKING : A
Torque is a valuable addition to your Agent roster. She will peak early in power upon unlocking her Poison Spit ability, and will generally be a delight to use against your enemies. Her ability to use Vent breach points will also let her reliably stun aggressive enemies during breach shootouts, and her ability to take out of the fight threatening criminals such as Ronins or Sorcerer will greatly help in controlling the flow of battle.
There's a good reason why she's everyone's favorite slithering alien, it's not just her shiny scales.

It's her bountiful venom sacks.
ZEPHYR [1]


Zephyr is a highly mobile unique Agent who only fights in melee and use her momentum to protect herself from incoming damage. Her melee attacks are always accurate, and what she lacks in range damage and breach skills she more than make up in her ability to quickly take down multiple foes in a single turn.

LOADOUT :
As a melee character, Zephyr uses her unique Pangolin Gauntlets. This means that her weapon cannot be upgraded and cannot be modified in any way except her own leveling abilities.
I highly recommend giving Zephyr either a Mach Weave to give her a good chance to dodge incoming fire. Alternatively, a Regen Weave can provide Zephyr a good way to regenerate lost HP, and an Infiltrator Weave will let her use Vent option during breach where she will face way less aggressive enemies that might shoot her.
Zephyr should usually be used as a 1st slot Breacher, as being able to activate her momentum is primordial considering her opening punch might leave her in a precarious position. During encounters where breach as the 3rd or 4th person, it is highly advisable to use the Cover rush so that she hides behind cover and stops her from being stranded and vulnerable amidst a group of enemies.
Zephyr can make good use of breacher item such as Flashbang bombs to disorient enemies and Breaching charges to open up walls and provide a better avenue to battle.
As she doesn't use any specialized ammo type, Zephyr can bring a good grenade in her loadout and a specialized utility item such as the medikit, the overdrive serum or the kinetic screen to protect herself from incoming damage.

ABILITIES AND BUILD :
  • Starting Skill : Crippling blow and Momentum
    Crippling Blow is Zephyr's default melee skill. It is an always accurate attack that does about 4-5 damage and can be used across her entire movement range. Crippling blow has a chance to inflict disoriented, root or stun upon connecting with an enemy, meaning it can be used to cancel out many enemy skills from being put in use.
    Note that, by default, crippling blow will always kill enemies.
    By using Crippling Blow on an enemy, Zephyr's Momentum is triggered which gave her a free action point to be used on movement. This is one of the most important part of Zephyr's kit as she is dedicated to hit and run tactics where she punch a criminal in the jaw and retreat back to safety behind cover.
    Be careful, as using Zephyr's subdue action will not trigger her momentum, potentially leaving her in a vulnerable spot.

  • Deputy Agent : Parry
    Parry offers the possibility for Zephyr to use her Momentum action as a means to defend herself completely from the next attack instead of using it to move. Parry can cancel pretty much any attack coming her way, including abilities such as Soulfire or a Berserker punch but will not stop Zephyr from getting damaged by environmental explosions or an Android self destruct. Parry is a very important skill for Zephyr as it will greatly reduce incoming damage and can be used to completely negate a Ronin's strike.
    Don't forget that Parry can be used each time Zephyr uses her Crippling Blow, which mean that if Terminal grand Zephyr a free action through cooperation later in the timeline, she can use this action to use Crippling Blow and set up her Parry again.

  • Field Agent : Lockdown or Pressure Point
    Lockdown is similar to Godmother's Close Combat Specialist as it makes Zephyr attack any enemy entering or exiting the 8 square adjacent to her. This can often provide a way to score free hit by the means of opportunity attack as some enemies will want to reposition and flee from Zephyr. It can also protect Zephyr from being rushed by Chryssalids or Berserker as she can potentially kill them, if they are wounded, before they can make any attack. Think of it as a permanent melee overwatch, similar to the way Godmother's Close Combat Specialist and Patchwork Voltaic Arc function.
    Pressure Point is a passive buff that grant +1 damage to Zephyr's melee attacks. Furthermore, any enemy that has been dealt lethal damage by Zephyr will be rendered unconscious instead of killed. This is the only way to reliably upgrade Zephyr's damage on the long run, and is a real boon on your early Intel economy as you can capture enemies more easily.
    I think that Pressure Point is the better skill. Lockdown is a nice skill to have but Pressure Point is one of the only way to upgrade Zephyr's damage reliably, and as Zephyr can only deal melee damage it is a safer, more consistent choice. On the long run, it will also greatly help with your Intel income by rendering many enemies unconscious instead of killed.

  • Special Agent : Crowd Control
    Crowd Control is a powerful active ability on a 2 turn cooldown that makes Zephyr designate a wide radius where she will attack every nearby enemy contained within that radius. She will then stand in the center of the targeted zone. This is a formidable way to quickly deal with multiple enemies that have been left wounded by the opening breach shootout. However, be careful about leaving Zephyr unprotected, as she will not be able to use her momentum action to move to cover or proc her Parry skill!
    In the early game, it is better to be conservative with the use of Crowd Control, and use it toward the end of the fight to quickly down multiple wounded enemies. Alternatively, you can use Terminal's cooperation to grant Zephyr a chance to use crippling blow and move back to cover or activate her parry after a successful Crowd Control.
    Upon reaching this rank, Zephyr can undergo training to boost her mobility by +3. Keep in mind that, by default, Zephyr is one of the most mobile agent you can have that can potentially cover an entire map by herself, so her boost in mobility might just be overkill.

  • Senior Agent : Moving Target or Vital Strike
    Moving Target makes Zephyr Subdue (if she didn't chose Pressure Point) and Crowd Control able to trigger her Momentum free action. This means that she will be able to run back to cover or use her Parry ability after her powerful Crowd Control, which will greatly improve her damage mitigation on the long run. In addition, Moving Target will make Zephyr not trigger any Overwatch or Reaction fire such as Hitmen or Turrets radial overwatch, or Muttons and Ronins melee stance.
    Vital Strike makes Zephyr melee attack bypass enemy armor. This can be use in tandem with her Pressure Point skill to inflict great damage upon heavy armored foes such as Praetorians or Bombers, and is one of the way you can boost Zephyr's damage toward mid-game.
    In my opinion, Moving Target is the better skill, especially on higher difficulty. Being able to run Zephyr back to cover or proc her Parry ability after using her Crowd control will let her deal more damage, more consistently and most importantly more safely. What's more, come end game, you can use various grenades or your other agents to shred enemy armor, which makes Vital Strike loose its edge.
ZEPHYR [2]
  • Principal Agent : Reaper
    Reaper is an active skill that is akin to Serial : It will grant Zephyr an extra action if she manage to down an enemy with a melee attack. However, each subsequent melee attack will deal less damage than the one before. Activating it is a free action, and you can still use Crowd Control under the effect of Reaper mode. However, it will not trigger Momentum, however, so be sure to use one last action to bring Zephyr behind cover. Reaper is a good way to quickly finish off multiple enemies that are left on very little HP, especially combined with Zephyr exceptional mobility.
    By reaching this rank, Zephyr unlock a training opportunity that grants her High Impact, which lets her inflict Disoriented, Root or Stun while using Crowd Control. This is a direct upgrade to Crowd Control and is a very valuable asset to Zephyr's kit, as she will be able to disable a group of enemies and leave them dazed, reeling, and about to break.

SYNERGIES AND FAVORED ENEMIES :
Zephyr works exceptionally well with Terminal as she can profit from the bonus action of Cooperation to trigger her momentum and Parry skill in the same round. Zephyr is a strong first breacher, so she can also be paired with Godmother to form a very powerful frontline.
She can fight well against the three enemy factions, but her ability to inflict root and stun upon striking a target will be most helpful against the Sacred Coil many Chryssalids and Ronins. Following this logic, she can be a valuable ally to have when fighting against the Progeny, as her Parry ability will let her absorb their Soulfire reliably.

FINAL RANKING : A
Zephyr is a strong character that more than makes up from her shortcomings. Even if you cannot upgrade her damage by much, she is able to consistently and reliably deal a lot of damage across the entire firefight by using her momentum. Her ability to inflict debilitating status effect is a welcome addition to any team. However, she needs to be carefully played to avoid leaving her in a dangerous spot following a breach, and tends to falter if she is the target of heavy retaliation fire and left on her own, without allies to support her. She is also one of the prime candidate to go capture objective, as both her mobility lets her cross the map with ease, and her momentum bonus action can be use to grind a few more inches on the field.
SOME EXAMPLES OF TEAM SYNERGIES
As you can see, you can tailor pretty much any agents to fit your needs and be efficient in the quest to restore order to City 31. But during my testing I found out that the following teams works quite well :

Axiom / Godmother / Patchwork / Terminal
Axiom is the designated first breacher to make use of his Battering Ram ability, quickly followed by Godmother with a smoke bomb or flashbang to protect the team from incoming damage. She can use her Alpha strike to come into play just after Axiom, activate her Overtime to make sure to come into play in three turn and then proceed to use her Team Spirit to make Axiom play again just after her. Patchwork and Terminal are there to finish off stragglers through Chaining Jolt or provide valuable heal.
If you value consistent damage and don't like Axiom's Rage mechanic, Zephyr makes a great alternative as first breacher.

Axiom / Torque / Blueblood / Terminal
A good jack-of-all trades team. Axiom takes the role of first breacher, followed by Torque who can use her superior mobility to flank or take a threatening enemy out of combat thanks to her bind. Blueblood provides covering fire and finish off stragglers with his good aim and Terminal, of course, is there to heal and provide good versatility thanks to her Cooperation. You can exchange Axiom for Godmother or Zephyr if you don't like his Rage mechanics.

Zephyr / Claymore / Verge / Patchwork
By equipping Claymore with Shock Grenades and by using Patchwork GREMLIN to stun and disorient target, this team can reliably stunlock an entire enemy encounter. Verge can use his Stupor to disable far away targets. As Verge and Patchwork both use assaults rifle, this team can be very efficient if you provide them with upgraded version of their weapon from the Assembly. However, be sure to equip some of your team with Medikit for the longer missions.

Cherub / Blueblood / Torque / Terminal
A safe and defensive team focused on holding the line and slowly bleeding out the enemy. Cherub can absorb a lot of incoming damage thanks to his shield. By equipping both Blueblood, Torque and Terminal with specialized ammo type such as venom round, you can reliably inflict poison upon a large number of foe, which will help Torque's crit potential against them if you picked her Synthetic Venom skill. This team make uses of pistols and submachine guns, so it is important to provide them with the enhanced version you can get from the armory.
FINAL WORDS
Thank you for reading this guide, I hope I could provide valuable informations about the various quirks and skills the Agents of Chimera Squad bring along with them on the field.

This guide focuses mostly on gameplay and agents builds tips, but if you want some more precise information about the Agents I recommend checking out Benci's guide as it provides a good indepth view on the personal statistics of each Agents, depending on the difficulty.

https://steamcommunity.com/sharedfiles/filedetails/?id=2087567795

Also, please forgive any grammatical error or strange turn of phrase, as english is not my first language and this is the first guide I wrote on a video game.


I wish you a good journey through City 31, and remember that Torque is the best girl.
39 Comments
[PGC] A-SAN Mar 31 @ 9:14pm 
Blueblood is without question the best agent in the game. FaceOff completely trivializes any single encounter. He is able to shoot twice per turn (Desperado), shoot for +50% damage at will (Deadeye) and double damage with his last bullet (Fond Farewell). With the epic pistol he gets a free lightning shot. Claymore feeding him with motile enducer won the final encounter on Impossible round one with an agent to spare... My A team is Claymore, BlueBlood, Godmother, and Terminal.
Need More Gore Apr 10, 2024 @ 6:02am 
beed messing around with expert difficulty. making an axiom based team with terminal and cherub and verge to keep him safe while he hulks out probably not super optimized but man is it fun
Alexolas Apr 16, 2023 @ 9:55pm 
wait, how have you *not* mentioned the combination of Shelter + Zephyr? Zephyr's momentum lets her place herself in any advantageous spot, for Shelter to follow up by relocating there for a flanking shot. It basically turns Shelter's signature ability into a teleport-anywhere power, and it's the only way I've found for Shelter's upgrade Distortion Field to be better as an alternative.
KT Chong Feb 14, 2023 @ 10:29pm 
For Epic Assault Rifles: Verge should use Fortunate Blossom (Serial). Patchwork should use Impetuous Spire (Banish).

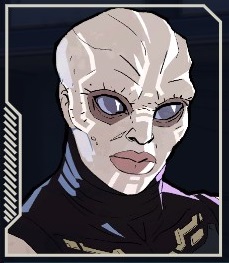
The reasons why Verge is better with Fortunate Blossom:

Verge, with Crowdsource and three or more enemies in his neural network, can easily reach 100% Aim. He can shoot and hit any target from the other end of a room, and he does not havev to move or reposition. He can continuously hit and kill his every target - and continuously trigger Serial on Fortunate Blossom.

On the other hand, Patchwork has a much lower Aim. She can miss a target, which breaks Serial.
SharkLazerBoy Oct 22, 2022 @ 8:37am 
Torque is the best agent in my opinion because of her ability to move allies and enimies around and bind strong enemies and they cant do anything.
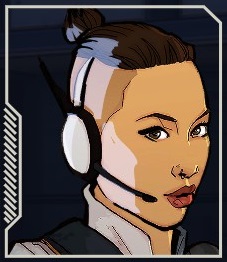
I mainly use Torque to get my agents evac quickly and secure vips.
I even managed to complete a vip mission in 1 ROUND thanks to her unlockable ability that allows agents to have an action after she tongue grabs them and a gadet from the Scavengers that gives an agent 2 actions, i forgot the name of it.
By choseing some certain abilites and armour, i managed to get her to have 90 dodge, so she always dodges.
I downloaded the nonlethal bind and Torque makeover since it made it easier to knock out important enimes unconsious at the end of an encounter without killing them. Also the Torque makeover mod fixes her face that always ticks me off.

Also, you guys are never going to stop simping for Torque are you?
SPRÆY Aug 16, 2021 @ 9:12am 
Good guide and good comments, cheers! :ghsmile:
W.T. Fits May 28, 2021 @ 2:09pm 
A quick note about Blueblood's Ever Vigilant ability - while the tooltip is written to imply that it only works after you take a movement action with him, that's not quite the case. Ever Vigilant will trigger and put him in Overwatch whenever he moves, period. This includes if someone else moves him, like Shelter with Relocate or Torque with Tongue Pull. This means that depending on how you play things, Blueblood can get multiple Overwatch shots per round simply by having his squadmates toss him back and forth across the field.
swordfish Jan 19, 2021 @ 5:44pm 
I just beat game on impossible hard core with Godmother, Blueblood, terminal, and used Patchwork & Torque switching them occasionally, though I took Torque to the final two missions.
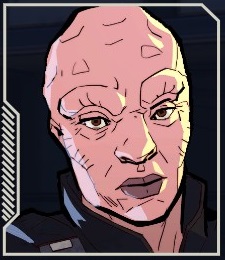
I disagree with you on Blueblood to rank him B. All his skills and stats are top notched. As someone who beat game two times on impossible hardcore, I assure you Blueblood is SSS at best.
With good aim and critic damage he was able to kill even two enemies with full hp in 1 turn.
Anyway, nice guide good work man
Turbs Oct 26, 2020 @ 3:57pm 
Shoot, grab, and then bind. That is the Torque way. Have a Patchwork nearby for a free shock and make it even easier to combo a high health enemy to 0 before they can do anything. Should work with Godmother and Zephyr too, but I always went to play an aggressive Patchwork so the extra shock can be used to make another free chain on the enemy roster should the two charge in the middle of the enemy while pulling this off.

Patchwork with an Impact Frame and Reflex Grip feels like a given especially if you go for the DPS side of her shock. Shoot, melee/sprint, shock. This can close to gap to a high health enemy while removing their health bar and all the enemies around them. When just surrounded by lower health enemies, you can cheese the mechanic by walking up to an enemy, shock the group, and then walk again for a double dose.
Turbs Oct 26, 2020 @ 3:55pm 
Crit in itself is pretty worthless to build towards with Talon Rounds as that +1 crit damage bonus is countered by just about all of the other ammunition types. Especially the ones that also provide harmful status effects such as corrosive, fire, or poison. They give you +1 damage no matter what including the DoT's after. If you do manage to crit, then you're just doing even more damage than you would have with the Talon Rounds.

This is why I'd just give Torque Venom Rounds since it'd help boost her damage across the board The +1 isn't mitigated by poison immunity. With a reflex grip, she can double tap an enemy pretty easily should they get poisoned by the first shot or prior with her synthetic venom perk. When going against Sacred Coil, I'd just switch it for Caustic Rounds and still do well. Bluescreen rounds if you refuse to use Patchwork for some reason and feel like one-shotting the androids with her.