Spelunky

Spelunky

36 ratings
Getting a Better Highscore
By Gativrek and 1 collaborators
This guide is going to help you to get a new highscore, helping also getting a nice position on the leaderboards on the normal game/daily challenge.
   
Award
Favorite
Favorited
Unfavorite
Introduction
This guide will help you with achieving new high scores in Spelunky. With this guide you can achieve the $500,000 Big Money achievement, but you can also get $1,000,000 and beyond if you maximize your treasure opportunities at every turn. In order to have enough skill and confidence to achieve these high scores, you should probably have completed Hell once or more so that you can face the game's hardest challenges. If you're having trouble with Hell, you can check out this other guide.
Treasure Values
Almost every treasure in the game scales in value according to the area you are currently in. If the Mines is Area 0 and Hell is Area 4, the value formula is: Base Value + (Value Increase * Area).

For a quicker calculation, note that most treasures increase in value by 25% per Area, meaning that by the time you get to Hell, they tend to be worth precisely double what they were worth in the Mines.


Small Gold Chunk = $100 + 25*A


Small Emerald = $200 + 50*A


Small Sapphire = $300 + 75*A


Small Ruby = $400 + 100*A


Note: There is no small diamond.


Big Gold Chunk = $500 + 125*A
(From dead shopkeepers and gold-containing terrain.)


Single Gold Bar = $500 + 125*A
(Out in the open.)


Stack of Gold Bars = $1,500 + 375*A
(Out in the open, though can be collapsed into three single gold bars.)


Big Emerald = $800 + 200*A
(Pots, chests, big enemies, and open terrain can all have these.)


Big Sapphire = $1,200 + 300*A
(Pots, chests, big enemies, and open terrain can all have these.)


Big Ruby = $1,600 + 400*A
(Pots, chests, big enemies, and open terrain can all have these.)


Skull Crown = $5,000
(Found only above the Haunted Castle entrance in Restless Dead Jungle levels.)


Diamond = $5,000
(If the Ghost collides with exposed big gems, they will turn into diamonds.)
(The one in the Moai Head is worth $7500 if you get in without using the Ankh.)


Golden Scarab = $5,000 + 1,250*A
(Found only in Dark levels and the City of Gold. Can never be in the Ice Caves or Hell.)


Golden Idol = $5,000 + 5,000*A
(Always guarded by a trap that differs from area to area.)


Crystal Skull = $15,000
(Found only in Restless Dead Jungle levels.)


Big Golden Idol = $50,000
(End of run bonus for defeating Olmec and going to the exit.)


Hell Treasure = $100,000
(End of run bonus for defeating Yama and going to the exit.)
Tools and Items
A very important level that can dramatically impact your score run is the first shop that's almost guaranteed to appear somewhere on level 1-2. It doesn't always appear, but it's a common enough thing to look out for.

This is an example of a high value shop, with some essential tools like the Jetpack and extra bombs. Having things like more bombs, a Shotgun, or a Mattock could be even better, but it is worth looking out for (and robbing) shops with great items. Note that even Mystery Boxes can be worth paying attention to, as they can contain a Jetpack or another valuable item.

In the example above, the shop could be easily and safely robbed by using the Freeze Ray to freeze the shopkeeper before shattering them with a jump or whip attack. You could even trade your Ray for their Shotgun after that.


The Jetpack provides the best mobility in the game. It will give you around 5 seconds of flight, but tapping the jump button instead allows for greater horizontal range at the cost of less vertical range. It's extremely useful for Ghosting. It's rare from shops and crates, though it can also be found from sacrifices (once you already have all of the other 8 first sacrifice potential prize items) and from Psychic Presence Ice Caves levels.

The Cape and Climbing Gloves are a excellent combo while Ghosting. Also having Spring Shoes and/or a Shotgun can allow you to jump quite high and get to many places. Handy in the Ice Caves, because you can just grab on the unbreakable wall and go up. Shops and sacrifices can reward you with both, though the Cape can also be dropped by Vampires.

The Mattock is a great tool for high scoring, especially early in your run where it tends to be available more often. It has a random amount of durability, generally between 20 and 200 hits. It can be obtained from shops and crates, though you're most likely to see it in the common Snake Pit Mines levels.

The Plasma Cannon is a very strong weapon from the Mothership and the best terrain-clearing tool since unlike the Mattock and bombs it can be used indefinitely. It is difficult, albeit possible, to bring it into the City of Gold to tear it apart even if you don't have a lot of bombs. Here's an example of how it can be done:


If you don't care about losing character and shortcut unlock process, a less luck-based method is to follow most of the same steps but instead just acquire the Robot character slave from the Mothership. This frees up your hands for easier treasure collecting and normal attacks, and it also means you only have to keep the slave alive for a mere two levels instead of up to thirteen with the other method.


If you're not lucky enough to get a slave though, you can still use the Plasma Cannon to destroy the entirety of the post-Mothership 3-4 and 4-1 before having to switch out for the Sceptre for the City of Gold. Ghosting 3-4 and 4-1 after destroying them with the Cannon can net you around $100,000 - 200,000. (Note that it is possible to obtain a Cannon from crates, but the chances of it happening are so slim that you should not rely on that as part of your scoring strategy.)


When going for high scores, you generally do not want the Shield. Though its reflective properties can be useful, it is very easy to inadvertently destroy treasure while moving around because it won't be automatically collected on contact as it normally would be without the Shield. The Shield is only found from the Black Knight in the Haunted Castle though, so you probably won't run into it all that often anyway.


The Gambling Wheel can be found in special shops that feature it and a locked up prize (for landing on the gift slice). You can gamble some money for a chance to win more money, a jackpot amount of money, or the locked item. Though the Ghost seemingly prevents you from gambling indefinitely, you can repeatedly stun the Ghost with a Camera to gamble forever so long as you can keep dodging and restunning when necessary. Though rare from normal shop spawns, you are guaranteed to find a gambling shop in the Black Market as the bottom-right most shop (just left and down of the Ankh shop that also has a fixed location). Note that gambling is impossible if angry shopkeepers are around.


Proximity Mines are free and portable bombs that can be found throughout the Ice Caves. If you crawl over them or quickly pick them up, they won't explode. They can be very useful for destroying terrain to free gems and gold so that you don't have to use your own bomb supply, but note that they are never sticky.

Wall Torches can be found in Darkness levels, always initially unlit. Touching them with a lit torch (like the one you start the level with) will improve the overall lighting and reward you with three small gold nuggets. They can also be used to relight torches if they are extinguished by water in the Jungle.

Mystery Boxes are much like crates but found only in shops and with a different appearance. They can contain many items, including especially valuable things like the Jetpack and Shotgun, possibly being cheaper than purchasing those items directly. Sacrificing one will give you a fragile eggplant.

Crates are a great and safe source for obtaining weapons and equipment. Three ropes and three bombs are the most common prize from breaking them, but almost every item in the game has at least some chance of coming from a crate. They can be found on any level, even boss levels, and are generally worth seeking out.

Pots can be found on any level, and may contain an enemy (snake, drop spider, cobra, scorpion, or alien) or some treasure (gold chunks or gems). Whipping them from up close can cause collision damage if there is an enemy inside, but throwing them can break the pot and put some distance between you and any nasties inside.

Treasure Chests can be found on any level and always contain some mix of small and big gems, though all of the gems inside can potentially be only big or only small. Chests found inside vaults or from Old Bitey always contain only big gems, and can contain diamonds as well. Rarely, chests are booby-trapped with a bomb, so make sure you can run away if the chest you open is dangerous.

Ropes are handy for dodging the Ghost and killing enemies from above. They can be supplanted by the Jetpack or Climbing Gloves, but can still be useful until then.


Bombs are a very important resource for score runs. They can open up vaults, free gems from the terrain, and kill bosses like the Alien Queen and Old Bitey. If you can save them up, they can even help you dismantle the City of Gold for lots of treasure.
Unseen Heroes/Villains
Unseen Heroes

Some traps/enemies can help on your favor do make gems available for ghosting. Most of them are explosives that really want to do that fat 10 damage on you but sometimes they're helpful.

Powder Boxes can only appear on the Mines and they are activated by any little piece of wood or dirt. They have 3x3 explosion radius, and they do 10 damage. They're activated by any particle that touches it. If you're on top of it and throw a damsel, it will disappear. (bug)

Fire Frogs can only appear on the Jungle and they have hops just like the normal Frogs. When damage, he turns into a bomb and has 4 seconds to explode with a radius of 3x3. Does 1 damage when frog, 10 damage when a bomb. When in contact with water, turn into a normal Frog.

UFOs can be found in the Ice Caves and in the Mothership and they can be deadly. Shoots a laser that does 1 damage and when attacked, the alien gets out of the UFO and the UFO drops like a bomb, having a 3x3 radius and doing 10 damage. The UFO can be pickep up if you have precision.

Turrets are very deadly traps if you don't pay attention to them. You can find them on Crash Sites levels and Mothership, and they're pretty common. When in range, they start charging their shot that does 1 damage and has pretty high knockback. When damaged, they are dropped and can be pickep up. If it gets damaged again, it will explode and do 10 damage, which can be really helpful at the mothership. If you pick one up, they will actually shoot which can be helpful if you don't have a shotgun.

Unseen Villains

Crush Traps (also known as Thwomps) are certainly a deadly trap that tries to crush you. But they can easily crush your precious Scepter or diamonds. They have a low range, but when in range, go in a really fast to crush the enemy and anything in the path.


Spike Balls are traps from Hell. Literally. They rotate into a pushable black block in different speeds. When they touch you, they do 2 damage. When destroyed, they are removed from the chain and start crushing everything, which can crush money which is valuable on Hell, since they're worth more.
Treasure-Dropping Monsters
Many of the larger and tougher monsters have a chance of dropping treasure, with some of them even being able to drop items. This section will cover all such enemies, ordered by the areas when you encounter them.

Note: Whenever an enemy is listed as dropping big gems, those will only be emeralds, sapphires and rubies. No enemy drops diamonds, as those are only attainable from ghosting or vault chests.


Mines


Name: Giant Spider (10 HP / 2 DMG [Contact])

Always Drops: Paste and two random big gems

Strategy: These will always spawn on a ceiling with two webs directly underneath them. Damaging them or walking under them will cause them to drop. The simplest way to kill them and acquire a guaranteed Paste is to throw a bomb in one of their undamaged webs, causing it to get stuck and killing the spider in the resulting explosion. The Giant Spider is unique among big enemies for taking injury from regular stomp attacks, though Spike Shoes stomps are still much more effective.

Special: Four are guaranteed to be near each other in Crawling Skin levels. Also, like all spiders, they are immune to the effects of natural webs and the Web Cannon weapon.


Jungle


Name: Giant Frog (8 HP / 1 DMG [Contact, also little frog contact])

Always Drops: Either one big emerald or Spring Shoes

Strategy: Moves infrequently and rather slowly, so ranged weapons like the boomerang and shotgun are ideal. They can be whipped, bombed, or stomped on (only with Spike Shoes) though.

Special: Can spawn infinite amounts of smaller blue frogs out of its mouth.


Name: Old Bitey (40 HP / 2 DMG [Contact])

Always Drops: Golden Idol and three random big gems

Strategy: If you can properly position him, four sticky bombs is enough to kill him. Since this giant piranha is so massive, it's even possible to trap it on terrain in order to use a boomerang, shotgun, or even just plain old whipping to kill him. His waters are quite dangerous, and it's not worth seeking his treasure unless you are confident you won't die.

Special: Only appears in Rushing Water levels, and only in the giant pool of water at the bottom. That same water also contains many smaller piranha that can be even more problematic. If you've angered any shopkeepers for that run, it's quite likely one will be bouncing around in the water too. If your Rushing Water level is also a Restless Dead level, the dropped Golden Idol will become a Crystal Skull.


Ice Caves


Name: Mammoth (10 HP / 2 DMG [Contact] or Instant Kill [Shattering])

Always Drops: Either one big sapphire or Freeze Ray

Strategy: Unlike many other monsters, Mammoths do not actively seek you out. Instead, they wander back and forth on flat terrain, occasionally horizontally shooting out a Freeze Ray beam. Thus, staying behind them or above them can help you kill them by various means, with one of the simplest being the use of proximity mines that litter the Ice Caves.

Special: Mammoth Freeze Ray attacks work on both players and enemies (excluding other Mammoths). Freezing by itself doesn't cause injury (only a temporary stun), but collision damage or dropping while frozen will cause the ice to shatter for an instant kill.


Name: Alien Lord (10 HP / 1 [Contact] or 10 DMG [Homing Beam])

Always Drops: Three random big gems

Strategy: If you get hit by the purple homing psychic beam, you're likely as good as dead since it damages for 10 hit points and can hit multiple times in a row. Lords are immobile, but their dangerous psychic attack means you should stay at range. Bombs and shotguns can be useful for safely taking care of these.

Special: One always appears in Psychic Presence levels (right above a buried Jetpack), with two always appearing in Mothership levels. They are also always guarded by shield generators from one side that can reflect anything touching them (including shotgun bullets and bombs) while they are active.


Name: Alien Queen (20 HP / 1 DMG [Contact] or 10 DMG [Reticle Blast])

Always Drops: Up to six random big gems

Strategy: Like Alien Lords, the Queen is immobile. Her reticle attack is targeted and will hit you if you don't stay on the move, but it only affects a small space around where it is shot and thus it's much more feasible to get within short range of her compared to Lords. If you've gone to the Worm, the Crysknife can be a handy way of quickly dispatching her. Otherwise, use a shotgun, bombs, or other explosives (dislodged turrets found within the Mothership are one such example of "free" explosives).

Special: Only found in Mothership levels, always near the top. Shield generators will guard her from both sides, and it may be necessary to use explosives to destroy at least one or two before you can access her chamber. Note that she guards the Plasma Cannon, but doesn't actually drop it herself. Thus, it is possible to bomb underneath her chamber in order to acquire the Cannon early and use it against her and other Mothership inhabitants.


Temple


Name: Mummy (10 HP / 2 DMG [Contact, also per fly])

Always Drops: Two big rubies

Strategy: Rather slow and has a ranged attack that functions like a slower and more spread-out version of the Shotgun. A bomb, Sceptre/Shotgun blasts, or Spike Shoes can make quick work of them.

Special: Since Mummies are considered an "undead" enemy, a Camera flash will instantly kill them. Also, the green vomit counts for the Kapala.


Everywhere


Name: Golden Scarab (1 HP)

Always Drops: Nothing, but counts as high value treasure upon contact.

Strategy: Harmless, but fragile.

Special: Only appears in Dark levels and the City of Gold.


Name: Golden Monkey / Crystal Monkey (1 HP)

Always Drops: While alive, periodically poops small gold nuggets and gems.

Strategy: To get one, you must sacrifice an idol. You should decide if you can stick around long enough to recoup your investment or if you should just cash in the idol instead.

Special: A sacrificed Crystal Skull turns him white.


Name: Shopkeeper (10 HP / 1 DMG [Throw] or 4 DMG [Shotgun pellet])

Always Drops: Four big gold chunks.

Strategy: Peaceful initially (and willing to sell you items), but rapidly vengeful if anything damages them or their shops. If you want to avoid paying for items you can steal from them or outright kill them, but beware that they will likely hunt you down for the remainder of the run if you do that. If you don't have anything better, items in their store can be used against them.

Special: A special Jungle level called the Black Market houses many shops and their keepers. Will guard all non-boss level exits after you anger them. They also guard enclosed vaults containing two treasure chests filled with big gems (possibly even including diamonds).
Idols
Idols are common but not guaranteed to appear most levels, though they will never appear in boss levels and certain other special areas. Unless your level happens to contain Old Bitey, only a maximum of one idol will appear per level. All idols are guarded by traps of varying difficulty, set per area. Below are strategies for each one.

Note that almost all idol traps are triggered when the idol is picked up or moved. Be careful not to accidentally whip an idol as that will trigger the trap.


Mines


The Idol trap in the Mines is one of the deadliest in the game, and for the overall lowest treasure reward. When the trap is sprung, your screen will start shaking and after a few seconds a large boulder will burst from the nearby statue's head and start destroying lots of terrain, as well as any items or enemies in the way (though shopkeepers tend to have a habit of getting out of the way in time). In general, you should only grab this idol after already clearing out the rest of the level, as triggering it early can cause the boulder to crush precious treasure, including stuff like the key and chest for the Udjat Eye. The reward is pretty paltry for the danger involved though, so if the boulder is at risk for crushing an altar or shop, it might be best to just skip it.


The boulder is only two tiles high, so it can be fairly easily avoided if you're prepared. Spring Shoes and Climbing Gloves can help you gain a height advantage, but simply using a rope or some convenient terrain to be out of range can work fine too. Though you'd have to be pretty close by in order to do it, if you can cash in / disappear idol at an exit, peaceful shop, or altar before the boulder appears, the boulder won't spawn.


Jungle


The most common Idol in the Jungle is the easiest one to get in the entire game. When the trap is triggered, the six tile wide bridge will start destroying itself starting from the edges and going towards the center. With practice, it is easy to consistently jump from the center of the bridge to one of the two rocky terrain edges, negating any danger the collapse might have caused. If you fail to clear the gap, you will fall into the water and be at mercy of any piranha below. The only way to get out of that deep pit is with Climbing Gloves, a Jetpack, a bomb, or a rope. If you don't have any of those, you're screwed and either have to End Adventure or wait for the Ghost to get you.


This less common Idol and trap only appears on Restless Dead levels in a tomb-like structure with a push block at each entrance, as well as some treasure, crates, and/or even a damsel in the corners. Unlike other traps, there isn't any effect in the immediate area. Instead, disturbing this Crystal Skull will cause a Ghost to spawn in, separate from the 2:30 level timer Ghost. (And if the level happens to also be a Rushing Water level, Old Bitey would drop another Crystal Skull that'd spawn another Ghost.) Similar to the Mines boulder trap, this is best handled after you've cleared out the rest of the level. You may already have to be dodging the timer Ghost by then, but at least if you grab the Skull and make a beeline for the exit, you should be fairly safe. If you have a fast and straightforward path, you might be able to avoid the trap Ghost entirely.


Ice Caves


The Idol trap in the Ice Caves is also fairly easy to handle, provided you're properly equipped. Climbing Gloves or a Jetpack can help you reach the high platform where the Idol will be, though a Cape in addition / instead could help you glide onto the platform from above. (A rope from a lower platform is fine in a pinch.) This is one of two Idol traps that doesn't activate something upon the Idol being disturbed. Instead, the high platform is made of ice that quickly decays while a player is standing on it, and if it decays entirely the player will be dropped onto the spikes below. If they happen to miss the spikes, they could still land in the clutches of some enemy or depths of the deadly abyss..


Temple


The most common Idol in the Temple is guarded by one of the most deadly traps, so you should be careful around them. When the Idol is disturbed, stone doors drop down on both entrances while the ceiling reveals spikes and starts descending. The ceiling spikes can easily kill you in a matter of seconds. The best way to handle this trap is to clear terrain with a pickaxe or a bomb (or the Plasma Cannon if you have it from the Mothership) around where the doors will close in advance. (In the example picture, the left door would appear just below the arrow trap, and the right door would mirror it.) The doors are only two tiles tall, so they won't descend into any empty space beyond two tiles. However, the spiked ceiling blocks will, so you're advised to not be below any block while it is moving. In case the trap is inadvertently triggered before you're done preparing, you will have a few moments to bomb or dig yourself out before it's too late. It's really better to make sure to do it in advance though, because if you're too slow laying a bomb its fuse won't run out before you are crushed (or blown up). However, caution should allow you to consistently score this high value idol, so you don't have to be as afraid of the trap as the more unpredictable Mines boulder.


This less common Idol only appears in Prayers to Kali levels. Suspended above a tall shaft that contains lava (and rubies) at the bottom, you will always see a damsel and this trapped Idol next to each other as an intended sacrifice. You can safely take the damsel out of the pit for rescue or altar sacrifice if you wish, but the instant you disturb the Idol, the bridge completely collapses (unlike the slower collapse back in the Jungle). Since the lava below will instantly kill you, you should take care to avoid falling too far / getting too close to the magma men. While you could technically bomb your way out of the shaft, you might have trouble being a safe distance away from the bomb before it explodes. Thus, a Jetpack, Climbing Gloves, or numerous ropes are a better way to escape from the shaft. Unlike the Restless Dead special idol in the Jungle, this special idol does not carry any additional value. However, the guaranteed damsel and rubies at the bottom of the lava shaft can make up for that though.


Hell


The Hell idols are the second of two Idol traps that don't activate something upon the Idol being disturbed. That said, just attempting to pick up the idol can be quite dangerous in and of itself as it tends to be guarded by multiple ball and chain traps that arc very close to the idol. Depending on the timing of the traps, it may be possible to just run in and grab the idol at some point, but you might be better off softening the challenge by bombing away one or two of the hardest-to-avoid ball and chain traps. If you have the bombs or time to spare though, the Hell idol is the most valuable one in the game and well worth recovering if you can survive the process.
Ghosting
Ghosting, as it is commonly referred to, is when a Ghost passes over a big gem and turns it into a diamond. Diamonds have a fixed value of $5,000, but that's always greater than the value of any other big gem even if all incremental area bonuses are taken into consideration. Many players hate the Ghost for its instant death upon contact, but gem conversion is the principle way it can be useful to players advanced enough to lure and dodge it consistently. A Jetpack's great maneuverability helps tremendously when Ghosting, though you'll also likely want bombs and/or a Mattock to help free gems from terrain. (A Climbing Glove and Cape combo can replace the Jetpack somewhat, but you may have trouble traversing and creating safe routes with those unless you also have ropes for emergency vertical ascent.) Other explosives like the Plasma Cannon work as well, but they tend to be more circumstantial and only available for certain levels.

The Ghost's hitbox is 3x2 tiles and it hovers at a slow speed, though unlike other enemies it is not stopped by walls and thus can still trap you if you're at a dead end or dealing with tricky terrain. It always appears two minutes and thirty seconds into a level (barring a few exceptions), also accompanied by fog and music distortion. It is important to note that the Ghost always spawns in from the side of the level you're closest to, and this can be important for more easily Ghosting vaults that are closer to one edge. Here's an example video:


Ghosting in the Mines is straightforward as there are few hazards to watch out for, though it can be difficult if you can't obtain the Jetpack or Climbing Gloves in this area. Ghosting in the Jungle often forces you to deal with many more hazards (including things like Tiki traps that you may have to leave active in order to preserve bombs), but if you rob the Black Market you can generally end up well-equipped enough to handle the Ghost and other dangers. It is by far the easiest to perform Ghosting in the Ice Caves due to the wide open spaces, and this is a good area to practice in if you're not that confident about your skills yet. Ghosting in the Temple is challenging due to tight passageways and dangerous enemies being common, but you tend to find a lot of gems in this area so it is worthwhile if you can pull it off. Plus, if you have the Plasma Cannon from the Mothership, you can use it extensively here to carve out terrain and safe passages. Ghosting in Hell is the hardest of all due to occasionally even tighter passageways and more danger, but it is still profitable.

Ghosting vaults can be quite dangerous in the Mines and Jungle, but you can usually fairly easily convert at least the Ice Caves vault into all diamonds to give yourself a score boost. Ideally you'd want to Ghost all vaults for the huge value that they provide, but it can be very challenging to do if you don't have enough equipment and supplies. It is worth noting that the danger of the Temple vault can be reduced dramatically by using the Sceptre through walls to kill the vault guardian before they are free, though it may take you quite a few bombs or Cannon blasts to actually dig yourself to the vault in the first place.

In general, when Ghosting you may need to make circuits through a level in order to keep yourself safe. Some levels may generate naturally circuitous routes (the City of Gold being a prime example), but oftentimes you'll need to dig out or blow up some terrain in order to accomplish that.

What about special areas? The Ghost normally does not appear in Olmec's Chamber, Yama's Chamber, and the Worm, but it is possible to have it appear there if you've damaged three altars by that point. Olmec's fight is pretty easy to Ghost since it's a big area and since you can quickly dig out a pit for him to fall straight down into. If you can survive the entire Yama fight with a Ghost on your tail, then converting the entire throne of rubies into diamonds can be a big score boost right near the end of your run. (Be careful not to melt them in the lava though.) The Worm generally isn't a good candidate for Ghosting since it's claustrophobic and may not contain many gems anyway. Unless you have a lot of bombs and are very confident in your ability to get around the dangerous level quickly, you probably shouldn't bother with Ghosting the Worm. Additionally, Ghosting the two normal Ice Caves levels that the Worm replaces might be more profitable anyways.

Some other special areas are worth mentioning as well. The Mothership is a good target for Ghosting because you're guaranteed some gems for conversion from the two Alien Lords and the single Alien Queen. If you're willing to stick around, using the Cannon could help you access more of the level's treasures. (You may also be able to get some gems from the blue lights scattered about the level. They may contain nothing or just a small sapphire, but occasionally you can find a big sapphire for conversion.) The City of Gold is a fantastic place for Ghosting as the guaranteed Mummies drop rubies for conversion. Additionally, the terrain can contain numerous gems, and it's quite possible you're going to encounter the Ghost anyway if you stick around to blow up the tiles for gold chunks. There tend not to be all that many gems in the Black Market and Haunted Castle though. Feel free to Ghost them if you wish, but their layout and treasure amounts may leave you wanting.
12 Comments
broomus Sep 13, 2023 @ 8:29am 
My Notes on Ghosting:

Remember, as was apparent in the video, that the ghost makes it its top priority to stay on your vertical level. Because of that, the pattern in which I recommend ghosting a level would be going through each horizontal layer, and upon reaching the end, wait somewhere high (or low) until the ghost gets near, so you can run under (or over) the ghost, and then collect the freshly-ghosted gems. Remember, this movement pattern also makes it so the ghost can cut you off and trap you quite easily if you aren't prepared.
broomus Sep 13, 2023 @ 8:29am 
For ghosting in the mines, I think if you don't have a jetpack or a surplus of resources, you should only ghost the accessible gems on the bottom layer. This grants a decent score boost, but also means you don't have to spend many of your resources in preparation. Make an exception for the vault however. Ghosting a vault is worth $65000, more than enough to justify using at least 4 resources on it. While also having a jetpack is extremely helpful and opens up a lot more ghosting opportunities, the chances of getting one that early are low.
broomus Sep 13, 2023 @ 8:28am 
Ghosting in the jungle should be an afterthought. Jungle levels are dangerous, and ghosting gems safely in them requires clearing out their dangers (mainly the traps) first. Along with the fact you should be searching for the black market, the only really worth it ghosting opportunity would be the vault. If you get the black market before 2-4, you could potentially ghost more intensively, but I often just skip it and make up for the score loss in the ice caves.
broomus Sep 13, 2023 @ 8:28am 
Speaking of the ice caves, my strategy for ghosting there is just to ghost every gem in the level. Use land mines and UFO's to uncover all the buried gems (as well as the vault, if on that level), and then lead the ghost through all of them for sumptuous extra money. If you really want to go big or go home, I'd recommend going to the mothership. Not only does that give you 2 extra levels for money collecting and ghosting, but it also lets you get the plasma cannon (more on that in a bit). But do so at your own risk, as the mothership is filled to the brim with extreme danger. (and watch out for that exit shopkeeper)
broomus Sep 13, 2023 @ 8:28am 
With decent bombs, the temple is quite conducive to ghosting as there is quite a few rooms that have decent treasure in them. But in the temple you have quite a few other things to focus on, like anubis and the city of gold. Ghosting olmec's lair is very profitable but risky. If you want to ghost yama's throne in the same run, I'd say just play it safe and crush the ball and chain in olmec's lair, but then hopefully find an altar in hell and destroy it there.
broomus Sep 13, 2023 @ 8:28am 
If you went to the mothership, I'd recommend completly destroying 4-1 before you abandon the plasma cannon. If you got a hired hand, you could do what was shown in the video instead, but that means you probably shouldn't ghost since you have a hired hand to worry about (pro tip: never let a hired hand out of your grasp near the ghost, if he sees the ghost, he'll jump straight into it). Like always, you should ghost the vault. If you didn't get the plasma cannon into the city of gold, using bombs still does great things to your score. When placing bombs, I'd recommend placing them where they can hit the blocks underneath tikis, as that will break more tiles for the bombs you place, and grant more money.
broomus Sep 13, 2023 @ 8:28am 
Finally, ghosting in hell should be kept to a minimum, as hell loves to overwhelm you with traps and enemies. But ghosting yama's throne is totally worth it, as it gives you a whopping $220000 right at the end of your run, but it requires a little work to be put in with destroying altars.

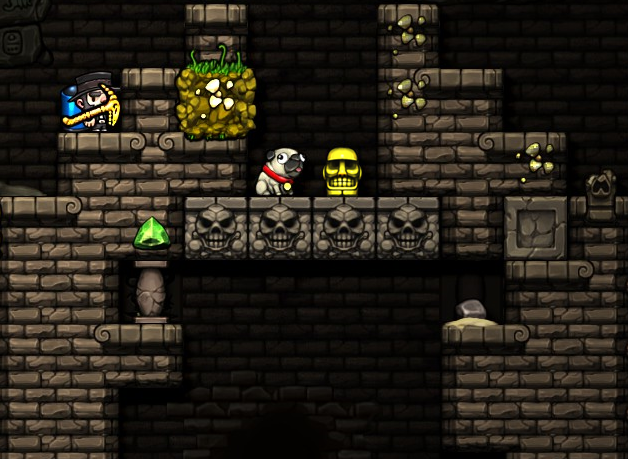
*For destroying altars, my recommendation is that you destroy the first altar after you get the kapala, if it's in the mines or the jungle. The second altar should be destroyed in the mines, the ice caves, or the temple as the jungle has no guaranteed way to crush the ball and chain. And the third altar should be destroyed as close as you can to the level you need the ghost for (I'd say 4-2 or 5-3).
YourAverageSpelunker Jun 24, 2022 @ 12:27am 
love this guide, was a very interesting even if i knew this all already.
Pancake Nov 19, 2018 @ 9:58pm 
Excellent guide! I don't ever go for highscores and have never ghosted before, but there is still plenty of useful information here.
[SSN] RSL Feb 28, 2016 @ 8:53pm 
Nice brah, 10/10