Terraria

Terraria

819 ratings
[2022] Terraria Ranger Guide (1.4.3)
By Twi
A step-by-step guide from a fresh world to the end-game on the ranger class ๐Ÿน
Reviewed on a monthly basis
6
38
2
2
6
6
2
3
2
   
Award
Favorite
Favorited
Unfavorite
ยญ
Introduction
This guide is by no way the definitive way to play the ranger class. There are a ton of weapons, accessories and buffs that you can include in your build. This guide is simply an example of how one might play the ranger class.

It is recommended to start on a small, Crimson world. But you wouldn't be too disadvantaged if you choose Corruption. This guide was not designed with Master mode in mind; good luck if you try it on Master ๐Ÿคž

The mob values such as HP and Damage are presented for the Classic game difficulty[terraria.gamepedia.com]

This guide is for the PC version of the game (version 1.4.3.6[terraria.fandom.com])

1.4 Boss Progression
Hover over the spoiler to view the boss progression in this guide.
1.4 Boss Progression
Stage 1 - New World
Suit Up
Forest
First you'll want to acquire ~50 Wood to craft yourself a Work Bench. Afterward, keep crafting Wooden Bows (10 wood) until you get a "Demonic" modifier, since knockback is not a factor.

Wooden Bow
Damage
Knockback
Critical Chance (%)
4
0
4

Modifier
Damage (%)
Critical Strike Chance (%)
Knockback
Tier
Value (%)
Demonic
+15
+5
-
+2
+60.02
Crimson / Corruption
Next, you'll want to search for either a Crimson or Corrupted Biome and chop down the trees; you need a minimum of 75 Shadewood / Ebonwood to craft a full set of armor which will provide you with 5 defense.

Shadewood Armor
Defense
Set Bonus
4 (5) (set)
+1 defense

In addition to the armor, consider crafting a Shadewood / Ebonwood Bow which deals an additional +4 damage over the Wooden Bow.

Shadewood Bow
Damage
Knockback
Critical Chance (%)
8
0
4
Ammunition
Snow Biome
For your ammo, you're going to be looking at Frostburn Arrows which are crafted by combining 10 Wooden Arrows (found in pots, chests and sold by the Merchant) with a single Ice Torch. To create these, find an Ice Biome and gather Ice Blocks which are combined with regular Torches to create Ice Torches.
Frostburn Arrow
Damage
Knockback
Velocity
9
2.2
3.75

A Frostburn Arrow deals an additional +4 damage over Wooden Arrows, as well as applying the Frostburn debuff for 4/8 seconds which causes the afflicted target to lose 8hp per second!

A debuff that prevents health regeneration and causes the afflicted target to lose 8 health per second. "It's either really hot or really cold. Either way it REALLY hurts"
Stage 1.1 - Health/Loot
Health
Your next stage is maxing out your health, head into the Underground levels and below to find Life Crystals; you can raise your health up to 400.
A good place to search is the Jungle biome, as it has vast amounts of open space.

Loot
Mobility
This stage is all about exploring the Underground/Cavern levels for mobility items such as:
Item
Description
Location
Magic Mirror
When used, a short animation plays before instantly teleporting the user to their set spawn point; if the player has previously used a Bed they will appear in front of it
Chests in the Underground and Cavern Biomes
Cloud in a Bottle
When equipped, it allows the player to double jump. The second jump is shorter than the first jump, but still increases the maximum height the player can reach.
Gold Chests in the Underground and Cavern Biomes
Hermes Boots
When equipped, they allow the player to gain a speed boost after running for a certain distance continuously.
Underground, Underground Desert, and Underground Jungle Chests
Grappling Hook
When used, a hook fires a chain that latches to a surface or platform and pulls the player towards it.
Crafted or Dropped by mobs. Simplest crafting includes 3 Chains & 1 Hook
Jungle
An optional location for loot is the Jungle Biome, although it features tough enemies it can be rewarding to obtain some of the rare loot which can be found there such as:
Item
Description
Location
Anklet of the Wind
It gives a 10% bonus to movement speed. The effect also stacks with the movement speed bonus of the Aglet.
Ivy Chests in the Underground Jungle
Boomstick
It fires a three-to-four-shot spread (14 base dmg), but only consumes one bullet per firing.
Jungle Crates (16.67% chance), and also in Ivy Chests (22.5% chance) located in Jungle Shrines and at the base of a Living Mahogany Tree in the Underground Jungle.
Staff of Regrowth
It increases the yield of herbs and seeds when harvested.
Jungle Shrines, and Jungle Crates from fishing.
Flower Boots
These cause flowers to grow when the player walks on the grass. These flowers are the same as the tall weeds that would normally grow on grass, meaning that they can be broken to spawn Seeds and critters, as well as harvested with a Sickle to produce Hay.
Ivy Chests

Travelling Merchant
The Travelling Merchant has a 1% chance to have the Ammo Box available for sale when he arrives; keep a lookout!

NPC
Purchase
Cost
Reason
Ammo Box
15 Gold
The Ammo Box is a furniture item that, when placed and pressed, applies the Ammo Box buff to all ranged weapons for 10 minutes.

The Ammo Box buff provides a 20% chance per shot of a ranged weapon not consuming ammunition. "Reduces ammo usage by 20%"


Stage 1.2 - Materials and Misc
NPCs
At this stage you should have unlocked the Merchant, the Demolitionist and the Arms Dealer, you should purchase the following:

NPC
Purchase
Reason
Merchant
Bug Net
The Bug Net is required in order to go Fishing, as it is the initial and primary method of obtaining Bait. Most Critters that are insects, worms, or snails can function as Bait once captured.
Demolitionist
Bombs
After being thrown, the bomb will explode inflicting 100 points of damage to nearby enemies and destroying multiple blocks around it. This will be used to destroy the Crimson Hearts/Shadow Orbs found in the Crimson/Corrupted Biomes respectively.
Arms Dealer
Musket Ball
This will serve as your main ammunition for bullet based weapons, note that you can upgrade these to Silver Bullets by combining Musket Balls w/ a Silver Bar at an Anvil

Graveyard
An optional weapon which can be obtained in 1.4 is the Quad-Barrel Shotgun for 35 gold coins. This item is sold by the Arms Dealer in the Graveyard biome.

Quad-Barrel Shotgun
Damage
Knockback
Critical Chance (%)
17
6.5
4

The Quad-Barrel Shotgun has the same damage, knockback, and fire rate as the Shotgun, but is obtainable much earlier and has more consistent DPS, assuming all shots hit. It's a great alternative if you're unable to obtain a Shotgun.

1.4.1 Changes for the Quad-Barrel Shotgun
  • Damage decreased from 24 to 17
  • Projectile count increased from 4 to 6
  • Use time increased from 45 to 55
  • This can only be obtained after the Skeletron is defeated

The Graveyard is a mini-biome that appears when several Tombstones are in close proximity. You need 7 tombstones (1.4.1) in close proximity to trigger special NPC items.

Another great item you got obtain from this biome is the Gravedigger's Shovel which destroys soft-tiles in a 3x3 radius from the cursor.

Gravedigger's Shovel
Ingredients
Crafting Station
Iron Bar (12)
Any Wood (3)
Iron/Lead Anvil and Ecto Mist (fog in graveyard biome)

Mini-boss Hunt
Your next goal is to upgrade your pickaxe and summon the meteor shower. To do so, head to the Corruption/Crimson region and break three (3) summoning items:
Crimson Heart
Shadow Orb

Which will spawn the Brain of Cthulhu/Eater of Worlds:
Brain of Cthulhu
Damage
HP
Defense
30
1000 + 3,000~4000
14

Eater of Worlds
Damage
HP
Defense
11-22
7485
2-8

Pickaxes
After defeating the boss, you'll hopefully have enough Crimtane/Demonite Ore to craft a pickaxe upgrade. In addition, the victory should have triggered a meteor shower.
Weapon
Pickaxe Power (%)
Damage
Mining Speed
Deathbringer Pickaxe
70
12
22
Nightmare Pickaxe
65
9
20

Meteorite
Crimson Hearts/Shadow Orbs
The next stage involves acquiring Meteorite from the Meteorite Biome. In order to spawn Meteorites, you need to destroy Crimson Hearts/Shadow Orbs after defeating the aforementioned bosses (EoC/EoW) which are located in their respective biome. Note that if you destroy 3 then another boss will spawn.

Note: As of the 1.4 update, a meteor can sometimes be seen in the background before crashing

Meteorite
Once you receive the "A meteor has landed!" message, begin exploring your surface world until you find the crash site. Note that if you step on meteorite blocks, you will suffer from the Burning debuff.

"The player takes continuous damage and has their movement speed reduced until they step off the block. Damage is taken at a rate of approximately 50 points per second."

As of 1.4.1 you cannot blow up (until Hardmode) Meteorite Ore so it has to be gathered by mining. It takes 3 Meteorite to craft a single Meteorite Bar, you'll need at least 20 Meteorite Bars (60 ore) to craft a Star Cannon. Note that the region also summons Meteor Heads which deal 40 damage, but only have 26 health points.

Goblin Army
Goblin Scout
Your next challenge is to find the uncommon Goblin Scout enemy which can be found on the edges of the world. You need 10 Tattered Cloth which will drop from 5-10 Goblin Scouts. Afterwards, you will be able to craft the Goblin Battle Standard (10 Tattered Cloth + 5 Wood @ Loom) and summon the Goblin Army.
Goblin Scout
Damage
HP
Defense
Drops
20
80
6
Tattered Cloth (1-2)

Goblin Army
Your next challenge is to summon the Goblin Army and defeat it. The event is completed when the player(s) defeat all goblins in the army.

The size of the army is based on the number of players currently in the world, and their health capacity:
  • There will be 80 base goblins
  • There will be an additional 40 goblins for each player that has a maximum health of 200 or more.
This means that in single player, the army will consist of 120 goblins
Goblin Tinkerer
Once the Goblin Army is defeated, the Goblin Tinkerer will spawn randomly in open areas in the Cavern layer. He will appear to be bound at first, talking to him in this state will free him. He will then respawn as long as a vacant House is available.
Goblin Tinkerer
Damage
HP
Defense
10
250
15

From him, you can purchase the Rocket Boots (5 gold) and the Tinkerer's Workshop (10 gold). The Rocket Boots provide mobility and the Tinkerer's Workshop will be used to reforge items.

It would be useful to consider crafting the Terraspark Boots[i.imgur.com] at this point as they provide valuable mobility.

Item
Description
Terraspark Boots
Provides the ability to walk on water, honey & lava
Grants immunity to fire blocks and 7 seconds of immunity to lava
Stage 1.3 - Straight to Hell
Hellevator
Pre-requisites
At this stage, you are ready to descend into the depths of hell. But before you do, craft an Obisidan Skin Potion:
Obsidian Skin Potion
Ingredients
Crafting Station
Bottled Water, Fireblossom, Waterleaf, Obsidian
Placed Bottle or Alchemy Table

This provides you with the Obsidian Skin buff for 6 minutes. "Immune to lava"

In addition to the potion, you should be able to craft the Star Cannon.

Note that this weapon uses Fallen Stars as ammunition which may be a hassle to gather so it's completely optional โญ

Star Cannon
Ingredients
Crafting Station
Minishark
Meteorite Bar (20)
Fallen Star (5)
Anvil


Star Cannon
Damage
Knockback
Critical Chance (%)
55
0
4

Digging Down
To build a Hellevator, dig straight down (2-3 blocks wide). As you do, consider mining any near-by Obisidan which will save you time later.
Here are a few factors to consider when building:
  • Protecting the tunnel from enemies with blocks on either side even through large caves is recommended so that traveling characters do not end up being attacked (and potentially knocked off the shaft's path).
  • Lighting, typically Torches, helps a player know in what part of the shaft their character is as well as illuminating enemies and collectables.
  • A character can travel down a rope or chain as fast as falling with out suffering fall damage upon hitting the bottom. Further more, little effort is needed to move back up

Deep-lava Diving
Once you've reached the Underworld Biome (Hell), jump into the lava and begin mining Hellstone. You need at least 135 Hellstone Ore for a full set of armor; and an additional 45 ore for the Molten Fury bow.
Molten Armor
Defense
Set Bonus
25
17% extra melee damage

Molten Fury
Damage
Knockback
Critical Chance (%)
31
2
4

Hellforge
Note that it's useful to steal the Hellforge found in Ruined Houses in The Underworld, as it will be needed for Hardmode crafting.

Boss Arena
Design
This stage is optional but very useful in later game so it's recommended to take your time and build it. A boss arena is a dedicated area which can be used to fight basic and more advanced bosses, for a starter arena you can use the following design:
Features
Most boss arenas have the following features:
  • Campfires can be very useful for earlier bossfights, as they provide passive healing.
  • Heart Lanterns and a Star in a Bottle can also provide useful passive regeneration.
  • Open space to move around and use ranged weapons in
  • Walls and a ceiling: Many players may wish to fight these bosses without having to worry about interference from normal monsters such as Zombies

Heart Lantern
Ingredients
Crafting Station
Life Crystal, Chain (4)
By Hand
The lamp provides you with the Heart Lamp buff: "Life regen is increased"


Star in a Bottle
Ingredients
Crafting Station
Bottle, Fallen Star
By Hand
The star in a bottle provides you with the Star in a Bottle buff: "Increased mana regeneration"

Blood Moon
A blood moon has a 11.11% chance to spawn during a full moon (and if the player has 120+ hp max). This event can be very beneficial as the Blood Zombies & Dripplers have a 0.67% chance to drop the Shark Tooth Necklace.

Shark Tooth Necklace
Tooltip
Description
Increases armor penetration by 5
This is equivalent to raising the damage of the player's attacks by 2 or 3, depending on the enemy's defense before this is factored in.
Stage 1.4 - Potions
Potions
This stage is all about equipping yourself with strong potions that will aid you in combat. Note that this is not a definitive list of available potions but merely a showcase of some of them.

Potion
Effect
Ingredients
Duration
Ammo Reservation Potion
Decreases chance to consume ammo by 20%
Bottled Water
Double Cod (Jungle)
Moonglow
8 minutes
Endurance Potion
Reduces damage taken by 10%
Bottled Water
Armored Cavefish (Any)
Blinkroot
4 minutes
Wrath Potion
Increases damage by 10% with every kind of weapon
Bottled Water
Ebonkoi (Corruption)
Deathweed
4 minutes
Rage Potion
Increases critical strike chance by 10%
Bottled Water
Hemopiranha (Crimson)
Deathweed
4 minutes
Regeneration Potion
Provides health regeneration
Bottled Water
Daybloom
Mushroom
8 minutes
Swiftness Potion
Increases movement speed by 25%
Bottled Water
Blinkroot
Cactus
8 minutes
Thorns Potion
Attackers take damage
Bottled Water
Deathweed
Cactus
Worm Tooth
Stinger
8 minutes
Ironskin Potion
Increases Defense by 8
Bottled Water
Daybloom
Iron/Lead Ore
8 minutes
Archery Potion
Increases arrow speed and damage by 20%
Bottled Water
Daybloom
Lens
8 minutes
Stage 1.5 - Sky Bridge, Money Making & Reforging
Sky Bridge
A Skybridge is a player-made structure, built at any altitude, that spans parts or all of a world's horizontal length. This will be your method of farming Fallen Stars during the night as well as an easy method of world traversal. It's up to you how far you wish to go out with your Sky Bridge; try to aim for at least for 200 blocks

Uses
A Skybridge can have many different uses, the more common ones include
  • It can be used to fight bosses and other monsters.
  • Can be used to prevent Meteorites from destroying Structures.
  • Can be used as a fast way to collect Fallen Stars, by running back and forth across the length of the Skybridge.
  • It can be used to more easily get around your world, especially if you add makeshift ladders.
  • A Skybridge can make finding Floating Islands much easier.
  • A player may find a lot of Blinkroot growing on a dirt skybridge, so having one is a good way to farm Blinkroot and mushrooms.

Money
Note: As of 1.4, NPC sale and purchase prices are no longer exact as they depend on the Happiness[terraria.gamepedia.com] level of the NPC!

See this chart [i.redd.it]for a breakdown of the optimal NPC housing set-up!

There are many ways in Terraria to make money, and you will need heaps of it to reforge all of the sweet weapons and accessories you own. Here are a few ways:
  • Bee Wax: 96 make 12 Bee Headgear (10โ€‰Gold & 80โ€‰Silver)
  • Jellyfish are weak bait but sell for a decent price (3โ€‰Gold & 50โ€‰Silver)
  • Collect all the Silt, Slush, and Desert Fossils you can find. Once you get an Extractinator, these can be converted to money, ores, and gems.
  • Selling Hellstone Bars, 99 bars sell for 39 Gold & 60 Silver

Reforging
Once you've acquired a substantial amount of Coins, and you have found the Goblin Tinkerer, you should be able to reforge all of you weapons and accessories at the Tinkerer's Workshop.

Accessories
For accessories you are aiming for either the Menacing (Damage) or Warding (Defense) modifiers; this will depend on your skill and ability to survive battles.

Weapons
By now you should have acquired strong tools & weapons, these are the modifiers you are looking to obtain:
Weapon / Tool
Modifier
Star Cannon
Demonic
Molten Fury
Unreal
Boomstick
Unreal
Minishark
Demonic/Deadly
Pickaxe
Light

Final Loadout
This is what your final load-out should look like at this stage.
Weapons
Accessories
Armor

Stage 2 - Pre Wall of Flesh
Queen Bee
Now that you're armed to the teeth, head to the Jungle and find the Queen Bee, feel free to defeat her several times for the loot and coins.
Queen Bee
Damage
HP
Defense
30 (melee) / 22 (stinger)
3400
8

The Queen Bee has a 33% chance of dropping The Honey Comb which when combined with The Sharktooth Necklace creates The Stinger Necklace, a neat accessory that can be stacked with The Sharktooth Necklace to boost your penetration, provide small healing and have bees swarming you enemies! - Thanks to Polaris for the suggestion!

Stinger Necklace
Description
Tool-tip
This item combines the Shark Tooth Necklace and the Honey Comb accessories, giving the player 5 flat armor penetration as well as releasing 1-4 bees when the wearer takes damage and grants the Honey buff for 5 seconds
Increases armor penetration by 5
Releases bees and douses the user in honey when damaged

The Honey Comb
Description
Tool-tip
The Honey Comb is an accessory dropped by the Queen Bee boss that releases 1-4 bees which attack nearby enemies every time the wearer takes damage. It also provides the wearer with the Honey Buff
Releases bees and douses the user in honey when damaged

Defeating the Queen Bee will also allow the Witch Doctor to spawn. He sells Leaf Wings. While in a Hardmode, Jungle biome, during night only.

These wings cannot be obtained until Hardmode but setting up housing in the jungle now is much easier than when you're in Hardmode!

NPC
Purchase
Reason
Witch Doctor
Leaf Wings
Despite being nerfed in 1.4, these wings provide early access to flight when entering hardmode

As a result, you should build a small housing for the Witch Doctor to move into and consider building a miniature hellevator to reach the Witch Doctor quicker; as the hard mode jungle mobs pack a punch.

Leaf Wings
Cost
Flight Time
75 Gold
1.67


Skeletron
Here we fight the Skeletron so we can go into the dungeon, we need bones from the dungeon to craft ourselves a Necro armor set.
Skeletron
Damage
HP
Defense
20 (hand), 32 (head)
600 (hand), 4400 (head)
14 (hand), 10 (head)
Once you reach the depths of the Dungeon we need two things:
  • 150 Bones, which drop from Angry Bones, Dark Casters, and Cursed Skulls
  • A Cobalt Shield, which an be found from the Locked Gold Chests in the dungeon.
Cobalt Shield
Description
Tool-tip
The Cobalt Shield is a Shield accessory that grants the player immunity from knockback when equipped. It also provides 1 defense.
Grants immunity to knockback

The Cobalt Shield can further be combined with the Obsidian Skull (20 Obsidian @ Furance) to create the Obsidian Shield:

Obsidian Shield
Description
Tool-tip
It grants immunity from knockback, as well as immunity from the Burning debuff, and provides 2 defense.
Grants immunity to knockback
Grants immunity to fire blocks

Another optional item which can be obtained from the Locked Gold Chests in the dungeon is the Handgun. Remember that you need a Golden Key to open this chest, these are acquired by:
  • Finding one in an unlocked normal Chest in the Dungeon.
  • Killing a Dungeon Slime (100% chance).
  • Killing any other Dungeon enemy (1/65 chance).
  • Breaking a Pot in the Dungeon (1/40 chance).

Handgun
Damage
Knockback
Critical Chance (%)
17
3
4
The Handgun on its own is okay, but it can be further upgraded into the Phoenix Blaster which features increased bullet damage and velocity but slightly less knockback; making it on par with the Quad-Barrel Shotgun.

Phoenix Blaster
Ingredients
Crafting Station
Handgun
Hellstone Bar (10)
Anvil

Phoenix Blaster
Damage
Knockback
Critical Chance (%)
24
2
4
The Phoenix Blaster is useful into early-mid Hardmode, outclassing many early-Hardmode weapons.
With reasonably rapid manual taps, the Phoenix Blaster can eclipse the Minishark in damage rate.

Necro Armor
Note that the Necro Armor also requires 135 Cobwebs to be crafted. Although this armor set has decreased defense, the damage buff is in my opinion more substantial and useful as long as you're able to stay alive. However, if you feel you're lacking defense, then you can keep the Molten Armor set.
Necro Armor
Defense
Set Bonus
16
20% chance to not consume ammo
(+15% ranged damage from pieces)

Final Loadout
This is what your final load-out should look like at this stage.
Weapons
Accessories
Armor

Optional Accessory

Tiger Climbing Gear
Description
Tool-tip
Tiger Climbing Gear is an accessory that allows for complete stops while clinging to walls.
Allows the ability to climb walls
Stage 2.1 - The Don't Starve Cross-over
What?! An unexpected cross-over update? Yes!

This update brings a new ranged weapon to our arsenal, the Pew-matic Horn which can be obtained as a 25% drop chance from the new boss The Deerclops[terraria.fandom.com]

Pew-matic Horn
Damage
Knockback
Critical Chance (%)
20
1
4

This weapon consumes bullets or musket balls, but fires out visually-different item blocks which yield a damage multiplier (x0.1 - x2.0). This multiplier is applied to the base damage of the ammunition used.

The projectiles fired also have a high drop off which appears to be correlated to the visual of the item (i.e. stone blocks drop more rapidly than mushrooms)
Stage 3 - Wall of Flesh / Hardmode
Boss Fight
You are now ready to fight the Wall of Flesh and unleash Hardmode upon your world! Head down to Hell. To summon the Wall of Flesh, you need to find a Voodoo Demon which carries the Guide Voodoo Doll.

Voodoo Demon
Damage
HP
Defense
32-42
140
8

Once the Voodoo Guide Doll is thrown into lava, the Wall of Flesh will spawn; it's direction will be determined by which side of the world the Voodoo Doll was sacrificed.
Runway
It's recommended to build a flat ground bridge running across hell, this will allow you to run backwards and shoot at the wall simultaneously, without worrying about lava. In addition to this, consider bringing the Ammo Box purchased from the Travelling Merchant to reduce ammo consumption.

Wall of Flesh
Once the big baddie spawns, there are some points you should keep in mind:
  • Attacking the eyes causes the most damage, as they have the lowest defense.
  • Focus on The Hungry first before significantly damaging the Wall itself due to their increases in damage and defense.
  • The Wall of Flesh is one of the few bosses that does not despawn based on player distance. Once summoned, it only despawns once it reaches the far edge of the world; if you die, you may return to it.
  • To defeat the Wall of Flesh, you must attack either its eyes or its mouth. They all share the same life counter, so attacking any of the three will deplete the total health of the boss.

Wall of Flesh
Damage
HP
Defense
50
8000
12

Hardmode
Upon defeating the Wall of Flesh, it will drop certain 100% chance items such as 5-15 Healing Potions and the Pwnhammer; this will be your main hammer for a long duration, keep it close.

As well as the guaranteed drops, the Wall of Flesh will drop 1 of 7 items, the item that were most interested in is the Ranger Emblem:

Ranger Emblem
Description
Tool-tip
A Hardmode Accessory that increases ranged damage by 15%
15% increased ranged damage

It's recommended to farm for several of these (can be done later) as we will use them for a Hardmode Recipe (Stage 4.2)

Item Upgrades
There are some essential item upgrades that you should get as soon as Hardmode begins, note that these will set you back 1 Platinum and 25 Gold coins.
NPC
Purchase
Cost
Reason
25 Gold
This gun fires a spread of three to five bullets (24 per), though each firing consumes only one ammunition
1 Platinum
Allows for flight

Ores
The Wall of Flesh always drops the Pwnhammer upon its defeat. This allows the destruction of Altars to bless the world with Hardmode ores.

Based on the type of world you have, you will either have to destroy the Crimson Altar, or the Demon Altar; both can be found underground in their respective biomes.

Some notes on Altars
  • First Altar: Cobalt Ore or Palladium Ore, chosen randomly.
  • Second Altar: Mythril Ore or Orichalcum Ore, chosen randomly.
  • Third Altar: Adamantite Ore or Titanium Ore, chosen randomly.

  • Altars are needed for crafting certain items; destroying every Altar in a world is not recommended.
  • Subsequent Altars destroyed will begin the cycle again, though the fourth to sixth Altars will drop half as much ore as the first ones.


Mining
Once your world has been blessed with Hardmode ores, it's time to go mining. I recommend brining a few potions with you to speed up and ease the process:

Spelunker Potion
Ingredients
Crafting Station
Bottled Water, Blinkroot, Moonglow, Gold/Platinum Ore
Placed Bottle or Alchemy Table
This potion will illuminate any valuable nearby objects, including the ores you're after.

Progression
Your goal of this mining is to upgrade yourself up to a set of Titanium Armor. Note that you need to follow the ore progression system in order to obtain the armor:
Anvil Progression
Ingredients
Crafting Station
Iron Bar (5)/Lead Bar (5)
Work Bench
Mythril Bar (10)/Orichalcum Bar (12)
Iron/Lead Anvil

Forge Progression
Ingredients
Crafting Station
Stone Block (20) + Wood (4) + Torch (3)
Work Bench
-
Found in Ruined Houses in The Underworld
Adamantite Ore (30)/Titanium Ore (30) + Hellforge
Mythril/Orichalcum Anvil


Pickaxe Progression
Ingredients
Crafting Station
Cobalt Bar (15)/Palladium Bar (18)
Iron/Lead Anvil
Mythril Bar (15)/Orichalcum Bar (18)
Mythril/Orichalcum Anvil
Adamantite Bar (18)/Titanium Bar (20)
Mythril/Orichalcum Anvil
Adamantite/Titanium Forge (bars)
Stage 3.1 - Farming/Upgrades
Farming
Before we continue with the farming session, you should have enough materials from Mining to craft yourself a full set of Titanium Armor with the Titanium Helmet that boost ranged attributes. This set features the Titanium Barrier buff as of 1.4.0.1

Titanium Armor
Defense
Set Bonus
34
Attacking generates a defensive barrier of titanium shards
(16% increased ranged damage,
7% increased ranged critical strike chance)

Titanium shards spawn and rotate around the player, damaging enemies who come in contact with them.

There can be a total of 7 shards spinning around the player, each dealing over 50 damage; incapable of achieving critical strikes, and lasting 10 seconds. The shards will immediately spawn again after hitting an enemy, regardless of damage class.


Underground / Cavern
In these biomes you will be hunting Skeleton Archers for some sweet loot.

Skeleton Archer
Damage
HP
Defense
45 (melee), 70 (ranged)
210
14

Loot
Magic Quiver
Description
Tool-tip
A must have for any arrow-based builds; velocity of arrows is ~doubled
Increases damage by 10% and greatly increases arrow speed
20% chance to not consume arrows
* Has a 1.25% chance of dropping

Marrow
Damage
Knockback
Critical Chance (%)
50
4.7
9
* Has a 0.5% chance of dropping

Underground Hallow
The Hallow will be your next target, note that it features some strong mobs such as the Chaos Elemental and the Enchanted Sword.

Chaos Elemental
Damage
HP
Defense
40 (melee)
370
30

The Chaos Elemental has a 0.2% chance to drop the Rod of Discord which is extremely useful as it allows the player to teleport to the cursor location!

Your goal here is to farm Souls of Light which have a 20% chance to drop from enemies located in this biome.

There are several items which require these souls, so it's a good idea to collect at least 100.

Key of Light
Ingredients
Crafting Station
Soul of Light (15)
Work Bench

Mechanical Skull
Ingredients
Crafting Station
Bone (30)
Iron Bar (5)
Soul of Light (3)
Soul of Night (3)
Mythril/Orichalcum Anvil
* Used to summon Skeletron Prime, the hardmode version of Skeletron.

Hollowed Mimics
The crafted Keys of Light will be used to summon Hollowed Mimics which when killed, drop some great loot including the Daedalus Stormbow (25% drop) and the Illuminant Hook (25% drop). The mimic is summoned by placing the key into any chest.

Hallowed Mimic
Damage
HP
Defense
90
3500
34

Drops
Daedalus Stormbow
Damage
Knockback
Critical Chance (%)
43
2.25
4
* The Daedalus Stormbow is a Hardmode bow which rains arrows down from the sky, instead of firing from the bow itself. It fires three to four arrows per shot, while only consuming a single arrow per shot from the player's inventory. The arrows fall in a wide spread towards the area the cursor was pointed.

Illuminant Hook
Reach
Hooks
Special Attr.
30
3
Glowing ends

Underground Corruption
Just like with the Underground Hollow, your goal in this region is to farm Souls of Night which we will use to craft the Key of Night

Key of Night
Ingredients
Crafting Station
Soul of Night (15)
Work Bench

We will use these keys to farm Corrupt Mimics for Putrid Scent which has a 20% chance to drop from the enemy.

Corrupt Mimic
Damage
HP
Defense
90
3500
34

Drops

Item
Description
Putrid Scent
When equipped, it will increase damage and critical strike chance by 5%, as well as decrease aggro

I recommend farming at least 2 Putrid Scents as we will use them later to craft the Stalker's Quiver and the Recon Scope

Crimson
Ichor is a Hardmode crafting material dropped by Ichor Stickers and the Tainted Ghoul in the Hardmode Underground Crimson and Crimson Underground Desert respectively.

I prefer these to Cursed Bullets due to their increased damage, velocity and debuff duration.

Ichor Sticker
Damage
HP
Defense
55 (melee), 80 (ranged)
340
20

Tainted Ghoul
Damage
HP
Defense
64
220
32

The Ichor can be combined with other ammunition (musket balls, arrows) to create a type of ammuniton which causes the Ichor debuff: "Reduced defense"

It decreases the enemy's defense by 20 points, which effectively can increase the damage from the bullet an additional 10 hit points from its base value of 13, totalling the effective damage of up to 23.

Upgrades

Onyx Blaster
In addition, by killing enemies in the Underground Crimson/Corruption, you will obtain Souls of Night which are needed for the Mechanical Skull and the Onyx Blaster. I recommend using Ichor Bullets alongside the Blaster to debuff enemies.

Item
Ingredients
Crafting Station
Shotgun
Dark Shard (2)
Soul of Night (10)
Mythril/Orichalcum Anvil

Note that you also need 2 Dark Shards to craft this weapon. The item has a 10% drop chance from the Dark Mummy located in the Crimson Dessert.

Dark Mummy
Damage
HP
Defense
60
180
18

Onyx Blaster
Damage
Knockback
Critical Chance (%)
24
6.5
4
* Fires a spread of 4 bullets while only consuming one unit of ammunition, but it also fires a single dark energy projectile that explodes upon impact with an enemy or a block, or after travelling 36 tiles.

1.4.1 Changes for the Onyx Blaster
  • Damage decreased by 4 (table adjusted)
  • Use time increased from 45 to 48

Final Loadout
This is what your final load-out should look like at this stage.

Weapons
Accessories
Armor
head
breast
legs

Stage 4 - Bosses
Duke Fishron

Note: This battle can be very difficult if you're not good at dodging, feel free to skip to the mechanical bosses instead and come back to this boss later.

Fighting Duke Fishron is optional, but he drops the Tsunami; an execellent bow. To summon this boss you need to obtain a Truffle Worm which is a rare critter that spawns in the Glowing Mushroom Biome during Hardmode.


It's recommended to use an Invisibility Potion when catching this critter as they begin to burrow once the player comes near them. In addition, you may use a Rod of Discord or a Golden Bug Net which is faster and has a longer reach than the default Bug Net.

Once you've obtained the bait, head to the Ocean. After casting the Truffle Worm via a fishing rod, the boss will be summoned.

Duke Fishron
Damage
HP
Defense
100 (Melee)
90 (Sharknado)
100 (Detonating Bubble)
50000
50
(100 enraged)

When hitting the player, Duke Fishron has a 33% chance to inflict Bleeding, and in Expert Mode a 33% chance to inflict Feral Bite.

"Cannot regenerate life" for approx 6-20 seconds.

"Increased damage, Decreased life regen, Causes status effects" for approx 3-10 seconds.


Bleeding can be ignored with an Adhesive Bandage or the upgraded version, the Ankh Shield.

Adhesive Bandage has a 1% (1/100) chance to drop from Rusty Armored Bones, Werewolves and Angler Fish.

The Inferno Potion can be utilised to destroy Duke's homing bubble attacks. Given the Ring of Fire will block them off completely.

Drops
There are three main drops were looking for from this boss:
  • Tsunami (20%) - Auto-fires five closely-grouped arrows per shot, while only consuming one arrow from the player's inventory each time
  • Fishron Wings (6.66%) - The Fishron Wings work in water just as they do on land, with the same speed, unlike other wings.
  • Shrimpy Truffle (100%) - Moving through liquids causes Cute Fishron (mount) to gain a drastic movement speed bonus of about +150% (to 82 mph, the fastest of any mount in Terraria, being tied with The Black Spot), as well as providing the rider with a +15% damage bonus

The Tsunami bow will be the bread and butter of this build until end-game, it's recommended to use either the Holy Arrows or Ichor Arrows with this weapon.
Tsunami
Damage
Knockback
Critical Chance (%)
53
2
4

1.4.1 Changes for the Tsunami
  • Damage decreased from 60 to 53

Mechanical Bosses
With your current set-up, you should be able to defeat the mechanical trio with relative ease!

The Destroyer
The Destroyer can be summoned manually using a Mechanical Worm at night in any biome. It can also spawn naturally upon dusk with a chance of 10% once a Demon or Crimson Altar has been smashed, as long as it has not yet been defeated in the current world.

Mechanical Worm
Ingredients
Crafting Station
Rotten Chunk / Vertebra (6)
Any Iron Bar (5)
Soul of Night (6)
Mythril / Orichalcum Anvil

The Destroyer
Damage
HP
Defense
70 (head)
44 (body)
40 (tail)
80000
0 (head)
30 (body)
35 (tail)

The Twins
The Twins can be summoned manually using a Mechanical Eye at night (7:30 PM to 4:30 AM). They also have a 10% chance to spawn randomly at dusk once a Demon or Crimson Altar has been destroyed, as long as The Twins have not yet been defeated at least once in the current world.

Mechanical Eye
Ingredients
Crafting Station
Lens (3)
Any Iron Bar (5)
Soul of Light (6)
Mythril / Orichalcum Anvil

The Twins
Damage
HP
Defense
Retinazer/II
45/67 (melee)
40/50 (laser)
NA/36 (rapid fire)
แ Œ แ Œแ Œ แ Œแ Œ แ Œแ Œ แ Œแ Œ แ Œแ Œ แ Œแ Œ แ Œแ Œ แ Œ
Spazmatism/II
50/75 (melee)
50/60 (laser)
Retinazer/II
20000/8000
Spazmatism/II
23000/9200
Retinazer/II
10/20
Spazmatism/II
10/28

TIP: Focus on defeating one eye completely first without doing too much damage to the other one. Battling The Twins when both are in their second form makes the battle much more difficult.

Skeletron Prime
Skeletron Prime can be manually summoned using a Mechanical Skull at night. It can also spawn naturally upon dusk with a chance of 10% once a Demon or Crimson Altar has been smashed, as long as it has not yet been defeated in the current world.

Mechanical Skull
Ingredients
Crafting Station
Bone (30)
Any Iron Bar (5)
Soul of Light (3)
Soul of Night (3)
Mythril / Orichalcum Anvil

Skeletron Prime
Damage
HP
Defense
47 (head)
94 (spinning)
28000
24
48 (spinning)
Consider focusing on the arms first. Once Skeletron Prime's head is no longer shielded by anything, the fight gets a lot easier. Prioritize damage on the arm which is causing the most damage or disruption, so it can be destroyed and removed from the fight as quickly as possible.

The Ichor debuff works well against this boss, lowering the boss' defense by 20!
Stage 4.1 - Jungle & Plantera

After defeating the mechanical trio, it's time to fight the Plantera. But before the boss, there are several upgrades we can make to our equipment.

Glowing Mushroom Farm
The first step in our upgrade path is to create an artificial surface (above depth 0), the Glowing Mushroom farm. This can be done anywhere on the surface level but you could save time by utilising a sky island as it comes pre-built with housing.

To build the farm you need at least 1 Mushroom Grass Seed and for a biome, you require 101 tiles covered in a mushroom-related block.

Truffle
To get the Truffle NPC to move in, there must be a vacant House in (or near) a surface Glowing Mushroom biome during Hardmode. This NPC will become useful only after the Plantera is defeated, however as we require a lot of glowing mushrooms we're setting up the biome farm early on.

NPC
Purchase
Reason
Truffle
Autohammer
The Autohammer is a Hardmode crafting station used to craft Shroomite Bars and Mini Nuke I and II. It is purchased from the Truffle for 1โ€‰Platinum Coin after Plantera has been defeated.


Jungle Exploration
Pickaxe Axe
As we defeated the mechanical bosses we're able to craft the Pickaxe Axe:

Pickaxe Axe
Ingredients
Crafting Station
Hallowed Bar (18)
Soul of Fright
Soul of Might
Soul of Sight
Mythril/Orichalcum Avil
This tool will speed up the next farming stage immensely

Pickaxe Axe
Pickaxe Power (%)
Damage
Mining Speed
200
35
7

Chlorophyte Ore
Your next goal is to gather at least 324 Chlorophyte ore which will let you craft 54 Shroomite Bars (with the addition of 810 Glowing Mushrooms). Note that the Shroomite bars can only be crafted after Plantera is defeated but you might as well gather the ore as you're searching for Life Fruit.

Once harvested and used, a Life Fruit permanently increases the player's health capacity by 5, turning one of the hearts in the player's health meter golden.

You need 20 Life Fruit to reach the full health cap of 500. I strongly recommend bringing a few Spelunker potions to speed up the grind.

Once you've maxed out your health, you are ready to face the Plantera

Plantera
To summon the Plantera you need to destroy Platera's Bulb, which is found naturally in random Underground Jungle location. They emit a faint pink light which makes them easier to spot.

Once the Bulb is destroyed, Plantera will be summoned.

Plantera
Damage
HP
Defense
50/70 (melee)
44 (Seed)
54 (Green Poison Seed)
62 (Thorn Ball)
30000
36
10 (second form)
Tips:
  • Clear out a large area to allow easier dodging before summoning Plantera.
  • Using a Gravitation Potion can help the player avoid damage from Thorn Balls laying on the ground, as the Thorn Balls obey gravity and fall to the floor.

Drops
The main drop that you're looking to get (100% drop chance) is the Temple Key, which gives access to the Temple.

Shroomite Armor
Once the Plantera is defeated, Truffle will begin selling the autohammer for 1 Platinum. Head to the surface Glowing mushroom biome you've created previously gather 810 Glowing Mushrooms and purchase the autohammer.

Once purchased, turn your Chlorophyte ore into bars, and then turn those bars into Shroomite bars. As previously mentioned, you need 54 Shroomite bars for a single set and 78 bars for all the headgears + set

Shroomite Armor
Defense
Set Bonus
51
Not moving puts you in stealth,
increasing ranged ability and reducing chance for enemies to target you

Note that full stealth will provide you with: 60% damage, +10% critical chance, and +50% knockback.

Headgear
This set features 3 types of headgear, my preferred is Shroomite Headgear for the damage boost to arrows.
Headgear
Name
Bonus
Headgear
15% increased arrow damage
Helmet
15% increased rocket damage
Mask
15% increased bullet damage

Final Loadout
This is what your final load-out should look like at this stage.

Weapons
Accessories
Armor


Stage 4.1b - Notable Mention
Pumpkin Moon
The Pumpkin Moon event is summoned by a Pumpkin Moon Medallion at any point in the night, ending at dawn (04:30AM).

Pumpkin Moon Medallion
Ingredients
Crafting Station
Pumpkin (18)
Ectoplasm (5)
Hallowed Bar (10)
Mythril/Orichalcum Avil

The goal is to eliminate 15 waves of enemies before the event ends, with said enemies dropping powerful weapons! One such notable enemy is the Mourning Wood

Mourning Wood
Damage
HP
Defense
120 (melee)
100 (Health < 25%)
80 (Greek Fire)
100 (Health < 25%)
12000
28

This mini-boss has a 20% chance to drop the Stake Launcher (and Stake as ammunition)

Stake Launcher
Damage
Knockback
Critical Chance (%)
75
6.5
14%

This ranged weapon pierces up to 10 enemies (decreasing by 10% in damage per) with additional damage dealt to vampires. The Steak as ammunition boasts 25 damage with 4.5 knockback.
Stage 4.2 - Temple/Golem
The Temple is located in the Underground Jungle. The entrance to it can be usually found in the top-left or top-right of the structure itself. The Temple Key you've attained should allow entry.

Entrance
Once inside consider farming some Lihzahrd Power Cells which have a 2% chance to drop from Lihzahrds and Flying Snakes

Lihzahrd
Damage
HP
Defense
38-60
400
20-30

Flying Snake
Damage
HP
Defense
85
260
28

These cells will be used at the Lihzahrd Altar to summon the Golem boss.


Golem
Before summoning the Golem I recommend clearing out a small arena and flattening the room the altar is located in which should make the fight easier.

Golem
Damage
HP
Defense
64 (head)
59 (fist)
16000 (head)
7000 (per fist)
20 (head)
28 (fist)

Drops

The main item we're interested in is the Eye of the Golem (12.5% drop rate) as it will be used to craft the Destroyer Emblem when combined with the Avenger Emblem.

Note that you're able to stack the The Destroyer Emblem atop a Ranger Emblem which will increase your ranged damage by 25%!

The Destroyer Emblem
Description
Tool-tip
A Hardmode, post-Golem accessory that gives the player 10% increased damage and 8% increased critical strike chance
10% increased damage
8% increased critical strike chance

Optional 1.4 Upgrade Path
The 1.4.0.1 Update introduced a new accessory, the Recon Scope. Although it's somewhat difficult to craft it's definitely worth the detour for the bonuses if you're using a bullet-based weapon!

The crafting path is as follows:
Eye of the Golem + Avenger Emblem = Destroyer Emblem Destroyer Emblem + Rifle Scope = Sniper Scope Sniper Scope + Putrid Scent = Recon Scope

The Recon Scope
Description
Tool-tip
This item combines the effects of the Sniper Scope & Putrid Scent
Increases view range for guns (Right click to zoom out)
10% increased ranged damage and critical strike chance
Enemies are less likely to target you


Stage 5 - Lunatic Cultist
Lunatic Cultist

The Lunatic Cultist can be summoned by defeating the Cultists which are located at the surface Dungeon's entrance. The only threat from these is the Cultist Archer which deals 45-80 damage; but only has 210HP and 14 defense

Once the Cultists are defeated the Lunatic will be summoned from their portal. After moving away from his spawn point, the Lunatic Cultist will begin to cycle through three attacks:

  1. A rotating ball of ice that fires six shards at equal intervals before disappearing
  2. Three homing fireballs that explode on impact
  3. A stationary orb similar to the Magnet Sphere that summons streaks of lightning in a straight line.

Lunatic Cultist
Damage
HP
Defense
50 (Melee)
36 (Shadow fireball)
70 (Ice mist)
60 (Fireball)
90 (Lightning orb)
120 (Ancient Light)
30 (Ancient Doom)
32000
42

Once defeated the Lunatic Cultist will drop the Ancient Manipulator an endgame crafting station used to craft items from Luminite and Lunar Fragments.

In addition, the defeat of the boss spawns the Lunar Events which summon the different Celestial Pillars in four different sections of the world.
Stage 5.1 - Lunar Events
The Beginning
Each Lunar Pillar shows a large moon in their background and spawns several unique enemies at high spawn rates, with one corresponding Celestial Pillar in each. These areas can be found on the minimap via icons that represent each of their Celestial Pillars.

Solar Pillar
The Solar Pillar is the melee-themed Pillar, with minions that bear strong defensive abilities and deal with heavy contact damage. It is often the hardest to tackle as a ranger due to the Crawltipede forcing you to stay grounded.

Solar Pillar
Damage
HP
Defense
120 (solar fragments)
20000
20
Enemies


  • The Crawltipede is a long, fast-moving worm-like enemy that can only be damaged on its tail. It is passive while the player has blocks under their feet, and only starts attacking once the player takes flight. While it has high health, damage against it is multiplied by 10.
  • The Sroller can curl into a ball and roll at the player, potentially dealing a large amount of damage on contact.
  • The Corite is a flying enemy that can shroud itself in fire and charge towards the player at high speeds, travelling through blocks.
  • The Selenian is a ground-based enemy that wields two flaming swords. It can curl up and fly towards the player at high speed. When it does so, it will reflect certain player-fired projectiles.

Vortex Pillar
The Vortex Pillar is the ranger-themed Celestial Pillar, with fast, mobile minions capable of long-ranged projectile attacks.

Note: After defeating this Pillar consider crafting the Phantasm and/or the Vortex Beater

Vortex Pillar
Damage
HP
Defense
0
20000
20
Enemies


  • Storm Divers shoot a small volley of projectiles that deal very high damage.
  • Alien Queens can fire stingers that cause the Distorted debuff, which causes the player to be unable to fly upwards or fall downwards for a few seconds, forcing them to only be able to move horizontally.
  • The Alien Queen spawns 3 Alien Larvae when killed, which will grow to Alien Hornets and into more Alien Queens if they are left for too long.
  • Vortexians are fighters that, on death, summon a portal which shoots a lightning bolt that deals relatively low damage.

Crafting
The Vortex Pillar drops 12-60 Vortex Fragments which should allow you to craft a weapon upgrade.

Phantasm
Ingredients
Crafting Station
Vortex Fragment (18)
Ancient Manipulator
Damage
Knockback
Critical Chance (%)
50
2
4
Constantly shooting with the Phantasm will gradually increase its firerate from once per 24 frames, up to once per 18 frames. The best modifier for this weapon is Unreal.

Vortex Beater
Ingredients
Crafting Station
Vortex Fragment (18)
Ancient Manipulator
Damage
Knockback
Critical Chance (%)
50
2
4
I recommend using Chlorophyte Bullets with this weapon as they home in to the nearest enemy


Nebula Pillar
The Nebula Pillar is the mage-themed Celestial Pillar, with minions capable of flight, teleportation, and other unusual attacks and abilities

Nebula Pillar
Damage
HP
Defense
0
20000
20
Enemies


  • The Nebula Floater shoots lasers that move very fast and deal large amounts of damage. It will teleport around the player, making it more difficult to dodge its projectiles.
  • The Brain Suckler can attach itself to the player, inflicting the Obstructed debuff and dealing damage.
  • The Evolution Beast shoots projectiles that chase the player and deal high damage multiple times.
  • The Predictor shoots 4 fast-moving, very high-damage projectiles at once.

Stardust Pillar
The Stardust Pillar is the summoner-themed Celestial Pillar, with large swarms of enemies that spawn smaller, weaker entities to attack.

Stardust Pillar
Damage
HP
Defense
0
20000
20
Enemies


  • The Milkyway Weaver is similar to the Crawltipede by flying and attacking players in midair, but it is smaller and can only be damaged on the head.
  • The Star Cell enemy, if killed, will split into smaller sized versions that grow into full sized versions after a few seconds, which can cause enemies to fill the screen.
  • The Flow Invader will summon smaller creatures around it, which will shoot themselves like projectiles at the player after there are three around the Flow Invader. The smaller creatures around it will become projectiles and shoot towards the player after the Flow Invader is killed, and can deal massive damage.
  • The Twinkle Popper, along with dealing contact damage, releases a small enemy called a Twinkle that chase players and explode to deal heavy damage.
  • The Stargazer runs after players and conjures powerful lasers to damage them.

Impending doom approaches...
After defeating all four Celestial Pillars, the screen will start to vibrate and go in and out of focus, and the music volume will lower before eventually going completely silent. A minute after the Pillars' defeat, the Moon Lord will spawn.

Stage 5.2 - Pre-Moon Lord Builds
Note: These are here to give you ideas, you are free to pick and choose whatever build you like =)

Build A - 1.3 Version Build
This is the goto build when the 1.3 was the latest version, it's defence and dmg is based on the modifiers you put on your accessories. I personally recommend either Warding for survivability or Menacing for damage.

Note, if you're playing in 1.4 there's no real reason why you shouldn't upgrade the Magic Quiver to the Stalker's Quiver.

Weapons
Accessories
Armor

Build A - Statistics
Item
Buff
Magic Quiver
Increases arrow damage by 10%
Greatly increases arrow speed
20% chance to not consume arrows
Fishron Wings
Allows flight and slow fall
Allows quick travel in water
Ankh Shield
4 defense
Grants immunity to knockback and fire blocks
Grants immunity to most debuffs
Ranger Emblem
15% increased ranged damage
Destroyer Emblem
10% increased damage
8% increased critical strike chance

Max Defense: 51 (armor) + 4 (shield) + 20 (full warding) = 75 defense


Build B - 1.4 Quiver Build
Weapons
Accessories
Armor

Build B - Statistics
Item
Buff
Magic Quiver
Increases arrow damage by 10%
Greatly increases arrow speed
20% chance to not consume arrows
Fishron Wings
Allows flight and slow fall
Allows quick travel in water
Stalker's Quiver
Increases arrow damage by 10% and greatly increases arrow speed
20% chance not to consume arrows
Enemies are less likely to target you
Molten Quiver
Increases arrow damage by 10% and greatly increases arrow speed
20% chance not to consume arrows
Lights wooden arrows ablaze

Recon Scope
Increases view range for guns (Right click to zoom out)
10% increased ranged damage and critical strike chance
Enemies are less likely to target you
Celestial Shell
Turns the holder into a werewolf at night and a merfolk when entering water
Minor increase to damage, melee speed, critical strike chance,
life regeneration, defense, mining speed, and minion knockback

Note: The Celestial Shell has too many boosts to list, click here[terraria.gamepedia.com] to view them all on the gamepedia!

Max Defense: 51 (armor) + 7 (Celestial Shell) + 20 (full warding) = 78 defense

Build C - 1.4 Mixed Build
If you are struggling or don't mind mixing your pure archer build then you might like the idea of combining the benefits of several sets in this build.
Weapons
Accessories
Armor

The main change in this build is the Valhalla Knight's Breastplate which provides you with 24 defense, 30% increased minion damage and massively increased life regeneration. This allows us to be a more tanky ranger, and take on a few extra hits.

To further profit from the Breastplate we can take the newly introduced Terraprisma:
Terraprisma
Damage
Knockback
Mana
90 (summon)
4
10
This weapons damage will be further boosted by 30% thanks to the Breastplate which puts its damage at 117!

An alternative weapon I've mentioned is the Electrosphere Launcher due to its constant DPS projectile type which lasts for 8 seconds.

Builds End-note
At the end of the day, the builds depend on many factors such as the modifiers you have, the buffs you use and even boss RNG. Don't feel restricted to mix and match your best equipment, explore and have fun with your build โš”

Stage 6 - Moon Lord

Area
The arena should be well lit and contain the essentials such as Campfires, Heart Lanterns and Stars in Bottles (if you're using mana weapons; mixed build).

If you have access to the Mechanic consider adding traps, and Heart Statues as an additional healing source.

If you have access to the Shrimpy Truffle (an expert mode drop from Fishron) then consider waiting till it rains (1.4) or building a water area to trigger the +150% movement speed buff

In addition, it will help to make the base of the arena out of Asphalt Block as it provides a movement speed buff atop speed-boosting accessories. It's crafted with Stone Block (2) and Gel (1) at the Blend-O-Matic


Boss
The Moon Lord has two hands and a head that must be killed before his core becomes available for attack. Note that as of 1.4 the death ray goes through blocks, and cannot be cheesed with traditional methods!

๐Ÿ‘ฝMoon Lord ๐Ÿ‘ฝ
Damage
HP
Defense
50 (Phantasmal Deathray)
60 (Phantasmal Bolt)
100 (Phantasmal Sphere)
60 (Phantasmal Eye)
80 (Melee (eye socket))
145000
45000 (head)
25000 (hand)
50000 (core)
50 (head)
40 (hand)
70 (core)

This boss is able to inflict the Moon Bite debuff which prevents lifesteal and lasts for 14 seconds. Note that this debuff can be cured by simply going to the nurse

The Rod of Discord is near essential as it instantly teleports the player to the mouse cursor. This is used to avoid Moon Lord's Phantasmal Death Ray

Cheesing
If you don't feel like fighting the Mood Lord legitimately there are some methods you can use to make the fight much easier.

Hoiking
A Hoik is a sawtooth series of sloped blocks, sometimes referred to as "teeth", which can rapidly move entities across distances. You can set them up in a radius around the moon lord to create an infinite moving loop.

Cute Fishron
As previously discussed it's possible to use the speed buff of Shrimpy Truffle to dodge most of Moon Lord attacks

Running Away
By using the The Black Spot its possible to out run the boss whilst flying in one direction and using homing ammo.

Drops
There are several items were interested in gathering from the Mood Lord, except the obvious Luminite Ore

Item
Description
The SDMG is the end-game Megashark, it deals 85 damage, whilst having 66% chance to not consume ammo
This launcher is an upgraded version of the Celebration, firing 7 different-colour rockets with each dealing 40 damage. It also has 50% chance to not consume ammo
The board travels at 83 mph horizontal, 175 mph vertical, and 51 mph while falling. Note that it's a Expert Mode-Only item
Stage 6.1 - Endgame Builds
โ–ˆโ–ˆโ–ˆโ–ˆโ–ˆโ–ˆโ–ˆโ•—โ–ˆโ–ˆโ–ˆโ•—โ–‘โ–‘โ–ˆโ–ˆโ•—โ–ˆโ–ˆโ–ˆโ–ˆโ–ˆโ–ˆโ•—โ–‘โ–‘โ–ˆโ–ˆโ–ˆโ–ˆโ–ˆโ–ˆโ•—โ–‘โ–‘โ–ˆโ–ˆโ–ˆโ–ˆโ–ˆโ•—โ–‘โ–ˆโ–ˆโ–ˆโ•—โ–‘โ–‘โ–‘โ–ˆโ–ˆโ–ˆโ•—โ–ˆโ–ˆโ–ˆโ–ˆโ–ˆโ–ˆโ–ˆโ•—
โ–ˆโ–ˆโ•”โ•โ•โ•โ•โ•โ–ˆโ–ˆโ–ˆโ–ˆโ•—โ–‘โ–ˆโ–ˆโ•‘โ–ˆโ–ˆโ•”โ•โ•โ–ˆโ–ˆโ•—โ–ˆโ–ˆโ•”โ•โ•โ•โ•โ•โ–‘โ–ˆโ–ˆโ•”โ•โ•โ–ˆโ–ˆโ•—โ–ˆโ–ˆโ–ˆโ–ˆโ•—โ–‘โ–ˆโ–ˆโ–ˆโ–ˆโ•‘โ–ˆโ–ˆโ•”โ•โ•โ•โ•โ•
โ–ˆโ–ˆโ–ˆโ–ˆโ–ˆโ•—โ–‘โ–‘โ–ˆโ–ˆโ•”โ–ˆโ–ˆโ•—โ–ˆโ–ˆโ•‘โ–ˆโ–ˆโ•‘โ–‘โ–‘โ–ˆโ–ˆโ•‘โ–ˆโ–ˆโ•‘โ–‘โ–‘โ–ˆโ–ˆโ•—โ–‘โ–ˆโ–ˆโ–ˆโ–ˆโ–ˆโ–ˆโ–ˆโ•‘โ–ˆโ–ˆโ•”โ–ˆโ–ˆโ–ˆโ–ˆโ•”โ–ˆโ–ˆโ•‘โ–ˆโ–ˆโ–ˆโ–ˆโ–ˆโ•—โ–‘โ–‘
โ–ˆโ–ˆโ•”โ•โ•โ•โ–‘โ–‘โ–ˆโ–ˆโ•‘โ•šโ–ˆโ–ˆโ–ˆโ–ˆโ•‘โ–ˆโ–ˆโ•‘โ–‘โ–‘โ–ˆโ–ˆโ•‘โ–ˆโ–ˆโ•‘โ–‘โ–‘โ•šโ–ˆโ–ˆโ•—โ–ˆโ–ˆโ•”โ•โ•โ–ˆโ–ˆโ•‘โ–ˆโ–ˆโ•‘โ•šโ–ˆโ–ˆโ•”โ•โ–ˆโ–ˆโ•‘โ–ˆโ–ˆโ•”โ•โ•โ•โ–‘โ–‘
โ–ˆโ–ˆโ–ˆโ–ˆโ–ˆโ–ˆโ–ˆโ•—โ–ˆโ–ˆโ•‘โ–‘โ•šโ–ˆโ–ˆโ–ˆโ•‘โ–ˆโ–ˆโ–ˆโ–ˆโ–ˆโ–ˆโ•”โ•โ•šโ–ˆโ–ˆโ–ˆโ–ˆโ–ˆโ–ˆโ•”โ•โ–ˆโ–ˆโ•‘โ–‘โ–‘โ–ˆโ–ˆโ•‘โ–ˆโ–ˆโ•‘โ–‘โ•šโ•โ•โ–‘โ–ˆโ–ˆโ•‘โ–ˆโ–ˆโ–ˆโ–ˆโ–ˆโ–ˆโ–ˆโ•—
โ•šโ•โ•โ•โ•โ•โ•โ•โ•šโ•โ•โ–‘โ–‘โ•šโ•โ•โ•โ•šโ•โ•โ•โ•โ•โ•โ–‘โ–‘โ•šโ•โ•โ•โ•โ•โ•โ–‘โ•šโ•โ•โ–‘โ–‘โ•šโ•โ•โ•šโ•โ•โ–‘โ–‘โ–‘โ–‘โ–‘โ•šโ•โ•โ•šโ•โ•โ•โ•โ•โ•โ•

End-game Builds
If you've made it this far hats off to you ๐Ÿฅณ, you have officially completed Terraria! Now for the fun part - endgame builds!

Rocketeer
This build is just a whole-lotta fun, and what a reward for beating the game than launching fireworks at your foes ๐ŸŽ‡!

Weapons
Accessories
Armor
We're using Mini Nuke I instead of Mini Nuke II because it doesn't destroy tiles, but if you want to destroy your world - then use Mini Nuke II ๐Ÿ˜‰

Extra Accessories
Feel free to mix and match these if you're in Expert/Master mode!

Celestial Shell
Description
Tool-tip
A Hardmode, post-Golem accessory that combines the stat-boosting powers of the Celestial Stone with the transformative powers of the Moon Shell, allowing both of their effects to happen simultaneously
Turns the holder into a werewolf at night and merfolk when entering water
Minor increase to damage, melee speed, critical strike chance,
life regeneration, defence, mining speed, and minion knockback

Soaring Insignia
Description
Tool-tip
A Hardmode accessory dropped by the Empress of Light that grants increased jump height and flight ascent speed
Grants infinite wing and rocket boot flight
Increases flight and jump mobility

Avenger Emblem
Description
Tool-tip
Grants 12% increased damage to all weapons. This accessory stacks with others!
12% increased damage

Bow Build
The bow build is a slightly modified Rocketeer build as in the end game there are a limited number of accessories you can mix and match, the main difference is the weapon used (obviously) and the 3 quivers we utilise for the arrow/dmg buffs

Weapons
Accessories
Armor

As this build doesn't have flight capabilities, I recommend using The Black Spot mount for mobility.

The best modifier for the bow is Unreal. Since it does not benefit from speed modifiers, Godly and Demonic provide the same DPS bonus as Unreal.

The best modifiers for the accessories are either Menacing or Warding - dependant on your playstyle

Change Log

This section outlines any 1.4.1/1.4.2/1.4.3 changes which affect this guide as well as any general changes to the guide

Weapons
  • Reaver Shark's power has been decreased from 100 to 59, making it essentially useless when going after obsidian. This has been updated in the guide, the next best alternative comes from EoC/Eater of Worlds. (29/05/2020)
  • Celebration MK2 an end-game weapon, will be considered for one of the final viable builds (03/06/2020)
  • Added Quad-Barrel Shotgun as an optional weapon (05/06/2020)
  • Added Gravedigger's Shovel as an optional tool (21/06/2020)
  • [Bug-fix] Fixed an issue where Star Cannon's projectile could not land critical hits, and wouldn't always receive proper stat bonuses from player equipment (07/07/2021)
  • [Bug-fix] Fixed an issue where Star Cannon's projectile could not be fired through platforms (07/07/2021)
  • Added Pew-matic Horn to Section 2.1 as an optional weapon (02/12/2021)

Armor
  • Titanium Armor - The Titanium Barrier buff has been discussed in Stage 3.1 (30/05/2020)

Bosses
  • Added information about Duke Fishron (30/05/2020); including drops and tips
  • Added mechanical bosses to Stage 3.1 (30/05/2020)
  • Added Plantera fight to Stage 4 (31/05/2020)
  • Added Golem fight to Stage 4.2 (31/05/2020)
  • Added Lunatic Cultist fight to Stage 5 (31/05/2020)
  • Added Lunar Event to Stage 5.1 (01/06/2020)
  • Added Pre-mood lord builds to Stage 5.2 (02/06/2020)
  • Added Moon Lord battle to Stage 6 (03/06/2020)

Accessories
  • With the additional features for Putrid Scent such as the Recon Scope and the Stalker's Quiver the hardmode farming will be altered to include Corrupt Mimics as these accessories provide a strong (20%) increase in damage
  • Celestial Starboard will be considered for one of the final viable builds
  • Terraspark Boots have been added to Stage 1.2
  • Stalker's Quiver discussion added (02/06/2020)
  • Black spot mount discussed in Stage 5.3

Misc
  • Added discussion about Happiness levels of NPCs and the optimal pylon set-up for NPC housing. See Stage 1.5 - Money (29/05/2020)
  • Added boss progression guide to introduction (29/05/2020)
  • Updated potion times to reflect actual values from in-game data (30/05/2020)
  • Added boss kill gifs to some bosses (30/05/2020)
  • Added final stages (empty) to the guide as a preview of what is to come (31/05/2020)
  • Added End-game builds to Stage 6.1 (03/06/2020)

Notable 1.4.1 Changes
This section outlines changes which are relevant either to the guide or rangers in general

Quad-Barrel Shotgun
  • Damage decreased from 24 to 17
  • Projectile count increased from 4 to 6
  • Use time increased from 45 to 55
  • The Arms Dealer now only sells this after Skeletron

Onyx Blaster
  • Damage decreased by 4
  • Use time increased from 45 to 48

Tsunami
  • Damage decreased from 60 to 53

Chlorophyte Bullets (Nerf)
  • Damage decreased from 10 to 9

Cursed Bullets (Buff)
  • Increased speed to match Ichor Bullets
  • Also, see Debuffs section for details of Cursed Inferno changes

Crystal Bullets (Nerf)
  • Only generate 2 shards on impact instead of 3

Jester Arrows (Nerf)
  • Applies a 10% damage penalty to the next hit for each enemy a projectile pierces

Graveyard Threshold (Buff)
  • The number of graves required to trigger both a full graveyard and the various levels of graveyard ambience has been increased by 1

Meteorite Ore (Buff)
  • While still immune to explosions under normal circumstances, like other materials, they will become breakable with explosives after entering Hardmode

Suggestions
If you have suggestions there are 3 ways you can suggest them:
  • Leave a comment below with the suggestion
  • Add me on steam and DM me the suggestion
  • Add me on discord: Twi#5077
81 Comments
redpandaalex06 Nov 5, 2023 @ 7:53am 
what about expert mode, classic is so easy
Kanlor May 4, 2023 @ 7:12am 
Thanks for the awesome guide and all the work you put into it! I'm finding it really helpful as a relative beginner for a ranger playthrough.

I think where you've put the Duke fight with the warning is perfectly reasonable. I've just gotten up to it and decided to give it a crack to see what all the fuss is about. Squeezed out a win on the third attempt and was rewarded with a Flairon. Three more wins (from seven) and I finally have my prize and feel like an absolute beast. Thanks for that!

So to those following this guide, I say give the Duke a try prior to the mechs. Yes it's a challenge fight and you'll probably die, but that's part of the fun and you'll learn from it. Plan your arena and bring all the buffs you can. It is very much doable at this stage, and you've not much to lose by trying.
Twi  [author] Jan 17, 2023 @ 11:14am 
@Kwizz

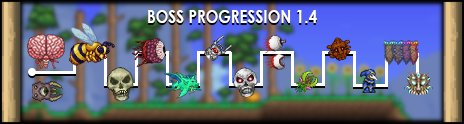
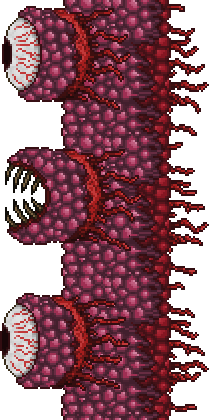
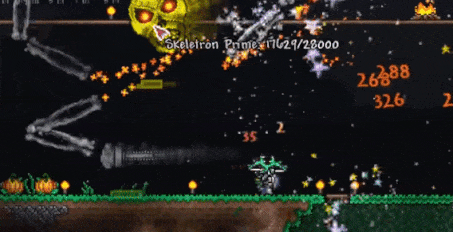
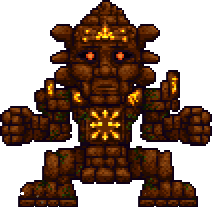
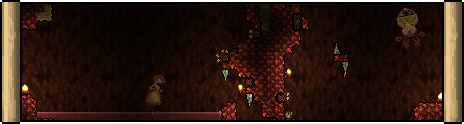
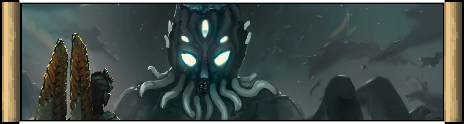
While I agree the Duke is a difficult fight, it is a boss in Terraria that drops useful ranger items. As such, I feel it should remain in the guide and not be omitted on the basis of its challenging nature.
Rinny Jan 16, 2023 @ 10:46am 
Even right after the mechs it would be too big of a difficulty spike, especially now that they've buffed Duke. It should not be in the guide in the first place.
Twi  [author] Jan 15, 2023 @ 4:26am 
@Kwizz,

It's a point that a few comments have raised, I agree it's a challenging fight hence the suggestion to skip the boss and attempt it following the mechanical bosses :47_thumb_up:
Rinny Jan 14, 2023 @ 1:31pm 
Great guide, though I would never recommend beginners (the kind of people who need this guide) to do Duke before any of the mechs. That's a terrible idea.
Phyrnna Aug 5, 2022 @ 9:57pm 
I would recommend giving attention to the Clockwork Assault Rifle, which does about as much dps as a Megashark.

Also, you could mention that you can alternate ichor bullets with other types of ammo to make use of the ichor debuff without losing the damage from higher tier ammo, and that crystal bullets are generally the best bullet to use for this purpose before you have access to chlorophyte bullets.
Twi  [author] Jul 20, 2022 @ 9:17am 
@Miles,

Well spotted! I've corrected the mistake and changed the best modifier of Minishark to Demonic, with Deadly proposed as the alternative
Miles (Tails) Prower Jul 15, 2022 @ 12:22am 
Are you sure that minishark has unreal modifie I swear that I wasn't able to get it after dumping 9 platinum. Max best I could get is demonic. But you should provide alternative modifiers, to make sure that someone is not gonna waste money on reforging.
Nebulous Mar 28, 2022 @ 12:18am 
I made an entire wall of text detailing a lot of the issues I see with this guide, only to find out that there's a 1k character limit.
Whoops.
Anyway I did add you on Discord, in case you don't see that lol. I'm Nebulous#3030.

I do have one thing I'd like to put in here anyway, just in case you never see the Discord add.

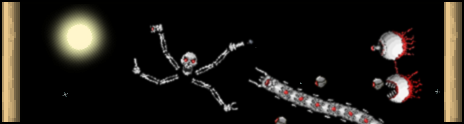
I would never recommend a new player to fight Duke Fishron before any of the Mechanical Bosses. He's a very difficult fight, and doing it Pre-Mech isn't really beginner friendly, which is who I'm assuming is reading a guide looking for helpful info.
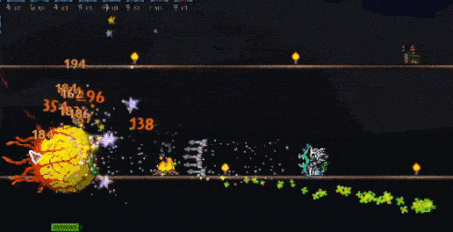
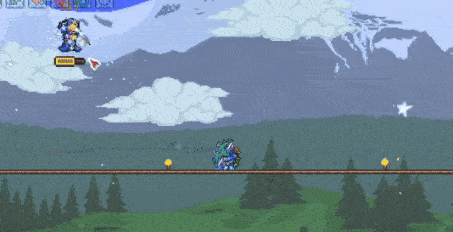
It also makes the next points about the Mech Bosses a little disingenuous.The sheer power of the bow makes the Mechs seem much easier than they really are. This issue bleeds into the next few sections, as well, since the GIFs show Plantera and Golem being killed with Tsunami, which, although reasonable for the stage, also means a large amount of alternative Ranged weapons are totally ignored.