Terraria
581 értékelés
A Beginner's Guide to Terraria (Now outdated)
Készítő: Aroband
This guide will go from spawning in a new world to activating Hardmode in 1.2. It will go over character progression and optional "quests", as well as general tips. This is in extreme detail, so if that's not your thing, please don't bug me about it. THIS GUIDE WAS MADE FOR 1.2! IT IS NOT UP TO DATE WITH THE CURRENT VERSION OF TERRARIA.
   
Díjazás
Kedvenc
Kedvenc
Törlés
Pre-guide details
This guide is not for people who want to experience the game without foreknowledge. It's detailed. That means how to get stuff, fight stuff, farm stuff and other stuffs. If that's not your thing, go somewhere else.

This is being updated all the time. I thought that I would put it up now so that people can start reading. More content is being added. Maybe not consistently, but hey, I'm a teenager. We're busy. Pictures will be added as well. They will be some funny gear that isn't pre-hardmode, but that's because I don't have time to do a full playthrough. Please excuse random text and OP armor, weapons, and accesories.

PLEASE keep the comment section frendly. I'm open to criticism and suggestions, but don't swear. Keep it nice for all younger readers.

And above all, ENJOY!!! Let me know it it was helpful and anything I can do to make it better. If you want, tell your friends. Especially if those friends want to learn how to play Terraria. Take it from someone who has played over 400 hours. <--------- Too much free time. If you have an item you have questions about, message me or check the wiki.
Just Spawned
So, here you are. A bright new world. Beautiful flowing hills and trees. Cute little bunnies hopping around. A strange man that wanders away immediately. Suddenly, a green blob hops and crushes a bunny, sending it flying. Run in fear or poke it (both are advised). This is a dangerous world, and almost everything will kill you if you let it. Pull yourself together and stop mourning the bunny. Another one just spawned.


The very first thing you want to do after spawning is look at your inventory (esc. by default. See controls under settings to change key mapping). The sword pokes. The pickaxe is for everything except chopping down trees. The axe is for trees. You can organize your inventory any way you want to. Just remember that holding left-shift will equip the item that seems the most important. Therefore, you can store the pickaxe and axe in the disappearing part of your inventory and still be able to use them.


Next, walk up to a tree, hold shift, left click and hold. Keep the cursor in one spot. In what seems like forever, the tree will explode into wood and acorns. Keep both. Continue to collect wood until you have 100-170, or if you want to keep going out for more or are impatient, get from 40-60. Each biome has it's own wood types from the trees, and they each look different, so it's worth it to chop them down.
House Building
Now, pick a nice spot for a home. Keep in mind; you tend to stay where you are, so choose wisely. The environment is fully destructible, so feel free to make a home in a hill if you want. Assuming you are making a surface home, clear and flatten the area, select your wood and left-click an open space. The wood will be placed and you can move on. TIP: Left-click does most things. Attack, mine, place, etc. Right-click only to interact with the environment. If you want, you can make a small cramped box to stand in. This is not recommended. Terraria says that to make a house that NPCs can live in, the house has to be 6 blocks tall by 10 blocks long, including the walls, ceiling and floor. The game has a built-in housing menu for testing for a suitable house or moving NPCs. To access it, click the little house on the far right side of the screen.This will show a question mark, used for testing a house, and a row of heads, showing your NPCs. At the moment you only have [insert name here] the Guide.


After exploring the NPC menu, look down to the bottom left. You will see a line of things you can make, the requirements to make it, and a black and white icon. Click it to see a huge menu of things you can make. What you need now is a workbench. To make it, click it. Very simple. From there you can put it in your inventory or place it directly into the environment. You can even move around.

Once you have placed your workbench, your crafting menu will have more options. Not many things can be crafted by hand, so if you want to make something stand by your crafting area. The first thing you want to do with the workbench is make a chair and place it in the house. Next you will need a back wall. Make that too. You will need about 32 walls. Place them inside the box your wood made. If you misclick, don't abandon hope. Make a hammer and recollect the walls. The only thing a hammer is good for is sloping blocks (just for looks) and removing walls. The last thing your house needs is light. So, kill a slime, which will drop gel. TIP: While not necessary, it is a very good idea to make a wooden sword. Short swords only poke, while broadswords swing. You can use that and wood to make torches. You will need a lot of these, so always have wood and gel on you, especially when you are going caving.

If you are finding it hard to get trees to grow with your acorns, find a relatively flat area, make it totally flat, go one block beneath the surface and dig a 1-block hole to put a torch in. You want these holes to be two blocks apart. It should go

GGGGGGGGGGG
BBTBBTBBTBBTBB

with T=torch, G=grass, and B=block. Make sure that the top layer is dirt and has grass on it. The blocks with torches underneath are where you will place the acorns.

So there you go. Your first house should be done. If you can't click the NPC's head in the housing menu and drop it into the house, count your blocks and move the furniture. The dimensions are six by ten, including the border. Also an NPC needs a few spaces to stand during night. You can just shove the furniture against one wall to be sure you have space. Just in case you still don't know what you need for a house, you need:
  • A ten by six box, including the walls.
  • A back wall
  • A table
  • A chair
  • A light source
TIP: The furniture and lighting have many different valid options. See the wiki about those. Terraria Wiki[terraria.gamepedia.com]
Exploration
Now that you have a safe base to come back to, it's time to get into the main part of this game, EXPLORING!

You may have noticed the large-ish mini map on the upper-left. You can see where you are and what's around you. Note that the map will show the brightest it has ever been in the area, so at night things will by dark unless you take a torch out.

Above that you will see your health. You start with 100. Every time you die and respawn, your health will be 100, then climb back up to the max. When an enemy hits you, you will take damage. If that goes to 0, you die. Hopefully a slime didn't kill you already. Whenever you take damage, a number will appear above your head, the same way it does for an enemy. You can get things called Life Crystals underground that will increase your max health. You can also find or make various things that will restore your health a certain amount. A great example is a mushroom. You can find these around the world on grass. Pick them up and keep them. To heal quickly, hit "h". When doing this remember that the first item in your inventory, going from top left to bottom right along the rows, will be consumed, and after that you can't use a healing item for 60 seconds.

On the far top right, you can see your mana. Each star is worth 20 mana. Mana is used by magic weapons and each weapon uses a certain amount of mana. More on this later.


Before you go exploring, make some wooden armor. It's not great, but neither are the mobs you will be fighting. The helmet will give you 1 defense, the chestplate will give you 1 defense, and the greaves will give you 0 d. d=Defense This may be bad, but each set of armor will give you a set bonus. You can check the wiki for all of these, but the beginning armors will give you extra d for a full set. The full set of wooden armor will give you a total of 3 d.

The way defense works is you take the number of d you have and divide it by 2, rounding any extra up. The number you have is how much damage the armor will absorb. EXAMPLE: 30 defense=15 damage absorbed. 21 defense=11 defense absorbed.

<---------
JUST AN EXAMPLE. THIS IS HIGH END, END GAME ARMOR.

Clad in splintered wood with a board as a sword, you are ready for adventure. You can head left or right. Some things to look for are:
  • Deserts for cactus and sand
  • Surface ores
  • Holes in the ground/hills
  • Pots and chests
  • Really weird landscape generation
These are really good things to get. The cactus can be turned into better armor and weapons, so get plenty. Sand can be used to make glass for building or for bottles and potions. You might get lucky and find a pyramid, which has good stuff in it and is pretty safe to go in. Ore is anything that doesn't look like stone and won't connect. Pots will often hold rope, which is great for going straight up or down without having to worry about placing blocks. They also hold torches, potions money and other things. Chests can hold a variety of useful items, which can be found here[terraria.gamepedia.com]. Be sure to pick them up once they are empty. You will want them later. The landscape generation is useful for later.

If you find any of these things, turn around immediately:
  • Strange red grass, trees and stone OR strange purple grass, trees and stone.
  • A mob called a harpy.
  • A very green place.
  • Something that looks like a fortress with an NPC outside.
  • A goblin scout or the message "King Slime has awoken!"
  • An ocean
The chance that you will run into these is from top to bottom. The red or purple place is the Crimson and Corruption respectively. You will only have one per world and the chances are 50-50. If you find it, flee in terror. The monsters in either can kill you easily. A harpy spawns when you are at a certain height. These have 100 health and a range attack. Flee in terror. The green place is the Jungle, a place that will kill you. The fortress is called the Dungeon. Continue to run. You can talk to the Old Man there, but DO NOT GO DOWN!!! YOU WILL DIE!! Try it if you want. The giant head oneshots you. For the scout, just run. Try to get to a defendable location to take him down. The King Slime spawn is rare, but if he does spawn, make a shelf so he can't get to you and kill him from there. If you hit the ocean, turn around. There's nothing out there but death and the end of the world.

You might find a snow biome. There isn't anything to hard here, but watch out for slippery ice and holes.

Once the sun starts setting, head home. You need a home to protect yourself from the night.
Night
Once the music changes, night has begun. New mobs spawn and a few new things appear. One of the mobs is the zombie. They aren't too tough, but you should be careful. If you get lucky, one might drop a shackle. This will give you extra defense and might have a modifier, such as "brisk" or "guarding". To gain its benefits, put it in one of your accessory slots under your armor slots. Certain zombies can also drop arrows. You also may have found some in your travels. To make use of these, make a bow. Twang! You can also turn these regular arrows into flaming arrows by combining them with torches. These have a chance to set the enemy on fire. Arrows have a chance to not break after shooting them, so be sure to pick them up. Another new mob is the demon eye. These flying enemies will drop lenses, allowing you to make some cool goggles. However, they can be tricky to kill in your present state, even with a bow.

A collectable that appears at night is the Fallen Star. If you collect 5 of these, you can make a Mana Crystal, which will increase your mana by 20. Your max base mana is 200. Stars are also useful for making potions, weapons, and other stuff, so hold on to them. Stars disappear once day arrives, so don't drop them during day. Now is a great time to get a few more options. If you got some stone earlier (i.e. 20), you can make a furnace. This doesn't really have any uses at the moment, but will be very important later. Also, if you got sand, you can turn some of that into glass and from there into bottles. Put one on your workbench to make an alchemy station. This is used for making potions, which are VERY good things to have.
Potions
This is a very good section to read if you want an early advantage in the game. In your running around, you may have picked up a daybloom or two. If you got some ore too, you could make an ironskin potion, which will increase your defense by 8. You can also make a regeneration potion if you have daybloom and a mushroom. Both of these potions require bottled water, which you can make by hand if you are near water and have a bottle in your inventory. Regular bottles can be used to make lesser healing potions and lesser mana potions. Mana potions aren't very important yet, so don't worry about those. For health potions, you need 2 empty bottles, a mushroom, and 2 gel. Just stand by your alchemy station.

There are many potions in the game. If you put a water bottle in the guide's crafting menu, he will give you a list of all the potions you can make and what you need for them. You can also see the wiki page on potions.[terraria.gamepedia.com]

In addition to those, there are some other affects you can get from using other potion-like things. You can get a Bowl of Soup, Ale, flasks, and a few others. Those are also on the potions page.
Mining
Night is a good time to go caving. However, you may want to wait your first one out. What you will probably want to do is make a few more houses, so that while you are underground, NPCs can spawn if you have met the requirements. Make three to five, one for the merchant, nurse, painter, dye trader, and demolitionist.

The merchant will spawn if you have 50 silver or more on you. You have to have it in your inventory. The nurse will spawn if you have used a Crystal Heart, the painter will spawn after you have found a painting, the dye trader will spawn if you have a dye ingredient in your inventory, and the demolitionist will spawn if you have an explosive in your inventory. All of these things can be found underground, so make the houses before you go down.


Once the zombies have run away, if you had found a large hole in the ground, go there and start going down. If you didn't, find a spot for a huge shaft. If you do the shaft, you just need to dig down until you find a cave. It's best to make it 3 wide for hardmode. When you're in a cave, you want to look out for a few things.
  • Ore
  • Gems
  • Silt
  • Red heart shaped things
  • Chests
  • Cobwebs
  • Traps
  • Places where there are a ton of monsters
  • Deep water
Ore is anything that isn't stone, dirt, mud, sand, snow, ice, slush, or silt. You will have either copper or tin, iron or lead, silver or tungsten, and gold or platinum. You will have one of the two in a section. Both counterparts do the same thing, although with slightly different appearances. Gems can made colored torches, grappling hooks, and mage items. The silt is for later once you have found an extractinator. The red hearts can be broken with a pickaxe and used to give yourself 20 extra health. Once you have found one, the nurse can spawn. Chests have great things inside. See here[terraria.gamepedia.com] for more information. Cobwebs are good for later, but if you see a cave that has a ton of webs and a dark background, don't go in it. That's a spider nest, and is very dangerous. Don't go in it yet. Traps are very dangerous and lethal at your level. You will find dart traps and boulder traps commonly. Dart traps will poison you, and boulder traps will crush you. The latter will oneshot you until you get a lot more health. There is a very rare explosives trap too, and this will kill you before you know what happened. To disarm these traps, break the dart trap, pressure plate, or the boulder. Not too hard, but hard to spot beforehand. If there is a huge group of monsters that can't get to you, range them. You will probably have some shurikans by now, so hit them with that. Last of all, you can't swim. Avoid deep water if you can. If you are stuck somewhere underwater, try to get to the edge or build up with blocks.

Once you have some stuff, try to head back up. If you die, sorry. Going up is harder than going down. As long as you have at least 1 gold after you die, your life will become easier.
Fresh air
Inhale that sweet smell of fresh air. The surface is a great place to be. You're so happy to be out, you hug a zombie. Yeah, don't do that. The best thing to do is go home and sort through the stuff you collected.

Start by turning all your ore into bars. Ore is useful for very few things, while bars are much better. Hopefully you got enough iron/lead to make an anvil. If not, place a chest, dump your stuff, and head back down. But you only need 5 bars, so you're probably ok. For the really lazy and those with a merchant, you can buy an anvil from him. So how much you can make depends on how much ore you got. I can't really tell you what you want to get because it depends on what kind of player. A melee player wants armor and a good sword. A ranger wants a good bow instead of a sword. It's really up to you. If you are a mage and found some gems underground, you can turn those into magic weapons.

At this point, you don't want to make anything decorative, mainly because you're wasting your materials. With this gear, you can head back underground. The first bit of the game is spent underground, just because that's where the good stuff is.

If you were lucky, you found a Glowing Mushroom cave. They have distinctive glowing mushrooms that you will have wanted to collect. They also have some hard enemies, so be careful. You can use these to make Lesser Healing Potions into Healing Potions that restore 100 health. These are very useful when you have more health. Glowing mushrooms are also used in turning Lesser Mana Potions into Mana potions. Both need two of their respective potion and can be combined to make Restoration Potions at both stages. Note that if you use a Restoration potion, the health cooldown does apply, so if you are a mage, keep some mana potions separate. Also keep in mind that once potions are Lesser Restoration pots, they can't be turned into their higher form.
Boss Gearing
So, you've gotten some Life Crystals, tons of loot, and stacks of bars. You might just have found a Suspicious Looking Eye in a chest somewhere. If so, congatulations, you have found your first boss summoner. If you didn't, kill a few demon eyes for 6 lenses, head for a demon altar, and craft one. Congatulations, you have made your first boss summoner. The next thing you want to do is get geared for this fight.

Side tip: At this point, you might want to make a sawmill, which gives you more options for crafting. You need 2 iron/lead and some wood. Turn one of the iron into chains and stand by the workbench. From this, you can make a loom, which will turn cobwebs into silk for banners, clothes, and beds. You could also make a pot to make soup.

Now, if you have been hanging around for a while with 200+ health, at least 10 defense, and 3+ NPCs spawned, there is a good chance that the boss we are gearing for has already spawned (1 in 3 chance). If you managed to kill it with a surprise spawn, I commend you. You either don't need this guide, got lucky, or are really good at dodging. Don't know what "You feel an evil presence watching you..." means? The boss is about to spawn. Don't use a SLE. You will get two bosses to fight.

So, assuming none of that has happened yet, let's prep. You are going to need about 250 wood for platforms for your arena. Just place a few rows of platforms, 4-5 should do it, and enclose it in a box. This is so that the shurikens will be easy to pick up. The best way that I know of to beat the boss is with shurikens. They are rather cheap and you don't need that many. 200-ish should do. If you don't want to do the platforms, just make the box, but know you're sacrificing some of your room to maneuver. If you don't feel like doing any of that, you really only need a flat area to fight on. Pop a campfire somewhere in the arena to give yourself a bit of life regen. Also, try not to build your arena on top of your house, as the boss can damage NPCs and kill them.

Last thing you need to prep is a few potions. You will want 1 ironskin potion (water bottle, iron ore, daybloom), 1 regeneraton potion (water bottle, mushroom, daybloom), a Swiftness potion (water bottle, blinkroot, cactus), an Archery potion (water bottle, daybloom, lens), and a slightly different buff. This one is called Well Fed and gives slight bonuses to all stats. You can get it by using a Bowl of Soup or a cooked marshmallow. The soup is easiest, requiring only two clay blocks, a goldfish, and a mushroom. To craft it, turn the clay into a bowl and stand next to a pot (iron). This will give you the buff for 10 minutes. For the marshmallow, you will need to move the merchant into a snow biome and buy marshmallows from him. From there, you can make a marshmallow on a stick. Just stand by a campfire for a few seconds and you have a cooked marshmallow. This will give you the buff for 10 minutes. You only need one of these to get the buff. You can also make Ale by turning sand into glass into a mug and standing by a keg (sawmill). This will increase your attack, but decrease your defense.

That's it. You're ready to fight the Eye of Cthulhu...
The Eye of Cthulhu
So here we go. The first boss in the game. Psych yourself up and give your pep talk to the Guide. He really doesn't care. Once you feel the cool of night, head out to your arena.

So if the Eye is going to spawn naturally, the message is going to appear as soon as the music changes, followed by the actual spawn a bit afterward. If you don't get the message, feel free to use the SLE. IF YOU DO GET THE MESSAGE, DO NOT USE A SLE. YOU WILL GET TWO EYES OF CTHULHU TO FIGHT!

Once the Eye spawns, you will hear a roar and the message, "The Eye of Cthulhu has awoken!" It will come from a direction off screen. Once it is in range, throw shurikens at it. At this point it will fire Servants of Cthulhu at you out of its iris. After a few Servant spawns, it will rush at you dealing damage. Avoid contact at all times. It will charge 3 times before it goes back to firing Servants. When it is doing this, it will attempt to stay directly above you. Stay still and throw shurikens straight up at it. They will fall back down and deal damage on the way down as long as it hasn't hit anything. They might get caught on the platforms you placed (if you did). The Eye will stay above you for a few seconds, then rush. It may take a few times to get the timing down. When it is chasing you, just throw shurikens or, if you have a bow, shoot it, as there will be no Servants in the way.


"Now this isn't that hard. He's almost down to half health. It's not even a challenge anymore." Yeah...no. Once you get the Eye down to 1400 health, it will spin, throwing bits of itself everywhere. Yeah, it's just as nasty as it sounds. While it may be tempting to just watch in horror as it turns into a giant mouth, don't. Now is a great chance to deal tons of damage to it. Once it is done spinning, its attack pattern changes. For one thing, it will no longer shoot Servants at you. Yay! Unfortunately, it doesn't stay still for very long and charges all the time. It does more damage during this phase, so dodging is a must. This is where the platforms come in handy. Dodge and fire. Don't stop firing. If you are using the flat land method, the best time to head the other way is when he goes above you. Just keep hammering it until it dies.
After the Eye
58...43...37...29...20...8...BOOM!!! "The Eye of Cthulhu has been defeated!" Shout for joy. Congratulations. The Eye of Cthulhu will explode and rain its loot down upon you. You will get some healing potions, some demonite ore, corrupt seeds, and unholy arrows if you are in a Corruption world. In a Crimson world, you will get crimtane ore and nothing else. There is also the chance it will drop an Eye of Cthulhu Trophy (10%) or Binoculars (0.67%).


So you have this new ore, Demonite/Crimtane. Depending on your play style, you will want to make the sword or bow. They will carry you to victory. If you don't have an empty house, make one. Now that the Eye has been killed, the dryad will spawn. She sells various nature based things. The one thing you want now is Purification Powder. This will turn Corrupted/Crimsoned blocks into their normal counterpart. With this in hand, you can head for the Corruption/Crimson. But wait a minute. Before you go, you will want to have a grappling hook and a gold/platinum pickaxe. The grappling hook is so that you can survive and the pickaxe is so that you can get what comes next.

The pickaxe is so that you can get stuff post Corruption/Crimson. Also, it mines faster than your lame copper one. It's pretty easy to get. Just mine. The grappling hook is something you will treasure all throughout the game. You can make them from 15 of any gem or a hook and chains. The hook is a rare-ish drop (4%) from Piranhas, Skeletons, and Undead Vikings (Snow Skeletons). Grappling hooks have different ranges. See here[terraria.gamepedia.com] for more information.

Once you have these valuable items, stock up on bombs and purification powder and head for the Corruption/Crimson.

(From this point on, both will be called the Corruption because it came first, UNLESS there is an important distinction.)
The Corruption/Crimson
NOTE: This section of the guide is for people with a Corruption, not Crimson.

The Corruption. An evil place where disease wallows. The grass cracks as you step on it. Flying cockroaches dive from above. A strange new plant called deathweed grows. This is not for the faint of heart.

A good range weapon is ideal for the Corruption, as the monsters tend to stay out of melee range. Collect some deathweed. You'll need it for later. If you go along for a bit, you will find a giant gaping hole. Jump down it if you like. Enjoy the splat your body makes. An easier way to get down is to use your cloud in a bottle, if you have one, just before you explode into bits. Or, if you followed my advice, you can use your grappling hook. Or if you have an absurd amount of rope, use that.

Once you are at the bottom of the chasm, go left or right in the big area you found. Note that not all of the chasms lead to the giant cave. You will see lots of demon altars and some purple orb encased in ebonstone. If you use your purification powder, it will turn into regular stone. If you're too lazy for that, use bombs. They can blow up ebonstone, but be careful not to blow yourself up. The demon altars, and the blocks they are on, can't be destroyed at the moment. Not with bombs, dynamite, hammers, pickaxes, dye traders, or anything else.

Once you have drilled your way to a Shadow Orb, break it with your hammer. You will see the message, "A horrible chill runs down your spine..." You will get a musket and some ammo. Now the Arms Dealer will spawn to sell you gun stuff. Also, there is a 50% chance you will get a meteorite to drop the next midnight. There are various shadow orb drops that can be viewed here[terraria.gamepedia.com]. Note that the meteorite drop chance will not increase if you break 2 shadow orbs in a row. Break one, wait for midnight. If one doesn't drop, go break another orb. However, DO NOT BREAK THREE ORBS! Once you do, the next boss will spawn and murder you.

Also, once you break a Shadow Orb and have 200 health, there is a 1/15 chance that a Goblin Invasion will occur at dawn. Because of the low chance, you should be ok for a bit. See the section on the invasion for how to beat it.

---------------------------------------

Crimson

NOTE: This section of the guide is for people with Crimson, not Corruption.

The Crimson. A bloody field with horrors roaming. Who knows why they're there. Maybe they are fallen soldiers on this war torn battlefield. Maybe.

So anyway, head to your Crimson and find a big thing that looks sort of like a mouth made of crimstone. There will be a winding tunnel leading down. Follow it and watch out for spiders. They are tough and are rather knockback resistant. Try to deal with them from a distance. Just keep going down and try not to die. You might see a large mass of gunk. Those are Demon Altars. They can't be destroyed at the moment, and trying will take away half your health. After a while, you will reach a giant hole in the tunnel. Feel free to kill yourself and jump. If you have a cloud in a bottle or a ton of rope, you can get down pretty easily. The grappling hook is a bit harder, as the cavern is basically a giant ball shaped hole. You could try to fire it at the ground just before you land, but it's pretty tricky to do.

Once you are at the bottom, go down a shaft. There should be about five in each mouth thing. Once you reach the end, there will be a heart-looking thing encased in Crimstone. Blast your way in or purify the stone and break the heart. The message, "A horrible chill runs down your spine..." will appear. Someone just vowed to hunt you down because their heart broke. Ha ha ha..ha......ha........You will get The Undertaker and some ammo. Now the arms dealer will move in. There is also a 50% chance that a meteorite will fall at the following midnight. There are a variety of things you can get from these hearts. See this[terraria.gamepedia.com] for all of them.

The best thing about The Undertaker is that when it has a prefix, it can be called Slow The Undertaker, or Deadly The Undertaker. Just for the laughs.

If a meteorite doesn't fall, go back and break another orb. DO NOT BREAK THREE ORBS (hearts). THE NEXT BOSS WILL SPAWN AND SHRED YOU TO BITS. Also, the girls will vow revenge. <--- Twisted sense of humor. Try not to stay too long, as you may get killed. If you have a Magic Mirror, use it. Or if you have a Piggy Bank, put you money inside, take the pig, and kill yourself. Or if you used rope, go out that way. Using the grappling hook is hard.

Also, once you break a Demon Heart and have 200 health, there is a 1/15 chance that a Goblin Invasion will occur every dawn. Because of the low chance, you should be ok for a bit. See the section on the invasion for how to beat it.

Once you are home and safe, just wait for the sky to fall.
Out of the Sky
Your one and only warning of rock from outer space. Get some blocks and sharpen your sword. Then head out to see what this stuff is.

Head left or right. You have a 50-50 chance of finding it. Once you are there, the music will change and you will see a big mass of glowing stone lining what is as close to a crater as you will see. Be careful. This meteorite is hot to the touch so be careful. Even grappling to it hurts you. Build a border on the ore to mine it, then get rid of it to keep going. You will also see a new mob called Meteor Heads. These spawn when there is 50+ meteorite in an area. They are really good for farming later, but are dangerous now. Don't let them hit you, as they do lots of damage and can set you on fire. So mine as much as you can before you get scorched.

TIP: If you are dying a lot, make a small house near the meteorite and set your spawn with a bed. This makes dying a lot less painful.

Since your pickaxe swings, try to kill Heads with it while still mining. There's not much to mining meteorite, but it can still be tricky. Once you have collected it all, head home.

So with your new ore, make some bars. With these, you can make some great stuff. For the melee player, there is the phaseblade, requiring 20 meteorite bars and 10 of any one gem. The gem will determine the color of the blade, but will not affect any of its atributes. For the ranger, you can make meteor shot, a bullet type that will bounce off walls. You will need 70 musket balls and 1 bar to make 70. There is also the Star Cannon, but this is only useful if you have lots of Fallen Stars. To make it, you need 20 bars, 5 Fallen Stars, and a Minishark (Arms Dealer). For the mage, this is your stuff. With 30 bars and 2 Fallen Stars, you can make a Space Gun. It is very fast and great for starter mages. There is also armor which benefits the mage, requiring 60 bars to make a full set. It gives you 16 defense and the set bonus is that it lowers the mana cost of firing your Space Gun to 0, meaning you can fire it forever. It also increases magic damage. There is also the option to make a Meteor Hamaxe, which is 35 bars to make, and acts as a hammer and an axe at the same time.

Now, with gear forged with glowing rock from the sky, the Corruption/Crimson awaits you...
Wormy Corruption Prep
NOTE: This section and the next one is for Corruption worlds only. Read these sections completely BEFORE following. Things aren't always in order. Feel free to do some more mining in between the chapters. :P

So, here you are. Back to the flying cockroaches. Now that you have your meteorite gear, you can survive a bit longer here. <--- Natural poet. So what you want to do is chop down some trees. This ebonwood won't spread the Corruption like the grass will, so feel free to use it in your house. The grass will only spread until it hits stone, sand, mud, or clay, so it's really nothing to worry about. At the moment, the wood is good for platforms. You will need enough to have 3 layers of medium length platforms. This is your next boss arena. Make sure you have a way to get up to them and have them a bit off the ground. What you're going to be fighting has some serious jumping power. Also, cover up any chasms under the arena so that no drops fall down. Have an easy way up and down the shaft, like platforms, or if you're really good at grappling, just do that. Next, head back down the chasm, and find another orb. Blast or purify your way to it and break it.

If you got a Ball o' Hurt, congratulations. The fight just got easier. This is going to be your main weapon during the fight. If you got something else, like a vilethorn, that's pretty good too, especially for the mage player. If you got a Band of Starpower, use it. For a ranger, just go make some Meteor Shot for your musket. Use some shurikens left over from the Eye and grenades. If you got a Shadow Orb, know that the floating ball does nothing but provide dim light and lame moral support.

For the fight, you will ideally have at least 260 health. I wouldn't suggest it with less. In terms of buffs, the Ironskin, Regeneration, Swiftness and Bowl of Soup/marshmallow works best. If you found a Hunter potion in a chest, use that too. A Shine potion helps too. And of course, have a few Healing Potions with you.

So when you are ready, head down and break the third Shadow Orb. If you don't want to break the third orb, you can make Worm Food with 30 Vile Powder from 6 Vile Mushrooms and 5 Rotten Chunks. It can be crafted at a Demon Altar. The boss will come after you immediately, so be ready to run.
So...How Long is It?
"The Eater of Worlds has awoken!" Wait for it. The giant worm bursts out of the ground. Now you see why you wanted the Hunter potion Attempt to move. The Eater has only one attack, which is to charge you. Once it is out of the ground, it has no control, which means that it will quickly fall back into the ground. A concequence of this is that it can easily trap you in its coils. To avoid it, if you see the worm coming from the left, go left. Then you won't be inside the rainbow of death and scales.

Sorry about some of the pictures. I don't know how it happened and don't know how to fix it.

Now, to fight it, pick your class and follow the instructions.

Melee

Your best bet is to go in with your phaseblade. If you got lucky with your orb drops, use the Ball. It will go through multiple sections and damage them all. It will do the most damage if you throw it through the face of the beast, but the head does the most damage, so be very careful. You can also hold left-click to let it bounce around. This can be hard to control and can take you closer to the worm than you want to. If you aren't opposed to using some grenades, use them. They damage multiple sections at once, but can cause you to take damage if you are too close.

Ranger

Ranger can be a little tricky to use, and you'll see in a minute why. But Jester's Arrows work best, because they pierce. You will still want to use the Ball 'o Hurt at some point if you have one. See Melee for how to use it. Shurikens and grenades are good to use as well. If you want to use the Musket, make some Meteor Shot and go to town.

Mage

Mage is a great class to take on the worm if you made a Space Gun. The thing will easily destroy the great beastie. You can also use the Vilethorn if you got one. Since it stays for a few seconds, it can be very deadly. Pack a few grenades too.

If you got a Ball, use it. It and grenades are your best bet for this fight. Blame the game.

So, about how to fight this thing. If you have a Ball, try to throw it along the body. This way it will do the most damage. For the Vilethorn, Space Gun and Jester's Arrows, do the same thing, except with the arrows, try to shoot down the worm, toward the tail. When throwing grenades, stand well back, as they tend to explode. PRO TIP: Never eat a grenade. In video games or in real life. ;)

So eventually, you might notice that the worm has different health bars at different amounts, but normal worms don't. Well, in case you didn't notice, THIS IS NOT AN ORDINARY WORM. If you kill one segment, that's all that dies. The one segment. So does the rest of it just sit there? NOPE! It will grow its own head and attack you by itself. So, yeah. Be careful. The smaller worms are easier to deal with, but are sneakier too.

The great thing about this boss is that you don't have to win to get the loot. Yep, death is ok. The worm will, of course, flee, but when you kill a segment, it drops Demonite ore or Shadow Scales, both of which you need to craft you Corruption gear. If you kill the worm, you do get the message, "The Eater of Worlds has been defeated!" and a bunch more stuff, but you can tecnically fight it with full Shadow armor without having killed it for the first time. I would advise however, to try to kill it. It's best not to have a giant worm that can eat planets digging around (not that it actually does anything to your world).
Scaly Hide Pieces
Once the final pieces of the giant worm are dead, examine what you got. You will probably have gotten about 150 Demonite ore and about 40 Shadow Scales. This is about what I got from a fight. Just so you know. So with the loot, you want to turn all the ore into bars. They are much more useful than just the ore. With that, you want to make a Nightmare Pickaxe. It doesn't matter how tempting better armor is. You need the pickaxe so that you can mine obsidian, ebonstone, and hellstone. Hellstone is the next ore to get, and yes, it's in the Underworld. Before you start tunneling, try to fight the Eater a few more times, just so you can get the armor and other stuff.
There's Blood Everywhere
Now time for you Crimson people to get some help. THIS IS FOR CRIMSON ONLY. Why you have a hard time figuring that out, I don't know.

So clad in your own body heater, head for the Crimson. Bring bombs or Purification Powder. Time to break some more hearts. :P You want to go back down the hole and into the large cavern. Before you go, make sure you have some wood for platforms. The next boss to fight is pretty tricky and you will need the room to move.

If you have a 2nd heart to break, do that now. DON'T BREAK A THIRD HEART! The boss will spawn and shred you. If you don't want to break hearts to summon him, kill some stuff and get some vertebrae. 15 of them and a Demon Altar will get you a Bloody Spine. This will summon the boss no matter what time it is, so be careful. One mis-click...and you can join the Face Monsters down here.

For the fight, make an arena that has about 5 layers. Do it underground because it doesn't make a difference. Make it as long as you want (long). With that ready, prep some buffs. You will want an Ironskin, Regeneration, Swiftness, and a Bowl of Soup. Or a marshmallow. You won't need a Shine or Hunter like you would for the Eater of Worlds. You can place torches on the wall and this one doesn't burrow.

If you think you're ready, break the heart or use the Spine to summon the Brain of Cthulhu.
Gross in a Brand New Way
This wonderful message tells all. Apparently Cthulhu wasn't satisfied with tearing out an eye and torturing us with it, so he cracked his skull and threw this at us. Cthulhu is being questioned about his motives now.

But you still have a giant brain to worry about, so let's get back to that. This boss is actually invulnerable in its present state. Don't bother with the brain itself. Instead focus on the Creepers flying around. For all you Minecrafters reading this, these are not the creepers you are looking for. These are flying disks that do not, in any way, explode. You want to focus on these first. Keep an eye out (lol) for the Brain too. It can still hurt you and can't be knocked back. When it phases out, watch the creepers. They will go straight to the Brain and can tell you where it is when it phases back in. Once all the creepers are dead, the Brain roars, splits open its mouth (again) and you can see what looks like a heart with an eye in it. Oh yeah, it comes after you too. Now it can be hurt and knocked back, go shred it. It can still teleport, and does much faster, so look out for that. FUN NOTE: The Brain is the only boss that is susceptible to knockback. ;D

Melee

For everyone wanting to melee this boss, the first thing you want is a good sword and a spear. If you got a Rotted Fork from a heart, that's great. It's very good against the second form. For the first, swing your sword and dodge. That's really all there is to it.

Ranger

For a ranger, you will want to use Jester's arrows or Meteor Shot. They both pierce, so you can hit multiple creepers. But, because of the constant flow of creepers, it can be hard. For the second phase, you want to have something really fast or switch to a spear. The boss comes after you really fast.

Mage

If you are a mage, the Crimson Rod works pretty well. It will shoot out one cloud that will stay in one spot and rain on enemies, damaging them. The Space Gun works pretty well too, as it can hit multiple Creepers at once. It's nice and fast too.

The best combo for this boss is probably the Space Gun and Rotted Fork. The Gun really tears through the Creepers.

Just like the Eater of Worlds, you do NOT have to win to get the loot. You will get more of it, but it is possible to fight, die, and make new stuff, as long as you killed enough Creepers, because they drop materials when they die. Remember this and take advantage of it. PRO TIP: This is a really bad strategy if you are playing Hardcore.
It's done...and there's even more blood everywhere.
Once you manage to kill the Brain, you will be showered with gory bits and pieces. Please keep in mind that this place is themed on blood. Anyway, the Brain will die and give you some more Crimtain Ore and Tissue Samples. Head for home before the stuff starts seeping into your boots (yes, the ones you don't have).

Once you turn the ore into bars, make a pickaxe. This will let you mine Crimstone, Obsidian, and Hellstone. Then, with what's left, make some armor or whatever. The armor set bonus is faster life regeneration, which is very nice. Just make whatever you want, and, if you need to, fight the Brain a few more times.
The Army
So now that you have you new tricked out arsenal, let's put it to the test with some goblins. If you traveled towards the ends of the world, you might have seen a goblin scout, and, if you killed it, gotten some tattered cloth. The cloth is used to craft the goblin battle standard, which summons a goblin horde for you to obliterate. But usually one in announced before you can collect the cloth, so don't worry about it too much.

Once you break a Shadow Orb/Demon Heart and have over 200 health, there is a 1/3 chance the army will invade. Once you defeat them for the first time, the chances go down to 1/15, so you won't have tons of invasions.

Once the event is announced, you will have a few minutes to prepare for the horde. Goblins can kick you doors open, so don't think you can just hide in your house. An easy way to solve this problem though, is to stick a block in front of the door so that it can't open. Then you can run up to your roof and rain arrows down upon them.

As far as what you are fighting, there isn't anything too hard. There are 5 different enemies that can spawn:
  • Peons
  • Sorcerers
  • Thieves
  • Warriors
  • Archers
The peons, thieves, and warriors all just run at you, but are rather resistant to knockback. Archers behave like the others but have bows that they will shoot you with. The hardest enemy is the sorcerer, as it can appear anywhere and shoot magic bolts through blocks at you. Take these out as soon as they spawn. With that in mind, you should have no problem with this event.

In the aftermath, you will have a large amount of money, a large collection of spikey balls, which are like grenades, but don't explode, and perhaps a Harpoon or two. This is a super helpful weapon, and is very fun to play around with. It can be fired repeatedly by holding down left-click and can be fired whenever it returns to the player. This combonation makes it very powerful at close range, but dangerous if you are around a lot of platforms. In addition, once you have defeated you first army, the Goblin Tinkerer can spawn near you while you are underground. He sells the rocket boots, an accessory that allows you to fly, the Tinkerer's Workbench, that allow you to combine certain accessories, and other things. He will also reforge your weapons and accessories to change the modifier and make it better or worse. See here for more on that.[terraria.gamepedia.com]
So Steamy...
So with your new gear, you want to go to the Jungle. While very dangerous, you should be able to handle it by now. So head over there. And watch out for hornets, bats and man-eating Man Eaters.

So once you are there (if you found the Dungeon, you need to turn around), look for a hole in the ground. If you seem to die a lot, consider making a house with a bed in it so that you spawn there when you die, saving you the long trek back. Look out for thorns, which will hurt you. Once you find one, go down. This is very simple. If you are having dificulty doing this, go back to the tutorial that doesn't exist. WASD isn't that hard.

But anyway, these caves are huge, so watch out. The grappling hook is going to come in handy here, so don't forget it exists. Something in a Bottle will help too. There is water everywhere, making it ideal for piranhas. If you look around you will find some glowing green things. Hit them to get some Jungle Spores, which are a very important crafting ingredient. Stingers will drop from hornets and Spliked Jungle Slimes, which are also useful. Finally, Man Eaters will drop vines, which can be used to make a better grappling hook.

Some things you can find in the Jungle are little huts with chests in them and a large, orange-ish thing. The orange thing is the Temple. This is for Hardmode and is end game stuff. You can't break the blocks. Only one pickaxe is strong enough, and you have to go in the Temple to get it. There is a door, but it's locked, and only a boss drop can open it. Just keep exploring.

So once you have a bunch of materials, or die, head home. I would recomend having at least 3 Vines and 12 Jungle Spores, so that you can make an Ivy Whip. It has a long range and can have three lines out at once, making it good for being Spider-man. You should also get a Blade of Grass before you move on, and for the boomerang people, a Thorn Chakram. Both of these have a chance of poisoning enemies, so they are even cooler. Hold onto your Corruption/Crimson sword. It's really good later on. Now you should be ready to take on the Dungeon.
Semi-optional Stuffs
So at this point there are some distractions you can have fun with. One is the Queen Bee and King Slime bosses. Niether are super important, but both are fun. The King Slime is found in the outer 1/3 of the map as a rare spawn. Or you can make a Slime crown with a bunch of gel and a crown made of gold or platinum. Make it at the Demon Altar.

For the Queen Bee, you need to look for a hive in the Jungle. They are filled with honey, a liquid that will give you regen for a while. There is also usually a Bee Larva in a cocoon like thing. It can be broken with an attack so be very careful. A simple arena will work, and can usually be made inside the hive itself. The bee is not too hard, but can be a bit tricky. A ranged attack is your best bet. Once you kill it, enjoy some of the fun loot. This boss can be resummoned using an Abeemonation. Ask the Guide about it. FYI, it uses hive blocks.

Once the Queen Bee is defeated, the Witch Doctor can spawn. He sells many things in Hardmode, but for now he sells the Imbuing Station, which gives melee attacks special abilities.

Now, in each world there are some floating islands way up in the sky that have very good loot in them. You can find them by either using a Gravitation potion and flying around, or by looking for strange land generation. From there, you can either build up to it or use a potion. There are three different things you can get from the islands: the Starfury, a Lucky Horseshoe, and a Shiny Red Balloon.

By now, you will have found a few mobs that can drop rare items, so if you are into that, go for it.

Other than that, congatulations! You are about half-way through the beginning of the game! :D
To The Dungeon
So once you've had your fill of the hot, steamy, green Jungle, you can head for the other end of the map. This holds the Dungeon, a strange, fortress-like structure that extends deep underground, gaurded by a crazy old man and gigantic spinning heads that attack if you go too far down. It's going to be soooooo much fun.

Before you leave, you will want to collect a few things. A bed so that you can set your spawn, a decent amount of wood for platforms and torches, and whatever you feel like fighting a boss with. I'll tell you that later. Once you have that stuff, start walking.

Once you are there, make a little house with a bed and a workbench in it. Don't set your spawn yet, as you might have forgoten something. Ideally you have a Magic Mirror by now, so you don't have to walk both ways. Now it's time to prep the arena. I did say you would fight a boss.

The top of the Dungeon is a nice place to make the arena. You just need a ton of platforms. You really shouldn't need help making this one. Two or three layers should do it. Just make sure the layers are long.

For buffs, you will want the typical Ironskin, Swiftness, Regeneration and Well Fed pots. You may want a Hunter and/or Shine potion, as it can be rather dark. That's pretty much it. If you haven't forgoten anything, set your spawnpoint and wait for night. That's the only time Skeletron comes out to play. >:D

Fun Note: The Dungeon that was in this world was buried in a hill, so I had to blast it out so that you could see what it really looks like.
Skeletron and the Temple of Himself
Just kidding. It's a Dungeon, not a Temple. That comes later. Anyway, Skeletron is only available to fight at night. The way you summon him is you talk to the Old Man wandering around, who mumbles things about being cursed and you being worthy of fighting his "master". What ever that means. But once the moon comes out, he has an additional option, Curse. This does not mean he is going to say some mean things about your face and your mom. It makes his head and arms grow to unimaginable sizes and explode into a skeleton. Player, meet Skeletron. Skeletron, kill him.

Now that the introductions are out of the way, you have a flying skeleton head to worry about. So hop up on those platforms and start attacking. Quick note: You will want to have full health (400).

For melee, you will want to use your Blade of Grass and Thorn Chakram. It's really not that hard tactics, just a hard fight. You want to target the hands first, as some of those attacks can be deadly. Just keep going at him.


For ranger, you will probably want to use a minishark. It's a very powerful weapon at this point in the game, and has a chance not to consume ammo. Paired with Silver Bullets or Meteor Shot, it can be super effective. If you do use Meteor Shot, be sure to try to line up shots so the penetration effect is effectively used. You can also use your Corruption/Crimson bow, paired with Flaming or Unholy(Corruption only) Arrows.


For mage, there are so many different weapons, it's hard to pick, but since you don't have especially good magic weapons yet, you might want to use another class. If not, the Crimson Rod, Vilethorn, and Space Gun all work pretty well.

The key to this fight is to be able to dodge quickly. Skeletron will attack you with his hands, which do a lot of damage. You will want to target these first. It may take a minute, but his attacks are very easy to predict. Eventually, he will roar and start spinning his head. While it's spinning, his defence goes way down, so hit him hard.

Another important detail is that Skeletron will retreat when morning hits, just like the Eye. Unlike the eye, however, Skeletron gains the invincibility of a Dungeon Guardian when this happens. Each hit will do 1 damage, and 2 if you get a critical. But you usually don't have the option to run for your life, as the way you will find out that it's morning is that Skeletron will insta-kill you. So do your best to finish him before day comes.

Upon death, Skeletron drops a few health potions and money, along with a change to drop a Skeletron Mask, Book of Skulls (mana weapon), Skeletron Hand (a grappling hook with the added bonus of being able to slap things), and his trophy. And finally, he allows you entrance to the Dungeon. Without getting mauled by gigantic heads, that is.
Down to the Depths....
With Skeletron defeated, you gain access to the Dungeon. A place where skeletons run rampant, with traps all around. But what they guard is much better. But first you have to get past the undead hordes. Just another adventure, right?

Once you start going down, you will be following a winding path leading deeper. Eventually you will hear the music change to some of the coolest in the game. You will begin to come across Angry Bones, which are like skeletons, but much more deadly. You may find some swinging Spiky Balls, which are to be avoided. Strange candles on ledges will increase the spawn rate of mobs. The shelves are filled with dusty tomes. There is one you should look out for in particular. When you mouse over it, it will show a spell book. This one is called Waterbolt. It uses mana and fires a slow moving bolt that will bounce off of walls. There is an NPC down here too, the Mechanic. She will appear bound, so you will have to free her. She can be killed quickly, but it never takes long for her to respawn. She will move in once she is freed.

So none of the enemies have tricky attacks, really. They all are just hard to kill. Angry Bones will just run at you, but can pile up quickly. Dark Casters will fire magic bolts that pass through blocks. Cursed Skulls will make you a big target for a few seconds (ie. you can't use any items). Sometimes you will come across a Flaming Wheel. These will go along the wall they are on, and go onto doors too. There is also the Dungeon Slime, which will drop a Golden Key when killed.


Scattered around the dungeon are gold chests. They are all locked, and Golden Keys will open them. The keys are a guaranteed drop from Dungeon Slimes, but have a chance to drop from all Dungeon mobs. They can also be found in Wood chests in the dungeon. In addition to these two standard chest types, there are the Biome Chests. These are unique chests that require a key from each biome to open. In each Dungeon there is a Frozen Chest, a Jungle chest, a Corruption/Crimson chest, and a Hallow chest. They each contain a legendary weapon. But, you can only get the keys in Hardmode, so just try to remember the locations.

So in the gold chests, you can find 1 of 7 treasures,
  • Aqua Scepter
  • Magic Missile
  • Blue Moon
  • Cobalt Shield
  • Handgun
  • Muramasa
  • Shadow Key
along with some other, more basic loot. Don't worry about what each one does. Just grab it and keep going. Once you are done exploring, head home.
Your Fabulous Prizes
So now that you are safe and sound in your rather large base, it's time to examine the loot. You will have a ton of bones, which you can make the Necro armor out of. You will also have some coins, potions, ammo, and other odds and ends. But the best stuff is what I mentioned in the last section.

There are seven different special items that can be found in the Locked Chests scattered around the Dungeon.
  • Aqua Scepter - This is a magic weapon that shoots a stream of water in an arc, damaging anything in its way. It can be very good for crowd control.


  • Magic Missile - This is the first of the controlable magic weapons. It fires bolts that can actually be controlled by moving the mouse around while holding left-click. This makes it very good for attacking enemies around corners.


  • Blue Moon - The Blue Moon is a very good flail. It has no special effects, other than having a long reach.


  • Cobalt Shield - This amazing accessory will negate all knockback. But the real selling point is that it can be combined with an Obsidian Skull to negate damage from Meteorite and Hellstone, making it a must, as we will be going to the Underworld next, the home of Hellstone.


  • Handgun - A decent gun, great for any rangers out there. It can be combined with some Hellstone Bars to make a Pheonix Blaster.


  • Muramasa - Another must for your collection. This sword is one of the fastest weapons in the beginning game. It can be combined with a few other swords to make the best blade before Hardmode.


  • Shadow Key - Not exactly essential, but can be used to unlock Shadow Chests in the Underworld, which hold powerful weapons.


So there you have it. That's everything you can get from the dungeon as far as loot goes. Feel free to head back and get anything and everything from the environment, but I would suggest not taking all the banners, as you will need to be able to identify certain areas later. In the meantime, grab your best gear and a pickaxe, because we are going straight down next.
The Great Pit
Or as it is better known as, the Underworld. Filled with lava, demons, and weird pillar-like buildings, this is one of the safest areas in the game. ;D Not.

But before you go melting yourself into goo repeatedly, you should grab a few things. For your hell survival kit you will need some stone or dirt, your Nightmare or Deathbringer Pickaxe, and some Water Walking potions. Despite their name, the potions will allow you to walk on lava too. Just don't press down, or you will find yourself WAY too hot. Water has pretty much no effect in the Underworld, as it will quickly evaporate.

For a quick way down to your new favorite biome, it is very effective to turn on your smart cursor and position it so that you are continuously mining the two blocks directly beneath you. Just watch out for lava and water beneath you. You could dig off to the side, but that tends to lead to messy splats and taking more time as you will be dying in the Underworld. Just try to divert the lava or get under it and mine like mad.

Well now that you are in this giant cavern, it's time to look around. There's lava, ash, more lava, and some flaming bats, flaming slimes, giant bone worms, and flying demons. And one of them likes to play with dolls. Don't let those dolls play in the lava. They are called voodoo dolls for a reason. And everyone loves the Guide....right?
The Final Grind
But seriously, don't throw the doll in the lava. You will end up very dead. Instead, start digging around for the hot ore scattered around. If you don't have an Obsidian Skull or Obsidian Shield (Cobalt Shield and Obsidian Skull combined), go back up and get one of the two. That way you won't be constantly burning. Now this Hellstone isn't like other ores. It's been down here soooo long, it absorbed some of the lava around it. And when you break it, that lava comes out. so don't stand on one block of it and mine that one block. The ore is nicely lava proof though, so you don't have to worry about it melting away.

If you want to get all the gear from this ore, you will need to mine exactly 456 ore. If you want explody arrows, you will need a bit more. But this isn't normal ore, so you need one piece of obsidian for every three pieces of Hellstone ore to make one Hellstone Bar. Oh, and you need a Hellforge, which can be found in the various buildings. Just watch out for the red Hellstone brick ones. Those burn just like the ore.

If this whole process sounds like too much, just get enough for the armor and pickaxe. If you don't want to do any mining, too bad. You will need the pickaxe to proceed in the game. If you have been collecting the swords I've been talking about, you will want to make a Fiery Greatsword as well. Once you have that one, your super sword count should be at the grand number of four. The Light's Band or Blood Butcherer (Corruption and Crimson worlds respectively), the Blade of Grass, the Muramasa, and the Fiery Greatsword. Just hop along to your nearest Demon Altar and make a Night's Edge today. Congratulations, you have the best sword in the game.........for now....
YOU SHALL NOT PASS!!!
So with your new armor and weaponry, I bet you're thinking that there isn't much left for you in Terraria. I mean, where's the challenge? Well, abandon those thoughts of boredom. You need all the room in your head for the terror you will soon be feeling.

But not quite yet. First, you need a bridge. Something that will cover all the lava that you really don't want to fall in. So grab some ash. I'm sure you have plenty by now. Pick a decent level and start placing blocks. Your bridge needs to be pretty long, as you will be doing a lot of running.
132 megjegyzés
✪ T2C SYCX™ 2024. okt. 16., 15:46 
Update this ? XD Zenith is best sword in the game currently and i know u know
Latte 2021. okt. 10., 6:43 
Without you I wouldn't know what to do in this game. Thank you so much!
Azzy Dreemurr 2020. aug. 23., 6:00 
I can be wide but not as wide as this!
Vanessa 2020. márc. 11., 3:24 
Really sorry to bother Mr @Aroband but I would like to know if there is second part of your amazing guide for the hard mode..Thank you so much for your work,I wouldnt possibly learn to play the game without this!
Lucky 2017. febr. 17., 16:13 
Can you guys please stop commenting ''nice ass'' on my profilerino :(
Taoist Ascendant 2015. júl. 1., 5:15 
Dear author i Noticed a Misspelling in Your Its Done With More Blood Section

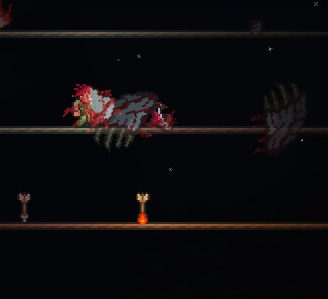
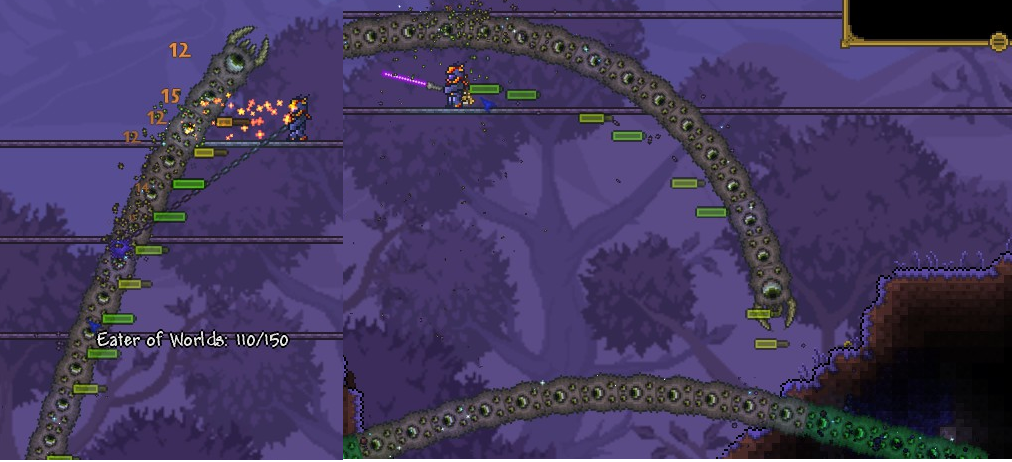
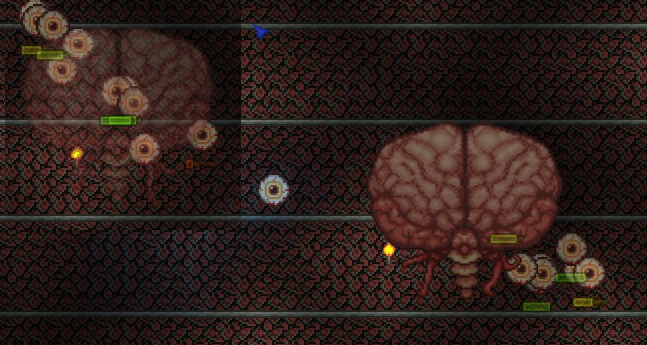
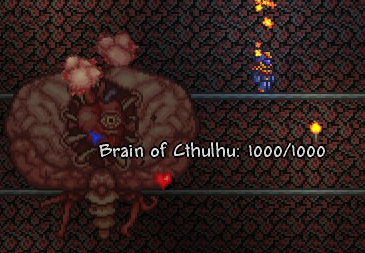
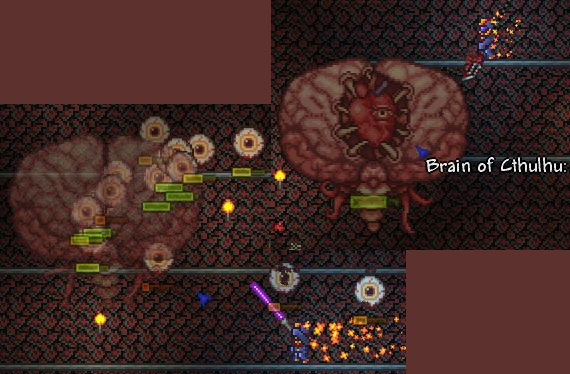
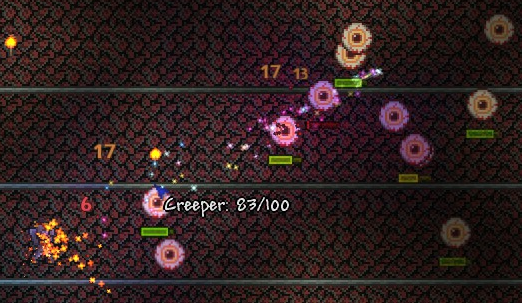
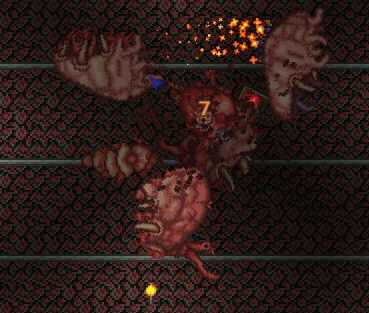
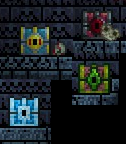
"mind that this place is themed on blood. Anyway, the Brian will die and give you some more Crimtain Ore and Tissue Samples" ^Brian>Brain

Now What i think about this guide:
I say this is an impressie in Dept Guide Good Job Author!
Jungaro 2015. ápr. 3., 21:57 
ok thanks :)
Aroband  [készítő] 2015. ápr. 3., 17:47 
All of the background blocks have to be placed by a player. Naturally generates walls don't allow NPC's to live in the house. Try tearing out all the walls and replacing them.
Jungaro 2015. ápr. 3., 17:31 
for some reson when i try to havemy guide move in it says it is not valid housing can you please explain why? my house ------> http://steamcommunity.com/profiles/76561198096733495/screenshot/532889637740280635
Mental Omega 2015. márc. 14., 19:38 
Man hardmode has been throwing blood moons at me every night lol