Märchen Forest: Mylne and the Forest Gift

Märchen Forest: Mylne and the Forest Gift

56 ratings
Märchen Forest: Mylne and the Forest Gift (Complete Guide, NO DLC)
By sylardean
A complete guide/walkthrough for 'Märchen Forest: Mylne and the Forest Gift'. I have also included much more information like Item lists, boss chest loot lists, a bestiary, Equipment list, and much more, ENJOY! THIS guide DOES NOT give walkthrough for the Japanese DLC. Don't forget to RATE and FAVOURITE this guide guys, thanks :)
8
   
Award
Favorite
Favorited
Unfavorite
BEGINNER INFO, HINTS, & TIPS !!
SO! before you get into the Guide/Walkthrough section I think it is best I give you some info, hints, and tips that will be great for to know before you start your journey.

  • The guide/walkthrough can be done a lot quicker than what is given to you here but what's the point in that? you should play to experience the entire game not just little bits of it.

  • Cooking can be done from 'Floor 1 Room 6' for the first time or from any other fire in a camp that is NOT the camp fire at 'Floor 1 Room 1'.

  • Once into 'The Strange Cavern' section of the game I recommend you try and spam the first few rooms, (1 to 6), over and over to build your max HP and FOOD up.

  • Equipping FOOD buffing equipment early on will help greatly as this is the stat that usually runs out first before your HP.

  • Use 'Escape Rope' to escape the dungeon room you're in and return to the safety of the Room 1 camp.. doing this will save you losing gained 'Unknown Artifacts'.

  • Save regular if you're grinding for the Relic items, nothing worse than completing a page and then you die after hours of grinding.

  • Once you defeat Floor 1's Boss you can fight it over and over from the fire at Floor 1's camp, I recommend you do this to get some nice equipment and levels up. This is also the same for later floor bosses.

  • Try and always have a few 'Antidotal Herb, 'Silver Spoon' and 'Escape Rope' with you at all times, these are life savers.

  • If you find you need to save 'Acorn' currency then don't forget you can make easy money from Fishing. Once you get into Floor 2 exploring 'Acorn' amount won't really become an issue anymore.
GUIDE - PART 1: NOVICE STAGE
After the lengthy intro you appear outside your house, the objective for this "Novice Stage" is to acquire 2 Ingredients for a potion, this is easy enough.

1. Just a little onward from your house is a buried ingredient, pull it out of the ground for the 'Ornithonion'.


2. Talk to the giant rock, 'Rocky', a couple of times for the second ingredient, 'Marshmoss'.


Now you have the two ingredients needed for making your first potion head into your house and talk to 'Grandpappy', this will start off the potion-making process where you will gain an Apothecary Level and move onto the 'Intermediate Stage'.
GUIDE - PART 2: INTERMEDIATE STAGE
The objective for this stage is to make another potion, but this time it will require 5 ingredients to allow you to progress onto the 'Expert Stage'. We will be getting more than 5 ingredients this stage. You start with two ingredients again from the 'Novice Stage', the 'Ornithonion' and the 'Marshmoss', so you are left with trying to gather 3 more ingredients.

1. Head South-West to try and move onward and you will get blocked by 'Forest Imp A', talk to him and he will request something sweet to eat.

2. Search the two crates just near you a few times to find the 'Doughnut', pick it up and go hand it to the imp, he will now let you pass.


3. Play the Mushroom Fairy Quiz by talking to the huge mushroom next to your house a few times. Answer three questions to get the 'DizzyShroom'. NOTE: You can't play the full quiz at this stage.

4. Head South-West past the 'Forest Imp A' you previously fed the 'Doughnut' to and search the flower patch to find your next ingredient, 'Zinnia'.


5. Now speak to the penguin that's near the broken bridge, 'Petey', a few times and agree to help him train so he can impress a girl. The object of this side-event is to train the penguin's Arms and Legs so they are strong enough to impress the girl and get them together. Just start with training his Arms first and you will want to get them to max 5-Stars, this will happen over time.
NOTE: When you start training for the first time you will lose access to 'Petey' because he will move to a location currently blocked off.

6. Next talk to the Squirrel, 'Chip', who's blocking the entrance to a small garden area. He says he has caught a cold. You need to find him a cure, luckily you made an 'Antidote' in the Novice Stage, head into your house and upstairs. Search the first table to find the 'Antidote' and take it back to 'Chip' and give it to him.


7. Examine the smallest carrot in the ground to get a 'Carrot'. Also pick up the 'Ghostly Pumpkin' that's just South of the 'Carrot' also.


8. Head back to your house and hand all the ingredients to 'Grandpappy'. You will get the next level in your Apothecary Level for making the next potion.
GUIDE - PART 3a: EXPERT STAGE
1. Head into your house, upstairs, and take the 'Dream Potion' off the middle table that you made at the end of the previous Stage.


2. Read the book on the third table to learn about "Negative Materials" then leave the house.

3. Outside, Take the quiz again and this time do all the rounds to get the 'Golden Mushroom' and the 'Evershroom' at the end of the quiz.


NOTE: Use the Quiz section further down to get all the correct answers.

4. After the quiz head to the bunny on the tree trunk in the carrot patch and use some of the 'Dream Potion' on him/her. After that head to the top of the stairs nearby and give the 'Dream Potion' to 'Slinky' the snake also.


5. Next go talk to the 'Bard' at the bottom of the steps just by you. He advises you to dowse the affected persons with water, you decide a bucket of water would be great but you don't have a 'Bucket' yet. Head to where you picked up the 'Ghostly Pumpkin' and speak to 'Scholar' for a free 'Bucket'.


6. Head to the Pier near your house and examine at the end of it to accidentally lose your 'Bucket' but you then gain a 'Bamboo Pole'. After the small tutorial for Fishing takes place you will also get the 'River Water' given to you.


7. Head over to the pink bunny NPC first and use the 'River Water' on him first, him memory will return slightly. Now head to 'Slinky' the snake and use the 'River Water' on him/her next, the snake gets cured and slithers off.. allowing you to pass.


8. DO NOT talk to the flower yet. Head Right to find the training penguin, 'Petey' at the side of the ruins. Talk to 'Petey' and take a look at how his training is going, if his ARM stats are 5-Stars then start his training on his LEGS, if your ARM stars are not max then stay training on his ARMS.

As you can see above MY ARM stats are 4-Star at the moment so I will keep it training.

9. Okay, head slightly South-East from 'Petey' and speak to the 'Forest Imp C', get him to show you his new toy, he will shoot an item off the tree branch, head down to it and pick it up for the 'Tomato'.


10. Now head back up the stairs and open the treasure chest just to your left for the 'Black Pearl', and then go speak to the flower a couple of times t start off a small mission to talk to a lot of people around the areas you have been to.


11. SO now you need to go and talk to some random people about the flowers, here's who...

Name
Location
Forest Imp B
Located by the ruins.
Bard
Located at the bottom of the steps.
Mr Bunny
On the log near the carrot garden area.
Scholar
By the river in the carrot garden area.
Forest Imp A
The Imp you gave the 'Doughnut' item to to allow you to pass.
Rocky
Under the giant rock near your house.
Mushroom Fairy
Talk to the giant mushroom near your house.
Grandpappy
BE SURE TO TALK TO HIM LAST. he's inside your house.


12. Once you have talked to all 8 NPCs head back to 'Violet' and speak to her again, you will give your answer automatically. For giving your answer to 'Rosie' and 'Violet' you will receive two items, 'Sweet Leaf' and the 'Tool Box'.


13. Go check on your penguin again just to make sure he's doing fine, if you have now 5-Star ARMS.. start training on the LEGS now, you need these to be 5-Star also.

14. Head to 'Bard' and hand over the Tool Box' to him, then go and rest in your bed to move time forward, head back to 'Bard' and he will have fixed the broken bridge for you.


15. Cross the bridge and pick up the 'Striped Melon', Talk to the female penguin here, 'Patsy', and then head across the second plank and head down the hole into 'The Mole Cafe'.


16. Talk to 'Chef 'Digbert' a couple of times and he will ask you to sell him some ingredients, agree but ONLY sell him the 'Striped Melon', nothing else, in return you will get a 'Meal Ticket'. Now talk to the waitress a couple of times to learn she has a crush on someone, you have an idea who to go to for answers. Examine the table in this room and select 'Ramen', you will then examine the table again to obtain 'The Mole Cafe Cooking'. DO NOT talk to Chef 'Digbert' when holding this item because he will take it off you.


17. Leave the cafe, pick up another 'Striped Melon' and go speak to the wooden log, 'Weedford' for the answer to who the waitress, 'Alice' is in love with. It turns out that 'Alice' is in love with 'Bard'.


18. Go speak with 'Alice' again and she asks you to find out what he likes, go speak to 'Bard' and then head back to 'Alice' and give her your answer, which is totally wrong by the way, ha ha. Speak to her again so she says, "he's mine now" or something like that.


19. Head back towards 'Bard' and you will see 'Alice' by the signpost, talk to her for a comical scene of her exposing her love to 'Bard'. After the scene talk with 'Bard' and then examine the bowl on the floor to get the 'Specialty Ramen'. Head back to 'Alice' and speak to her again to receive the 'Straw Doll', strange girl.
GUIDE - PART 3b: EXPERT STAGE
20. Okay, head to 'Scholar' and hand him the 'Specialty Ramen' and he will give you the 'Strange Rock' in return, bargain.


21. Now, it would be a great time for you to do Fishing for all the poles and to get all five fish trophies appear on your top floor of your house, so do this now to get it out of the way with, should take about 20/30 minutes max. MAKE SURE you keep at least one of every fish you catch, including the shark, don't be tempted to sell it cos of the 'Acorn' prices, either way.. once you have the best rod and have caught all the available fish head to your house and SAVE. See the Fishing section of this guide for more info on Fishing.


22. Now head back to the penguin in training and pray that he has mastered both ARM and LEG sections to max 5-Star at this point. IF he has then choose the option to 'Confession Challenge'. NOW! there are two options for you here via path choices made in this scenario.. below is the path choices and their results.


Choice: Go steady with me!
Choice: Be my bride!
Making this choice will result in you gaining the item 'Ice Cream' and also the 'Seaweed Stem' when you talk to 'Petey' again.
Making this choice will result in you gaining the item 'Mandragora Root', and also the 'Seaweed Stem' when you talk to 'Petey' again.

As you can see both choices result in two different items, both seem to be used only for potion making so i'm not particularly sure if they are used for anything else. I think the 'Mandragora Root' is probably the rarer of the two items as the books by 'Bard' mentions that one of the other roots are hard to find also. (LET ME KNOW IF YOU COME ACROSS ANYTHING!)

NOTE: For the purpose of this guide I will choose the 'Mandragora Root' purely because I think it's the rarer item at the time of writing this guide.

23. Head to the ruins and use the 'Strange Rock' on the middle pedestal, now head to your house, SAVE and then rest in your bed. Leave the house and it is night.. head to 'Bard' and he will say to take a 'Seaweed Stem' with you, just South of him is also a strange guy that says something about hiding and only appearing at night. Head to the Ruins and search the UFO there, choose "Go for it!" for your first BOSS BATTLE !!


Taking out the boss is pretty easy, attack him a few times first then he will start to count down, when the counter says " Count 1 " use the DEF command to block the bosses major attack skill.


Keep attacking and the boss will soon summon 2x Clone. Take those out first with a few hits, use HEAL option when 'Mylne' says her health is low or you will die. DO NOT run from the battle, there is no need to. Once the 2x 'Clone' are dead keep attacking the boss and you will learn a new skill - Stardust Dragon, use this on the boss continuously for massive damage until it is dead.


Once the boss is dead you will receive '250 EXP', and a 'Matter X, you'll also learn your new skill permanently.


24. Talk to 'Mr Bunny' and he remembers who he is, he then leaves in the UFO, he drops off what looks like a giant carrot, search this for the 'Ginseng Root' and search just to the left of the ruins to find the 'Old Journal' that fell off the roof of the ruins.


25. Head back to your house and rest for the night. In the morning SAVE your game and head to the Mole Cafe.

26. Speak to chef 'Digbert', he will more than likely take 'The Mole Cafe Cooking' item off you before you can sell any items you don't need. As you go through the items you will need to keep most of them and only sell the ones that are "Negative Material" for your potion your going to soon make. There are two ways to go about this..
  • Whenever the chef says "What a delicious Ingredient!", you sell that item to him.
  • Listen out for a weird piano sound on the items, if you hear it then that's the item you need to sell him.
You might have to talk to 'Digbert' a couple of times to get rid of any items you have duplicates of because he only takes 1 at a time, ugh! i know.. and sell ANY fish you have, including the shark. Make sure you sell the 'Bucket' also, this don't play a sound for some reason. Here's a quick checklist of the items you should ONLY be throwing into the cauldron for mixing..

Marshmoss, Ornithonion, Tomato, Striped Melon, Seaweed Stem, Ginseng Root, River Water, Sweet Leaf, Zinnia, Carrot, Ghostly Pumpkin, Meal Ticket, Golden Mushroom, and Evershroom.

27. When this is done head home to 'Grandpappy' and talk to him to make your newest potion, 'Flower Storm Elixir' and your next Apothecary Level.


28. With the creation of the 'Flower Storm Elixir' you head outside to use the new potion. It begins to snow and the Story Credits role for this stage of the game, congratulations!
GUIDE - PART 4: THE STRANGE CAVERN


With the lengthy ending and this part of the game's opening credits you learn why you are at the forest, your mother.. 'Lhuna', and who is 'Bard' really?

1. After the intro you start in a cave, leave this cave for a few minutes as there are a few items to go pick up.

  • Upstairs in your house - pick up the 'Flower Storm Elixir'.
  • Talk to 'Petey' the penguin for a 'Mandragora Root'.
  • In Mole Cafe ask for "Ramen" again for the 'Mole Cafe Cooking'.
  • Open the chest near 'Rosie' for a 'Black Pearl'.


2. Head to the crate outside your house and examine it, 'Rocky' appears and says he can help if you get him food that grants him power, so head to Chef 'Digbert' and ask him about power food. It seems he needs a 'Ginseng Root', which you already have, and '500 Acorn', which if you don't have you can go get by fishing. Have 'Digbert' make you the food.. receive the 'Miracle Moxie Bowl'.


3. Go give this food now to 'Rocky' and watch him destroy the crate, granting you access to another cave.

Enter the new cave, head down the ladder in the floor and examine around the room. Examine the table a few times to take the 'Great Mikan' off the table, believe it or not.. this is a hat for you to wear. Now head out and enter the other cave near where 'Bard' was stood.


Floor 1 / Training Room

4. This area is where most of this section of the game will take place for you now, and there will be plenty of battles ahead for you to get stuck into. Head North and talk to the 'Traveler', he tells you if you're interested in exploring further you should do the tutorial, to do that.. enter the tent.


5. Speak to 'Sparrow Skywalker' and read on his tutorials, especially the 'Equipment' option as you will receive some new gear for you to equip.. 'Apprentice's Stirring Rod', and a 'Cloth Garb', these get equipped to you automatically this time.


6. Stand on the switch to open the door to the North, enter it. Talk to 'Traveler' again and he will give you a 'Vial of Abandon' and also an 'Escape Rope'. Now head West into the next room.


7. In this room speak to 'Rozalina' a few times and then you can buy things from her, if you have enough 'Acorn' currency I recommend you buy from her a 'Hemp Satchel' and a 'Mini Hat' for the extra food space and defence. You can also find the "Relic Book" here that lists all your found relics throughout the dungeon floors you find and bring back to 'Rozalina'. When your done head back to the 'Traveler' room and head North through the door and into the dungeon.


8. SO! The dungeons are pretty simple really, you just need to get to the end of every floor, open the door and carry on whilst collecting treasures and stuff and making sure you don't die. The best tip I can give here is make sure you have plenty of 'Escape Rope' items with you, these will allow you to escape the dungeon without losing any items you have found, unlike the 'Vial of Abandon' that will teleport you out BUT will drop all your found 'Unknown Artifacts'.
GUIDE - THE STRANGE CAVERN: FLOOR 1 (WITH MAPS)
To make things easier I will use maps for the rooms instead of giving directions, this will make it easier for you to follow rather than read walls of text. Be aware, some of the pots and chests might not be there in one run but then are there in another run, it's NOT a mistake on the maps that I have put things in locations that you can not seem to find. I have no doubt that I probably would have missed a couple of locations of pots etc, I have run each floor and room multiple times to do the best I can for you but this is not really important, the idea is to just get to the switch and get through the door with as many upgrades and chests as possible without your FOOD/HP hitting 0.

NOTE 1: These maps are NOT created/drawn to the correct scale/size in game so they might be slightly out in areas. Unfortunately, this is the best I can do for you.. drawing maps by hand then trying to draw them using MS Paint after is not the best of my skills.


NOTE 2: It seems only select floors have their own unique maps, though items might vary in location, with this knowledge I will not post every single map as its own picture, I will put a few maps onto one picture to keep space down as these are random maps used in certain rooms.


Item Key
Here is the key for each icon used on the maps further below.


Floor 1 - Room 1


Floor 1 - Room 2


Floor 1 - Room 3, 4, 5, 7, 8, 10 Random Rooms


Floor 1 - Room 6


Floor 1 - Room 9


Floor 1 - Room 11


Beating the boss is pretty simple for the first floor, all you need to do is.....

Raises up and spins around - wait for the first flash and use 'DODGE' then counter with an ARTS.

UNBLOCKABLE - Use 'EVADE' as soon as you see the skill notice pop up to avoid damage.

LIGHTNING SPEED - Use 'EVADE' as soon as you see the skill notice pop up, you need to be very quick on this one.


Floor 1 - Room 12


GUIDE - THE STRANGE CAVERN: FLOOR 2 (WITH MAPS)
This floor, the first 4 rooms are random every time you enter them but from Room 5 onward they are set maps, so nothing changes other than minor items such as Pots, Chests, etc. Each floor from 5 onward are also linked to each other via ladders so you will find yourself climbing up one set then going down another passing rooms to get down to the 12th room and to the boss's door, best way I can describe it is kinda similar to how Legend of Zelda dungeons work.

Item Key
Here is the key for each icon used on the maps further below.


Floor 2 - Base Room / The Pit Room


The Pit room is reached by falling down a pit trap in the random room that appears for rooms 1 to 4, its random so you might not get it, in which case you will need to go through the rooms again.

BE AWARE! the monsters in The Pit are tough but you should be fine if you can Dodge/Evade.

SECRET ITEM - The Archive's Key can be found in The Pit, in the chest, this will be used eventually on Floor 3 to gain access to 'The Archive'.


Floor 2 - Rooms 1-4 Random Rooms


Floor 2 - Room 5


Floor 2 - Room 6

You will need to speak to the injured 'Bard' here and help him. Pick up the small bag next to the cauldron, make a 'Potion' if you don't have one already and hand it over to him. He will get taken away to the 'Floor 1 Camp'. If you speak to him there you will get a 'Ginseng Root'. You will also notice a cauldron will have appeared at the camp also, great!


Floor 2 - Room 7


Floor 2 - Room 8


Floor 2 - Room 9


Floor 2 - Room 10


Floor 2 - Room 11


Floor 2 - Room 12


Floor 2 - Room 13 (Boss Room)

The boss can be pretty annoying at first, it could take a few times to learn its attacks and timing of them to get things right. Here are the steps to take to defeat it. Below are the skills it casts and the steps to take to counter the attack.

BADI - Use 'EVADE' when the skull is midway through your body to avoid damage. Be sure to avoid this at ANY cost, it deals MASSIVE damage to you.

SPIN - Use 'BLOCK' to lower the damage greatly caused, cannot be damage avoided so don't bother with 'EVADE'.

QUICK SILVER - Use 'EVADE' to avoid this skill also, use pretty much as soon as the skill's use notice disappears.

Now, the time to attack the boss is ONLY when the swords look like they do in the picture below, wait until just after the 1st flash and hit 'BLOCK' to counter it and use your ART skill, I recommend using the healing art for this fight to heal if you got damaged from other attacks.


Okay, once the boss is dead, open the chest for your rewards and then speak to the Paladin to receive the 'Paladin's Blade'. Step onto the lift to head back up to 'Rosalina', do what you need to do here, SAVE, replay the boss over and over for all the nice new items, etc.

There is now a side-quest you can do at this point, you need to go through rooms 7, 8, 9, 10, 11 and 12 again to find all the dead "Paladin Knight" bunnies and examine them to gather up all their souls.


Once done you will unlock the new battle menu - Holy Arts. This is a super powerful attack that will hit up in the 1000's damage range.


Below are the room locations of these Knights.

4x bunnies are found just before fighting Floor 2's boss, at the elevator.
1x Knight in Room 7.
1x Knight in Room 8.
2x Knight in Room 9.
1x Knight in Room 10.
2x Knight in Room 11.
1x Knight in Room 12.

When you have done the side-quest above and ready to move onward head down the lift from 'Rosalina' to Floor 12 and exit out the North door into Floor 3 - Room 1.


GUIDE - THE STRANGE CAVERN: FLOOR 3 (WITH MAPS)
Floor 3 is... a lot harder in terms of battles compared to floors 1 and 2, the monsters hit hard. You will be pushed from this floor onward to master your timing with skills and deflecting so you can use your ARTS skills. I certainly recommend you have 'SOUL STEAL' as your 'ARTS' so you can heal in battles. You are certainly going to struggle for a short while until you learn each monster's attacks and timing to deflect the skill back, once you learn these.. this floor becomes MUCH easier. I will give you help with timings on bosses but for "normal monsters" you will be left to learn those yourself.

INFO: The floor itself is split into unique rooms that have more than one exit on them, you need to choose the correct teleport out otherwise you will end up back at Room 2. Luckily for you the maps below tell you the correct teleport to take.


Item Key
Here is the key for each icon used on the maps further below.


Floor 3 - Room 1 / The Pit / Area Of Dispose

To get into the 'Area of Dipose' you will need to fall down the pit trap and defeat the secret boss here to gain access to the chest. This boss hits HARD if your low level, I recommend you being at least level 50+ attempting it. There's NOT really much info I can give you about this boss other than list its skills and the counter-skill to use on it.

  • Fierce Roar - Use 'BLOCK' to lower the damage taken, you can't dodge the damage.
  • Kilo Slash - Use 'EVADE' to move out of the way of this skill, as soon as you see the skill pop-up use your 'EVADE' straight away.
  • Side Slash - Use 'BLOCK' as soon as you see the skill pop-up appear, this is cast fast.
  • Heal Undead - Just use a normal regular attack on the boss to interrupt it's heal spell cast.

Floor 3 - Room 2


Floor 3 - Room 3


Floor 3 - Room 4

The 'Archive Key' is found on Floor 1 in one of the random rooms, you need to fall down the pit trap and open the chest in the room. Be aware, the monsters are tough in there at the beginning of the game, best leave it until your higher level. The item behind the two teleports can be got by walkign through the wall in the previous room, see in comments section exact location, the item is a 'Sushi - Fatty Tuna'.

Floor 3 - Room 5


Floor 3 - Room 6

Once you reach the Check Point area, search the wall on the Right to reveal a secret chamber. Inside, read the 'Journal' a few times until you reach the end of it. Now examine the 'Vial of Memories' just North of the 'Journal' and choose the option 'Nicolas Flamel' as your choice, this will return Rozalina's memories to her. Okay, continue on to Room 8 and you will come across a door you will not be able to pass, (see picture below.)
Use an 'Escape Rope' and return to 'Rozalina', speak with her. She will thank you for returning her memory and give you the 'Rozalina's Stone' accessory, this will also now allow you access into that room in 'Room 8' that was previously locked.

NOTE: If you don't have a way to return to base camp then your only other options is to die in battle and lose your gained 'Unknown Relics', or head back to the beginning of this room and use the 'Necrotaxi'.

Whilst you are outside the dungeon, check your Potions for a 'Flower Storm Elixir', if you have one then great, if not.. head to your house and upstairs to find one on the desk, you will need this for the boss coming up shortly.

NOTE: It is entirely possible to kill the boss without using the potion to destroy its barrier.

So, head to Floor 1's camp at the entrance, examine the fire and teleport to Floor 3 Room 6 camp, now continue onward from there to Floor 3 Room 7.


Floor 3 - Room 7


Floor 3 - Room 8

At the gate, you will use 'Rosalina's Stone' to enter the door. In this room you need to examine the 'Journal' for a clue on how to solve this puzzle, luckily I have done this for you by marking the shelves in the order you need to activate them on the map above. Done correctly the teleport will appear to the boss room.

In the boos room you will watch a lengthy scene and then you will engage 'Flamel The Alchemist' in battle.

At this point he will raise a barrier of fire, you can now either just use 'Holy Arts' to hurt him OR use the 'Flower Storm Elixir' to break the barrier and attack the boss as normal, up to you.. it has no impact what so ever.
  • Clean Sweep - Use 'BLOCK' to counter the skill and then use ARTS after.
  • Blizzard - Use 'EVADE' to move out of the way of the spell.
  • Flame Strike - Use 'EVADE' to move out of the way of the spell as soon as you see the pop-up.
After a few hits the boss will fall and then show it's true form.. a HUGE DRAGON !! As with the previous boss I will list here the boss' skills and counter skill to use.
  • Dragon Breath - Use 'EVADE' to avoid this damage.
  • Grim Reaper - Use 'EVADE' to avoid this damage.
  • Tail Swing - Use 'BLOCK' as the boss pulls it's head back to counter this skill.
  • Meteor Storm - Spam the use of 'EVADE' to lower damage taken, can't dodge fully.
  • Disruptive Wave - Use 'BLOCK' to lower incoming damage.
  • Dark Stream - Can't avoid this, it's a debuff that lowers HP every second or so.
NOTE: The dragon boss will first do an attack that will seemingly kill you, after the cutscene is when the true battle begins. If you die you will have to watch the first part of the scene again but you will not have to watch the dragon scenes, thank God!

SO! after the battle with the dragon you will get another short battle against your mother, you just need to hit her a few times to kick in the last scenes in the dungeon and the final scenes of the game.


CONGRATULATIONS !!
Now sit back and watch the game's ending.
BOSS LOOT CHEST (QUICK CHECK LIST)
Here's a complete loot list for every boss chest in the game. I'm pretty sure I have missed a couple of weapons, as I keep thinking each named weapon has their own STR, LUC, STA, VIT, HP version of the weapon. Until someone comes forward and or I play again and see myself I will leave them out for now as it's just theory.

Floor 1 Boss Chest
  • Acorn Currency - Various amounts.

  • Foods - Meat Strip, Sushi-omelet.

  • Level 1 Armor - Leather Garb - +10 Def.
  • Level 1 Armor - Linen Robe - +15 Def.

  • Level 1 Weapon - Alchemist's Stirring Rod - +10 Atk.
  • Level 1 Weapon - Alchemist's Stirring Rod (LUC) - +13 Atk. Gives 'Luck' buff, restores HP every few seconds outside of battle.
  • Level 1 Weapon - Alchemist's Stirring Rod (STA) - +20 Food, +13 Atk.
  • Level 1 Weapon - Apprentice's Stirring Rod (LUC) - +1 Atk, Gives 'Luck' buff, restores HP every few seconds outside of battle.
  • Level 1 Weapon - Apprentice's Stirring Rod (STA) - +20 Food, +1 Atk.
  • Level 1 Weapon - Apprentice's Stirring Rod (STR) - +11 Atk.

  • Level 2 Accessory - Bone Cross - +10 Atk, +10 Def, -31 HP.
  • Level 2 Accessory - Fanged Talisman - +5 Def, +5 Atk.

  • Level 3 Relics - Various ones off the level 3 relic collection page.

  • Head - Mushroom Hair Ornament - +5 Atk, +2 Agi, -10 Food.

Floor 2 Boss Chest
  • Acorn Currency - Various amounts.

  • Foods - Meat Chunk, Sushi-Salmon Roe, Sushi-omelet, Sushi-prawn.

  • Level 3 Armor - Disciples Robe - +10 ATK, +80 DEF.
  • Level 3 Armor - Worn Gown - +100 Def.

  • Level 3 Weapon - Master Stirring Rod - +100 Atk.
  • Level 3 Weapon - Sage's Stirring Rod (HP) - +45 Atk, +46 HP.
  • Level 3 Weapon - Sage's Stirring Rod (LUC) - +58 Atk. Gives 'Luck' buff, restores HP every few seconds outside of battle.
  • Level 3 Weapon - Sage's Stirring Rod (STA) - +20 Food, +58 Atk.
  • Level 3 Weapon - Sage's Stirring Rod (STR) - +110 Atk.
  • Level 3 Weapon - Sage's Stirring Rod (VIT) - +110 HP, +20 Food, +58 Atk.

  • Level 4 Accessory - Zeus's Bracelet - +30 Atk, +96 HP.
  • Level 4 Accessory - Paracelsus's Bracelet - +45 Atk, +250 HP.
  • Level 4 Accessory - Silver Bracelet - +61 HP, +15 Atk, +6 Def.

  • Level 5 Relics - Various ones off the level 5 relic collection page.

  • Head - Medicinal Hair Ornament - +50 HP, +10 Def, +20 Agi.

Floor 3 'Test Subject Lv 99' Boss Chest
  • Acorn Currency - Various amounts.

  • Foods - Sushi-Fatty Tuna, Sushi - Sea Urchin.

  • Level 4 Armor - Stardust Robe - +120 Def.
  • Level 4 Armor - Alchemist Robe - +110 Def, +16 Atk.

  • Level 4 Weapon - Master Stirring Rod (LUC) - +130 Atk, Gives 'Luck' buff, restores HP every few seconds outside of battle.
  • Level 4 Weapon - Master Stirring Rod (STA) - +20 Food, +130 Atk.
  • Level 4 Weapon - Master Stirring Rod (STR) - +234 Atk.
  • Level 4 Weapon - Master Stirring Rod (VIT) - +149 HP, +20 Food, +130 Atk.

  • Level 5 Accessory - Hermes's Shoes - +100 Agi.
  • Level 5 Accessory - Item Store Bag - +200 Food.
  • Level 5 Accessory - Researcher's Bag - +300 Food.
  • Level 5 Accessory - Solomon's Bracelet - +300 Hp, +150 Food.

  • Level 5 Relics - Various ones off the level 5 relic collection page.

  • Head - Old Crown - +50 HP, +19 Atk, +5 Def, +10 Agi.
EQUIPMENT LIST
Here is a quick list of every item in the game, what it is for, stats if it is Equipment, and how you get it. Each section is alphabetically sorted by item name. Most ingredients can later be got from the small bags of supplies you find dotted around dungeon floors.

NOTE: I'm sure I might have missed some Equipment items, if you come across anything not listed here please leave me a comment with the item name, stats and where to get it, thanks.


Accessories
  • Bone Cross - From Floor 1 Boss Chest. +10 ATK, +10 DEF, -31 HP.
  • Broken Amulet - Found as an Unknown Relic. +1 Def.
  • Fanged Talisman - From Floor 1 Boss Chest. +5 DEF, +5 ATK.
  • Hemp Satchel - Bought off 'Rozalina', 250 Acorn. Can be found. +10 FOOD.
  • Hermes's Shoes - Out of Floor 3 Boss Chest after killing 'Test Subject Lv 99'. +100 AGI.
    Item Store Bag - +200 Food.
  • Item Store Bag - Out of Floor 3 Boss Chest after killing 'Test Subject Lv 99'. +200 FOOD.
  • Leather Satchel - Bought off 'Rozalina' after entering Floor 2. 250 Acorn. +40 FOOD.
  • Paracelsus's Bracelet - From Floor 2 Boss Chest. +45 ATK, +250 HP.
  • Researcher's Bag - Out of Floor 3 Boss Chest after killing 'Test Subject Lv 99'. +300 FOOD.
  • Rozalina's Stone - Get off Rozalina after returning her memory on Floor 3 Dungeon. +1794 HP, +1 DEF.
  • Silver Bracelet - +61 HP, +15 ATK, +6 DEF.
  • Solomon's Bracelet - Out of Floor 3 Boss Chest after killing 'Test Subject Lv 99'. +300 HP, +150 FOOD.
  • Sylvan Bracelet - Found as an Unknown Relic. +5 HP, +1 DEF.
  • Zeus's Bracelet - From Floor 2 Boss Chest. +30 ATK, +96 HP.

Armor
  • Alchemist Robe - Out of Floor 3 Boss Chest after killing 'Test Subject Lv 99'.+110 DEF, +16 ATK.
  • Cloth Garb - Get off Equipment Tutorial, Sparrow Skywalker. +1 DEF.
  • Disciples Robe - Out of Floor 2 Boss Chest. +10 ATK, +80 DEF.
  • Leather Garb - Out of Floor 1 Room 12 Boss chest. +10 DEF.
  • Linen Robe - Out of Floor 1 Boss Chest. +15 DEF.
  • Mink Coat - Random reward from the locked room chest on Floor 3 Room 4. +50 DEF.
  • Silk Robe - Buy off Rozalina, 500 Acorn. +25 DEF.
  • Stardust Robe - Out of Floor 3 Boss Chest after killing 'Test Subject Lv 99'. +120 DEF.
  • Worn Gown - Out of Floor 2 Boss Chest. +100 DEF.

Head/Helm
  • Great Mikan - Found on table in Sparrow Skywalker's room. +10 FOOD.
  • Invisible Hat - Bought off 'Rozalina', Acorn. +1 DEF.
  • Maid Headband - Bought off 'Rozalina', Acorn. +15 HP, +15 FOOD.
  • Medicinal Hair Ornament - From Floor 2 Boss Chest. +50 HP, +10 DEF, +20 AGI.
  • Mini Hat - Bought off 'Rozalina', Acorn. +3 DEF.
  • Mushroom Hair Ornament - From Floor 1 Boss Chest. +5 ATK, +2 AGI, -10 FOOD.
  • Old Crown - Out of Floor 3 Boss Chest after killing 'Test Subject Lv 99'. +50 HP, +19 ATK, +5 DEF, +10 AGI.

Weapons
  • Alchemist's Stirring Rod - From Floor 1 Boss Chest. +10 ATK.
  • Alchemist's Stirring Rod (LUC) - From Floor 2 Boss Chest. +13 ATK. Gives 'Luck' buff, restores HP every few seconds outside of battle.
  • Alchemist's Stirring Rod (STA) - From Floor 2 Boss Chest. +10 ATK, +20 FOOD.

  • Apprentice's Stirring Rod - Get off Equipment Tutorial, Sparrow Skywalker. +1 ATK.
  • Apprentice's Stirring Rod (LUC) - From Floor 1 Boss Chest. +1 ATK. Gives 'Luck' buff, restores HP every few seconds outside of battle.
  • Apprentice's Stirring Rod (STA) - From Floor 1 Boss Chest. +1 ATK, +20 FOOD.
  • Apprentice's Stirring Rod (STR) - From Floor 1 Boss Chest. +11 ATK.

  • Master Stirring Rod - From Floor 2 Boss Chest. +100 ATK.
  • Master Stirring Rod (LUC) - Out of Floor 3 Boss Chest after killing 'Test Subject Lv 99'. +130 ATK, Gives 'Luck' buff, restores HP every few seconds outside of battle.
  • Master Stirring Rod (STA) - Out of Floor 3 Boss Chest after killing 'Test Subject Lv 99'. +20 FOOD, +130 ATK.
  • Master Stirring Rod (STR) - Out of Floor 3 Boss Chest after killing 'Test Subject Lv 99'. +234 ATK.
  • Master Stirring Rod (VIT) - Out of Floor 3 Boss Chest after killing 'Test Subject Lv 99'. +149 HP, +20 FOOD, +130 ATK.

  • Sage's Stirring Rod - Buy off Rozalina, 1500 Acorn. Appears after killing Floor 2 Boss. +50 ATK.
  • Sage's Stirring Rod (HP) - Out of Floor 2 Boss Chest. +45 ATK, +46 HP.
  • Sage's Stirring Rod (LUC) - Out of Floor 2 Boss Chest. +58 ATK. Gives 'Luck' buff, restores HP every few seconds outside of battle.
  • Sage's Stirring Rod (STA) - Out of Floor 2 Boss Chest. +20 FOOD. +58 ATK.
  • Sage's Stirring Rod (STR) - Out of Floor 2 Boss Chest. +110 ATK.
  • Sage's Stirring Rod (VIT) - Out of Floor 2 Boss Chest. +110 HP, +20 FOOD, +58 ATK.

Weapons (Fishing Poles)
  • Bamboo Pole - Get for free off Mr Pole, or buy off Triton, 10 Acorn. Used for Fishing.
  • Fisherman's Pole - Buy off Triton, 15000 Acorn. Used for Fishing.
  • Ippei's Pole - Buy off Triton, 1500 Acorn. Used for Fishing.
  • Laundry Pole - Buy off Triton, 500 Acorn. Used for Fishing.
  • Stream Pole - Buy off Triton, 150 Acorn. Used for Fishing.
FISHING 101
Here is everything you need to know about the Fishing feature available in this game.

What is Fishing?

Fishing is a limited resource feature of sorts that allows you to build up 'Acorn' currency to buy various things from the Fishing Store, and later.. 'Rozalina'.. This feature also allows you to build up your trophy collection in your house and use other item gaining shops.

How to unlock Fishing

By following the Guide/Walkthrough section you will eventually unlock Fishing when you lose your 'Bucket' in the water on the pier, you can't miss unlocking this game feature. Rozalina comes later on in the game once you reach the dungeon exploring part.

How to Fish

This is pretty simple, a 3 step process. Stand at the end of the Pier and examine to start the fishing game. Press 'CAST' to start fishing.

Wait for the fishing bobble to get pulled under the water and press 'PULL' as quick as you can.

You will then pull a fish up out of the water, it's as simple as that.

The Fishing Store

Once you unlock Fishing you also unlock the Fishing NPC - Triton who stands just by the pier, where you fish.

Talking to Triton a few times will give you access to his store where you are able to buy and sell items, the following is a list of items that can be bought. <Name, Stats, Cost>
  • Bamboo Pole - +10 Luck - 10 Acorn
  • Stream Pole - +20 Luck - 150 Acorn
  • Laundry Pole - +30 Luck - 500 Acorn
  • Ippei's Pole - +40 Luck - 1500 Acorn
  • Fisherman's Pole - +50 Luck - 15000 Acorn

The Fish

Here is a list of Fish you can catch and also the price you will get for them if you decide to sell for 'Acorn' currency to upgrade your Fishing Poles. <Name, Sell Price>
  • Mr Pole - 10 Acorn
  • Gummyfish - 12 Acorn
  • Pop-eye - 30 Acorn
  • Scorpionfish - 80 Acorn
  • Humpfish - 1500 Acorn
  • Sylvanshark - 7777 Acorn

As you can see, the two most profitable fish are the Humpfish and Sylvanshark fish, working you way up the rods will allow you to catch these two fish more often than the previous Fishing Pole.

Hints & Tips

  • The fish you will aim to catch are the Humpfish and Sylvanshark, they are easier to catch the higher level Fishing Pole you use.
  • Each Fishing Pole can catch the same fish other than Sylvanshark.
  • The Sylvanshark can only be caught using the 'Ippei's Pole' and 'Fisherman's Pole', or at least those are the only two poles I have caught the fish with.
  • You can buy back sold fish once you sell them to Triton.
ITEMS LIST
Below are complete lists of every item type in the game.

Food
  • Cooked Meat - Made by Cooking. Restores +60 Food.
  • Half-Cooked Meat - Made by Cooking. Restores +15 Food.
  • Meat Chunk - Out of Floor 2 Room 12 Boss chest. Restores +100 Food.
  • Meat Strip - Bought off 'Rozalina', 150 Acorn. Can be found in chests. Drops off monsters. Out of Floor 1 Boss Chest. Restores +10 Food.
  • Sushi-Cucumber - Drops off monsters. Restores +1 Food.
  • Sushi-Fatty Tuna - Out of Floor 3 Boss Chest after killing 'Test Subject Lv 99'. Restores +30 Food.
  • Sushi-Omelet - Out of Floor 1 Room 12 Boss chest. Restores +5 Food.
  • Sushi-Prawn - Drops off monsters. Restores +10 Food.
  • Sushi-Salmon Roe - Drops off Floor 2 Boss. Restores +15 Food.
  • Sushi-Sea Urchin - Out of Floor 3 Boss Chest after killing 'Test Subject Lv 99'. Restores +20 Food.
  • Sylvan Ramen - Made by Cooking. Restores +200 Food.
  • The Mole Cafe Cooking - Got off 'Alice', choose "Ramen". Restores +5 Food.

Ingredients
  • Black Pearl - Used for potion making. Get from inside the chest at the top of the stairs.
  • Carrot - Used for potion making. Get in the small carrot garden area.
  • Dizzyshroom - Used for potion making. Get three questions right in the Mushroom Fairy Quiz then quit the quiz.
  • Doughnut - Give to 'Forest Imp A' to let you pass. Found in the two crates near your house.
  • Evershroom - Used for potion making. Bet by completing the quiz, all rounds.
  • Ghostly Pumpkin - Used for potion making. Get in the small carrot garden area.
  • Ginseng Root - Used for potion making. Got off Mr Bunny after he leaves in the UFO.
  • Golden Mushroom - Used for potion making. Get by completing the quiz, all rounds.
  • Gummyfish Rubbing - Sell for Acorn. Used for potion making. Got by fishing off the pier.
  • Humpfish Rubbing - Sell for Acorn. Used for potion making. Got by fishing off the pier.
  • Ice Cream - Used for potion making. Got from making the penguin love choice.. "Be my bride!"
  • Marshmoss - Used for potion making. Got off Rocky by talking to him/her just outside your house.
  • Mandragora Root - Used for potion making. Got from making the penguin love choice.. "Go steady with me!". Later got by just talking to 'Petey'.
  • Matter X - Used for Potion Making. Get after defeating Spaceman and 2x Clone.
  • Meal Ticket - Used for potion making. Got off Chef 'Digbert' for trading ingredients to him.
  • Mr Pole Rubbing - Sell for Acorn. Used for potion making. Got by fishing off the pier.
  • River Water - Used for potion making. Get after dropping the bucket in the river.
  • Ornithonion - Used for potion making. Found just outside your house in the ground.
  • Pop-eye Rubbing - Sell for Acorn. Used for potion making. Got by fishing off the pier.
  • Scorpionfish Rubbing - Sell for Acorn. Used for potion making. Got by fishing off the pier.
  • Seaweed Stem - Used for potion making. Heals you in battle by using the heal skill. Got from any choice in the penguin love scenes. If you dont have the penguin scene you can get it off 'Bard' just before you head to defeat the Spaceman & 2x Clone boss at the ruins.
  • Specialty Ramen - Give to 'Scholar'. Get by watching the scene between 'Alice' and 'Bard'.
  • Sulfuric Ashes - Used for Alchemy. Get from the small 'Bag of Supplies' on Floor 2 areas.
  • Sweet Leaf - Used for potion making. Got off 'Rosie' after talking to 8 Forest Folk.
  • Sylvanshark Rubbing - Sell for Acorn. Used for potion making. Got by fishing off the pier.
  • Tomato - Used for potion making. Get when 'Forest Imp C' shoots it off the tree branch.
  • Watermelon - Used for potion making. Get near the penguin 'Patsy', off the ground.
  • Zinnia - Used for potion making. Found in the bush near 'Bard'.

Key Items
  • Bucket - Drop off the edge of the Pier for the 'Bamboo Pole'. Got off 'Scholar'.
  • Miracle Moxie Bowl - Give to 'Rocky'. Get off Chef 'Digbert' for 'Mandragora Root' and '500 Acorn'.
  • Tool Box - Give it to the 'Bard'. Got off 'Rosie' after you talk to 8 Forest Folk.

Potions
  • Antidote - Give to 'Chip' the Squirrel to cure his cold. Get from 2nd floor of your house after completing 'Novice Stage'.
  • Dream Potion - Use on 'Mr Bunny' first and 'Slinky' the snake last. Get from 2nd floor of your house after completing 'Intermediate Stage'.
  • Flower Storm Elixir - Used to make snow appear in the forest. Can watch a small ending from a present box in your house. Get from 3rd floor of your house after completing 'Expert Stage'.
  • Protect Potion - Found in dungeons. Temporarily boosts DEF by 25%.
  • Potion - Created with Alchemy. Recovers a small amount of HP.
  • Quick Potion - Found in dungeons. Temporarily boosts SPD by 25%.
  • Strength Potion - Found in dungeons. Temporarily boosts ATK by 25%.

Search Supplies
  • Antidotal Herb - Bought off 'Rozalina', 70 Acorn. Cures Poison effect.
  • Archive's Key - Found in Floor 2 rooms, fall down a pit trap, it's inside a chest sometimes.
  • Dowsing Rod - Bought off 'Rozalina', 200 Acorn. Allows you to spot traps for 60 seconds.
  • Escape Rope - Bought off 'Rozalina', 800 Acorn. Teleports you to 'Traveler' room. No penalty.
  • Golden Key - Found in dungeons. Used to open wooden doors.
  • Holy Water - Bought off 'Rozalina'. 500 Acorn. Prevents enemy encounters for a limited of time.
  • Magical Key - Bought off 'Rozalina', 120 Acorn. Unlocks treasure chests.
  • Paladin's Blade - Got after defeating Floor 2's Boss, off the Paladin Knight. Used in the Paladin Knight Side-Quest, gather all 12 souls to unlock 'Holy Arts' option in battles.
  • Silver Spoon - Bought off 'Rozalina', 50 Acorn. Allows you to check the quality of springs in dungeons.
  • Skill Tome - Allows you to forget a mastered skill to learn a new one.
  • Vial of Abandon - Teleports you to 'Traveler'. Unlimited use. You lose all 'Unknown Artifacts'.

MONSTER / BOSS COMPENDIUM
Here is a complete list of every monster in the game, it's name, skills, and item drops.


FLOOR 1 MONSTERS

Level 1 Monsters
NAME
SKILL(S)
DROP(S)
Ancient Shade Lv1
Weapon Swipe.
15 Exp, Acorn, Unknown Relic Lvl 1.

Level 2 Monsters
NAME
SKILL(S)
DROP(S)
Ancient Ghost Lv2
Weapon Swipe, Poltergeist.
25 Exp, Acorn, Meat Strip, Sushi-Cucumber, Unknown Relic Lvl 1.
Ancient Shade Lv2
Weapon Swipe.
25 Exp, Acorn, Meat Strip, Unknown Relic Lvl 1.

Floor 1 Boss
NAME
SKILL(S)
DROP(S)
Abyss Shade Lv5
Weapon Swipe, Unblockable, Lightning Speed.
25 Exp, Acorn, Meat Strip, Sushi-Cucumber, Unknown Relic Lvl 1.


FLOOR 2 MONSTERS

Level 3 Monsters
NAME
SKILL(S)
DROP(S)
Abyss Shade Lv3
Weapon Swipe, Unblockable, Lightning Speed.
80 Exp, Acorn, Meat Strip, Sushi-Prawn, Unknown Relic Lvl 2.
Mummy Lv3
Weapon Swipe, Curse, Gluttony.
80 Exp, Acorn, Sushi-Omelet.

Level 4 Monsters
NAME
SKILL(S)
DROP(S)
Abyss Hunter Lv4
Weapon Swipe, Shoot, Quick Shot, Napalm.
80/125 Exp, Acorn, Meat Strip, Sushi-Omelet, Unknown Relic Lvl 2.
Mummy Lv4
Weapon Swipe, Gluttony, Curse.
80/125 Exp, Acorn, Meat Strip, Sushi-Omelet, Sushi-Prawn, Unknown Relic Lvl 2.

Floor 2 Boss
NAME
SKILL(S)
DROP(S)
Paracelsus's Blade
Quick Silver, Spin, BADI.
500 Exp, Acorn, Sushi-Salmon Roe, Unknown Relic Lvl 2.


FLOOR 3 MONSTERS

Level 5 Monsters
NAME
SKILL(S)
DROP(S)
Flamel's Old Pupil Lv5
Weapon Swipe, Liquid Nitrogen, Combustion, Absolute Territory.
300 Exp.

Level 6 Monsters
NAME
SKILL(S)
DROP(S)
Abyss Daemon Lv6
Weapon Swipe, Area of Effect, Acid Ink.
300 Exp.
Flamel's Old Pupil Lv6
Weapon Swipe, Liquid Nitrogen, Combustion, Absolute Territory.
300 Exp.

Level 7 Monsters
NAME
SKILL(S)
DROP(S)
Abyss Daemon Lv7
Weapon Swipe, Area of Effect, Acid Ink.
300 Exp.

Floor 3 Bosses
NAME
SKILL(S)
DROP(S)
Test Subject Lv 99
Weapon Swipe, Fierce Roar, Kilo Slash, Side Slash, Heal Undead.
500 Exp, Acorn, Sushi-Salmon Roe, Unknown Relic Lvl 2.
Flamel The Alchemist
Clean Sweep, Blizzard, Flame Strike.
N/A
Flamel The Alchemist (Dragon)
Dragon Breath, Grim Reaper, Tail Swing, Meteor Storm, Disruptive Wave, Dark Stream.
N/A
Lhuna
N/A
N/A


OTHER MONSTERS

Alternative Fought Monsters
NAME
SKILL(S)
DROP(S)
Ghost of the Abyss Lv ???
???
300 Exp, ???
Test Subject Lv80
Weapon Swipe, Iron Ball, Hurl, Spin.
???
MUSHROOM FAIRY QUIZ (ANSWERS)
The questions and answers below for the Mushroom Fairy Quiz are sorted alphabetically for easy searching.

The Questions and Answers

Q: A surprising method to grow more mushrooms exists! What is that method?
A: Electrocution.

Q: How can a mushroom newbie tell a toxic mushroom from a normal one?
A: It's too difficult to spot, so not a good idea...

Q: How many acres wide is the world's largest honey mushroom population in Oregon?
A: 2,300 Acres.

Q: How many different species of fungi exist in Japan?
A: About 5,000 species.

Q: In the fairytale Alice in Wonderland, which character smokes a hookah on top of a mushroom?
A: The Caterpillar.

Q: In "The Last of Us", a game where the US is ravaged by a mutant fungi, who is the voice actor of the male lead?
A: Troy Baker.

Q: Is it true that mushrooms have no gender?
A: It's true!

Q: Mushrooms...
A: (you can choose any answer for this question, all all correct.)

Q: Mushrooms are a good source of:
A: All of the above.

Q: Mushrooms aren't plants, so what are they?
A: Fungi.

Q: Nintendo's Mario comes to mind as a hero of mushrooms, but what was his debut game?
A: Donkey Kong.

Q: The method of growing mushrooms by planting a species in a culture medium enclosed in a bag is called what?
A: Mushroom bed cultivation.

Q: What is the astonishing fact regarding mushrooms and the former video game studio, Data East?
A: Its side business was growing shiitake mushrooms.

Q: What is the most cultivated mushroom in the world?
A: Mushrooms.

Q: What is the "shii" in shiitake derived from?
A: Wood of a Pasania species of tree.

Q: What is the trick to storing shiitake mushrooms in the refrigerator?
A: Store them so the underside of the caps are facing up.

Q: What is the world's top mushroom producing country?
A: China.

Q: What is your favourite kind of food?
A: Mushrooms.

Q: What tree do pine mushrooms grow on?
A: Red Pine.

Q: What's the title of a comedy horror movie that features mushrooms?
A: Shrooms.

Q: When you say "mushroom", what Touhou character comes to mind?
A: Marisa Kirisame

Q: Which contains the most chocolate?
A: Chocolate Truffles.

Q: Which is an eerie mushroom that lives on insects?
A: Caterpillar Fungus.

Q: Which mushroom is known for its psychedelic effects?
A: Psilocybin Mushrooms.

Q: Which mushroom was named for being the Roman emperor's favourite?
A: Beefsteak Polypore.

Q: Which of the following is a toxic mushroom?
A: Fly Agaric.

Q: Which of the following is an actual edible mushroom?
A: Beefsteak Polypore.

Q: Which of the following mushrooms glows?
A: Jack O'Lantern Mushrooms.

Q: Which of these mushrooms actually exists?
A: Brown-toothed Crust.

Q: Why are female boars used to hunt for truffles?
A: The scent of truffles is similar to that of male boars.

Q: Why are mushrooms shaped the way they are?
A: So they can shoot spores a great distance.


RELIC BOOK CHECK LIST
Here is all the relics from each page that you can collect. This basically serves as a visual check list for you to see which one(s) you are currently missing and needing to collect.


RELIC BOOK LV1


RELIC BOOK LV2


RELIC BOOK LV3


RELIC BOOK LV4


RELIC BOOK LV5
SKILL BOOK LIST
Here is a complete list of every skill 'Mylne' can learn in the game. I will also list the location and what the skill does for you. SOme skills will become active to buy from 'Rozalina' once defeating a floor's final boss. Skill book damage is multiplied by base damage.


Kilo Slash - Found on Floor 2, Room 8 of 'The Strange Cavern'. Deal medium damage to the enemy. Can later buy off Rozalina, 20 Acorn. This skill deals x10 your base atk.

Soul Steal - Found on 'Floor 1, Room 9' of 'The Strange Cavern'. Deal Light damage to the enemy and restores a little HP. Can later buy off Rozalina, 20 Acorn. The healing power is direct amount of what your regular weapon attack is.. so if you hit a monster for 150 damage, the 'Soul Steal' Art will also heal for 150. Higher the damage you do the better this heal skill will become. This skill deals x5 your base atk.

Stardust Dragon - Learned during and after defeating the boss: Spaceman & 2x Clone. Can later buy off Rozalina, 20 Acorn. This skill deals x5 your base atk.


Trine Strike - This is a 'Holy Arts' skill. You learn this after completing the "Paladin Knight" side-quest after defeating Floor 2's Boss. Does massive damage, in the 1000's to a single target enemy. This skill deals x14 your base atk.
UNSURE STUFF !!
Here's a few things I am unsure of when I played through the game for this guide. If you know and can answer any of these questions then please feel free to post in the comment section.. thanks.


1. The Barrel outside your house, does this do anything?

2. The Penguin Coin currency, how do you get these and what do you do with them?
This currency is part of the DLC that's not in English so no worries there for English players.

3. Floor 3 Room 4, there is an item behind two teleports, how do you reach this and what is it?
This has been found out and answered by Plantszaza, check out their comments below, credits to them and thanks for this info.. it has been added to the relevant guide section.
ABOUT THE GUIDE
Hi,

This is my first game guide I have created for a STEAM game, so please be kind with your words if you find errors or stuff missing. So, let me give you a little information about this guide I have created.

This guide came about after hand drawing maps for the dungeons for myself to use, then I thought.. "Why don't I just write a guide and share the maps", so I went about making the maps look better for the guide using MS PAINT, and started from the beginning and wrote the guide as I played.

It took me about a week to complete the guide you see now and taking screenshots of stuff, including creating the maps, gathering information, the quiz answers, etc.

I hope you enjoy the guide as much as I did creating it and certainly can't wait for the English version of the DLC to be released for me to write a guide for that one also.

If anyone wish to use ANY information on this guide, including the maps and screenshots then I have NO objection but I do have a couple or requirements..
  • 1. Let me know where you are using the information to by sending me a message on here with the web address where I can find my guide.
  • 2. None of the material in this guide can be altered, changed, or edited unless I have given my permission.
  • 3. You MUST credit me for the work.


Thanks for your time and hope you enjoy the guide.

SylarDean
CREDITS
Here's a list of credits for this game i'd like to send out..

Plantszaza - For giving me a bit of info on things, and letting me know how to get that one item behind the two teleport circles. Also, for making me check my guide again cos I would not have known pictures were missing that should have been there if I hadn't have looked to add in the info given.

Primary Orbit - For making a cute little game for me to play and write a guide on, I wasn't expecting to enjoy this one that much but I really did, evident by the guide produced. Now hurry with that DLC.. i'm waiting to add more to this guide.. LOL! :D
63 Comments
Famine (IRyS)bandit.gg Sep 2, 2024 @ 2:18pm 
ohhhh okay ty
sylardean  [author] Sep 1, 2024 @ 7:51am 
@Famine (RyS
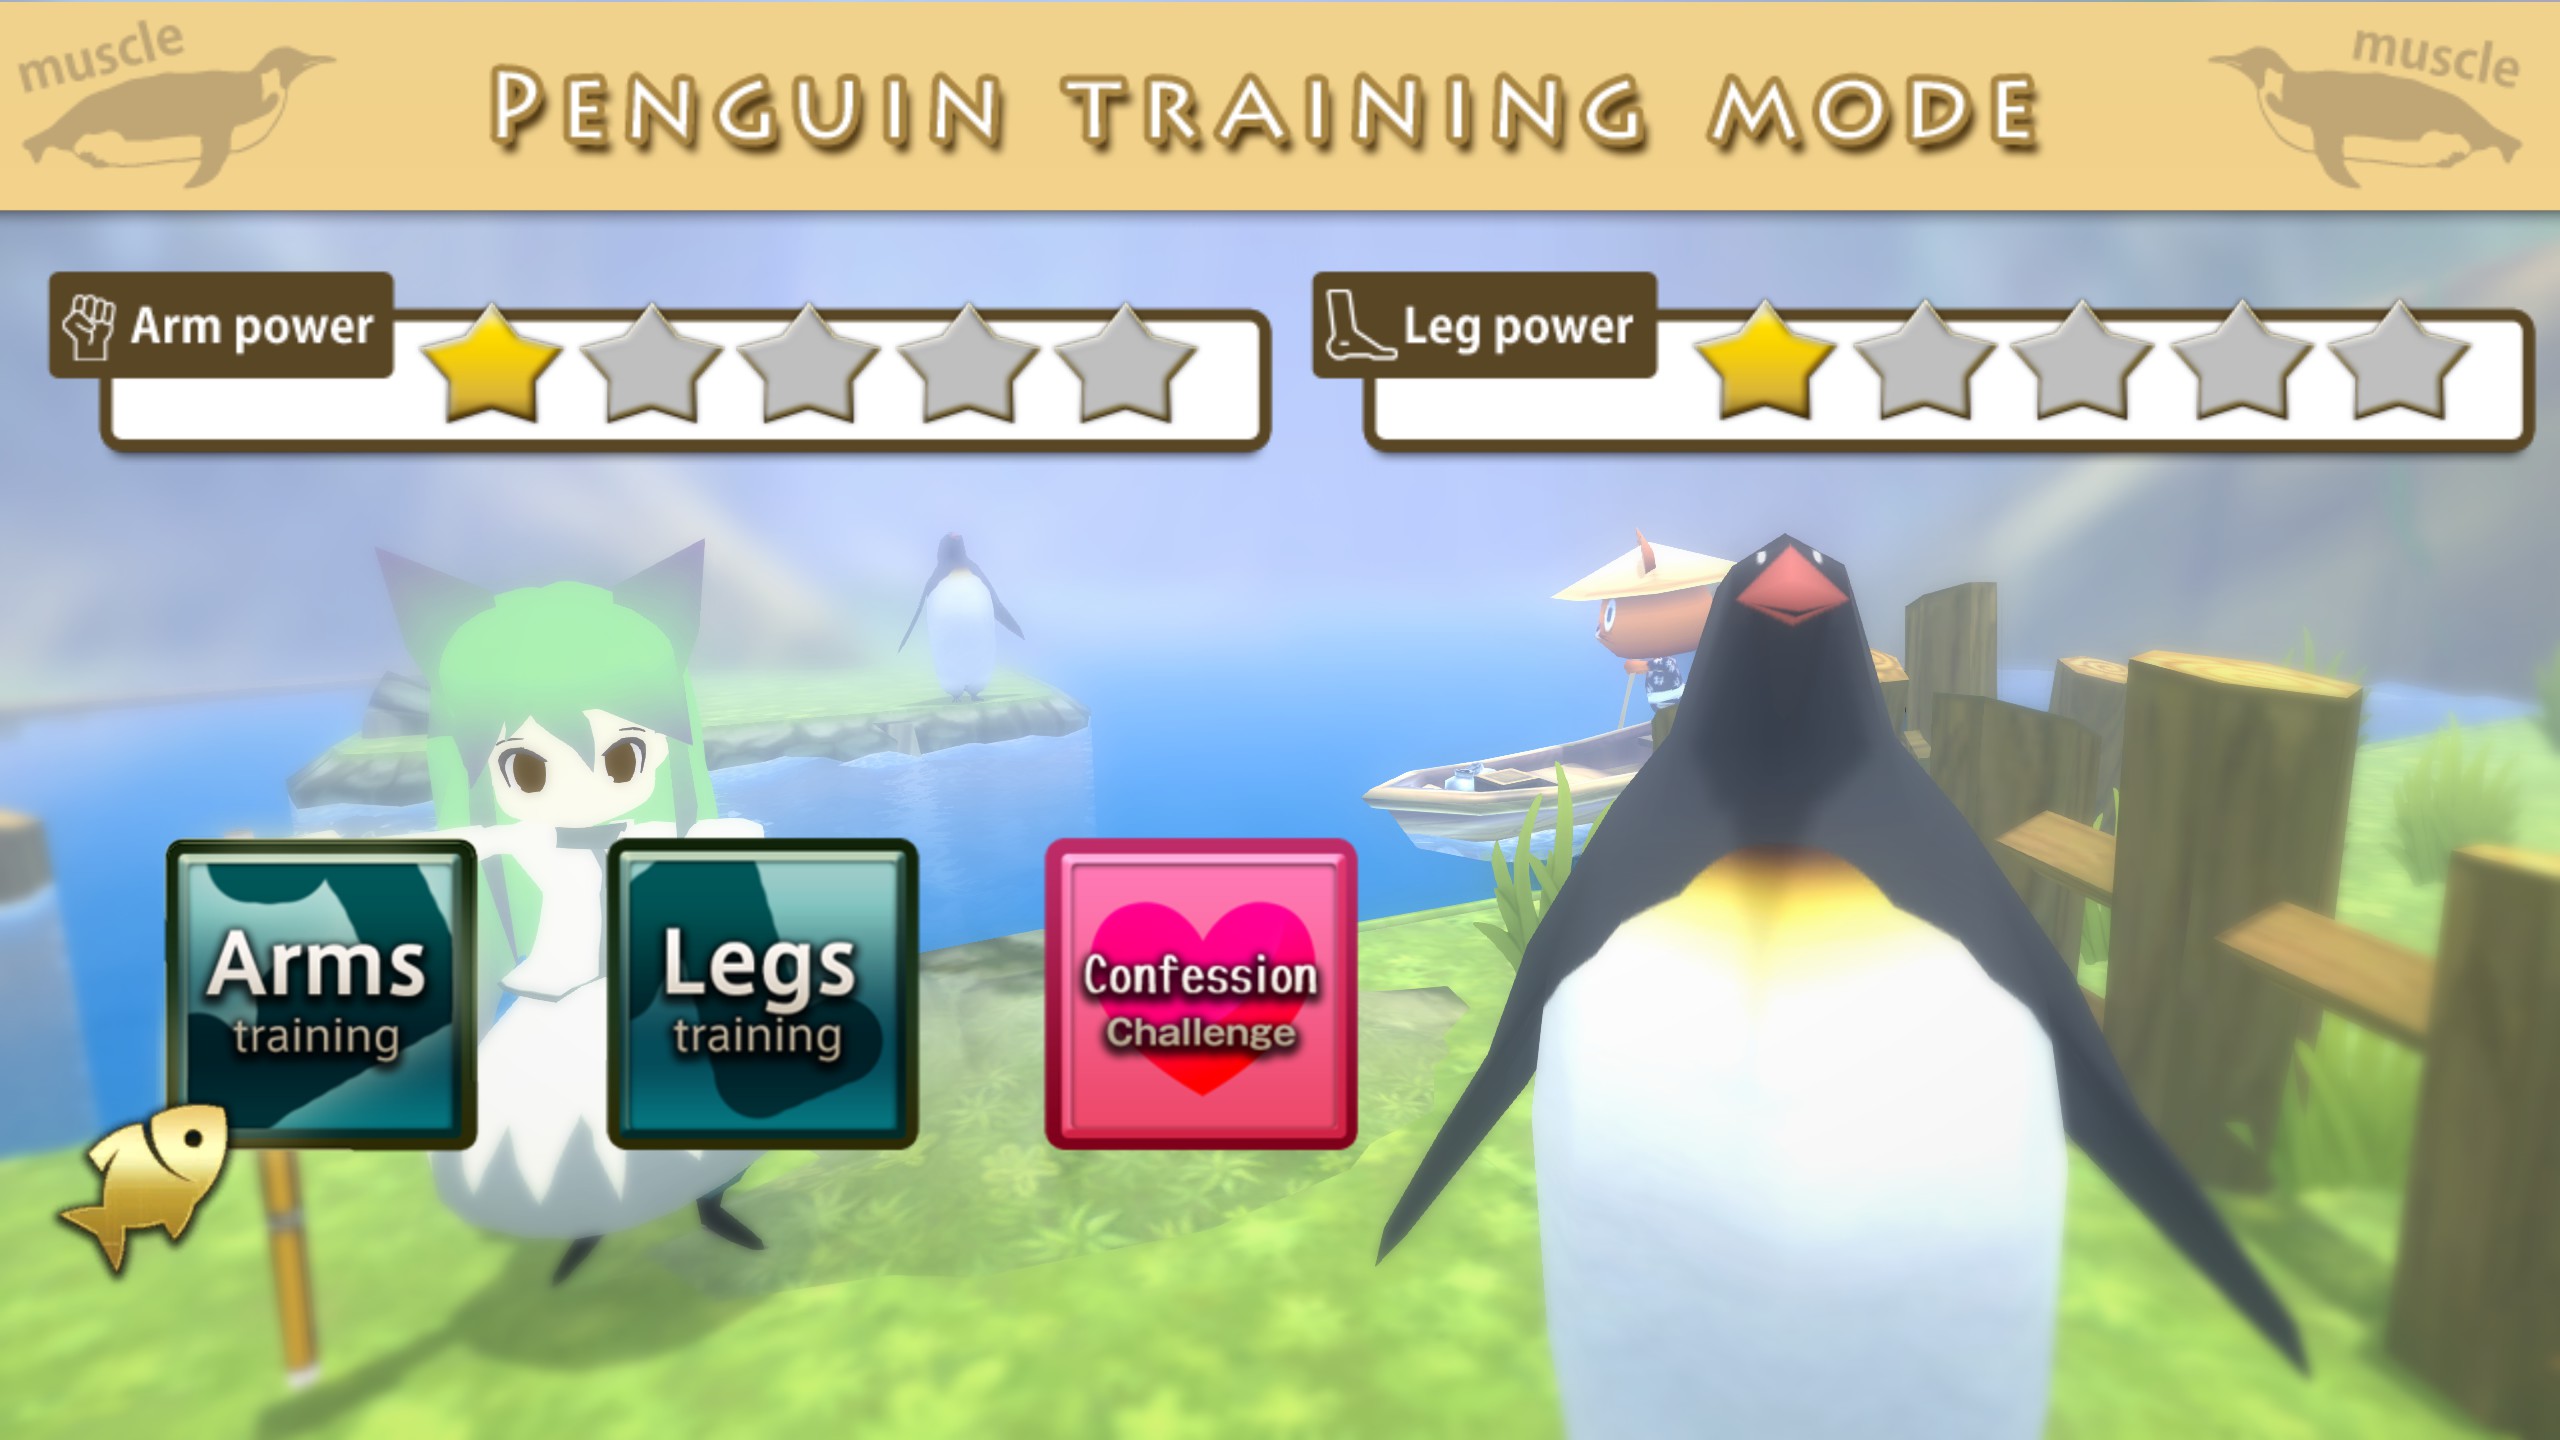
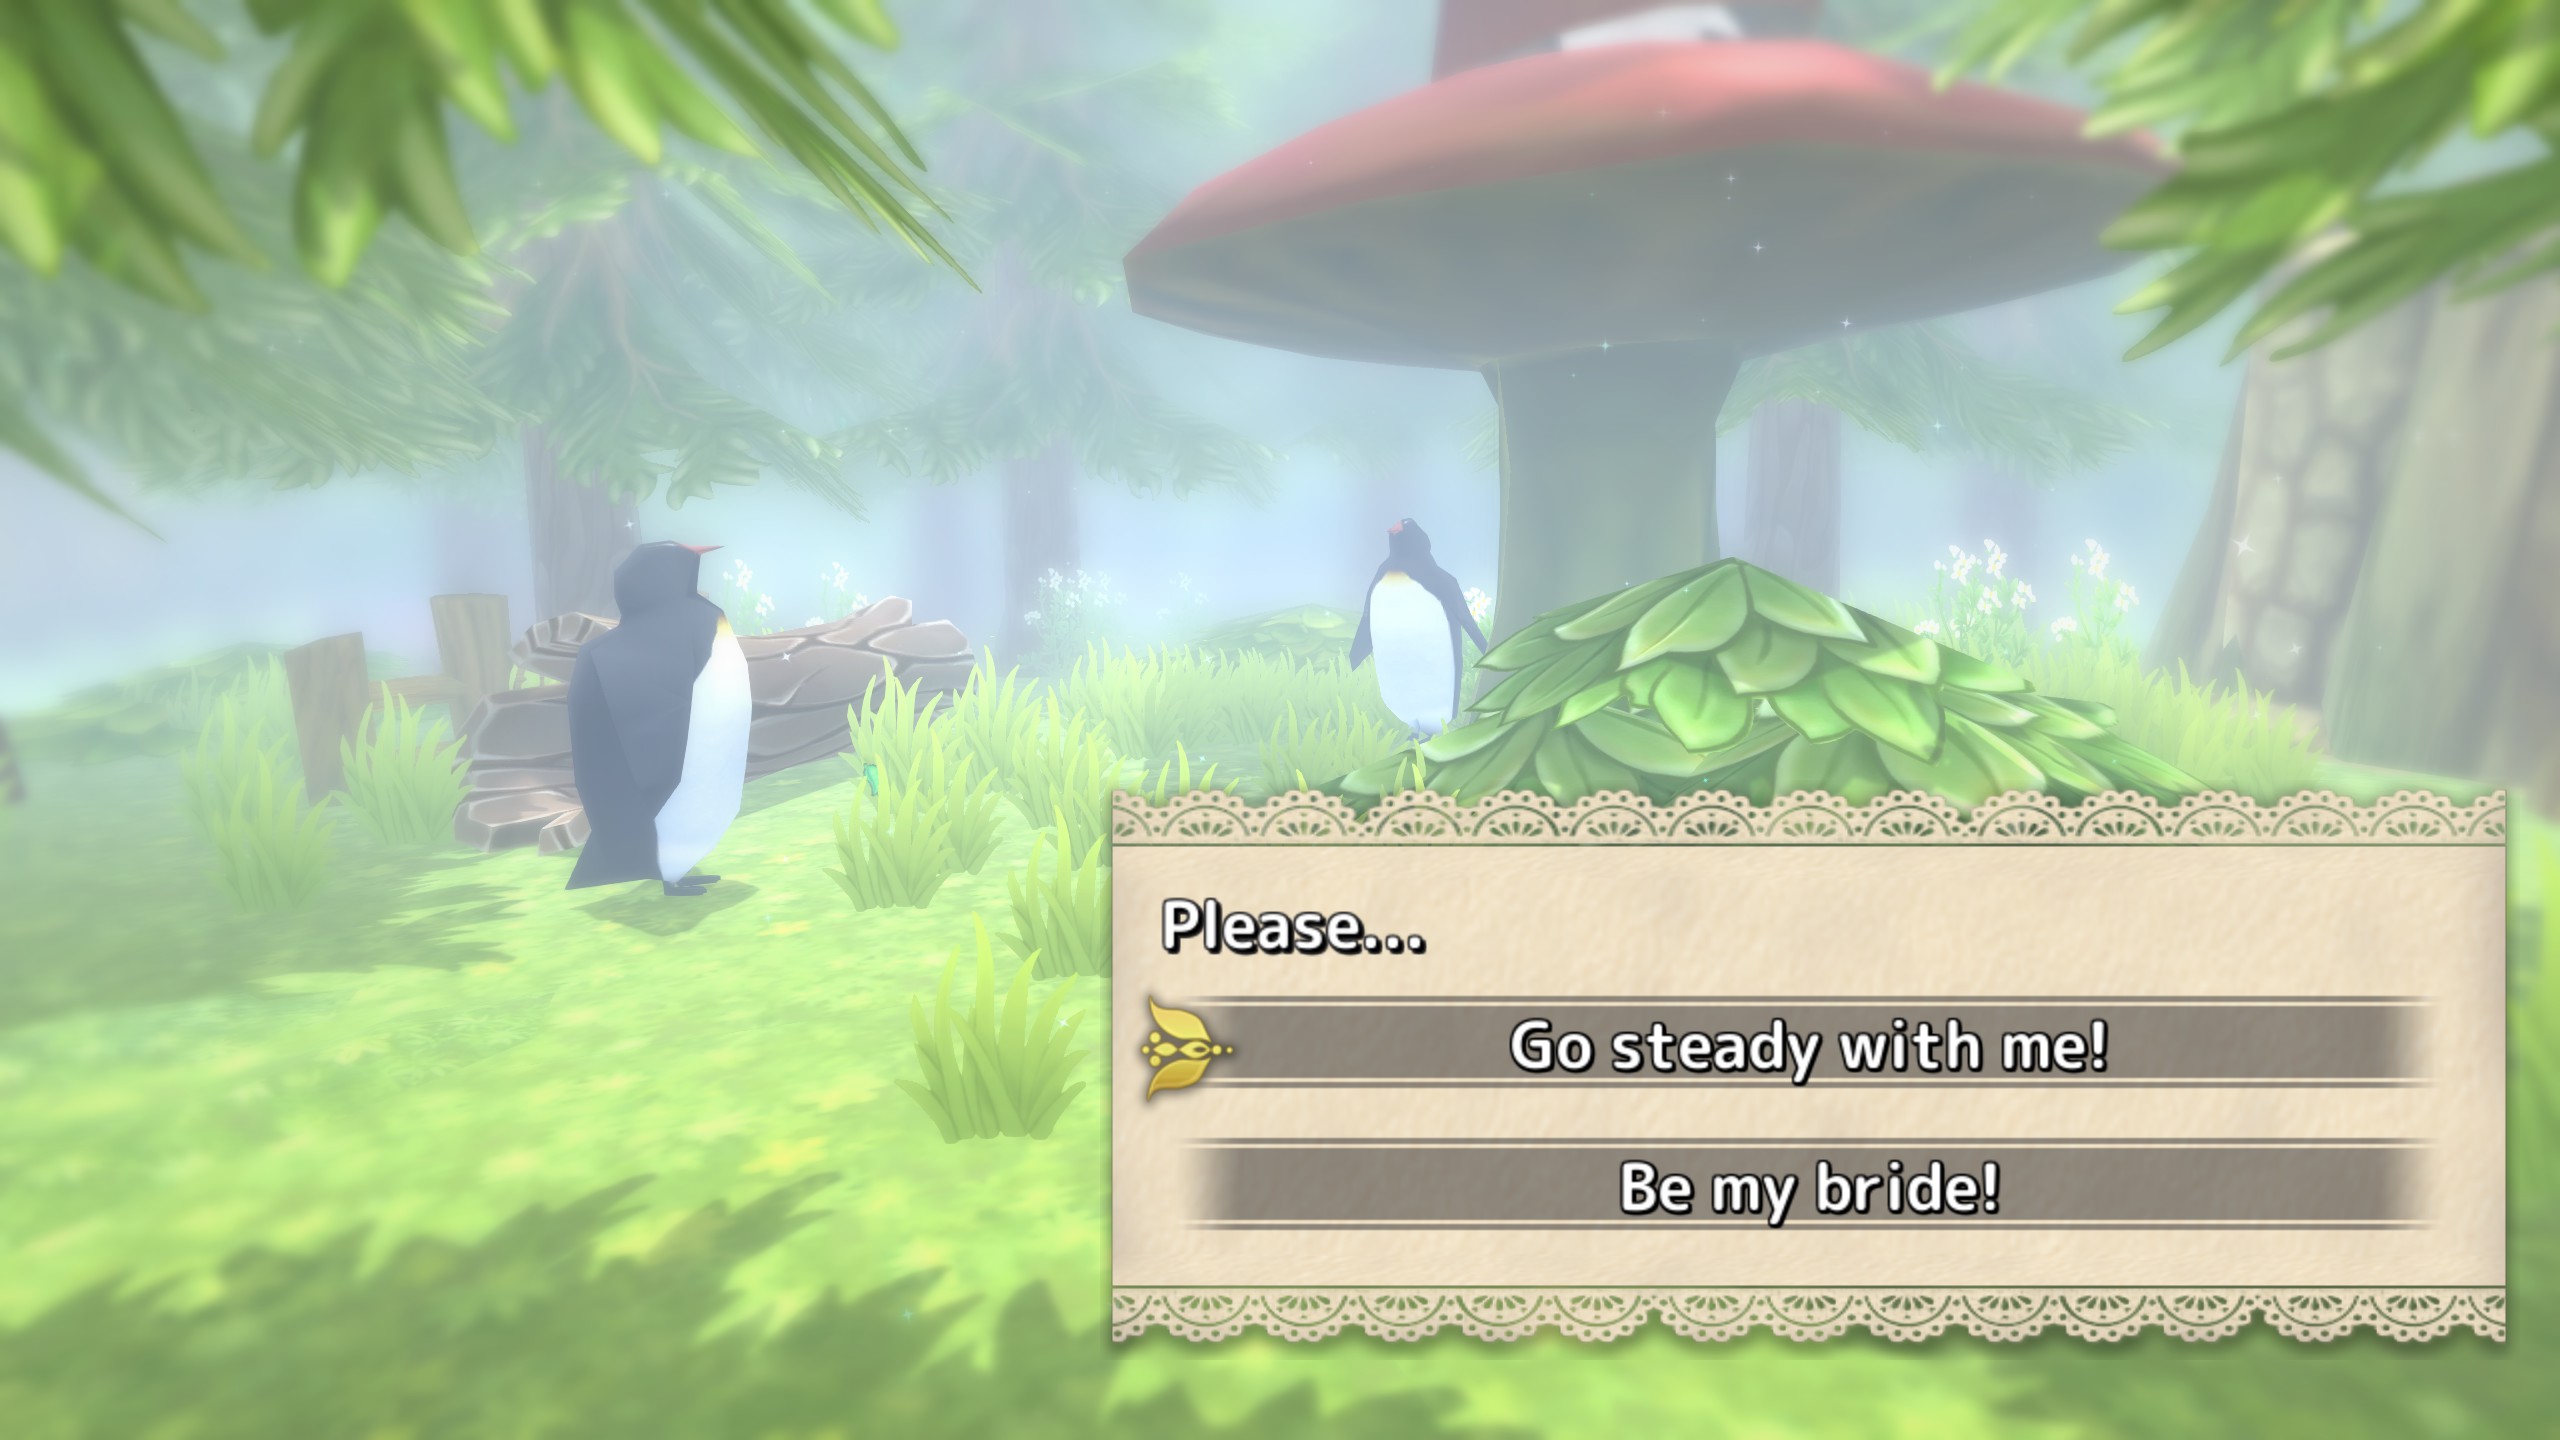
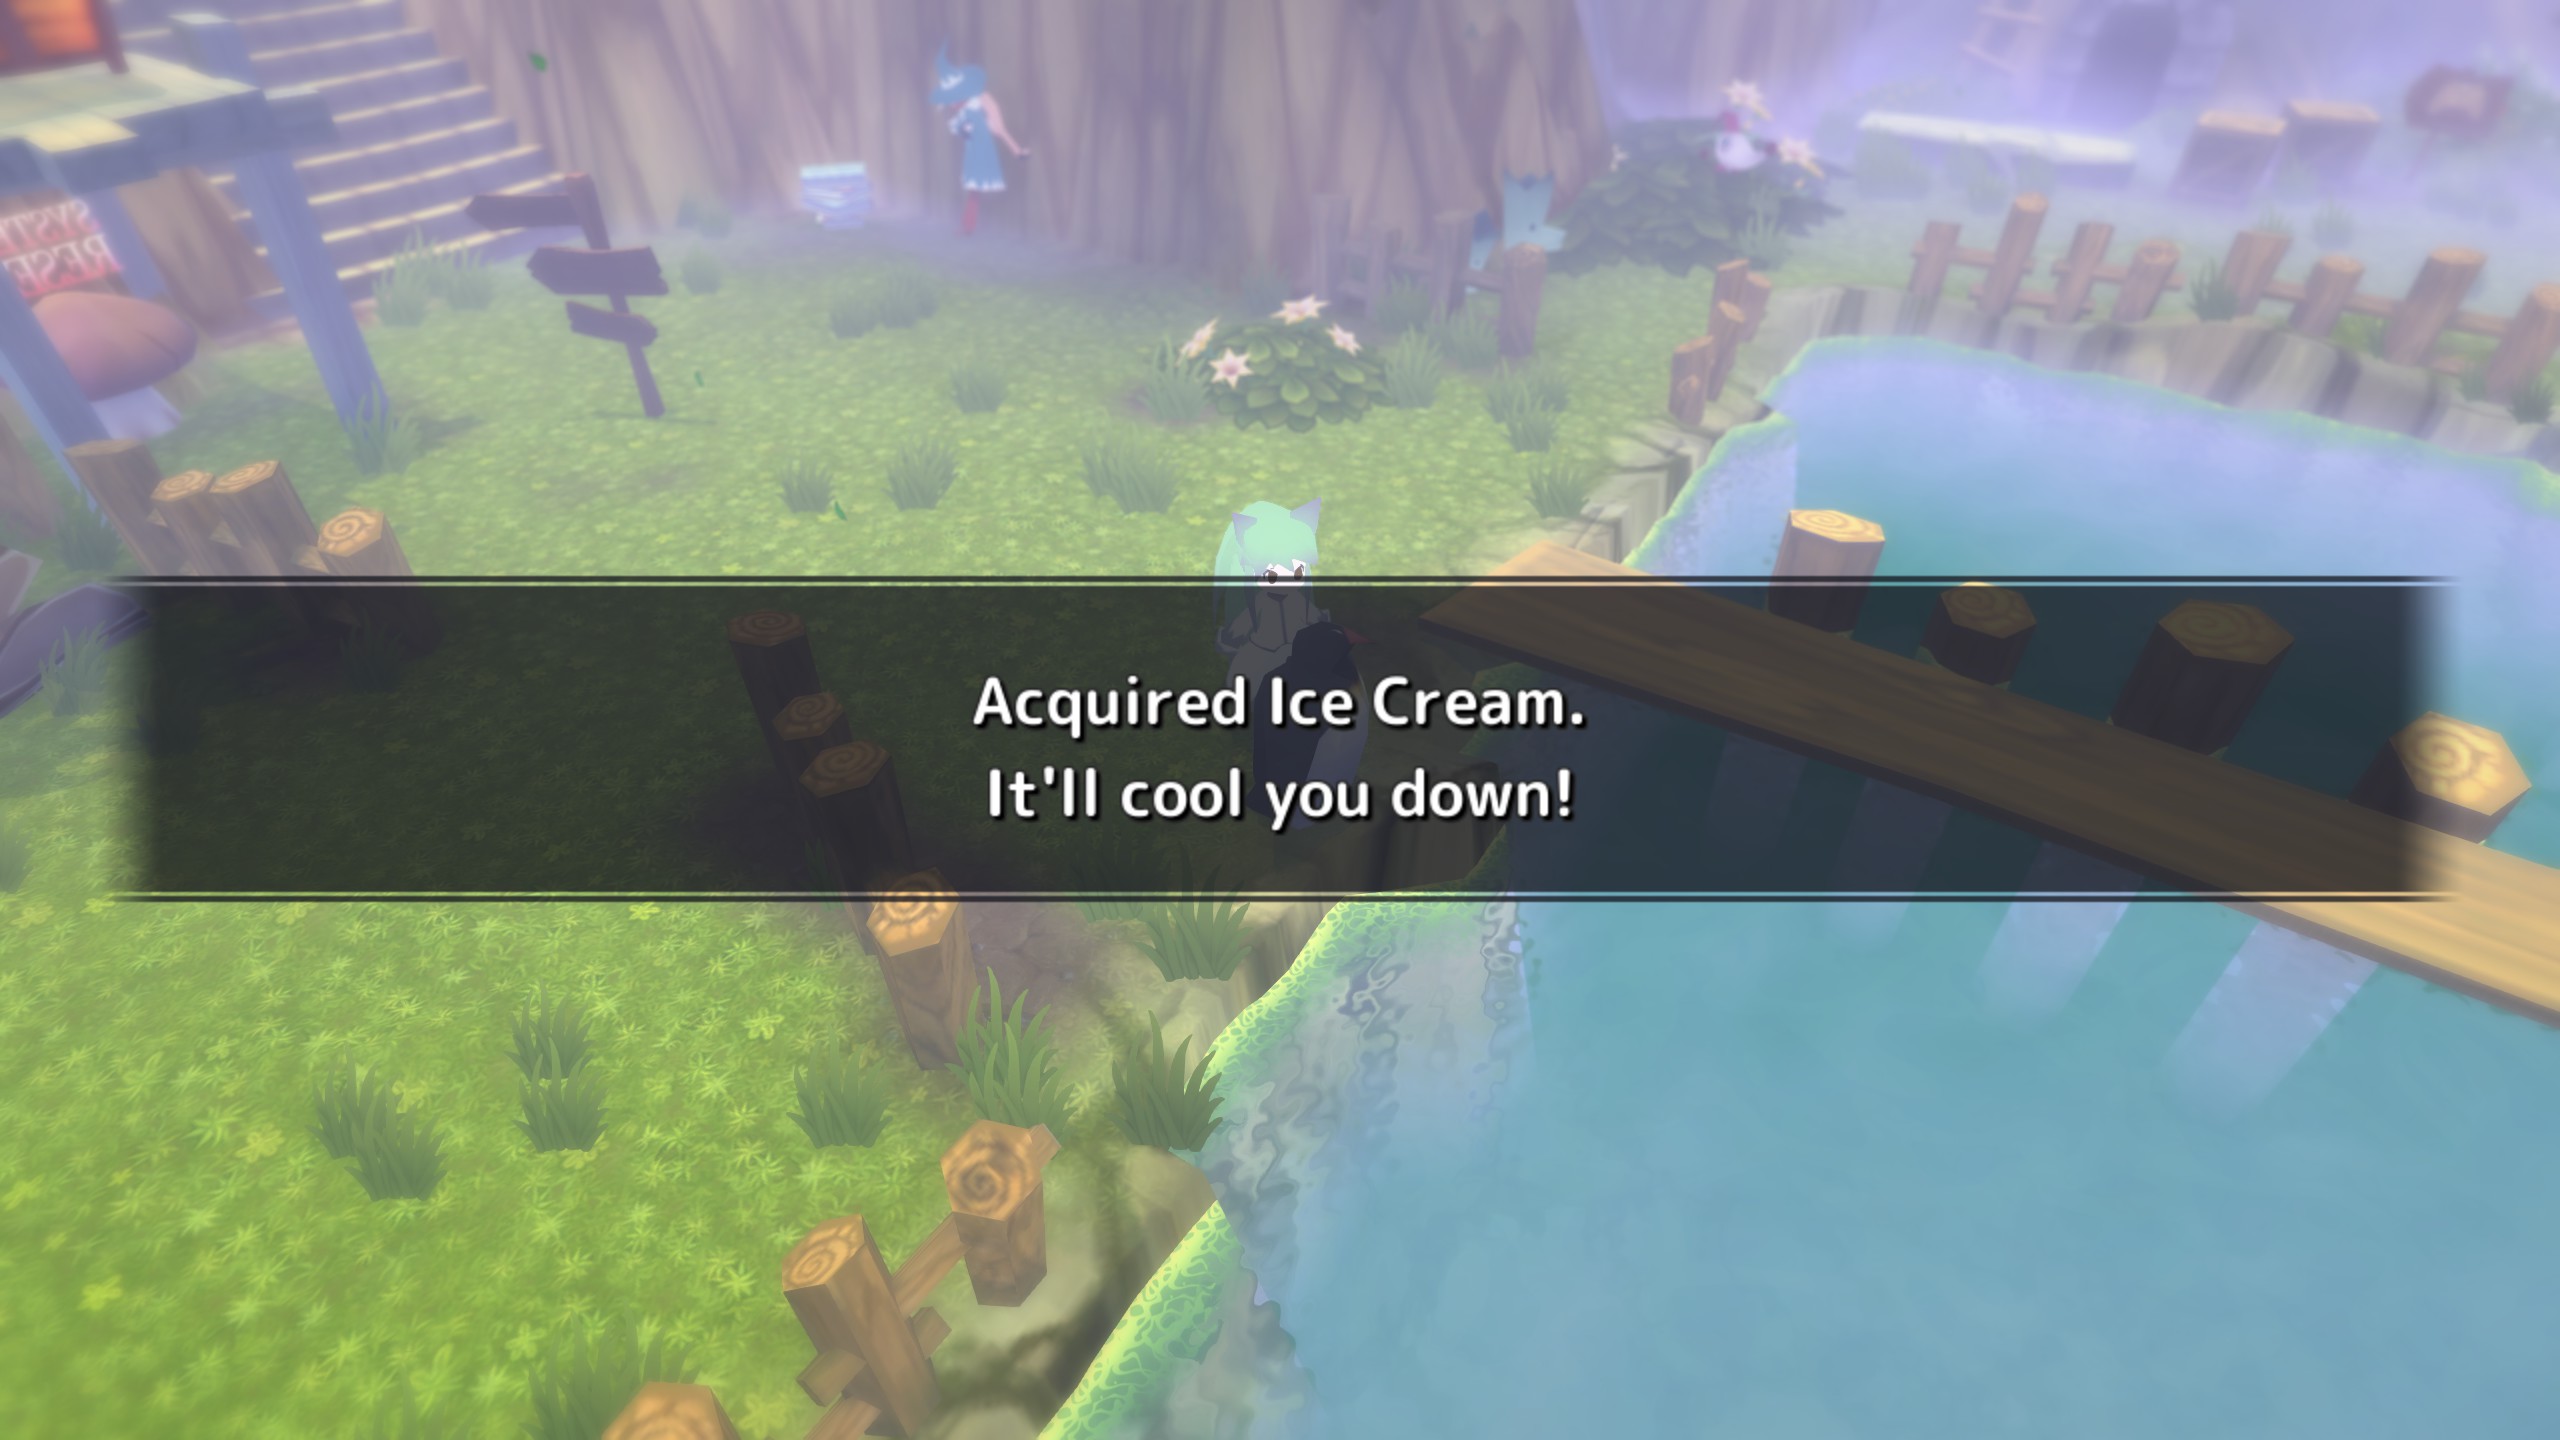
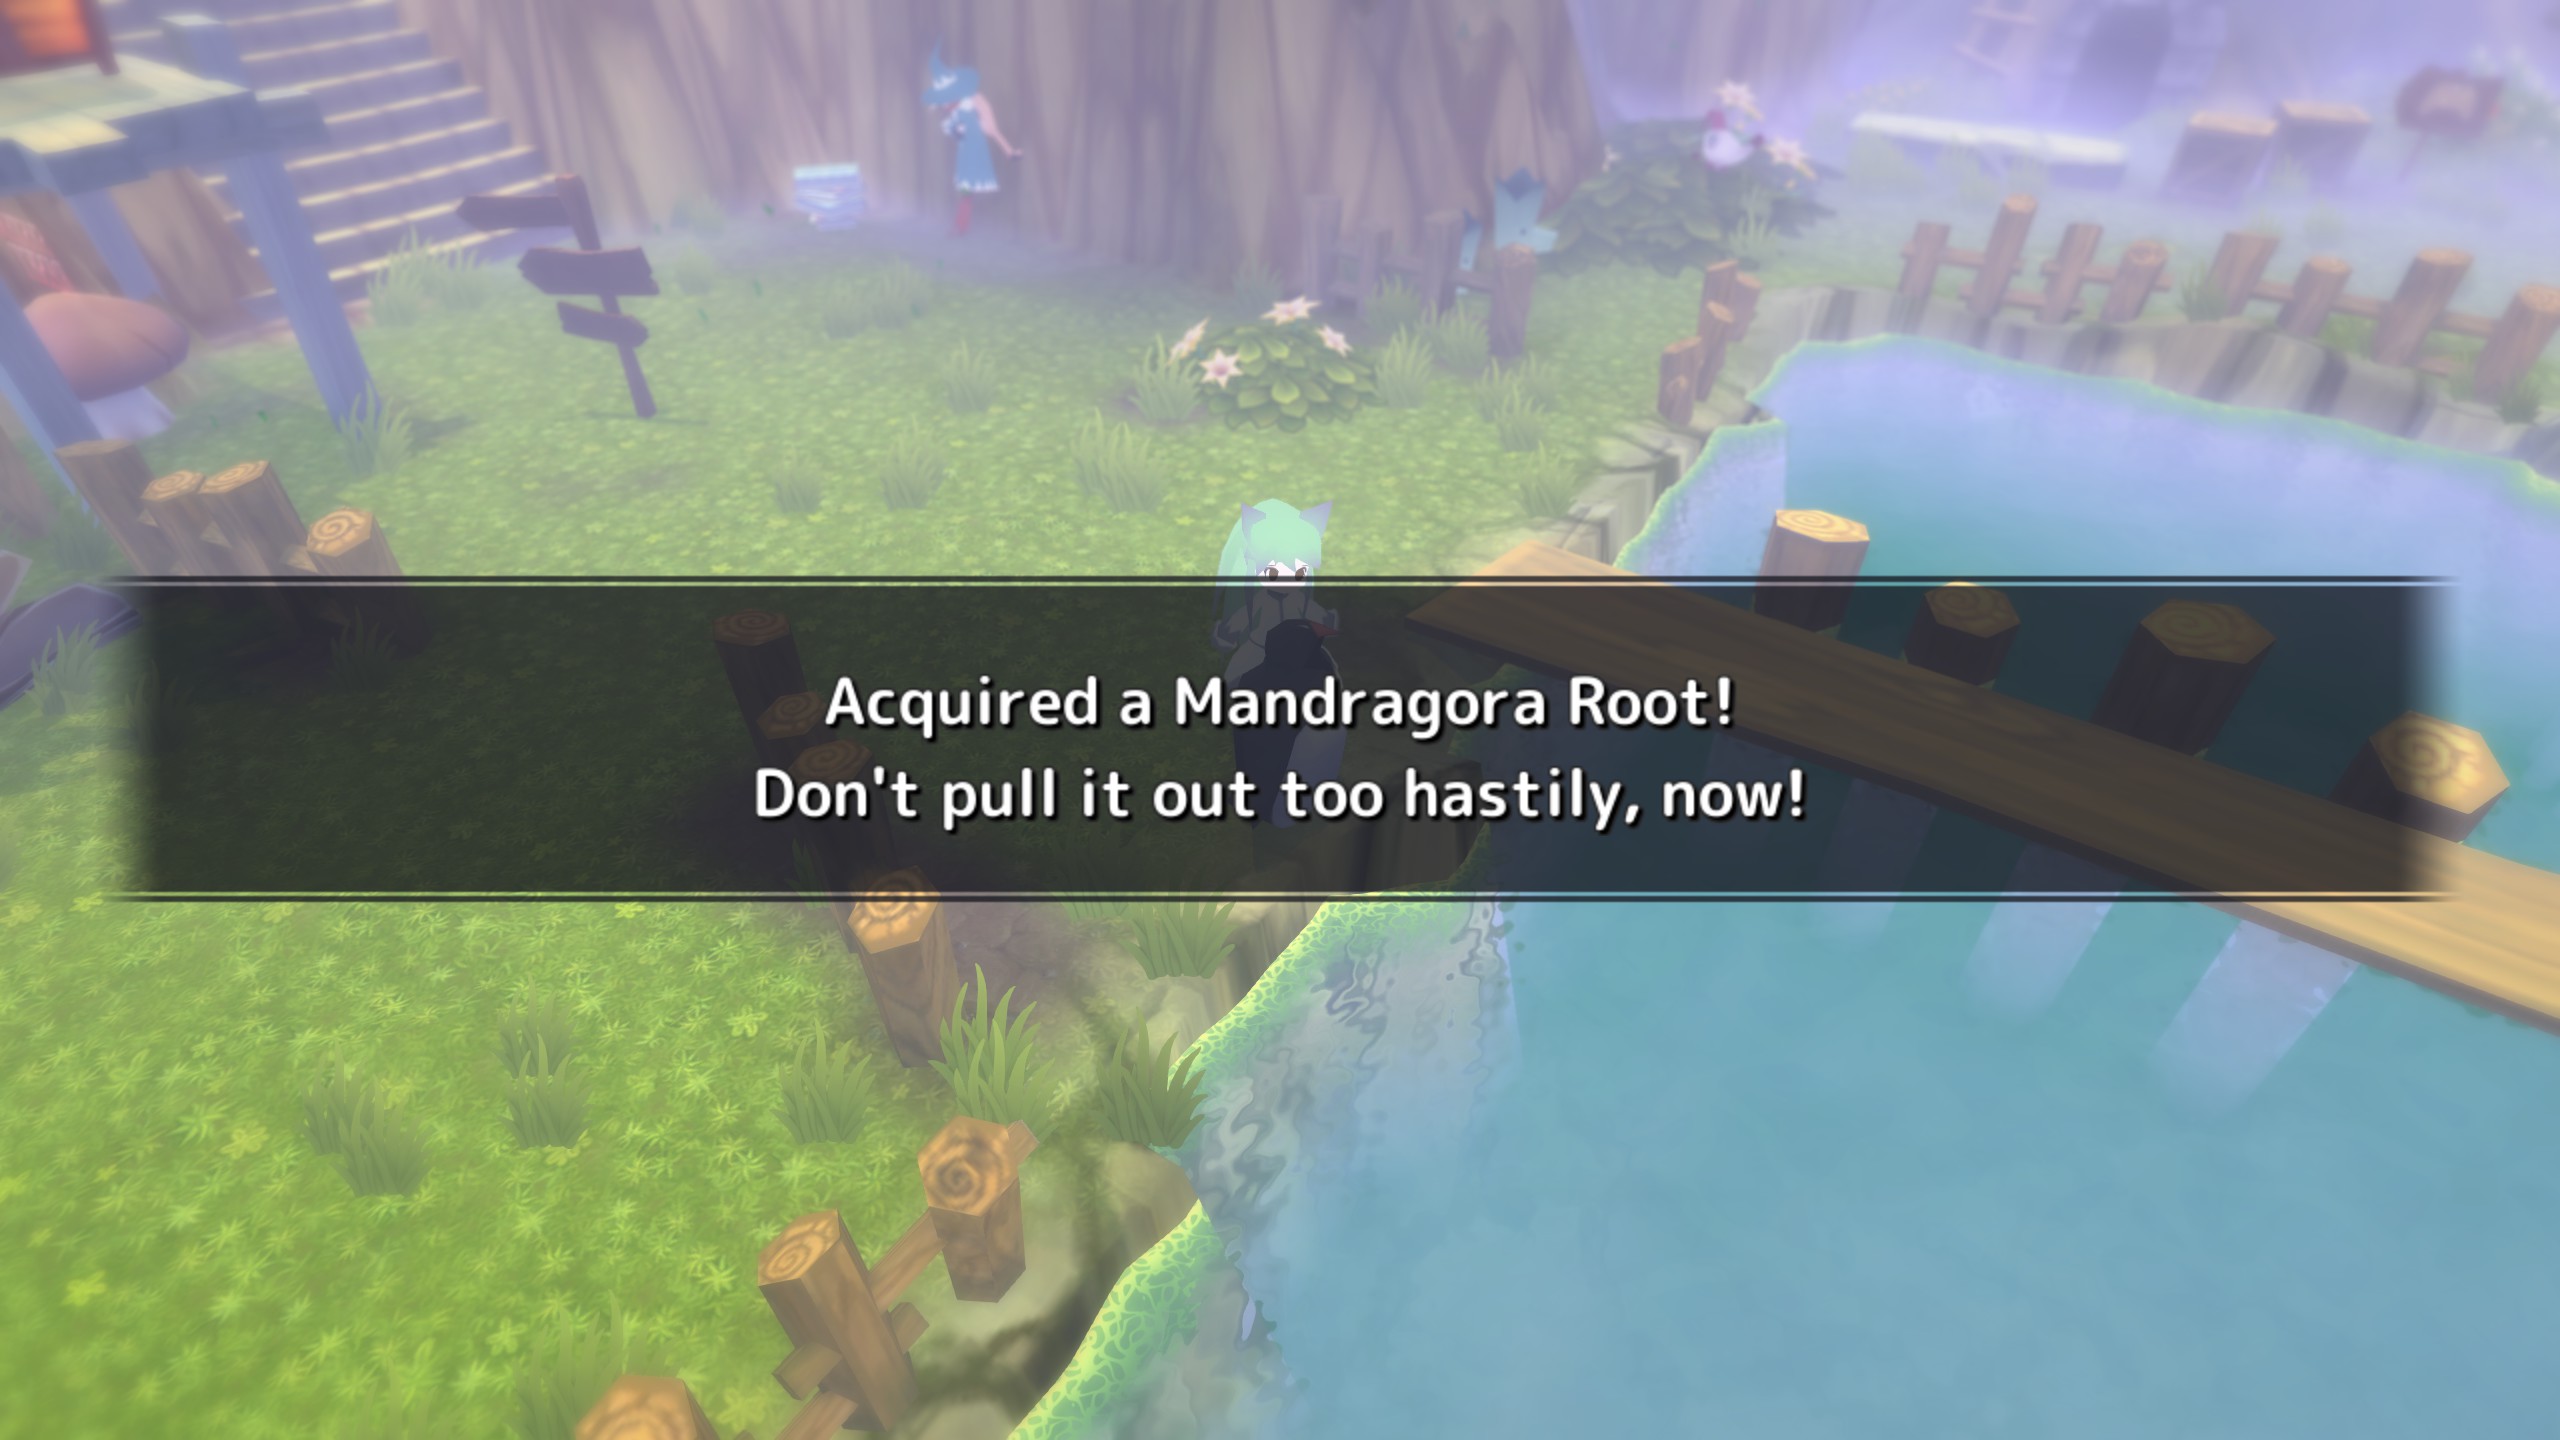
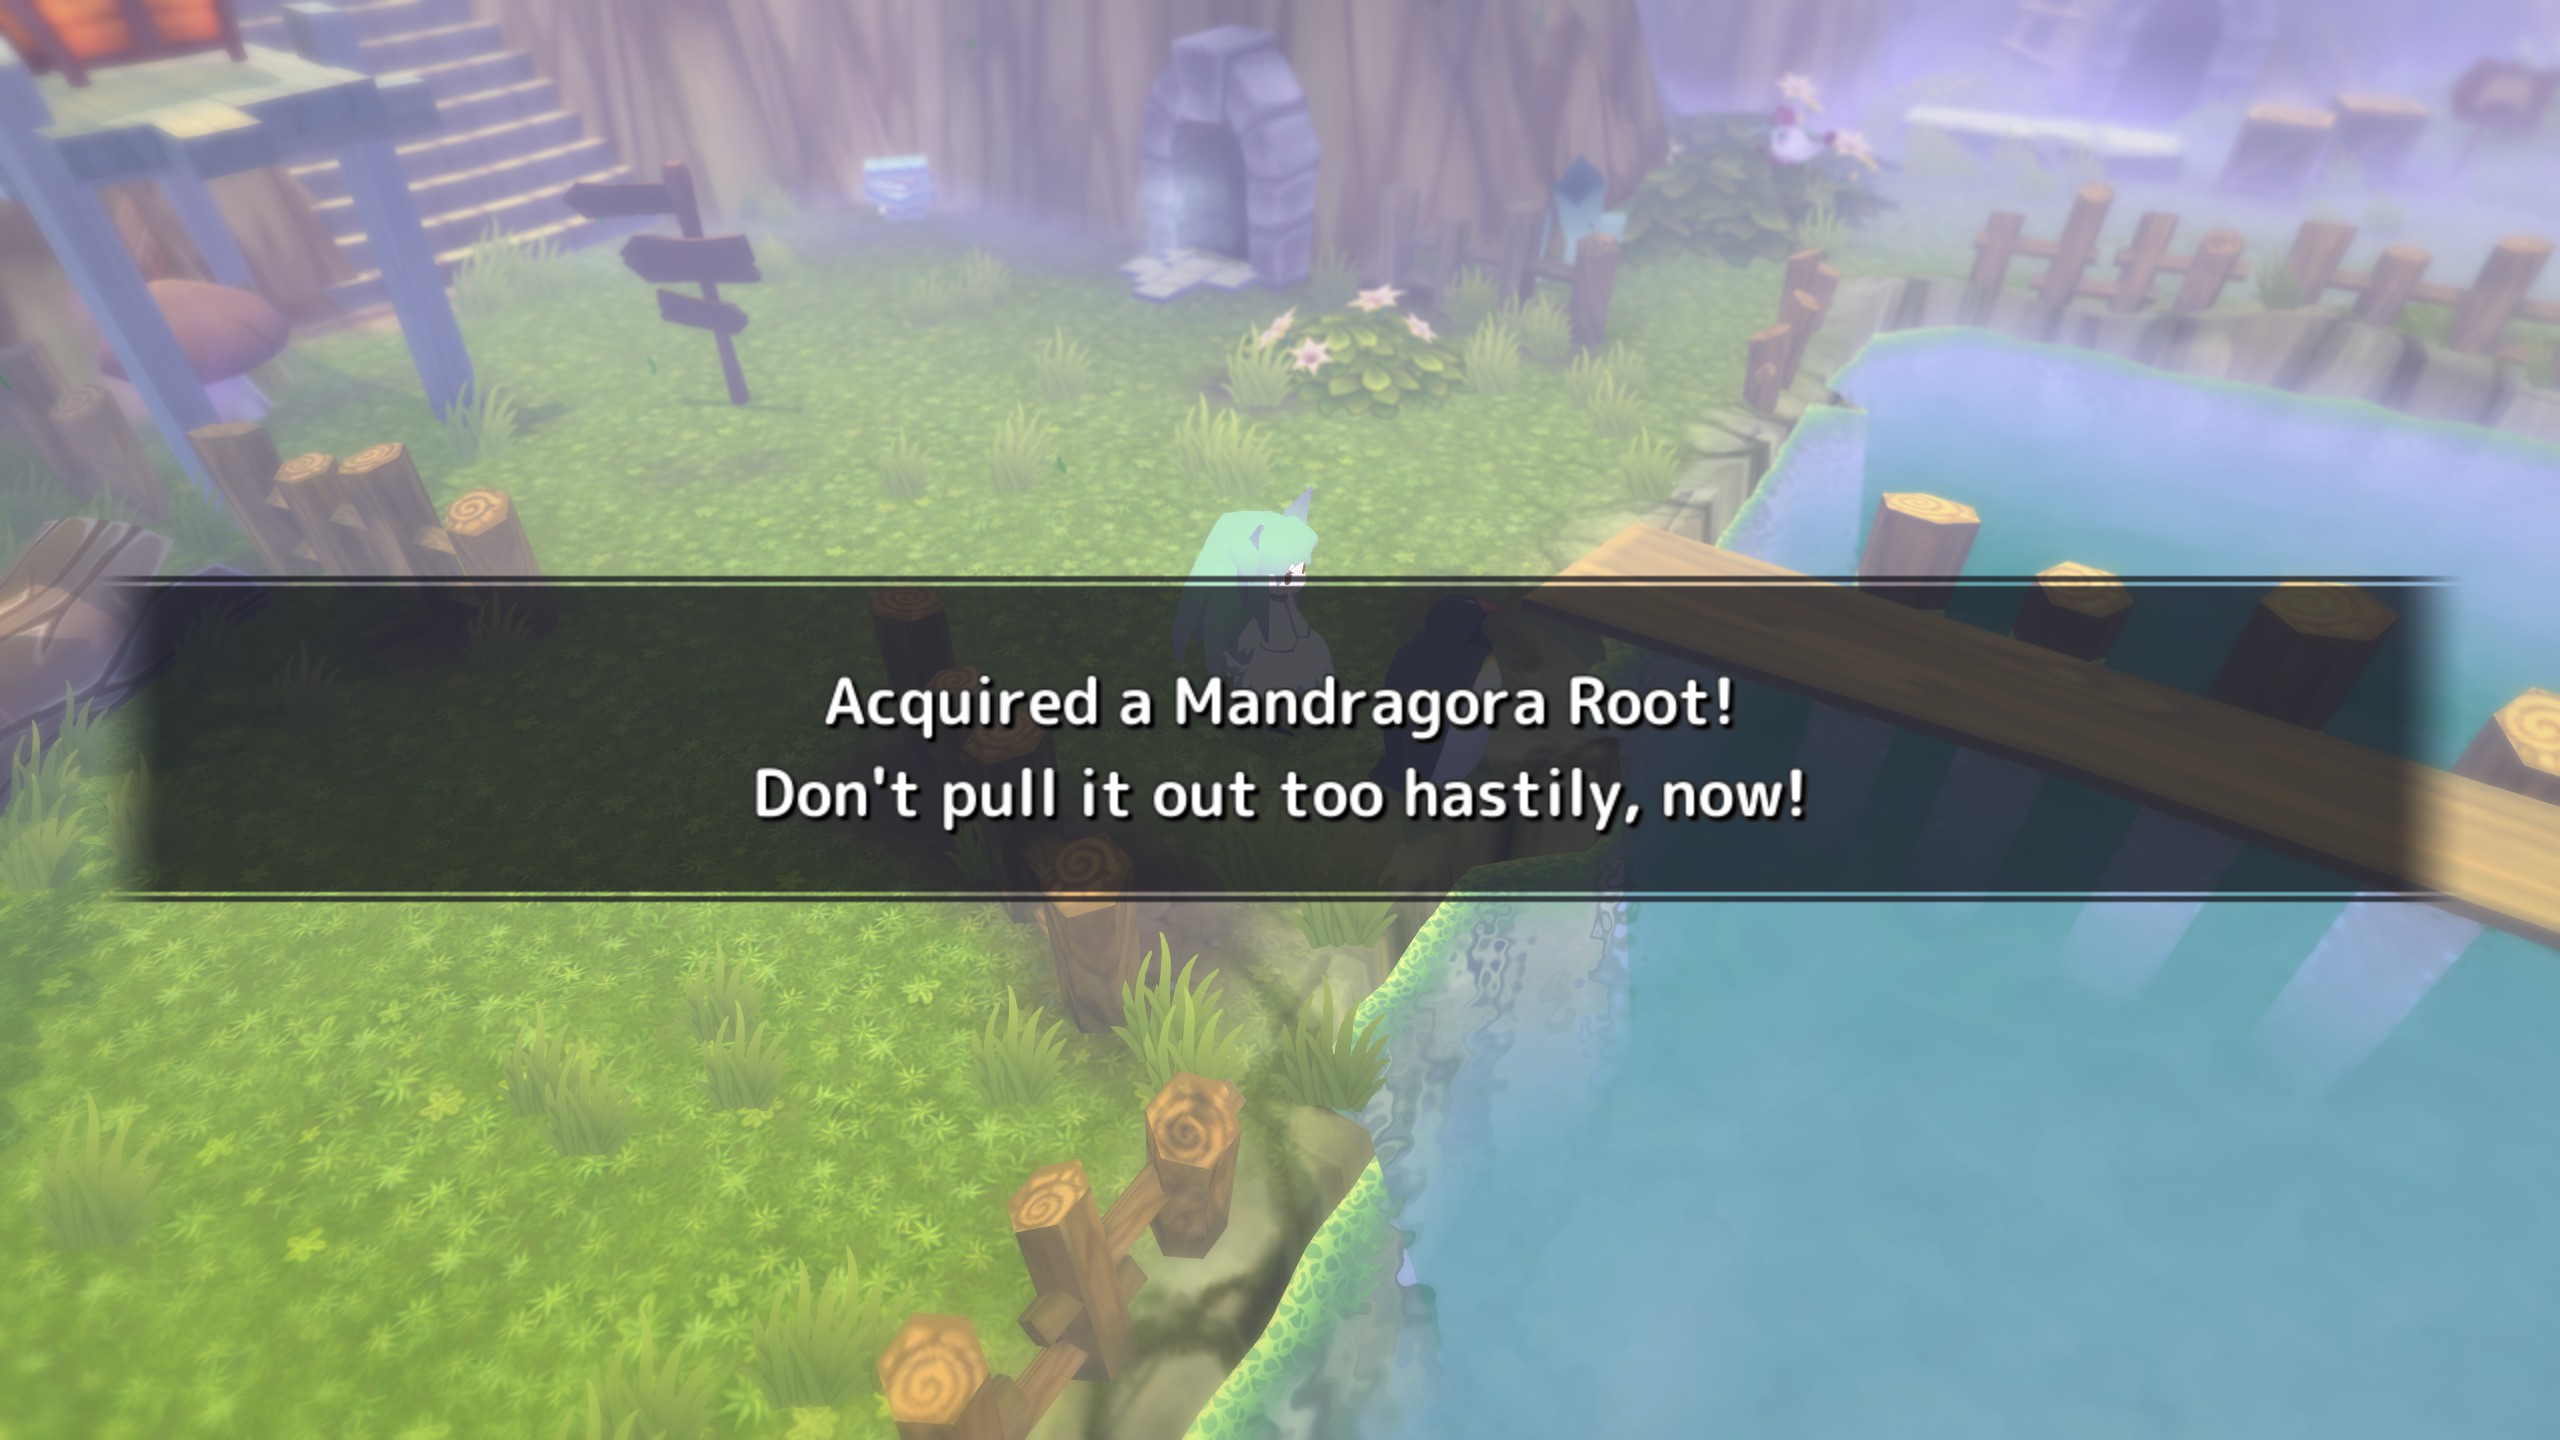
You can only get the icecream OR Mandragora Root depending on how you interact with the penguin. Asking the penguin to marry you will result in you getting the Mandragora Root, asking her instead to go steady with you will get you the ;Icecream'.
Famine (IRyS)bandit.gg Aug 31, 2024 @ 7:24pm 
how do you get the ice cream i have the penguins dating but idk
Meowish Mar 30, 2024 @ 4:10pm 
Almost forgot, another important item (Ring) that helps you fight the Mimic can be found on 6-1.
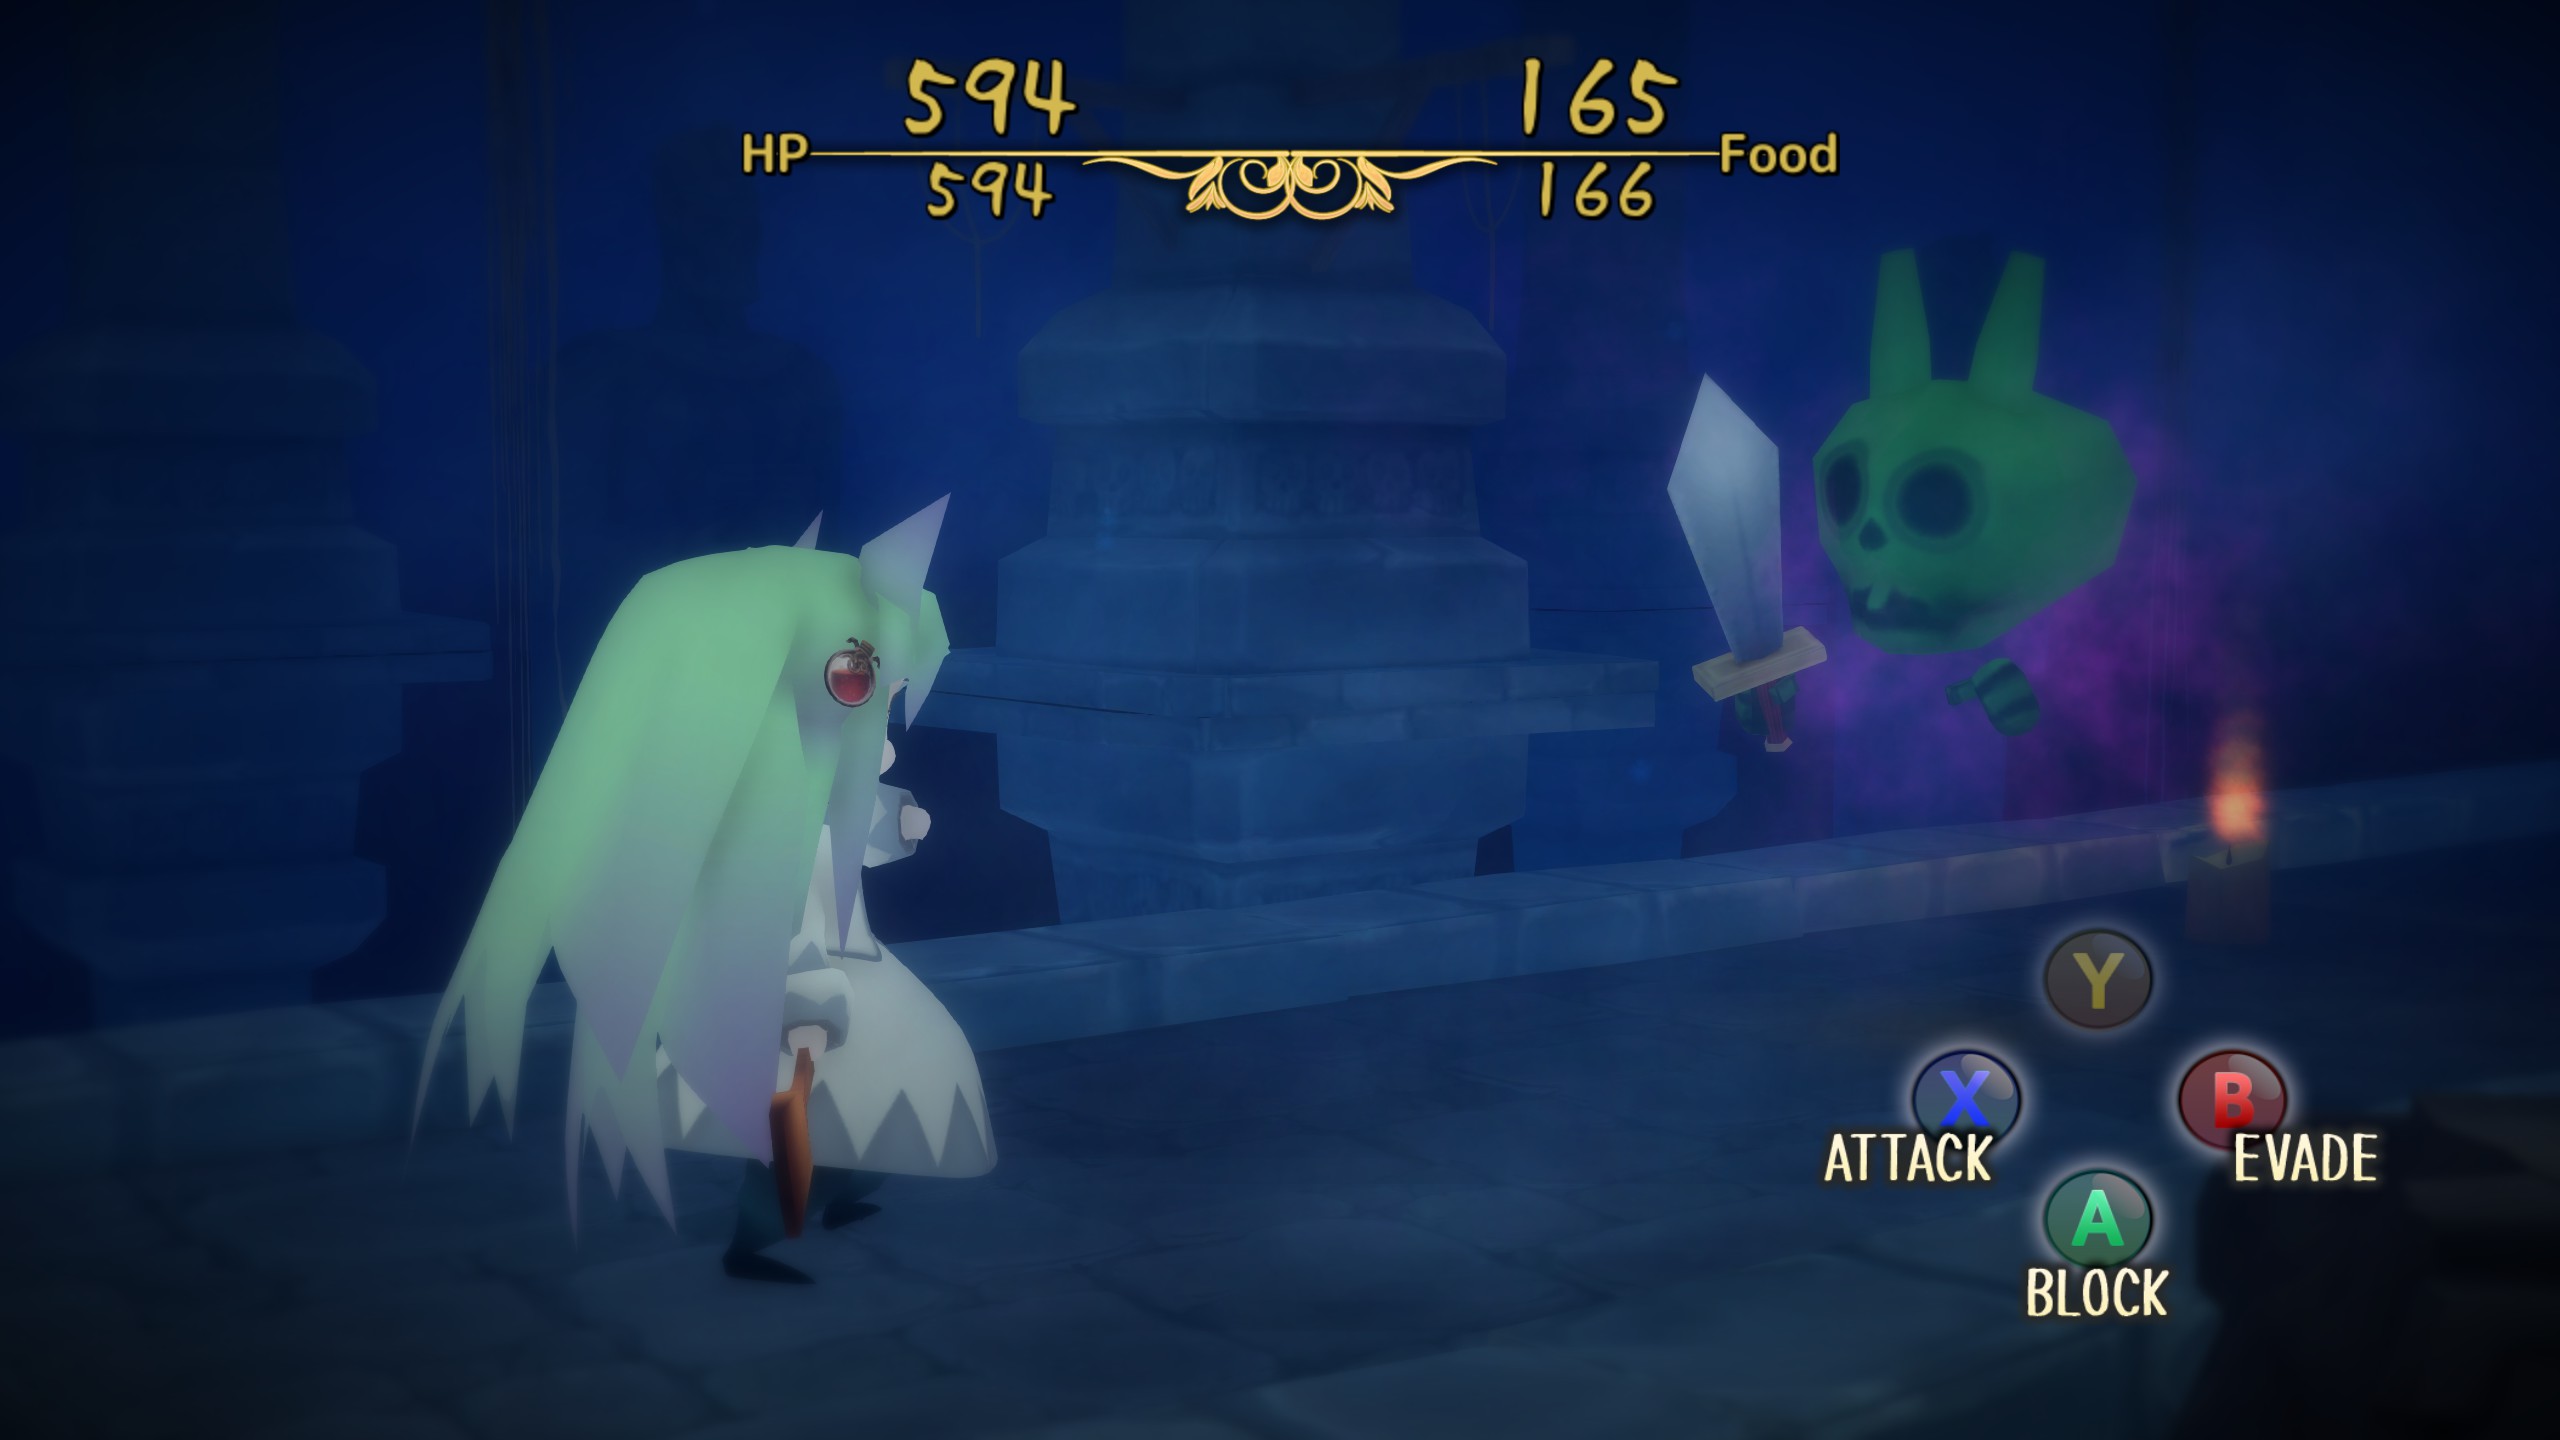
There are tons of Mimic in the EX dungeon, so make sure you equip the ring and get ready for them.
Meowish Mar 30, 2024 @ 2:20pm 
You already cover the part to unlock the DLC dungeon from your Rocky part.

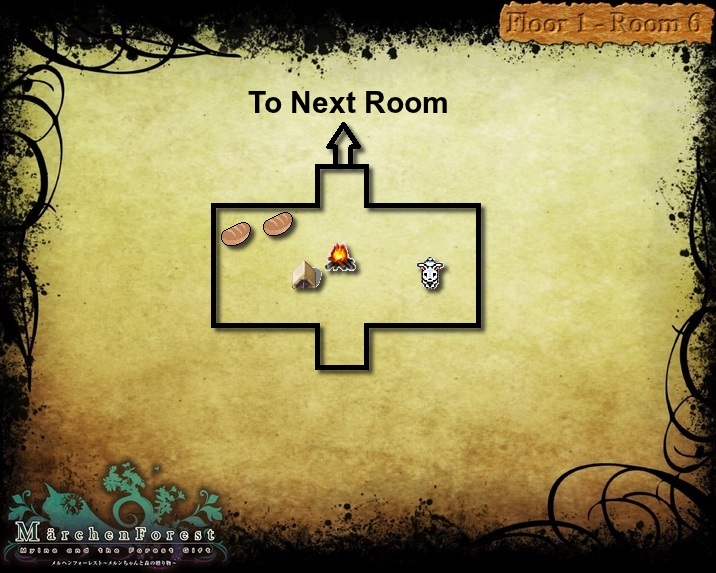
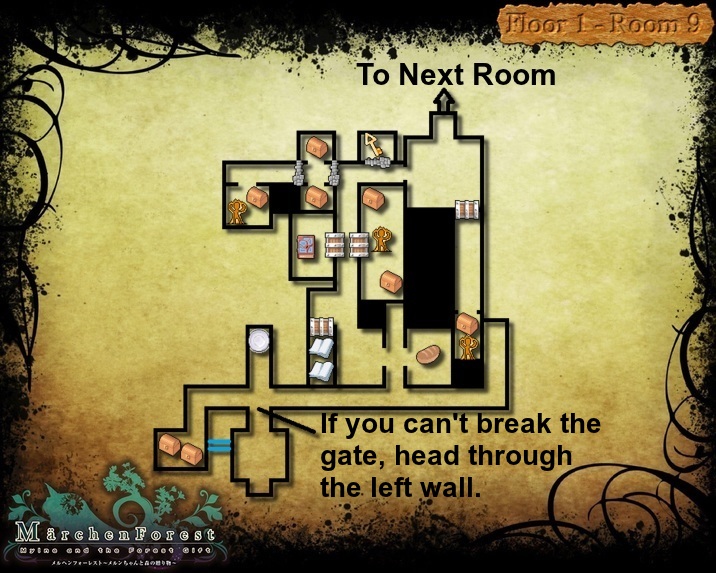
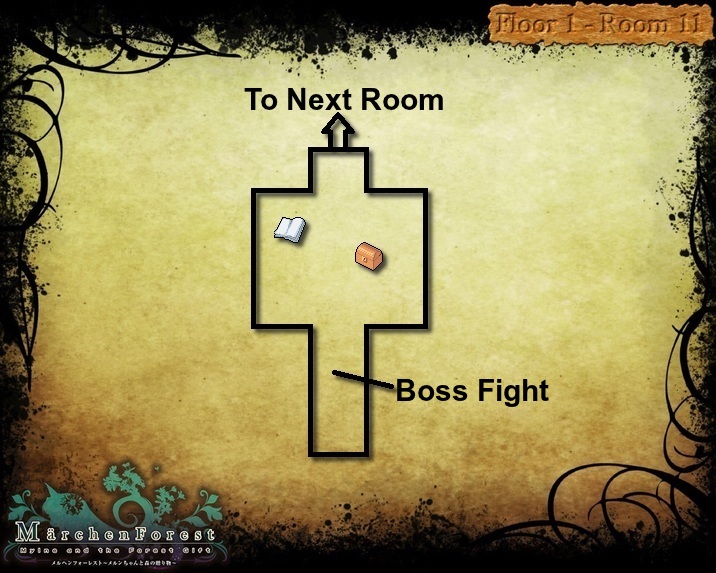
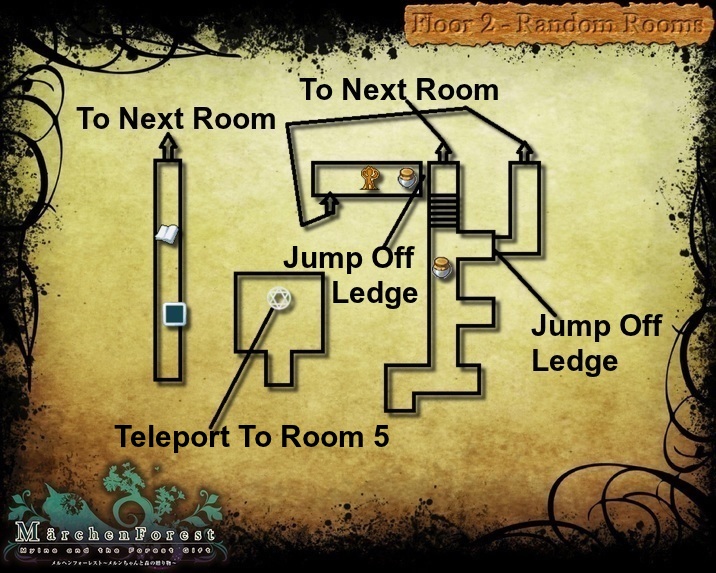
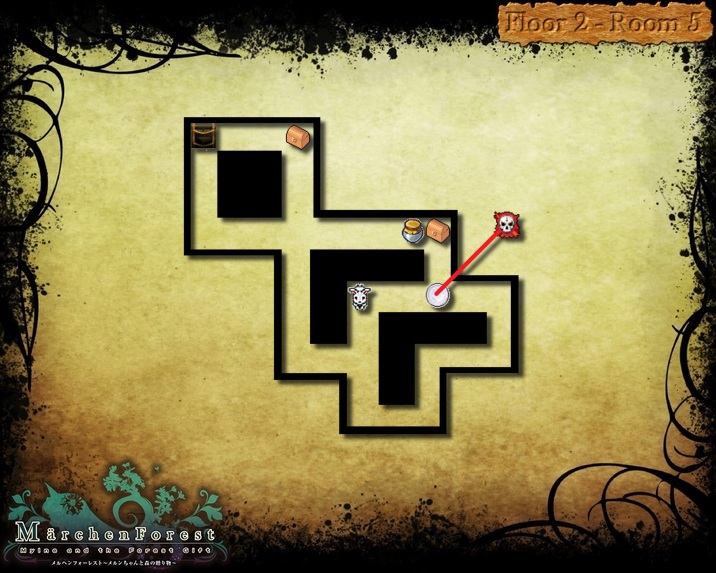
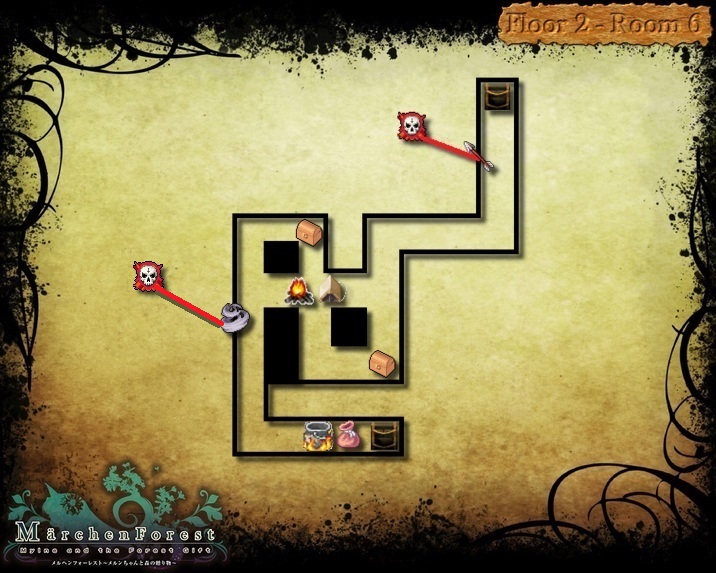
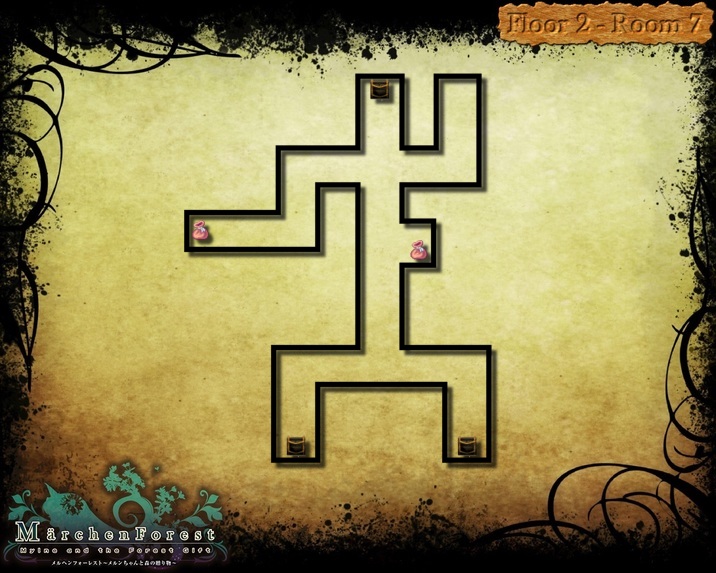
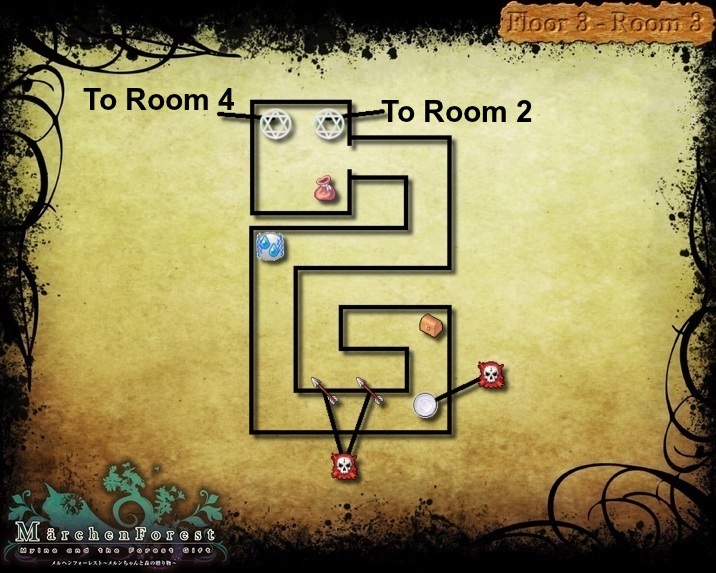
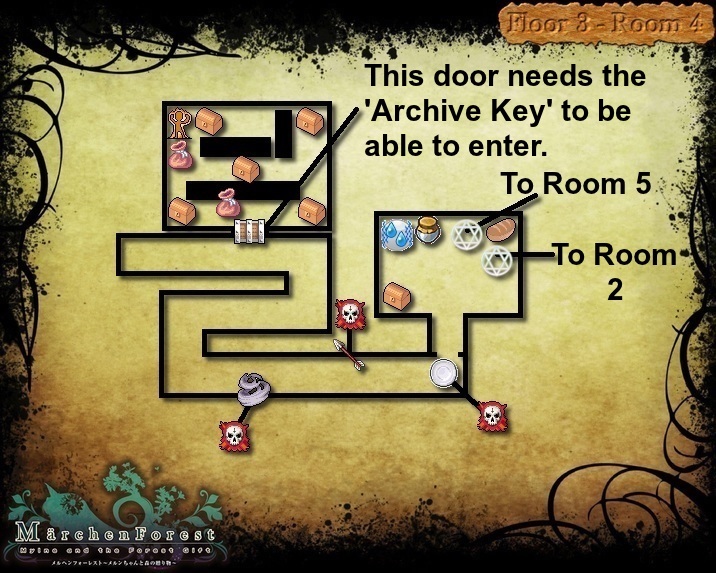
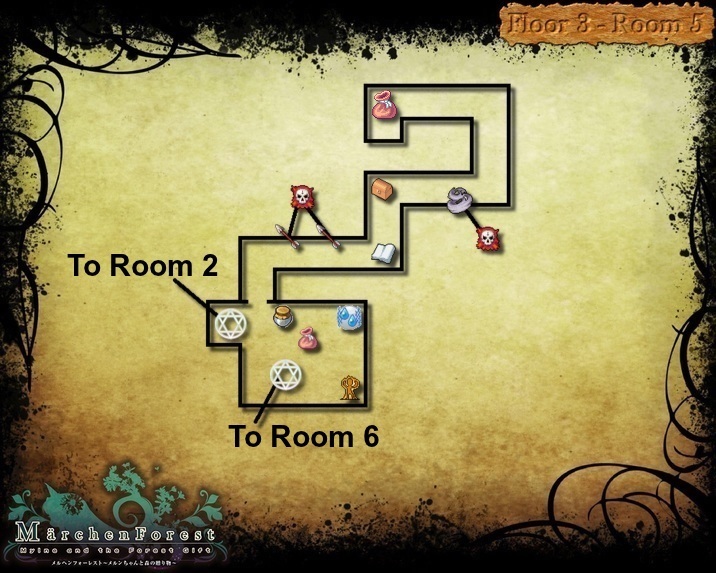
Dungeon 4~6 clearance which is pretty easy and straight forward.

You get the bomb from following the story, and then the unlimited bomb after that.

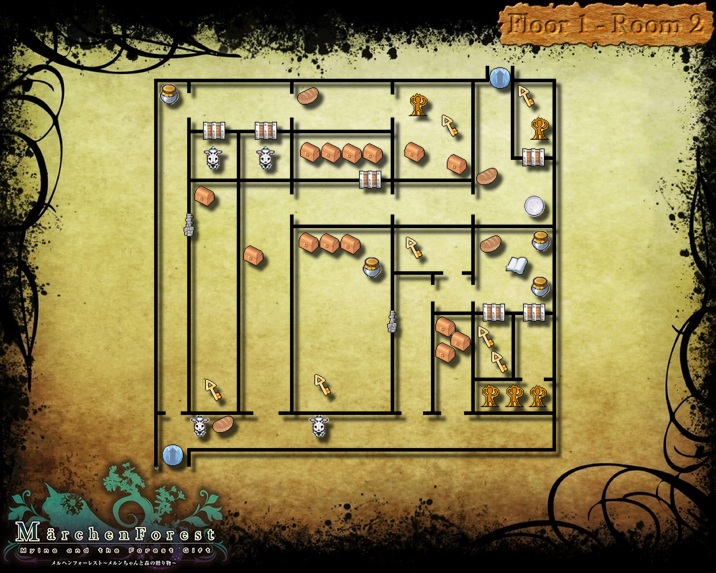
The Color Switch can be activated by using the bomb to remove hidden walls and the color hints is on the tablet next to the switch.

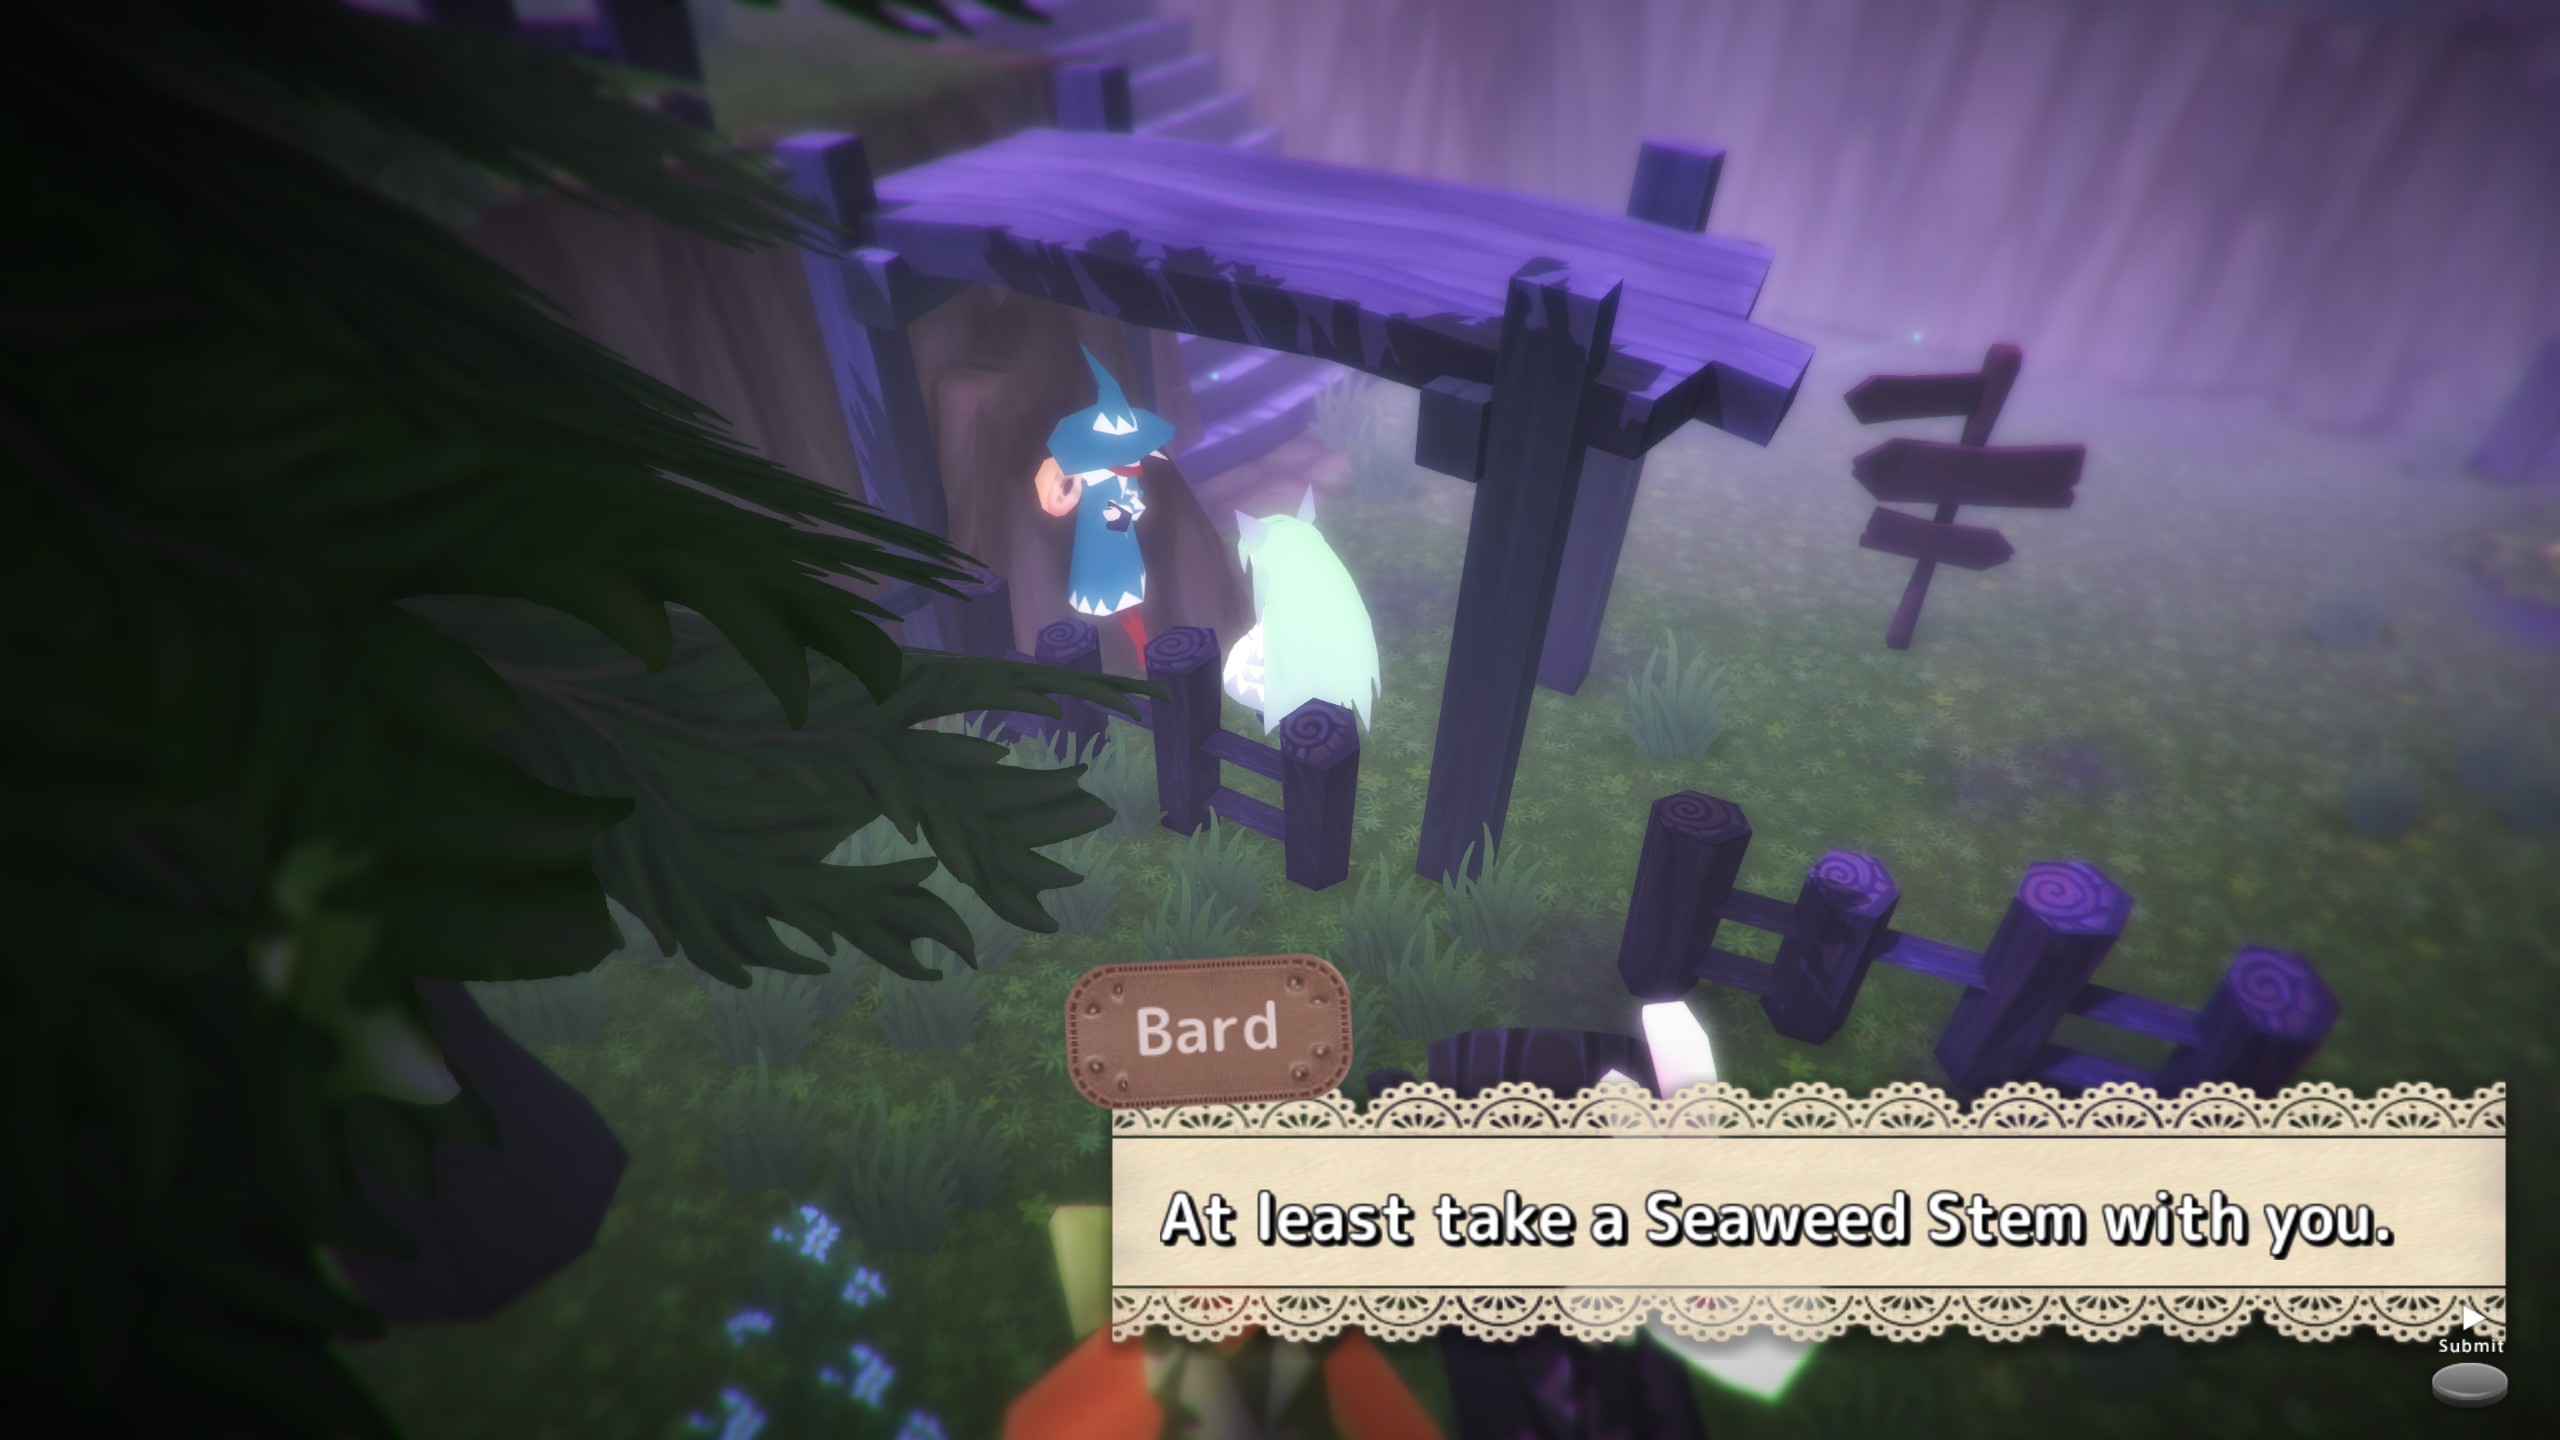
Frog is used to get treasure chests you can't reach, you can find the frog and get him by talking to it multiple times in the tent.

For the riddle at 5-16. Straight answer, the tallest guy is "D". Give him the item and return to the door where you get the quest to get a Ring. That ring protects you from arrows during the Knights fight when you use protection. But one can win the fight without it, so it's optional.

After clearing dungeon 6 you get the 3rd ending. But there's more, EX dungeon with a hidden ending is unlocked with the boss's tombstone.
Plantszaza Mar 30, 2024 @ 2:15pm 
How about giving the files to someone else then have they upload it and credit it back to you?
Meowish Mar 30, 2024 @ 2:02pm 
Well, at least we can add in the info in the comments for those looking i guess.

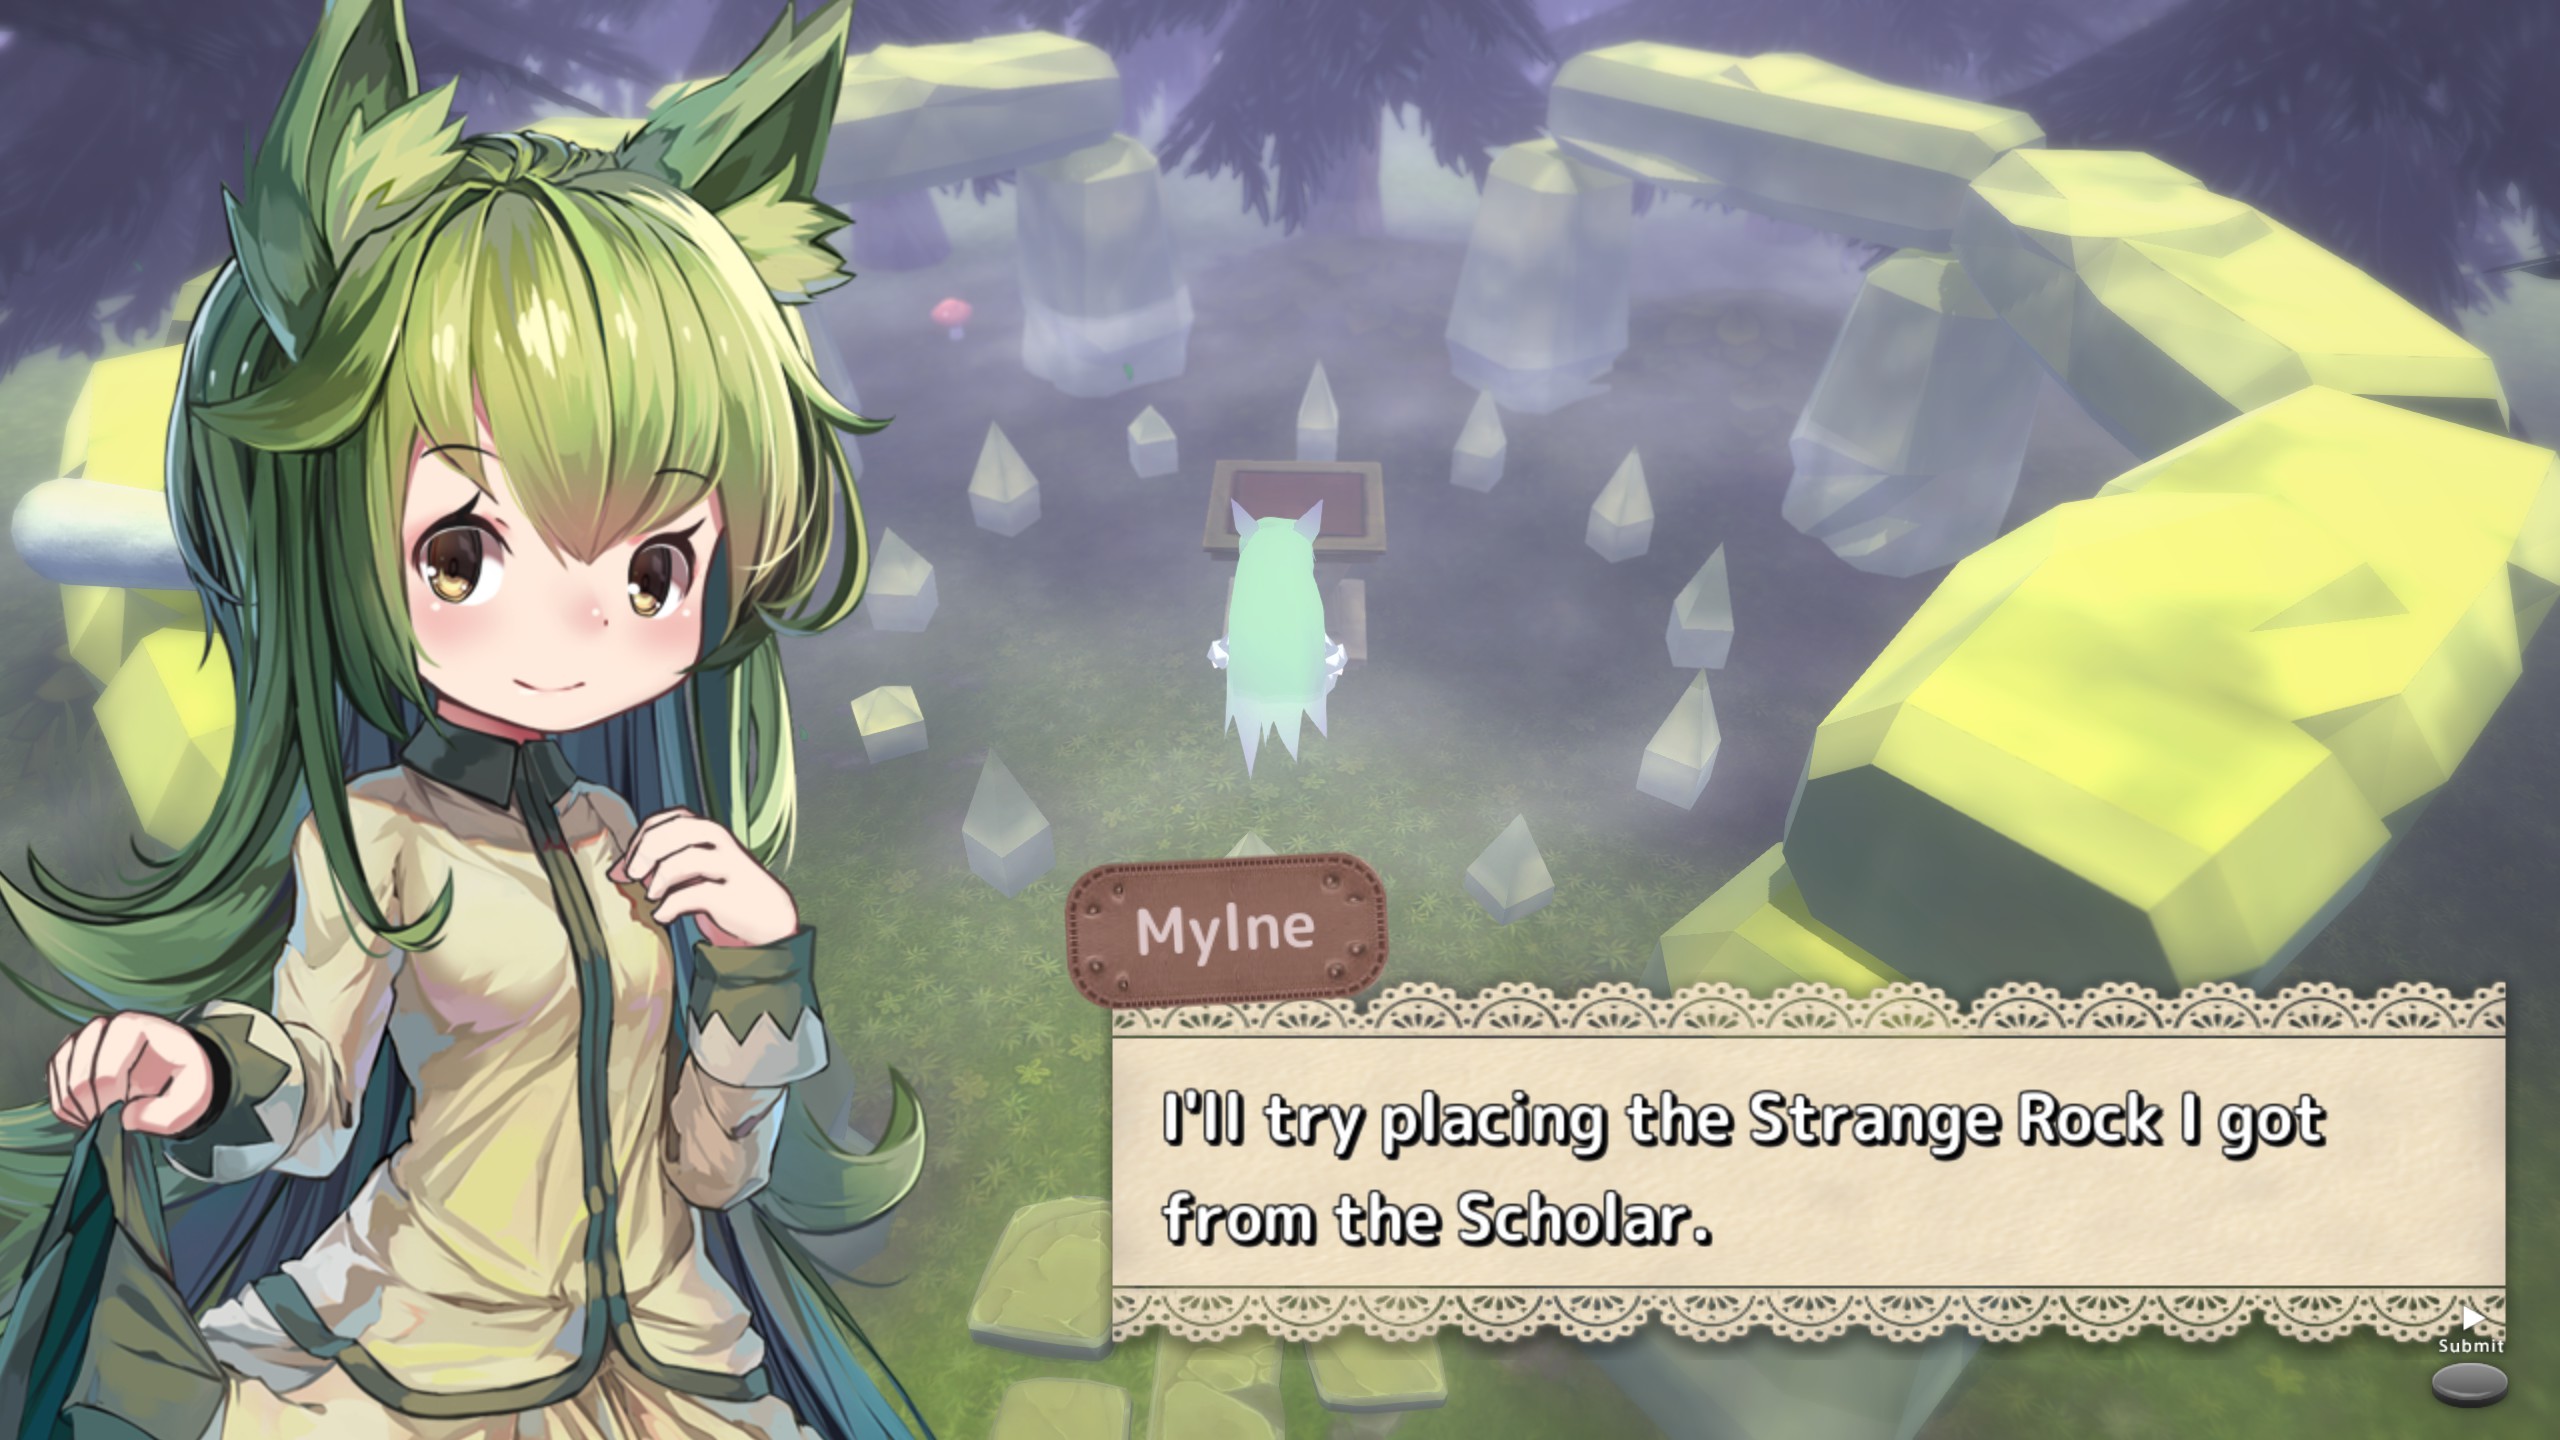
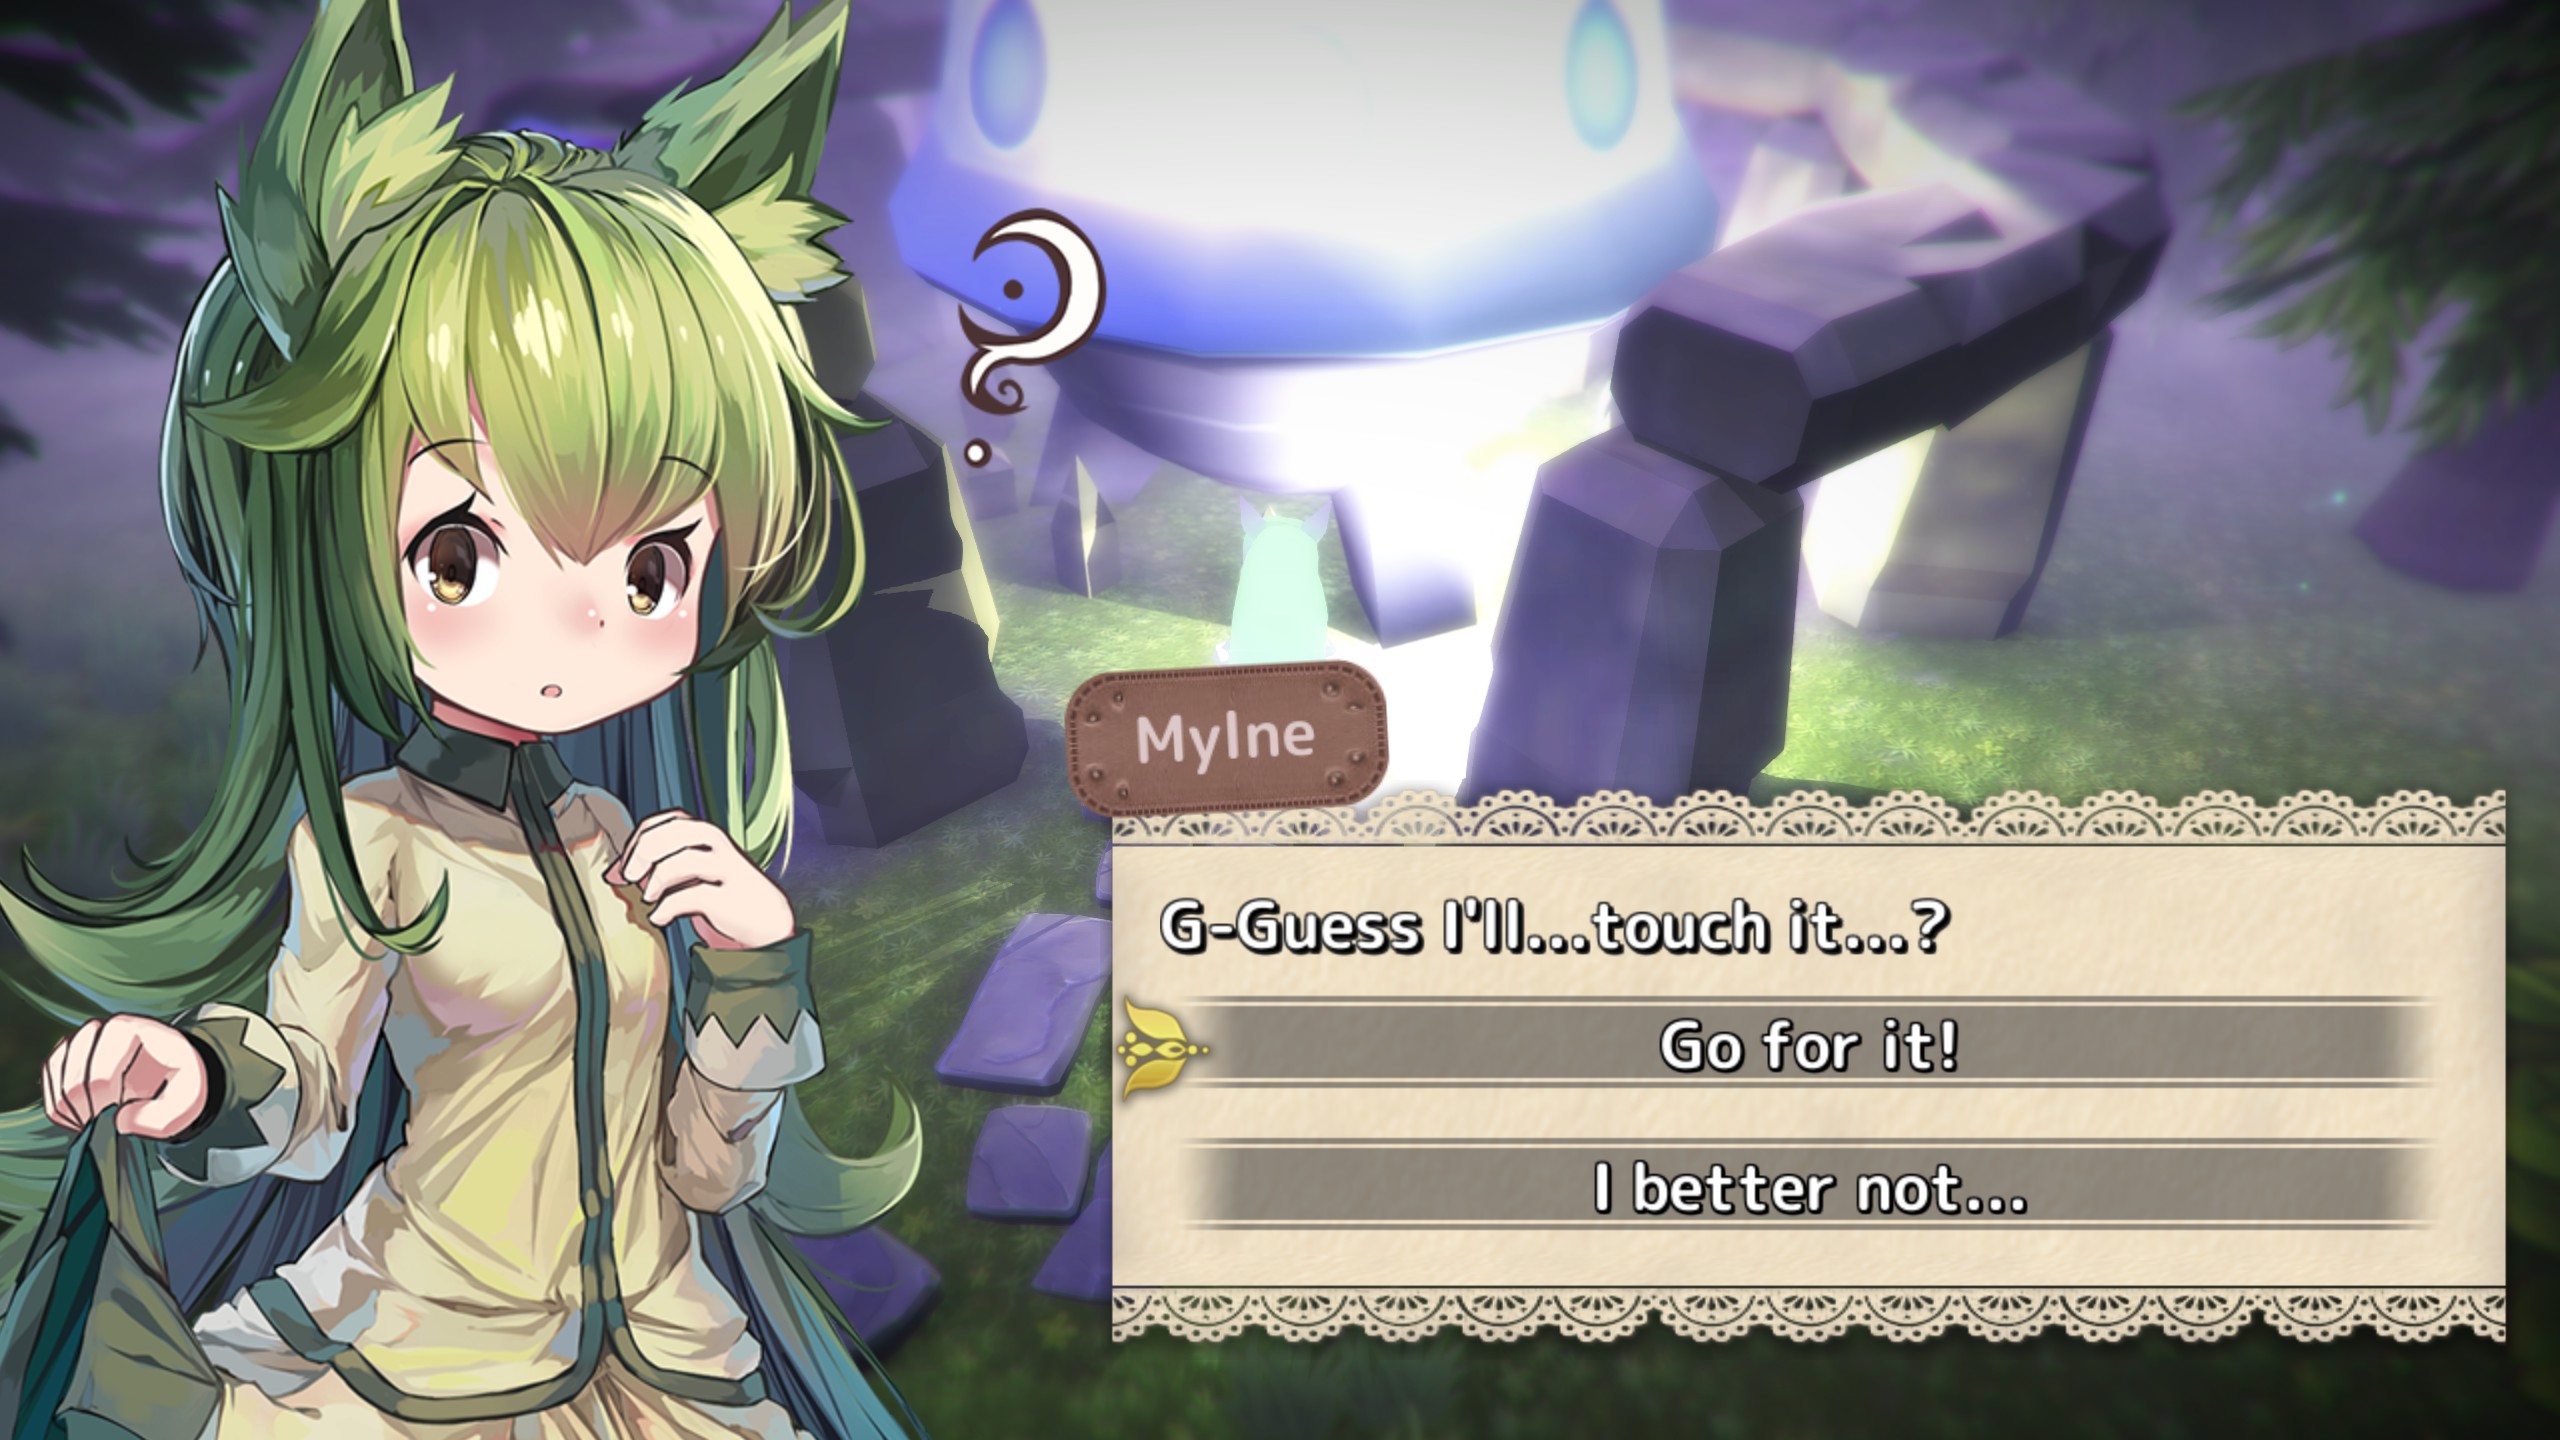
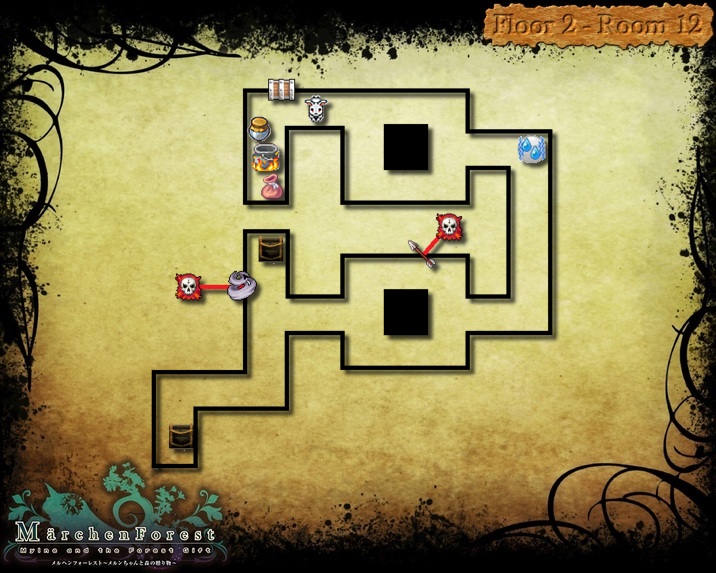
After fighting Dungeon 6 Boss once (unlock the tombstone at starting area) > Go in tombstone dungeon, look for abandoned mine and find a book > Goto 5-12 and give the book to researcher in exchange with lute. Use the lute on golden platform on 5-12 and summon boss fight (Unlock EX dungeon tombstone at starting area). Enter tombstone and fight the boss gets you the key to the 2nd floor of the EX dungeon. Goto 6-3 and summon another boss fight with the lute on the golden platform there (unlocks another tombstone that acts as another entrance to the same EX dungeon). Clear all the way to Floor 2 and the rest is straight forward from there to the final boss fight and ending.
sylardean  [author] Mar 30, 2024 @ 1:58pm 
@Meowish yeah, i dont think you get what i'm saying.. I cant even add 1 more line of text, im completely maxed out of STEAM storage space.. LOL! Until they upgrade space or offer a paid service for more storage space for Guide Writers it'll always be on hold and in limbo until I can finish it.
Meowish Mar 30, 2024 @ 1:53pm 
The DLC doesn't require a long guide imo...
Just a few more instructions on how and where to find certain stuffs will get those seeking for answers going.
So you can easily add that to this guide so you can proudly call it a "Complete Guide".

The only important stuffs to look out for on Dungeon 4~6 is the Frog, the bomb, the Ring Quest, and that's probably it. For EX dungeon hidden stuffs, some might need help on where to find them. But for those who actively doing the boss hunt should stumble upon the starting line easily. Just that the 2nd place to go could be tricky. And the 3rd usable goods the lute will start the boss fight which is probably a good thing to warn in a guide. After that 2 boss fight, it's the EX dungeon clearing with puzzles which doesn't require a guide as the NPC is there to give enough info, but making one for none Japanese users will make your guide useful i bet. Honestly it all can be summarized shorter than what i typed here.. lol
sylardean  [author] Mar 30, 2024 @ 1:43pm 
@Meowish i've actually done a guide for the updated game too but unfortunately i've run out of STEAM Storage space that they give you with the other guides so I can't ever finish it, hence why I haven't released it.