Champions Online

Champions Online

217 ratings
Powerset Specifics
By SQUIGLONKER99
A listing and personal rating of each of the powers in the game, giving some rough ideas about how different powersets work, and what components are the most effective in the long run.
2
11
   
Award
Favorite
Favorited
Unfavorite
Introduction and Key
Power info up to date since February 23rd, 2019

Each of the powersets is prefaced with a short paragraph that details its general, self-contained gist, as well as a listing of what's good in the set, and what's bad. From there, powers are given their name, their scope of hit area and usage style, and a rating from 1 to 4 stars:

★ - One star denotes that the move is fairly worthless to most builds. If it's an energy builder, this usually means that it doesn't have any special effects on it - not that this is a huge factor, as you should always aim to minimize its usage.

★★ - Two stars denote moves that are either highly situational or only mediocre in performance (usually when a better alternative is available). Most energy builders with special effects (multiple targets hit, or a first-hit effect) get this rating.

★★★ - Three star moves generally can be worth going out of your way for. Especially for a character who uses the moves in a given set, this can be a good ability to base yourself around.

★★★★ - Four stars usually mean that the ability is either blatantly overpowered, is a main player in a build's setup for a certain powerset, or is ubiquitous in its usage (i.e. a must-have self heal).

It should finally be noted that the guide is a constant work in progress - currently, I'm doing work to re-evaluate some of the underrated or otherwise low-ranked moves. Also, keep in mind that a lot of this information is subject to change as more game updates might come in.
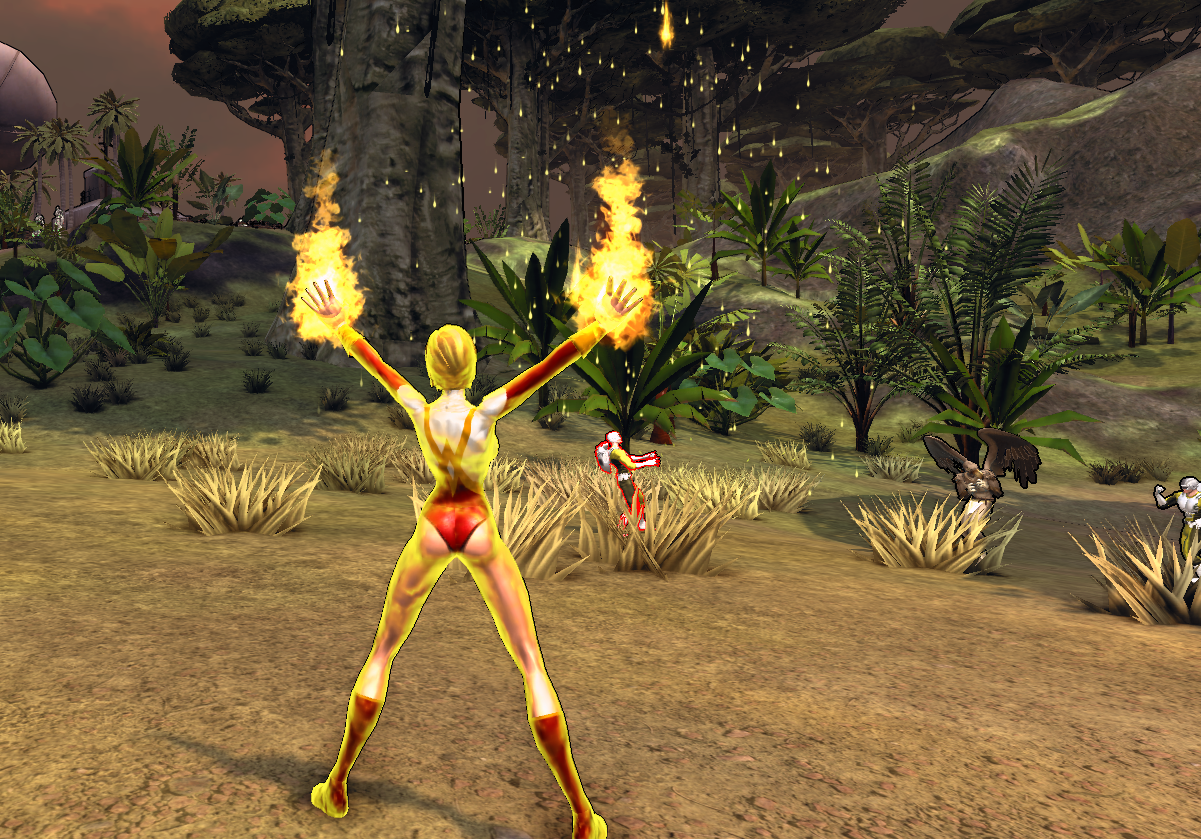
Fire
Fire is a set built around pure destruction. With a combination of bursts, maintains, and DoT effects, fire can completely ruin packs of enemies when used correctly.

Strengths
  • Extremely high DPS thanks to stacking DoTs and various defense debuffs.
  • Performs absolute best against bunched up mobs of enemies.
  • Can slow down and damage a wide spread of enemies
  • Minor support capabilities

Weaknesses
  • Energy Hog - Abilities cost a lot of energy to use and maintain!
  • Range - Very few of its moves have a reach over 50 feet, making this a very bad 'sniper' set
  • Low mobility

Recommended Stats: REC, END
Damage Types: Elemental-Fire


Throw Fire
Energy Builder
★★
The basic energy builder of Fire is not much different than others. Its bonus is that it can set people on fire with Clinging Flames on the first hit, which can add in a little more DoT effect and generate energy if you happen to have Thermal Reverberation. As an energy builder, though, you'll hopefully want to keep the usage of this to a minimum.
Burning Desire - enables the Energy Builder to chain to another target. Completely useless, as it doesn't generate extra energy, nor does it do any worthwhile damage.
Fuel my Fire - A cheap advantage that allows every hit of this move to apply Clinging Flames. If you want to set off your energy unlock, this is a surefire way to do it.

Fire Strike
Click-activated single-target attack (blast)
★★
Among tier 0 blasts and basic attacks, Fire Strike is one of the oddest. Instead of favoring charged burst damage, Fire Strike is a tap that boosts its own damage on each cast, up to roughly 80% extra damage and minutely out-damaging some of the other blast abilities. Each stack of this damage-boosting buff, Engulfing Flames, also increases its chance to apply Clinging Flames. Its big offset is that, compared to most other blasts, it also is somewhat energy inefficient due to requiring repeated taps. Like most low-tier abilities, its best used for utility.
Wildfire - Refreshes the duration of a Clinging Flames effect on your target, as well as a small pulse of AoE damage.
Kindling - This advantage causes its stacking damage boost to also provide up to 40% extra damage on your next non-fire strike fire attack. If you plan on basing a build around fire-burst damage (fireball and pyre) this might see some use.
Fan the Flames - Each hit you land with Fire Strike will refresh the duration of Engulfing Flames, a stacking resistance debuff that reduces resistance to all elemental damage - but with three times the effectiveness with fire damage.

Fiery Will
Ranged Toggle Form
★★
Fiery Will grants you increased ranged and melee damage, scaling best off of your Recovery stat - backing up Fire's high-energy playstyle. Its main drawback is that the user needs to specifically apply Burning effects to get the form to stack up, limiting its usefulness purely to fire builds.

Immolation
Active offense
★★
Immolation is fairly typical among active offense measures - it offers a temporary boost to damage output (usually quite sizable), alongside other, power-unique, auxiliary buffs. In Immolation's case, it offers extra power efficiency, making it easier to use powers. Enemies attacking you also have a 25% chance to be affected by some Clinging Flames.
Blazing Body - Causes you to do periodic damage to targets around you while this is active. Much like the advantages before it, the damage on it isn't really all that worthwhile, and also has very short range.

Fire Shield
Block
★★★
Much like Active Offenses, the blocks offer a basic pattern. They offer baseline extra defense, alongside support bonuses. Fire Shield's bonus is that it will apply clinging flames to enemies who attack in melee range, as well as dealing light damage to enemies that attack you.
Fiery Spirit - After releasing this block, you get a 4 second period where you are granted strong bonuses to knock resistance. If you release the block and get stuck in a held, doing this also will provide a burst of break-free strength, allowing you to potentially get out of the hold much earlier.

Thermal Reverberation
Energy Unlock
★★★★
Thermal Reverberation is something of a requirement for fire characters. Depending on how much fire you can churn out, this energy unlock has the potential to flood your energy bar to full. Its disadvantages include its lack of applicability outside the fire set, as well as its reliance on Endurance.

Heat Wave
Maintained single-target hold
★★★
Fire's hold would be a decent enough attack on its own if it weren't for the fact it interrupts itself if the opponent breaks out. It has some very nice (almost essential) utility advantages, but also suffers from a lengthy cooldown period.
Engulfing Flames - Applies the Engulfing Flames debuff on your target, supplying a strong, stacking defense debuff to your target. Even on a hold-resistant target, a half-maintain should get you maximum defense debuff.
Feed the Flames - While using Heat Wave, you siphon health out of your target, recovering a flat percentage of your HP with each pulse of the ability - keep in mind, Heat Wave's pulses of damage are slow.

Fire Breath
Maintained AoE cone
★★
A wide-angle attack that can easily apply clinging flames to many targets. In addition to these basic properties, Fire Breath is fairly low on energy cost, and is mainly useful as a transitional move into Thermal Reverberation energy gain. Its downside is that, as an attack, it's not very powerful.
Spitfire - Doubles the chance that clinging flames gets applied to enemies, as well as guaranteeing application on full maintain. If you're looking to further cement Fire Breath's utility features, this would be the way to go.
Chemical Fire - Subs out the Clinging Flames effect of this attack with Plasma Burn - meaning, if you wanted to be a fire-breathing laser-sword swinger, this'd be the go-to ability! (?) It also is notable for modifying how Spitfire works, to match the debuff.
Fan the Flames - Identical to the version featured on Fire Strike, but with the added bonus of applying to multiple targets.
Char - The advantage for controller builds, Char will paralyze your primary target, and stun secondary targets when they are hit with a full maintain of fire breath.

Fiery Form
Offense Passive
★★★
Fiery Form provides a strong boost to damage output among all elemental style attacks (not just fire, but also ice and toxic attacks become more powerful), offers strong defense against fire, and can also set enemies in melee range ablaze. Probably the most important feature of the passive, however, is how it can boost itself when surrounded by more fire - every enemy within 50 feet of you affected by Clinging Flames will boost your damage by another rough 10%, and this effect can stack up to 10 times - meaning, with enough clinging flames effects around you, your damage is basically doubled. Extremely effective in alerts and mob-heavy raids, but otherwise is only a minor bonus gimmick against singular cosmic enemies. Still, this is a pretty optimal choice for fire-damage builds.
Fire - Part 2
Fireball
Charged spherical AoE
★★★
A quite powerful but costly attack. Fireball does much higher damage to its primary target, making it a viable option for some single-target combat. Its one of the only sources of actual burst damage in the set, being a charge.
Unstable Accelerant - Applies the Unstable Accelerant defense debuff, which provides a massive 69% defense debuff towards specific sources of fire damage, called Burning effects. The Burning effects in question include Clinging Flames (your standard Fire DoT effect), Leaping Flames (another DoT effect that can chain off of Clinging Flames-affected enemies), Fire Snake, and any Pyre Patches generated. Lay down that fiery pain!
Charged Up - grants your fireball the ability to apply the Negative Ions debuff, in case you want Fire/Elec builds. Generally speaking, there's faster ways to apply the debuff.
Illuminate - True to the name, this applies the Illumination debuff to your enemies if you half-charge the attack. Other heroes attacking the illuminated target will get small heal bonuses. This ability also ties into celestial and sorcery sets!

Pyre
Charged point-blank AoE
★★★
Pyre is something of a tank staple for fire. Requiring you to stand front and center, Pyre has the advantages of being a fairly powerful burst attack on its own, and also has the bonus of leaving a patch of flame if fully charged. On the flipside, if actually seeking to use this move to lay down flame patches for energy generation/crowd control, there are definitely much faster alternatives out there.
Backdraft - A quick and effective knockdown that doesn't disrupt enemy formations; even a tap can trigger this effect, paired with a bonus refresh to the Clinging Flames effect. The only downside is that the knock effect doesn't trigger often enough to really lock enemies into place, only knocking down once every 5 seconds.
Burn Up - Bizarre gimmick move that ties into Ice, Burn Up will consume Chill stacks to deal extra fire damage, and also will shatter any ice structures nearby to generate further boosts. If you've chilled up many enemies, this ends up hitting way harder than normal Shatter does, kind of justifying the 3-point advantage cost.
Burning Sun - Fully-charging this attack leaves behind a healing rune, supplying you and your allies with a little extra health.

Conflagration
Maintained spherical AoE
★★★
Conflagration is the mainstay AoE attack of the set, hitting for the highest consistent damage in a tight sphere of any Fire attacks. It can apply Clinging Flames for some extra DoT, but suffers from a very high energy cost. Ironically it still costs more energy despite lacking some of the raw damage and crowd control that abilities like Avalanche have.
Burning Rain - At the cost of some of Conflagration's potential power, it will now lay down a new patch of fire if fully maintained. Keep in mind, if you have another ability to apply fire patches, you can only have one out at a time.
It's Raining Fire! - People kind of get scared when a ton of burning stuff is falling on them - a 10% chance with this advantage. Use it to either debuff damage for support, or as an odd shadow-fire build.

Flame Prison
Ranged Sphere Hold Maintain
★★
Surrounds several targets in a small sphere with a ring of fire, trapping them in place while dealing moderate fire damage. Aside from its crowd-control utility, it doesn't have much going for it - it can easily be interrupted by targets breaking free, and it suffers from a huge cooldown period.
Engulfing Flames - Possibly the only place in the set where you can apply the Engulfing Flames debuff to multiple targets (save Firesnake). The effect is almost guaranteed if the enemies get affected by Clinging Flames.
Work Up - On the flipside of the interruptable state of Flame Prison, Work Up will activate a Restoration Heal just by tapping the ability for a split second, making for a decent, quick self-heal.

Incinerate
Ranged Single-target Maintain
★★★★
Your go-to option for single-target damage in Fire, Incinerate hits an enemy with high-power fire damage over time, and will constantly apply the Unstable Accelerant effect on your target, making them very susceptible to burn effects. This is best combined with attacks such as Firesnake or Fire Patches to maximize the hurt on your target - doubly so, as it otherwise has nothing else that enables the ability to apply clinging flames or any other debuff
Burninator - This one-point advantage will enable you to deal an extra 10% damage against enemies also affected by Clinging Flames (which is almost a given if you're using a full Fire setup). Burninate those Peasants!

Rimefire Burst
Click single-target/spherical AoE
★★★
Sort of a fire/ice hybrid move, Rimefire Burst is an odd beast that triggers special AoE effects if the target is both affected by clinging flames and chill. Normally, the move also comes with a hefty cooldown period, but triggering the move under the correct conditions will completely remove this drawback, enabling incredibly quick and devastating burst damage. The downsides include that it's mostly useless to pure fire/ pure ice characters.

Flashfire
Click spherical AoE
★★★★
With extremely low damage, you'd probably be surprised to hear me say this is one of the more useful Fire moves. It allows you to instantly lay down a patch of fire beneath enemies, without having to get near, making it invaluable for applying clinging flames, generating energy, and providing more damage to enemies who might be getting pelted by your conflagration.
Sweltering Heat - The slowdown on this advantage is barely noticeable. Theoretically, though, it should help to ensure that targets do not escape the fire zone.
Fan the Flames - Once again, this is an Engulfing Flames refresh, but this one has special notice because it subliminally causes all Pyre Patches, regardless of source, to apply this effect. In a fire-patches case, the refresh gets applied on initial patch spawning, as well as halfway through its duration.

Firesnake
Click summon
★★★★
Another auxiliary ability, Firesnake summons up a chasing pet that will severely reduce the target's resistance to fire damage with the set's flagship Engulfing Flames debuff. Not only do they become vulnerable to fire, but also to ice and toxic attacks (albeit to a lesser degree), meaning that the Firesnake is not only fairly damaging and helpful, but it also works for Ice and infernal characters!
Trail Blazer - Speeds up the firesnake, at the expense of potential defense down. Because enemies don't move around all that much in the basic game, this can be skipped over mostly. If you PvP it could see some use.
Fiery Path - Instead of chasing after enemies, the Firesnake stays with you. This makes it most useful to fire-oriented melee builds, such as Heavy Weapons users, or fire tanks in the close-up thick of battle.

Pyromancer's Blades
Temporary Summon
★★★
Ported over from Sorcery! A decently damaging pet with high health, which can hit multiple targets. It sort of lacks any extensive synergies with sets unfortunately (except maybe fire snake.)
It's very good for builds that must contend with enemies up close, and is one of the most damaging pets. Its big drawback is that its AI seems a bit derpy at times, and usually it doesn't prioritize big mobs.
Fire - Part 3
Living Fire
Charge AoE (summon?)
★★★
An adaptation from Sorcery Sigils, Living Fires will explode if anyone is nearby them, which essentially makes them a semi-lengthy full-charge PBAoE. With the added bonus of making sure they actually hit something. Living Fires have fairly low HP, but this isn't a large concern, considering they usually will explode anyways before that becomes a factor.
Mystic Transference - This advantage is on all sigils and sigil-like abilities, and only causes 2 to appear. In exchange, you can now summon another full set of sigils on top of that, and the recharge is shorted substantially.
Living Fire is probably the best candidate for this advantage, as this will make the sigils overall behave much more like a typical recharge-based PBAoE in terms of range and recharge.

Smoldering
Support Toggle

Smoldering will grant you stacks of Empathy whenever you apply Burning effects to your enemies. That said, the trigger condition for this is identical to Fiery Will, but instead, the actual effect is that you gain more healing power rather than damage. The Empathy effect scales with your Recovery stat and nothing else (compare to Compassion, which scales with both Recovery and Presence). A combination of completely imbalanced playstyles (you need to attack enemies to gain more healing power, versus using Compassion which just requires healing allies to gain healing power) means this toggle is more of a gimmick rather than a practical build tool.

Hearth
Support Passive
★★
Support passives are generally designed to provide characters with support builds (focused on healing, buff/debuff, and enemy control) with passive stats that make their jobs easier. The Hearth passive is a little unusual, as it's one of the few support passives to provide extra damage to elemental attacks (actually exactly on par with fiery form). Hearth is a bit more straightforward than most support passives in execution, as it directly improves your healing strength, and also has a small passive healing aura for allies nearby you. Generally a good option if you want to hybridize a support-dps build (they don't usually exist), but otherwise, many of the more widespread aura choices for support passive will serve better - healing strength, in fact, is easy to stack.

Absorb Heat
Click PBAoE
★★★
A neat fire-based heal, Absorb Heat will deal out light PBAoE fire damage to end all stacks of clinging flames within a tight sphere around you. For each clinging flame stack you consume, you will generate a pulse of healing. In the right hands, this can create massive bursts of healing power. However compared to the likes of Bountiful Chi Resurgence or Conviction, its healing value is a lot less stable and much slower, requiring more tactical use of the ability than just straight, repeated applications. Used effectively however, the ability can put out some very high pulses, and it certainly can hold its own against single bosses. It also is capable of providing healing to your surrounding allies as well.
The healing buff only seems to apply for enemies explicitly affected by the debuff, instead of like how Thermal Reverb works (any fire patch within range also generates energy, but does not generate healing.)

Warmth
Maintain Heal
★★
Warmth provides your target with a consistent, though slightly low, stream of healing. The power is extremely low cost in energy, but suffers also from short-range, as well as self-root when healing other targets (when healing yourself, however, you can still move.) As a small bonus, while you're healing an ally, they will gain a fairly sizable bonus to their damage resistance. This bonus doesn't count on self-heals!
Illuminate - Much like with Fireball, this can apply the Illuminate effect, but on allies instead of enemies. In this case, the Illuminate effect will improve healing effects on them, allowing them to gain more health from any healing source. Also notable - the effect applies immediately, making it a very fast way to activate this buff.

Nova Flare
Strange Sphere heal
★★
Throws out a ball of healing, restoring a small amount of health to its targets. Each use of Nova Flare increases stacks of Fiery Escalation (shared with Fire Strike). Incidentally, those Fiery Escalation stacks also heavily improve the healing put out by Nova Flare, giving it a synergy with Fire Strike's effects. Also ranking up Nova Flare has the odd effect of increasing the number of healing ticks the flare puts out, but also reduces the strength of each tick. Useful for critical hits I guess? Also important to note is that you cannot self-target with Nova Flare. This is not a self-heal!
Thaw - Usage of Nova Flare on your targets will help them break out of holds.

Fiery Embrace
Self-Resurrect
★★★
Fiery Embrace is only usable when you have been defeated, and will bring you back to the battle with some of your health. You can gain extra health by defeating more enemies, and also can apply clinging flames to enemies you attack.

Rise from the Ashes
Resurrect
★★★
Rise from the Ashes is a pretty standard revive ability, which will bring targets back with anywhere between 33-100% of their health, depending on what rank you're using it at.
Spreading Flames - Enables the revive to catch up to 4 other dead heroes in a 25 foot sphere. This splits the healing done by the revive between the heroes - which usually means that a full 4-person revive will leave all the targets pretty badly banged up, so get to healing fast!

Hydra
Click Sphere Summon
Unlocked.
Unlock difficulty: Medium
Worth unlocking?: Yes
★★★
Unlocked by spending a ton of GCR, Hydra summons up a pit of lava beneath your selected target, as well as flanking them with Hydra heads (ranging from 2 to 4 on rank). The hydras are immobile and slowly spit out flames, while the lava pit will act generally like your usual firepit (even setting off Thermal Reverb, but the lava pit can be stacked with a fire patch as well). Its ability to snare, deal continuous damage, and provide distractions, all without significant time wasted, means that Hydra makes for an excellent auxiliary ability. The one big drawback is that the hydra heads can be targeted and killed.

Meteor Blaze
Charged Ranged Sphere
Unlocked.
Unlock difficulty: Medium
Worth unlocking?: Nah
★★
From the Blazing Lock Box, Meteor Blaze has a long charge and extreme energy cost for... A single rock landing on top of a group of enemy's heads. In all fairness its damage output is pretty high, and it leaves behind a fire patch (though it's totally not the first choice you'd want for placing one of those down.) Decently useful to non-fire builds, but inversely doesn't have that great of synergy with its own set either.
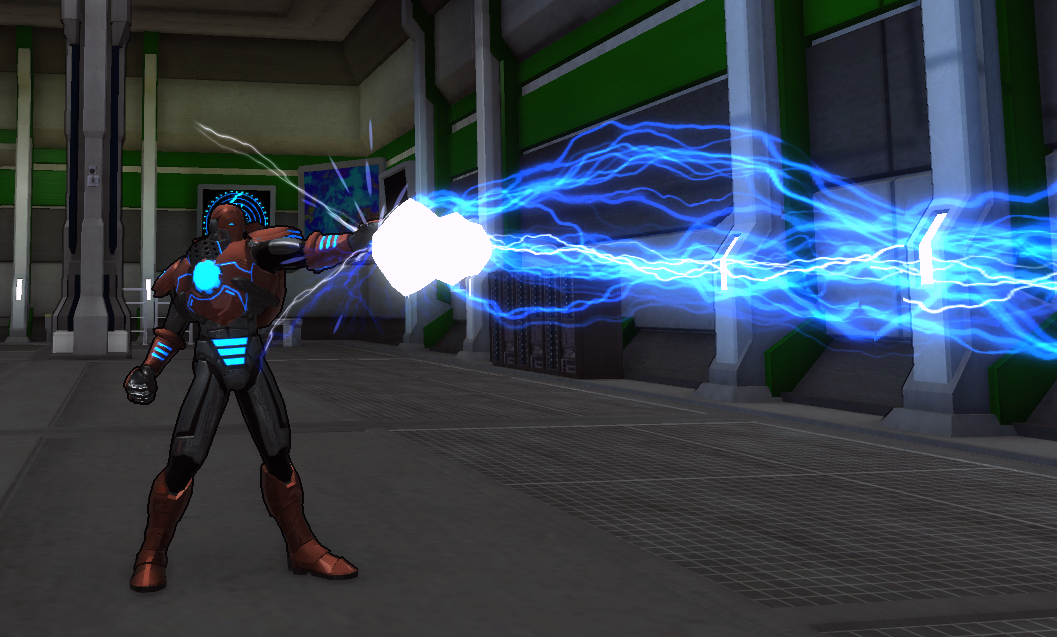
Electricity
Superficially quite similar to Fire, but has a bit more tricks up its sleeve. Electricity is a bit more focused, placing more of its DPS in direct hits and chain-arcing effects rather than in DoT debuffs. Still, though, Electricity requires mastery of utilizing circuits to maintain high energy to be played to its fullest.
Strengths
  • Large AoE and Far reach.
  • High levels of light crowd control
  • Minor support capabilities
  • Can deal sizable damage without direct attacks (arcs, sigils, block...)

Weaknesses
  • Bad mobility
  • Attacks themselves suffer from high energy costs
  • Arcs can cause collateral damage to neighboring mobs (though it thankfully doesn't disrupt control effects.)
  • Poor outside-set synergies.

Recommended Stats: EGO, END
Damage Types: Energy-Electric

Electric Bolt
Energy Builder

Electric Bolt's bonus is that it can apply Negative Ions on first hit, which can be utilized by a few other abilities in Electricity.
Lightning Overload - A chance for the naturally weak energy builder to chain to another target is not liable to do you much good.
Ionic Infusion - If you're having energy problems and need to apply Negative Ions, though, having each strike of the energy builder potentially do this can be useful.

Chain Lightning
Charged Blast
★★
Another unique blast; chain lightning will strike the primary target for a bit of damage. The longer it's charged, though, the more targets it can chain to, doing a non-charge damage value to them. If any target in the chain dies, the lightning effect ends, limiting its usefulness in culling mobs of weak enemies. The attack can chain more if the target is affected by Negative Ions, and to the ability's credit, it has a decent enough chance of applying the effect (above half).
Lightning Helix - A one-point advantage that generates an extra random arc.
Superconductor - Applies the Superconductor debuff to targets affected by Negative Ions, enabling you to do much higher damage to enemies with your other electricity attacks. The debuff only gets added to your primary target, not all enemies hit by the chain.

Sparkstorm
PBAoE maintain
★★
What could be considered the 'tank' move for electricity, Sparkstorm hits in a sphere around you, doing light damage and knocking down any targets that might be affected by Negative Ions. Sparkstorm's lighting has a chance to arc between targets, sometimes hitting unlucky enemies twice, and potentially hitting upwards of 5 targets. The disadvantage is that you can't move while maintaining this ability, its tendency to knock enemies out of its range, and the aforementioned low damage.
Electric Personality - Turns Sparkstorm into a toggle and enables slowed movement. If you aim to make a build that is specialized in PBAoE, you can use this to stack Sparkstorm on top of other moves, but this advantage does cost 3 points.
Electric Jolt - Upgrades the knockdown of this ability to a knockback (similar to old-style Sparkstorm).

Electric Form
Offensive Passive
★★★
Electric Form boosts all Energy Damage, upping the output of Electric Damage, and the much rarer Particle and Sonic damage types. The big bonus that Electric Form has, though, is that it also ups your equilibrium and energy building rate slightly, making intense power usage a bit easier. It also heals you slightly as you attack enemies under the Negative Ions debuff.

Electric Sheath
Active Offense
★★★★
The active offense bonus on Electric Sheath is that it increases your energy generation and equilibrium, as well as causing you to gain minor energy on hit. A very good option if you need to attack consistently. Electric Sheath also applies negative ions to enemies who hit you while it's active, as well as removing the Electrical Surge debuff from you completely and preventing it from re-applying, meaning you can repeatedly do full-charges of Gigabolt!
Matter – Energy Union - One of the best advantages on an Offense Passive, this causes Electric Sheath to form a protective barrier over you (which, despite description, has a set value of shielding). This essentially turns this into a hybrid offensive-defensive active ability. The downside is that this eats up a bit of your energy to supply the defense barrier.

Ionic Reverberation
Energy Unlock
★★★★
Much like Thermal Reverberation in Fire, Ionic Reverberation is something of a prerequisite. Largely because of how often it triggers - whenever an Negative Ions stack is utilized by a move, and whenever it's consumed in the process to form a circuit (which generate massive energy boosts.) Pair it with Endurance, and not much will be able to bring your energy down.

Electric Shield
Block
★★★
A block that can shock enemies in melee range for very low damage. It has no cap to how many targets it can hit, but very rarely will you ever be put into a situation where said cap will be an issue, thanks to how often Electricity attacks chain naturally.
Electric Vengeance - Any target that hits you while blocking will take a more substantial burst of damage. There seems to be some sort of limit to how often it occurs, but for the most part, the energy cost can be discounted - taking hits with a block up tends to generate more energy than this uses up. This can be a surprisingly effective tactic if you dive into huge mobs, grab aggro (perhaps with sparkstorm), and then block a ton.

Electrical Current
Cone Maintain
★★
A low-damage cone attack that shoots electricity at your foes. It's the electrical-equivalent of a breath attack, and is very effective at creating Negative Ions on your enemies for utilization. Despite the low damage, it has a respectable energy cost, and its traits make it an excellent uitily attack.
Bad Wiring - Gives your current a chance to stun enemies, which is guaranteed if the targets are affected by Negative Ions. Great for control.
Unlimited Power! - The name of this 3-point advantage only really makes sense if you're using Electrical Reverberation: It causes Electrical Current to instantaneously stack, as well as consume Negative Ions, forming circuits very quickly that generate tons of energy if you're using Electrical Reverb. This aside, it doesn't synergize well with the other debuffs in the set.

Lightning Strike
Melee Lunge
★★
An odd standout in this ranged set, Lightning Strike will zap you right in front of your enemy. If lunging from beyond 20 feet, the target gets stunned for 2 seconds. This attack will see the most use on melee builds - particularly beam swords since its damage type matches it the best, though it's good enough to work on most melee builds anyways.
Charged Up - If hitting a target with Negative Ions on them, the debuff is consumed and you will become Charged Up, gaining massive boosts to your jump height and run/flight speed (notably this is one of the very few flight-speed buffs in the game).

Electrocute
Charged single-target hold
★★★
A slow, lengthy hold dealt to multiple targets. Electrocute also causes moderate damage to a target nearby the electrocuted target, as well as always applying Negative Ions. A great lead-in to Lightning Arc. Its downsides include its lack of effect on high-rank targets, and its slowness to activate.
Superconductor - Using this move also makes all targets hit vulnerable to electric damage (even if the hold doesn't work). Great pairing with an electric AoE.
Electricity - Part 2
Electrical Siphon
PBAoE Click/Heal
★★★
With a flick of your hands, you absorb all the negative ions in the area and transform it into a massive burst of healing. Because the move also forms circuits, it can also grant you a big burst of energy as well... In the right cirucmstances. Electrical Siphon also has a very steep energy cost. Even with just one enemy affected by Negative ions, it generates a huge burst of healing, but it requires you to be in the thick of combat to get its benefits, and has a lengthy recharge. Much like with Absorb Heat, this can also heal allies nearby you.
Charged Up - Same as the lunge, this will boost your movement speed if you complete a circuit on any enemy affected by Negative Ions, and can also stack up to 3 times depending on how well-landed the siphon is. Useful for fleeing from enemies.

Power Source
Ranged Damage Toggle
★★
Scaling off of the Endurance Stat (oddly enough), Power Source will grant you extra ranged and melee damage whenever you complete a circuit, apply negative ions, or have an attack that arcs. In a pure electricity build, this is fairly frequent, but the Endurance stat can be a hairy one to utilize as a core superstat. While a good option for simple electricity builds, other toggles can offer much more control and flexibility in builds.

Blinding Light
Single-Target Ranged Threat Wipe

A rudimentary threat wipe that will temporarily place you in stealth. Its threat wipe only works against single targets, meaning its biggest value is in Cosmic Raids against very large bosses. Outside of that, it's pretty risky to use against mobs.

Thunderstrike
Charged sphere AoE
★★★
One of two alpha strike options to Electricity. Thunderstrike has the advantage of being able to reliably apply Negative Ions to a wide number of targets on hit. It also does higher damage to the primary target, and is guaranteed to apply Negative Ions. An overall great option for starting a fight against a specific mob, extremely solid for generating energy (as it forms circuits easily) but it suffers from a recharge
Ionic Compression - A lengthy root is added to the Thunderstrike, allowing it to be followed up with some other, more consistent Area attacks.
Strike Down - Your primary target is knocked down by the force of your lightning! This also will refresh the duration of your Superconductor debuff (even on tap), making this one of the best pairings with Lightning Arc for extended combat.
Never Strikes Twice - Thunderstrike now does significant bonus damage against held targets (+50%)

Lightning Arc
Single-target Maintain
★★★★
Your primary Electricity attack for single targets, Lightning Arc will consistently strike the target with electrical damage, while sometimes arcing to nearby targets as well. Also, the big reason it's so potent, is that it will do 20% extra damage if the target's affected by Negative Ions, and its energy cost is actually pretty fair. Its one downside is that it doesn't benefit from completing circuits, actually proving a big detriment if Negative Ions is constantly removed. Ionic Reverb, by default, also won't give you much energy unless you have tons of Endurance. That in mind, Lightning Arc can be difficult to fully maintain unless you have the right stats.
Blindside - As you fire your Lightning Arc at your enemy, they will be snared, and cannot move as quickly.

Gigabolt
Charged cylinder AoE
★★★★
The other alpha strike option to Electricity, and it's quite a bit more versatile. Mainly used to lay the hurt on opponents with rapidfire, it can also be charged once every 8 seconds for a big burst of damage, ideal for sniping. Being a 10x100 cylinder, Gigabolt is one of the most massive AoEs in the game in terms of coverage, which makes it great for easy crowd devastation. Its disadvantages, though, include its tendencies to strike more enemies than you might want, its steep energy cost, and its actually somewhat underwhelming DPS output.
Death Arc - A fairly attractive novelty; Death arc's damage is actually very high for what it is. If you strategically set up for it, Gigabolt might be able to single-handedly decimate a crowd of enemies, as well as a boss that might be hiding in there.

Lightning Storm
Spherical AoE Maintain
★★★★
Basically, this is Electrical Conflagration. Enemies inside this attack will consistently get shocked by it. It has a bit more lenient an energy cost than gigabolt, while having roughly equal damage output. Its one disadvantage is that it has a much lower chance of applying Negative Ions than either Gigabolt or Lightning Bolt, so even if the energy cost isn't as steep, you might not be able to upkeep it if you don't have a good way to apply the effect.
Stolen Thunder - Gives Lightning Storm the ability to knock down targets, making it a great option for light crowd control against mooks.
Panic and Run - Enemies hit by the Lightning Storm will become staggered, moving more slowly and taking more damage.

Ball Lightning
Click-summon pet
★★★
Summons forth a ball of lightning that will shock targets nearby it while it's active. It travels somewhat slowly, but floats, and will follow its target quite reliably. Upon running out of time, it erupts in a decently damaging electrical explosion. Its disadvantages include its steep energy cost to summon, and its low chance of applying Negative Ions.
Triplicity - This advantage basically vaporizes the disadvantage of its low application chance by summoning two other balls. The chance is still only 10%, but keep in mind that the lightning effects from all these balls hit multiple targets, and trigger at least three times every one second. This advantage basically transforms Ball Lightning into a fueling utility for electrical characters, as well as a bit of a damage spike.
Supercharged - The first and last hits of the Ball Lightning pet will refresh the duration of the Superconductor debuff.

Neuroelectric Pulse
Click-PBAoE Buff
Unlocked.
Unlock difficulty: Medium
Worth unlocking?: Yes
★★★
This tier 2 power is unlocked using a combination of Silver and Gold Champion Recognition (currently farmed by completing Teleios Ascendant or Cosmics) - and it's, all things considered, a pretty good reward. A fairly light-energy cost and quick activation make way for a rooting, energy-sapping area of effect. The energy sap doesn't affect most enemies, but inversely, the field also gives you and your allies a fairly consistent supply of energy. One of the best things about it is that it has a recharge near-equal to the duration of the area, meaning it can be run almost constantly to provide easy energy to your team. Overall a very nice utility for stationary ranged fighters.
Recharge - Applies a healing buff to the user when the power is activated. This heal is boosted if you also happen to be below 20% HP, which doubles the amount of healing received. On whole, the heal's strength is on-par with a Rank 1 Conviction - not great, but not bad at all considering NEP's other benefits.

Sigils of the Storm
Sigil Summon
★★★
Another sigil ability. While Living Fires are best used for quick damage, the Storm Sigils are best used for building damage up. Each target in range of a sigil gets shocked repeatedly, so long as the sigil stays standing. In a situation where targets do not use AoE or have weak attacks, this is a great move for wreaking havoc. However, in situations where very damaging area moves are being used, they usually don't last that long - and that's really true for all sigils.

Thundering Return
Self-Resurrect
★★★
Raises you from the dead in a flash of lightning. In addition to this, you gain extra healing when you defeat more enemies, naturally apply Negative Ions with any attacks you use, and gain energy when taking damage. A very solid self-revive, all things considered.
Electricity - Part 3
Storm Summoner
PBAoE Maintain
★★★
A very odd attack, it's notable for technically being able to hit 25 targets, and can completely decimate bunched up mobs. As it's maintained, targets take moderate electrical damage while inside your radius. After fully being maintained, however, bolts of lightning hit 5 targets within your range - which in turn are generated as sphere attacks and then can hit targets around the main targets. In short, a powerful burst ability, and has the bonus of applying Superconductor on enemies affected by Negative Ions. It pairs amazingly with Sparkstorm. Its only downsides include its very high energy cost (as well as the necessity for a full-maintain to really make it pay off) and its PBAoE status.
Magnetic - While maintaining your storm, enemies are drawn towards you. Really helps bunch in those distant targets for the final blow of this attack.
Squall - Consumes your Negative Ions to knock targets upwards at the end of your maintain. The maintain period also will snare targets while in effect.
Particle Storm - Gives Storm Summoner some interesting mix with Power Armor/Laser Swords, allowing it to stack Plasma Burn for Particle Damage over time.

Storm Strike
Charged Sphere Ultimate
Unlocked.
Unlock difficulty: Medium
Worth unlocking?: Yes
★★★★
A very powerful damage dealing ultimate from the Rave Lockbox, Storm Strike will knock down all targets, and deal bonus damage on any targets affected by negative ions (an extra 25%). The attack will remove Negative Ions, only for it to reapply it a couple of seconds later, generating energy if you're using Electricity energy returns/toggles. A very potent attack, but also somewhat restrictive in synergy (doubly so since its energy cost is pretty high.)
Commanding Presence - Tank advantage, the attack will generate a heapin load of threat after it lands, though seemingly not as much as other ultimates with similar-flavor threat advantages.
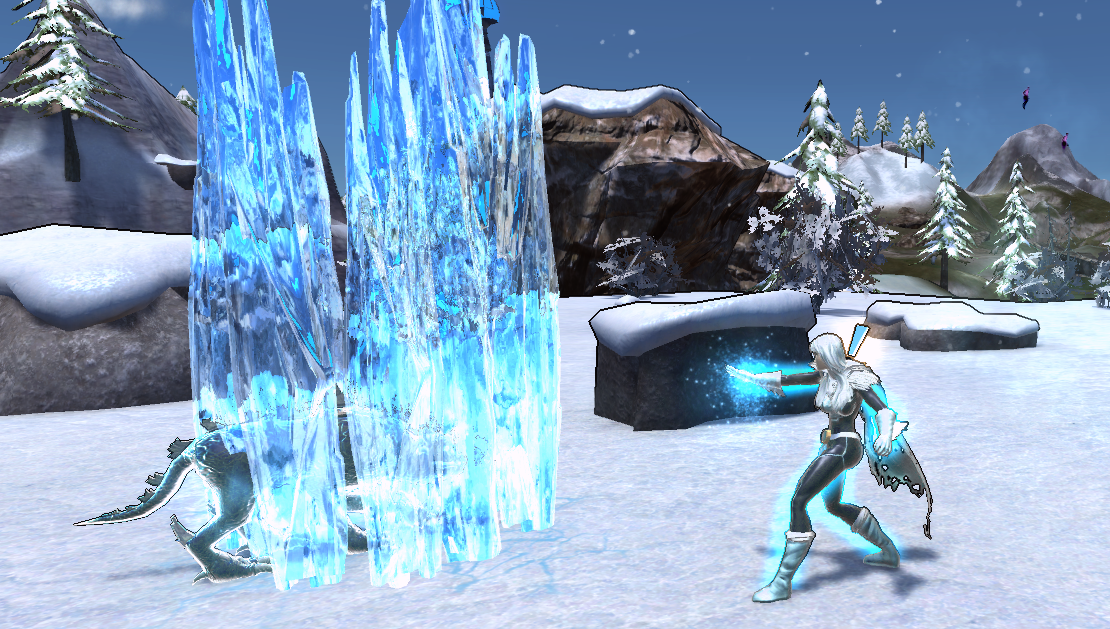
Ice
Ice is a very odd beast among power projectors, seemingly placing much more emphasis on rooting and control rather than outright damage. That said, it does have some surprisingly good tricks up its sleeve for all sorts of character types. At its core, it seeks to build up masses of ice structures, then break them apart for a burst of damage via shatter.

Strengths
  • Great at slowing - Can potentially apply chill instantaneously to foes.
  • Chill is irresistable, and slows down even Legendaries/Supervillains.
  • Excellent options for light crowd control - Root, Slow, Knock, and Interrupt.
  • Extreme single-target damage

Weaknesses
  • Difficult energy costs at times.
  • A lot of junk moves and poorly planned out gimmicks.
  • Shatter takes some time to set up.

Recommended Stats: DEX, EGO, REC, END
Damage Types: Elemental-Cold

Ice Shards
Energy Builder

Ice Shard's bonus is that its initial strike can chill the target.
Ice Impaler - Raises critical chance of this energy builder drastically. Small problems include the fact that the energy builder itself does very low damage, and that there now is no 'on all hits' equivalent on this energy builder, like Fire and Electricity feature. However, the added critical chance does make it ideal for activating Cold Snap on ice Form.

Ice Blast
Charged Blast

One of the better blasts, Ice Blast, at first glance, doesn't look like much. If the user is affected by cold snap, however, the blast gets a drastic increase to its charge damage, making its full charge a force to be reckoned with. If you have a way to reduce charge times (specializations - particularly Avenger Mastery) Ice Blast can be a very nasty surprise for your enemy.
Hard Frost - Hard Frost has been changed recently, so be wary. Hard Frost now offers a defense debuff to your target against cold damage, so long as they have Chill on them.
Frost Bite - Frost Bite serves to refresh stacks of chill on your target, keeping an enemy slowed. This all in mind, Ice Blast can take both this and Hard Frost to serve as a single-target utility for Ice Builds.

Ice Cage
Single-target root

Places down a rooting pet on top of your enemy, doing consistent, but low, cold damage over time. When the cage is destroyed, it explodes in a fair burst of damage. Ice Cages do sometimes naturally form due to stacking chill, but those usually do not explode or induce damage over time.
Sub-Zero Cellblock - When the ice cage is applied to an enemy, an interrupt maneuver is attempted, which might stop the target from using a charged ability or maintain. Even legendaries are susceptible to the interrupt effect, which means that it can be very valuable for flat-out stopping enemies from doing powerful attacks or other annoying maneuvers. Its only drawback is that, despite not having a recharge, the interrupt effect can only be triggered roughly once every 10 seconds per target.

Frost Breath
Cone Maintain

The breath attack of Ice is quite similar to Fire Breath - big area, low energy cost, high chance to debuff, but low damage. This combination makes it the perfect lead-in to Shatter. It's also notable for being the highest damage of the elemental breath attacks (but lacks any backing DoT effect).
Frost Bite - Instead of only 25% of the time, every hit of Frost Breath will now chill your targets. Now instead of having to wait for the chill to be applied, you can just tap Frost Breath for a split second, and all enemies are instantly chilled, becoming vulnerable to Icicle Spear or Shatter!

Shatter
Cone Click

A costly and initially unimpressive move, Shatter is a wide-angle burst that takes advantage of the chill effect. Any target affected by the chill will take much higher damage. It doesn't stop there, either - damaging chilled targets also causes you to gain energy back, dependent on your Recovery score, and also will cause ice structures you have up (ice cages) to break and explode into extra damage. If affected by Cold Snap from a critical/ice sheath, Shatter does twice as much damage, and is viable as a spammable assault in this form. The disavdantages include a very steep energy cost (limiting rapid usage), and the fact that it consumes chill and ice structures to perform its function.
Crushed Ice - With this advantage, there's a 50% chance that chilled targets don't lose their chill effect. This gives the move a bit of spam-potential, provided you both get lucky, and have enough energy left over to use the move again.

Wall of Ice
Click Summon

Essentially a glorified sphere AoE, Wall of Ice sends a trail of icicles trailing after your current target, which roots every enemy that gets near it as it travels, and then explodes in a substantial Ice Burst after reaching the target. It's a fairly powerful move, but is hampered by its recharge and poor energy cost.
Frozen Footsteps - Transforms Wall of Ice into a localized AoE. While this makes it much easier to freeze and root localized targets, it removes the substantial damage burst the move deals out.

Ice Shield
Block

Ice Shield will chill any enemy who hits you in melee range - the chance is fairly low, and the move otherwise has no extra bonuses. On the plus side, it's very visually appealing.
Frigid Air - Extends the Ice Shield's retaliatory chill range to a full 50 feet. Provided that you can catch enemy attention, the tactics of this block might be of use, but for the most part, pure defensibility will likely serve you better.

Ice Sheath
Active Offense

Ice Sheath's special bonus is cool - It will substantially increase the critical severity of your attacks, ensuring criticals have very nasty effect. It also automatically activates cold-snap, which will empower Ice Blast, Shatter, and Ice Barrier. Though it might not come with any aids for extended energy or attack period, it definitely serves to boost damage output. If you are not using Ice Form (if you're an Ice Tank, for example) this is the only way to activate Cold Snap.
Supercooled - With every attack against you chilling opponents, this becomes a star tactic for tanks, or anyone durable, who wants to unleash disastrous shatters upon their enemies.
Ice - Part 2
Ice Form
Passive Offense

Ice Form serves the same core function as Fire Form - in terms of damage boosting, the two are identical. The difference lies in its more subtle effects, including Ice Form's much greater resistance to cold damage, and its ability to chill melee enemies. Most notable, though, is that if you land a critical, Ice Form will automatically activate the Cold Snap effect. If seeking to make an ice-based DPS character, there's little reason to choose any other passive.

Chilled Form
Offense Toggle

Chilled Form is an offense toggle, which will provide your character with sizable extra ranged damage, and a minor benefit to melee damage as well. It's quite similar to the Tech Tree's Concentration, but instead scales off of stats Dex and Ego instead of Ego and Int. Despite the name and theming, it's a fully viable alternative to Concentration and stacks in the same manner.

Icy Embrace
Energy Unlock

Ice's all-new Energy Unlock, Icy Embrace will provide energy for your character whenever applying Chill to an enemy. It does have an internal cooldown, but can stack, and scales best with Endurance. It works somewhat like a reskinned version of Flame Reverberation, but less severe, due to Chill being a much more directly-applied effect. For most powers in the Ice Set, save specifics such as Icicle Spear and Shatter, Icy Embrace is not needed for most Ice attacks provided you build well for efficiency.

Ice Barrier
Click Summon/Self-Root/Active Defense

What used to be a weird defense move has now been converted into an Active Defense - meaning it shares cooldowns with other similar moves. To its benefit, each barrier now provides roughly defiance-level defense, resistance to knock, and a small but rapid AoE heal, which can even help allies. However, the Ice Barriers themselves are still very vulnerable to enemy AoE attacks, meaning the barriers' defensive bonuses can be negated by powerful enemy strikes. More of an interesting support gimmick than a proper Active Defense.
Frigid Freedom - The move no longer roots you. The advantage is cheap, and if you take Ice Barrier, I would fully encourage taking this as well. However, the barriers only supply defense to you if you stand near them, so if you stray too far, they basically become fodder for a shatter or similar tactic.

Ice Burst
Click Summon/AoE

Ice Burst does moderate damage in a very large sphere. It also knocks all targets involved, making it ideal for crowd control and disruption. To top it off, the Burst also persists as a structure that can be shattered, and will also explode upon running out of duration. The downsides include its high energy cost, slow animation, recharge, and the fact that this move will fling enemies all over the place, making it difficult if you're looking to keep enemies together for further AoE attacks.
Freeze, Dirtbag - Primary target is held for a fairly substantial period of time. The hold is a basic hold that can be broken out of, but this makes it notable for being one of the very few holds in the game with no startup charge.

Snow Storm
Maintain AoE

Snow Storm is a very bizarre move. Though it has a high tier, it has a comparatively quite low cost, and does very low damage to enemies. The longer it is maintained, the longer it will persist as a sort of area Damage over Time effect, but achieving that effect already requires a bit of commitment.
Eye of the Storm - Anyone who attacks while inside the storm will take a set amount of damage. The usefulness of this is limited by an internal cooldown of how often it can trigger, and apparently an overall limit to the number of bursts that can happen.

Vapor Form
Weird Travel Power thing

If you thought the rest of the moves in Ice were strange, this one is by far the top of it all. Vapor Form turns you into a fast-moving cloud of mist that deals Ice damage to whoever is near you. While in this form, you cannot block, and cannot use any of your other attacks, making you very vulnerable to incoming damage. On the plus side, you do gain some fairly strong damage resistance (all damage cut in half at least), and the damage done by Vapor Form is decent. It also doesn't come with any energy cost, and can also be used to grant extra mobility in some situations where it would otherwise be impossible (Hi-Pan custom alert and Cybermind alert, to give some examples.)
Invigorating Chill - Slowly gain very small amounts of energy while the form is active. Not very useful, considering you don't use energy while in Mist form, and also because the energy gained from this is so low.

Arctic Beast
Charged, Controllable Pet Summon

Arctic Beast is a helpful little critter that can be used to more easily spread Chill around to enemies. The damage from this pet (and all pets in general, really) is questionable, and unlike the other Elementalist pets (ball lightning, dust devil, and fire snake) Arctic Beast can be killed.

Avalanche
Spherical AoE Maintain

The crowning move of Ice is the be-all end-all of Ice moves; nothing in the set is more effective or more straightforward than this - a sphere attack that does quick and sustainable damage to enemies inside, while also knocking them down and applying chill.
Serrated Shards - To make matters better, Avalanche also can use this advantage to raise its critical stats drastically, making Cold Snaps occur much more frequently (if Ice Form is used) and also dealing more deadly criticals.
Ice - Part 3
Fractal Aegis
PBAoE Charge
Unlocked.
Unlock difficulty: Medium
Worth unlocking?: No

The secret Ice Ultimate, gained from the Frozen Lockbox, Fractal Aegis is mainly a defensive/tank gimmick, utilizing a fast charge to hit all enemies for light ice damage and knock them into the air. For each target hit (up to 8) you can get stacks of Fractal Aegis, which grant between 10-30% extra defense, acting somewhat like a strong, temporary Defiance (and at absolute peak performance like a weak block). The effect only lasts for 20 seconds and each stack's strength is dependent on the target's rank, meaning the full potential of this ultimate doesn't usually get realized. Much like the other modern lockbox ultimates, it has a very long recharge. Ranking up will only increase the damage done by this ultimate - the main features of the move - knockup and defense - are not improved by this.
Chilling Reminder - A reskinned version of Challenge. However, it generates over twice the amount of threat that base CS does, making it one of the best choices you can take for a tank with this ultimate. Much like actual Challenge, it only costs a single advantage point.

Icicle Spear
Single-Target Charge

Ice's new single-target nuke attack, Icicle Spear hits enemies for devastating damage, which becomes even more powerful if the enemy is afflicted by chill - fans of the old Ice Blast will be familiar with how this generally works, as Chill will apply an extra tick of damage on to the attack. Not only this, but it has a slim chance to apply chill by itself, and the extra tick also scales with charge levels, thus not benefitting tap spamming much more than full charges. To offset the effectiveness of the attack however, Icicle Spear has a high energy cost, so have a good energy unlock at the ready - Icy Embrace was made for this move!
Frost Burn - This goofy, semi-sensical attack will apply Clinging Flames to your target 20% of the time, making this possibly the best single way to lead into a Rimefire Burst.

Aurora
Self-Revive
Unlocked.
Unlock difficulty: Easy
Worth unlocking?: Yes

A powerful self-revive ability unlocked by spending Silver Champions Recognition, Aurora distinguishes itself by guaranteeing an application of chill to enemy targets attacking you for a while after you come back. It also grants health to the user for each enemy they manage to defeat. Aurora will also trigger a 10-second cold-snap, buffing your shatter and ice blast. In addition to being a powerful utility for ice build offense, its general use for self-revival, as well as a lack of major drawback, make it highly useful for general survivability in tough fights.
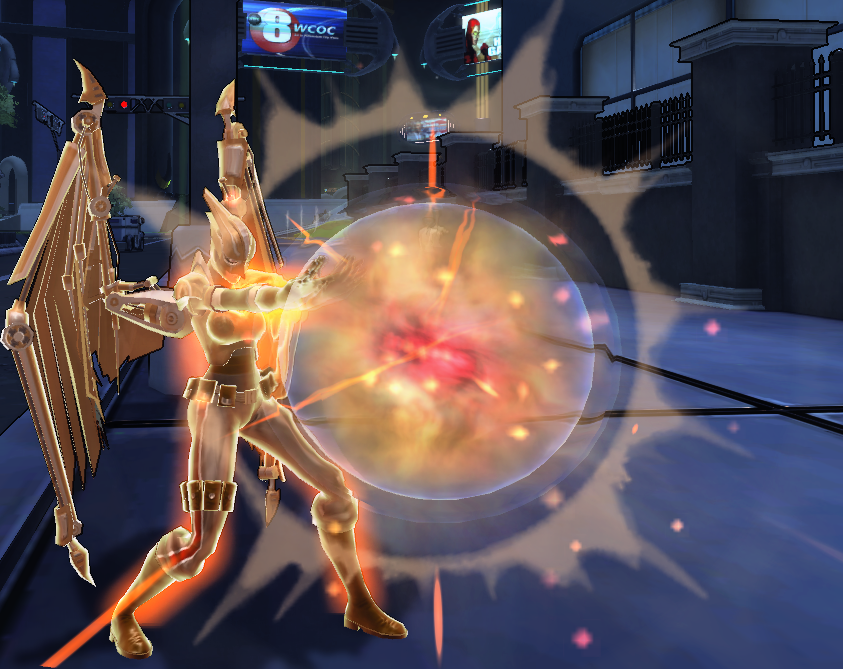
Force
Essentially the tank/all-around unit of Energy Projectors, Force has a versatile set of attacks and abilities that aim to boost the user's stats and effectiveness, while also providing powerful control through consistent knocks, pushes, and holds. Its not nearly as aggressive as any of the other Energy Projectors, lacking the extreme energy generation, consistency, or defense-down/attack boosts the other sets get. However, what it lacks in power it more than makes up in with its versatility.

Strengths
  • Home to one of the most devastating AoEs in the game.
  • Has useful utilities for tanks and support characters
  • Very consistent knocks allow for crowd control
Weaknesses
  • Lowest overall DPS of the projector sets
  • Passives in Force either are outclassed by alternatives or require express adjustment to use.
  • Poor early-tier options for attacks.

Recommended Stats: INT, EGO, END
Damage Types: Physical-Crushing

Force Bolt
Energy Builder

Force Bolt's bonus is that every first shot of it has a chance to knock the target backwards.
Energy Refraction - Each shot of the energy builder has a chance to form a weak forcefield. The advantage of this is that it applies an energy form, which can be used by Force Cascade for lower energy cost!

Force Blast
Charged Single-Target attack (blast)

A standard blast, Force Blast's hits will knock back the target, while doing some basic damage. It's also notable for being the only consistent single-target attack inside the Force set.
Field Inversion - Seeks to take advantage of holding forcefield effects that Force can place on enemies. While this initially seems like it would make it similar to Ice's Ice Blast, the problem is that said forcefields also increase enemy defense slightly, and also break with incoming damage, making this a non-sustainable tactic. To its credit, the visual effect is actually quite impressive.
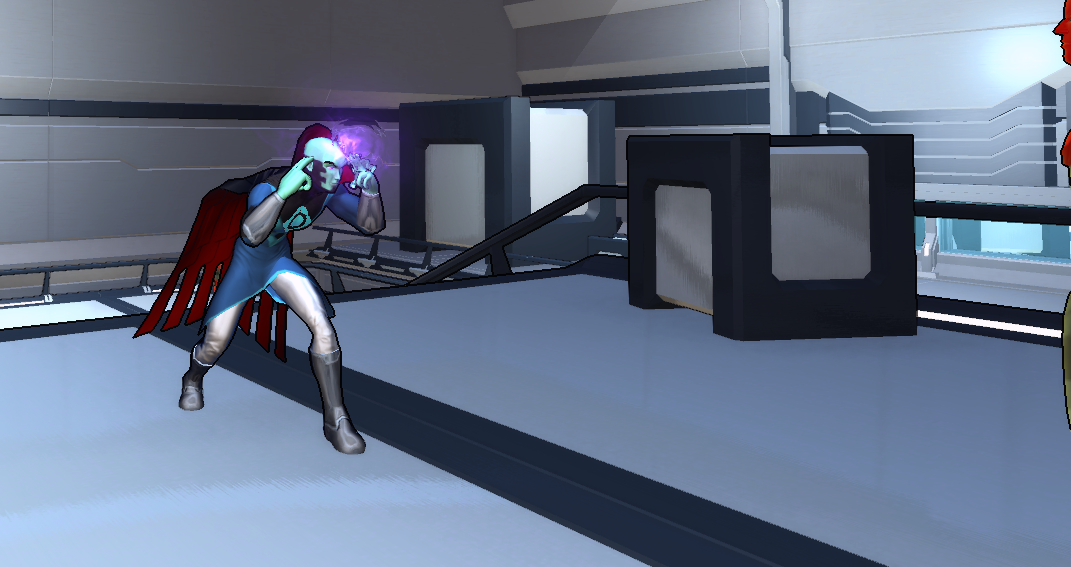
Personal Force Field
Passive Defense

The most unusual defensive passive in the game; PFF provides you with a hefty regenerating shield over your base health. PFF's strength can be increased by stacking any other defensive effects over it, including other forcefields, dodges, and defensive boosts. However, the big problems that PFF runs into include its non-responsiveness to traditional heals, its weakness once it's depleted, and generally a much more defensive approach to its setup. Taking a good block and the active defense of Field Surge are highly recommended.

Kinetic Manipulation
Passive Offense

Kinetic Manipulation is standard, once again, among energy projector offense passives. It's notable for getting a more versatile defense boost, being able to resist the quite ubiquitous physical damage (with increased effect at range). However, aside from this, it lacks any other bonus, and does not provide extra damage to physical melee attacks (in case you wanted to mix those in.) Decent for basic functionality, but there exists a much better alternative within the Archery set...

Protection Field
Single-target Shield

One of two shielding powers in the game; Protection Field will place a strong shield on the target. Of the two shields, Protection Field is stronger, lasts longer, but also takes a bit longer to apply. For the purpose of protection, it serves very well, and has the added bonus of generating energy for you whenever the target is hit!
Expel Impurity - If you want your protection field to remove one of two very specific DoT effects, this is what you want, yessireeeEEEee!

Force Snap
Single-target click

A strange and low-damage move, Force Snap pulls the target towards you while doing its effect. A ranged force build will hardly have a reason to use something like this. It unfortunately is not much good for pulling knocked-out targets back in, thanks to its short 50-foot range.
Entropic Collapse - A nice, cheap advantage that will disrupt (but not damage) targets surrounding the target you're attempting to pull in. Since the effect is a light knockdown, it won't mess up enemy crowds too badly.

Force Shield
Block

Force Shield has the bonus of generating more energy on hit than other blocks. It's fairly average otherwise, but...
Force Sheath - This advantage enables the Force Shield to set up an 8-second after-effect. This only applies a very low defensive benefit, but more importantly, also causes hits taken after blocking to generate energy, and sometimes a lot of it. If you're taking damage and need energy, block for a split-second, and Force Sheath will power you up very quickly.

Force Eruption
Charged PBAoE

A very weak PBAoE, Force Eruption's main purpose is to serve as keepaway, blowing all enemies in melee range outwards. It suffers from its very short range and aforementioned low damage. To its benefit, it also comes with a very low energy cost, and can be used while held.
Gravitational Polarity - However, this advantage enables full-charge Force Eruptions to leave behind cloudy 'hot-spots' that will boost your damage by 15%. This makes it good for setting up a sniping post, and because Force Eruption lacks a recharge, it can easily be repositioned if you need to move.

Force Geyser
Single-target click

With its long range, knockup effect, and moderate damage, Force Geyser has the bittersweet title of the strongest single-target attack that Force gets. Its only downside is that it has a recharge period. It's notable for being unbelievably popular in PvP for its quick interrupt of the target.
Hard Landing - induces a snare on your target.

Containment Field
Charged single-target hold

A slow hold on a single target, this is apparently the gimmick that Force was built around - this is a bad sign, because Containment Field opts to boost its hold strength slightly in exchange for using said field to somehow protect the target from damage. Yes. This hold literally cuts all damage the target takes in half. On the plus side, this confusing defense bonus to the enemy doesn't seem to last beyond the duration of the hold itself.
Force - Part 2
Field Surge
Active Defense

Field Surge places a powerful, non-regenerating shield over you for up to 15 seconds. This provides Field Surge with potentially the strongest stopping power for a big burst of damage, but on the downside, the least longevity for any other purpose. Field Surge also will repair PFF if you happen to be using it, actually making this Active Defense sort of a staple for PFF users.
Power Swell - Basically, the inverse of Electric Sheath's advantage. Field Surge, while active, causes you to do a bit of extra damage - a small 15% extra, versus the minimum 40% that dedicated Offense Passives offer.

Crushing Wave
Maintain Cone

Essentially Force's 'Breath' attack, Crushing Wave does the same amount of damage as any other breath, but comes with a set of implicit disadvantages - it roots you in place as you use it, has stronger, but slower damage ticks (same DPS in the end, and ends up just making it more difficult to stack concentration), and has a less lenient energy cost - particularly, a much higher starting energy cost for the move. Its debuffing bonus is that it pushes enemies backwards - sometimes out of its own range.
Disruptive Force - The final tick of Crushing Wave knocks targets down, making it a pretty good option for crowd control.

Redirected Force
Maintain PBAoE Defense

A recent addition; Redirected Force will form weak shields over you and your friends while maintained. As they are hit, you can gain up to 10 stacks of small boosts to your physical damage, which can be used to retaliate. Said stacks do not get consumed by attacks, but they do have short duration, meaning your best bet for utilizing them is by using a quick, low-energy physical damage maintain to lay the smackdown (SMG burst might be the best candidate.)
Redirected Force acts like a maintain, but it has no duration and can be done indefinitely if you have enough energy. Downside is, it is very expensive energy-wise, and only really usable by support characters.

Force Detonation
Click Sphere AoE

A powerful, instantaneous, but very disruptive move. Force Detonation causes the targeted enemy to basically explode, knocking them and everyone around them way out.
Force Spate - For all intents and purposes, this is identical to the Field Inversion advantage on Force Blast, right down to the exact damage it generates.

Force Cascade
Charged Cylinder AoE

Force Cascade - the single most damaging AoE attack, and most cost-intensive move in the game. Force Cascade hits in the same area that Gigabolt does (that is to say, a very large area), but does a good deal more damage. It also comes with a huge knock upon charge, meaning that Force Cascade has the ability to wreak huge chaos in mobs, and potentially make your whole team hate you. Regardless, the very steep energy cost makes this move reserved either for builds that aim to severely boost energy generation and efficiency, or builds that bide their time by strategically utilizing energy forms. When this condition is met, though, Force Cascade is truly a force to be reckoned with, as it has the highest DPS output of any attack in the Force set.
Containment Blast - If you charge Force Cascade to full, all targets hit get caught in containment bubbles. And thereby take half damage. Great.

Inertial Dampening Field
Toggle Form

IDF is an odd beast - a defensive toggle buff, it's the only one of its kind, and it has a very slight effect - flat subtraction of damage from you and your allies. This toggle is contending against others which can boost the strength of damage, healing, or control by up to around 80-120% extra base effect. However, IDF does have its niche. It's effects applying to your team means that this form is the form of choice for petmasters, as the other forms will provide no benefit to their pets at all.

Gravity Driver
Charged Sphere AoE
Unlocked.
Unlock difficulty: Medium
Worth unlocking?: Yes

A power that's currently inside a horrible lockbox, Gravity Driver has the honor of being the largest ranged sphere attack in the game, with a 40-foot radius. Gravity Driver will deal high crushing damage to everyone inside the area, albeit half damage to anyone outside of 20-feet from the targeting location. Anyone inside the area also will get stunned and knocked down, and all targets suffer a moderate defense debuff to crushing damage for a short 12 seconds.
It's a fancy looking attack, but it's mostly useful as a powerful damage and crowd-control move - the defense down effect is too short and Gravity Driver's energy cost too high to really synnergize with something like Force Cascade. Have high energy ready if you plan to build for this attack, because the base energy cost on this attack is extremely high. Energy cost aside, the only other big downside Gravity Driver has is that it must be fully charged to fire (making it questionable for actual DPS usage), as well as its long cooldown (~1:30, roughly on par with Implosion Engine.)

Gravitic Ripple
PBAoE Maintain
Unlocked.
Unlock difficulty: Easy
Worth unlocking?: No?

This power can only be unlocked by doing Onslaught Supervillain content. Fairly small, only dealing moderate damage, and low on energy cost, Gravitic Ripple will inflict enemies it hits with Gravity Well, which causes enemies to draw in nearby enemies into a tight cluster, making it quite useful for crowd control and AoE hits. Because of its properties, it's fairly unique as a helpful debuff ability for AoE blasters and tanks, and it has a moderate, though noticeable, recharge period. The debuff, because of its constant pull, also will cancel out a lot of knock, making it possible to keep enemies gathered even after attacks like Roomsweeper and Force Cacade.
Wind
A versatile energy projector set, Wind aims to take some advantage of the Disorient debuff, repelling effects, and also bridge powers between Electric and Ice sets. All this taken together, and Wind is a quick-striking, damage-mixing AoE beast.

Strengths
  • Can tie in very well with Ice and Electricity (as well as other sets that feature physical damage or Disorient.)
  • Repels supply reliable buffer space and/or crowd control for lower-rank enemies.
  • Extremely powerful low-tier options

Weaknesses
  • Difficult to utilize a defense debuff with
  • Very bad energy unlock
  • Underwhelming high-tier choices
  • Poor standalone performance; few ways to apply Disorient effect.

Recommended Stats: INT, EGO, END
Damage Types: Phsyical-Crushing, Elemental-Cold, Energy-Electric

Wind Lash
Energy Builder

Wind Lash's unique effect is actually compound; simultaneously repelling the target, and disorienting them.
Stiff Breeze - Same as most, Stiff Breeze extends the first-hit effect to the rest of the energy builder's strikes.

Gust
Single-target charge attack (blast)

Gust is notable as a blast for having actually decent DPS. The proof really is right there in its numbers: Compared to force blast, the tap damage is roughly 1.5x. Gust's special effect is that all hits repel the target in question. When the target is affected by a disorient, Gust will do 10% extra damage, and also knock the target down sometimes instead of a repel. The only problem is finding a reliable way to apply disorient in the set...
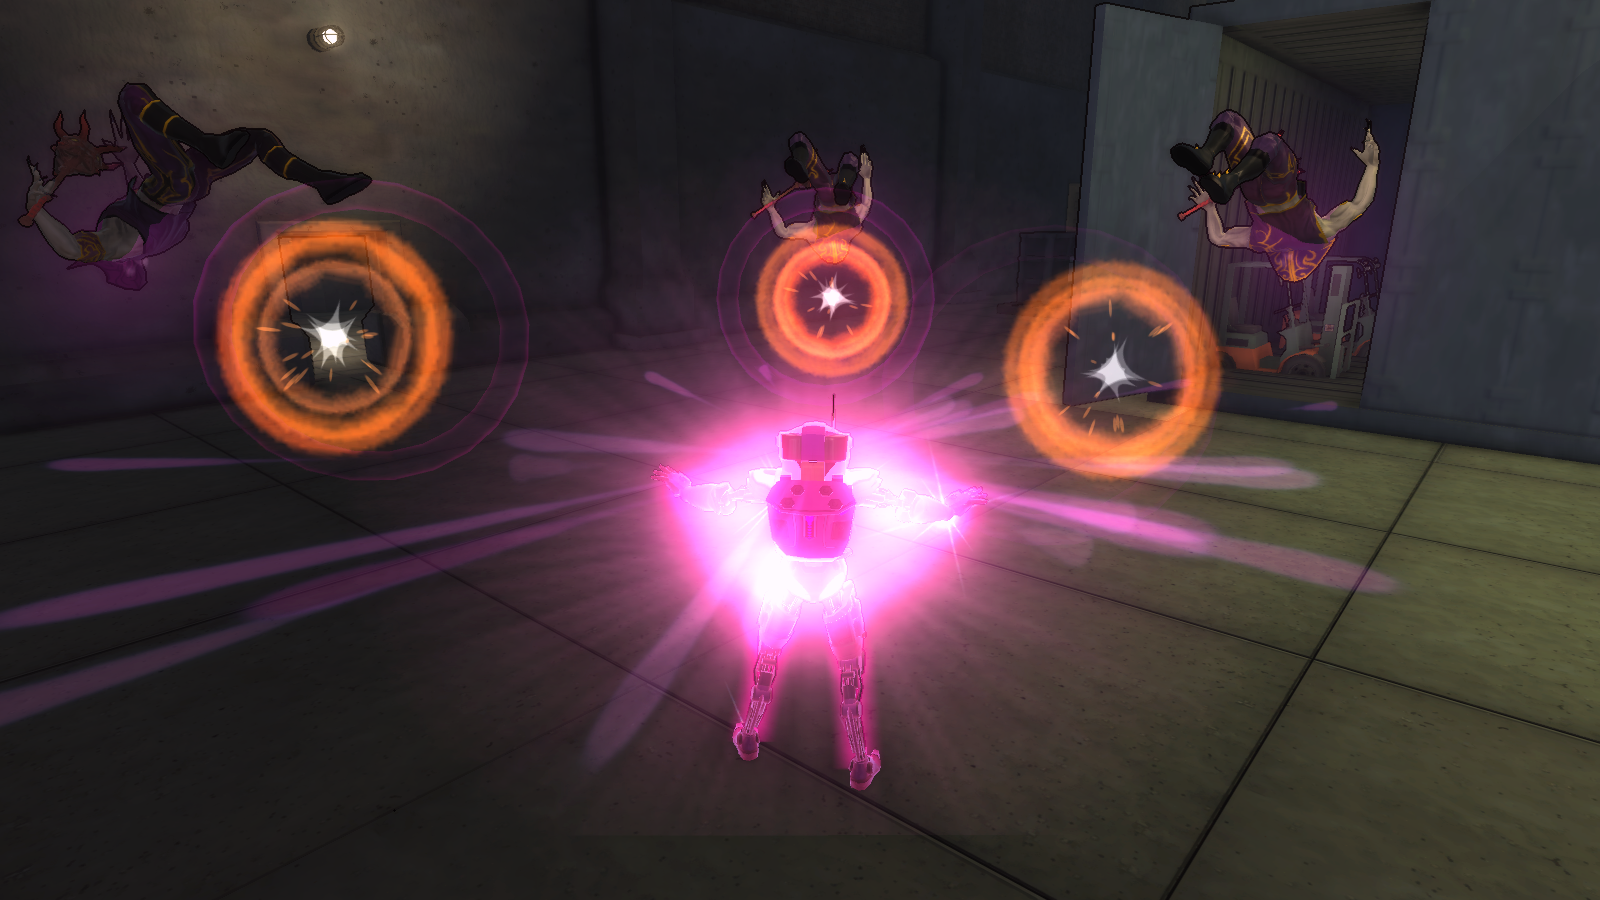
Toppling Winds - Adds a chance for Gust to stagger. Stagger is NOT the same as Disorient. While they both apply a slowing effect, Stagger will reduce the enemy's defense against your attacks, while Disorient reduces their attack power. This all said, the stagger effect actually makes this blast unusually receptive with the Earth powerset.

Hurricane
PBAoE maintain

Well, that escalated quickly. Hurricane is pretty much the best move in Wind, thanks to its very low energy cost, its very rapid damage output, and its ability to finely perform crowd control with a repel effect and knock at the end (which can be omitted by just half-maintaining). The move causes compound crushing and ice damage, meaning that builds that boost only one damage type might not be able to use it to its fullest. The one major disadvantage is that it requires the user to stand front-and-center to hit all targets. This move makes for a great staple for tanks. The one thing its missing, really, is the application of disorient, but that's really a minor setback.
Perfect Storm - Throws a bit of electricity into the mix of damage. It also enables Hurricane to build stacks of Chill and Negative Ions on enemies, providing compatibility with the Ice and Electricity sets.

Wind Breath
Cone Maintain

Continuing the fine tradition of breath attacks, Wind Breath does low damage, has low energy cost, and can use its effects to apply the Disorient debuff. Much like other wind abilities, it also repels people. It'd be a perfect stand-in for Crushing Wave, if it weren't for the fact it throws in a bit of cold damage for flavor.
Unstable Footing - versus raising the chance of applying disorient, this advantage adds Stagger chance into the mix, as well as a knockdown alongside that. This isn't that great if you're concerned with guaranteeing the disorient effect, but it makes for some very good rapid application of debuff and control.

Stormbringer
Passive Offense

Stormbringer eschews some of the special side-bonuses that Passives get in favor of providing a specialized suite of damage type boosts - crushing, electric, and cold; exactly what the Wind set uses in whole. It also concurrently will substantially increase resistance against those same damage types. Aside from that, however, stormbringer has no extra effects.

Wind Reverberation
Energy Unlock

Wind reverb is supposed to generate bursts of energy for you whenever you repel a foe. The problem is in its details, as it sometimes does not differentiate properly between 'repel' and 'knock', and so it's a bit haphazard which abilities actually will trigger this energy return. It also, in some cases (i.e. hurriicane) will only trigger the effect if a target actually is repelled, rather than just an attempt being made.
Wind Barrier
Block

Wind Barrier is not much more than a gimmick. The effect it gets is that anyone who is in melee range or attacks you will be repelled. While this theoretically could be used to trigger Wind Reverb, it usually just gets used to do funny stuff like push enemies around while you're in stealth.

Updraft
Single-target charge

A moderate-damage, semi-exotic attack. When it comes to damage, Updraft works opposite of most moves in CO - The tap serves as a great maneuver for interrupting enemies, as it quickly knocks them into the air and does minimal damage. In turn, the full-charge ultimately generates higher DPS, but of course comes at the risk of a greater up-time for the enemy. In any case, Updraft is a great tool that's useful for disrupting enemy offense in a pinch.
Dispersal - Enemies around the primary target take half-effect, and get knocked outwards. This basically turns Updraft into a sort of wind equivalent to fireball or lightning bolt.

Whirlwind
Sphere maintain

Essentially a wind reskin of snowstorm; whirlwind does continued damage after the maintain ends, dependent on how long it was maintained. And once again, this comes at a cost of not being able to do immediate damage. To its credit, whirlwind comes with a guaranteed snare.
Vortex - This, on the other hand, makes Whirlwind quite a bit more useful than Snowstorm, as it will draw targets inward while the Vortex is active. The downside is that the Vortex is quite weak, meaning enemies, even with the snare, can stand to resist the pull of it.
Wind - Part 2
Dust Devil
Click Summon
★★★
A very unique pet; dust devil serves to provide auxiliary damage support over time, simply standing over the target and shredding at them with ticks of crushing damage. What's unique about Dust Devil, though, is that it can stack. Depending on how fast your recharges are, you can have upwards of 3 of these little tornados out. This comes at the advantage of also being able to disorient targets.
Triple Threat - Throws in electric and ice damage into the mix, as well as the ability for the Dust Devil to take advantage of Negative Ions and Chill.

Twister
Charged Hold

It's a hold. It literally does nothing more than that. The one benefit it has is that it looks nice.

Typhoon
Charged cylinder AoE
★★★★
One of the big-league hitters, alongside Gigabolt and Force Cascade, Typhoon stands in a valley between Gigabolt and Cascade in terms of damage output (though the cold/crushing hybrid damage does make this hard to tell at first glance). Each typhoon blast also repels the targets, and knocks down any disoriented ones for some extra crowd control. In the case of the knocks, it can also stagger the targets for further debuff. Cost-wise, it's equal to Gigabolt, but lacks the benefit of having a good energy unlock to back it up.
Cold Front - Increases the compatability of Typhoon with ice, granting it the ability to chill. This can be hypothetically followed up with moves such as Shatter or Ice Blast.
Ionic Discharge - Gives Typhoon an arcing effect for negative-ioned enemies, very similar to Gigabolt. It should be noted that both of these advantages have only a 1-point cost. If willing to sacrifice a rank, both of these can be activated at once.

Air Elemental
Charged pet summon
★★
The Air Elemental is a versatile swirly dude. Not quite as globally useful as the Ice Beast, however, as it only gets the ability to apply Disorient at rank 3. In a way, though, the Air Elemental does highlight the spirit of the Wind set; it applies debuffs, but doesn't distract itself to use them. Above all, it just aims to rip mobs up.

Whirlpool
Click Sphere
Unlocked.
Unlock difficulty: Medium
Worth unlocking?: Yes

★★★★
Whirlpool summons up a literal whirlpool beneath your foes' feet, sucking enemies in while dealing cold damage, chilling, and even rooting enemies that reach the center of the whirlpool. In essence, it's an alternate version of Implosion Engine, which is another ult mainly used for rounding up large numbers of enemies. Whirlpool benefits from using Chill instead of Snare to slow its targets down (which cannot be resisted), and deals higher damage at a lower energy cost. Its disadvantages include that the chill effect isn't guaranteed per tick, and that its overall sucking power isn't as strong as Implosion Engine is. In either case, both work very well as round-up, and Whirlpool has the added benefits of synergizing with any builds that need a chill-applier. A viable choice of Ultimate ability.
Munitions
Guns guns guns. Munitions is a straightforward, damaging set, which aims to use a wide variety of different ranged attacks. It gets straight to the point and hits rapidly, using little but some select defense debuffs, and a lot of critical hits.

Strengths
  • Mobile
  • Wide variety of attacks - charges vs maintains, long range vs short range.
  • Good utilities for auxiliary debuff and survivability
  • Great emphasis and synergy with critical hits in general - can be worked into many critical builds

Weaknesses
  • Damage ceiling of some attacks are quite low
  • Pistol attacks can be very high energy-cost
  • Poor choice of passive

Recommended Stats: DEX, EGO, REC
Damage Types: Physical-Crushing + Piercing, Elemental-Fire

Gunslinger
Energy Builder

Quick and effective energy builder. Outside of the energy projector sets, most energy builders don't actually have any special bonuses on first hit.
Trick Shot - Hooray, you can now do really pitiful damage to a second target. For some really weird reason. It can trigger reliably off of the pistol-exclusive Furious buff.

Steady Shot
Energy Builder

The direct opposite of Gunslinger - it's slow and clunky. Kind of odd, really, because it generates just as much energy as any other energy builder out there. The problem is that the lag before and after the shot makes transitioning to and from this move quite slow.
Paint the Target - A useful advantage, so long as you don't crit on your energy builder. Unfortunately, since each shot raises the chance, the possibility of this happening goes up with each shot.

Burst Shot
Charged Cylinder Blast

A simple attack with moderate energy cost and some good damage output, Burst Shot is primarily made for setup for more powerful munitions attack via its Armor Piercing debuff, making enemies much weaker to piercing and crushing damage. Though its animation seems slow, it puts out damage ticks much faster than one would expect. For any ranged physical build, this currently is the defense-debuff of choice, as it is fast, requires no charge to apply the debuff, and has great advantages as well!
Taking Names - The shots used also apply Furious to you, which can increase critical chance up to 3% when the ability is used, and has a chance to heal you when taking damage. This buff can make for a very nice support function when combining pistols with another crit-based powerset. The buff stacks up to 3 times, but this advantage will only grant one stack at most.
Off your Feet - Grants Burst Shot some more Crowd Control by making it knock enemies back, combining well with Might oddly enough. It should also be noted - the defense debuff that Burst Shot puts out does not increase with rank.

Killer Instinct
Energy Unlock

A great energy unlock for munitions characters, Killer Instinct triggers whenever you land a critical with a gun, and the return scales off of Recovery. Much like other energy unlocks, the energy granted comes in via a slow trickle over time, and it cannot stack. For most munitions purposes, Killer Instinct serves nicely.

Bullet Ballet
Melee combo

Notable for being the longest combo in the game, with 4 stages and hitting the target 9 times, the Bullet Beatdown does very high damage, and has attacks that inflict roots and stuns. Its biggest disadvantage is a comparatively steep energy cost, as well as the fact it doesn't entirely play along with how the rest of the powerset plays out.
Not Without Incident - Adds an extra AoE element to the combo. More accurately, it gives the move a chance to also generate an AoE sphere around the target with each hit. If you have the Furious buff (which can be obtained by using Burst Shot+Adv or maintaining Two-Gun Mojo) this always happens. The advantage is great, because not only does it cause damage to multiple targets, but the extra pulse also applies its damage to the primary target, sometimes outdamaging the extra rank on some hits.

Composure
Offense Passive

Composure has the benefit of providing the user with a fair dodge boost, providing decent defenses, alongside resistance to knocks and a bonus to Technology type attacks. The downfall of this passive is that its damage boost is a bit smaller than average (slightly above the tier of Quarry and Targeting Computer, discounting their extra bonuses). The biggest perk of this passive is its energy return on dodge, which can trigger shockingly often and provide big bursts of energy when you least expect it. Overall a well-rounded passive, though not optimal for DPS.

Sharp Shooter
Toggle Buff

Sharp Shooter is Munition's unique twist on the ranged-damage buff form, and stacks whenever the user lands a critical while under the effects of the Furious buff, Or applies furious. Furious is utilized by a great deal of Munitions abilities (both pistols and long arms) and buffs critical chances. Its benefits scale off of Dexterity, suiting the high-crit style of this toggle. Unfortunately, its stacking nature is still less reliable than Concentration, but it is a good option for gunslingers that want to get in close.

Holdout Shot
Single-target click

An unusual attack for basically last-leg combat. Normally, this move does fairly standard damage. However, it gets huge boosts to its severity. In addition to its base severity bonus, it also gets an extra, 2x base damage boost if you use the power while low on energy.
Stim Pack - Using Holdout Shot places Restoration on you; a heal-over-time effect. If you are low on health, Restoration will also generate a stronger pulse of healing right on onset. Though somewhat similar to old Stimpack, this is a rather significant debuff, since the effect cannot crit. It has an internal cooldown of 4 seconds.
Open Wound - Applies the Open Would debuff to your target, which causes them to have the chance to generate bleed stacks over the next 10 seconds. The debuff is highly chance-based, and can generate anywhere from 0 to a full 5 stacks.
Munitions - Part 2
Parting Shot
Reverse-Lunge click

An unusual distancing ability, Parting shot causes you to do a backflip away from your enemy before landing a powerful burst shot on them that knocks them backwards. Compared to Breakaway shot, it has a much faster activation time and higher damage, but will only land its hit on a single enemy.
Predictable - Against your target, you will wipe threat and go into stealth. However this also will extend the recharge period of this ability to 45 seconds.
Armor Piercing - Applies the defense debuff of the same name to your target

Shotgun Blast
Conical charge AoE (blast)

A fun cone blast that's used mainly for crowd control. Shotgun Blast's special effect is that it can knock targets down, and if charged, knock them back. The chance of the knock happening is higher on the primary target. The attack is usable rapidly, but has a steep energy cost, considering its mediocre damage.
Breaching Round - Now guarantees your shotgun shots knock your main target down. If any other targets are affected by Armor Piercing, they will get knocked always as well. Finally, using Shotgun with this advantage, refreshes all Furious stacks.
Mind the Uniform - Everyone you hit with your Shotgun falls victim to Fear, doing less damage.
Armor Piercing - Will cause Shotgun to apply the debuff to its primary target, and have a small chance to do the same for secondary ones.

Submachine Gun Burst
Cone AoE maintain

SMG is a wide-area attack with some unusual bonuses and setbacks. While capable of quickly stacking up Furious for some extra critical hits, its target cap is lower than most AoEs, only regularly capable of hitting 3 targets at once compared to the usual 5. Combine this with lower than average damage output and this isn't the most impressive attack out there. For utility and support though, SMG has got you covered.
Aggression - Gives the attack a chance to apply bleed (guaranteed in melee). This actually makes the SMG burst the best attack to apply the bleed effect to a lot of targets quickly, and becomes a great companion to Form of the Swordsman or Aspect of the Bestial.
Wall of Bullets - While maintaining SMG, you will apply a high-durability shield over your current health that will rise in strength over time, similar to Eye of the Storm in the Dual-Blade powerset. Unlike most shields, however, the effect immediately ends as soon as you finish maintaining the ability. The advantage also costs 3 points instead of the standard 2.
Assault - Refreshes the duration of Armor Piercing debuffs on your targets.
Extra Bullets - Raises the target cap of the AoE to its usual 5, making the best use of its large cone, as well as doing some extra damage on scared targets. This advantage only costs a single point, and should be considered highly - with its ability to hit 5 targets, it becomes one of the most reliable AoEs in the set.

Bullet Hail
Cone AoE reskin of SMG burst

It's a pistol reskin of SMG burst, and has the exact same advantages.

Execution Shot
Melee Click

This... Markedly unheroic ability deals a massive burst of piercing damage in melee range, does bonus damage to enemies below 25% health, and will outright erase Henchmen/Villain rank enemies when in that condition. The caveats of Execution Shot include its high energy cost, its recharge, and its melee scaling. The last point means it can be unusually effective on builds that otherwise would barely use any guns.
Is it not just mayhem? - Apparently shooting a damn person in the head at point blank isn't something that's inherently kind of scary. This changes Execution Shot to inflict fear on any targets nearby your victim. It does not require your shot to even kill the target to trigger.
I pay it gladly - If your shot succeeds in defeating a foe, you will gain 3 full stacks of furious for a quick and effective critical buff.

Smoke Grenade
Sphere AoE click

Creates a cloud of perception-reducing smoke on the target. Most major NPC enemies are entirely immune to its effects, limiting effectiveness in PvE situations. It can be used when held, but the usefulness of this move becomes way less notable if you fight closer to the target, or the enemy has AI that causes them to move frequently.
Escape Artist - Transforms Smoke Grenade into a threat wipe ability, theoretically causing all targets hit by it to break combat with you. Unfortunately, it's bugged at the moment.

Lock N Load
Active Offense

Lock N Load's bonus adds extra critical hit chance and energy efficiency to your abilities, making this one of the most solid active offense choices out there. Also, if you have a gun out, it has the bonus of playing a custom reloading animation when this is used.
Two Smoking Barrels - Likely meant to play into the use of Bullet Beatdown, this advantage causes each melee strike you land to reduce the recharge time of this move. The downside is that it no longer applies bonus damage to melee attacks - however, reduced energy costs and increased critical chance still apply!

Breakaway Shot
Retreating cone AoE click

A high damage, but very slow burst of piercing damage. Breakaway shot's movement causes it to cover a very large area, and it comes with the defensive bonus of applying a stack of Defiance (which is more useful if you use Constituion), and also forces you to move backwards. Its a very defensive move, but unfortunately cannot be done that fast, on account of its long animation, and its high energy cost.
Microfilanment Wire - the primary target is pulled towards you if you start out next to them, provided they're not resistant to pull effects. Not that useful, considering how most bosses operate.

Trip Wire
Charged Ranged Pull

Sends out a surprisingly damaging tripwire to reel a target in and disorient them. The longer you charge, the higher this chance becomes. The wire has a surprisingly low energy cost, but is rebuffed by its long recharge period. Still, this is a strong contender for an effective pull-in due to its long range.
Stim Pack - This is a recovery advantage, and will apply a self-heal.
Open Wound - Will apply a timed debuff that can possibly apply up to 5 stacks of bleed.
Munitions - Part 3
Flamethrower
Ranged Maintain Cylinder

While low-tier, Flamethrower is a surprisingly powerful attack that obviously benefits fire builds more than Munitions. Similar to fire breath, it has a good chance to apply clinging flames to its targets, but does more damage than fire breath in exchange for a narrower area hit.
Panic - When hitting targets, it has a chance to stun them for a short time. If the targets are feared, they always will fall victim to this stun.
Spitfire - Doubles the chance per tick that clinging flames can apply, as well as guaranteeing an application if you are affected by Furious.

Gatling Gun
Cylinder AoE maintain

Do not let the low numbers of this move fool you - Gatling gun hits 8 times per second, and that damage can rack up fast. The Gatling Gun also has the chance to apply Armor Piercing - with a guaranteed application on full maintain. Its thin cylinder belies its total area covered - 100 feet range means that, if you line up well, Gatling Gun can take down a lot of enemies all at once. Its disadvantages include that it requires aforementioned lineup, you cannot move while using it, and the fact that enemies with flat-damage subtraction (anyone with invulnerability) will shrug off your bullets; hitting 4 times every 0.5 seconds means that each of those periods gets 4x the damage subtraction versus a standard maintain.
Listen to Reason - Applies the fear effect, which has a very high chance of applying, thanks to all the ticks it's putting out. That aside, the fear debuff will enable you to limit enemy damage output, and also can be utilized by Darkness (of all things) to do more damage. Full maintains will also refresh all Furious stacks on you, but this condition can be difficult to reach unless you have a lot of energy.
Sheer Force - Causes your Gatling Gun to repel enemies, and knock down enemies in melee distance. The repel only occurs when targets are within 60 feet of you.

Mini Mines
PBAoE Melee summon

A gimmicky move, Minimines produces a cluster of mines at your location that explode when enemies are near them. The explosion deals pretty good crushing damage, and will knock the targets back. Unfortunately, the knock from this ability doesn't seem to generate a stack of Enrage if you use that passive, but its best bet of use still will tend to be on a Melee-oriented crushing build. Has a rather high energy cost.
Wall of Fire - Produces three mine clusters. Is only really useful for wide-area crowd control with knocks, but this is still kind of a dubious bonus to have.
Stim Pack - The self-heal restoration advantage.

Frag Grenade
Click Sphere AoE

Throws a grenade that explodes in fragments, dealing Piercing damage... Over time? Yeah I don't get it. On the plus side, the damage dealt from the grenade isn't bad. Of all the grenade options, Frag Grenade is capable of the absolute most damage. Its drawbacks includes its recharge period, and its high energy cost.
Cuts and Scrapes - Applies the Armor Piercing defense debuff to the targets it hits, making them susceptible to your follow-up with guns!
Open Wound - Applies up to 5 bleeds over time, in case your build mixes in some blades or stuff.

Incendiary Grenade
Click sphere AoE

Incendiary Grenade deals a moderate burst of fire damage to the enemy, and sets them on fire with Clinging Flames. The flames are guaranteed to hit your main target, and have a 1/4th chance on surrounding targets. Of the grenades, it does middle-of-the-road damage.
Chemical Burn - Your grenade applies the No Quarter debuff (originally from Heavy Weapons), which renders your targets more susceptible to Crushing and Fire damage. Optimal for builds that utilize explosives. Or flaming megaswords.
Scorched Ground - The blast of the grenade makes a patch of fire on the ground, perfect for Fire builds!

Concussion Grenade
Click sphere AoE

The last grenade option does the least damage in Crushing form, but pairs it with a powerful knock. Mechanically, this grenade is the most similar to old Frag grenade, and has the same energy cost it had as well. Of the grenades, it's most optimally used for crowd control.
Stun Grenade - As the name would imply, Stun Grenade will stun the targets hit.

Rocket
Charge Sphere AoE

Something of an Alpha Strike for the powerset, Rocket does high compound fire/crushing damage to the hit target, and about half-damage to targets around the main one. Rocket's DPS isn't bad, but the move has a recharge, meaning that it won't be anywhere near a mainstay mid-combat attack. The base energy cost is very high, but the long charge has the bonus of not increasing it any further.
Concussive Rocket - throws a knock into the mix, allowing rocket to perform some simple crowd control.
Scorched Ground - Similar to Incendiary Grenade, but requires a full-charge. Compounding this with an attack that doesn't do pure fire damage, and it isn't really the most useful option available for laying down fire patches for a Fire-hybrid build.

Assault Rifle
Single-target maintain

A reliable and strong long-ranged attack, which deals a strong first-shot followed by consistent damage throughout its maintain. Due to taps taking a longer time to process damage than maintains, it generally still is preferable to maintain fire instead of tapping. Its biggest disadvantage is its unique slow effect while firing, making it difficult (but not impossible) to avoid attacks while firing.
Mow 'Em Down - Changes the Assault Rifle into a cylindrical attack, which does reduced damage for each extra target it hits (up to 3 max.) Generally dedicated AoE moves such as SMG or Gatling Gun will far outperform this advantage.
Uncompromising - The advantage for Furious-based gunners, Uncompromising will enable you to gain up to 30% extra damage on your assault rifle when all 3 stacks are active. The nature of this advantage will favor using Assault Rifle at a closer range (50 feet) and alongside many AoEs, due to the abilities that grant Furious. Rank 3 is slightly weaker, but much more flexible, especially for extreme-range pulling.
Munitions - Part 4
Sniper Rifle
Charge Single-Target

Devastatingly powerful burst damage construes this attack's nature. In addition to the damage, Sniper Rifle also stuns the target, and it is also only one of two moves in the game with a range of 120 feet. The disadvantages define the Rifle's true purpose - high energy cost aside, it must be fully charged, and gets interrupted if you take any damage. Unless you've got a reliable way to apply a forcefield or damage-absorption, there's no real way to use Sniper Rifle in the middle of battle.
Tungsten Rounds - Spreads the effect of Sniper Rifle over 3 targets in a line - full damage and stun dealt to 3 targets. The cylinder is thin, but since it's likely you wont be in battle at the time of using Sniper Rifle, you likely will have ample time to line up the targets correctly. On the flipside, the AoE effect does sort of go against the very definition of a snipe, and might draw unwanted attention from further or closer targets.

Lead Tempest
PBAoE Maintain

The biggest PBAoE in the game. Lead Tempest eschews damage for its extremely large radius. It also eschews some chance to hit targets that are further away, but for the purposes of grabbing enemy attention, no move really does better than this. It also has the benefit of having a very low energy cost, and is one of the better options for placing Challenging Strikes.
Tread Softly - While maintained, Lead Tempest drastically boosts your dodge stats, ensuring that the fire you take in retaliation is mitigated, with an added bonus if you are affected by the Furious buff. Especially if you're fragile and plan to go gung-ho with this move, take this advantage to give yourself a better chance.
Maybe I'm just Better - Incidentally, this advantage can be used to apply Furious to yourself while using this ability!

Pistol Whip
Melee Click Stun

A funky and quick utility move, Pistol Whip is a stun ability that has no cooldown and a modest energy cost. While not that impressive on its own, its lack of recharge makes it unique and could possibly be put to use in some funny, rapid-target-switching builds that just like slapping people with pistols.
They Never Go Easy - Applies the Trauma debuff to your target, making it much harder for them to heal. Only really has applications in PvP content, as most standard enemies do not use healing abilities.

Rifle Butt
Melee Click Stun

Identical to Pistol Whip, but uses a different animation. Also has no cooldown for stunlocking weirdness.
Concussion - Completely identical to 'They Never Go Easy', applying Trauma.

Two Gun Mojo
Single-target maintain

A powerful short-ranged assault, Two Gun Mojo benefits from great mobility and can quickly apply the Furious buff without any extra advantages. It requires some stat commitment for energy, but Two Gun Mojo is still very capable of tearing up enemies, and serves as an impressive critical and heal buffer as well.
Close the Gap - Versus an extra rank, this enables you to do 30% more damage if standing right next to your foes. Ok if you plan to shoot things point blank or mixing it in with Melee.
Bullet Spray - Allows TGM to hit up to 3 targets in a line within a 2 foot cyilnder. The damage dealt from this advantage will scale down the more targets it's hitting.

Showdown
Cone Maintain Ultimate
Unlocked.
Unlock difficulty: Medium
Worth unlocking?: Yes

Showdown is an exclusive ultimate hidden inside the Western Lockbox. Fitting its cowboy style, it unleashes some western dual-pistol mayhem upon the area before you. After a short, quick charge, Showdown deals devastating damage and roots all targets in place. Pair this with a huge 180 degree cone with a 50 foot range, and a target cap of 10, and this ability can clear out large mobs within seconds. Its drawback - the energy cost on this baby is massive, and being an ultimate, you'll need to wait a full 90 seconds before you can get another shot at using this attack. Killer Instinct is basically a necessity.
You Clean, We'll Sweep - Any targets you hit will be dealt a taunt debuff that will build up threat against you over time, making a lot of enemies understandably very angry at you. The massive coverage of this maintain makes this advantage ideal for tanks. The only issue is, again, offsetting that huge energy cost in a role hit with an energy penalty.
Archery
Semi-similar to Munitions, Archery eschews pure damage in favor of flexibility - namely, its incredible range, large hit areas, mobility, and debuff potential. The components for a well-balanced character are contained in this set.

Strengths
  • Mobile and long ranged - almost none of its attacks root the user in place, and all of them have a range of 100 feet.
  • Great passive and options for stealth/dodge survivability.
  • Powerful control options

Weaknesses
  • Attacks do mediocre damage
  • Inconsistent energy costs
  • Requires specific, non-synergistic stats

Recommended Stats: INT, DEX, EGO
Damage Types: Physical-Piercing, Energy-Sonic + Electric, Elemental-Fire

Strafe
Energy Builder
★★
Strafe's 'bonus' is odd, in that its firing pattern is opposite of all other energy builders - while others start with a slow, powerful shot, then follow it up with quick, weaker ones, Strafe starts out with a quick shot, then takes slower shots that generate more energy.
Aversion - Each hit has a chance to provide a fair boost to your dodge stats, based on your intelligence. As a general note, a lot of Archery's tactics are based off of the Int stat.

Straight Shot
Single-target charge (blast)
★★★
Straight Shot is a mobile and low-cost blast. Though the damage output is initially low, Straight Shot places a debuff on its hit foe that reduces their defense against the next two archery attacks used on them. In general, this makes Straight Shot the strongest and most reliable single-target attack in the set.
Split the Arrow - Increases the shot's defense-down effect, making it more suitable as a support attack for other archery shots. All in all, Straight Shot has some very powerful synergy with the Avenger specialization tree and its Preemptive Strike option.

Sonic Arrow
Charged sphere AoE
★★★
Shots from this arrow cause a spherical blast of sonic damage. The primary target also takes extra piercing damage from the arrow itself. In general, the sonic arrow is best used for debuff and crowd control purposes, thanks to its stun effect, and isn't that bad at DPS either.
Deadly Dissonance - Increases the sonic damage of the arrow (thereby increasing the proportion of damage done to the non-primary target) and stuns everyone involved in the shot. This is an excellent option for quick crowd-control if you want to deal damage at the same time, and a very reliable Manipulator stacker.

Evasive Maneuvers
Click buff
★★
When activated, you backflip away from your target. After this, you gain a boost to your dodge chance. This is simultaneously useful for both ranged fighters who want to quickly increase distance between themselves and the enemy, as well as dodge tanks who want to maximize their dodge chances. Unfortunately, the ratio of the buff's length to the cooldown of the ability means it isn't as great as it once was for maintaining dodge survivability.
Sleight of Mind - This advantage tweaks Evasive Maneuvers into a Threat Drop ability, increasing its recharge time threefold. While useful for mass-group escape, it stymies EM's usability as a dodge buff even semi-consistently, and is often excessive for most single-target fights.
Stimpack - When using EM, it will give you a Heal Over Time that will generate 4 ticks of healing, as well as a bonus if you are currently at 20% health or less. This advantage makes EM much more useful for non-dodge oriented characters. As a side note, it is identical to both Stimpack on Holdout Shot, and to Recharge on Neuroelectric Pulse.

Hunter's Instinct
Energy Unlock
★★
Basically, this is an archery reskin of Killer Instinct. Aside from what attacks trigger it, it's completely identical. This brings up some problems, because this energy unlock is based on Ego, while the majority of Archery bases itself around Int, and you need Dex to start with to trigger those critical hits. Basically, it does work, but only in the narrow purview of a DPS-styled Ego-centric Archery build.

Taser Arrow
Charged single-target hold
★★★
A unique hold in that each shot does have some chance to hold the target, even if not fully charged. This quirk is offset by the move itself having a heinously high energy cost, and doing fairly bad damage. It also drains energy from the foe, but this only becomes a factor if the target is either a nemesis, or another player.
That said, Taser Arrow is a popular choice for cosmic control builds, especially for applying its paralyze to a singular focus target, and benefits from being one of the only paralyze moves without a recharge meaning it can apply its hold to multiple targets in quick succession. Taser Arrow can help immensely at re-balancing stacks of hold resistance.
Aftershock - Adds a DoT effect to the move following its usage, as well as further energy drain.

Quarry
Passive Offense
★★★
Quarry provides a global damage buff to the player. Said buff is a bit weaker than average, and angled a bit towards physical damage, but is also offset by the fact that Quarry boosts the user's Ego and Intelligence scores as they land hits (based off of Intelligence, so having high Int is recommended.) To top it all off, Quarry offers a small boost to the user's dodge chance. It does lack a bit in avoidance, but can stack it by fighting. Other than that, Quarry is easily the closest thing the game has for a ranged tank/DPS hybrid passive, if you gear for Dodge stats over defense.
Fair Game - Kills you score will restore health to you, based on your constitution score. The heal is instantaneous, but weak, and comes at a tradeoff of extra dodge and damage output. I recommend skipping over it, unless there is no other way to heal yourself.

Storm of Arrows
AoE Sphere Maintain
★★★
A very easy-to-use, very large AoE attack. Storm of Arrows might not impress at first glance, but it makes up for its moderate numbers with its extreme range, huge hit area, ability to hit 7 targets, and 2 chances each tick to do extra damage. Storm of Arrows does come with a recharge, but that's just to slightly curb its magnificence. Besides, the recharge is so minute (3 seconds) that it hardly makes a difference.
As an aside, it's for set features such as extremely-short recharges on some attacks, on top of Quarry's INT scaling, that Gadgeteer's Molecular Self-Assembly ends up working better for an Archery build than the set's own dang Energy Unlock!
Achilles' Heel - For the duration of this attack, enemies hit by your storm are rooted in place. This makes Storm of Arrows basically snowball up targets as they run into the area, ensuring that 7-target limit gets put to good use. Chalk this up as another powerful ability that can also stack Manipulator! Archery is quite the Crowd-Control-friendly set.
Archery-Part 2
Torrent of Arrows
Charged AoE Cone
★★★★
Torrent of Arrows might be the largest cone in the game, and it's certainly the only one that's 100 feet in range. The semi-lengthy recharge on it, combined with its charged nature, makes it ideal as a battle-starter at range, but it regardless stands tall as the most powerful of the archery AoEs, even considering its cooldown.
Relentless Recurve - Adds a flat, non-scaling knock to the attack. The knock is noticeable, so only use it in case you're sure you want to have this ability used more for disruption. It also does not increase in strength with the charge, meaning even a tap can throw enemies off balance.

Snap Shot
Single-target click
★★★
At face value, Snap Shot has a bit more DPS than Straight Shot, the difference being in Snap Shot's faster activation time. In addition, it also does much higher damage after the enemy has been reduced to 25% health (25% extra damage as it turns out), with damage about on-par with Two-gun mojo. However, it does lack the defense-down effect that Snap Shot gets, but regardless shows through when it comes to shooting down boss enemies.
Finish Him - Increases the damage bonus on low-health targets by 35%, further cementing its utility as a finishing move while sacrificing its potential general damage - The result is a 60% damage increase on low health targets.

Focused Shot
Single-target charge

The other sniping attack in the game. Compared to Sniper Rifle, it has a much lower energy cost, but also does less damage and does not stun. Everything else, including its interruptability, its self-root (actually, the only archery attack with one) and charge length, is identical. By comparison to rifle, it's basically worthless.
Ballista Bolt - Essentially the Focused Shot's reskin of Tungsten Rounds - it can now hit 3 targets in a line.

Explosive Arrow
Sphere AoE Charge
★★
Explosive Arrow is very bizarre for an AoE - it has a flat energy cost, regardless of tap or charge, meaning that it is very energy inefficient when tapped. That aside, the attack does decent enough damage, but hits in a comparatively small area. It's mainly the strange energy cost that hampers it.
Where's the Kaboom? - Gears Explosive Arrow to be more single-target oriented. What it does is turns the initial hit into a single-target piercing strike, and follows that up, 3 seconds later, with an explosion that scales damage with the number of targets. The initial shot does much lower damage, but the explosion can do either disastrous or horrible damage, depending on how many targets it hits.

Gas Arrow
Sphere AoE Click

Lays down a field of gas, which deals light toxic damage to targets within while also reducing their visibility. The extremely low damage, combined with the incapability to critical, makes this move very weak.
Noxious Fumes - Adds chances to both snare and stun the target if they stand in the cloud for too long. This is what Devana Hawke uses (though it should also be noted that her version can make up to 4 extra instances of the gas cloud, making it much more lethal. The player version is still pretty much useless.)
This also isn't that great of a CC gimmick, either, as the result of randomly-applied stuns usually isn't precise enough to control a fight in a reliable way. At worst, this ends up wasting Hold-resistance stacks by building them up on your targets at random.
Gadgeteer
One of the most widespread and versatile of powersets, Gadgeteer's local layout is supposed to make it a moderate support unit, based more strongly on control, pets, and damage, rather than straight-up healing. Over the years, however, it's built up more and more powers that extend its function to focus a bit on damage. In most situations, Gadgeteering is the grab-bag of moves that other build types can borrow from to improve their characters' performance. As a consequence, it hasn't seen an organized set refocus in years...

Strengths
  • Unique attacks with applications to other powersets
  • Solid energy generation (if int-based)
  • Great source for debuffs
Weaknesses
  • Underwhelming DPS output overall
  • Very bad passive abilities
  • Poor choice of heals
  • No consistent damage type
  • No consistency period

Recommended Stats: INT, EGO, PRE, END
Damage Types: Physical-Crushing + Slashing, Energy-Particle + Sonic, Elemental-Toxic...

Sonic Blaster
Energy Builder
★★
The oldest of the Gadgeteer energy builders. Sonic Blaster's bonus is that the first pulse can knock the enemy backwards.
Refraction of Sound - Transforms Sonic Blaster into a cone, allowing it to perform basic crowd control with its first-hit knock. While this can be useful, the sporadic nature of the knock makes this tactic a bit unreliable.

Particle Rifle
Energy Builder

A very basic energy builder that lacks any other bonuses. Its shot timing is very consistent, though a bit slow for an energy builder.

Boomerang Toss
Energy Builder
★★
The most damaging ranged energy builder, Boomerang Toss does crushing damage and knocks back the target on first hit. It totally isn't a reskin of Force Bolts. Really. We swear.

Experimental Blaster
Single-target charge (Blast)
★★★
Fires out a low-damage beam at a foe. To make up for the low damage, though, Experimental Blaster has random chances to inflict a slew of different effects when charged above halfway (which can actually affect high-rank enemies). Shorter than that, and it will instead simply have a chance to do extra damage with each shot, making it a pretty powerful blast for tap-spamming. Finally, there is a 1% omnipresent chance that the Experimental Blaster will transform the target into a teddy bear, which renders them unable to attack and vulnerable to crowd control, but also gives them high damage resistance. It's a bit expensive for its effect, but a pretty neat gimmick nonetheless, and can be used well with Avenger mastery.
Death Ray adds another omnipresent 1% chance - the beam does extra damage very infrequently. Against lower rank enemies, the Death Ray instead is a (VIOLENT) instakill. It has the unfortunate downside of doubling teddy-bear chances.

Bionic Shielding
Click heal
★★
Bionic Shielding does have quite a bit going for it - its quick application, long range, and very high final healing value, restoring upwards of 1500 health in total (without presence specialization). The disadvantages, though, include the requirement for the affected target to be hit for the heal to trigger, and the fact that it cannot be applied to targets more than once every 15 seconds. It's not bad for a self-heal, though, as the cooldown and effect of the heal essentially transforms it into a miniature active defense. Keep in mind that its use as this will be limited (and detrimental) in teams if the healer is also using this ability (as their Bionic Shield will be much stronger.)
In short, Bionic Shielding, unintuitively, has extremely poor returns if multiple people are equipped with it. Bioshield will see the most mileage if only the absolute strongest healer is equipped with one, and can apply it shrewdly to their allies.
Overloaded Circuits - Adds retaliatory electric damage to the shield. It does pitiful damage.

Entangling Mesh
Click sphere root

A low cost way to stop your enemies from moving. Aside from that, though, this really does nothing. Doesn't help that damage can help the target break out.
As a small plus, it's a good way to stack or maintain Manipulator without building up hold resistance.
Sapping Solution - After being rooted, the target is slowed.

Experimental Burst Ray
Charged Cone
★★
A fitting attack for mad scientist gadgeteers... It's not actually a very good attack. Its effects make it optimal for a debuff, but the way to maximize its damage output is simultaneously risky and not very effective - Full charges will overcharge the gun, increasing its damage. However, the overcharge also increases the chance it will overheat, disabling its use for a couple of seconds.
Arcteus Cooling System - Decreases the chance of an overheat from happening. It also has like a 1% chance of turning you into a Gordon Freeman homage for a couple of seconds. While weird, becoming Gorden Freechmen doesn't have any gameplay effects; it's only visual.

Gauntlet Chainsaw
Melee Maintain Cylinder
★★★
This attack is downright brutal. It has no extra effects besides its damage, but it does solid amount of it. Its downside is that it has very high cost for a maintain, and compared to a lot of present-day melee combos, its damage output now pales in comparison, but it's still a decent attack nonetheless.
Ripsaw - Transforms the Chainsaw into a finishing move, doing much higher damage against low health targets (below 30% - actually, a fairly lenient activation condition). In classic (pre 2011) PVP, this was the move of choice for finishing battles decisively.
Open Wound - With just a tap, this can apply the Open Wound effect, causing a random amount of bleed stacks (from 0 to 5) to be generated. If you're lucky, this can be quite a rapid bleed-applier.

Grapple Gun Pull
Single-target click
★★
The most damaging pull move in the game - not that it's particularly damaging in itself. That's about it, really; aside from the knock-to, it doesn't have any extra effects. It has a very low energy cost, but suffers from its very slow (but pretty cool) animation.

Molecular Self-Assembly
Energy Unlock
★★★
One of the more globally useful energy unlocks in the game. MSA triggers whenever one of your abilities recharge, with the only clause being that it isn't a travel power. It doesn't matter if the recharge is a minute or a second; if it recharges, you gain energy back for 3 seconds, scaling off of your intelligence score (a stat that decreases recharge time!) If you need more energy and can't see an alternative that fits your build, MSA would be the way to go.
Since having Recovery or Endurance is generally more useful than Intelligence for energy management, however, and the fact that more and more mechanically-relevant EUs are popping up, MSA is slowly becoming less and less relevant.

Medical Nanites
Support Passive
★★★
Medical Nanies acts as a team-wide Regeneration effect, providing light defense to all nearby allies, and healing them slowly. It's a pretty solid support passive, all things considered, as the defense value it provides is not insignificant. It can stack and pairs well with the similar Aura of Radiant Protection (which is just pure defense) to make for a very hard-to-kill team.
Gadgeteer-Part 2
Nanobot Swarm
Click buff
★★
When activated, Nanobot Swarm instantly lops off a few seconds off of your recharges, making it possible to use long-recharge moves, such as active offense, much more rapidly. Its disadvantage is that it itself has a very long recharge!
Rejuvenating Injectors - Adds a fairly hefty heal over time effect, which lasts 16 seconds. It's like an active defense, without the active defense recharge restriction!

Particle Mine
Click pet
★★
Compared to Minimines, Particle Mine has a slower activation and longer recharge, but has a very long period it persists, and does much higher damage that scales with Ranged instead of Melee. Whereas Minimines is something more of a hit-and-run tactic, Particle Mine is used to actually lay traps.
Ejector Module - Adds knock, to stop enemies from retaliating.

Pulse Beam Rifle
Single-target maintain
★★★
A somewhat assault-rifle like attack, Pulse Beam Rifle will haphazardly increase its own damage as you maintain it, as well as boosting its critical chance and severity over time. This attack doesn't slow you down, and lands criticals like crazy, so don't let the modest numbers of this attack fool you. To top it all off, it has a very low energy cost.
Finite Improbability Engine - Transforms the rifle into a debuff engine - each pulse has a chance to apply random effects that reduce offense, defense, and inflict stun and DoT, among a slew of other debuffs. FIE also boosts the critical stats of the attack even further as you maintain it.

Ricochet Throw
Charged single-target (Blast)
★★★
Ricochet Throw, even after a nerf, is still markedly stronger than most blasts. If charged, will chain to hit up to 5 targets nearby sequentially. Not only does it chain like this, but the chain also continues from defeated enemies - unlike Chain Lightning. It does somewhat increased damage when used from stealth.
Microelectronic Controllers - Damage goes up as you chain to other enemies (as opposed to down).

Sonic Device
On-Next Hit Buff
★★★
A very nice buff - the next non-energy builder attack you land deals a burst of sonic damage, and stuns the primary target (or no target if using a non-targetted attack.) It can be used on AoEs, but in that case, it does slightly less damage.
Deafening Dissolution - Increases the effect's damage on AoEs. It does not extend the stun on this move to affect all targets, though.

Attack Toys!(!!)
Pets
★★★
Summons up a tiny toy that uses kung-fu moves and explosives to hurt enemies. As it fights, it can summon up to 3 other toys to help it out (depending on rank). It can also be commanded to throw a grenade to interrupt enemies. Of the gadgeteering pets, it is the most durable.

Bolas
Charged Hold
★★★★
Hooray, more hideously overpowered stuff. Bolas is a highly-damaging hold ability that, unlike every other charge hold, does damage (both over time and a burst at onset), and doesn't need to be charged at all to inflict its hold.

Gas Pellets
Click summon
★★
A decent move that requires some strategy to use effectively, this throws out a cluster of 7 pellets in front of you that will consistently damage enemies within, with a chance of poisoning them. While effective, they have an unusual lack of gravity and can very well hover harmlessly in midair if used while flying or jumping.

Miniturization Drive
Next-hit buff
★★★★
One of the most powerful offense-debuffing skills in the game, any enemy this effects gets shrunk, and has upwards of 15% of their damage output reduced - that's well over the effect that other offense debuffs (Fear and Disorient) can achieve. It also has the bonus of being able to increase ranks (more damage debuff!) and also slows targets that it hits. AoE effects reduce these effects slightly.
Reciprocation Gizmo - Transforms the move into a compound debuff and self-buff. When you land an attack with this advantage, you get HUGE! Your attack power increases, and you move faster.
Note that the growth of Reciprocation Gizmo does not stack with other model-enlarging effects (such as enrage's giant growth effect), so if you were thinking of becoming double-huge, don't even try and go there, Kaiserin will get ya.

Munitions Bots
Pets
★★★
One of the more damaging of pets, Munitions Bots strike their foes from afar with gun cannons and missiles, often combined. They can also be commanded to transform into higher-damage turrets, and if ranked up, can explode on death in a cluster of mines to cause a final blow. Their one downside is that they are quite fragile, with their turret form being even more so, as well as being immobile. Two bots are summoned with this move.

Sonic Boom Generator
Charged Sphere AoE
★★
Similar to the experimental burst ray, Sonic Boom Generator seems to be more oriented to debuff rather than damage. Each attack it does deals decent damage, and has the added benefit of disorienting the targets hit, reducing their damage output. However, its firing animation is quite slow.
Sonic Suppression Enhancer - Decreases the targets' resistance against Sonic Damage. The use of this is limited, thanks to a lack of powerful Sonic-damage moves. In fact, SBG might be the most powerful reliable sonic move in the game, so it's a bit redundant to have the defense debuff override the attack's maximal damage potential.
Gadgeteer-Part 3
Support Drone
Pets
★★★★
The best support pets in the game, Two Support Drones will follow people around and fire healing beams at them, steadily restoring health. Ranking the Drones up will increase the scope of their healing beam, from single target, to cylinder, to sphere. The drones can also toggle to offense mode, which enables them to fire force bolts and beams to repel targets and reduce their defense. They suffer from the same weakness as Munitions Bots - individually, the support drones are quite fragile.

Tanglecoil Launcher
Charge Hold
★★
One of the better charge holds, Tanglecoil Launcher has the added bonus of dealing crushing damage to the target over time. The downside is that this damage is very weak, but said damage also doesn't affect the duration of the paralyze it inflicts. It's also a good deal more expensive in energy cost than other such holds.
Constricting Coils - Damage dealt by the coils is doubled. While ranking up does increase the damage that the move does, it pales in comparison to being able to do it twice as fast.

Throwing Blades
Charge Cone
★★★
Throwing Blades is a decent enough attack. It does roughly double damage when thrown from stealth, which is excellent when combined with its wide hit arc, and generally makes it the best AoE option to execute out of stealth.
Aggression - Causes targets hit by your blades to start bleeding, if fully charged. If in melee range, the bleed applies regardless of whether you charged or not. Overall, a great option for bleed-based characters thanks to its wide range.

Toxic Nanites
On-Next-Hit buff (DoT)
★★★
Of the next-hit buffs, Toxic Nanites does the most damage, but has no other debuff effect associated with it. Much like other next-hit buffs, its effects are diminished if you use it with an AoE.
Nerve Damage - Adds a slowing effect to the poison alongside its damage. Much like before, the duration of this snare is reduced if used on an AoE.

Tractor Beam
Single-target Maintain

Slowly pulls a target towards you while doing low particle damage with a really badass looking raygun. Unlike most other pull skills, Tractor Beam does not knock. Unfortunately, all possible advantages that this might pose are negated by the fact that the tractor beam provides unique stacks of 'pull resistance', which, to my knowledge, no other ability gets.
Final Delivery - Enemies in melee range when you use this beam take a moderate burst of particle damage and are knocked away. This effect does not trigger on knock-resistant enemies. At all. And lord knows why you'd want to use a tractor beam to then just knock your enemy out of range all over again.

Resurrection Serum
Revive
★★
Resurrection Serum is one of three revive skills, and the most unusual of them. Its bonus is that it restores more health to the target initially than the other revives. However, it also comes with a recharge, and has no way to revive more than one target. Because all revive abilities will fully restore HP at rank 3, its bonuses means that it's more useful on builds that are auxiliary support instead of main healers.
Reanimator - Removes the ability to revive with this skill... Okay then! Instead, you now can use the resurrection serum to convert a defeated enemy into a zombie that fights for you. To its credit, though, Reanimator can be used to revive up to 3 of these zombies, and they seem to do really high damage for pets. Finally, for temporary pets, they seem to also last a very long duration (1 minute), and they move much faster than most other zombie-type pets. Their persistence and lack of commandable AI means that they tend to get left behind if you activate travel powers and fly off, and can encounter a lot of deadly enemies while they try to catch up to you, so take care to not use them in hit and run situations.
You can revive some weird things with this skill (including exploded robots) by remembering roughly where certain enemies were last located when they died. As of August 11th, there's a possibility this advantage might be bugged/nonfunctional...

Strafing Run
Click-and-fire weird skill
★★★
A powerful burst of damage dealt to enemies in a circle. Unlike every other move in the game, Strafing Run has to be manually aimed, and also very hard to use in midair/underwater. It hits three times in a row within its area for fire damage, with each hit weakening in succession. It ends by leaving a fire patch that can apply clinging flames. Note that all hits will crit at once, meaning criticals of this attack can be extremely powerful. Its disadvantages include its high energy cost, and its longer recharge period.

Orbital Cannon
Charge Sphere AoE
★★
A high-burst-damage attack - fires down a beam of plasma energy from above, blasting anyone within the crosshairs and applying Particle Burn. The disadvantages of this, however, include its extremely long priming period (a required full-charge, and a targeting period), and its recharge. If the enemy is not underneath the crosshair by the time it goes off, the attack is entirely wasted. The combined charge and priming of the cannon makes its overall DPS extremely bad, and very likely to be negated by natural enemy movement.
Anvil of Dawn - After the beam touches down, it continues firing a constant stream of energy. Its a bit inconsistent, as when it activates, it will spawn right on top of the target (even if they moved out of the crosshair). In any case, Anvil of Dawn ensures that an Orbital Cannon shot isn't wasted on a miss, though the advantage does do substantially less damage than the initial burst.

Mechanical Monstrosity
Pet Ulitmate
Unlocked.
Unlock difficulty: Medium
Worth unlocking?: Yes
★★★
Found within the Spider lockbox, This summons up what could currently be the strongest and largest pet in the game; an 8-foot long robot spider that slices, shoots electricity, and poisons. Spawning with a staggering 18k HP (at rank 1), and boosted with extra threat, and the apparent ability to keep fighting after all HP is lost, the Mechanical Monstrosity is something of a tanking pet, though its effects as such will be understated if your character personally has high damage output. Mechanical Monstrosity lasts somewhere around a good 30 seconds before it dissipates, giving it plenty of time to do some damage and making its semi-lengthy default recharge of 90 seconds fairly forgiving. Inversely, the monstrosity is susceptible to stun and crowd control, which means that well-placed holds on the spider can waste its usage pretty badly.
Power Armor
Power Armor stands at a lot of extremes. Simultaneously the most damaging, most AoE-capable, and most energy draining of all the sets, Power Armor's gimmick is that it can use multiple attacks at once - Hand slot, Shoulder slot, and Chest slot attacks, which are usually toggles. These can be aimed at different targets, and each will do their own damage until they run out, or your energy is drained. For many reasons, its one of the strongest and most difficult sets to play and synergise with.

Strengths
  • Stacks AoE, doing massive damage to multiple targets
  • Many long-ranged attacks
  • Contains useful utilities for tanking and melee combat.
Weaknesses
  • Hardest set to play, requiring mastery of power management and targeting enemies (or using alternate controls)
  • Attacks either hog energy, or don't have much effect on their own.
  • Not very good at sniping/taking out dedicated targets
  • Not compatible with outside power usage

Recommended Stats: END, REC, INT, EGO
Damage Types: Physical-Crushing, Energy-Particle

Wrist Bolter
Energy Builder
★★
Wrist bolter is fairly standard for an energy builder, though its notable for being somewhat low on damage. Its timing is a consistent speed, much like Particle Rifle.
Automated Assault - Allows wrist bolter to fire as a hand slot attack, enabling the user to fire shoulder and chest weapons while using energy builder. While this is being done, Wrist Bolter does not generate energy, but it still counts as an energy builder when it comes to specs and other bonuses - that said, there are ways to use this to generate energy while firing other weapons!

Power Bolt
Energy Builder
★★
Power Bolt has a lot more in common with the energy projector builders. Its first strike has a chance to apply the Particle Burn debuff, which does damage over time.
It Burns! - And much like other energy projector builders, this advantage upgrades the debuff effect to trigger on each strike.

Power Gauntlet
Charged Blast
★★★
Power Gauntlet's bonus is that each hit it lands has a chance to interrupt the target hit (actually guaranteed when fully charged up). The interrupt can work even on higher-ranked targets, but has a lowered chance for each extra rank above Master Villain you face. Against lower ranked enemies, even taps (22% chance of interrupt) can lock down single targets about once every 4 seconds. It's a rapidly-spammable interrupt with no cooldowns associated with it, and it has surprising uses in some cosmic content (interrupting most cosmic adds). The big flaw of Power Gauntlet is that its damage isn't great.
Downrange Disaster - Deals more damage to the target the closer you are (and less when you're farther).

Tactical Missiles
Charged Blast
★★
Tactical Missiles benefits from its fairly good damage. It can also knock down its target, providing some basic crowd control. Even on a full charge, though, the chance for a knockdown maxes out at 50%, so spam if you want to see your enemies fall down!
Blast Radius - Deals a bit over non-charge damage to targets nearby your main target. The best way to do AoE damage with this advantage is to tap the attack rapidly instead of charging, as the blast radius does not increase in damage when charged. The AoE effect does not deal out any knock, so no falling-over parties for your enemies.

Eye Beam
Toggle Cylinder (shoulder slot)
★★★
Eye Beams will fire a cylindrical laser through your target, dealing moderate damage to everyone in line. In terms of different attack slots, shoulder slot attacks are weaker than both hand slots and chest slots, generally speaking. There is one exception to this much later on in Shoulder Launcher.
20/20 fission - This advantage enables Eye Beams to apply Burn Through to your targets, which reduces their defenses to both Particle and Crushing attacks. This is perfect to mix in with any other Power Armor attacks you desire.

Invulnerability
Passive Defense
★★★★
One of the strongest of defense passives, Invulnerability's approach is very straightforward. It applies a percent-based reduction to all incoming damage, combined with a subtraction factor for each strike. If being hit by many weak strikes, Invulnerability can shrug it all off. Its one weakpoint is that the percent-based reduction is not as strong as some other defenses, leaving a bit of a gap when it comes to taking heavy burst damage. It is possibly the strongest defense-passive for block-turtling, as the reduced damage taken during a block makes the flat-subtraction factor of this passive really shine through.

Energy Shield
Block
★★★★
Energy Shield's bonus as a block is also very straightforward - higher damage reduction, making it the strongest block in the game, not taking ranks into account.
Laser Knight/Phalanx Defense System - These two advantages activate a lesser energy shield while you attack, providing a defense boost in these cases. The difference lies in what activates them: Laser Knight can only be triggered when landing melee attacks, while the Phalanx Defense System only activates when firing off ranged Power Armor moves. They also minutely reduce damage output when activated, but the hardiness they apply more than makes up for that.
Also note: while Laser Knight lingers a bit after using a melee attack, Phalanx only stays up when your toggles are up, making it a little less effective for consistent defense.

Concussor Beam
Single-target Toggle (hand slot)
★★
A set of hand beams that deal damage to a single target while pushing them backwards. Concussor Beam is about standard for a hand-slot attack. The pushback will not trigger if the target is beyond 45 feet away from you, meaning you can continue to fire your energy builder at the target if need be. Of all the basic slot weapons you can have, Concussor Beam does the most damage, but offsets this by being only single-target.
Frenetic Blast - Also causes the beams to slow the target down, which can be useful for keeping the target as a central target for other AoE attacks.

Dual Wrist Rocket Barrage
Single-target Toggle (hand slot)
★★
Literally identical to Concussor Beam aside from damage type. DWRB deals crushing damage instead of particle.
Frenetic Blast - Yeah it has this as well.
Power Armor-Part 2
Targeting Computer
Passive Offense
★★★
The technology tree's patent offense passive, this boosts the damage of all ranged technology-tree attacks (archery, munitions, gadgeteer, and power armor). The passive also debuffs enemies over time when they are attacked - after 3 seconds following an attack, they become your target, making you more resistant to their attacks, and raising your critical chances against them. Its disadvantages include its wind-up time, and general defensive and versatility inferiorities to Quarry. Given a high enough base crit chance, you can break the critical curve and become very good at landing critical hits!

Overdrive
Energy Unlock
★★
Overdrive triggers whenever you maintain a ranged attack, or a power armor toggle, for over half its length. The energy gain from this is low, but stacks with repeated attacks/stacking attacks, up to 3 times, and also benefits from a long duration. Overdrive scales best with Endurance, but can also scale fairly effectively with Recovery as well.

Plasma Beam
Untargetted Toggle Cylinder (Hand)
★★★
The low numbers of this maintain are offset by the fact that it hits 4 times per second, giving it some very impressive destructive power. Unfortunately, the energy cost for this maintain also triggers 4 times per second, meaning it's also quite energy intensive. The fact it does not require a target to fire means that you can spread its narrow cylinder by waving it around manually, or even fire it in circles for a 360 degree shot. However, even when targeted, it cannot be aimed up or down.
Melta Cannon - A 10% chance to apply plasma burn doesn't seem so low when it triggers once every 0.25 second. It's also the most effective way to apply it to a wide number of targets, thanks to the move's range.

Micro Munitions
Sphere Toggle (Chest)
★★
A slow but low-cost chest slot attack, Micro Munitions does moderate damage, but is easily the most sustainable chest slot attack in the set. Its hit radius and range also make it quite valuable.
Alpha Strike - Gives the micro munitions more of a single-target angle, doing much higher damage the fewer targets its affecting.

Unbreakable
Active Defense
★★★
Places a very strong defensive shield over your health. Taking damage will replenish strength to this shield, ensuring that only the strongest of attacks get through. Downside to this is that the amount the shield can repair itself is reduced as you deal damage to enemies. However, in general, Unbreakable is one of the more useful active defenses, enabling you to use interruptable attacks and actions in the middle of combat. It sees effective use in missions and instances requiring object interaction, as well as enabling interruptable attacks, but its damage absorption is a bit low for cosmic content, making it dramatically less useful for tanks.

Mini Gun
Cylinder Toggle (Shoulder)
★★★
A good, consistent barrage of gunfire. Minigun hits faster than normal to offset its low damage, has long range, and also has a very modest energy cost to back it up. Aside from damage type and tick rate, it's basically identical to eye beams.
U-238 Rounds - Mini Gun now applies the Burn Through debuff, reducing targets' resistance to Particle and Crushing damage, if maintained for half its duration. This makes it useful for sapping the defenses of your enemies against power armor attacks (which are all crushing and particle) and is an alternative to using the extreme-energy cost Chest Beam.
Infrared Guidance System - Makes the cylinder of Minigun a bit wider. This allows it to more easily hit targets, but comes at the cost of making it less likely to reach full damage potential against dedicated targets. Thankfully, this advantage costs only 1 point.

Reconstruction Circuits
Healing Toggle (Chest)
★★
A unique heal that can be used while maintaing weaponry, Its ticks are high, but relatively infrequent. The energy cost on this move is very low, and it can be maintained through a block. Its disadvantages include its lack of ability to critical heal, and its incompatibility with other build types - while Reconstruction Circuits is enabled, you cannot use any other attacks or moves than Power Armor toggles. While the fact that it continues through blocks makes it valuable for bunkering down behind a shield while healing, it gets annoying to manually toggle it off when you need to use abilities such as Actives.

Chest Beam
Charged Cylinder
★★★
Chest Beam is comparatively short-ranged and very high in energy cost, but is extremely powerful. The beam also uses Burn Through, wearing down the crushing and particle defense of the target it hits. It can also knock with charge, which makes for nice control of power for damage or interruption. The combined damge and debuff makes it a great attack on its own, and Its status as a standard, charged attack means that it is one of the very few Power Armor attacks with outside-set applications. Its defense debuff makes it ideal for laser sword, force, and the Brick melee sets!
Point Blank Blast - Raises the damage of the beam by up to 50%, depending on how close the targets are. This is actually a very powerful boost if you can get into melee range - Rank-ups usually only offer around 20% extra damage.

Shoulder Launcher
Sphere Toggle (Shoulder... I THINK!?)
★★★
One of the few power armor moves good for far-ranged sniping, Shoulder Launcher's disadvantages include its steep energy cost, small hit area, and long priming period. The damage it does, though, is undeniable, and it does roughly twice as much damage to the primary target. The explosion also sometimes causes knockback. Another nice feature of Shoulder Launcher is that only the initial activation of the power has an energy cost, meaning it will fire when activated, and only will get de-toggled if you completely run out of energy.
Bunker Buster - The damage of this move is increased if the primary target of the move blocks. Note that this does not mean that the move pierces the block, it just raises the damage. So, oddly enough, this serves to make it so that, if launched at a blocking boss, it ends up doing more damage to surrounding mooks. Long story short, it's kind of a dumb gimmick.
Power Armor-Part 3
Chest Laser
Cylinder Maintain Toggle (Chest)
★★
The Beam counterpart to Micro Munitions (and impromtpu replacement to Chest Beam in the normal toggle-based PA build), Chest Laser maintains a steady laser on all targets in line, dealing Particle damage. In terms of damage, both Chest Laser and Micro Munitions do middle-of-the-road damage to related targets. Ultimately, however, Chest Laser has the upper hand on Micro Munitions, due to doing slightly more damage. It's a good choice if you don't mind limiting your hit range to a narrow cylinder.
Melta Cannon - Identical to Plasma Beam, Chest Laser can now inflict Plasma Burn on its targets. Unfortunately the chance of applying Plasma Burn isn't any higher on Chest Laser than it is on Plasma Beam, meaning it can only apply it potentially half as fast as Plasma does.

Hand Cannon
Charged Cylinder Toggle (Hand)
★★★
If you were a fan of the old Chest Beam, Hand Cannon has your back. It fires a long-ranged, narrow cylinder a few seconds after activation. In general, it shares a bit more in common with Shoulder Launcher, doing much more damage to the primary target of the attack than the rest. Hand Cannon has a low chance to knock targets hit by the blast backwards. Compared to Shoulder Launcher, it has a minutely higher energy cost.

Energy Wave
Charged PBAoE
★★
Throws out a spherical wave of energy, which does damage and knocks backwards. The move has compound scaling with both Strength and Ego with its knock, making it valuable for both melee and ranged characters.
Hardened Particle Matrix - Full-charges create a shield, with strength that scales with how many targets you caught. Unfortunately, even at full capacity, the shield formed is quite weak, even if it does look cool.
Inverse Polarity - Knocks inwards instead of out, making it a great option for melee fighters.

Fire All Weapons
Cone Toggle (ALL SLOTS!)
★★★
The Ultimate ability of Power Armor, Fire All Weapons creates an extremely wide-angle cone of destruction. The energy cost on it is fairly steep, but the damage it deals is easily among some of the best of cones, and it is also capable of hitting a whopping 10 targets. Unfortunately, it also suffers from a sizable recharge, as most ults do.

Rocket Punch
Sphere Blast
★★
A moderately powerful sphere blast. With its 100 foot range, it's a decent attack for sniping, but is quite poor in terms of energy efficiency. All hits have a chance to knock back, with the chance rising significantly on a full charge. Even when tapping, the knock on this blast is very powerful.
Grasping Hand - Subs out the knockback effect for a root, making it useful for possibly setting up further AoEs on stuck targets.

Aspect of the Machine
Toggle Form
★★
Something of an all-range DPS form, Aspect of the Machine grants an equal damage bonus to all attacks. The damage bonus, per stack, is the highest of all toggle forms, but it's riddled with a variety of other flaws: It only stacks when you kill a target (you'll hate killstealers!), does not have any energy return, and can only get up to 5 stacks instead of the usual 8. Because of how restrictive its stacking condition is, It's actually a decent idea to rank this form up.

Binding Shot
Charged Hold
★★★
It's a reskin of Bolas, right down to damage dealt. Instead of flinging bolas around your head, though, you fire a black net out of your hand, like some kind of dark gooey spiderman. Eh.
Laser Sword
Emphasizing the technological power of plasma beams over might or finesse, the Laser Sword is a fast and damaging melee set that is defined by its high energy costs and complex power mechanics, utilizing a variety of self-buffs and debuffs to chain attacks together and keep energy going. While not capable of utilizing as much raw Strength or Dexterity as other melee sets, Laser Sword manages to keep up by exercising its naturally higher values.

Strengths
  • Attacks have high base damage and very quick activation times
  • Utilizes Plasma Burns in a wide variety of ways for different effects.
  • Fair number of ranged abilities tailored for melee utility.
  • High number of advantages opens up lots of different synnergies with other power sets and role possibilities.

Weaknesses
  • Requires high energy to get the most out of powerful attacks
  • Does not utilize normal melee stats, favoring Int over Dex or Str.
  • Complex attack pattern for AoE attacks, requires tracking of recharges.
  • Rupture effects not as straightforward as those from Single-Blade.

Recommended Stats: END, INT, STR, DEX
Damage Types: Energy-Particle

Laser Edge
Melee Energy Builder

This is the first Melee energy builder we've seen in this guide! Melee energy builders, at range, do not deal damage, but do build some energy and attempt to taunt the target to fight you in melee range. On the plus side, these energy builders do much better damage.
It Burns! - Much like Plasma Beam, this causes Laser Beam to stack the Plasma Burn effect, dealing damage over time. Plasma Burn ties into many of the mechanics of the Laser Sword powerset, so keep it in mind!

Lightspeed Strike
Combo

A modest start to the Laser Sword powerset, Lightspeed Strike uses agile laser slashes to deal damage in front of you within a cone. Its short activation time potentially makes the absolute fastest combo in the game, which potentially ramps up its seemingly low numbers actually quite high. As a result of its speed, though, this also means its energy costs trigger a lot more than might be expected. The final hit of Lightspeed Strike hits in a much narrower cone than the first two swings.
Each hit has a chance to apply the Plasma Burn effect, dealing damage over time on top of the attacks themselves. This effect, while its chance to apply is high, is never entirely guaranteed, unless under the effects of the Unity buff.
Particle Acceleration - Completing Lightspeed Strike now Disintegrates foes, making them susceptible to Particle and Energy damage (Energy damage including Electric, Sonic, and Particle damage types - so a double-down on Particle). Disintegrate lasts for 16 seconds and counts as a Radiation effect, which is important for the toggles and energy unlocks of the Laser Sword set.
Legacy Code - The final hit of Lightspeed Strike knocks the target down, making it highly useful if you want to make a Might/Strength-based laser sword user.

Lightspeed Dash
Lunge

Also, our first lunge! Lunges are 60-foot 'melee' attacks, which cause you to fly straight towards your target and deal damage. They aren't particularly strong, but they are quite useful for closing distance and following up with more melee strikes. Lightspeed Dash's bonus, when landing a hit from beyond 25 feet, is that the target becomes rooted in place.
Download - A common advantage on a lot of different Laser Sword attacks, this causes the power to place the Download buff on you, reducing the costs of different Technology abilities.

Lightwave Slash
Melee Charge PBAoE

A charged, wide-angle slash that hurts all targets nearby. Not particularly good at dealing damage, but is a great option for crowd-control due to its knockdown effect on a full-charge. It's the main utility AoE of the set, thanks to its wide array of advantages:
Light Mend - Refreshes the duration of Disintegrate on all targets hit.
Burn Bright - And this is similar, refreshing the duration of all Plasma Burns.
Lightwave Slash also gets Download.

Glance
Melee Stun

A quick slash of the laser blade that stuns the given target.
Trauma - Prevents the target hit by Glance from healing effectively, making it useful in PvP situations. And against other enemies that might use regenerative effects (that aren't cosmic.)
Download shows up here as well.

Cybernetic Tether
Ranged Charge Pull

Fires out a mechanical beam-claw that drags your target in. With a 25-foot range, melee damage calculation, and a charge, Cybernetic Tether is very similar to the Lariat moves featured in the chain powersets of Might and Bestial. It's also similar in that it has a ton of advantages:
Recharge - The self-heal advantage, applies Restoration to yourself for some emergency healing.
Burn Bright - As before, this refreshes the duration of all Plasma Burns.
Radiate - This gives Cybernetic Tether a chance to apply up to 5 Plasma Burns over time after it lands a hit.
Download - Applies a buff that reduces the energy cost of other Technology abilities.

Quantum Stabilizer
Offense Passive

This interesting passive grants the user a boost to all Energy damage dealt, making it ideal for not just Laser Sword characters, but also for Power Armor builds that use beams, some electrical builds, and even some gadgeteer loadouts. It pairs its normal damage boost with a very light bonus to damage resistance (that's much greater against other sources of Particle damage). Finally, it also renders you much harder to knock back.
Quantum Stabilizer has a lot more defense capability than Electrical Form, but lacks the same sort of energy boost that passive has. In terms of melee performance, its defenses are comparatively a bit worse, and it won't provide any benefit to any melee powerset other than Laser Swords.

Particle Accelerator
Melee Toggle

Particle Accelerator stacks the Unity buff, which boosts your melee damage predominantly. Its stacking condition is whenever you apply a Radiation effect - This includes: Plasma Burn, Disintegrate, Overheat, and Burn Through. Despite being a melee toggle, it uses the strange stat of Intelligence to bolster its own effectiveness. In most cases, it can be safely subbed-out for Enrage or Form of the Tempest if you can knock or crit reliably with laser-sword powers.
Laser Sword-Part 2
Laser Deflection
Block

When activated, you start swinging your sword around like some sort of nutty jedi, supposedly deflecting all attacks thrown your way. Its special bonus is that it will reflect the first attack that makes contact with you, basically acting as a clone of Martial Arts' Parry.
Data Conversion - This causes every melee attack you land to activate a small shield, boosting your defenses, essentially acting identically to Laser Knight.

Unified Theory
Energy Unlock

Unified Theory grants you energy whenever you apply or refresh the duration of a Radiation Effect, providing a slow and steady supply of energy. This unlock scales best with the Endurance statistic.
Remember: Burn Through also counts as a radiation effect, meaning this can be used as an alternative to Overdrive on Power Armor builds.

Plasma Cutter
Melee Charge

This unique move will rupture your Plasma Burn stacks, turning the effect into Overheat. After 5 seconds, the target hit by your Plasma Cutter erupts in a burst, dealing damage to targets within 10 feet based on the number of Burns you ruptured. Plasma Cutter has a couple drawbacks, including its high energy cost, and its recharge. The damage that Plasma Cutter itself deals also isn't incredibly impressive. Finally, when Overheat is triggered, you cannot begin stacking more Plasma Burn on your target until the Overheat has detonated.
Encryption - Enemies hit by Plasma Cutter are rooted in place, allowing you to more precisely control where your target explodes for damage.
Chalk up this ability as another to get the Download advantage.

Particle Smash
Ranged Sphere Click

A short ranged attack that throws an exploding laser disc at your foe. The recharge of this move is hefty, but is offset by the high damage it deals when used correctly. For each target it hits with a plasma burn, it will deal extra damage to the target, consume the Plasma Burn, and then debuff their defenses with the Disintegrate effect. A surprisingly devastating strike overall.
Light Everlasting - Somehow this imbues your laser disc with holy magic or something, because now it causes allies nearby your main target to gain Light Everlasting, a sorcery healing buff that will heal over time.
Null Value - Converts Particle Smash into a control ability, stunning your main target, and knocking down everyone else.

Particle Wave
Click Cone Pull

Sends a massive wave of light out of your blade, which drags all targets hit inwards. It also will apply Particle Burn to all targets without the debuff, which can enable Particle Wave to quickly chain into Particle Smash.
Illuminate - Provides all targets hit with the Illuminate debuff, causing people that hit the target to gain some healing. This counts as a sorcery curse, in case you want some magic laser blades.
Bad Footing - All targets nailed by the Particle Wave get disoriented, reducing their speed and attack power.

Luminescent Slash
Melee Single-Target Charge

The highest damage strike of the Laser Sword set, Luminescent Slash is a basic attack that simply deals damage and snares the target. While the numbers might seem somewhat low, Luminescent Slash charges up extremely fast - which then just makes it a testament to how steep its energy cost is in order to put out damage.
End of the Line - When above certain energy threshholds (70%, 95%) Luminescent Slash does an extra 30-35% damage (Compare to an extra rank's 20% damage boost). This also causes all Full-Charges to refresh all Download stacks, revealing the true purpose of that buff.
Radiate - Grants Luminescent Slash the ability to stack up Plasma Burn stacks over time. The number of stacks you can get is anywhere between 5 and 0.

Meltdown
Melee PBAoE Ultimate
Unlocked.
Unlock difficulty: Medium
Worth unlocking?: Yes

The ultimate unlocked from the toy powerbox. Capable of dealing devastating damage in a tight sphere, Meltdown is one of the smallest ultimates in the game (only a basic melee reach), but possibly has some of the best burst DPS due to its quick charge. The high damage is also paired with an afterburn effect that can stack plasma burn over time on all targets hit, making it possibly one of the best lead-ins to a Particle Smash after you give it some time to stack up. The biggest issues with the ultimate include its aforementioned short range, long recharge (as with most other ults), and its extreme energy cost to even start charging it. Thankfully, it only is usable as a full-charge, so no need to worry about running out of energy in the middle of a maintain and all.
Martial Arts - Shared Moves
The four martial arts sets share some common components, mainly in passives and utilities. While each of the individual sets have their own unique way of fighting, these core techniques define their basic stature: Precise, Evasive melee fighters that place focus on Dexterity.

Strengths
  • Has utilities to make the best of dodges.
  • Has utilities to create stealth characters
  • Effective basic crowd control
Weaknesses
  • Not massively helpful to ranged characters

Recommended Stats: DEX, STR, CON

Shuriken Throw
Single-target Click
★★
A quick ranged attack with unusual affinity for melee. Unlike all other ranged attacks, it scales partially as melee, gaining more damage when running in the Brawler role. This aside, Shuriken Throw's damage is mediocre, it has excellent range, and has a chance to knock down once every 5 seconds. If you're going for damage, Ricochet Throw is much better, even when running in a melee role. If you're going for utility, though...
Serrated Edges - Each hit you land with a Shuriken has a 10% chance to cause bleeding on the target.
Poison Shuriken - Same as above, but with poison instead. These two advantages make for a good pairing with the respective chain abilities (barbed chains and vile chains in supernatural).

Thunderbolt Lunge
Lunge
★★★
A generally useful lunge, the bonus on it is that it will root targets in place on hit, preventing escape.
Essence Assault - Adds a substantial stun to the lunge, making it perhaps the best lunge for crowd control.

Smoke Bomb Lunge
Lunge
★★★
This lunge's bonus is that it stuns the target on contact. It is essentially a reskin of Mighty Leap.
Sudden Strike - After lunging from far away enough, Smoke Bomb Lunge raises the critical severity of your next critical hit by 15%. This also causes the lunge to count as a Chi Power effect, which can be utilized by some energy unlocks.

Inexorable Tides
PBAoE Melee Click
★★★
A low damage trip-kick, its main draw is its modest knockup, which almost always works on the targets in question. Its rapid usability makes it ideal for keeping enemies off their feet while you land more powerful attacks, but it also has a somewhat high energy cost. It serves mainly as an intermediary move for mostly the Unarmed martial arts set.
Instep Crush - Adds a fairly lengthy root to the primary target. Usually, it proves to be excessive.
Power Sweep - Causes the kick to have a 25% chance per usage to apply Chi Flame, which is another Chi Power effect, and causes Dimensional damage over time.
Flowing Strikes - Using this ability will now refresh the duration of Demolish by 10 seconds.

Intensity
Offense Active
★★★
Intensity's bonus is that it provides a substantial boost to your Dexterity and Strength scores, increasing critical chances and melee damage (slightly). Depending on what other powers you have scaling off those stats, it could also provide some minute boosts to other characteristics. The main benefit Intensity has now is its access to unique advantages:
Fists of Righteous Flame - While Intensity is active, every melee hit you land will have a 50% chance to apply Chi Flame, causing more damage over time and potentially netting you extra energy with the right energy unlock.
Rage of the Beast - If you activate Intensity while under the effects of a hold or stun, you not only break free (stacked on top of the innate break-free power), but gain several stacks of Charged Up, granting you a huge speed boost.

Lightning Reflexes
Passive Defense
★★★
Adds a substantial boost to dodge chance and avoidance to your character. It also grants a massive boost to DoT resistance, and will apply a buff of escalating reflexes on each failed dodge, ensuring that the next hit you take is more likely to be avoided. It's quite effective in general, and provides a nice, alternative way to defend. To seriously tank with LR, however, a rather significant amount of gearing and specific building for extreme dodge chance is recommended, generally making it one of the hardest tank types to maximize damage with.

Way of the Warrior
Passive Offense
★★★★
The best melee passive in the game, Way of the Warrior is nicely balanced between offense and defense, offering a massive boost to your melee damage output, as well as more modest boosts to all other physical damage. It also comes with a decent boost to dodge chances, making it quite survivable.

Night Warrior
Passive Offense
★★★★
The assassin passive. Night Warrior provides small boosts to dodge stats and damage (actually, all damage, making it the only offense passive to equally buff damage types). It also boosts charge speeds, and comes with two special moves: Sneak, and Shadow Strike:
Sneak - Makes you very hard to see, guaranteeing that only targets with high intelligence, or of Tough rank or harder, will see you. The move also provides boosts to single-target damage (higher to melee than ranged) and synergises with various other moves in the Gadgeteering tree. Unfortunately, taking any damage, dealing any direct damage, or healing, will make you visible. It also makes you move a bit slower.
Shadow Strike - Normally, this does pitiful damage. When in stealth, though, it does roughly 8,000x its original damage value, allowing it to one-shot many targets from stealth. Its disadvantages include that it has a recharge, its reliance on stealth, and its melee range.
Silent Running (advantage) - Removes the slowdown effect while sneaking.

Smoke Bomb
Threat Wipe
★★★
Throws down a smoke bomb, which instantly places you into stealth and wipes your threat. On teams, this becomes very useful, as its threat-wipe is guaranteed against all enemies after you. However, it has a very long cooldown by default (possibly the longest of all threat wipes), and it will put your other Threat Wipe abilities on a 30 second cooldown when used. Smoke Bomb's perk will put you in stealth for 3 seconds, allowing you to chain into moves that benefit off its effect (Throwing Blades, Shadow Strike, etc)
Concussive Escape - targets nearby you (within 35 feet) get knocked back. The effect deals no damage, but serves to nicely disrupt attackers.
Martial Arts - Shared Moves II
Chained Kunai
Ranged Pull
★★★
Throws out a chained kunai at your target, reeling them in. Kunai, mechanically, is very similar to the Chain Lariat abilities, including its short range. Kunai has the benefit of having perks of applying bleed by default, with full-charges doing extra damage and having a complete chance to apply bleed. Versus Kyoketsu Shoge, however, the Chained Kunai will always knock your target in. The weakness of Kunai lies in its lower damage versus a chain. The big thing that sets it apart from the chain lariats, however, is that it has a crapton of advantages, making it a good choice for utility:
Open Wound - Gives Kunai a chance to apply bleeds over the next 10 seconds of a hit, ranging anywhere from 0 to a full 5 stacks.
Fine Cuts - Full-charge hits of this attack will refresh the duration of Shred on your target, making it a good cycling move for cutting-based melee fighters.
Weak Points - Generally the same as Fine Cuts, but with Bleed instead of Shred.
Inner Peace - Using Chained Kunai will generate self-healing. The healing properties of this advantage are identical to Stimpack and Recharge.

Parry
Block
★★★
Parry's bonus is that it will reflect the first incoming attack that hits you back at the target, within the first 3 seconds of being activated. The bonus of this is quite sporadic, and only is useful if the attack you're receiving does substantial damage on its first strike. Speaking of that, it's very hard to control which attack you retaliate to with Parry, since it's always automatically the first one. However, well-timed parries against strong attacks will do very respectable damage to the attacker, making Parry a good option for keeping defensive DPS up against bosses.
The Elusive Monk - Melee attacks now add dodge and avoidance, while reducing your melee damage output slightly. The bonus of this rises with higher DEX score, and in general, becomes a way for melee dodge fighters to survive in the frontlines if they're dodge-based.
Of special note, Parry's damage penalty only applies to melee attacks, not ranged, so it could be possible to tailor a build to perhaps use melee attacks for defense, and ranged ones for offense...

Fluidity
Block

A block made to augment the new dodge mechanics, Fluidity is an outlier among blocks, because it doesn't give you any damage resistance when active. Instead, it will make your dodge chance shoot way up while active, while still offering resistance to holds and knocks. In terms of numbers, fluidity is the worst block: Whereas all other blocks will reduce most incoming damage to around 25%, Fluidity only has a small chance to provide (by default) damage reduction to about 70%. Combined with a higher base dodge and avoidance (from other powers), Fluidity begins to show its value.
Flow like Water - If you block for 2 seconds, Fluidity's dodge bonuses persist for 10 seconds while decaying slowly. Great tactic for pre-battle survivability boosting, though a bit sluggish to use in close quarters.

Bountiful Chi Resurgence
Click Heal
★★★
One of the most reliable heals for defense, BCR applies a steady stream of healing over time. It's got a cheap energy cost, lasts a while, and heals enough health to be noticeable. The disadvantages include its recharge (a little shorter than its duration, actually), and its damage reduction, which is pretty substantial. Best used for survival on healing and support builds because of this.
Resurgent Reiki - Adds a rank-2 level heal whenever you dodge an attack. This makes BCR a mainstay survivability tool for dodge tanks and dodge-based fighters.
Gifts of the Storm - Any healing you receive will radiate out of you within 20 feet to the nearest 5 allies, granting them 20% of the healing you would have received. The effect can only occur once every two seconds, and doesn't trigger off of Heal-Over-Time effects. It's best combined with activated heals such as Absorb Heat or Conviction, and possibly even Ego Blades. Mainly this is to be used either by healing-melee hybrids, or tanks who will receive lots of directed healing.

Masterful Dodge
Active Defense
★★★★
Currently the only active defense that can't be ended by attacks (unless you die), Masterful Dodge provides you with a massive boost to your dodge chance (currently, easily in excess of 100%), as well as a good boost to your avoidance. This enables you to apply that avoidance bonus to all incoming damage automatically, which, given a high avoidance, makes it probably the best active defense in general. It can also be combined with Bountiful Chi Resurcgence + Advantage to get healing out of it. The disadvantage, though, is that it doesn't fully stop damage, and using it when too close to death most likely will still end badly.
Unfettered Strikes - Adds pitiful damage boost to you as you dodge - 7.5% extra damage, and it doesn't stack.

Rising Knee
Click Melee
★★
A good, semi-slow enemy interruptor with a knock, Rising Knee is a good burst of crushing damage. It has a recharge, which prevents it from really being a mainstay attack, but said recharge is short, and is useful for triggering MSA often. It has a lot of overlap with Inexorable Tides in terms of uses sadly - it has similar advantages as Inexorable Tides, as well as a similar knockup, but only affects a single target.
Flowing Strikes - Refreshes the duration of a Demolish debuff by 10 seconds, keeping that debuff going.
Focused Energy - Similar to Flowing Strikes, but for the Chi Flame effect. Combine these two advantages to make Rising Knee a useful intermediary refresher for single-target combat. This advantage counts as a Chi Energy effect, even if Chi Flame isn't on the target to begin with!
Gut Strike - Landing your knee will inflict the enemy with Despondency, reducing the target's chances of dodging. It also counts as a Mental State, which can be exploited slightly by Telepathy abilities.

Shuriken Storm
PBAoE Maintain
★★
This can best be thought of as a shorter-ranged alternative to Lead Tempest. Compared to it, it (should?) do higher damage, but has a higher energy cost, suffers from the same miss-chance that lead tempest gets. Basically it has no real benefits over Lead Tempest and it also looks doofy.
Floating Butterfly - Identical to Tread Softly. Though it seems to have a bit more dodge chance.

Bladed Cyclone
PBAoE Maintain
★★★
Swings a bladed chain around you in a circle, much like the other chain attacks. This one deals slashing damage and will snare targets that are hit. It's bafflingly similar to Lacerating Cyclone (slashing damage chain whirl in the Bestial set) and does less damage due to not utilizing bleed. Still, this is an introduction to the chain cyclone attacks, all of which utilize the same effective advantages:
Vortex Technique - A must have for melee tanks, Vortex Technique knocks targets inward who get hit by the Iron Cyclone. Fully maintaining this ability also will causes you to gain a stack of Furious, raising your critical chance and providing a small heal if you take damage.
Stand Your Ground - While maintaining the cyclone you are much harder to knock. Basically just semi-useful in case you want to make sure your cyclone's knocking power has priority over an enemy's knock.

Steadfast
Energy Unlock
★★★★
This energy unlock triggers whenever landing a critical hit with any Martial Arts attack. It has some significant similarities to Killer Instinct, but scales off of Dexterity instead of Ego. Optimal option for any martial-arts build, and especially for Unarmed builds that don't want to make use of any fancy Chi effects.
Martial Arts - Shared Moves III
Relentless
Energy Unlock
★★★
This energy unlock triggers whenever landing a critical hit against any target affected by a wound. This includes: bleeding, shredded, open wound, and deep wound. While the trigger effect may seem narrow for certain setups, there is no caveat about what kind of attack needs to crit against the wounded target - just that the wound is inflicted by you. Potentially this can apply its benefit to a large number of builds, if the user is creative with what they attack with. The statting fits this, as it scales most strongly off of Recovery, with a bit of Endurance scaling thrown in for good measure.

Laughing Zephyr
Reverse-Lunge Speed Buff
★★★
Doing a series of backflips, this ability creates quick distance between you and your target, and after completion, provides you with the Charged-Up buff, increasing all your movement stats (run speed, jump height, and flight speed.) These buffs don't stack well with your travel power if you're using one, so it's best used while moving around normally in combat. Its recharge rate, energy cost, and animation are just about identical to that of Evasive Maneuvers from Archery.
Laughing Zephyr enable ssome precise escapes from PBAoE effects and melee attacks, but the timing is very tight. It is undoubtedly more useful to melee characters than Evasive Maneuvers is since they'll need to be able to move to either enter or exit melee range for their attacks. Most critically, this enables some excellent positioning tactics for fights that disable travel powers consistently, such as most cosmics or in some alerts - highly recommended for roles such as Qwyjibo controllers, for example.
Sleight of Mind - Transforms this into a threat-wipe with an extended 45-seconds-ish cooldown, same as what this advantage does on Evasive Maneuvers. However, in the case of Laughing Zephyr, its speed boost can be utilized with the stealth for a quick getaway, rather than sacrificing the dodge benefits of EM on a threat wipe. Overall, a pretty solid choice for dropping your aggro.
Stim Pack - Identical to EM once again, this applies Restoration to you each time you utilize Laughing Zephyr, turning this into a healing technique. Much like with EM, you don't want to combine this advantage with Sleight of Mind, lest you then end up with a self-heal that you can only use once every minute or so.
Dual Blades
Rapid and ruthless, Dual-blades is the most straightforward and widest-ranged of all the Martial Arts subsets. Its lack of focus on various buffs or debuffs means that its naturally blessed with the ability to hit multiple targets, focus heavily on critical hits, and even perform laudably in survival.

Strengths
  • Lots of AoE
  • Heavy critical hit boosts
  • No buildup required
Weaknesses
  • High energy costs on some powers
  • Lower potential for single-target damage than Single Blade or Claws.

Damage Types: Physical-Slashing

Rain of Steel
Energy Builder
★★
A quick and effective energy builder, Rain of Steel hits rapidly in a cone. This energy builder does happen to be slightly slower than the others, and has its damage reduced when hitting multiple targets.
Grinning Ghost - The advantage on these MA energy builders enables them to build a single stack of focus.

Blade Tempest
Cone Melee Combo
★★★
Blade Tempest is actually the highest DPS AoE in its set. This sort of makes sense, since it's also the only AoE in the set that isn't a full circle in coverage. It has an extremely wide cone that can hit some enemies slightly behind you, and hits for laudable damage, but is also steeper on energy cost than most other combos. It can apply the Shredded debuff on your targets when finished, making them more susceptible to slashing attacks.
Crashing Crescendo - Each hit raises your critical chance by 2.5%. This makes it a great lead-in to a more powerful attack - provided you don't crit with Blade Tempest. If you land a critical, this buff gets consumed.

Storm's Harvest
Single-target charge
★★
This slash is largely designed for debuff and rooting. Of the two single-target strikes that Dual-Blades gets, this one is the lesser.
Red-Eyed Dragon - Once every 5 seconds, Storms Harvest has the ability to automatically critical hit. Said critical hit ability also disables critting following the move.

Strike Down
Lunge
★★
A swift and simple lunge with dual blades, Strike Down's on-hit bonus allows it to knock targets down when used from beyond 20 feet away. It's notable for being particularly low cost and high damage, especially for a lunge, but otherwise is somewhat lacking in special abilities.

Form of the Tempest
Toggle
★★★★
The Martial Arts forms are the damage-boosting toggles used most ubiquitously for builds of this type. They have different toggle conditions, but all these forms stack Focus, which provides Melee-oriented damage boosts that scale off of Dexterity.
Form of the Tempest might be the most ubiquitous toggle of all the Focus forms. Provided you have a decent enough critical chance (which isn't hard with high Dex, or a way to force critical hits... See above) Form of the Tempest can stay up in battle laudably. Unfortunately, it (like most other martial-arts forms) has a low duration.

Eye of the Storm
Sphere AoE Maintain
★★
With a twirl of the blades, you defend yourself from damage. Eye of the Storm deals de-escalating damage while you maintain, pairing this with a rising self-shield effect. Unfortunately, this shield doesn't last long after you stop using the attack meaning that it's essentially a sacrifice of damage in exchange for super-survival, which is not a tradeoff many character types would want. Tanky characters usually can survive most attacks anyways and need as much damage as they can get to grab aggro, while DPSers usually will benefit more from either just blocking, using a threat-drop, or dealing enough damage to kill whatever's hassling them.
Blade Beyond the Veil - Machine gunners best beware - all attacks made in melee range will reflect damage back to the attacker. The amount of damage done is flat, meaning enemies who attack you rapidly get torn up really fast.
Cut to Shreds - For a bigger offensive edge, Cut to Shreds can be utilized to reduce defenses against physical attacks as you maintain the attack. A full maintain of Eye of the Storm guarantees a shred. Overall, though, basic Blade Tempest can apply the debuff much more reliably and quickly, while doing more damage.

Dragon's Wrath
Single-target Charge
★★★
A fiercesome attack, Dragon's Wrath has the bonus of being armor-piercing, ignoring around 50% of enemy resistance. While this makes it valuable against armored opponents and other players, it falls short a bit when up against standard bosses.
Tiger's Courage - Adds bonus damage buff to the attack, scaling with critical chance. Versus an extra rank, this tends to be better than the rank-up if your critical chance is above 20-25%, and even better if you have other ways to boost that chance even higher.
Dragon Rush - A three-point advantage for energy generation. Dragon's Wrath is one of the 'dragon' moves - if you're affected by focus and full-charge a dragon move with this advantage, you get rush, which grants you energy for a duration equal to the number of focus stacks you have. This comes at a cost of both high advantage points as well as the raw potential of damage this ability can deal.

Sword Cyclone
Maintain PBAoE
★★★
A purely damaging full-circle, this basically transforms you into a blender. The effect is impressive, and you're able to move freely while maintaining, but the actual damage on the move is a little underwhelming, and the energy cost is quite high - so much so that it normally is only practical to use it while under the rush buff.
Butcher's Blades - Changes the move from a maintain to a charge. Said charge has a very steep energy cost, but the DPS actually seems to shoot way up.
Blender - You create a vortex as you maintain this attack, knocking enemies inwards as you maintain it. Blender will also have a chance to knock targets outside of your range into you (double-melee range). Excellent idea if you want to round up minions for your allies to pick off as a tank.
Chaotic Movements - While maintaining, you gain benefits to your dodge and avoidance stats. Your dodge increases by a respectable 10% while your avoidance shoots up around 50% (albeit affected by some diminishing returns). This makes it a soft substitute for Eye of the Storm, with higher damage but less focus on defense.

Whirling Dragon Blade
Ultimate Sphere Lunge Click
Unlocked.
Unlock difficulty: Medium
Worth unlocking?: Yes
★★★★
This ultimate is found within the Buccaneer lockbox. Twirling in like a sword-weilding cyclone, Whirling Dragon Blade deals impressive slashing damage to all targets instantaneously (at the point of arrival), knocks them down, and deals out the defense-debuffing overpower effect. Though the area it hits is moderate (a 20 foot sphere - pretty big for melee), it can hit up to 10 targets, making it crazy for completely decimating whole mobs. Whirling Dragon Blade gets high marks for being the fastest way to apply overpower, as well as a comparatively short recharge rate for an ultimate. Its lunge property makes it good for tanks and melee builds, but poor for ranged support, and despite being an instant click, it still has an extremely high energy cost to even use. Altogether, including its very flashy effects, this is a very nice ultimate to unlock.
Commanding Presence - Common ultimate advantage, this causes all enemies hit to gain extra threat against you over time, making them much more liable to attack you. This move's aggressive lunge status makes it a great option for this advantage if you're rolling a tank build.
Single Blade
A complex facet of Martial Arts, single blade places focus on stacking and rupturing bleed upon its enemies, which produces extreme bursts of damage. The added bleed is valuable in itself for doing damage over time.

Strengths
  • Very high burst damage
  • Deals DoT with bleeds
  • Excellent tanking and defense options for AoE (currently has perhaps the only non-slotted resistance buff in the game right now)
Weaknesses
  • Inconsistent direct-attack DPS
  • Moderate AoE damage output

Damage Types: Physical-Slashing

Reaper's Touch
Energy Builder

A basic energy builder.
Three-edged blade - When hitting enemies, you have an innate chance to cause them to bleed with this. The chance is 15% by default, but doubles to 30% if you're under the effects of focus.

Reaper's Caress
AoE Cone combo
★★★
A quite damaging combo, and a decent AoE option for the set, Reaper's Caress is best used to stack bleed on its targets. It has a moderate energy cost, massive coverage (with a full 360 degree sphere on its last hit) and has a final hit that hits twice. However, to actually guarantee application of bleed, it can take several hits to get the effect to apply. If you're affected by Focus stacks (are dex-based) each combo can guarantee an application when completed.
Cleaving Strikes - The final hit of this combo now applies Shredded to the targets hit, making them more susceptible to damage from your slashing attacks.
Cleanse - For each strike you land with this combo, you will consume a stack of bleed or poison on yourself to gain some healing. The healing provided is moderate, but can occur fairly quickly. Unfortunately, not all enemy types utilize bleed/poison effects so its ultimate utility is a bit dubious.
Fiery Blade - Subs out the combo's bleed-application effects for clinging flames, making this attack synergize with fire and heavy-weapons. As a bonus, the chances of applying this effect are essentially doubled by default, but not many builds can utilize a combination of fire/slashing damage that well.

Slash
AoE Cone combo
★★
An alternative to Reaper's Carress, Slash uses an animation that's well-suited to small knives. Slash's damage output per hit is more consistent than Reaper's Carress, and will build up bleed stacks faster by default. However it is weaker than Reaper's Carress and covers a much narrower cone in general and doesn't gain benefits from combining with Focus. Its best perk over Carress is that its energy cost is much lower.
Serrated Blade - Much like Cleaving Strikes, This causes a complete combo to apply Shredded to its primary target. Note that this will only apply it to your main target - not all targets in its range. This is the main difference between this advantage for Slash and Carress.
Head Trauma - A full combo applies the Bewildered debuff to the target, which makes it so that they become stunned if they attempt to use a charged attack. Fairly decent crowd-control option.

Swift Strike
Melee Click Stun
★★
A fast overhead slash with your blade that stuns the target. Swift Strike's damage is a bit higher than most stuns, but compounds this with a slightly boosted energy cost. It also still isn't that great at dealing damage.
Trauma - Stops healing from happening as good on your target. Same as any other stun ability.
Subtlety of the Tides - After each Swift Strike hit, you gain a stacking bonus to your avoidance when you use other attacks temporarily, raising the amount of damage you dodge on a successful dodge. Once you make a dodge, however, all stacks of this buff, Ebb and Flow, are dropped.

Cut Down
Melee Lunge
★★★
Identical to Thunderbolt Lunge in most ways, Cut Down's hit bonus from 20+ feet is a target root. Its main difference is that it will hit your target with a sword.
Delayed Attack - Applies a Jinx to the target, which is normally a sorcery effect (and can synergize with its EU and other aspects of that set!). Jinx will heavily debuff the target's movement speed and damage output, and once Jinx ends, the target is knocked down. A pretty good deal!

Scything Blade
Charged PBAoE
★★★
A whirling cut that deals some decent damage and will apply bleed reliably on surrounding targets. The bleeds applied by this move cannot stack, however. In raw damage, Scything Blade handily outdoes Reaper's Caress.
Swallowtail Cut - Has a chance to add a powerful, health-scaling bleed to targets, provided they aren't above Master-Villain rank. While not counted as a bleed, it is counted as a wound, which allows it to generate energy through EUs that focus on this debuff type. Swallowtail Cut's chance of applying goes up the longer the attack is charged.
Heavy Blade - For crowd control (or weird enrage builds), Heavy Blade will allow this attack to knock down enemies. Despite the description, it does not require a full-charge to trigger the knock, though it is limited by an internal cooldown.
Messy - Refreshes the duration of Bleed on all targets hit...
Weak Points - ...And very similar, this refreshes Shredded! Neither of these require any charge to apply their effects, making them quite quick, and applicable to multiple targets!

Form of the Swordsman
Toggle
★★★
Form of the Swordsman stacks whenever you apply bleed to a target, rupture bleed, or even refresh bleed duration. Using a single-blade loadout, or even a bestial one, this is an extremely easy form to use.

Dragon's Bite
Single-target Charge
★★★
Don't be fooled by the low numbers: This move actually hits twice, making its DPS roughly identical to that of the other Dragon charges. Its on-hit bonus is that it will refresh all bleed stacks on the target, making it ideal for maintaining DPS through bleed stacks. However, it doesn't apply bleed, per-se, so don't expect to get the most of it if you try to start a battle off with Dragon's Bite.
Cull the Weak - Makes the move stronger on targets below 25% health (actually seems closer to 20%). If the target's of villain rank or lower, they just die. This is implemented as an extra tick of damage dealt to the targe. It also does not seem to trigger on Legendary targets at all, so be wary. In any case, the advantage is very useful for landing quick and decisive kills on targets of enforcer/master villain rank, and below.
Heavy Blade - Each strike you land knocks the target down. The knock occurs on the second hit, and can happen even when Dragon's Bite is tapped.
Dragon Rush - This three-point advantage will retool your Dragon Kick to trigger a Rush effect on full-charge, generating energy over time. The duration of this buff is based off of how many stacks of focus you have (if you're not using focus, then there's no reason to use this advantage!) This can make Dragon moves extremely valuable as secondary support attacks to keep offense up, but obviously gimps their full damage potential - and costs a lot of points.
Single Blade - Part 2
Reaper's Embrace
Single-target Charge
★★★★
The finishing cut for Single-Blade, Reaper's Embrace ends all bleed on the target, dealing extremely high burst damage to the target if bleeding. If the target is Shredded and you full-charge, they also gain the Open Wound effect, which can stack bleed back up over time. Even discounting the rupture effect, the attack is the most damaging of all single-blade attacks. The downside to the move is that it has a very high energy cost, and a fairly slow windup, and a (very short) cooldown, making it unviable to use as a spammed assault.
No Mercy - In addition to just your bleeds, No Mercy changes Reaper's Embrace so that it ruptures all wound effects - So including bleed, also shredded, open wound, deep wound, and swallowtail cut. For each wound you rupture this way, the rupture is converted into a damage-over-time effect, versus a large single burst. Overall, damage done per effect is lower, but there's more stacking potential... In essence, more complicated to use (since it ends shred as well), and with less bang for buck. Not my kind of advantage.

Deflect
Block
★★★
A block similar to parry, Deflect causes you to hold up your blade to return a slice that applies extra stacks of bleeding, provided an attack contacts with you within the first 3 seconds of blocking. Versus Parry, its damage is much less direct and much lower, but has greater synergy with the Single-Blade attack framework.
The Elusive Swordsman - A three-point advantage, this is identical to The Elusive Monk, providing you with bonus dodge-chance and avoidance, at the cost of raw damage, each time you land a melee attack.

Tornado Slash
Charged Ranged Cone
★★★
This large cone attack throws out a stunning wave of force that can apply bleed. The longer you charge, the higher the chances become for applying bleed and stun to its targets. Tornado Slash suffers from a bit of a cooldown, and due to its large hit area (50 foot cone of 60 degrees), it counts as a ranged attack, meaning it won't deal nearly as much damage on most melee-focused DPS builds. This is very much a variety of tank-styled attack, and otherwise is an excellent auxiliary attack, thanks to its crowd-control effects, and its advantages:
Soul-Capturing Blade - this advantage subs out the Stun effect of this attack for the application of the Dependency debuff (which counts as a mental state, for you Telepaths out there). Dependency causes the affected enemy to radiate minor healing to surrounding allies, providing support to your team. While it can affect a wide number of targets, its cooldown makes it difficult to stack the effect up.
Fighting Spirit - And inversely, this one subs out the Bleed effect for application of Chi Flame, a DoT effect utilized by Unarmed martial arts. This is generally a good choice for unarmed builds, since Chi Flame doesn't need to stack to be effective, and by far, this can get the debuff on the most possible targets at once.

Crimson Bloom
PBAoE Melee Maintain
★★
Crimson Bloom is Single-Blade's counterpart to Dual-Blade's Eye of the Storm attack, dealing moderate to low damage while generating an escalating damage shield on your character. Much like with Eye of the Storm, the damage shield doesn't last long after you complete the attack, making this once again a troubling tradeoff of a lot of damage for survivability.
Wall of Blades - After 1 second of maintaining, you apply the Aegis buff to yourself, gaining 15% extra damage resistance. There's no need to even hit a target, so just using the attack for a split-second is enough to get you some extra armoring.
Serrated Edges - Each hit now has a chance to apply bleed to surrounding targets, helping this attack synergize with Single-Blade playstyle.

Vorpal Blade
Ultimate PBAoE Sphere
Unlocked.
Unlock difficulty: Medium
Worth unlocking?: Yes
★★★★
Unlocked from the Inmate Lockbox, Vorpal Blade is a very quick ultimate, benefitting from a short cooldown (for an ultimate). The damage on this power starts low, but scales up extremely well with stacks of focus (not unlike Unleashed Rage and Enrage stacks). Versus attacks like UR and Fury of the Dragon, Vorpal Blade benefits from a matching damage type, and counts as a melee attack. Its duration is much shorter than FotD, and it doesn't put out as much burst damage as UR does, but it will inflict 5 guaranteed bleeds on every target it hits, making it a great setup for Bleed Ruptures. Especially for how quick the animation is, the DPS it puts out isn't bad at all.
Fighting Claws
One of the most powerful single-target sets in the game, Fighting Claws aims to apply the Shred debuff to foes, reducing their defenses. Using powerful slashes, it can take advantage of this debuff either through pure damage output, or by ending the shred in extra damage.

Strengths
  • Very high and consistent damage
  • Contains knocks for crowd control
Weaknesses
  • Redundant moves
  • Single Blade results in higher bursts of damage.
  • Underwhelming AoE performance

Damage Types: Physical-Slashing

Hawk's Talons
Energy Builder

Another basic energy builder. Fast and effective, but nothing special. Its focus building advantage is Peerless Predation.

Viper's Fangs
AoE Cone Combo
★★★
Viper's Fangs is something of a staple for the Claw set, as it's the most reliable way to start up Shred, and is the set's only AoE, covering in a very wide cone. Shred doesn't stack, but does have a fairly long duration of 15 seconds, and this combo is the only way within its own set to apply the debuff. Of the martial arts combos, Viper's Fangs is the strongest hitting, making this a very solid choice of combo overall for a slashing-based melee build.
Spitting Cobra - The claws are now poisoned, applying the deadly poison debuff. Semi-unrelated to what Claws does, but this debuff can stack up to 5 times to do laudable toxic damage to the target. Deadly Poison is actually the main debuff featured in Infernal Supernatural, but it can be utilized by Bestial as well in some cases.

Rend and Tear
Charge melee
★★
A good move for interrupting targets. The knockup on this move is existent, but very weak, meaning it won't mess up enemy positioning. The downside is that it's not terribly damaging, and also quite steep on energy cost. Rend and Tear will also refresh the duration of the Shredded debuff, making it a way to continue chaining single-target attacks on a powerful boss.
Drake's Deliverance - This advantage does not work as advertised, at all. It just puts an extra DoT effect on the move, which does very low damage.

Form of the Tiger
Toggle
★★★
The easiest of the melee toggle forms to control, though probably the hardest to stack quickly. Form of the Tiger will refresh whenever a melee move is charged above half. This makes it a strangely good choice for Might, and also makes it very easy to gain constant energy by fully-charging Dragon moves repeatedly. The downside is that maintains and combos will do nothing for this form.

Dragon's Claws
Charged Melee
★★★★
Probably the most outright damaging of the Dragon moves, Dragon's Claws' bonus is that it has +50% severity when landing critical hits. This perfectly is applied above your normal severity, which can result in extremely damaging hits from this move if you land a critical. It has a fair energy cost, but the one implicit downside is that it makes the rest of the moves in this subset of Martial Arts entirely redundant.
Vertebreak - Trips up the enemy 3 times in a row following the attack. It can only occur once every 60 seconds, and comes at the cost of raw damage. Of note, despite triggering 3 knock effects, it will only stack resistance once. It's best used for crowd control and disruption.
Dragon Rush is present on this ability as well, trading off damage potential for energy generation upon a full-charge.

Tiger's Bite
★★★
The finishing spike of the claw set, TIger's Bite will consume Shred to deal an extra burst of damage. The burst is easier to set up, but not nearly as damaging as what Single Blade can build up to. Of the single-target martial arts attacks, Tigers Bite has the highest damage, but has the drawback of also having very high energy cost.
Mouth of Madness - There's a 50% chance that the attack won't consume Shred, while still dealing its burst. This can occur even on taps, but unlike Reaper's Embrace, it can't apply shred from the start of a battle like Embrace's advantage can.
Unarmed Martial Arts
The most extensive of the martial arts sets, due to having been the most recent to receive a rehash. Unarmed can be built to be a fierce rapidfire melee bruiser, or a graceful and evasive tank. In both cases, Unarmed has the most tools in its set to keep enemies off its toes, combines its strong crushing strikes with the extra damage of chi flames, and arguably synergises best with the core components of the set.

Strengths
  • Balanced options for single-target and AoE
  • Can customize moves to either focus heavily on damage or dodge-tanking
  • Has moves that can stun and knock enemies
  • Highly synergistic in-set, thanks to Chi Power effects and energy unlocks.
Weaknesses
  • Advantage decisions cost many advantage points and will sacrifice potential damage output in most cases.
  • Extreme energy costs on powerful attacks
  • Complex setup requires juggling and maintaining several buffs and debuffs.

Damage Types: Physical-Crushing, Paranormal-Dimensional

Righteous Fists
Energy Builder

Fast, basic, and effective.
Drunken Master - Each hit landed with the energy builder that lands a critical will grant you Aversion, which will provide you some extra dodge and avoidance for 12 seconds. The effect, while lengthy, cannot stack.

Vicious Strikes
Energy Builder

Numerically speaking, Vicious Strikes is actually the fastest-hitting melee energy builder, though its animation looks pretty blase. It thereby actually has a much faster and stronger first hit, and might be the most damaging of energy builders out there. It also uses the advantage of Drunken Master.

Thundering Kicks
AoE Melee Combo
★★★
By and large the most powerful of the Crushing Melee combos so far, it also happens to be the overall fastest combo in the game, only taking 1.2 seconds to complete. Keep that in mind if building around a spec tree that focuses on completing combos (Warden or Arbiter masteries). It also grants a good dodge boost upon completing a combo, making it valuable for survival as well if you're dodge-based.
Floating Lotus Blossom - Each hit will allow you to stack the Quick Maneuvering buff on subsequent attacks (combo or no). This effect can stack, ultimately producing a dodge boost of up to 50% extra chance! The application rate of the buff is fast, but gets consumed upon any successful dodge. Extremely strong dodge-tanking utility, but requires the user to keep attacking constantly (and take damage without dying) to get its benefits.
Demolishing Strikes - If you take this advantage, you will lose the ability to gain dodge-buffs by utilizing the combo and can't reach full damage potential, but completing this combo will now apply Demolish to the enemies hit by your last kick, which is the main defense-debuff utilized by melee crushing sets. Combined with the fact that this is a fast combo, it is possibly the fastest and most damage-effective way of applying it to a single target. High priority choice if you're going for DPS.
Storm's Eye Prana - Completing the combo reduces the recharge of your healing abilities (such as Bountiful Chi Resurgence) by 2 seconds. The advantage costs 3 points instead of 2, but it can allow you to pull off some filthy stacking of some effects such as Bountiful Chi Resurgence.

Crashing Wave Kick
Single-target click
★★
A quick and effective stun move. It does comparatively low damage and has a pretty high energy cost, however, and overall takes on a quite defensive stature.
Ebb and Flow - Following the use of the kick, every hit you land has a chance to add on extra dodge rating and avoidance. It also counts as a Chi Energy effect, in case you're using Form of the Master and Chi Manipulation.
Drop Kick - True to the tradition of other stun-abilities, this one applies Trauma to your target, ruining their healing abilities for PvP.
Flame Drop - This will extend the duration of the Chi Flame effect for more damage.

One Hundred Hands
Cone maintain
★★★★
A very rapidfire attack with a decent energy cost, One Hundred Hands is a contender for the most damaging AoE in the set. Disadvantages include that its damage output wanes if hitting more than one target, and its weakness against armored opponents, but its hits can also apply the Chi Flame effect for more DoT madness.
Ghostly Strikes - Causes random hits from the attack to be ghost strikes, which deal a higher amount of Dimensional damage. This counts as a Chi Power effect, which can mesh with its innate ability to apply Chi Flame (buffing the damage from this effect by 50%)
Demolishing Strikes - A full maintain of this attack will demolish your primary target. This wouldn't be my first choice for this power, since its base damage is pretty high and a full-maintain does take some time.
Flaming Fists - Subs out the Chi Flame effect for classical Clinging Flames, utilizing Fire damage instead of Dimensional. Ironically, this makes this high-speed melee blitz most compatible with the setup of the sluggish Heavy Weapons.

Form of the Master
Toggle
★★★
Form of the Master's stack condition is whenever the user applies a Chi Power effect - most of which are abilities that emphasize extra dodge chances, or trigger Dimensional damage over time. It should be noted that not all the trigger conditions listed are attacks - for example, it can be stacked by just using the Bountiful Chi Resurgence heal. This in mind, utilizing the right skills can make it very easy to stack, but also not quite as flexible as some of the others for build purposes.

Dragon Kick
Charged PBAoE
★★★★
Dragon Kick is a full-sphere sweep that has the added bonus of stunning targets upon full charge. The stun, combined with decent damage output, means that it is an awesome option for crowd control. Its main disadvantage is a rather steep energy cost, as well as otherwise suboptimal damage for its cost.
Lashing Dragon Tail - Adding to its defensive stature, full-charge kicks offer a massive boost to avoidance, ensuring that your dodges reduce more damage. The buff has a very good duration, and synergizes with Chi Power mechanics.
Flaming Dragon Tail - Now has a chance to apply the Chi Flame effect, with chances going up with charge time, but never guaranteed.
Spectral Dragon Tail - Splits the damage of the attack done between Crushing and Dimensional, with the Dimensional part being larger and being a Chi Power. Only costs one point for a net-damage gain, but less overall benefit from damage debuffs.
Like other Dragon-Style attacks, Dragon Kick gets access to Dragon Rush for potential energy generation.

Dragon Uppercut
Charged single-target
★★★
Fast and efficient, Dragon Uppercut doesn't have quite as much damage potential as the other Dragon Moves, but instead serves excellently as single-target crowd control. It also suffers a bit from its higher than average energy cost, but makes up in its easily controllable knock-up effect, and its extra damage dealt to knock-resistant enemies.
Chi Flame - This utility adds a chi flame effect on your foe for some Dimensional DoT, as well as reducing their defense against Chi Power effects. The result is less immediate damage, but a bit more pain when combined with other attacks.
Ghostly Strikes - This is this attack's version of Spectral Dragon Tail, splitting the damage into crushing and dimensional.
Dragon Uppercut also gets advantage to Dragon Rush.
Unarmed Martial Arts-Part 2
Chi Manipulation
Energy Unlock
★★★
Chi Manipulation is an energy unlock that will be triggered whenever the user utilizes a Chi Power effect, which covers a wide array of buffs and debuffs used throughout the Unarmed set. The energy supplied by this unlock trickles in is fairly substantial chunks over time, and if utilizing the main gimmicks of the set, this can help you use some of the most intensive attacks of Unarmed martial arts.

Backhand Chop
Click single-target
★★
A quick chop that is good for its impressive spike damage, and ability to interrupt enemies (of below supervillain rank). The downside of the move is its recharge, but its selection of advantages makes it very useful as an intermediate attack.
Stinging Bee - Inflicts Trauma for reduced healing effectiveness on the target.
Chi Flame - Applies the titular debuff for dimensional DoT and Chi Power resistance reduction.
Brutal Strike - Your backhand chop extends Demolish's duration by 10 seconds.

Elbow Slam
Charge single-target lunge
★★★
Bringing a little bit of MMA into the scene, Elbow Slam charges up a short-ranged lunge that deals high crushing damage to its target and paralyzes them for a small duration. Its offset by a poor recharge rate, and its charge period means that its overall DPS might not be a net gain if used. Its main draws are its control and combat utility for closing distance, its advantage choices, and of course for looking cool as all hell.
Falling Hammer - Your elbow now applies demolish. The fact that Elbow Slam has such a short charge duration means that, while not a flexible option for the debuff, it is one of the quicker options and is a great option for opening a fight with.
Blunt Force - Applies a disorient, making it useful for defensive fighting, and combining a bit with either Brick powersets or Telepathy.
Flaming Chicken Wing - Offers your foes Buffalo Wild Wingsnah it's another applicator of Chi Flame for DoT.

Burning Chi Fist
Charge single-target
★★★★
Of the single-target punches, Burning Chi Fist is the most powerful. It's also the most energy intensive, but has the advantage of burning the enemy over time when landing a full-charge. Not only this, but even landing taps against the target will refresh the duration of this burn. Much like all the advantages listed above that apply Chi Flame, this effect also makes foes more susceptible to other Chi Power effects, and is perhaps the only option that can apply the debuff natively without any extra advantages.
Righteous Fury - Trades out the application of Chi Flame for a Chi Blast! Hitting your foe with a full-charge of this punch will now generate an AoE burst of Dimensional damage, hitting surrounding targets. It once again counts as a Chi Power, meaning Chi Flame can cause this attack to deal even more grievous damage. The drawback is its complicated preparation and its lower damage dealt to a single target.
Shattering Strike - When using Burning Chi Fist on a Demolished target it deals an extra 30% damage. Set em' up and punch them down with this for optimal damage with a pure punch.
Ghostly Strikes reappears here as well. Of note, Ghostly Strikes is self-synergysing with BCF's Chi Flame, which causes the dimensional portion of this attack to do 50% extra damage!

Open Palm Strike
Ranged Melee Cylinder
★★★
Open Palm Strike is basically a Hadoken, firing out a short-ranged wave of force at enemies in a line. For an AoE its damage output is surprisingly brutal, but it also gets combined with a knockback effect which can make it suboptimal for most melee builds. It should be noted, though it looks like a wave of energy its damage starts out as purely crushing. It's appeal is a bit niche, but it does have a good array of nice advantages:
Power Shift - Reverses the knock of the palm strike, dragging your foes inwards for more hurting.
Force Collapse - A full charge applies Devoid to the main target, reducing their defenses to Dimensional damage. It is in fact the same debuff used by Darkness builds.
Chi Flame and Ghostly Strikes are here too.

Devastating Strike
Ultimate Charge Single-Target/Sphere
Unlocked.
Unlock difficulty: Medium
Worth unlocking?: Sure
★★★
This 8-hit combo starts out with a very short charge, and then leads into is hyper-fast flurry of punches and kicks, ended with a final burst kick that deals dimensional damage in an area of effect (versus the first 7 hits, which are all crushing). The final hit gets compounded with a powerful knock (or disorient if they can't be knocked) and the application of Chi Flame. Will obviously benefit Unarmed builds the most, but it can be good for damage regardless. Is a very feast-or-famine ultimate when it comes to critical hits (either all of them crit or none do). Has a short recharge rate of around a minute, meaning it can be used pretty frequently, but suffers from an extremely high energy cost.
Commanding Presence - Classical threat advantage for your ultimate, in case you're making a tank. Of note, this only applies the threat to the main target, instead of all of them hit by your final burst attack. Not great.
Telepathy
One of the most nonstandard sets available, Telepathy eschews a lot in terms of pure numbers in favor of applying very strong debuffs and holds to its enemies. On the defensive, it is home to some of the best heals and defense buffs for teams.

Strengths
  • Responsive and quick heals
  • Powerful, far-ranged holds (essential for cosmic fights!)
  • Excellent tools for DoT effects
Weaknesses
  • Moderate to Poor upfront damage
  • Hold gimmicks lose heavy value on teams

Recommended Stats: INT, PRE, DEX
Damage Types: Paranormal-Ego

Psi Lash
Energy Builder

An average energy builder, though if you happen to be using a non-auto EB control scheme, Psi Lash is perhaps the only one that is a maintain instead of a click ability.
Psychic Reverberations - Grants you a low chance to get a small ego damage buff. Can be useful to even Telekinetics.

Ego Blast
Charged single-target Blast
★★★
A decent blast that can apply disorient. Damage-wise, it's actually towards the upper end.
Mind Opener - If you have Telepathic Reverberation, take this advantage. Full-charge an Ego Blast, then follow it up with rapid taps - the disorient it inflicts, combined with receiving energy from reverberation, causes this move to do mid-charge damage whenever the attack hits (even on tap) providing a massive DPS increase. This is a powerful single-target blitz in a set otherwise dominated by low-damage trickles and debuffs.
Rude Awakening - A cheap advantage that deals 15% extra damage to sleeping targets. Full charge to get the full benefit of this.

Mind Break
Charged single-target
★★★
Mind Break is used by DoT telepaths to end their debuffs in huge bursts of damage. It's a bit more damaging than Ego Blast, but also comes at the cost of higher energy. Each type of debuff it ends will also trigger special effects, the most notable one being Dependency stacks, which generate giant bursts of healing around the target.

Empathic Healing
Maintain heal
★★
Perhaps the most basic and straightforward heal, Empathic Healing will do escalating healing to the target. Its notable for being able to get the largest number of benefits from Sentinel specs, and can frequently crit, but suffers from low base healing, short range, and a self-root when healing another target. To its credit, it isn't a bad self-heal, provided you got the time.
Empathic Reverberation - A technique that would probably be best combined with a very powerful charge of some sort - perhaps a PBAoE, considering the pain of having to switch targets.

Ego Sleep
Charge Sphere Hold
★★★
Though one of the few that can be applied instantly, and also very quick for an AoE hold, the sleep effect breaks instantly if the target takes damage. In a team context, it can be used to apply very long holds to focus targets (if everyone involved agrees to not attack them). Solo-play, the only moves that can be used on enemies in this state, without awakening, are any of the telepathy DoT attacks (Ego Sprites, Shadow of Doubt, etc.) In any case, Sleep has perhaps the longest duration of all holds, making this a staple ability used in fighting cosmic minions such as Kigatilik's Dogs.
Plagued by Nightmares - And in the case of this advantage, it's also good for applying fear for some extra offense debuff. This is actually, arguably, the most effective way to apply fear debuff instantly to targets.

Telepathic Reverberation
Energy Unlock
★★★
A really weird energy unlock; unlike every other one, this one has very noticeable visual effects, with small sprites flying towards you whenever it triggers. It's a bit finnicky, if not a little underwhelming when only working on one target, but will easily give you tons of energy if triggered on a big mob of foes.

Ego Sprites
PBAoE DoT Click
★★★
These unassuming little sprites shouldn't be underestimated. Low energy cost, fair duration, double-stacking, and a very wide application range, Ego Sprites are a perfect companion to other damage effects, and can be tailored to be a good fire-and-forget weapon. The low damage is not nearly as offensive as it would be in other situations, because of how quickly it can be applied to enemies. Of the Telepathy DoTs, this does the highest damage, has a large radius, and is the only one without a recharge.
Slave Mentality - After the sprites have served their time, they return to you to give you a bit of healing. The healing from these sprites stacks up to 5 times, but is not affected by your presence. The heal, individually taken, is slow and very low, but can be quite sizable with all 5 stacks acting - it works best in mobs.

Shadow of Doubt
Sphere DoT Click
★★
One of three TP debuffing click powers, the shtick of these is that they will deal low ego DoT to the affected targets for a while, while also applying a recharge rate reduction (less frequent attacks), and an extra debuff after the time is up, which can be utilized either as pure debuff, or as fodder for Mind Break. This one's debuff bonus is a stacking offense debuff. The damage on this one is average, but the radius is very small. Meanwhile, the offense debuff makes this optimal for a survivability boost to your team against dedicated targets.
Malaise - Slightly slows down enemy recharge times for each use, making for less frequent attacks.

Mental Leech
Sphere DoT Click
★★★
Mental Leech does lower damage, but has a larger radius. Upon expiring, Mental Leech will heal nearby allies gradually, which can get pretty substantial if enemies are closely bunched up. It's the lowest damage of the telepathy DoTs, though has a larger radius than most. As mentioned above, however, comboing this with Mind Break creates for an awesome emergency heal option.
Mental Weakness - Slightly slows down enemy charge times for each use, making for slower charge attacks.

Ego Placate
Single-target click
★★
Attempts to get the enemy targeted to stop attacking you, though this effect usually fails more often than not. To add to this, it also applies disorient to your target, and it will flatly subtract threat against you on the target for each use, meaning repeated application of this on any enemy should eventually force them to stop attacking you altogether, even if the placate itself didn't work.
Svengali's Guile - This causes the debuff effects of DoT abilities; Stress, Dependency, and Regret, to be partially renewed by this ability. To my knowledge this is one of the only ways to refresh these effects, making this advantage fairly useful.
Telepathy-Part 2
Congress of Selves
Hybrid Passive
★★★
The only one of its kind, Congress of Selves will apply a boost to all Ego DoT damage you do (actually, all Ego damage period), and also boosts your defense penetration, energy efficiency, and your stealth and threat reduction. It can be used in any role, and becomes silly when combined with a stat like Dex - you can basically waltz straight through enemy territory without anyone doing anything.
Conditioning - Enemies you hit have a much harder time healing. Good for two things: PvP, and killing Ao'qephoth.

Summon Nightmare
Charge Summon
★★★
Summons forth a worm to attack your target. If you charge it up, it's a worm and a dog/imp guy. Decently powerful, but temporary and strictly tied to the lifespan of your target. Two cool perks about Summon Nightmare, though: you can summon as many nightmares as there are enemies, meaning you can have upwards of 10 of these beasts flailing about! Nightmares also will not be desummoned if you die, which can be helpful when used on a team.
Night Terror - Extends the nightmare's duration to whenever the target dies, instead of an arbitrary value. Not that great, unless used against a boss of some sort. The low health on these critters means that, unless the battle strictly involves single-target attacks, they're most likely going to die before then.

Psionic Healing
Charge Heal
★★★★
A general and very powerful (albeit very risky) heal, Psionic Heal has a lot going for it: Long range, variable energy cost (taps actually generate energy), and widely synergizes with specs. The downsides include its difficulty to use precisely (results aren't immediate, meaning to get the most, you have to carefully measure your charge to get the biggest bang for the heal, without the target dying before then), and its self root.
Psionic Emanation - Adds a random AoE component to the heal, with a flat healing value. This occurs regardless of charge level, but generally doesn't occur too often.

Mind Lock
Click Single-target

You can use this move to get a low-rank target to attack a random target. The big problem about this is that they still remain hostile to you, and any damage they take basically breaks them out of the confuse effect instantly.
Befuddling Rage - And hey, if you want to use this move to make your enemies more deadly, you can utilize this advantage. Who knows, it might make supervillains more able to kill you.

Psychic Vortex
Charged Summon
★★
An unusual move, Psychic Vortex summons up an independent entity that will reflect damage back at enemies as they attempt to attack. Despite needing a target, the pet appears on top of you. While the pet is untargetable, immune to damage, and has long duration, its limitation of only reflecting damage back at targets once every 3 seconds makes its direct damage dealing utility limited, but the damage does escalate for each hit that's landed. An interesting gimmick, but not one you'd normally want to build around.
Single Minded - Adds a stun ability to the vortex.

Collective Will
Click summon
★★★
Summons up a hooded glowy man to shoot Ego Blasts at enemies for heavy burst damage. The phantom cannot be targetted or damaged, and basically serves to unequivocally boost your damage output. Also, if any held targets are nearby, up to 3 extra guys can show up. However, these ghosts are tied specifically to the life of the targets they were summoned up from. The slow animation this move has also is troubling, but if you're willing to go out of your way to put it into a control build, you'll be surprised at how effective it is.
Consume Will - The blasts dealt by the ghosts also reduce their targets' resistance to ego damage with Stress. This stacks, and if they happen to be focusing on a single target, they will be very weak to your assaults.

Mindful Reinforcement
Click Shield
★★★★
Applies a protective field quickly. The weaker of the two forcefields, Mindful Reinforcement suffers also from a shorter duration, but uses the short duration to also utilize its expiring benefit sooner: a burst of healing, double the strength of the remaining shield. Essentially, it's combined defense and healing, and works very well for allies who aren't being actively attacked by foes.
Revitalizing Boost - Provides a bit of return energy to you if the shield gets used up by damage.

Ego Storm
Maintain PBAoE hold
★★★
Probably one of, if not the best crowd control move for general use, Ego Storm will attempt to lock down all targets surrounding you, while dealing out decent damage. Unfortunately, if any of the targets die after the move is half-maintained, or if any of the targets resist its effect, the ego storm will end. Not to worry, though, as even that duration is enough to place a considerable hold on affected targets.
To my knowledge, this is the only way to stack the Manipulator toggle without having to directly hit or control a target.
Malevolent Manifestation - Instead of a maintain, it becomes a toggle that summons the storm up as a pet. This uses up more energy, and unfortunately cannot stack Manipulator, but has the benefit of allowing you to lay down an offensive while enemies become locked down. It also doesn't end early, unless your energy runs dry.

Mental Storm
Charged Sphere DoT
★★★
The last of the DoT moves, Mental Storm can be charged to place a significant hold on its targets. Charging it will increase the duration of the hold, allowing for quick DoT and debuff with a tap, and lengthy crowd control with the charge. Its after-DoT effect is an ego defense reduction. Generally, it's very versatile and quite useful to Ego-damage characters.

Master of the Mind
Click Ultimate
★★★★
Casts a psionic shadow over you, acting as an extremely powerful offense/defense active ability. When in action, the Master of the Mind buff will grant you immense resistance to damage, knockback, and holds. You will also be able to fly around at a high speed (roughly Acrobatics speed), and will gain a substantial buff to your crit chance for each stack of Ego Leech you have active. And don't worry about building them up, either, because over the course of this ultimate you passively gain Ego Leech stacks. This overall makes this a fine choice of ultimate for a surprisingly large number of builds. its main downside is that it has a very long recharge (over 2 minutes) and that it also puts all other active abilities (offense AND defense) on an extended 90 second cooldown.
Telepathy-Part 3
Mind Control
Charged Corruption

With moderate energy cost, far range, and one of only two abilities to make the use of the 'corruption' effect, Mind Control will force an enemy of villain rank or lower to fight for you. After the effect ends, targets will take a percentage of their total HP in damage, depending on enemy rank and this abilities' rank.
It can be used to quickly have other enemies eliminate the target, especially if you haven't aggroed the mob it belongs to yet, but it's hampered by its long cooldown and wildly fluctuating corruption period, with enemies sometimes losing the mind control effect in seconds. Mind-controlled enemies also will still be affected by other crowd-control effects on them when they became corrupted, so be careful to target an enemy that isn't stunned or confused so that they can help you out!
Bewilder - Will disorient targets immune to the mind-control effect. While this can be useful for disorienting enemies from a far distance, there are quicker ways to apply the effect (i.e. Ego Sleep tap)

Mind Wipe
Single-Target Threat Wipe

Versus the majoirty of threat wipe abilities, Mind Wipe will only apply its effect to a single enemy, making it somewhat of an oddity among the threat wipes. Other enemies after you will continue pursuing you if you have their aggro, but the stealth does operate (against lower-ranked targets). Its main perk versus most other threat wipes is that it has a faster cooldown than most, and it is generally more useful in large boss battles against one enemy than the other threat wipes for this reason.
Free Your Mind! - When used, Mind Wipe will generate a PBAoE that helps nearby allies break out of holds if they're affected by them.

Mind Drain
Single-Target Maintain
Unlocked.
Unlock difficulty: Easy
Worth unlocking?: Yes

Currently the cheapest unlockable power in the game (which only needs a fair amount of Silver Champion Recognition to unlock), Mind Drain is a telepathic reskin of Life Drain. Its stats are basically identical, aside from different damage type. Overall, a fair-cost, highly-effective self heal and attack, especially if you're high on Presence or other healing stats. As an added bonus (incentive?) it has a unique psionic-focusing animation.
Deplete - Much like Vampiric Sympathy, this causes you to radiate an AoE Heal around you in a large 20ft sphere. Unlike Vampiric Sympathy, however, its full-heal AoE bonus triggers when the target is afflicted with Dependency rather than Fear. Combine it with Mental Leech to activate its special effect!
Telekinesis
An all-around damaging and effective melee/ranged hybrid set. Telekinesis places focus on building and utilizing Ego Leech, boosting its own critical chances and energy efficiency, and then using it up to deal out high spike damage.

Strengths
  • High burst damage
  • Seamless switching between melee and ranged combat
  • Strong control and utility options
Weaknesses
  • Highly variable energy costs
  • Doesn't play well with other melee/ranged sets.
  • Unreliable AoE - either small coverage, or a recharge.

Recommended Stats: EGO, DEX, REC, INT
Damage Types: Paranormal-Ego

Kinetic Darts
Energy Builder
★★
Back to first-hit bonuses! Kinetic Darts has a chance to apply Ego Leech on its first hit. It's curiously bugged, in that it actually can stack Concentration when landing hits from far away enough (if using the Concentration toggle).
Leeching Strikes - The usual 'all-hit bonus' advantage; now all hits can apply Ego Leech.
Incisive Wit - Gives the energy builder a chance to apply an Id surge, which boosts ego damage output and your ego stat. A pretty solid deal, all things considered.

Ego Blade
Energy Builder
★★
Identical to Kinetic Darts, but melee. Even uses the same advantages. Obviously is more useful for melee fighters.

Ego Weaponry
Cone Combo
★★★★
A moderately powerful combo attack, it's a melee staple for the Ego Blade set, and has the benefit of being very energy efficient. It also benefits from a higher critical chance than most other moves, thanks to its escalating bonus based off of Ego Leech.
Thought Sever - A low-cost advantage that will drain energy from your target, and deal extra damage to low-energy targets. Honestly not sure if this even works on non-energy-based enemies (every enemy, sans other players and nemesis').
Siphoning Strikes - Every crit now heals you for the severity it would have dealt out. This makes Ego Weaponry a massive boost to survivability. If you're a fragile melee fighter, this ought to patch you up quickly (obscenely so when hitting multiple enemies). However, keep in mind that this comes at a fairly substantial cost when considering damage output and advantage points.
Stressed Out - Gives Ego Weaponry the chance to apply Stress, debuffing enemy resistance against Ego damage. This is the same debuff used by Ego Storm, and is unique among defense debuffs since it's meant to stack multiple times.

Telekinetic Strike
Ranged Combo
★★
TK Strike can best be thought of as a ranged version of Ego Weaponry. While it has very similar features and traits as Weaponry does, it suffers from being able to hit a single target. The damage output climbs much faster, however, and the attack overall has an extremely low energy cost.
It shares the Siphoning Strikes and Stressed Out advantages with Ego Weaponry. Its bad damage actually makes it a pretty good candidates for these advantages, though obviously the Siphoning Strikes on this attack won't heal nearly as much with just one target.

Telekinetic Barrage
Ranged Sphere Maintain
★★★
The go-to option for ranged AoE early on, This ranged attack has the benefit of dealing decent damage, as well as the potential to stack Ego Leech extremely quickly.
Instill Doubt - Inflicts enemies with the Dependency debuff, causing them to radiate healing to the nearest ally. Useful if crafting a hybridized support build of some sort.
Dazzle - Each tick of this attack now has a 20% chance to stun (identical to the Ego Leech building chances).

Ego Blade Frenzy
Melee PBAoE Maintain
★★★
While not as reliable as Ego Blade for applying leech, Frenzy is a staple for the set when it comes to AoE, doing laudable damage, and maintaining some stacking ability. Especially if you took Siphoning Strikes on weaponry, this will likely be your transitional DPS attack as you wait for leech stacks to build back up. The one drawback of this attack - it roots you in place.
Unnerving Rage - Adds a mostly unnecessary root to the move.
Instill Doubt - Inflicts surrounding enemies with the Dependency debuff, causing them to radiate healing to the nearest ally (usually you). This is better used for support rather than defense, mainly because of the next advantage:
Mental Block - This 3 point advantage creates a temporary shield over your HP while maintaining Ego Blade Frenzy, which gets stronger the longer you maintain the attack. This can be used to make your DPS builds very sturdy even in the thick of a brawl.

Ego Blade Astonish
Melee Click Stun

One of your standard Melee stuns.
Trauma - Applies a debuff that makes it difficult for enemies to recover health. Has more uses in PvP rather than against PvE enemies.

Telekinetic Reverberation
Energy Unlock
★★
Every time you gain a stack of Ego Leech, you will regain energy over time. This unlock scales best with Recovery and Endurance, which generally doesn't gel extremely well with some of the lower-cost attacks in this set.

Ego Form
Offense Passive
★★★
A very good passive indeed, Ego Form is tailored to suit ranged Telekinetics, boosting all Paranormal and Physical damage (for the few situations that it's used in-set.) Ego Form is also notable for its light, but apparent, reduction of all damage, and a hefty energy efficiency upgrade to mentalist powers.

Id Mastery
Offense Passive
★★★
The melee counterpart to Ego Form, Id Mastery drops the physical component of its damage boost in favor of pure Paranormal damage, with a much greater boost to melee. Id Mastery has a worse efficiency upgrade, but a much better defense.

Ego Blade Dash
Lunge
★★
Ego Blade Dash's bonus is that it will root the target hit, much like Thunderbolt lunge.
Head Shot - Adds a bonus disorient to the lunge.

Telekinesis (a power, not the set itself.)
Click... Throwing thing.
★★
Telekinesis summons up a random object from nowhere to lob at your target, dealing Ego damage and applying Disorient. When hit by this attack, objects nearby you will also fly in towards them, dealing additional damage in a sphere, and potential status effects upon hit. The heavier the objects that collide with them, the more severe the effects will be, including knock, or in the heaviest object cases, instant death to low-rank targets. The mass of what you can pick up with this ability is influenced by your Ego stat instead of Strength (the stat usually used for picking up and throwing objects.) Overall a neat gimmick, but lacks some essential synergy with the set itself. On whole it works better with Telepathy.

Telekinetic Burst
Charge Sphere
★★
A decent spherical attack. Low damage, but can apply disorient very easily, as well as Ego Leech with some reliability.
Sudden Impact - Burst will now also automatically knock its targets down, making it excellent for crowd control as well as debuff.

Telekinetic Shield
Block
★★★
TK Shield's bonus is that it supplies higher physical defense than other blocks - quite useful, considering how often physical damage is used.
Telekinetic Reinforcement - An afterblock effect is applied to you, much like Force Sheath. It lacks the energy generation, but has twice the amount of defense applied.

Telekinetic Assault
Single-target Maintain
★★★
One of the most reliable attacks for a ranged telekinesis character, it has the benefits of being fairly low cost, and far ranged, while also pumping out a massive amount of damage - especially because of the crit benefits it gains from combining with Ego Leech.
Explosive Potential - Turns the maintain into a sphere, affecting nearby targets with comparable damage to that of the main one. Basically it turns the attack into Telekinetic Barrage, but with slightly stronger damage on the main target.
Telekinesis-Part 2
Mental Discipline
Toggle
★★★
This toggle, intended for melee Ego Bladers, will stack Focus each time the user applies a Mental State effect, including the Ego Leech buff, and various mental debuffs (fear, dependency, stress, etc). Focus is from the Martial Arts tree traditionally, and scales best with the Dexterity stat. In practice, this form is somewhat interchangeable for Form of the Tempest (as ego blades lands crits quite frequently), but it certainly sees plenty of use for this playstyle, regardless.

Mental Precision
Toggle
★★★
Just about identical to Mental Discipline, but instead of stacking Focus, this stacks Precision, which is a Dex-scaling damage buff that favors Ranged instead of Melee.

Telekinetic Shards
Ranged Sphere Click
★★
Causes a cluster of little psionic rocks to hit enemies within a sphere. This does moderate damage and refreshes the duration of Ego Leech on yourself. Thanks to middling damage and its recharge, this is strictly a utility ability.
Impaled - Will refresh the duration of any Stress stacks, extending the duration of your Ego defense debuff.
Inner Peace - Applies a restoration self-heal when the attack is used.

Ego Choke
Maintain Hold
★★
A typical maintain hold - most would be good for damage, if they continued beyond halfway regardless of breakout.
Garroting Grip - Pairs the hold application with Fear, reducing the target's damage output by 10%. The effect is entirely independent of the hold's application, and can even be applied to high-rank targets.

Ego Hold
Charge Hold

A typical charge hold, with no side-effects.
Mass Effect - Will snare the target in addition to the hold, as well as snaring all targets nearby.

Ego Surge
Active Offense
★★
The bonus on Ego Surge is that it will severely boost your ego stat, raising your ranged damage slightly (and any other statistics that might be associated if you have Ego as a superstat).
Nimble Mind - If you utilize Ego Leech stacks, this will raise your base Critical Chance for each stack you have by 2% (for a grand total of 10% extra chance). Useful if not rupturing Leech stacks, but dramatically less so if stacks are removed frequently.

Telekinetic Eruption
Charged PBAoE
★★★
TK Eruption's one of the older PBAoE, and also one of the better ones. It does moderate damage to targets all around you in a pretty wide ring, and can knock targets down or back depending on charge levels. Not only this, but charging it over 1 second will grant you Id Surge, which boosts your ego stat and ego damage for around 15 seconds - like a miniature active form. The disadvantages of it include its fairly severe charge, and its high energy cost.
Enhanced Form - On top of your damage boost, TK eruption now grants you the Aegis buff, providing sizable defense for 15 seconds.

Telekinetic Wave
Charged Cone
★★
TK Wave is fairly closely related to TK eruption - moderate damage to targets in a cone, alongside a powerful knock. TK wave's main problems include heavy energy cost, long recharge, and lack of other benefits. Of the ranged TK attacks, though, it has the widest coverage and range.
Psychic Tides - Has a mostly useless energy sapping effect, and applies a snare to slow targets down.
Mental Instability - Instead of knocking targets away from you, they're drawn inwards, making this quite useful for Ego Bladers who want to corral enemies into range.

Ego Blade Breach
Charged Melee Single-Target
★★★
A moderate cost melee attack, Breach's main purpose is to maintain Ego Leech stacks via refresh. It's a fairly simple yet powerful utility move, but not the strongest choice in terms of DPS output.
Domineering Will - The attack now snares the target hit. If you fully charge, the Breach will knock the target down for some added control.
Stressful - Refreshes the duration of Stress stacks on your target, enabling extended stacking of the defense debuff.

Ego Blade Annihilation
Charged Melee Single-Target
★★★★
Meant specifically for spike damage, Ego Blade Annihilation has a very short charge, long attack animation, and will use up all Ego Leech stacks to add extra damage when fully charged. Without stacks, it does decent damage, but has very bad efficiency. With stacks, it does its extra burst of damage, alongside applying a DoT effect and a self-buff that slowly restores ego leech stacks to you over time.
Mental Accuity - Further reinforces the strength of the Ego Leech stack usage by 50%, at the cost of pure damage without stacks. Take that as you will, considering the other specs of the move.

Telekinetic Lance
Charged Single-Target
★★★
The ranged equivalent to Annihilation. It will also use leech stacks to add burst damage to the attack on full charge, though TK lance has a longer charge and works a bit better when just spammed. Instead of applying a DoT effect on breach, it creates a spherical burst of damage that hits targets within 10 feet of the prime target. The damage of this is pretty weak on the non-primary target, but it does its job pretty well, and retains the restacking over time Ego Infusion.
Id Infusion - Instead of empowering the Ego Leech burst, Id Infusion will cause the consumption of Leech to boost your ego damage slightly.

Lance Rain
Charged Sphere
Unlocked.
Unlock difficulty: Easy
Worth unlocking?: Yes
★★★
Unlocked from the Onslaught Supervillain content, Lance Rain is a version of TK lance that causes a barrage of lances to descend upon gathered targets. Compared to TK lance, it does slightly less maximum damage on full-charge, has a much weaker Ego Leech consumption effect, and costs a very high amount of energy. However, this is all offset by its added AoE aspect, and the fact that the Ego Leech effect will trigger on each target, making several overlapping AoE effects. Its slightly muddled by the fact the ability must be fully charged to activate and has a substantial recharge of 20 seconds.

Telekinetic Maelstrom
PBAoE Charge
★★★
A fairly powerful radial stun, TK Maelstrom's disadvantages include its odd hybrid damage type (crushing and ego), its steep energy cost, and its recharge. However, its advantages include its decent damage otherwise (higher than TK Eruption), and its instant stun, regardless of charge. Probably the fastest-executable AoE stun.
Expansive Intellect - Increases the range of this move by 10 feet. At 35 feet, this makes it one of the largest PBAoEs in the game. However, this will decrease its potential damage, and also still has its 5-target limit.
Telekinesis - Part 3
Ego Blade Pandemonium
PBAoE Toggle Utlimate
Unlocked.
Unlock difficulty: Medium
Worth unlocking?: Yes
★★★
Found within the Alien lockbox, It causes a ton of ego blades to orbit around you for 8 seconds, dealing damage to anyone nearby. The damage comes in fairly substantial 1-second bursts - about the damage of a charged Blade Breach - and covers every side of your character for the duration. Strangely enough, ranking it up will apparently decrease the damage done by Pandemonium, but causes the attack to hit more times per second, resulting in a gain in overall damage. Pandemonium also causes your crit chance to rise for your other attacks for each stack of Ego Leech you have on yourself (at an extreme rate! If you have 5 stacks, easily higher than 10% extra chance.) The two downsides of Pandemonium is that it uses up energy while the toggle is on, which means it can be interrupted if you run out of energy. Also, because it's an ultimate, it naturally is saddled with an extended cooldown period.
Leave A Mark - Each hit draws threat, which can be paired with further Challenges to draw even more aggro from enemies. Use it on tank builds.
Buzzsaw - Enemies caught in the pandemonium are snared, having their movement speed slowed. Both this advantage and Leave a Mark only cost a single advantage point, meaning you can take these advantages without having to sacrifice maximum damage from this ability.

Mental Impact
Sphere Charge Ultimate
Unlocked.
Unlock difficulty: Medium
Worth unlocking?: Yes
★★★
Unlocked from the Cybernetic lockbox, Mental Impact allows you to slap a gigantic telekinetic hand over a large area of the battlefield, knocking targets down and inflicting Overpower - a universal defense debuff against all damage types. While expensive, Mental Impact's charge period is quite quick, and a decent 20 foot radius. For each target you land your impact on, you will gain a stack of Mental Leech, reducing the cost of mentalist powers and allowing you to execute special moves in the Telekinetic tree. Like most other ultimates with a charge, it requires a full-charge time to be used. Compared to similar Overpower ultimates, it has the same sphere size as Crashing Incantation, but has a longer range and lower damage output.
Leave a Mark - All enemies hit by the Mental Impact are taunted, and build up threat against you over time.
Brick - Shared Moves
The brick powersets share a few passives and abilities, which base themselves strongly around melee damage and defense using the Strength statistic.

Strengths
  • Solid choices for defense, working best with Constitution.
  • Tools for making the most of Strength statting

Weaknesses
  • Few moves - mostly passives.
  • Offense passive is underwhelming.

Recommended Stats: STR, CON, REC, EGO(earth)

Defiance
Defense Passive

Of all the defense passives, Defiance has the biggest potential to stop damage, gaining up to 39% extra damage reduction without any superstats - That's a good deal more than what Invulnerability or Aura of Radiant Protection are capable of. To add to this, Defiance also will generate energy for you when you are hit, making it a powerhouse for your heals and retaliations, as well as a great defense. The one downside is that it scales only with Constitution. If your score in constitution is low, or not a superstat, your ability to effectively use this passive is quite limited. In addition, there is the issue of how its defense has to ramp up over time, meaning the start of most of your battles might very well entail a lot of blocking.
Because of how Defiance stacks, and how extra ranks only affect how many stacks you passively have, it is not necessary to 3-rank Defiance to reach its full defensive potential. However, extra ranks will reduce the time you need to get up to full defense.
Force of Will - The lower your health is, the more resistant you become to control effects. Not only are these resistances very minute, but they only really begin to kick in until you're below half your health.

Unstoppable
Offense Passive

The lesser of the two melee passives. Unstoppable offers the same amount of damage output and offense boosts that Way of the Warrior does, but differs in how it applies defense - instead of a modest dodge boost, Unstoppable causes the user to resist a very small amount of flat damage. To its credit, though, it can manually and quickly generate energy by doing knocks and also grants knock resistance. The damage subtraction also helps immensely when blocking, but it simply doesn't have the same dodge defense potential WotW has.

Enrage
Toggle

Enrage provides a powerful boost to your power based off of your strength score. That's the good part; high strength characters do massive melee damage using this toggle, even without critical hits. The problem, however, is its difficulty to stack - You must knock your targets to get stacks, or otherwise use other unusual tactics. Thankfully, the sets that largely utilize Enrage usually come paired with either weak, easy-to-handle knockdowns or knockups, or flat-out utilize unique power mechanics to more quickly stack the buff.
Endorphin Rush - Whenever you stack enrage, you gain a very weak Heal over Time effect. The strength of the heal is determined by your Constitution, while the length of the heal is determined by defiance stacks - meaning both do serve to boost the heal's overall potential. A very minor survivability buffer, though also one of the few Toggle upgrades that does help out.

Aggressor
Active Offense

Aggressor's Bonus is that you will gain a major boost to your Strength and Constitution, giving a minor survivability buff to compound the extra damage. However, Agressor will also cause you to stack enrage, dependent on what rank of Aggressor you have, making it one of the few Active Offense moves you might want to rank up. Note that the effect only will stack if using a toggle that specifically utilizes Enrage stacks (Enrage or Aspect of the Bestial)
Might
The most diverse and the oldest of the Brick sets, Might is mostly focused on heavy knocks and extreme burst damage against single targets. It might not hit rapidly, but it stands up to other melee sets when it comes to both crowd control and damage output.

Strengths
  • Powerful burst damage
  • Interrupts targets with its knocks
  • Does even higher damage against knock-resistant targets.
  • Fastest possible Enrage stacking.
Weaknesses
  • Underwhelming damage on AoE attacks
  • Completely screws up enemy formations with its knocks

Damage Types: Physical-Crushing, Energy-Sonic

Clobber
Energy Builder

A bit slower than most other melee energy builders, but not so much to be a hassle.
Onslaught - This advantage is very similar to the focus advantages on Martial Arts builders, only it stacks enrage instead of focus. The chance of this triggering is also a bit higher than standard.
It's that Time - Each hit has a slight chance to disorient the target, debuffing enemy damage output and speed.

Beatdown
Combo

One of the slowest combos, it unfortunately is also one of the least damaging, though also one of the least expensive. Beatdown staggers on its third hit, potentially making it more deadly, thanks to defense down, and also making it quite compatible with Earth.
Blindside Blow - If the target's rooted or snared, beatdown will do 50% extra damage - or so it says. In practice, the damage generated by this on rank 2 beatdown, versus full rank, is inferior, so this gimmick advantage is moot. Also, is the fact it costs 3 points.

Defensive Combo
Combo

Oddly enough, the damage from this move is about on par with Beatdown, trading off slow, powerful strikes with a very quick boxing combo. It also is similarly efficient, will naturally generate extra threat with each hit, and has a final hit that damages enemies within a sphere, and grants you a stack of defiance (without need of the passive). The downsides include its still modest damage output, and the threat buff of the move making it undesirable for DPS fighters.
Surge of Strength - The combo does not need to be completed for Defiance to be applied, improving the combo's use in applying fast defense and threat instead of damage.

Mighty Kick
Charge Melee

A kick that aims to create buffer space. Its stature is very defensive - it roots the user in place, will repel if the knock fails, and only does moderate damage (though it's suprisingly high, outdoing the two might combos).
Madness..?? - Full-charging this move applies a stack of defiance to yourself. This basically makes it the DPS equivalent to Defensive Combo, as it will apply a similar survival buff, but without the added threat.

Roomsweeper
Charge Cone

Roomsweeper is an awesome low-level attack; doing moderate damage, building enrage, and always knocking, it will completely wreck any standard henchmen it hits when full-charged, combining the damage it does with its fall. The problems with this include its volatile nature, with all hits knocking backwards very far, and the moderate effect otherwise. To its credit, if the targets are stunned OR rooted, they get knocked vertically instead of outward, making enemy management a lot easier. Combine with Thunderclap or a mass root like Entangling Mesh to get more controlled knocks.
Concussive Blow - Each hit has a chance to apply a very short stun. Not a great advantage, because the one place you'd want to use this is to follow up with another Roomsweeper - only, everything's now flying away from you!

Iron Cyclone
PBAoE Maintain

Iron Cyclone is one of three templates for the majority of 'Chain' attacks, where you predictably use a chain to smack people. Iron Cyclone covers the widest area of the three, and historically has been the most popular of the powers due to its ability to provide a wide angle of damage and threat, as well as lots of knockback. It is the least damaging of the powers, but is the only one with a wide area of effect.
Much like the other cyclones it gets access to Vortex Technique and Stand your Ground

Hurl
Single-target click (ranged)

Basically, imagine Shuriken Throw if it sucked - Shuriken throw with a 3 second recharge, a snare instead of a knockdown, and a lower damage output overall. Hurl was intended to be a move to chase down targets you just knocked away, and aside from its great range and generating some energy when combined with MSA (and being very low cost), it's not nearly as good as Shuriken.
Rubble Trouble - And this advantage gives the hurl an AoE effect. Does just slightly over half damage to the other targets.

Iron Chain
Melee Combo (except ranged, final hit cone)

Iron Chain is an odd beast: A melee attack with 25 feet range. Despite the distance, it operates exactly like a combo, with repeated uses of Iron Chain building up to a conical attack that knocks targets upwards. Its current traits ironically make it possibly the most effective combo ability in Might at the moment, and certainly a very solid pick for a might-based character.
Demolition - A full combo of Iron Chain applies Demolish to the main target, which provides a global debuff to all physical defense, as well as extra crushing damage weakness.
Rampant - The defensive counterpart to Demolition, Rampant will put the Reckless buff on you, which boosts your ability to resist knocks, as well as a small bonus to Offense.

Mighty Leap
Lunge

Starting out, this is probably the best lunge, as it will stun the target when starting far away enough. Leads in very well to Roomsweeper.
Bull Rush - Makes a sphere effect that snares and knocks targets next to the primary target. Effect is very small in area, and does no damage.
Might-Part 2
Iron Lariat
Single-target charge
★★
Iron Lariat is the last of the Chain attack types. Lariats will reel the target in, dealing moderate damage. Iron Lariat's bonus is that it has a chance to disorient the target, with the chance rising to full 100% when completely charged. Iron Lariat can put out a pretty saucy burst of damage, but its recharge is long, and its range is nothing compared to other pull abilities, let alone lunges. Much like Iron Chain, it counts as a melee attack.
Intimidate - Targets hit by the Iron Lariat now suffer from fear, reducing their damage output. The effect is guaranteed and doesn't require a charge-up.
Red Hot - Targets hit by the attack get Clinging Flames, taking damage over time. Again, this effect requires no setup time.
Work Up - Applies restoration to you, applying the same sort of heal that Holdout Shot gets.

Retaliation
Block
★★★
Retaliation's bonus is that it will give you a very powerful damage buff when you are hit (80-120% extra damage, multiplicative). The bonus will only last for one hit, however, making it useless on maintains. It also gets consumed by Energy Builders (and, as I just recently learned, DoT effects), so be conservative if planning to use it to your advantage.
Punitive Pummeling - Has a chance to retaliate at melee attackers with a roomsweeper-like attack, knocking them backwards. The effect only triggers 20% of the time, has a full-sphere reach, and can only occur once per 10 seconds. And mostly just messes up enemy formations.

Demolish
Single-target Charge
★★★
Taking everything else out of account, Demolish is the most damaging single-target attack in the might set. It pairs its damage with a strong defense debuff against physical damage, making further punches even more deadly. The disadvantage of the move is its very high energy cost and slowish animation, and the requirement for a full-charge to apply the debuff makes it a bit of a risky maneuver.
Below the Belt - This attack now will knockdown and snare your target, boosting its utility as interrupt and control for a Might character.
As an aside, recent changes to this power also mean that ranking up Demolish will not increase the defense debuff that this ability grants.

Uppercut
Single-target Charge
★★★
While not a particularly impressive attack on its own, Uppercut is a low-cost move that has a huge number of practical applications - it always knocks up, allowing you to keep enemies off their feet and building knock resistance to resist other knocks that would mess up formations. Finally, if you full-charge Uppercut, following it up with a full-charge Haymaker allows you to gain 2 stacks of enrage (on top of the stacks gained from knock). For an enrage-based character, Uppercut is a staple.
Head Trauma - Disorients the target, as well as stunning enemies who attempt to charge attacks. The effect can only occur infrequently, and also might not work on most enemies...

Thunderclap
PBAoE Click
★★★
A full-radius stun. Thunderclap is a great lead-in to Roomsweeper, and is also notable for being able to somehow very quickly stack Manipulator. It isn't a bad source of burst damage, either.
Collateral Damage - Adds a ring of sonic damage to the outer reaches of the move, increasing its radius to 15 feet. Not great for damage, and doesn't really increase the target limit, but good if targets are spaced out unusually and you just want to land a stun.

Haymaker
Single-target Charge
★★★★
One of the most devastating punches in the game, Haymaker has a very long charge, but the damage can really add up - especially if the target is resistant to knock. While the extra damage against a knock-resisting target is very volatile, it is present, and can add up to 50% extra damage, arguably making it the strongest of the punches. Because of the way its knock and damage bonus works, it's one of the few punches where full-charges work way better than taps.
Nullifying Punch - Halves healing effectiveness on the target. Useful against Ao'qephoth. And regenerating PvPers. Most trauma effects that reduce healing, like this, do not require any charge to apply, so you can quickly use Haymaker if the enemy is healing too fast.

Havoc Stomp
PBAoE Charge
★★★
While doing about the same amount of damage as Roomsweeper (actually a bit less, thanks to animation), Havoc Stomp has the upper hand in terms of coverage and controllability - any charge less than full will attempt to knock targets upwards instead of outwards, and it can easily be chained up for a rapid stomping strike. Other disadvantages include its lack of reliability in knocks, and how it roots you in place during charge. While the half-charges/taps are more controllable and better for stacking Enrage/Knock resist, the full charge does the most DPS.
Cry Havoc - Applies fear; a good debuff if you're playing defensively.

Shockwave
Cone Maintain
★★
A really underwhelming high-tier attack, and questionably the least damaging move in the set. It basically serves to debuff targets while maintained with a snare and knock at the end, because its strange damage type (one of like three sonic damage attacks) and low numbers certainly don't do much for it. It does benefit from good coverage and angle, but there are better alternatives that have better efficiency and do more damage.
Power Shift - Almost a redeeming advantage here, this will replace your knockup effect with a knock-towards, essentially making this a very large pull ability. Great for tanks, but the long maintain does mean it'll take a little going for it to draw everyone in.

Nuclear Shockwave
Cylinder Charge
Unlocked.
Unlock difficulty: Easy
Worth unlocking?: NO

A unique move unlocked by gathering and using Villain tokens from the Onslaught content. Hitting in a 75 foot long cylinder with a 20 foot diameter, Nuclear Shockwave hits a very substantial area, but is severely lacking in damage output, and must be fully-charged to be unleashed. Similar-looking attacks in Heavy Weapons and Earth, Faultline and Earth-Splitter, are capable of faster charges and putting out more damage than this ability, as a tradeoff for a narrower hit area. Nuclear Shockwave even lacks any extra debuff or knock effects, making it also very dubiously useful to brick builds.

Catastrophic Pummeling
Single-Target/Sphere AoE
Unlocked
Unlock Difficulty: Medium
Worth Unlocking?: Sure
★★
A single-target-oriented ultimate that puts out a massive barrage of melee strikes. If you make it to the end of the maintain, you deal out a big final uppercut with an AoE component, and inflicts Overpower. While a good source of single-target damage, its AoE payoff takes a long time to realize (5 seconds), but if you make it to 2 seconds, you do gain some significant resistance to hold and knock effects. While the energy cost is moderate, you won't deal out that final strike if you can't make it to the end of that duration. It has a fairly short cooldown (same as other melee ultimates) but its overall a bit more difficult to utilize than your average melee ultimate, combining a self-root with the traits of both an Overpower ult and a Melee ult. It doesn't quite do what either of those can as well, with shorter range than most Overpower debuffs, and less damage than most melee ults. At the very least, it looks cool.
Might-Part 3
Hyper-Voice
Cone Maintain
★★
One of a very few Sonic attacks in the game, Hyper-Voice enables you to scream at enemies in a cone to do pretty good damage, about on-par with an elementalist breath attack (with a similarly cheap energy cost). Each tick of the attack will repel your target, not unlike wind breath, and the final hit will knock targets down.
Deafening - Your scream is deafening, and as a result, your full-maintain of a hyper-voice will severely debuff enemy resistance to sonic damage. Still, the issue exists in a lack of serious sonic attacks.
Rattle - Each pulse of the attack will have a chance to Disorient your targets.

Headbutt
Single-Target Melee Stun
★★
You headbutt a person. While funny it's not a terribly effective or unique attack otherwise, as it has the exact same stats as Pistol Whip and Rifle Butt, including the same Trauma advantage.
Heavy Weapon
Whereas Might focuses most of its attacks on smashing a single target, Heavy Weapons trades off some of the speed that Might had in exchange for pure destruction against mobs of targets. That's not to say that Heavy Weapon can't hold it's own against a boss - it places particular focus on also applying the debuffing effect of Disorient, reducing target damage output and speed.

Strengths
  • Great mix of AoE and single-target attacks
  • Disorient debuff, combined with high burst, make this an ideal tank set
  • Has some very reliable and controllable knocks, and builds enrage very easily
  • Mixes very well with fire

Weaknesses
  • Sluggish - Slow animations and many self-roots
  • Not as strong as other sets when it comes to single-target
  • Quickly stacks knock resist - Can't use it as effectively as an interrupt

Damage Types: Physical-Crushing, Elemental-Fire

Bludgeon
Energy Builder

In addition to hitting all targets within a cone, Bludgeon can also apply Disorient to the main target on its first strike. It's also quite slow.
Until Morale Improves - Now all strikes can apply disorient to the main target.

Cleave
Cone/Sphere Combo

A very powerful move for an AoE combo (actually, almost the strongest AoE in the set), Cleave is extremely slow with its hits, taking nearly 3 seconds to complete a full combo. However, each swing does excellent damage, has massive coverage, and adds up. To top it off, its hits also have a rising chance to knock enemies down, and it can also stack Clinging Flames for fire synnergy.
Defensive Stance - Completing combos with Cleave will apply defiance to you.
Rampant - As you use Cleave, it will stack Reckless, granting extra offense (minor damage buff) and knock resistance. This helps it serve as a great utility for continuing an offensive through knocking attacks.

Eruption
Cone Click

A decent move for interrupting targets and building a stack of enrage (and also setting off MSA). Eruption does great damage in a burst, and can refresh the Ruthless buff on yourself if you have stacks, but it also suffers from long cooldown.
Magma Burst - Adds fire damage to the eruption in a sphere - very low fire damage. Also sets them target on fire with Clinging Flames sometimes. This effect only triggers on the primary target, so no giant horrible fire explosion chain reactions here.

Brute Strike
Single-target Click

Deals low damage to a target in an attempt to stun them. A fairly quick and reliable way to do it against a single target, but the damage result from this strike is quite slow.
Concussion - Halves all healing the target gets. In effect, the move as a whole is best used in PvP... Which is oxymoronic, because the Heavy Weapon set, as a whole, is horrible for this purpose.

Guard
Block

It's a complete reskin of Retaliation - only instead of blocking with your arm, you hold up your weapon.

Decimate
Lunge

One of the slowest lunges. Its bonus applies Disorient, essentially super-slowing the target.
Restraining Order - The lunge also roots the target if done from far away enough.

Annihilate
Single-target Charge

The haymaker equivalent for Heavy Weapons - good damage, and a very lenient energy cost, but it roots you in place and has a long swing animation (short charge, though.) Of all moves without recharges in the set, it does the most damage. The knock damage bonus on this move (because it always knocks) is more nebulous on whether taps or charges do better DPS.
Scorching Blade - As a bonus, Annihilate does increased damage on enemies who are on fire with Clinging Flames, increasing damage by 30%. Is less accessible than the standard attack, but when active, it seriously works and generates a very dramatic damage increase that propels it to be the most powerful attack in the set.
Because of how this advantage works, as well as its comparison to Skewer, Annihilate should be a prime choice for Fire/HW mixes, while Skewer can be used for Bestial/HW mixes. As a main attack for pure Heavy Weapons, both are completely operable.

Arc of Ruin
Sphere Charge

The quickest and easiest way to apply Disorient in the set, Arc of Ruin has a wide coverage, but only has moderate damage. It also has the benefit of disorienting all targets hit, with a rising chance based on charge period. Because of its sphere nature, it now no longer requires a target to charge up.
No Quarter - All swings of Arc will apply a -15% crushing and fire defense debuff to targets hit, essentially making it a wide-range version of Demolish (while also tying in to fire again). Also nice is that this effect doesn't require a charge.
Wildfire - Refreshes the duration Clinging Flames on the hit targets, and cause extremely light fire damage to all targets nearby them. Despite this move's AoE nature it only seems to affect one target at a time per swing. Arc of Ruin can also knock targets down once every 3 seconds with this advantage.

Skullcrusher
Charge Cylinder

A really funny looking AoE attack, Skullcrusher is decently powerful, but not that efficient, and has a narrower hit range than most other traditional melee AoEs. It also can disorient and knock down the target, but its knock doesn't seem very reliable, unlike Inexorable Tides or a similar attack. Its damage is split between fire and crushing.
Put Them Down - A 1 point advantage for doing 15% extra damage against disoriented targets. Can be put on top of a rank 3 attack.. Because Skullcrusher itself can apply Disorient, this is a great option if you want this attack to be your main damage dealer.
Heavy Weapon-Part 2
Skewer
Charge Cylinder

Disputably the most powerful attack in Heavy Weapons, Skewer hits the primary target for more damage, but suffers from a hefty energy cost, and is also quite difficult to line up. However, Skewer does have the bonus of stacking bleed (though with a bit of chance), and actually has the potential to outdamage Annihilate, thanks to...
Follow Through and Initiative - These 1-point advantages will apply extra damage on two different ends of the attack: Initiative makes the tap damage of the move slightly higher, while Follow Through raises the full-charge damage. Ultimately, Follow Through seems to generate more results. They are best taken with a rank-3 skewer, as taking both without an extra rank generates less damage.

Vicious Descent
AoE Lunge

A pretty decent AoE, though hampered a bit by its very long recharge and poor energy cost. Can stack reckless, equal to the number of targets hit, and is pretty good for closing distance in a pinch.
Relentless - Knocks down targets, for more crowd control and gives it the potential to build enrage.
Work Up - Provides restoration to you, a minor self-heal with emergency benefits.

Earth Splitter
Ranged Charge Cylinder

A very bizarre attack, Earth Splitter has a fairly large area, but is low-damage, split between crushing and fire, ranged, slow, and expensive. The knockup does make it quite nice for crowd control, though, and it also has the potential to reliably stack Clinging Flames. To finish it off, its hits (regardless of charge) also can apply Reckless (up to 3 dependent on targets hit), boosting your offense score and your knock resistance. Of the abilities that can be used to stack Reckless, it's the only one that doesn't require an advantage and has no recharge. Overall, it's very much a utility for tanks.
Bend the Earth - Targets hit now are knocked inwards as well as up, making it a mass-pulling technique. This knock happens to be independent of charge levels, so even a tap can quickly draw in distant enemies. Its one downside is that the minimum range of the pull (25 feet) is still outside of melee range.

Brimstone
PBAoE Charge

Low damage aside (split once again between fire and crushing), Brimstone has a lot going for it, including its reliable knockdown, full sphere coverage, and constant energy cost (and short charge). It's a bit chancy, but it can also apply Disorient.
Aftershock - Full-charges put down patches of fire. The length of the charge combined with the lack of a recharge means that this is the overall quickest and most reliable way to apply a flame patch - it's much faster than full-charging pyre.

Power Chord
PBAoE Maintain Ultimate
Unlocked.
Unlock difficulty: Medium
Worth unlocking?: Maybe

Acting as an active offfense, PBAoE attack, and crowd control utility all in one, Power Chord is a goofy as heck rock solo attack that will cause some moderate sonic damage to your surrounding targets, ending in a giant burst of damage that knocks all targets away. The longer you maintain, the more stacks of Rocking Out! you build up, boosting your damage for 10 seconds after you use the solo. The buff can stack up to 10 times and will boost your damage by up to 30-50% depending on rank. Lots of fun to be had, though the effects of the damage buff are a bit subdued. It can only be unlocked by getting it from the Rockbox (which is a lockbox).
Rock Concert - Give your allies a show! Rock Concert will remove the personal buff, but instead places the damage buff on nearby friends and will also restore a bit of their energy via the Exhilaration buff.
Earth
The last and latest of the brick sets, Earth is the only one of the bunch that has any dedicated support for ranged attacks. That's not to say it's helpless in melee, though. Earth's big draw is that it focuses on building and breaking stacks of Stagger, reducing the defenses of enemies and slowing them down, trapping them in earthquakes and quicksand.

Strengths
  • Very good at slow effects
  • Great debuff and control set
  • Mix of melee and ranged makes it compatible with a lot of other sets.
Weaknesses
  • Low base damage
  • Not very good at either dedicated melee or ranged.

Damage Types: Physical-Crushing, Elemental-Fire

Wield Earth
Energy Builder

The only melee/ranged hybrid energy builder, Wield Earth has a chance on the first hit to apply Stagger. Its melee variation is about twice as powerful as the ranged one, and also generates a lot more energy. The downside is that it's a fairly sluggish energy builder either way.
Faltering Strikes - All hits now have a chance to apply stagger. It should be noted that the chance of stagger applying on this attack is quite high - 20%.

Stone Shot
Sphere Blast

A very strange blast with a sphere effect. The longer you charge it, the larger its area of effect gets. However, the AoE effect only does half damage, and overall the move doesn't hit that hard. It's the best way to reliably apply stagger in the set.
Shard Burst - And with this advantage, it's also probably the best way to reliably apply Stagger to multiple targets. The AoE effect of this attack also gets strengthened to 75% main target damage.

Onslaught
Cone Melee Click

One of the most powerful attacks in the set, it's a bit slow and only has a modest 20% chance to apply stagger. However, it's quite clear it's made more for pure destruction rather than debuff.
Excessive Force - Essentially adds an extra critical hit to the attack - 20% chance (coinciding with the stagger effect) to knock down the targets hit and do double damage.

Earth Form
Offense Passive

Earth Form is pretty much a straight upgrade to Kinetic Manipulation in multiple ways, including its global buff to physical damage (ranged and melee), and the ability to slow enemies who get near you. Compared to other physical damage buffs, however (Quarry, Unstoppable, and WotW) it still leaves a bit to be desired, but can quite well shrug off crushing damage.

Tremor
Charge Sphere

Tremor's a great move for mass interruption, knocking enemies within its sphere upwards. The charge and animation itself is quite slow, and while the burst damage is decent, the sluggishness of the move makes it sub-par for actually doing damage.
Rupture - If your main target is staggered, this will apply stagger to all targets hit. It also will stack Stagger on whatever it hits, but this all only occurs on full-charge. This makes Tremor a very reliable, but also very slow way of stacking Stagger.

Stone Shroud
Block

Probably the least documented block in the game - It's not listed anywhere in its description, but the bonus on it is that it will apply Imposing Strength to targets that hit you, very slightly reducing their movement speed. It does also have a bonus of increasing healing gotten from Fissure + Advantage, and looks quite neat when ranked up, but it's altogether quite underwhelming.

Land Slide
Lunge

Probably the most damaging of all the standard recharge lunges, Landslide will stagger the target if you hit from far enough.
Rock Solid - If the target already is staggered, it produces an AoE effect that knocks all targets within 10 feet upwards and does damage.

Upheaval
Charged Melee

A somewhat weak melee attack that causes a big stone fist to punch your target from below, knocking them upwards. It has the bonus of doing extra damage to staggered targets, without consuming said stagger effects. However, this also causes the target to be knocked backwards instead of the much more manageable upwards. The intent seems to be to stagger the target, knock them back, then chase after them with Land Slide to further stack Stagger. Once stagger is stacked up, Upheaval can do respectable DPS with its taps.
Expansive Terrain - Transforms Upheaval from a melee move to a ranged pull. Long range, at the cost of pure damage - and basically turning it into a melee utility with that knock-to effect.

Cave In
Charged Single-target, Ranged

The most powerful of the earth attacks, Cave In will crush the target with a bunch of stones. Stagger doesn't cause the move to do any extra damage, but will enable a stun on full charge, without consuming the Stagger effect.
Aggressive Gravitation - Or you can use this advantage to end those stagger stacks to give yourself enrage. Note that you cannot stack enrage above one without taking the Enrage toggle (or Aspect of the Bestial.)
Earth - Part 2
Seismic Smash
Cone Charge Lunge

A surprisingly powerful lunge that will deal high damage and knock back enemies. It has a chance to apply stagger, but is a bit hampered by its long recharge, short range, and difficulty in properly lining enemies up.
Massive Attack - The attack is now focused against a single target, doing 60% extra damage. This questionably makes it the most powerful burst of damage you can get, taking other buff factors out of play.

Quicksand
PBAoE Maintain

A unique, expanding PBAoE that pulls enemies inward. While not that damaging, it's very easy to use, and is very good for controlling enemy movement. It's also very low cost.
Repusling Waves - Reverses the flow of your quicksand, forcing enemies outward. This is better for ranged characters. It also can stagger foes now.

Fault Line
Charge Cylinder

Despite being the highest tier dedicated attack in the set, it's also the least damaging to start. This is offset by its other effects, however - It's a reliable knockup to perhaps the largest range of targets. In addition, it consumes Stagger stacks to do 10% extra damage per stack. In any case, it's a pure-crushing reskin of Earth Splitter.
Bend the Earth - Staggered targets get a compound root - after they break out of it, they get knocked up.

Fissure
Sphere Charge

A really fun control/debuff summon thing - This will create an earthquake beneath your target, dealing low fire and crushing damage over time. More important than that is that it can continuously knock targets down inside, and slows down movement. It's a bit expensive, but can be combined with other moves readily.
Reconstruct - Adds a weak heal to allies that stand inside the fissure. If they block using Stone Shroud, it's doubled, reaching roughly BCR-levels of healing.
Celestial
Celestial is a set that was created shortly after release, and is, by far, one of the most unique in execution. A majority of its abilities can do double-duty between healing and damage, making this a veritable damage/support 'dual-class' powerset.

Strengths
  • Extremely powerful healing
  • Versatile powers
  • Great utility and support abilities
  • Good crowd control
Weaknesses
  • Medium/Short Ranged
  • Very inefficient abilities
  • Difficult to use in targeting context

Recommended Stats: END, REC, PRE, EGO
Damage Types: Paranormal-Dimensional

Radiance
Energy Builder (heal and damage)

Radiance shows off one of the main features of the set - depending on who it targets, Radiance can either damage enemies, or heal allies. Both will generate energy, but the attack version will generate more. The healing on the move is higher than the damage, and can be self-targeted. However, self-targeting heals do not generate energy, nor do you generate energy when healing an ally at full health
Convergence - Creates an infrequent chain effect that can hit a target of the opposite type.

Rebuke
Blast (heal and damage)

A typical blast, aside from the whole "can heal allies" thing. It's notable for being rather slow, with a long animation and a long charge. Much like other double-duty moves in the set, its heal is more powerful than its damage.
Admonish - Full-charged, this will cause all enemies within 10 feet of the target hit (ally OR enemy), excluding the main target, to become stunned. Very nice crowd control.

Imbue
Active Offense

Imbue is an unusual active offense - it's the only one that does not grant extra base damage on all hits, but instead offers a substantial boost to both critical chance and severity, while also perserving the break-free properties of other AOs. With the value of the base damage boost of an AO heavily devalued on high-DPS builds, the large boost of critical stats here can be surprisingly useful.
Illusive - While the AO is active, you also generate much less threat on each hit. Once again, this is a valuable tool to powerful DPS builds.

Illumination
Click Sphere (buff and debuff)

Illumination is the main mechanic of celestial, so to speak. When used on allies, it will provide a small burst of healing and boosts the amount of healing they receive afterwards for 20 seconds. On enemies, it will inflict Illumination on the targets within for the same duration, causing all hits they take to have a chance to heal the attacker. For both versions, the power counts as both an Enchantment and a Curse for sorcery abilities, and thanks to the abilities' fairly wide radius, it's quite good for split-second buffs, as well as applying illumination to a ton of enemies at once for a Soul Beam or big chain Celestial Conduit. Its only downside (versus its old version) is that it now has a short cooldown.
Brilliance - When used on allies, they will become more aware of invisible targets and can see through stealth or perception debuffs. This proves useful against enemies who like using snowstorms or smoke grenades.

Celestial Conduit
Single-target Maintain (damage and heal)

This ability fires a beam of energy at the target, hurting or healing them. Much like Rebuke, its healing is more powerful than its damage, and if the target's affected by Illumination, Conduit chains to another target of the same type, and if they have illumination, it can continue from there - up to 4 times. Celestial conduit's healing/damage is consistent, and energy-efficient, but overall a bit low.
Serenity - If the target is being healed by Mend (from hitting an enemy with Illumination) you can get energy back. This component can only be applied to the heal version of this move, not the damage one.

Conviction
Click Self Heal

Conviction is pretty much a counterpart to Bountiful Chi Resurgence: It's fast, recharges quickly, and can restore a lot of health. Versus BCR, though, it requires more energy and also more micromanagement to use consistently. The health boost it offers will instantly be used up by taking any damage. It doesn't matter how much or how little damage is done, it will just disappear. The health boost part is literally worthless.
Reverence - Adds a small AoE heal to Conviction. Really not worth it, because the strength of this heal is less than a quarter of the base heal.

Seraphim
Support Passive

Despite being a support passive, it has a lot more in common with an Offense Passive. It boosts all paranormal damage, and has side bonuses that offer extra healing strength, and a very minute AoE heal around you. A pretty good form for soloing - not so much for team support. The added healing strength also applies to shields, and can be useful for non-PRE support builds, or even survivable healing soloists.
Balance - The healing aura of your passive becomes stronger, and can also slowly damage enemies nearby.

Iniquity
Click Heal

One of the fastest and most unusual heals in the game. The downsides seem pretty severe - It deals damage to you as you heal, can't heal yourself, and also cannot critical. However, it applies healing extremely rapidly, doesn't cost energy, and has a very far range. It's fairly incompatible with healing specs, but it doesn't need them!
Justice - The range of this heal is shortened to half, but now hits in a cone. The heal's strength drops fairly rapidly when more than one target is involved, but if your team's getting hit by a ton of AoEs, this would be a great way to ensure survival.

Vengeance
Charge Sphere

A bizarre and underwhelming attack, charging this move up will increase the area it hits, and causes your next Vengeance attack to have a lower energy cost and faster charge, lopping off up to 30% charge time and energy cost. It's got a long animation, but moderate charge, but also suffers from mediocre damage output.
Redemption Denied - All enemies hit by a full-charge get held: The main target is paralyzed (longer duration, but damage breaks them out), and all others are stunned.
Celestial-Part 2
Holy Water
Click Cone Buff/Debuff
Unlocked.
Unlock difficulty: Hard
Worth unlocking?: No

Unlocked by spending an exorbant number of Elysium Coins from the Nightmare event, Holy Water has a more mundane appearance than the rest of the Celestial set, but nonetheless retains its signature dual-functionality. On enemies, it will deal light damage over time to everyone within the cone, while on allies, it will cast a roughly-conviction-value heal on everyone inside. Holy water can also be used on yourself, but in this case does not cast any sort of AoE effect. It also gains extra effects if the targets are affected by illumination: On allies, it will help illuminated people break free of control effects, while on enemies, it will disorient those hit. While it's an ability that has plenty of auxiliary use, its long default cooldown of 20 seconds relegates it to just that, instead of being a mainstay support ability.
Heavenly Mana - Grants allies hit by your water an energy generation boost, and an energy sap to enemies hit by the water (though this isn't noticeable unless fighting an enemy with energy reserves, such as a Nemesis.)
Impure Waters - Swaps out the Disorient trigger effect with Debilitating Poison, dealing damage over time.

Redemption
Revive

Redemption is typical for a resurrection move - charge it to bring a target back to life with 33% of their health. The only downside is that you can't take damage while charging it, so prepare yourself with a forcefield/stealth/distance.
Salvation - Revives all targets in 50 feet of you, but splits the healing value between all targets. Can be risky if many targets die, but still retains base versatility if only one target falls. It should be noted that Redemption doesn't have any recharge.

Palliate
Click Heal

An emergency heal, this instantly restores a substantial percentage of the target's health. Very effective, but can only be used once per 2 minutes. Despite healing based on health percentage, it can crit.
Absolve - When you use Palliate, you will drop all threat from yourself on a maximum of 5 targets within 50 feet of you, and enter stealth. This is mainly useful as a way to force enemies to stop mobbing on you if you've grabbed their attention via heal-aggro. Generally, a lot more preferable than the old version of this advantage.

Expulse
Charge PBAoE

A solid PBAoE attack with some utility application, Expulse will place a healing rune beneath you when utilized. Its damage and energy cost isn't great, but it has a selection of neat advantages.
Impose - Targets are snared, so they'll have a harder time getting back to your melee range if you knock them out.
Expel - Knocks targets out of the way!
Daybreak - Summons a patch of fire beneath you when using Expulse.

Ascension
Active Offense (support??)

While not nearly as powerful offensively as the other Active Offense moves, it is way more versatile - it only offers half the damage boost of other active offenses, but also gives you much stronger heals (equal to damage boost on other active offenses), and grants you highly agile flight. Keep in mind the flight component can be cancelled out in areas where Travel Powers have been disabled.
Judgement - Targets within 25 feet of you have their Illumination effects removed, granting a large burst of healing or damage to targets affected.

Celestial Cleansing
Click Debuff/Heal thing

Every few seconds you can remove one debuff from an ally, or debuff the damage output and remove a travel power on an enemy. You can't use it fast enough for it to be really effective for debuff removal, nor is its debuff effect quick enough to be readily applied to multiple targets.
Deliverance - You help an ally hit by this to break free from a hold. Not like damage/z-smashing already does this.
Darkness
While built similarly to an energy projector, Darkness is a much more nuanced and versatile set than just that. Damage-focused moves aside, Darkness has the capacity to control enemies, heal allies, debuff damage, and increase its own abilities with extra pets, damage, and defense.

Strengths
  • Readily meshes with effects from other sets
  • Can hold and debuff foes readily using fear
  • Pets, heals, and many autonomous damage effects, making this set highly versatile.
Weaknesses
  • Moderate base damage on attacks
  • Less than stellar damage-stacking gimmicks don't easily counterbalance low damage.

Recommended Stats: PRE, EGO, REC
Damage Types: Paranormal-Dimensional

Shadow Bolt
Energy Builder
★★
Like most projector-related energy builders, Shadow Bolt has a first-hit bonus: A 15% chance to apply fear.
Despondency - Not only does this add the 15% chance to the other hits of this builder, but it also reduces the dodge chance of the target automatically, which is an added bonus against high-difficulty enemies, other players, and enemies with lightning reflexes.

Shadow Blast
Blast
★★
One of the stronger blasts, Shadow Blast is the most reliable way in the set to apply fear to a target, using full-charges to guarantee an application.
Psychotic Break - Full charges will stun the target and do upwards of 320 damage to the target over 16 seconds. Overall, full-charge psychotic breaks will do more damage than an extra rank, but fall short in tap-damage.
Devoid - The obligatory application of a defense debuff, fully-charging your blast applies it, reducing target's resistance to Dimensional damage greatly. Using it on targets affected by AoE attacks of this set will also cause the effect to propagate to surrounding targets.
Back to the Darkness - If you've summoned any shadows, this causes the attack's half-charge to immediately kill them in order to restore fairly substantial amounts of health to yourself. The shadows do need to be near your current target for this to work, however.

Dark Tether
Charged Pull
★★
A mid-range ability that will lash out at your enemy and drag them in. Charging up the tether will increase its chance of applying fear (which is already fairly high.) A somewhat niche choice for dimensional melee builds (i.e. Martial Arts...?)
Work-Up - Classic Restoration advantage; use this ability to activate a steady self-heal.
Devoid - Fully-charging will place the Devoid debuff on the target, similar to Shadow Blast. This makes it capable of fulfilling the same role in a shorter-ranged build, though it is also limited by its cooldown.

Grasping Shadows
Sphere Hold
★★★
A slow but effective hold, Grasping Shadows is one of the only holds that effects multiple targets at range. It also will always apply Fear to the targets it hits. Its offset by its long charge and high energy cost.
Unyielding Agony - Enemies hit by Grasping Shadows take damage over time - above 660 total at level 40. Better yet, this damage doesn't weaken the hold in question.
Devouring Darkness - Allies nearby your held targets now benefit from a heal over time, which is an effect that can stack up to 3 times. It's fairly powerful it turns out.
Void - Applies trauma to disable targets hit with this hold from healing. Not many applications to this in PvE, aside from maybe Teleiosaurus in TA.

Ebon Void
Block
★★★
Void's bonus is that you will have a chance to sap small amounts of health of enemies who hit you. The effect is very small, largely unreliable, and only occurs once per second.
Voracious Shadows - On the flipside, this 3 point advantage basically turns this into the block version of defiance, capable of granting 5 stacks of extra defense that will linger after you block. It's recently been a bit reduced compared to its 1 pt/10 stack version from the past, but it still is a highly defensible option that serves well for turtling tactics. One downside that still exists - to make the most of its defense, a lot of blocking and good timing is required to ensure good refresh of the buff stack.

Shadow Embrace
Cone Maintain
★★★
A very inexpensive cone attack, Shadow Embrace's benefits include its mobility, ability to apply fear, and wide angle. However, it's also not that damaging. It's basically the equivalent of an elemental breath attack.
Dark Displacement - Transforms Shadow Embrace into a crowd control ability, adding a chance to knock down on each hit.
Fatal Allure - This one point advantage causes hits on feared enemies to also sometimes knock the target towards you, sometimes clean over your head. Good for melee, but more disruptive than Dark Displacement.
Draining Shadows - Heals you as you maintain the attack. The heal stacks for each target you hit, and appears to occur consistently per hit, so when hitting a full mob of enemies, this generates some pretty rapid recovery.

Shadow Shroud
Active Offense
★★
Shadow Shroud is sort of tanky for an active offense - you gain energy, based off your constitution stat, when hit for damage. Otherwise, it's fairly standard for offensive output.
Terrifying Visage - Nearby enemies are at a severe disadvantage, as they become feared, and suffer psychotic break for a stun and extra damage.
Night Vision - Applies a perception bonus when you use this ability. The effect does count as an enchantment, so it does have some use for Sorcery, but mainly it's used to spot stealth builds during PvP.

Spirit Reverberation
Energy Unlock
★★
Whenever you strike an enemy with dimensional damage while they're afraid, you gain energy, dependent on your Recovery stat. The nature of this makes it compatible with also Martial Arts and Celestial, since they also use Dimensional damage. You just need to find some way to scare your foes.

Shadow Form
Passive Offense
★★★
Shadow Form is very effective, boosting paranormal damage. Its side bonuses include its stealth boost, and the ability to heal very small portions of your health as you attack.

Void Shift
Lunge
★★★
A bizarre lunge in the midst of a bunch of other ranged attacks. This is basically Mighty Leap, but with dimensional damage. It's the same as leap, including its underlying animation and stun effect.
Emerging Nightmares - All lunges of this attack will apply fear in a sphere, making it one of the quickest ways to apply the debuff. Unlike most other corresponding lunge advantages, you do not need to stand far away for it to trigger.

Dark Transfusion
Click Buff
★★
A unique move, Dark Transfusion will damage you over time to grant you a big boost to your energy, nearly doubling your energy gain. Not only this, but it severely weakens most heals on you (sans life drain), so be wary if you use this while low on health.
Blood Sacrifice - Adds a damage buff to Dark Transfusion (seemingly about equal to the strength of a rank 2 Active Offense), allowing you to put out some nasty damage with your buffed energy reserves.

Void Horror
Summon
★★
A pretty damaging pet, but the weaker of the two featured in this set. It can inflict more damage if its target is feared, but unfortunately doesn't have a way to apply it on its own.
Darkness-Part 2
Life Drain
Single-target Maintain
★★★
A very good move for survivability, Life Drain will damage the target over time while healing yourself. The heal on this move is notably higher than the damage it deals by default, and also scales with your Presence stat.
Vampiric Sympathy - As far as support tactics go, this one is one of the best - this radiates out a half-strength heal to targets around you, and while it might be halved, it still occurs as often as normal. Not only this, but if the target being hit is feared, this AoE heal value is increased to full.

Ebon Rift
Maintain Sphere
★★
A decent enough tactic for crowd control, Ebon Rift basically creates a weak black hole that sucks enemies inwards while severely slowing them and doing damage. Much like snowstorm or whirlwind, it will last longer if you maintain it longer. Its damage is somewhat low, and the big issue with it is that it doesn't benefit from many spec tree options like other sphere-AoEs would. Also a huge energy hog.
Vengeful Shadows - Enemies who hit the center of the rift get knocked outwards and take massive damage. In some cases, this basically transforms Rift into a darkness grenade. Against knock-resistant targets, it inflicts extra damage (at a greater rate than an extra rank, in fact.) This makes it a tradeoff between sustained damage against mobs, or for dealing higher damage against knock-immune bosses.
Event Horizon - Applies bane to targets hit, applying a potential slew of random debuff effects. Bane counts as a curse, so it will synergize well with Sorcery.
Hellfire - Creates a fire patch on a half-maintain.

Summon Shadows
Temporary Summon
★★★★
Among temporary summons, they are some of the hardiest - three swift shadows, each with as much health as a standard pet, rise up and tear at enemies in melee. They are also the most damaging pets, but are unfortunately temporary, limiting the use of that large health pool.
Devouring Darkness - Shadows now heal you for 20% of the damage they deal out. This seems small, but three are attacking at once, and they attack fast. The heal on this also transcends the heal debuff on Dark Transfusion.

Ebon Ruin
Single-target Charge
★★★★
A brutal single-target attack, Ebon Ruin's base DPS isn't that high, but is offset by a near-instantaneous animation (though a lot of after-attack lag), damage over time, and long range. The DoT effect on it is more than that on Shadow Blast's advantage, but less than Grasping Shadows. To top it off, Ebon Ruin's energy cost is very steep.
Paranormal Paranoia - Gives the ability a chance to apply fear. While this does make it a better utility for debuff purposes outside of a darkness build and is a great choice for support, it's not the optimal choice if considering it for brute force.
Nyctophobia - Provides a significant damage buff to the attack if you use it on targets affected by Fear. If you can keep the effect up, this is the way to maximize Ebon Ruin's damage output.
Darkness Feast - If you use Shadow Form passive, this will buff the healing you get from it. The advantage also only costs 1 point.

Soul Vortex
Click Sphere Summon
★★★
Places a light-damage vortex on top of your target instantly, dealing dimensional damage over time and sucking enemies inwards. After completion, it creates a healing rune in its place, providing support to any allies nearby the area.
Soul Drain - Solidifying its status as a support tactic, Soul Drain causes the vortex to apply Dependency to enemies once the vortex disappears, causing them to start healing nearby allies. This makes it valuable for more immediate healing when fighting large mobs, but Rank 3 does generate slightly more healing on the healing rune, so it is somewhat of a tradeoff.
Fear Machine - Grants the ability some chance to apply Fear to targets hit. Best used if you intend to use this for damage.

Endbringer's Grasp
Charged Sphere Ultimate
Unlocked.
Unlock difficulty: Medium
Worth unlocking?: No
★★
The Darkness Ultimate, found within the Villain Lockbox, Endbringer's Grasp creates a huge black hole with crystals around it, dealing constant moderate dimensional damage to anyone within while inflicting fear once every 3 seconds. On afraid targets, the fear effect can develop into Corruption, a (currently) completely unique status effect that causes enemies of Villain rank or lower to flat-out fight for you - their health bars even turn green and you can heal them if you so choose. Enemies with this effect will have their defenses reduced, and attack their allies wildly. The effect also makes them immune to damage from you or your friends' attacks, so be careful once they get their senses back (provided another enemy didn't kill them first).
Corruption effect aside, however, Endbringer's Grasp is a fairly modest power, which happens to have an extremely high energy cost, and very slow recharge. Its damage unfortunately doesn't help matters much, as most lower-rank enemies get killed by the attack due to its damage output. It requires a lot of planning to use, and the charge-activation of the move makes this somewhat difficult, especially in a rapid team situation.

Shadow Eruption
Charged PBAoE
Unlocked.
Unlock difficulty: Hard
Worth unlocking?: Possibly
★★★
Unlocked by spending gold champion recognition, Shadow Eruption is a powerful AoE that deals out knockback to targets. Its damage and recharge is about on par with Telekinetic Maelstrom. Shadow Eruption does ultimately have a higher damage potential thanks to being a single more powerful burst of one damage type, and benefits from a slightly lower energy cost. While the chaotic knockback of the move is obviously less preferable to a stun, it does come with a good set of advantages to make it useful in a diverse set of situations:
Blot - Now inflicts a stun on all targets when this power is used. The stun only occurs on full-charges and does not override the knockback, which makes it a bit undesirable since the knock already will interrupt targets that can be held.
Work Up - Your standard Restoration advantage, use Shadow Eruption now to heal yourself in emergency situations.
Drag Back - Enemies caught in your Shadow Eruption get knocked towards you instead of away. In my experience this advantage doesn't work at all.
Envelop in Shadows - Full-charges now apply Devoid to all targets, making everyone weak to Dimensional damage. This is the only way to apply Devoid to multiple targets as far as I know. Pair it up with Shadow Embrace or other dimensional AoEs.
Consume Fear - Deals extra damage for every enemy afflicted by fear you hit. The consumption only will occur on a full-charge, and seems to oddly 'trickle-down' for every consecutive target you hit, with the nearest target taking the most damage. I don't think it's worth it versus an extra rank.
Darkness-Part 3
Shadow Manifestation
Passive Toggle - Ranged DPS
★★★
This toggle works off of applying Mental State effects to your targets. For Shadow, this mostly encompasses using the Fear effect, but can also include a variety of Mentalist abilities as well, particularly telepathy. It scales best with Presesnce.
The nature of this toggle makes it quite attractive as a secondary toggle to carry on a build that wants to switch between dealing ranged damage and doing healing - both it and Compassion scale off of the same stat, and provide benefits to different functions.

Madness Aura
PBAoE Toggle
★★
A somewhat situational ability, Madness Aura causes you to potentially apply Fear to targets nearby you. While the toggle is enabled, it will consume energy, but you will still be able to otherwise use your other abilities without restriction. What Madness Aura does that's outstanding, however, is that it will throw objects around you to cause damage to your targets, or explode in Devoid-applying bursts in place. The ability of this aura to affect objects is limited by your Presence stat, much like how Strength influences how heavy the objects you can pick up manually can be. In many areas where serious fights occur, Madness Aura doesn't have much of an effect due to there not being any objects, and its energy cost is not insignificant otherwise. Very much made to be a DPS/Support ability considering the stat scaling.
Chaos! Chaos! - Applies bane to targets nearby you while active, which causes your enemies to fall victim to any number of random status effects.

Dimensional Collapse
DoT Ranged AoE sphere click
★★★
Dimensional Collapse is the prime utility ability of Darkness, providing a small amount of extra damage over time, and knocking down targets. The cooldown on Dimensional Collapse is a bit long, and its damage alone is quite low - not too big a problem, as it can quickly be activated. Its big draw is that it has a wide number of advantages that prove key to providing consistent DPS upkeep for a darkness build:
Envelop in Darkness - Enemies hit by this ability's initial application are rooted. Makes it quite useful as an ability for control builds for stacking Manipulator.
Glimpse of the Abyss - The initial hit of the attack, as well as random ticks of the DoT, have a chance to apply Fear.
Gravitational Collapse - Replaces the knockdown of this ability with a knockback, in case you want to make your team mates angry at you.
Lingering Darkness - The most important of advantages for a shadow DPS, lingering darkness will refresh and potentially extend the Devoid defense debuff to enemies affected by the attack. Because the initial application of the debuff is now slower, having this effect in place makes it easier to keep pressure up with your main DPS dealers.

Shade Storm
Ranged Sphere Maintain
Unlocked.
Unlock difficulty: Hard
Worth unlocking?: Yes
★★★★
Unlocked by spending a mix of Gold and Silver Champion Recognition, this attack causes shards of inky blackness to rain down upon your enemies, similar to attacks such as Conflagration and Avalanche. Its damage is in the similar ballpark to such abilities, making it a powerful and consistent attack. It has a small chance to inflict fear on its targets, and if the enemy is scared, each strike can knock the enemy down. Its drawbacks, compared to the main AoE option for darkness, Shadow Embrace, is that it has a smaller hit area and a higher energy cost. Its spherical nature however combines much better in general with the other lingering AoE effects that shadow can use, making this a high contender for AoE of choice for this framework.
Horrifying Shadows - Fully maintaining your shade storm stuns all targets inside.
Splatter - Replaces the knockdown effect of Shade Storm with a knock up, juggling your enemies through the air. While this can be used for longer crowd control than knockdowns (or even a single stun, for that matter), it can also potentially throw off the hit area of the attack if the primary target is sent flying over the rest of the enemies.
Void Feast - Any fear effects on enemy targets get consumed by this attack to produce a small pulse of healing. This also includes the stacks of fear that Void Feast itself still applies, and each pulse can also critical for even more healing. Combining this with other AoE effects (such as Soul Vortex) can apply and trigger a ton of fear stacks, producing an insane amount of recovery. This can be used overall for a pretty amazing survival ability while also dealing out sizable damage against multiple enemies.
Sorcery
Much like Martial Arts, Sorcery shares a lot of core moves that define the overall style of the sorcery subsets. Perhaps even more so. In general, Sorcery fancies itself on wide-area traps, buffs, and debuffs, while backing itself up with strong pets, fairly damaging spells, and light healing. It sort of can be thought of as the mystic equivalent to Gadgeteering.

Strengths
  • Very strong control
  • Varied and unique buffs and debuffs
  • Extreme damage potential against single-targets
  • Can stack summoned effects to deal damage passively while defending
Weaknesses
  • Highly dependent on position - many pets and buffs either cannot move, or force you to stand in one place.
  • Less impressive performance against multiple targets
  • Confusing setup takes a while to get used to

Recommended Stats: PRE, INT
Damage Types: Paranormal-Magic

Eldritch Bolts
Energy Builder

The first hit of this energy builder can root the target in place.
Wizard's Discretion - Every hit now has a low chance to stun. The length of this stun is pretty impressive, but more often than not the unreliable nature of this attack serves to either just pointlessly stack hold resistance, or apply the Sentinel Mastery debuff rapidly.

Eldritch Blast
Blast

A fairly damaging blast. Each blast has a chance to apply the Mystified buff to yourself, reducing the energy cost of future mystical abilities on you. Unfortunately, this buff isn't guaranteed, only capping out at a 50/50 chance on a full charge. Mystified counts as an enchantment, which is used to buff the power of Soul Beam.
Sorcerer's Whim - If the target is held, Blast will deal a flat amount of extra damage, not unlike Ice Blast or Ego Blast with their respective advantages. The activation range of this is quite narrow, but does a bit more damage than the others. Best used with Manipulator. Highly recommend combining this with a stun.
Chant - All blasts refresh the duration of the Hexed defense debuff on your target, which can be good for single-target damage builds.
Blinding Light - Full-charges of Eldritch Blast not only apply illumination to your target, but also to yourself and your nearby allies. This can be a decent way to quickly get full enchantments and curses rolling for Soul Beam.
Bad Luck - Bad Luck will apply the Jinxed debuff to your target - essentially Jinxed acts like a highly-superior version of Disorient, and will even cause the target to fall down once the effect expires.

Enchanter
Offense Passive

Enchanter grants bonus damage to the damage types used by the majority of ranged mystic powersets: Dimensional, Magic, and Toxic. While this enables a decent blend of builds utilizng all separate trees of the Mystic family, Enchanter lacks any other unique bonuses.

Spellcaster
Ranged Toggle

Spellcaster is a sorcery-specific toggle, which will only stack whenever you Curse an enemy. Curses include a variety of effects, including Hexed (on Hex of Suffering), Jinxed (various different advantages), and Illumination. Spellcaster only scales off of Intelligence and overall is a bit more difficult to utilize than just using Concentration, which ultimately supplies the same damage benefits. However, as a benefit, having a stack of Spellcaster also counts as an inherent enchantment, making it much easier to use a buffed Soul Beam with less preparation.

Conjuring
Energy Unlock

Conjuring will grant you energy whenever you apply a Curse or Enchantment to someone, which slowly trickles in over 6 seconds when active. Enchantments, versus Curses, entails self-buffs such as Mystified or Illumination. If you have a reliable way to apply these effects (particularly Mystified, which is both common AND aids in energy efficiency), Conjuring can easily keep you going. Conjuring also scales off of Intelligence.

Eldritch Shield
Block

This block's bonus is that it has higher non-physical protection than any other block - which covers a lot of bases against most bosses.
Imbue with Power - If you're using a sorcery aura passive, Eldritch Shield will trigger a special effect when hit.

Binding of Araton
Maintain Hold

A moderately damaging and very low-cost maintain hold. It does not have any side properties.
Tenable Bonds - The move now slowly heals you as you maintain it.

Pillar of Poz
PBAoE Click

An instantaneous ability, now retooled for buff. Pillar Of Poz does decent damage to nearby enemies, and places a healing circle beneath you, which will slowly heal you and your allies so long as you're inside. Its damage is decent and it has a short enough cooldown to be useful, but its main utility lies in all its advantages:
Dizzying Impact - All targets hit by your pillar are now disoriented, serving as some decent close-up debuff.
Immense Power - Makes Pillar operate like its old-self, now knocking everyone nearby backwards.
Dilemma - All target hit by the pillar are Jinxed, which counts as a debuffing curse. Utilize with Spellcaster!
Enchanted - Every time you use pillar, you gain a guaranteed stack of Mystified, and refresh all stack duration. This is likely the most reliable way to apply an enchantment to yourself, so long as you remember to keep using it once it's off cooldown.

Magician's Dust
Cone Threat Wipe

Adapted from Red Banner magicians, this dust will wipe the threat of whatever targets it hits. Magician Dust coverage is wide, but not spherical, meaning it will require some aim if you want to cover the maximal number of targets. Unlike enemy magician dust, it does not slow down the hit targets.

Banish
Charge Hold

A carbon copy of Force's Containment Field, also including its damage reduction. It looks a whole lot cooler than Containment Field does at least?
Sorcery Part 2
Skarn's Bane
Cone Maintain

Skarn's Bane is a modestly powerful cone (though still the most powerful AoE in this set), which, since its rehash, is much more geared for debuff than flat out damage. It's fairly narrow, however, but will apply the Hexed defense debuff to all targets if fully maintained, allowing for even greater damage to a wide number of targets.
Warlock's Malice - Gives each tick a chance to root the target in place.
Chaos Magic - Super-buffs Skarn's Bane's ability to debuff, applying the Bane effect on its targets. In turn, bane can inflict a huge number of random status ailments on enemy targets.
Mystical - Much like Eldritch Blast, this gives you a chance to stack up Mystified enchantments on yourself as you maintain the cone.

Soul Beam
Single-Target Maintain

Soul Beam is the single-target Bread and Butter of the modern Sorcery setup. While its initial damage seems very underwhelming, it also isn't a terribly expensive ability. However, it gains an extra 10% damage output if the target it's used against is Cursed in some way, and then another 10% if you are Enchanted! When set up correctly (and also combined with Hexed) Soul Beam can match the damage of much more direct attacks.

Star Barrage
Ranged Sphere Maintain

Star Barrage fires a volley of magical missiles at your foe, hitting in a sphere area. Barrage is less powerful than Skarn's Bane and covers less area, while still holding on to roughly the same energy cost. In turn, each hit from Star Barrage has a chance to apply Illuminated debuffs to the targets hit. Overall, Star Barrage is much more potent as a support-based attack versus pure damage.
Light Everlasting - Fully-maintaining Star Barrage applies the Light Everlasting heal over time effect on yourself and nearby allies.
Mystical - Once again, self-buff chance for Mystified enchantment.

Tyrannion's Familiar
Controllable Summon

Designed more for taking damage than dealing it out, the familiar comes with growing damage resistance, and has the ability to build up energy charges - these charges can be consumed by you for bursts of personal damage and energy. Sort of micro-management based, but fairly effective otherwise. Of all controllable pets, the familiar is the only one that does not use a summoning circle.

Urthanora's Charm
Click confuse

Identical to mind lock in pretty much every way, except faster animation and higher energy cost. Also:
Ephemeral Endowment - This advantage buffs a ton of things on the enemy, including speed, damage, and defense. Why would you do this!?

Vala's Light
PBAoE Charge heal

The thing about sorcery heals is that they're all AoE's, but also a bit weaker than single-target heals. Vala's Light is no exception. It's also a bit risky, as it requires charge to do any major healing.
Light Everlasting - Fully charged version of this move (this takes 2.5 seconds to do) will place a very weak DoT heal on you and your allies.

Warlock's Blades
Temporary Summon

The non-fire variation of Pyromancer's Blades, the only difference between the two is that Warlock's Blades deals out Magic damage, making it more synnergistic with hexes. Magic defense debuffs, while not as numerous as fire debuffs, also have a higher base debuffing value.

Hex of Suffering
Click Sphere

Places a debuff on your foe that causes them to radiate magic damage over time, and applies Hexed to everyone hit, reducing their resistance to magic damage. It's stronger than Ego Sprites, but has shorter radius, has a shorter duration, centers around a specific target, and can't be spammed. Still quite good for damage backup and its defense debuff. Skarns Bane will ultimately do more damage, but takes much longer to apply the debuff.
Rune of Lethargy - And with this advantage, all targets hit get rooted, ensuring enemies who enter the rune's radius don't escape.

Crashing Incantation
Charged Sphere Ultimate
Unlocked.
Unlock difficulty: Medium
Worth unlocking?: Yes

This ultimate, unlocked from the Arcane Lockbox, is strikingly similar to Gravity Driver - albeit it swaps in the Jinxed curse (clumsy falling over and lowered damage) in exchange for Gravity Driver's huge area. It also still maintains the Overpower effect, providing a global debuff to all damage resistance. Its biggest downsides are its charge period, and its extreme energy cost - which is just a few points lower than Gravity Driver, for reference.
Arcane Sorcery (Legacy)
Sigils of Arcane Runes
Charge AoE (summon?)

Some of the most expedient and simple-to-use sigils, Arcane Runes will explode if anyone is nearby them, which essentially makes them a semi-lengthy full-charge PBAoE. With the added bonus of making sure they actually hit something. Their fire-and-forget nature means that the low health on sigils doesn't matter that much, but in terms of long-term effect, they're some of the least effective.
Mystic Transference - This advantage is on all sigils, and only causes 2 to appear. In exchange, you can now summon another full set of sigils on top of that, and the recharge is shorted substantially.
Arcane Runes are probably the best candidate for this advantage, as this will make the sigils overall behave much more like a typical recharge-based PBAoE in terms of range and recharge.
Inner Peace - Summoning up a sigil now places Restoration on yourself, providing healing over time. Combined with Mystic transference, this can make for a good quick-healing ability.

Aura of Arcane Clarity
Support Passive

Currently the only way in the game to drastically shorten your recharges, Aura of Arcane Clarity has more of a niche appeal, due to its lack of other noteworthy buffs. While it can make energy management very easy, and makes your charge-up periods shorter, it is overall a weaker than average passive when soloing. In terms of cosmic content, however, Arcane Clarity can make a much larger DPS difference for players that utilize fewer crits and longer charges. It will provide more of a benefit to the team if there is an AoAC with an AoED rather than two Ebon aura users, so it is a good idea to diversify!
Also note: This aura is partially bugged, as its benefits of Presence and your base Superstats are swapped, with the self-buff being boosted by Presence, instead of any superstats, and vice-versa.

Circle of Arcane Power
Circle Summon

This circle serves to massively boost energy generation stats. Not only this, but it also will count for an energy form, meaning it can be used to fire off a Force Cascade at reduced energy cost. The general downside of the circle (and all sorcery circles, for that matter) is that they cannot be moved without spending a second to reallocate them.
The Circle of Arcane Power is notable for being the fastest-summoned circle of the four. It can be laid down much quicker than any other circle, making it quite flexible for energy management.
All sorcery circles, save for one, count as an Enchantment. This can be used to boost the power of your Soul Beam.

Ritual of Arcane Summoning
Controlled Pet

The Arcane pet summons up a golem. Of all pets, the ritual pets have the most hit points, and this golem uses Challenging Strikes, making it an ideal pet for tanking. In general, summoning rituals are unique among summons in that they do not have an energy cost, but use a circle - if you exit this circle, the pet disappears and must be resummoned.
Unbound Ritual - All summoning rituals, however, have access to this advantage, which gives the summon a fair energy cost, alongside typical pet mechanics - the summon is no longer bound to a circle. The one downside is that the pet can no longer reach rank 3.

Arcane Vitality
Maintain Cone Heal

A decent enough AoE heal, it has similar advantages as Empathic Healing does, including its high synergy with healing specializations. It also benefits from its cone spread, allowing it to heal your team/pets. The downsides include that it's much less potent than most other heals, with scaling that goes down with the more targets it hits. It's notable for being the absolute best AoE heal option for high-crit healers.
Impart Freedom - If you fully maintain the heal, all targets hit will be freed from control effects: holds, roots, and snares are wiped in 4 seconds.
Mystical - Same as before, Arcane Vitality's maintains can apply the Mystified efficiency buff to yourself.
Primal Sorcery (Legacy)
Sigils of Destruction
Sigil Summon

Sigils of Destruction are what the Sigils of the Storm originally were. The only difference between them and Storm Sigils is that these will instead inflict magical damage on targets within range.
Aura of Primal Majesty
Support Passive

The Primal Aura is extremely straightforward - you and your allies get a boost to all your stats. The most noticeable effect this has is that you have much more energy to use. And, depending on what superstats you have, you can use the aura to buff said superstats to extreme levels, while not having to be sidetracked with auxiliary stat boosts (i.e. a little bit of endurance on a Str/Con/Dex character.) The downside is that it is limited to hybrid and support roles, limiting its usage for building super-tanks or super-dps. Also, it's extremely overused.

Circle of Primal Dominion
Circle Summon

A great tanking utility - Primal Dominion will grant you massive boosts to your resistance to knock, ensuring you don't get blown out or away from your circle. It also provides a fair boost to your damage resistance, slow health regeneration, and if you're running in Tank role, a boost to your threat generation. The only downside is that it also makes you more vulnerable to holds, but this effect really is unnoticeable, especially if you block.

Ritual of Primal Summoning
Summon

The primal ritual summons up a wolf (or bear. Or raptor!) that is imbued with magical power and can cause lightning to hit targets. It also can howl to increase your damage output a little bit.

Invocation of Storm Calling
PBAoE Maintain

The power that Storm Summoner was based off of, Invocation of Storm Calling replaces all Electric damage with Magic type. Compared to normal Storm Calling, The Invocation does higher damage while maintained, and will inflict Jinxes upon your targets once completed, but has the downside of having an even higher energy cost! Invocation of Storm Calling also has a much wider range of advantages:
Strong Winds - Identical to Storm Calling version, it repels all targets inside your AoE.
Electrify - Adapts Storm Calling's main debuff application to itself, giving each tick a 25% chance to apply Negative Ions for stronger electrical attacks.
Light Up the Sky - Enemies hit by a full maintain become cursed with the Illuminated effect.
Mystical - Once again, you now can apply Mystified Enchantment to yourself on a full maintain.
Ebon Sorcery (Legacy)
Sigils of Ebon Weakness
Sigil Summon

One of the best debuffs, these Sigils will both severely slow and reduce the damage of nearby targets. If standing dead-center, targets get upwards of 41% of their damage output removed, and are basically slowed to a crawl. Unfortunately, they seem to attract a lot of attention, even if they don't do damage, and as a result, they need that damage debuffing effect to stop themselves from being shot down instantly.
The Debuff of the Ebon Sigils also count as a Curse, which can generate more damage when using Soul Beam! However, the curse from this ability does not count towards stacking Spellcaster.

Aura of Ebon Destruction
Support Passive

A great passive for DPS support and petmasters alike, Ebon Destruction will raise all damage you do slightly, as well as your allies' damage. If any of you crit, however, you will also add on a special shock effect that does extra damage, and occurs once per 3 seconds. This effect, however, also has independent cooldowns for each target, so you can be striking random targets with aura lightning much more often than that.

Circle of Ebon Wrath
Circle Summon

The Ebon Circle provides a decent damage buff, at exchange for quite a lot. Threat reduction aside (you don't want to be using this as a tank.), standing still in this circle also reduces the amount of healing you get, to nearly 17%. If your first priority is going to be survival, you'll want to get straight out of this ring. As an added bonus, anyone who is in melee reach of you, and anyone who hits you, gets scared.

Ritual of Ebon Summoning
Summon

A quite destructive pet, Ebon Summoning calls forth a fire demon that can sling powerful burst-damage fireballs at foes. Ranking it up also grants it further access to fiery blade attacks.

March of the Dead
Charged Temporary Summon

The March of the Dead summons up a gang of very hardy zombies to slap your enemies senseless. They have the benefit of coming in high numbers (sets of 3), and being more enduring than even Shadows. They also do great damage in melee, but suffer from very slow movement speed. They also reduce your equilibrium for a bit.
Forced March - Base summon duration is doubled - to a minimum of 40 seconds. These pets last for quite a while! However, resummoning them (20 seconds) will cause previously called zombies to disappear, making summon duration a bit pointless. In addition to this advantage, the duration of the March of the Dead is increased with high intelligence.
Radiant Sorcery (Legacy)
Sigils of Radiant Sanctuary
Sigil Summon

The radiant sigils are best used on DPS characters as it turns out - they will provide very light protection and healing to targets that stand nearby them. However, more importantly, they will hide anyone who stands nearby them, making their threat generation very low. If one player were to summon the sigils up, stand dead-center in them, and begin fighting, the targets would be forced to attack the sigils instead.

Aura of Radiant Protection
Support Passive

One of the best support options for defense, Radiant Aura serves basically as a defense passive for you and your team, granting a sizable resistance buff to the group. When built up, Radiant Aura offers a bit more damage resistance than Invulnerability (though it lacks subtraction), and could feasibly be used as a defensive passive if one felt so inclined to make a tank out of it.

Circle of Radiant Glory
Circle Summon

The only circle to be redone in the game's time, Radiant Glory Circle is a fairly neat support gimmick. It's notable for being a good deal larger than the other circles, giving it wiggling space. in addition, it can be instantly resummoned to your location if it's been laid down (though this can only be done once per 6 seconds). The recall also causes the circle in its old and new locations to erupt in a burst of light healing. To top it all off, if you're killed while in the circle, you come back to life with most of your health intact. Though this does place the circle on a very long recharge. This all in mind, radiant circle is only one of two ways through powers to bring yourself back to life.
Because Circle of Radiant Glory doesn't grant you a passive bonus while standing inside it (as well as its other numerous perks), it is the only Sorcery circle that does not count as an Enchantment buff.

Ritual of Radiant Summoning
Summon

While semi-damaging, the radiant summon is usually too sidetracked trying to slowly heal single targets to be of much use. The simple reason that it doesn't work well is that it just is incapable of healing multiple targets, and in turn, also unable to properly gauge which targets are higher priority for healing than others.

Divine Renewal
Revive

The last of the revive moves, it's practically identical to Redemption, with one crucial change:
Radiant Renewal - This revives all targets within 25 feet of you, with the same amount of health they would have received if individually revived. However, this comes at a huge cost of doubling the charge time of this move to 4 seconds. Regardless of how many targets are actually being affected, this charge rate can't be reduced. It also costs 3 advantage points.
Shared Supernatural Moves
At launch time, there was a powerset known as Supernatural, which consisted of sort of magic vigilante themed moves (think Spawn). Over time, however, the developers realized there was a bit of a disjoint within the set itself - one half was dedicated to feral-looking melee swipes and bites, while the other was devoted to using toxic-styled ranged attacks to poison enemies.

Since then, the sets were separated into Bestial Melee and Infernal Blasts. At the heart, though, the two sets still have some abilities in common:

Strengths
  • Very easy playstyle - automatically generates health and energy as you fight.
  • Decent compatability between the two playstyles, thanks to shared moves
Weaknesses
  • Easy to play, but this results in a slightly lower than average maximal potential in some cases.

Venomous Breath
Cone Maintain

By nature, Venomous Breath is very much a product of Infernal, even though it's shared between the two sets. It's very much similar to other elemental breaths, in that it has a very low energy cost, good reach, and poor damage output. Its current incarnation also has a good chance to apply some extra poison as the breath is maintained. Finally, it has advantages that allow it to be better suited to both supernatural playstyles:
Paralytic Bile - This grants the breath the ability to stun targets. If the target is bleeding, this stun is reliable and very fast, and will always trigger.
Infectious Bile - If your target is bleeding, Infectuous Bile will grant a very high chance to apply its poison, raising it from 15% to 50% per tick.

Regeneration
Defense Passive

True to its name, Regeneration will automatically restore health to you as you take damage, with its strength increasing as you take more. Regen also comes with a small passive percent-based defense, which goes down as you take damage. By nature, Regen works best if you have a lot of health, because it's more vulnerable to very quickly incoming damage. Regen is also meant to be weakened when you take hits while blocking, but in actuality the healing doesn't even dip down below the base value. It's best fitted with a good damage shield, and even without, it's capable of contending with other defense passives if blocking is used effectively.
Regeneration can also stack and benefit from compassion. If you want to maximize Regen's defensive benefits, you can take compassion for even more hardiness, as well as strong team heals if so inclined - keeping in mind that your offense might suffer in the process.

Pestilence
Offense Passive

Pestilence is the perfect offense-passive for any supernatural character. By nature, it not only drastically increases your toxic and slashing damage (note: only two specific damage type, so be careful), but also causes any attack you land to poison the target. You also radiate a cloud of flies, damaging targets nearby you, will reduce the poison resistance of targets hit, and will also decrease healing effectiveness. While the main damage buff would seemingly make it only useful for Infernal characters, it also proves itself useful for DoT builds and melee in some cases, with bleed specifically wearing down target resistance to further slashing damage.

Supernatural Power
Energy Unlock

Part of what makes Supernatural sets so easy to play is this unlock: Every time a supernatural attack reduces your energy below 15%, this triggers. If using moderate cost maintains, this basically causes you to never run out of energy, and makes usage of some more energy-intensive attack possible. Supernatural power, outside of its set, however, is quite ineffective. This return scales off of Recovery, and does not suffer from any internal cooldowns.

Resurgence
Active Defense

An extremely straightforward active defense, and potentially one of the best for some situations (depending on how hard it is to bring your health down in the first place). Resurgence restores a sizable percentage of your health instantaneously and slightly boosts your max health. However, resurgence will only offer extra defensibility after this fact if you're regeneration, by boosting your healing rate.
Evanescent Emergence - If you were held, you get woken up inside and break out of holds. Using Resurgence when under 50% health also will give you a single stack of Enrage, for a bit of extra damage.

Soul Mesmerism
Charged Hold

An average hold with no special effects. But,
Glossolalia - This advantage turns Mesmerism into one of the few AoE holds, giving it a small chance to chain its effect to nearby enemies. It also does low sonic damage over time.
Bestial Supernatural
While Single Blade takes a dexterity-based approach to bleed melee, Bestial takes a strength-based one. In more ways than one, Bestial's approach is much more simple and brutal, with attacks that, while not necessarily slower, are much simpler to carry out and aim for pure damage.

Strengths
  • Fast and consistent damage
  • Can easily apply bleed
  • Throws in other debuffs and self-heals for flavor
Weaknesses
  • Mediocre AoE options

Recommended Stats: STR, CON, REC
Damage Types: Physical-Slashing

Bestial Fury
Energy Builder
★★
Bestial Fury is an interesting case for an energy builder, since the default layout is just pure damage and no extra effect. However:
Rip and Tear! - This advantage gives all hits a decent chance to apply bleed (doubled if enraged). However, not only can it apply bleed to start with, it stacks bleed - sometimes extremely rapidly.

Shred
AoE Cone Combo
★★★
A powerful AoE combo, Shred's hits are a bit slow, but each has a very high chance of applying Bleed. Its main use is for building up bleed, versus strict damage output. Despite being an AoE, its cone is very narrow and makes it difficult to land hits on multiple enemies, outside of the last hit.
Penetrating Strikes - Each hit now has a 50% chance to apply Shred debuff, which reduces the target's resistance to damage. This is the same debuff used by the Fighting Claws set.

Frenzy
AoE Cone Combo
★★
Frenzy is very similar to Shred - it's a conical combo that can apply bleed to its targets. Versus Shred, it has a much larger coverage in total, but trades off chance to apply bleed for its larger cone, and it also gets narrower as the combo continues, as opposed to wider. Its damage also does not escalate per hit. Despite this, it's a much better option for AoE attacks in general.
Fear Sense - Fear Sense used to synnergize with the Fear debuff, but now it will instead serve to apply the Furious buff when the ability is used, improving your critical chances and giving you a chance to heal when hit. It also is useful if you plan on making a gun-toting claw monster for some reason.

Feint
Single-target Melee Stun
★★
A quick move that will stun your target for a moderately long period. Feint has no cooldown, but largely suffers from its very low damage.
Trauma - Enemies hit by your feint will have their healing severely stunted.

Antagonize
Block
★★★★
Bestial's block focuses on granting its user unique, situational defense buffs. Against ranged attacks, Antagonize will build up a stacking buff that noticeably increases your jump height, run speed, and knock resistance. Taking damage in melee grants stacks of Cornered, which boosts damage resistance and greatly increases knock resistance. Both of these buffs stack 3 times, and last 10 seconds, and can be used for some unique rushdown or escape tactics. Mobility aside, the block is otherwise quite a potent option for melee fighters (and mobile ranged ones as well). However, the unique traits of Antagonize don't increase with extra ranks.
Quills - Taking damage will cause you to generate up-close quill bursts that have a chance to apply bleeding or poison to nearby targets.

Bite
Charged Melee
★★★
Bite's one of the least damaging options in the set, partially due to its slow animation. However, Bite makes up for this by being able to restore small bits of health when full-charging, which consumes the bleed stacks to place a heal-over-time on yourself.
Furor Venom - All full-charge bites from this attack stun, while partial attacks have a smaller chance. It also applies the furious buff when biting a bleeding target, raising critical stats, and it will also refresh the buff.
Rabies - If your main target is poisoned, the poison stacks will be refreshed by your bite, and you can also spread the poison to nearby enemies.
Scent of Blood - Essentially the 'bleed' version of Rabies. Refreshes bleed on your target, spreads bleeding to others.

Pounce
Lunge
★★
Pounce's bonus is that it will knock the target down if launched from far away enough, reliably interrupting non-knock-resistant targets, but not lasting as long as a stun. Of all the lunges in the game, it has the fastest startup, and lowest damage.
Furious Rush - Using this lunge will both apply and refresh the duration of the Furious buff.

Command Animals
Controllable Pets
★★
Summons a pair of comparatively weak beasts to help you out. They seem to mainly serve as a way to quickly apply bleed to multiple targets than anything else.

Howl
PBAoE Click
★★
Howl is a quick, far-ranged way to apply Furious on yourself and inflict fear in enemies around you. Howl doesn't do any damage, and ranking it up will simply reduce its recharge period a few seconds.
Make Them Tremble - Roots and Snares all targets hit by the howl. This is a low-cost 1-point advantage
Intimidating Force - Knocks targets down.

Aspect of the Bestial
Toggle form
★★★
Whereas Enrage could be compared to Form of the Tempest (in some ways), Aspect of the Bestial is comparable to Form of the Swordsman. It will apply enrage to your character whenever you inflict, refresh, OR rupture a bleed, or apply a poison.

Thrash
Maintain Melee
★★★
You ravenously dig into your target, dealing consistent and moderate damage. The big draw of Thrash however is that it generates quick healing for each bleed stack you have on your target, making it highly effective for recovery.
Fester - If your target is poisoned, Thrash will also debuff enemy attack power by 5% for every poison stack they have, making it a highly effective defensive debuff.
Bestial Supernatural - Part 2
Wild Thing
Energy Unlock
★★★
A globally useful energy unlock for bleed-based characters, Wild Thing will activate whenever you land a bleed effect on your targets. Its effect doesn't trigger as often as some other unlocks, but it will provide a steady flow of energy to you while it's active (6 seconds). Wild Thing scales best off of Endurance.
The endurance scaling of this energy unlock, combined with its general activation clause, means that it can be of use to single blade/bestial builds with a high demand for energy, or better yet, builds that combine aspects of these powersets into some sort of extreme bleed-centric hybrid. Supernatural Power is undoubtedly better if you combine Bestial/Infernal, and is easier to build for (as is Steadfast), but Wild Thing is strictly superior in how much energy it can generate if you consistently apply and utilize bleeds.

Cower
Threat Wipe
★★★
By being a huge coward, you can get your target to stop attacking you, as well as nearby smaller enemies to stop. Compared to Smoke Bomb, Cower has 30 seconds less recharge, but instead will inflict Fear on you, causing you to do less damage for a short duration. Inversely, this can also help prevent you from accidentally gaining aggro from enemies again, and has no impact on builds that focus on either remote sources of damage, and/or are support-based.
Run Away! - Cower will now also provide you with a boost to your running speed, jump height, and flight speed, which lasts for a good 3 or 4 seconds after your stealth wears off.

Massacre
Charge Melee
★★★★
Massacre is a very damaging swipe that can knock the target down. Its animation is somewhat slow, but its charge is extremely fast. A strange quirk is that its full-charge and tap DPS are exactly the same, so it's best just to full-charge repeatedly. Its biggest drawback would be its very high energy cost, largely to justify its excellent base damage.
Bloody Mess - If the target is bleeding (and they should be if you're bestial), Massacre does an extra 30% damage. It's highly recommended to use this advantage if you have bleed stacks quickly applicable and available.
Open Wound - Gives your Massacre hits a chance to stack bleed over time - again, anywhere between 0-5 stacks can result over 10 seconds.

Eviscerate
Charge Melee
★★★
You literally rip your enemy's heart out, as the animation appears. Taps of Eviscerate will refresh the duration of bleeds, allowing for more stacking if carefully timed. However, full-charges of eviscerate serve to rupture the bleeds, and transform them into Deep Wound, which has a ton of defense-ignoring properties and does roughly twice the amount of damage that bleed would over the same period. The drawbacks of eviscerate include its (short) recharge, meaning it can't be spammed to keep bleed stacks going as a main attack, and the inability to stack more bleed on top of the deep wound.
The Deep Wound effect is represented only by one stack. When triggered, its damage ticks are slow, but high and consistent. Its main use is against armored enemies using passives such as Invulnerability that usually are very resistant to the effect of Bleed. Though the damage will not usually be as potent as bleed, Deep Wound can be used to very quickly get healing from Thrash while it's active.
Messy - All hits from Eviscerate now also refresh the Shredded buff by 10 seconds, allowing for more consistent defense-down on your target.

Barbed Chain
Melee Combo (with range)
★★★
Similar to Iron Chain, Barbed Chain replaces the bonus of Knock to Bleed application. It also alters its damage type from Crushing to Slashing, but otherwise is very similar.
Sever - Barbed Chain does come with different advantages, however. Sever causes the final hit of the combo to apply Shredded.
Wild Slashes - And this is the counterpart to Rampage, which will apply Furious instead of Reckless.

Barbed Lariat
Single-target Charge
★★
Much like Iron Lariat, Barbed Lariat pulls the target inwards, and has a chance to make the target bleed. Fans of the old Kyoketsu Shoge advantage on the Lariat Powers will feel right at home with this ability.
Work Up - Identical to the Iron Lariat version, Work up applies Restoration to you when used.
Open Wound - Provides a chance to apply anywhere between 0 and 5 extra stacks of bleed over time.
Messy - A full charge of the lariat will renew the Shred debuff on your target. Combos nicely if you took Sever on Barbed Chain.
Slice and Dice - Full charges of your lariat renew all stacks of Bleed. Combos nicely if you didn't take Sever on Barbed Chain!

Lacerating Cyclone
PBAoE Maintain
★★
Versus Iron Cyclone, Lacerating Cyclone instead will cause targets to bleed instead of being knocked away.
Similar to the other cyclones, this power can get the Vortex Technique advantage.

Moonstruck
PBAoE Click Heal
Unlocked.
Unlock difficulty: Hard
Worth unlocking?: Not really.
★★
Unlocked by spending 350 SCR at the Champions Recognition Store, and by completing all the possible Bloodmoon content for its perks, Moonstruck will let you howl to knock down all targets within 15 feet, and places a healing rune beneath your feet (suitably, displayed as a glowing moon image). The default cooldown on this ability, as well as the rune's duration, are both 10 seconds. The healing generated by the rune is identical to that of the one created by Expulse (i.e. very low healing, and also to multiple targets within the radius, also counts as an Enchantment, granting it functionality as a Sorcery power.) Moonstruck benefits from a quick activation, moderate energy cost, and a variety of advantages that synergize with Supernatural abilities (as well as being classified as supernatural to start with, letting it benefit from Supernatural Power.) It can also stack Enrage, making it useful for knock-based builds.
Moonlight - If you're using the Regeneration passive, it will boost its damage resistance slightly, as well as preventing it from lowering. This makes it a good choice for Regen-based tanks, so long as they don't need to move around.
Lunar Force - Increases knock resistance substantially while standing in the rune, even further so if you're affected by Furious (which is generated by both Bestial and Munitions attacks). This will once again prove to be a good benefit to a stationary tank, but still requires a bit of in-supernatural set synergy to work (though not as much as Moonlight.)
Midnight Frenzy - While you're standing inside the Moonstruck rune, your howl ability will recharge at a much faster pace. This effect has the caveat that the rune actually needs to restore lost health on you to trigger (meaning it won't have an effect if you haven't taken damage). Again, a utility that will mainly see use by supernatural tanks.
Nightmare - Creates FIRE beneath you when you use Moonstruck!
Bestial Supernatural - Part 3
Last Stand
Active Defense/Self-Revive Hybrid
★★★
Returning from the dead, Last Stand will, by default, heal you up to full health. On top of this it then pairs it with increased max. health, super-powerful health regeneration, and high damage resistance (about half the strength of a block) for the next 15 seconds. Then pair this with almost-absolute knock and CC resistance, and you become a force to be reckoned with during this period.
After 15 seconds, however, you have a massive chunk of your health drained (anywhere from 80-90%), and become unable to be healed for the next 10 seconds. It's very likely that you could die again during this time period - explaining the name of this ability, after all. In addition, Last Stand simultaneously counts as a self-revive and an active defense, so it'll put other ADs and revives on cooldown - and in addition, a much longer than usual cooldown on ADs to be precise (90 seconds versus the normal 20).
The higher your rank, the more health you're left with after you're done, as well as the greater your defensive benefits become while Last Stand is active.
Eyes on Me - As you use Last Stand, you generate much more threat, allowing you to use your awesome survivability during this period to tank your enemies... Just be careful after you've run dry with this ability, however.
Fighting Spirit - For just a single advantage point, you can utilize Fighting Spirit to halve the period during which you are immune to healing, making it more likely you could survive.

Feral Rage
Active Whatever Ultimate
Unlocked.
Unlock difficulty: Medium
Worth unlocking?: Whatever
★★
Whatever it's bestial specific damage buff that only scales with enrage why would you take such an inflexible crappy ultimate also it has a recharge the length of Cryptic's release schedule. Also turns your animation set into bestial.
I need a nap - What? Why would you put yourself to sleep? It's a threat drop I guess.
Intimidation - look at me i'm a tank
Infernal Supernatural
Infernal is the de-facto damage-over-time DPS set, rapidly stacking the Deadly Poison effect to deal impressive ticks of damage inbetween attacks. That's not to say that the set is without its sources of direct damage, however, as many powers serve to further augment the effectiveness of its poisons.

Strengths
  • Can be built destructively or with survivability
  • Easy playstyle
  • Can passively damage targets
Weaknesses
  • Moderate spike damage
  • Few outside compatabilities
  • Some high energy costs

Recommended Stats: EGO, INT, REC
Damage Types: Elemental-Toxic

Infernal Bolts
Energy Builder

Infernal Bolts' first strike can apply Deadly Poison to its target.
Toxin Overload - Adds the chance to all energy builder strikes. I'm pretty sure, much like Rip and Tear, this advantage can also stack deadly poison.

Infernal Blast
Blast

While not particularly damaging, Infernal Blast is a good move for stacking Deadly Poison on its target. Also useful is that it will refresh the duration of all poisons, ensuring that stacks do not end early and keeping other Poison debuffs going.
Virulent Propogation - Charging this against a pre-poisoned foe will spread a random poison effect to a nearby enemy, as well as refreshing duration on nearby targets.

Lash
Ranged Combo

A poisoned mirror to Might's Iron Chain ability, Lash does toxic damage and has a quarter of a chance to apply poison on the first two hits, and a 50% chance on the last. It seems to do slightly less damage than the other chains, but makes up for this for its high rate of poisoning. Keep in mind, versus the other chain attacks, the Infernal ones count as Ranged instead of Melee.
Decay - The final hit of your combo applies Debilitating Poison, severely debuffing enemy resistance against poison, as well as a slight decrease to all elemental resistance.

Devour Essence
Melee Single-target Maintain

Highly damaging, moderate cost, and self-healing, Devour Essence is one of the most effective melee tactics in the game. Though it doesn't really play well into the traditional strengths of the Infernal powerset, it is valuable for being a melee attack that heals the user as it hits. The properties of this move are the opposite of Life Drain's: The damage is much stronger than the heal. Whereas life drain is made more for support characters, Devour Essence is purely for personal use, and suits DPS and Tanks alike.
Phlebotomist - All DE ticks will root the target in place, and if the target is afflicted by a bleed or poison (meaning this works well with bestial or single blade), it will heal an extra 50%.

Condemn
Sphere AoE

A strange reskin of Celestial's Vengeance; it's a low-damage AoE, though oddly enough one of the strongest. Charging it will increase its hit radius, and if the targets are not poisoned, it will always start a stack of Deadly poison.
Much like Vengeance, it has the advantage Redemption Denied, stunning the targets and paralyzing the primary one.
Corrupting Force - Applies the Debilitating Poison to your primary target when it is fully charged, providing a powerful defense debuff to the target against Poison damage, as well as a bit of weakness to fire and ice.
Dark Rune - As a weird support maneuver, this places a healing rune beneath the target you hit, which heals allies nearby that target. The rune has some basic synergy with Sorcery, though if you happened to take Expulse or Pillar of Poz, the runes from these abilities cannot be stacked.

Epidemic
PBAoE Maintain

Pretty much the AoE staple of Infernal, Epidemic's damage is low, but it covers a very wide radius, has a low energy cost, and will double poison stacks on targets whenever fully maintained, making it very easy to get up to 5 stacks on multiple targets.
Outbreak - Reduces maintain time by 1 second, reducing the time needed to reach maximum damage output, as well as time needed to double poison stacks. Also readily increases the chance to apply poison stacks.

Vile Lariat
Charged Pull

The toxic reskin of Iron Lariat; It can poison the target instead of applying Disorientation. Much like the other lariats, it has access to Work Up for a self-heal.
Fester - Full-charge Vile Lariat will apply a damage debuff to your target, which gets stronger the more stacks of Poison are on them.
Viral - Provides increased chance over time for the target to gain deadly poison on their own.

Vicious Cyclone
PBAoE Maintain

And this, also, is a toxic reskin of a chain attack: Iron Cyclone. Its poisoning ability is pretty staid, at a 10% chance per hit, and it predictably hits in a wide area.
This also gets access to Vortex Technique for pulling in targets and applying Furious.
Infernal Supernatural-Part 2
Mephitic
Energy Unlock

The toxic counterpart to Wild Thing, Mephitic will trigger whenever you apply or refresh poison effects on your targets. Because of how energy-intensive some powers in Infernal can get (i.e. Defile) this can see some use to build up some energy to use your most powerful strikes, versus Supernatural Power, which is only mostly good for maintaining a baseline. Mephitic scales best off of Endurance.

Aspect of The Infernal
Toggle

If you use toxic attacks at range, this form will stack ranged-damage boosting Focus stacks on you like nothing else. Its activation condition is very general - any poison effect featured in Infernal attacks will do, and even refreshing poison duration will stack it. This toggle is very viable for supernatural characters, as it can stack concentration, even when the target hit is close to you.

Crippling Coils
Maintain Hold

A standard maintained hold. Will end if the target breaks out.
Barbed Chains - Speaking of breaking out, this advantage deals a sizable of extra damage if they do, and also will put on an extra stack of bleed. It will only trigger if the hold applies in the first place, though, and the bleed stack seems rather haphazard.

Locust Swarm
Charge Hold

A charged hold, which has the bonus of doing very low toxic damage over time.
Festering Bites - These ticks of damage also have a small chance to further stack debilitating poison. Good for extended pain, but the problem might be that poison in general helps to break targets out of holds, making these two hold abilities a bit dubious for toxic characters.

Rebirth
Self Revive

The only one of its kind, Rebirth is very odd, even among reviving abilities. It will restore you with full health, and grants the user a sizable defense and damage bonus (damage doubled, damage taken halved). However, for 20 seconds, you'll be taking 5% of your health in damage per second, which is enough to kill you again. Thankfully, landing kills offers a bit of healing, and other self-heal skills are not off limits. It also has a very long recharge (5 minutes!), and is mostly useless when soloing, since dying causes most targets to restore all their HP.
Grave Consequences - You also summon 3 high-hp zombies to help you out when you revive.

Defile
Ranged Charge

A very powerful and straightforward attack, Defile will hit its target for very high toxic burst damage, and serves to stack the DoT effect of Deadly Poison. Its biggest disadvantage is that it's very high in energy cost, meaning it's one of the less sustainable attacks in the set.
Plague Bearer - Fully charged, plague bearer creates a Noxious Poison, which will cause your primary target to radiate toxic damage to all enemies within 10 feet of them.

Entrancing
Threat Wipe

Entrancing shares all of its traits with Mind Wipe, wiping threat from a single target without placating all nearby enemies. It also has the same recharge period. The big difference is that it exchanges a psionic animation for a nice kiss.

Life Essence
Maintain Single-Target AoE Heal(??!?)

This bizarre heal will generate powerful healing to yourself and allies nearby you. Like life drain, it requires a target to be used, but it doesn't deal damage to the target by default. Also like Life Drain with Vampiric Sympathy, the AoE heal is halved for your allies, and is raised to full value if the target you're using this on is poisoned. The main advantage this has over Life Drain is that its healing power is even stronger than normal, but this is offset by a pretty high energy cost. Overall, thanks to not needing to take an advantage for AoE, this power can put out some amazing healing for nearby allies.
Infernal Bond - Adds in toxic damage to the attack, making it basically a lifedrain reskin. The damage from this is identical to Rank 1 lifedrain.

Voodoo Doll
Block

You raise a voodoo doll in front of you, which reflects toxic damage back at attackers. The damage reflection on this block is pretty slow, with what seems like nearly a full second delay between damage ticks. That aside, it's a pretty standard block ability.
Voodoo Curse - Attackers have a chance to get stunned when hitting your doll. The effect can only occur once every 10 seconds, so its usage in truly controling a huge crowd of enemies is limited.

Death's Embrace
Revive

To put it shortly, Death's Embrace is a reskin of Celestial's Redemption ability, but with a much more lively and sinister animation. Same charge period, no cooldown, and decent HP restoration.
Pact - Pact acts exactly like Salvation, enabling you to revive up to 4 targets at once, and divides the healing between them.

Curse
Click AoE Hold/Poison

Places a Voodoo Doll on top of your target, which stuns them and radiates out some Toxic damage. If anyone in this AoE is afflicted with poison, they also will get stunned. It's notable for having an extremely high energy cost, and a ton of advantages:
Jinx - Inflicts your target with a pokemona debuff to their attack power and movement speed, and once it wears off they trip. Jinx counts as a type of Curse for Sorcery abilities.
Needles - Applies bleed to the target, if they're not already bleeding. Use this for Bestial supernatural mixes.
Covet - Applies Restoration to you, for some light self-healing in emergency situations.
Corrosion - Simply refreshes the duration of all poisons on the targets affected. The most useful of the effects for pure Infernal builds.
Infernal Supernatural- Part 3
Will-o'-the-wisp
Click Sphere Damage/Debuff

Throws a glowing little ball of poison at your target, inflicting them with Debilitating Poison, and surrounding targets with normal poison. This is a very quick and effective way to get the Toxic resistance debuff on a target. The only downsides of this ability is that it's energy cost is quite steep, as well as its moderate recharge period.
Why do these powers have like a million advantages
Guide - Applies illumination to yourself, your allies, AND the targets you hit, making this probably the most extensive spreading of illumination of any ability in the game so far. For sorcery's purposes, the illumination buffs applied to you and your friends counts as an Enchantment, and on enemies, counts as a Curse. For Celestial purposes, this is just ridiculous.
Cursed - Applies the Hexed debuff to the main target, basically giving them a double-defense debuff against both toxic and magic from this ability. This also counts as a Curse.
Ghost Fire - Most of the advantages on this ability are pretty insane, and this is no exception, because Ghost Fire applies both Clinging Flames and Fear to your main target. In case you want to make that fire infernal darkness build.

Shared Powers - The Toggles
Each of the overarching power categories also come with toggles. The more specific ones were included in the appropriate sections (in particular, see Force, Supernatural sets, Martial Arts sets, and Brick Shared Moves). These toggles, however, are very broadly defined, and fit a huge range of builds:

Technology - Concentration
Toggle

Concentration is the undisputed toggle for ranged DPS style characters. It will stack whenever the user either charges a ranged attack halfway, maintains a ranged attack for at least 4 ticks, or hits an enemy with a ranged attack from beyond 25 feet. Concentration stacks have the same duration of a focus stack (20 seconds) and scale best off of Ego or Intelligence.
While very well suited to ranged characters, Concentration only offers half its damage buff to melee attacks, and its inability to stack with any melee strikes means that it's not the best toggle by a long shot for hybridized melee/range fighters. For such purposes, I highly recommend using Form of the Tempest or Enrage.

Mentalist - Manipulator
Toggle

Manipulator is an odd toggle that will gain a stack whenever you attempt to hold or root a target. The internal cooldown of this toggle means you'll do best to carefully space your holds while you attack or provide support. It boosts the strength of holds and damage (to a lower degree), and scales best off of Presence or Intelligence.
Manipulator should not be underestimated - it's possible to get stuns upwards of 6 seconds using this form, which gives allies (and yourself) huge windows of opportunity to take down helpless targets. In the case of full holds and sleep, there have been hold durations noted of over 2 minutes in some cases (provided other players don't hit the sleeping targets). However, outside of the purview of control-based builds, Manipulator is easily substituted by many other toggles, which simply are capable of doing higher damage or providing more direct support.

Mystic - Compassion
Toggle

Compassion is the healer toggle, which grants extra healing and shield strength, and a small increase to damage output. It stacks whenever you deal out healing (i.e. whenever you see green numbers pop up). It scales best off of Presence or Recovery.
Above being support-based, Compassion is very defensive. It's not a bad choice for fighters, provided that if they have high enough presence or recovery (not to mention that it also synergises with Regeneration and even boosts its healing). Compassion can offer a fair damage boost (this is also true for any other toggle, though), alongside its hefty boost to healing power. If you have a rapid way to stack compassion, it is well possible to integrate into your build.
Shared Powers - Ultimates
After reaching level 35, characters get access to Ultimate Powers - Alternatively called Tier 4 moves, these moves have long recharges, and the player can only take one of them. However, they can be taken without any other prerequisites than the level requirement, meaning that they can be taken early on when respeccing a character.

Energy Projector - Energy Storm
Cone Maintain to Tap Single Target
★★
Energy Storm is an interesting attack. It has two phases: The first being a cone maintain that will absorb energy projector debuffs off of enemies, while boosting the user's damage output temporarliy and adding extra potential buffs. The second phase, once the user has stacks of Infused Energy (from maintaining) turns the move into Unleashed Tempest, which is a high-damage single-target particle damage attack, which gains extra effects if you absorbed energy projector debuffs (clinging flames, negative ions, chill, and containment fields).
The actual damage on the final burst is quite high, and indeed gets higher the longer you maintain the first phase. However, this is quite a lengthy setup, and it usually only will effect one enemy. The particle damage doesn't meld well with most energy projector forms (except Electric Form), it generally is too slow to really be a main source of damage. Best place to use this skill is if you have a way to rapidly apply multiple Energy Projector debuffs to a single target, though it could also be put to use by just repeatedly doing Energy Storm's first phase.
It is the only ultimate to not have a recharge.
Weather the Storm - Gives the move a chance to not absorb energy projector debuffs on foes, allowing for some (admittedly dubious) chain Energy Storms - usually, the debuffs in question will be over by the time 30 or so seconds pass.

Technology - Implosion Engine
Click Summon
★★★
While more of a utility than a final nuke attack, Implosion Engine will repeatedly snare and pull targets inward while it's active. The Implosion Engine also happens to be undamageable, and deals light crushing damage over time.
Above all, Implosion Engine's quick activation, combined with a powerful and nearly irresistable pull-inwards, means that this is one of the best utilities in the game for herding up crowds of weak enemies to hit with AoEs. Its notable for having the longest recharge of any of the ultimates.
Inverse Polarization Field - After expiring, Implosion Engine explodes, knocking targets outwards. Rather counter-intuitive to the purpose of the Implosion Engine, and doesn't seem to add any extra damage in.

Martial Arts - Fury of the Dragon
Cone Maintain
★★★
Fury of the Dragon will hit all targets in a fairly sizable cone for decent crushing/dimensional damage (about on par with Sword Cyclone), while applying the Chi Flame debuff for some unarmed synergy. While the base damage is quite low (and dual type), its offset by its very strong scaling with Focus stacks, and can also snare targets hit by it. It is also capable of hitting maximum 10 targets. The energy cost of this ultimate is actually quite low, but if used while low on energy, it will get ended early. The utlimate also now roots you in place while in use, which can made it difficult to aim to blast the most targets possible. As an added bonus, you are immune to control effects and highly knock-resistant while maintaining, making it more likely you'll reach the end of your maintain period.
Real Ultimate Power - Turns the move into something of a bleed-applying AoE for single-bladers, as it now has a very high chance to apply the effect.

Mentalist - Mind Link
PBAoE Maintain
★★
Reflects damage back at attackers, at a maximum of your Ego stat times 4/5/6 (dependent on rank). The damage reflection is quite rapid, semi-reliable, and very low energy cost. However, has some counterintuitive setbacks - mainly, it prevents you from actively counterattacking with anything else, and also doesn't generate much threat at all. If it weren't for the threat reduction, Mind Link could've been a decent enough tank strategy. You'll also need substantial ego statting to really make the damage reflection shine, and even then, it's strongly based on how much damage is coming in.
Aggression Inhibitor - Adds decent armoring to yourself while this is maintained.

Brick - Unleashed Rage
Click PBAoE
★★★★
One of the best ultimates, Unleashed Rage will hit all targets around you for Sonic Damage, dealing out a knockdown and fear to back it up. The base damage starts low, but rises very sharply if you have any Enrage stacks on yourself. To back it up, it also is one of the quicker recharging Ultimates. Fast, effective, and sudden - for some, this is a key redeeming feature for the Brick playstyle.

Mystic - Planar Fracture
Charge Summon

In addition to its very lengthy activation, taking 2 seconds to start up, Planar Fracture serves to apply dubious debuff effects to targets at random. The damage on this move is extremely underwhelming and slow, and only a maximum of 1 debuff can be dealt to each target. It also happens to be very high in energy cost. Sort of makes sense the power classification with the most widespread playstyles would get the most blase of Ultimates.
Double Vortex - Raises the number of maximum debuffs that the Fracture can deal to a single target to 2 instead of 1.
Shared Advantages
A good deal of abilities in the game share common advantages, which each serve their own functions. Some are fairly simple and self-explanatory, while others are a bit more complex - albeit no less vital to understand.

Accelerated Metabolism
Present on almost every attack power - even Energy Builders

Accelerated Metabolism is a very bad advantage. It's fairly ubiquitous, but I so seldom use it that I pretty much forgot to include it in earlier versions of this guide. In any case, AM has a 20% chance per usage of the advantaged power to generate a small burst of energy. This would be decent enough, if it weren't for the fact that usage of AM also has an internal cooldown, meaning that bonus energy cannot be generated very consistently at all. My advice is to stick to using Energy Builders and Energy Unlocks. The 1 point really isn't worth it.

Challenge!
Challenge is the advantage used to generate threat, making enemies more likely to attack you - and it's quite an effective at this: Against the targets that it hits, Challenge will generate threat over 10 seconds, and debuff the enemy's attack strength. This effect cannot stack or be refreshed, and the strength of the effect is more pronounced on the primary target versus the rest of the ones hit.

Challenge is a must for tank builds, as this is the primary method by which you will encourage your targets to attack you. If you're going DPS or Healing, do not take this advantage, and focus on perhaps finding a Threat Wipe ability instead.

Challenge is highly convenient, because it only costs 1 point to take, meaning you do not need to limit your attack power in order to have a good threat ability.

Break Through
This advantage costs 3 points instead of the usual 2! Break Through's special ability allows the attack it's taken on to a target's block. If the block breaker successfully lands, the target also suffers from a huge slew of other debuffs, including reduced defenses, reduced attack power, the inability to block for 10 seconds, and reduced healing received. The effect of Break Through cannot be refreshed while the debuff is in action.

Break Through comes with a terrible onus, however; if the target it hits isn't blocking, the move with Break Through on it will just cause the target to become resistant to your next attempt for the next 10 seconds. The same applies for when Break Through wears off on a successful Break Through. In short, Break Through has absolutely no effect against a target that never blocks - which is most non-player enemies in this game.

This advantage makes for an excellent choice for destroying enemies in PvP that block too much, but outside of this, it has too few uses to really justify itself in a PvE case. If you do take this advantage, make sure to use it on a fast, non-telegraphed attack - and especially not one one you'll use consistently.

Nailed to the Ground
Present on all lunges, and various ranged skills - some AoE, others not.

Nailed to the ground has the very simple effect of temporarily disabling travel powers on enemies hit by this attack. This is useful for preventing fleeing enemies (With travel powers) from escaping you, or calling in reinforcements, and much more so for Melee fighters without flight for getting pesky flying enemies down (though thrown objects can also be used to disable travel powers). Most of the time, however, it's not super important to have this advantage included. Less so if you're ranged.
Afterword
Woah, you made it through. Congratulations! Though roughly 3 months into the making, the guide's obviously far from finished. However, I'd just like to throw out some thanks to some power data sites I gleaned some information from. Don't worry; a majority of these ratings and write-ups are based off of personal experience.
  • CO-Wiki's Power Listing[www.champions-online-wiki.com] - Quick reference for naming effects of powers.
  • Selphea's DPS Guide[worldsojourner.wordpress.com] - Reference for how powerful and efficient, by default, powers are. This one really was a big help.
  • DPS Spreadsheet, by Flowcyto[docs.google.com] - Another DPS chart for all the attacking and healing powers. This one is also a great resource, as it allows you to sort out specific powers and see which ones work best when tapped/charged/maintained!
Finally, I'd just like to encourage people to tell me ways I could improve the legability of the guide, and heartily welcome people to correct me on anything I might've overlooked in my evaluations. In extension, feel free to horribly mock any spelling errors I might have missed or complain to me how Steam has a maximum length for guide sections.
No, but seriously, feedback can only help this gigantic undertaking, and I especially hope it can help out people designing builds see both what powers work the best traditionally, as well as encouraging more unique styles of play.

Thanks again!
34 Comments
Meltman Nov 6, 2023 @ 8:56pm 
Whats the chest/back piece on the picture of the Earth section?
teoteodore Oct 19, 2022 @ 1:19pm 
If I were to use the Quentionnite sets, would Glacier's Ice skills be considered "physical" and require the Samurai set?
Plake Apr 30, 2020 @ 9:47pm 
This guide is great, especiqlly since some powers changed and most munition FF builds out there are invalid now. Thx for taking the time writing this =D
finishing move: die May 7, 2019 @ 11:42am 
If the author decides to take down all his excellent guides , then I will tell you how to save the information to your PC to keep them for personal reference:

>Right Click on the page
>Sage Page As
>save the html file on your pc.
This will let you access the page offline even if he takes them down.


While Cryptic obviously is not treating their customers with respect, the author is hurting even more innocent people by taking down these guides. They are the sole source of much of this information that is available to the layman. If he removes them he is acting just as bad as Cryptic in this regard by not listening to his audience. I highly encourage him not to do this. I don't want to nullify the author's choices or protest, but others need not pay for his choices.
Fei the Magical Beast Aug 7, 2018 @ 5:57pm 
should i go for lash, vile lariat, or both
SQUIGLONKER99  [author] Feb 5, 2018 @ 9:05pm 
@TLS

woah, those changes were older than I thought. Thanks for noting them for me!
TLS - Corgserker Nov 27, 2017 @ 10:38am 
Master of the Mind is now a shared Mentalist power retooled into an Active Ultimate.

-Grants our hero with a powerful buff that lasts for 15 seconds and provides the holographic projection of them.
-Grants a large amount of damage resistance based on rank.
-Grants agile flight for the duration.
-Grants a stack of Ego Leech once every 2 seconds up to 5 stacks.
-Grants a Critical Hit chance boost of 2% per stack of Ego Leech present on our hero.
-Grants resistance against Crowd Control effects like Holds, Roots, Sleep or Confuse effects as well can be used when our hero is under these effects to break free of them.

The catch is that it puts both Active Offenses and Active Defenses into a cooldown while the power itself has a 3 minute recharge.
Lord Wevilspore Jul 19, 2017 @ 4:42pm 
I think it's missing some talk about the various Travel Power advantages, such as Superspeed's Impact advantage.
SQUIGLONKER99  [author] Jun 24, 2017 @ 6:06pm 
I switched to smaller stars to save character count. The big glowy ones were images that takes up like 100 chars each while these are all just a single character - end result is that I'll be able to fit more powers in each section as each powerset expands.

It's gonna be on a set-by-set basis as the game gets updated though (or more revisions are pointed out), so pardon the inconsistency for now!
Phoenix Wolf Jun 24, 2017 @ 12:40pm 
You may want to check your entire Telekinesis section: The star ratings in that section don't seem to be formatted the same way as the rest. Might be a good idea to look some of the other sections over in case I missed any other similar formatting errors while skimming through. I figured I would let you know for the sake of format consistency.