EARTH DEFENSE FORCE 5

EARTH DEFENSE FORCE 5

334 ratings
Fencer Beginner's Guide
By moat
Being a Fencer pilot is like being a heavy machinery operator. At first it feels clunky, but the purpose of this guide is to help you see how the Fencer can become an amazing speed-dash-jumping-blitz-blazing-tornado of fun and mayhem!
4
20
7
2
2
2
2
   
Award
Favorite
Favorited
Unfavorite
Basic Information
While the Wing Diver wields the greatest mobility and burst damage in a high-stakes game with a small health pool, the Fencer swaps between excellent mobility and steady, devastating damage. Fencers see all kinds of combat, from brief, brutal kills up close, to point defense, to sustained bombardments at range.

The three most important skills of mastering your Fencer are: Movement, movement and movement.
If you can't move your Fencer properly, then it won't score any hits, it won't dodge any hits, and it won't be any use.

A Fencer can barely walk fast enough to avoid distant attacks (you should always be walking while firing anyways!), so most of your movement will come from Dashing and Boosting.

DO NOT MASH KEYS!
As a Fencer Pilot, you are a heavy machinery operator. The name "Fencer" is ironic. "Juggernaut" is more appropriate. Piloting a Fencer requires situational awareness and a steady mind more than reflexes alone. If you mash your dash keys and boost keys carelessly, you'll strand yourself in a bad situation.

Many Fencer actions are delayed. Chainguns and flame revolvers have windup times. Gallic Cannons and NCS-1 Cannon Shots have pre-fire animations. Some weapons are so heavy that aiming them is unwieldly. You must initiate your actions in advance of when you want them to happen so you must always look a few seconds ahead. It makes the difference between being the wrecking ball that sails through showers of monsterbits and being the team's dead weight.

There's only so much you can change about your Fencer. The rest is up to you if you want to become the Ace Fencer Pilot that your teammates can count on.
Travel Kit / Bombardment Kit
In this guide, I'll be using a "Travel Kit / Bombardment Kit" weapon organization.

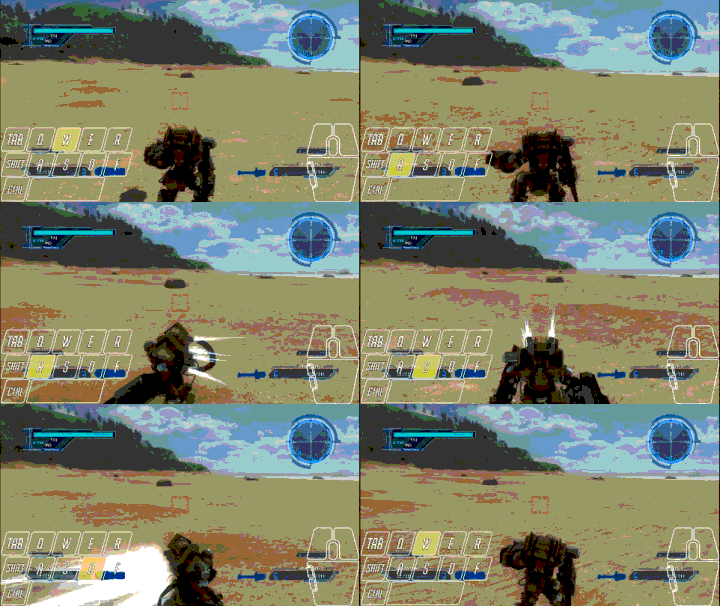
The purpose of your Travel Kit is to give you the very best movement that a Fencer is capable of in that it can perform both side-dashing and boost-jumping. The reason you need all that mobility is so that you can effectively zip around the battlefield while you jackhammer, chaingun, flame and cannon-shot all the small-fry into submission, flee from sticky situations, zoom over to fallen friends to revive them, scoop up loot, and also to vault to the best vantage points to rain down hell with your Bombardment Kit.

The purpose of your Bombardment Kit is highly situational. It doesn't have to offer *any* mobility options whatsoever. It can be focused purely upon dishing the greatest amount of material damage possible in the shortest amount of time. Things like Gallic Cannons, Blood Storm missiles and Mortars will populate your Bombardment kit, and will vary greatly to suit demands of the mission. But if you start finding yourself struggling because you're getting overwhelmed by small-fry or the enemy is getting too close for you to use your Bombardment Kit effectively, just switch to your Travel Kit and either stomp all the small-fry or relocate to a better shooting position!

But back to the Travel Kit...

Some weapons offer a "Side Dash" ability while others offer a "Boost Jump". Other weapons like cannons have a zoom/scope, and Shields often have a Reflect, and these extra abilities will factor greatly into your loadout decisions.

Fencers are capable of dual-wielding two of the same or different weapons and can switch between two sets but...

NB: Having two weapons that grant a dash will not give you more dashing, nor will having two weapons that grant a boost give you more boosting! There are Dash Cells and Add Boost support modules that serve that purpose, and you can stack them for extra effect.

Your Travel Kit will need one weapon that grants a dash, and one that grants a jump. You need this in order to perform dash-boost combos.
Side-Dashing

Multidirectional Dash (Hold any movement key and hit Dash)

  • Walking as a Fencer is torturously slow. You're gonna be dashing a LOT.
  • You need a weapon that adds a Dash to your Fencer.
  • Multiple Dashing weapons do not add Dashes. Use Dash Cell Support modules for that.
  • Useful for dodging.
  • You can't attack or switch guns during a Dash.
  • In fact, the Dodge can be used to CANCEL out of long animations.
  • Dashing can be used to recover from a fall if you dash just before hitting the ground. This is an absolute life-saver.
  • Dashing can be done in any direction! (Including diagonal directions!)
  • Your Dash(es) are restored as soon as your feet plant on the ground!
Boost-Jumping
  • You need a weapon that adds a Boost to your Fencer.
  • Equipping multiple Boosting weapons does not stack. Use Add Boost Support Modules for that.
  • Boosting can be done in any direction!
  • Boosting can be used to recover from a fall if you boost just before hitting the ground. This is an absolute life-saver.
  • You can attack during a boost!
  • Boosting is useful for moving small distances while still attacking.
  • Boosting without pressing any movement keys allows you to boost up really high!
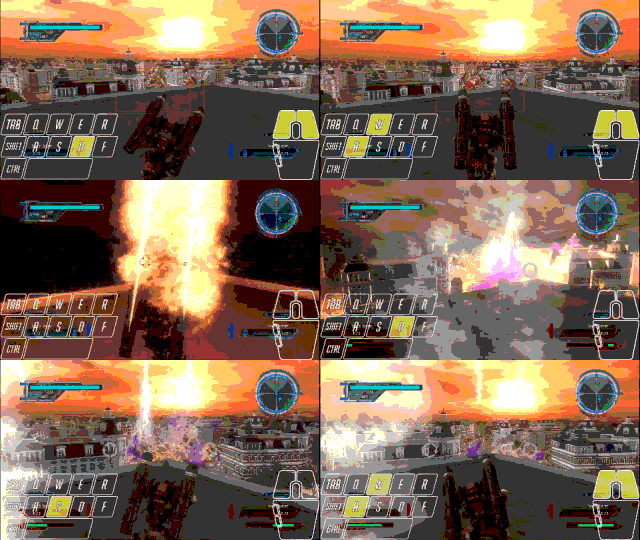
  • Hop & Pop: Boost straight up, switch to your Bombardment Kit and fire at the apex of your jump, and then switch back to your Travel Kit to repeat the process or scoot away! Intensely satisfying to pull off on a Gallic Cannon.

When things get messy, keep an eye on your radar to make sure you don't get flanked and reposition yourself with your Boost so you can keep shooting!
Dash-Boost
If you make a weapon set with a weapon that lets you Dash, and includes a weapon that lets you Boost, then you can do a Dash-Boost! Any weapon set that allows for Dash-Boosting shall henceforth be known as a "Travel Kit!"

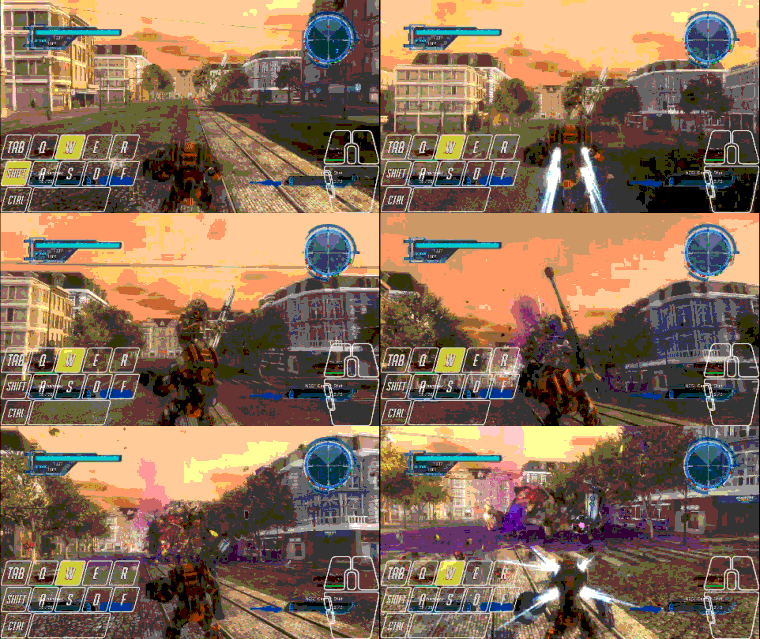
Dash-Boosting lets you travel tremendous amounts of lateral distance and if you are using any "Add Boost" support items (They stack!) then you can CHAIN your Dash-Boosts as many times as you have Boosts!

NB: You CANNOT attack or switch weapons while doing a DASH, but you CAN during a Boost!(Cannon Shot is a notable exception to this rule, allowing for attacking during a dash)

This means you can do a Dash-Boost to rapidly close the distance and send yourself flying through enemies, and then start unloading your jackhammer and shotgun and absolutely make an enormous bloody mess.

Remember, you can ONLY attack while you are still airborne from your boost! If you Dash, you'll have to wait until your feet are solidly planted or until you Boost so you can attack again!

If you chose to use a weapon with a windup like a chaingun(~2s windup) or a flame revolver(~4s windup), you can start your windup as soon as you enter your Boost phase and (in the case of the chaingun), start firing by the time you hit the ground! So you can become a total dynamo, boosting through the air, pummelling enemies with your jackhammer, and then landing to drill any small-fries sitting at the landing zone with your chaingun.

Originally posted by Pope Dewrito the Thirst(Daisuke):
"i'd like to mention that you do seem to retain some of your wind-up time if your firing a minigun or flamethrower and then perform a dash jump, since when i've done so i've had to wind back up a little before resuming firing mid-air, but not the full period"

So don't let go of any fire buttons for wind-up guns whether you're dashing or boosting!
Boost-Dash
Boost-Dashing is simply Boosting straight up into the air (without hitting any movement keys) and then dashing at the apex of your jump to get to high vantage points.

If you equipped any "Add Boost" support modules, then you can chain your boosts together to get to extremely high areas!
Support Modules
The "Add Booster" support modules which adds more Boosts are *really important* because boosts seem to come back on a much slower separate cooldown than Dashes, which seem to come back as soon as you hit the ground after a Boost. Also, you cannot attack during a dash. Plus, if you Boost without pressing any directional keys, it will send you REALLY high into the air, and if you use that additional boost at the top of your jump you can scale extremely tall buildings and high walls underground.

If you're looking to max out your travel distance, I suggest maximizing your boost modules so you can continue chain-dash-boosting as long as possible.

Dash Cell - this lets you perform consecutive dashes. It's not quite as awesome as it sounds because the dash comes back reasonably quickly, and always after you land, unlike the Boost. However, having one means trading away some vertical flight and shooting on the move and dash-boosting in exchange for some extreme long-jump capability for crossing long chasms.

Muzzle Stabilizers are generally only useful if you're using dual chaingun / flame revolver and Arm Actuators are for going dual-Gallic.

Sabin has this to mention about later game modules:

Originally posted by Sabin Stargem:
A thing to note about Dash and Boost modules: The former reduces the interval between uses, the latter adds acceleration. The DLC2 booster gives +200% acceleration, while the 4-4 module grants +140%. Dash is reduced to 60% downtime with DLC2, or 80% for 4-4. The boost speed only applies to horizontal movement, though.

Haven't tried it yet, but my speculation is that the Boost is better for top-level play, since it frees up a support slot for other aspects of the Fencer, such as the shield. You can probably use a Mortar-Shield setup for ranged exchanges, and a melee-gun combo for travel or general combat.

Numbers come from this:

http://weapon.edf.jpn.com/5_eng/f.html
Travel-Kit Suggestions
Blasthole Spear (Dash) - It's a PILE BUNKER!!!! It has a 50m range, does INSANE damage (500!), and the Mk-II does double that! It's a weapon that requires finesse. You have to carefully pick your shots and you can't just flail it anywhere because it has a 1s pre-fire animation. It's just the right tool for committing pre-meditated froggicide humanoidcide. I'm fast warming up to this weapon, especially its longer-ranged, higher-damage lunge attack. If you like to go toe-to-toe with enemy infantry units, the Blasthole Spear Mk-II will serve you well. It pairs up very well with...

Dexter Automatic Shotgun D1(Boost) - This is the second Dexter shotgun that you get and it also, is a bit of a finesse weapon in that it shoots slower than the first shotgun but packs a greater punch. It's good at one-shotting smaller mobs like ants, spiders, wasps and small drones, which is something the Blasthole Spear has difficulty with.

Jackhammer(Dash) - (My favorite!) It's a rapid-fire punching metal fist! Has a 40m range, does GOOD damage(~125ish) and has a very good fire rate, like 4-5 shots per second and a generous magazine (~30ish). With that decent damage, it can still one-hit most small-fries and if they don't go down right away, you can follow up quickly with another shot. The Jackhammer will not interrupt windup weapons like Chainguns or Flamethrowers! For the best in close-range blending of small-fry a flame revolver is highly recommended. For bigger game, pair it with...

NCS1 Cannon Shot (Boost) - OMG IT'S A CANNON SHOTGUN! Ok, this might be the thing to use if the Dexter doesn't quite have the reach you need and you might want to shatter everything in front of you. You get 3 shots, and there's a delay before you fire it, but you can fire it while you're Boosting which makes this thing *insane*. Definitely pair this thing up with a Jackhammer so you can pummel small-fry in your way while the thing is in-between reloads. The individual pellets only do single-target damage but this also means you cannot kill yourself with this gun up close, and the spread is a generous and dense blanket. It's also *really* powerful - powerful enough to one-shot multiple small-fry or flying saucers or wasps right out of the sky. The spread makes it very forgiving for those enemies that are *just* out of jackhammer reach when your boost is on cooldown.

Doing a High-Boost (boosting without pressing any other movement keys) will also set you up to blow your load all over a swarm of enemies. It also gets you out of those "oh crap" moments when a frog steps out from behind a building and starts blasting away at you up close. The NCS1 will make anything that steps out right in front of you up close go "oh crap" instead.

Can one-shot frogs(I mean humanoids) and devastate the armor on normal infantry, the second shot will seriously maim if not kill them.

Originally posted by magusblack:
"Small note on the Cannon Shot: if you dual wield it you can cut the recoil animation short by firing the second one and chain fire them much faster than you normally would be able, great for either output a bunch of damage in a general direction or dealing with flying drones. Similarly, if you dual wield gatling guns alot of times its better to fire one until its about at half ammo then start up the second one, which will allow you to keep up a constant rate of fire because when one runs out and is reloading the second is still firing. great for sweeping across waves of ants and spiders, surviving close combat, and locking down narrow tunnels underground."


Originally posted by BlackFlame1981:
Canister cannons should be good against flying hordes of enemys.
Have to test it myself later on.

Canister Cannons[Boost] - are the l'il bro of the Cannon Shot. Sometimes the NCS1 is overkill and the lengthy firing delay makes it too cumbersome for dealing with smaller threats. The Canister cannon, however, is a much more manageable shotgun which can also be used for dishing out stuns to a large target that you're closing in on to hit with your melee weapon, and it's good for swatting smaller mobs!

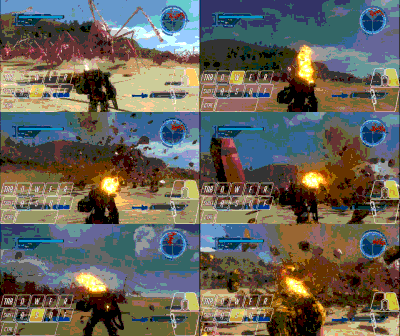
Flame Revolver(Boost) - You might hate this gun until it gets some windup upgrades, in which case it becomes an awesome force to be reckoned with. As a stock weapon, it has a *really long 4 second windup*, but it can be brought down to around 1.5s. Once it gets going, the flame stream does EGREGIOUS damage that passes through enemies and it might be me, but I think that each puff of fire multi-hits enemies. It absolutely deletes dense swarms of red ants and pill-bugs Gamma aliens. Just make sure you find a nice little nook to back into if you're dealing with the latter. Dishes out lots of damage to Queens, Kings and giant kaijus. Having a Muzzle Stabilizer with this is kind of nice but not necessary unless you want to pack TWO of them like some sort of utter lunatic. (Maybe you're trying to take down a hive or something, but Fencers are for utter lunatics anyways!)

Originally posted by SINIGA:
"Arm Hound has a side thruster and High Altitude Impact Launcher has a jump booster.
The opening of the missile carnival! No one can stop you."

- Sounds to me like a Travelling Bombardment Kit! The H.A.I.L. is a beast at dealing with scattered small-fry and pairs extremely well with a Gallic Cannon since it can swat smaller distracting enemies while you plink at distant targets. The fact that the H.A.I.L. has a booster makes it especially attractive since you can Hop & Pop enemies with your Gallic Cannon much more easily.

Originally posted by Krypthiccc:
"YH3 Dispersal Mortar (Lv 42) will carry you through the entire game on hard, and on quite a few missions in hardest. 360x20 damage with a blast radius also removes limbs from aliens and humanoids with no problem. Its even nice enough to give you boosters as well! I use 3 of them with a Blast Twin spear and maxed out dash/booster cells. It becomes comical after a certain point, give it a try!"
Bombardment Kit Suggestions
Your other set of weapons (not your travel kit) should have weapons for dealing with various mission objectives, like shooting down teleporter ships and teleporter towers. Generally, I choose heavy-hitting long-range weapons that either deal enormous single-target damage or have wide AOE capabilities. The items in your Bombardment kit can be almost anything you want so long as you keep in mind that you're treating your Fencer as a turret that switches between fast movement and slow bombardment.

The heavier your weapons are, the slower you move and turn!
This can be alleviated with various support items, but just keep in mind that wielding TWO gallic cannons, while able to shoot a bit faster than one, will be incredibly slow to aim! Also, dual-wielding chainguns and flamethrowers is nearly impossible without Muzzle recoil reduction items because you'll be 'roasting the sky' without them.

Blood Storm (Self-locking missile) - You get up to two locks with these extremely versatile missiles which don't require an Air Raider's laser guidance kit (although the laser guidance makes them lock even faster). The missile tracks pretty quickly and just before it hits the target, it splits like a shotgun blast into little exploding bomblets that utterly ruins swarms of small-fry and especially medium-sized targets too! If you carry two of these, you can one-hit frogs, and lock two frogs at a time. The lock-box is a bit smaller which works to your advantage since you can use that smaller box to avoid locking onto nearby smallfry if you're trying to lock onto a distant, large target by aiming over the heads of the small-fry. If jumping spiders are making that difficult, then use your Travel Kit and Boost-Jump straight up to get on top of a tall building for a better shot. They're even capable of hitting those annoying red drones.

You can also turn sideways when launching these missiles to affect their initial launch trajectory, in case you need to curl them around a building. I also abuse their target-lock abilities to keep track of the position of enemies behind cover as well as in foggy/low-light situations and plink at them with a Gallic.

The downside to the Blood Storm is that you can't use them up super close since the missiles won't arm in time (so switch to your Travel Kit and go ham on the enemy) and using them underground might be an impossibility. Also, if an ant walks over you or a flying saucer flies into you when you launch, you might blast yourself.

Having a pair of them will almost always kill a frog humanoid in a single salvo. It's also very good for smashing up the armor on Infantry and blasting Deroys. If there are a lot of enemies on the ground blocking a tall enemy that you wish to lock, aim high, and then sweep the targeting reticle downwards so it acquires the tall enemy first.

Gallic Heavy Cannon (Zoom) - An extremely heavy-hitting but difficult to learn long-range cannon that has a pre-fire animation and a long recoil follow-through. This thing delivers enormous single target damage (~500, ~1000 for the M2) and is useful for bringing down teleporter ships, teleport pylons, It's very tricky to use against moving targets, though. Good for turrets, too. It can punish Deroys from a distance and shatter the armor off of Infantry and delete frogs humanoids.

Originally posted by Cam:
"I find the Gallic Cannons oddly effective against many air targets. Drones specifically have highly predictable patterns when aggro'd making it easy to draw a bead on them with the overkill cannons. The fact that the cannon shots pierce also means that I occasionally hit multiple drones in one shot.

Very satisfying."

Originally posted by SINIGA:
"The Hand Cannon requires the Muzzle Stabilizer, but it has small motion, rapid fire, and enough damage.
Hand Cannon is not good at precise shooting like Gallic Heavy Cannon, but can handle various situations such as Teleportation Ship, Teleport Anchor, Swarm and Drone.
Order to consume one Support modules, will have the some of the constraints on the side thruster and jump booster."

Hand Cannons (Zoom) - It's a Gallic Jr.! Although it doesn't pack as much of a punch as the Gallic, it makes up for this in terms of mag capacity and fire rate, making it versatile at handling speedier enemies! I switched to one later on when I felt that I was struggling with the Gallic.

NB: Missile Launchers and steep inclines don't mix. The rockets may collide with the hill upon launch so try to turn your launcher away from the hill and let the seeking warheads do the rest.

NB: Missile Launchers and overhead swarms don't mix. Boost out of the swarm and launch at the apex of your jump to avoid a misfire.

NB: Don't fire the H.A.I.L. while you are FALLING! If you're falling, the missiles will also be falling as they are launched. And when you hit the ground, they'll hit the ground and blow you up.

Originally posted by SINIGA:
Arcane 6-Barrel Launcher - Unlike the High Altitude Impact Launcher and Arm Hound, this weapon has no means of movement.
However, the performance of the missile is high and the explosion range is wide, causing serious damage. Also, it can be used in narrow places.
The weak point is that it takes some time to launch a missile.
What about Shields? CC Strikers? What about all those other guns??!?!
I don't have enough Shield experience to offer worthwhile info, but moving effectively with a shield is a very advanced topic best covered here:

https://steamcommunity.com/sharedfiles/filedetails/?id=2423108163

A shield presents a difficult problem where the shield takes up a slot for a weapon that you would otherwise use to dash or boost. So does that mean there's no dash-hopping?

No, but there's "switch-hopping" and "switch-dashing"! Let's say:

Your Dash Loadout is a shield paired with a weapon that offers a Dash.
Your Jump Loadout is a shield paired with a weapon that offers a Jump.

You need your weapons on the same side on both loadouts so that the alt-fire accesses the movement ability of the weapons on both loadouts.

Then if your Dash Loadout is equipped, you perform a Dash-Hop by hitting the following sequence of keys:

Altfire->Weapon Swap->Altfire

This causes your Fencer to:

Dash->Swap to Jump weapon->Jump

And then you can follow up with another Weapon Swap if you want to return to your Dash weapon. So yes, it's very tricky. You might decide to reassign the number keys to explicitly switch between your weapons instead of using the weapon toggle, and of course, using the mousewheel will probably be too tricky. But yes, it means you can absolutely break the mold of travel/bombardment kits.

And keep in mind that this applies not only to shields, but to ANY weapons without movement skills!

Also...

Originally posted by mar:
Shields are great against infantry, mini-bosses and Derons.

Shield allowing you to facetank most enemies, distracting them from the team and giving you free window of attack. They will protect from artillery ragdolling (you can even reflect them away) and Red Ant bites.

Optimal loadouts, IMO:
1. Ion Mirror Shield+NC Hand Cannon+Shield Protection Armor - versalite mid-range setup with good DPS weapon and boosted shield durability/ark, good enough to tackle infantry from one direction.
2. Tower Shield+Hand Gatling/Flame Revolver+Arm Exoskeleton - more close-range solution, gun will destroy big targets with DPS, Tower Shield is strong enough without any boosters, Exoskeleton will help with aiming inertia.
3. Tower Shield+Blast Twin Spears+Shield Protection Armor+Barriacade/Deflect Cell - ultimate tanking setup, huge damage reduction, shield HP and shield arc. BTS is here for mobility (dash+attack dash).

Originally posted by Dys:
Personally I use a shield, and I've found that when in the stance, you are immune to knockdown effects and grabs (red ants, gold ants and tadpoles) from the front. Great for dealing with Gamma Bug hordes. Paired with a Gatling gun or even a Revolving Flamer, you can tank entire hordes.
The exception being Spider Hordes, who will quickly become your nemesis, as the shield does not affect their webs.
Though the downsides are without Support Modules, you are still affected by push-back. Beam Aliens will push you across the map.

I don't use shields! But that's just me!

It's mostly because I like maintaining high mobility with a Travel Kit and then switching to a Bombardment Kit. Shields look good for people who want to plant in one place and be a turret and not have to worry about incoming attacks from one direction. You could probably deflect really large shots back at the enemy, too, which sounds kind of cool.

Later on, you'll encounter enemies that use unavoidable beam-weapon attacks against you, and having a shield might let you weather the onslaught while returning damage in kind. Again, whenever one of those beams focuses on me I just take that as my cue to scoot behind some intact buildings.

I also feel that if you have to pull out a shield to protect yourself, then you're in a situation where you can't use your bombardment kit effectively. Gallic cannons have egregious range. Blood Storm missiles have pretty long range. Most times you're using these weapons, you're out of the enemy's firing range. And, if I am in the enemy's firing range, effective use of chained dash-boosts lets me deke between some buildings to give them the slip.

So having a Shield in my bombardment kit feels like I'd be losing half of my damage output, and having a Shield in my Travel Kit would remove half my movement ability. Fencers just don't strike me as a sort of thing to run in half-measures.

But it doesn't mean there aren't more good guns out there -- there's simply so many to test and talk about, and so many I haven't even acquired yet! But if you've taken a shine to one of them, then tell us about it in the comment section!
Situational Loadouts
To get you started, here's some loadouts for commonly-encountered situations:

Versatile Anti-Swarm, Anti-Air and Anti-Infantry Urban Warfare Kit for when you have no idea what's coming! This became my loadout for every mission since entering Hard mode(mission 40+).

  • Pyro's Travel Kit: Jackhammer / Flame Revolver - This close-range travel kit can erase dense swarms and hard targets with your Flame Revolver while you Jackhammer individual small-fries! Both weapons can be fired simultaneously!
  • Sniper's Bombardment Kit: Hand Cannon and H.A.I.L. - Plink Teleporter Ships, Pylons, Kings, Queens and Infantry at range and use your H.A.I.L. to boost to high vantage points and swat nuisance enemies!

Flexible Anti-Air & Infantry Urban Warfare Kit
  • Buckshot Surgeon's Travel Kit: Blasthole Spear M2/ Dexter Combat Shotgun D1 - The spear destroys hard targets like infantry and shieldbearers while your Dexter can pop scattered small-fry and weak flying critters. You might struggle a bit with red ant and pillbug gamma swarms though.
  • Sniper's Bombardment Kit: Gallic Cannon and H.A.I.L. - Hop & Pop hard targets with your Gallic while swatting nuisance enemies with your H.A.I.L! This kit can Boost!

Aggressive All-Range Anti-Infantry kit (deletes infantry but struggles against small-fry)
  • Infantry Assassin's Travel Kit: Blasthole Spear M2 / NCS-1 Cannon Shot - Smash armor/maim/stagger with the NCS-1 and deal final blow against infantry with your spear.
  • Infantry Assassin's Bombardment Kit: Gallic Cannon & Blood Storm - Plink infantry with your Gallic and blast them with Blood Storm from behind cover!

Defensive Mid-Range Anti-Infantry kit (mows down infantry but weak against swarms)
  • Infantry Assassin's Travel Kit: Blasthole Spear M2 / Cannon Shot - Smash armor, deal final blow against infantry
  • Defensive Bombardment Kit: 2 Blood Storms - Use cover and cheap-shot the infantry armor with impunity. Erase up to 2 frogs humanoids with every salvo.

Underground Warfare:
  • Pyro's Travel Kit: Jackhammer / Flame Revolver (works great on queens AND dense swarms!)
  • Buckshot Surgeon's Travel Kit: Blasthole Spear M2 / Dexter Combat Shotgun D1
  • Always stack up as many "Add Boost" support items as you can when going underground because there are some very very deep chasms and long climbs.
Situational Awareness
There are many situations that can catch a Fencer Pilot off-guard.

  • You could be so focused on plinking a distant hard target that you fail to notice an artillery shell or seeking missile creeping up on you.
  • You could be torching a swarm of red ants with your Flame Revolver and fail to notice that one had flanked you and is about to grab you.
  • You could rush a lone enemy infantry unit but fail to notice his friends right next to him because of the tall buildings.
  • You could be so focused on battling a Deroy and not notice a dropship full of infantry creeping up behind you.

All of these situations can be avoided if you glance at your radar when reloading your weapons, or if your vision is blocked - not just by tall buildings, but just by having your face planted in an object many times larger than your field of vision.

If one of your weapons allows for target locks (missile launchers), you can use it like a wallhack to lock onto targets behind cover for Hop & Pops with your Gallic. It's also useful in poor visibility conditions such as low lighting and fog, The H.A.I.L. is one of the best Gallic companion weapons.

  • Whenever you're reloading, look around you. Do a 360 of your surroundings because...
  • All things are equal under the radar. An Ant is a red blip. A Dropship is a red blip. A Deroy is a red blip. A Kaiju is a red blip.
  • Have a rough idea on how much time you have before you have company. Know when Deroys and enemy artillery units have taken an interest in you. Don't be there when they arrive. It's easy to forget this when you're busy plinking a pylon.
  • Before battle begins, get onto vantage points and mark (Q) any hard targets such as elite infantry, pylons, Kings, Queens and Aranea.
  • If visibility is poor and your missile unit is targeting something off in the fog, mark it(Q) for your teammates.

If you hear radio chatter and the ground underfoot turns red, MOVE! If you're torching swarms, they tend to ball up on your position. Your Air Raider teammate(s) are probably using up their cooldowns so just boost out of there.

It can be vexing to have to bail before you can deliver the finishing blow on a regenerating enemy, but believe me, it's even more vexing to your whole team if they have to rescue you because you got downed. Fencers with their large health pool are excellent at reviving other soldier classes, but it's the opposite when they're being revived. So whatever you do, don't get downed!
Close Infantry Combat
When performing close-range hit & run infantry attacks, always:

  • Have a reasonably ranged, fast firing weapon for dishing out stuns, plus another for wholesale damage. Towards the endgame (Normal) I was using the second Jackhammer with the second Flame Revolver(with windup upgrades)
  • Make sure your guns are topped-up before the fight starts. It's a luxury, so take it whenever you can.
  • Know how many other targets are near your target.
  • Plan your approach vector and distance so that you can close the entire distance while boosting, preferably while under cover of buildings. If you are shot while boosting it can slow you down!
  • If you have been noticed, boost DIAGONALLY towards the enemy instead of AT them to avoid incoming fire! Also, if you get pinned by stun-locks, boost SIDEWAYS to break the stun-lock and just get out of there!
  • Have an exit plan. A way out that can break line of sight with the enemy after you've emptied your mags into the target.
  • STUN the target if it notices you! I use the Jackhammer to break its leg armor and legs to get it on the ground and then torch it with my Flame Revolver.
  • Close Infantry Combat is very messy. Your screen will fill with debris. Use your radar to center yourself on the target and don't let up until you hear the *splorch* and see his blip vanish.
  • Once your mags are empty, don't stick around unless you're sure you can safely finish what you've started, and definitely don't stand there getting melted by his friends while reloading.
  • Try to minimize the time that more enemies than you can shoot at can shoot at you.
  • If this cannot be helped, then maximize your lateral and/or vertical movement.
  • If your movement is restricted, dash underfoot. Few enemies can attack straight down and you force them to turn around or lose sight of you.
  • Save enough HP so that you can take a few shots in the back when retreating. Don't wait until you're almost dead to run away.

Rescuing Teammates
  • You have a Travel Kit and the largest health pool of all. You could be a great medic.
  • Rescuing teammates always gives them half of your remaining hitpoints.
  • You can max-heal any other player class except another Fencer if your health is full or almost full.
  • Small Health packs give 15%, Large Health packs give 30%.
  • Health packs scale with your massive health pool, so always heal yourself before healing others if there are health packs nearby.
  • Try not to revive teammates in the middle of the enemies that melted them. Use your Travel Kit to get away from a surrounded downed teammate and then bombard the enemies to lure them away from him instead. Then sneak back using the buildings for cover.
  • If there are other downed teammates, the two of you should avoid re-engaging targets until you can manage to revive the others.
Strategy Tips
Try to stay healthy. Just because you have a huge armor pool doesn't mean you should be sitting out there soaking up hits. It's there for when things go terribly wrong and you're the last man standing. You can fully revive and heal a wing-diver, but she can't fully heal you!

Prioritize short engagements when attacking high-threat targets like Alien Infantry and Heavy Infantry. Get in, maim/kill one, get out scot-free. Hit and run, reload, rinse and repeat! Maximize the use of your Travel Kit and scoot around buildings and catch them off-guard as much as you can.

Serve your weaponry and Fencer, not the other way around! If your bombardment kit allows you to deal out damage to a high-risk enemy with impunity due to distance and indirect fire, then maximize its use by moving to vantage points and using cover. (That goes double for Blood Storm users!). Place yourself where you can dish out the most effective damage while receiving the least in return.

Don't forget your Dash/Boost recovery when you get thrown/tackled/blasted! It can't be said enough that you can avoid getting ragdoll-locked to hell if you hit your Dash or Boost key just before you hit the ground and avoid those situations where you have to stare helplessly at your character struggling to get up before taking another hit, and another... and another...

Save your Trump cards when you can, but don't forget to play them too! While it may be tempting to zoom out there and bust a nut unload your NCS-1 Cannon Shot on a whole squad of frogs, it's better to hail on them with your bombardment kit first, and save the Cannon Shot and Jackhammer for when they start rushing in.

Pay close attention to you radar! If you can't see any enemies, then LOOK AT YOUR RADAR! You might have tons of debris or giant enemies or buildings blocking your vision. Don't let yourself get flanked or outgunned! I find myself frequently glancing up there to maintain my situational awareness. Sometimes a dropship shows up unannounced or enemies come burrowing out of the ground! The Radar keeps you up to date on these things only if you look at it!

Patience. You might be in a situation where you're the only one standing. You might have to get the heck out of there, scoop up some health, switch to your bombardment kit and plink at the enemy to lure them away from your fallen teammates, and then scoot away again so you can revive them and give your team some time to regroup.

It's OK if you're distant from the fight if you're still dishing out effective damage with your Gallic Cannon. If you can consistently land those 1k hits on the big boss, don't worry. You're doing good. Fencers can perform many roles and they don't all have to be up close and personal. Just try to keep walking as you're bombarding the enemy so they can't land a constant stream of gunfire on you.
Closing Words and GOING EVEN FURTHER!!!!
Lemme know in the comments if you've found your own viable combos or have a tip to share! I'm having a blast playing as a Fencer and I know how at first he felt kinda clunky. Now I'm pretty used to his routines and now he's a very zoomy shooty smashy crashy boi.

Also, if the guide helped you out, don't forget to rate it so that other Fencer Pilots can find it! They might be on your team!

EDF! EDF! EDF! EDF! EDF! EDF! EDF! EDF! EDF! EDF! EDF! EDF! EDF! EDF! EDF! EDF! EDF! EDF! EDF! EDF! EDF! EDF! EDF! EDF! EDF! EDF! EDF! EDF! EDF! EDF! EDF! EDF! EDF! EDF! EDF! EDF! EDF! EDF! EDF! EDF! EDF! EDF! EDF! EDF! EDF! EDF! EDF! EDF! EDF! EDF! EDF! EDF! EDF! EDF! EDF! EDF! EDF! EDF! EDF! EDF! EDF! EDF! EDF! EDF! EDF! EDF! EDF! EDF! EDF! EDF! EDF! EDF!

Addendum: There's EVEN MORE things to be learned about Fencer movement, and I would highly recommend you check out the following guide:

https://steamcommunity.com/sharedfiles/filedetails/?id=2423108163
62 Comments
-Zeph- Mar 12 @ 1:40am 
Glad to see the Arm Hound getting some recognition, it's basically the only missile weapon that dashes and is very great for hit-and-run tactics.

I always find myself switching between Twin Spears and Arm Hound depending on missions since Twin Spears can save you from getting stun-locked and is very nasty against clumped up mobs, Frogs and Greys. Arm Hounds, on the other hand, are great for kiting hordes since you can dish out damage on both travel-kits on safe-distances.

IMO, the only worth CC Striker in the late game is the Vulcan Hammer, which is a great dash option/high-damage weapon. As while it has very short range, the final one at 50+ deals MASSIVE damage at full charge. But do note that as a Travel-Kit, you'd be trading Twin Spears or Arm Hound for it, but if you really want that power fantasy of smacking Kaiju with a funny hammer, go for it!

This is a great guide and I wish I stumbled at this one when I started as a fencer. Good luck to the new fencers out there!
Turahk Apr 5, 2023 @ 4:48am 
Actually, you don't need muzzle reduction for chainguns at all, arm inertia is nice but optional.
Archaon The Never-Chosen Jan 22, 2023 @ 4:05pm 
Blasthole spear and dispersal mortar works very well and the dispersal mortar can be used as a weird form of close range flak. personally the blasthole is my favourite to use on all difficulties just because the body piercing means that its extremely capable of thinning bug swarms you can dash between shots which causes a slide giving you extra distance and use you mortar/shotgun during boosts this class has to be on of the best at crowd control especially in a more sustained way than wing diver/air raider and a more mobile way than ranger
djoser Dec 1, 2022 @ 8:56am 
I'm not sure what I'm doing wrong with the dash boost. Sometimes it works but other times I just do the dash portion. Makes it hard to chain dash boosts since they keep ending in dashes,
DragonRage Nov 15, 2022 @ 2:40am 
Thank you for helping me learn to Fencer. Now that I know you can equip a piercer + gun to fly, and dual wield Gallic cannons, I am far less frustrated and far more effective.
ExAliquo Aug 14, 2022 @ 9:18am 
I'm fairly new to Fencer and don't have everything unlocked yet, let alone upgraded, but can I note that the Spine is an amazing 'sidegrade' for the Blasthole? It deals just as much damage, but at almost double the range. It technically has a slower firerate, but it has NO windup animation. You click, it shoots. This results in it kinda matching the output of the Blasthole if you need to sustain fire for whatever reason.

I've found it to be insanely effective on cityscape maps for fighting frogs. My current build consist of Spine/Light Mortar travel kit and a double Spine Driver setup. You can dash out of an alley, two shot a frog in the head, and dash back in safe from his friends.

This same 'Brawler' build works really well on Red Ants too. You can kinda just waddle around in the pile of them and keep shooting. If one picks you up, it's just getting you away from the bodies. If it's only the reds, they literally don't do enough damage to outdo the medkits they drop.
M3OW Jul 9, 2022 @ 6:29pm 
????
midpackula Oct 10, 2021 @ 9:50am 
chunky wing diver go brrrrrrrrrrrrrrrrrrrrrrrrrrrrrrrrrrrrrrrrrrrrrrrrrrrrrrrr
moat  [author] Jul 6, 2021 @ 10:58pm 
@Seth because I never tried the force blades and uh, nobody else mentioned them! If you wanna write the section on 'em go for it and I'll add it.
Seth Abercromby Jul 6, 2021 @ 9:11am 
Any particular reason the Force Blades and their variants got no mention at all? What they lack in raw damage they compensate with reliable effectiveness. Force Blades can hit any airborne target, and also have no chance of missing an ant by having its shock wave pass in-between its legs. They also have fast attack animations and reloads, making them great to quickly dash-cancel across the map as an uncharged attack will still give you slide momentum, but can be canceled into a new dash long before you stop sliding. The Canister Shot is also not the only heavy cannon that has the dash-cancelling property, the Gallic Heavy Cannon shares that trait as well, which makes it a potent medium-range sledgehammer if you pair it with an agile dash weapon such as Force Blades, compensating for its low rate of fire by alternating between melee and shooting after each dash.