Frontline Tactics

Frontline Tactics

80 ratings
Practical Tactical Guide: How to Survive, How to Win
By Umbrella Incorporated and 1 collaborators
This field guide for Frontline Tactics will tell you everything you need to know to keep your squad alive and the insurgents dead.

While this guide covers the basics, and even a few advanced tips, keep in mind that it takes practice to get the full potential out of your troops. Learn what works best in what situations. Now get in line, soldier!
   
Award
Favorite
Favorited
Unfavorite
Boot Camp: What are you doing here?
At ease, Commander. You have been selected to lead a squad of troops into combat against the Rumul Army and their gurellia fighters. This will not be an easy task, mind you. There will be blood spilt. There will be lives lost. But remember what General McArthur said: "It's not a soldier's job to die for his country, it's his job to make sure the other poor son-of-a-b!tch dies for his."


Frontline Tactics is, as it's name suggests, a turn based tactical combat game. Somewhat like chess with guns and grenades. Learning the ins and outs of the game will take some time. Expect to lose many times, especially in the beginning. But once you have trained your troops a bit, and figure out the finer points of when to hide, when to fight and when to run, it will be you that will reign victorious.

Those of you looking for an engaging story will be sorely dissappointed, as there is none. At any given point on the main map, there will be 3 or 4 missions to complete. When you complete one, another will take its place. You will never run out of missions to take, but you cannot select specific missions other than the ones that are available to you.

This is an extremely impressive Free To Play game. What makes it even more impressive is the fact that the entire game was built by a very small developement team.
.
Show your love and support, won't you?
Troop Stats: Build a better Soldier
So you think that just because you know how to pull a trigger, that means you'll survive the night? Well, maybe you will, maybe you won't. Getting the best out of your soldier takes time, patience, training and a fundamental understanding of what your stats mean and how to make the best of them.


  • HP: This is the amout of health your soldier has. This value will never change and no equipment or skill will bring it up or down.

  • Armor: For a weapon to do full damage to your soldier, it needs to have an armor penetration rating above this value. All weapons that do not exceed this value will have their damage against you greatly diminished. With the right equipment and accessories, this can cap at 40.

  • Initiative: A God Stat by any other name, your initiative value determines how often your soldier will be able to act. Contrary to every other value in the game, you want this to be as low as possible. Your classes, certain skills (when active), and your equipment all can change this value greatly. A soldier with an initiative of 7 will get roughly twice as many actions as a troop with 14 initiative. The absolute minimum this value can be is 5 with skills active. With all the wrong choices, this can cap at 36. You sir, are a lawn ornament.

  • Move Range: The number of spaces your soldier can move on their turn while still being able to attack. Your soldier will also be given the option to move several additional spaces, but then will not be able to attack. You can attack either before or after you move.

  • Damage: The spread of damage possible with the weapons you have equipped, minimum to maximum. This does take into consideration damage boosts from passive skills.

  • Camo: This determines how easily your soldier will be seen as they move about and perform actions. All soldiers, yours and the enemy, have an effective sight range of 12, meaning if they are facing directly at you, they will spot you at 12 spaces away if you have no camo. The camo value is subtracted from the sight range. This means if you have a camo of 4, the enemy won't spot you until you're 8 spaces way, instead of 12. Again, with the right gear and skills, this can max at 10. This value can be dropped into the negatives, but it is unknown if this means you can be spotted beyond the initial sight of 12.
Classes: The right troop for the job
You can't very well send your squad out into the field naked and expect them to get the job done, now can you? Your troops require training, weapons and a role to fill. There are 7 classes to choose from. Each soldier can also be proficient in 2 classes. Choose wisely, some combinations work better than others and cannot be changed without retiring the soldier.


Medic: The only class that can treat wounds in the field is also the only one that does not get a weapon. A second class is essential if the Medic wants to be able to defend himself.
Basic Training: 4 Initiative Slower, Move Range +1 - Medical equipment is heavy, but the Medic is trained to go the distance when his brothers need him to patch them up,

Small Arms: Lithe and nimble, your SA will be moving far and moving often. Their selection of handguns may make them seem weak, but in the right hands, they are truly devistating. Their ability to use Hand Grenades makes them deadly to any enemy. Unless you want a backup medic, SA is undoubtly the best class to have as a secondary.
Basic Training: 2 Initative Faster, +2 Move Range, +2 Camo - A handgun and a grenade means the SA is traveling light, fast, and silently.

Sub-Machine Guns: With a high rate of fire, ability to pin enemies down, and spray multiple targets in one burst, who doesn't love SMGs? Be sure to check for friendly fire, though.
Basic Training: 2 Initiative Slower, +1 Move Range - Moderate equipment weight may slow a SMG down some, but they can still get from A to B quicker than most.

Machine Guns: When you absolutely have to kill every ♥♥♥♥♥♥♥♥♥♥♥♥ in the room, count on this beast. Better range, damage and bullet spread than the SMG, this also means it's more likely your buddies are going to get hit in the process. You ain't got time to bleed.
Basic Training: 4 Initiative Slower, -1 Move Range - All that ammo weighs a ton, and you won't exactly be fleet of foot either. With a gun that big though, who cares?

Close Quarters Combat: You have to be either crazy or daring to get this close to your enemy, but you can tear them apart like noone's business faster than anyone else. Your Stun Grendes will keep the enemy at bay long enough for the rest of your squad to catch up.
Basic Training: Move Range +2, Camo +4 - Since you have to get in so close, you specialize in reaching your target quickly and quietly. Stab, stab, stab!

Rifles: The only series of rapid fire weaponry without a spreading arc. Very good range and some of the highest damage output in the game. Close range damage is lackluster, so keep the enemy at bay.
Basic Training: 3 Initiative Slower - Moderate weight may slow you down, but at least you won't be tripping on your own feet.

Sniper: Never run from a Sniper, you'll only die tired. Very good damage and an absurdly long range make a Sniper a threat no matter where you are. Sniper rifle damage up close is poor, so it's good to have a backup.
Basic Training: 3 Initiative Slower, Move Range +1, Camo +1 - Moderate gear weight means you won't be the first out of the gate, but you've been trained to make the most of what you got and you have a little bit of sneaking under your belt.
Mission Types & Objectives: Business is booming!
There are many different objectives for your squad to complete. Mission types range from capturing strategic locations, to escaping, to keeping the enemy away. Or you might simply have to kill them all. Initially, the Eliminate All mission type will be the only one available until additional mission types are unlocked, adding variety to the gameplay.

Eliminate All: Simply put, kill all of the enemy units. No time limits, no surrender, no escape.
.
Area Capture: There are certain positions on the map that must be secured. While it takes a few turns to capture a point uncontested, you don't have to worry about the enemy taking it back. No time limit.
.
Area Control: Similar to Area Capture but you must keep a unit on each point and all points need to remain uncontested to win. As soon as one of your units reaches the target, it is considered held unless an enemy tries to take it back. No time limit.
Yes, the icon colors in the tuitorial are wrong. I know.

Aera Defend: Critical assets in the field need to be defended from the enemy's grubby hands until an extraction team can reach the area. Keep the gurellas away from the equipment for a certain number of turns.
.
Area Escape: You're in way over your head. You need to get the hell out of Dodge. Get your squad to the extraction point before they are eliminated.
.
Survival: Severly outnumbered, and with nowhere to run, you must survive until reinforcements arrive. Keep your troops alive for however many turns it takes.
Selecting a Mission: Begin at the Beginning
To be sure, you will find the first few missions you undertake to be quite challenging. You start with only 2 troops, a SA and a SMG. The enemy starts with many more than 2, but are no better equipped than you are. You must use all of your cunning to survive and take them out. Expect to lose often.

The first thing you'll do after selecting the PLAY button on the main menu is look over your choices of missions. Initially, you'll only have access to some locations and the Eliminate All mission type.

As you complete missions you will be given the opportunity to unlock additional locations, mission types, troop slots and bonus credits. The box directly under the mission briefing will tell you how many missions you need to complete to earn your next unlock. When available, click on the box and you will be given a choice of what you want to unlock.

After selecting a mission, you then select which troops you want to send into combat. The mission will inform you if there is a minimum or maximum number of troops you can assign. The maximum number of soldiers you can have in a squad in any mission is 5. Selecting fewer soldiers than you are allowed will not reduce the number of insurgents you will need to face. Click START to begin the mission with the troop you have selected.

.
You will then be given a more detailed mission briefing and a digital overview of the map.

The red squares are your possible starting locations. Select which soldier you want to deploy and then click on the square you want to place them. Clicking on a space once will select that space, clicking it again will deploy the soldier selected. You can rearrange your troops however you like until all of them are deployed. Once the last soldier is deployed, the mission begins.

Once the objective is complete, you will receive credits based on the mission itself, the number of your troops that survived, the difficulty rating of the mission, how many enemies were taken out, and how many crossfires you scored.
Survivors bonus caps at 5,000 credits, and is based on the % of your squad that survived. If you deploy 2 troops and only 1 survived, you lost half of your squad, so you get half credits, 2,500. 3 of 5 survivors nets 3,000.
Kills bonus is 500 for each insurgent you dispatch, up to a maximum of 25,000.
Crossfire bonus is 2,000 for each crossfire you score on enemies, to a cap of 25,000.
Combat: More then just 'Point & Shoot'
Frontline Tactics takes place on a square grid that defines spaces for movement and firing range. It is turn based, in which one unit takes their actions while all others stay in place until that unit is done, then the next unit acts. Your units Initiative value determines how often their turn comes up. It's possible for one unit to move twice or even three times before another gets one turn.

BASIC TRAINING
Lesson 1: Movement

When it's your units turn, squares will appear around them in different colors. The white spaces can be moved to and still be allowed to attack or make other actions.
The red squares are Run squares. You can move to any of these squares but you will then forfit any other actions.
Click on the space you want once to highlight it. Click again to move. You cannot move again or go back to move elsewhere so be sure of where you want to go.
If you attack or use an action before moving, you will still be able to move to any of the white squares.
The turn counter displays your unit's movement range.
It is also important to note you cannot move through your own troops, so be careful not to clog hallways and narrow paths.

Lesson 2: Attacking

There are three ranges to all weapons (except melee): Short, Medium, and Long.
Short range is any space inside the yellow square. Medium is between the yellow square and the orange. Long range is between orange and red. All targets beyond the red square are out of range.
Unlike movement, diagionals are counted the same as straight forward, which is why shooting range is in squares and movement looks more like a diamond shape.
You also cannot shoot through walls or around certain obsticles, even though your weapon range displays beyond these restrictions.
The bottom right of the screen shows the weapon you are using along with the damage you will do at all three ranges. Damage displayed will change depending on passive and active skills. Short range damage is under the yellow marker and so on.
As long as you have a valid shot, you will never miss. This applies to the enemy as well. Certain conditions can change the amount of damage done.

Lesson 3: Take cover

Nothing says, 'Shoot me please. I'm an idiot.' like a soldier standing around and not taking cover. This is a warzone! Do you want to die?
To take cover, simply move onto a space next to a short fence or crate or whatever you find, as long as the space has the white borders on at least one side. See them?
Taking cover has three benefits. First, they reduce damage you take coming from that direction by half. Second, your unit will use the cover to steady their aim, resulting in up to 15 more damage done against units on the other side of the cover. Third, your unit will gain a temporary camo bonus while hiding behind cover. I do not know what the camo bonus is but I do know there is one. Keep in mind the enemy receives these same benefits as well.
Even if you do not believe that there are any enemies around, it's always a good idea to take some form of cover, just in case.

INTERMEDIATE TRAINING
Lesson 4: Return Fire
All single target weapons will provoke the enemy to return fire at the soldier that shot it, as long as the weapon they are using can reach. The same goes for your soldiers being fired upon as well. All damage from return fire attacks is halved due to snapfire inaccuracy.

Lesson 5: Area Effect Weapons
All SMG and MG weapons have a cone of fire that can hit multiple enemies. This allows for massave damage against groups that are huddled together. However, if you have any friendlies inside the cone, you will hit them as well. Friendly fire isn't.

Enemies that are hit by these weapons will not return fire.

ADVANCED TRAINING
Lesson 6: Line of Sight

All units have an effective visual range of 12 spaces ahead of them and a certain degree to their left and right. If you look closely, you'll see a faint white arc coming from the front of units showing what direction they're facing. Sometimes these arcs can be extremely hard to see. These units will only be able to spot an enemy that is inside that cone with the exception of the spaces that are immediately around them. Even if your soldier has a camo of 0 you can sneak up to an enemy 2 spaces behind them and not get spotted.

Multiple enemies grouped together that are facing different directions can be a challenge to approach without being seen.
Another thing to note is that attacking an enemy within direct visual range will give away your position, even if the enemy does not return fire.
This is a challenge to understand at first but if you stick with it, you'll eventually come to realize how useful this information is.

Lesson 7: Being Spotted & Spotting Enemies

Unlike most other tactical games and even RTS games, there is no fog of war. You have complete view of the entire map at all times. However, you still don't know the location of the enemies and they also do not know where you are.
If one of your troops is spotted by an enemy, an eye marker will appear on your unit. Once spotted, all enemy units will know of your location, so staying hidden is crutial against overwhelming odds.

As long as you are being spotted, you can be attacked by any enemy unit as long as they have a weapon that can reach you and have a clear shot.
To lose the eye requires either killing the unit that spotted you or staying away from enemy units for several turns, after which they'll lose track of you.

Lesson 8: Crossfire
When any unit, yours or the enemy, takes damage, they become succeptable to crossfire damage. If you look closely at a unit that has been attacked recently, you'll notice a portion of a white circle under their feet. This is their crossfire arc. The crossfire arc develops at the opposite angle of the direction the unit took damage from. This arc will continue to grow as the unit is attacked from different angles. If this unit takes fire from any angle within the white circle, they wil take crossfire damage.
Crossfire damage is doubled, so take care to keep your troops from getting surrounded.
Once a unit's turn comes up, their crossfire arc is reset.

Lesson 9: Turn Counter
In all these gameplay screenshots, notice the name list in the upper left corner of the screen? The same place that tells you your Armor, Camo and Move Range? That's the Turn Counter. This extremely handy thing tells you the order of the next 8 units on the map, yours and theirs, that will get to act as well as what class they are. Click on an enemy name and, if they have been spotted, the camera will center on that enemy.
When you select an enemy to attack, if they are on the Turn Counter, they will be highlighted. Focus on the enemies that will go next to reduce the fire you take.
Have a soldier that is close to death, but one enemy gets to act before your Medic can get to him? See if he's in range of your active unit to eliminate or delay. This can save your soldier's life and win you the mission.
Weapons & Accessories: Tools of the trade
Every class starts with their Tier 1 gear automatically. Medics have only 4 tiers of equipment to upgrade to while all other classes have 5 tiers, each more expensive to unlock than the last.
Medic Tier 2 costs 155,000 credits. Tier 3: 310,000. Tier 4: 515,000. For all other classes, Tier 2 costs 88,000 credits. Tier 3: 175,000. Tier 4: 295,000. Tier 5: 442,000. It costs a Medic 980,000 credits to get his best equipment while everyone else costs a cool million.
Each class also has 4 or 5 different accessories they can choose from to further augment their abilities. All accessories cost the same to unlock, 100,000 credits each.
One thing to remember is that unlocking gear for one of your soldiers does not unlock the same gear for your others of the same class. If you have multiple Medics, you will need to unlock their gear separately.
The following lists show what gear and accessories each class can get. Try different gear combinations to fit your playstyle.

Medic
    Gear
  • First-Aid Kit - 25 Heal
  • Med Kit - 30 Heal, 1 Initiative Slower
  • Advanced Field Kit - 35 Heal, 2 Initiative Slower
  • Nano Kit - 40 Heal, Target 3 Inititive Slower

    Accessories
  • Jet Injector - -5 Heal, 2 Initiative Faster
  • Field Defibrillator - +5 Heal, 2 Initiative Slower
  • Scanner - +10 Heal, 4 Initiative Slower
  • Scalpel - +20 Heal, 6 Initiative Slower.

Small Arms
    Gear
  • USP - Damage 28(S), 15(M), 5(L) - Range 3(S), 6(M), 8(L)
  • Burghetti - Damage 30(S), 20(M), 5(L) - Range 2(S), 6(M), 8(L) - 5 Armor Penetration
  • Falcon - Damage 40(S), 25(M), 12(L) - Range 4(S), 6(M), 10(L) - 10 Armor Penetration
  • FCDK - Damage 38(S), 34(M), 28(L) - Range 2(S), 5(M), 9(L) - 15 Armor Penetration
  • COBI - Damage 40(S), 25(M), 10(L) - Range 3(S), 8(M), 12(L) - 20 Armor Penetration

    Accessories
  • Laser Sight - -1 Camo, +5 Short range damage
  • Red Dot - +5 Long range damage, -1 Short range distance
  • AP Ammo - -5 Weapon damage, +15 Armor Penetration
  • 2x Scope - -5 Short range damage, +1 Long range distance

Sub-Machine Guns
    Gear
  • Walther - Damage 22(S), 16(M), 10(L) - Range 5(S), 7(M), 8(L) - 20 Firing Arc
  • UZI - Damage 25(S), 17(M), 8(L) - Range 4(S), 6(M), 7(L) - 30 Firing Arc - 10 Armor Penetration
  • MP5 - Damage 30(S), 20(M), 15(L) - Range 5(S), 8(M), 9(L) - 25 Firing Arc - 12 Armor Penetration
  • KRISS - Damage 34(S), 25(M), 12(L) - Range 6(S), 9(M), 10(L) - 30 Firing Arc - 10 Armor Penetration
  • CSV - Damage 40(S), 24(M), 15(L) - Range 6(S), 8(M), 10(L) - 30 Firing Arc - 15 Armor Penetration

    Accessories
  • Red Dot - +5 Long range damage, +1 Short range distance
  • Suppressor - +1 Camo, -5 Weapon damage
  • AP Ammo - +15 Armor Penetration
  • Extended Mag - 1 Initiative faster, -5 Weapon damage
  • Thermal Scope - -5 Short range damage, +5 Medium range damage, +1 Long range distance

Machine Guns
    Gear
  • M249 - Damage 18(S), 28(M), 20(L) - Range 6(S), 8(M), 12(L) - 25 Firing Arc - 28 Armor Penetration - 5 Initiative slower
  • HK MG4 - Damage 16(S), 35(M), 25(L) - Range 3(S), 7(M), 10(L) - 25 Firing Arc - 30 Armor Penetration - 4 Initiative slower
  • Mk 48 - Damage 16(S), 35(M), 30(L) - Range 3(S), 7(M), 10(L) - 30 Firing Arc - 30 Armor Penetration - 3 Inititive slower
  • TX-45 - Damage 20(S), 35(M), 30(L) - Range 3(S), 7(M), 13(L) - 30 Firing Arc - 32 Armor Penetration - 2 Initiative slower
  • N-Tech 950-S - Damage 35(S), 40(M), 35(L) - Range 5(S), 10(M), 14(L) - 25 Firing Arc - 30 Armor Penetration

    Accessories
  • Red Dot - +5 Long range damage, +1 Short range distance
  • Extended Mag - 1 Initiative faster, -5 Weapon damage
  • AP Ammo - +5 Armor Penetration
  • HE Ammo - +7 Weapon damage, -3 Armor Penetration

Close Quarters Combat
    Gear
  • Knife - Damage 35(S) - Range 1(S) - 40 Armor Penetration
  • Silenced USP - Damage 28(S), 10(M), 5(L) - Range 3(S), 6(M), 8(L) - +1 Camo
  • Silenced MP5 - Damage 30(S), 15(M), 10(L) - Range 5(S), 7(M), 9(L) - 25 Firing Arc - 12 Armor Penetration - +1 Camo
  • SPAS-1200 - Damage 55(S), 30(M), 10(L) - Range 2(S), 4(M), 6(L) - 45 Firing Arc - 15 Armor Penetration
  • Vibro Blade - Damage 70(S) - Range 1(S) - 50 Armor Penetration

    Accessories
  • Riot Pads - +5 Armor, -1 Move Range
  • S.T.R.I.K.E. Vest - +10 Armor, -1 Move Range, 1 Initiative slower
  • Grenade Belt - 1 Initiative faster, -1 Camo
  • Tactical HUD - 2 Initiative slower, +2 Camo

Rifles
    Gear
  • M16 - Damage 15(S), 35(M), 30(L) - Range 3(S), 8(M), 13(L) - 20 Armor Penetration
  • M4A1 - Damage 18(S), 40(M), 35(L) - Range 3(S), 8(M), 14(L) - 22 Armor Penetration
  • SCAR - Damage 20(S), 40(M), 35(L) - Range 3(S), 10(M), 15(L) - 25 Armor Penetration
  • X8M - Damage 24(S), 45(M), 30(L) - Range 5(S), 13(M), 16(L) - 30 Armor Penetration
  • SNG 556 - Damage 22(S), 50(M), 40(L) - Range 5(S), 13(M), 17(L) - 25 Armor Penetration

    Accessories
  • Laser Sight - -1 Camo, +5 Short range damage
  • Red Dot - +5 Long range damage, +1 Short range distance, +1 Medium range distance
  • AP Ammo - -10 Weapon damage, +15 Armor Penetration
  • ACOG Scope - -10 Short range damage, +5 Medium range damage, +5 Long range damage, +2 Long range distance

Sniper
    Gear
  • M24 - Damage 10(S), 35(M), 30(L) - Range 5(S), 14(M), 20(L) - 28 Armor Penetration
  • M40A5 - Damage 16(S), 40(M), 35(L) - Range 6(S), 15(M), 23(L) - 30 Armor Penetration
  • Barrert M82 - Damage 14(S), 52(M), 20(L) - Range 7(S), 18(M), 26(L) - 30 Armor Penetration
  • M110 - Damage 18(S), 44(M), 35(L) - Range 5(S), 15(M), 25(L) - 34 Armor Penetration
  • Berman Special - Damage 20(S), 48(M), 35(L) - Range 6(S), 16(M), 28(L) - 36 Armor Penetration

    Accessories
  • Thermal Scope - -5 Short range damage, +5 Medium range damage, +1 Long range distance
  • 4-16x50 IR Scope - -5 Short range damage, +2 Medium damage, +2 Long range distance
  • Tactical Scope - -1 Move Range, -1 Short range damage, -1 Medium range damage, +3 Long range distance
  • CCD Scope - 1 Initiative slower, +1 Move Range, -1 Short range damage, -1 Medium range damage, +3 Long range distance

NOTE: As you unlock better equipment for your troops, the insurgents will gain access to the same equipment assigned randomly. Yes, that means that the insurgents do get the Vibro Blade, but, thankfully, it only does 35 damage in their hands, not 70.
Grenades: Now it's a party
The best party favor in your favor is grenades! Everyone loves them pineapples! Well, not the insurgents, they'll just die. Thankfully they don't get access to these or else the game would be neigh impossible to complete.

There are two types of grenades, Frag Grenades and Stun Grenades.
Only Small Arms get one Frag Grenade per mission and Close Quarter Combat gets two Stun Grenades. If you have a soldier with both proficiencies, you choose which to take into battle, not both.

Frag Grenades
Do you see that?! 70 damage! That's enough to kill a fresh insurgent, or cause severe damage to a player in vs. mode! That full 70 is only dealt to the target on the same space as it, though. The damage is reduced for each space away from the center. Also be sure to keep friendlies out of the circle unless they seriously think that chicks dig shrapnel. You only have one, so make it count.

Stun Grenades
Yes, only 20 damage and not as big of a splash radius, but what you lose in sheer power you gain in delaying all affected units by 10 Initiative. That, and you have a second for later.

Make them bleed!
To cause some carnage, first select the grenade by clicking on the grenade picture on the right side of the screen. This will show where you can throw the grenade.

Click on a space to see the grenades area of effect, and how much damage you'll do to all units in range, friend and foe.

Click on the space again to send the grenade flying! You always have perfect aim, so the grenade will always land where you intend it to.

Grenades are a great way to cause massive damage to groups of enemies, or to quickly eliminate someone spotting you.
It is comforting to know that insurgents never use grenades.
Armor: Invest in the vest
With all that lead flying around everywhere, you'll need some protection to keep your vitals in once piece. That's what Armor is for.

Armor comes in three flavors: Light, Medium and Heavy.
Light armor costs 200,000 to unlock. Medium costs 400,000. Heavy costs 800,000. Each armor needs to be unlocked in order. Just like gear, unlocking armor only makes it available for that one soldier.

Light Armor

10 Armor
While it may not sound like much, no penalties means it's better than nothing.
This armor is good for all classes that don't want to be bogged down. While more vulnerable, your soldiers will be able to act quicker. More actions means more lead heading the enemies way.
This armor is best suited for SA, CQC, and Sniper. Because of their longer than normal range, Rifles could do with this armor as well.

Medium Armor

20 Armor - 2 Initiative Slower
Better armor at the cost of some initiative. The trade off could go either way.
Best suited for Medic, SMG, MG and Rifles.

Heavy Armor

30 Armor - 5 Initiative Slower - -1 Move Range - -1 Camo
It's like having your own personal tank! You'll also be lumbering around like one.
I do not advise using this armor at all. The Initiative penalty is murder.

Insurgents will be randomly assigned armor to match your deployed troops.
Example: If all of your troops in the field are wearing Light Armor, the enemy will be wearing Light Armor or none, even if you have heavier armors unlocked and assigned to other soldiers. What you have on the field is what they have access to.
Skills: You got 'em, they don't
Ok, so you got some weapons, you strapped on some armor. Now you needs some skillz.

Each class has an assortment, 4 or 5, skills they can learn. Every class has at least one skill that can be leveled up, providing a passive bonus to damage or healing.
The first skill is Basic Training, which lists your initial class bonuses and penalties. It's also free.

  • Passive Skills apply their bonuses and penalties automatically.
  • Active Skills use the soldier's attack action. Requires several turns before it can be used again.
  • Toggle Skills can be turned on and off as desired.
  • Set Skills immediately end the soldier's turn, even if they have not moved. Click on a direction to see the affected area. Click again to set the selection.

Medic
Basic Training - Passive - 4 Initiative Slower, +1 Move Range
Medical Training - Passive - +3 Heal per level - Level Cap: 5
Adrenaline Shot - Active - 10 Initiative faster to target along with heal - 5 turn cooldown - Can be used on self
Full Heal - Active - Full heal on target - 6 turn cooldown - Can be used on self


Small Arms
Basic Training - Pasive - 2 Initiative faster, +2 Move Range, +2 Camo
Firing Range Training - Passive - +1 Short range damage ler level - Level Cap: 5
Quick Reload - Toggle - 2 Initative Faster, -5 Weapon damage - Cannot be used with Take Aim
Ballistics Training - Passive - +1 Medium range damage ler level - Level Cap: 5
Take Aim - Toggle - 4 Initiative slower, +10 Weapon damage - Initiative penalty only applies when attacking - Will delay initiative when counterattacking - Cannot be used with Quick Reload

Sub-Machine Gun
Basic Training - Passive - 2 Initiative slower, +1 Move Range
Firing Range Training - Passive - +2 Short range damage per level - Level Cap: 5
Focused Aim - Toggle - Short range distance +1, Firing Arc -5
Overwatch - Set - 1 attack against an enemy that moves into selected line of fire per level - Level Cap: 3
Stopping Power - Active - 10 Initiative slower to targets, -10 Short range damage, -5 Medium range damage, -10 Long range damage - 4 turn cooldown

Machine Gun
Basic Training - Passive - 4 Initiative slower, -1 Move Range
Firing Range Training - Passive - +2 Medium range damage per level - Level Cap: 5
Overwatch - Set - 1 attack against an enemy that moves into selected line of fire per level - Level Cap: 3
Suppressive Fire - Active - 10 Initiative slower to targets, -10 Weapon damage, +25 Firing Arc - 4 turn cooldown

Close Quarters Combat
Basic Training - Passive - +2 Move Range, +4 Camo
HTH Combat Training - Passive - +2 Short range damage per level - Level Cap: 5
Stealth Movement - Toggle - -1 Move Range, +1 Camo
Sprint - Active - +3 Move Range - 4 turn cooldown

Rifles
Basic Training - Passive - 3 Initiative slower
Firing Range Training - Passive - +2 Medium range damage per level - Level Cap: 5
Quick Reload - Toggle - 2 Initative Faster, -10 Weapon damage
Overwatch - Set - 1 attack against an enemy that moves into selected line of fire per level - Level Cap: 3
Headshot - Active - Double damage to target - 6 turn cooldown


Sniper
Basic Training - 3 Initiative slower, +1 Move Range, +1 Camo
Firing Range Training - Passive - +2 Long range damage per level - Level Cap: 5
Quick Reload - Toggle - 2 Initative Faster, -10 Weapon damage
Overwatch - Set - 1 attack against an enemy that moves into selected line of fire per level - Level Cap: 3
Headshot - Active - Double damage to target - 6 turn cooldown

Insurgents only have the Basic Training Passive skill as per their class. They get no others.
Class Combinations: A gun in each hand (not really)
Since all of your troops can be proficient in two classes, it's a good idea to plan ahead. Class proficiencies, once selected, cannot be changed without retiring the soldier and resetting him so be sure you know what classes you want to go with others. The good thing about resetting a soldier is you do receive full credits back for whatever class they are, so you don't have to worry about losing credits when creating a new soldier and picking the wrong class on accident. You only receive full credits back for the class selections, you will receive partial credits for unlocked gear, accessories and skills.

Primary Medic Combinations
  • Small Arms - I want to be able to get there quickly if someone's dying. Well, someone I care about, that is.
  • Sub-Machine Guns - I can take the fight to the enemy when everyone's in good shape.
  • Machine Guns - I'm already overloaded as it is, now you want to add on even more weight? Not advised.
  • Close Quarters Combat - My McSurgeries in the field combined with the devistating power of this shotgun means I don't know who's blood is who's on my uniform anymore.
  • Rifles - Excellent damage and very good range means I'll be better protected. My position also makes a great fallback point if things go south.
  • Sniper - I'll be too far back to even see my squad. Not advised.

Primary Small Arms Combinations
  • Medic - I'll be in the direct line of fire, but I'll be responding often. The ability to patch myslef up in a jiffy is ideal. I need to keep my gear light, though.
  • Sub-Machine Guns - It's a nice weapon, but it'll only slow me down. Not advised.
  • Machine Guns - What the hell do you expect me to do with this damn thing? Not advised.
  • Close Quarters Combat - Invisibility and speedy footwork make me a ghost on the battlefield. They'll never seem me coming.
  • Rifles - Um, no. Not advised.
  • Sniper - (laughs) I don't think so. Not advised.

Primary Sub-Machine Guns Combinations
  • Medic - While in the thick of things, I can make damn sure my brothers make it home.
  • Small Arms - Carrying less of a burden means I can focus on taking out these basdards. Plus the grenade is nice in a pinch.
  • Machine Guns - I like rapid fire weaponry, but I also like being able to lift it. Not advised.
  • Close Quarters Combat - You call that a knife? Oops, you're dead already.
  • Rifles - I want to hit more than one at a time, despite less damage. Not advised.
  • Sniper - I have the tools to be in the enemie's face, or support my team from afar. Wherever my brothers need me, I'm there.

Primary Machine Guns Combinations
  • Medic - I'm not going to be standing round here all day. What am I, a lawn ornament? Not advised.
  • Small Arms - Finally! I can move again!
  • Sub-Machine Guns - Why would I want a downgrade? Not advised.
  • Close Quarters Combat - My toys make noise, but I am quite as a mouse.
  • Rifles - Uhh, I'll leave that for someone with better aim. Not advised.
  • Sniper - Only one shot per kill? Then why to I have so many bullets? Not advised.

Primary Close Quarters Combat Combinations
  • Medic - I could always use a few band-aids. You know, just in case they find me.
  • Small Arms - Now I can run as well as I sneak. I can also make one hell of a diversion.
  • Sub-Machine Guns - On the few ocassions I'm not severing spines, I'm filling them with lead up close.
  • Machine Guns - This, thing, just cramps my style. Not advised.
  • Rifles - A fine weapon, but I believe my skills are better suited elsewhere. Not advised.
  • Sniper - I'm supposed to be behind enemy lines, not our own. Not advised.

Primary Rifles Combinations
  • Medic - I'll be waiting for you guys to take a few hits. I'll be right here. (gunfire) I'm not going anywhere. (reloads)
  • Small Arms - Rapid response and explosive ordinance equals many dead terrorists.
  • Sub-Machine Guns - If they're brave enough to get close, boy, do I have a suprise for them.
  • Machine Guns - Wow! That's a big... Moving along. Not advised.
  • Close Quarters Combat - If I bump into someone I'm not expecting, maybe they won't see me.
  • Sniper - I'm a good shot, but not that good. Not advised.

Primary Sniper Combinations
  • Medic - Can I shoot a syringe into my teammates? I didn't think so. Not advised.
  • Small Arms - I'll find my vantage point almost as fast as my bullets will find their skulls.
  • Sub-Machine Guns - To be fair, he didn't know I was prepared when he came at me.
  • Machine Guns - This gear operates exactly opposite of mine. Opposites do not attract. Not advised.
  • Close Quarters Combat - I'm a lone wolf, that means I may not have backup if I run across unexpected company. Good thing they have a hard time noticing me.
  • Rifles - I can do more with one shot than what takes them half a clip! Not advised.

The only insurgents that multiclass are Medic / Small Arms.
Maxing Out: Making the most of your troops
As you play more and get a feel for how the game mechanics work, it's easy to spot how to tailor your troops to fit your tastes. This section provides my personal favorite loadouts and tips.

MAXING YOUR CLASS

Primary Medic
First off, make sure you have more than one medic in your entire lineup. Out of your 10 troops you can make, I advise having at least 3 medics combined with other classes. This way your medic can perform as needed in the field and you can even bring multiple in for the really tough missions. For your main medic that is going to be deployed most often, go with the Nano Kit. Your backup medics will do fine with the First Aid Kit unless you decided to upgrade them. The kits should be all or nothing, avoid using the Med Kit or Advanced Field Kit if you can since they slow you down. The Jet Injector is definately the best accessory since you only lose 5 healing to get 2 initiative back. Depending on what class you combine with and what your initiative is, you can do well with either Light Armor or Medium Armor. Get all your skills and max out Medical Training as soon as you can.

Primary Small Arms
Stick with the Falcon and stop. Yes, the COBI does the same damage, somewhat better overall range and armor penetration, but the Falcon has the longest short range, and that's where your damage is going to come from. The Laser Sight is by far the best accessory, since it gives you more of what you need most: short range damage. Stick with Light Armor. Get all your skills in order as quickly as you can. Ballistics Training costs a ton and doesn't help all that much, honestly. Skip on upgrading it until you have nothing else to spend your credits on.

Primary Sub Machine Gun
Each SMG is argueably better than the last, so upgrade as needed. If your SMG unit is a bit on the slow side, use the Extended Mag. If you want to give your gun a bigger punch, use the Red Dot. You should be fast enough to make good use of Medium Armor without losing too much initiative unless combined with a slower class, then you might want to stick with Light Armor. Get all your skills first and max Firing Range Training and Overwatch as you see fit.

Primary Machine Gun
For the love of whatever God you pray to, upgrade your weapon ASAP!! You will want to use the Extended Mag until you get the N-Tech 950-S, then switch to HE Ammo for maximum power. You're going to be a big lug anyway, so go for Medium Armor. Treat your skills the same as a SMG.

Primary Close Quarters Combat
You've got options, depending on what you want to do. If you want to do decent damage while retaining some range, go with the Silenced MP5. The SPAS-1200 deals stupid damage close up and has the widest firing arc of any weapon in the game, but this tank buster turns into a cotton candy shooter more than 4 spaces away. The Vibro Blade has it's obvious advantages and disavantages, melee only but an instant kill. If speed is your focus, use the Grenade Belt. If you'd rather not be seen then the Tactical HUD is the accessory that's right for you. Stop at Light Armor. Again, get all your skills down the list first. Only if you plan on using the Vibro Knife and don't want to pvp should you skip on maxing HTH Combat Training as quickly as possible.

Primary Rifle
Upgrade your rifles as needed, things just keep getting better. Use the ACOG Scope for maxing your range and overall damage or go with the Red Dot if you find your enemies keep getting too close for comfort. Depending on your secondary class and initiative, you'd do well with either Light Armor or Medium Armor. Treat skills again just like the SMG.

Primary Sniper
The power of the Berman Special is a real joygasm, so get it when you can. Overall, I think the 4-16x50 IR Scope is the best since you won't lose either initiative or movement and still get a nice range boost. Light Armor is all you'll need. Because of your range, I would advise maxing Overwatch first after unlocking all your skills.

MAXING YOUR STATS

Maximum Armor
All you need is a CQC with the S.T.R.I.K.E. Vest and Heavy Armor and you have an armor rating of 40. With that much armor, only the Vibro Knife and some rifles with AP Ammo will do full damage to you. However you will also lose 6 initiative, 2 move range and 1 camo, making you easier to spot, slower to react and forcing you to take baby steps.

Maximum Initiative
A SA/CQC combo with the Grenade Belt will give you an Initiative of 7. Using the Quick Reload skill as well will bring it down to 5 in combat. Moving this often is NICE.

Maximum Move Range
The SA/CQC combo will also get you a maximum move range of 9 as long as you don't load down with armor. A Sniper/SA combo using the CCD Scope will also have this same move range (again with Light Armor only). The SA/CQC combo can be further boosted with the Sprint skill, granting a total of 12 movement range. Being able to move this far and still shoot gives you many options.

Maximum Damage (with max skills)
Melee: CQC Vibro Dagger, dealing 80 damage. Duh...
Short Range: CQC SPAS-1200, dealing 65 damage.
Medium Range: Rifle SNG 556 with ACOG Scope, dealing 65 damage.
Long Range: Rifle SNG 556 with ACOG Scope or Red Dot or Sniper M110 or Berman Special, dealing 45 damage.

Maximum Camo
Again with the SA/CQC combo! Skip the Laser Sight, use the Silenced USP or Silenced MP5 (go with the MP5) along with the Tactical HUD will give you a passive 9 camo. Use the Stealth Movement skill in combat to make it a 10. It's the greatest setup until personal cloaking devices are invented.
Locations: Your shooting range awaits
Travel to strange and exotic lands. Meet new and interesting people. And kill them!

Al Gharb Hideout
.
Al-Aq Army Intelligence Base
.
Al-Masaari's Farm
.
Andreyzvar Desert Camp
.
Bandar Kohr Coastline
.
Battlefield of Dan Gonbad
.
Blikeh City
.
City of Snotnahr
.
Cloobahr City Suburb
.
Coast of Al Bandar
.
Denharez Cargo Facility
.
Fahravan Village
.
Forward Army Outpost
.
Iawani Village
.
Lundzan Hideout
.
Mosque in Jayhahr City
.
Mountain Checkpoint
.
Outskirts of Banjany City
.
Pisnahar Fishing Village
.
Road Corner in Pakadeh City
.
Road to Sakab
.
Rumul Army Base
.
Rumul Base Air Defenses
.
Tank Base At Canyon Ridge
.
Yngwe Desert Oasis
Multiplayer: Wage war with Friends, or against them
You have friends, right? Well, not for long after you paint the town red with their blood in versus mode! Or you could be a pal in co-op mode.

To setup a game, click on one of the Create Game boxes on the right side of the main menu screen. It'll bring up this fancy menu for creating or joining a multiplayer game.
.
With great friendship comes great trust because the only way to save and connect with friends is with the email address they registered when they started playing Frontline Tactiics. I know it would be simplier to just use their Steam Profile, but that's the way it's setup right now.

Versus games come in four categories: Small, Medium, Large and Unlimited. What determines the size of the game is the total value of the troops in play. The value of your troops increase as they get better equipment and upgrade skills. In an unlimited game, you can deploy all 10 soldiers in versus.

In a co-op game, you and your friend get 3 soldiers each to complete a mission, chosen at random. The map is random as well as the mission objective. Since you select your troops before the mission starts, you take a bit of a gamble bringing a long range soldier into a small and dense map.

While playing, there is a text box in the upper right corner of the screen that you can chat with the other player. Unfortunately, the player limit is 2 and there is no voice chat. These are both features I pray will eventually be added if enough people buy stuff form the shop and this game gets the recognition it deserves.
Achievements: Bragging rights, anyone?
You like Steam achievenements, right? Well, thankfully the achievements in Frontline Tactics are fairly easy to get.

First Blood - Complete your first mission
Beachhead Established - Complete 40 missions
Mission Accomplished - Complete 150 missions
Make Them Bleed - Hit 3 or more enemy units with a weapon that has a Firing Arc
Technical Advancement - Have 1 of every class assigned to your soldiers
.
Pinned Down! - Score 80 crossfire hits
Cautious Approach - Use cover to approach and attack enemies 300 times
Casualties of War - Kill 300 insurgents
Superior Military Intelligence - Unlock everything in the Unlock Box
Art of Combat - Win 50 multiplayer games
NOTE: This does not mean versus games only, completing co-op games counts
.
Multi-Kill - Kill 3 or more enemies with a weapon that has a Firing Arc
They Never Saw Us Coming - Complete a mission in 6 turns or less
We Want YOU! - Unlock all 10 soldier slots
Leave Noone Behind - Deploy a squad of 5 and lose none
Who Needs Guns Anyway? - Make 50 melee kills
.
Who's Tough Now? - Kill an enemy that is using a Tier 4 or Tier 5 weapon
Fire in the Hole! - Make 100 kills with grenades
Experienced - Unlock every skill for each class
Multi-Tasking - Take a second proficiency with one soldier
Easy Money - Earn more than 10,000,000 credits
.
Liberty Comes at a Price - Purchase more than 10,000,000 credits
NOTE: Wait for the shop to go on Steam sale
Blinding Pain - Use Stun Grenades on 6 enemies
Boot Camp - Read all 18 tuitorials
55 Comments
Ctrekoz Jan 10, 2024 @ 9:25am 
The game was pretty good, right. I've played 21 hours. Sad.
Awesomeguy002 Dec 24, 2020 @ 9:58pm 
Whatever happened to Frontline Tactics? Did we ever get anything from the developers? It was a pretty good game, albeit annoyingly microtransactional. It would've been worth even paying for if there weren't any microtransactions.

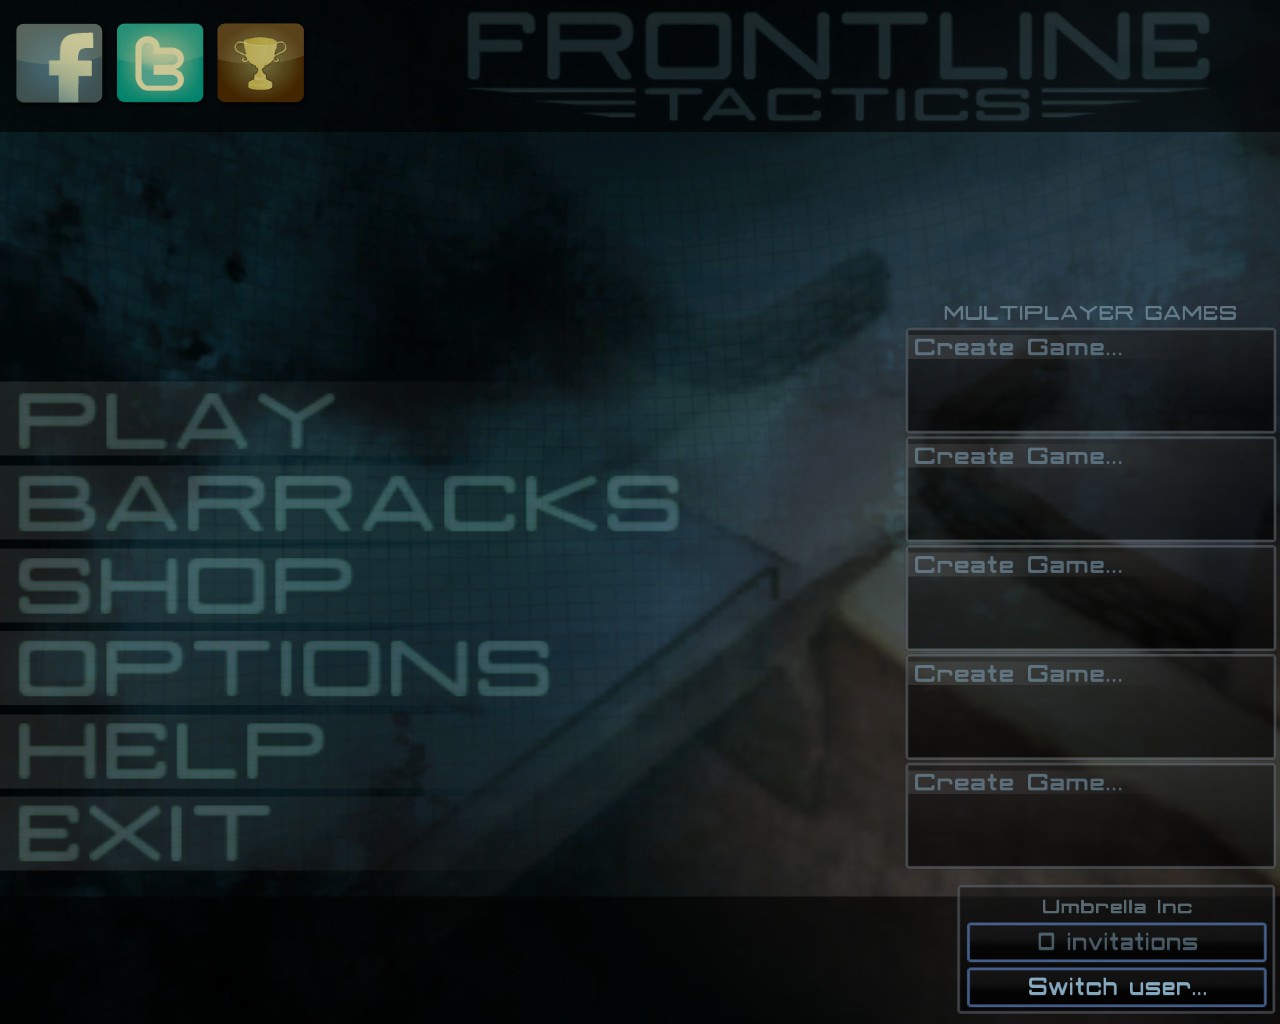
I presume the developers weren't getting enough revenue to maintain their servers, so they made the choice to just shut it down. I would've thought they'd be more vocal, though. The community seemed pretty close.
JumpOffACliffy Jul 4, 2019 @ 5:49pm 
@Ghost... yeah it was solid. But its dead now - removed from the Steam store.
Ghost993514 Jul 4, 2019 @ 5:18pm 
I know it's 2019, but honestly this game, if it weren't designed with 'free to play' micro-transactions in mind, would've been pretty great.

Not that it's a bad game at all; it's fairly underrated.
JumpOffACliffy Aug 24, 2017 @ 4:50am 
Ahh I see what you mean. I guess it's effectively the same thing, but depends on how you use the troop.
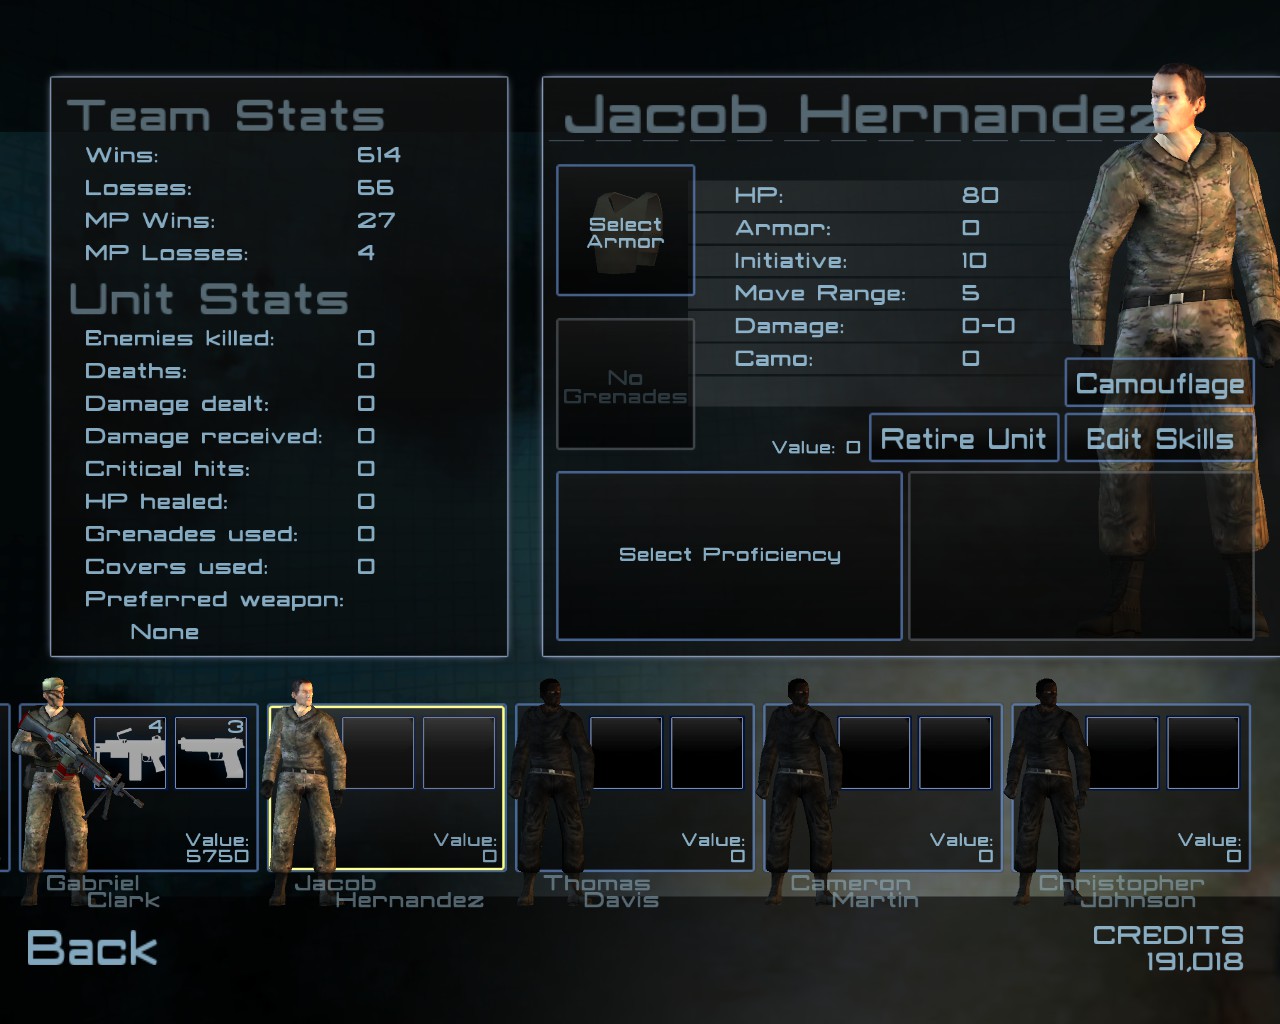
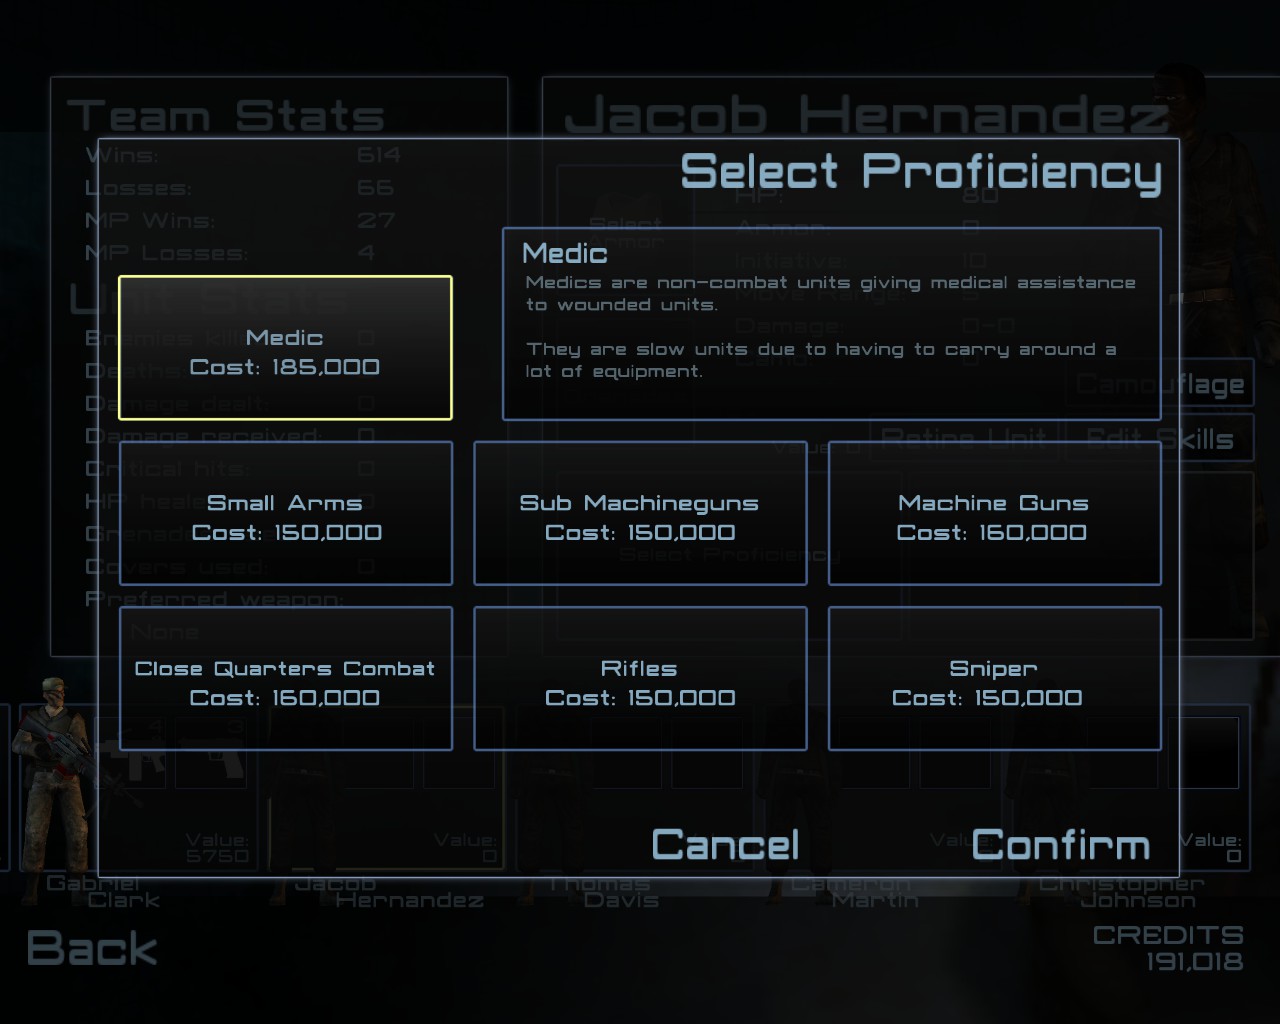
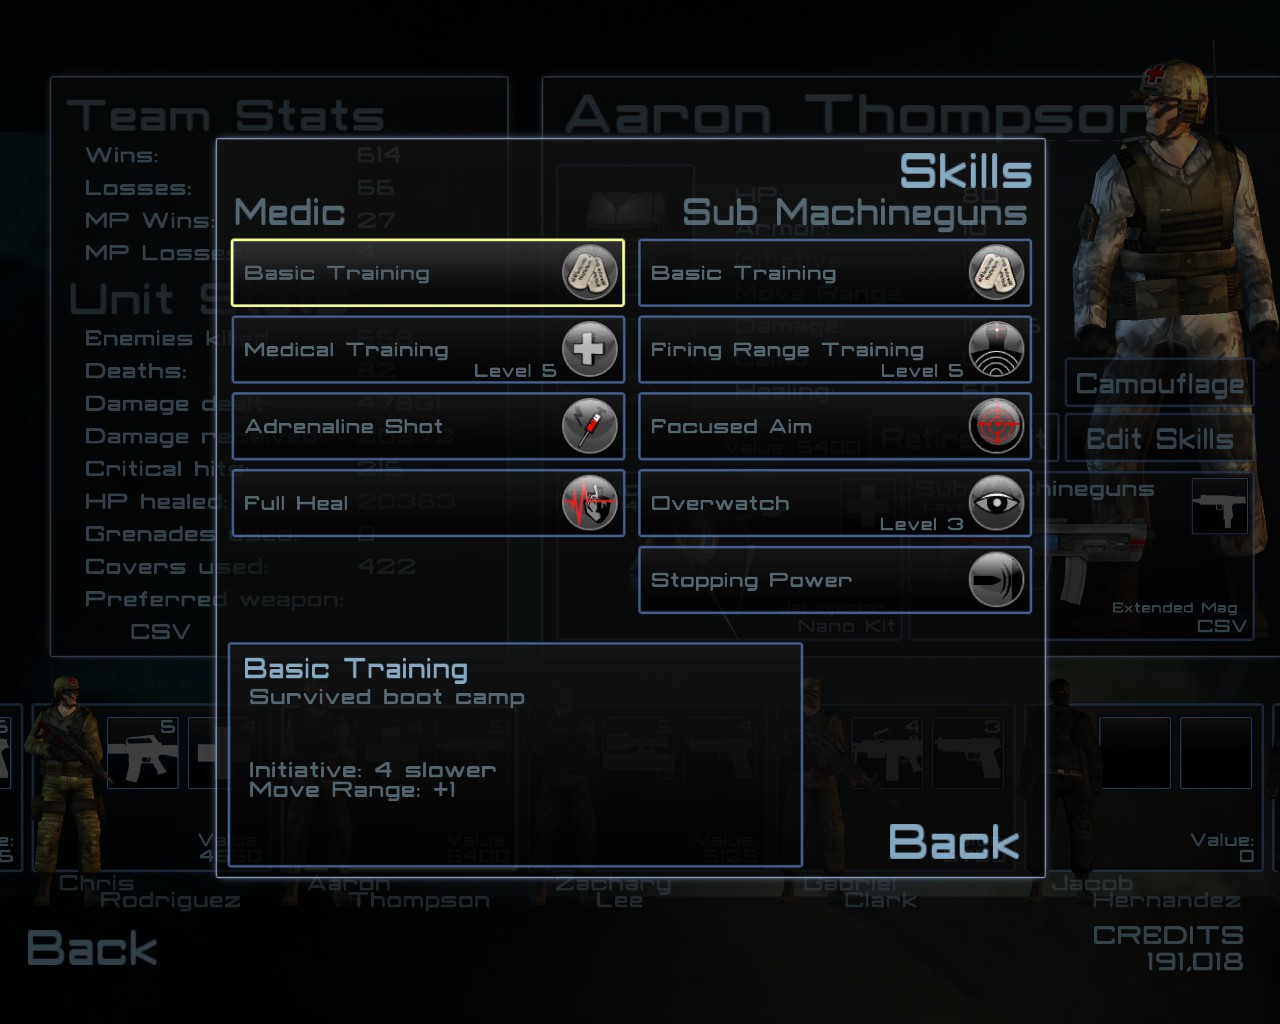
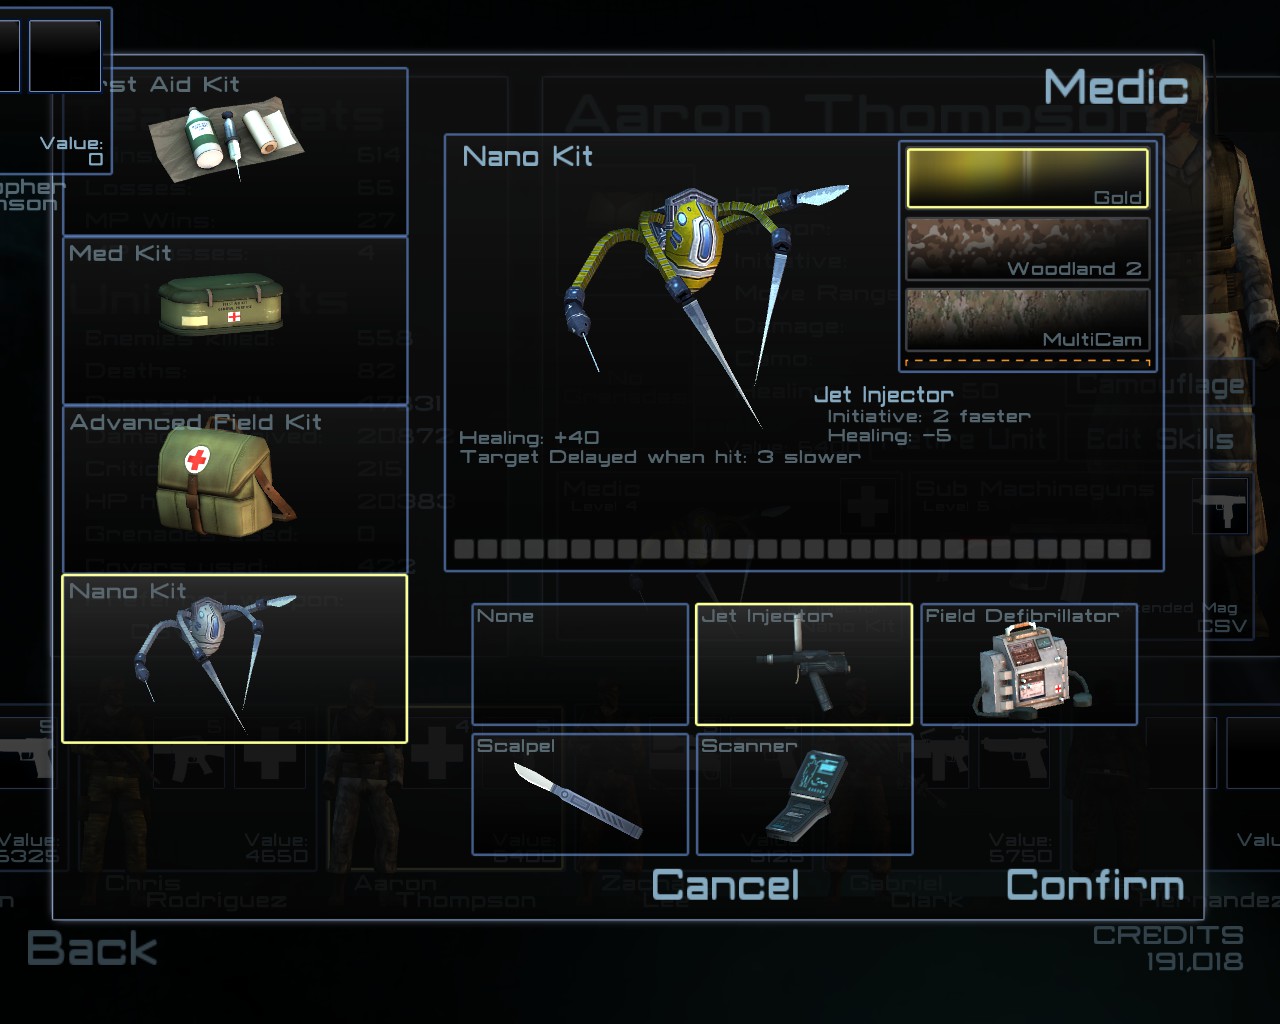
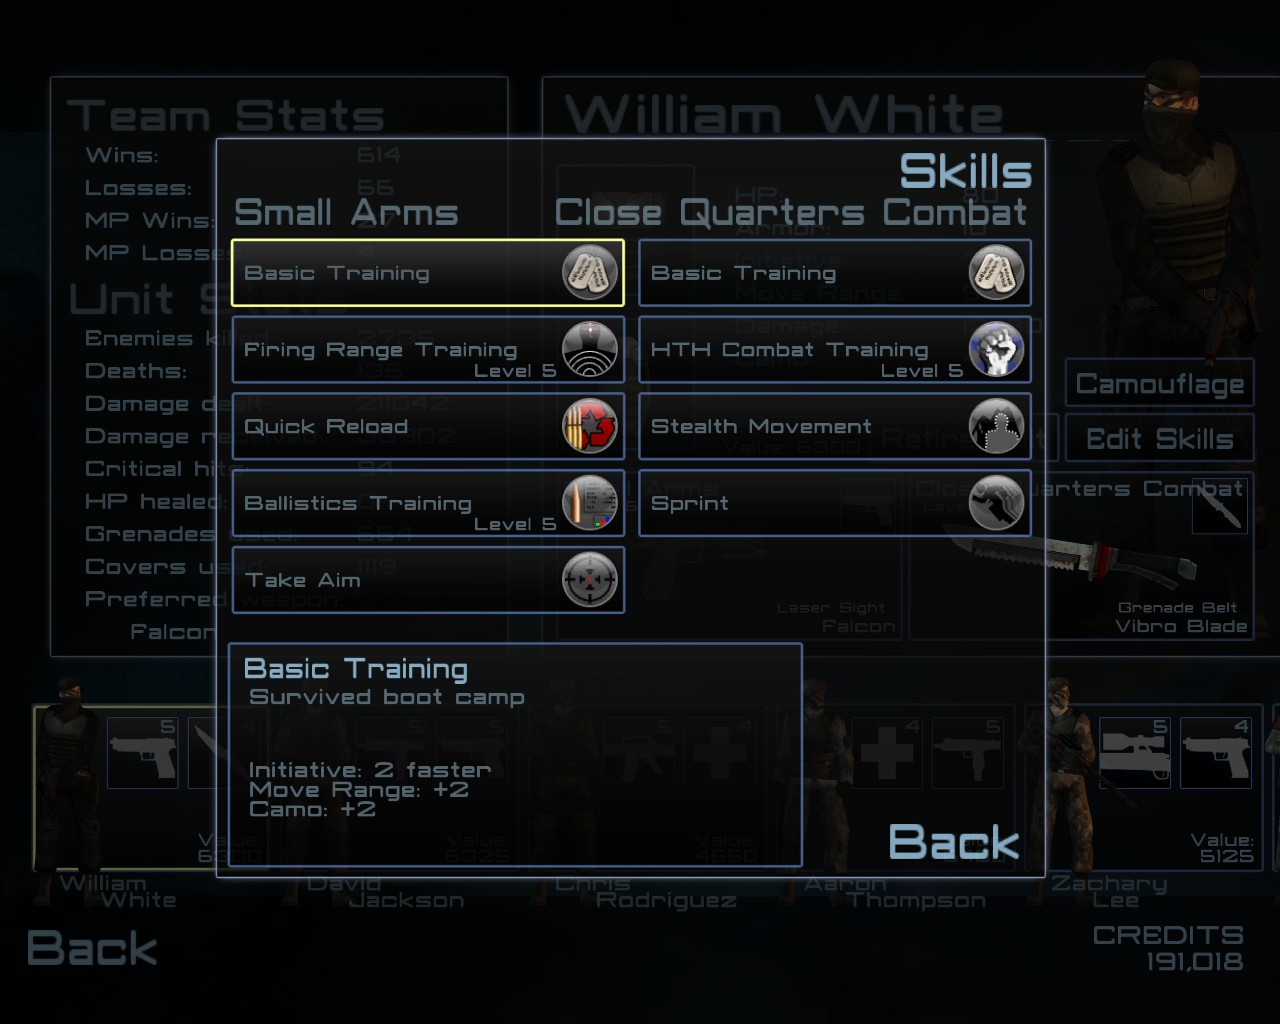
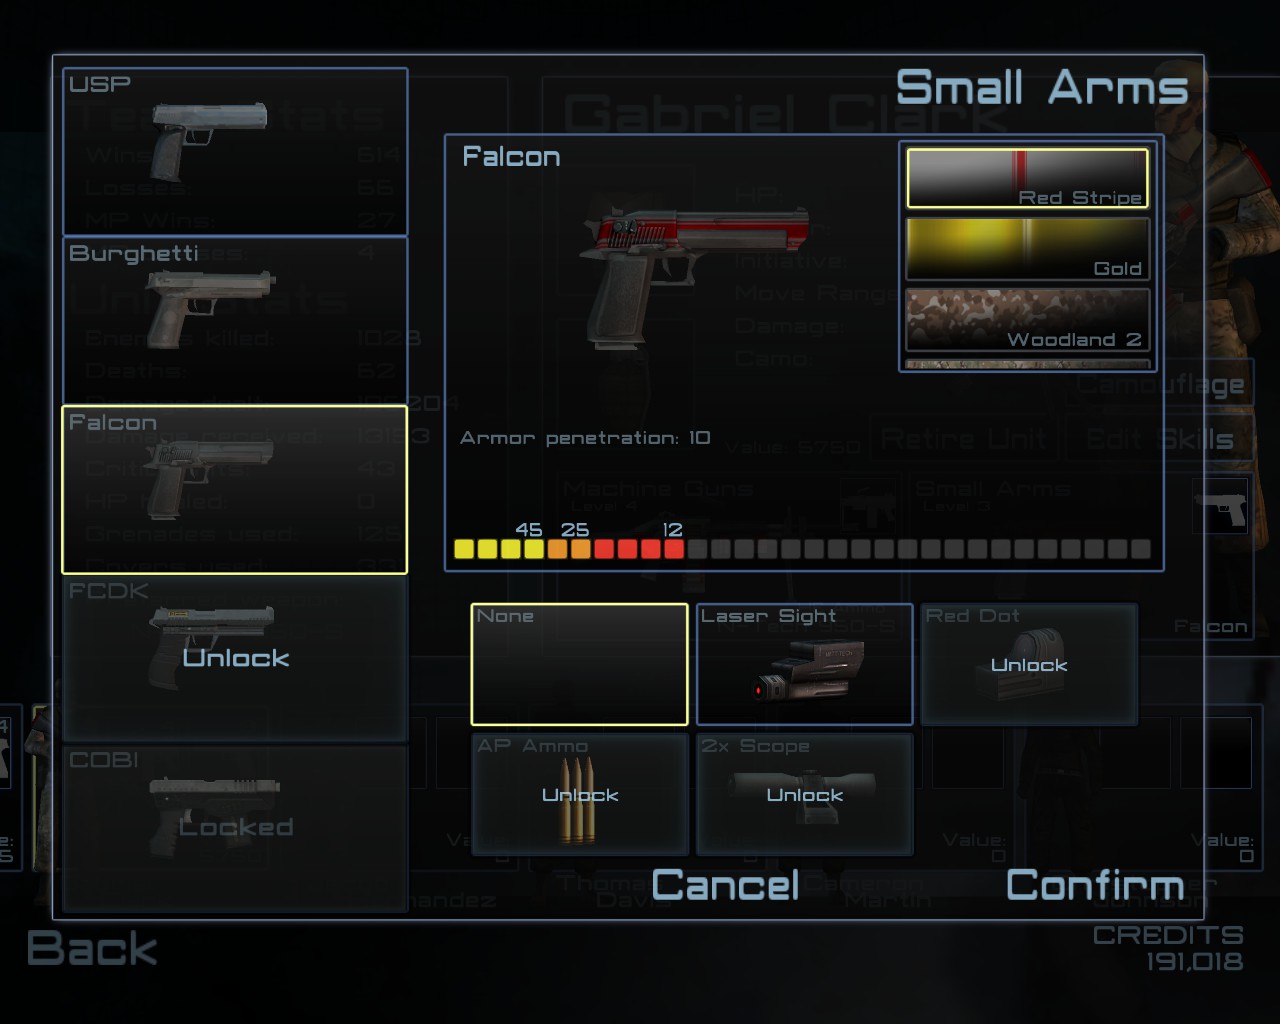
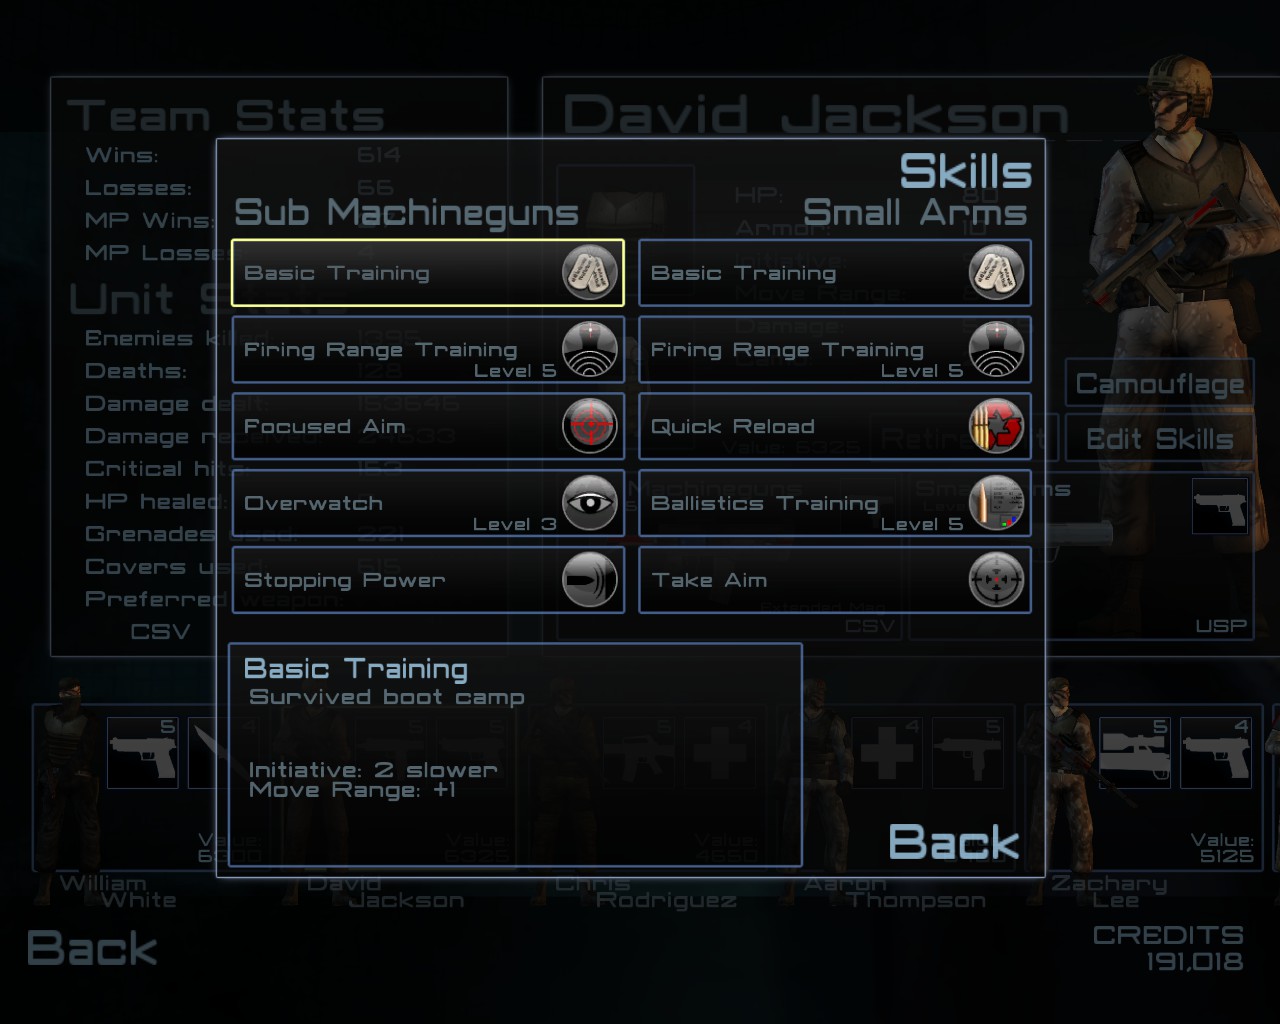
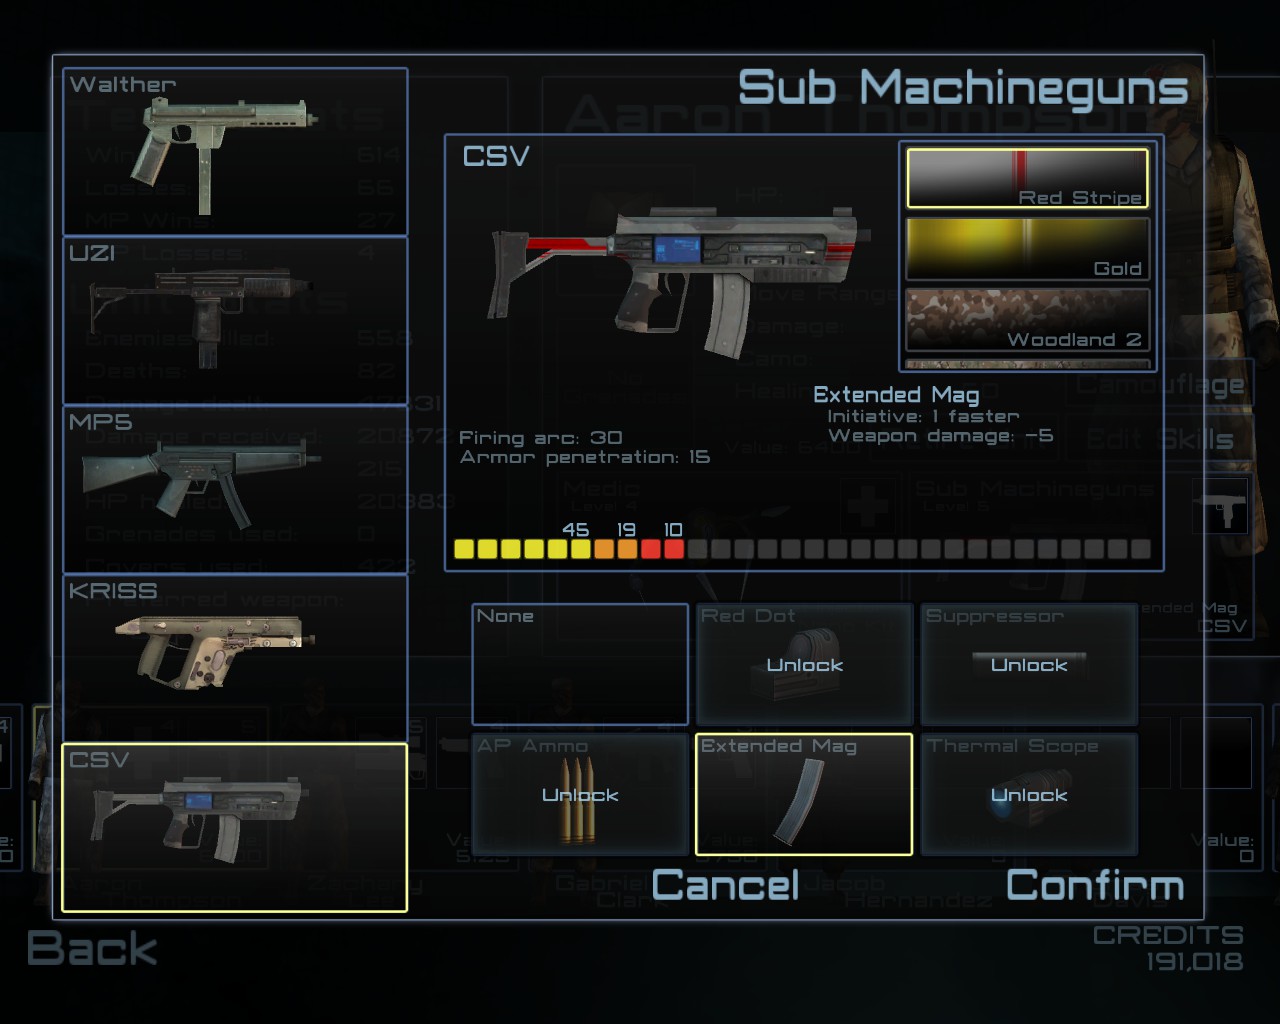
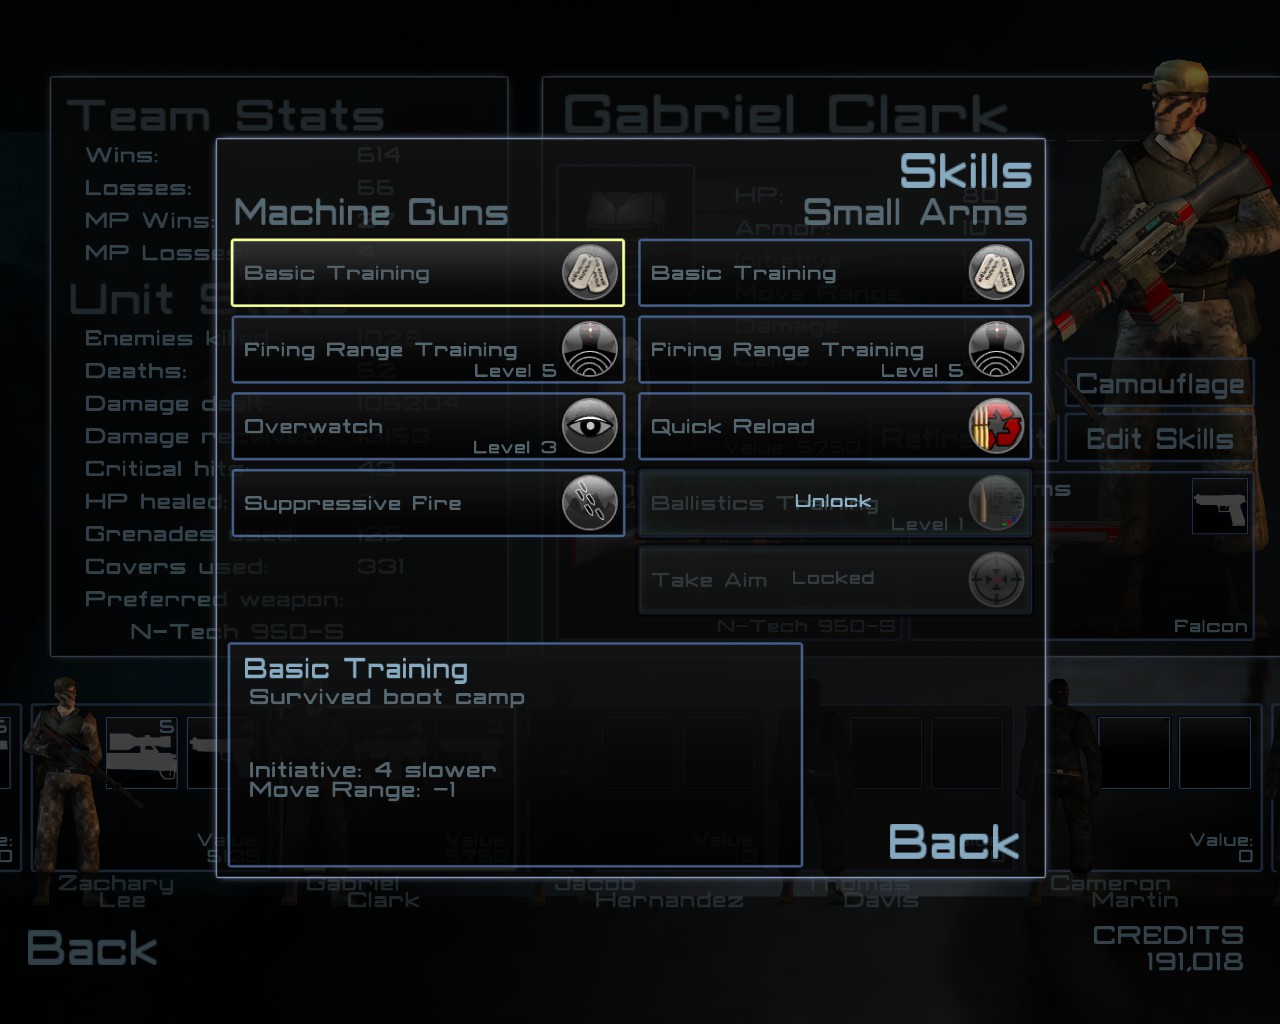
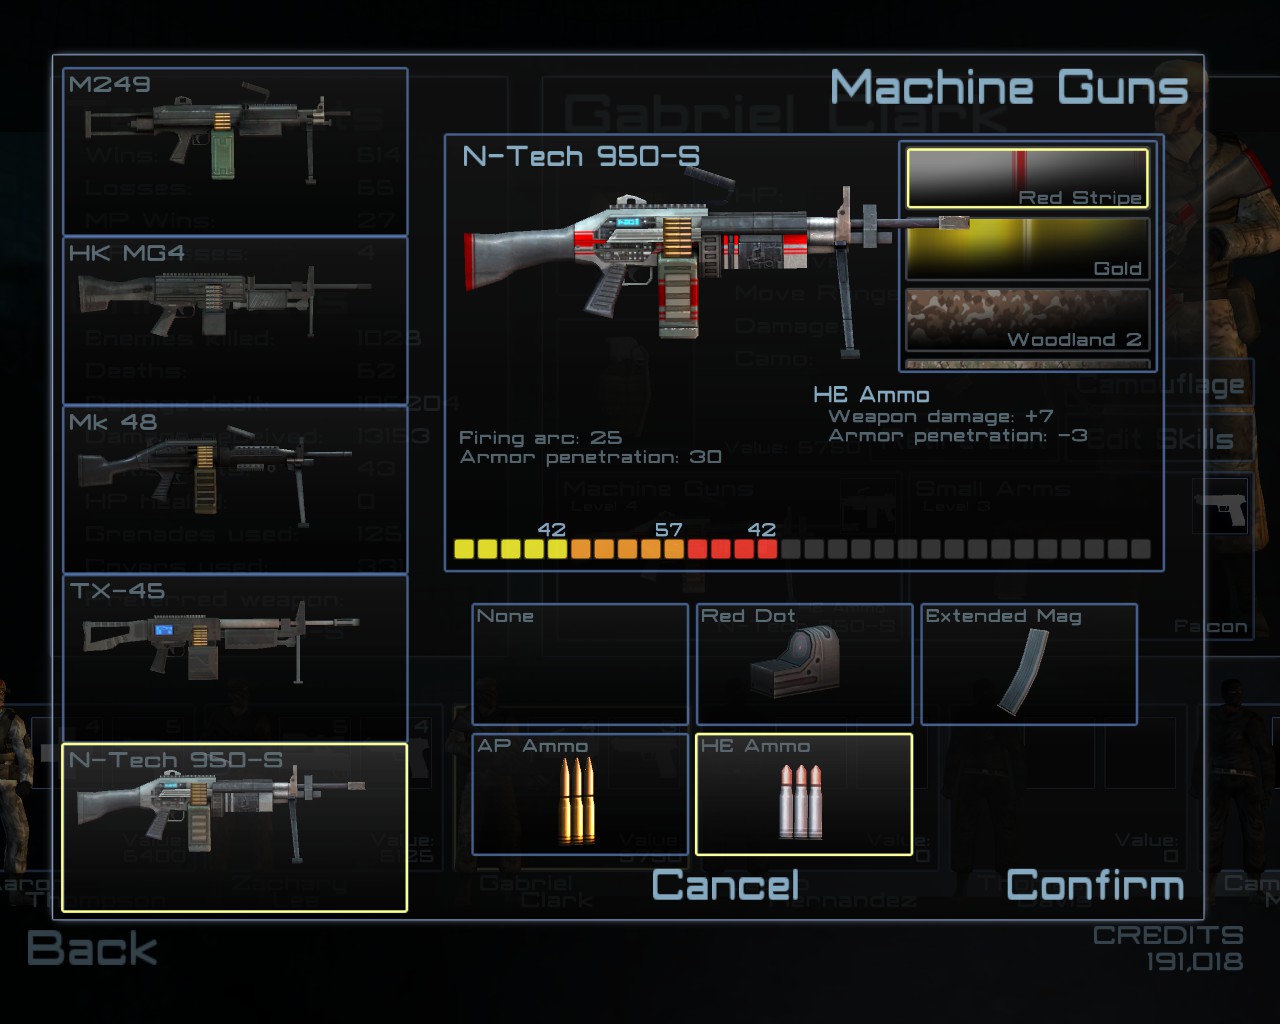
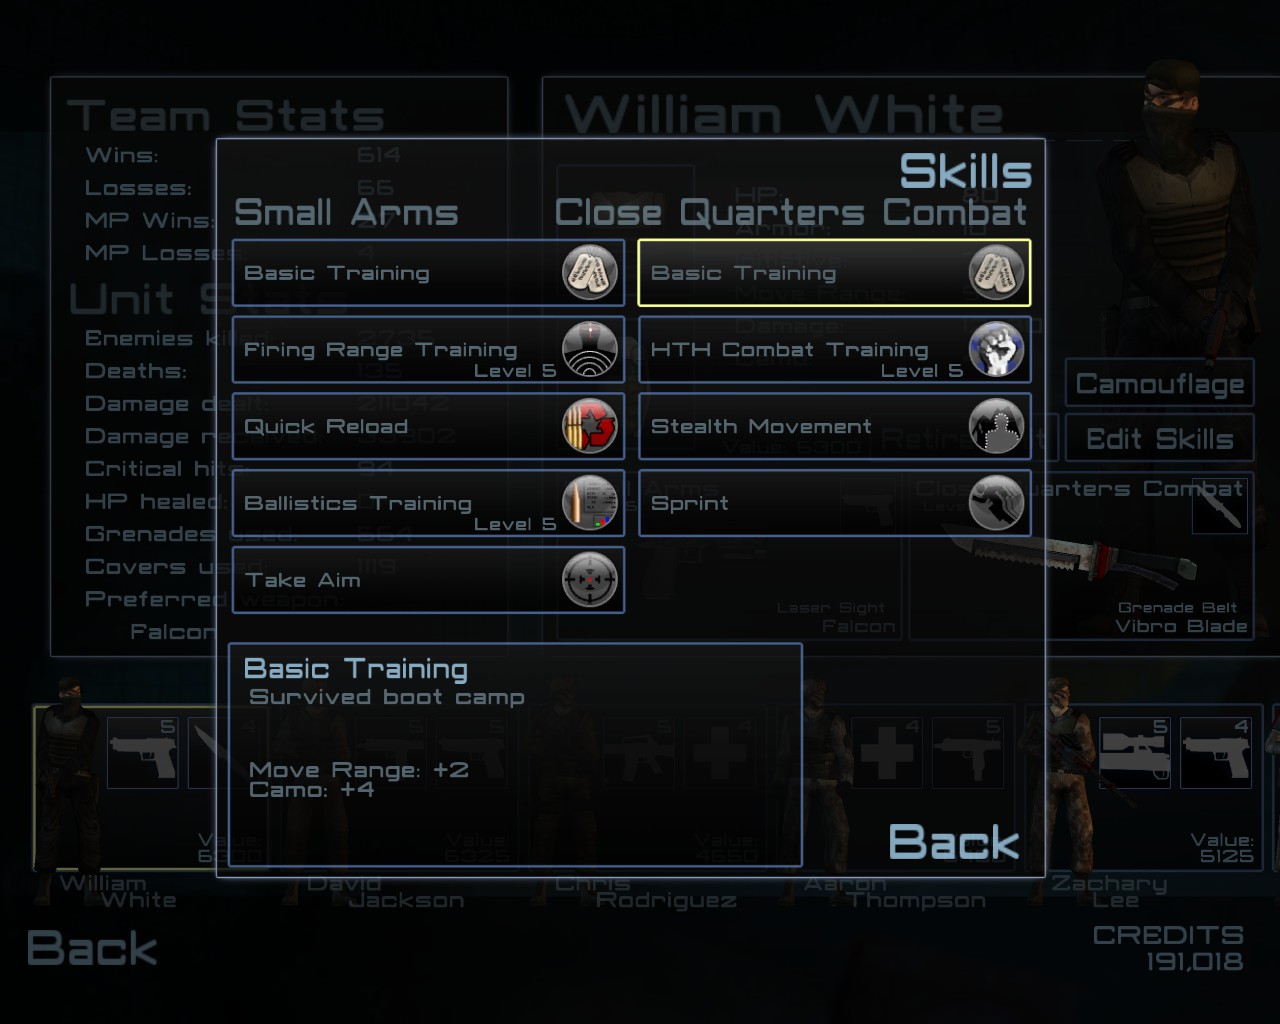
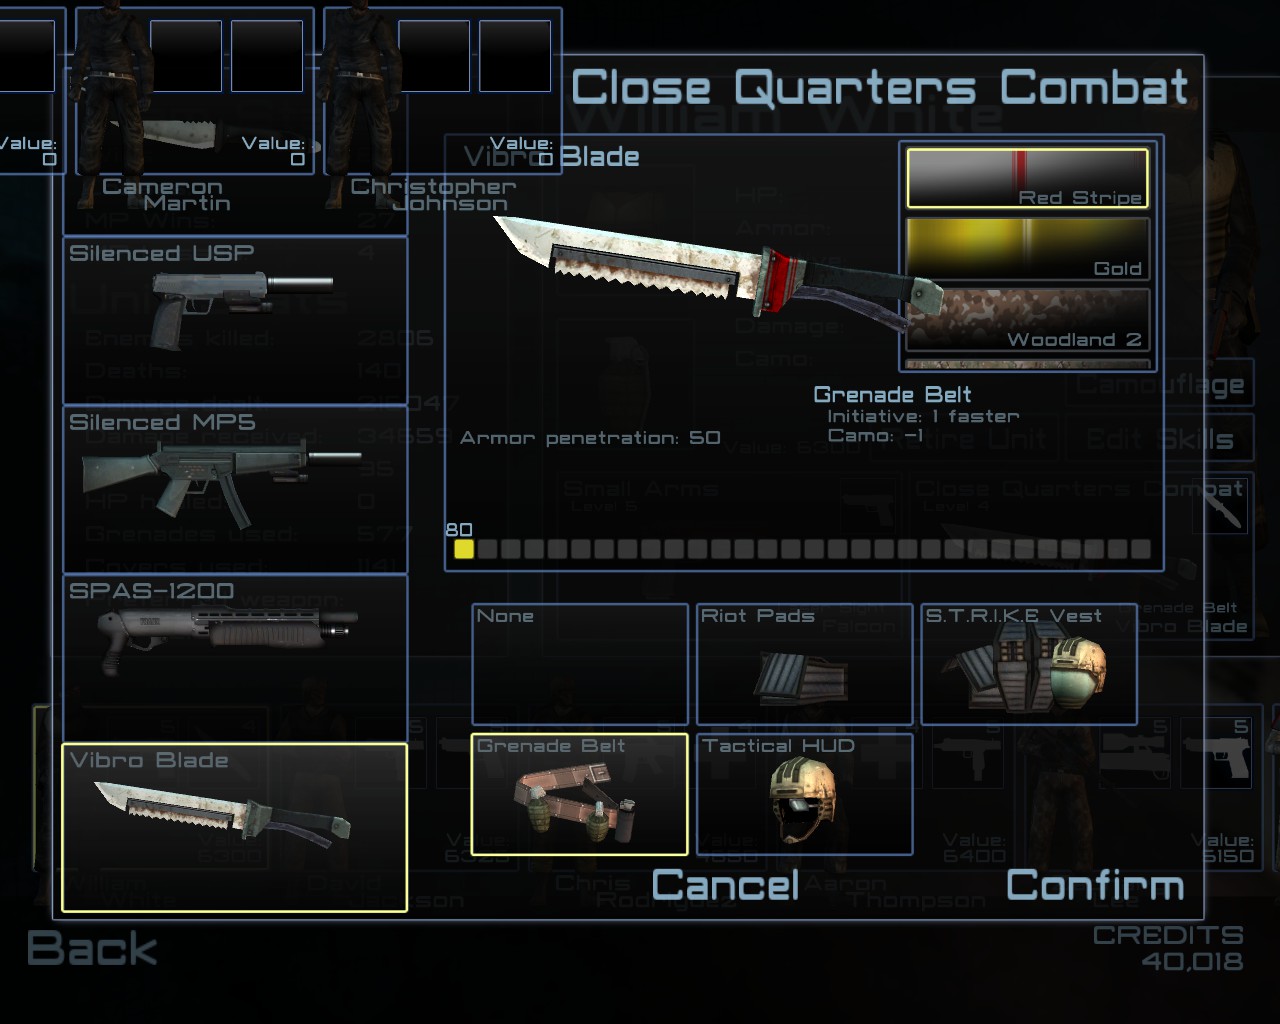
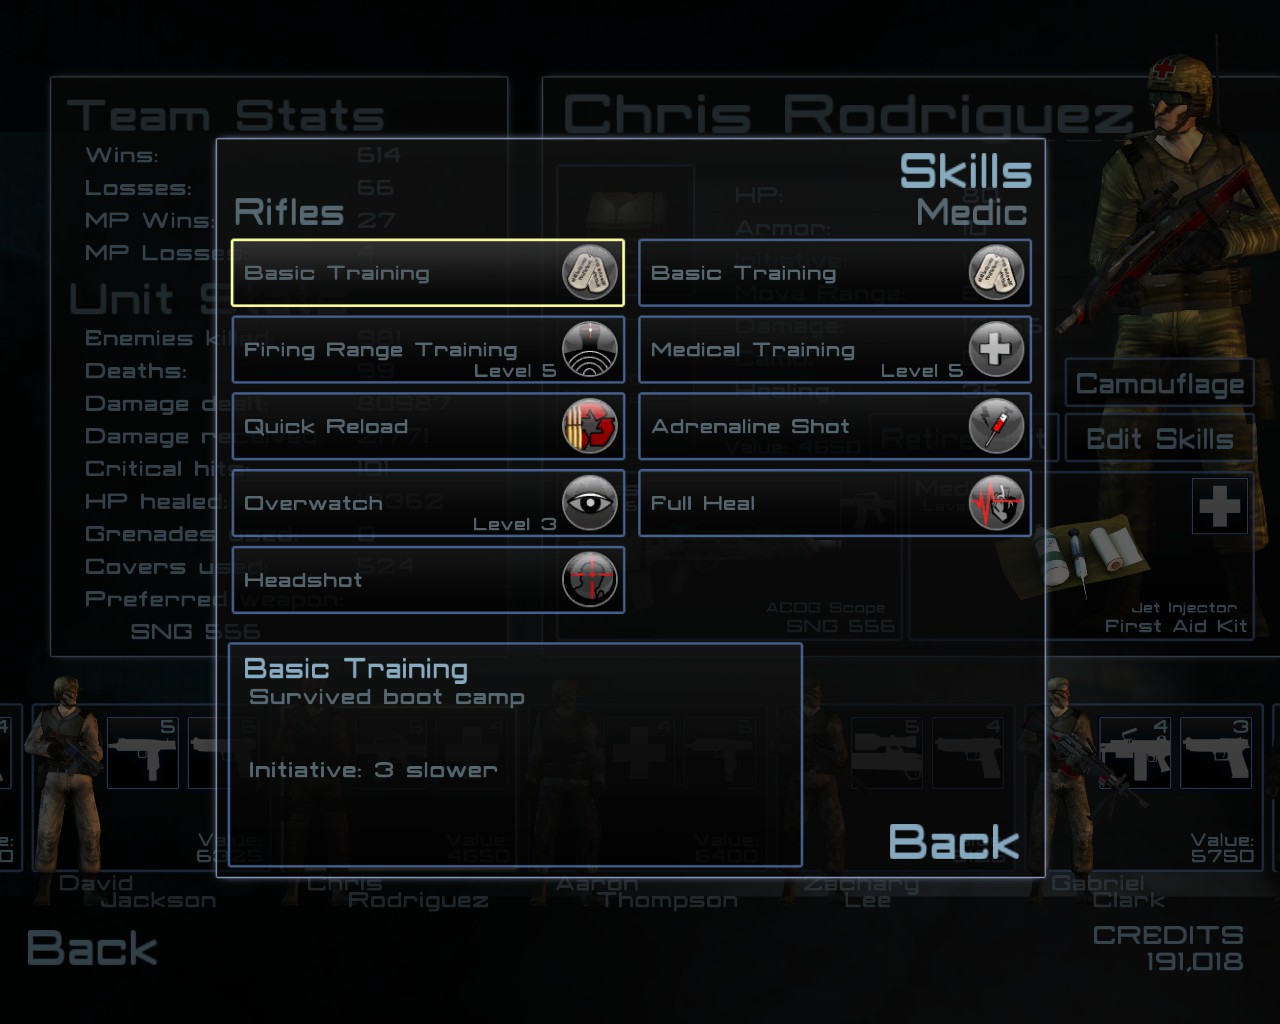
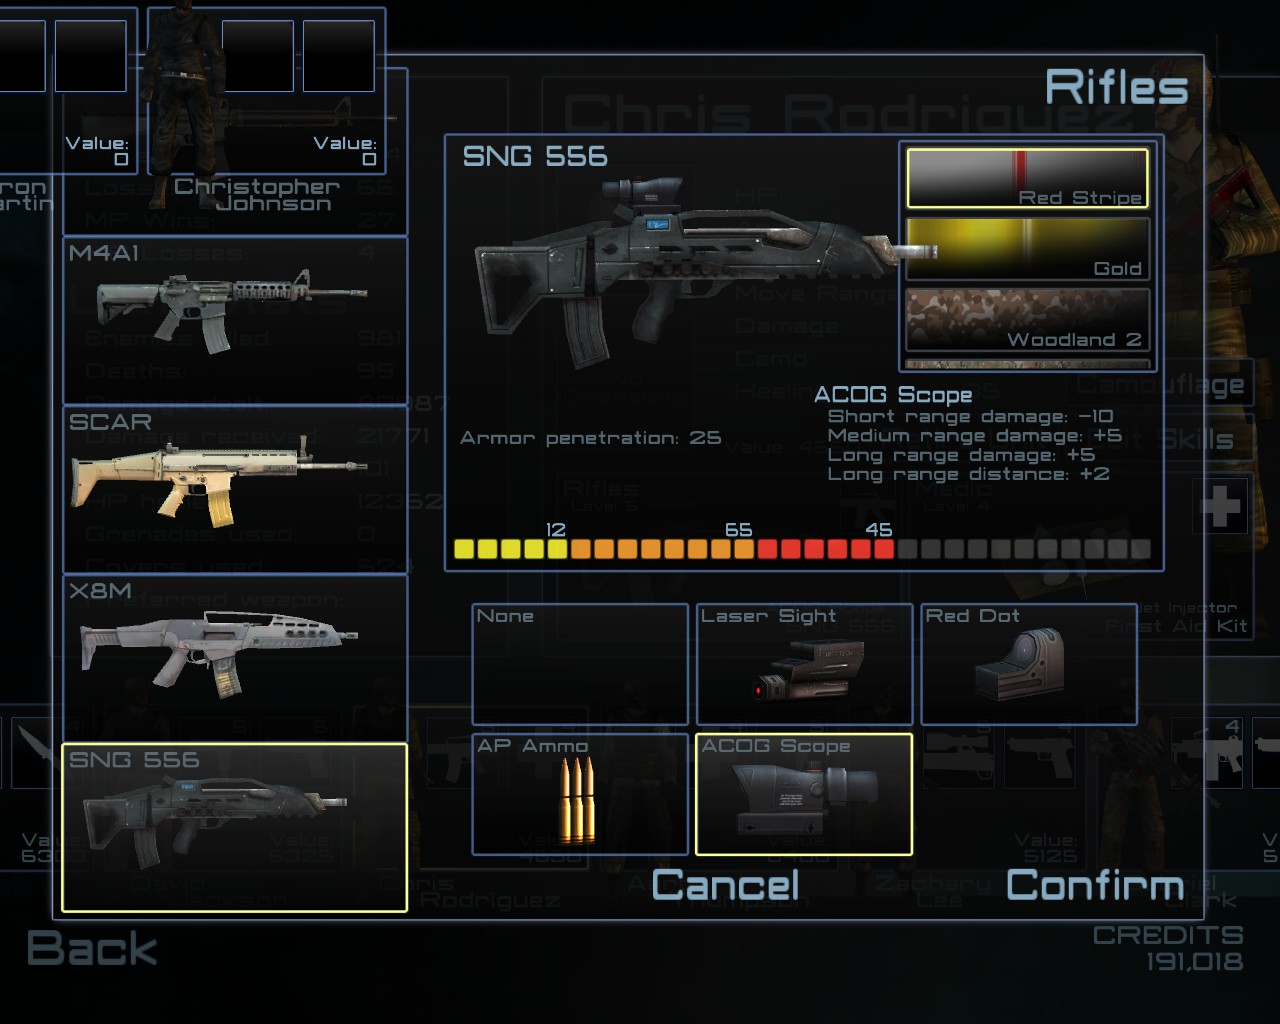
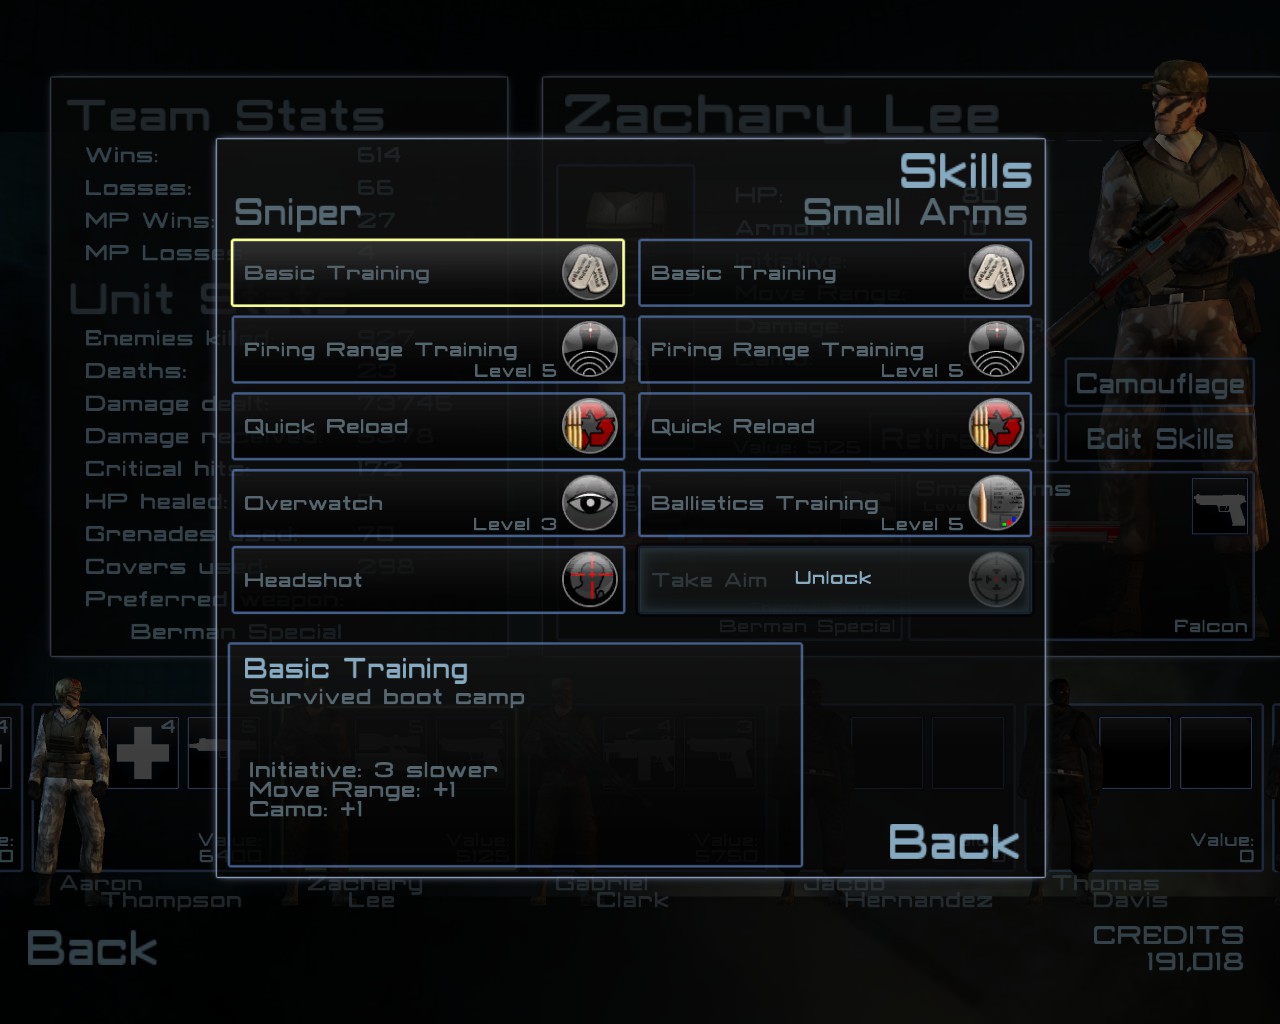
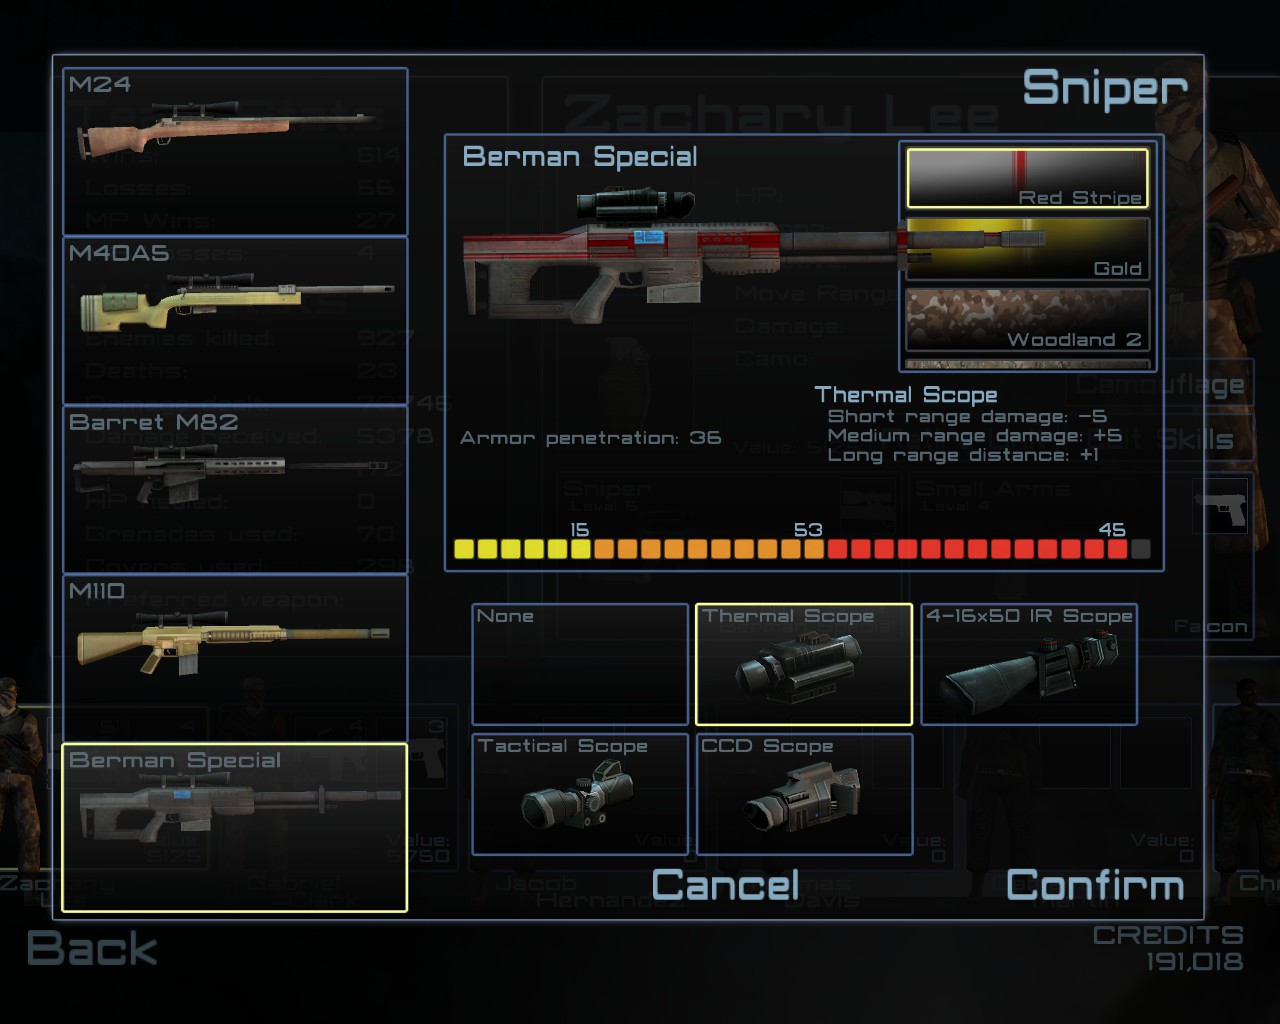
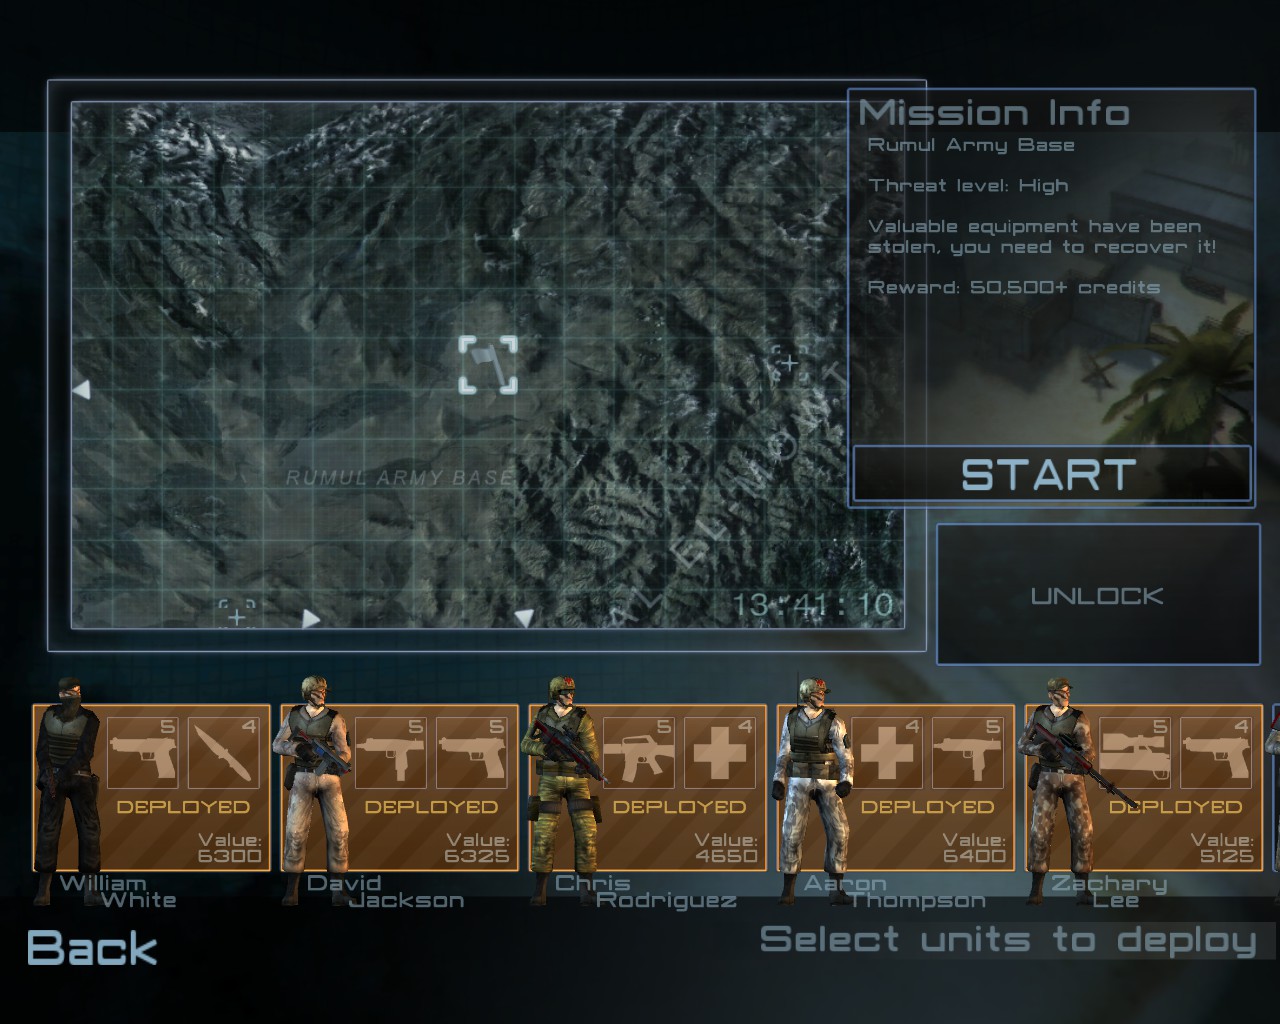
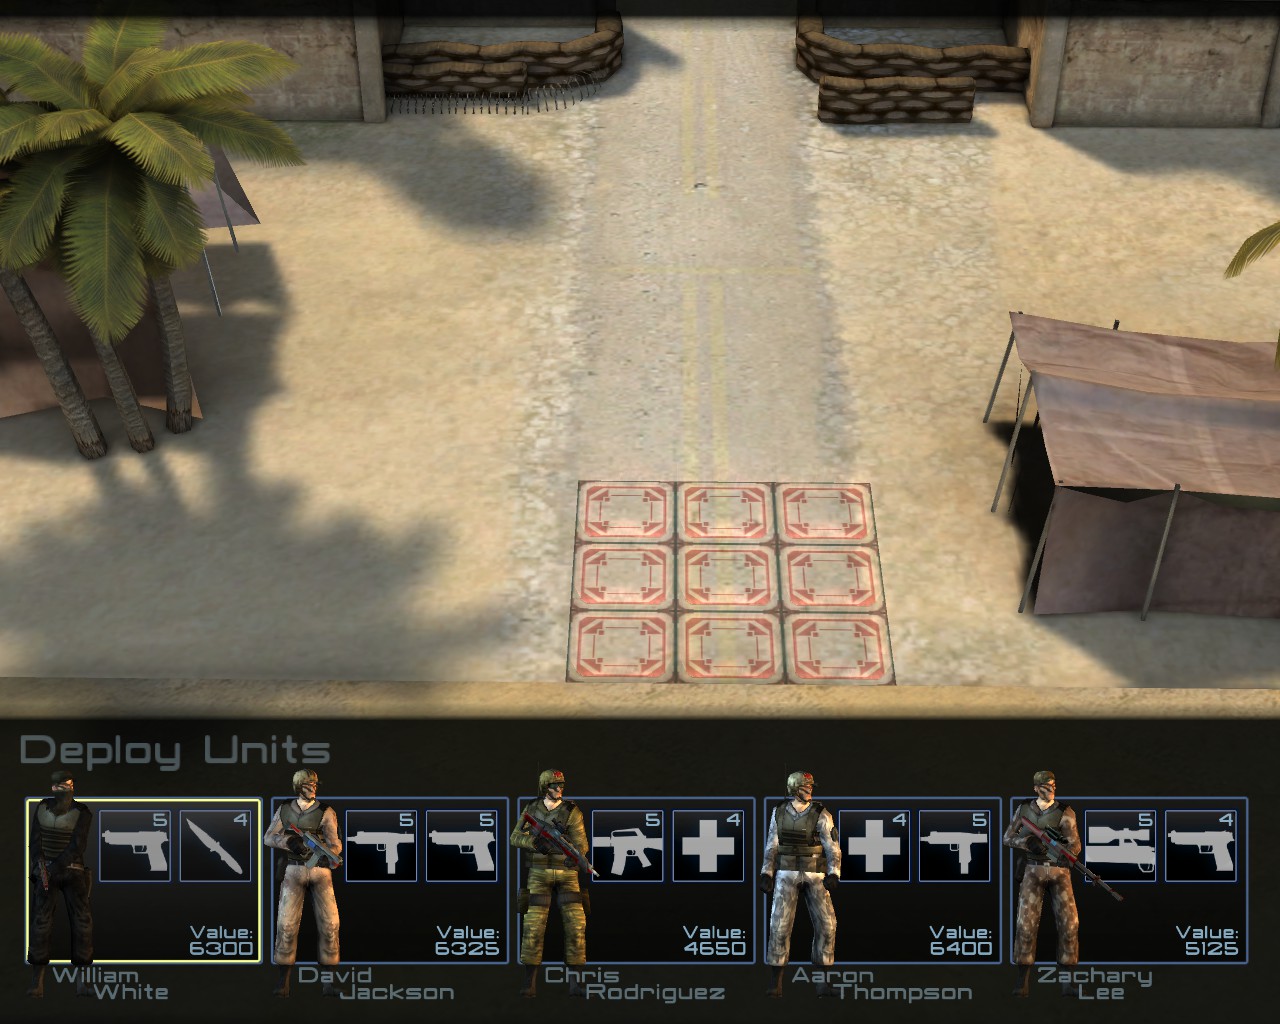
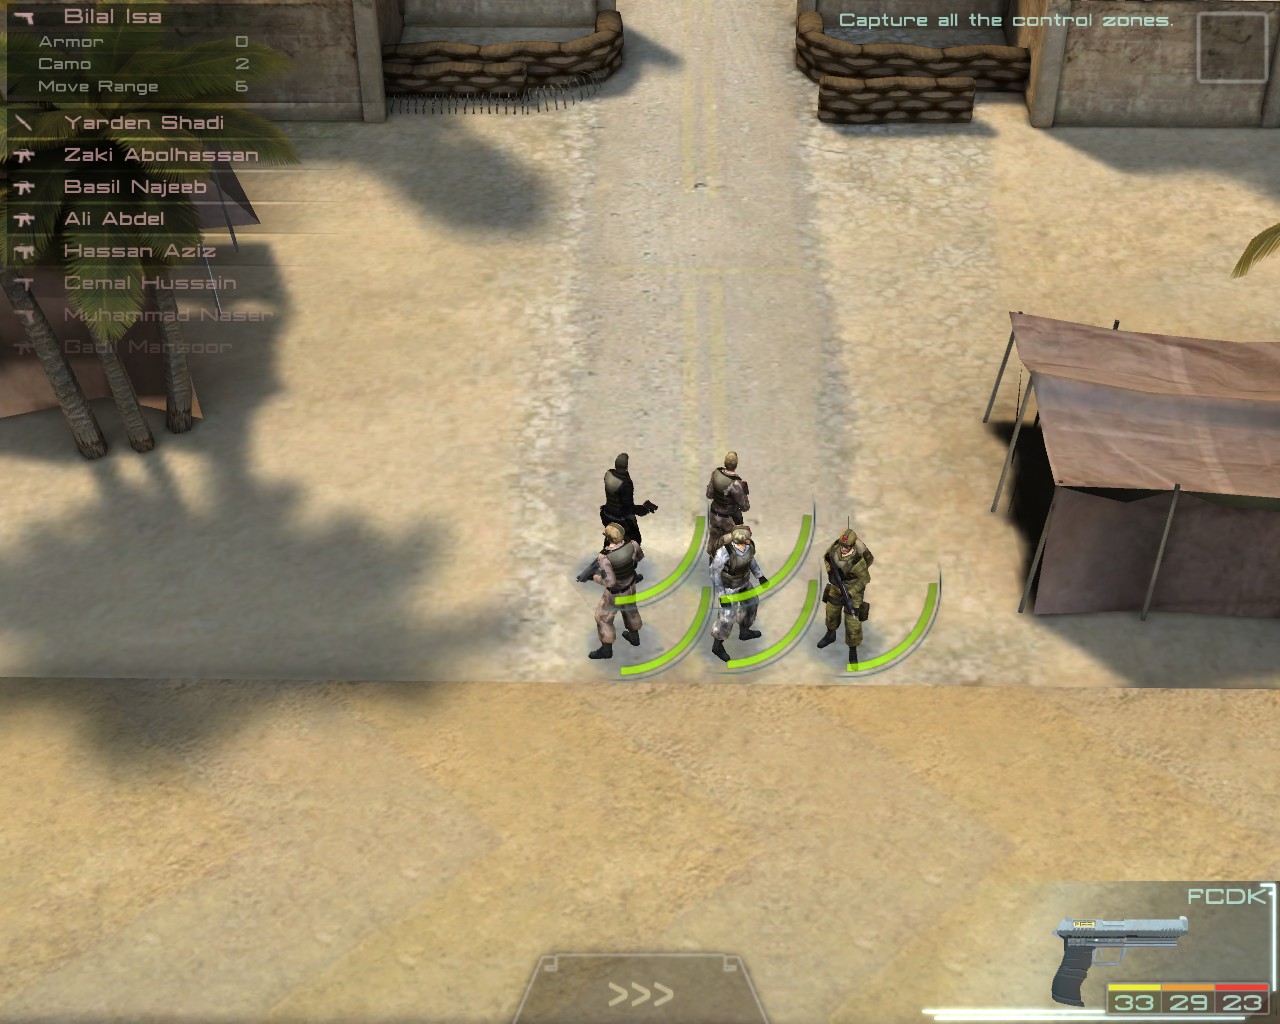
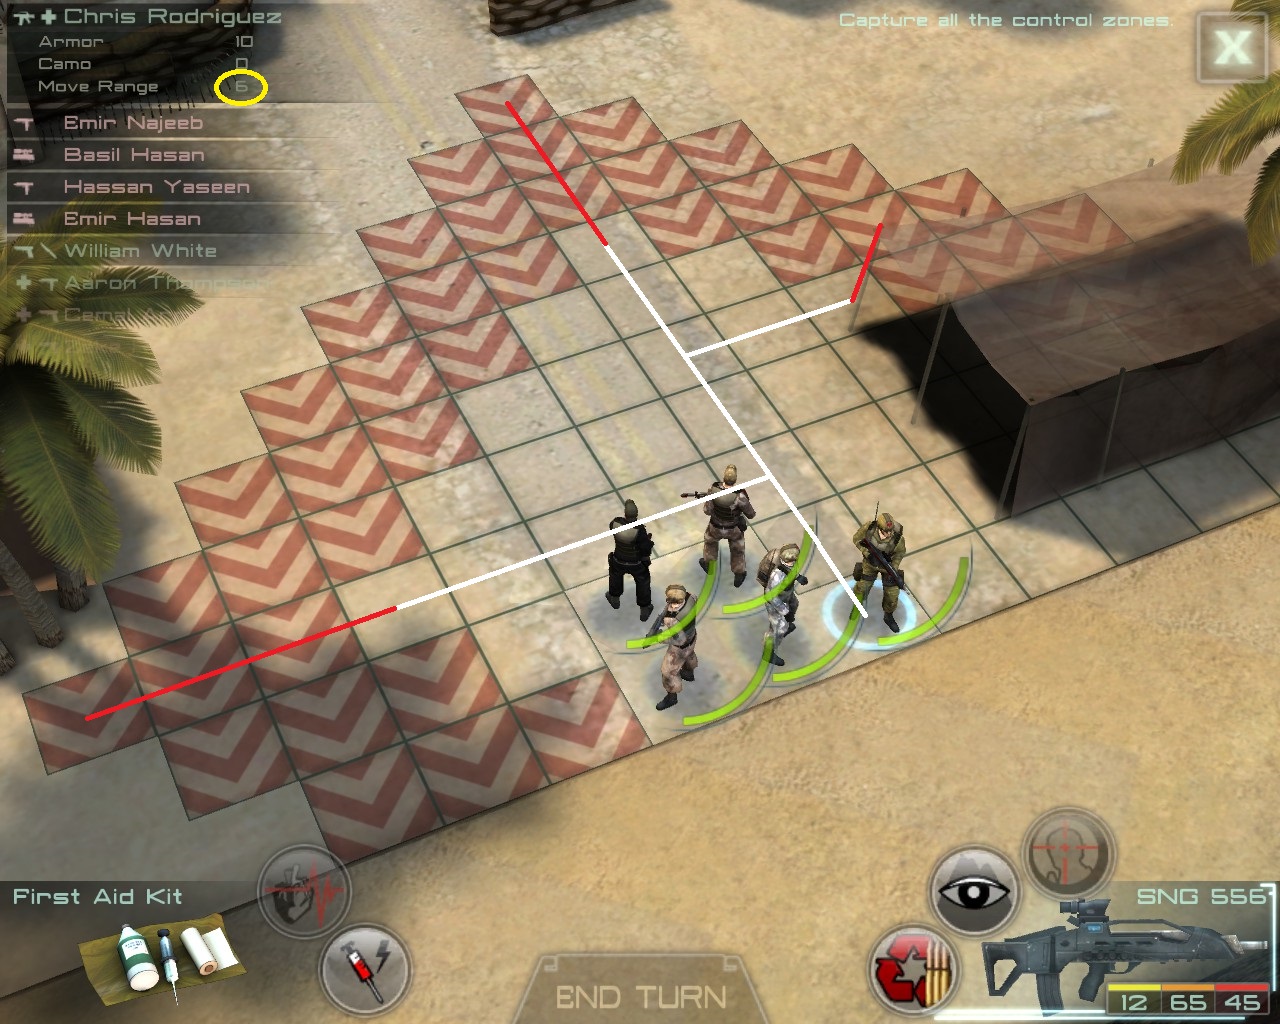
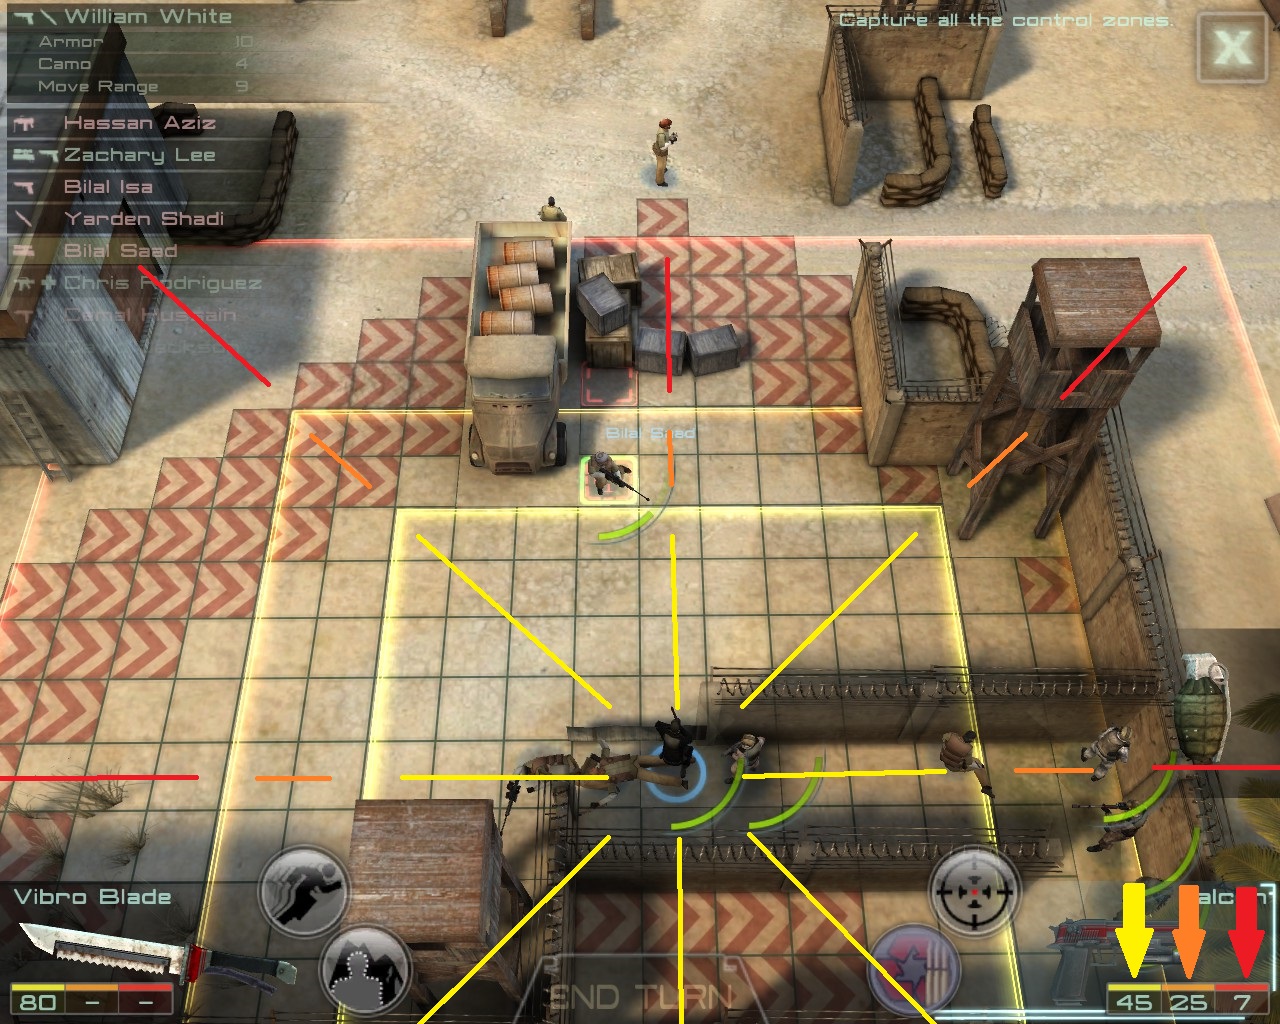
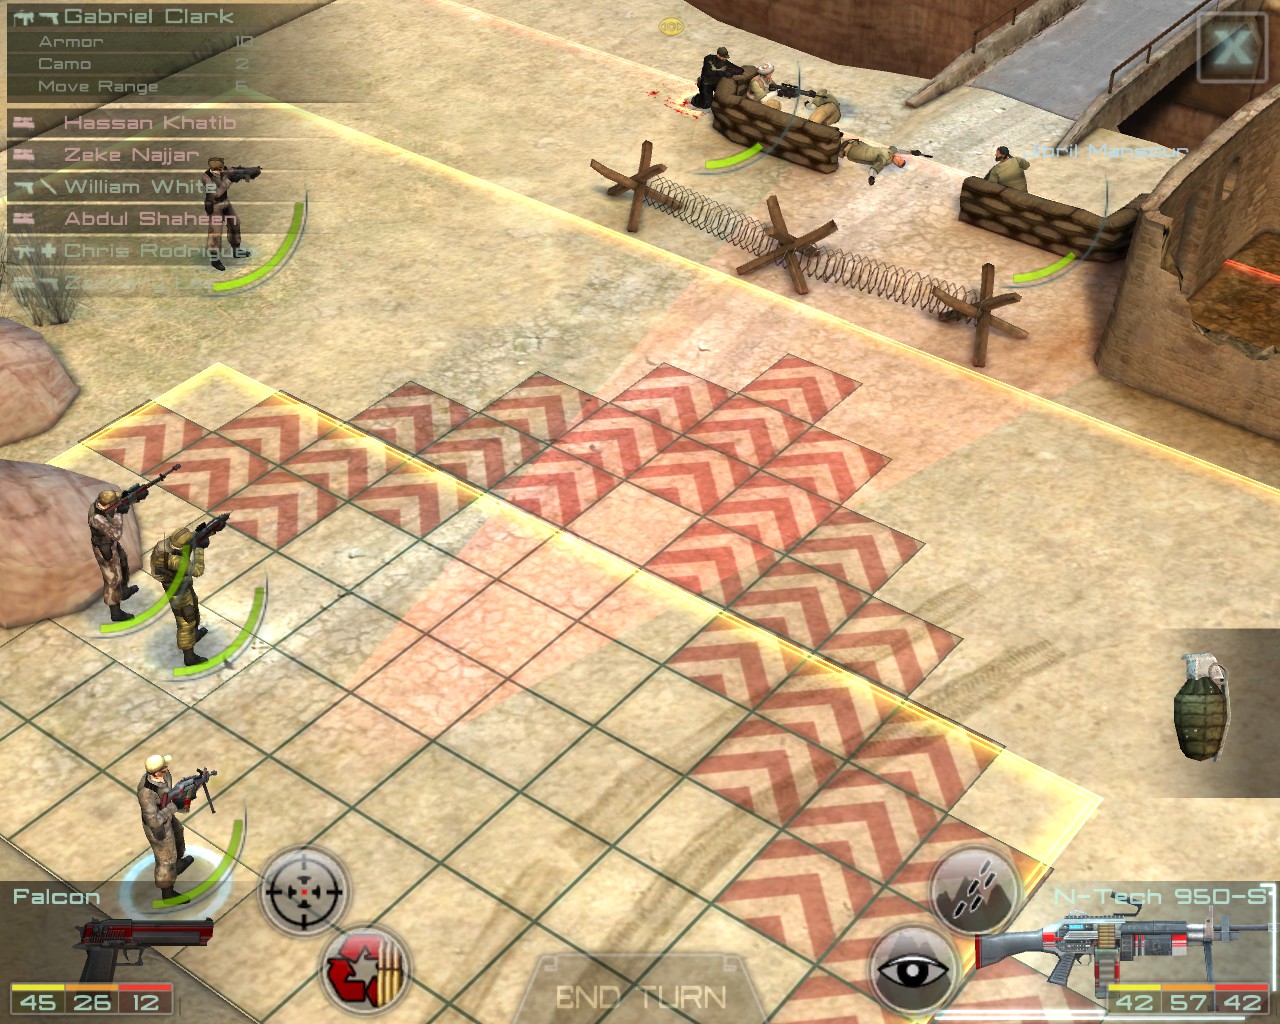
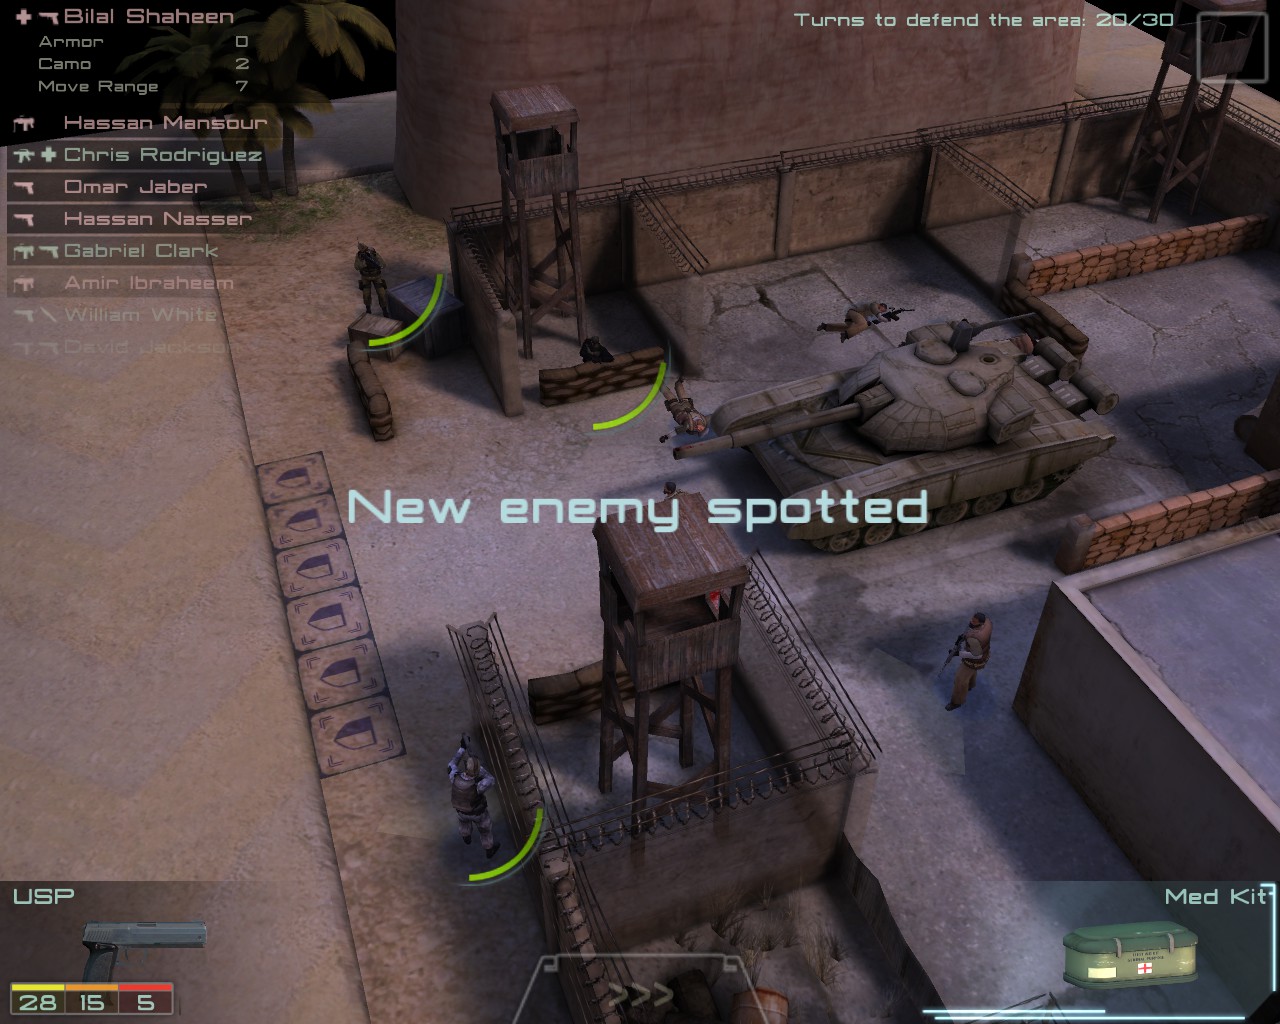
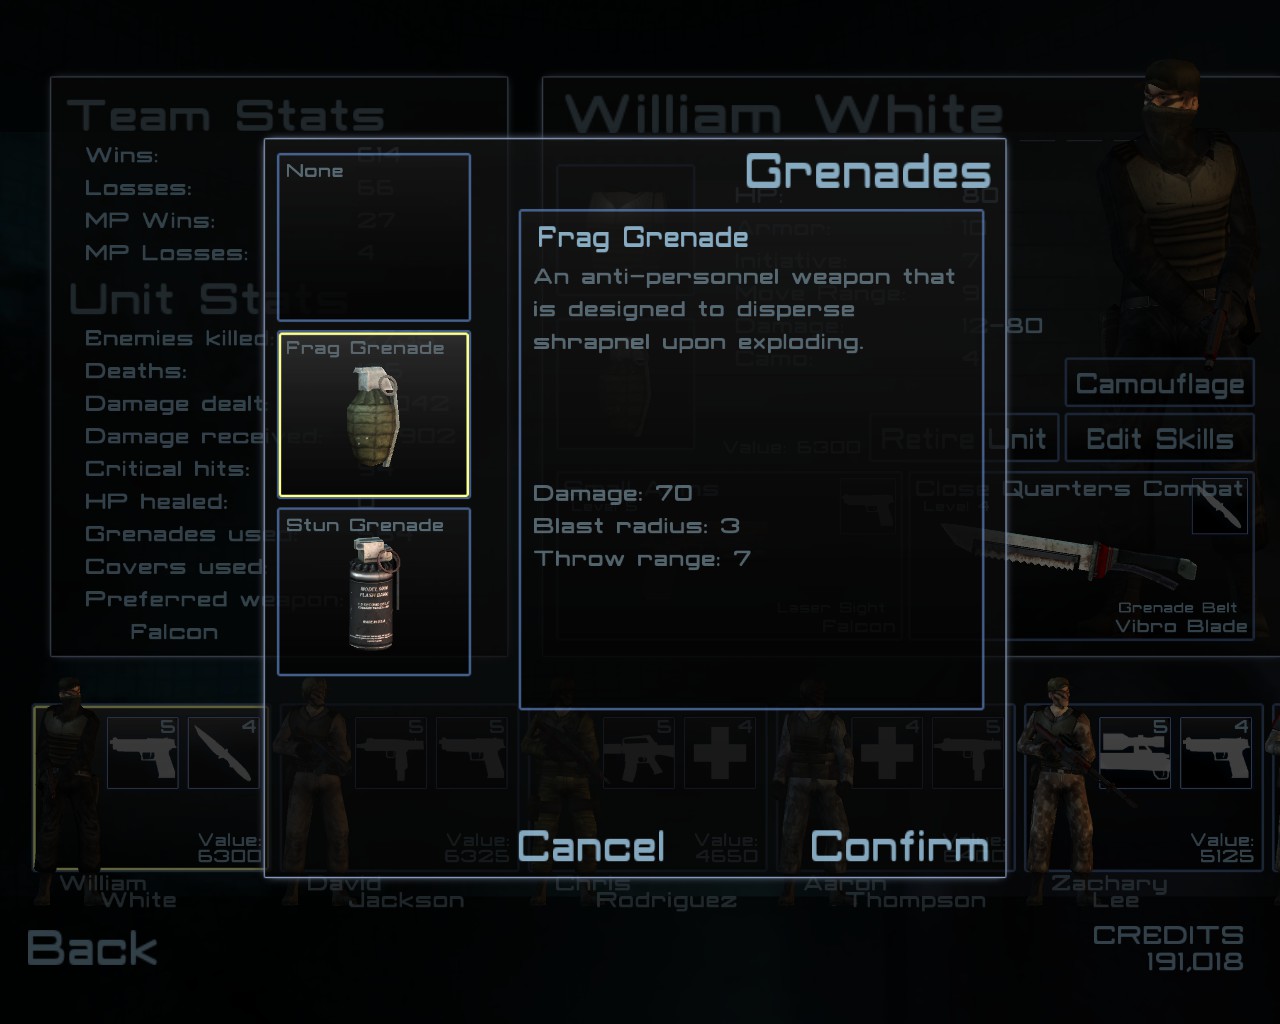
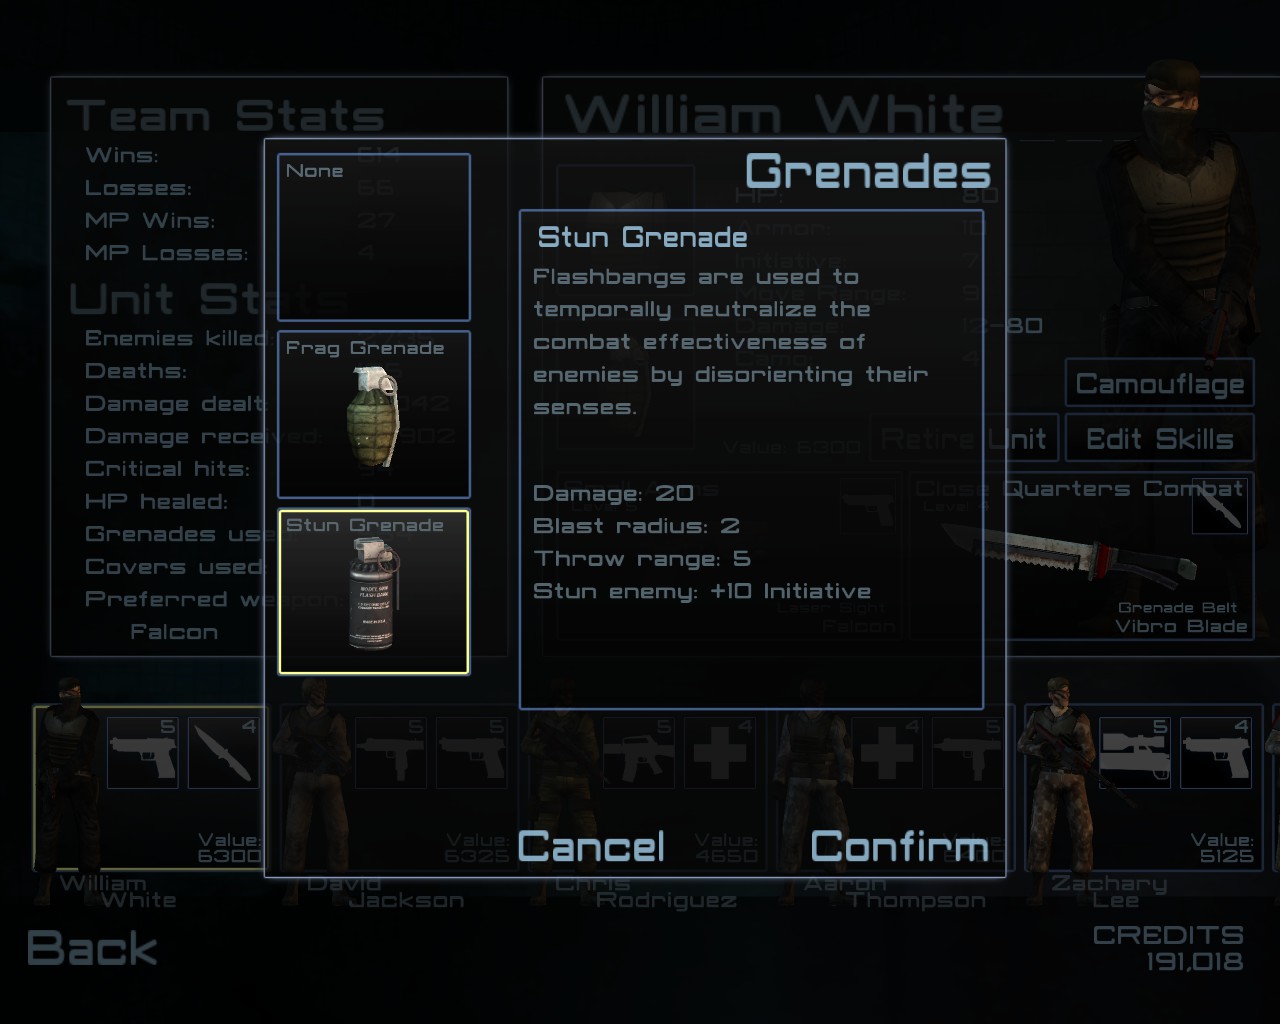
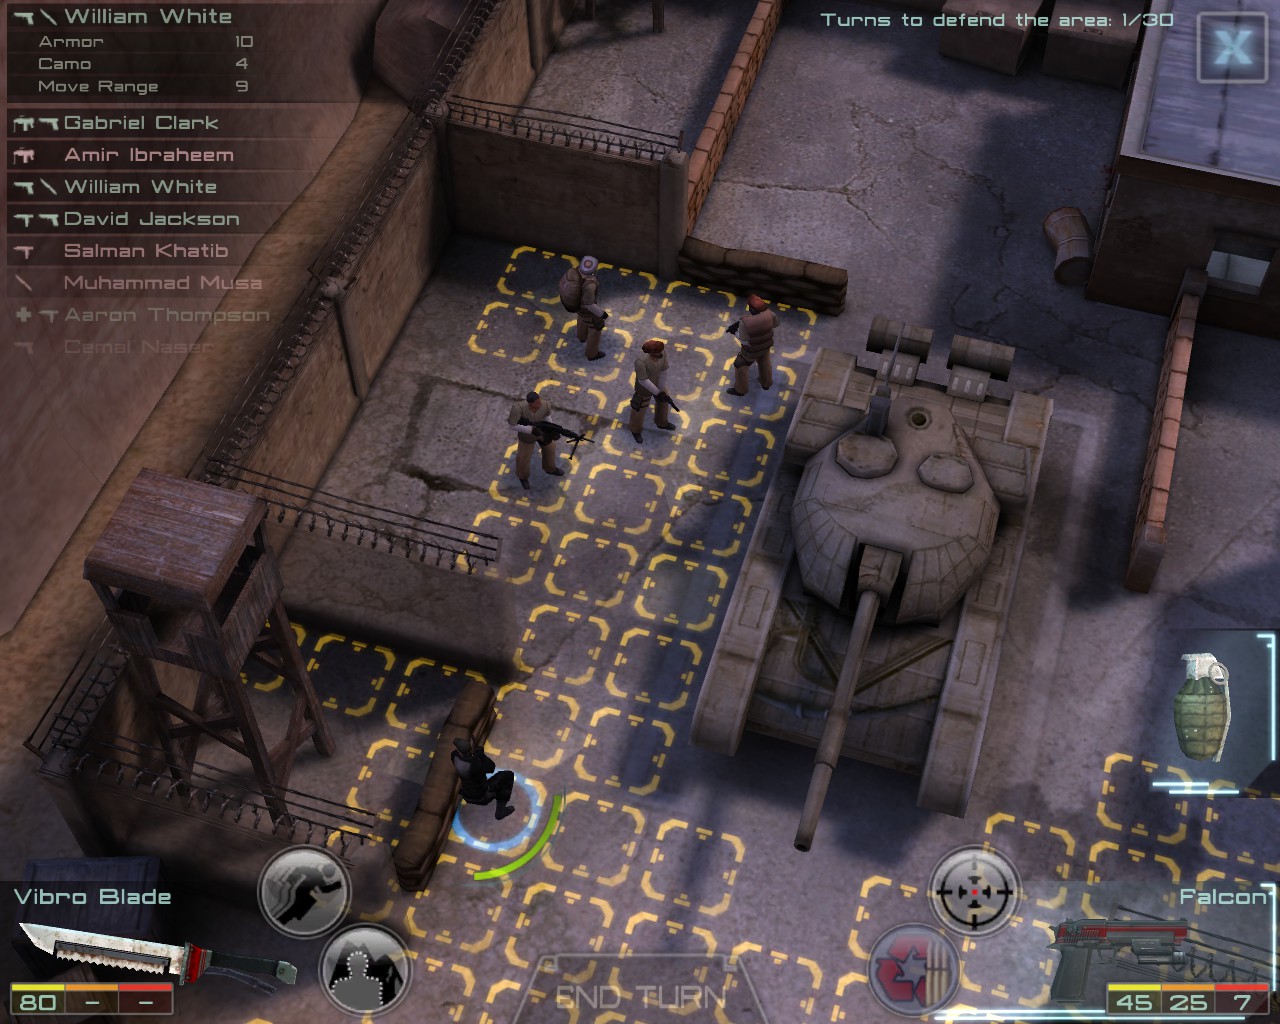
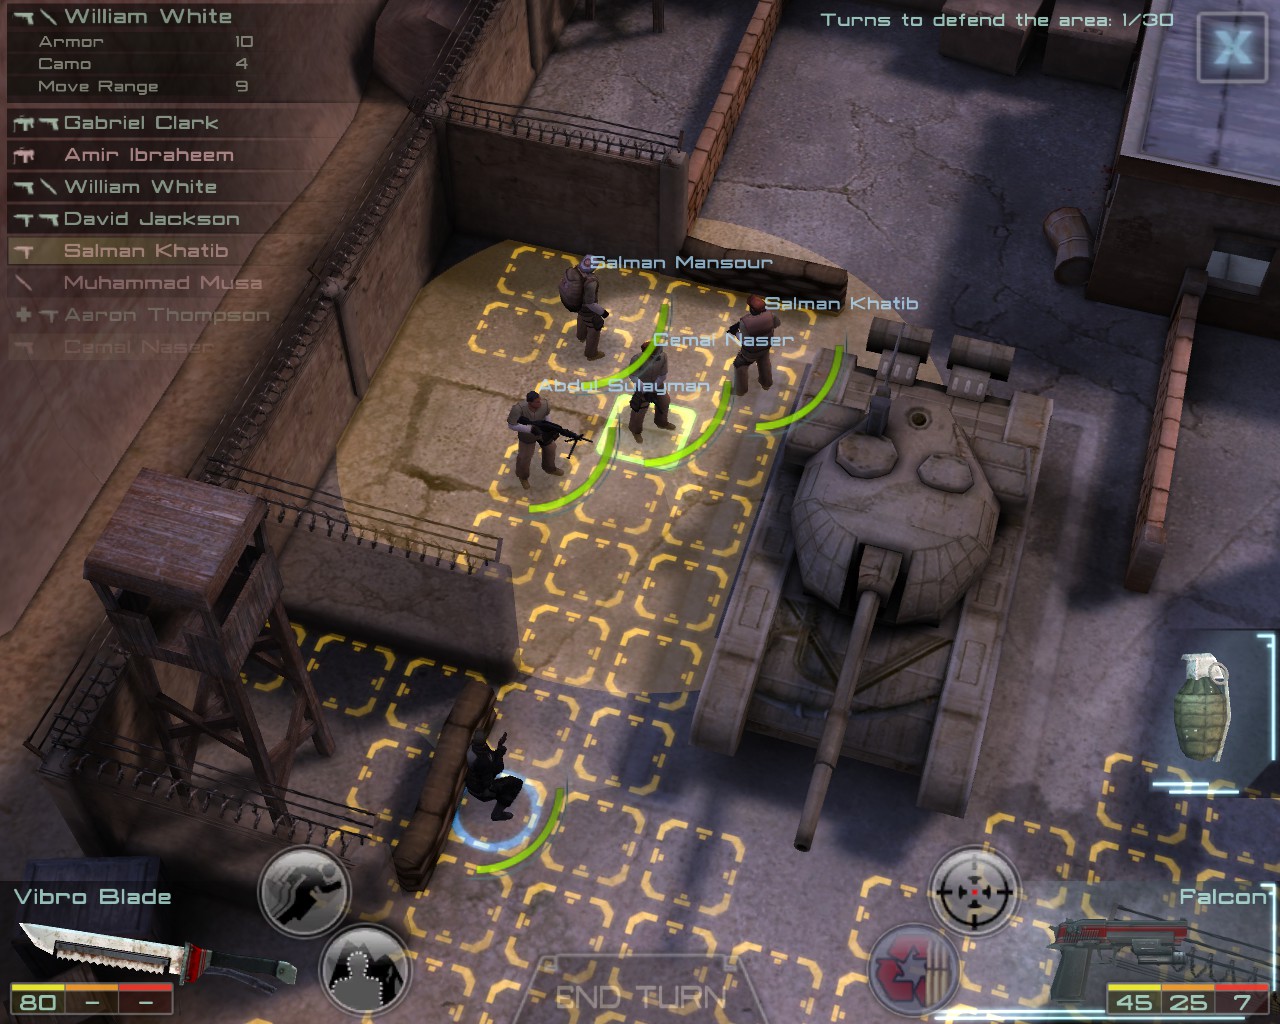
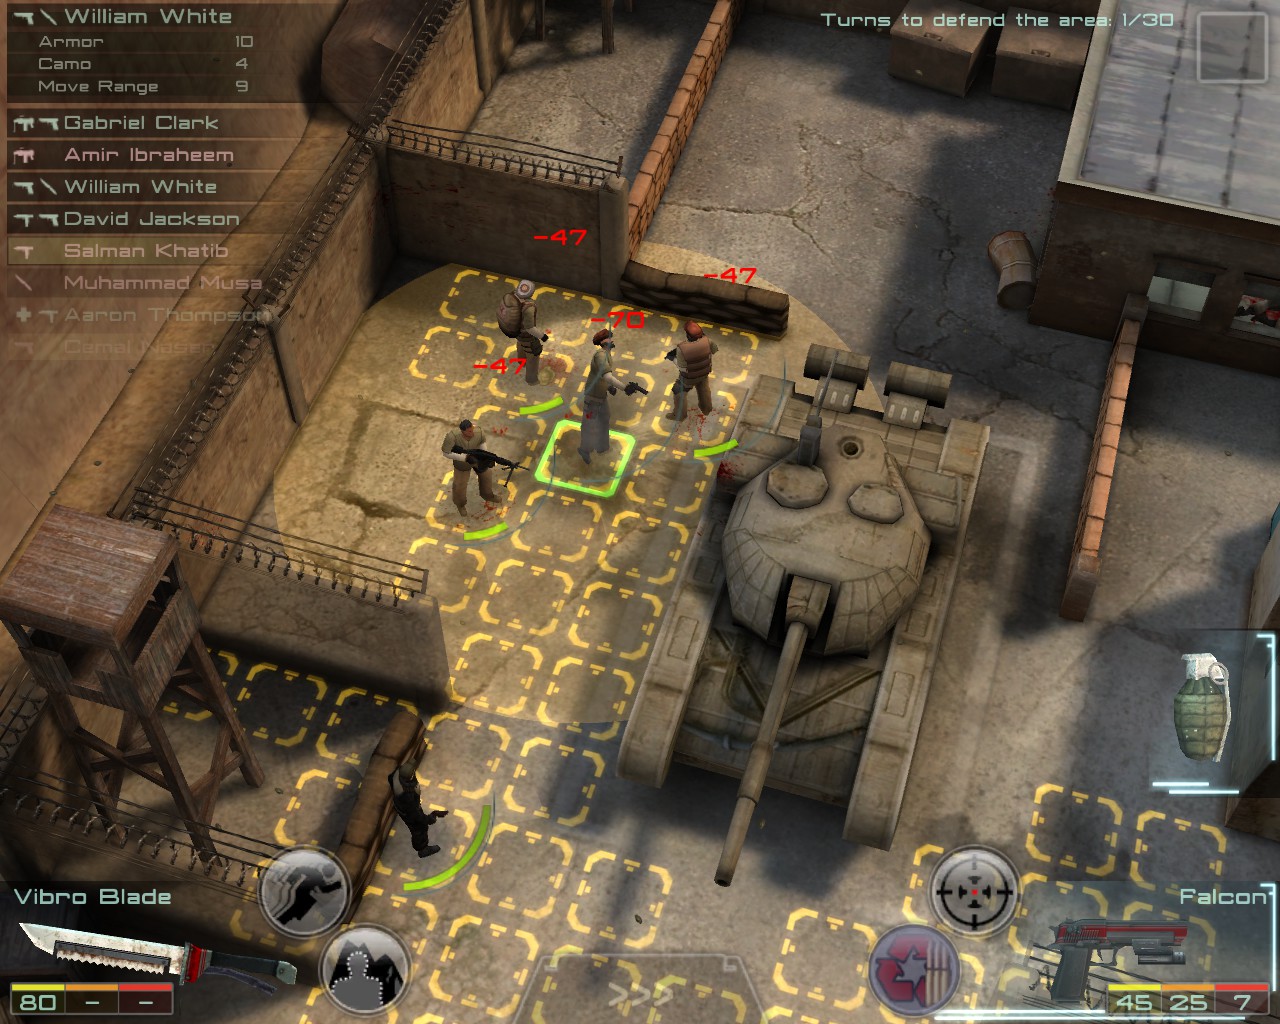
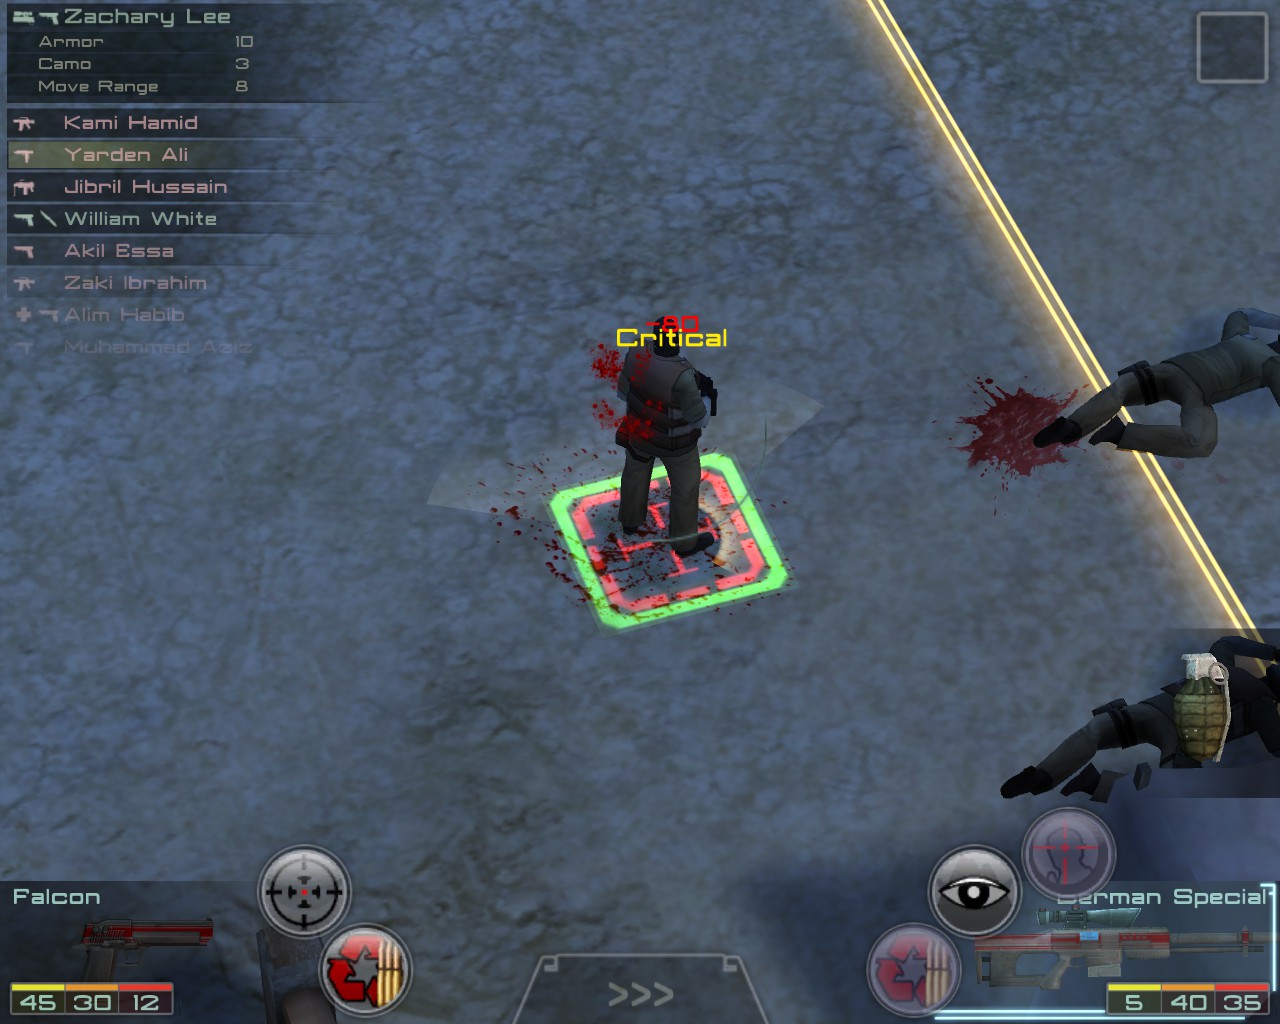
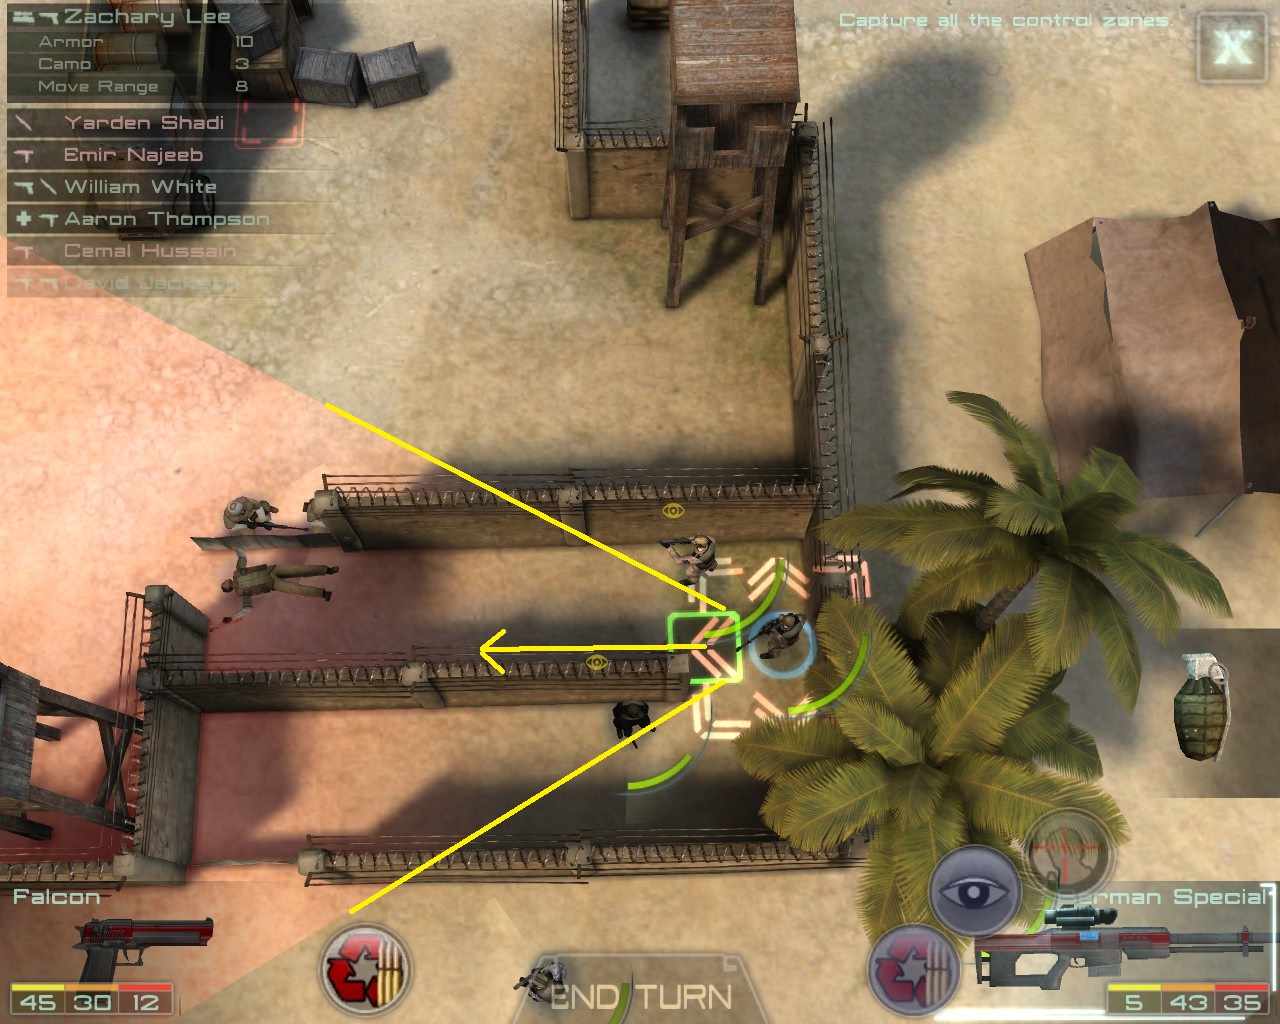
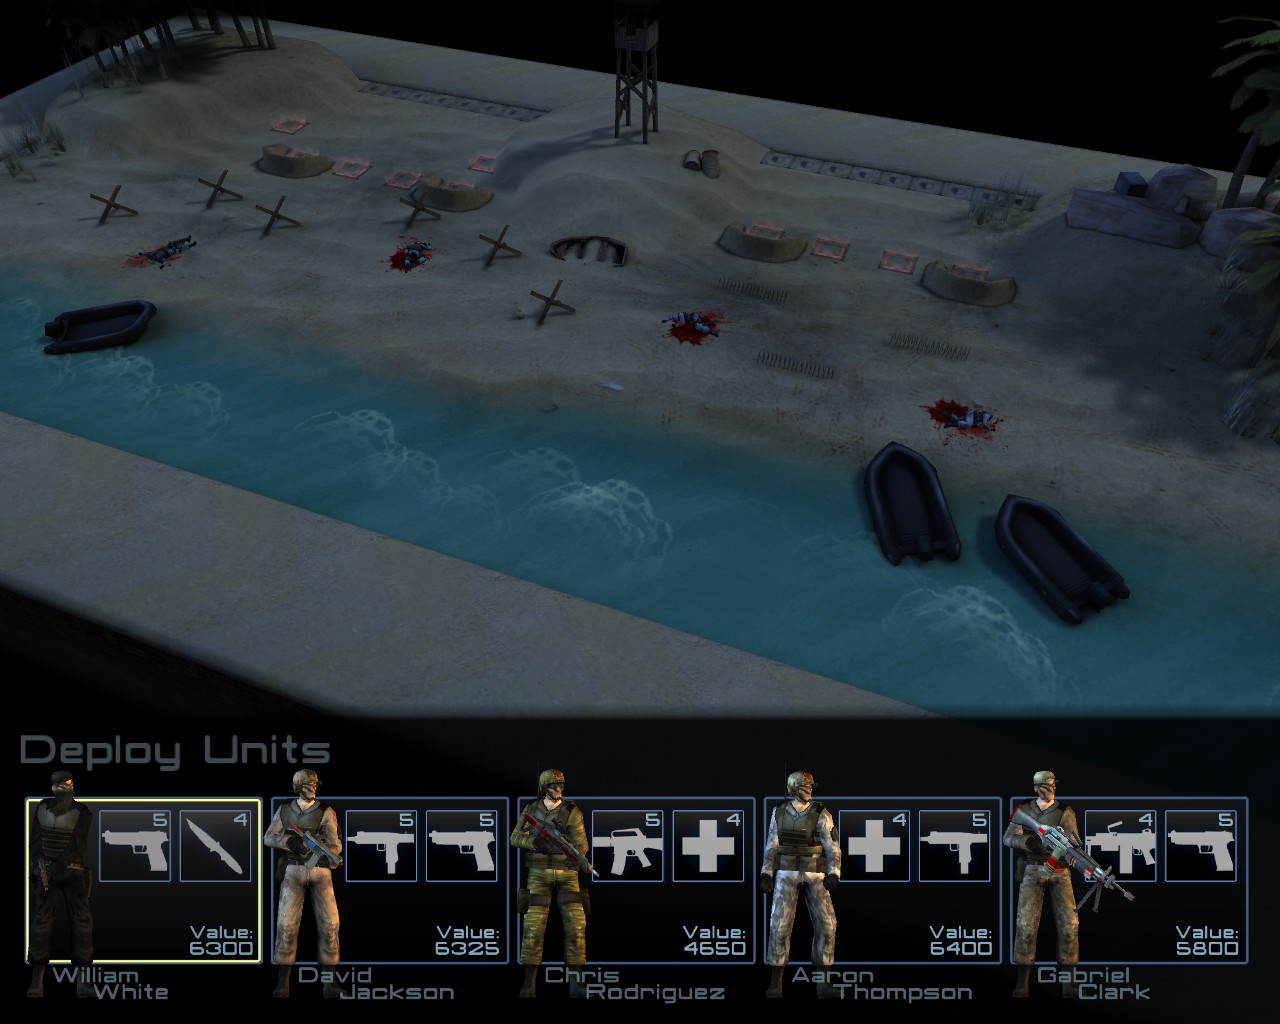
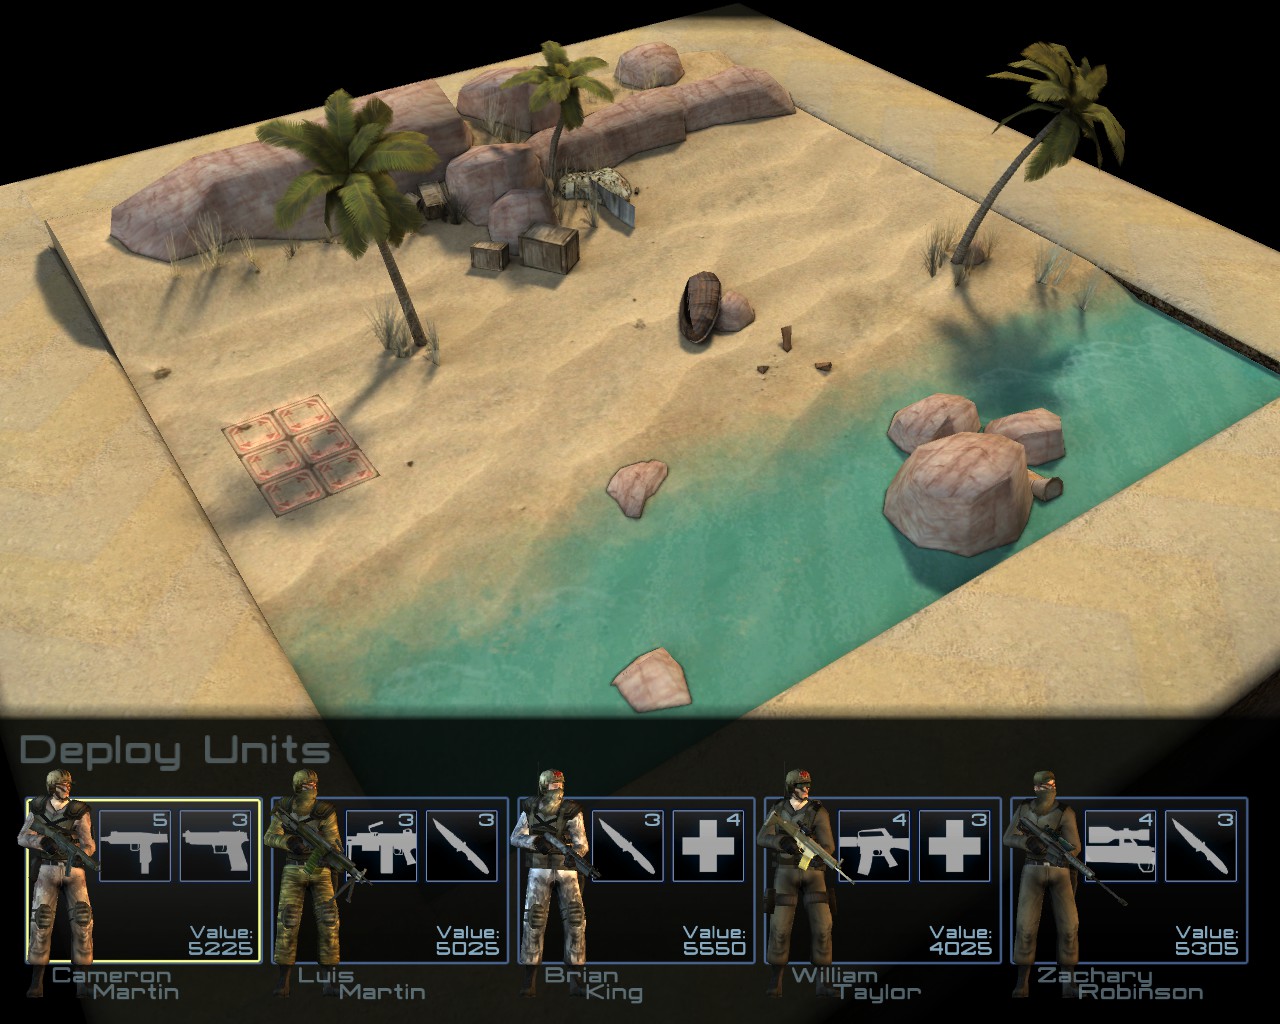
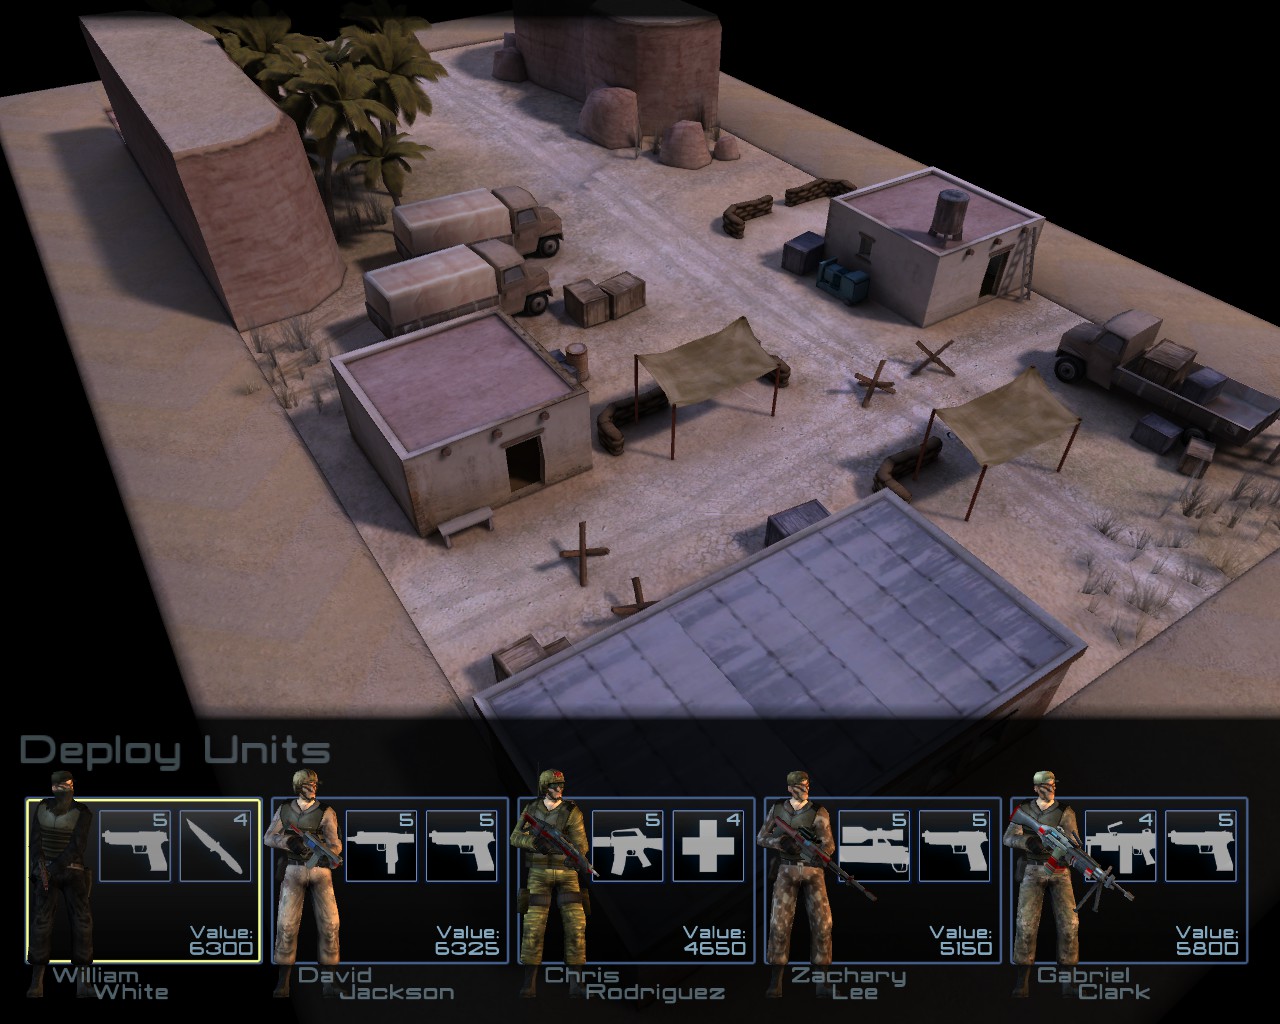
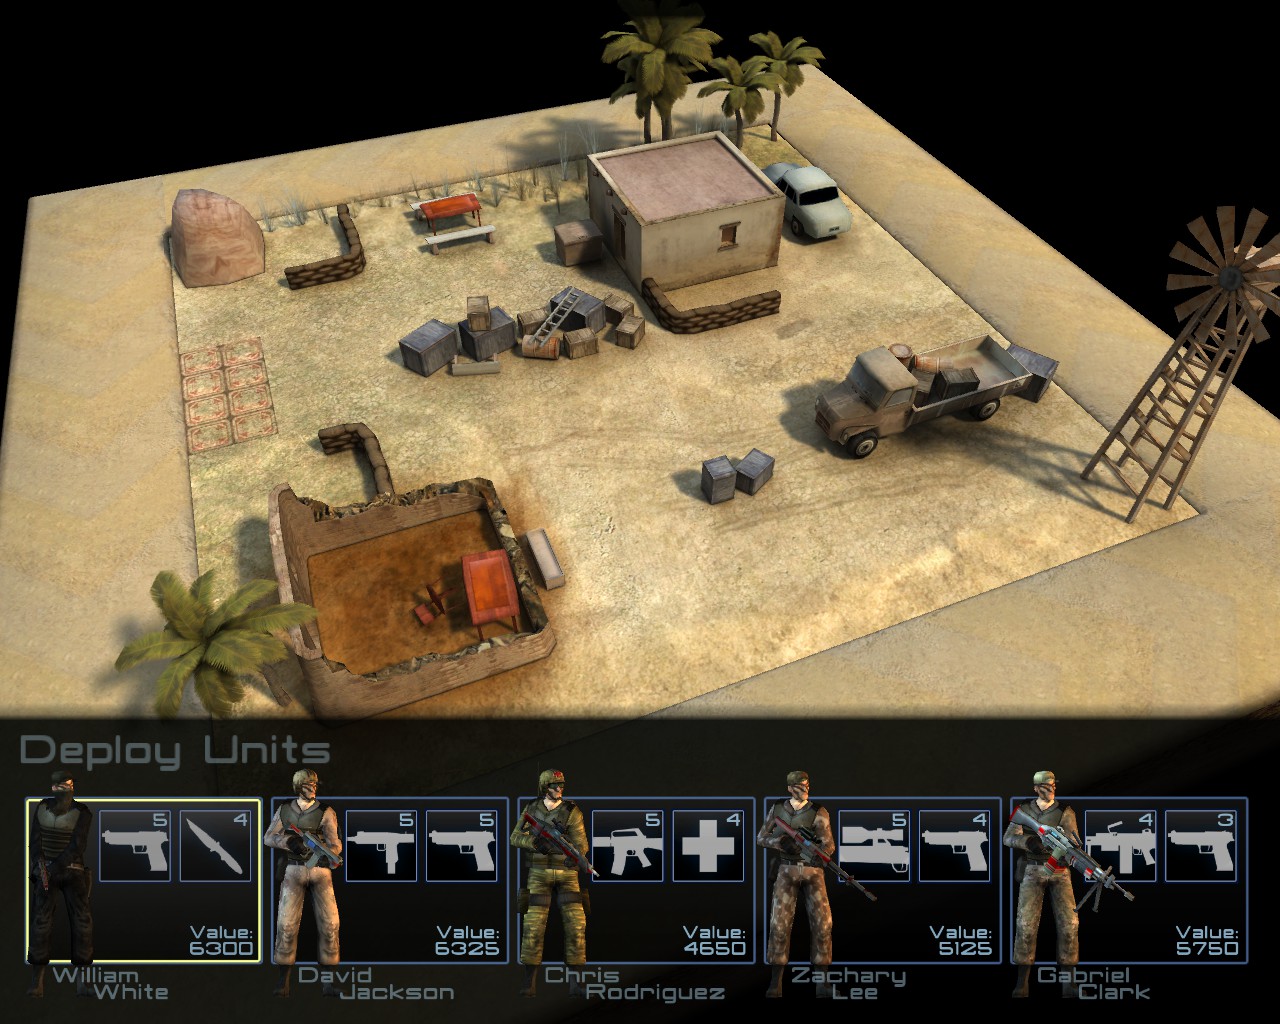
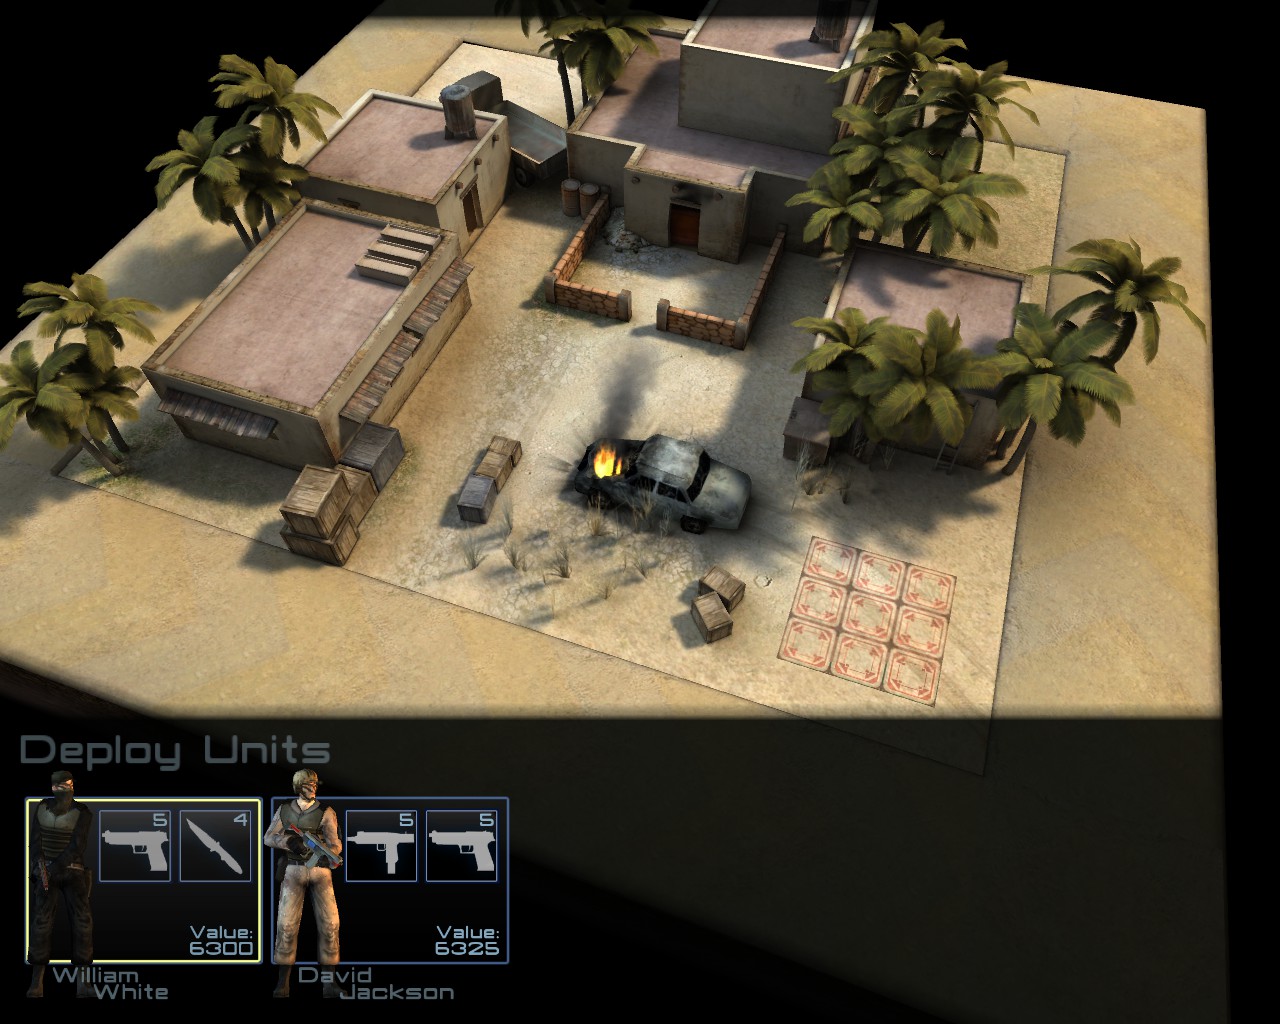
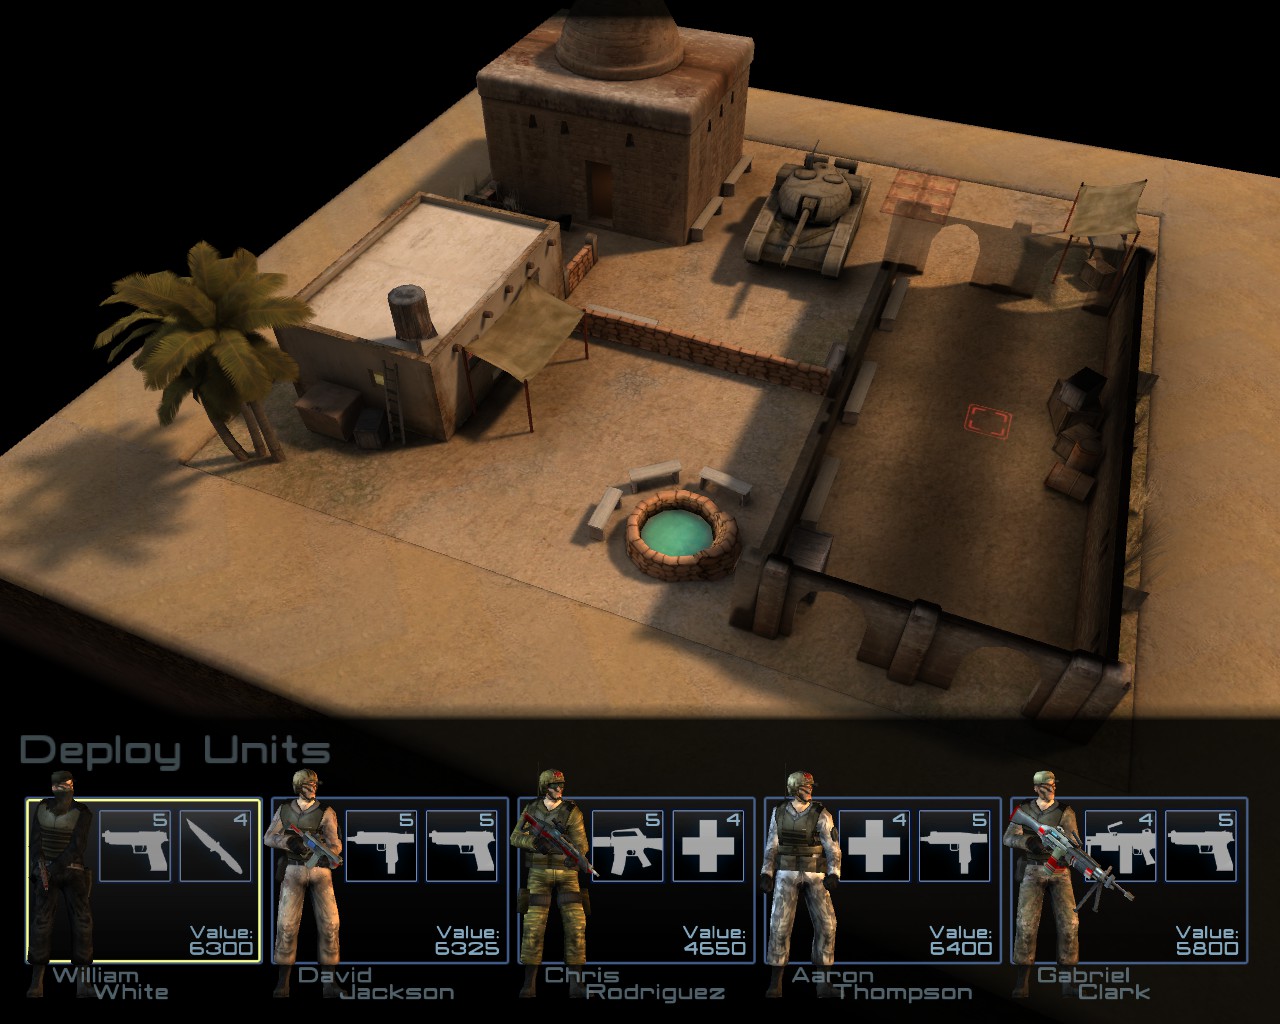
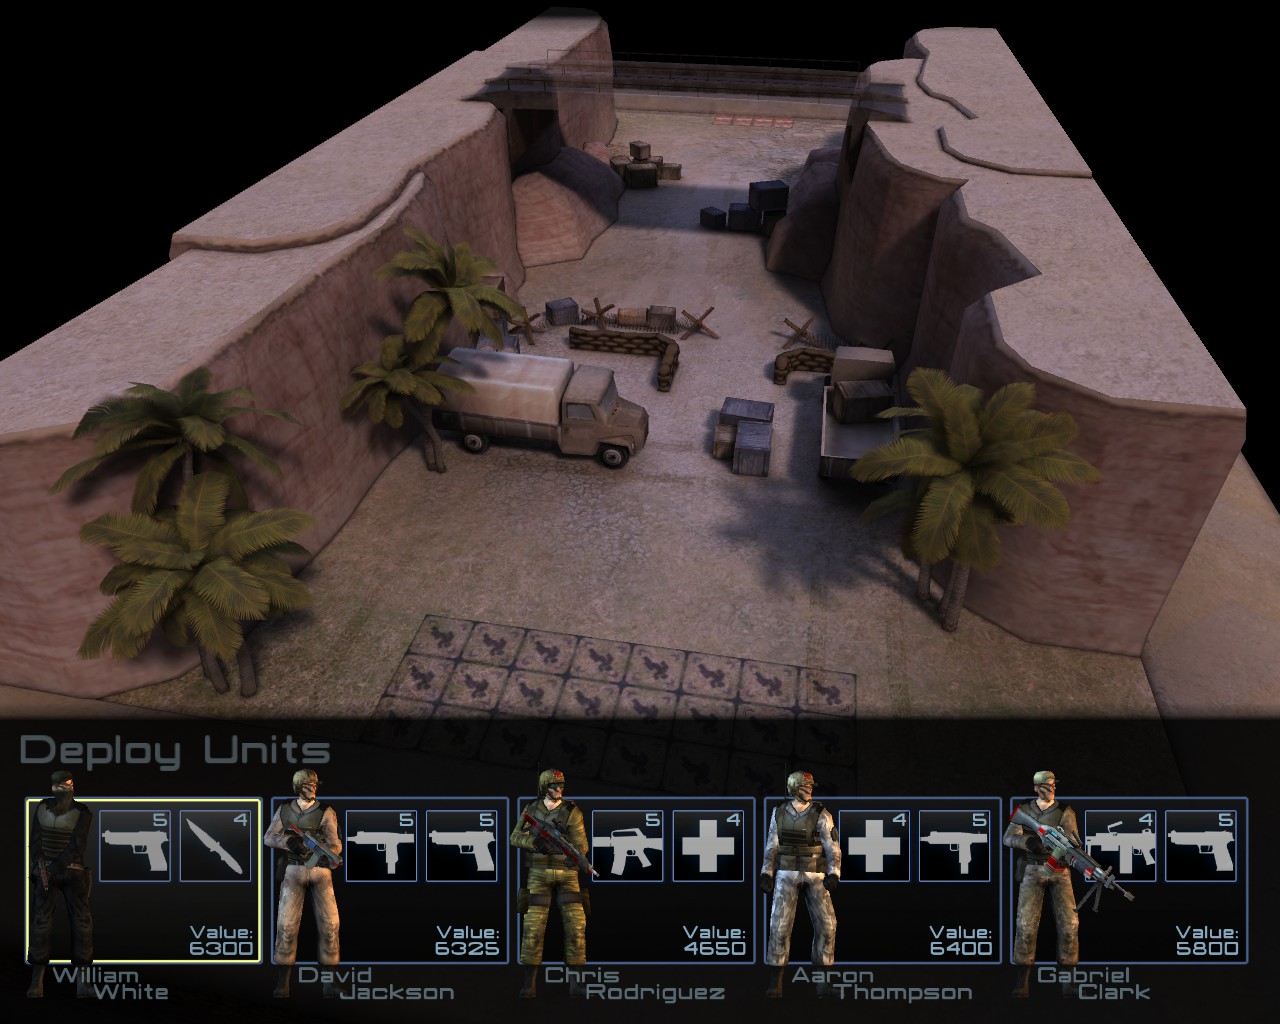
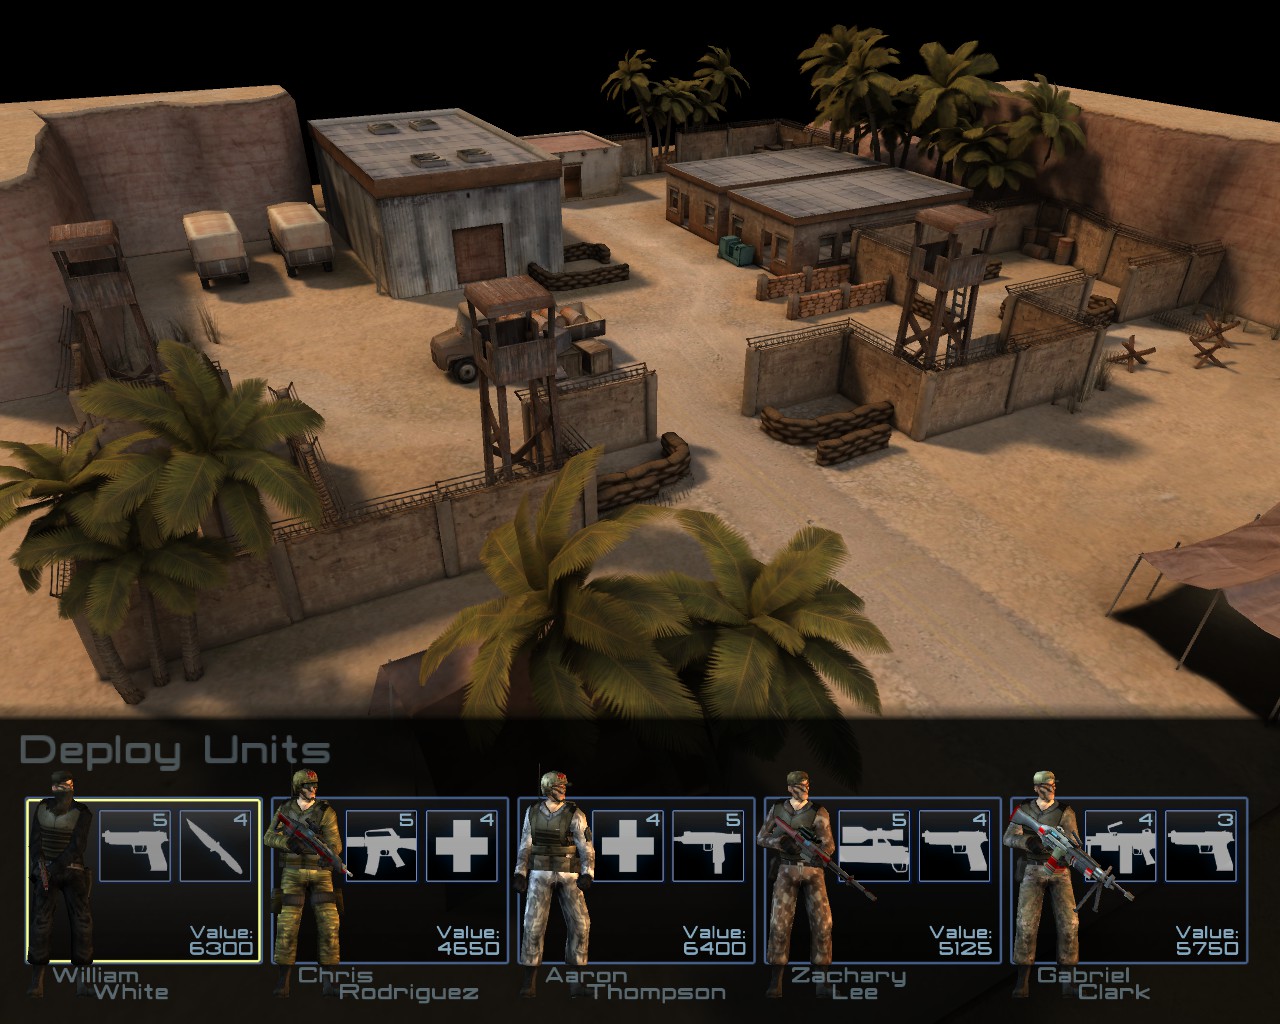
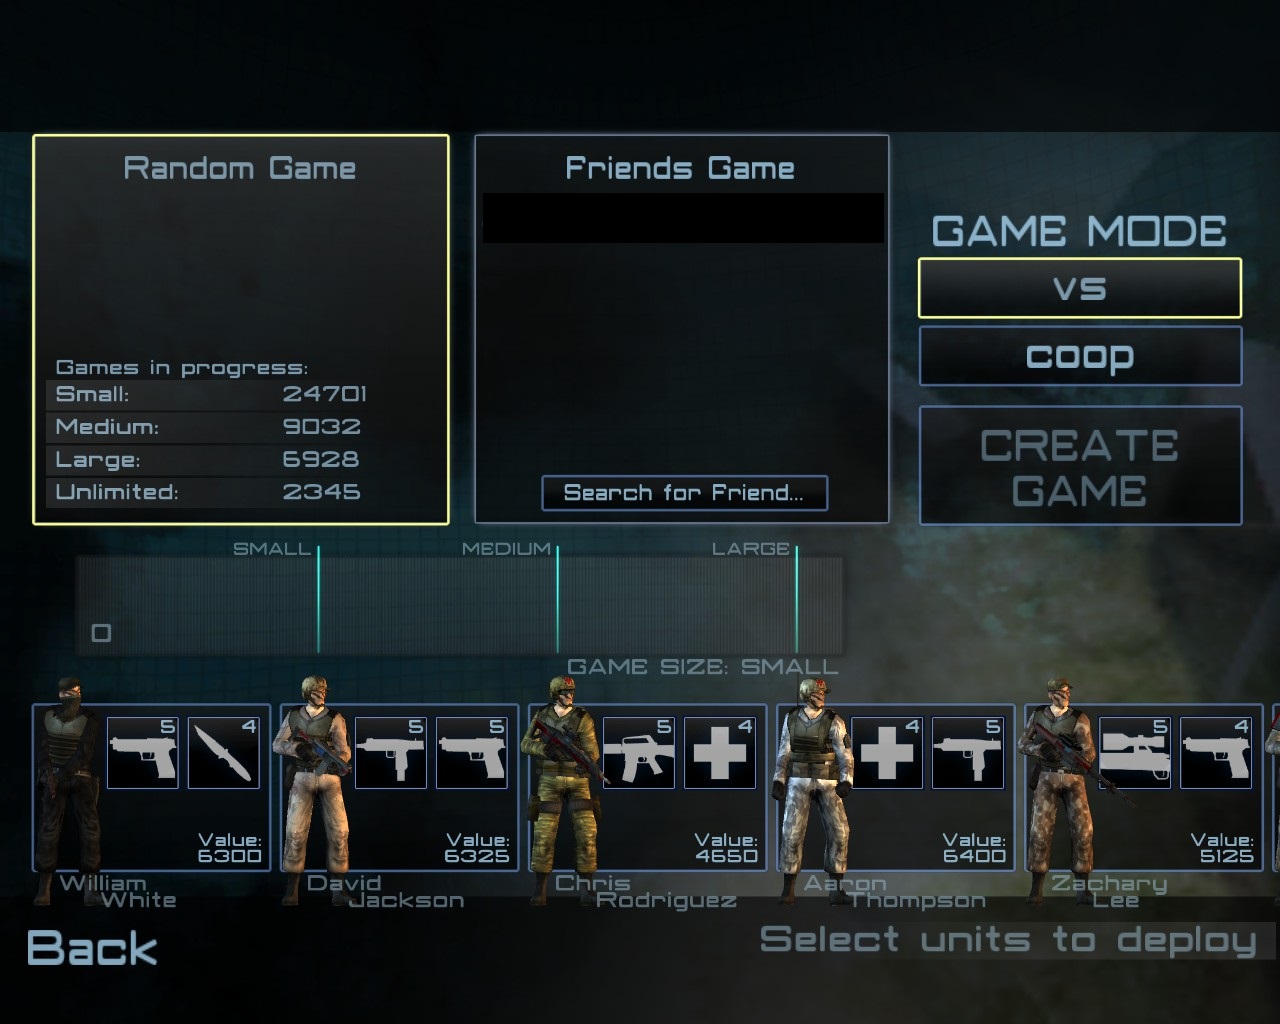
My best unit has Rifles and SA. I primarily use the Rifle as it has a lot more damage, but the handgun is good for the extra damage at close range (as well as movement and initiative bonuses). The grenade is also good too :flashbang:
Umbrella Incorporated  [author] Aug 24, 2017 @ 4:40am 
By primary, I mean the class weaponry the soldier will be using most often as his primary weapon. You get full benefits from both classes you choose. A Soldier that uses his SA handgun for close quarters combat would not benefit from having a sniper rifle, but a dedicated sniper would benefit greatly from the SA's bonuses.
JumpOffACliffy Aug 24, 2017 @ 12:14am 
Wow, amazing guide! You've put a lot of effort in. Not only do you have heaps of useful information, but you also included some humour :showtongue::2016trophy::Trophies:
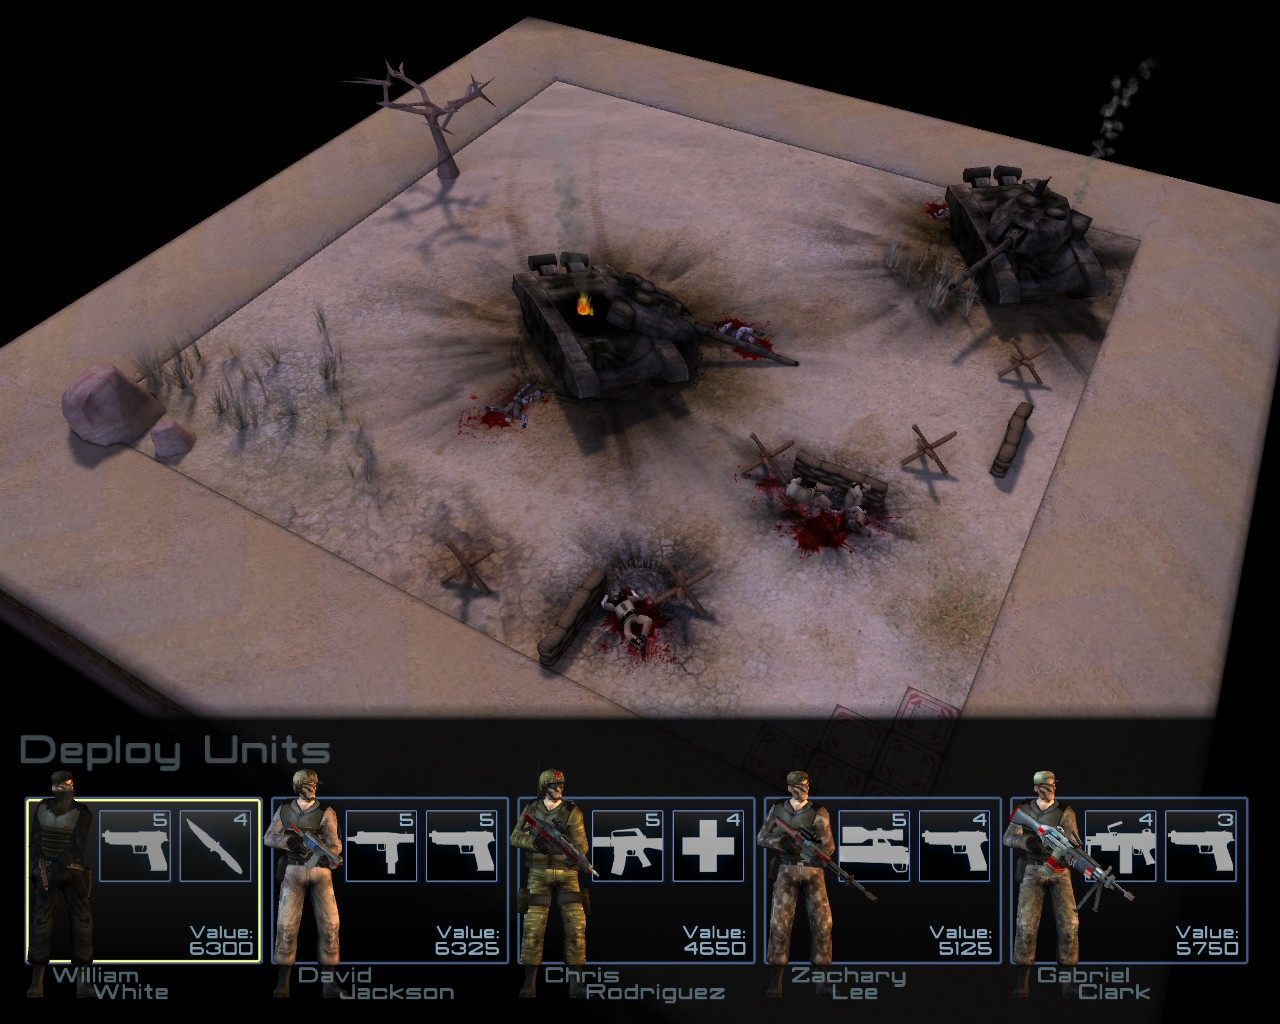
Just one question, what is the difference between a primary class and secondary class? And how does it affect the troop? For example, you said that for primary SA you shouldn't include Rifles, but for primary Rifles you could include SA
Galactipod Jul 6, 2017 @ 7:46pm 
Just buy xcom.
Umbrella Incorporated  [author] Jun 12, 2017 @ 8:29pm 
The most likely cause of that is the shop is no longer in service. This is somewhat of an older game and the servers are not goign to stay active forever. It's a shame, really.
sotamies Jun 12, 2017 @ 4:33pm 
Shop wont load, did i seriously get a game that is "missing" one important feature?