Rise to Ruins

Rise to Ruins

403 ratings
Rise to Ruins Beginner's Guide [InDev 33]
By Meshech
A playbook for the modern tyrant.
7
5
25
3
5
2
3
2
   
Award
Favorite
Favorited
Unfavorite
INTRODUCTION


The aim of the guide is to provide a basic understanding of game mechanics and a few strategies to employ as a base to conquer the world map in Traditional mode or move onto Survival mode and improve and develop on the foundation built here. The game draws heavily on traditional tower defence elements and city building and resource-management games with a sprinkling of 'populous' style god elements, so if you're familiar with concepts applied to that style of game, then you'll likely have a head start on the kind of things you'll be doing and looking for. This includes production bottlenecks, maze-like defences, reducing travel time for workers and effective worker distribution.

It is also a work in progress, likely at least until the game actually releases. As such, please feel free to message me with any omissions, suggestions, corrections, or any other feedback. As with all these kinds of games, there are many valid strategies, and many, many important tips I probably haven't included. If you think they're important, let me know and I'll try and add something! Please rate the guide!

Likely updates:
  • More images, especially for enemy and tower types - probably some more throughout to make reading easier. Improved tables for enemies and towers.
  • Spell guide (changing spells, usage/advantages).
  • Golem defence.
  • A section on migrating to new lands.
  • Fishing and Hunting update (hopefully soon after release).
  • Hygiene update (hopefully soon after release).
  • A section on the corruption mechanics (these are confirmed to be changed next update, so seems a bit early to put much detail).
  • Event explanations and strategies. Fear the blood moon.
  • More diligent and gruelling editing/improvements. Breaking into smaller sections for a better index.

Where to start?
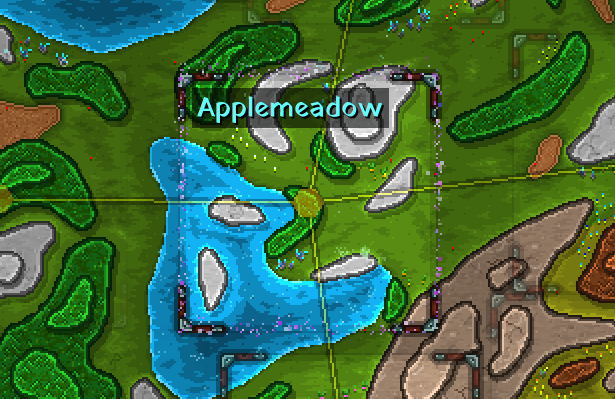
If this is your first time playing, or even if you're already a few defeats in, then this guide would recommend starting on the World map in Applemeadow on Traditional difficulty game mode. The central area near the peninsula offers an easily defensible position with abundant resources. Later, it can function as a perfect staging ground for your expanse across the region.


Some introductory notes and tips from a thousand new beginnings:

  • Do not be afraid to lose! You can reset the entire map but keep any perks you have unlocked. This game, like many older tycoon/builder games, requires multiple failures to pave the path to victory!

  • Game speed - Be very careful with the increased speeds, especially early in the game, as things can happen quickly! Use [] and [] to decrease and increase speed respectively, and [space] to pause.

A few more notes on hotkeys:
  • The grab tool [] can be used to speed up building, provide resources to manufacturers, or to rescue stuck villagers. Sacrifice enemies that stray into your village by dropping them in the Cullis Gates dotted around the map for a small burst of mana.

  • The spells bar, at the top of the screen, can be accessed using the hotkeys []. They can be individually remapped using the buttons underneath each spell. At the start. [] summons a holy golem, who is very useful for early base defence and later in small swarms to aid towers if walls are breached. The total amount of mana you can hold increases with the number of villagers you have.

  • To destroy terrain use [] and [] to destroy buildings. These are also accessed in the bottom right of the screen.

  • Direct your minions to harvest resources with the buttons in the bottom left of the screen. Also use [] to fell trees, [] to mine rock, [] to collect food and water and [] to harvest crystals. While using any of these tools, or the destroy terrain tool, hold [] while clicking to cancel the orders.

  • The brush used for most terrain manipulation actions can have its shape changed with [] and can be made larger and smaller with [] and [].


1.0 ESTABLISHING YOUR VILLAGE
1.1 Planning the Camp
Thinking about the basics: food, water and housing, and initial defences
Initial camp and ancillary placement should be decided based on a number of factors, including proximity to food, water and natural resources, but particular attention should also be paid to defensibility. Use natural barriers, such as mountains (or even the map edges) as starting points and bridge the gaps between them with fences and walls. Your building placement should aim to reach some of these to provide range, allowing construction of perimeter walls. As you extract the resources, you can add walls and towers to solidify your rule.

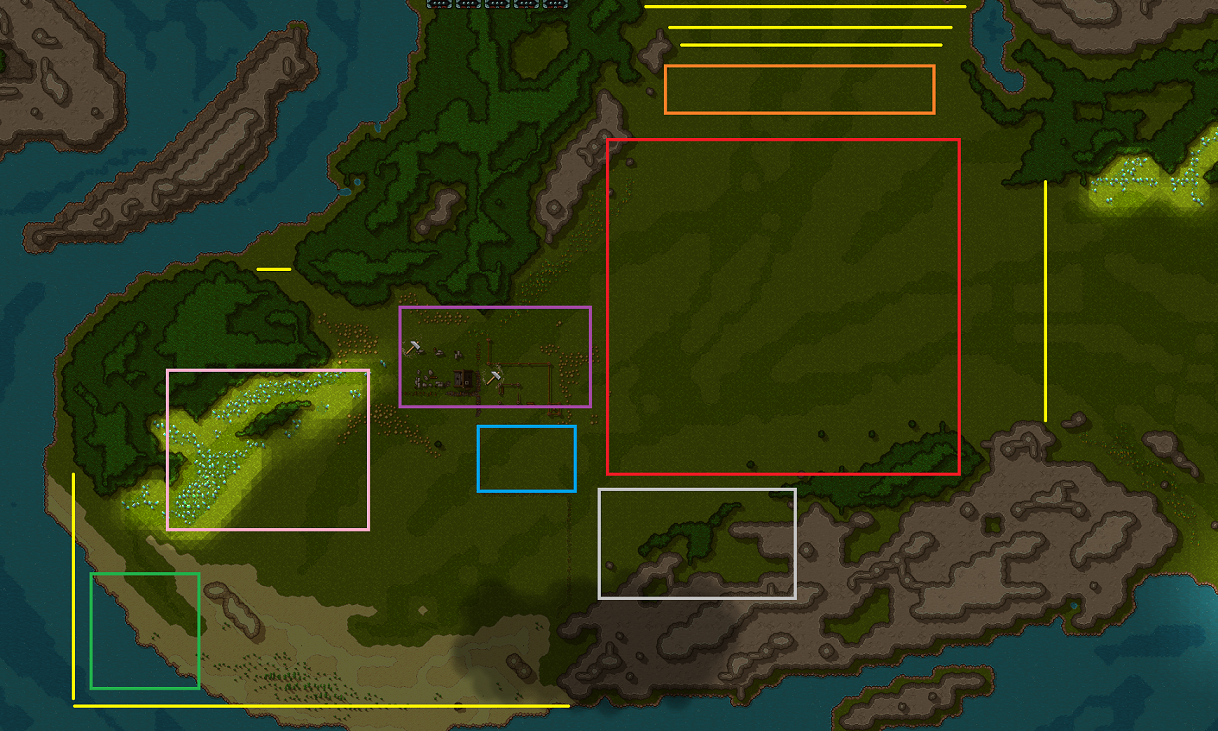
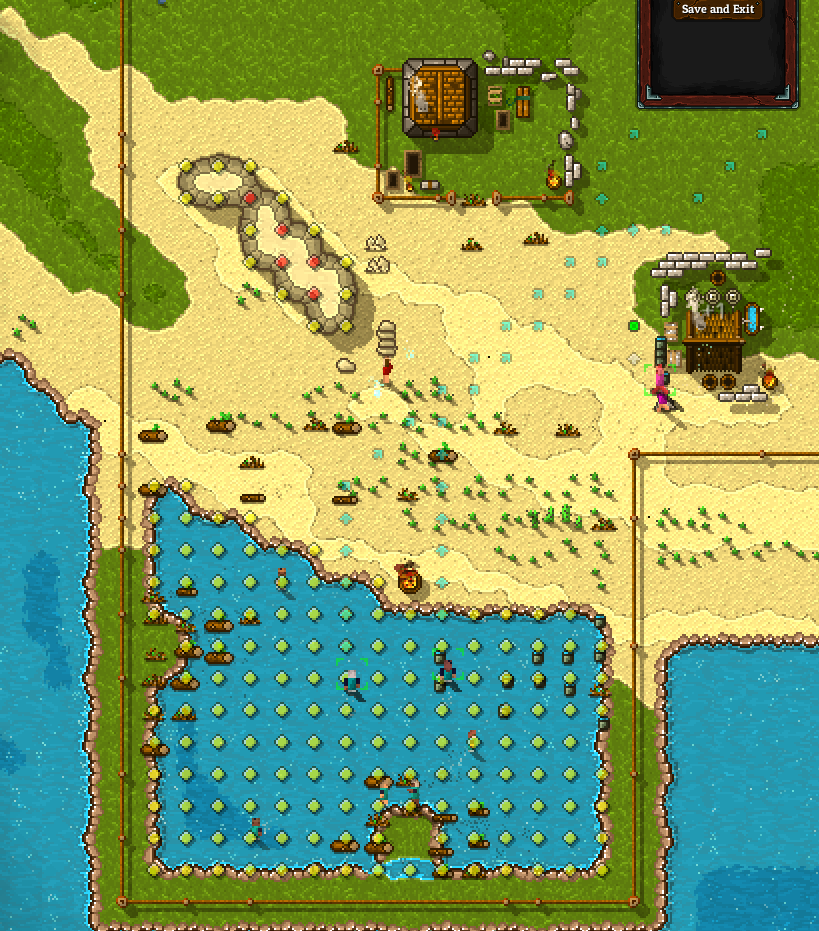
A possible plan
  • Red - Initial Camp location with housing and farms
  • Blue -Initial Ancillary position to extend reach
  • Purple - Prospective lumber area
  • Pink - Crystal area
  • Green - Prospective water harvesting
  • Grey - Mining area
  • Yellow - Wall positions - The northern wall section indicates labyrinth position
  • Orange - Tower location

Some tips:
  • Don't forget to use the Grab [] tool to help your villagers build! Pick up logs from forests and rocks from mountains then drop them onto building sites that require the materials. It's a little mystifying to your villagers watching trees uprooted and dropped in front of them, interrupting their work momentarily.
  • Don't forget to tag some stone, wood, crystals, food and water using the buttons in the bottom left of the screen, or the [] keys.
  • If they aren't doing anything else, assign villagers to work as builders, then swap them to other roles as necessary. Later, assign spare workers as organizers, too. Unemployed workers are listed at the top-right of the workers panel on the left of the screen.
  • Don't be afraid to experiment. Modify what you've been doing based on what it seems like is needed. Learn from your mistakes! If you're playing on Applemeadow for example, you may need to build the ancillary earlier, so that you can reach the lumber shack, or you may need to reclaim the wood storage first.
1.2 The First Day - Establishing the Camp
A suggested build order for day one:
  1. Build one farm - assign one Farmer in the left-hand panel, or by clicking a farm. This will harvest food resources you've marked on the map and replant them in the farms, multiplying them over time.
  2. Build one house. The house has food and water stores for the people, makes them happier and more efficient and protects them from extreme hot and cold.
  3. Build a well - assign one Water Master
  4. Upgrade the camp to a large camp
  5. Build a lumber shack - assign one Lumberjack
  6. Build an ancillary or two (if required) - assign one Organizer. Ancillaries both provide more building slots and facilitate the logistics and hauling for your village.
  7. Begin perimeter wall construction with wood fence. Consider if there are any gaps between natural barriers that could easily be fenced off completely to discourage enemies from heading in that direction. The eventual aim is to have a single entrance that functions as a choke point where most of your defensive towers will be concentrated.

This will function as a solid foundation for the rest of the village. Be aware of corruption. On Traditional difficulty at the start of Day 2, the corruption will spawn giving an indication of which direction the enemy will attack from. The corruption will spawn instantly in Survival and Nightmare difficulties.

Organizers
Often overlooked, Organizers play a critical role in efficiently moving resources around the base, including food from fields to storage and ammunition to towers. Though builders and other workers will deliver resources to building sites and processors, by getting Organizers to do the 'heavy-lifting' and logistics, other workers will have more free time to do their primary tasks.


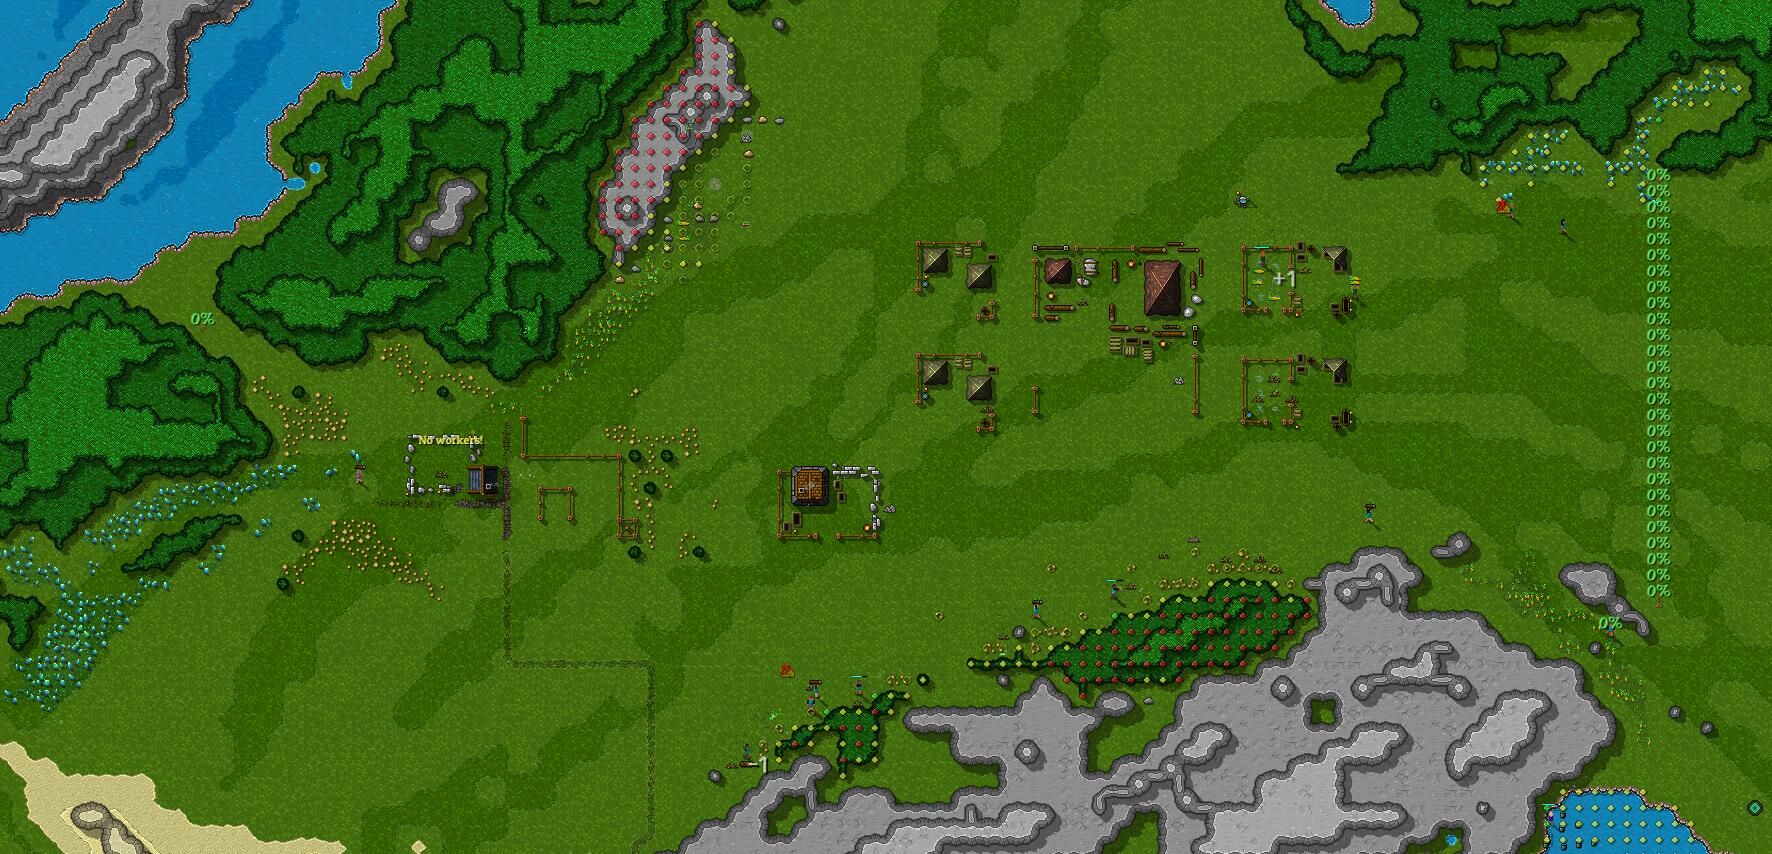
The foundations of a town under construction.
1.3 Preparing Initial Defences
  1. Build a mining facility, assign a miner.
  2. Build a bowyer, assign a fletcher. Set the production threshold to the right to around 40 ballista bolts. Make bows and arrows for your villagers if you wish.
  3. Build at least two bow towers in the direction that you expect the monsters to be approaching from. I prefer the bow towers to the alternatives due to the increased range.
  4. Continue to block other potential approaches. As the corruption spreads around the sides of the base, or as you block certain routes, enemies can find new, shorter paths that can circumvent your defences. Plan your expansions accordingly!
1.4 Resource Production
Firstly, start building another farm, well and house, and a food storage. You're going to want to keep scaling these up and building more as your population increases. If you're ever running out of building slots, upgrade the camp or an ancillary, or even build a new ancillary. You will need enough storages and food to fill them to survive the first winter!

Successfully managing food and water can be a challenge, and can create a difficult-to-reverse crisis should they get out of control. With the generation of trash, overproduction of food can generate vast amounts of Trash Slimes that can destroy your village. Make sure food is put into storage and cooked into rations. Water doesn't suffer the same kind of issues, but without wells and bottlers, winter can still be a problem. Farms also use significant amounts of water to increase field fertility.
1.4.1 Advanced Food Production
Farm
I like one makeshift farm for every 10 villagers and a single food storage earlier in the game, and between one and two established farms per 20 villagers later in the game, with 3 or 4 food storages, but perhaps I tend toward very justified, winter-based paranoia with regards to food and water.

Kitchen
Allows your villagers to carry the food around, is more efficient and slows spoilage. When your food production is established, a team of cooks makes food management easier and becomes vital in the late game.

Food Storage
These prevent spoilage of the food due to being left around on the ground. These become essential to feeding your large population through winter.

Running out of food in the winter?
If you leave some food uncollected on the map, you can set it to be harvested to get a few extra food in a pinch. During the Spring and Summer, motivate land can be used to grow more crops. When used on fully grown crops, it will spread to new tiles.

1.4.2 Advanced Water Production
Wells and Fountains
I tend to start with two wells next to the farms, then put pairs of wells in more distant areas, building them up as I feel necessary. Wells provide water in the winter in addition to the other seasons, making them very useful, even if just as a reserve of clean drinking water. Fountains serve a similar purpose, allowing your villagers to drink where they need it, but when this becomes much of a concern, I usually have a bottler up and running. I aim for six before the start of winter.

Rain Catcher
Gathers a supply of water from rain, either in addition to other water facilities or when no other water sources are available. Highly dependant on weather conditions.

Water Purifier
Water purifiers turn dirty water from surface water sources into clean, drinkable water. I like one of these early on, moving up to two before winter, scaling with demand.

Bottler
Bottlers allow your workers to carry some water with them, allowing them to sate their thirst, wherever they are. Similarly to kitchens, these become more important in the late game.

You may find you need to expand the amount of water you're harvesting with additional Water Masters and extending walls to capture new areas of lake/sea to satisfy a growing population. This will be explained in a following section.
1.4.3 Wood and Stone Production
Rock and wood collection are fairly simple, and will become more complex with refining in the next stage. Having a lumber shack and mining facility is sufficient at this stage, but upgrading and adding more gatherers will be necessary as demands for materials increase. For example, more wood will be needed for making ammo as your number of towers increase, as upgrades become higher level and more expensive and as you're producing more refined materials.

Looking at the numbers at the top of the screen for resources, the first number is the amount you have, and the second number is the remaining storage space. Make sure that you aren't running out of the raw materials completely. You may need to increase the number of gatherers or tag new resources for extraction. Either way, you can operate with a single mining facility and lumber shack for a long time.

Resource caps
Overproduction of resources without storage leads to lots of resources on the ground. These decay into trash, resulting in trash slimes! Be judicious with the areas you're selecting for resource harvesting and destruction, and set caps using the resources tab. Make sure any resources you want to keep are in storages! You will want to think about building wood and stone storage soon!
1.5 Extending the Defensive Perimeter
At this stage, I would recommend making sure that all the ways other than one are blocked up with wood fence. In the other gap, we will add the labyrinth, funnelling the monsters into a single choke point.
1.5.1 Capturing New Land
Firepits have been placed after opening the walls. Construction of the exterior wall is nearly complete.

Capturing new land outside your walls must be done very carefully. It's generally not recommended to puncture holes in your wall, unless you have many towers and defences. Later in the game, it will almost certainly spell defeat.

The basic process is as follows:
  1. Place a firepit to extend your building reach. Early game for acquiring new water sources, making a hole in the wall is fairly safe, or just using the pits to extend the reach early on, and only putting the wall in later works too. Find what works for you!
  2. Build a perimeter wall, adding new firepits as needed to reach around.
  3. Remove the once-interior-now-exterior wall if you want.
  4. Remove unnecessary firepits to free up building slots.

The completed water gathering area
1.5.2 Beginning the Labyrinth
The aim of the labyrinth is to keep monsters within the range of your towers for the maximum amount of time.

To build a labyrinth:

  • Add a few firepits in a line at near maximum range of your towers. As these are probably distant from your main camp and wood, you can tag wood near them for gathering or use the grab [] tool.

  • Add a wooden fence leaving one square between it and the firepit, on the side opposite side from your towers. Extend this starting at a mountain or forest, nearly all the way to the other side, leaving one square of room on the far side. so that monsters can still come through.

  • Add a wooden fence along the line of your firepits, leaving a one-tile wide gap on the opposite side from where you did last time. You can leave wider spaces for wider pathways, which occupy more space, but are less easy to block with forest growth and earthquakes later in the game. By placing the firepits in the wall, we can save some room (as we're using the walls to funnel the enemy, not actually withstand attacks and firepits block movement) and the reach they provide will let us repair and upgrade our walls later.

  • Build another wood fence across again leaving a gap for a pathway and another on the opposite side from the previous wall. You can repeat this process to make as large a maze as you like!

There are better and improved designs, e.g. vertical lanes, wider pathways, but this should start your thinking and explains the basic concepts. I'll recommend some improvements to expand on this later too, making it more resilient and effective. You can use waymakers to fill the pathway with water, but remember that fire elementals will then avoid this route and attack your walls instead! You can use this filtering to create an alternate route for them filled with ice towers instead though!

By now you should have:
  • A defensive perimeter setup.
  • Food, water, wood and stone production.
  • Some storage for your goods.
  • Some ancillaries and/or an upgrades camp

I would start building two of each houses and farms at this stage to bring the total up to 4 of each. Add two more bow towers too.

The camp should look something like this.
2.0 TOWN EXPANSION
Now that we're relatively safe within our walls, attention can be turned to improving our town.

This includes:
  • Expanding the labyrinth
  • Harvesting crystals
  • Refining resources
  • Handling trash
  • Harnessing magical power
  • Upgrading and expanding defences around the perimeter and covering the town
  • Increasing food and water stocks for winter
  • Providing housing for a growing population
  • Making paths and roads
  • Repairs and maintenance

Doggos!
Sometimes doggos will spawn and join your village. Picking them up with the grab tool and dropping them inside the village seems to help tame them quicker. They will live in your existing homes, or you can build them dedicated Doggo Houses. They will sometimes help by harvesting food, fighting, hauling or opening chests with keys.

Food and water production expansion
At this stage it is likely worth expanding your food and water production.

I would suggest:
  • Increasing and upgrading farms
  • Adding kitchens
  • Food storage - at least one, probably two.
  • Six total wells before winter
  • Acquiring new areas of water if necessary
  • Two water purifiers
2.1 Advanced Resources
To continue upgrading and building more advanced buildings, refined resources are required.

Lumber Mill -> Boards
First, build a lumber mill somewhere near your lumber shack and wood storage, then assign a carpenter. Set production on the left side of the screen to 50 boards.

Stone Cutter -> Cut Stones
Build a stone cutter somewhere near your mining facilities. Assign a stone cutter and set production to 50 cut stones.

Crystals
The third resource, crystals, that you will have tagged for resources earlier - and likely grabbed some to drop to complete the towers - will be required for more advanced buildings. In anticipation of beginning to use magic, we should build a crystal harvestry and assign someone to collect some.
2.2 Trash Collection and Processing
Trash is created when your villagers do most actions in the game and when resources are left on the ground for too long. Food and forest areas tend to be particular problem areas for trash build-up. Dropped items from enemies in killing zones which are not hauled quickly enough can begin to cause a lot of trash too, which is a possible use for Attract Towers.

If enough trash accumulates, trash slimes can spawn, which in large numbers can be a serious problem for a fledgling base. The more trash that is next to each other, the more chance that trash slimes will spawn. Controlling the amount of resources harvested and ensuring proper storage of objects and trash will mitigate these problems.

There are multiple types of trash, most of which can be processed by the Processor to recover some of the material of that type of trash, e.g. food from Organicy Trash. After processing, Trashy Trash remains. This can only be burned into energy within the Burner. Trashy Trash can be compacted into cubes, consolidating many pieces of trash into a single resource and making it more efficient to burn. These cubes can also then be used to build defensive walls or put into larger cubes for long-term storage.

The trash system consists of five key elements:
  • Landfill - Stores large quantities of trash, stopping trash slimes from spawning and buffering burners and processors. Only trashers can use these.

  • Trash Can - Only hold a small amount of trash, but can be used by anyone. Trashers will then collect the trash and deposit it in the other trash-related buildings..

  • Burner - Destroys trash, creating energy in the process.

  • Processor - Extracts resources from trash, based on the type. Creates Trashy Trash as a byproduct. When upgraded, it also gives increased global work speed.

  • Cube-E Golem Combobulator - Creates golems that walk around crushing trash into smaller trash cubes.

  • Trashy Cube Pile - Serves as long term storage for trashy cubes, preventing trash slimes. Can only be build by the Cube-E Golems and must be destroyed to extract and process the trash. They can also be useful for dealing in spikes in trash production, such as after destroying a large area of terrain for building or losing structures to monsters.

Staying on top of trash can be tricky, but is essential to managing the potential slimes that can spawn and spell the end of your village. Correct balancing of resource production and these trash processing methods is key. Bare in mind that adding more Trashers won't necessarily solve the problems. If Landfills, Burners and Processors are all full, then there's nothing else for them to do.

A suggested build order:
  1. Early game - One landfill and one burner, one or two Trashers can handle most of the trash, providing food isn't piling up on the floor and too many resources are not removed at once.
  2. One burner and one processor
  3. Cube-e Golem Combobulator
  4. One or two landfills, close to areas of trash build-up or distant to reduce travel times.
  5. 2 - 3 more burners, I prefer a central set of these, but a few distal ones can be useful.
  6. 2 - 3 more processors
  7. Then as required when trash appears to pile up. I would probably add more golems at this point too.

Make sure to build a landfill and burner now and assign a trasher! You may also want to upgrade your camp and ancillaries.
2.3 Magic Development
A byproduct of burning the trash in the burner is energy. We should now start setting up our magic defences. First though, you may want to build another house and farm, or begin upgrading your existing ones, and a couple more wells. I prefer to have multiple base level buildings before improving them to capture more building range. Make sure to assign a couple of extra farmers as your number of farms increases. I would also recommend adding another two bow towers.

To begin magic development:
  1. Build an essence collector - these increase the size of your energy pool, collect stray essence from the map (and your burners) and allow processed crystals to be deposited to generate energy. Hovering over them will also draw essence into your personal energy pool for casting spells and grabbing resources.
  2. Build a crystillery - this is the equivalent of the lumbermill and stonecutter for crystals. Add a crystillier and set production to 50. This resource is required for advanced towers and can be placed into the essence collector.

As you advance through the game, more towers will require energy to fuel them. As such, you'll need to build and upgrade more essence collectors to increase your mana pool and keep them going through tough night-time invasions of monsters.
2.4 Improving Town Defences
It's time to improve our defences against the various types of monster that we're going to face.

Important defences:
  • Ballistas - these have enormous range and can shoot over all the types of wall in the game. You will want to build at least two of these at the front of your base. Build some around the other walls as well and make sure that most, if not all, of your base interior has some ballista coverage. Sometimes enemies within the walls are unavoidable, and you need something to counter that. Barracks will also help to cover blind spots later, but require troops which could be working in the early game.

  • Elemental bolt towers - build a couple of these early on at the labyrinth to defeat physical-resistant mobs, which spawn fairly early on. Later, I put small outcrops near ballistas as well to stop ghosts that have wandered through your walls.

  • If you build a rock tumbler, you can add spray towers and bullet towers, these have shorter ranges but do good damage against skeletons particularly.

  • Golems - these provide a strong frontline to hold enemies in place for your towers or strike from a distance with magic attacks. These are incredibly useful for a number of reasons.

As the basic towers are upgraded, they will gain elemental damage of your choosing. Make sure to choose a range of elements to deal with the variety of monster types. They will begin to consume energy, but unlike elemental bolt towers, when all your mana is spent, will continue to shoot their base ammunition.
2.4.1 Constructing a Labyrinth
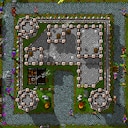
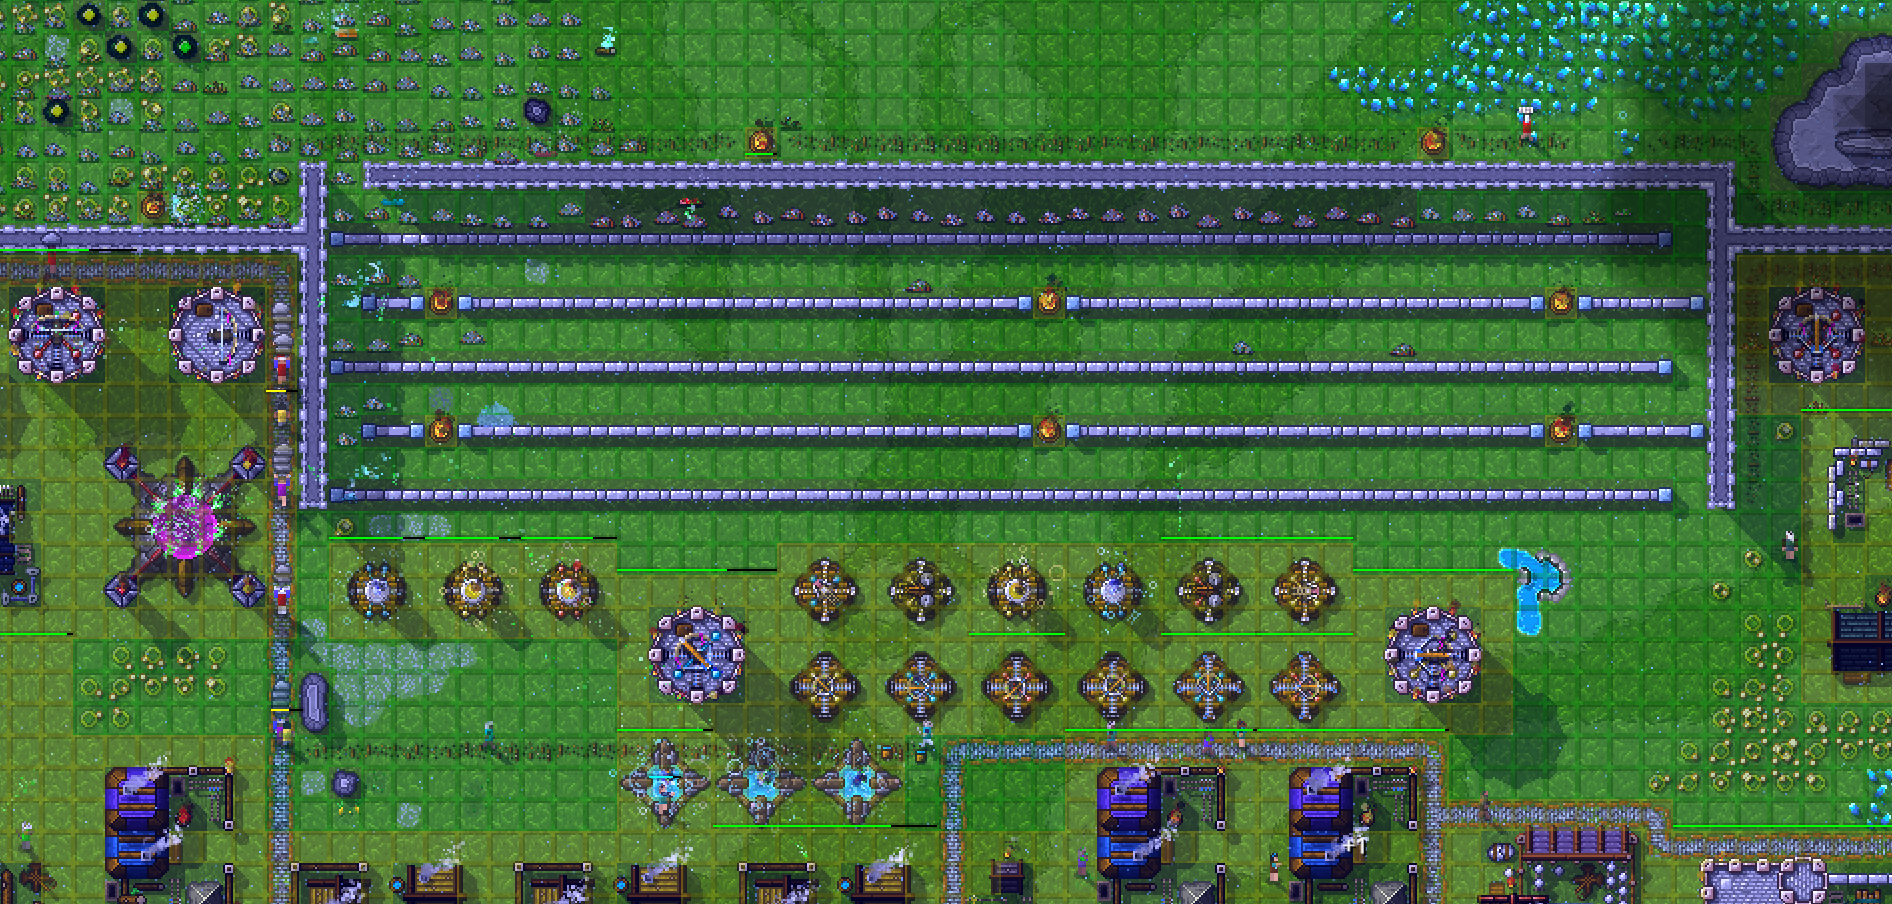
An example labyrinth at the base entrance. Leaving doors off this area means monsters should still recognize it as being the shortest path into the base, and move through here, remaining in the tower's range for longer.

At the labyrinth, the various types of monsters attacking will necessitate a wide variety of towers. As you can see in the above image, in the square behind where the firepits are in the north of the labyrinth, I've added a curtain wall to protect the towers from flame elemental's ranged attacks. The wooden fence has also been replaced with stone wall. Ultimately, you should probably surround your entire base with one or more layers of curtain wall as defence.

Building a few of each of the above types of towers at the labyrinth will help dramatically with your defence. Like food and water, you will need to keep an eye on the effectiveness of your defences and upgrade them throughout the game. There are a few other types of tower that you can explore on your own.

In the image you can also see a cullis gate on the left. Convenient to throw pesky enemies into!
2.4.2 Making a Secure Backdoor
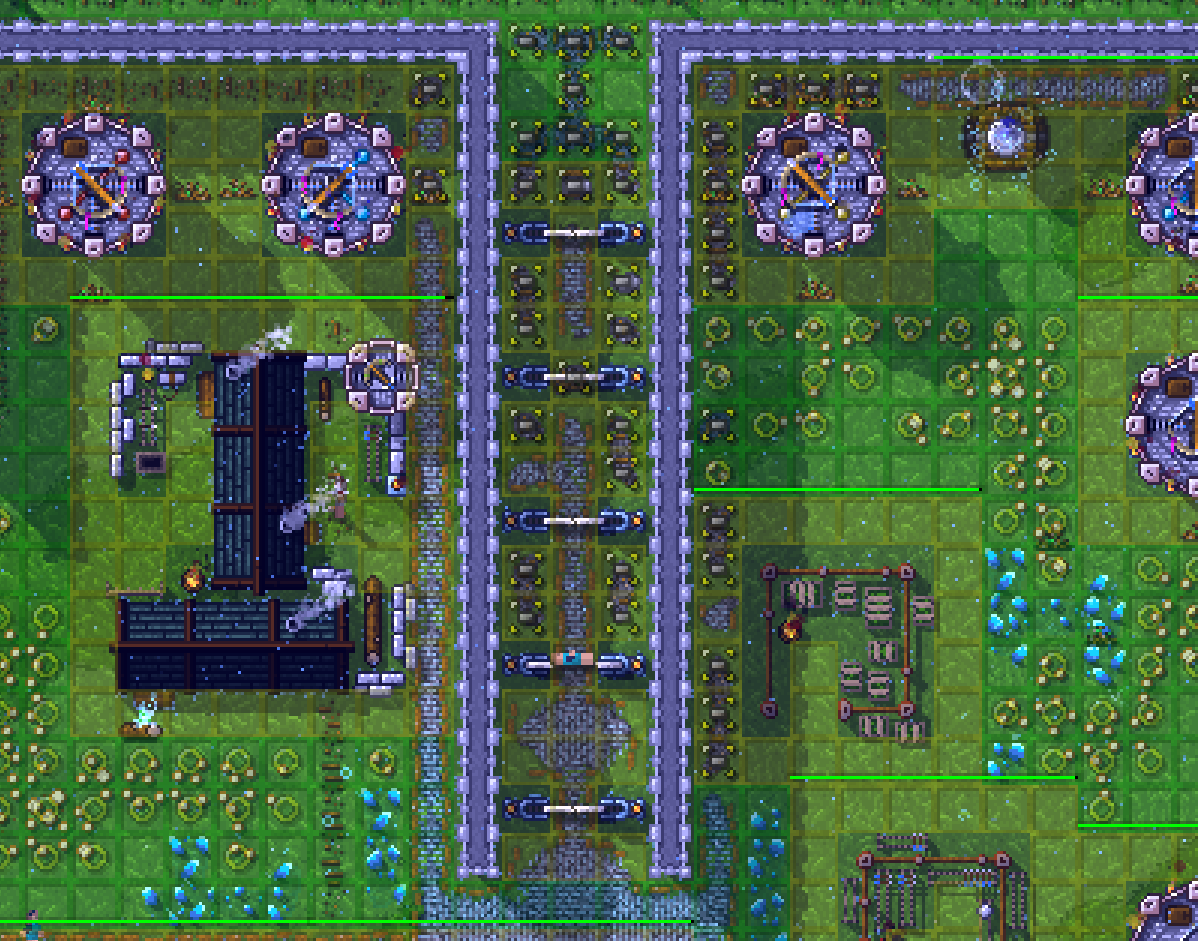
An example construction of a secure door access. The monsters should think this will take longer to get through than the labyrinth.

To safely construct a backdoor for quicker exits for your villagers:
  1. Begin by constructing curtain walls within your base. Extend downward two walls, three apart, perpendicular to your existing walls. Add three for each gate, and add at least 3 or four gates. You may need to extend this, and the exterior gate can get destroyed sometimes.
  2. Add in the gates.
  3. Remove the outer three tiles of curtain wall to allow the villagers to exit.

Enemies can still soemtimes try to follow your villagers in through the door, and one or two doors can get destroyed. Keep a close eye on this area and make sure it's well covered by ballistas!
2.4.3 Golem Defence
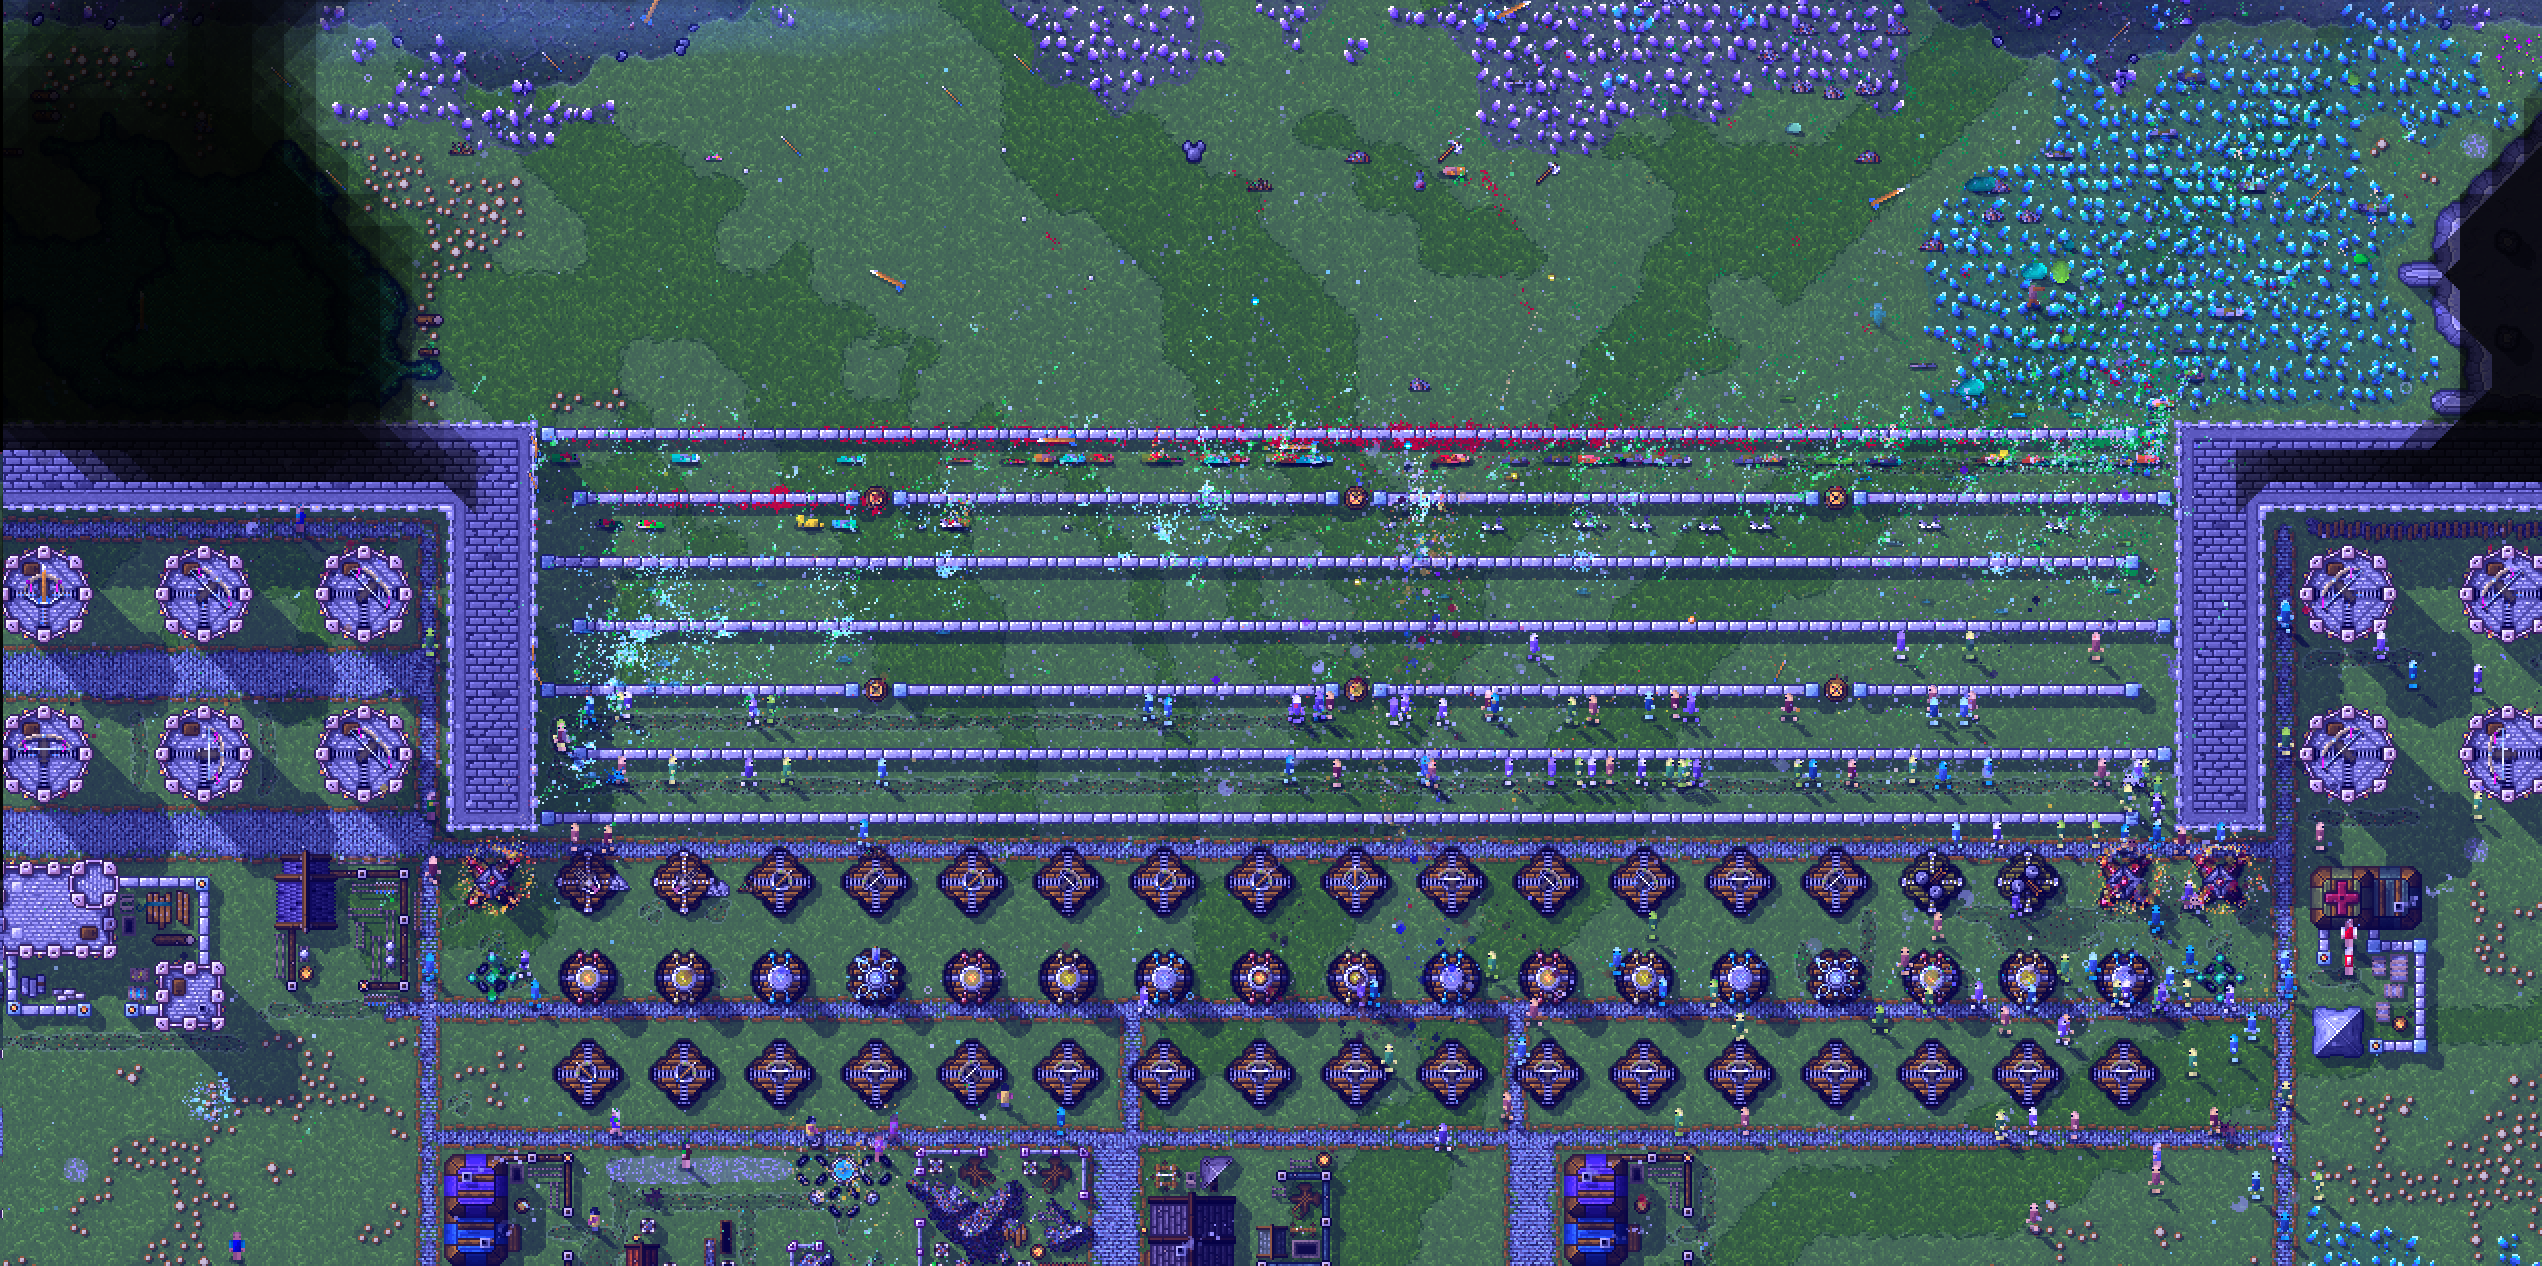
Crystal golems flooding the labyrinth.

Golems form a key part of the defensive strategy once you have the energy generation to support them. They gravitate to areas of low desirability, such as around your turret, or to golem recombobulators, which also heal them. Each type costs energy to maintain and uses resources of different types to spawn. They move to defend your villagers and buildings as well as standing around your frontlines attacking enemies and holding them in range of your towers.

  • Wood Golems + Stone Golems
    These two types are melee and can be upgraded to have elemental magic damage. The wood golems are faster than the stone ones, but have much lower hp. They are useful for holding enemies in place for your towers and can possibly even replace your labyrinth.

  • Crystal Golems
    This type of golem is my favourite to use with their ranged magic attacks that can be further upgraded to elemental damage. These too will hold enemies in place for your towers, but will also do ranged damage across your maze and effectively deal with specters. They do have lower health to compensate though.

I would suggest building three crystal golem combobulators as soon as possible - they help defend the frontlines and reduce reliance on towers and ballistas to defend the more distal parts of your town. I end up with a huge amount of these, equally balanced in the types of elemental damage.
2.5 Enemy Types and Defences
The following sections are intended to give a quick reference to the resistances and vulnerabilities of enemies and which towers are effective against each type.

2.5.1 Defensive Towers
Defensive Tower Types:

I've not detailed the Attract and Banish towers below, as I consider them more of a utility. The Attract Tower draws in items dropped by enemies, and is useful near your labyrinth. The Banish tower is useful at the end of your labyrinth to teleport any enemies that make it past your defences away.

The majority of towers can shoot over all walls, except for curtain walls, mountains and forests.


Ballista Tower
The longest range tower in the game and the only one capable of firing over curtain walls and mountains. Other towers cannot fire through it either.

It is useful to have these around the perimeter of your base to fire at attackers, but they will also pick off structures within the corruption and idle monsters if they are within range, making them useful for conquering new territory or controlling the enemies numbers. I also use a few of them to cover my base interior, in case of slime spawns.

Damage
Fires
Ammo per Bundle
Reload Time
Firing Range
Elemental upgrades
Piercing - 75-150 / 100-175 / 125-200 / 125-200 + 50-75 Upgrade Damage
Ballistae bolts
10
800 / 650 / 550 / 550
32 / 36 / 40 / 40
Fire, Ice, Poison


Bow Tower
A medium range tower with quite quick firing and reloading. These will often form the core of your early defences.

Damage
Fires
Ammo per Bundle
Reload Time
Firing Range
Elemental upgrades
Piercing - 20-30 / 25-35 / 30-40 / 30-40 + 10-15 Upgrade Damage
Ballistae bolts
20
150 / 130 / 110 / 110
16 / 18 / 20 / 20
Fire, Ice, Poison


Bullet Tower
A medium range tower with fast reloading. Its reloading and firing range are not improved when upgraded, only the damage. These can be useful early game defences.

Damage
Fires
Ammo per Bundle
Reload Time
Firing Range
Elemental upgrades
Crushing - 7-10 / 9-12 / 12-15 / 12-15 + 4-6 Upgrade Damage
Stone Balls
100
10
30
Fire, Ice, Lightning


Elemental Bolt Tower
An essential tower for taking care of specters. It runs on magical energy rather than ammunition, and deals splash damage in a small area.

Damage
Fires
Reload Time
Firing Range
Elemental upgrades
Magic - 20-40 / 25-45 / 30-50 / 5-10 + 30-50 Upgrade Damage
10 energy per shot
60 / 55 / 50 / 50
14
Fire, Ice, Lightning


Phantom Dart Tower
A small-footprint magic tower, they can be stacked in a smaller area to behave like a single multi-barrelled larger tower or used to fill in the gaps between other towers. They can be especially useful to kill specters before moving up to elemental bolt towers and your villagers can walk over them.

Damage
Fires
Reload Time
Firing Range
Elemental upgrades
Magic - 4-6 / 6-8 / 8-10 / 8-10 + 4-6 Upgrade Damage
3 energy per shot
60
10
Fire, Ice, Lightning


Sling Tower
An extremely interesting tower. These can't fire over any walls, but its attacks pass through enemies, dealing damage for each tick it is touching a monster. They can however fire through the middle of gates, even when they are closed.

In the final upgrade, the fire branch will change the projectile so it explodes on impact with a larger area of effect. The other two elements will maintain the 'piercing' effect and increase the damage.

Damage
Fires
Ammo per Bundle
Reload Time
Firing Range
Elemental upgrades
Crushing - 6-8 / 7-9 / 8-10 / Fire upgrade: 10-15 Piercing + 10-15 Crushing + 20-30 Fire + 25% Splash damage + 4-6 Upgrade Damage | Other upgrades: 8-10 Crushing + 4-6 elemental upgrade
Stone Balls
10
350 / 300 / 250 / 250
12
Fire, Ice, Lightning


Spray Tower
A weak but rapidly firing turret. Its rapid firing and inaccuracy makes it effective for dealing with large groups.

Damage
Fires
Ammo per Bundle
Reload Time
Firing Range
Elemental upgrades
Crushing - 1-2 / 2-3 / 3-4 / 3-4 + 1-2 Upgrade Damage
Stone Balls
300
5
10
Fire, Ice, Lightning


Static Tower
A short ranged tower that deals magic damage in an area around it, making it very effective for dealing with large numbers of enemies with some cunning placement.

Damage
Fires
Reload Time
Firing Range
Elemental upgrades
Magic - 10-50
16 / 14 / 12 / 10 energy per shot
150 / 130 / 110 / 90
5 / 5 / 7 / 7
Magic Lightning
2.5.2 Enemy Types and Tower Counters
Specter
Capable of moving through your small walls (not curtain walls, forests or mountains) and attacking your towers directly. A separate path can be created for these enemies by encasing the first part of path in curtain wall, then allowing a shorter path through, but filled with regular wall. The specters, as the only unit capable of moving through, should follow this path, where you can have magic damage lying in wait.

Best counter tower: Elemental Bolt Tower

Resistances
Vulnerabilities
Melee Damage Type
70% Crushing, Piercing
60% Slashing
50% Magic Fire, Magic Electric, Magic Ice
75% Magic
30% Fire, Ice, Electric
Magic


Fire Elemental
Ranged unit and can be very dangerous, especially if allowed to attack your towers directly. Can shoot over the smaller walls (not curtain walls, mountain or forest). They take damage from water, meaning they will die in bodies of water or the rain over time. They will actively avoid crossing water, meaning that water can be used as a defence strategy by completely surrounding your village, or allowing a gap to funnel them through a kill zone. If surrounding yourself with water however, be aware that fire elementals can walk across ice.

Best counter tower: Elemental Bolt Tower with ice upgrade.

Resistances
Vulnerabilities
Melee Damage Type
Ranged Damage Type
80% Fire, Magic Fire
75% Ice, Magic Ice, Water
Magic Fire
Magic Fire

Skeleton
Weaker melee units, but fast and resistant to basic bow towers.

Best counter tower: Bullet tower/Sling tower or other rock-based ammunition users.

Resistances
Vulnerabilities
Melee Damage Type
20% Slashing
75% Piecing
50% Crushing
Crushing

Zombie
Melee unit. Inflicts some blight damage over time, and slain villagers can raise to become zombies themselves.

Best counter tower: Elemental bolt with fire upgrade.

Resistances
Vulnerabilities
Melee Damage Type
80% Poison, Blight
50% Fire, Magic Fire
Blight

Drone
These are the corruption's version of your villagers and handle the menial labour of an evil empire, such as harvesting resources and building graveyards.

Vulnerabilities
Melee Damage Type
20% Fire, Magic Fire
Crushing

Headless
The weakest melee unit.

Best counter tower: Elemental Bolt Tower with fire upgrade.

Vulnerabilities
Melee Damage Type
20% Fire, Magic Fire
Crushing

Slime
The basic slime. The other slimes below are variants on this type. They can split into smaller versions of themselves when killed.

Best defenses: Elemental Bolt Tower upgraded with lightning.

Resistances
Vulnerabilities
Melee Damage Type
80% Poison, Blight
50% Piercing, Slashing
80% Magic Electric
50% Electric, Magic
30% Fire, Ice, Magic Fire, Magic Ice
Poison

Blood Slime
Spawned in during the deadly blood moon event.

Best defenses: Elemental Bolt Tower upgraded with lightning.

Resistances
Vulnerabilities
Melee Damage Type
80% Blight
50% Piercing, Slashing
80% Magic Electric
50% Electric, Magic
30% Fire, Ice, Magic Fire, Magic Ice
Crushing

Trashy Slime
Spawned in from trash left on the floor for too long.

Best defenses: Elemental Bolt Tower upgraded with lightning.

Resistances
Vulnerabilities
Melee Damage Type
80% Poison, Blight
50% Piercing, Slashing
80% Magic Electric
50% Electric, Magic
30% Fire, Ice, Magic Fire, Magic Ice
Dysentry(??)

Conclusions and tips:
  • Make good use of chokepoints! Force enemies down a single (or limited number of) routes to simplify and amplify defence efficiency.
  • A good variety of towers is necessary, especially late game when each type is stronger.
  • Keep magic towers near your other towers to deal with pesky specters.
  • A separate entrance for fire elementals can be build by filling one entrance with water.
  • Ensure a decent supply of magic using the crystillery and essence collector.
  • Make sure you have enough ammo being manufactured, and it is held near your towers in storages.
2.6 Maintaining the Village
It's probably good to make sure that you've been:
  • Keeping up with housing upgrades and new builds.
  • Expanded food and water production to support the growing population.
  • Controlling trash production and clean-up.
  • Creating enough ammo/magic to support your towers.
  • Build Maintenance buildings to repair walls, gates and towers.
2.7 Making Roads and the Trader
Paths and roads will help you get your villagers to where they're needed much faster and are absolutely essential to exploiting distant resources.

By building a Way Maker Shack and assigning a few Way Makers, you can begin placing paths. The higher level the path, the more expensive it is. To build higher level paths, the previous level of path is also required beneath it, extending construction time significantly. Paths also require maintenance, so bear this in mind when building a serious road network.

The Trader
At the Marketplace, you can buy and sell any of the goods in the game for gold. You can trade this for other goods, or Catjeet laborers, who will become regular villagers when purchased.

You can order a threshold of coins to be manufactured at the forge (1 coin manufactured is actually a lot more than that), and use that to buy raw and processed resources from the Catjeet in the Marketplace.
3.0 FORTIFICATION + OFFENCE
By now you should have a portion of the map completely under your dominion and may decide to conquer the rest of the map, drive back the corruption and gain new sources of resources. It's now time to begin conquering new portions of the map.

3.1 Extending reach & The Creeping Tower Strategy
Securing new land for the village.

I usually adopt the following approach to capture new segments of land for expansion and resource acquisition:
  1. Extend building reach with firepits over an area that is already defended with ballistae to drive back corruption and extend buildable area. You can also construct a series of gates with curtain walls as detailed in the secure backdoor section behind your walls, then remove the outer curtain wall to open it when it is complete.
  2. Extend curtain wall around the outside of the new build area range. If the desired area is large, this may require taking several smaller sectors.
  3. Add ballista towers around the perimeter of the wall. Ammo storage, bowyers and ancillaries may also be required.
  4. Remove any firepits that you no longer want/require.

Continuing to do this until you have conquered the whole map, parcel by parcel, is the creeping tower strategy. First choose a side of the map to extend to and creep in this direction until no corruption is visible at the edge of the map. When this is complete, choose another side and head toward that. Repeat ad nauseum.

You may also want to:
  • Use the multiple-gate structure to create new entrances, further reducing travel time
  • Build wells, housing etc. on distant parts of the city to reduce travel times and avoid citizens starving or dying of thirst.
  • Extend road networks to reduce travel times
  • Establish new colonies!
4.0 WHERE NEXT?
  • Conquer the World Map on Traditional
    Continue migrating to new areas until you've got a working colony in every one!

  • Survival Mode
    Corruption will begin spawning nearly immediately. You will have to move much quicker, and get defences established much earlier.

  • Sandbox Mode
    Experiment with game mechanics and learn more about how to optimise your village and defences.

  • Scenarios
    Single-map campaigns to conquer. Choose any difficulty you like.
29 Comments
Dr.Abriss Sep 22, 2023 @ 9:08am 
wasn't there a guide with these 3- or 4-row crylithium walls and tons of static towers?
thought this is the one, since it's like the most elaborate I can find here on steam :)
dyne46 Apr 3, 2023 @ 11:32pm 
An excellent guide. Thanks for sharing your tips!
Cikiloppe Mar 25, 2023 @ 3:03am 
Coming back to this game in a while now, amazing guide my dude.
Tankfarter Jan 5, 2023 @ 6:20pm 
how do i start a wrold on deck i cant find the bouton
xpndsprt Jul 23, 2022 @ 9:23am 
an amazing guide
哈某人 May 24, 2022 @ 2:19am 
Very thanks for your guide. Language is easy to understand and the guide is really helpful.
FishtailBob Apr 10, 2021 @ 6:14pm 
I have done something similar but on strongvale (sp?). It has 2 natural choke points. One at the top and the second at the river. It makes for a good fortified starting position.
cropro ************* Jan 25, 2021 @ 1:31pm 
:steamthumbsup:
ZeroGravitas Nov 4, 2020 @ 8:46am 
Best guide on the RtR hub. :bigups:

Do you know what target priority the turrets have? Is it just whichever monster is closest to reaching your village? Or closest to its individual destination therein, or...?

Is there any target prioritising of monsters with a vulnerability to a turret's specific damage type? It seems like one can only separate spectres (all year around), now. i.e. by using one piece of regular wall in your crystal maze, to route all other monsters, but let them path through elsewhere. So one can use regular bolt towers and phantom darts, for the 75% (pure) magic vulnerability. But apart from that, it just seems like a mess of every turret shooting every monster and crossing one's fingers and the pixels fly...?
nils.coussement Aug 10, 2020 @ 3:40am 
I would go at this in another way.
"
A suggested build order:
Early game - One landfill and one burner, one or two Trashers can handle most of the trash, providing food isn't piling up on the floor and too many resources are not removed at once.
One burner and one processor
Cube-e Golem Combobulator
One or two landfills, close to areas of trash build-up or distant to reduce travel times.
2 - 3 more burners, I prefer a central set of these, but a few distal ones can be useful.
2 - 3 more processors
Then as required when trash appears to pile up. I would probably add more golems at this point too.
"

One bin to the front and 4 burners and a landfill next to your castle can handle anything the beginning of the game could throw at you.
Plus those burners can be used as a major source of mana for harvest and motivate spells.

By the time it starts to fill up the resource cost of the other building or upgrading will not drag you down anymore.